1/32 Tamiya Strike Eagle WIP
Discussion


Guys,
Thought you might be interested in this one - It is some thing I am building in between model kits for a review magazine I do in my spare time (Working on an F-22 in 48th Scale and a 1/32 F-16D Barak as well!)
Tamiya 1/32 F-15E Strike Eagle with Bunker Buster Kit
Extra Aftermarket Parts:
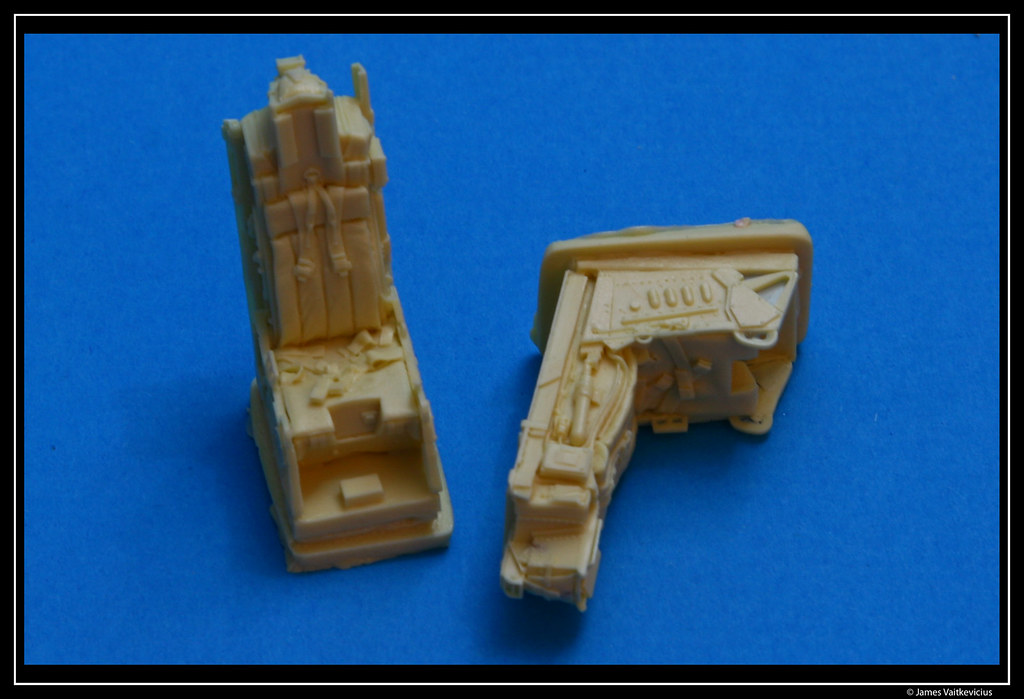
Avionics Resin Cockpit Set
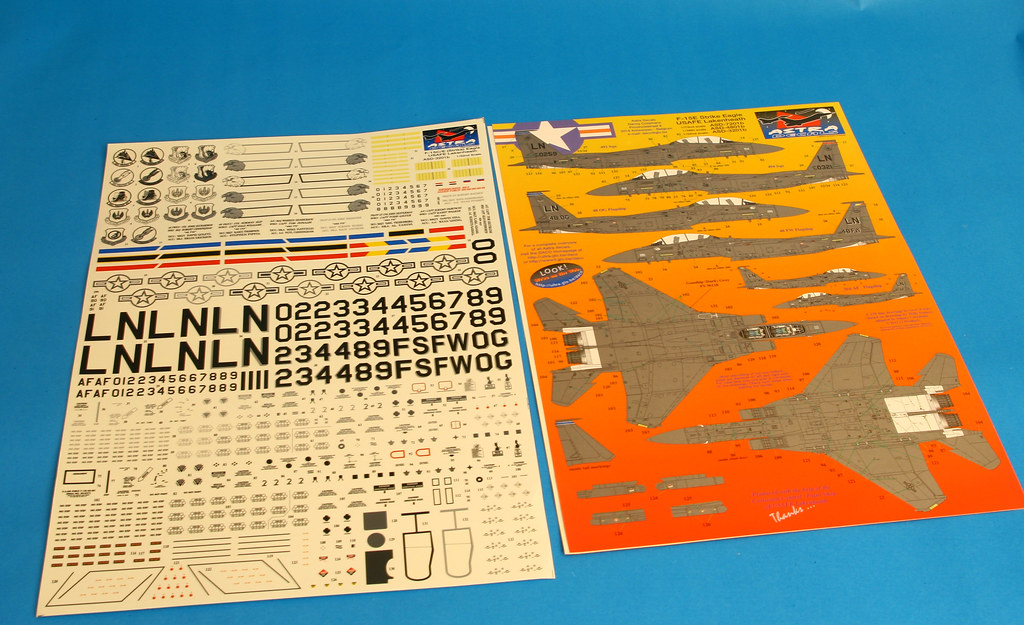
Astra Decals Lakenheath Decal Set (All models C – E)
Ever since I was a kid, I remember going into Beatties in Peterborough and looking up at the fantastically large models on the ceiling upstairs, thinking how great they were and how I would like to build something like that when I had more skill and money! A few years past and I saw this model (Tamiya F-15E Strike Eagle) and fell in love with it, knowing that I my paper round money would go no where near covering the expensive cost of the kit. It has been a few years since then and a few better jobs later, I could not resist getting my hands on one of the largest plastic model fighter aircraft in Tamiya’s catalogue. It did take three attempts as the first one fell foul of DHL and was replaced with an F-16 CJ (a FANTASTIC kit to build), the second one I got scammed over on Britmodeller, third time lucky, I got the kit from my local model shop for a very good price!
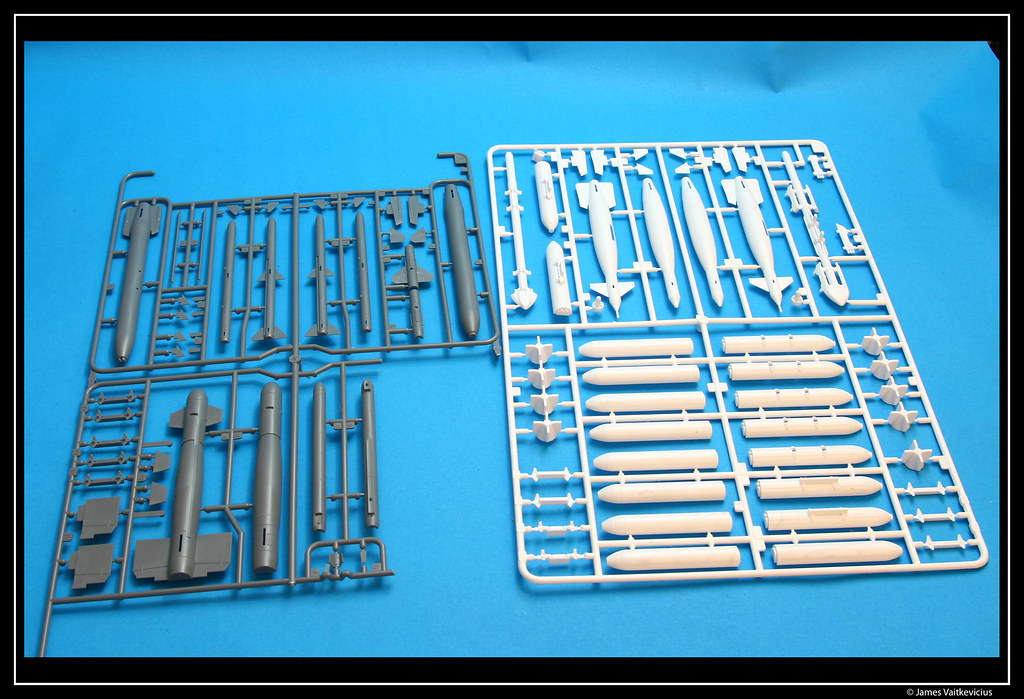
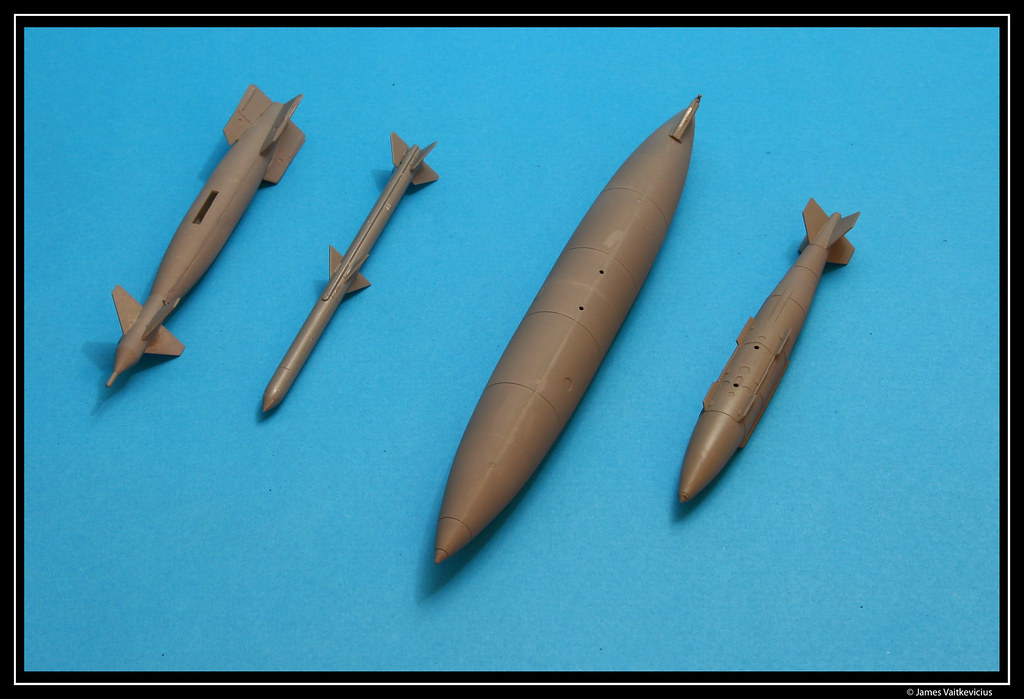
The Tamiya kit comprises of an arsenal of weapons as follows:
1). AIM-9L Sidewinder (x4)
2). GBU-10 LGB (x6)
3). MK-20 Rockeye (x24)
4). 610 Gallon Fuel Tank (x3)
5). GBU-28 Bunker Buster (x2)
6). GBU-31 JDAM (x2)
7). AIM-120B/C AMRAAM (x4)
8). GBU-15 or AIM-130 (x2)
As you can see there are a lot of weapons to choose from on the kit, I was aiming to have the following load out on my model:
1). AIM-9L Sindwinder (x2)
2). 610 Gallon Fuel Tank (x2)
3). GBU-31 JDAM (x2) or GBU-10 LGB (x2)
4). AIM-120B/C AMRAAM (x2)
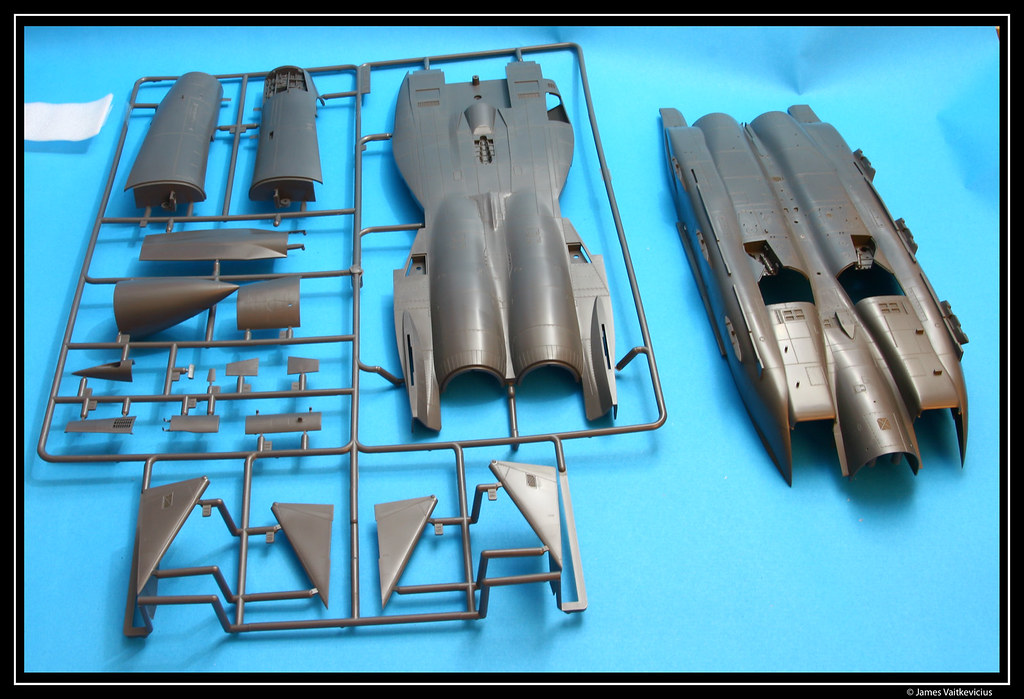
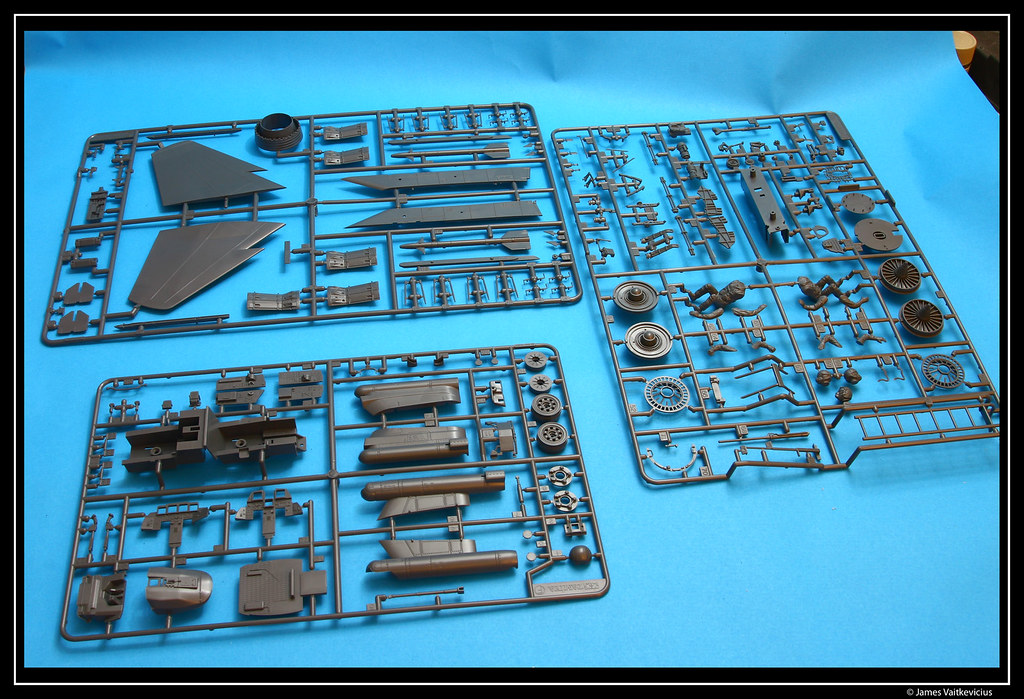
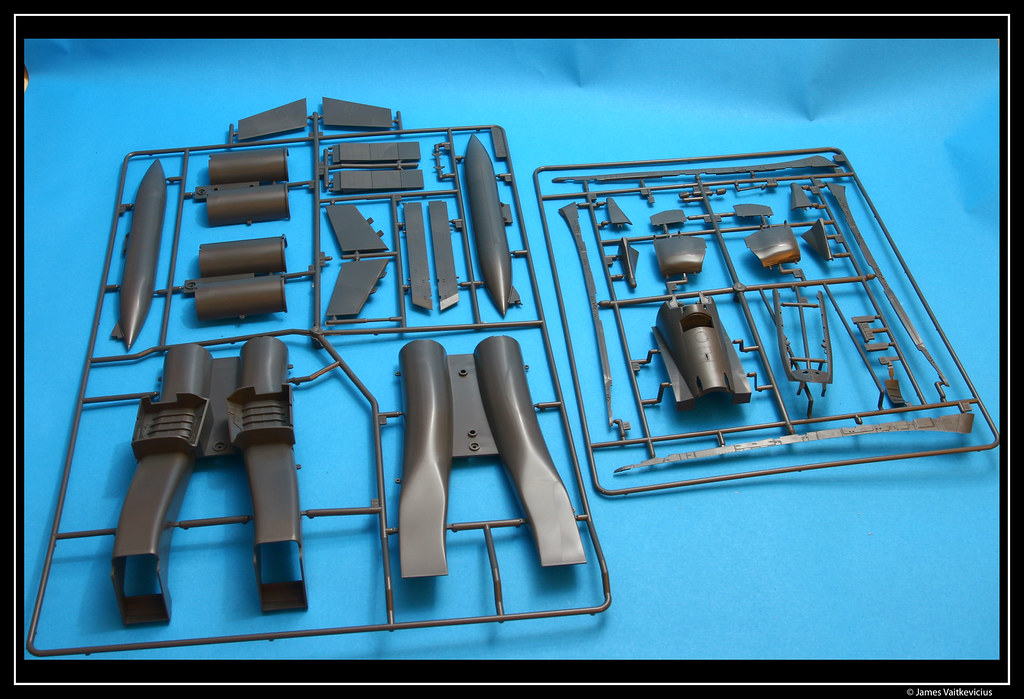
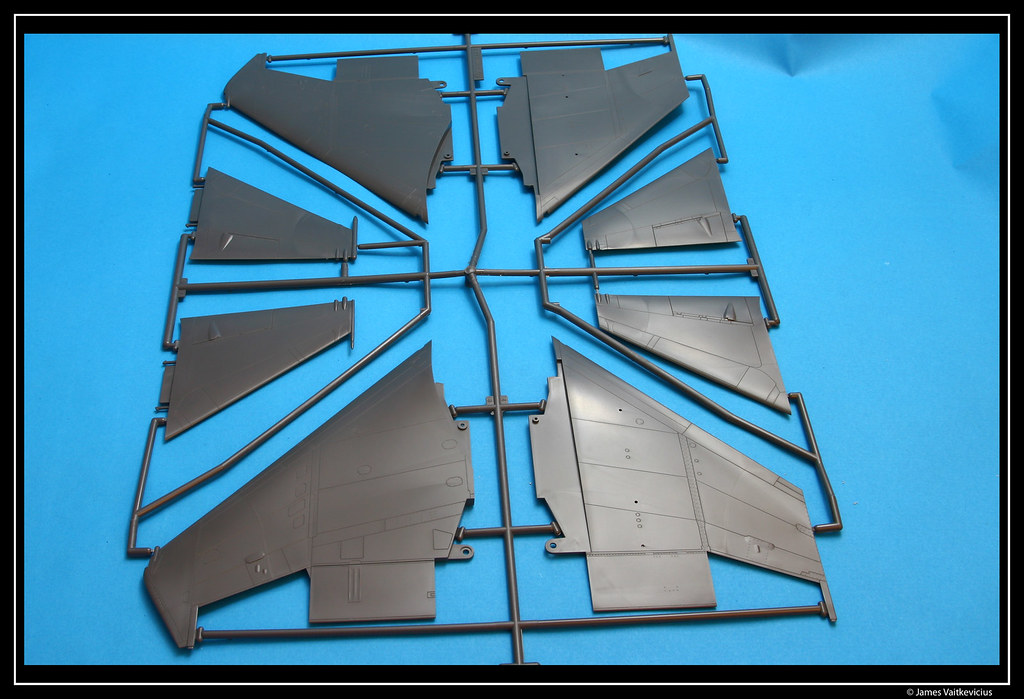
See below for some pictures of the sprues so far - I can assure you that this plane is MASSIVE! I know I keep saying that but I have no idea what I am going to do when I complete it as regards to storage! I am also contemplating "lighting" up the airframe (lights, and cockpit section, so might look into doing that before I seal everything up!
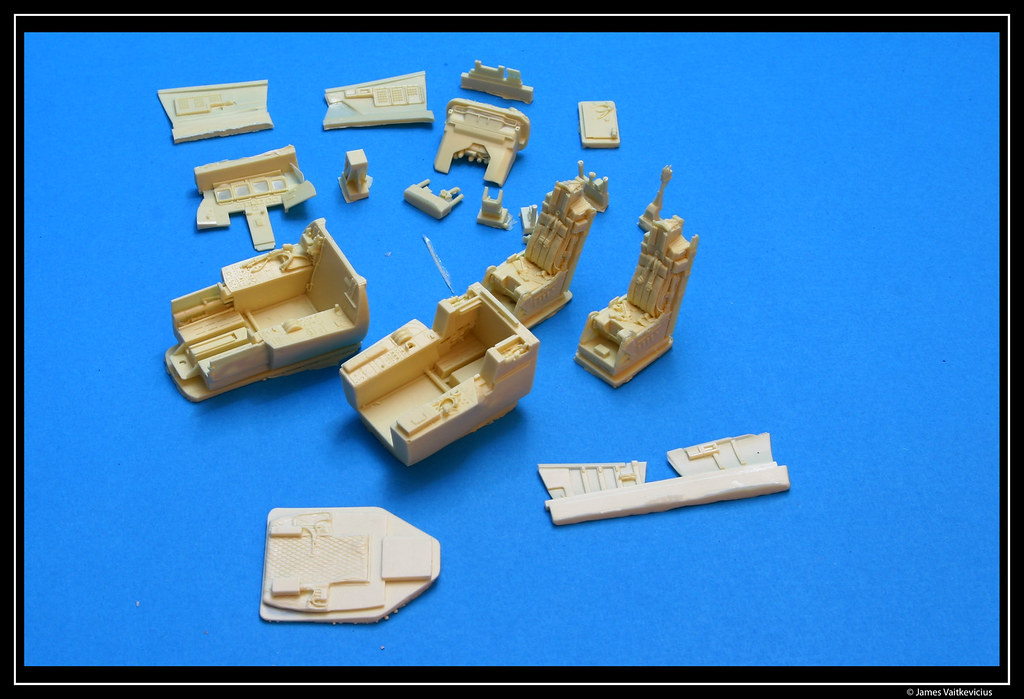
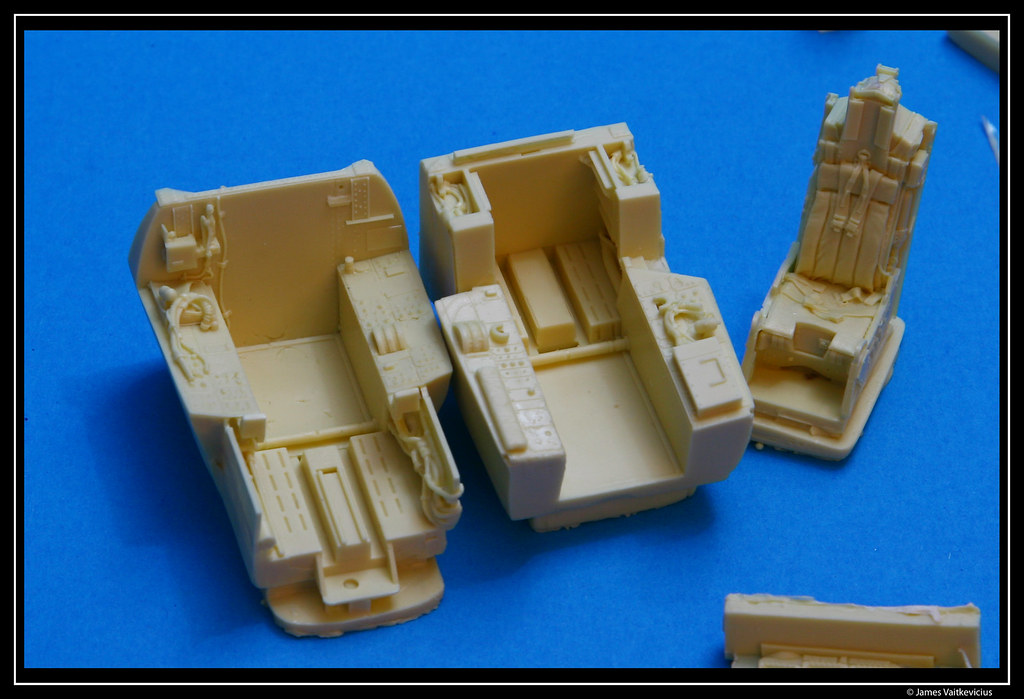
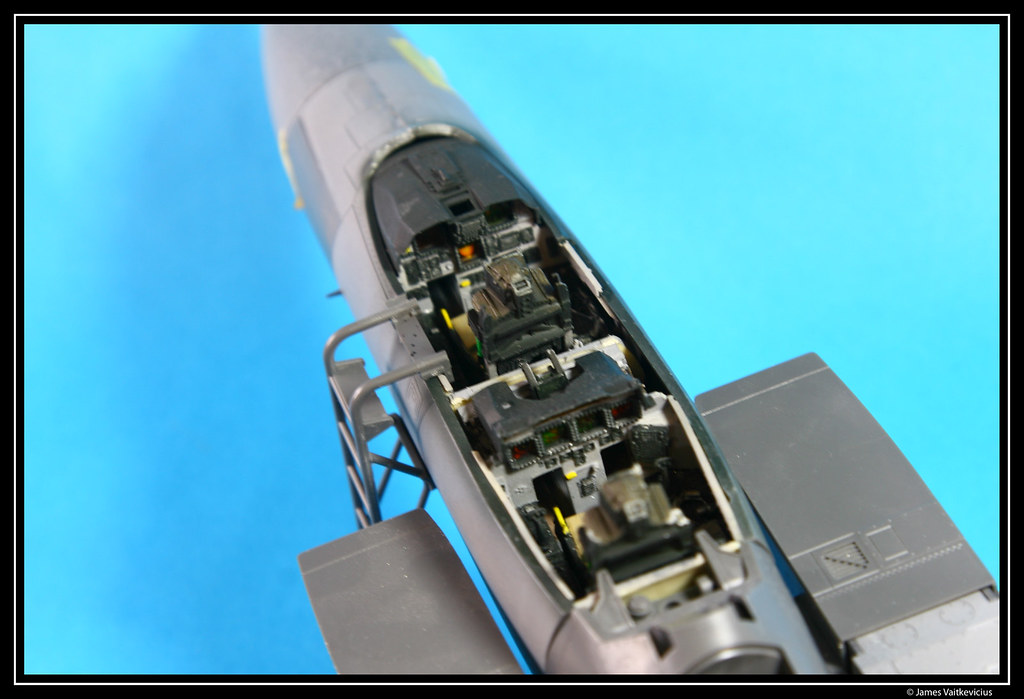
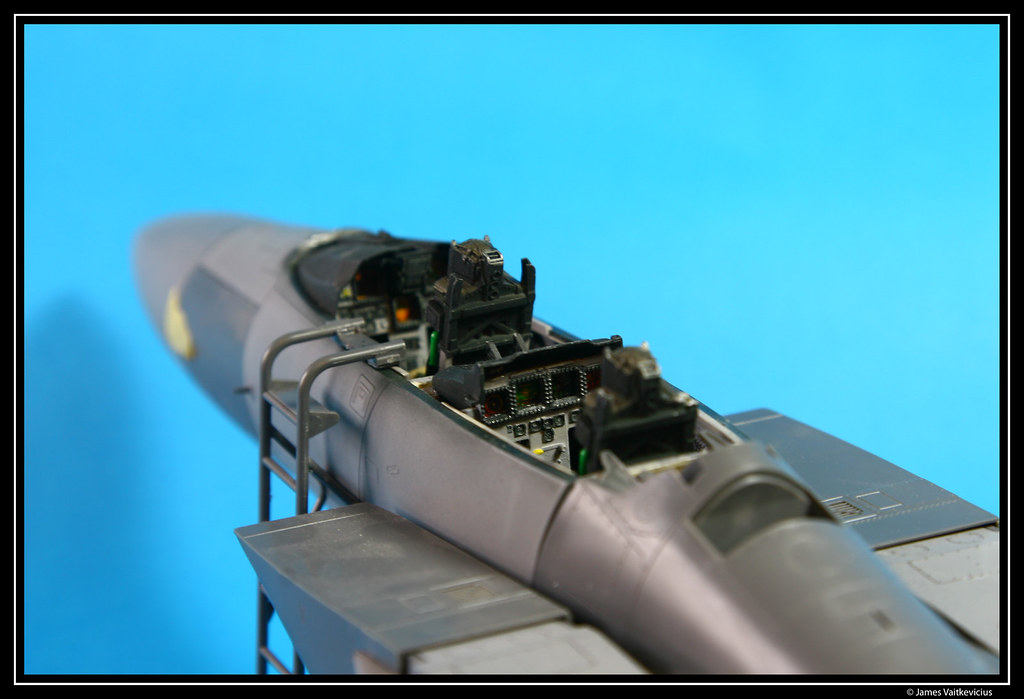
Anyway on with the pics, not much to show so far but I thought you might like to see. The Avionics cockpit in resin looks very nice and has some real nice details in there.
Next was:
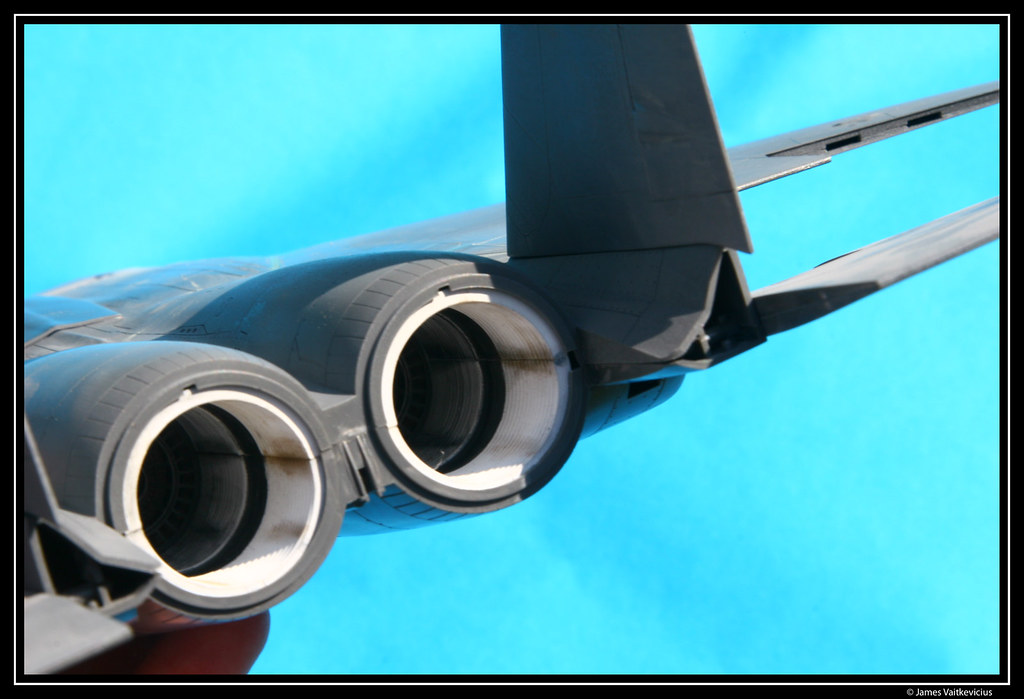
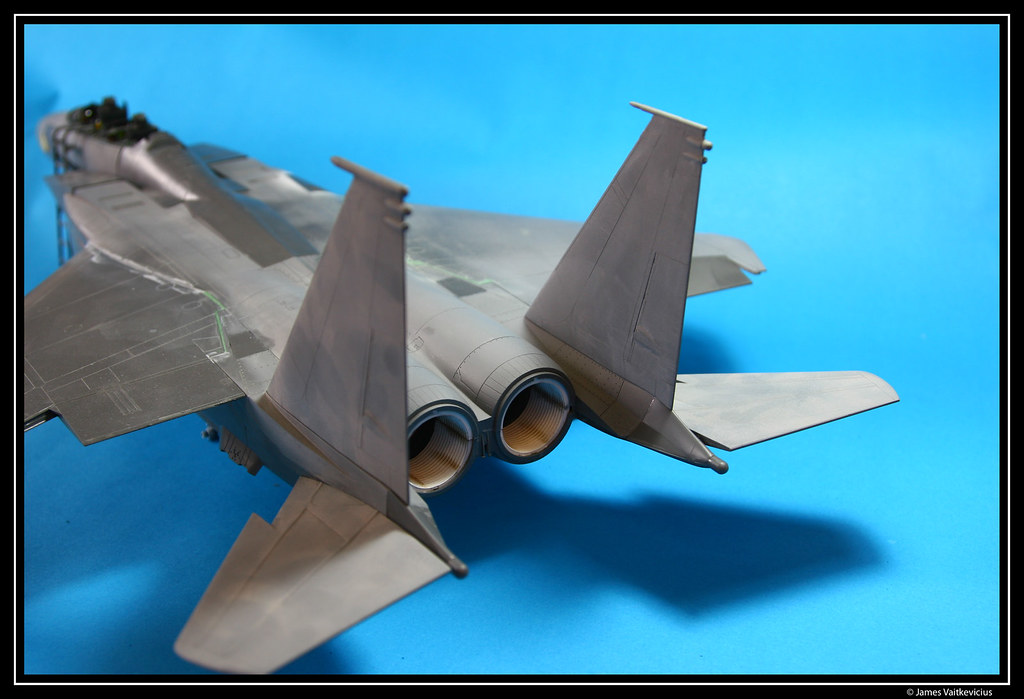
1). Rear Burner internal cans
2). Front air intakes
3). Main body sealed and screwed toegther
4). Wings added to the main body
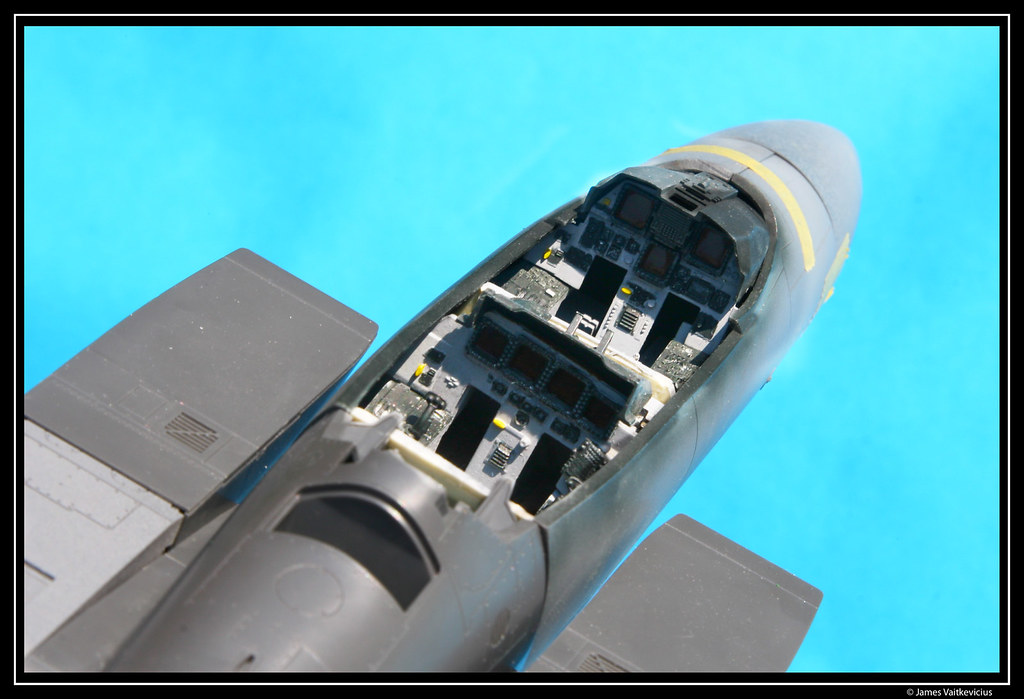
5). Front cockpit is around 70% complete
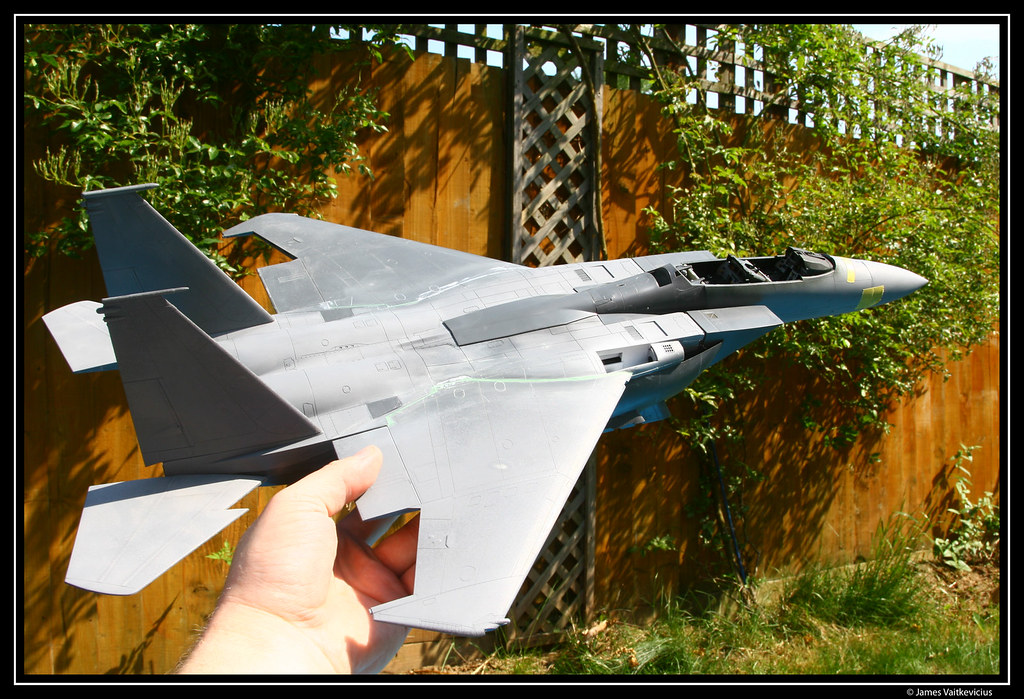
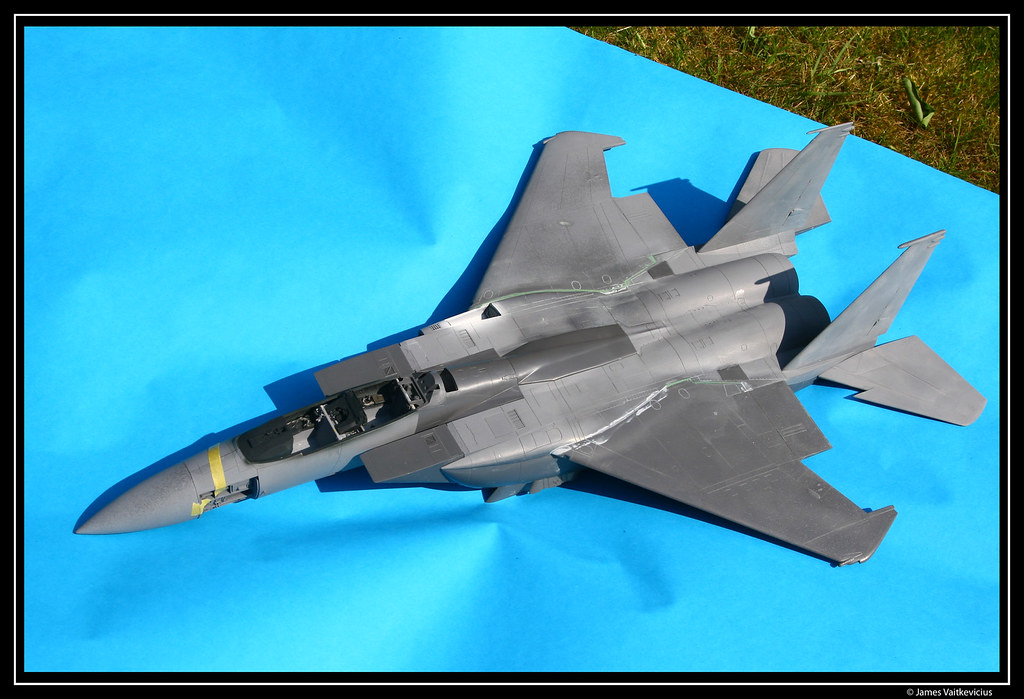
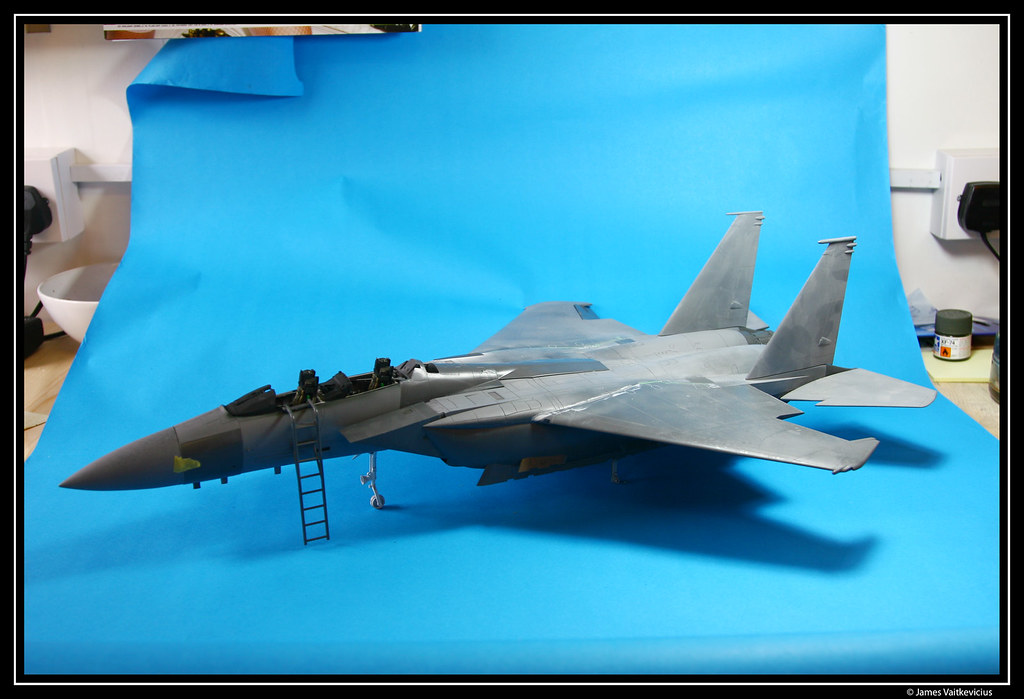
However, i thought I would dry fit the mdel together; I really thinkt he photos do not give a perspective of how large this kit is.. How on earth they fly so fast and low through the loop I'll never know!
Dry fit - held at full arm stretch at 24mm
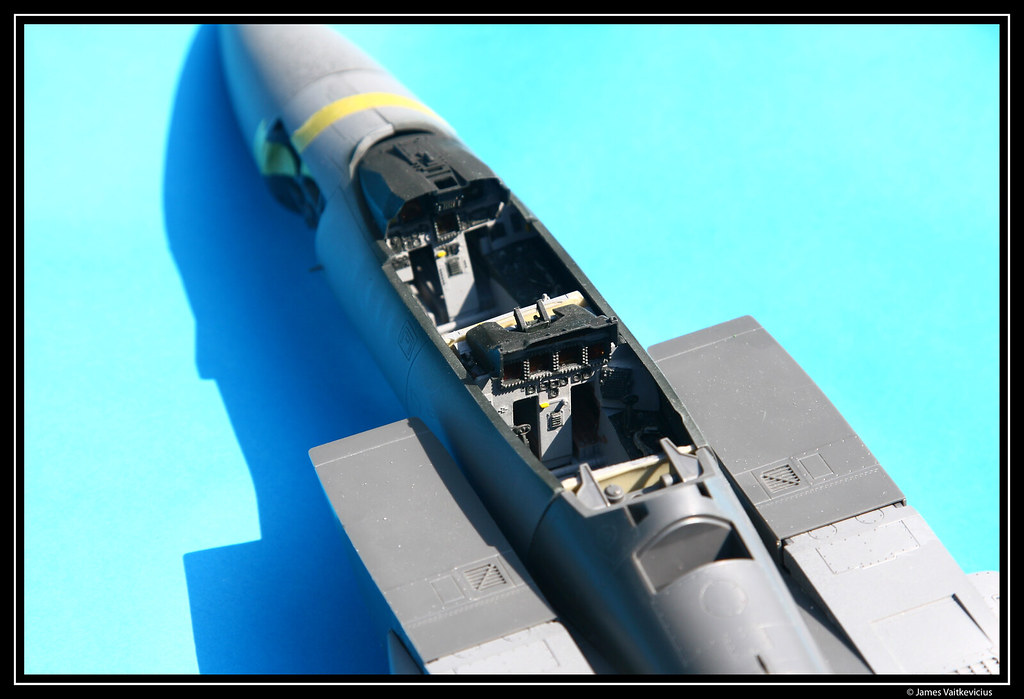
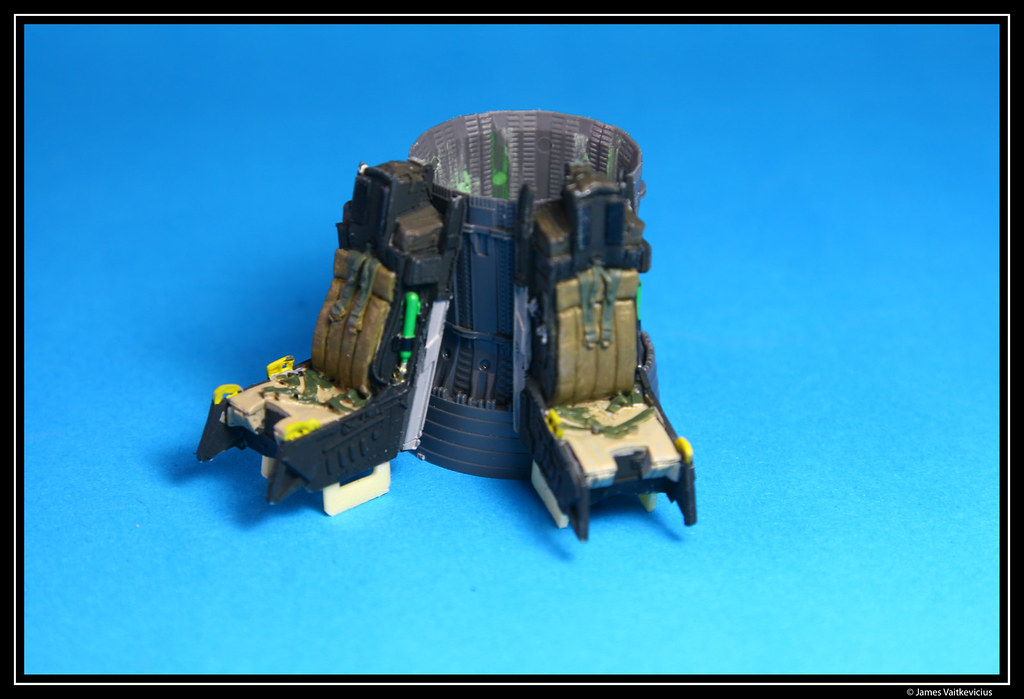
Avionix Cockpit - Around 70% there - I need to finish some of the dials off and buttons. The seats also need to be done as well!
Rear internal Burner Cans
Plan view - the paper it is sitting on is 750mm in width!
This is where I am about up to - IF you are interested I can post the WIP on here?
Thought you might be interested in this one - It is some thing I am building in between model kits for a review magazine I do in my spare time (Working on an F-22 in 48th Scale and a 1/32 F-16D Barak as well!)
Tamiya 1/32 F-15E Strike Eagle with Bunker Buster Kit
Extra Aftermarket Parts:
Avionics Resin Cockpit Set
Astra Decals Lakenheath Decal Set (All models C – E)
Ever since I was a kid, I remember going into Beatties in Peterborough and looking up at the fantastically large models on the ceiling upstairs, thinking how great they were and how I would like to build something like that when I had more skill and money! A few years past and I saw this model (Tamiya F-15E Strike Eagle) and fell in love with it, knowing that I my paper round money would go no where near covering the expensive cost of the kit. It has been a few years since then and a few better jobs later, I could not resist getting my hands on one of the largest plastic model fighter aircraft in Tamiya’s catalogue. It did take three attempts as the first one fell foul of DHL and was replaced with an F-16 CJ (a FANTASTIC kit to build), the second one I got scammed over on Britmodeller, third time lucky, I got the kit from my local model shop for a very good price!
The Tamiya kit comprises of an arsenal of weapons as follows:
1). AIM-9L Sidewinder (x4)
2). GBU-10 LGB (x6)
3). MK-20 Rockeye (x24)
4). 610 Gallon Fuel Tank (x3)
5). GBU-28 Bunker Buster (x2)
6). GBU-31 JDAM (x2)
7). AIM-120B/C AMRAAM (x4)
8). GBU-15 or AIM-130 (x2)
As you can see there are a lot of weapons to choose from on the kit, I was aiming to have the following load out on my model:
1). AIM-9L Sindwinder (x2)
2). 610 Gallon Fuel Tank (x2)
3). GBU-31 JDAM (x2) or GBU-10 LGB (x2)
4). AIM-120B/C AMRAAM (x2)
See below for some pictures of the sprues so far - I can assure you that this plane is MASSIVE! I know I keep saying that but I have no idea what I am going to do when I complete it as regards to storage! I am also contemplating "lighting" up the airframe (lights, and cockpit section, so might look into doing that before I seal everything up!
Anyway on with the pics, not much to show so far but I thought you might like to see. The Avionics cockpit in resin looks very nice and has some real nice details in there.
Next was:
1). Rear Burner internal cans
2). Front air intakes
3). Main body sealed and screwed toegther
4). Wings added to the main body
5). Front cockpit is around 70% complete
However, i thought I would dry fit the mdel together; I really thinkt he photos do not give a perspective of how large this kit is.. How on earth they fly so fast and low through the loop I'll never know!
Dry fit - held at full arm stretch at 24mm
Avionix Cockpit - Around 70% there - I need to finish some of the dials off and buttons. The seats also need to be done as well!
Rear internal Burner Cans
Plan view - the paper it is sitting on is 750mm in width!
This is where I am about up to - IF you are interested I can post the WIP on here?
Guys,
The U/C is white metal, that is one good thing about Tamiya's larger kits!
More progress will follow in the next few months, I am kind of doing this kit in the background while I work on others! I think next will be the spray on the body, which should be a whole load of fun to do! I am planning to give the air frame a slightly weathered look - not an overall "just out the paintshop" look, however, the USAF do like to keep their planes in good condition, so it just might be some subtle weathering and chip marks..
Gassing Station | Scale Models | Top of Page | What's New | My Stuff