GB: Academy Tempest V : Yertis
Discussion


I've made a start, I've glued some shiny kitchen foil behind where the landing light lenses are located:
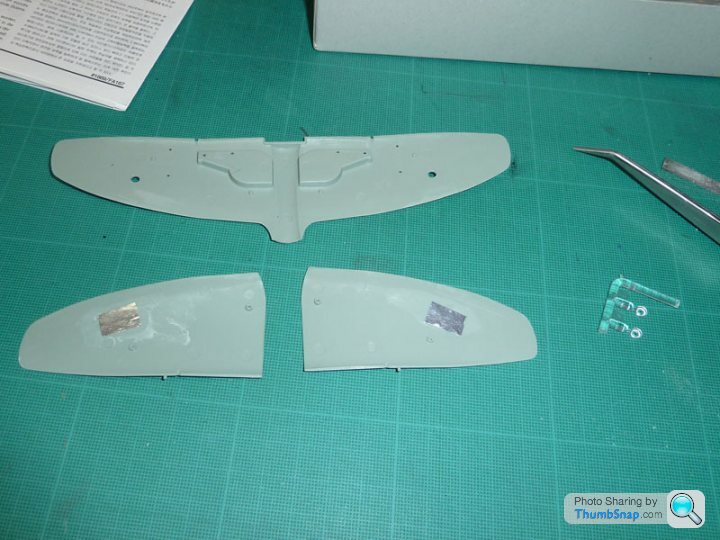
The wings are assembled. I've done a dry fit to the fuselage. The wing root fillets need to be slightly relieved toward the trailing edge.

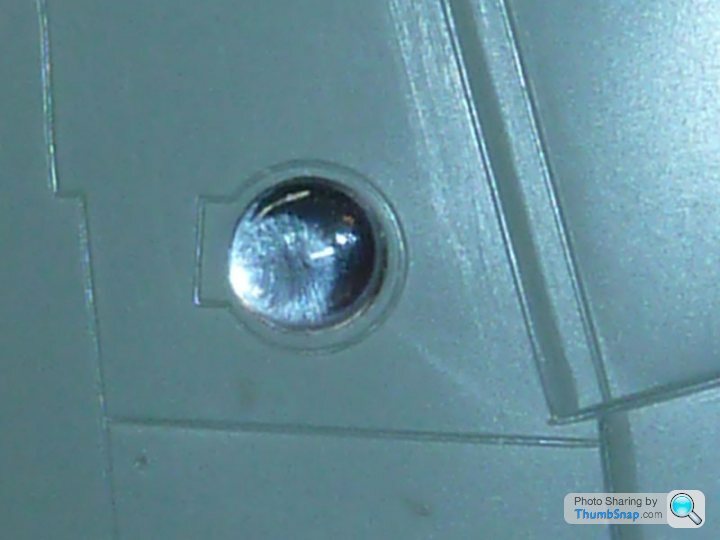
This is how the landing light looks.
Overall, the fit of parts so far is excellent.
The wings are assembled. I've done a dry fit to the fuselage. The wing root fillets need to be slightly relieved toward the trailing edge.
This is how the landing light looks.
Overall, the fit of parts so far is excellent.
I was toying with the idea of masking the camouflage with bluetack, as away of getting the demarcation line feathered but narrow with slight variations. I've now started thinking in terms of creating a two-layer paper mask by using the offset path function in Illustrator.
I think I'm taking this a bit too seriously...
I think I'm taking this a bit too seriously...
dr_gn said:
Yertis said:
Ah! I didn't realise that stump was supposed to represent one of the cannon, and was going to drill out anyway. I can see they do peep out a bit, so I'll have to put something in. Hypodermics or similar. Or maybe just leave holes.
Well, I assume its meant to be a cannon barrel, you can see one sticks out further than the other on one of the cutaway drawings in that link.
Thanks for that weblink dr, I've got some spare parts whizzing through to me now.
My xtracrylix have turned up from Hannants (great service) together with a decal set which I'm slightly perturbed to see dates from a very long time ago (it says 1988 and looks it). The carrier film looks to be all one big bit, for want of a better expression. Any good tips for cutting out the roundels, other than the Olfa compass-cutter?
My xtracrylix have turned up from Hannants (great service) together with a decal set which I'm slightly perturbed to see dates from a very long time ago (it says 1988 and looks it). The carrier film looks to be all one big bit, for want of a better expression. Any good tips for cutting out the roundels, other than the Olfa compass-cutter?
perdu said:
I had that one-off too.
Gave it away with practically every modelling mag I ever bought, including all those Scale Aircraft Modeling mags from the first newspaper ones to the later semiglossies. Every one had a scale drawing of an aircraft type in the middle, a true innovation back then. The only one I have left of Alan Hall's marvellous magazine is the BAC Jet Provost issue with a report of the IPMS Nationals of '83.
No prizes for a correct guess why

Mine (including, likewise, Issue 1 of SAM onwards) were uncermoniously dumped together with about 100 Humbrol tinlets, MicroSol/Set, a Humbrol "airbrush", a couple of dozen unfinished kits (including three Hasegawa F14s and associated MicroScale transfers

 ), my collection of Quattro brochures...
I just dumped the lot one day.
Luckily, my wife bought me the Tempest, but only on condition that I "finish the bloody thing".
Just to show some activity, bit of a juggling act at the moment, re-decorating hall, fixing Quattro, busy at work.
I'm glad I didn't splash out on one of the interior kits, I was sorely tempted. Seem a PITA and can't be seen properly anyway. I've settled for using the parts in the kit, and thinning them down to more realistic thicknesses with a file, see the pilot's armour plate, and I've also done it on the sides of the seat. I'll put the quilting in once I've airbrushed and used 'weathering powder' to bring out the details. I've two teenage daughters, and access to an unlimited palette of such powders.

I've found that by judicious reduction of the cockpit floor width it can be made to force the lower sides of the fuselage apart so that they become a perfect fit with the wings. You can't see that in these photos, it's all dry fit at the mo.
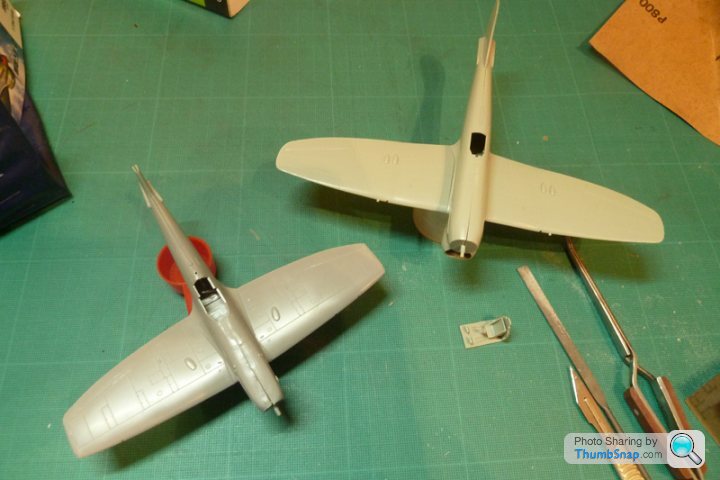
My wife gave me a Revell Spitfire for Christmas about five years ago, so this is the opportunity I need to build it properly. I'm building it as a very tired Mark V, to contrast what will be a virtually new Tempest. Although nicely moulded in the main, as Eric mentioned the other day the contours around the rear wing root underneath are poorly represented on this kit, the old Airfix Mark V is much better in this regard and also has a better canopy. I've a pre-built Mark V on my desk here (used as reference for a D-Day anniversary logo a few years ago) so I shall pinch bits from that.
Sorry about crap-ness of photos.
I'm glad I didn't splash out on one of the interior kits, I was sorely tempted. Seem a PITA and can't be seen properly anyway. I've settled for using the parts in the kit, and thinning them down to more realistic thicknesses with a file, see the pilot's armour plate, and I've also done it on the sides of the seat. I'll put the quilting in once I've airbrushed and used 'weathering powder' to bring out the details. I've two teenage daughters, and access to an unlimited palette of such powders.
I've found that by judicious reduction of the cockpit floor width it can be made to force the lower sides of the fuselage apart so that they become a perfect fit with the wings. You can't see that in these photos, it's all dry fit at the mo.
My wife gave me a Revell Spitfire for Christmas about five years ago, so this is the opportunity I need to build it properly. I'm building it as a very tired Mark V, to contrast what will be a virtually new Tempest. Although nicely moulded in the main, as Eric mentioned the other day the contours around the rear wing root underneath are poorly represented on this kit, the old Airfix Mark V is much better in this regard and also has a better canopy. I've a pre-built Mark V on my desk here (used as reference for a D-Day anniversary logo a few years ago) so I shall pinch bits from that.
Sorry about crap-ness of photos.
Gassing Station | Scale Models | Top of Page | What's New | My Stuff