Unusual job on the bench today
Discussion


Since I put up the build pics of my wife's diamond half eternity ring a few people have asked me if I have any other similar items I'd like to share. Well, today was a different day so you can check this out if you want.
Background: A customer came to me about 3 years ago with an idea for an engagement ring. She had the stone and the ideas, we produced it. She's not your average customer, very different but utterly excellent in her spark and desire to enjoy life. You'll see what I mean below.
..................................
So, over the past few years she's brought in her own gold, which we melt, make something she wants and then melt the remains to leave her a bar for next time. This gold came from her mums passed down jewellery, and although not assayed its about 14ct.
In that time we have made her wedding bands, a cross for her husbands confirmation and various other little bits and bobs. Today I made her eternity ring as its coming up to her 1st year anniversary.
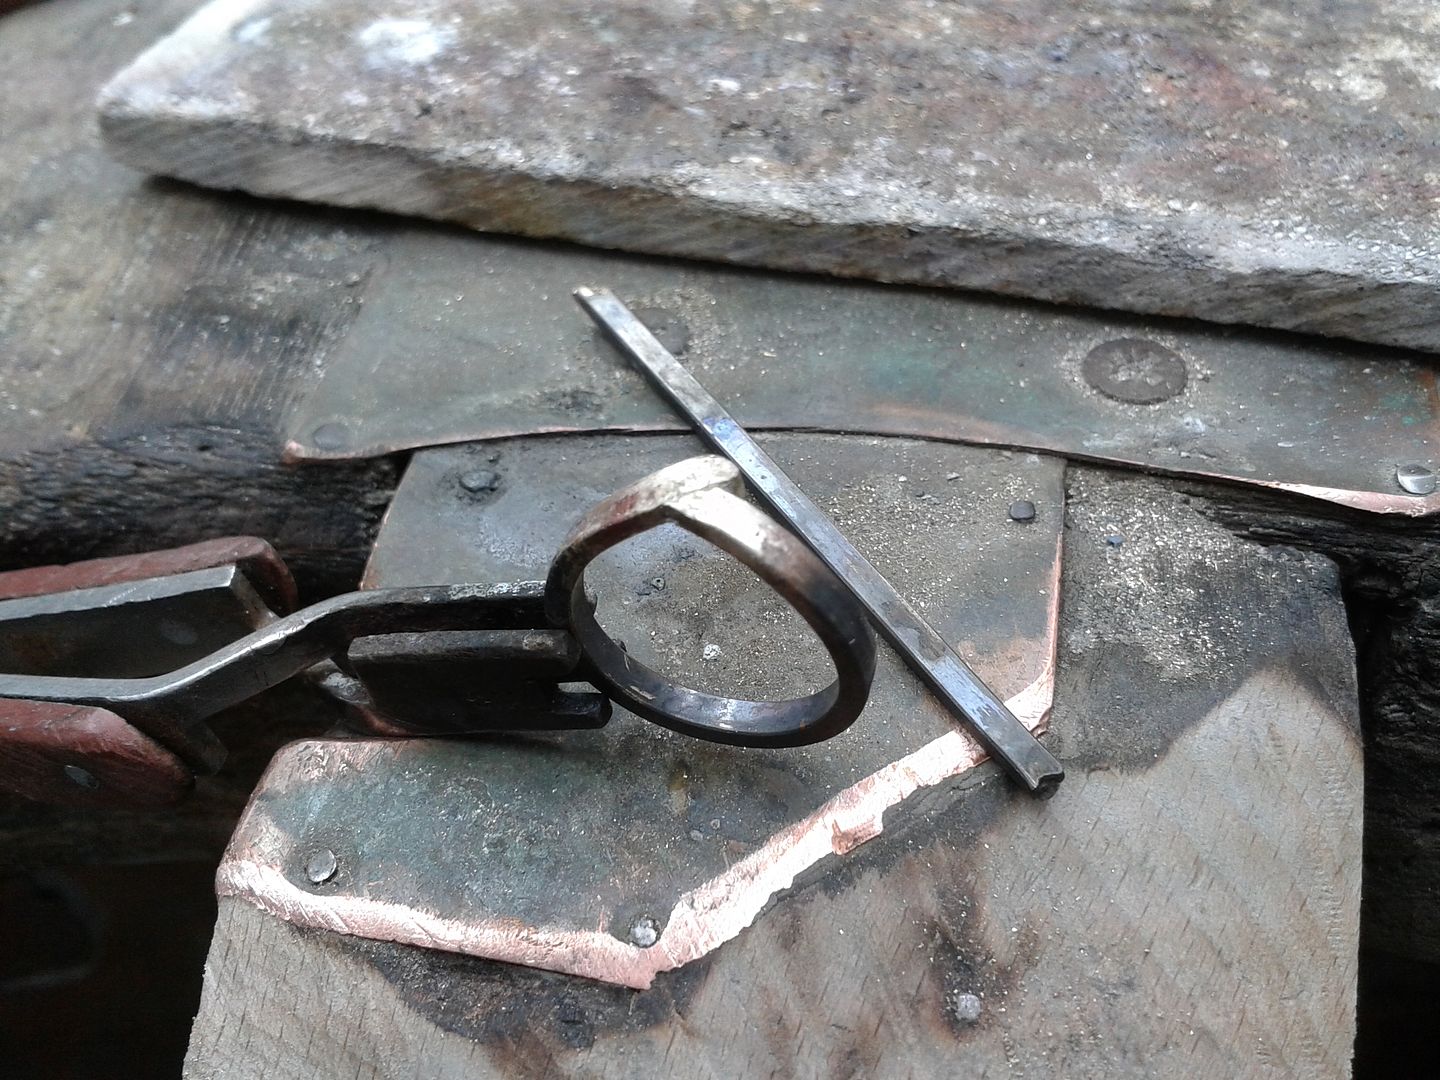
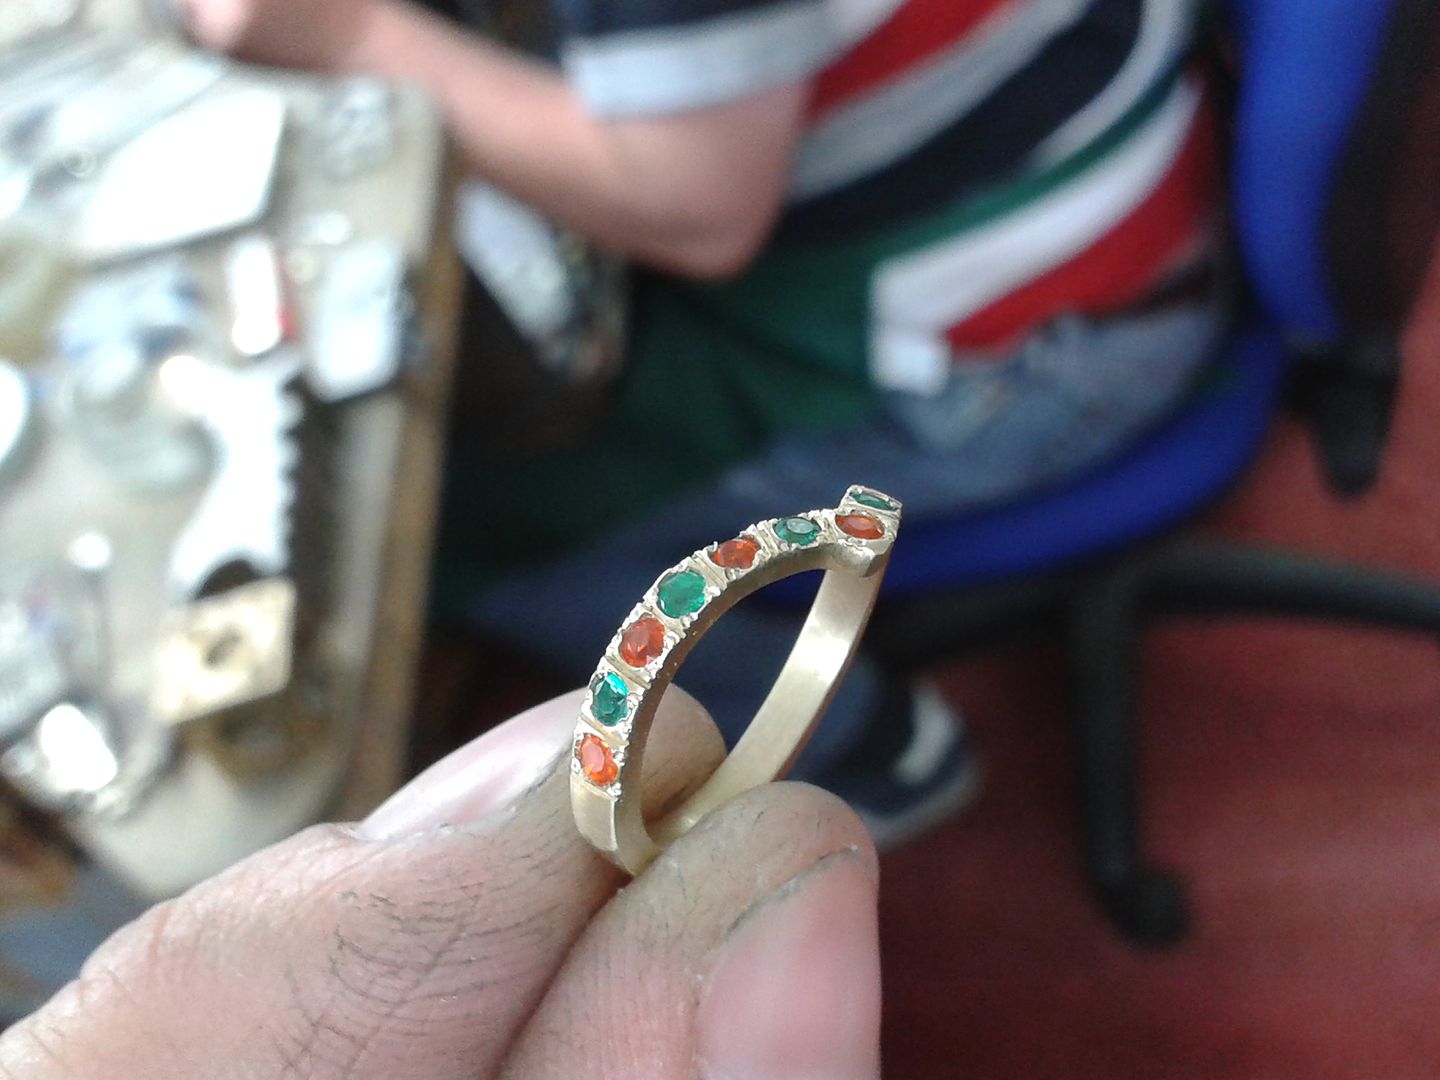
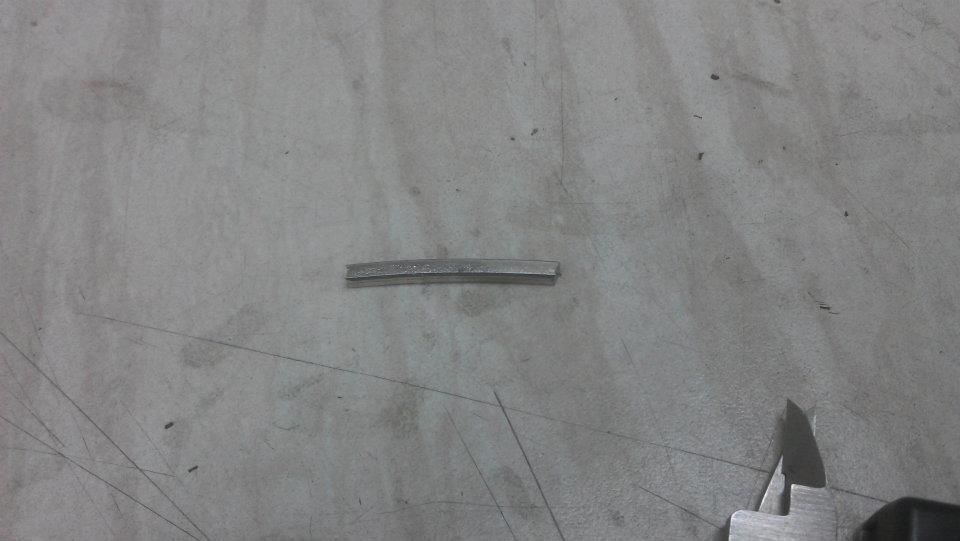
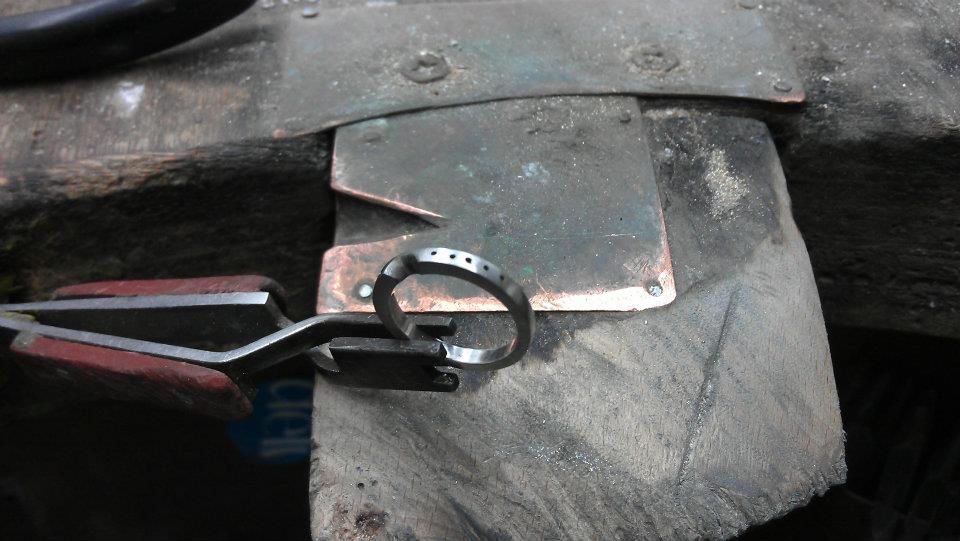
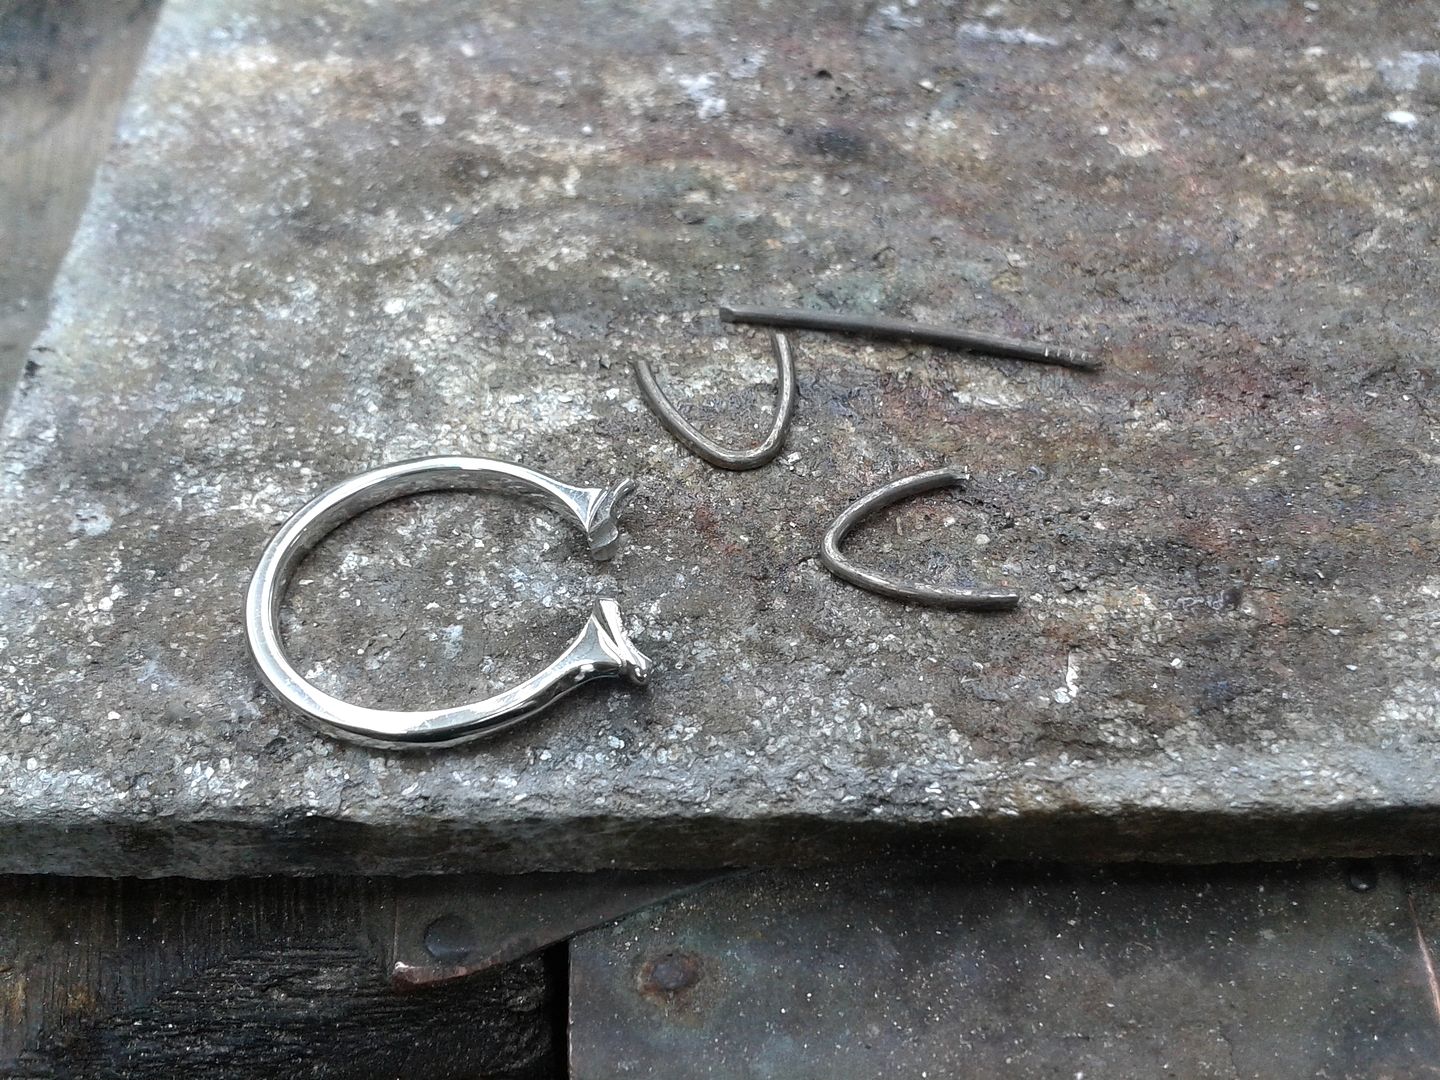
As you can see here I've made a rough, wishbone shaped ring to match the wedding band and engagement ring, which you'll see later. The dimensions needed before cleaning are 2.5mm wide and 1.8mm thick. You can see behind the rough ring shape the remains of her gold bar ready for her next design idea. The ring needs soldering at the top to join and shaping to fit against the wedding ring. It has already been turned to ensure its the right size.
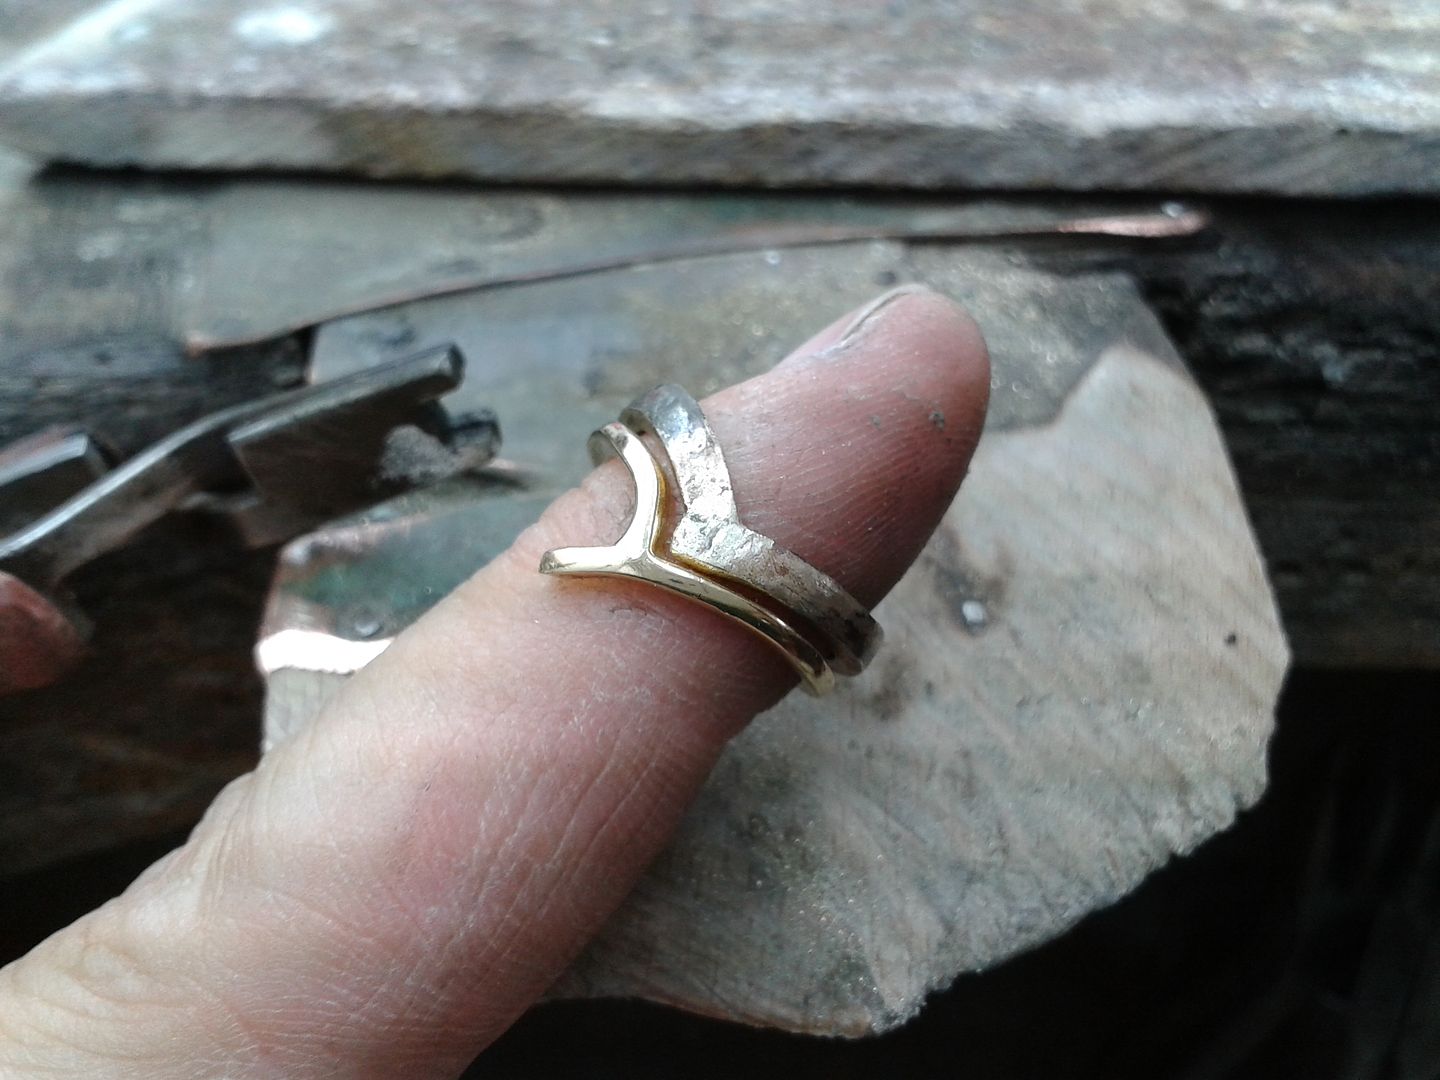
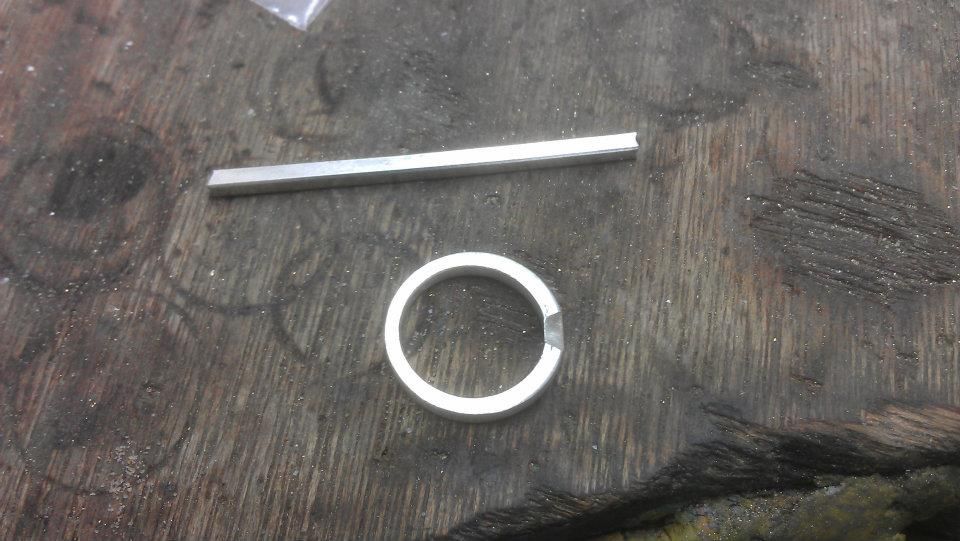
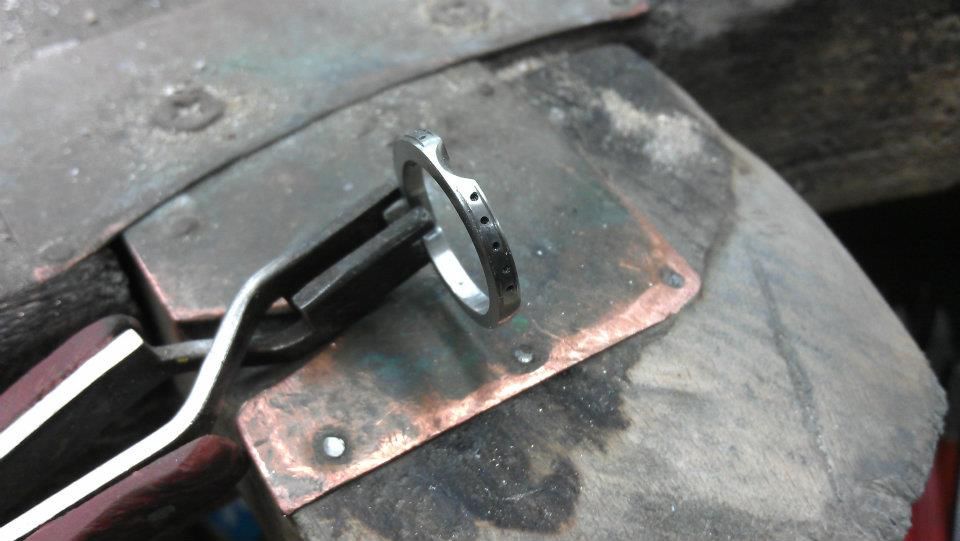
Ring soldered, it just needs more shaping and then profiling and buffing to smooth the surface ready for stone setting and polishing. As you can see, the wedding ring is an unusual shape so you can start to build a picture of this ladys approach to life. More to come on that!
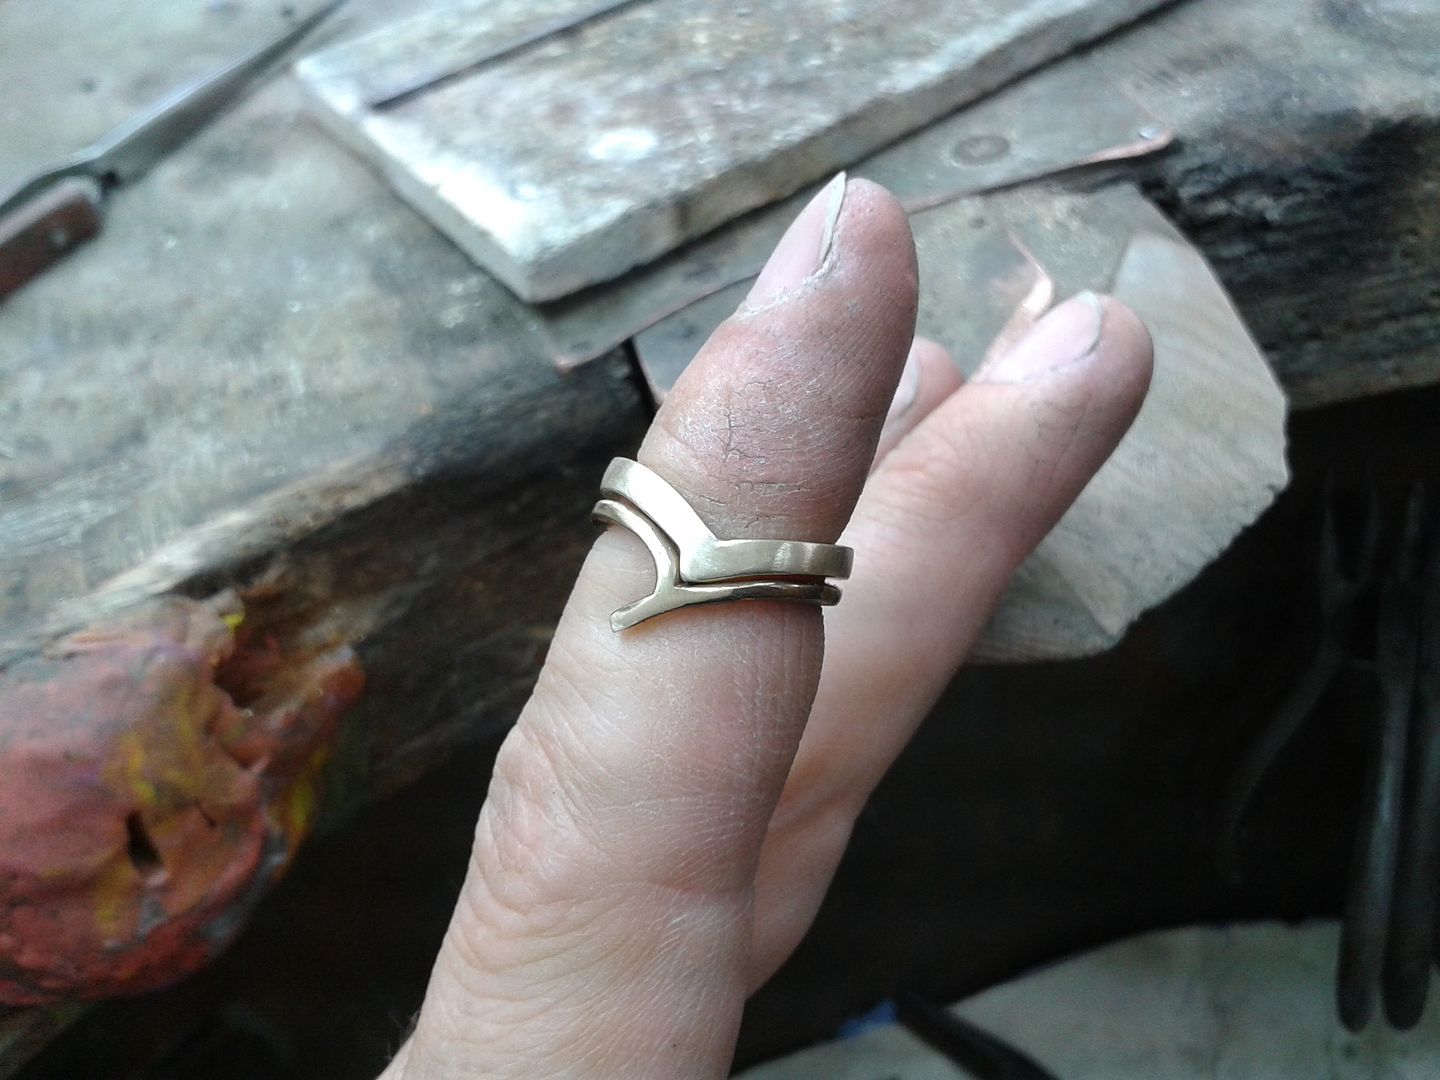
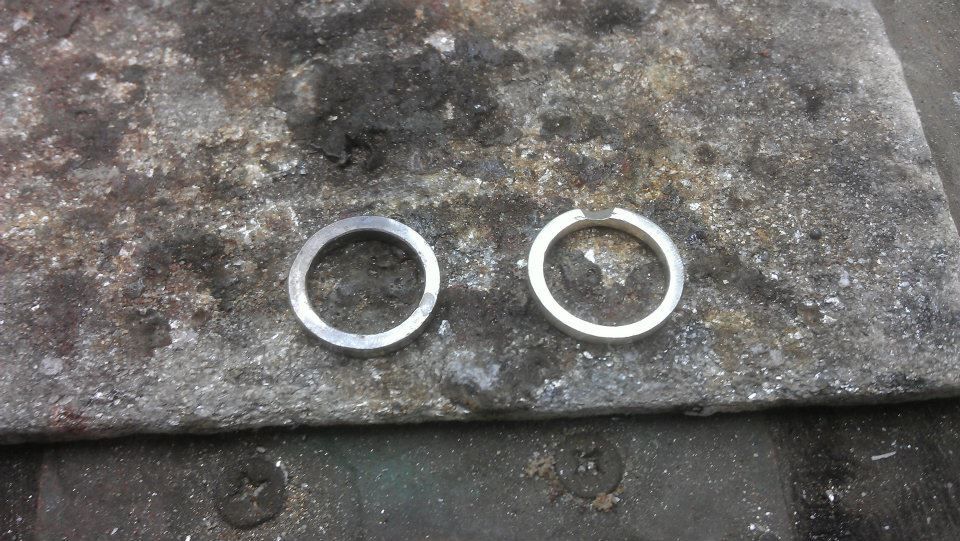
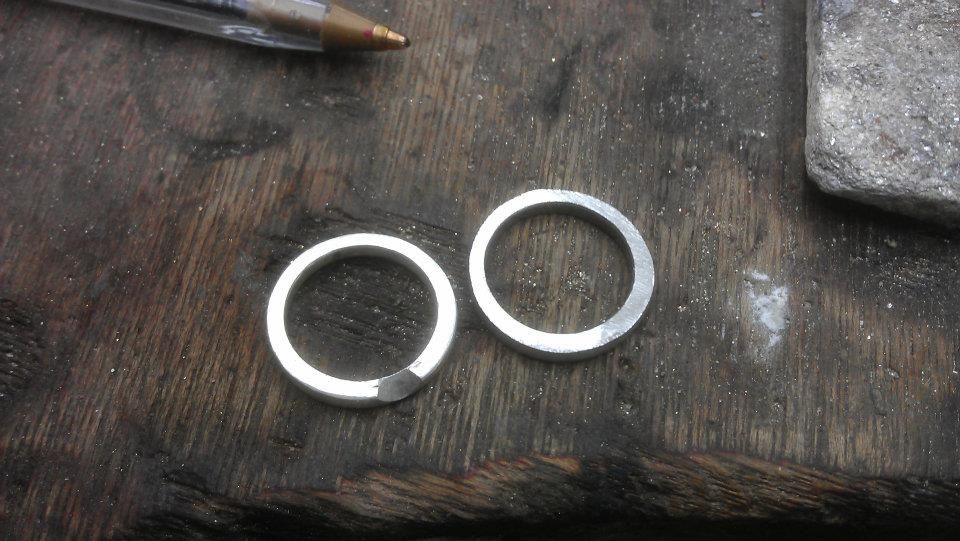
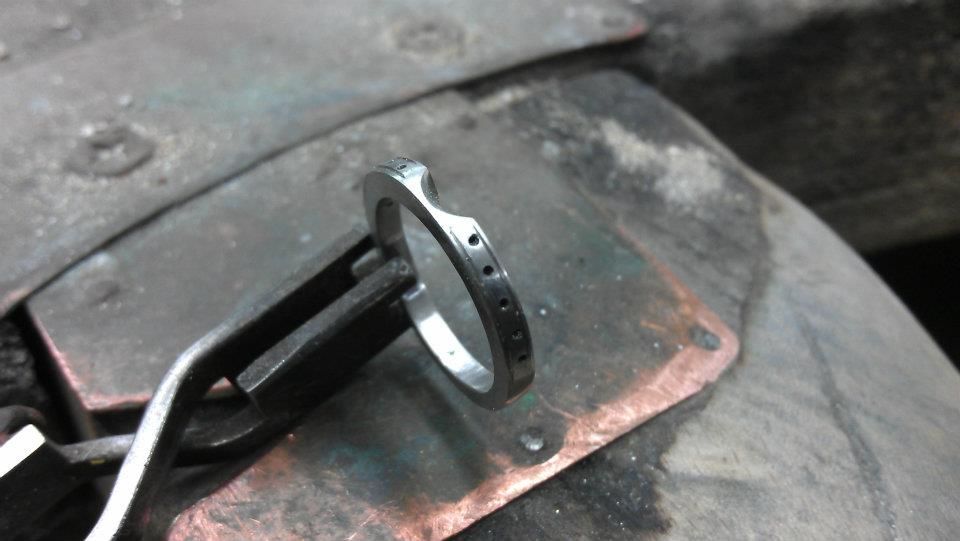
The ring has now been shaped to fit the wedding ring and has been been buffed down to a medium grade ready for stone setting. At this stage there is no need to buff it too finely, its going to get some stick before its ready for polishing.
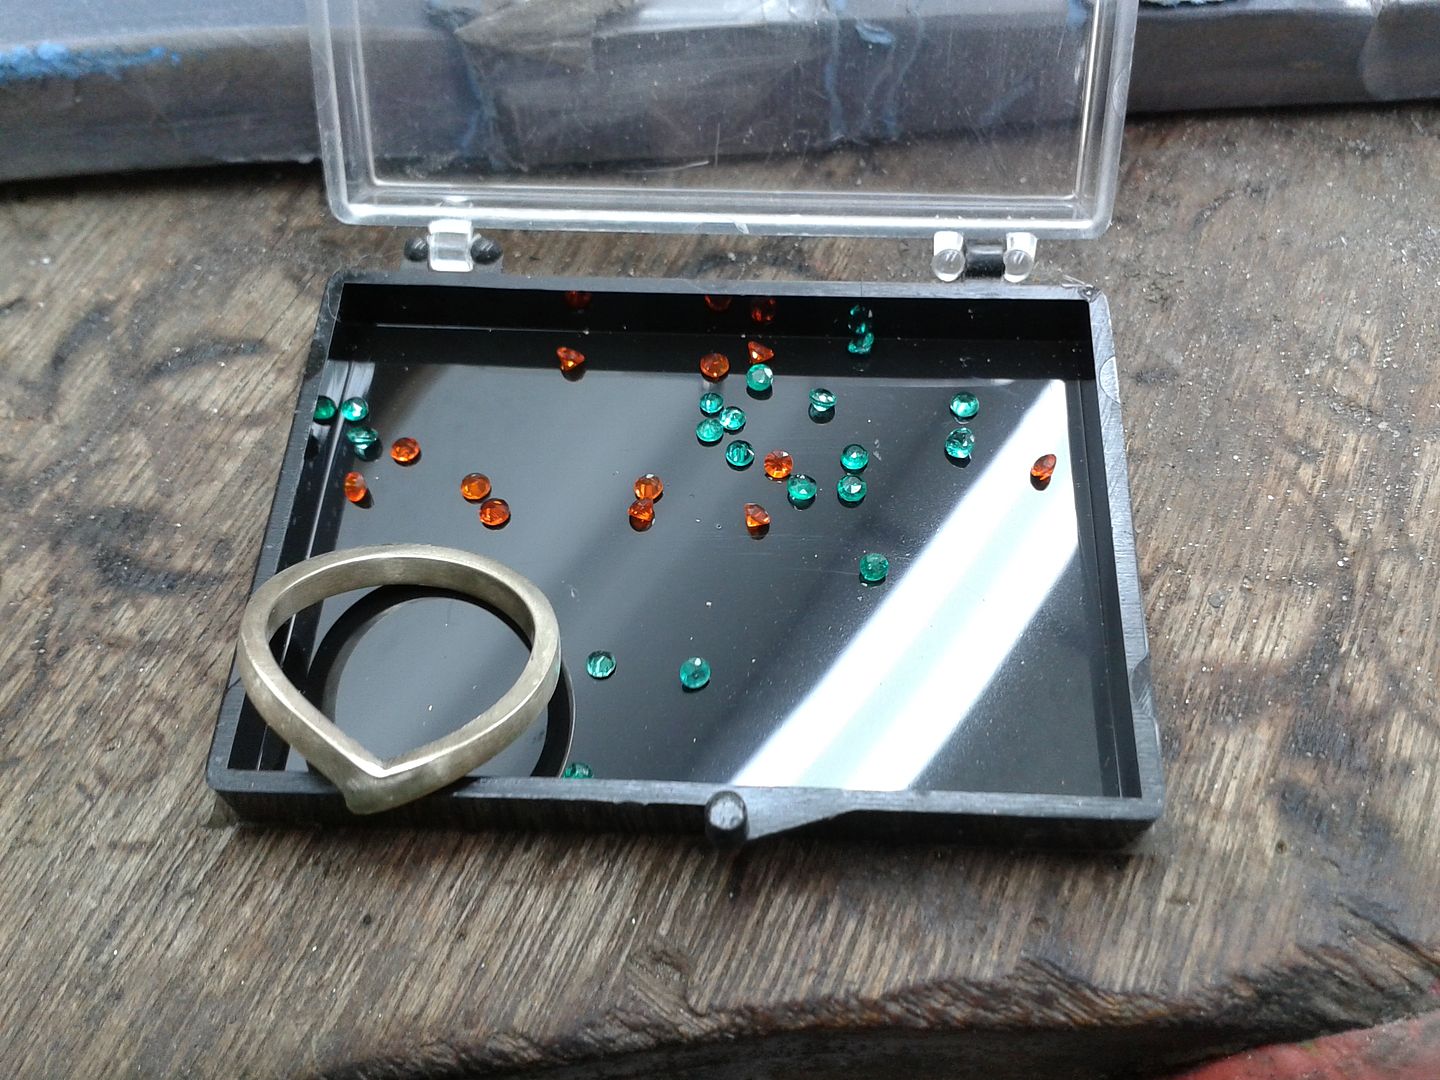
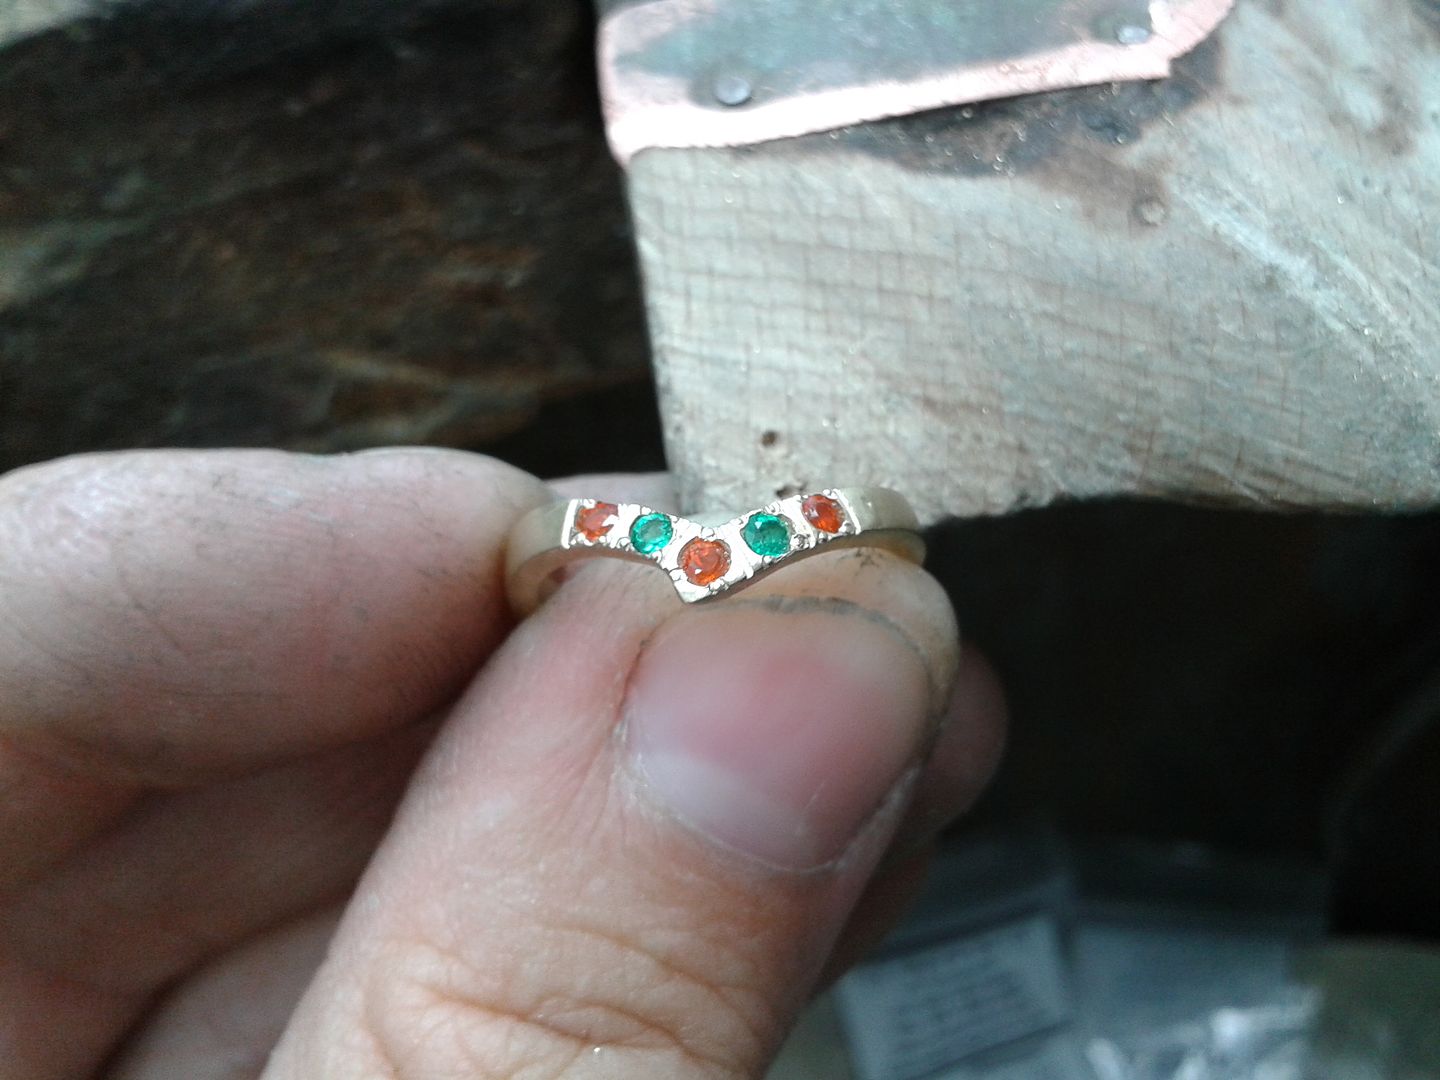
The lady in question has a theme of orange and green running through her life. Her wedding was planned in these colours and I only ever see her in these colours. So, spooky she should choose two of the softest stones known to the jewellery trade. How I'll sweat over this one. Here we have 12 x 2.25mm clear and bright orange fire opals and 12 x 2.25mm good quality emeralds. I wont need them all but spare matching stones are very handy to have when the stones are so soft.
First five stones in. I've chosen to grain set the stones as its less heavy on the stones themselves. Just for a guide, it took me 3 breakages before I got the first fire opal in. They scratch and break so easily (even just picking them up in tweasers will mark them) I was sure I'd run out of stones before I'd finished the job, delaying it being ready for the customer. Luckily, that first couple of breakages allowed me to perfect the setting of these stones and I broke very few after.
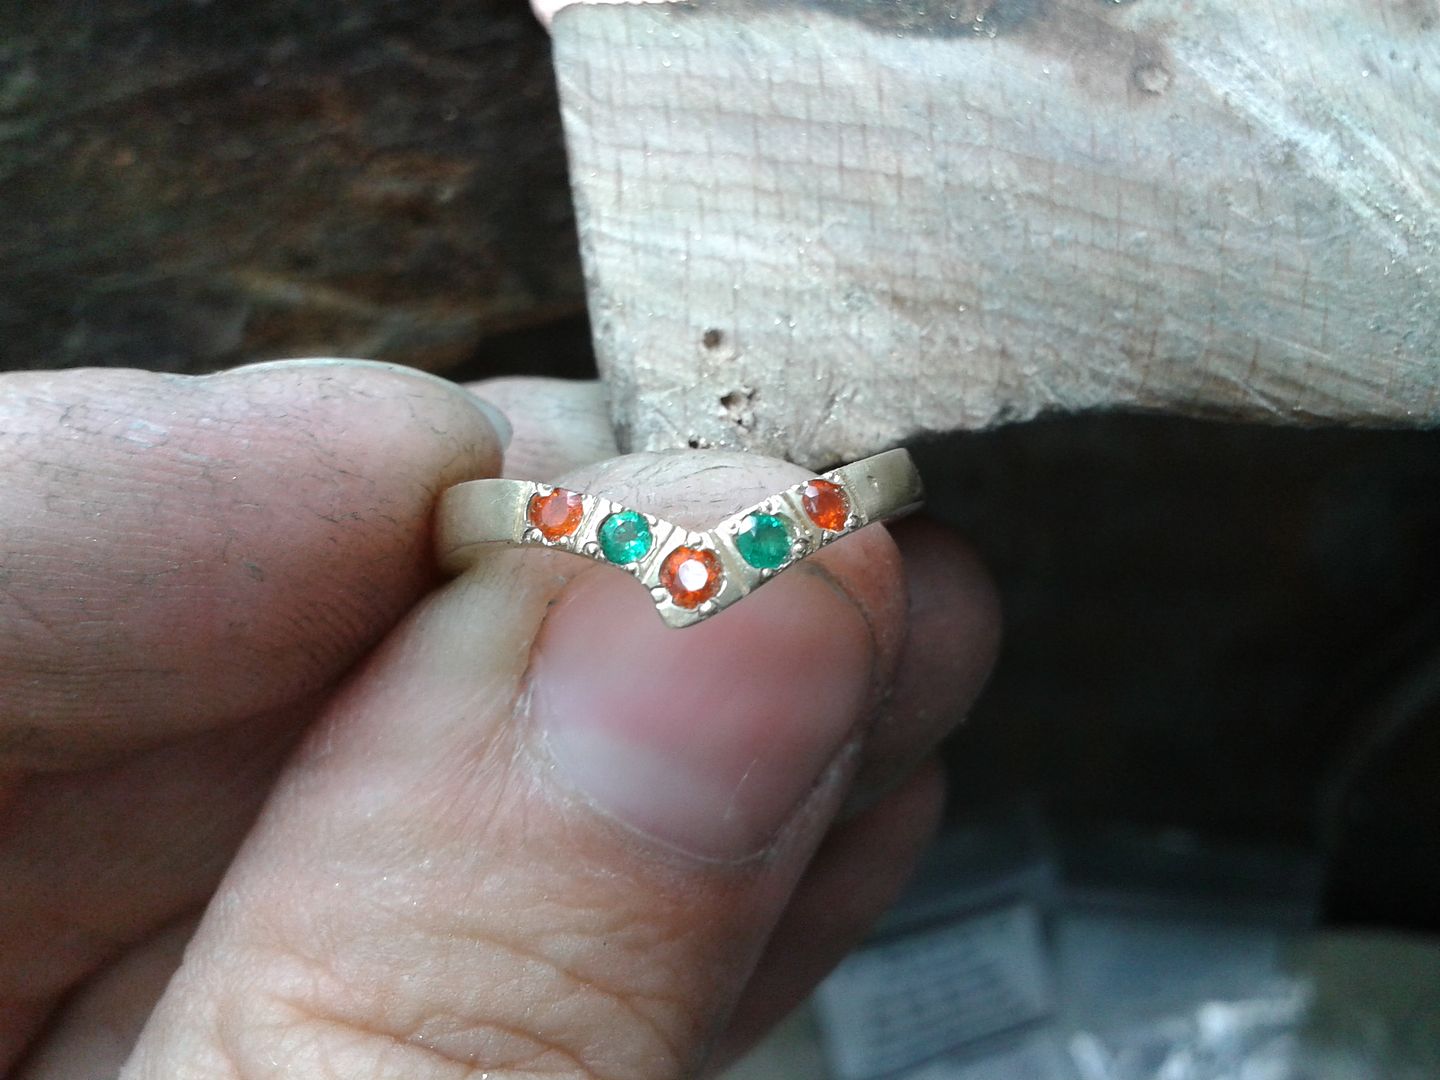
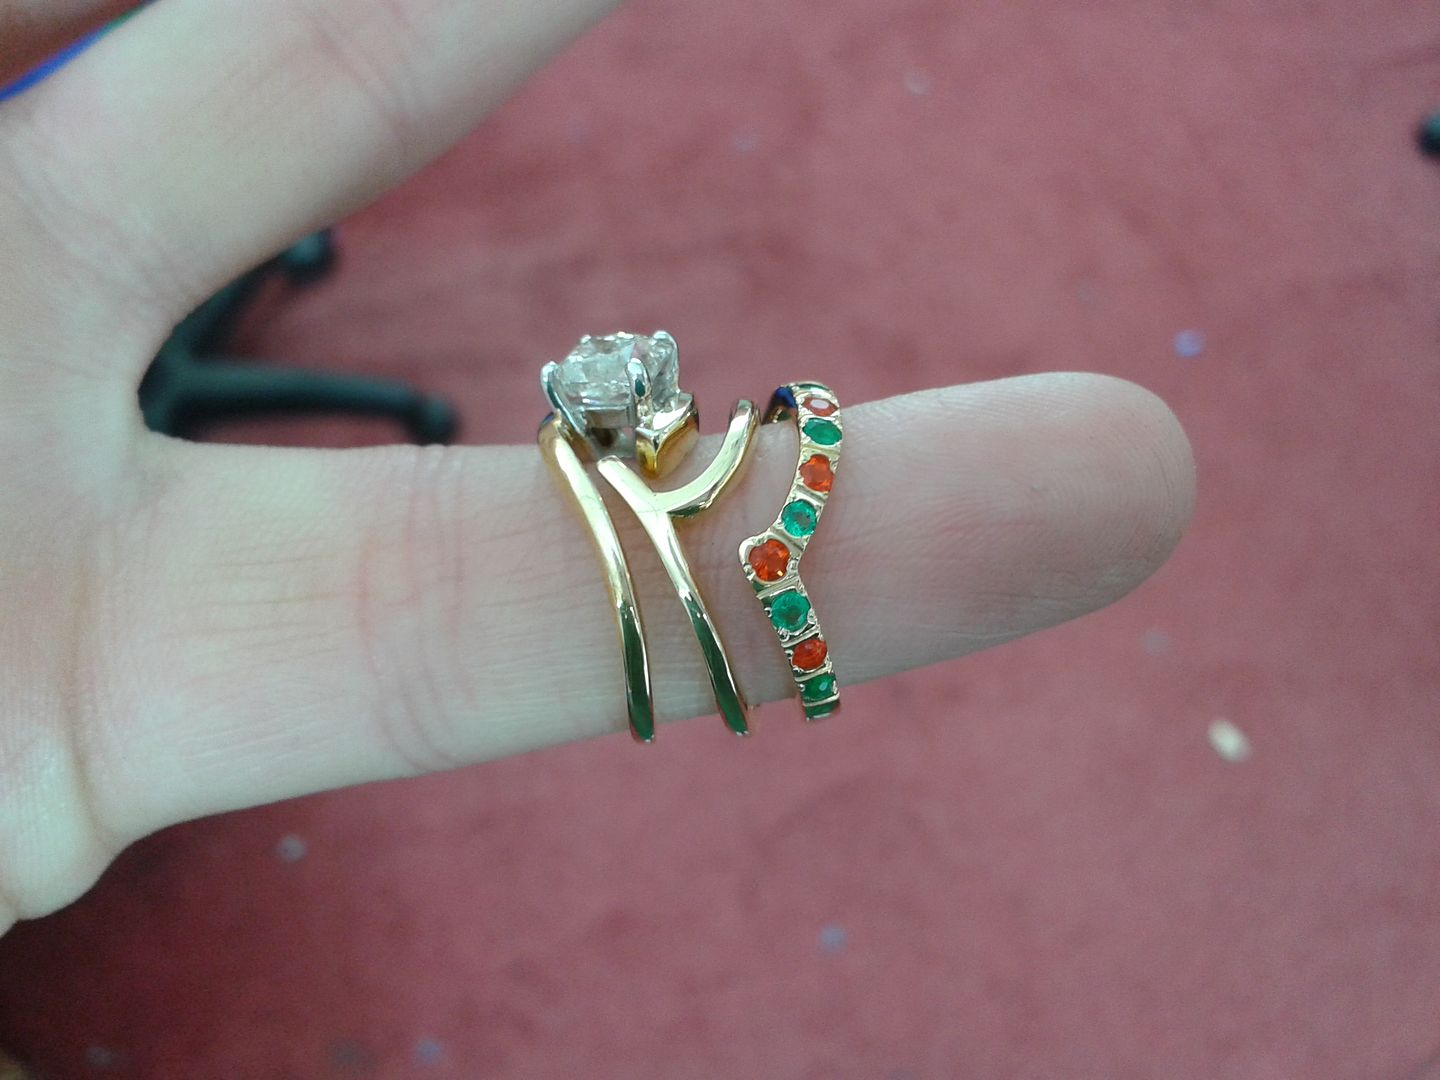
Right, I've got 9 stones in and have a good few spares left over. I call the customer up for her to come in and try it on. This gives me an opportunity to see if i need to set any more and on what side of the hooked bit they are needed. The way the band lies means that the stones are not in even numbers on each side. When she came in we established we needed another emerald and fire opal on one side to make them reach below the 1/2 way point.
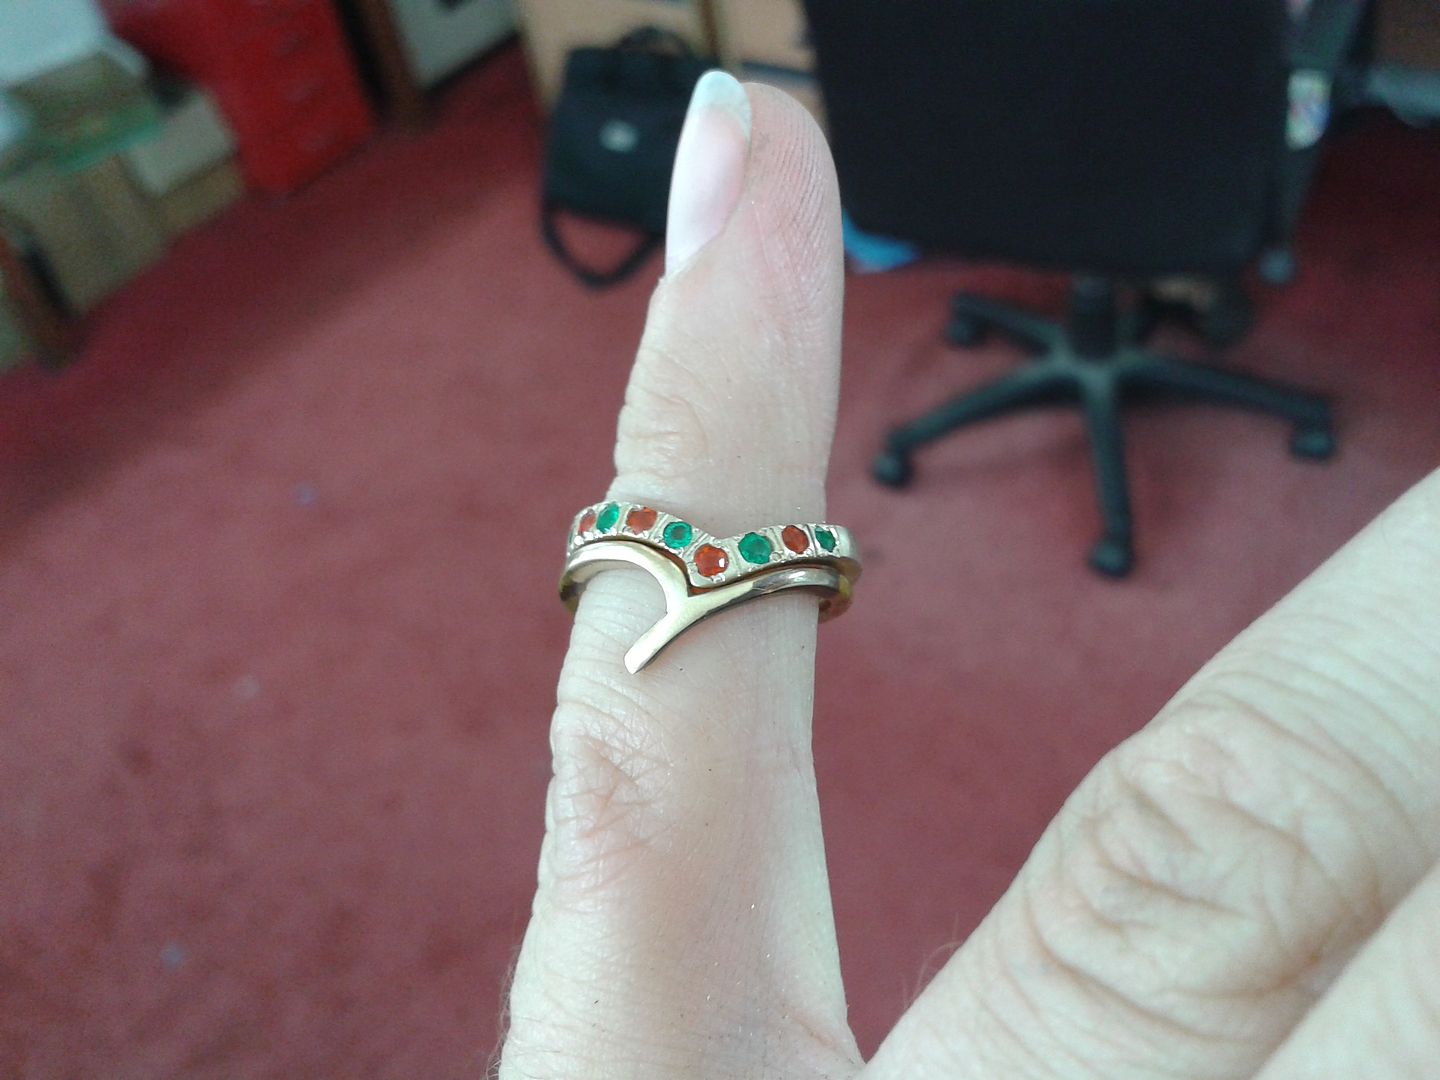
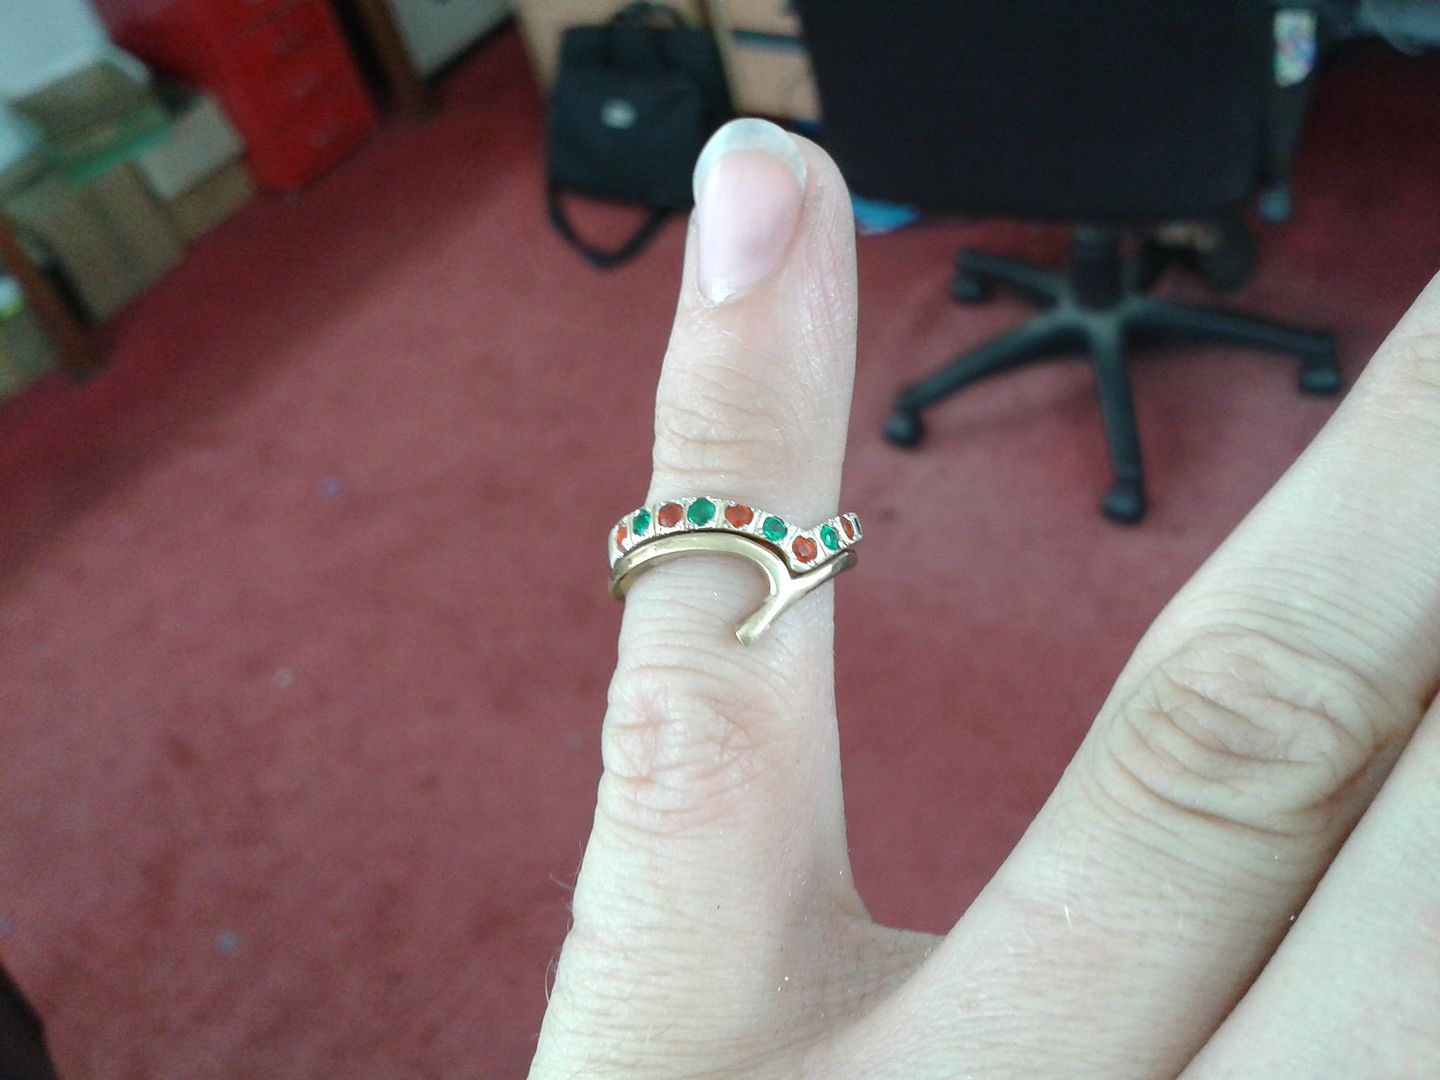
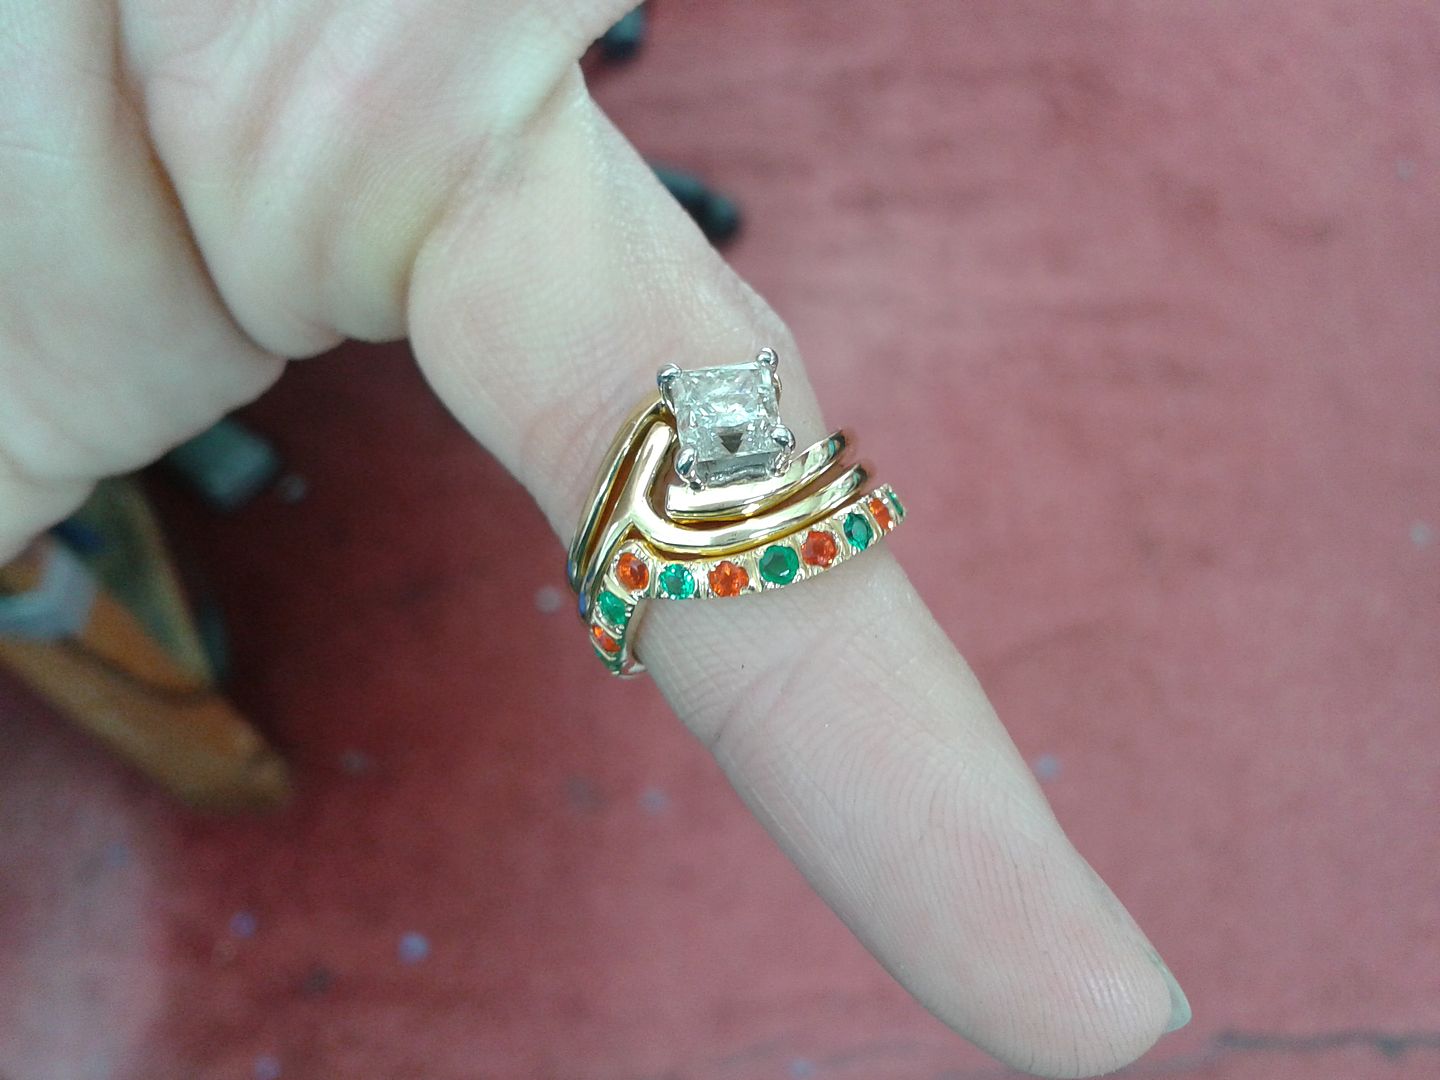
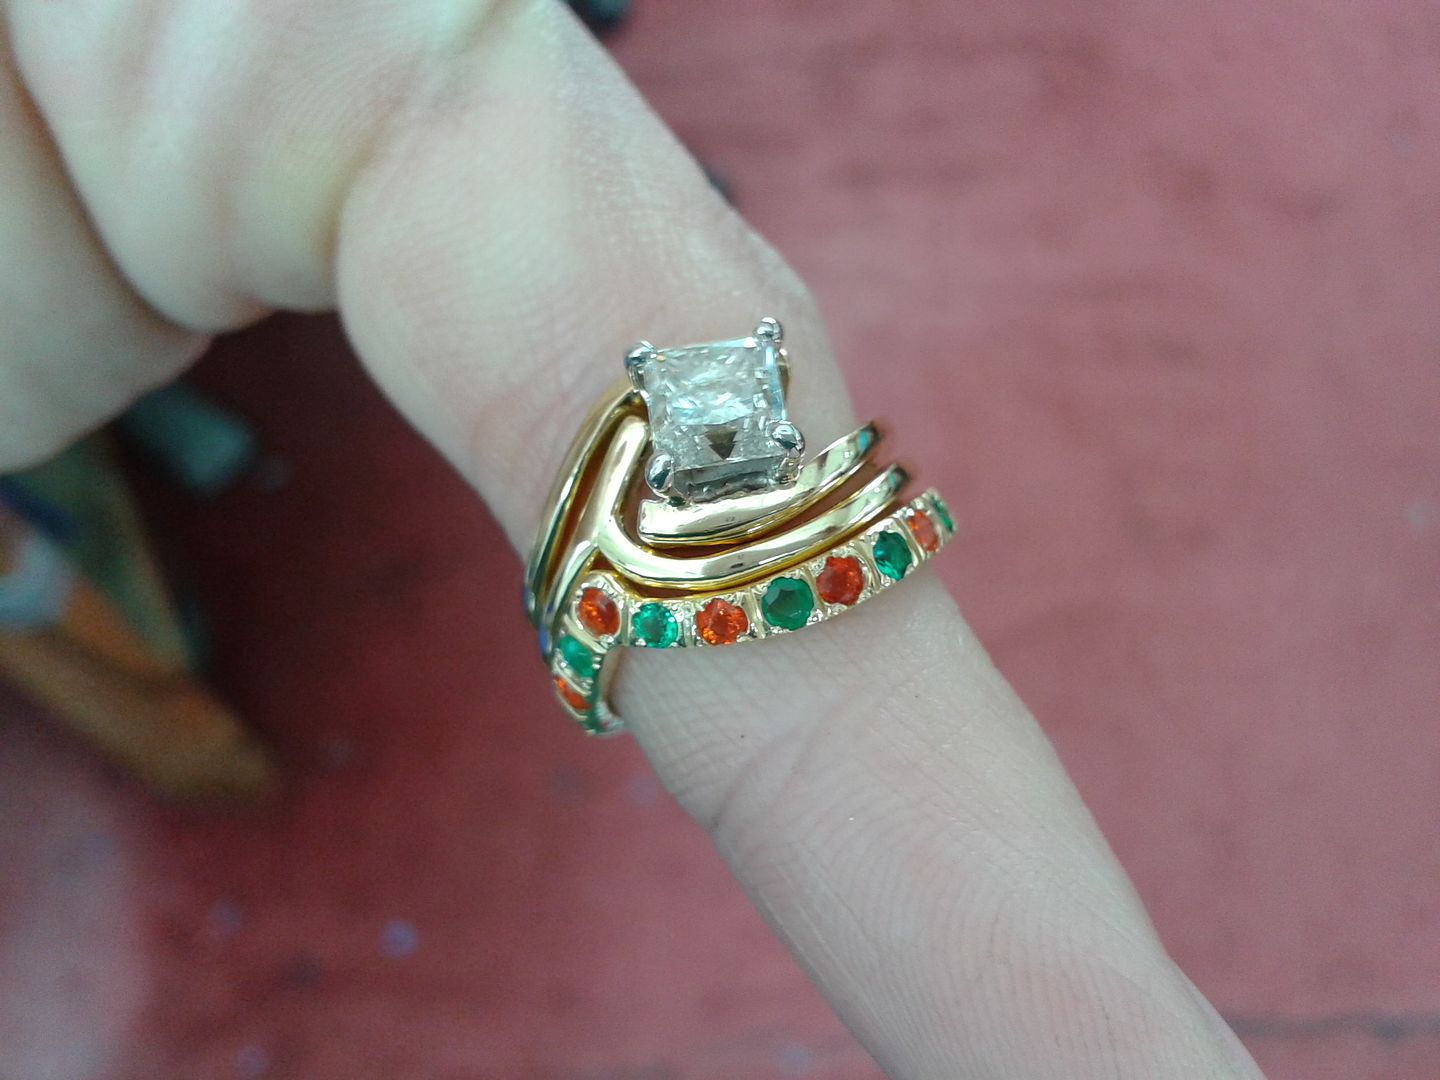
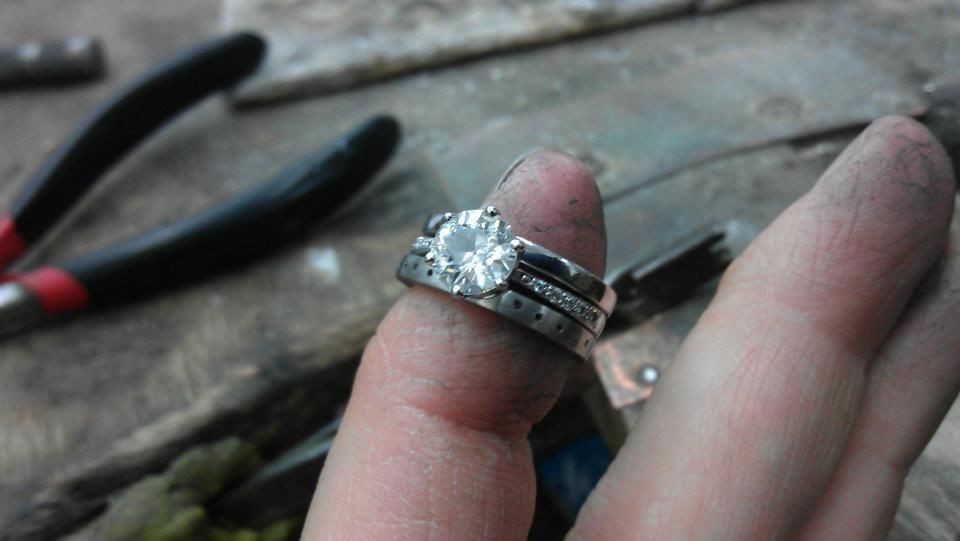
With the final stones set the ring gets a good polish, a clean and then the stones get checked for security. This is a tricky stage as any loose stones have to be tightened up by pressing a bit harder on the grains. By this point I've used 11 out of the 12 fire opals I had so to say I was praying they were all secure would be an understatement. Luckily only one emerald needed tightening so I wasn't too stressed as the day came to an end. Emeralds are also very soft but so long as they are not too badly flawed they will take a little bit of pressure where the fire opals would instantly fail. Also, here is the engagement ring. Not your average, but neither is the customer.

Hope you enjoyed that.
Eddie
Background: A customer came to me about 3 years ago with an idea for an engagement ring. She had the stone and the ideas, we produced it. She's not your average customer, very different but utterly excellent in her spark and desire to enjoy life. You'll see what I mean below.
..................................
So, over the past few years she's brought in her own gold, which we melt, make something she wants and then melt the remains to leave her a bar for next time. This gold came from her mums passed down jewellery, and although not assayed its about 14ct.
In that time we have made her wedding bands, a cross for her husbands confirmation and various other little bits and bobs. Today I made her eternity ring as its coming up to her 1st year anniversary.
As you can see here I've made a rough, wishbone shaped ring to match the wedding band and engagement ring, which you'll see later. The dimensions needed before cleaning are 2.5mm wide and 1.8mm thick. You can see behind the rough ring shape the remains of her gold bar ready for her next design idea. The ring needs soldering at the top to join and shaping to fit against the wedding ring. It has already been turned to ensure its the right size.

Ring soldered, it just needs more shaping and then profiling and buffing to smooth the surface ready for stone setting and polishing. As you can see, the wedding ring is an unusual shape so you can start to build a picture of this ladys approach to life. More to come on that!

The ring has now been shaped to fit the wedding ring and has been been buffed down to a medium grade ready for stone setting. At this stage there is no need to buff it too finely, its going to get some stick before its ready for polishing.

The lady in question has a theme of orange and green running through her life. Her wedding was planned in these colours and I only ever see her in these colours. So, spooky she should choose two of the softest stones known to the jewellery trade. How I'll sweat over this one. Here we have 12 x 2.25mm clear and bright orange fire opals and 12 x 2.25mm good quality emeralds. I wont need them all but spare matching stones are very handy to have when the stones are so soft.

First five stones in. I've chosen to grain set the stones as its less heavy on the stones themselves. Just for a guide, it took me 3 breakages before I got the first fire opal in. They scratch and break so easily (even just picking them up in tweasers will mark them) I was sure I'd run out of stones before I'd finished the job, delaying it being ready for the customer. Luckily, that first couple of breakages allowed me to perfect the setting of these stones and I broke very few after.


Right, I've got 9 stones in and have a good few spares left over. I call the customer up for her to come in and try it on. This gives me an opportunity to see if i need to set any more and on what side of the hooked bit they are needed. The way the band lies means that the stones are not in even numbers on each side. When she came in we established we needed another emerald and fire opal on one side to make them reach below the 1/2 way point.


With the final stones set the ring gets a good polish, a clean and then the stones get checked for security. This is a tricky stage as any loose stones have to be tightened up by pressing a bit harder on the grains. By this point I've used 11 out of the 12 fire opals I had so to say I was praying they were all secure would be an understatement. Luckily only one emerald needed tightening so I wasn't too stressed as the day came to an end. Emeralds are also very soft but so long as they are not too badly flawed they will take a little bit of pressure where the fire opals would instantly fail. Also, here is the engagement ring. Not your average, but neither is the customer.


Hope you enjoyed that.
Eddie
Edited by ecain63 on Wednesday 24th July 21:52
ecain63 said:
Seeing as we are doing rings etc......
Recently made my wife an eternity ring for our 5th anniversary. Strictly speaking you're supposed to give an eternity ring at the 1st year anniversary or on the birth of the first child. Claire didn't want it that early.
I know its a bit of minor advertising but hopefully will be seen as harmless helpful info :
:
Started out with 3g of 6mm x 6mm Platinum bar:
Rolled down to 2.25mm x 2.25mm and then rolled again on one side to make 2.1mm wide x 2.40mm deep. The ring below is a silver wedding mock up, designed to fit against her engagement ring, made by Joe (father in law) in 2007 when Claire and I got married:
After the ends have been flattened by cutting and filing them off with a fine bladed hack saw the bar is turned by hand (very tough and metal needs to be softened regularly) and the ends solderd together with Platinum solder. The excess solder is filed away from the inside of the band and then made round by use of a soft hide-mallet:
To acheive the correct size and to get the slightly tapered profile the band is made about 4 sizes smaller than needed when finished. The base of the lower half of the band needs to be only 1.6mm thick and the top half at its thickest is 2.30mm thick. To get this tapered effect i use a lightwieght hammer to tap the platinum to the correct size, making it thinner at the base as needed. Every 1/2 size it gets bigger the ring needs to be heated to soften it. If you do not heat it the metal becomes hard and will eventually crack:
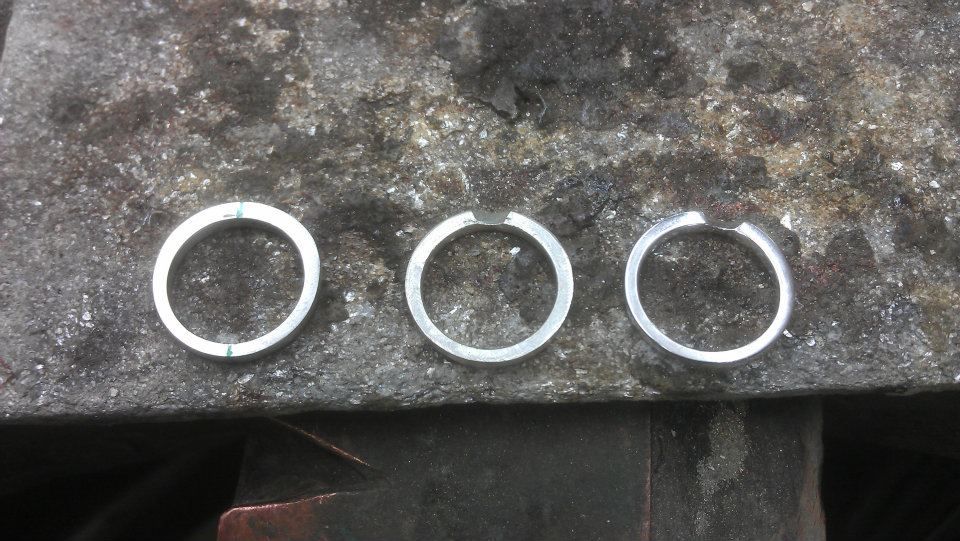
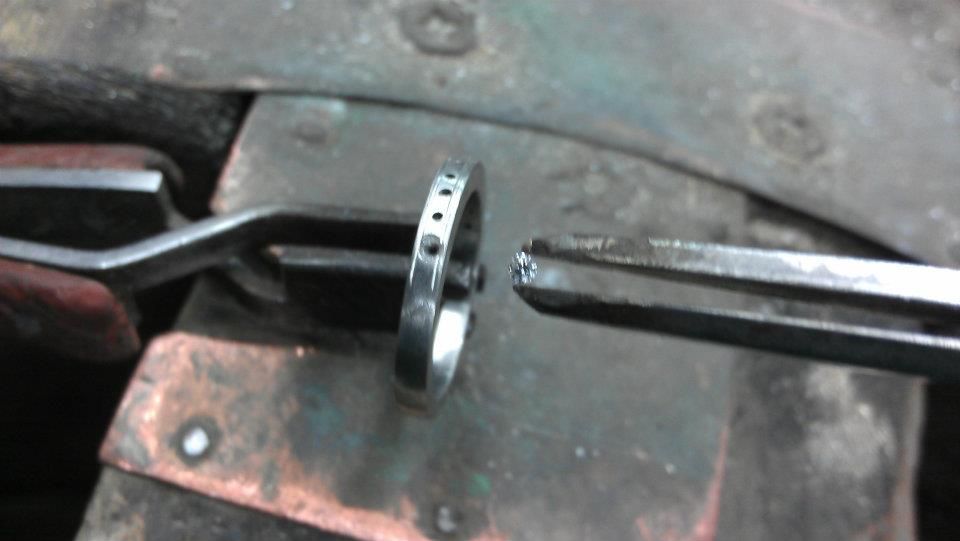
Now we have the correct size and profile the top of the band needs to have a semi-circular knotch cut into it to allow the band to sit against the engagement ring, in the same way as Claires current wedding band. A half-round file is used. LEFT is the new platinum band. MIDDLE is the silver sample and RIGHT is Claires actual wedding band:
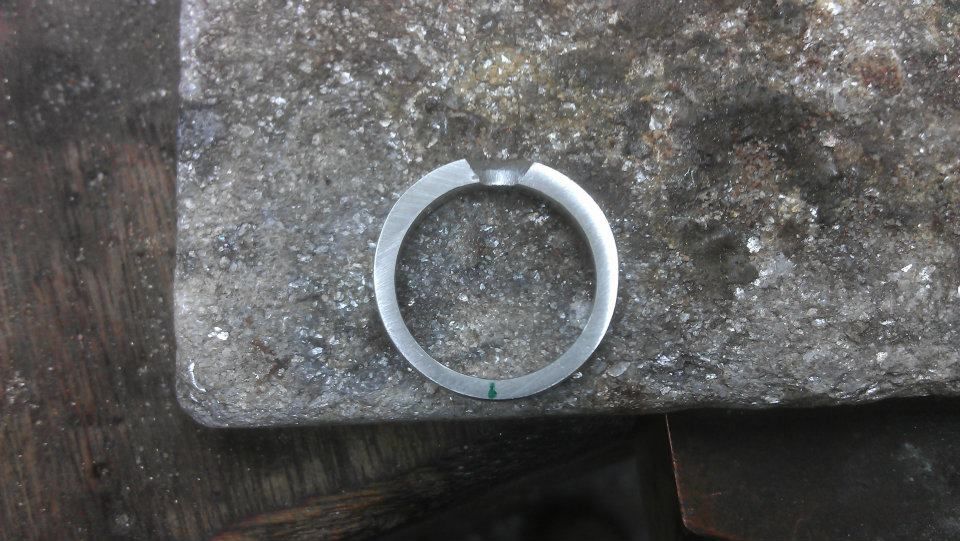
Knotch cut in, ready to think about setting the diamonds:
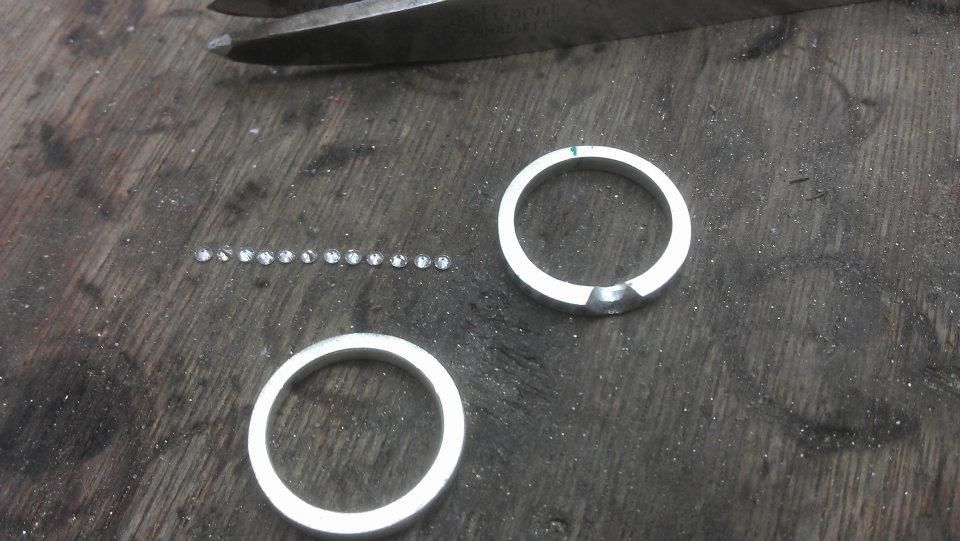
Claire wanted the diamonds to stretch only half way around the band, like the shank of her engagement ring. Here i have roughly marked where they will be set:
12 diamonds selected but only 10 diamonds will be needed, 5 each side. They total 0.21ct according to the scales:
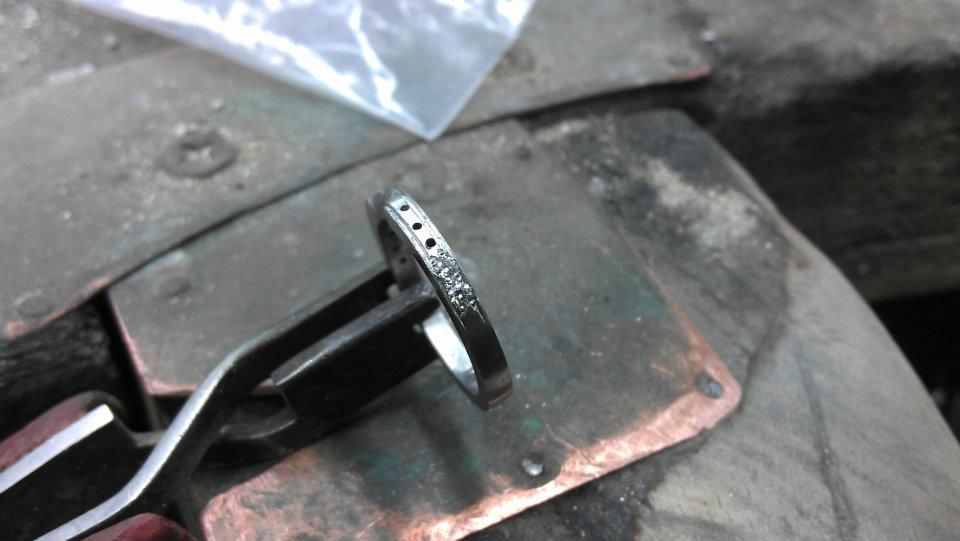
The first part of setting the stones is to mark where they will be set. After scoring a centre line around the ring with an adjustable scribe and then measuring the distance between stones with a caliper i drilled the pilot holes which will guide the drills and bores needed to make the holes for the diamonds:
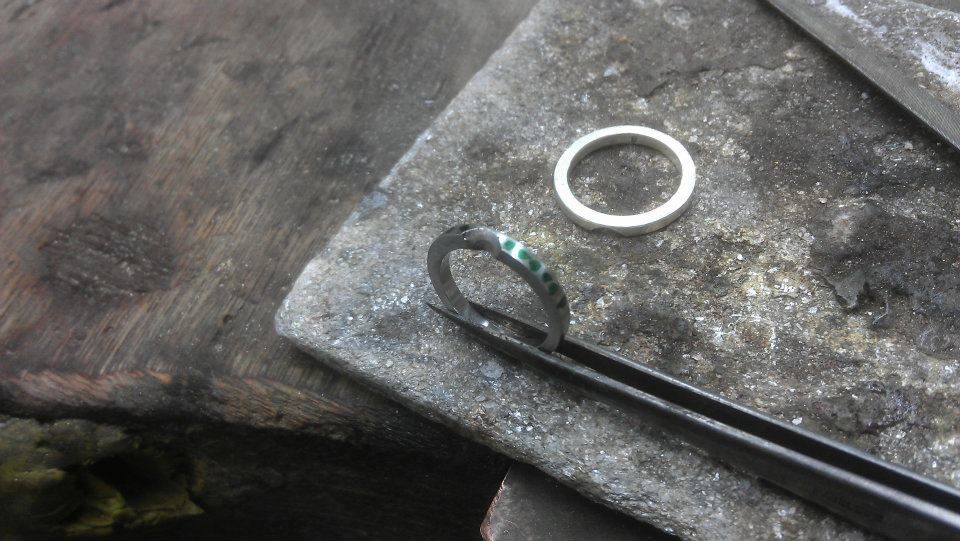
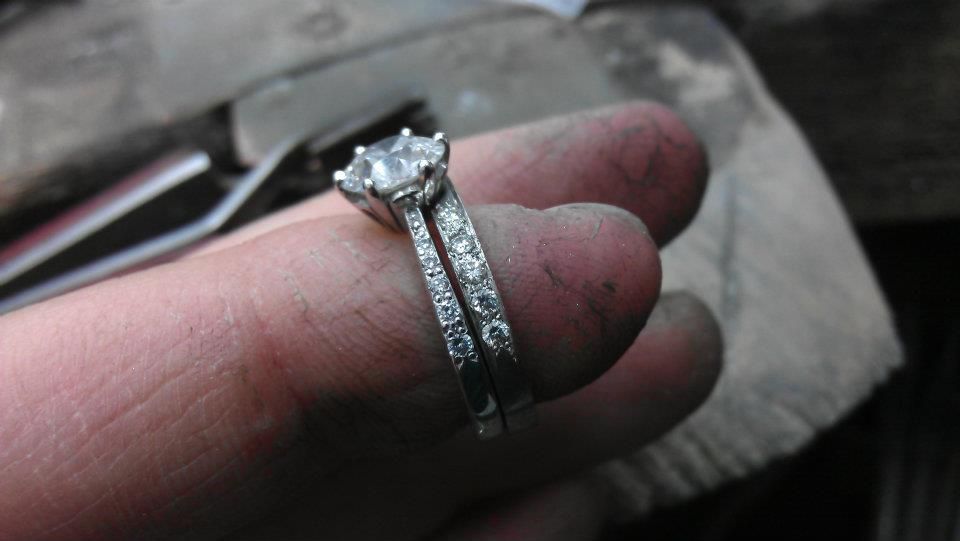
Here you can see how the rings will lay once completed:
All pilot holes drilled, ready for some more drilling with shaped bores. Notice too how i have scored the edges of the ring to make a groove. This gives me a guide which i can work to when deciding the size of stone needed:
Close-up of pilot holes and edge of band
One hole has been drilled to the right size. Its a tight fit as you dont want gaps:
First 2 stones are set. They are held in by 'grains' of platinum which are formed by cutting away the metal around them. The grains are pressed over the edge of the stones, without breaking them:
5 Diamons down and 5 to go. Starting to look the part:
So, all the stones are in now. All that is needed is to clean it up a bit, polish it and then Rhodium plate it to give the ring a bright white finish. Claire will be pleased!:
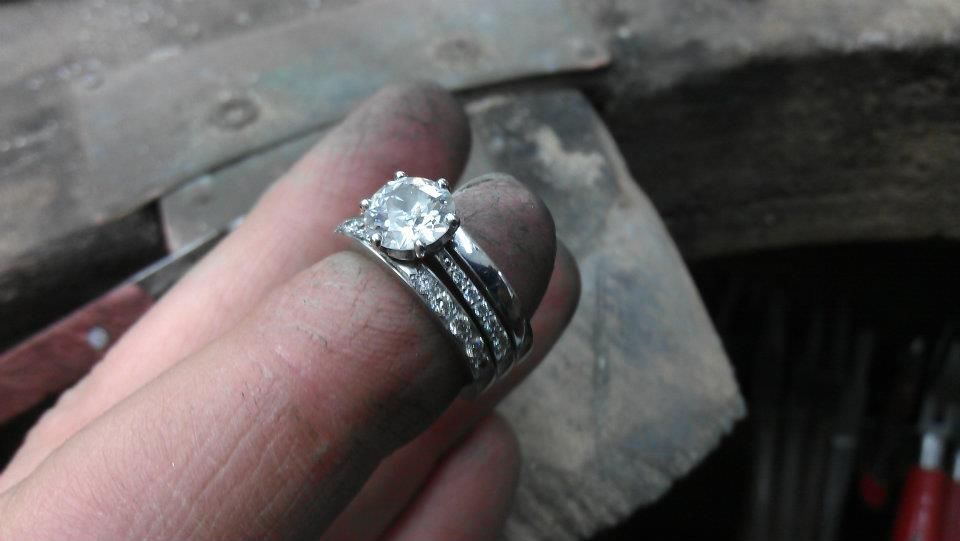
The finished ariticle. Not bad for an afternoons work:

Eddie
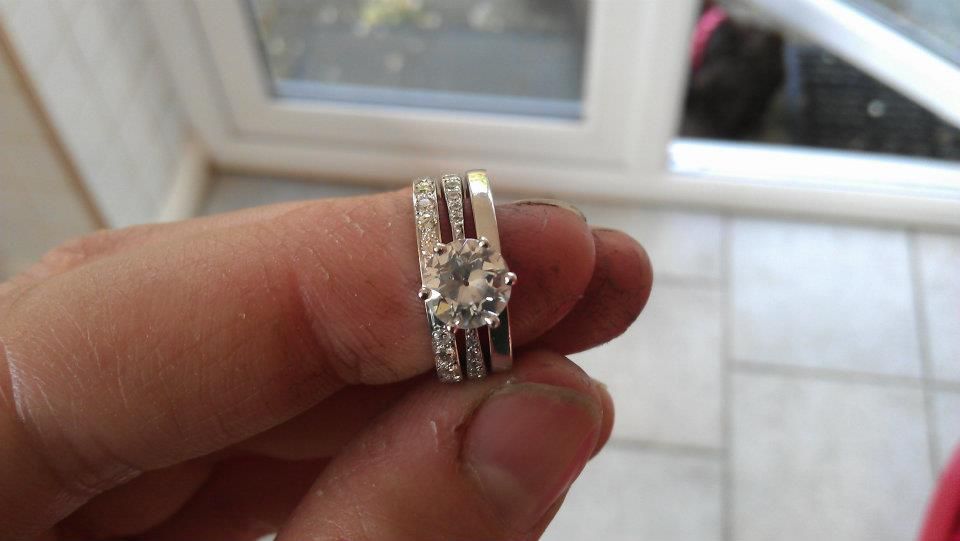
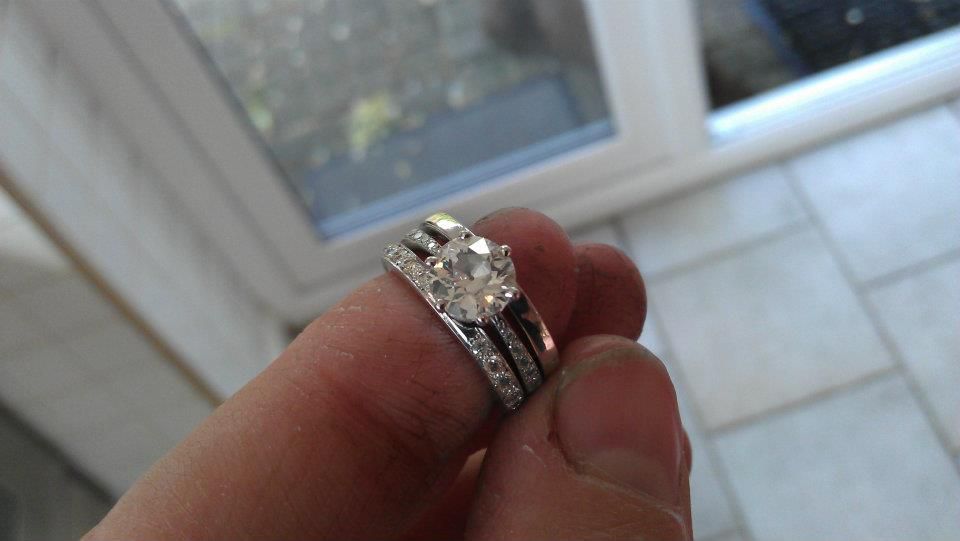
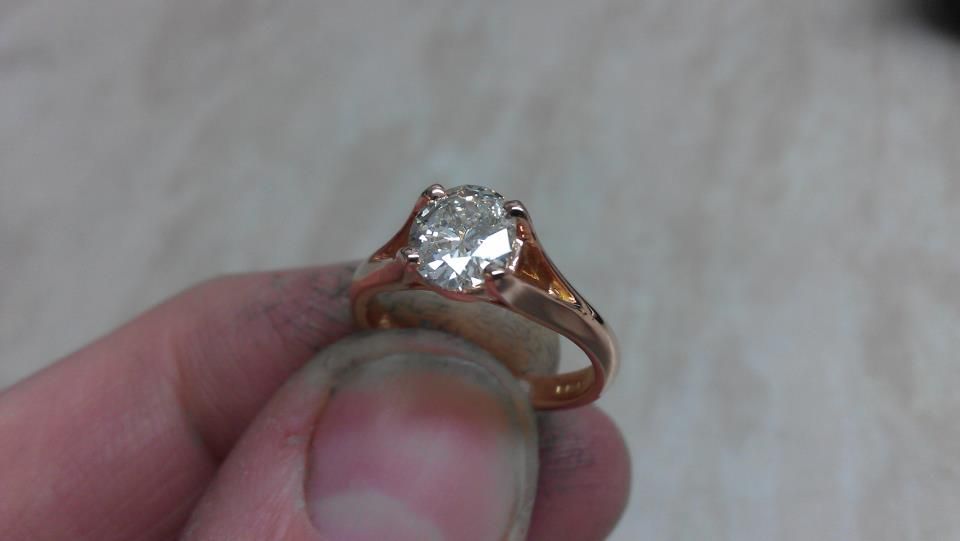
Made this last year for a good friend of mine. Custom made rose gold mount for her own 1.20ct oval diamond.
They got married yesterday. Made this to matech:
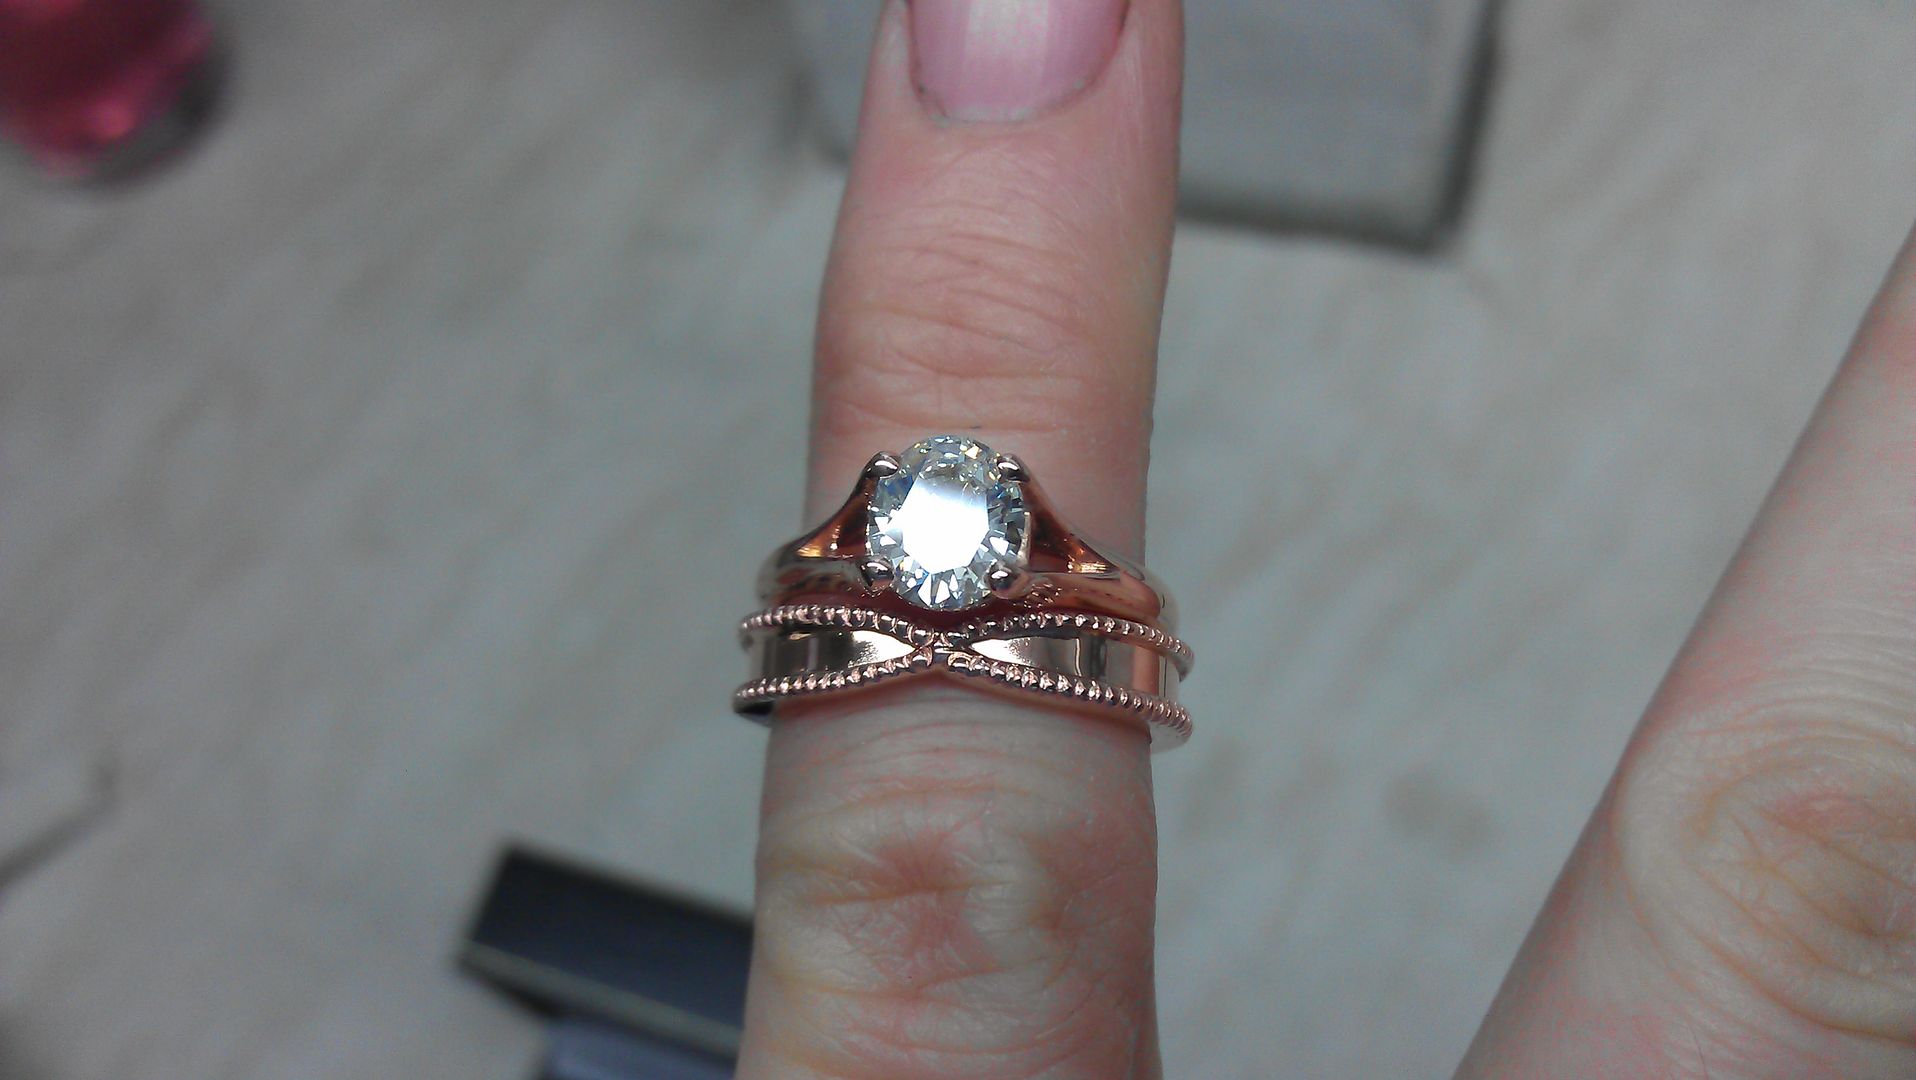
(That'll do me). lol
Recently made my wife an eternity ring for our 5th anniversary. Strictly speaking you're supposed to give an eternity ring at the 1st year anniversary or on the birth of the first child. Claire didn't want it that early.
I know its a bit of minor advertising but hopefully will be seen as harmless helpful info
:Started out with 3g of 6mm x 6mm Platinum bar:

Rolled down to 2.25mm x 2.25mm and then rolled again on one side to make 2.1mm wide x 2.40mm deep. The ring below is a silver wedding mock up, designed to fit against her engagement ring, made by Joe (father in law) in 2007 when Claire and I got married:

After the ends have been flattened by cutting and filing them off with a fine bladed hack saw the bar is turned by hand (very tough and metal needs to be softened regularly) and the ends solderd together with Platinum solder. The excess solder is filed away from the inside of the band and then made round by use of a soft hide-mallet:

To acheive the correct size and to get the slightly tapered profile the band is made about 4 sizes smaller than needed when finished. The base of the lower half of the band needs to be only 1.6mm thick and the top half at its thickest is 2.30mm thick. To get this tapered effect i use a lightwieght hammer to tap the platinum to the correct size, making it thinner at the base as needed. Every 1/2 size it gets bigger the ring needs to be heated to soften it. If you do not heat it the metal becomes hard and will eventually crack:

Now we have the correct size and profile the top of the band needs to have a semi-circular knotch cut into it to allow the band to sit against the engagement ring, in the same way as Claires current wedding band. A half-round file is used. LEFT is the new platinum band. MIDDLE is the silver sample and RIGHT is Claires actual wedding band:

Knotch cut in, ready to think about setting the diamonds:

Claire wanted the diamonds to stretch only half way around the band, like the shank of her engagement ring. Here i have roughly marked where they will be set:

12 diamonds selected but only 10 diamonds will be needed, 5 each side. They total 0.21ct according to the scales:

The first part of setting the stones is to mark where they will be set. After scoring a centre line around the ring with an adjustable scribe and then measuring the distance between stones with a caliper i drilled the pilot holes which will guide the drills and bores needed to make the holes for the diamonds:

Here you can see how the rings will lay once completed:

All pilot holes drilled, ready for some more drilling with shaped bores. Notice too how i have scored the edges of the ring to make a groove. This gives me a guide which i can work to when deciding the size of stone needed:

Close-up of pilot holes and edge of band

One hole has been drilled to the right size. Its a tight fit as you dont want gaps:

First 2 stones are set. They are held in by 'grains' of platinum which are formed by cutting away the metal around them. The grains are pressed over the edge of the stones, without breaking them:

5 Diamons down and 5 to go. Starting to look the part:

So, all the stones are in now. All that is needed is to clean it up a bit, polish it and then Rhodium plate it to give the ring a bright white finish. Claire will be pleased!:

The finished ariticle. Not bad for an afternoons work:


Eddie
Edited by ecain63 on Monday 3rd June 21:00
Edited by ecain63 on Monday 3rd June 21:02
Made this last year for a good friend of mine. Custom made rose gold mount for her own 1.20ct oval diamond.

They got married yesterday. Made this to matech:

(That'll do me). lol
Edited by ecain63 on Monday 3rd June 21:09[/footnote]
[footnote]Edited by ecain63 on Sunday 13th August 20:02ecain63 said:
NeMiSiS said:
Well done.
Show us more, a monthly best of will keep me going.
Cheers.
Lol. Maybe a "this month I've mainly been......" type thread. Show us more, a monthly best of will keep me going.
Cheers.
Actually im just about to start my wife's anniversary present so might post that up when its done.
Thanks for the kind words guys.

As its my anniversary on Sunday i thought i'd better get on with finishing that ring for the wife.
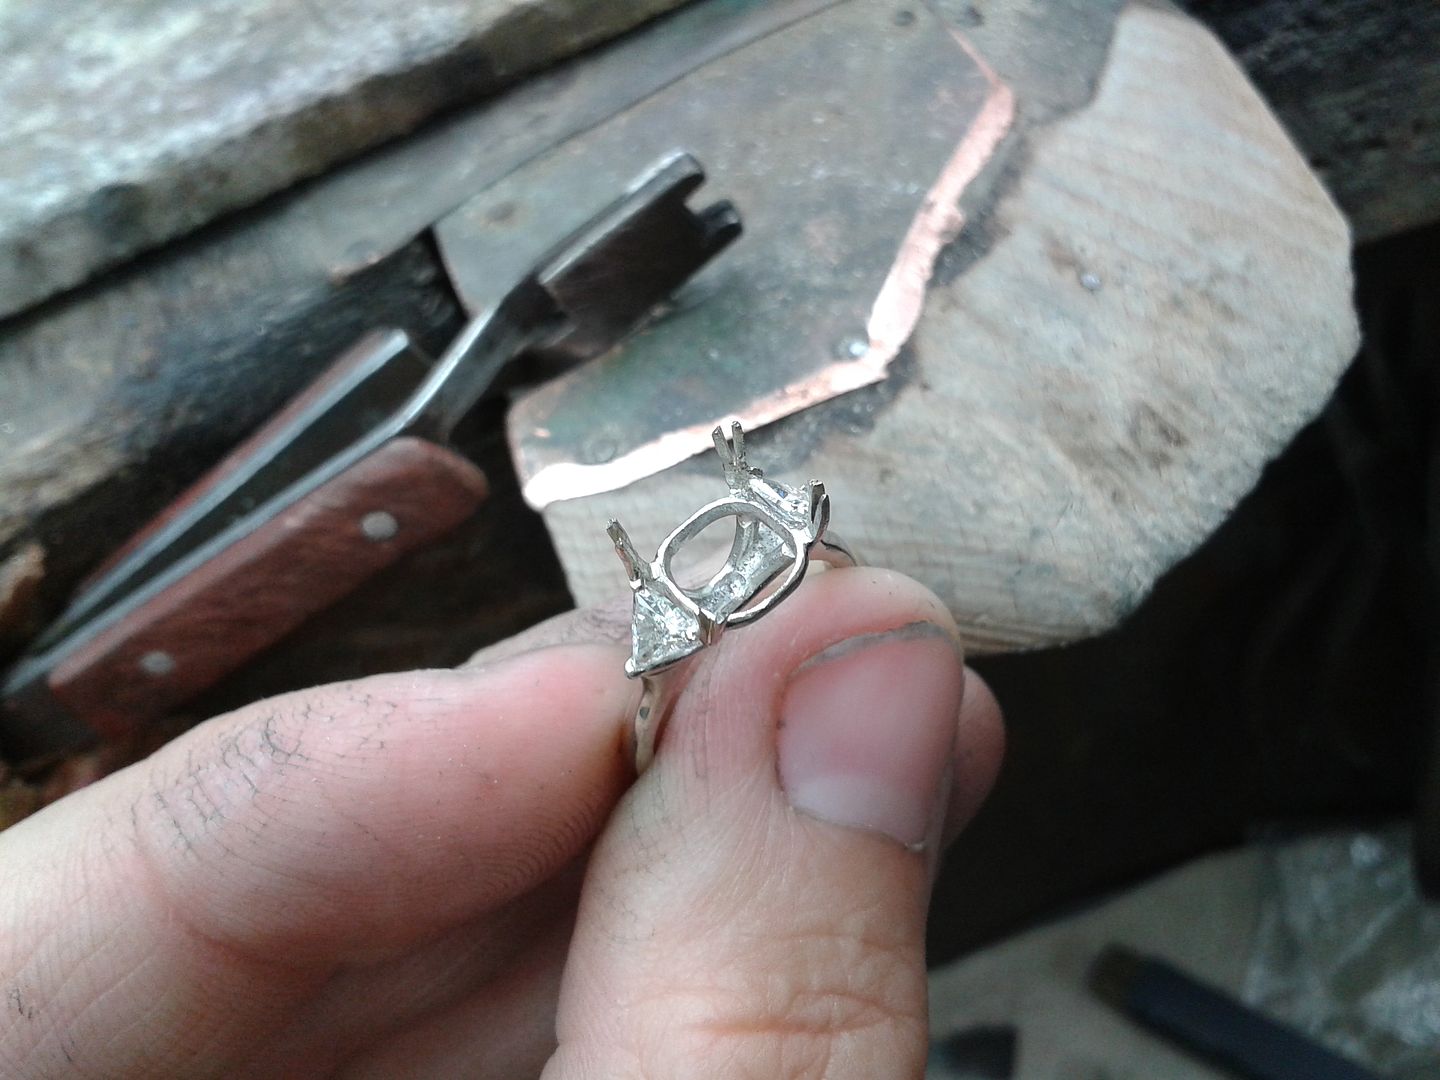
Custom built mount in Platinum. Usual processes but as the centre stone is a cushion cut its a very 'trial and error' build. Luckily it went without too much issue:
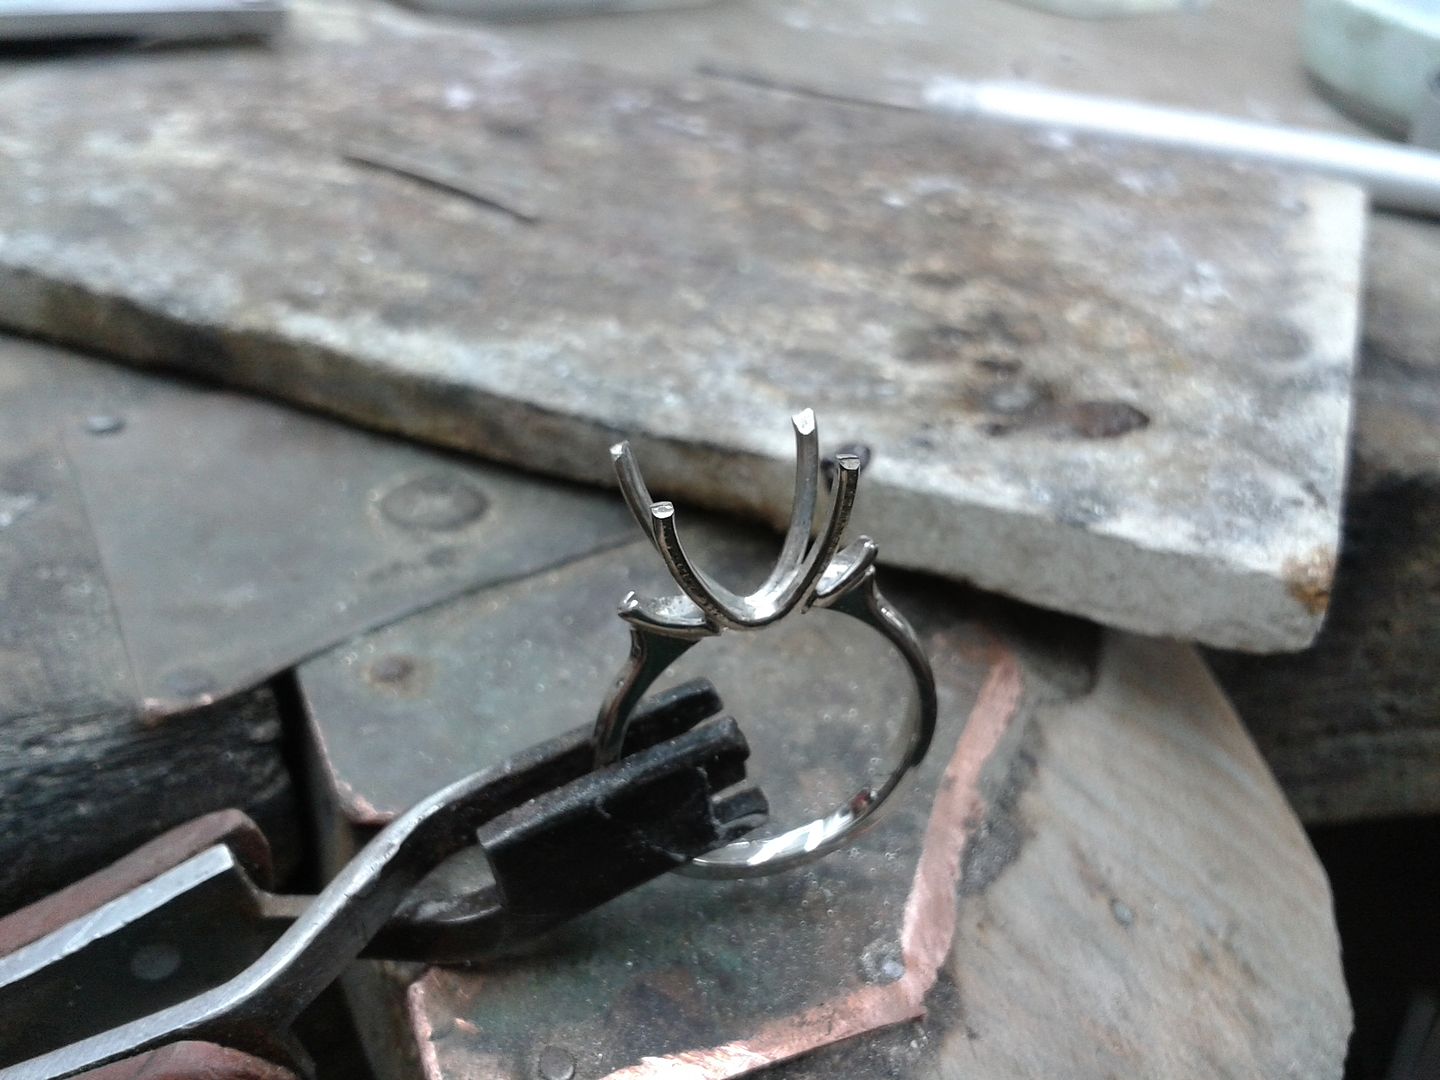
Claire has really small fingers (H3/4) so once the setting is built its time for sizing down:
After the sizing, double checking that the setting hasnt moved too much by laying the stone in gently. Little adjustments sort any movements out:
Bit of strengthening to be on the safe side:

Test fit diamonds and split claws for setting of Tanzanite:
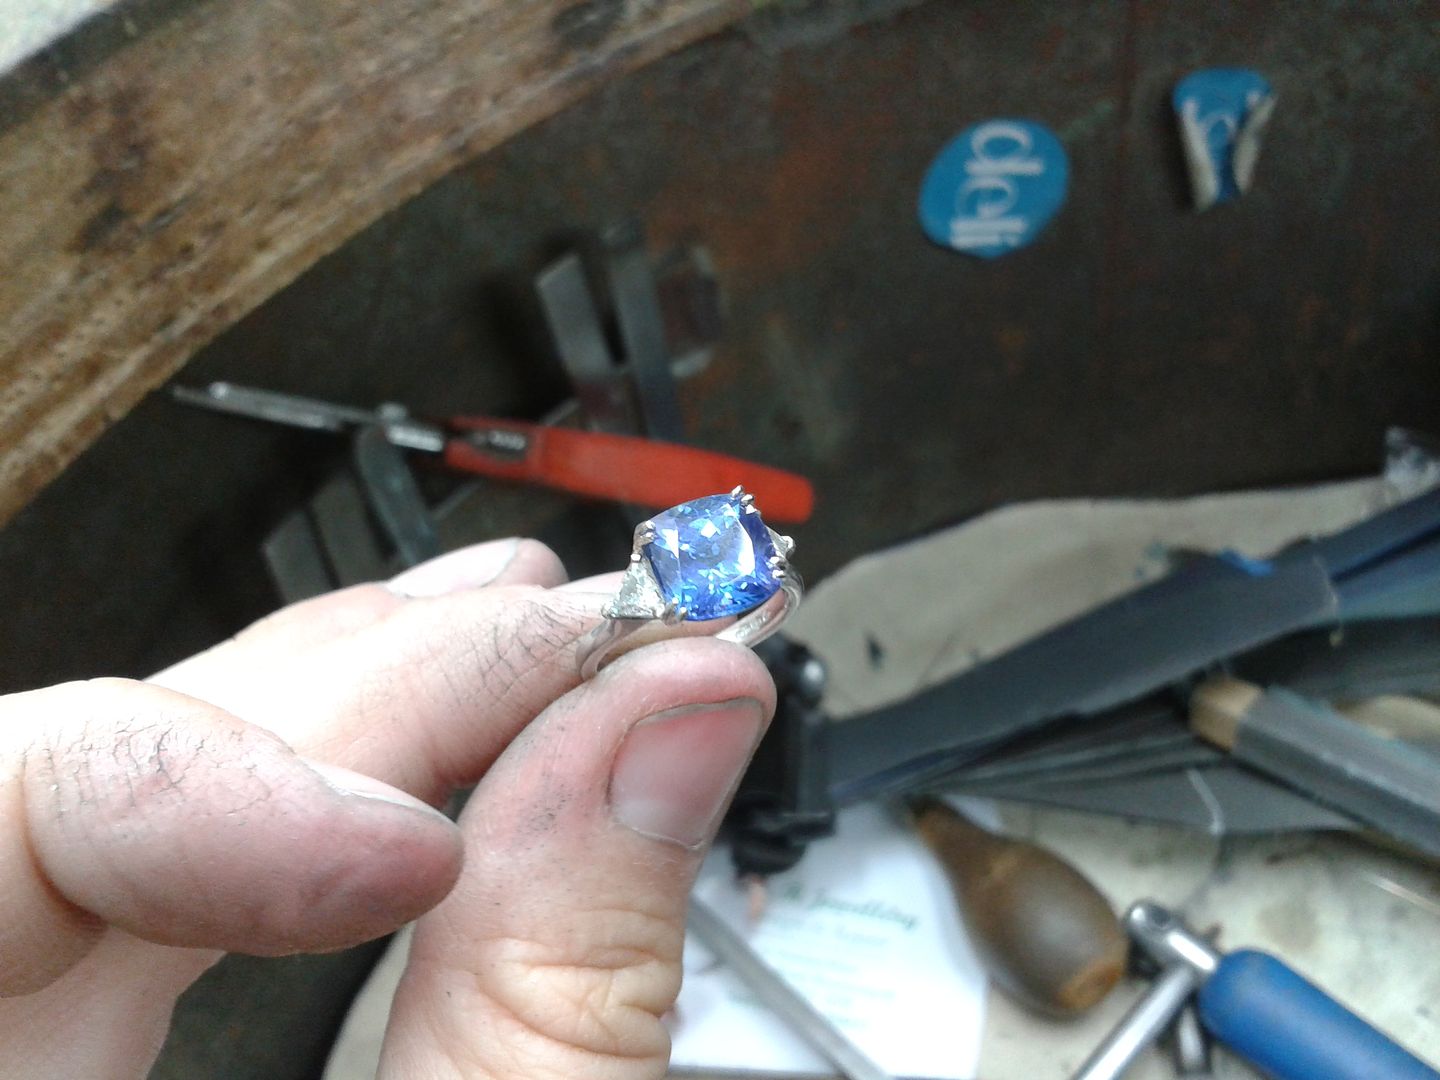
Both diamonds set:

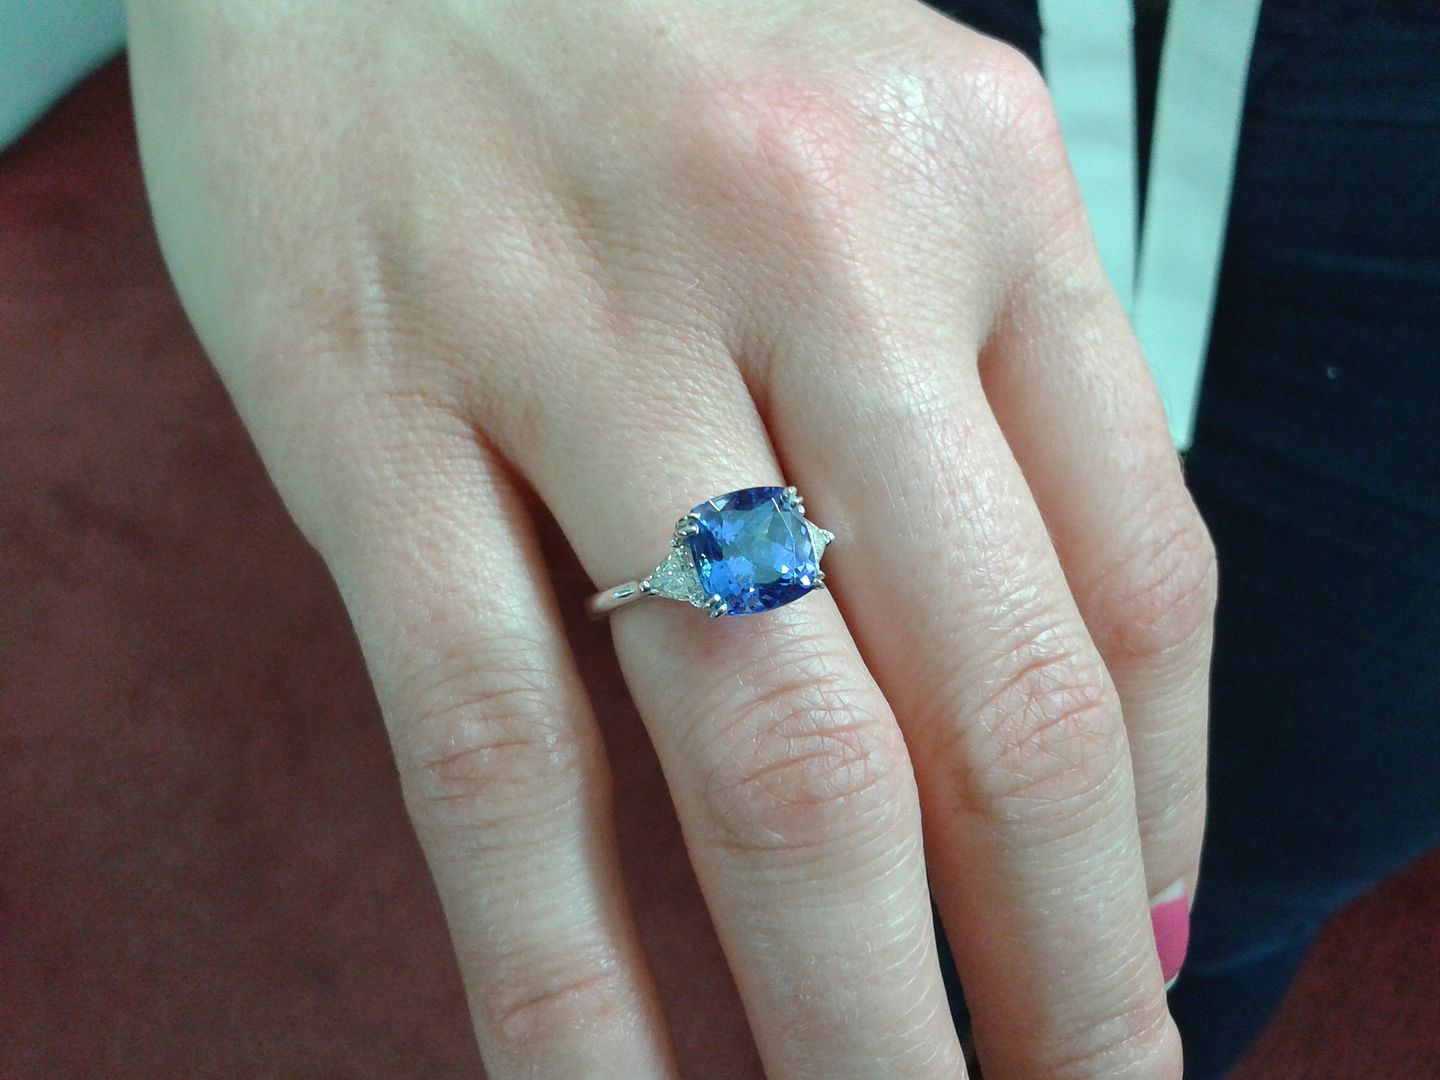
Tanzanite set and ready for polishing:
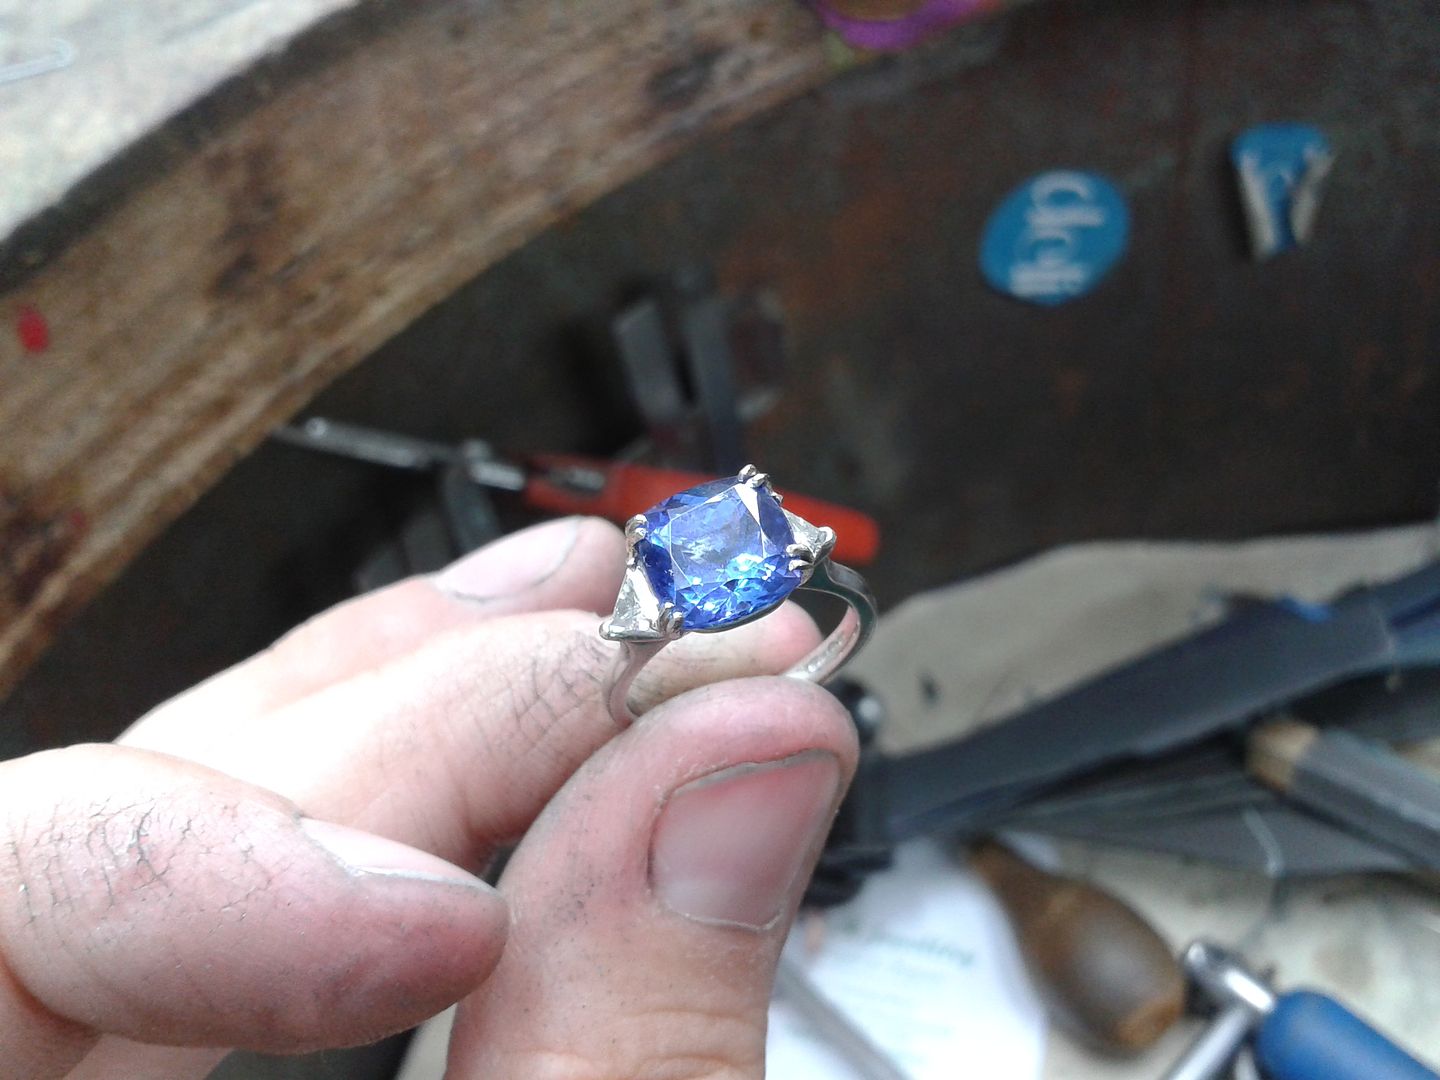
All done and ready for Claire:
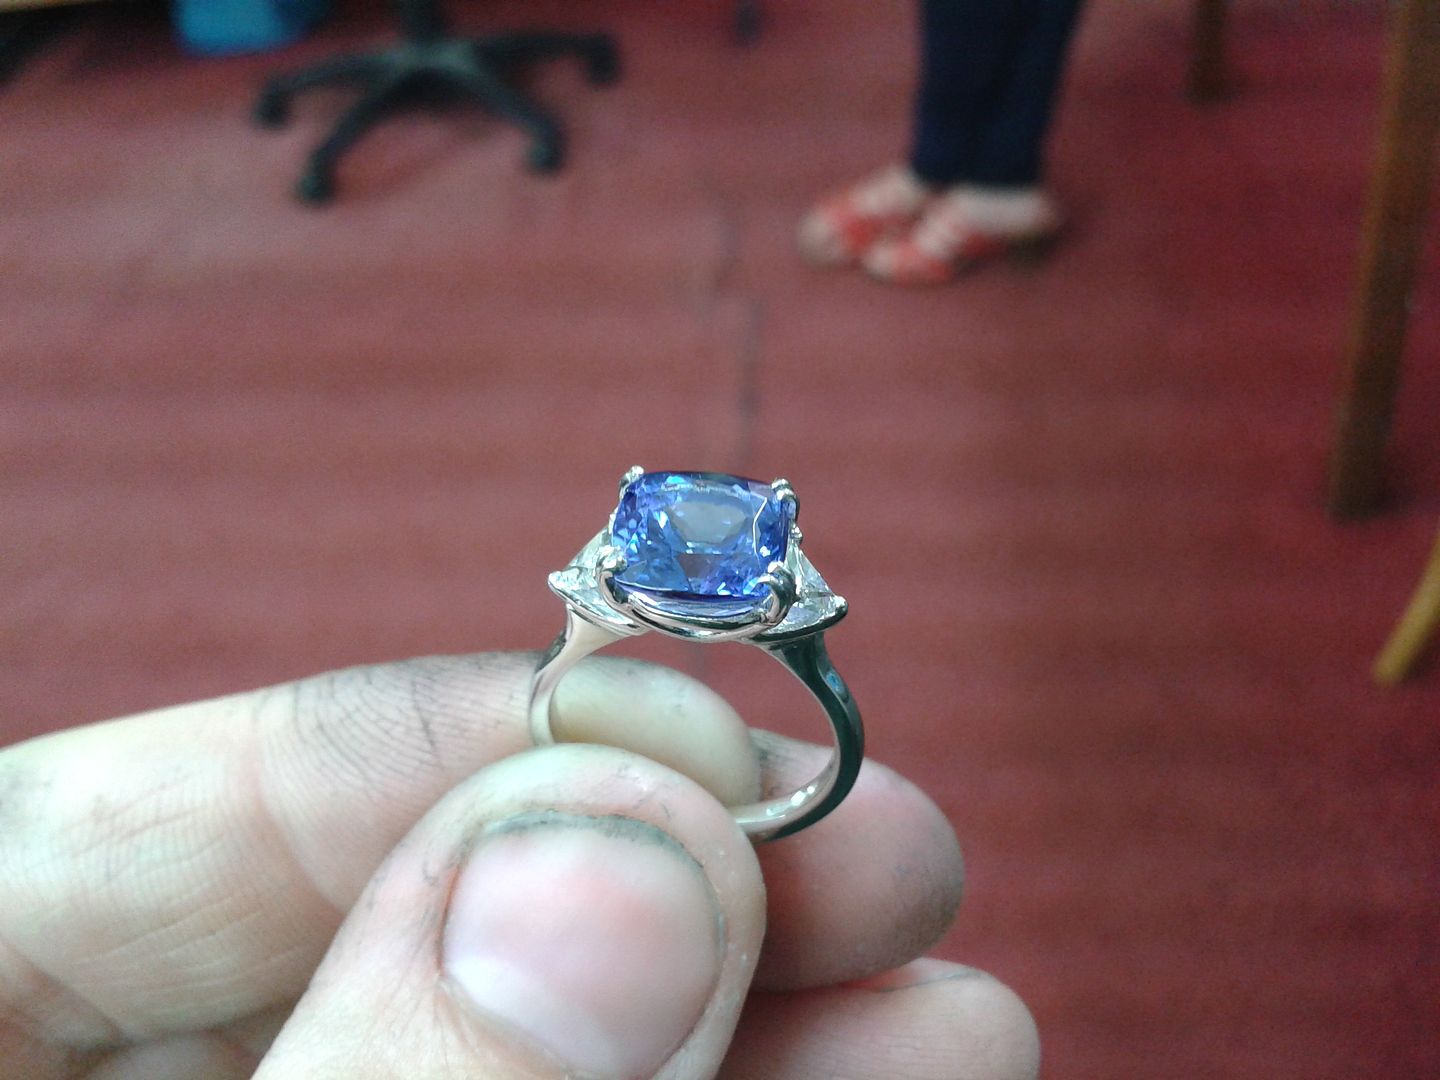
Happy wife!
More next month im sure.
Eddie
Custom built mount in Platinum. Usual processes but as the centre stone is a cushion cut its a very 'trial and error' build. Luckily it went without too much issue:


Claire has really small fingers (H3/4) so once the setting is built its time for sizing down:


After the sizing, double checking that the setting hasnt moved too much by laying the stone in gently. Little adjustments sort any movements out:


Bit of strengthening to be on the safe side:

Test fit diamonds and split claws for setting of Tanzanite:

Both diamonds set:

Tanzanite set and ready for polishing:


All done and ready for Claire:

Happy wife!

More next month im sure.
Eddie
Edited by ecain63 on Wednesday 7th August 20:34
longshot said:
Good stuff.
What are the diamonds set in?
How do you mean?What are the diamonds set in?
They are set in 3 claw tension settings. Basically a single larger claw on the shoulder and then 2 x smaller claws on the back of the tanzanite setting keeping them held in place. Normally not a setting id recommend to the masses but as my wife's finger size is known, and im going to be doing all the maintenance I have no issue with this type of setting. All set in platinum.
Well its been a fairly mundane month. The work load has been mainly ring sizings, chain repairs and claw retipping. Of the interesting stuff:
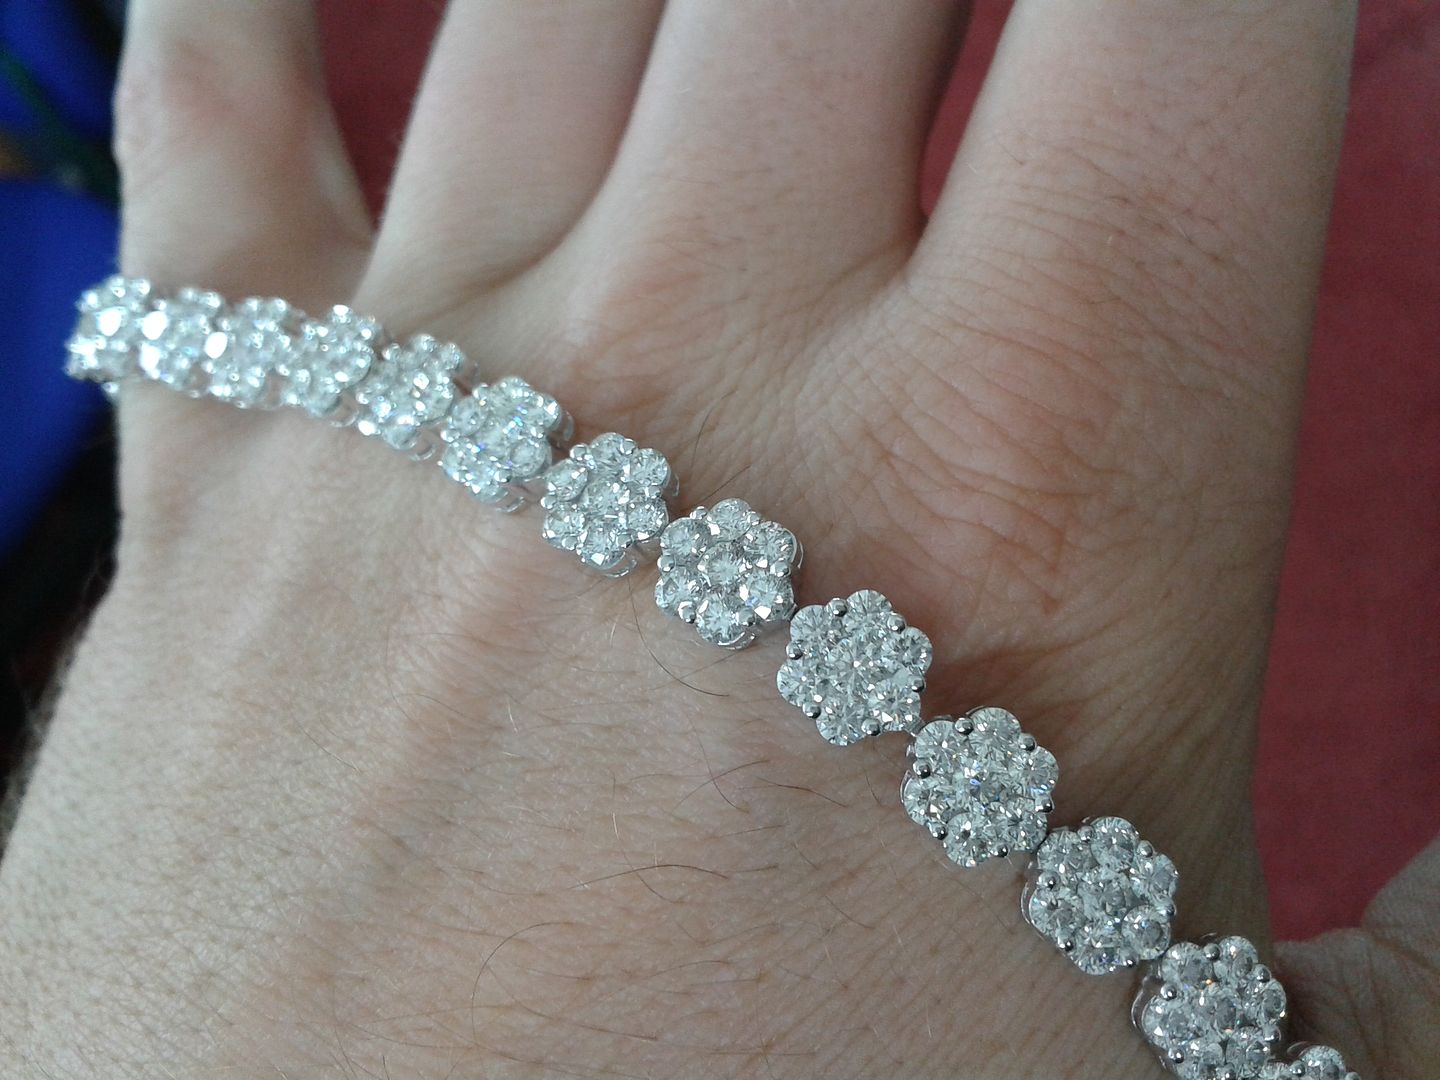
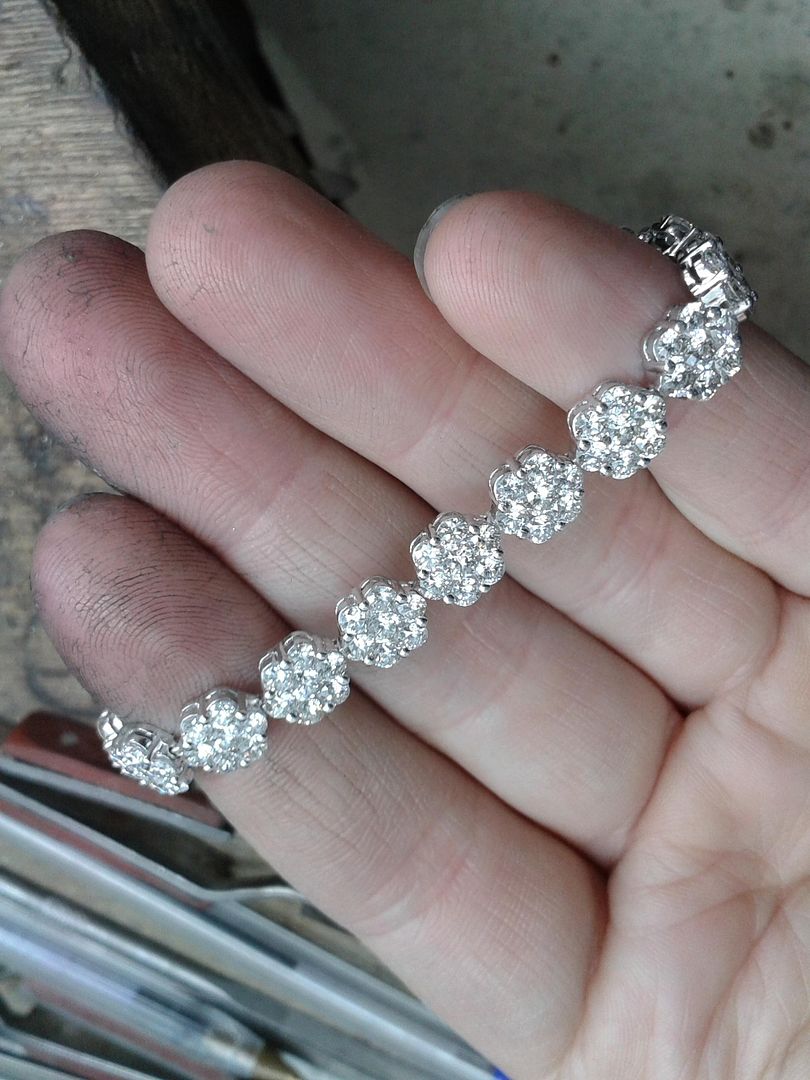
Rebuilding a diamond tennis bracelet that was worn to death. Roughly 16ct of diamonds:
In bits and cleaned up.
New loops on one end of each link:
New pins on the other:
And hey presto:
Servicing and refurbishing some nice clockwork:
Scratchbuilt from customers sketch. Silver and Opal ring:

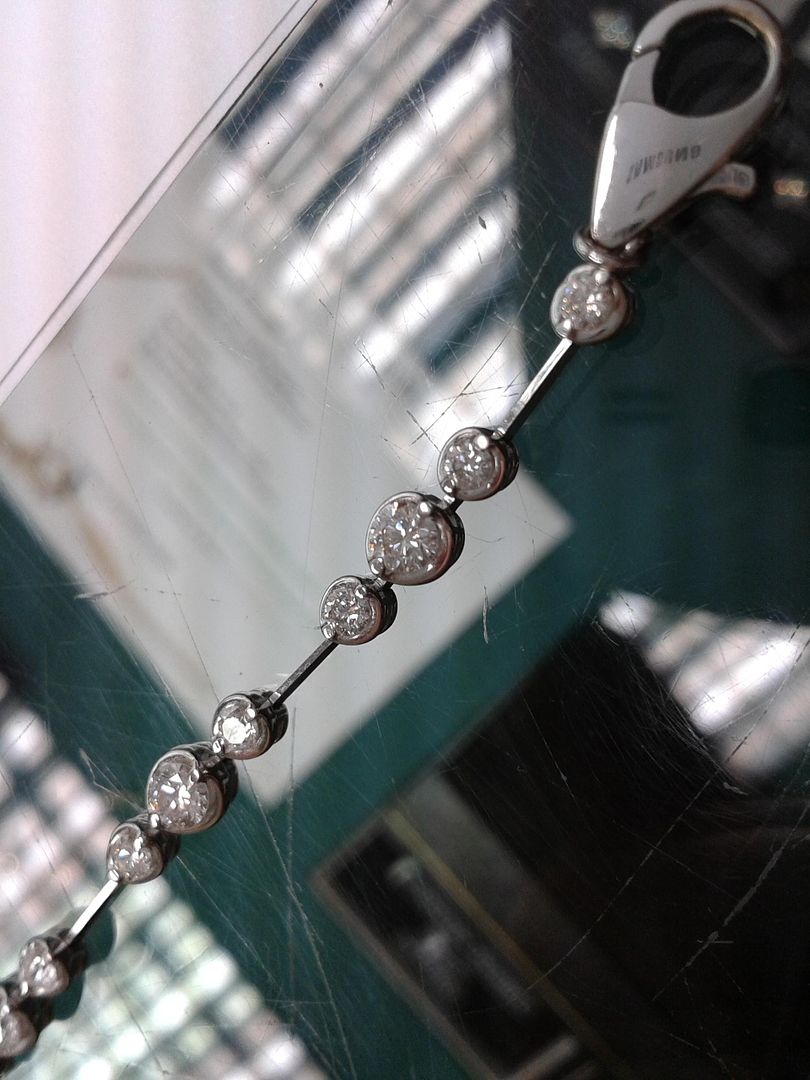
Hand made diamond pendant as an anniversary gift to match a customers bracelett:

More next month.
Eddie
Rebuilding a diamond tennis bracelet that was worn to death. Roughly 16ct of diamonds:
In bits and cleaned up.

New loops on one end of each link:

New pins on the other:

And hey presto:


Servicing and refurbishing some nice clockwork:

Scratchbuilt from customers sketch. Silver and Opal ring:

Hand made diamond pendant as an anniversary gift to match a customers bracelett:


More next month.
Eddie
Thanks all.
Ive got a big retipping job to do over the next couple of weeks so i'll take some pics and you can see how thats done. A lot of people think that jewellers / goldsmiths just 'stick' bits of gold where needed and hey presto. When you see the retipping process you'll see where your money goes. Took me the best part of 5 years to get a grip of tipping.
Ive got a big retipping job to do over the next couple of weeks so i'll take some pics and you can see how thats done. A lot of people think that jewellers / goldsmiths just 'stick' bits of gold where needed and hey presto. When you see the retipping process you'll see where your money goes. Took me the best part of 5 years to get a grip of tipping.
Revs_Addiction said:
Great thread, great skills. How much would that bracelet be worth?!
Thats a tough question to answer, really depends on the quality of the stones and where you are buying it. In this case the stones were roughly 0.12ct each (centre stones slightly larger, maybe 0.15ct) and VVS G/H quality. The item was being rebuilt for one the souths most prestigious jewellers and it was bought there as new a couple of years back. If i wanted to make one today I worked it out that it'd cost me £10k to £12k in materials alone (trade prices). So once my labour and consumables are factored in, the item moved to a retailer, probably a high class of jewellers so big mark up, I'd say the customer could be looking at anything over £20k.
I don't have the footfall / diary of well suited customers to sell these to myself (wish i did) but every so often you do get asked to make something like this for the trade.
ALawson said:
I appreciate the workmanship but don't like the orange and green number.
Your wife's ring on the other hand looks great!
Get some moisturiser on those hands!
The Fire Opal and Emerald ring is definitely an item that very few people could appreciate / have the foresight for. The good thing is that she is exactly the sort of person to carry it off and i doff my hat to her for being so excellent and different. Your wife's ring on the other hand looks great!
Get some moisturiser on those hands!
Its jobs like that which give me enjoyment in my work. The day to day stuff is really really boring and i hate 85% of what i do. The buzz is in seeing the faces of those 15% when they turn up to collect their items. Whether it be a simple maintenance job or a full custom piece its those few private customers that give the satisfaction in my work.
Glad you like the theory behind it all.
Ref the wifes ring. She loves it. Its not an everyday ring with Tanzanite being quite soft, but she does enjoy showing it off at work when new customers come in to see what we do.
My hands are way beyond moisturising point! lol
NeMiSiS said:
Excellent Saturday morning read.
The ring you made for your wife should put you in the good books for a while.
The rescued bracelet looked like scrap, how you re-place/re-weld tiny hooks and pins to make a new hinge is an art form.
I've noticed one downside to your profession, you seem to be wearing your fingers out.
Thanks mate. The ring you made for your wife should put you in the good books for a while.
The rescued bracelet looked like scrap, how you re-place/re-weld tiny hooks and pins to make a new hinge is an art form.
I've noticed one downside to your profession, you seem to be wearing your fingers out.
The loops and pins are quite easy to do actually, the difficulty is in making sure they are all level. If they are out at all, or the pins / loops too heavy a gauge the bracelet won't lie flat. Its just something that takes time to get right.
Once you see the claw work on the upcoming retipping job you'll see the stress of working on a tiny scale. I do retipping on a daily basis but this one will take me a couple of weeks to find time for.
Ref the fingers. I often wear them through the top layer and the best cure is superglue. Just dab it over the spots where its bleeding or nearly worn through and hey presto, you've got another 5 - 10 mins of use of out of them before a reglue is needed. Its a result of buffing rings with fine emery paper. The paper we used to get (dry stuff) was pretty gentle on the fingers and i had very few issues but since 2010 the main stockists are only supplying wet and dry paper of the same grade which is much stiffer. As a result it rubs your fingers more when on the spindle. You dont even know its worn through your flesh until the paper goes red. Perks of the job!
I did promise a 'claw job' post this month.
Its not the one I'd originally planned on, owing to it being a very busy month and not having time to photograph and do the work (cannot complain at being busy) and me suffering from a fairly draining / all-encompassing stomach issue that is currently under investigation (can complain), but it does demonstrate the processes involved.
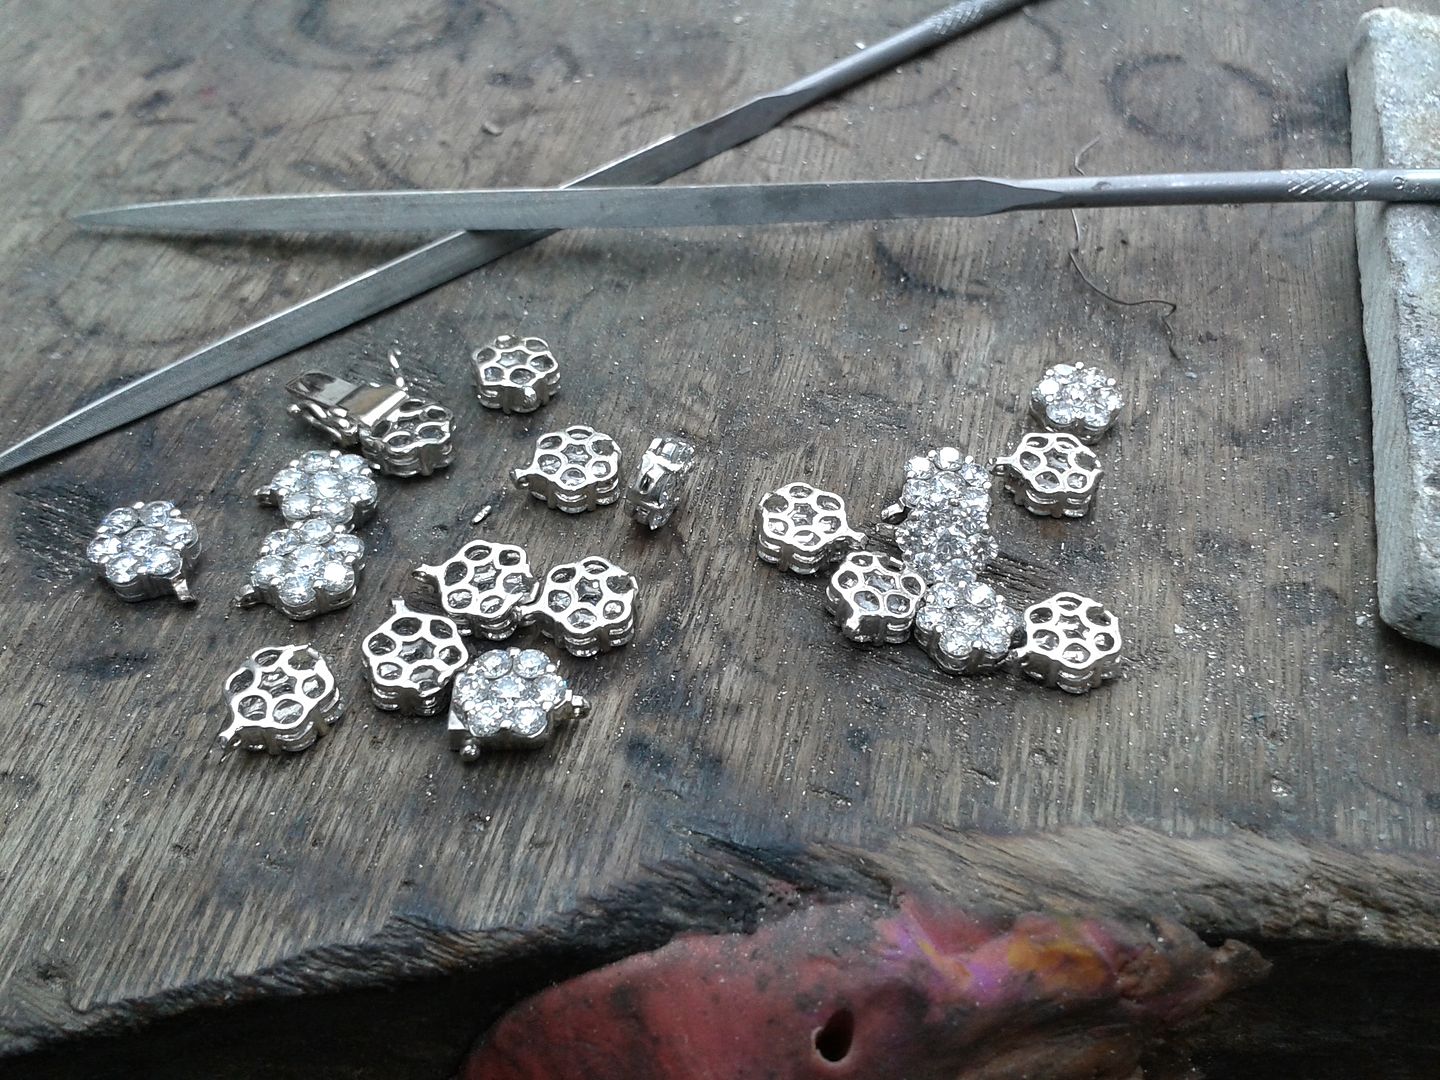
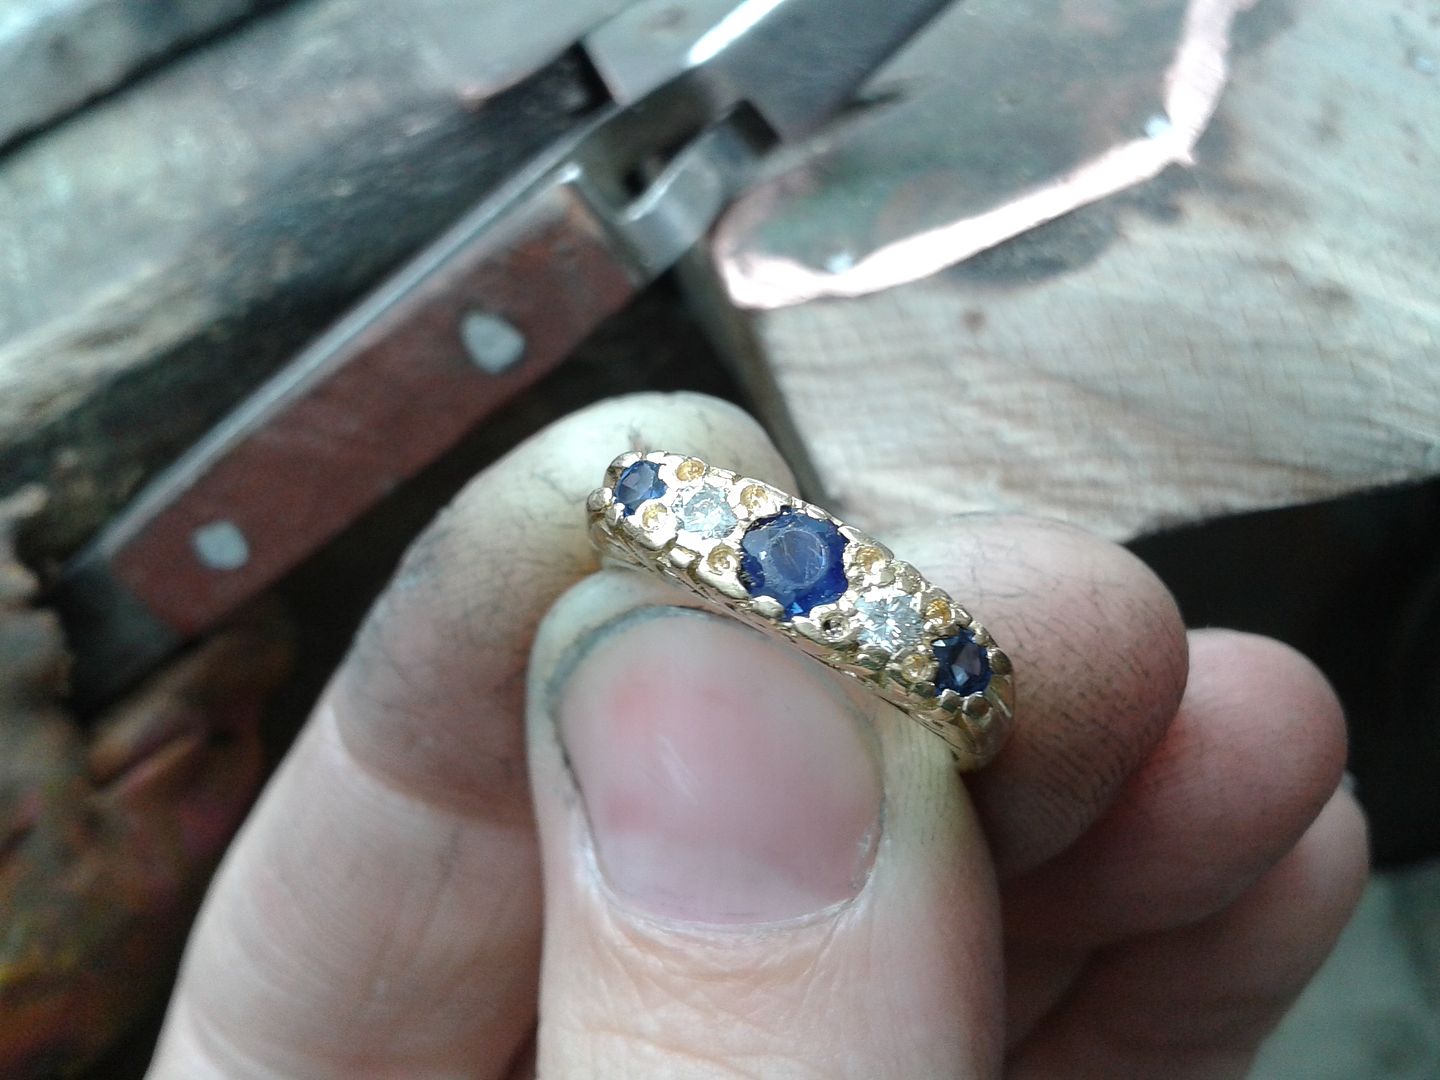
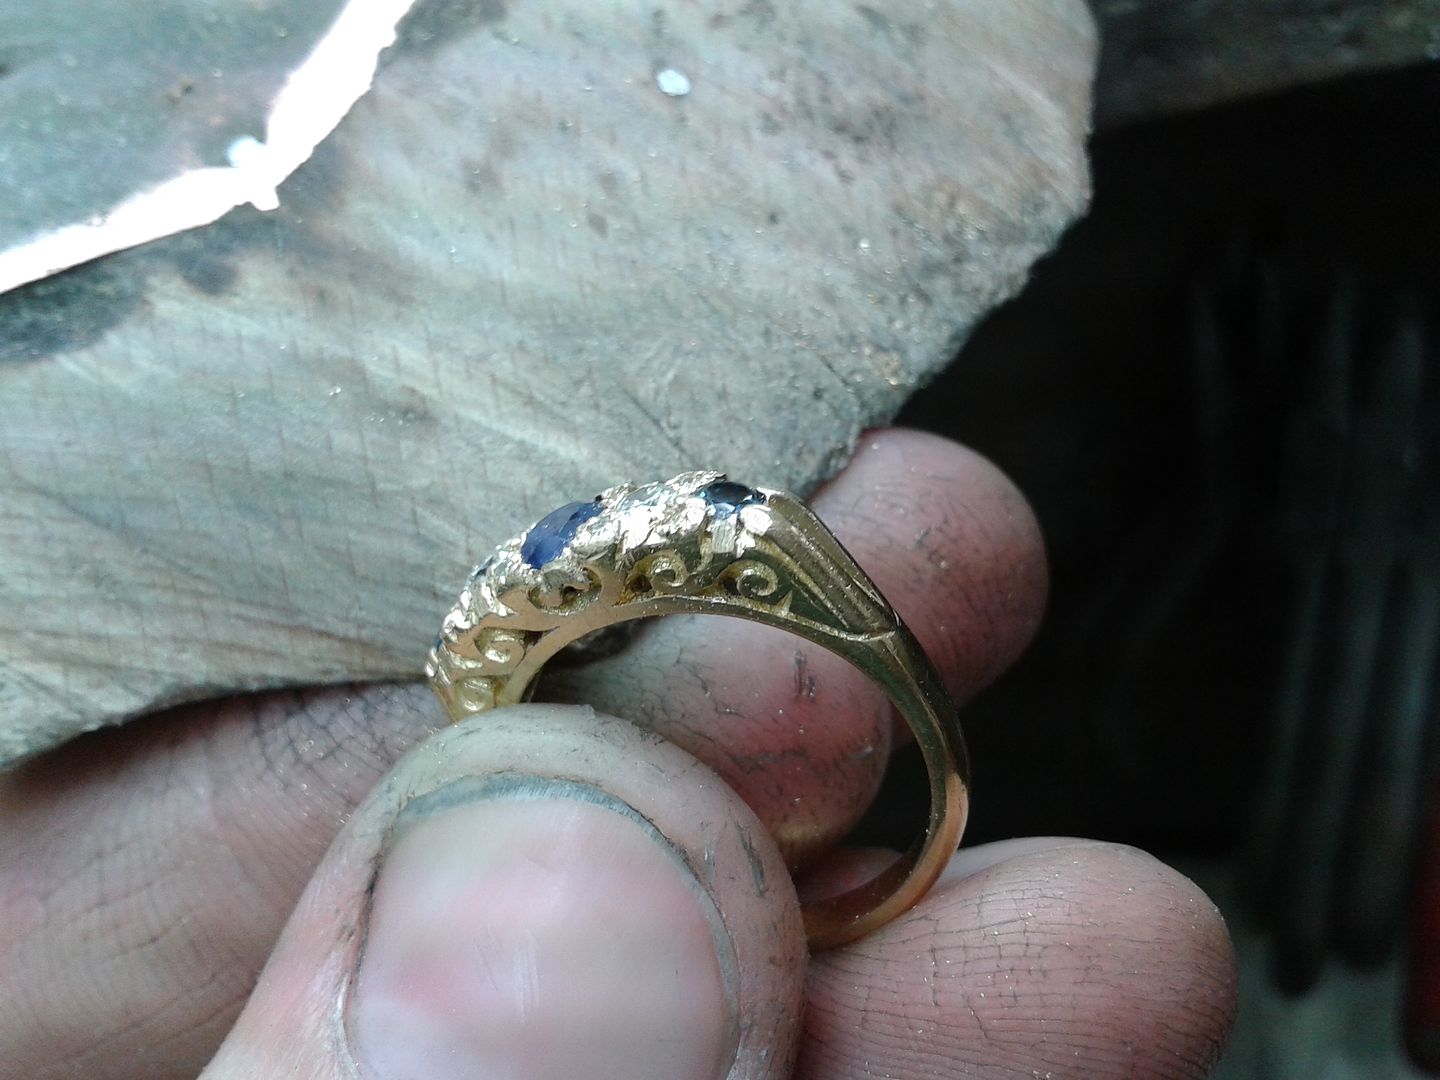
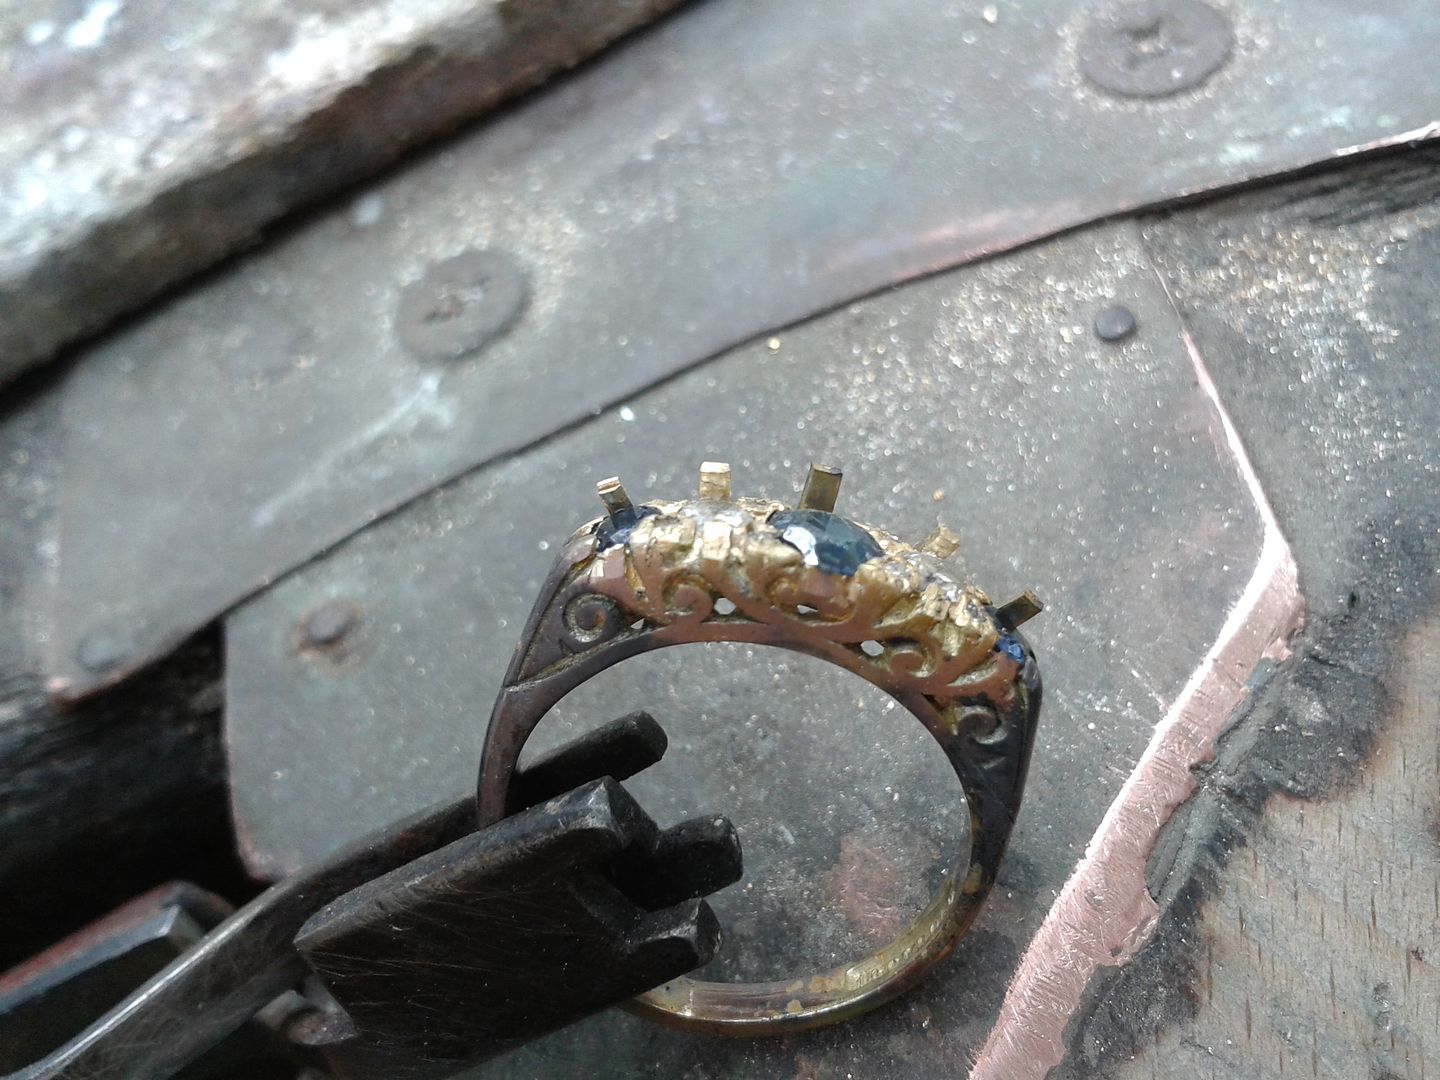
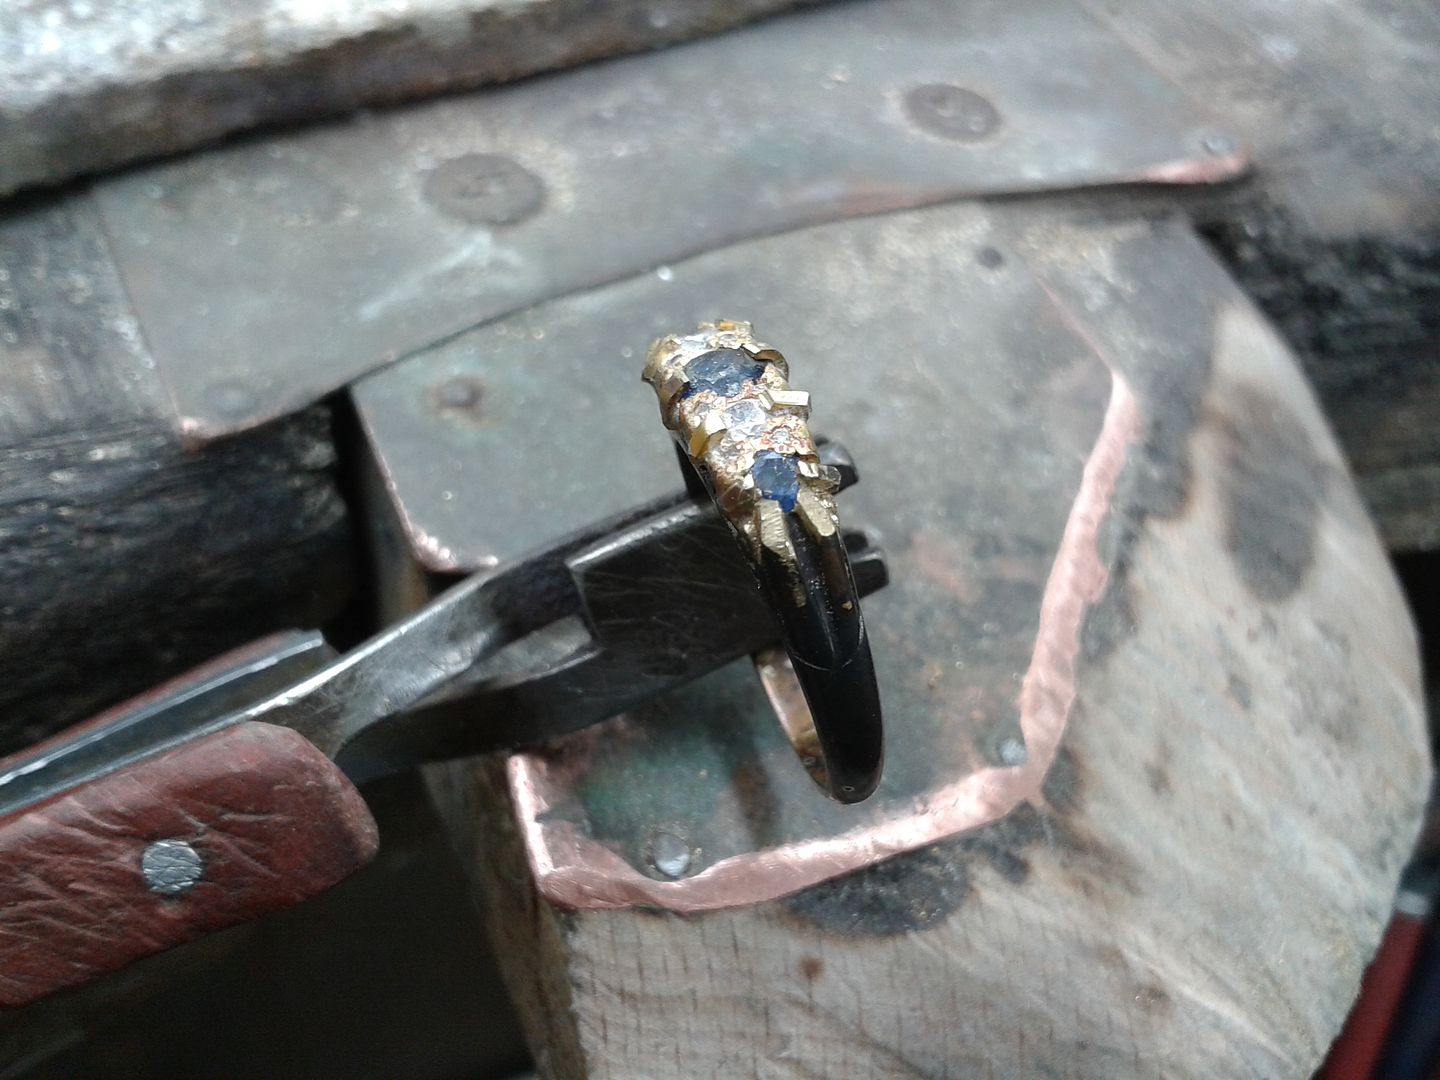
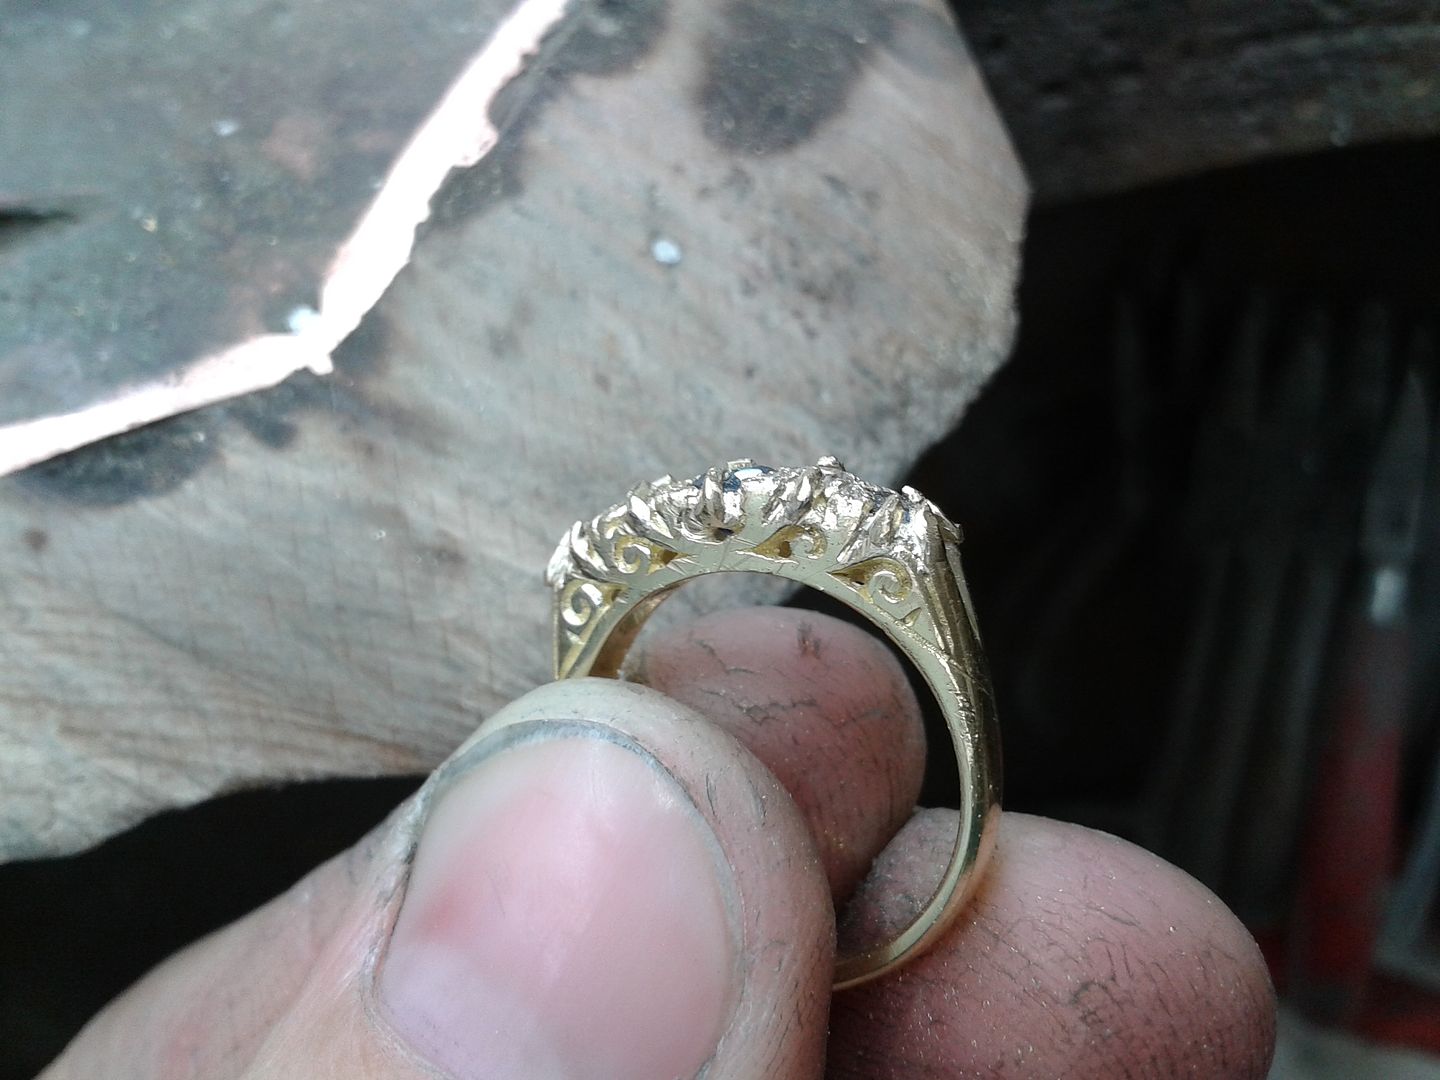
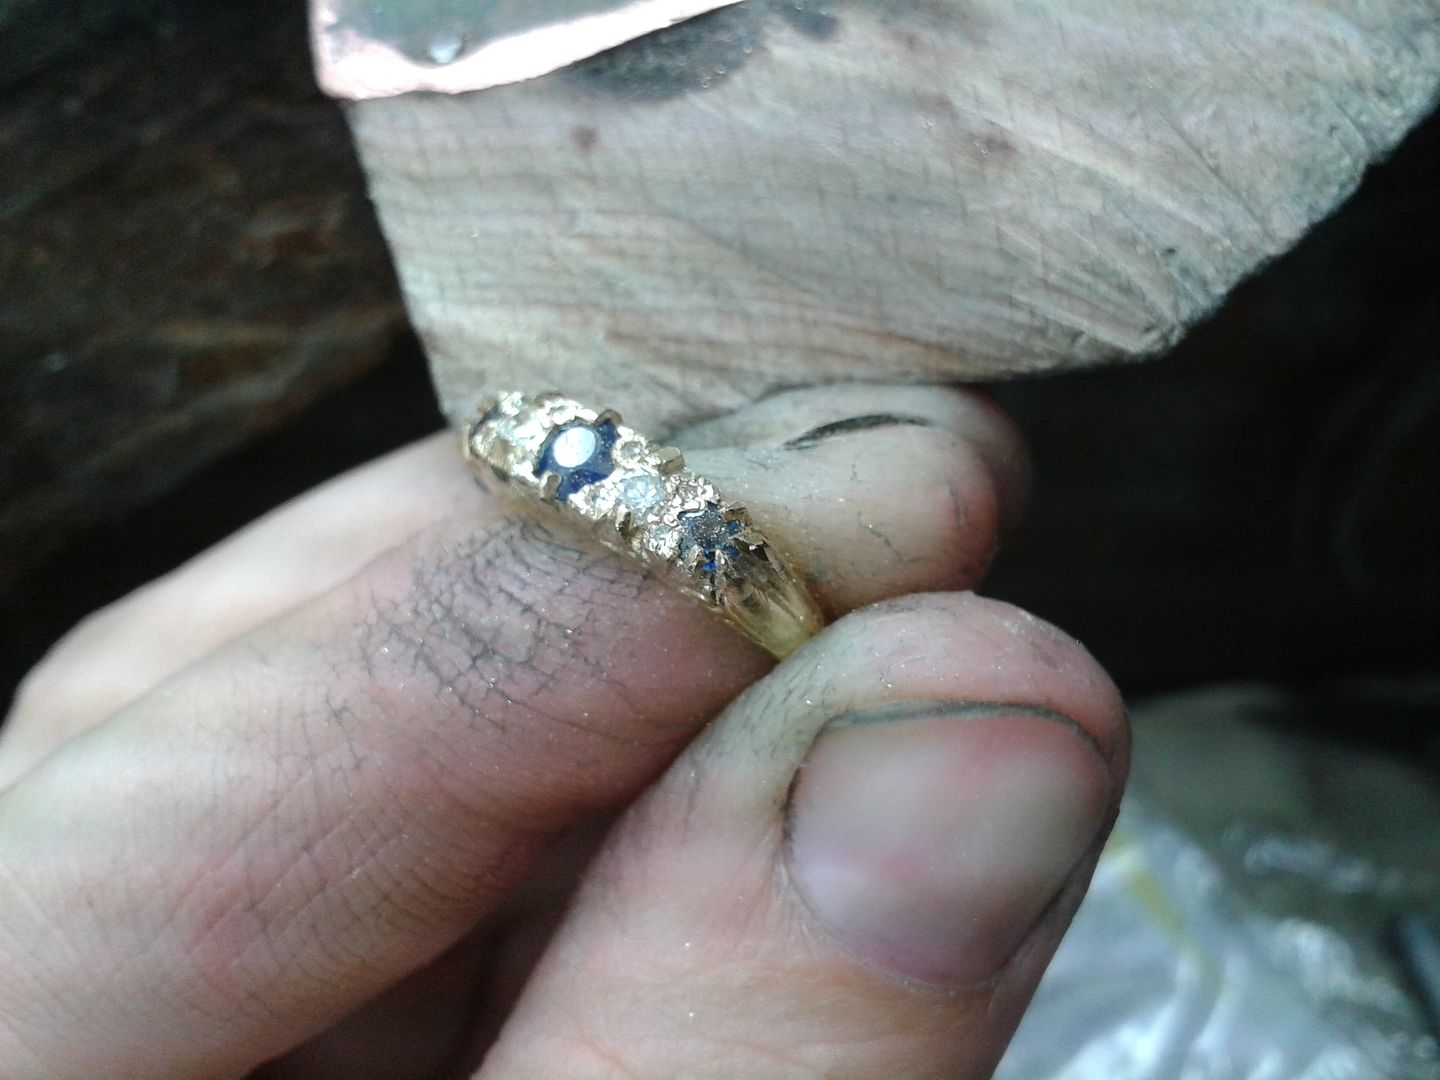
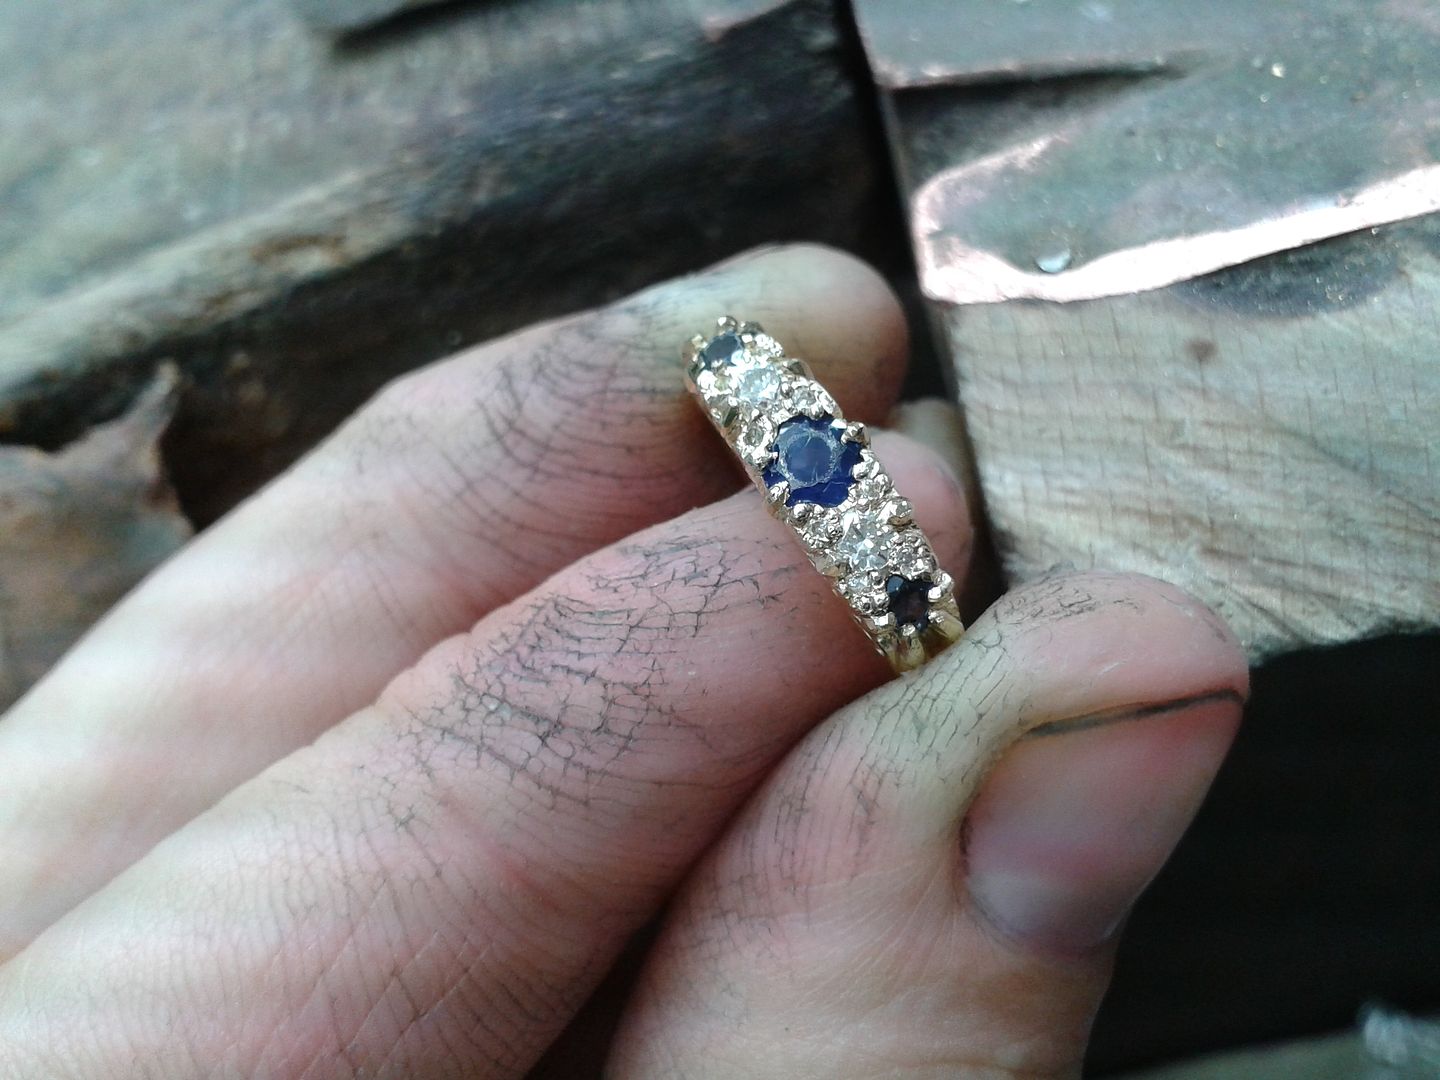
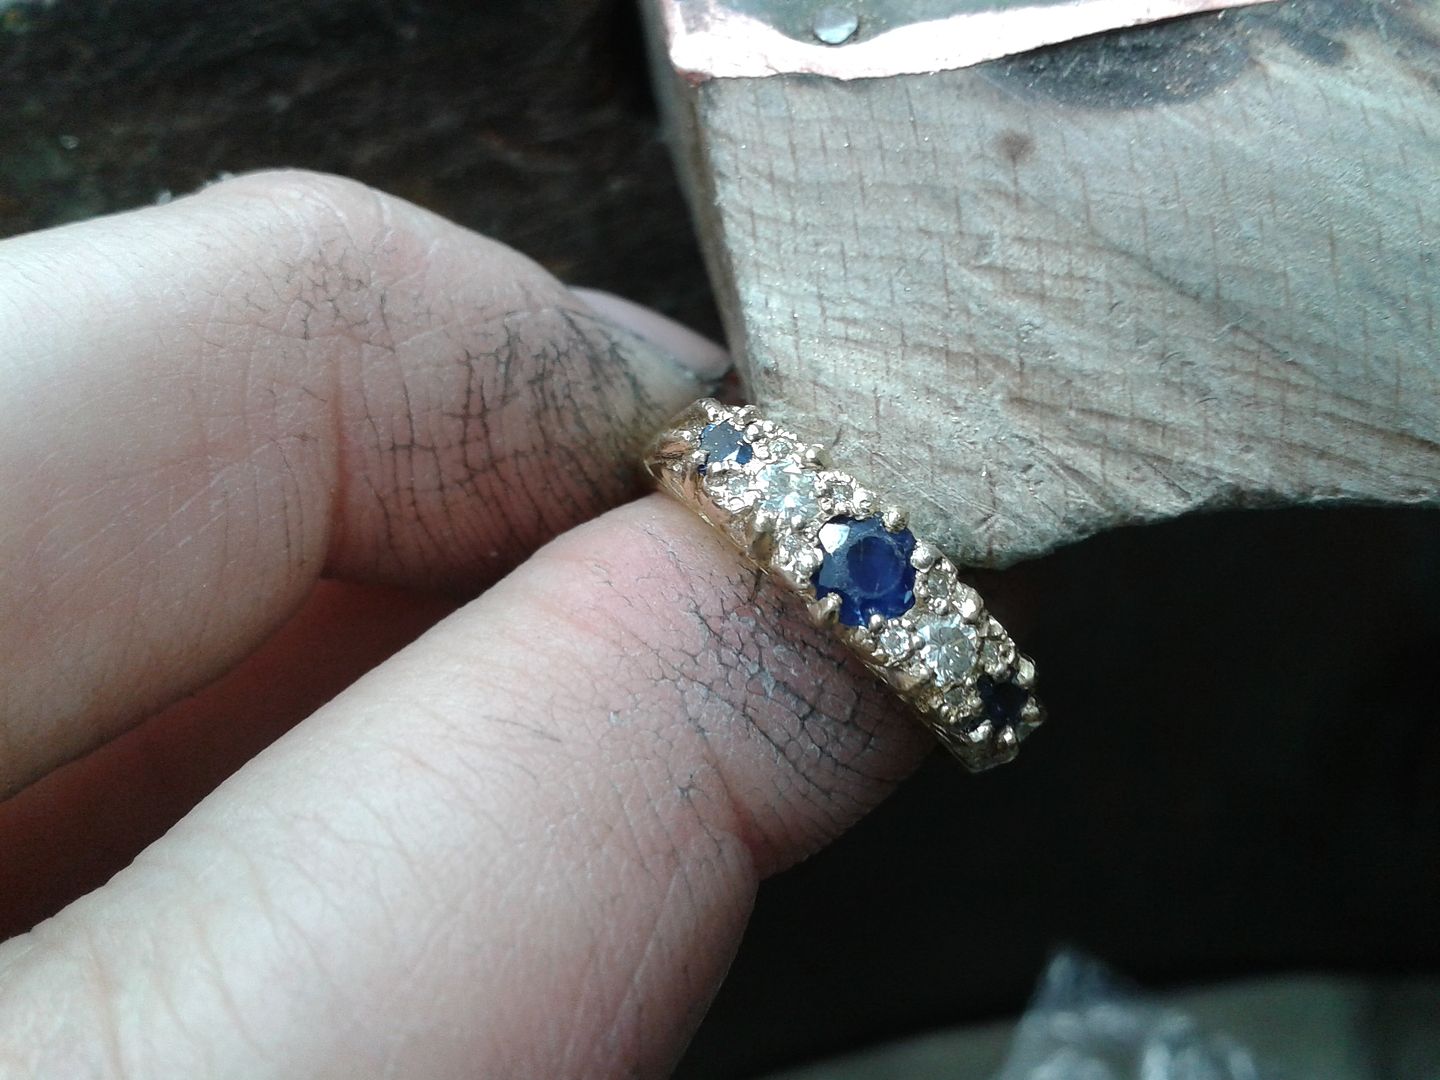
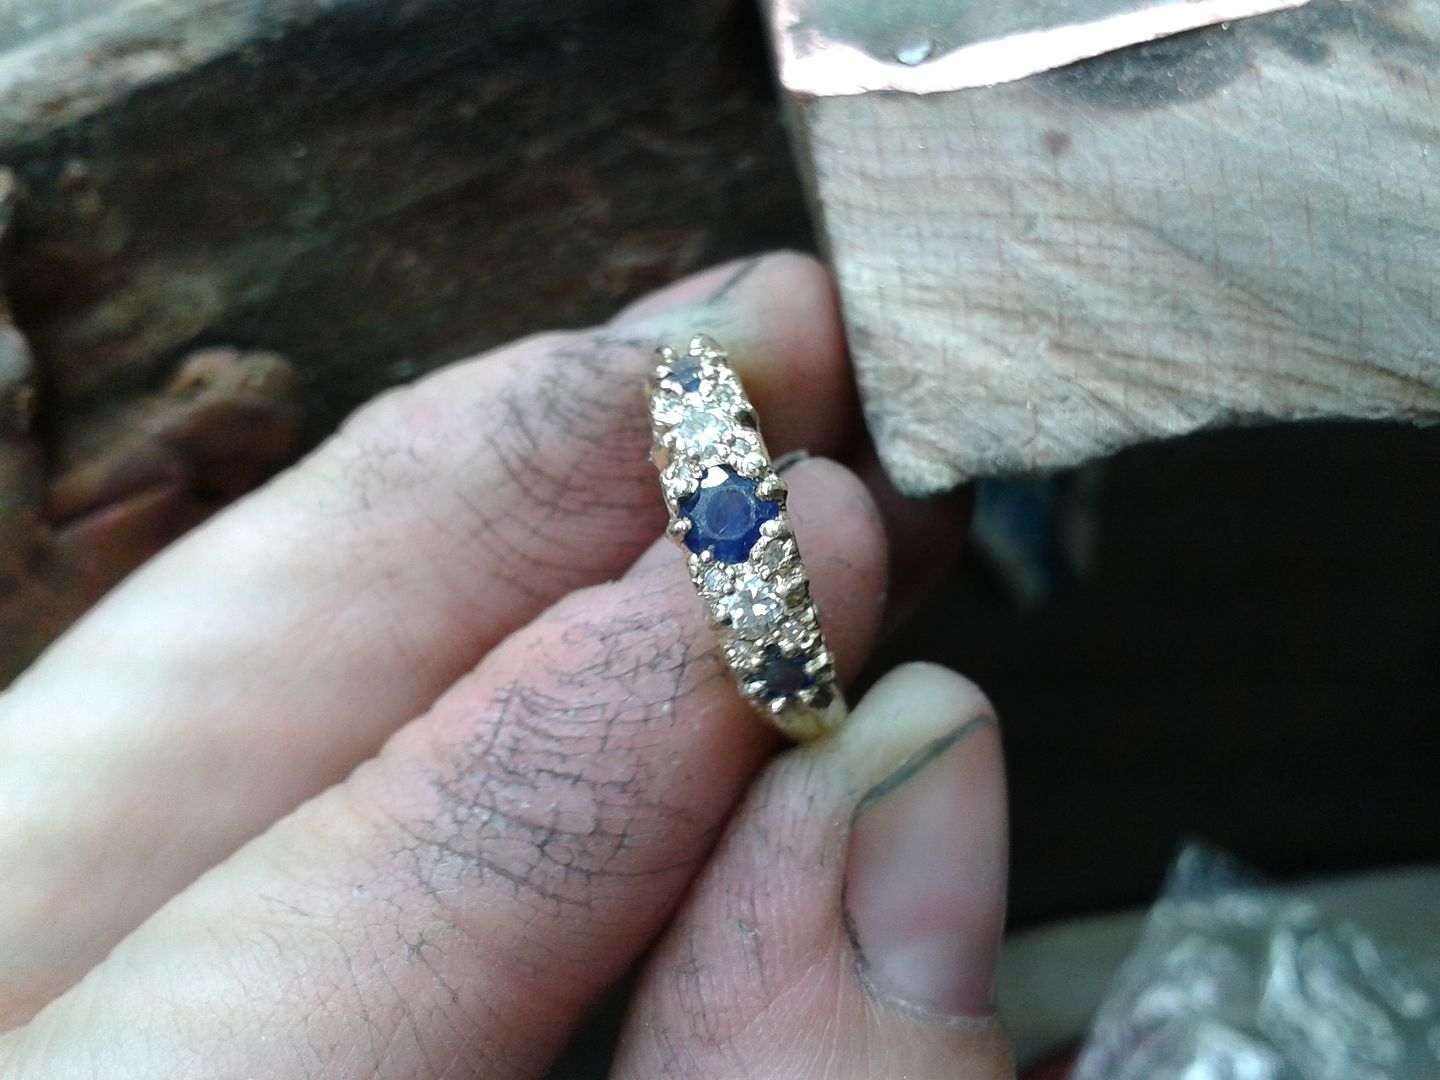
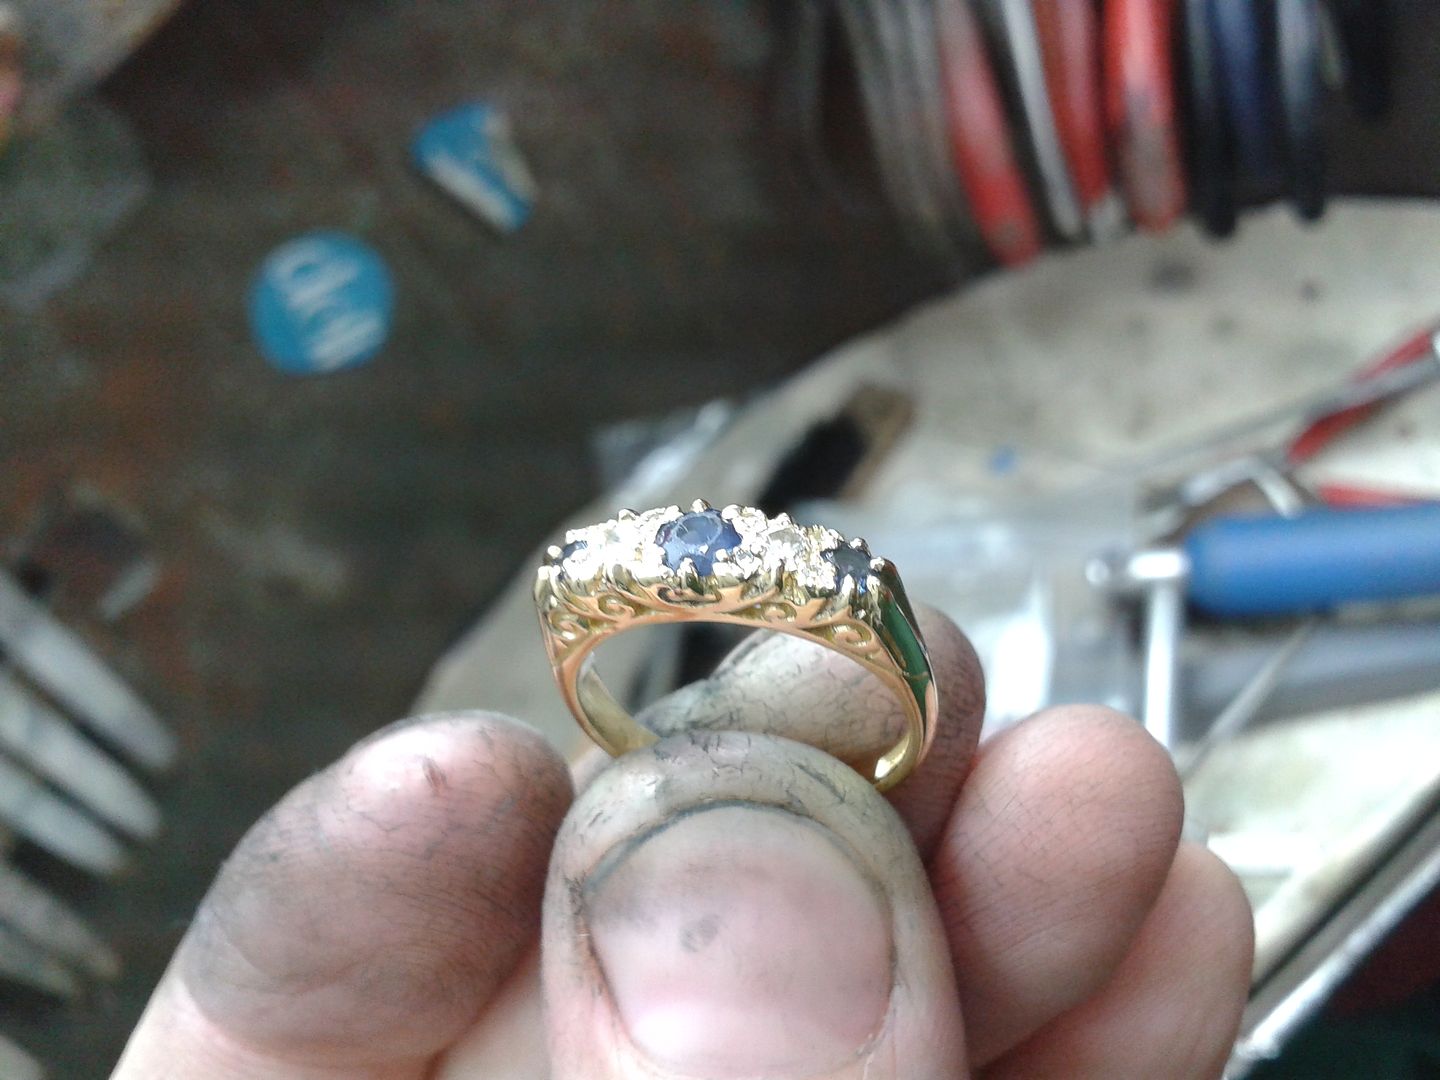
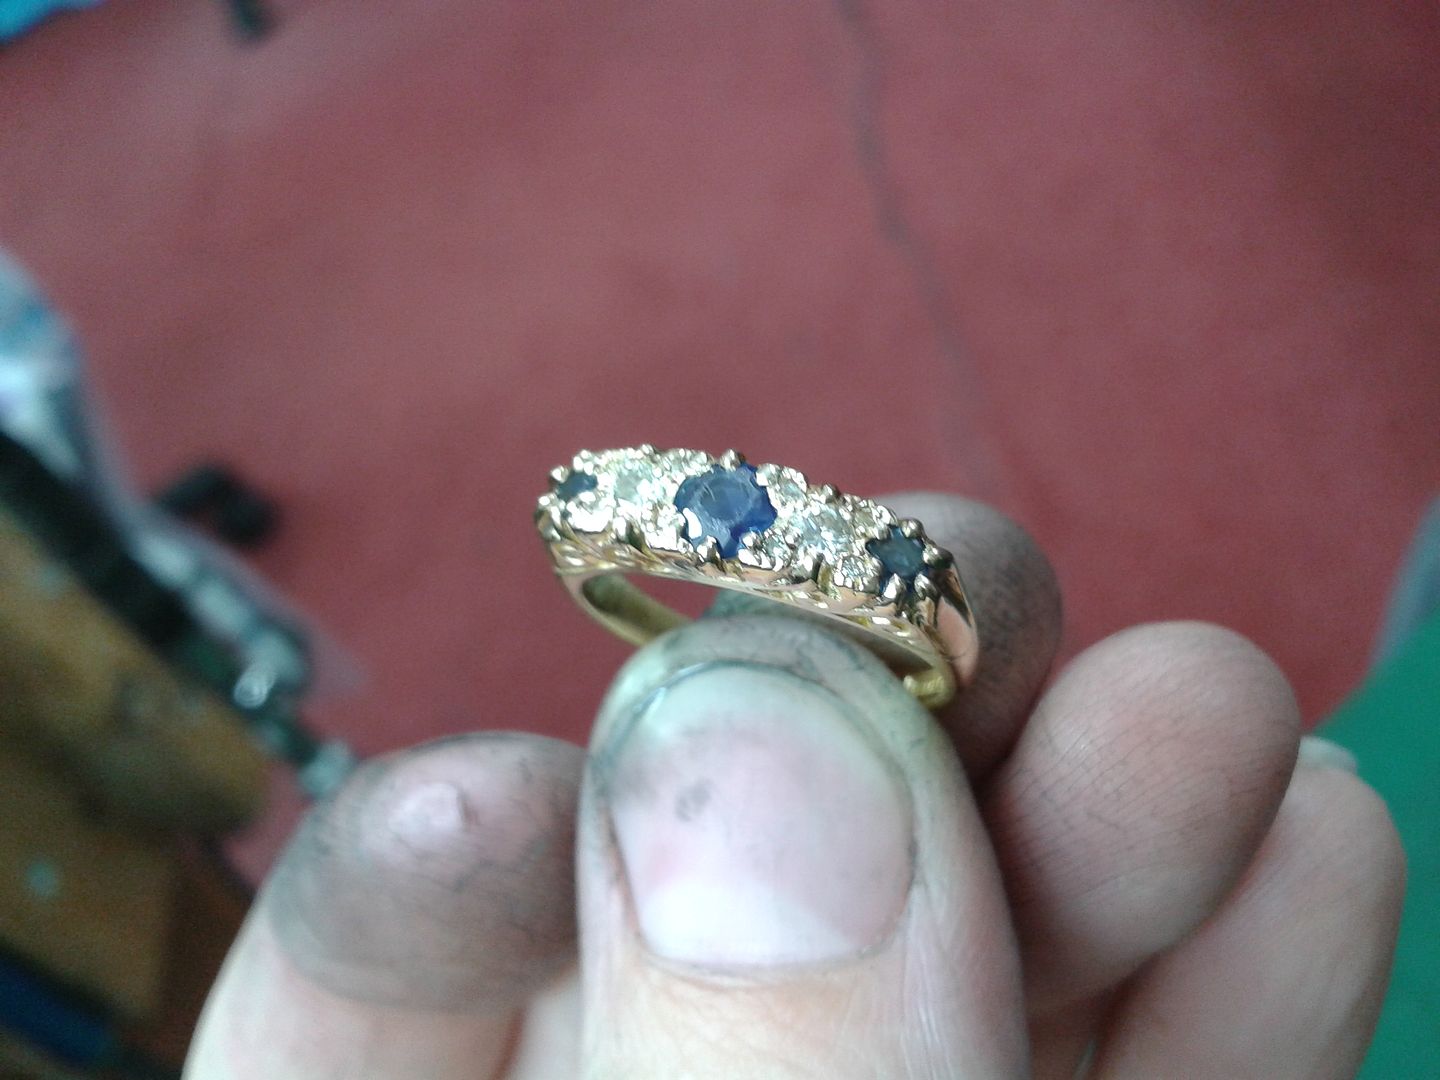
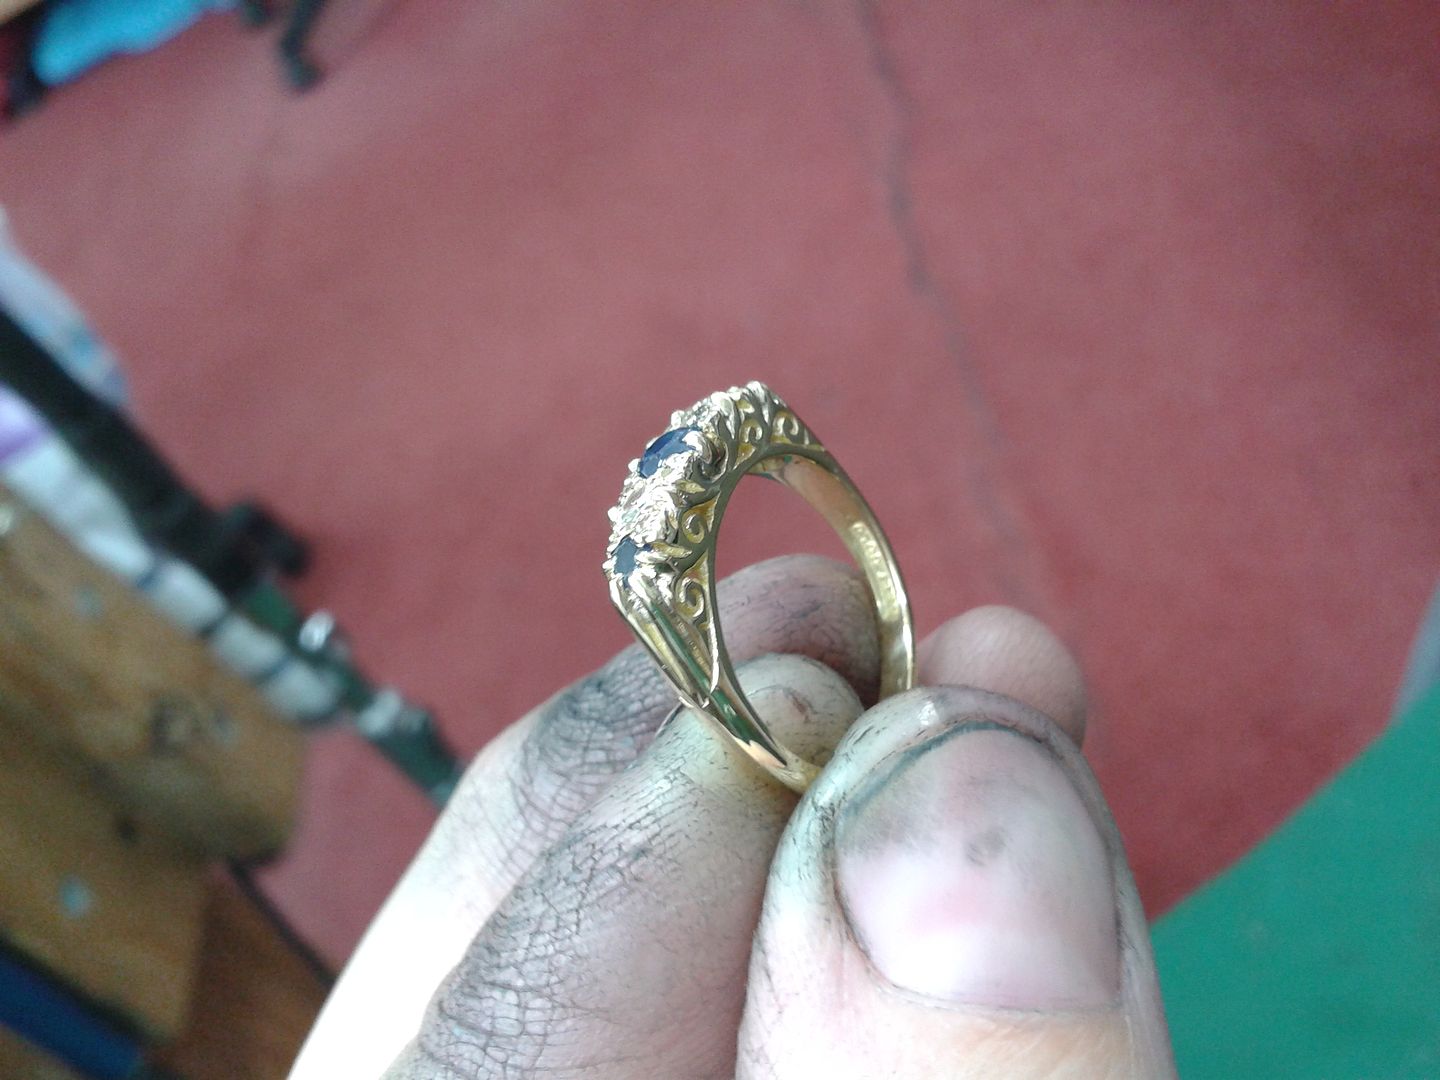
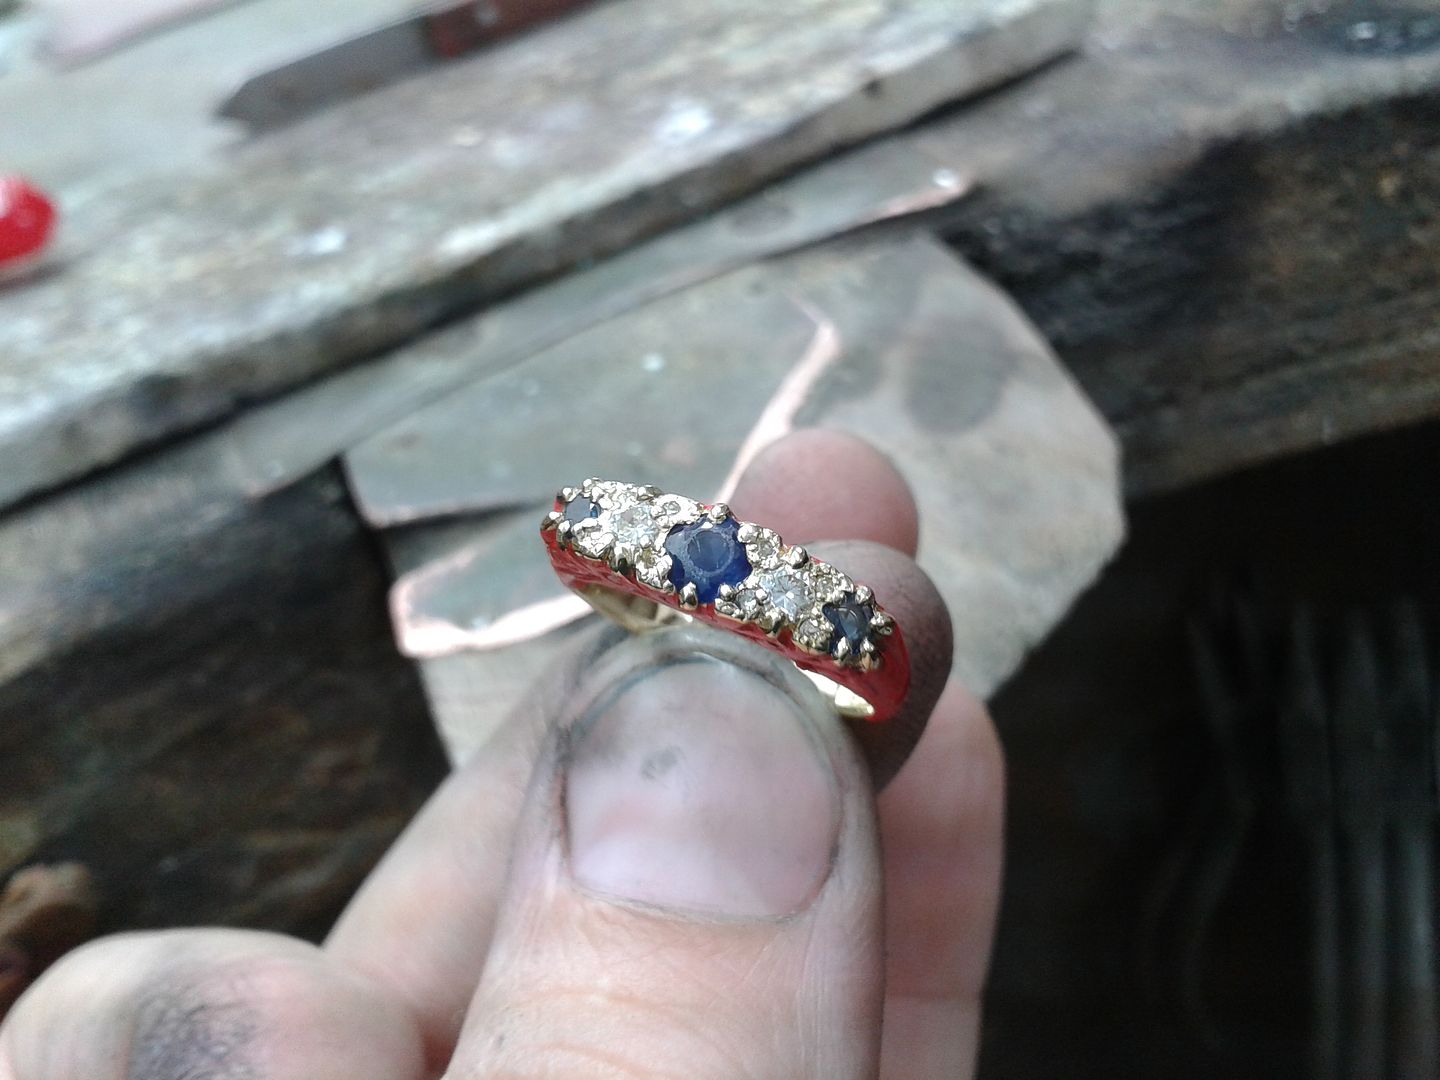
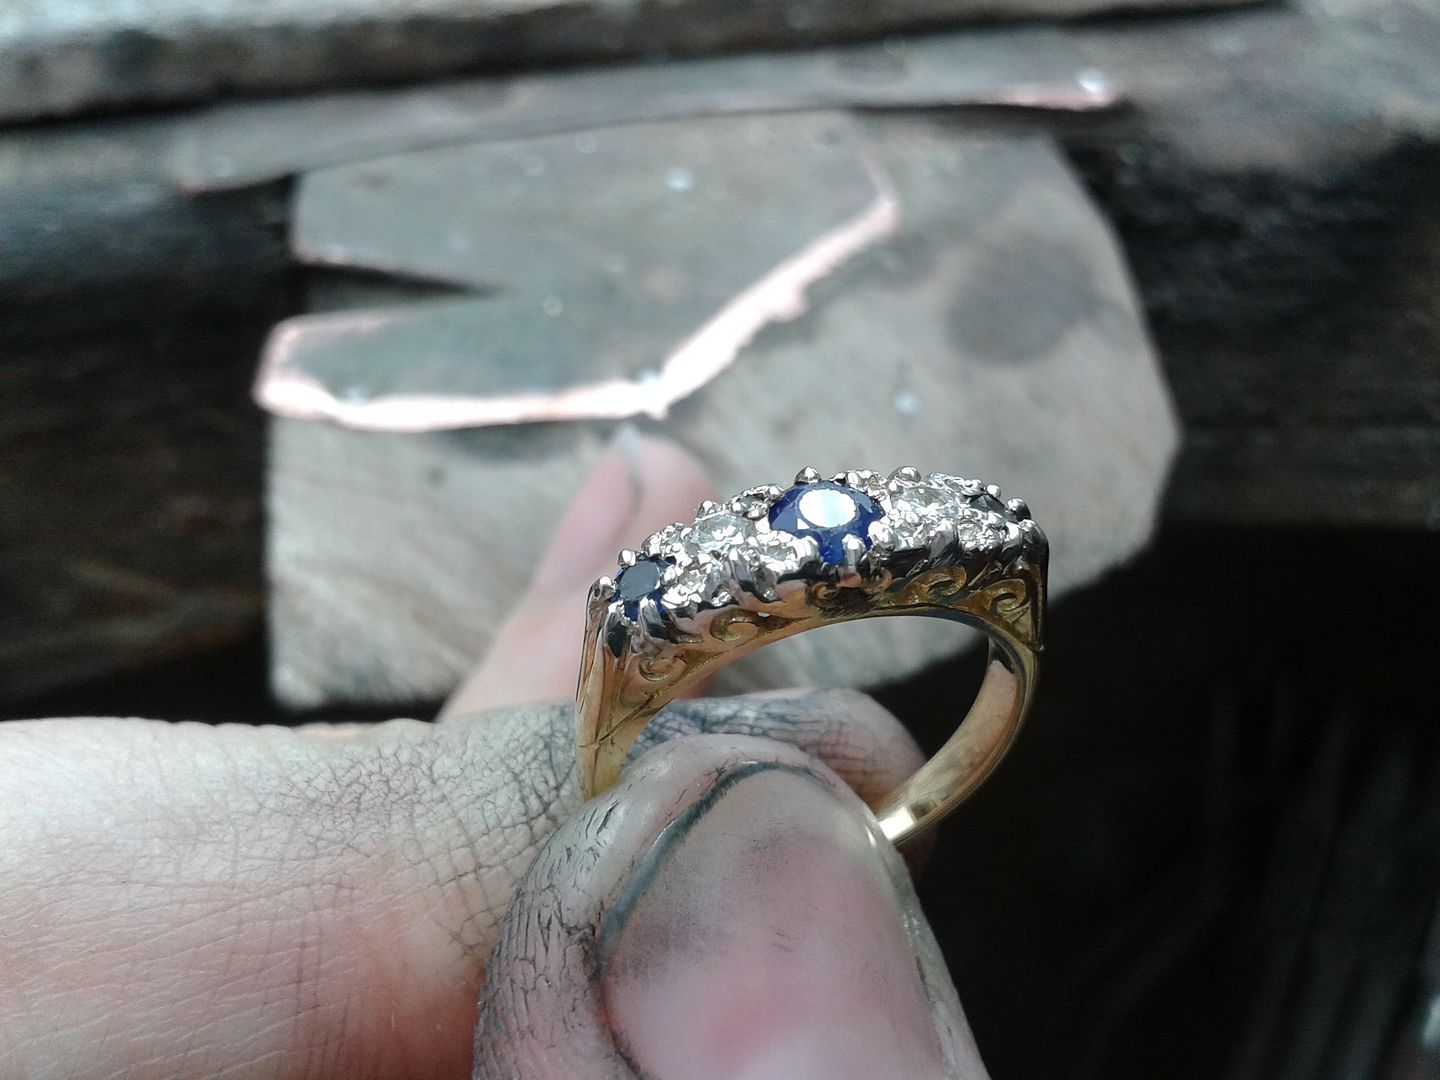
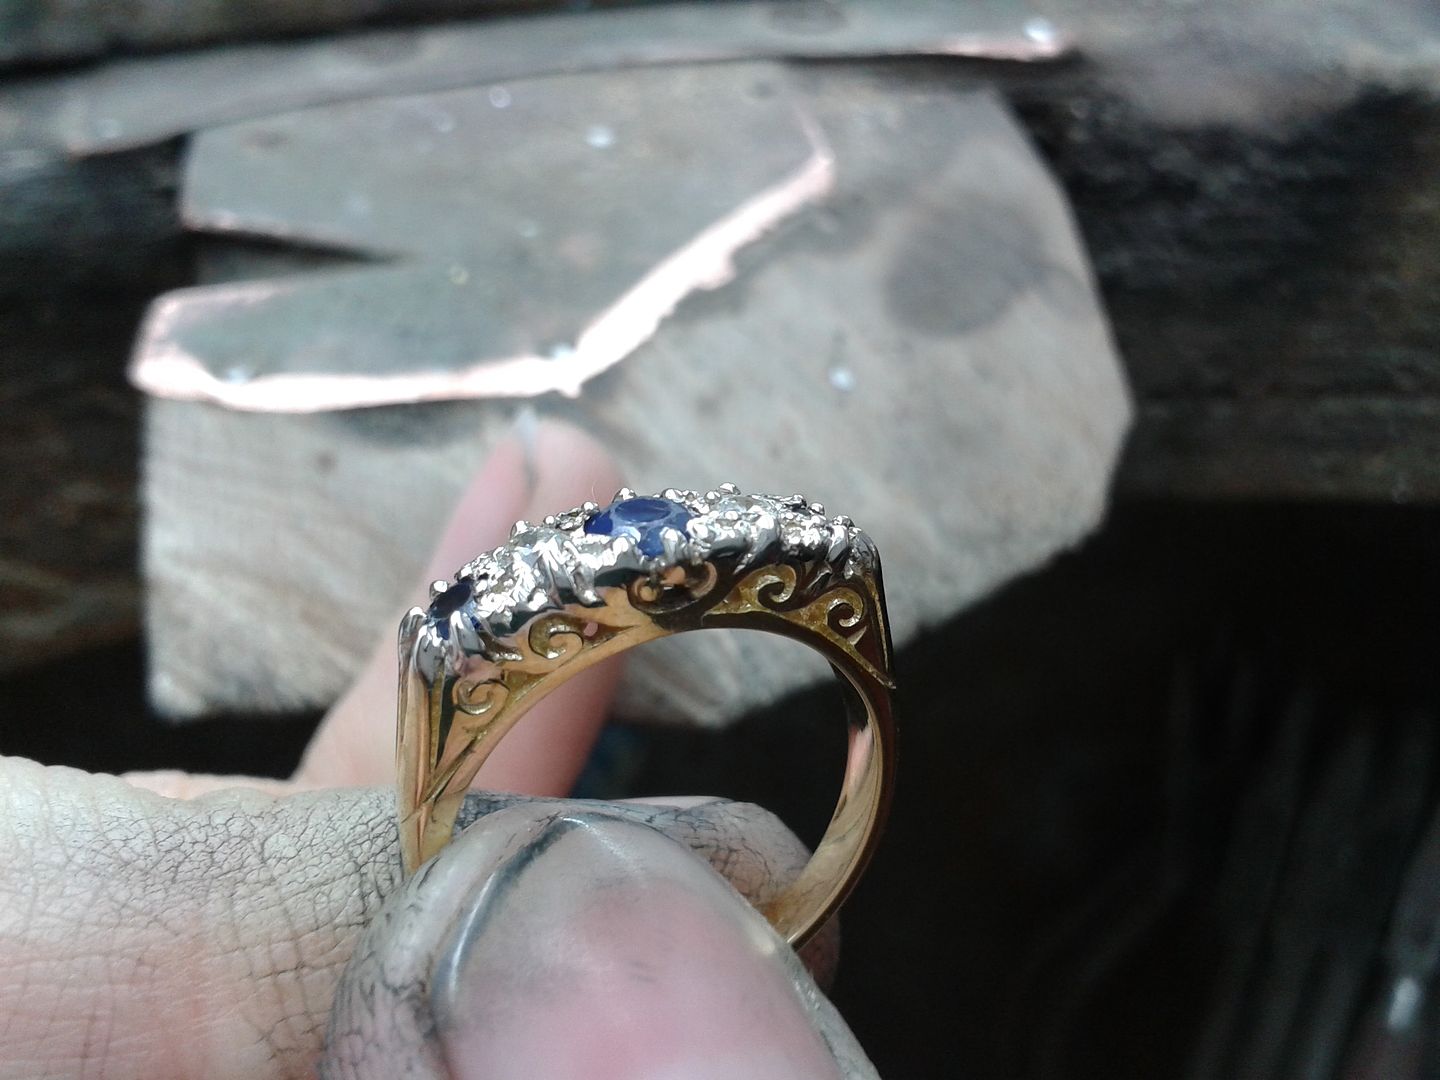
Take one pretty worn out and old sapphire and diamond ring. Its a very old fashioned item and has a hand carved construction that we have to maintain.
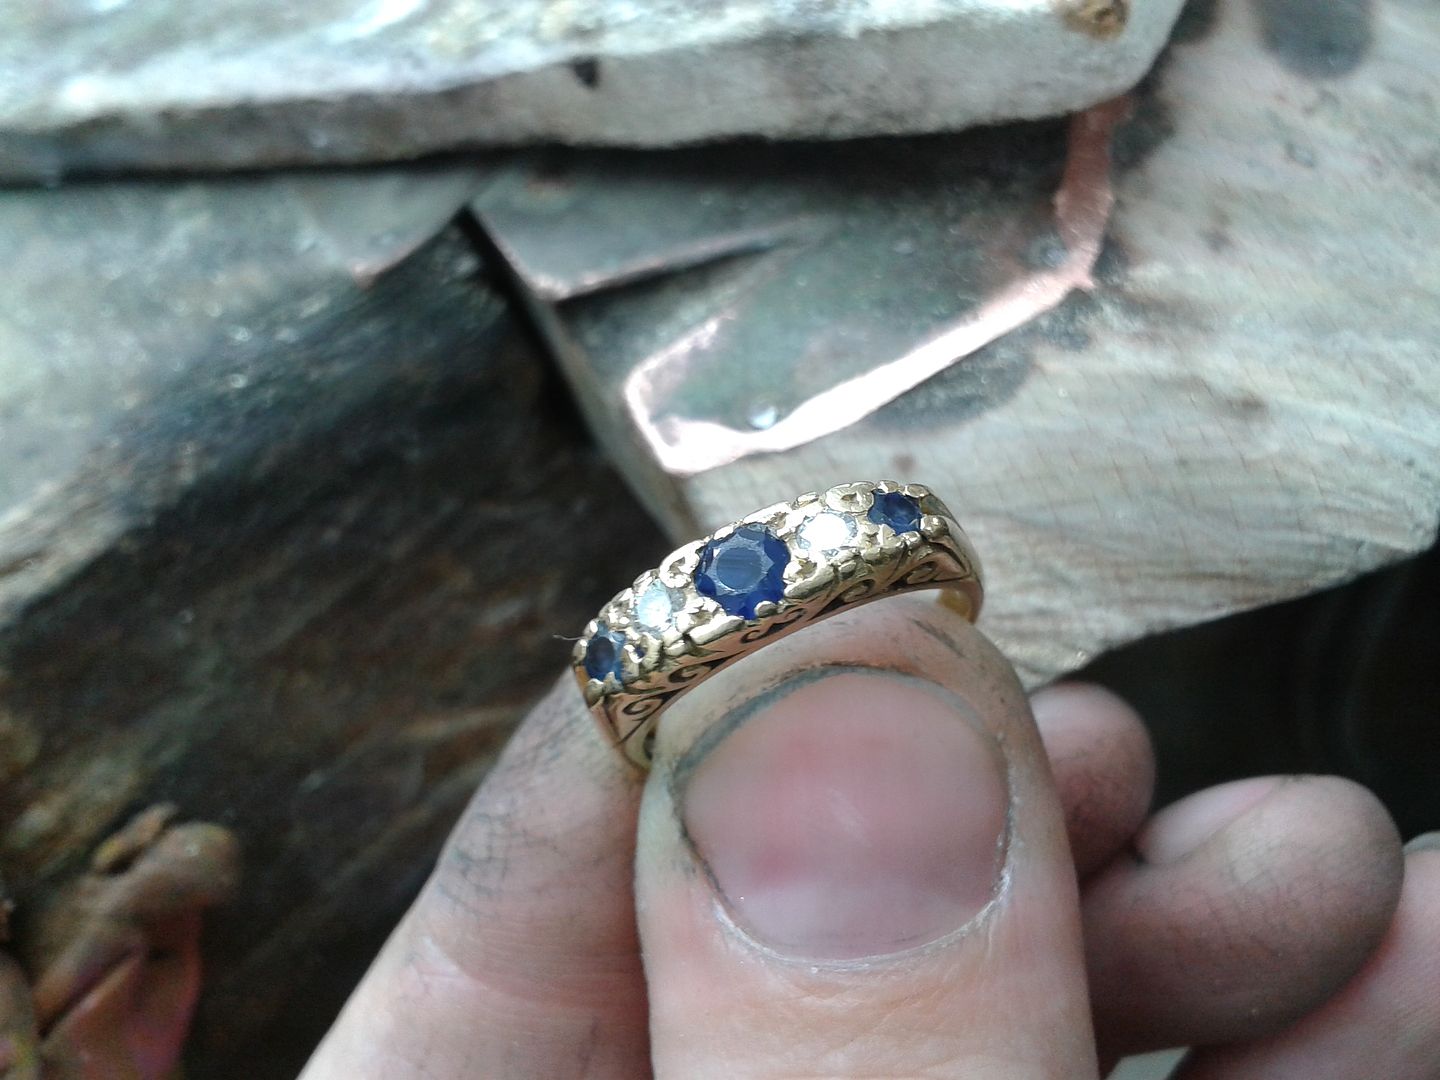
Note the 8 x missing small diamonds from between the main stones. We will replace these as part of the process:
You can see from the picture here the condition of the sapphires. They are pretty worn and abraded. In some circumstances we'd have these removed and replaced or re-polished by a lapidary but the customer wants to maintain the 'used' look.... so they stay.
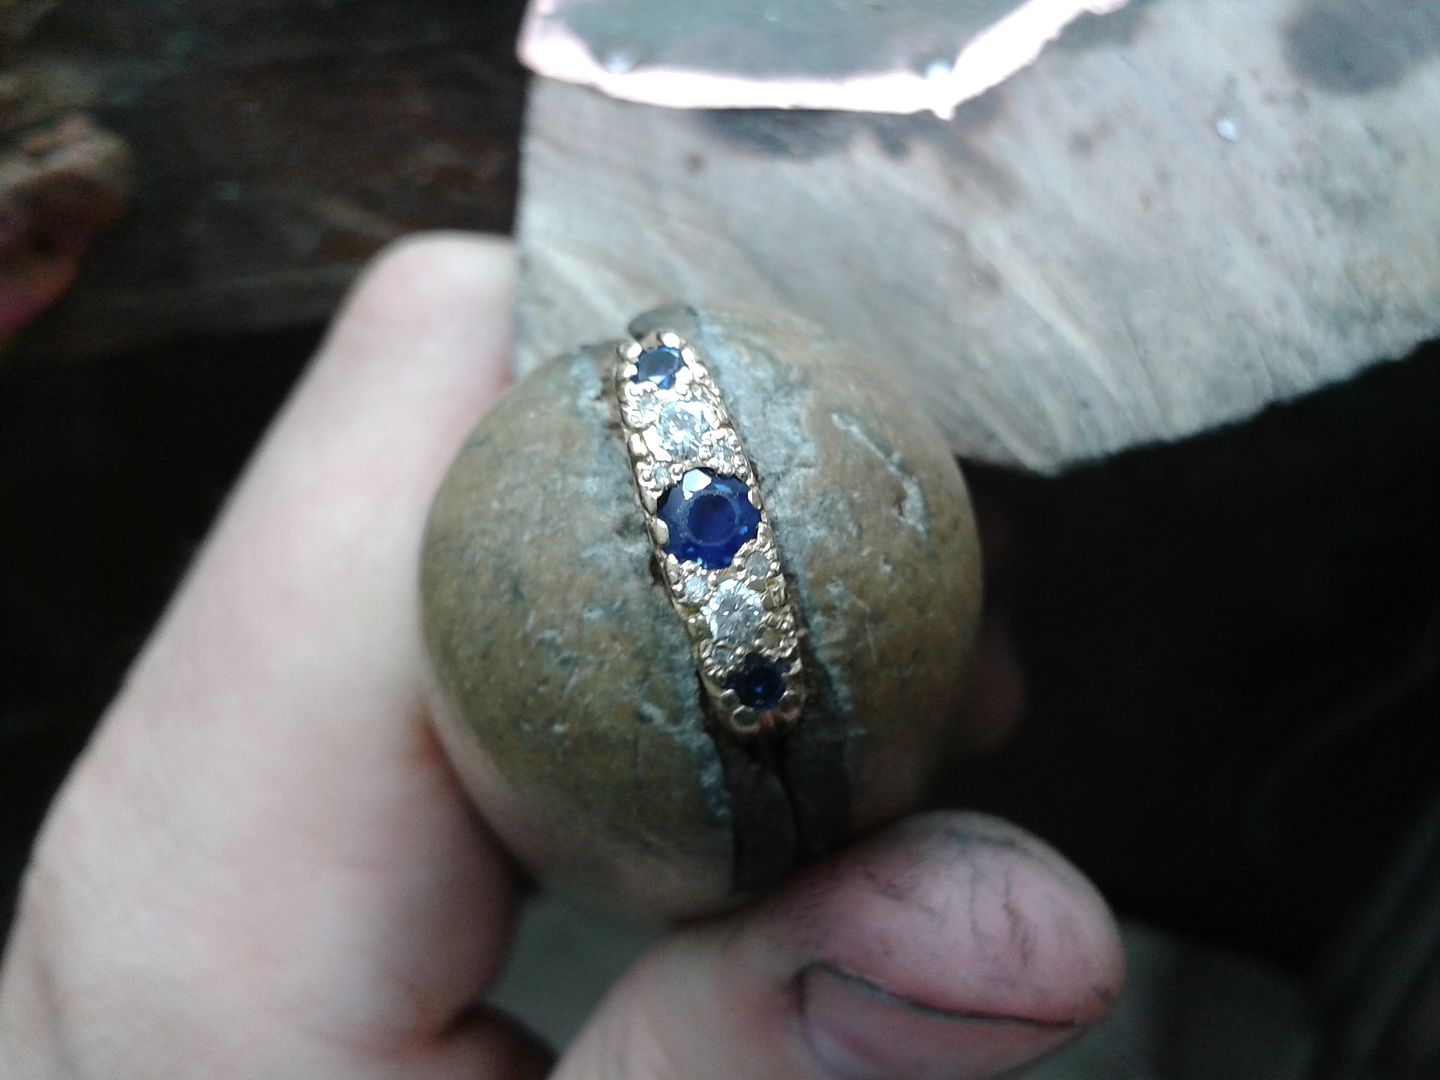
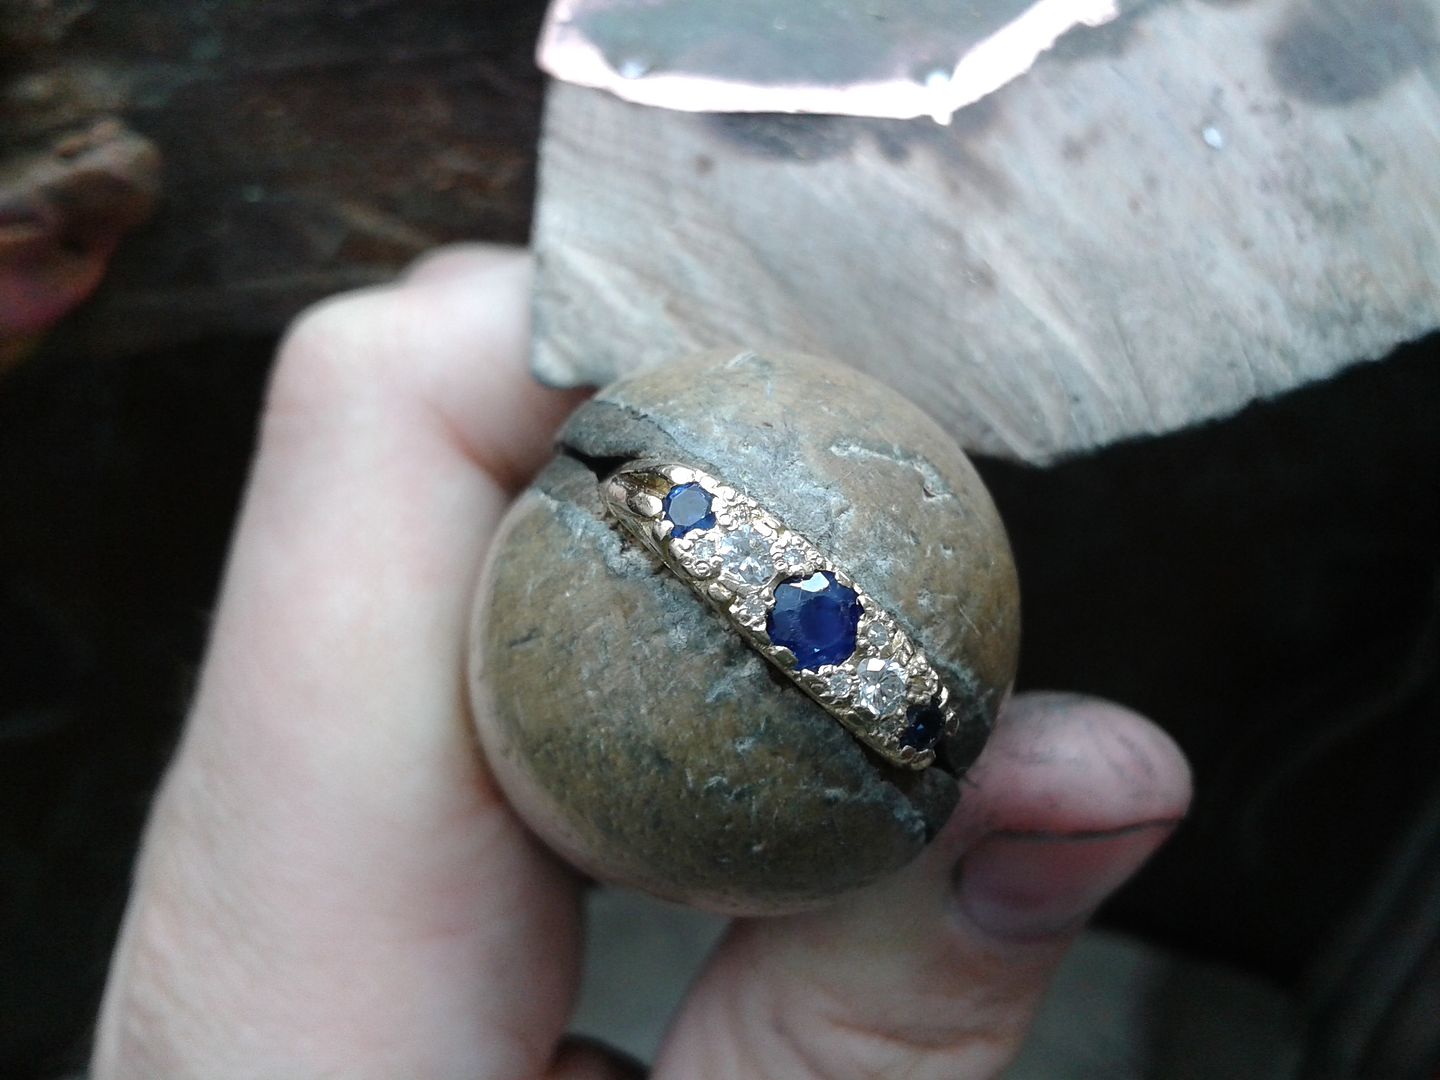
So, first job is to get the missing diamonds back in place. Here i have drilled the 8 x settings ready to take the new stones. They are only very small but do accent the other stones pretty well.
Apologies for no 'setting' pic but this is the 8 diamonds now set and ready for other work to start.
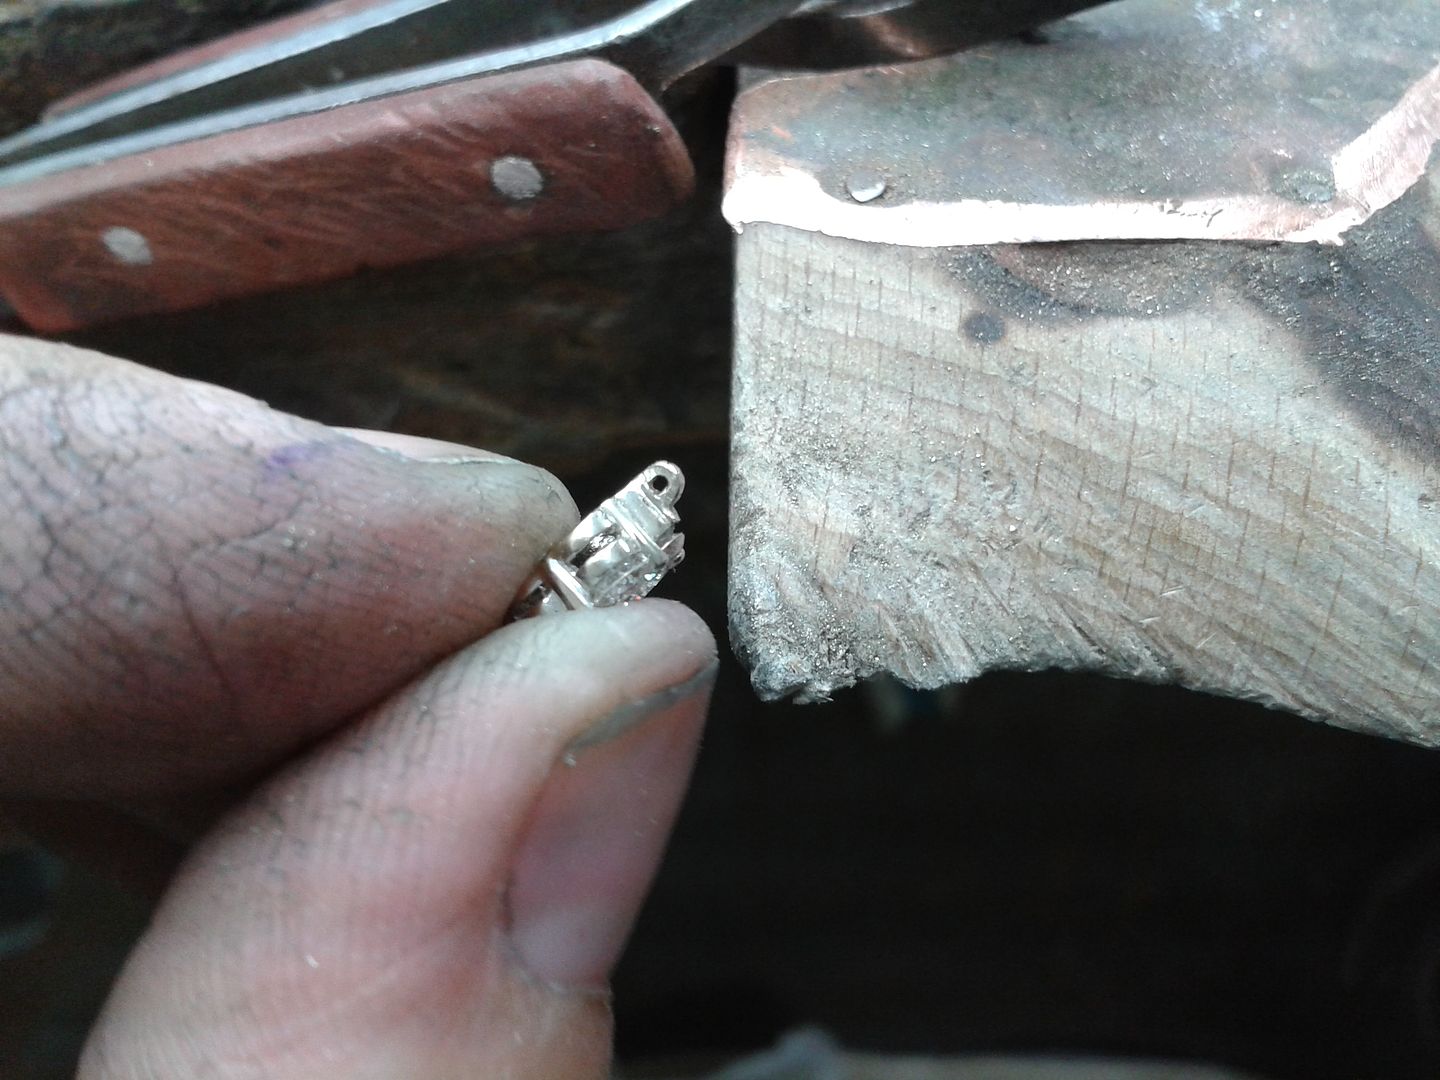
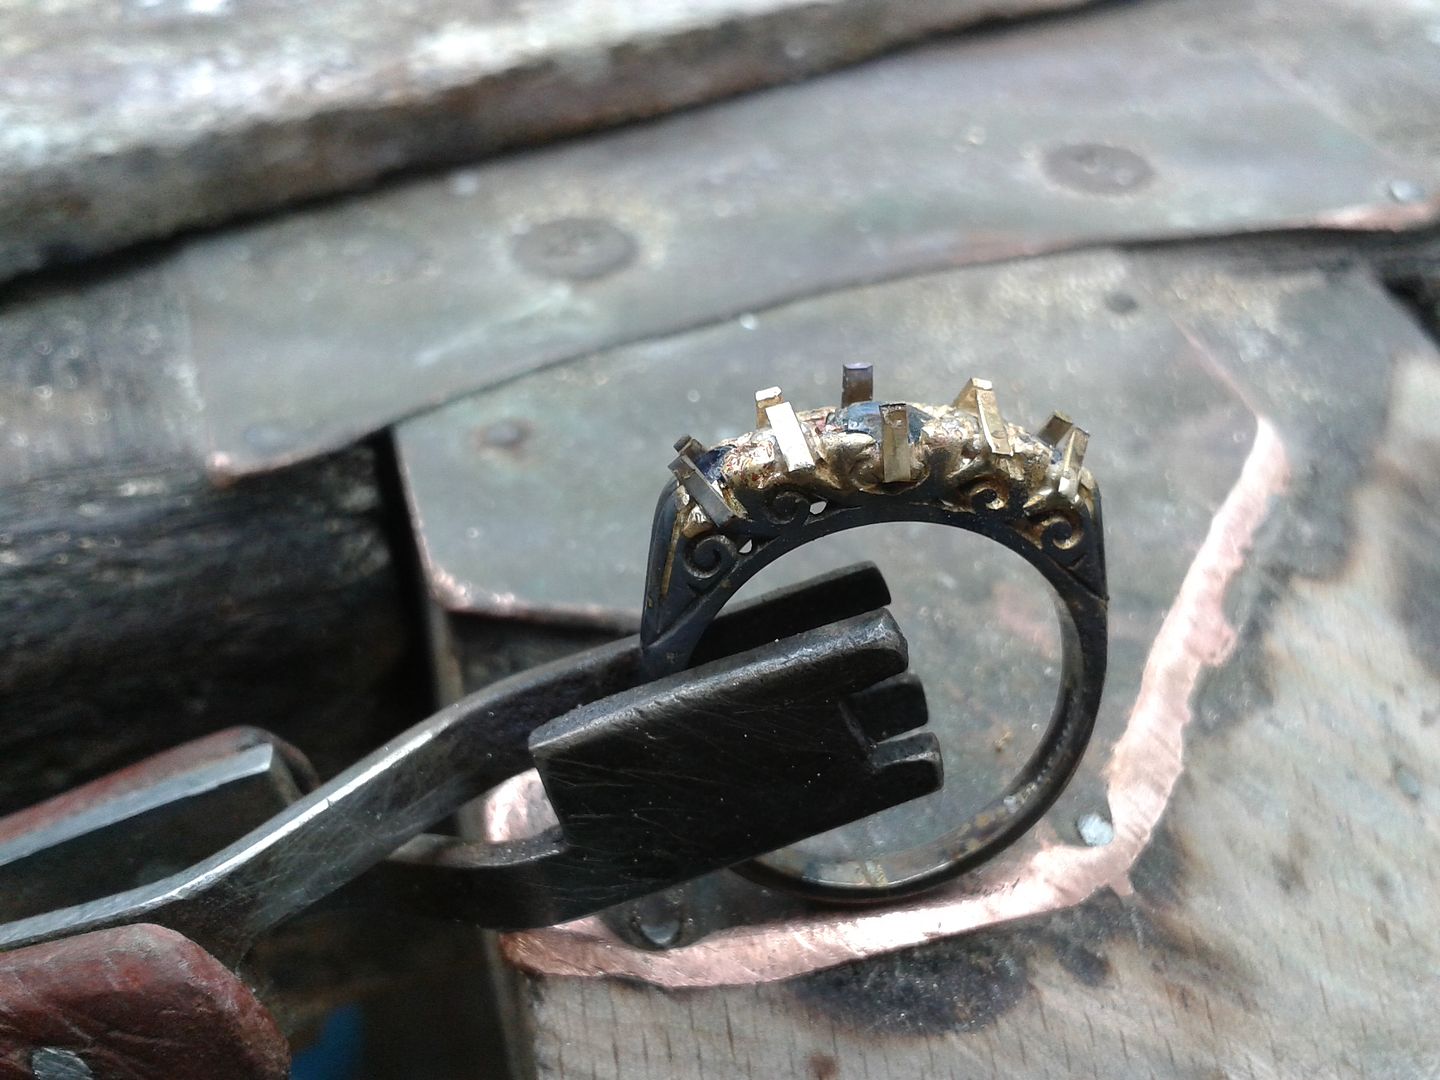
The next thing to do is to remove the old claws that hold the sapphires and larger diamonds. Look closely and you can see where ive filed the old ones down to the base:
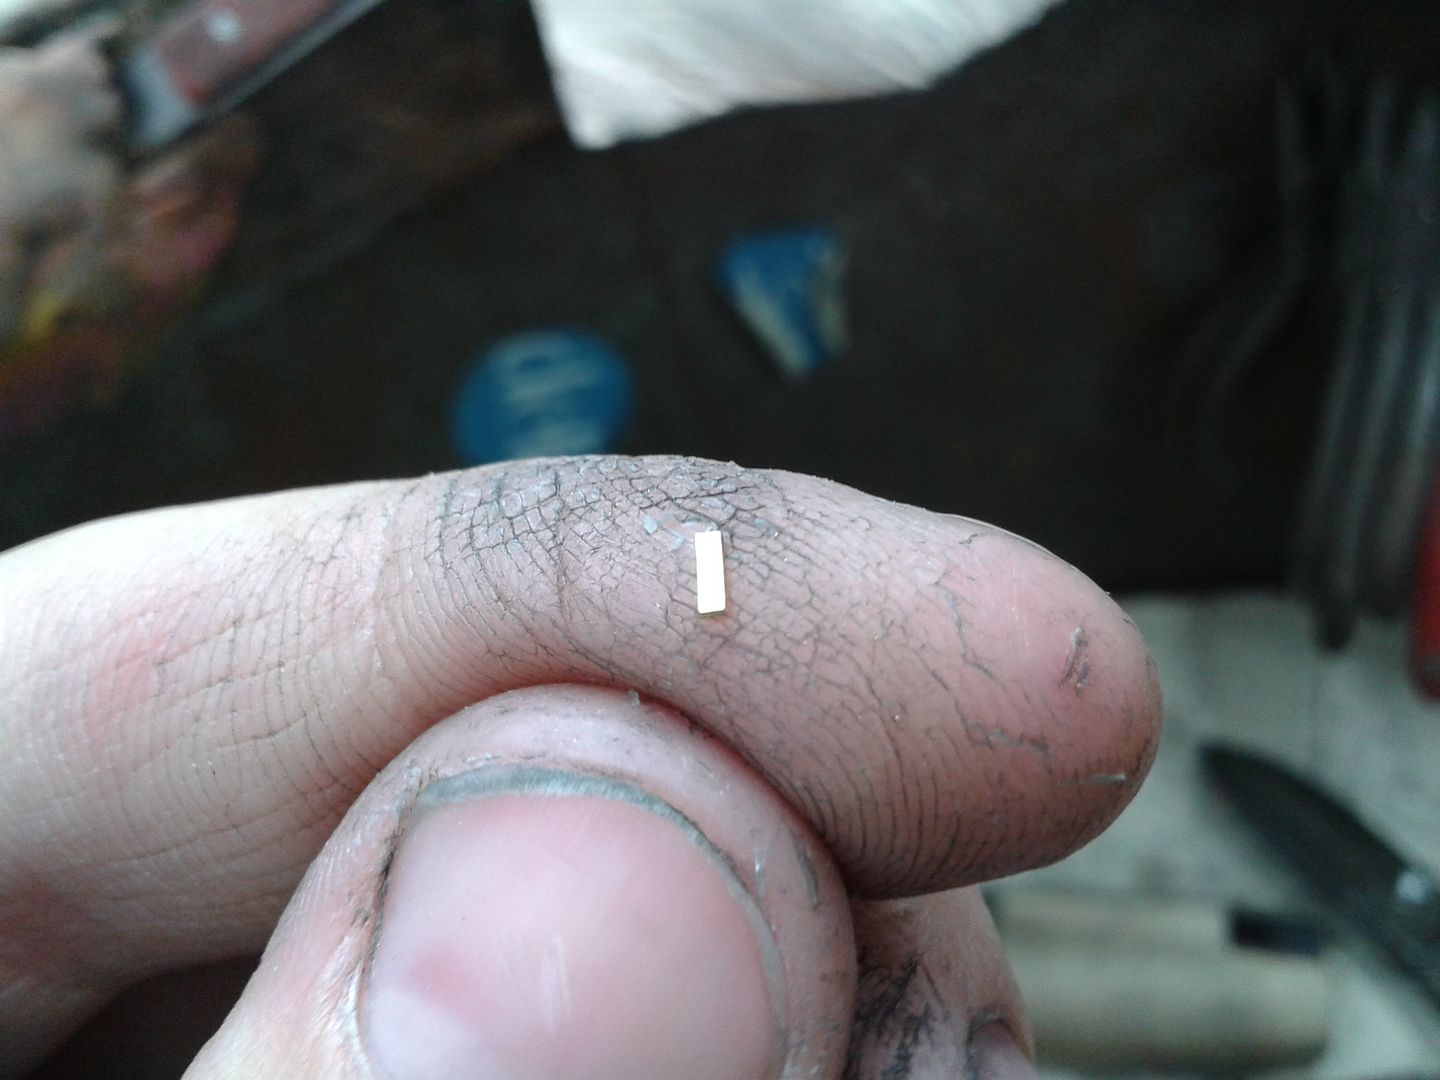
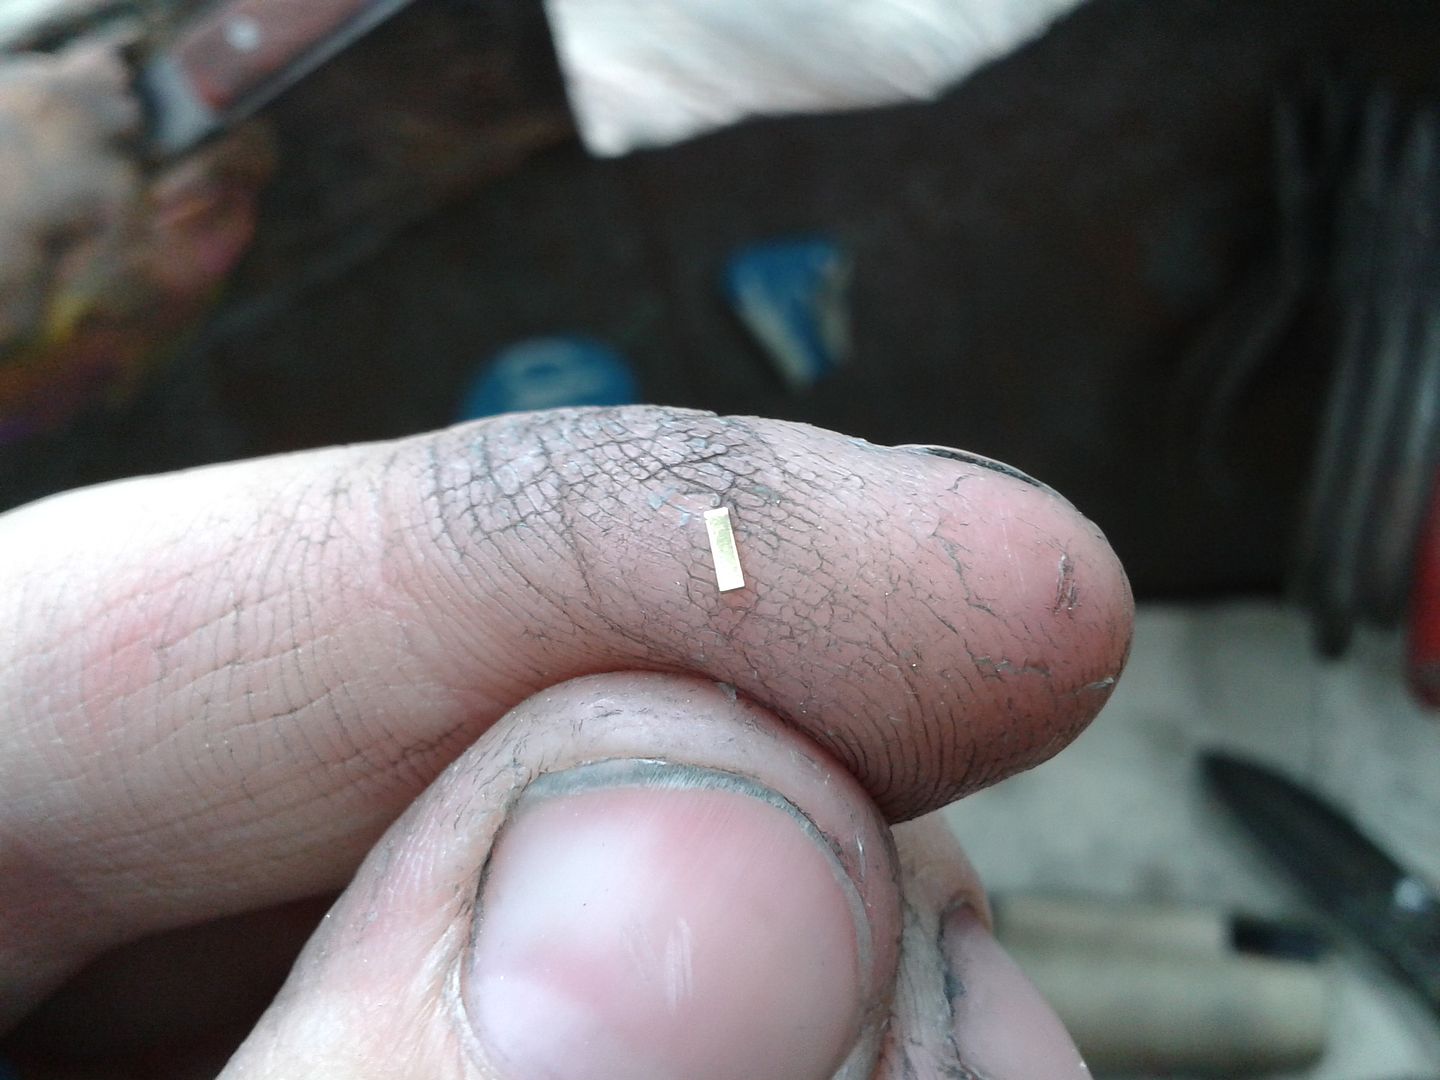
These are claws. They are cut in varying sizes (job dependant) from solid 18ct yellow gold bar that we roll down (without annealing) to the required thickness. We dont anneal the claw material before cutting as it makes it easier to cut. It'll soften up nicely when i solder it on. Same process for white claws, except we use rolled down 18ct white bar.
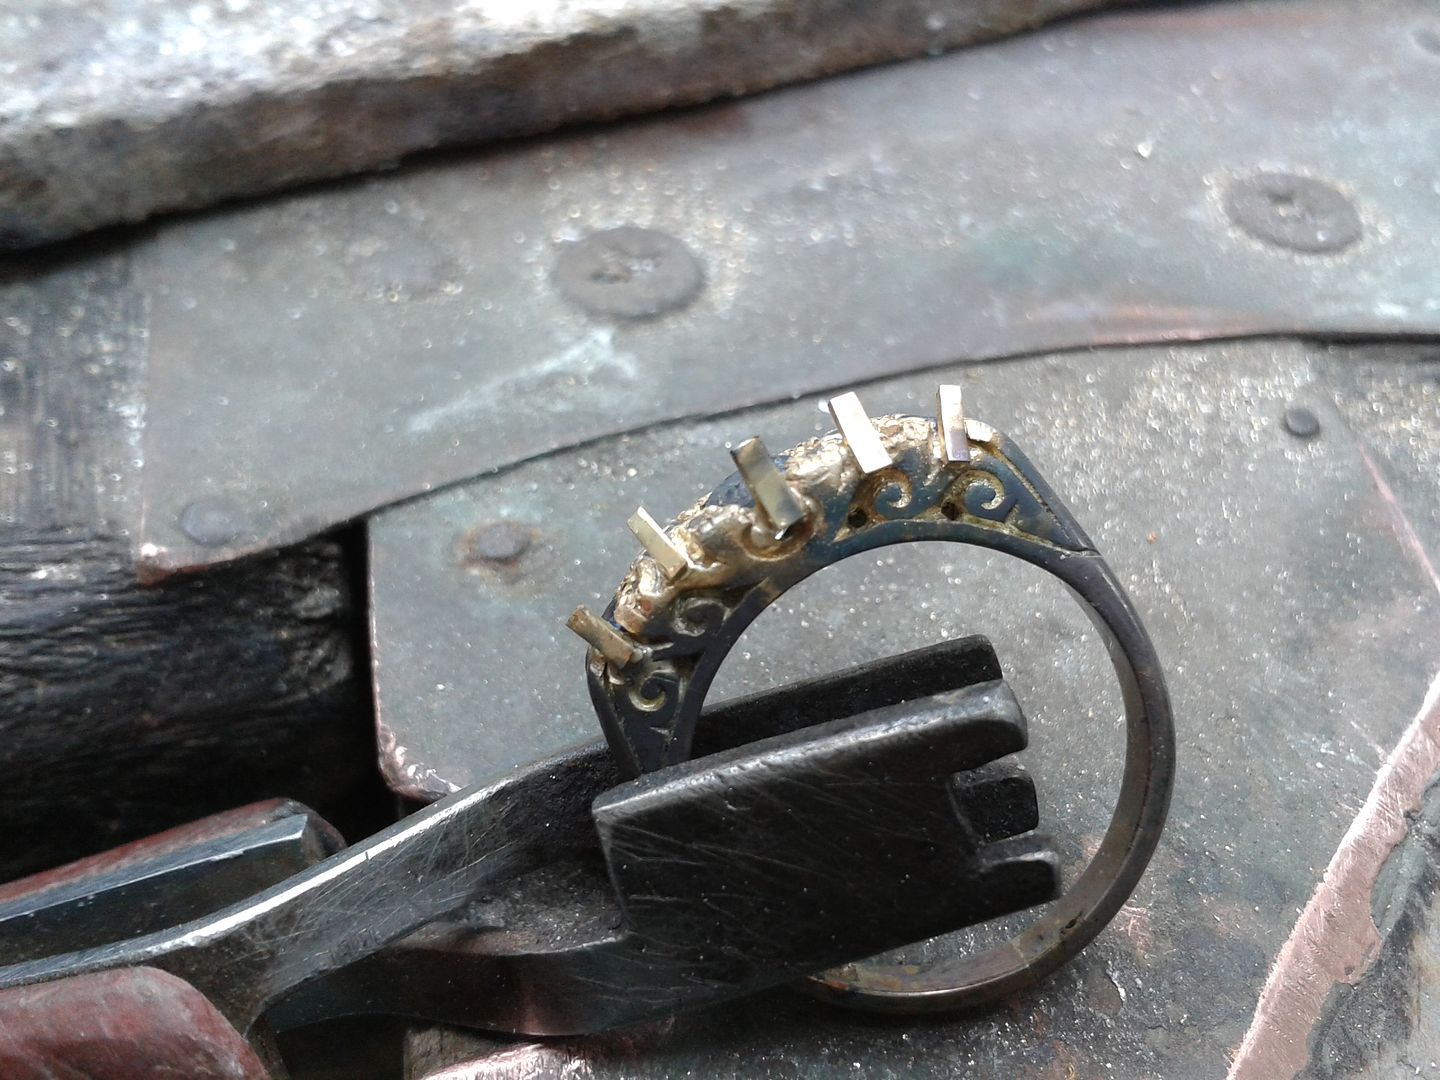
Starting on one side i solder the 5 main structural claws that hold in the sapphires and diamonds. There are 2 more on each end that i'll do once all the stones are secure enough. Note that we are maintaining the original claw pattern as per the sides.
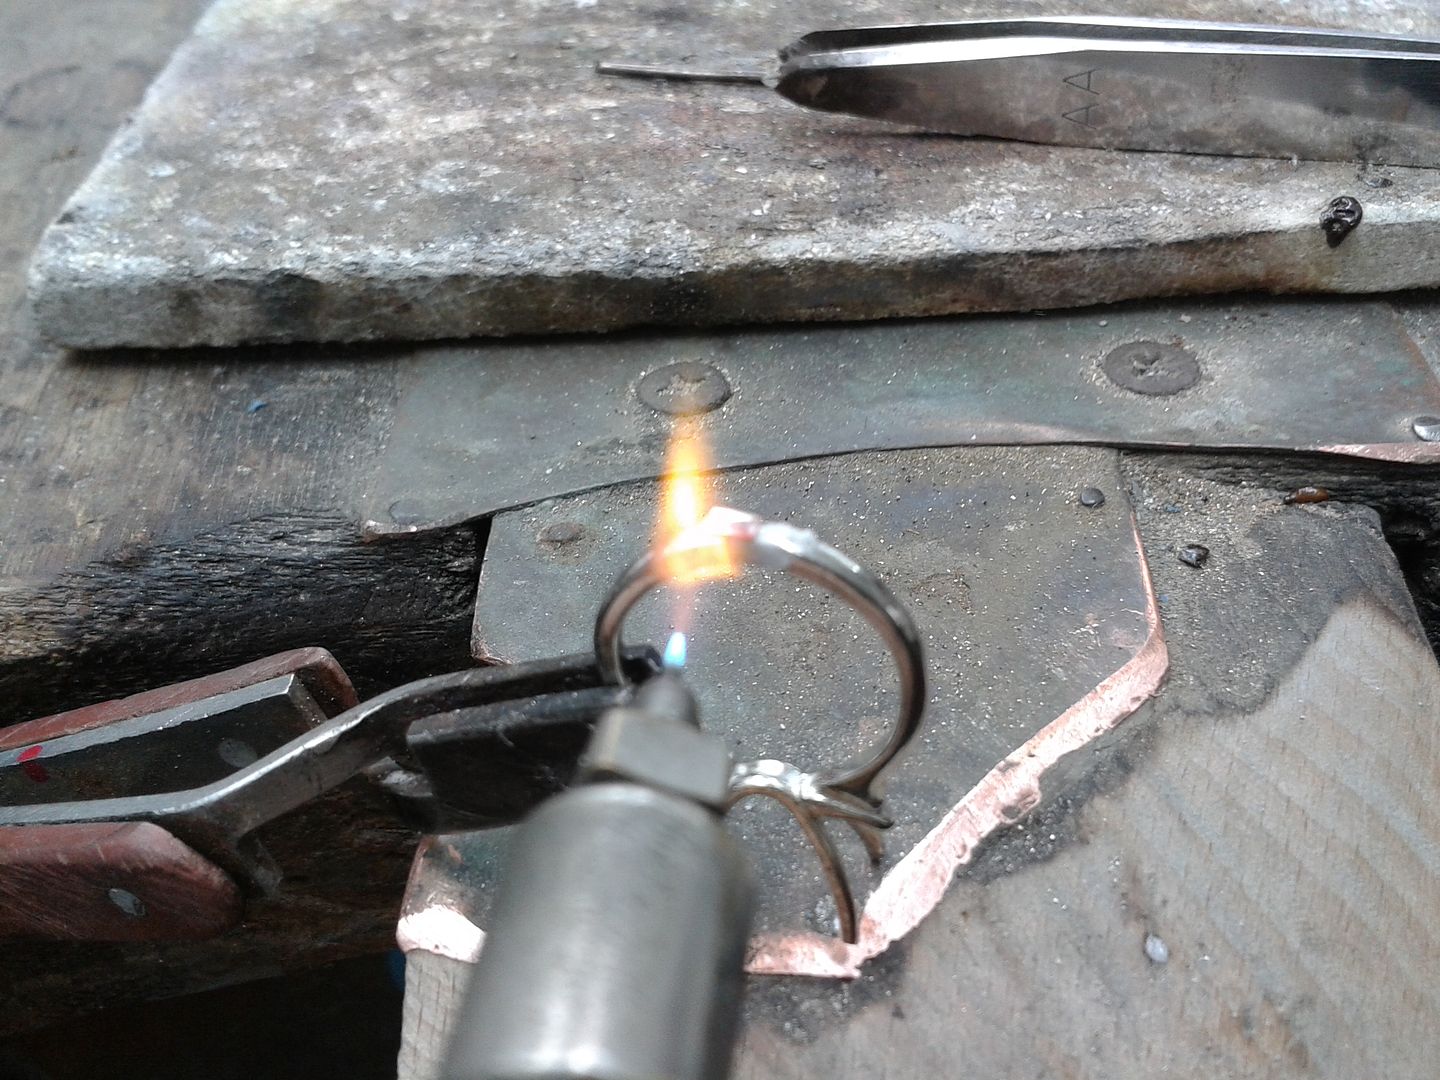
Other side filed down to the bases. Point to note: The diamonds are protected from the heat by applying borax. The sapphires dont respond well to borax and are easily damaged by the borax corrosive properties, leaving the surface cloudy and damaged. So long as the sapphires don't take direct heat they cope well with high temperatures. This is why claw work can be so tricky. Knowing your stones and getting the heat right.
5 more claws applied and in place:
The 10 claws are then pressed over the sapphires and diamonds and then cut down in length to keep them out of the way of further work. Note the 2 other claws on each end that still need to be replaced.
2 x end claws filed down:
2 x new claws applied: These end ones are actually quite tricky to keep in place. You get one down ok and then because of the proximity to the next one it can move because of the heat. Practice practice.

And the other end done too:
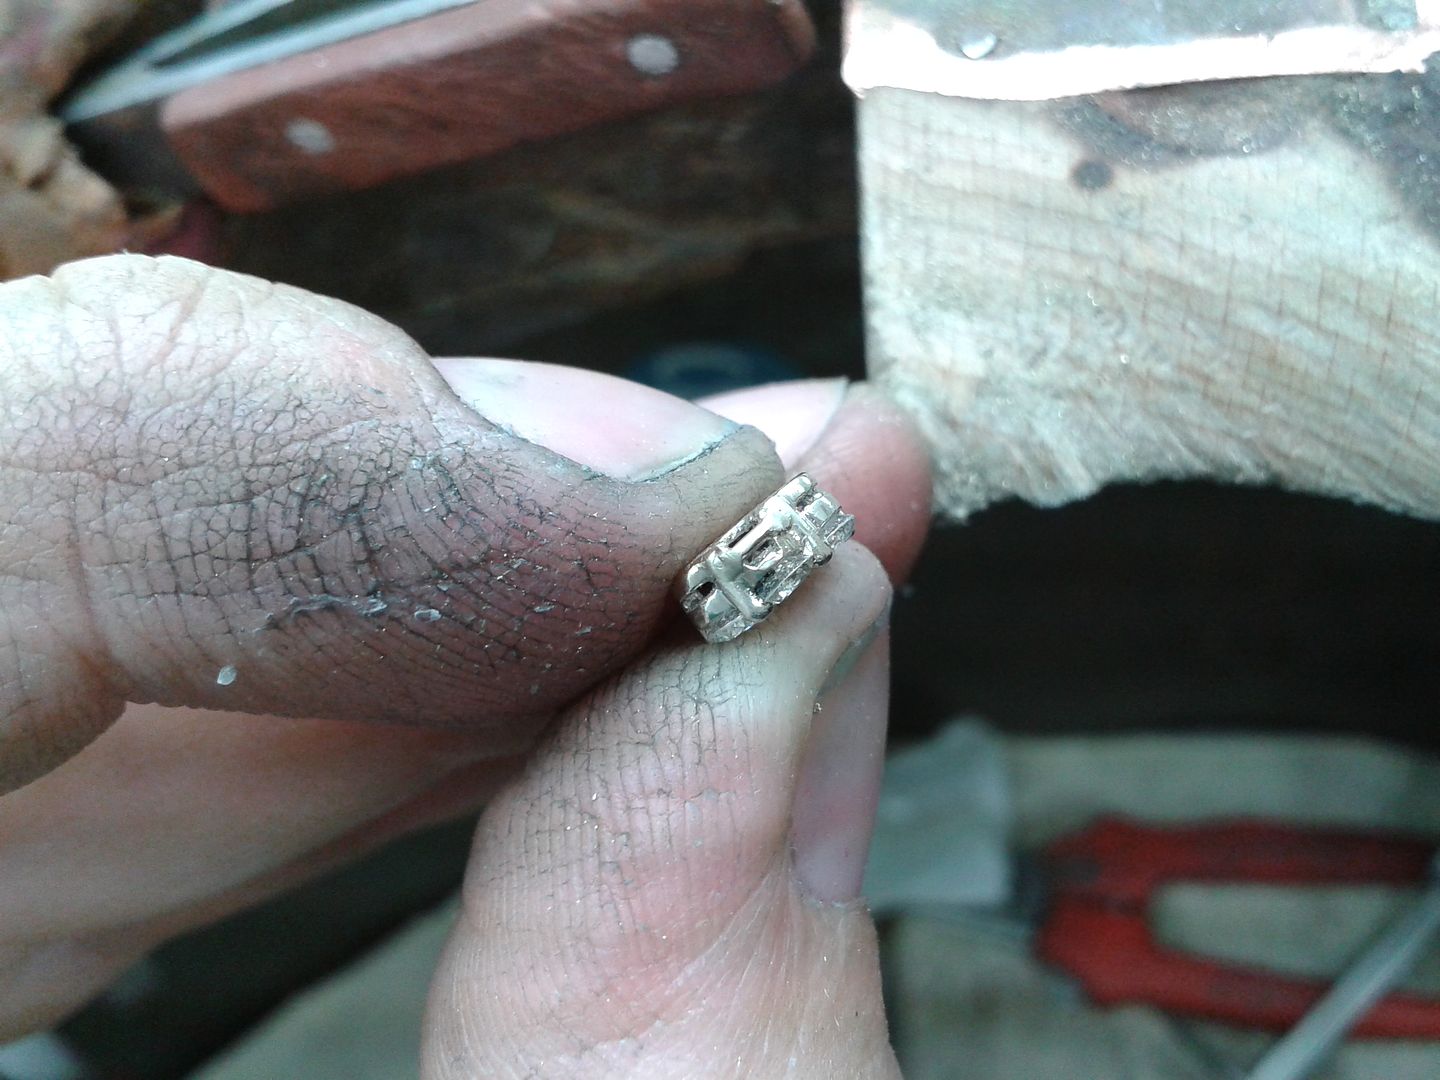
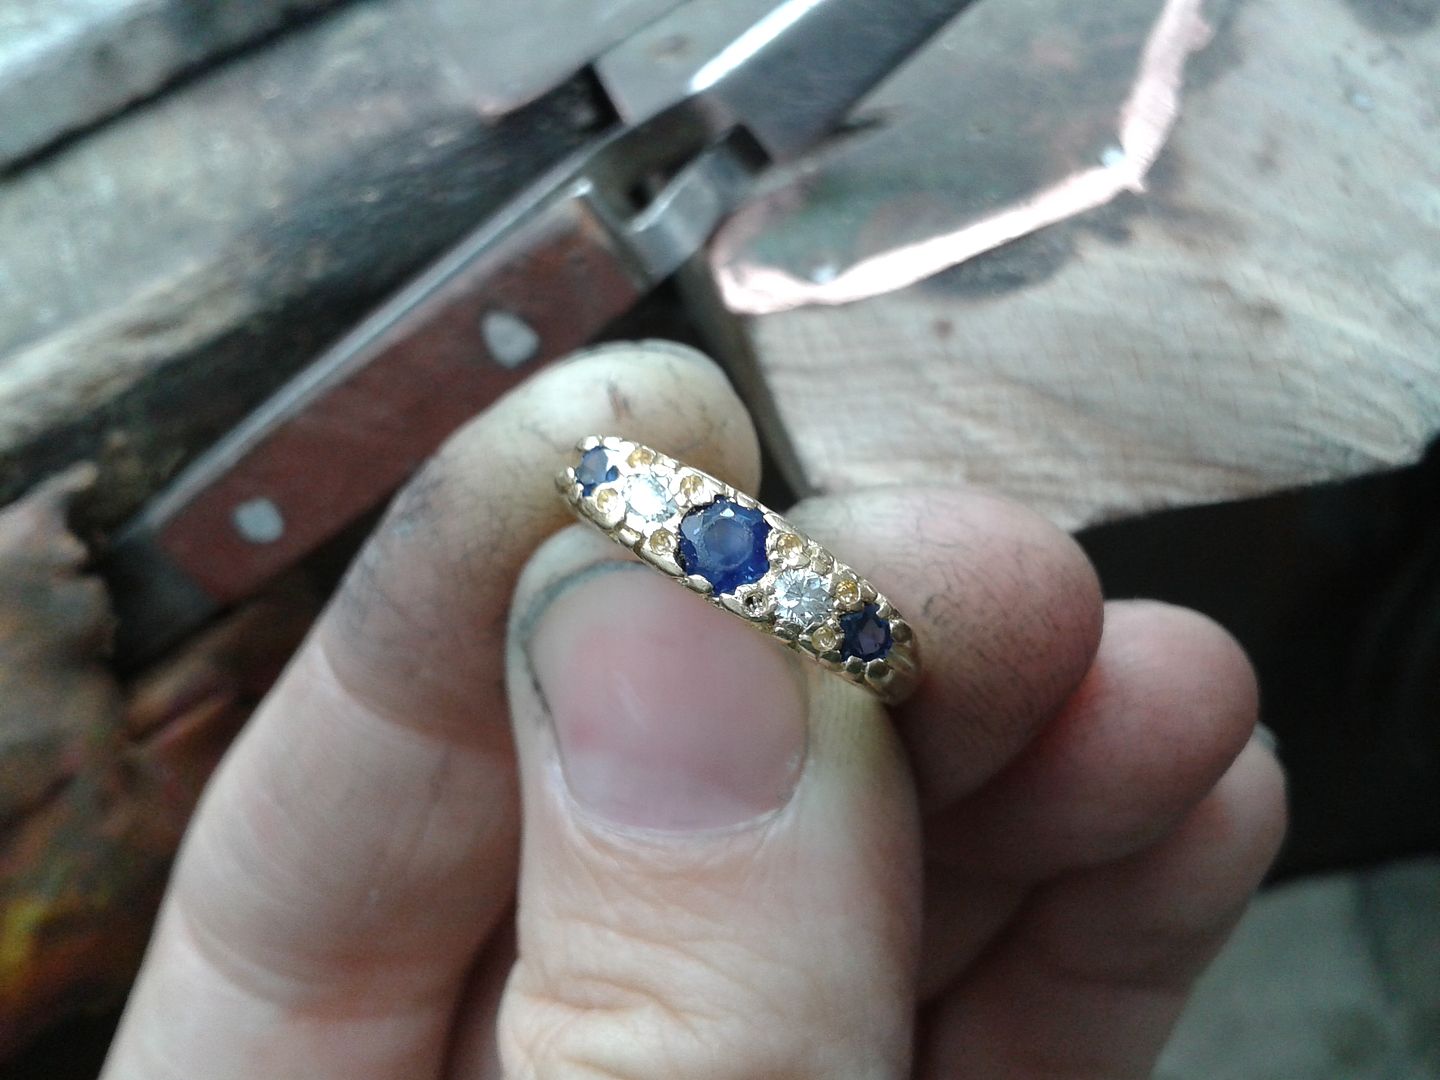
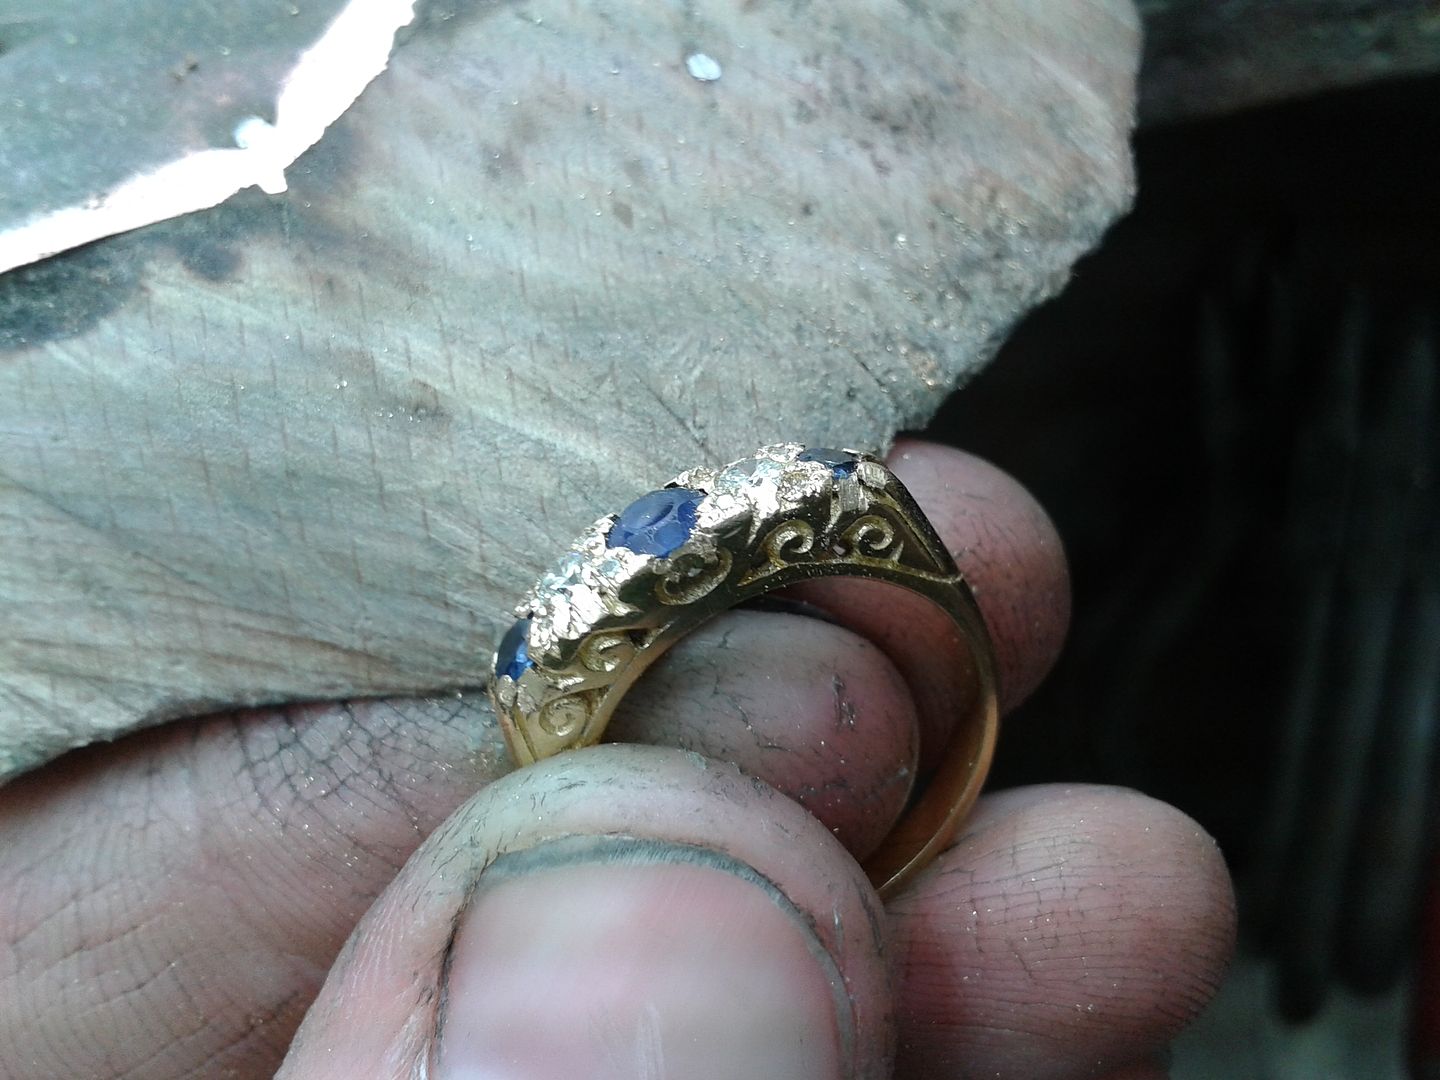
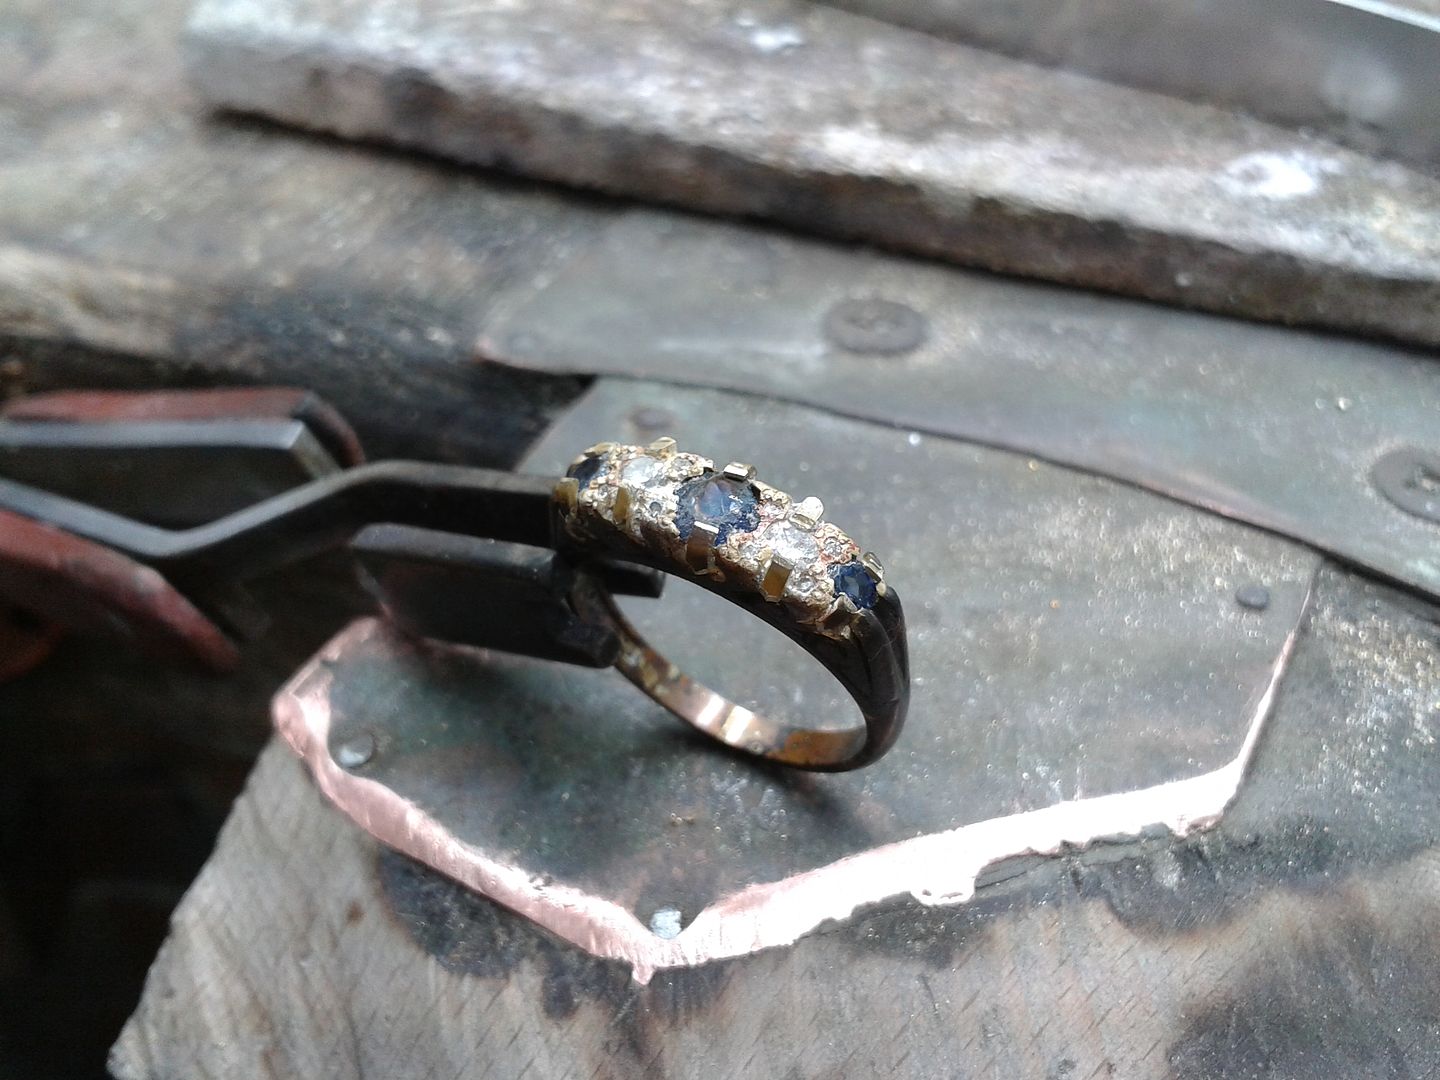
The next phase is to shape the main claws. Here you can see the sides roughly filed and profiled to shape:
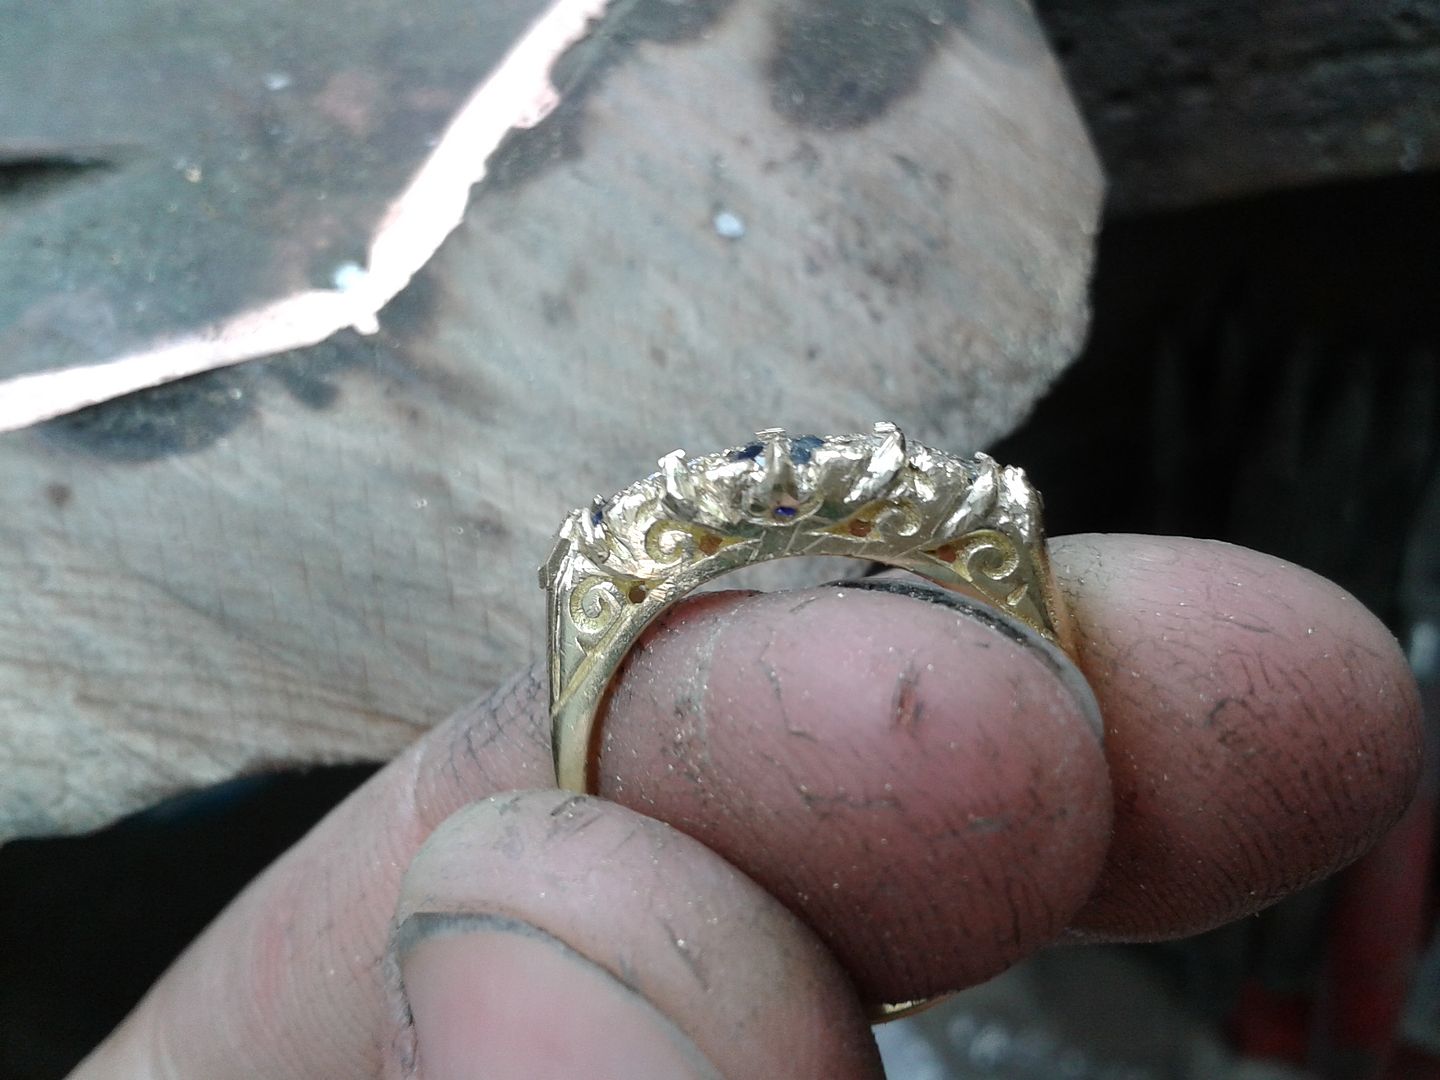
And the tops in a rough shape:

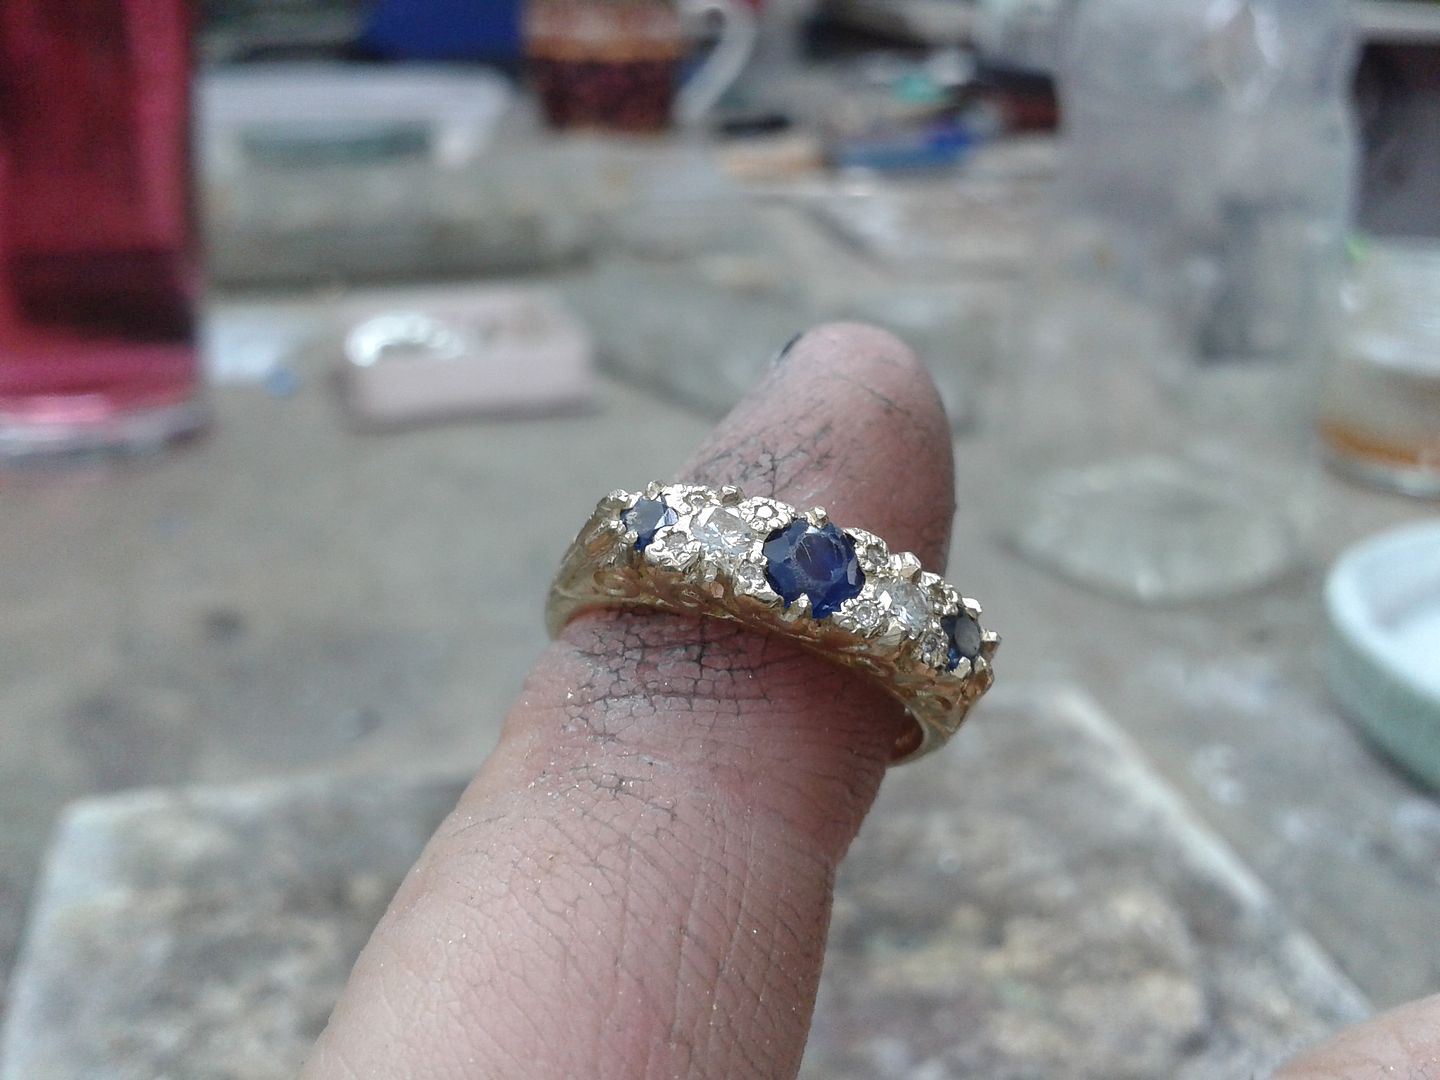
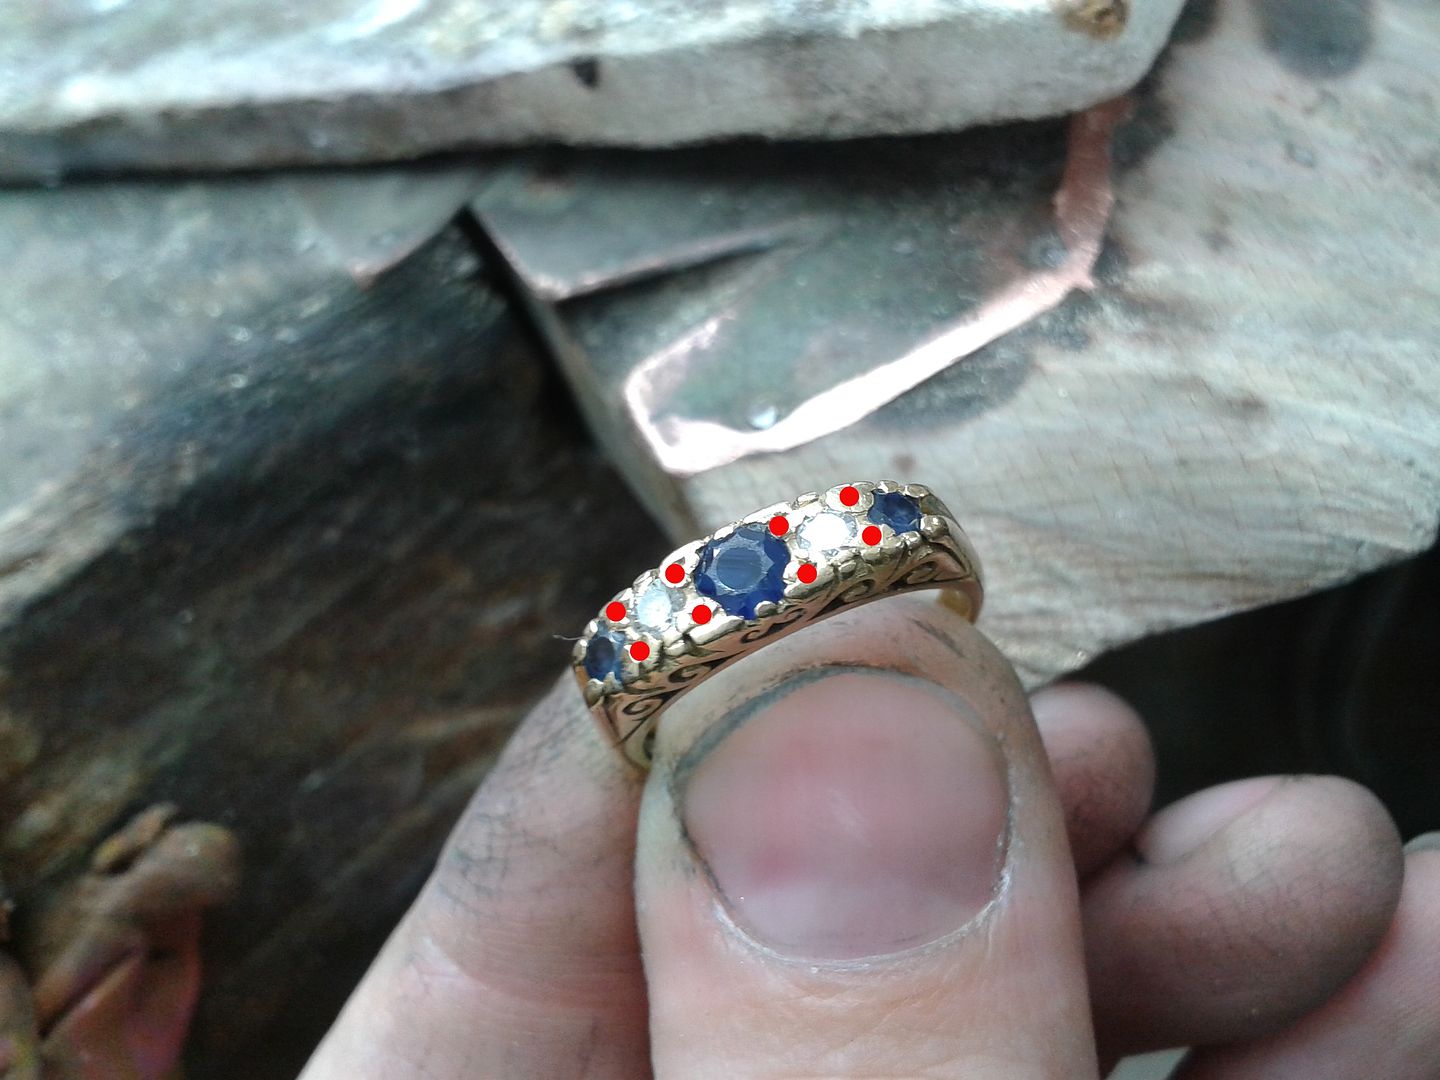
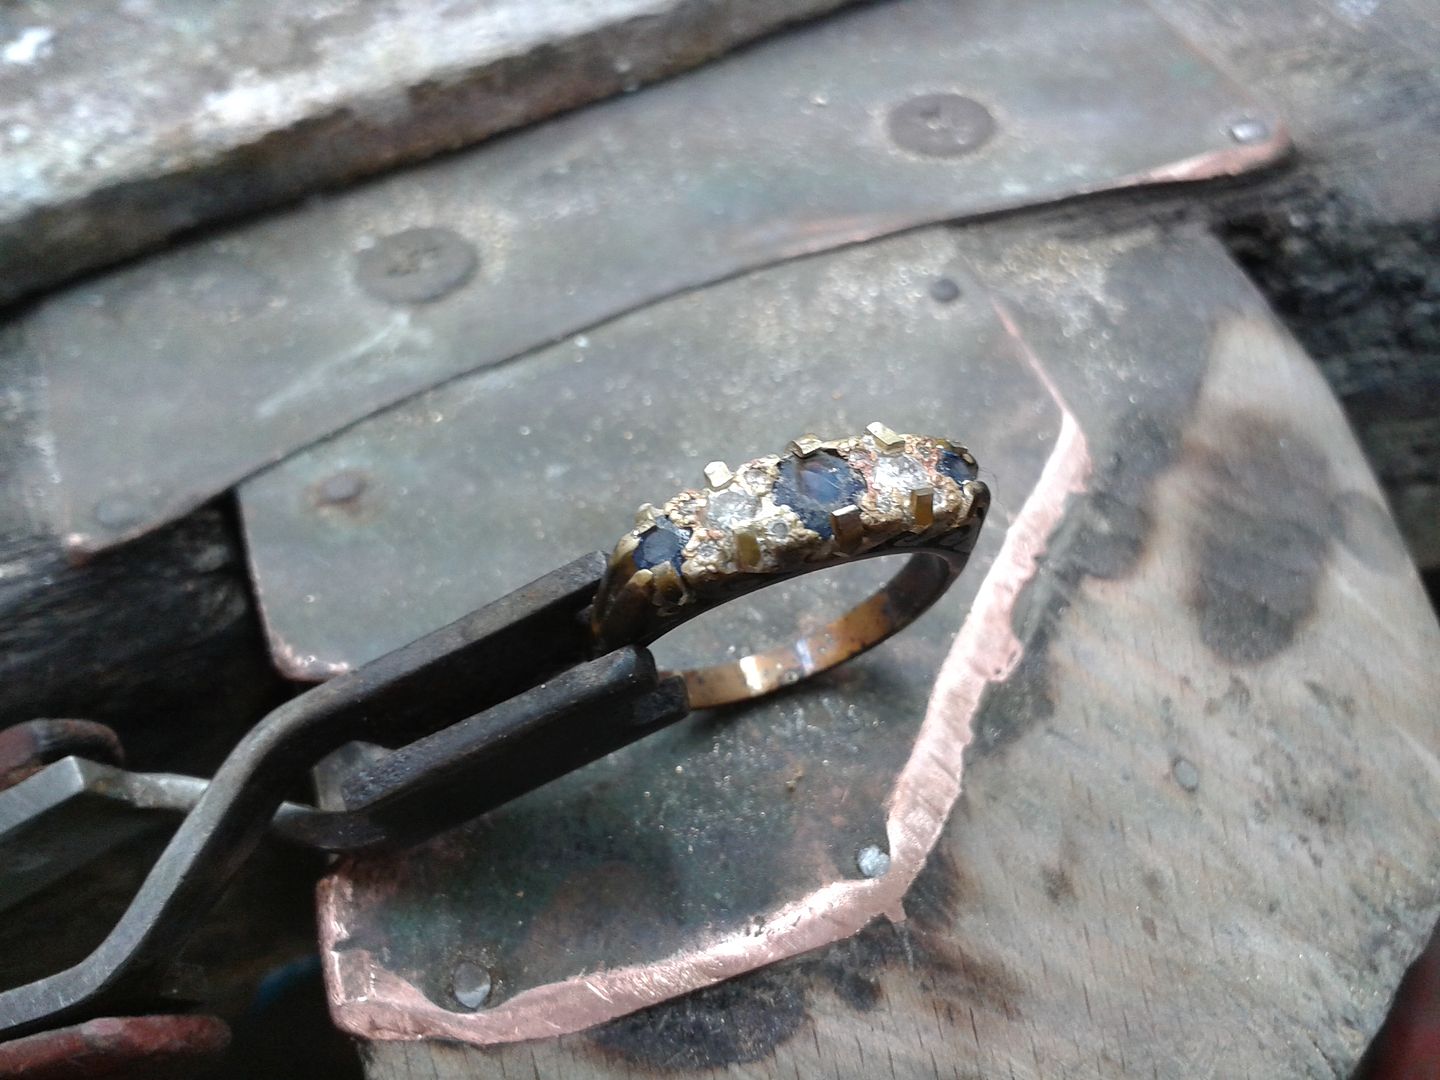
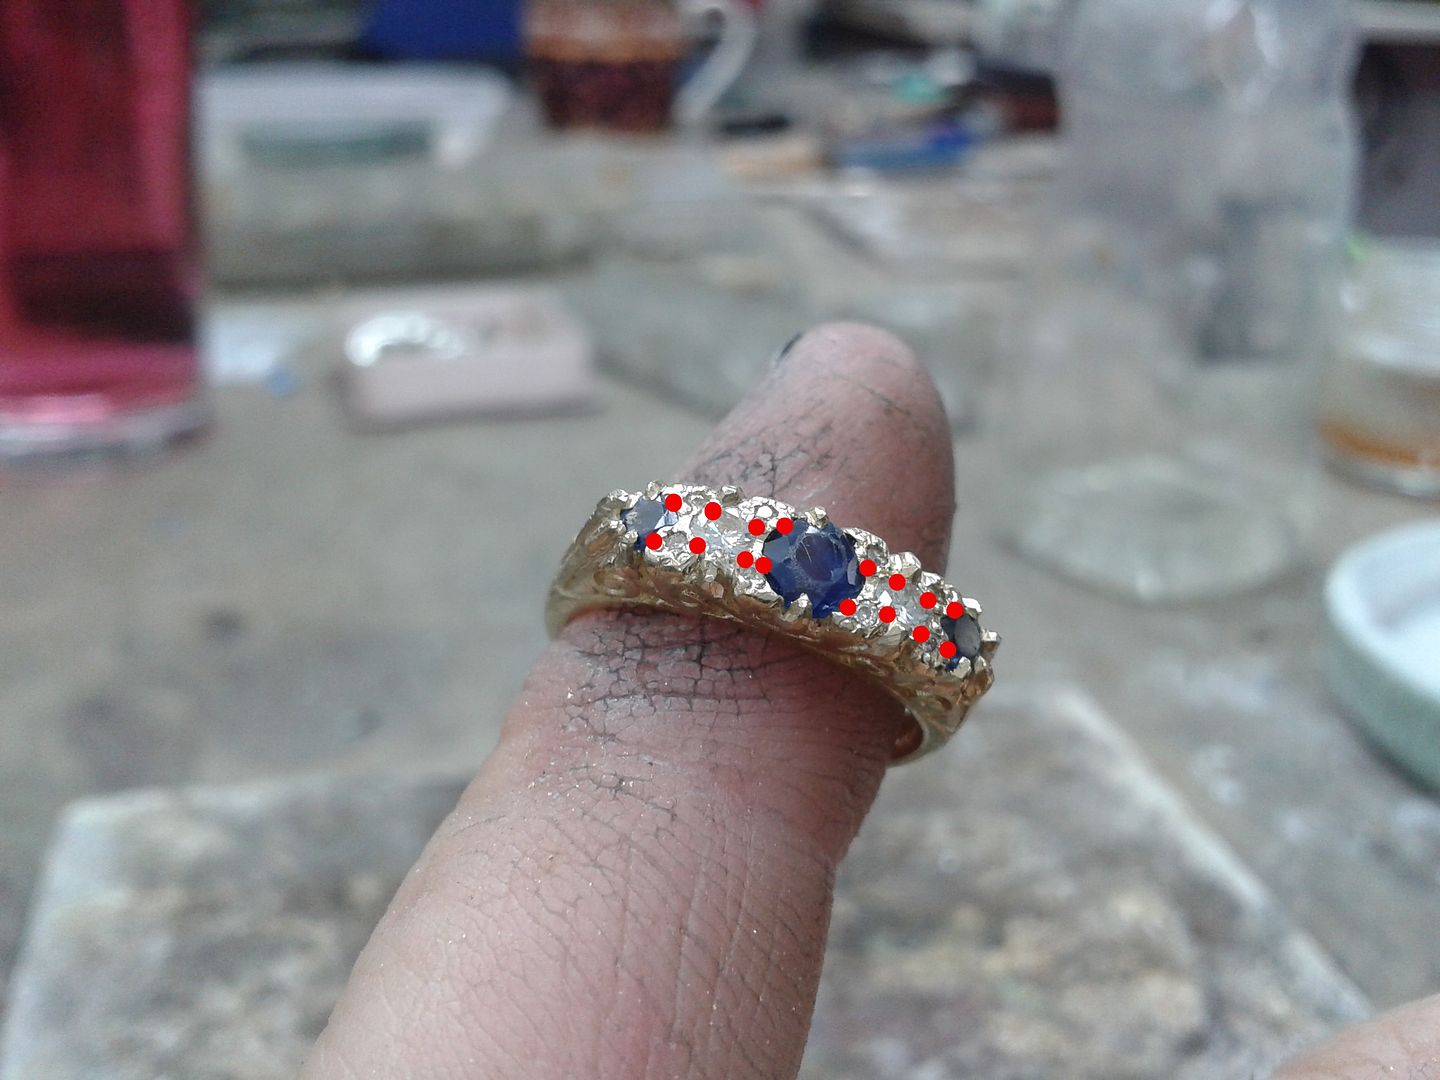
Its difficult to see in the following pics but the most tricky bit of the process is still to come. We have to solder tiny claws known as 'grains' around the ring to secure the stones in places where standard claws are not an option. The red dots mark where they will go. The solder we use is a shop recipe.
Here you can see them applied: The phone pics dont help but the grains are all there.
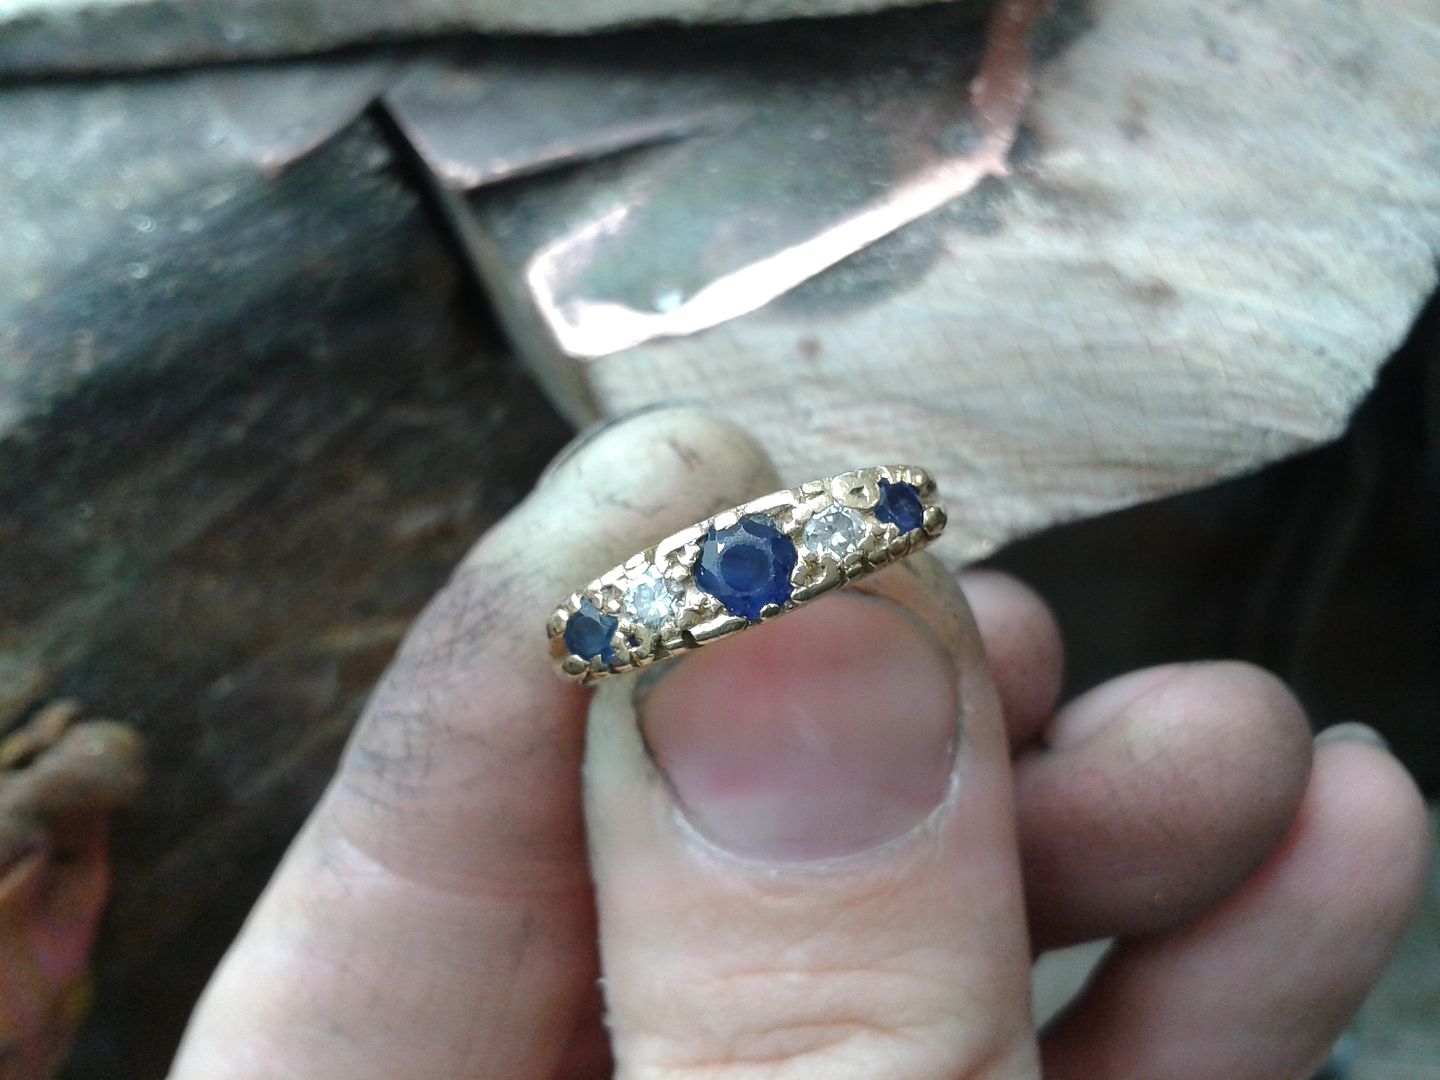
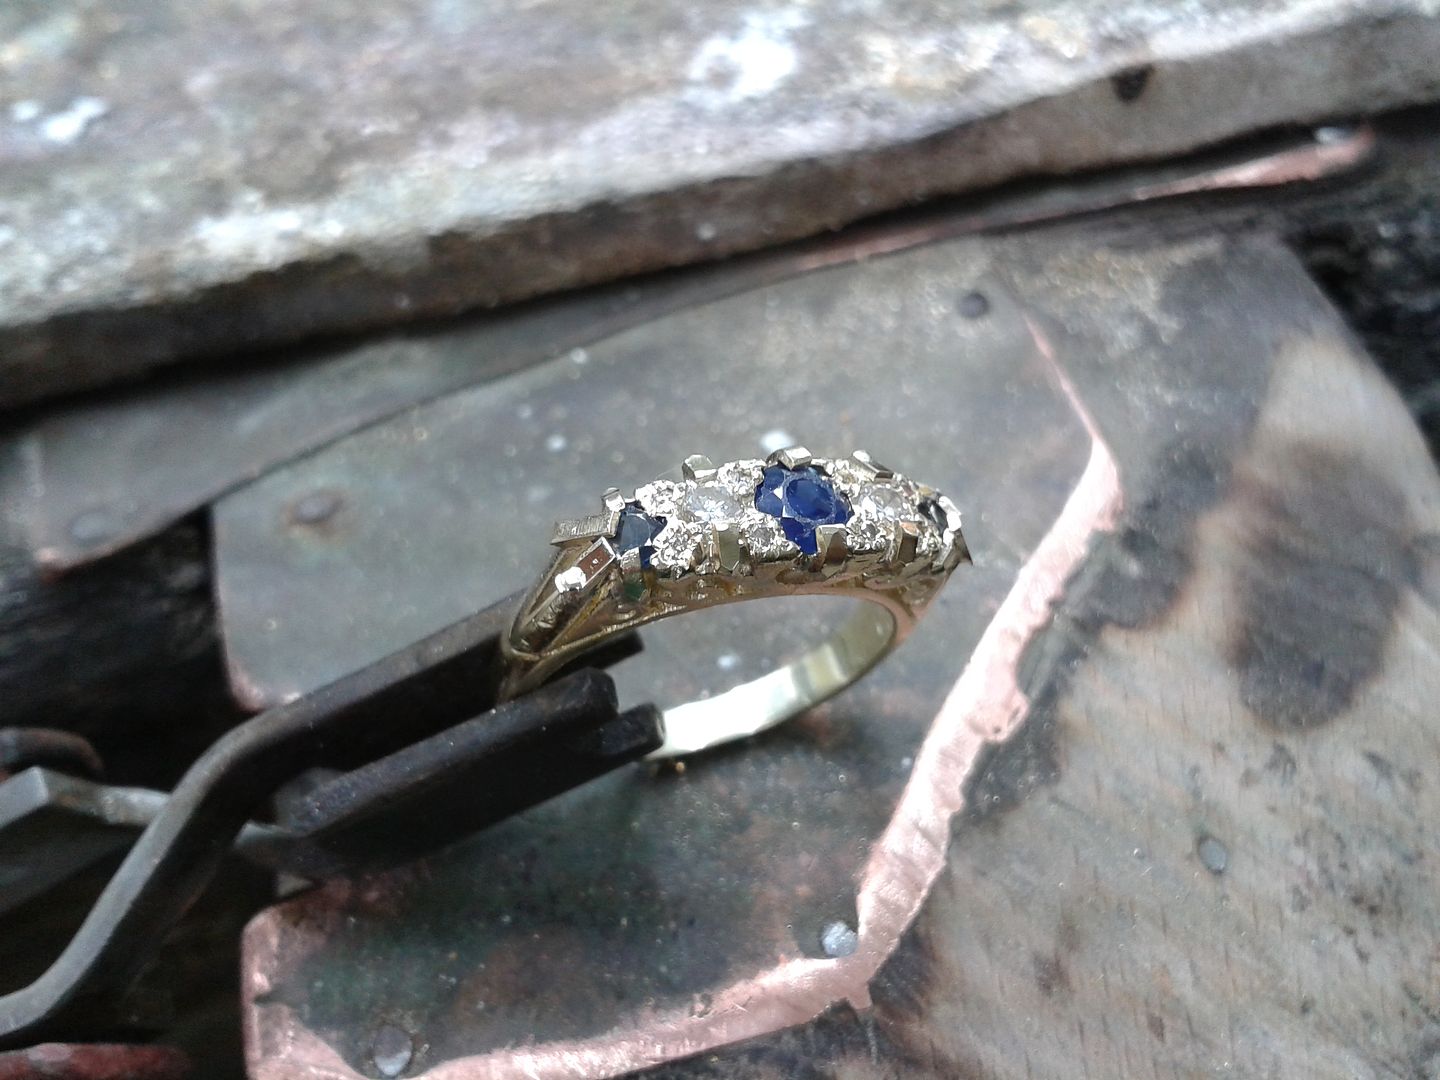
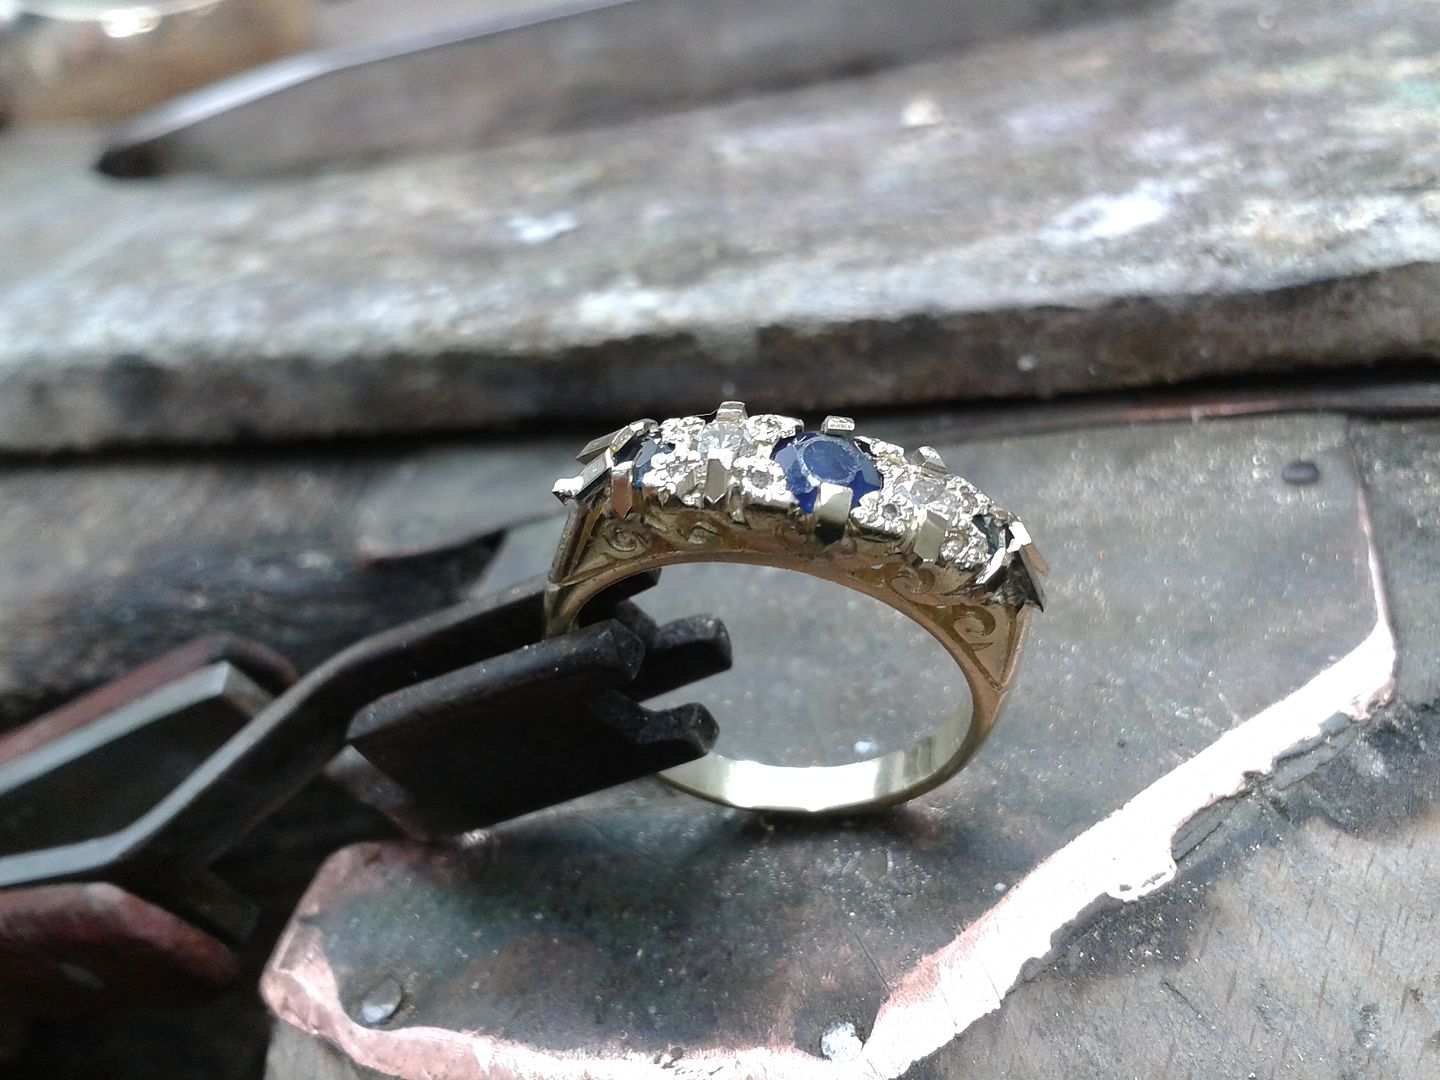
We then give the ring a good polish to give light to all the hard work. It also highlights any areas where we need to do more. In this case we are fine.
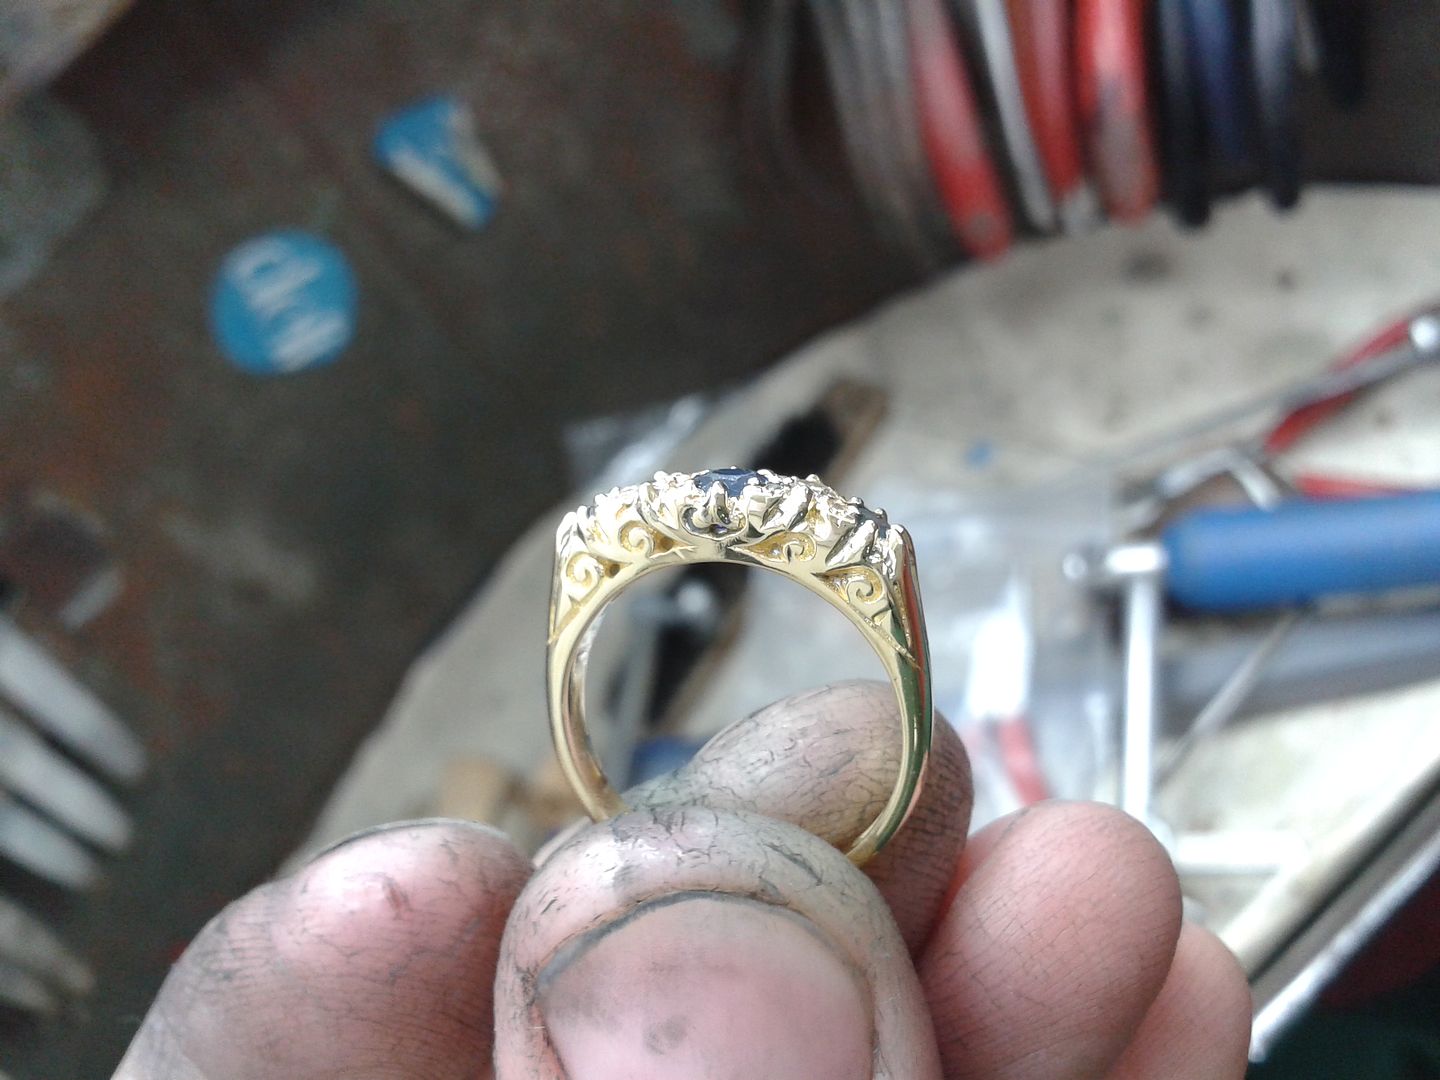
For an added sparkle the customer has opted to have the top of the setting rhodium plated. This gives a platinum white finish to the setting and allows the stones to show their best colours. Masking out the ring for plating:
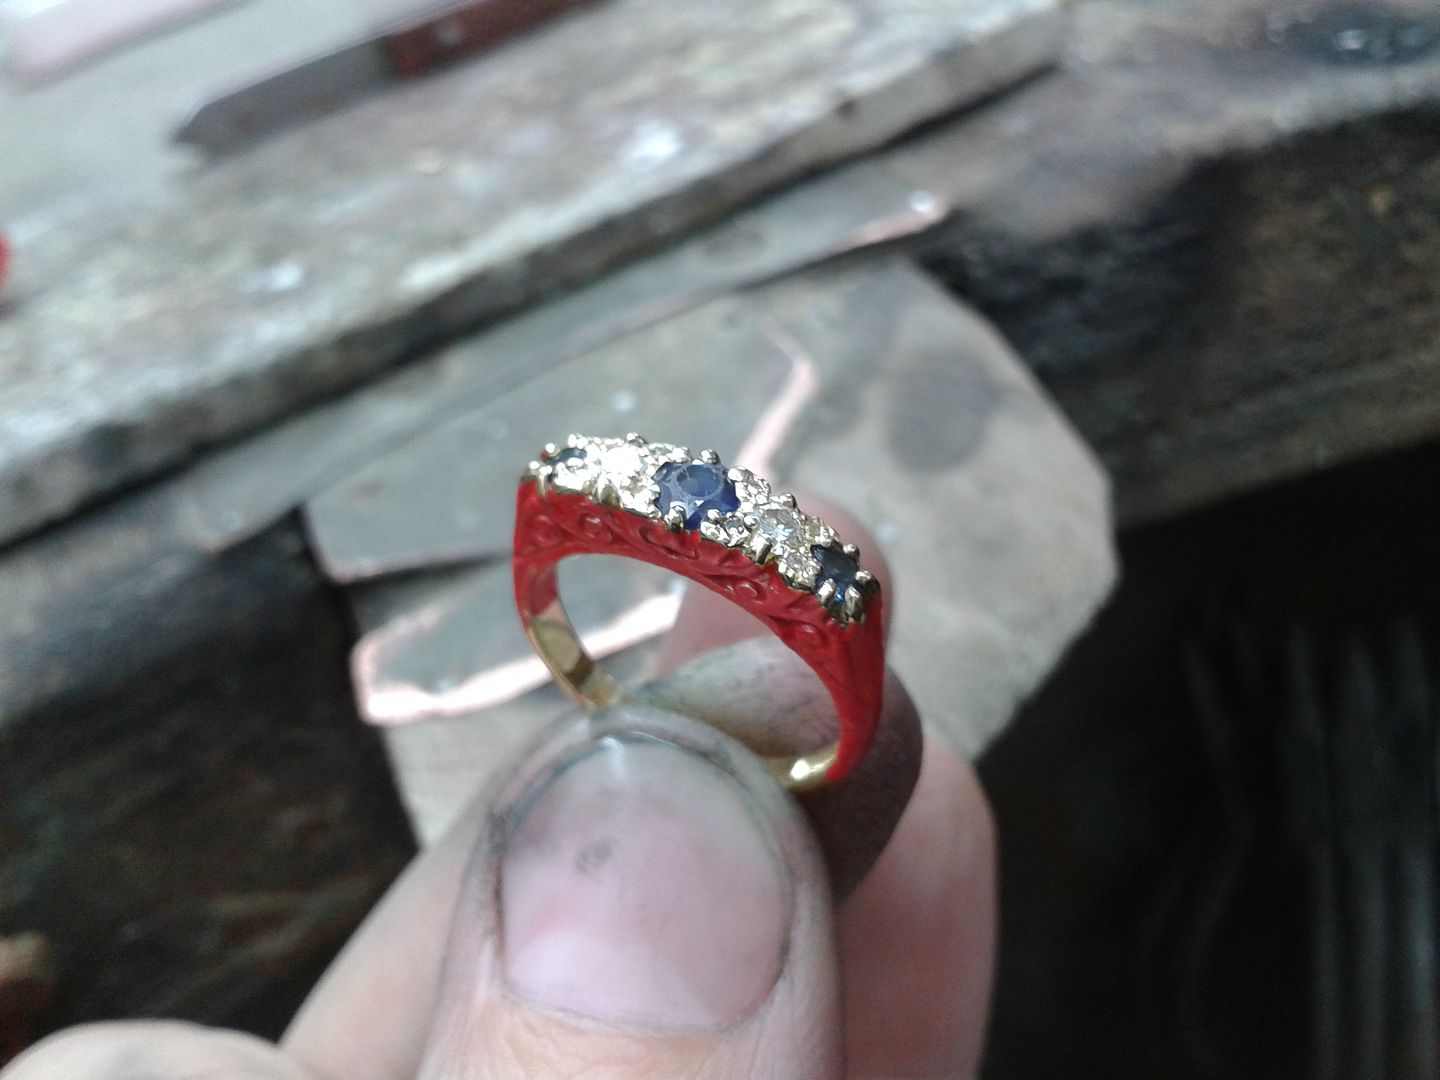
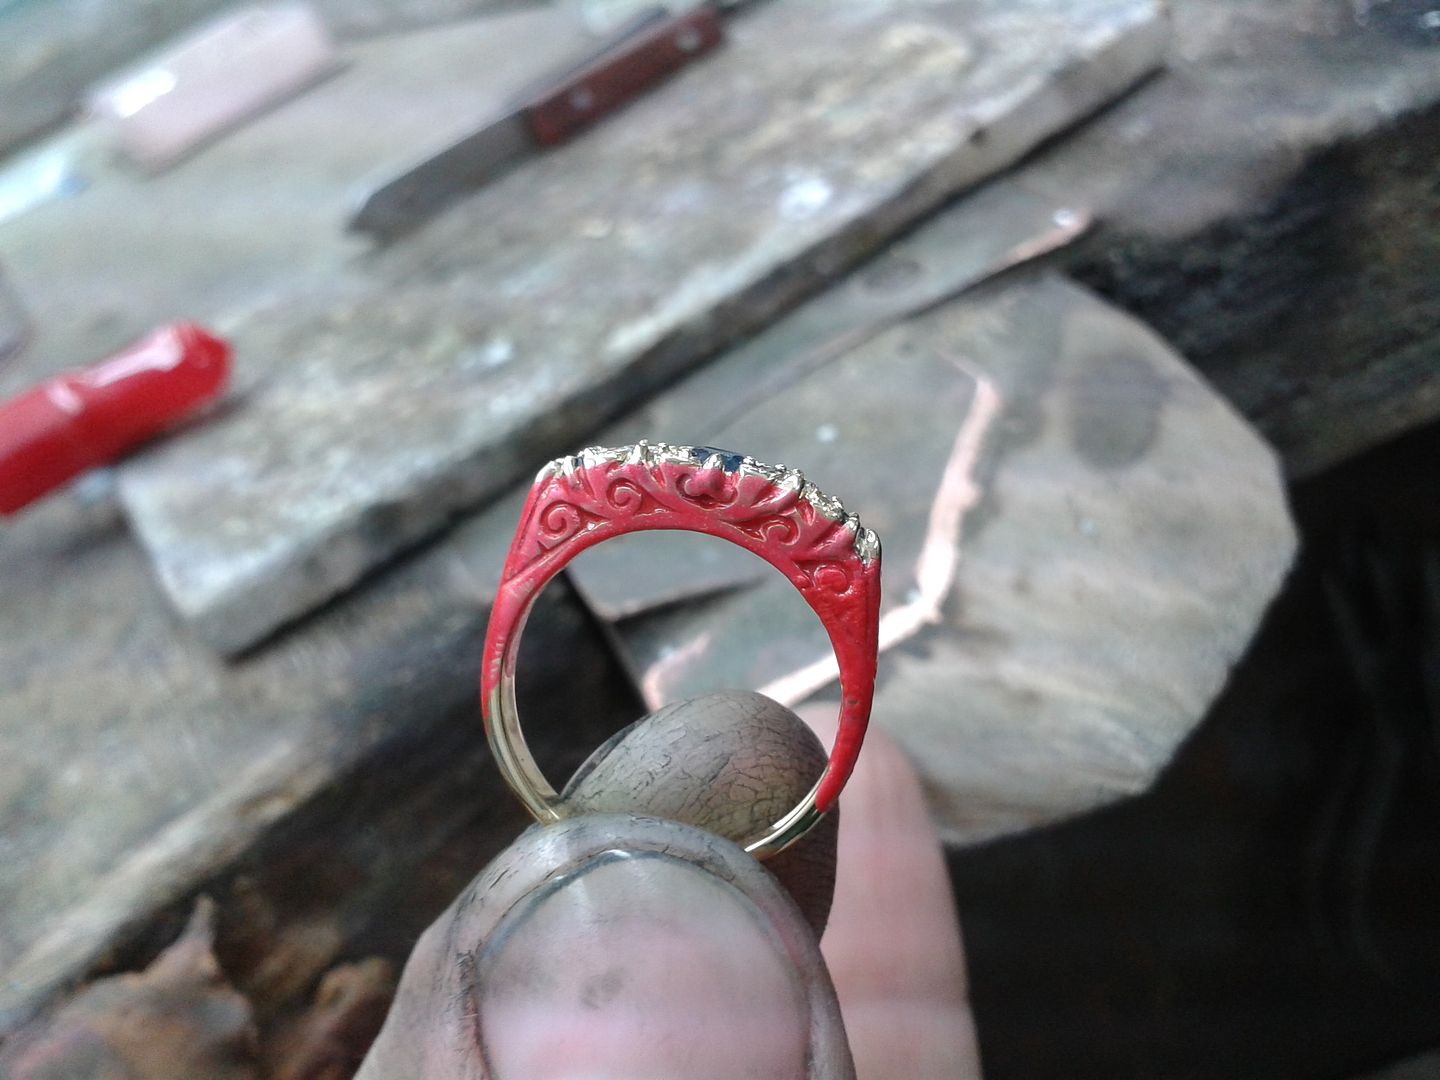
And plated. Sorry about the hair sticking out of the top of the ring. Its from the polishing mop and was removed afterward:
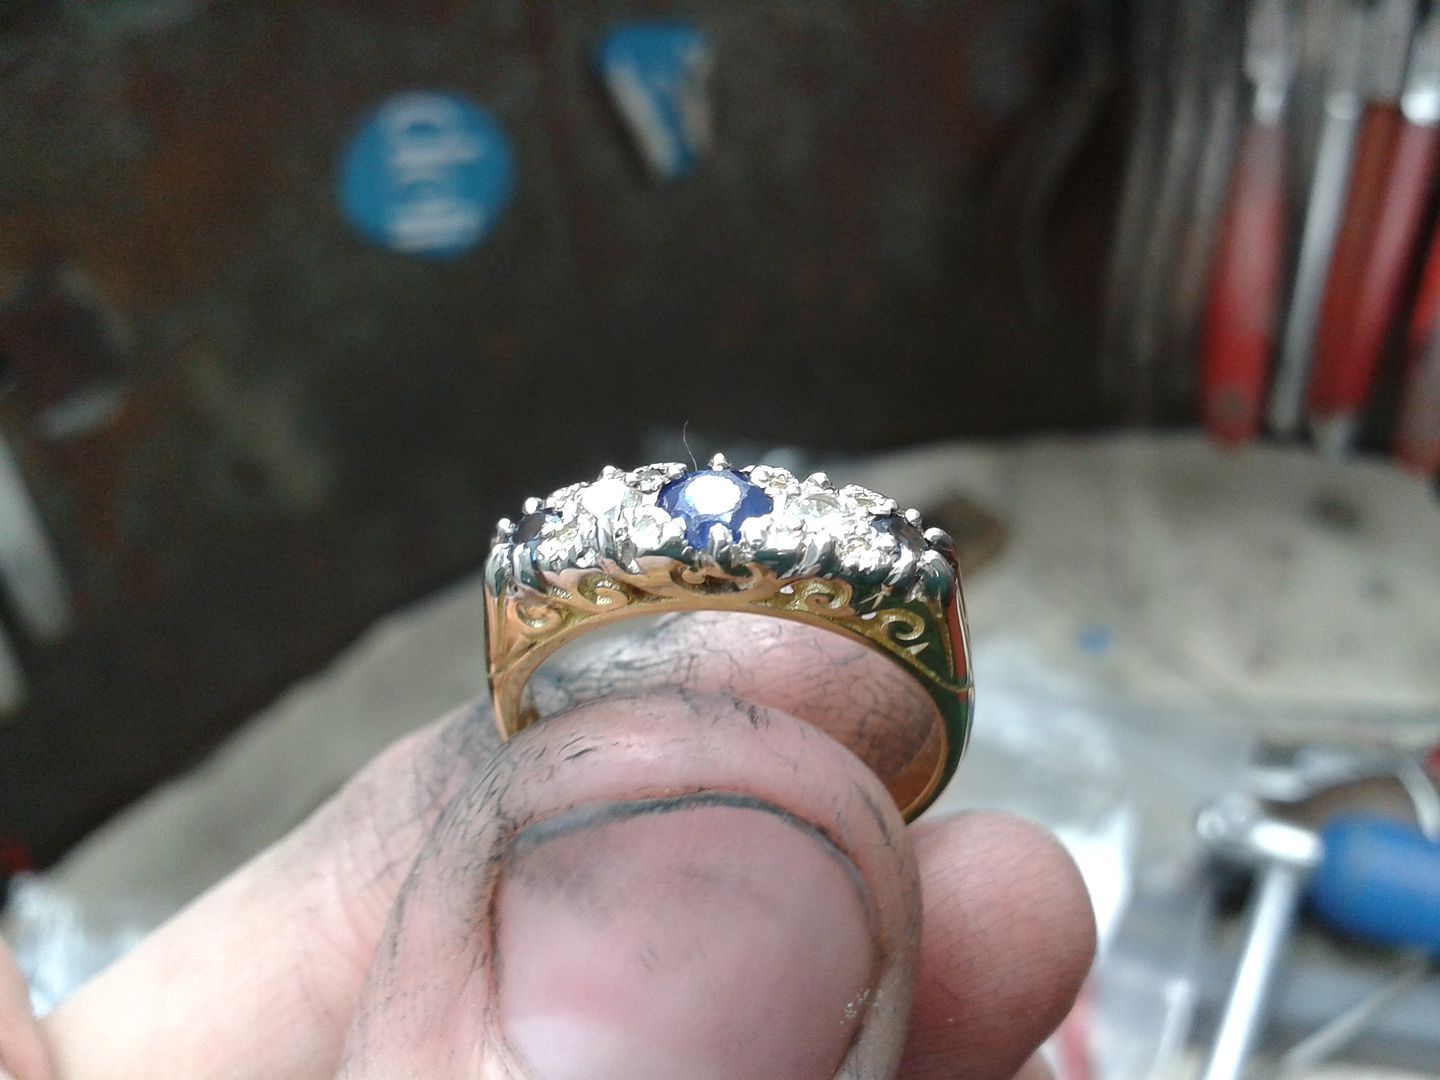
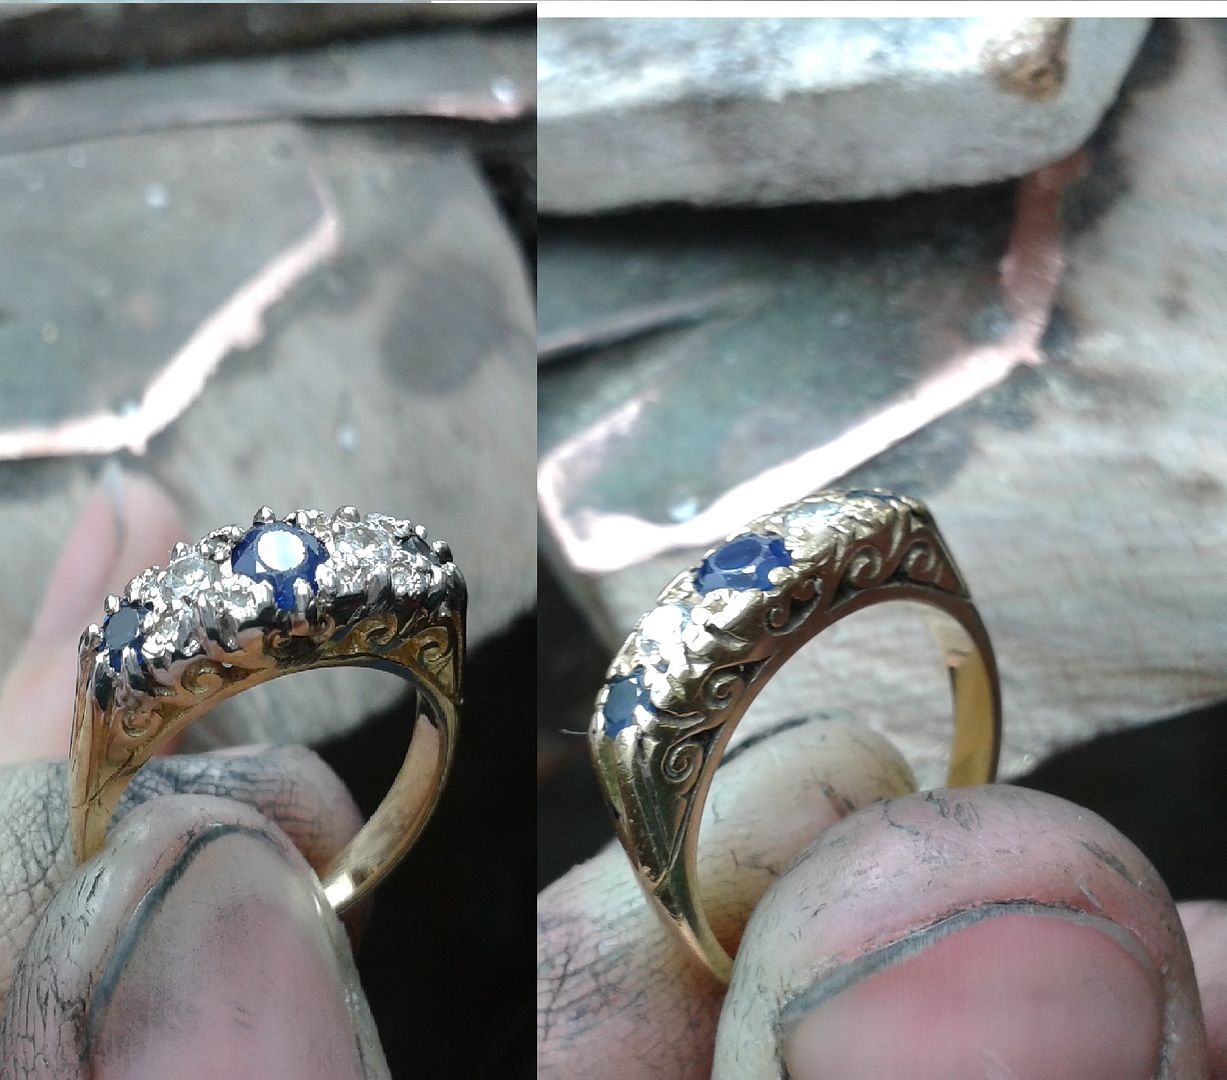
The phone pics don't do it justice but it was a really successful job.
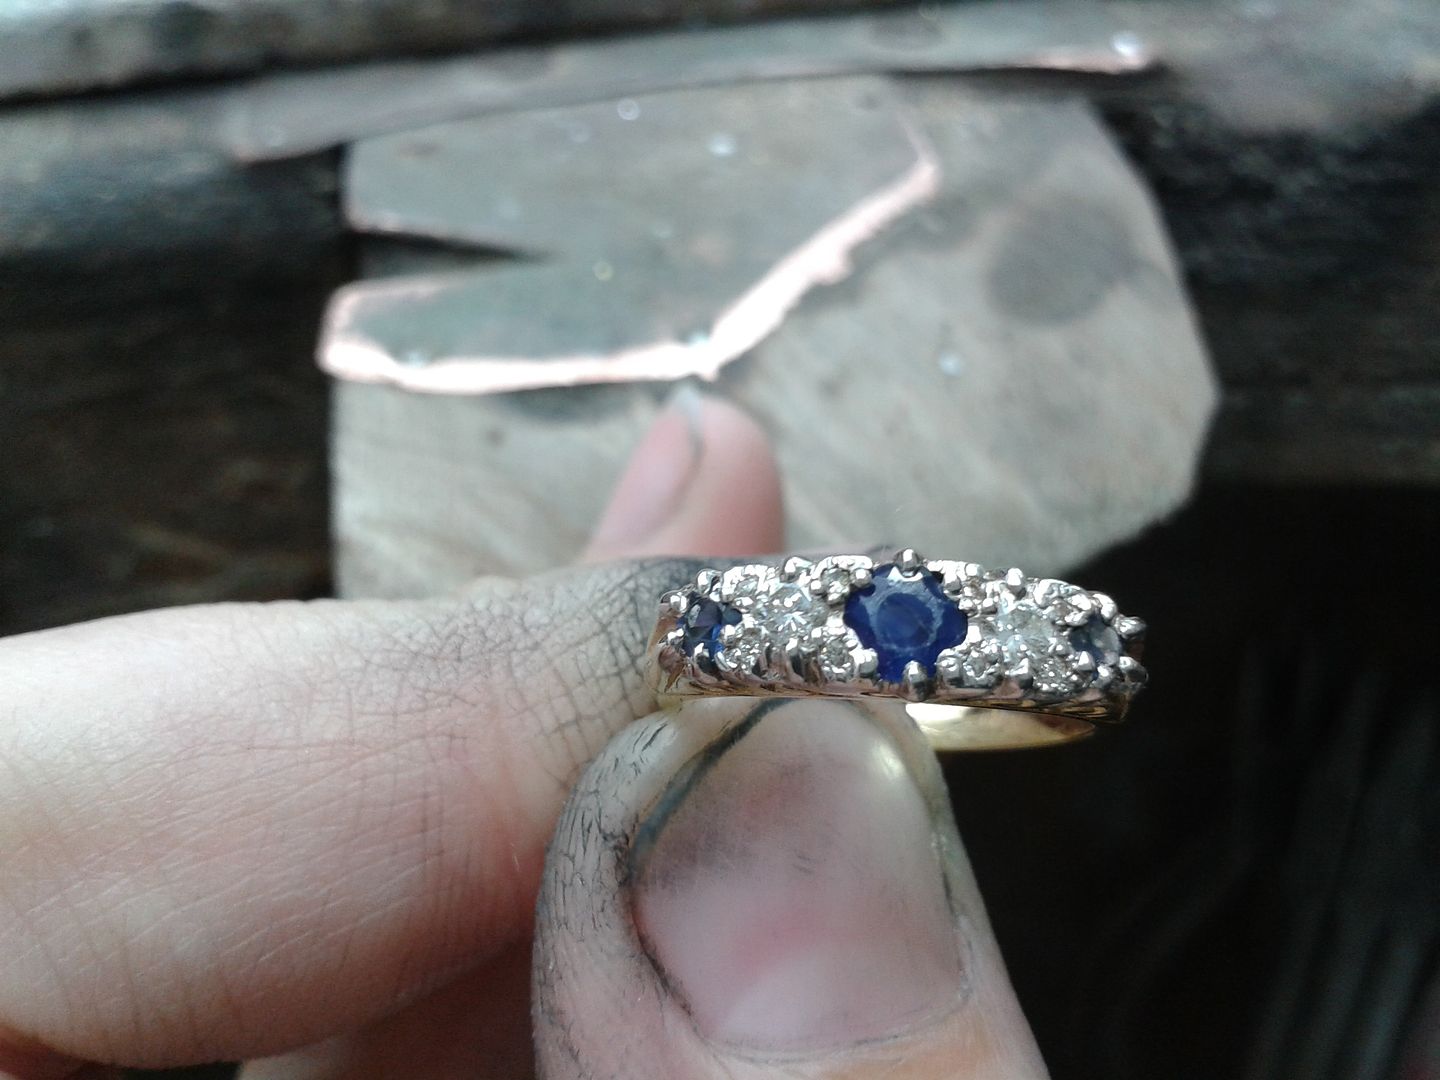
Before and after:
Eddie
Its not the one I'd originally planned on, owing to it being a very busy month and not having time to photograph and do the work (cannot complain at being busy) and me suffering from a fairly draining / all-encompassing stomach issue that is currently under investigation (can complain), but it does demonstrate the processes involved.
Take one pretty worn out and old sapphire and diamond ring. Its a very old fashioned item and has a hand carved construction that we have to maintain.

Note the 8 x missing small diamonds from between the main stones. We will replace these as part of the process:

You can see from the picture here the condition of the sapphires. They are pretty worn and abraded. In some circumstances we'd have these removed and replaced or re-polished by a lapidary but the customer wants to maintain the 'used' look.... so they stay.

So, first job is to get the missing diamonds back in place. Here i have drilled the 8 x settings ready to take the new stones. They are only very small but do accent the other stones pretty well.


Apologies for no 'setting' pic but this is the 8 diamonds now set and ready for other work to start.


The next thing to do is to remove the old claws that hold the sapphires and larger diamonds. Look closely and you can see where ive filed the old ones down to the base:


These are claws. They are cut in varying sizes (job dependant) from solid 18ct yellow gold bar that we roll down (without annealing) to the required thickness. We dont anneal the claw material before cutting as it makes it easier to cut. It'll soften up nicely when i solder it on. Same process for white claws, except we use rolled down 18ct white bar.


Starting on one side i solder the 5 main structural claws that hold in the sapphires and diamonds. There are 2 more on each end that i'll do once all the stones are secure enough. Note that we are maintaining the original claw pattern as per the sides.

Other side filed down to the bases. Point to note: The diamonds are protected from the heat by applying borax. The sapphires dont respond well to borax and are easily damaged by the borax corrosive properties, leaving the surface cloudy and damaged. So long as the sapphires don't take direct heat they cope well with high temperatures. This is why claw work can be so tricky. Knowing your stones and getting the heat right.

5 more claws applied and in place:

The 10 claws are then pressed over the sapphires and diamonds and then cut down in length to keep them out of the way of further work. Note the 2 other claws on each end that still need to be replaced.


2 x end claws filed down:

2 x new claws applied: These end ones are actually quite tricky to keep in place. You get one down ok and then because of the proximity to the next one it can move because of the heat. Practice practice.

And the other end done too:


The next phase is to shape the main claws. Here you can see the sides roughly filed and profiled to shape:


And the tops in a rough shape:


Its difficult to see in the following pics but the most tricky bit of the process is still to come. We have to solder tiny claws known as 'grains' around the ring to secure the stones in places where standard claws are not an option. The red dots mark where they will go. The solder we use is a shop recipe.

Here you can see them applied: The phone pics dont help but the grains are all there.


We then give the ring a good polish to give light to all the hard work. It also highlights any areas where we need to do more. In this case we are fine.


For an added sparkle the customer has opted to have the top of the setting rhodium plated. This gives a platinum white finish to the setting and allows the stones to show their best colours. Masking out the ring for plating:


And plated. Sorry about the hair sticking out of the top of the ring. Its from the polishing mop and was removed afterward:

The phone pics don't do it justice but it was a really successful job.


Before and after:

Eddie
Edited by ecain63 on Sunday 29th September 20:45
Apologies again for the delay in getting you an update. Reason is that i was diagnosed with colon cancer last month and its been a bit of a run around with treatments, testing and meetings etc. On the upside I should be ok so im no overly fussed by the diagnosis until somebody tells me otherwise. On the work front ive had to take the odd day off here and there and even when i am in the side effects of the chemo mean what i can do is a bit limited.
That said, here is a little something my very sore hands made on monday:
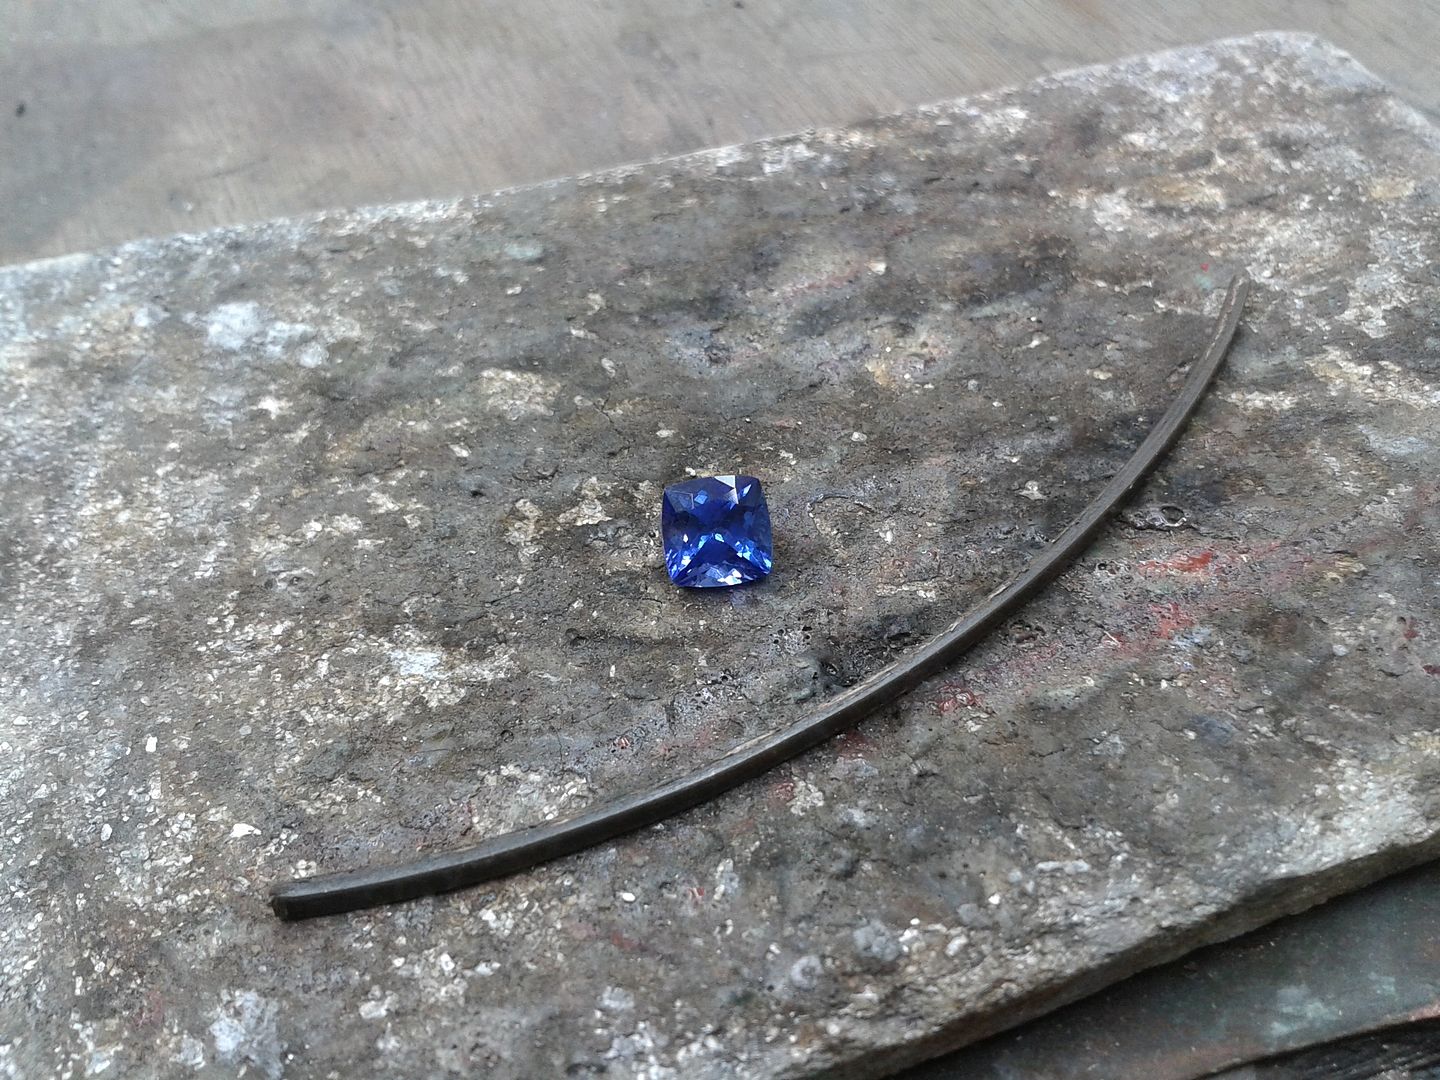
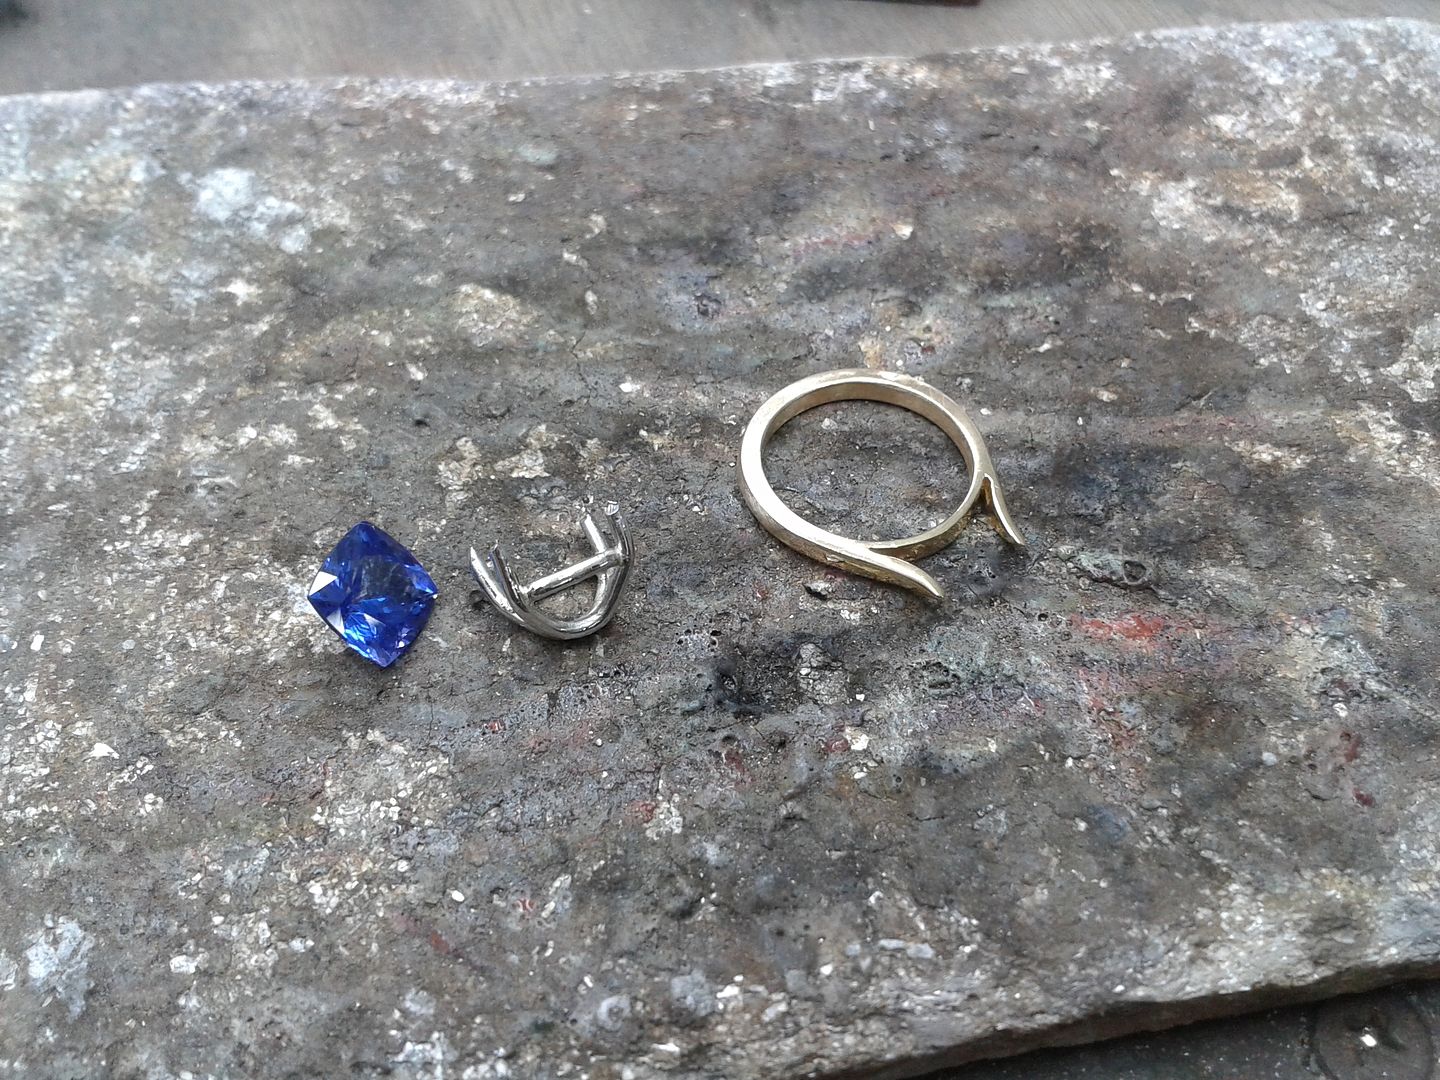
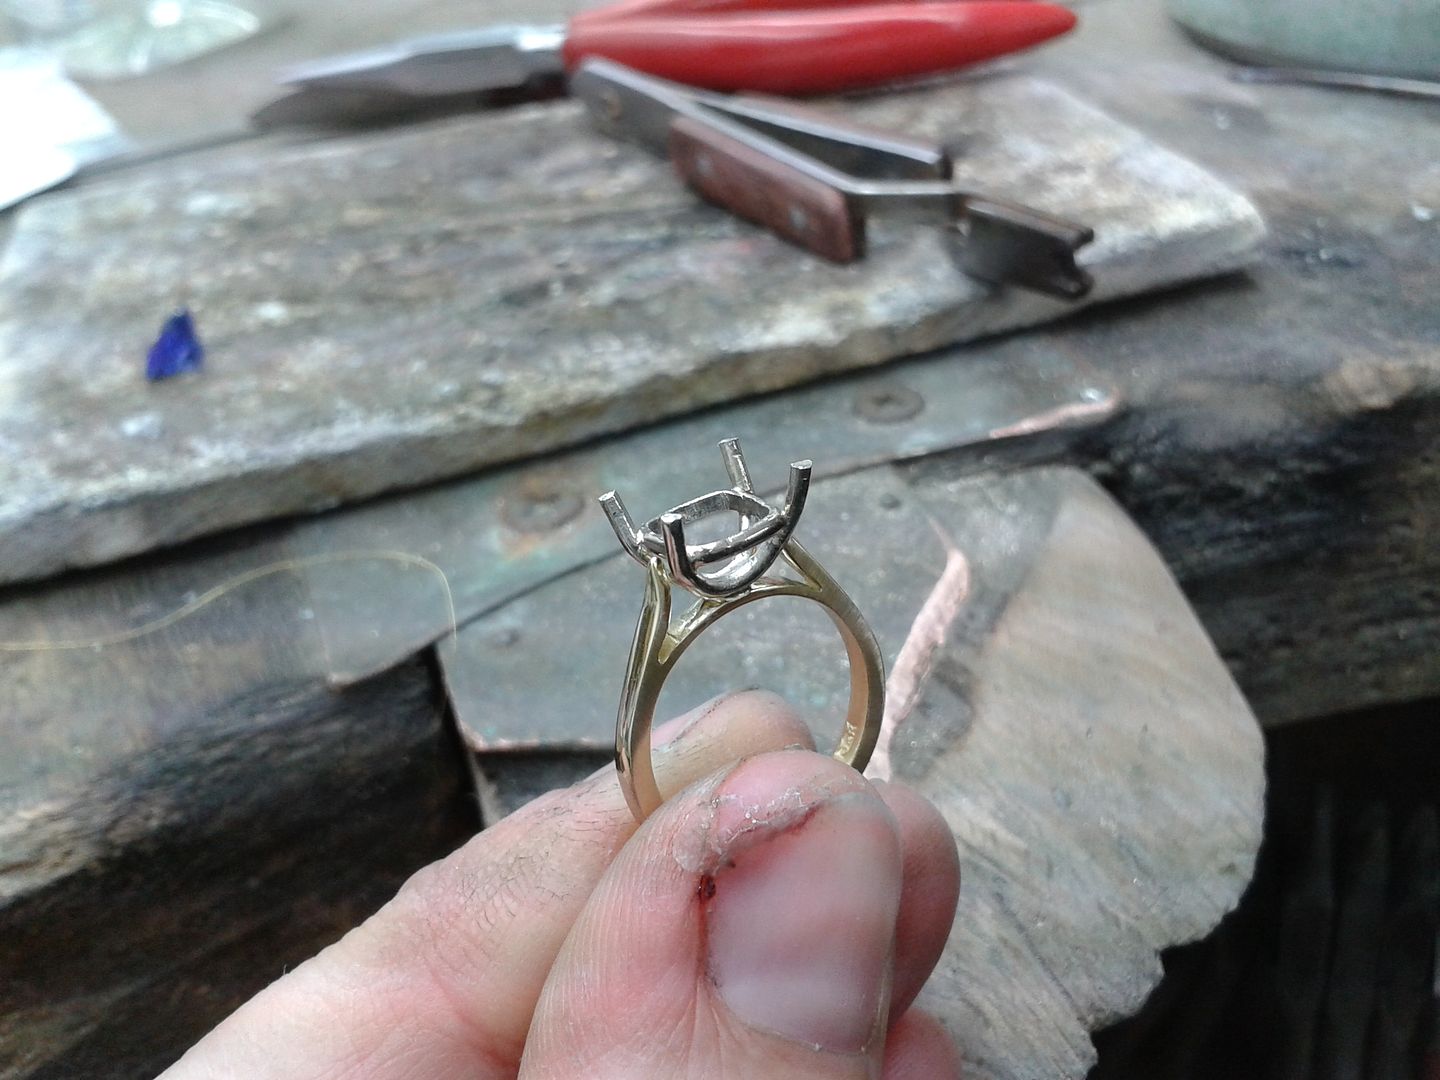
Start with 1 x tanzanite and some of the customers own gold, which we melted down from a couple of inherited wedding bands she had.
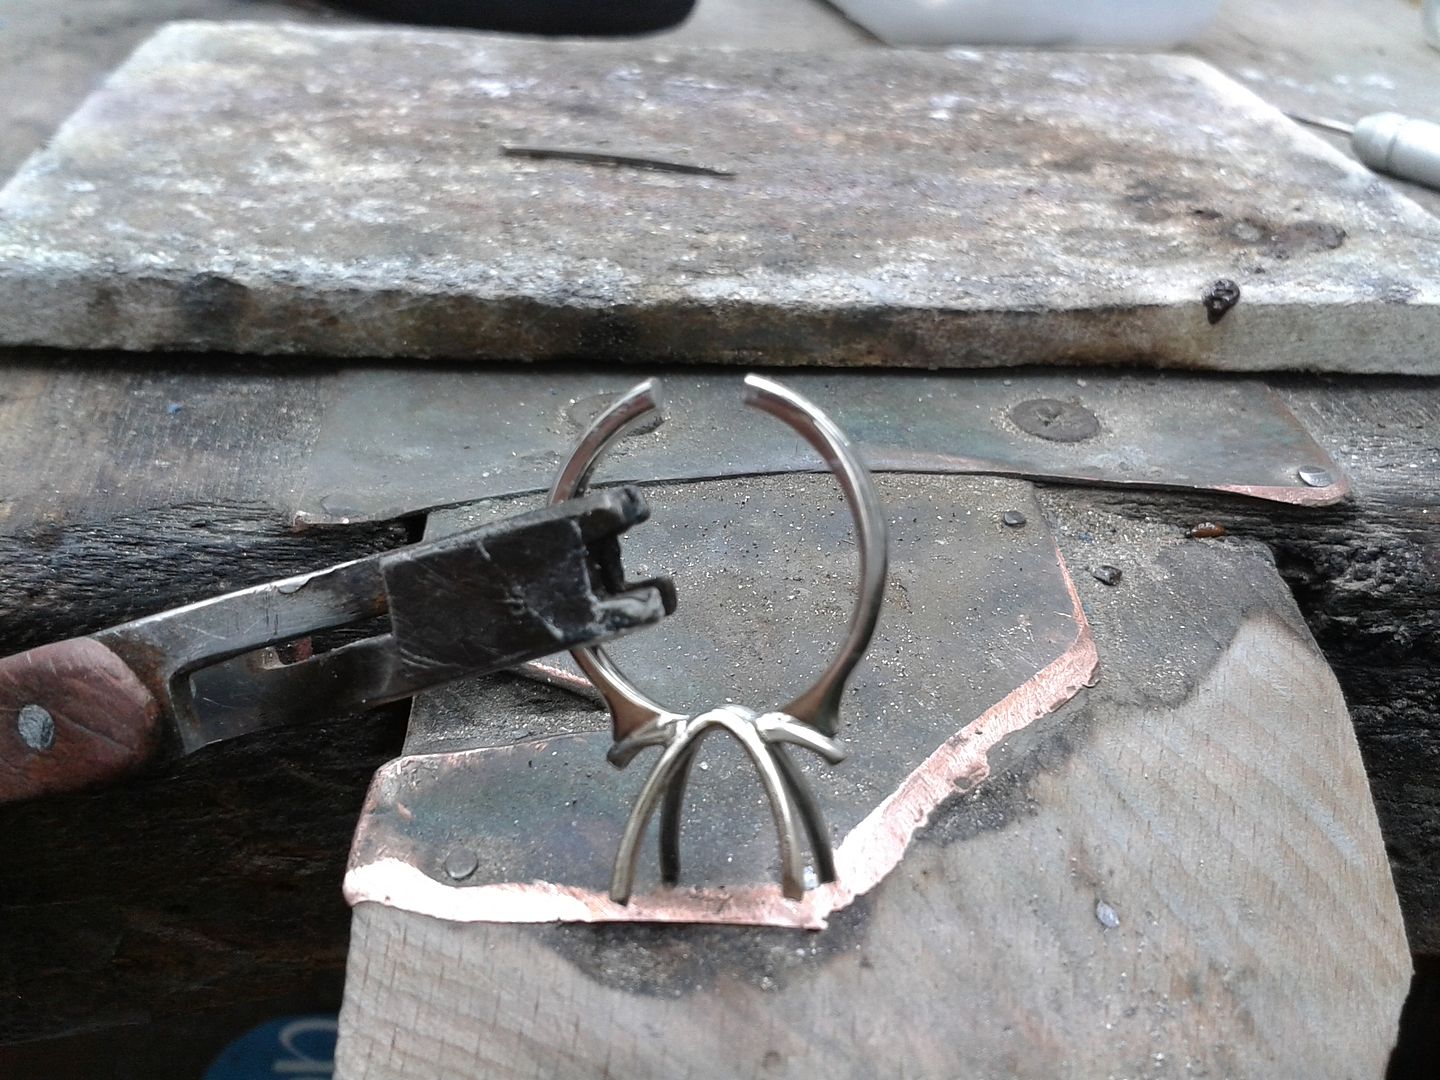
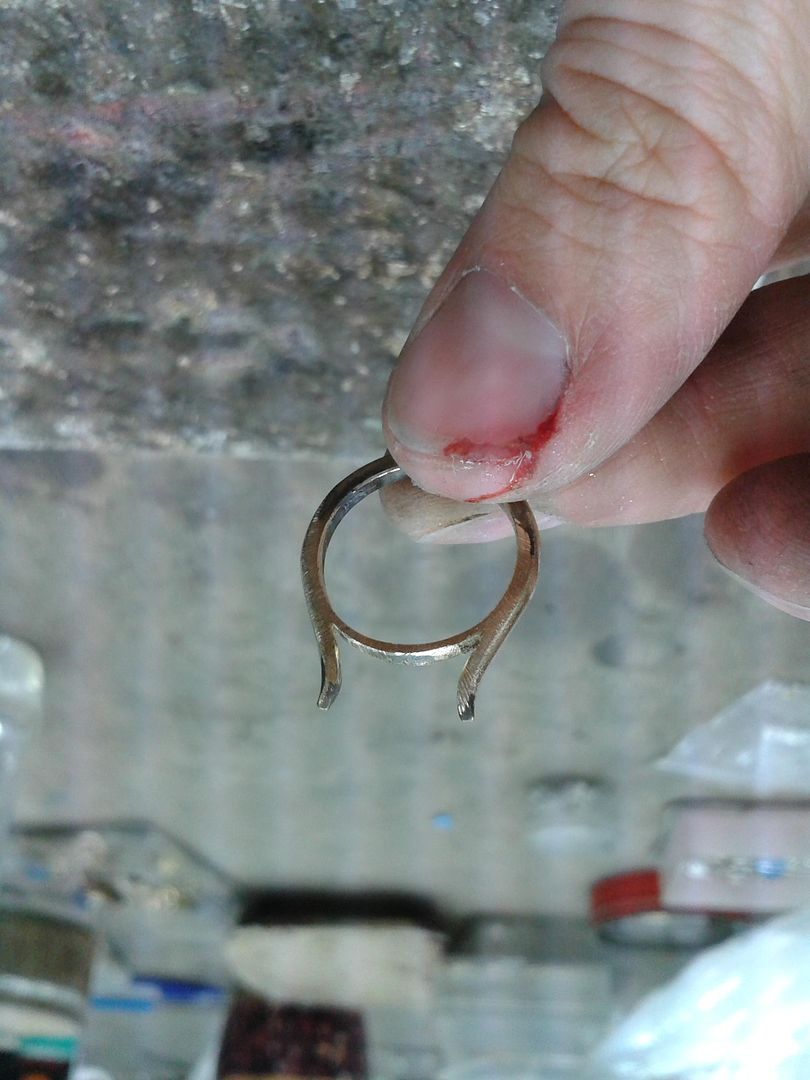
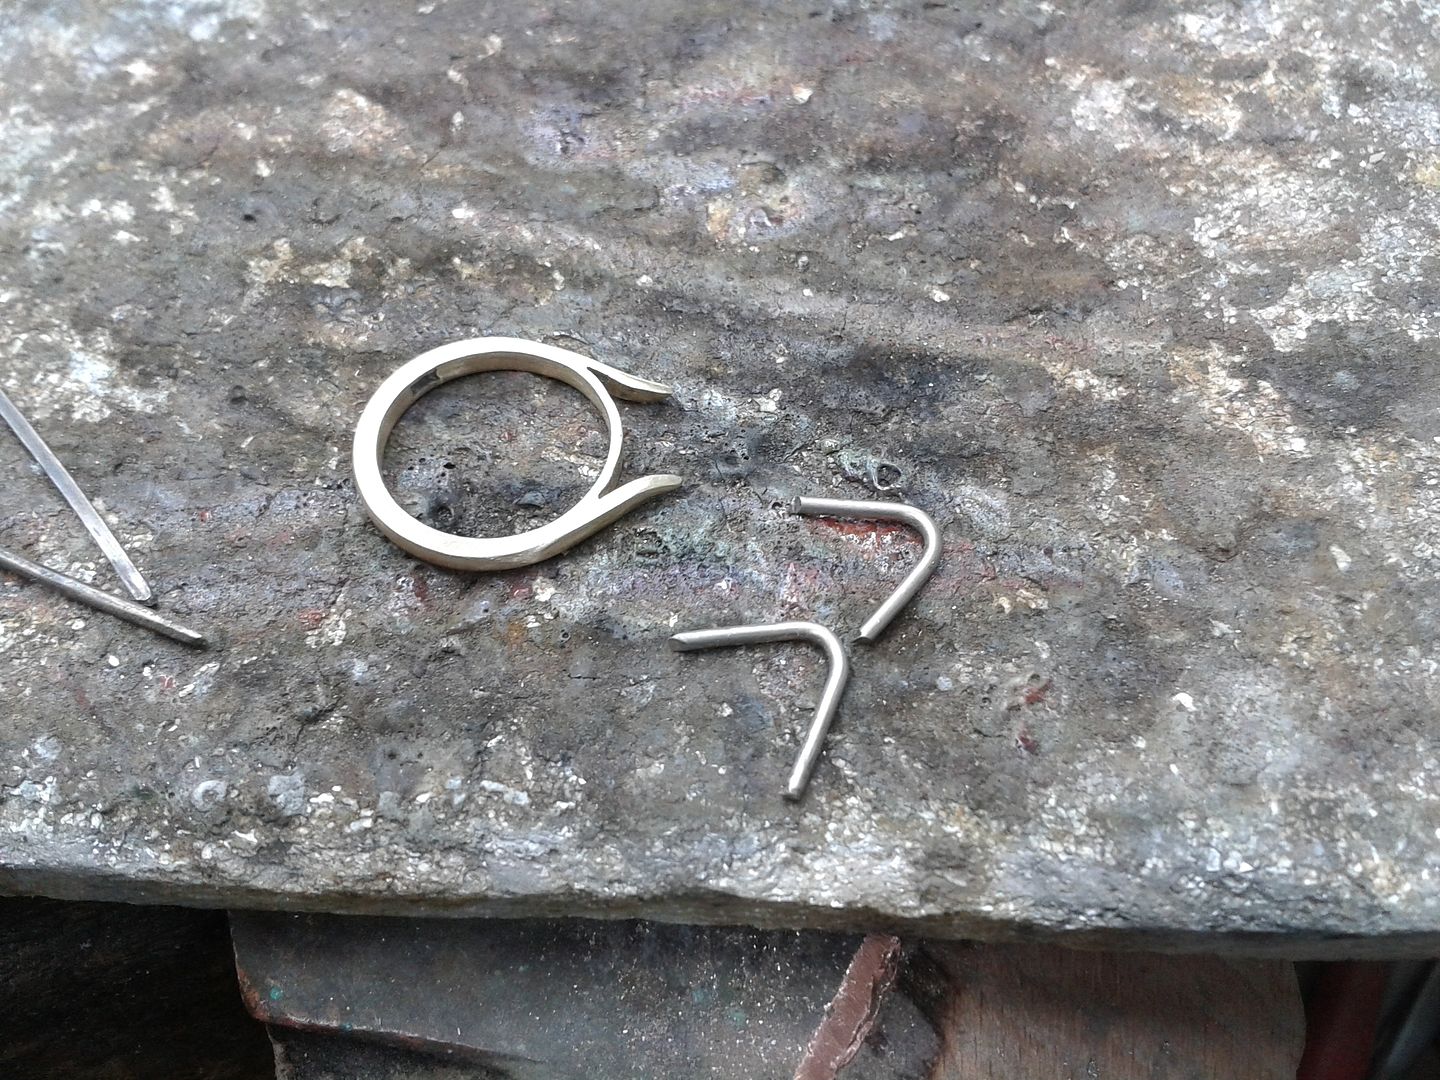
Take the gold bar (2.25mm wide x 1.75mm thick) and make a shank. Note the split shoulders (and finger).
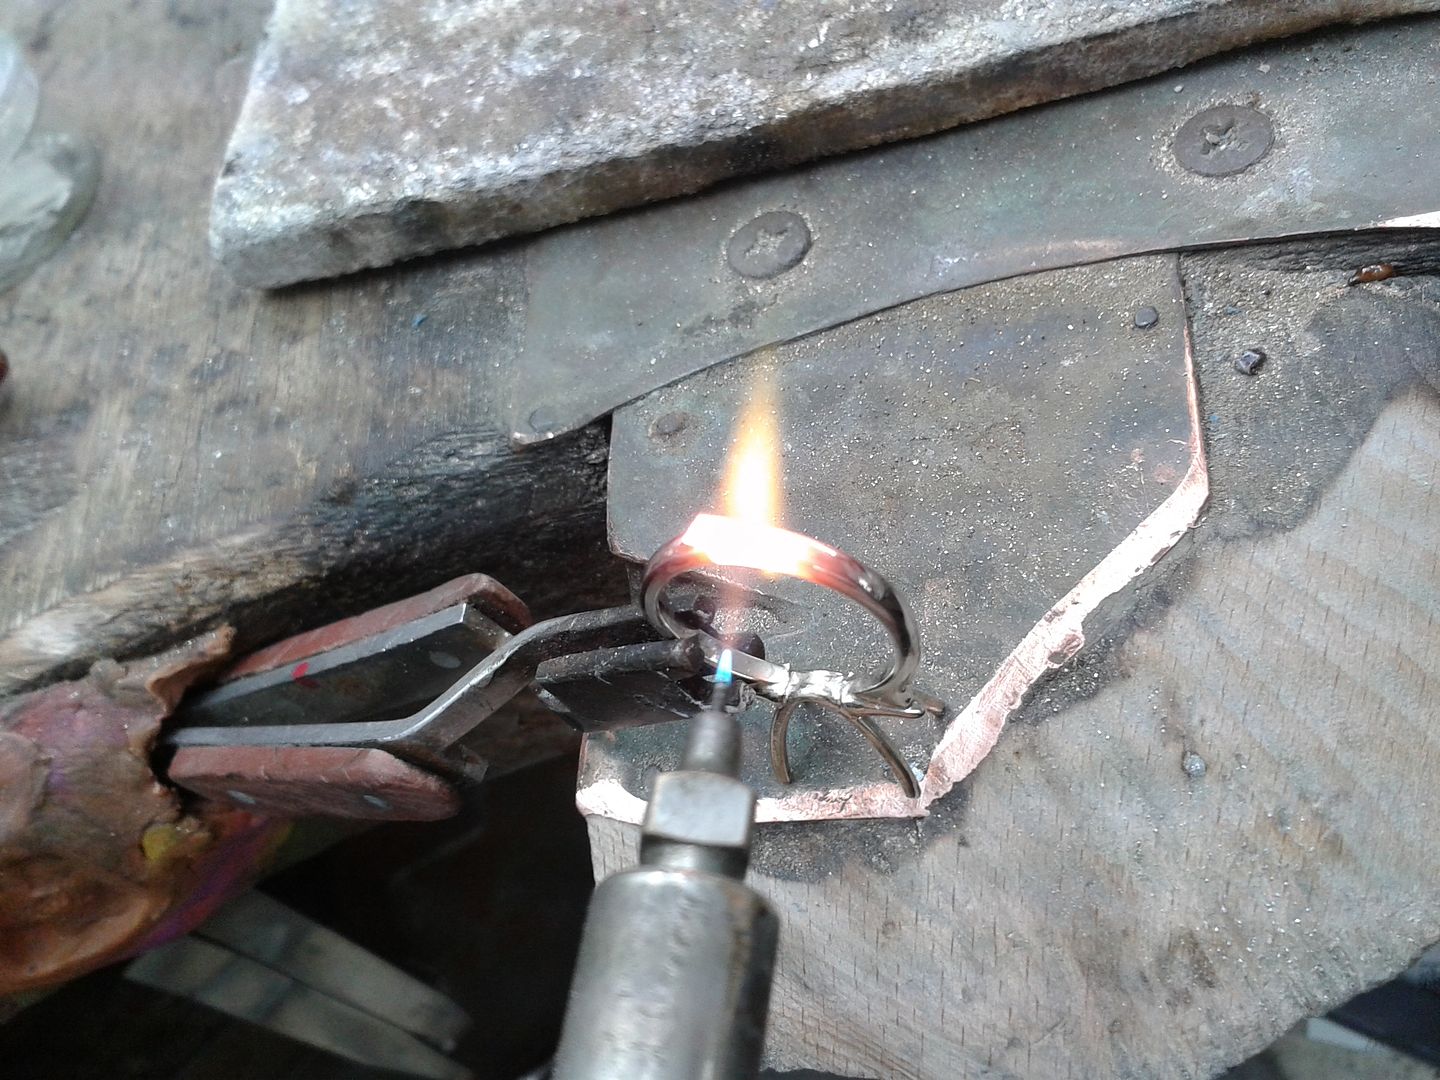
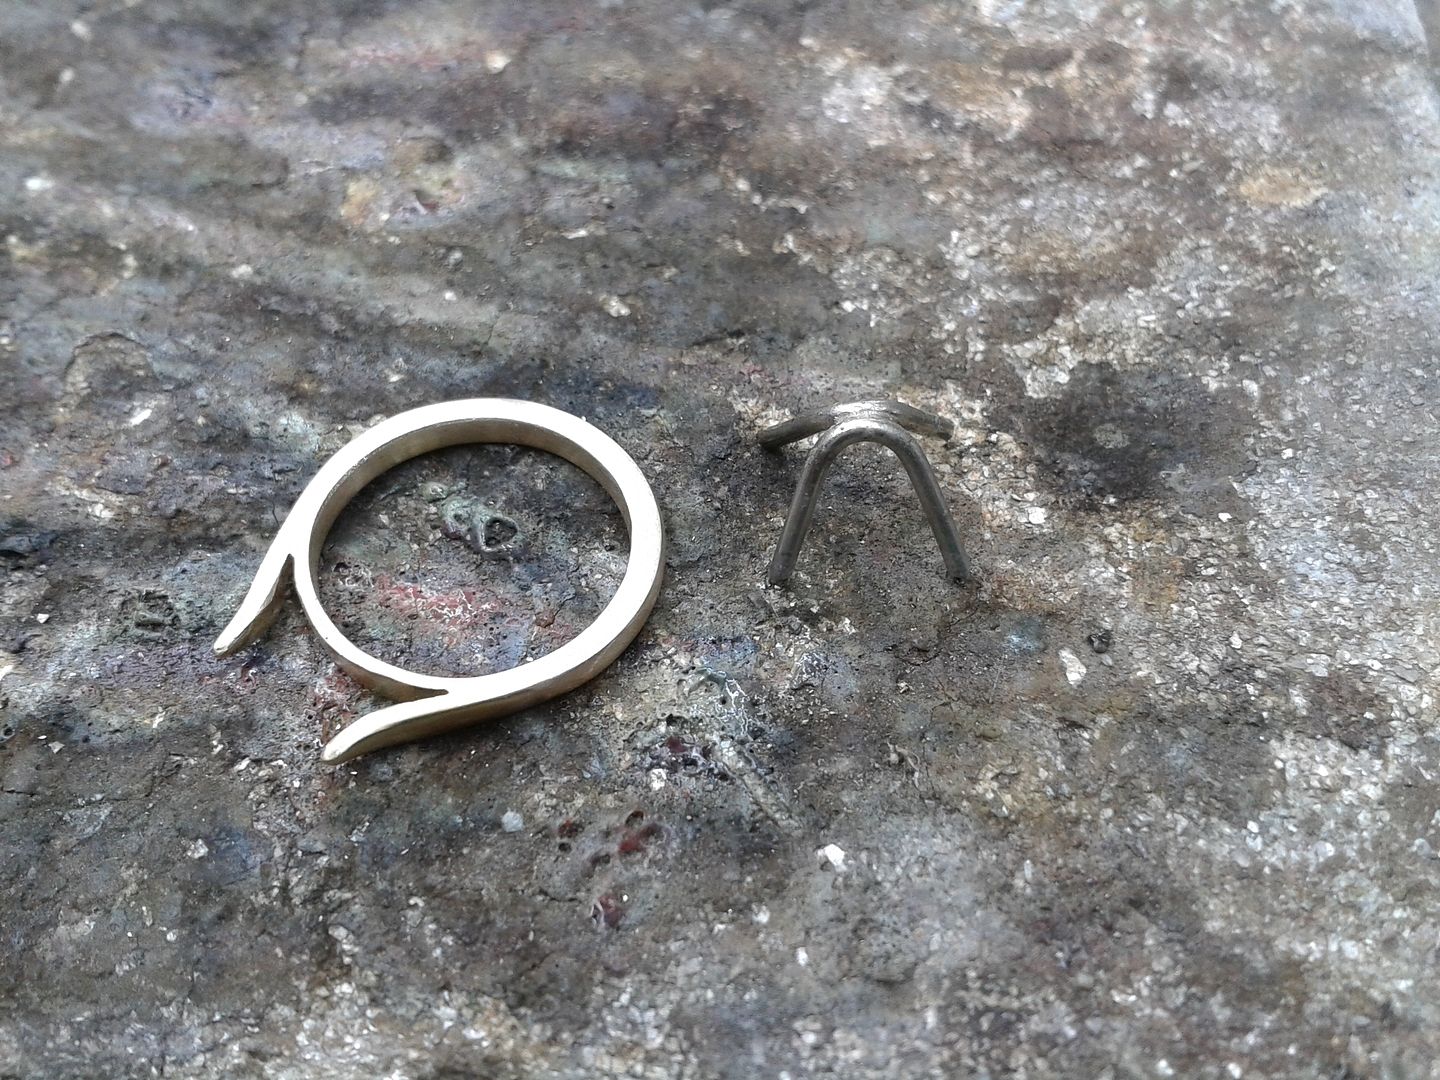
Now the shank is all cleaned up its time to make the setting. I made the setting using platinum wire to give it a lovely white finish. Its nice and soft too which makes it easier when setting such a fragile stone.
Simple setting part done
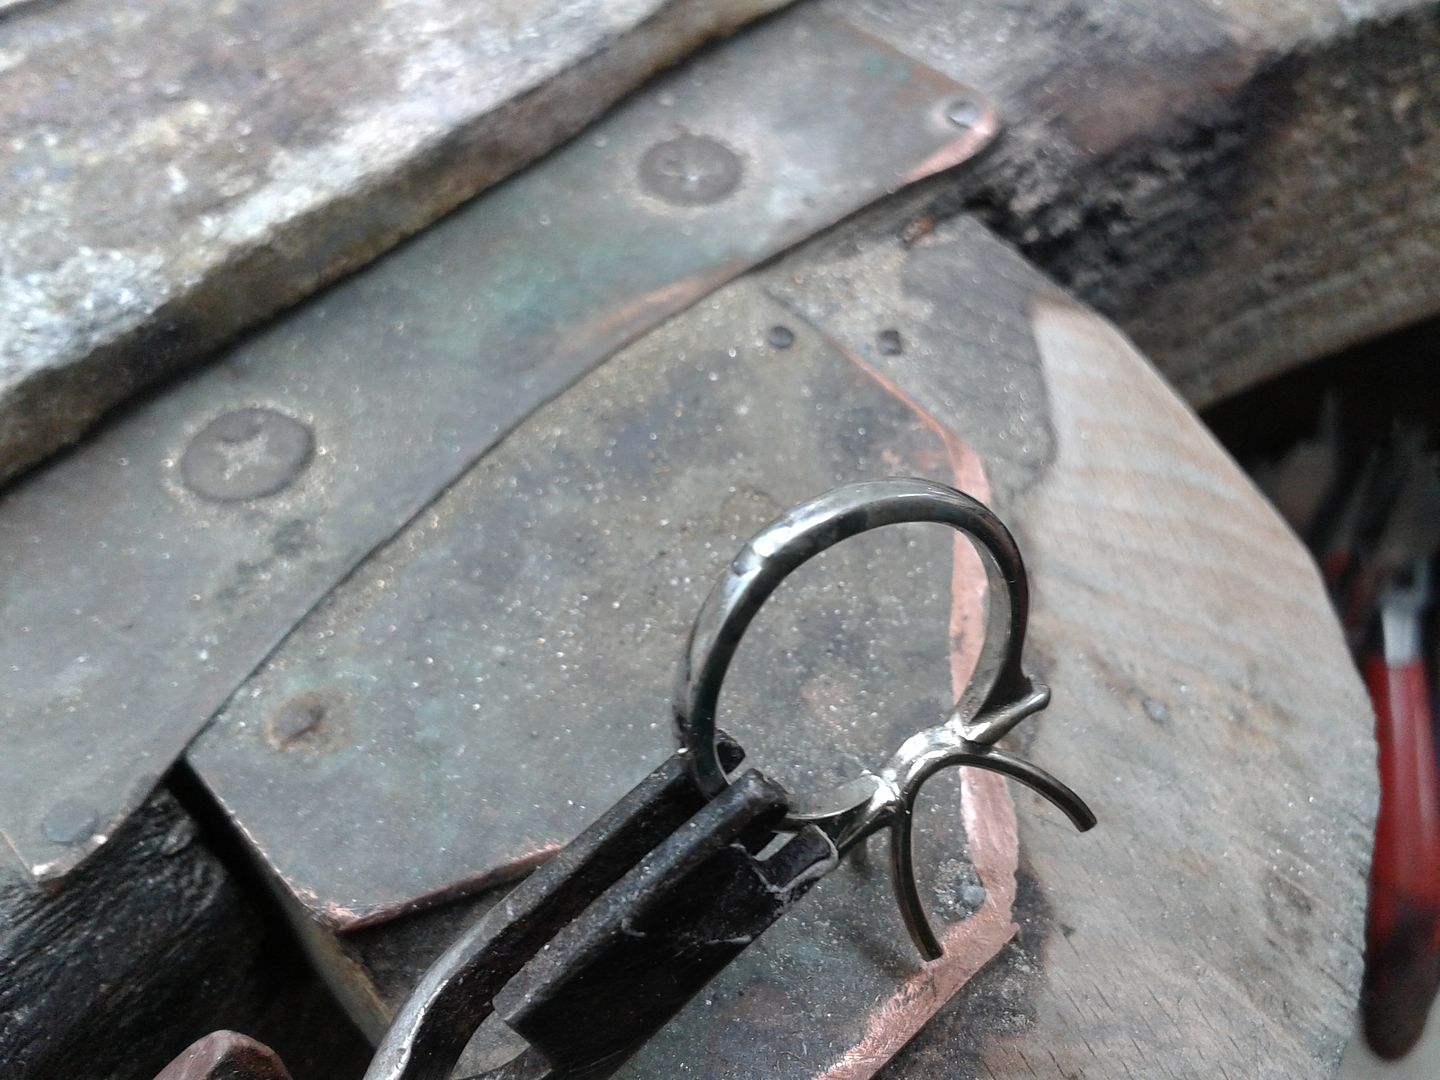
Setting complete, just needs fitting to the shank and finishing off. Note the strengthening brace around the setting.
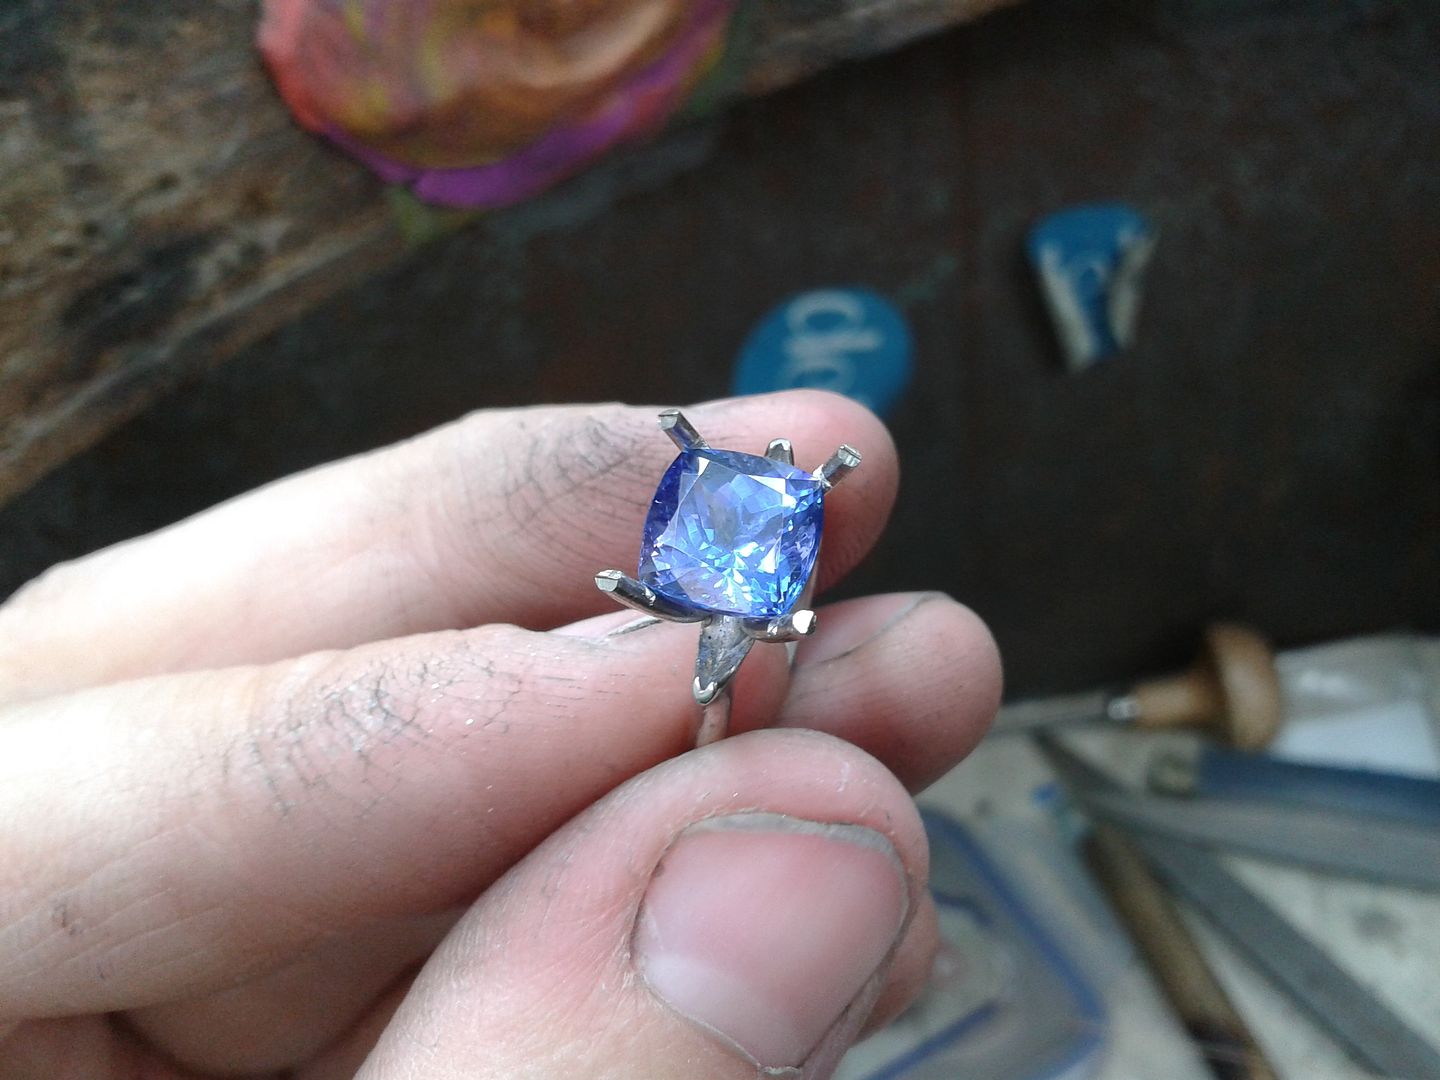
Fully assembled. Just need to set the stone.
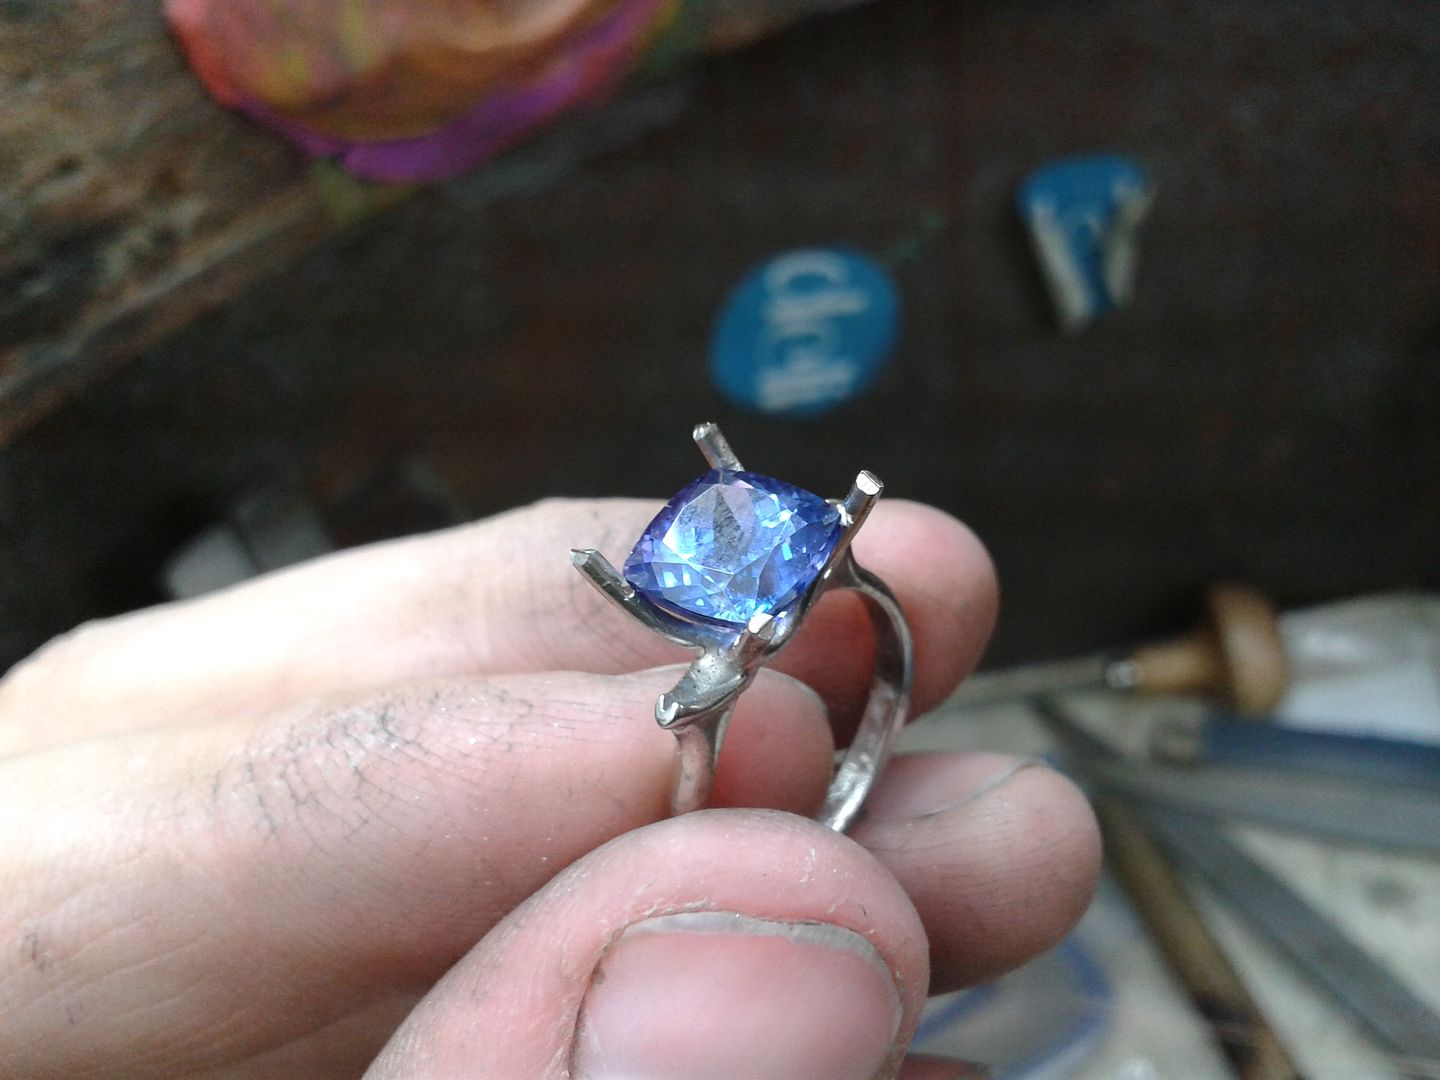
And all done:
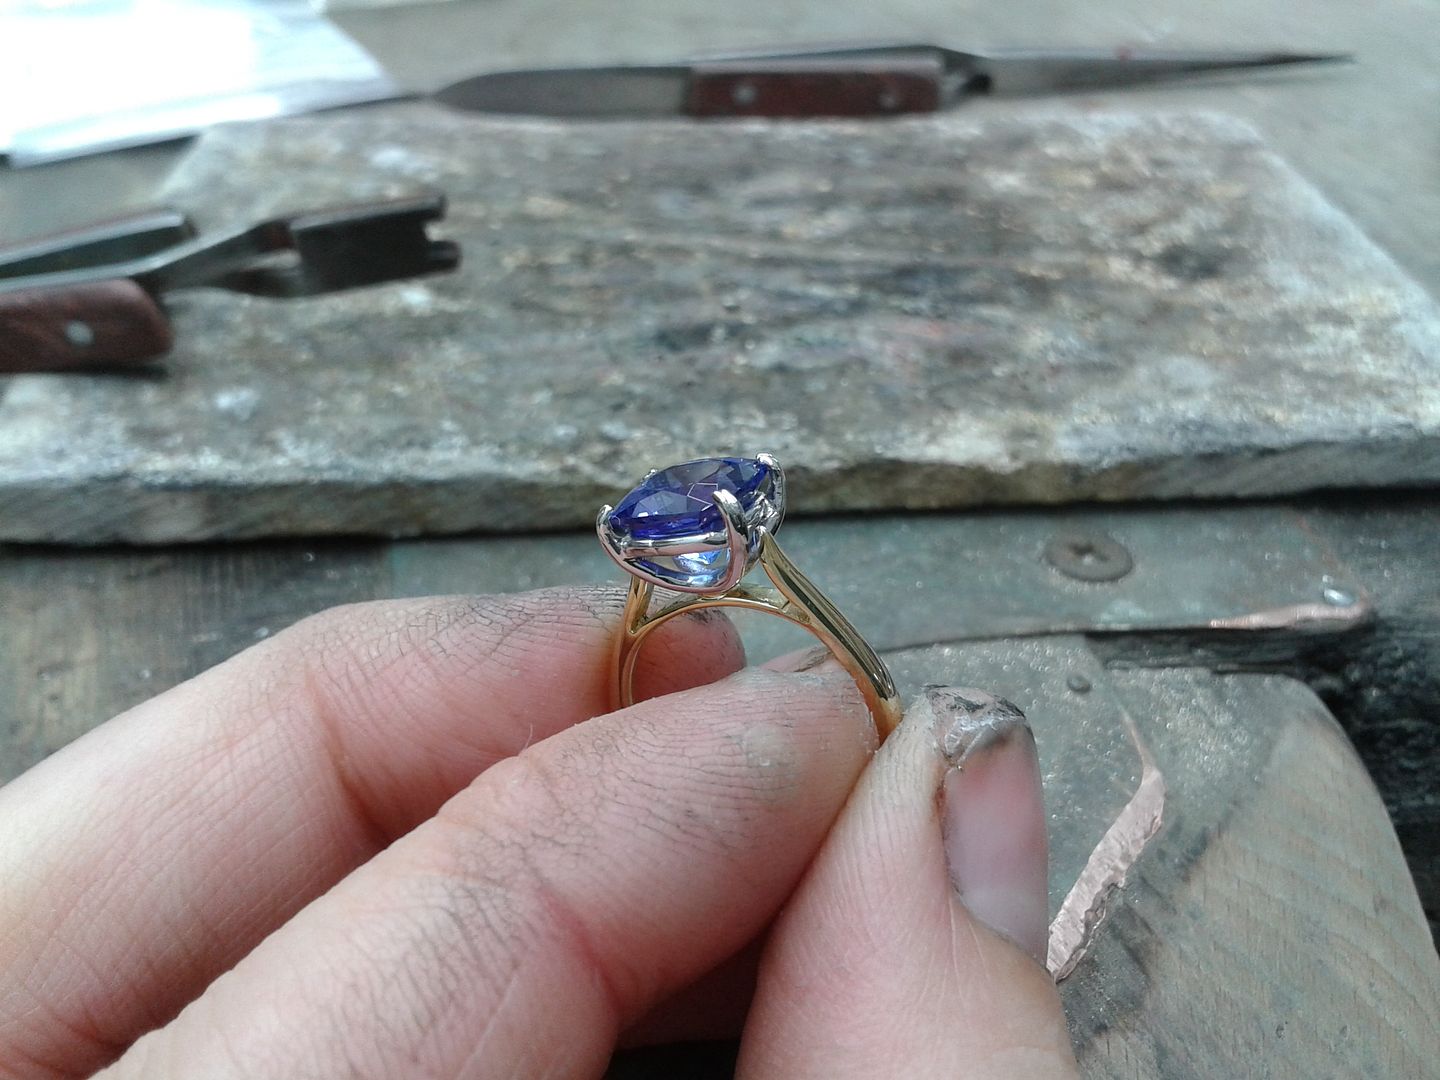
Another happy customer.........
More next month i hope.
Oh, here's a couple of other things i made between chemo treatments:
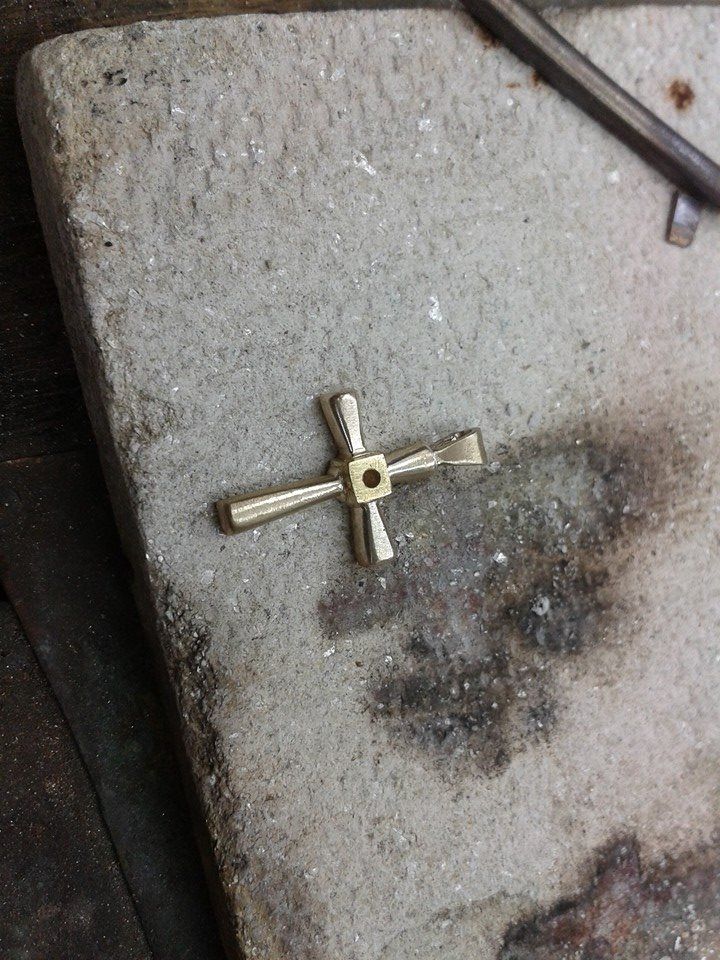
Made this cross to replace an item stolen from a customer.
Photo from customers insurance docs: 9ct and emerald
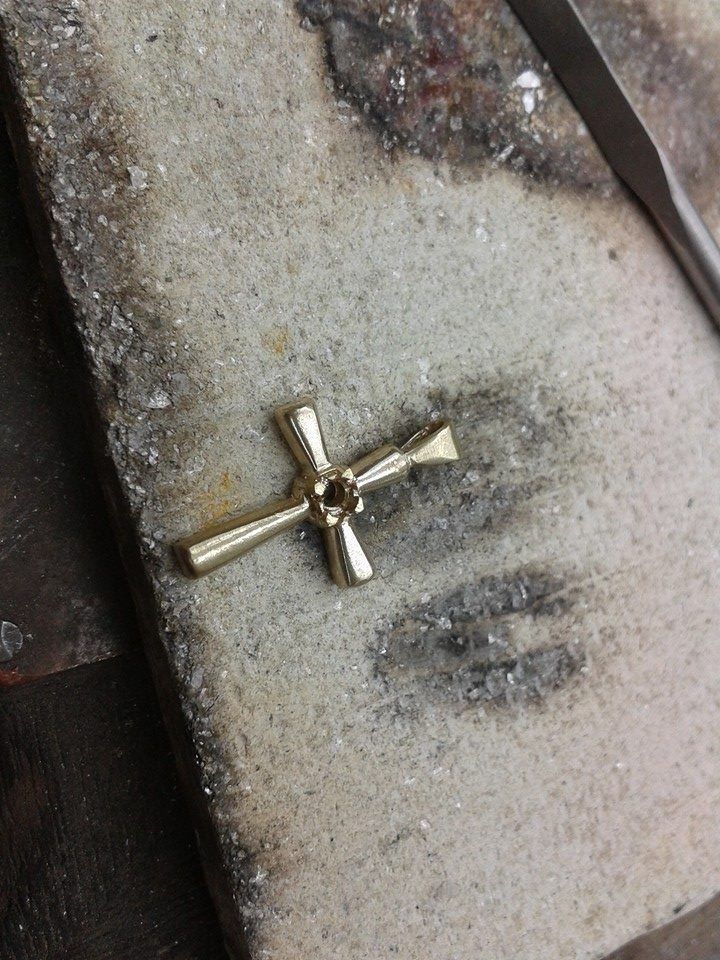
Cross built, just needs the emerald setting
Drilling the setting
Setting all cut and ready for the stone
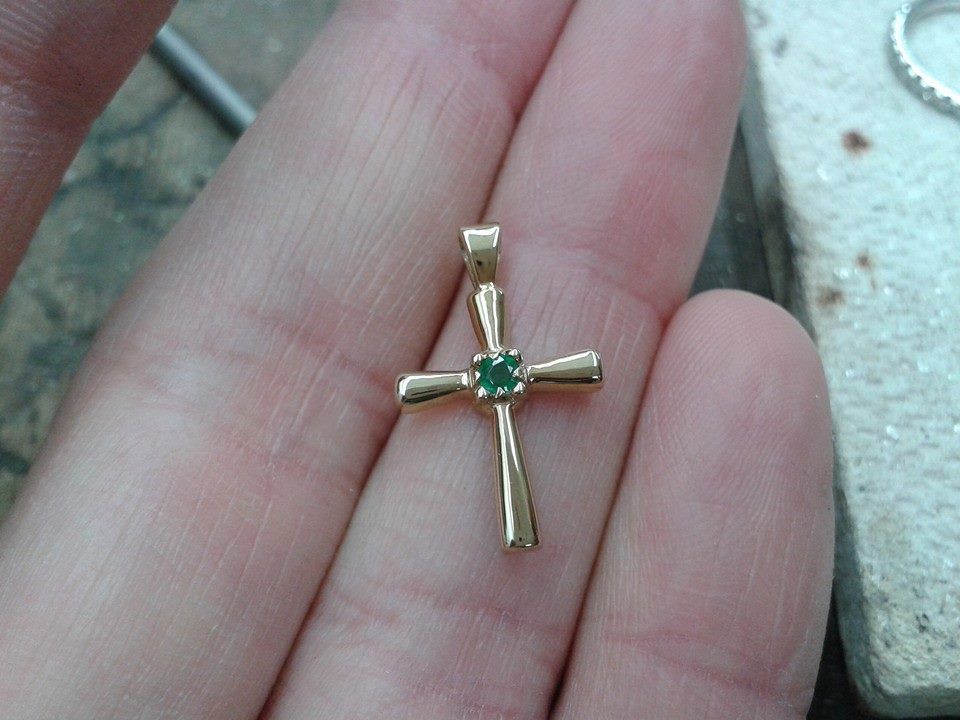
And all set
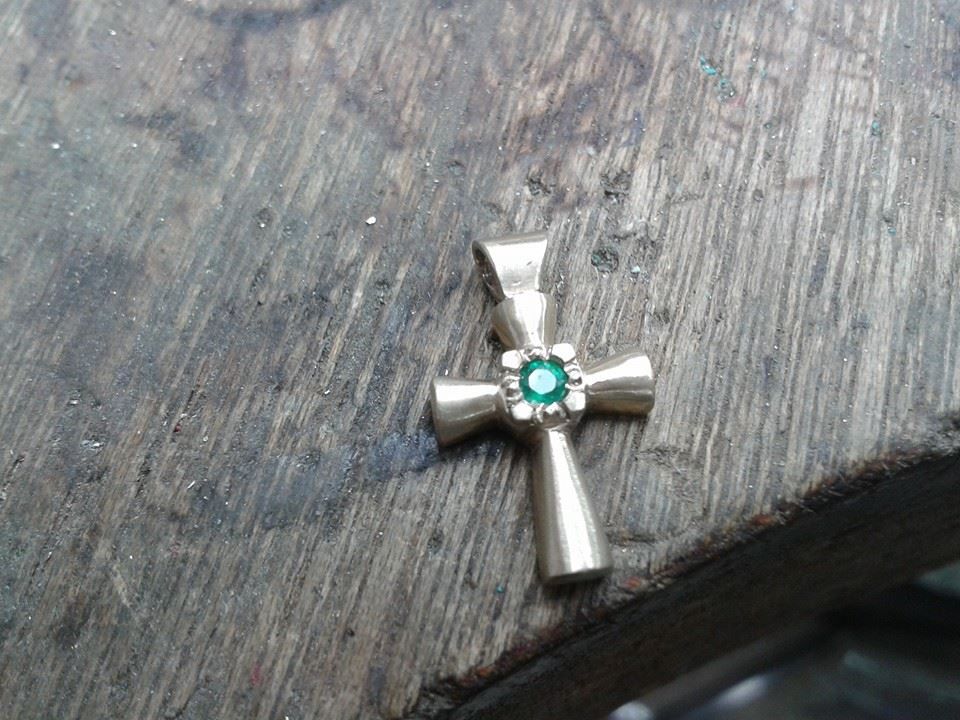
Because i liked it so much i made another chunkier one for stock
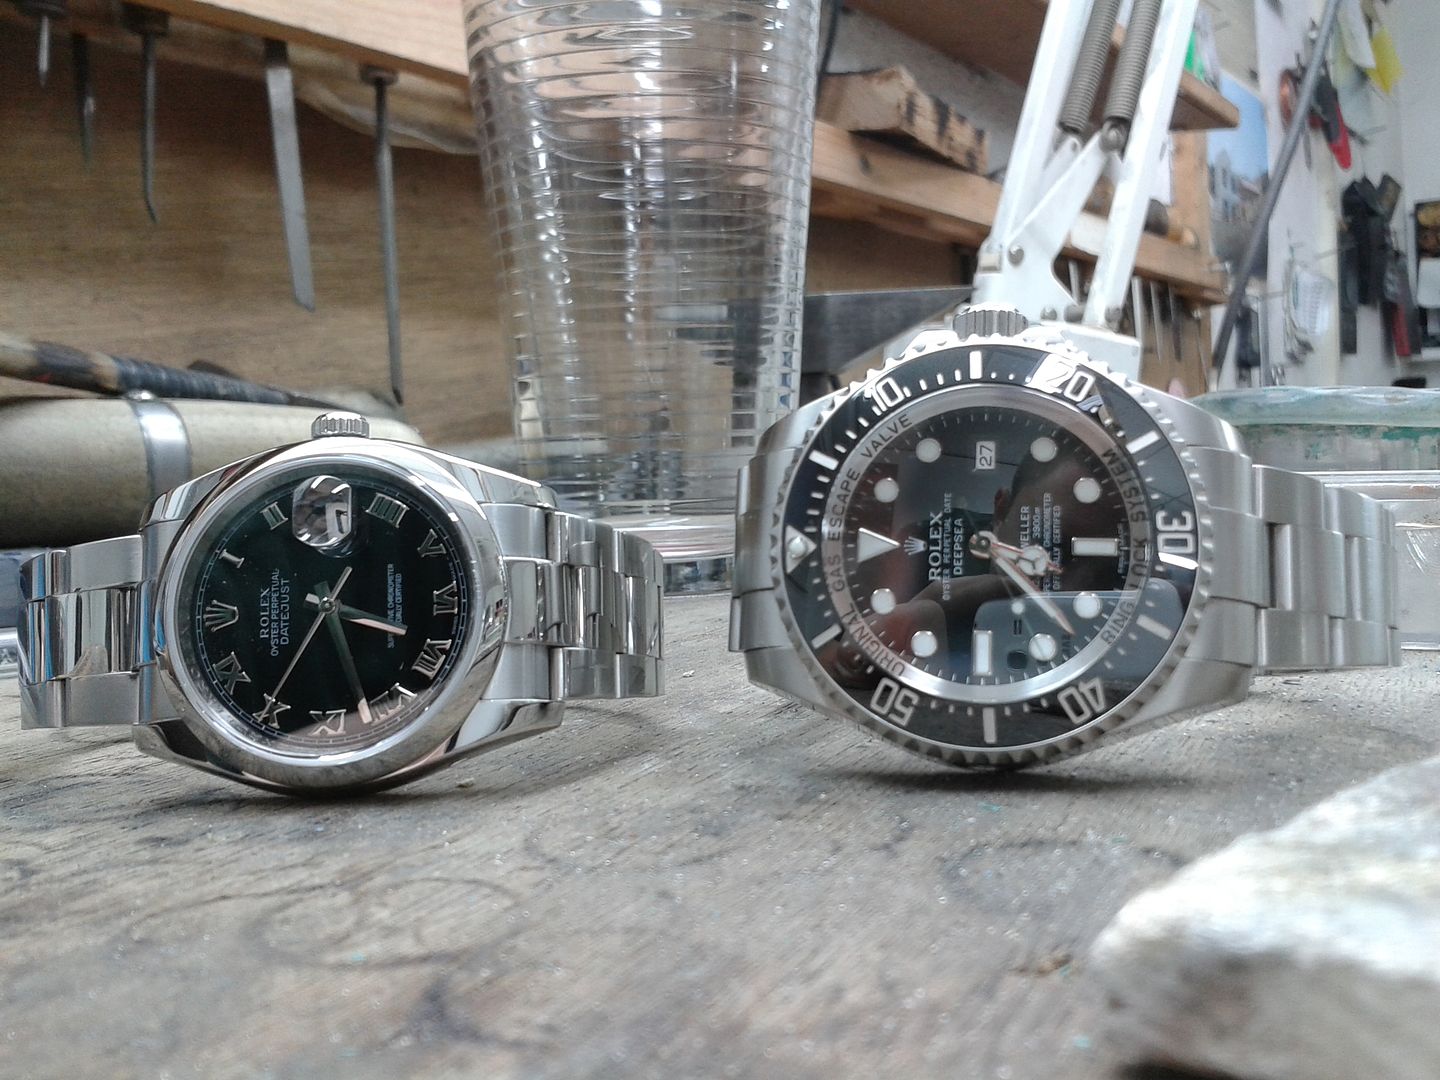
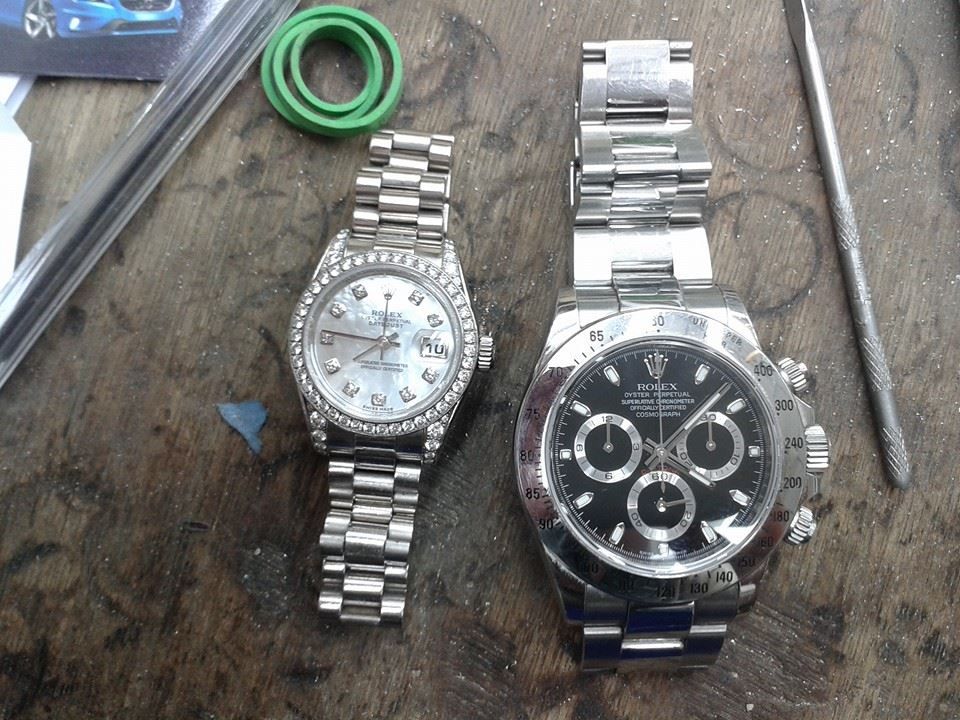
And finally a couple of watches in for service and refurb
That said, here is a little something my very sore hands made on monday:
Start with 1 x tanzanite and some of the customers own gold, which we melted down from a couple of inherited wedding bands she had.

Take the gold bar (2.25mm wide x 1.75mm thick) and make a shank. Note the split shoulders (and finger).

Now the shank is all cleaned up its time to make the setting. I made the setting using platinum wire to give it a lovely white finish. Its nice and soft too which makes it easier when setting such a fragile stone.

Simple setting part done

Setting complete, just needs fitting to the shank and finishing off. Note the strengthening brace around the setting.

Fully assembled. Just need to set the stone.

And all done:

Another happy customer.........
More next month i hope.
Oh, here's a couple of other things i made between chemo treatments:
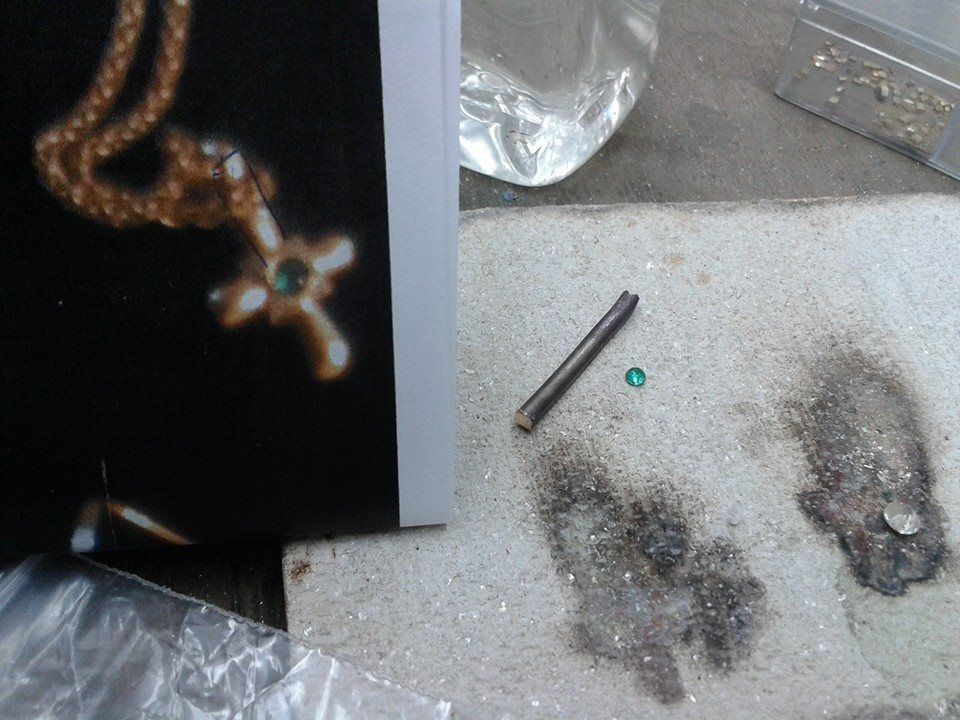
Made this cross to replace an item stolen from a customer.
Photo from customers insurance docs: 9ct and emerald

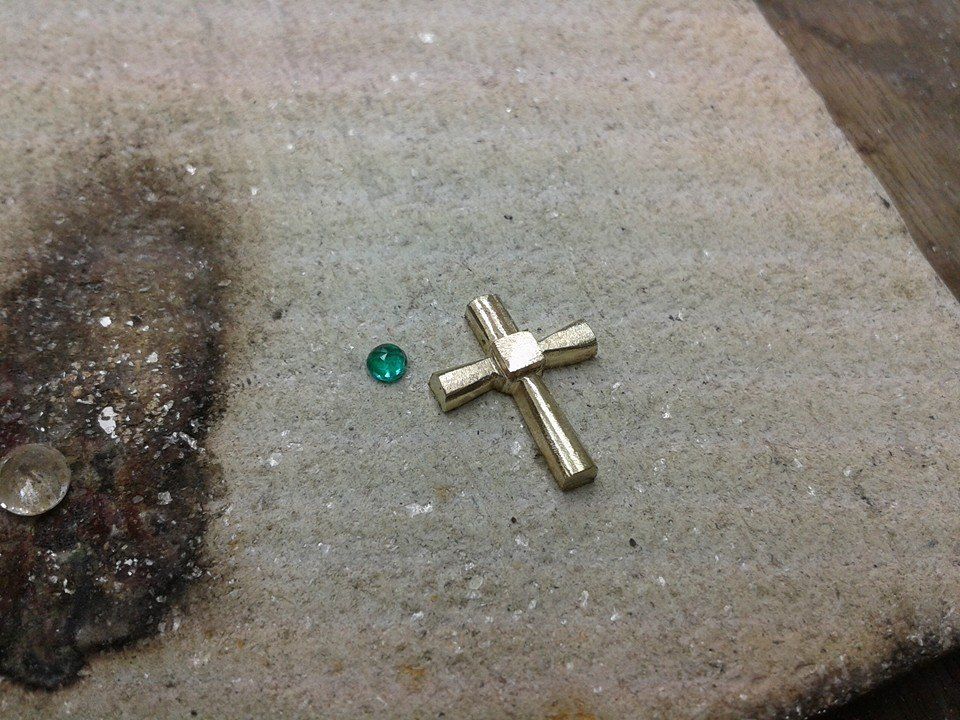
Cross built, just needs the emerald setting

Drilling the setting

Setting all cut and ready for the stone

And all set

Because i liked it so much i made another chunkier one for stock

And finally a couple of watches in for service and refurb

Thanks chap. As i said earlier, im not that fussed by it. It was a massive shock when i found out but medical science i so good now and the care im getting is so spot on i have every hope im going to come through it stronger than ever. I had my second chemo session yesterday and all looks to be going well.
Top tip for all out there. If you have any dodgy symptom, big or small. Be sure to get it checked out asap. My tumour was 10cm by the time it was discovered which is pretty big. Im just lucky it hasnt spread anywhere else!
Top tip for all out there. If you have any dodgy symptom, big or small. Be sure to get it checked out asap. My tumour was 10cm by the time it was discovered which is pretty big. Im just lucky it hasnt spread anywhere else!
HIS LM said:
I know nothing about making jewellery but your work looks fantastic - when making a ring how do you secure the setting to the shank ?
If securing a platinum setting to an 18ct yellow gold shank we would use 18ct yellow gold solder as platinum solder has too high a melting point. All joints are made using solder of an appropriate carat for the ring or piece in question. The lower the carat the lower the melting point, but solders must match the ring material where possible. longshot said:
Great work.
How does your "new build" jewellery get hallmarked?
Its up to the customer really. They can choose two options: Having the item stamped by us (J&R375, J&R750, J&R950PLAT etc....J&R is our company name), trusting that we use the correct materials for the job. Or they can opt to have it assayed by one of the 3 assay offices in the UK, where materials are tested and then hallmarked. This has an additional cost so that's why we let the customer choose. 99% are happy to have us stamp it.How does your "new build" jewellery get hallmarked?
In this case we stamped the ring J&R750 and Plat
Gassing Station | Watches | Top of Page | What's New | My Stuff