My 1968 Olsen Nimbus restoration project.
Discussion


Howdoo! Thought I'd post a few pictures of my project. 
I've had the old girl sitting on the hard for 6 years, I found her after she's already been abandoned for 4 years before that, so I think she'll be dry!
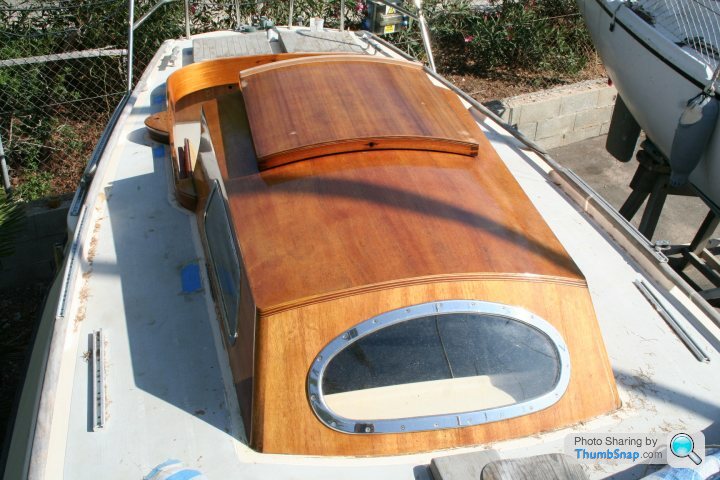
This is how I found her before I managed to track down the owner in Denmark and do the deal.
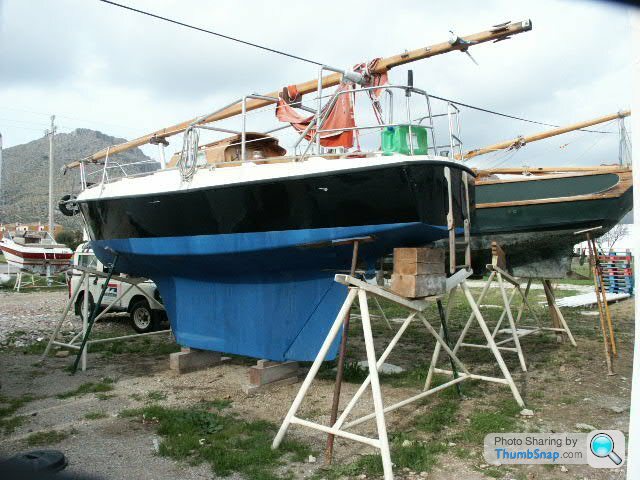
A nasty aluminium frame had been bolted through the decks to carry the mast, as I beieve she had been brought into the Med via the European canals.
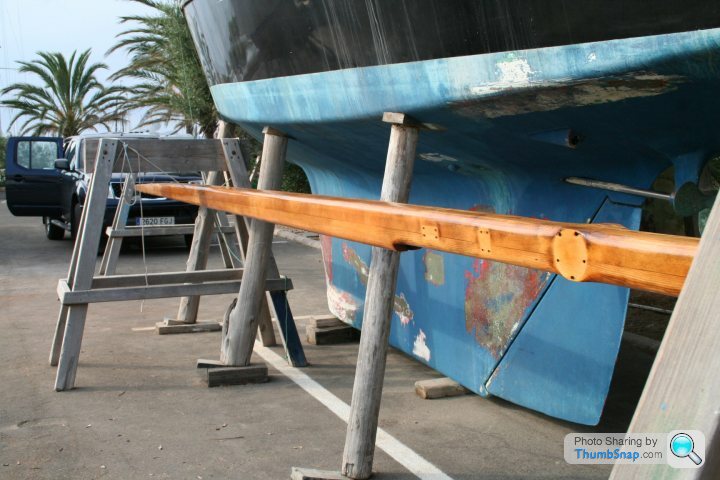
I started by stripping and re-glueing the mast, as you can see it wasn't pretty.
Old wire halyards!
12 coats of varnish.
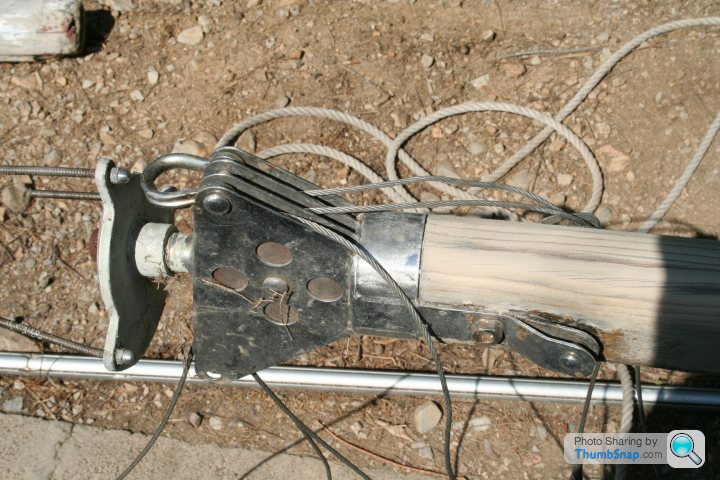
I also wanted to be rid of the nasty wire halyards. I'm not a racer, so wanted something nicer on my cruisers hands! So I had larger and wider sheaves made, and had the masthead modified.
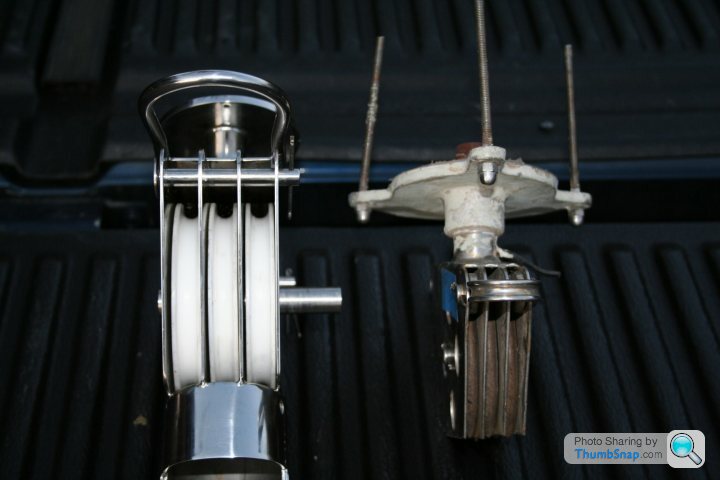
Here it is with a hoop for the spinnaker block, VHF antenna mount, and LED Lopolight tri-colour with a windex mount.
I also fitted an LED steaming light.
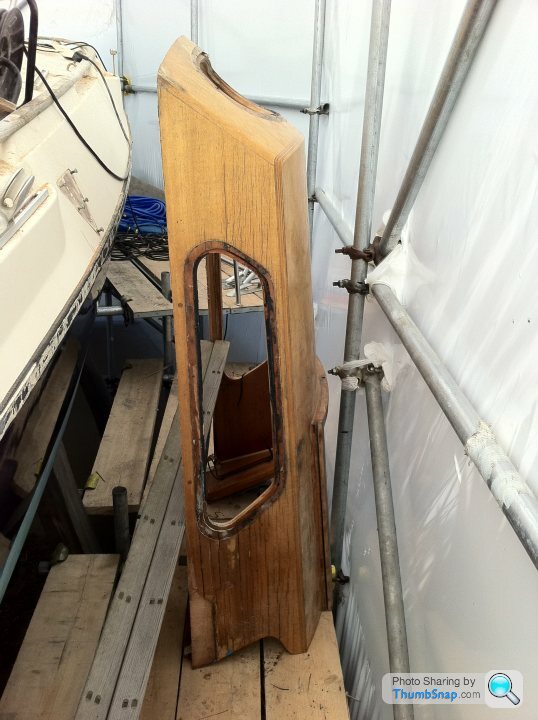
Next on the list was the Mahogany ply dog house, which had been sanded through the outer layers over the years, and had some de-lamination.
I took off the top layer, and epoxied on a new outer skin.
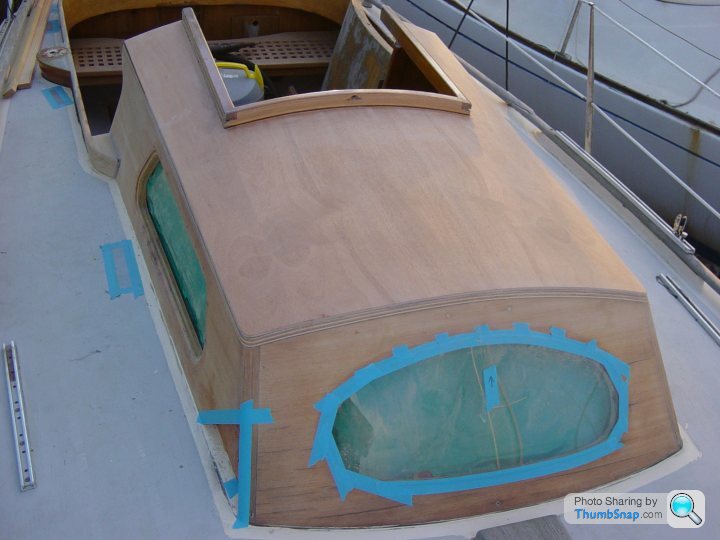
I also cut out some rot, and epoxied in some new wood, and disgarded the old corroded aluminium porthole frames for some nice new custom made stainless steel ones.
Then I bought an old property needing renovation!
That was 5 years ago, and I'm just about finished it.
So the old girl took a back seat, and was starting to look sorry all over again.
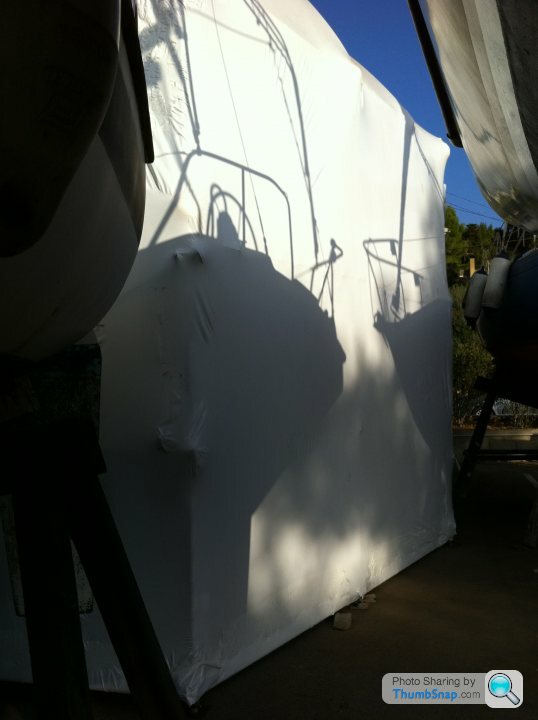
This time, I decided not to be outdone by the eliments, and get her covered properly, with scaffold staging so I can also get the deck and topsides painted too.
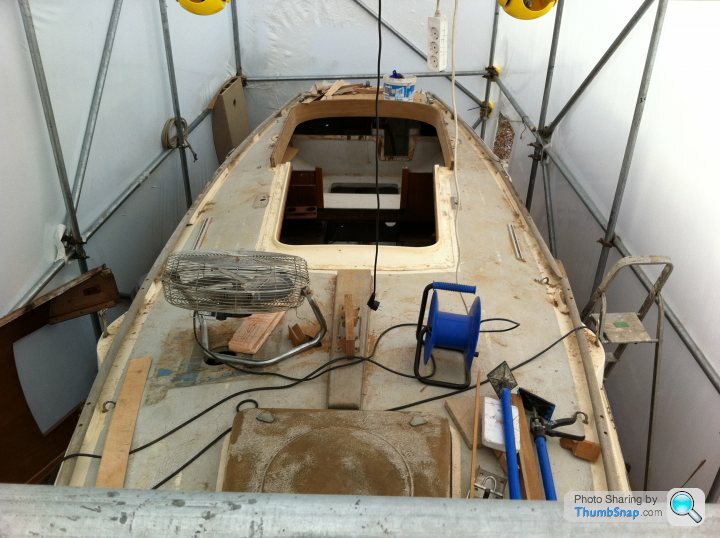
I looked at all the work I'd done on the old dog house, and decided I wasn't happy with it at all.
So it all had to come off!
More to follow!
Hope you enjoy.
I've had the old girl sitting on the hard for 6 years, I found her after she's already been abandoned for 4 years before that, so I think she'll be dry!
This is how I found her before I managed to track down the owner in Denmark and do the deal.
A nasty aluminium frame had been bolted through the decks to carry the mast, as I beieve she had been brought into the Med via the European canals.
I started by stripping and re-glueing the mast, as you can see it wasn't pretty.
Old wire halyards!
12 coats of varnish.
I also wanted to be rid of the nasty wire halyards. I'm not a racer, so wanted something nicer on my cruisers hands!
So I had larger and wider sheaves made, and had the masthead modified.Here it is with a hoop for the spinnaker block, VHF antenna mount, and LED Lopolight tri-colour with a windex mount.
I also fitted an LED steaming light.
Next on the list was the Mahogany ply dog house, which had been sanded through the outer layers over the years, and had some de-lamination.
I took off the top layer, and epoxied on a new outer skin.
I also cut out some rot, and epoxied in some new wood, and disgarded the old corroded aluminium porthole frames for some nice new custom made stainless steel ones.
Then I bought an old property needing renovation!
That was 5 years ago, and I'm just about finished it.
So the old girl took a back seat, and was starting to look sorry all over again.
This time, I decided not to be outdone by the eliments, and get her covered properly, with scaffold staging so I can also get the deck and topsides painted too.
I looked at all the work I'd done on the old dog house, and decided I wasn't happy with it at all.
So it all had to come off!
More to follow!
Hope you enjoy.
Edited by mickrick on Sunday 16th October 16:56
So, back to "Svip".
I didn't like the way the mahogany bleached in the sun, and how the endgrain ply didn't weather well at all.
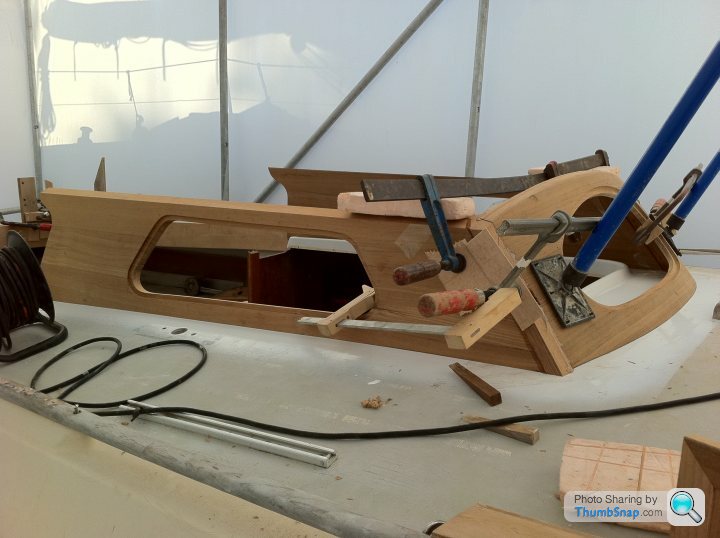
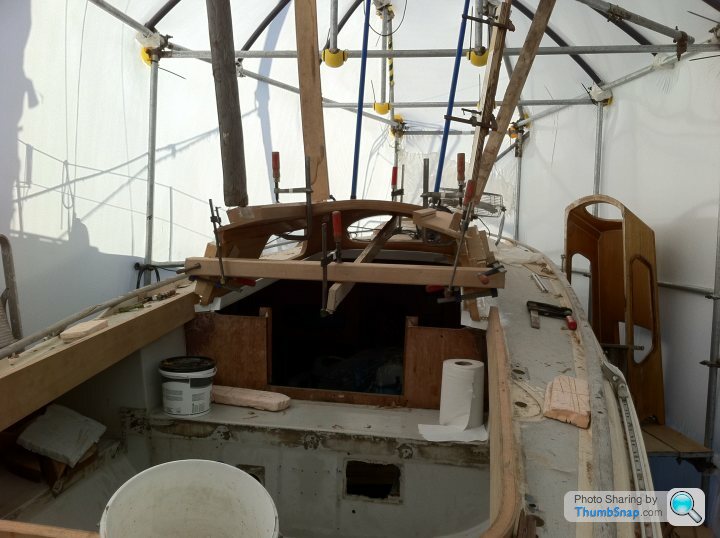
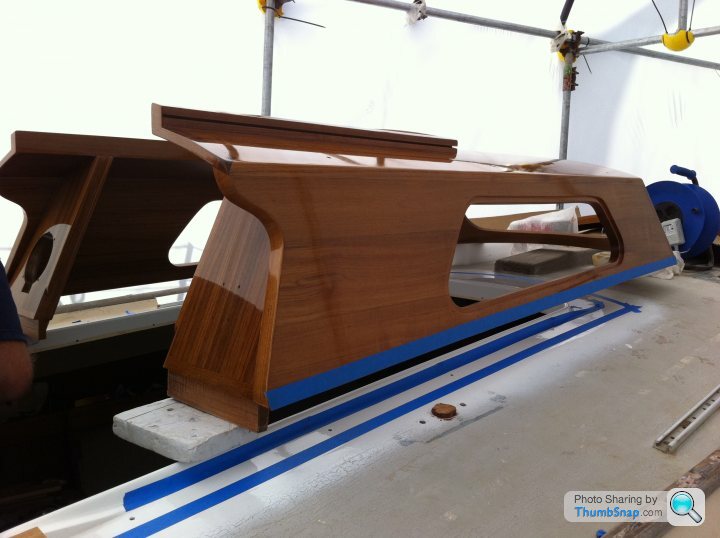
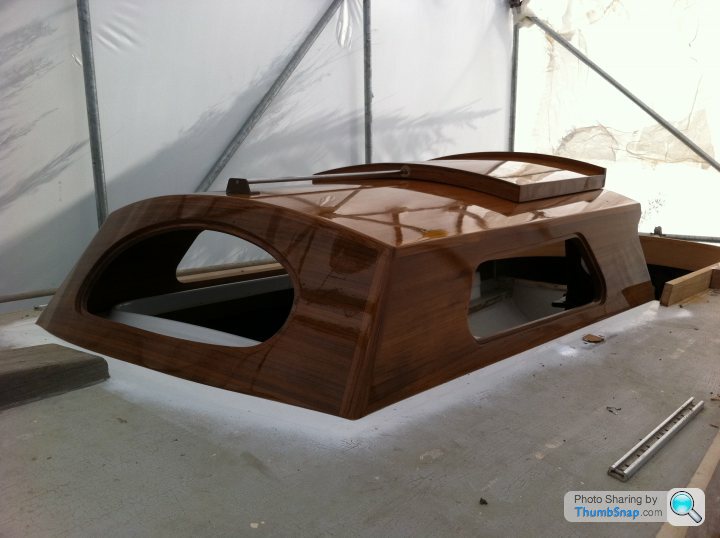
I realised my basic carpentry skills weren't good enough for the quality of work I wanted. So I enlisted the help of my shipright friend to reconstruct a whole new dog house and cockpit coaming, winch blocks etc. in solid, and laminated teak.
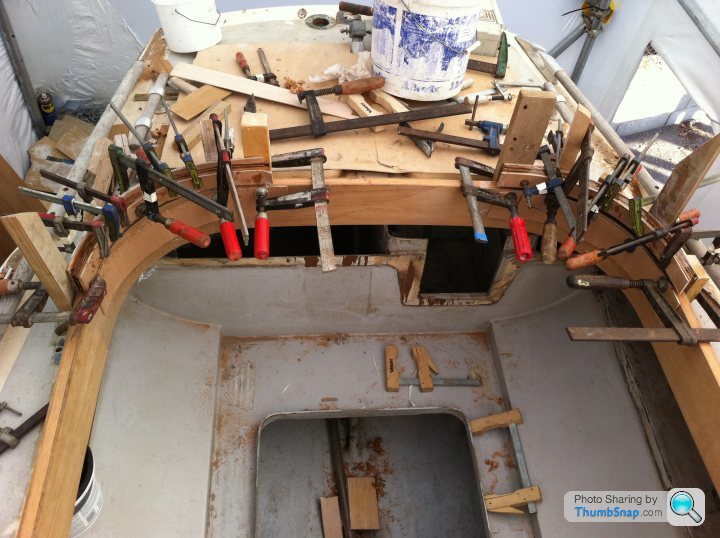
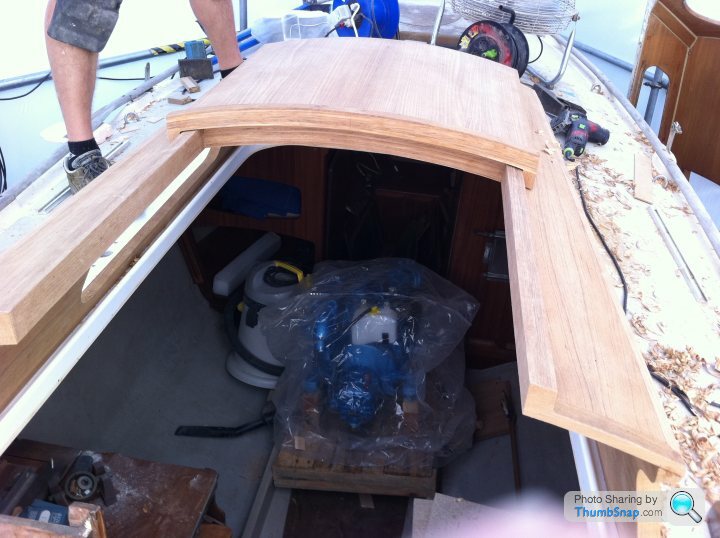
Patterns where made of the curved front and roof, as the portholes are toughened glass, so had to match perfectly.
Forms where made out of chipboard and formica to vacum bag the wood laminates.
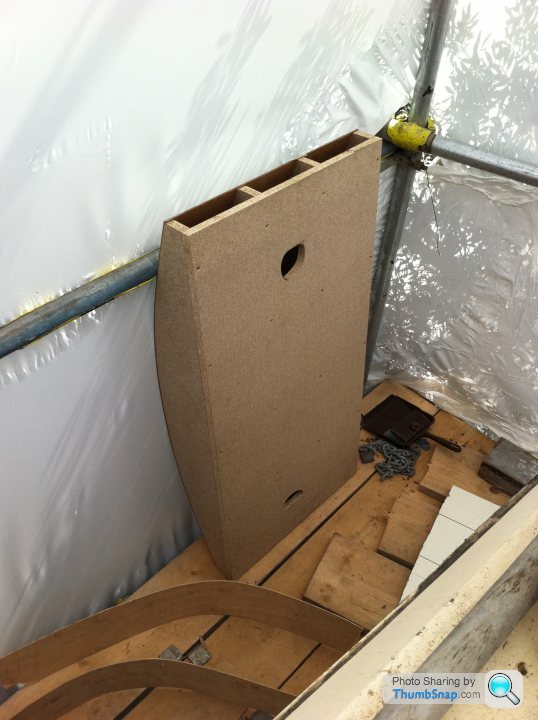
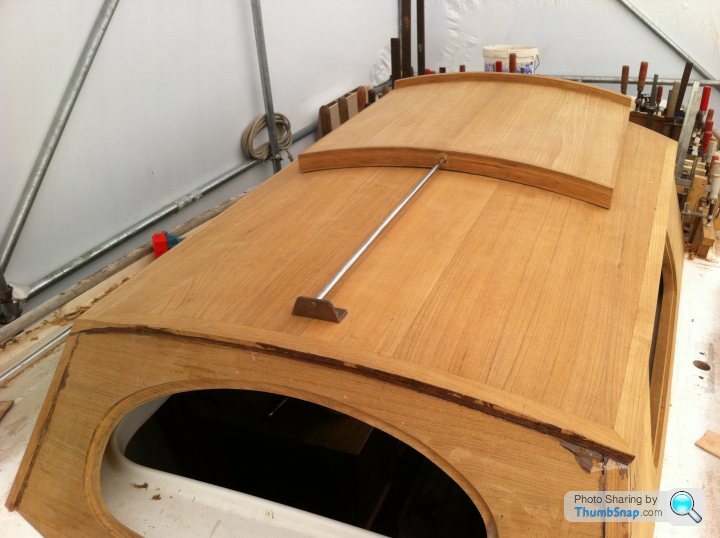
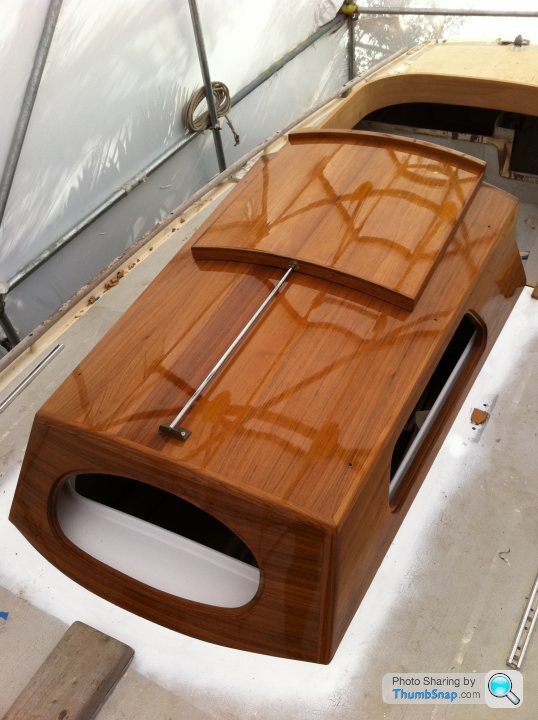
Seperate ones for the front, roof, and companionway hatch.
The front section was made with 5 x 5mm sheets, vacum formed with epoxy and glass fibre woven roving between each layer.
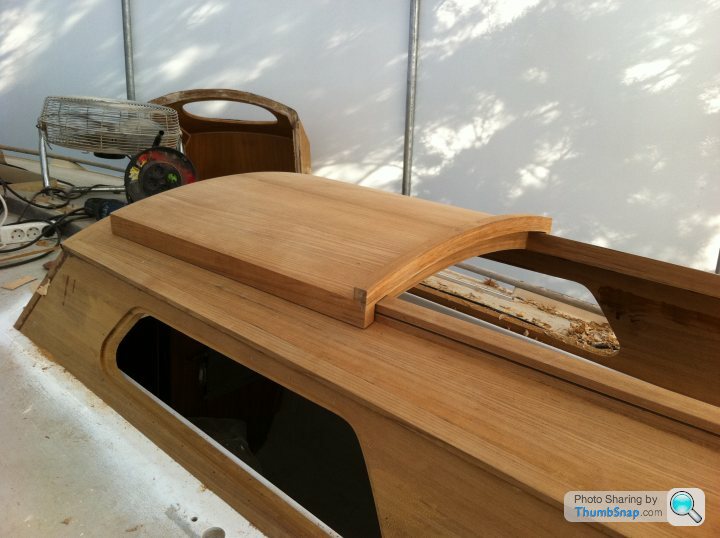
The roof was teak/woven roving/ply/woven roving/teak, as this would be edged with solid teak, and the end grain wouldn't be exposed.
The sides where made out of 30mm solid planks.
Here it is test slotted together.
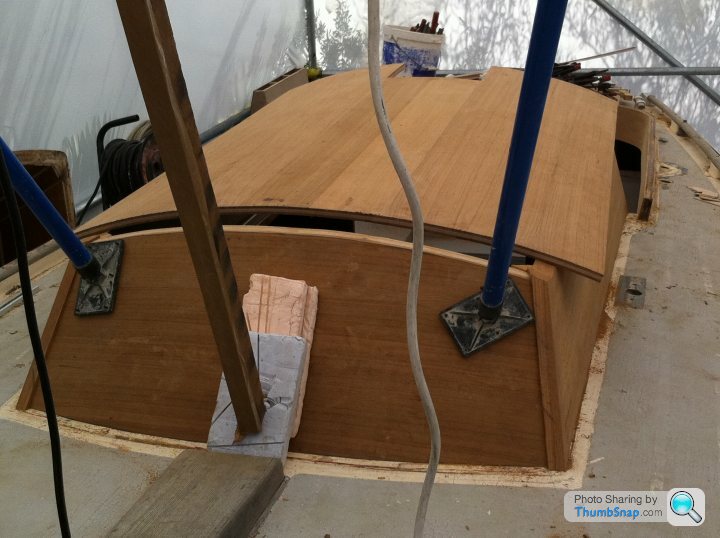
You can see here some of the glass fibre between the wood laminate.
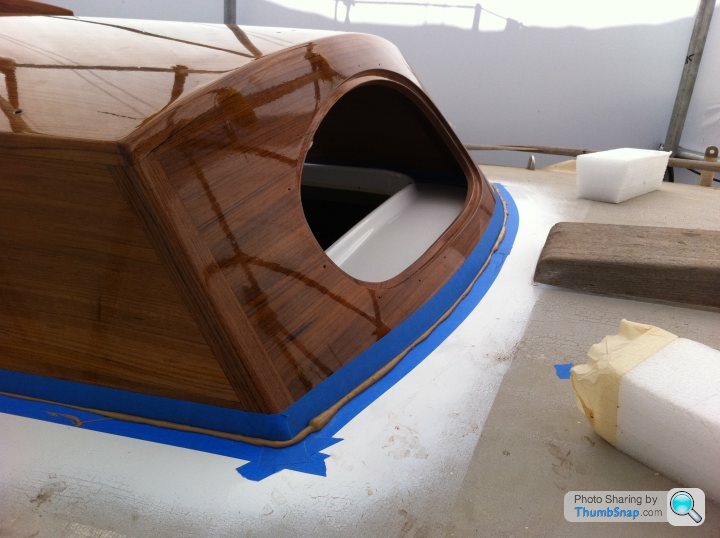
The cockpit coaming was also skinned inside and out with 5mm teak. It had to be steamed to get the curve.
Then the top was cut off, and capped with solid.
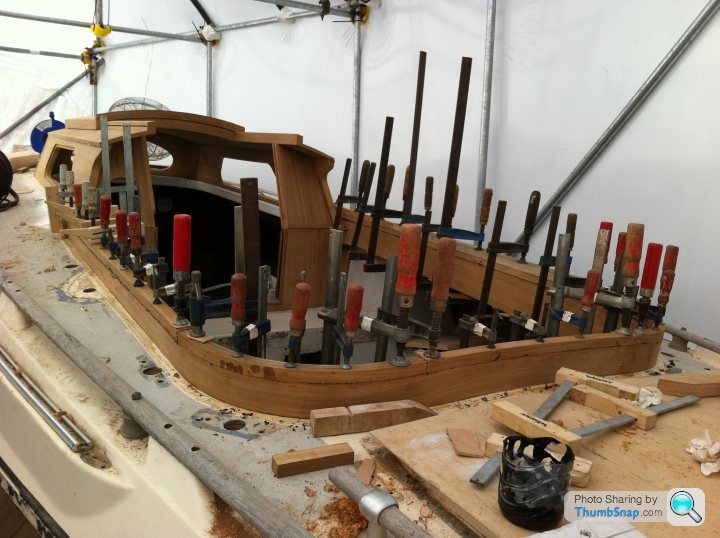
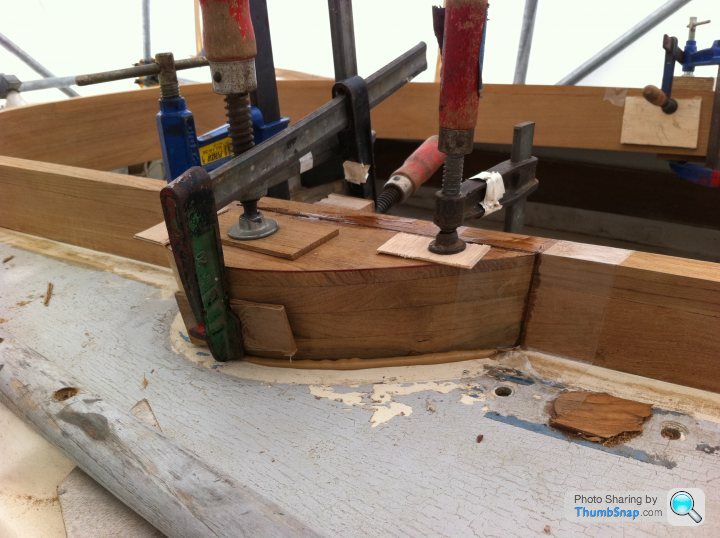
The corners had to be laminated.
More to come!
I didn't like the way the mahogany bleached in the sun, and how the endgrain ply didn't weather well at all.
I realised my basic carpentry skills weren't good enough for the quality of work I wanted. So I enlisted the help of my shipright friend to reconstruct a whole new dog house and cockpit coaming, winch blocks etc. in solid, and laminated teak.
Patterns where made of the curved front and roof, as the portholes are toughened glass, so had to match perfectly.
Forms where made out of chipboard and formica to vacum bag the wood laminates.
Seperate ones for the front, roof, and companionway hatch.
The front section was made with 5 x 5mm sheets, vacum formed with epoxy and glass fibre woven roving between each layer.
The roof was teak/woven roving/ply/woven roving/teak, as this would be edged with solid teak, and the end grain wouldn't be exposed.
The sides where made out of 30mm solid planks.
Here it is test slotted together.
You can see here some of the glass fibre between the wood laminate.
The cockpit coaming was also skinned inside and out with 5mm teak. It had to be steamed to get the curve.
Then the top was cut off, and capped with solid.
The corners had to be laminated.
More to come!
Thanks. The Guy doing the work is indeed an artist. I'm proud to be the guardian of some of his work.
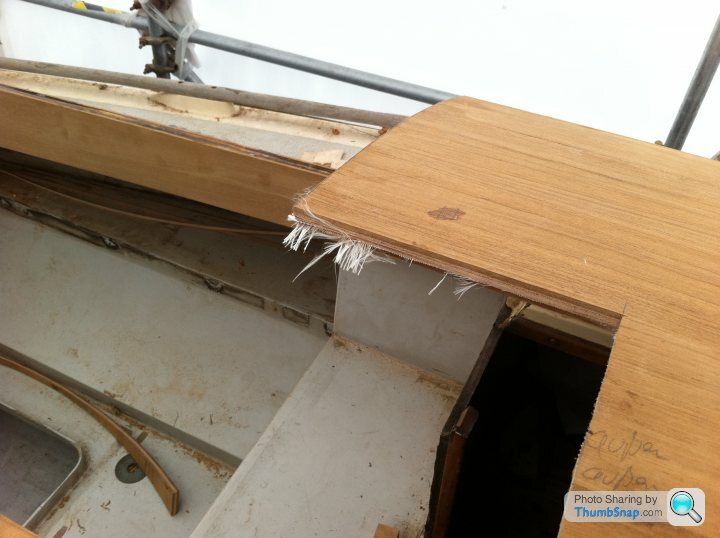
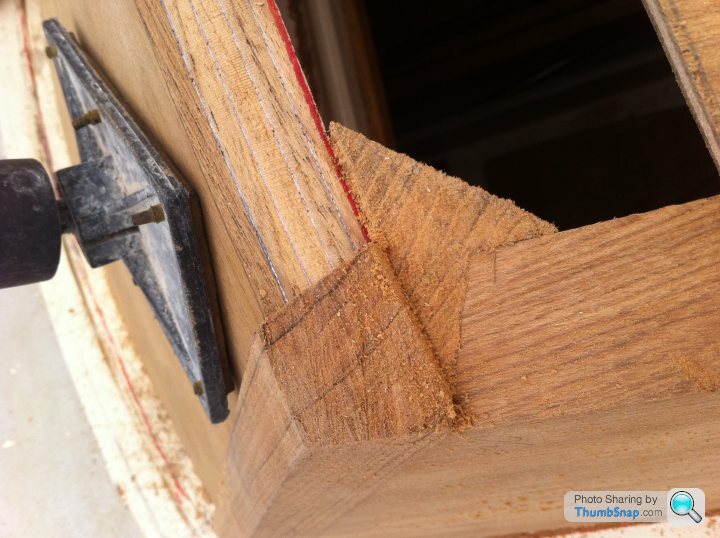
Here's a detail shot of the corner pieces. Inner and outer all one block of solid.
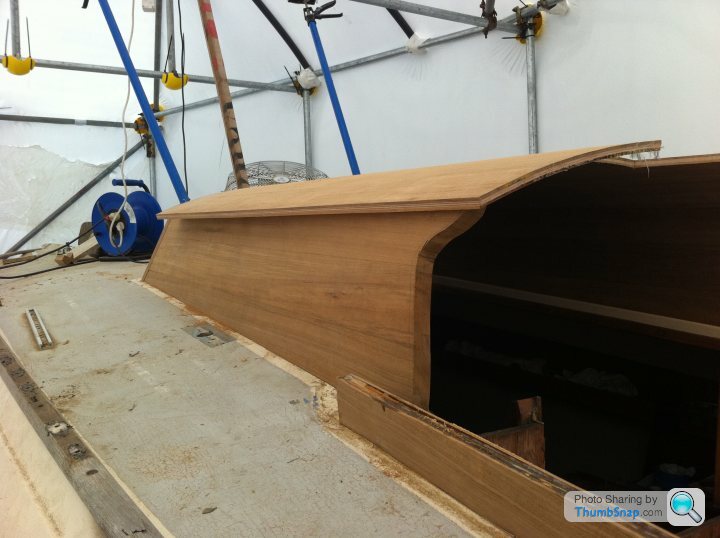
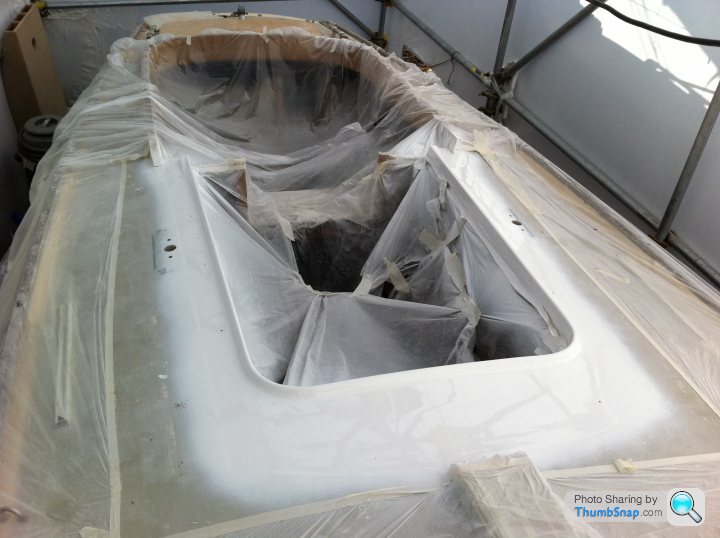
Once everything looked good to fit, all was taken back to the workshop for the porthole apetures to be routed out, and solid added to the roof edges, companionway hatch and frame to be made, and the front and sides to be brought back and glued up.
Before that though, I had the gelgoat repaired, and the area under the dog house painted as the edges are visible from inside the boat.
Front and sides glued up.
More to follow!
Regards,
Mick.
The Guy doing the work is indeed an artist. I'm proud to be the guardian of some of his work.Here's a detail shot of the corner pieces. Inner and outer all one block of solid.
Once everything looked good to fit, all was taken back to the workshop for the porthole apetures to be routed out, and solid added to the roof edges, companionway hatch and frame to be made, and the front and sides to be brought back and glued up.
Before that though, I had the gelgoat repaired, and the area under the dog house painted as the edges are visible from inside the boat.
Front and sides glued up.
More to follow!
Regards,
Mick.
Only the doghouse and cockpit are wood. The hull and deck are glassfibre/foam core.
I have to say I was very surprised to find a foam core boat of that age! Especially with no apparant delamination of the core/skin.
Some more pictures.
Test fit of the companionway hatch.
More to come.
Cheers,
Mick.
I have to say I was very surprised to find a foam core boat of that age! Especially with no apparant delamination of the core/skin.
Some more pictures.
Test fit of the companionway hatch.
More to come.
Cheers,
Mick.

Someone else also asked me "Is it worth it?" I guess that's a matter of opinion.
I've only ever seen 2 or 3 for sale up in Denmark. I had some teak grating made for the cockpit sole, companionway, and helm seat about 5 years ago, and that cost me more than those boats where selling for.
I don't like fin keeled, spade ruddered, fat, round bottom modern boats with no bilge, I'd rather spend money on recycling an old hull, and have a basicaly new boat when it's finished.
If you let your head rule your heart, you'd never buy a boat in the first place.

Back of the old dog house, with de-laminated ply.
New lower, made from teak/ply laminate with solid edging.

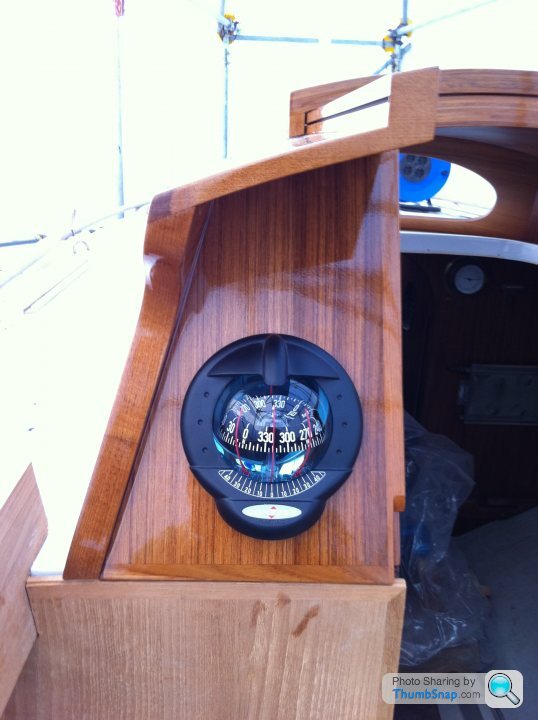
Upper 33mm teak ply laminate with solid edging, and cut out for compass.
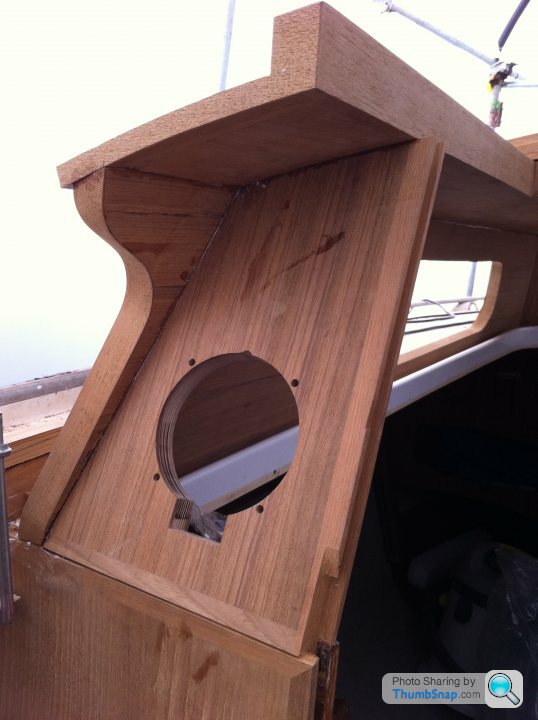
Joint detail.
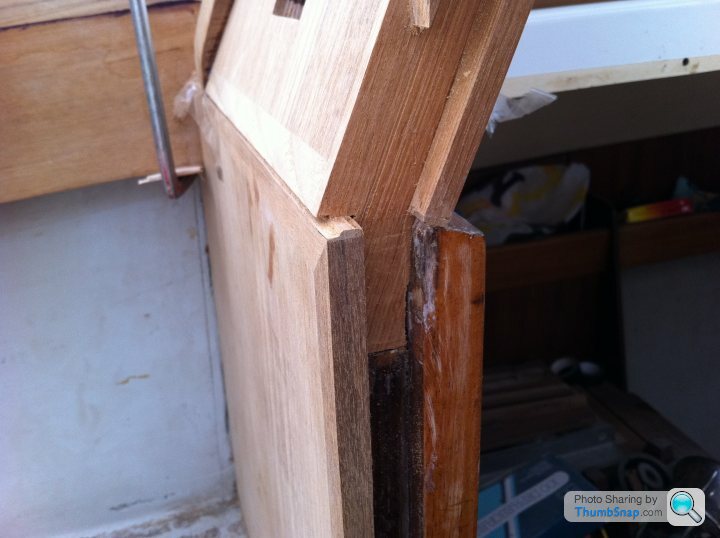
Weather boards where made using foam sandwich with solid edging.
Sorry about the picture quality, it was poor light when I took the picture.
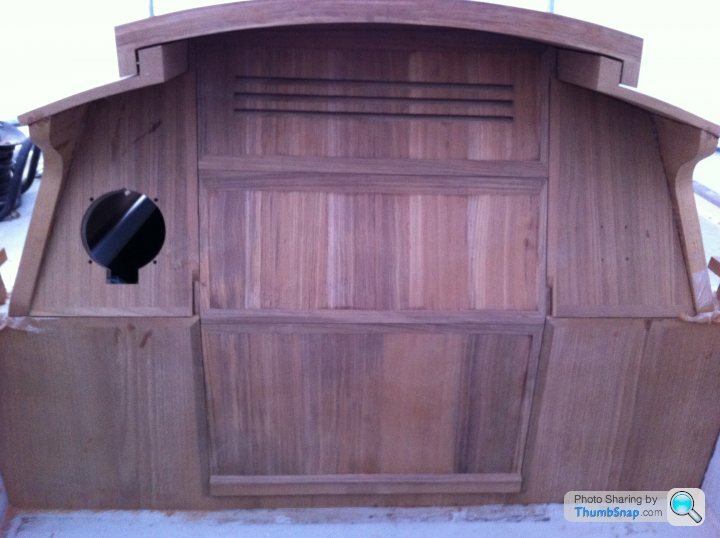
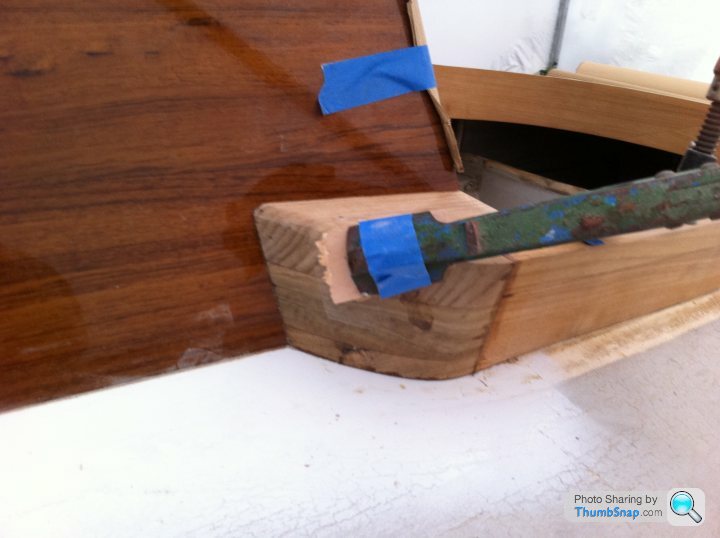
Companionway hatch guide mounted. I had a nice bronze bush turned up and rebated into the hatch, to slide nicely over the stainless bar.
That's all for today.
Regards,
Mick.
MOTORVATOR said:
Good on you Mick for taking it on. The upside being when you sit on anchorage with a G&T you can look at it all and say "I did that" which makes the drink all the more pleasurable. 
Cheers! But I take no credit for the wonderful carpentry! That's all my friends work. We did have a long discussion about how it was all going to be done though, as I didn't want to see any end grain.
However, I did say to him that I would propably be running aground a fair bit, due to staring at all thet lovely teak and not watching where I'm going!
He'll be coming back in the new year to vac bag a new engine bed in, with a bulkhead for a GKN aqua drive. I think I can just about fit one in there.
Then I can fit nice soft engine mounts. The only thing I want to hear when I turn the key for the "Iron sail" is the water splashing out of the exhaust!
I enlisted the help of some more friends to drop the new engine in the boat while the top was off.
Edited by mickrick on Sunday 16th October 17:03
hidetheelephants said:
mickrick said:
The front section was made with 5 x 5mm sheets, vacum formed with epoxy and glass fibre woven roving between each layer.
The roof was teak/woven roving/ply/woven roving/teak, as this would be edged with solid teak, and the end grain wouldn't be exposed.
The sides where made out of 30mm solid planks.
Here it is test slotted together.
Is that lot not rather heavy? I think I might be tempted to have a balsa core in the middle to reduce the weight(and cost! Teak is ruinously expensive these days). Beautiful though, and I'm sure it will be source of great pride when done. I was about to write finished, but boats are never bloody finished; there's always something left to fiddle with or not quite done right...The roof was teak/woven roving/ply/woven roving/teak, as this would be edged with solid teak, and the end grain wouldn't be exposed.
The sides where made out of 30mm solid planks.
Here it is test slotted together.
Anyway, Balsa core is the devils work! If I where going to core anything (We did the weatherboards) I'd use foam.
You're definately right about it being Ruinously expensive though!
But this is my retirement plan, I hope to spend many happy hours bashing abound the Balearics, and Sadinia and Corsica.
You can't put a price on Happy.
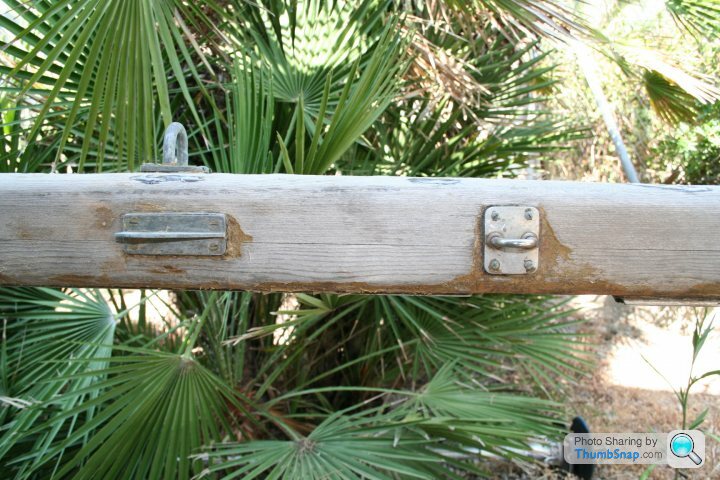
Hi KT  Yes Mate, even when it's flat I always keep the bottom weather board in. It only comes out on the hook or in a marina. They will also have a chord attached to each one, to be cleated off.
We have also made sure the weather board joints slope down, to let water run out of the joint, and not into the boat. ;-)
I have a friend staying with us this week, whom I sailed accross the Atlantic with 3 years ago on his 10 meter boat, and I happened to mention what would happen if it took two dumpers one after the other, as although there are quite large self bailing drains, I doubt it would clear quick enough.
Although I already have a circumnavigation under my belt from over 16 years ago, and I have to say, the only time I've had water around my knees in the cockpit was when I broached a boat at night in the Pacific, as a very unexperienced helmsman! (Downwind, gooswinged out, big swell, and caught out from behind by one of those pesky Pacific line squalls!)
Yes I did clench my buttocks!
ETA, two berths in the main cabin, and a V berth up forward with a head under the center of the V berth. But as is usual, the V berth will probably end up full of sails.
New foam mattreses with sunbrella covers have already been made, and are ready to go in when the time comes.
Yes Mate, even when it's flat I always keep the bottom weather board in. It only comes out on the hook or in a marina. They will also have a chord attached to each one, to be cleated off.We have also made sure the weather board joints slope down, to let water run out of the joint, and not into the boat. ;-)
I have a friend staying with us this week, whom I sailed accross the Atlantic with 3 years ago on his 10 meter boat, and I happened to mention what would happen if it took two dumpers one after the other, as although there are quite large self bailing drains, I doubt it would clear quick enough.
Although I already have a circumnavigation under my belt from over 16 years ago, and I have to say, the only time I've had water around my knees in the cockpit was when I broached a boat at night in the Pacific, as a very unexperienced helmsman! (Downwind, gooswinged out, big swell, and caught out from behind by one of those pesky Pacific line squalls!)
Yes I did clench my buttocks!
ETA, two berths in the main cabin, and a V berth up forward with a head under the center of the V berth. But as is usual, the V berth will probably end up full of sails.
New foam mattreses with sunbrella covers have already been made, and are ready to go in when the time comes.
Edited by mickrick on Thursday 29th September 19:35
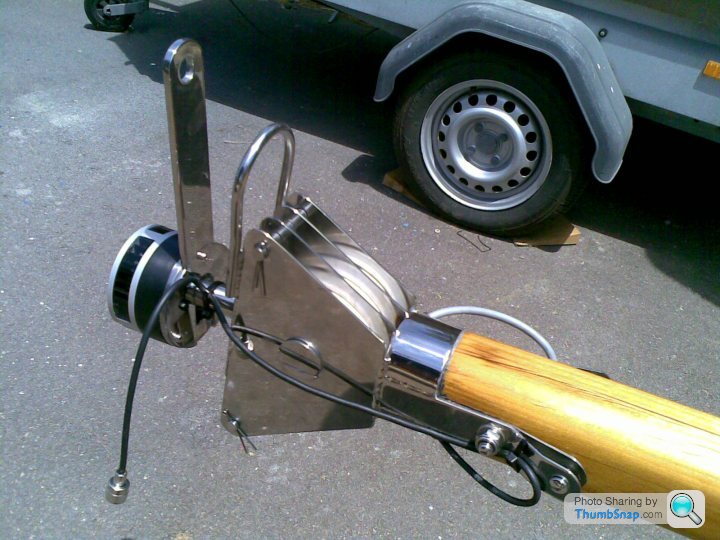
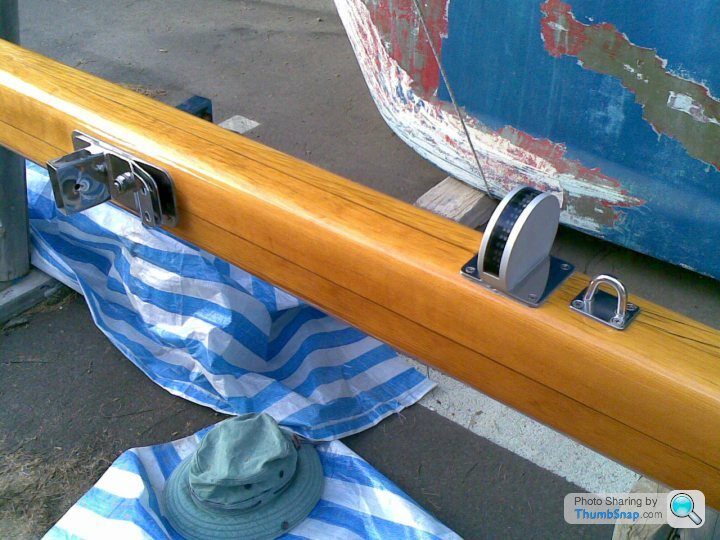
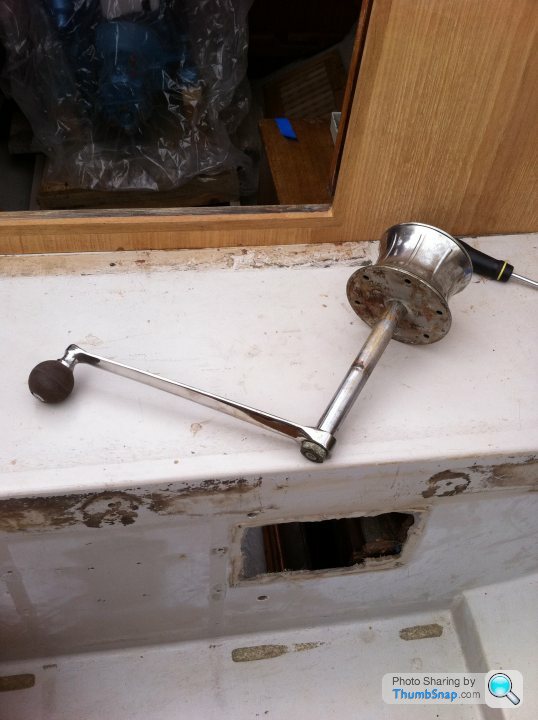
I still have the original Andersen winches, they'll be going off to the metal shop to be re-polished so they look new, and I'll obviously strip them and give them a good clean and replace the pawls and springs. 
The mast winches also have their own handles, quite handy I thought.
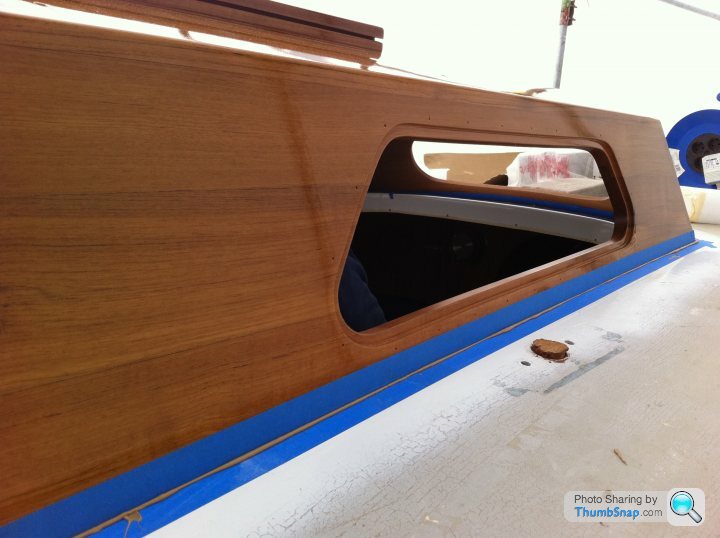
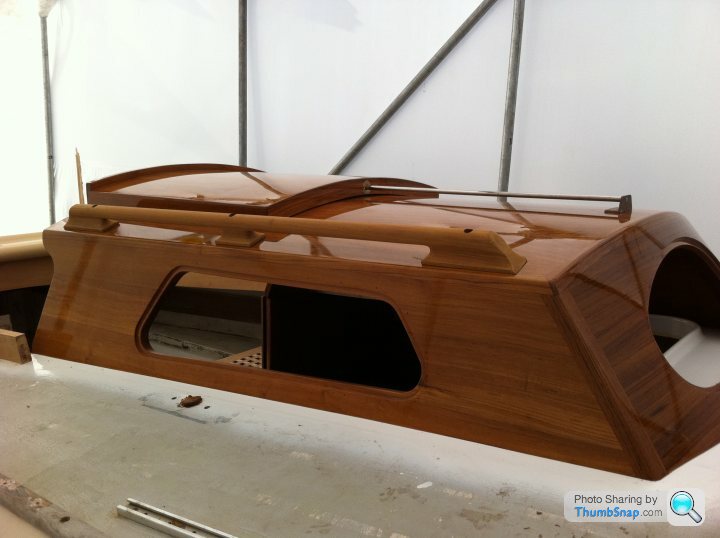
The deck house has now had 14 coats of varnish on the outside, (12 Epifanies PP and two PU), and 10 (I think, need to look at the peice of paper it was all recorded down on) on the inside.
The inside has beed done with rubbed effect for the last two coats.
Just got it bedded down tonight with some Sika 298.
Here it is masked up ready to be keyed, before the sika is applied.
Nicely squidged out all around!
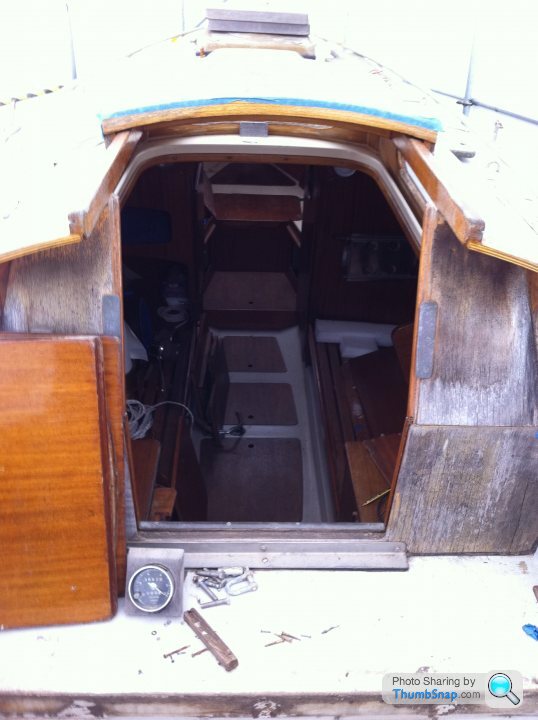
The companionway hatch is also now fitted, and the weatherboards fettled, but it was too dark to take a decent photo, so I'll post later.
Cheers,
Mick.
The mast winches also have their own handles, quite handy I thought.
The deck house has now had 14 coats of varnish on the outside, (12 Epifanies PP and two PU), and 10 (I think, need to look at the peice of paper it was all recorded down on) on the inside.
The inside has beed done with rubbed effect for the last two coats.
Just got it bedded down tonight with some Sika 298.
Here it is masked up ready to be keyed, before the sika is applied.
Nicely squidged out all around!
The companionway hatch is also now fitted, and the weatherboards fettled, but it was too dark to take a decent photo, so I'll post later.
Cheers,
Mick.
Edited by mickrick on Saturday 15th October 19:47
Everything is going to be epoxy primed and painted. Deck will be the same as the paint that was used before the deck house was put back, with grey non skid, the topsides will be shiny battleship grey.
I have an ex F1 Jaguar paint guy to do the painting, and another guy I know who specialises in boat names and gold leaf, is going to do the name on the transom with some turned platinum leaf, which I think will look fab with the grey!
I have an ex F1 Jaguar paint guy to do the painting, and another guy I know who specialises in boat names and gold leaf, is going to do the name on the transom with some turned platinum leaf, which I think will look fab with the grey!
Edited by mickrick on Sunday 16th October 16:51

Hand holds have also been made, but need varnishing. I'll do these along with the cockpit coaming and lower part of the aft section of dog house.
An interior shot of the rubbed effect varnish.
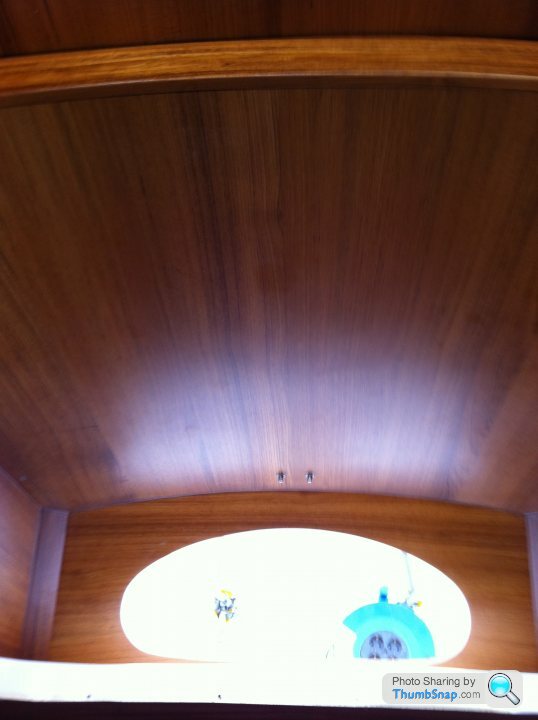
And finaly a detail shot.

Apart from the cockpit coaming cheek blocks and shaping up, the next job will be to plug the holes in the deck, where the previous owner through bolted some awfull alloy frames to carry the mast through the european canals.
Good job the core is closed cell foam!
Then remove the rest of the deck hardware, and get it all sanded faired, primed and painted.
That should take me through to the New year.
Cheers,
Mick.
An interior shot of the rubbed effect varnish.
And finaly a detail shot.
Apart from the cockpit coaming cheek blocks and shaping up, the next job will be to plug the holes in the deck, where the previous owner through bolted some awfull alloy frames to carry the mast through the european canals.
Good job the core is closed cell foam!
Then remove the rest of the deck hardware, and get it all sanded faired, primed and painted.
That should take me through to the New year.
Cheers,
Mick.
Edited by mickrick on Sunday 16th October 16:50
Cheers Slim! It's not bad considering it was sprayed in a makeshift tent in the back garden.
The first of the last two coats of PU turned out to be a bit of a nightmare, we had a bad batch, and it fish eyed all over! 10 hours of flatting it all off again
I've had that before though. In the past it urned out to be a problem with a new seal they where using on the tins, contaminating the varnish.
It's not bad considering it was sprayed in a makeshift tent in the back garden. The first of the last two coats of PU turned out to be a bit of a nightmare, we had a bad batch, and it fish eyed all over! 10 hours of flatting it all off again
I've had that before though. In the past it urned out to be a problem with a new seal they where using on the tins, contaminating the varnish.
Thank you all for the kind comments.
The brightwork will have covers made to keep the sun off it when it's not being sailed, and I'll also have a boom tent made for when I'm sitting on the hook. (In the cockpit with a G&T ) So hopefully a fresh coat at the beginning of each season should keep it up.
I work in the private yachting industry, so I'm quite used to seeing that sort of workmanship. I was in Palma last week with my Boss's boat, and some of the superyacht sailboats there where just jawdropping! I'm trying to create my own superminiyacht
KT, yes the Caterham has taken a backseat for a while, as it doesn't cost anything to sit in the garage with a dust sheet over it, but the boat on the otherhand does!
Besides, it's time I finished it so I can do some propper sailing, without generators and A/C chillers, and all the other Gin palace crap ringing in my ears.
For anyone who's interested in my other mistress, here's a link
http://www.pistonheads.com/gassing/topic.asp?h=0&a...
Back to "Svip" I have a stinking cold at the moment, so haven't done much today, but I did pop down and mount the main compass, just to make me feel like I've achieved somthing.
The brightwork will have covers made to keep the sun off it when it's not being sailed, and I'll also have a boom tent made for when I'm sitting on the hook. (In the cockpit with a G&T
) So hopefully a fresh coat at the beginning of each season should keep it up.I work in the private yachting industry, so I'm quite used to seeing that sort of workmanship. I was in Palma last week with my Boss's boat, and some of the superyacht sailboats there where just jawdropping! I'm trying to create my own superminiyacht
KT, yes the Caterham has taken a backseat for a while, as it doesn't cost anything to sit in the garage with a dust sheet over it, but the boat on the otherhand does!
Besides, it's time I finished it so I can do some propper sailing, without generators and A/C chillers, and all the other Gin palace crap ringing in my ears.
For anyone who's interested in my other mistress, here's a link
http://www.pistonheads.com/gassing/topic.asp?h=0&a...
Back to "Svip" I have a stinking cold at the moment, so haven't done much today, but I did pop down and mount the main compass, just to make me feel like I've achieved somthing.
Cheek blocks fitted today.
Nasty holes from nasty aluminium frames (Who would do such a thing?!) plugged up (8 of them) and glassed over.
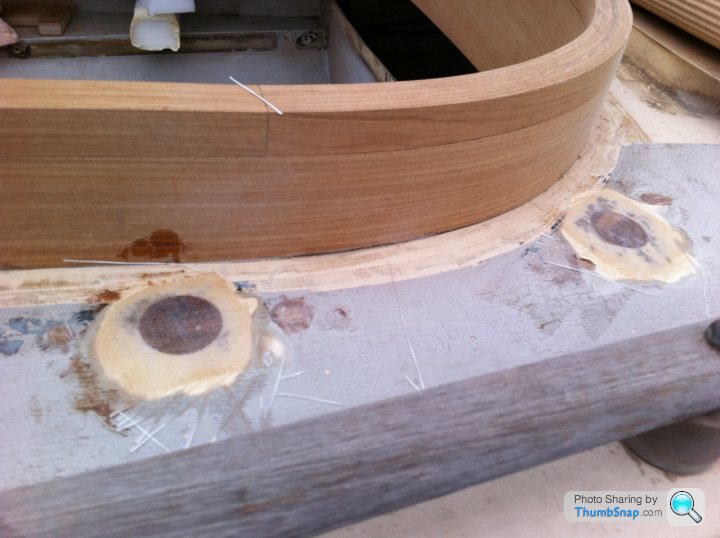
Hole from cabin heater chimney also filled with new foam and glassed over.
(Didn't fancy carbon monoxide poisoning thank you!)

Boring pictures I know, but it's progress.
Cheers,
Mick.
Nasty holes from nasty aluminium frames (Who would do such a thing?!) plugged up (8 of them) and glassed over.
Hole from cabin heater chimney also filled with new foam and glassed over.
(Didn't fancy carbon monoxide poisoning thank you!)
Boring pictures I know, but it's progress.
Cheers,
Mick.
Hello again,
Ayahuasca, take no notice of me mate, I'm one of those anal people, at least you got out on the water. But I apreciate your apreciation.
KT, on the move! Krikey, how did you manage to get off the rock? Keep posting, as if you're ever near Muros, we're there once or twice a year visiting the outlaws
Talking of itchey feet, we're both a bit fed up of life on the Island, well the Island is lovelly, it's the bloody people that spoil it! (But we're tied up with two substantial brick anchors at the mo, and I can't see much moving for a few years yet)
But this little boat is part of my big picture, as apart from my better half working with me on an 80 meter yacht for 3 years, she also did quite well with the lines and fenders when I had a big old gas guzzling Tempest 44, http://www.tempestyachts.net/packs/t44riviera.pdf but she's never sailed, so I'm hoping to break her into it real easy, as I really would like to get back to the Pacific before I fall off my perch.
Today in fact, I've been trying to convince my shipright pal that the next project should be a new build wood/epoxy Bristol Channel Pilot Cutter. I can see the lovely laminated frames now
Anyway, today, the cockpit coaming, cheek and wich blocks are finished.
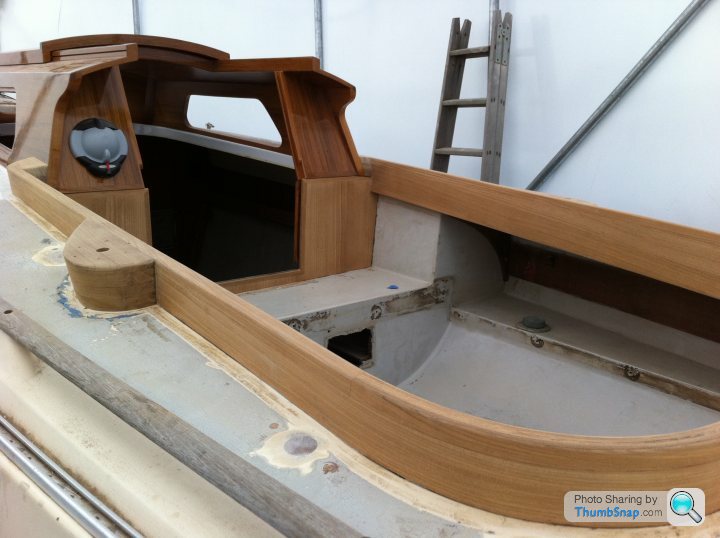

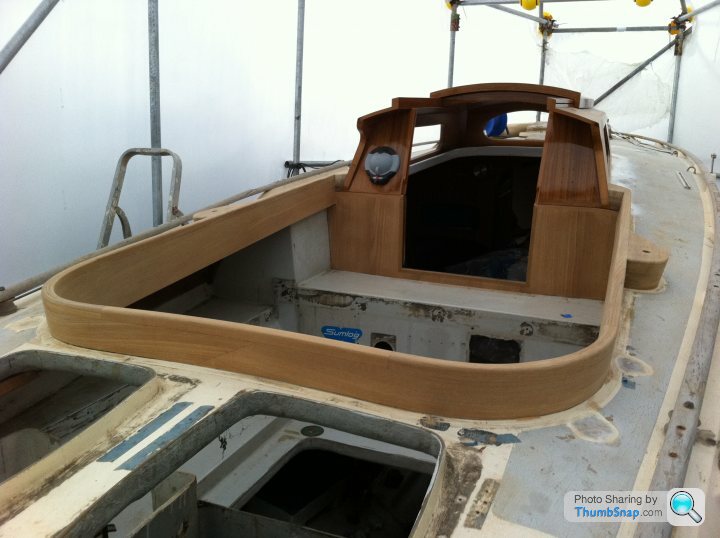
Also a very pleasing moment, the builders plaque is back. Ignore the nasty screws, they'll be replaced when the coaming has been varnished.
I hope Bjorn would approve.
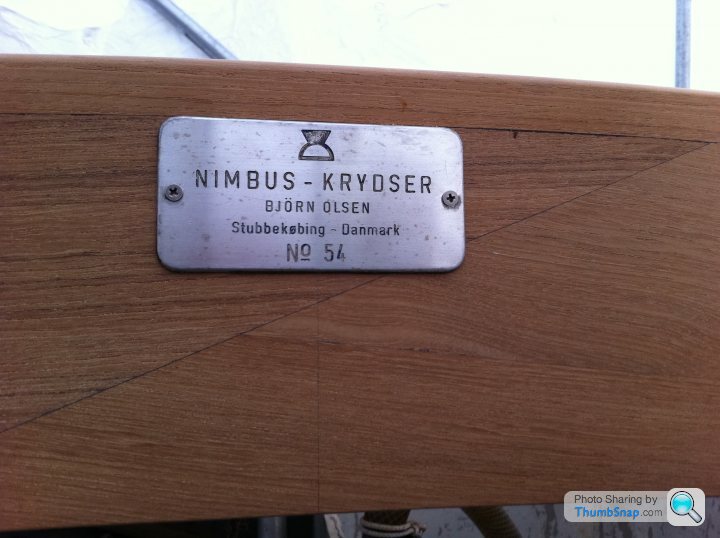
Now I need to spend the weekend with my lovely Wife, and next week start some more varnish. But I'll be back with some more progress pictures.
Have a great weekend Y'all!
Mick.
Ayahuasca, take no notice of me mate, I'm one of those anal people, at least you got out on the water.
But I apreciate your apreciation. KT, on the move! Krikey, how did you manage to get off the rock? Keep posting, as if you're ever near Muros, we're there once or twice a year visiting the outlaws
Talking of itchey feet, we're both a bit fed up of life on the Island, well the Island is lovelly, it's the bloody people that spoil it! (But we're tied up with two substantial brick anchors at the mo, and I can't see much moving for a few years yet)
But this little boat is part of my big picture, as apart from my better half working with me on an 80 meter yacht for 3 years, she also did quite well with the lines and fenders when I had a big old gas guzzling Tempest 44, http://www.tempestyachts.net/packs/t44riviera.pdf but she's never sailed, so I'm hoping to break her into it real easy, as I really would like to get back to the Pacific before I fall off my perch.
Today in fact, I've been trying to convince my shipright pal that the next project should be a new build wood/epoxy Bristol Channel Pilot Cutter. I can see the lovely laminated frames now
Anyway, today, the cockpit coaming, cheek and wich blocks are finished.
Also a very pleasing moment, the builders plaque is back. Ignore the nasty screws, they'll be replaced when the coaming has been varnished.
I hope Bjorn would approve.
Now I need to spend the weekend with my lovely Wife, and next week start some more varnish. But I'll be back with some more progress pictures.
Have a great weekend Y'all!
Mick.
Edited by mickrick on Friday 21st October 19:59
Hi KT,
No mate, just got back from Corwallshire. Nice. Didn't feel good to get back to Fraggle Rock to be honest.
Anyway I digress. Catching my breath from the final scary invoice!
Pushing on my house now, so I'll probably start again in the new year.
Watch this space.
How's things going in Galicia?
No mate, just got back from Corwallshire. Nice. Didn't feel good to get back to Fraggle Rock to be honest.
Anyway I digress. Catching my breath from the final scary invoice!
Pushing on my house now, so I'll probably start again in the new year.
Watch this space.
How's things going in Galicia?
Gassing Station | Boats, Planes & Trains | Top of Page | What's New | My Stuff