2014+ Ultima GTR build
Discussion


Hello World,
Here is a topic to tell a story about my build.
For my profile, I'm 38 years old, married, 2xfather, with engineering background, but my work is mainly management, then I need some activities with my hand to free my mind during my limited free time and because I love building stuffs. I am located in Switzerland (the other name of Sweden ;-)) close to the Léman.
After having discovered the Ultima 10 years ago on the web, a scary drive with Ted on a wet road in June 2013 convinced me to send the order for a black Ultima GTR top spec just 2 months later, without engine package yet.
The here is my trial to describe the build through with the forum as diffusion tool:
End of November 2013
Santa Claus from Romania brought me the sexy beast.
Don't look at the arrangement of the packages on the truck, it was not done like that by the factory. The first trailer had a problem and they have transferred it to another truck. The packages and car were perfectly arranged on the picture that the factory sent me. Luckily, even if some packages were damaged on their external appearance, everything was fine internally thanks to the quality of the protections.
The rear body has a chip of gelcoat which is gone close to the plate area and we can see some marks and hit on the powder coating close to the lowered floor.

December 2013
Crazy month at work with lots of travels, conferences, apero, parties, left me only the time to organize the working area, the tasks planning with checklist of all things to do, to sort the packages and to remove the prefitted body panels from the chassis.
But every time I go in the car, I feel like a kid again!

Christmas Holidays 2013
Real start of the build with the first panels = cutting, filing, testing, cutting, filing, ... until it fits, then drilling, gluing and riveting.

The bending of the first three panels around the chassis is probably the most critical task; the other tasks just need a lot of hours. It is easy to mark the panel if we hit the wood too hard and if the hit is not strong enough, it doesn't bend. My trick of the day to avoid marking the panels is to create radius on the edges of the wood piece, so that no concentration of constraints are located in this area.
The part which took a lot of time was the front bulkhead, it should be easy, but with the extended pedal box option and the new uprated chassis, it makes the task exponentially harder. The front bulkhead box needs to be bended and tilted in 4 different directions to be inserted, there is only one way to do it that I always forgot between each of the 5-6 fitting tests; a good protection of the chassis with heavy duty sticky tape and cardboard is a must. The new chassis has this transverse bar which limits or suppresses the access from below for everything: insertion, drilling, riveting.
A time consuming task is the finishing of the alu box. When delivered, it has ugly visible weldings that I didn't want to keep. Lot of elbow grease, the file, sandpaper 400, 800, 1500, 2000, polishing and cleaning, then I saw a small defect and started with the sandpaper again etc. Every time the part looked better, but I could see other defects. In such situation, I listened to the experienced and wised Stig, who asked himself on his build site if he does want to spend 500'000 doing it? Once we have to say no, it is enough like that. The look is already good for an area that we seldom look at.
But, it finally works after hours and its always motivating to reach a small step forwards. The ugly weldings are now mirror edges.

January 2013
Chassis turned upside down for the underside panels thanks to the help of three friends.
It's a lot of holes. The 30mm spacing must be adapted slightly to reach a nice alignment of the rivets between the different panels.
The picture with the rivet is only a final test, because the panels are now away for anodising, as they will be in rougher environment. The free days are used to add some Hammerite paint on the lowered floor and of the bottom of the chassis on the motor side, with a second layer on the sides facing the driving direction. It is around 50 additional gr for the car, but I hope worth it in the very long term.

Panels anodised, glued, riveted, cleaned, 2.5 hours, nice job for a Friday evening!
I have drilled 4x3mm holes in the front, left and right sections, of the radiator panel and three holes in the two sections of the "battery" panel, to allow water to exit. Nothing in the middle sections of the front, as it will be 100% sealed. As advised by Steve.
The edges of the lowered floor have been silicon "Würth" sealed.
Small job, the battery tray, just need to fix the rivet-nuts holding the battery when I get the right tool. Until then, it will stay loose.

The radiator double panel are ready and back from anodizing. Nice mat finish!
The best tool to cut the aluminium panel was finally simply this metal plate scissors.

February 2014
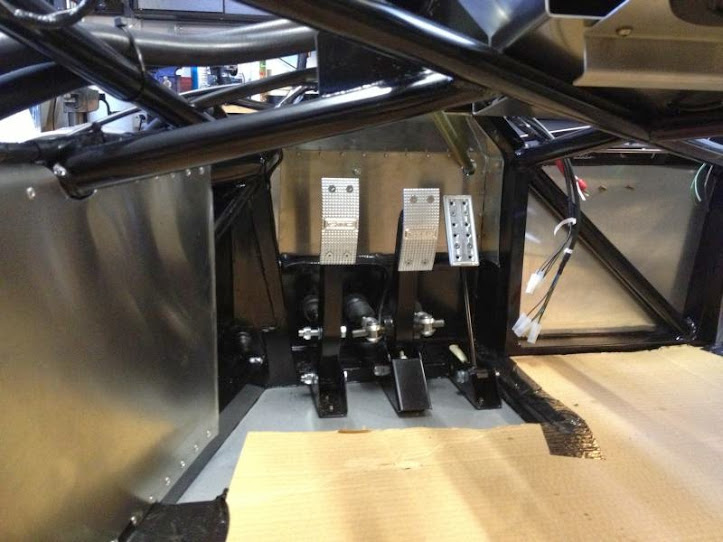
- Steering system installation. With the extended pedal box, the first universal join needs some serious modifications, as the angle is much higher with this configuration to avoid having to drill a big hole in the pedal box.
- Isolation of the side panels and rear bulkhead. The best way to glue the parts when the panels are already fitted is to leave around 5cm on the sides without contact glue.

- Gold heat insulation on the rear bulkhead.
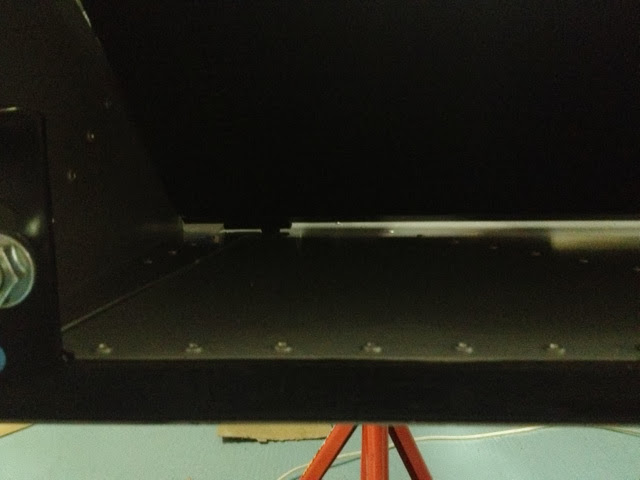
- Double skin legs area. This is a long job. I took this opportunity to add an electric tube between the skins if I want to fit electrical stuffs in the future in the gearchange area.
- Installation of the radiator and cooling pipes.
- Installation of the rear brake line and clutch line.
- Battery cable
- Installation of the rear-left wishbones, suspension, upright, brake, handbrake calipers and rim to see how it fits... and it looks good!
- Positioning of the wiring loom.
Status of the build, end of February

March 2014
- Fine tuning of the steering for smooth operation with some filing of the hot spots. Reduction of the length of the screws for a nice fit with the nuts.
- Fitting of the air conditioning in the cockpit and pulling of the heater and AC tubing to the engine bay. Installation of the AC control, heat valve and electrical connection. I was thinking about adding nicer visible control for the AC, but finaly the hidden version is in a certain way elegant to have at the end a very simple dashboard. My goal at the end is to have as interface only one touch screen monitor, the start button and control stalk on the dashboard + some buttons for the functions missing in the stalks.
- Near final fit of the loom (95%) and all brake lines.
- Horn installation (5 minutes job)
- Installation of all wishbones and uprights with suspension. It can be now considered as a rolling chassis and it looks like a race car!
- Lots of search for the GPS-stereo system. I think that I'm on the right track for a very nice, simple, well integrated solution.. to be continued...
- Internal black painting of the left side pod. The weather was so nice this Sunday that I wanted to do something outside to honor the arrival of the spring.
Status of the build, middle of March

The new pedal pads
The rear rims are really huge

Now let's move to the luggage boxes!
Here is a topic to tell a story about my build.
For my profile, I'm 38 years old, married, 2xfather, with engineering background, but my work is mainly management, then I need some activities with my hand to free my mind during my limited free time and because I love building stuffs. I am located in Switzerland (the other name of Sweden ;-)) close to the Léman.
After having discovered the Ultima 10 years ago on the web, a scary drive with Ted on a wet road in June 2013 convinced me to send the order for a black Ultima GTR top spec just 2 months later, without engine package yet.
The here is my trial to describe the build through with the forum as diffusion tool:
End of November 2013
Santa Claus from Romania brought me the sexy beast.
Don't look at the arrangement of the packages on the truck, it was not done like that by the factory. The first trailer had a problem and they have transferred it to another truck. The packages and car were perfectly arranged on the picture that the factory sent me. Luckily, even if some packages were damaged on their external appearance, everything was fine internally thanks to the quality of the protections.
The rear body has a chip of gelcoat which is gone close to the plate area and we can see some marks and hit on the powder coating close to the lowered floor.
December 2013
Crazy month at work with lots of travels, conferences, apero, parties, left me only the time to organize the working area, the tasks planning with checklist of all things to do, to sort the packages and to remove the prefitted body panels from the chassis.
But every time I go in the car, I feel like a kid again!
Christmas Holidays 2013
Real start of the build with the first panels = cutting, filing, testing, cutting, filing, ... until it fits, then drilling, gluing and riveting.
The bending of the first three panels around the chassis is probably the most critical task; the other tasks just need a lot of hours. It is easy to mark the panel if we hit the wood too hard and if the hit is not strong enough, it doesn't bend. My trick of the day to avoid marking the panels is to create radius on the edges of the wood piece, so that no concentration of constraints are located in this area.
The part which took a lot of time was the front bulkhead, it should be easy, but with the extended pedal box option and the new uprated chassis, it makes the task exponentially harder. The front bulkhead box needs to be bended and tilted in 4 different directions to be inserted, there is only one way to do it that I always forgot between each of the 5-6 fitting tests; a good protection of the chassis with heavy duty sticky tape and cardboard is a must. The new chassis has this transverse bar which limits or suppresses the access from below for everything: insertion, drilling, riveting.
A time consuming task is the finishing of the alu box. When delivered, it has ugly visible weldings that I didn't want to keep. Lot of elbow grease, the file, sandpaper 400, 800, 1500, 2000, polishing and cleaning, then I saw a small defect and started with the sandpaper again etc. Every time the part looked better, but I could see other defects. In such situation, I listened to the experienced and wised Stig, who asked himself on his build site if he does want to spend 500'000 doing it? Once we have to say no, it is enough like that. The look is already good for an area that we seldom look at.
But, it finally works after hours and its always motivating to reach a small step forwards. The ugly weldings are now mirror edges.
January 2013
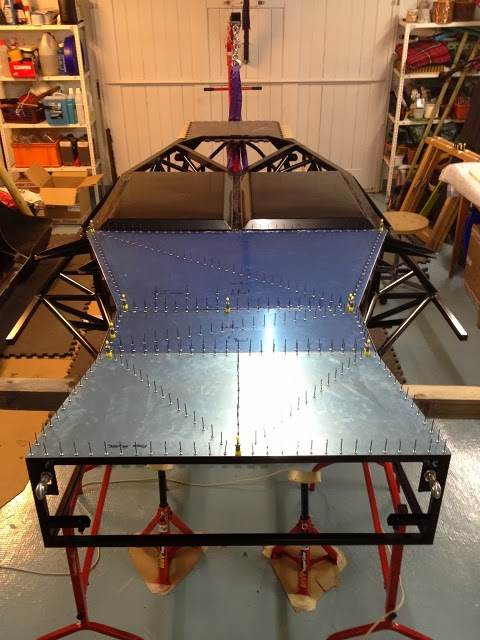
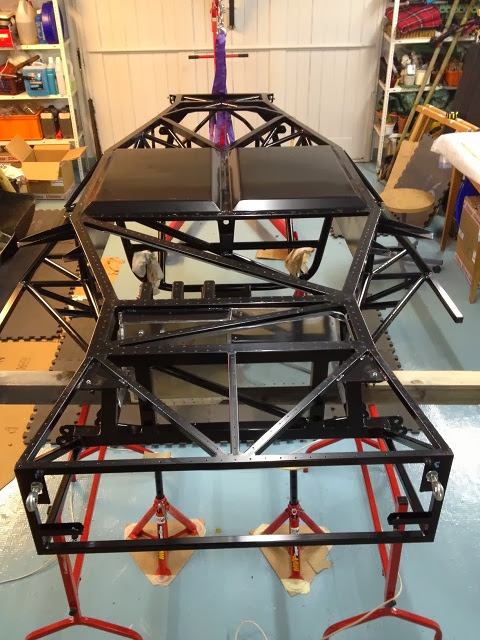
Chassis turned upside down for the underside panels thanks to the help of three friends.
It's a lot of holes. The 30mm spacing must be adapted slightly to reach a nice alignment of the rivets between the different panels.
The picture with the rivet is only a final test, because the panels are now away for anodising, as they will be in rougher environment. The free days are used to add some Hammerite paint on the lowered floor and of the bottom of the chassis on the motor side, with a second layer on the sides facing the driving direction. It is around 50 additional gr for the car, but I hope worth it in the very long term.
Panels anodised, glued, riveted, cleaned, 2.5 hours, nice job for a Friday evening!
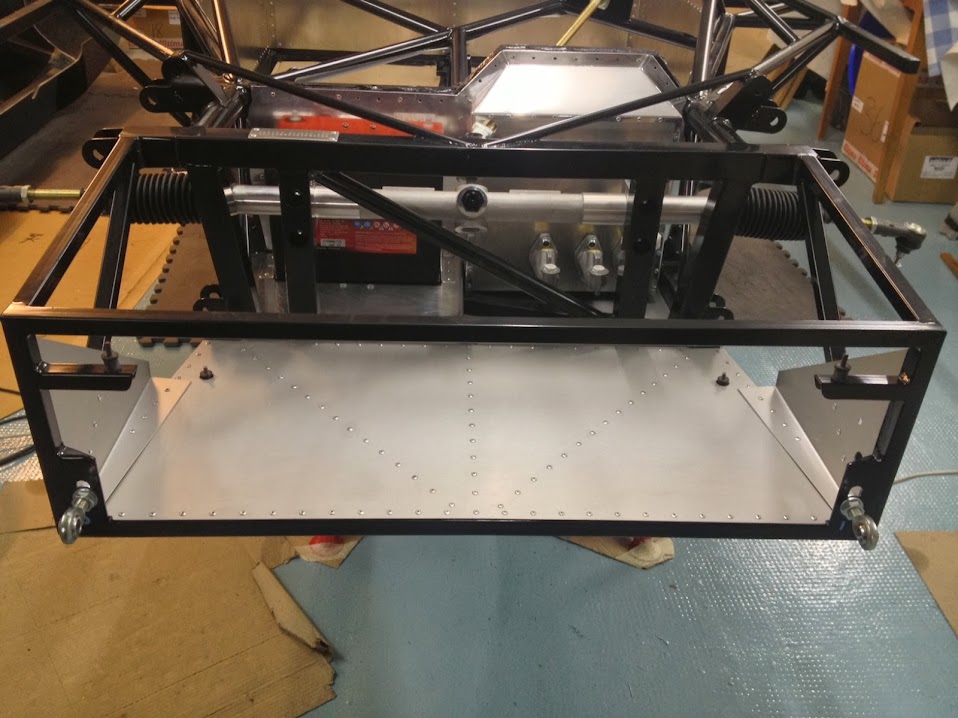
I have drilled 4x3mm holes in the front, left and right sections, of the radiator panel and three holes in the two sections of the "battery" panel, to allow water to exit. Nothing in the middle sections of the front, as it will be 100% sealed. As advised by Steve.
The edges of the lowered floor have been silicon "Würth" sealed.
Small job, the battery tray, just need to fix the rivet-nuts holding the battery when I get the right tool. Until then, it will stay loose.
The radiator double panel are ready and back from anodizing. Nice mat finish!
The best tool to cut the aluminium panel was finally simply this metal plate scissors.
February 2014
- Steering system installation. With the extended pedal box, the first universal join needs some serious modifications, as the angle is much higher with this configuration to avoid having to drill a big hole in the pedal box.
- Isolation of the side panels and rear bulkhead. The best way to glue the parts when the panels are already fitted is to leave around 5cm on the sides without contact glue.
- Gold heat insulation on the rear bulkhead.
- Double skin legs area. This is a long job. I took this opportunity to add an electric tube between the skins if I want to fit electrical stuffs in the future in the gearchange area.
- Installation of the radiator and cooling pipes.
- Installation of the rear brake line and clutch line.
- Battery cable
- Installation of the rear-left wishbones, suspension, upright, brake, handbrake calipers and rim to see how it fits... and it looks good!
- Positioning of the wiring loom.
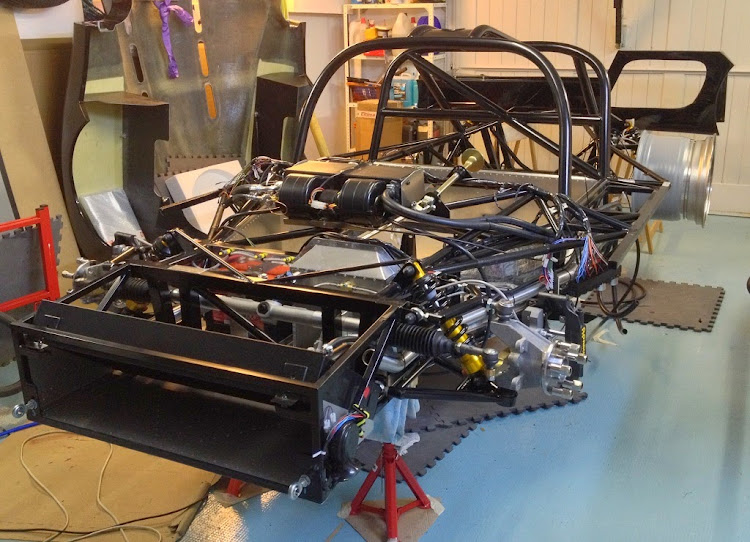
Status of the build, end of February
March 2014
- Fine tuning of the steering for smooth operation with some filing of the hot spots. Reduction of the length of the screws for a nice fit with the nuts.
- Fitting of the air conditioning in the cockpit and pulling of the heater and AC tubing to the engine bay. Installation of the AC control, heat valve and electrical connection. I was thinking about adding nicer visible control for the AC, but finaly the hidden version is in a certain way elegant to have at the end a very simple dashboard. My goal at the end is to have as interface only one touch screen monitor, the start button and control stalk on the dashboard + some buttons for the functions missing in the stalks.
- Near final fit of the loom (95%) and all brake lines.
- Horn installation (5 minutes job)
- Installation of all wishbones and uprights with suspension. It can be now considered as a rolling chassis and it looks like a race car!
- Lots of search for the GPS-stereo system. I think that I'm on the right track for a very nice, simple, well integrated solution.. to be continued...
- Internal black painting of the left side pod. The weather was so nice this Sunday that I wanted to do something outside to honor the arrival of the spring.
Status of the build, middle of March
The new pedal pads
The rear rims are really huge
Now let's move to the luggage boxes!
Edited by UltimaFAN on Tuesday 18th March 19:00
Thanks Daniel. It is already one month since you came here. With 2 hours of work 5 times a week, the work moves slowly forwards.
For the quality of the build, the problem is that we always think that we could have done details slightly better, and we know the small "mistakes", scratches, even if they are not in a visible area.
For the quality of the build, the problem is that we always think that we could have done details slightly better, and we know the small "mistakes", scratches, even if they are not in a visible area.
Gassing Station | Ultima | Top of Page | What's New | My Stuff