Setting out floor tiles
Discussion


Hi all,
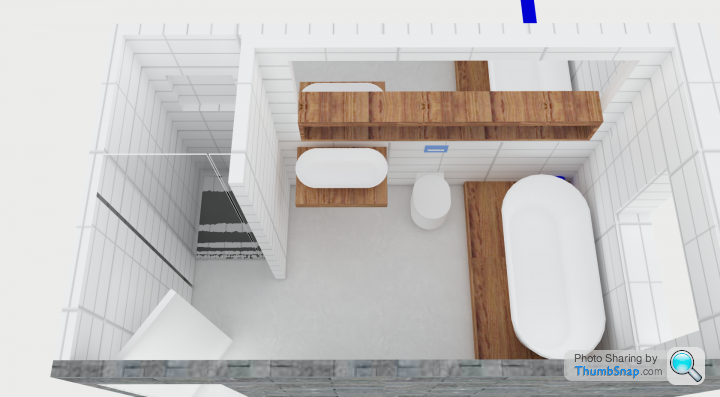
My bathroom is pretty completely boarded out with marmox. I'm trying to decide on a setting out pattern for the 600x600 porcelain floor tiles which is complicated by the level access tray requiring an envelope cut. I've drawn up 4 variations, and would be grateful for your opinions....

My bathroom is pretty completely boarded out with marmox. I'm trying to decide on a setting out pattern for the 600x600 porcelain floor tiles which is complicated by the level access tray requiring an envelope cut. I've drawn up 4 variations, and would be grateful for your opinions....
Wifey is keen to avoid mosaic due to the abundance of grout lines. Also there is no mosaic version.
I was goin to go wrhi layout 1 to line up all the tiles, but it seems to flout setting out rules...
A symmetrical layout is likely to result in lots of awkward cuts at the tray - I guess I'll have to put up with offset grout lines...
I was goin to go wrhi layout 1 to line up all the tiles, but it seems to flout setting out rules...
A symmetrical layout is likely to result in lots of awkward cuts at the tray - I guess I'll have to put up with offset grout lines...
Griff Boy said:
Well, 2 is the most correct set up IMHO as you've got even cuts around the perimeter of the room. There's always issues with started off a wall with whole tiles , as the room is never 100% square and you'll either find yourself with ever widening grout lines at one edge or trying to shave 3 mm off a tile to get it to fit, also similar issues with doorways, you'll often need to run the tile into the doorway slightly to have it finish under the door, which you can't do if you started in a whole tile....
However I would always follow the lines of the whole tiles into the wet area, personally in wouldn't stagger the joints as per you plans.
I agree it is a bit of a conundrum. The default layout is as yo describe, aiming to achieve even cuts at the edges - this leads to offset lines at the shower tray and very awkward crossed envelope cuts which will look like crazy paving. Going with layout 1 from the left, I end up with a 300 half tile down one side of the room, and shaving 10mm of whole tiles at the edge.However I would always follow the lines of the whole tiles into the wet area, personally in wouldn't stagger the joints as per you plans.
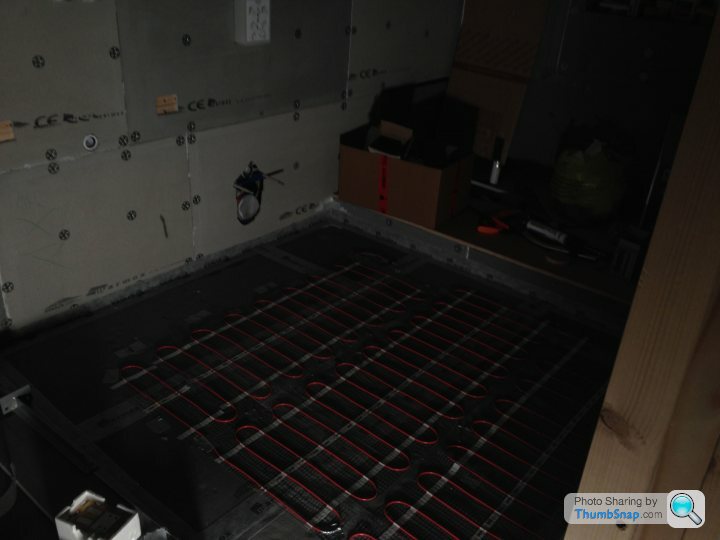
Here is a pic of the room so far - I'm attempting to pour self levelling by this weekend. I've set up a dam around the tray to achieve a 6mm lip. The shower screen will sit
wish me luck as it could go completey wrong from here
matty g said:
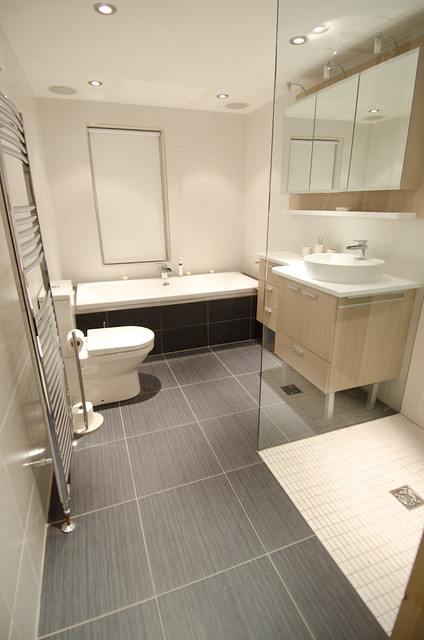 Bathroom done 1 by mpg Photo's, on Flickr
What self levelling are you using.
I love mapei ultraplan renovation screed.
Edited by matty g on Thursday 27th November 15:18
Going to stick the tiles on the floor with BAL single part flex and walls with mosaic fix.
Is that a DIY or pro install? I'm getting varying opinions on what I should do. First quote has come in at 1500 to tile the room with me supplying everything.......
Also, what tile layout would you go with?
Gassing Station | Homes, Gardens and DIY | Top of Page | What's New | My Stuff