Our School House project
Discussion


Evening all,
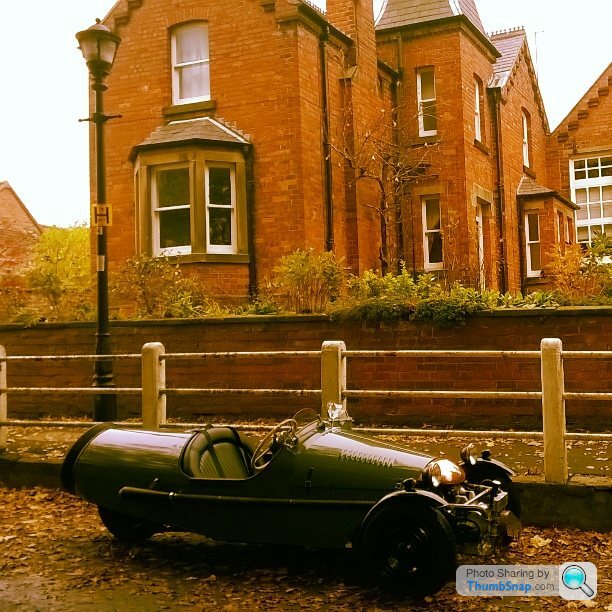
Exciting day today as we finally got the keys for our new project. It's a Victorian school house; some disagreement whether it's 1876 or 36, but Gothic revival style which we love.
I don't think it will live up to some of the amazing renovation threads here, but I thought it would be a good way to document my progress and get some ideas from the PH collective. Due to a (very!) tight budget, progress will be slow and I'll try to use reclaimed and second hand where possible; it will be the house that ebay built! Either way, or aim is to restore the house to its former glory as much as possible. I'm a teacher, so hopefully will get a good run at it this holidays with the help of my retired father.
Bit of history - the house is the old headmasters house and attached (by approx 1ft of shared wall!) to the old school. The whole school plot was bought from the council by a developer in 2001. He then split it into three dwellings - It was a pretty basic 'renovation' - I suppose just a reflection of what was happening in the housing market at the time, although the house benefited from a re-wire, gas CH and new DPM, so hopefully most of my work left for me is cosmetic. The developer sold the other two and kept this as a rental until now when We bought from him.
The condition in the photos looks better than it is really - i have never seen so much gloss! It's over everything, you just wouldn't believe. I'm handy with a car, but DIY is a new venture. Wish me luck....
Pic time!
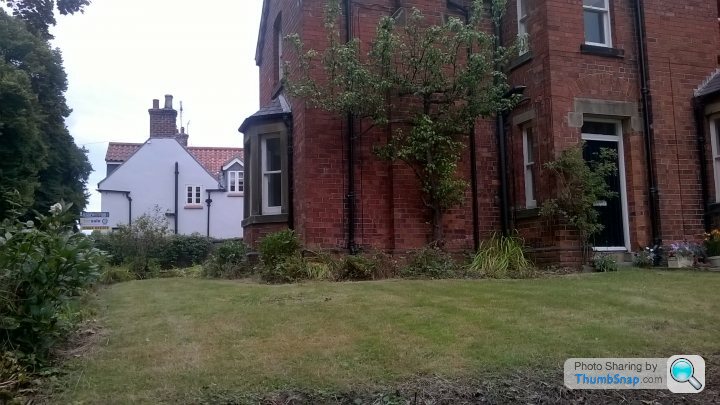
I'll admit to buying because of the turret!

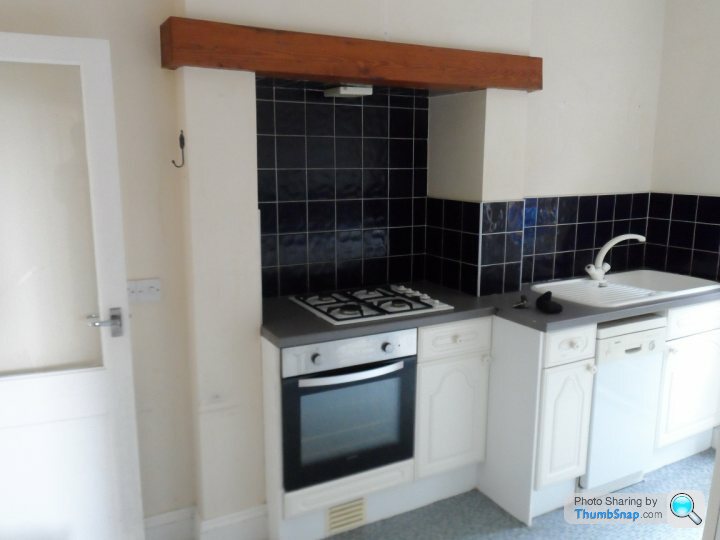
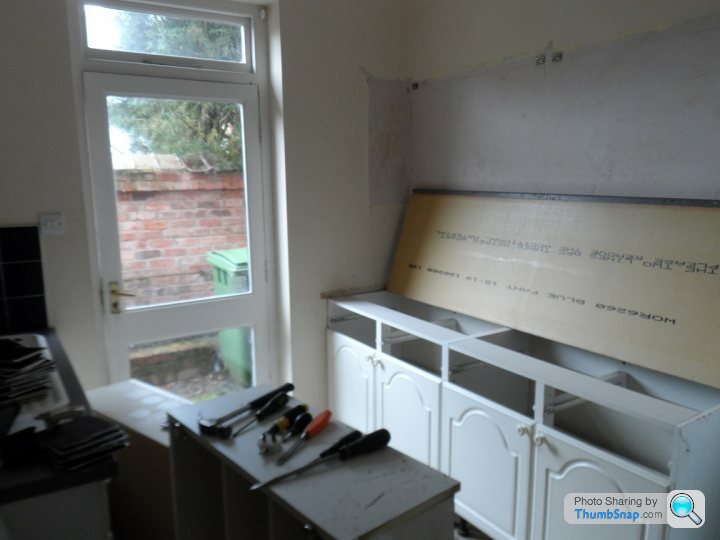
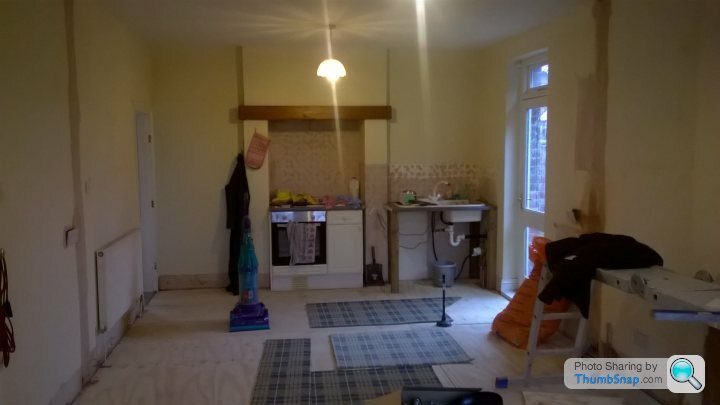
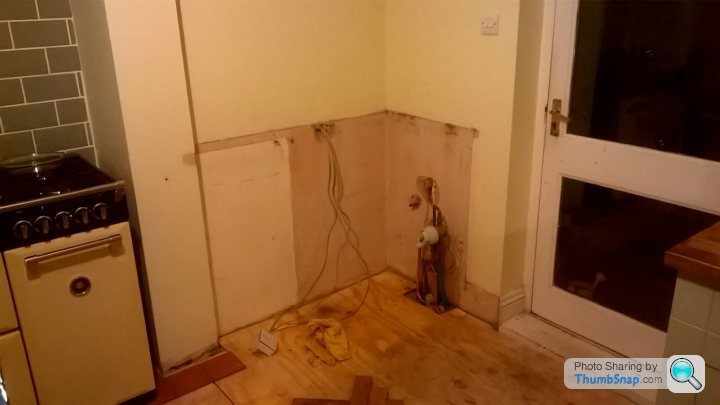
Kitchen - it's an awkward width, wider than a standard galley, but not enough for much else:
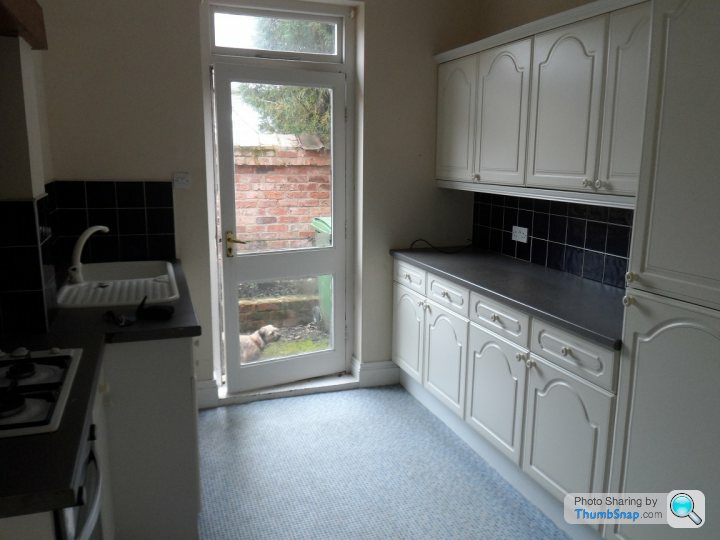
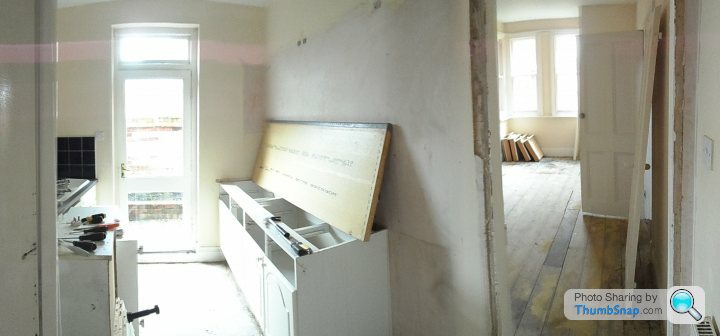
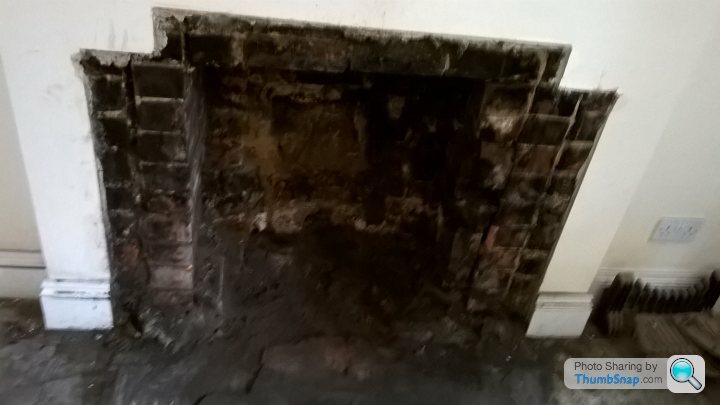
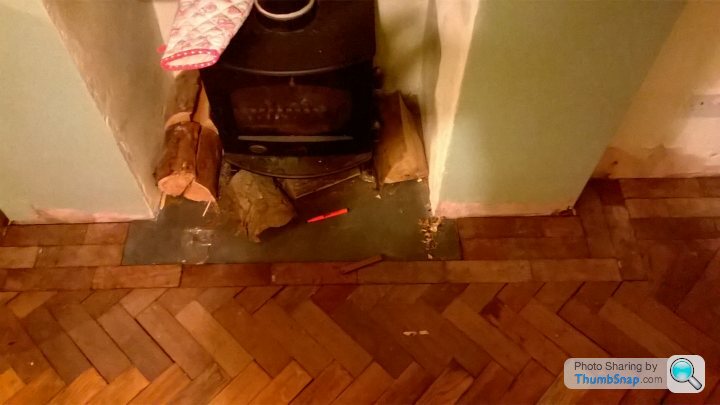
Dining room. The plan is to knock through between kitchen and diner, then remove that (bloody awful!) fire and fit a log burner
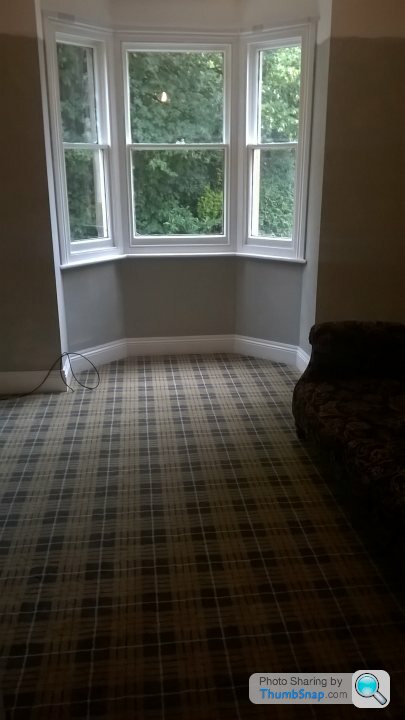
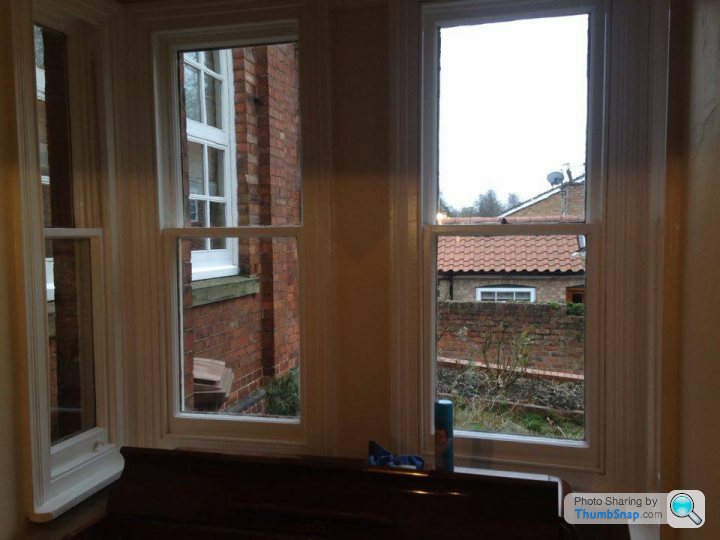
Square bay in the dining room - how do I fit curtains?!

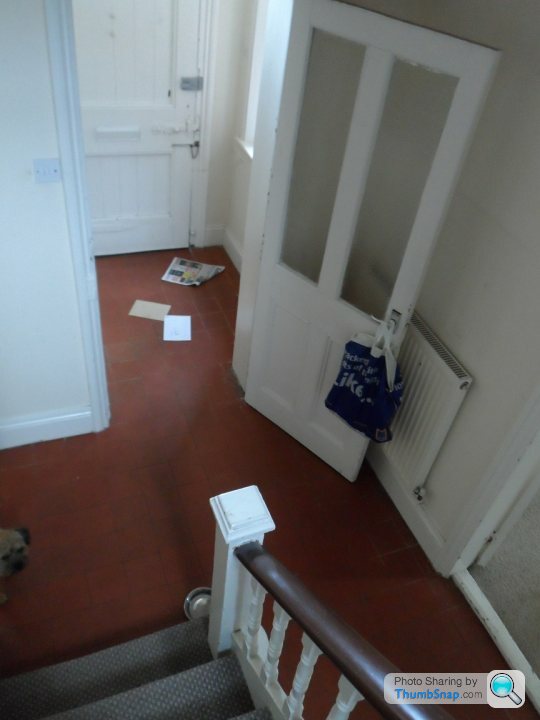
Hall. Nice flooring, just again needs a good tidy after years of gloss work. Carpets also smell of dog p...

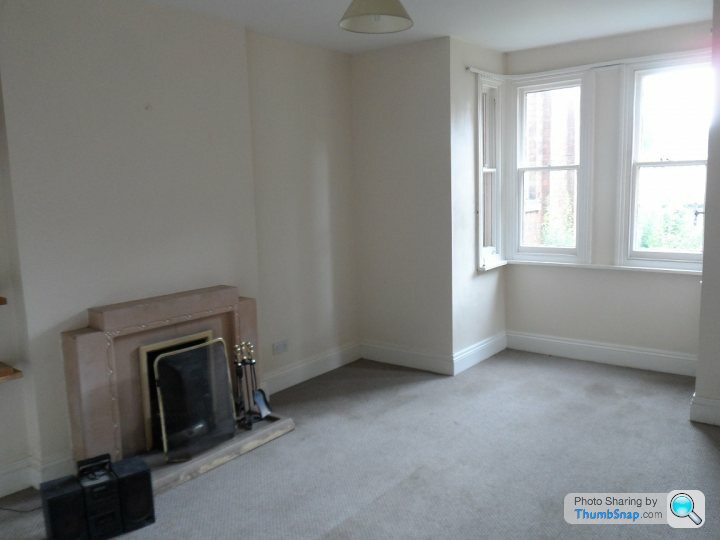
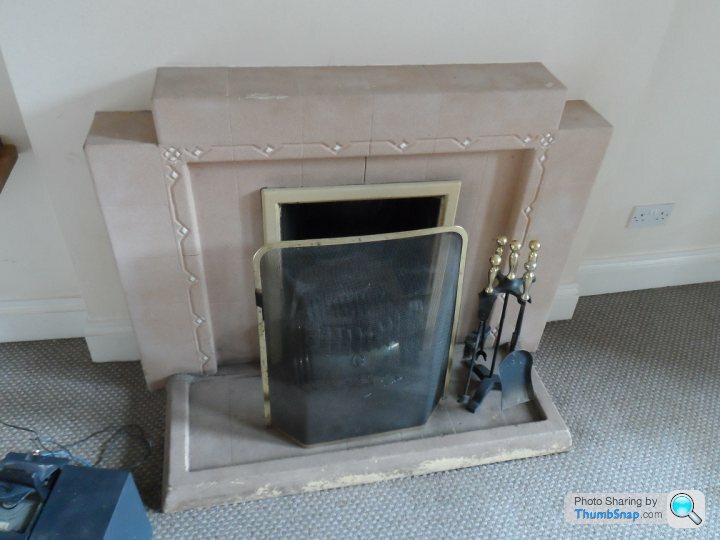
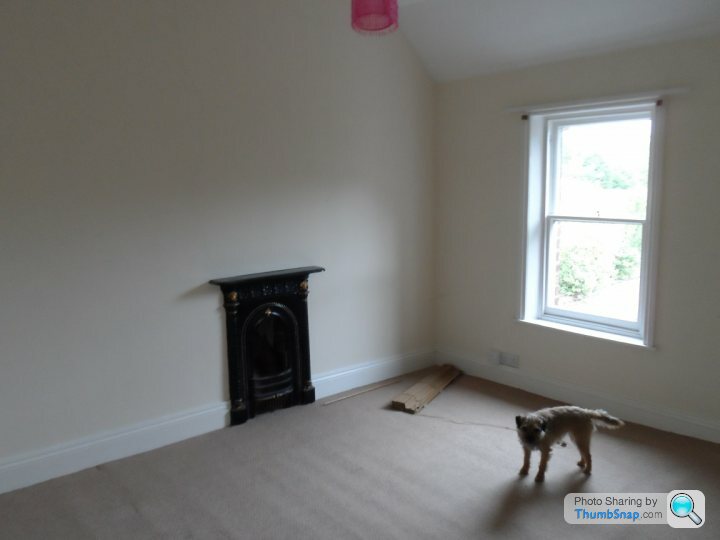
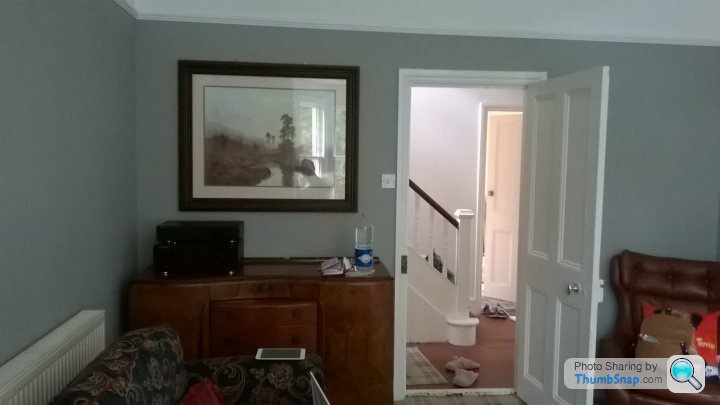
Lounge is small buy cosy. We hope the kitchen diner will become our living space and the lounge will act as a snug. Not much needed apart from decor and some re-plastering due to a (now fixed) damp issue. Fireplace is quite offensive, but that can wait.

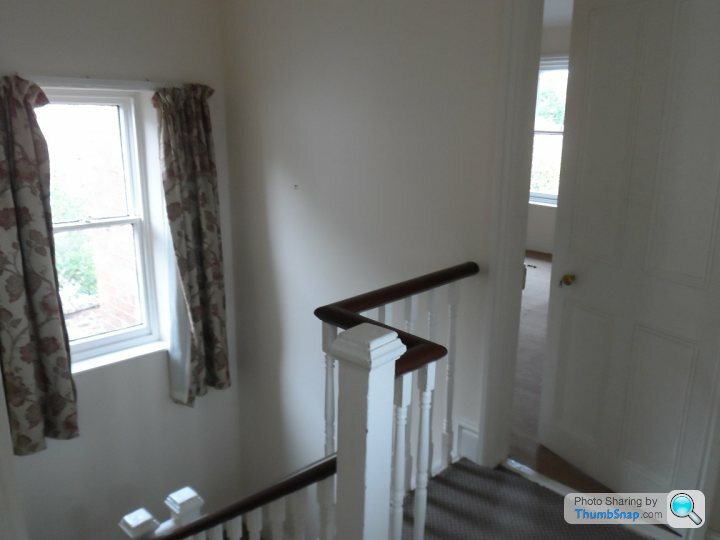
1st floor:
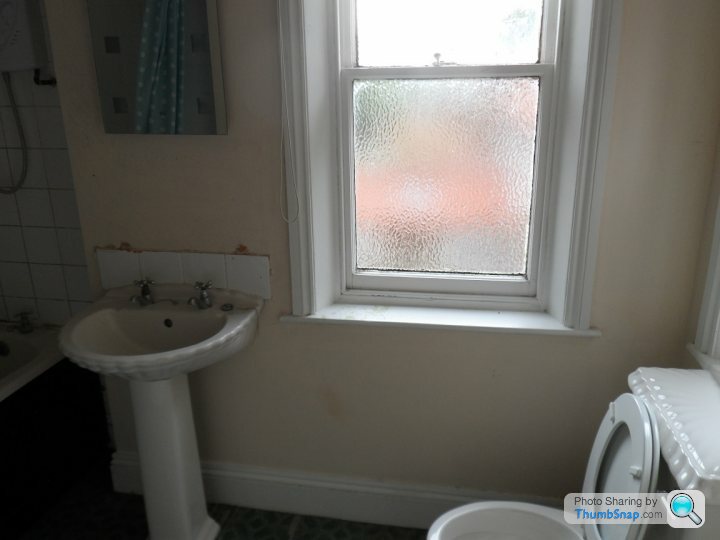
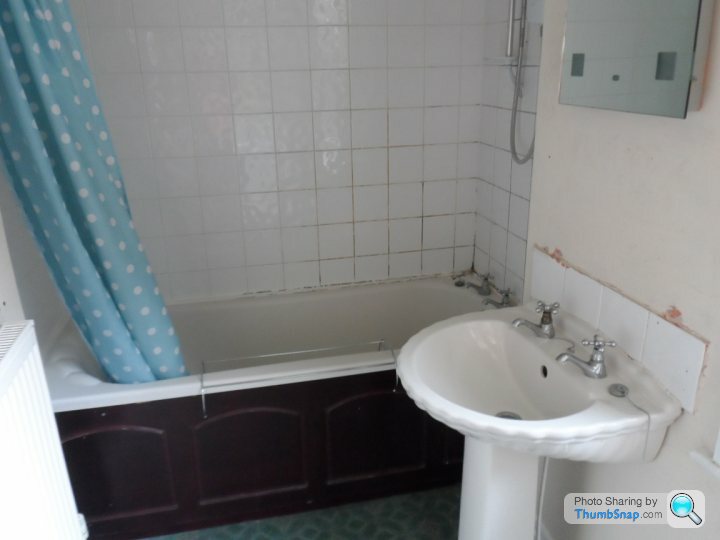
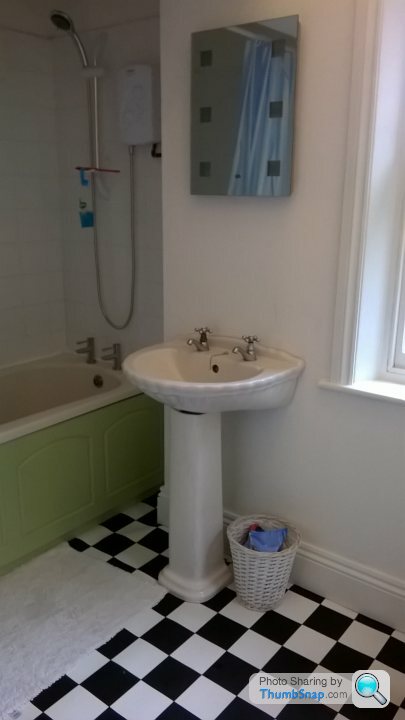
Bathroom isn't far off 'Trainspotting spec'
Anyway, we exchanged and completed today at lunch time, so I had chance to make some headway into removing the old kitchen units. The plan is to knock the dividing wall down - which luckily isn't supporting anything - then create one room with a kitchen island to the left of centre.
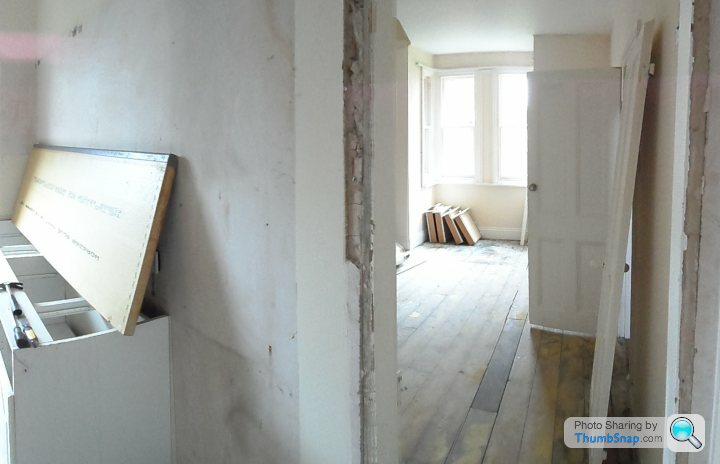
The Kitchen floor is concrete and dining room has floorboards. I wan't to fit reclaimed parquet - am I right in thinking the best move would be to fit ply to the whole floor to get a level base to begin with?
Thanks for looking,
Phil
Exciting day today as we finally got the keys for our new project. It's a Victorian school house; some disagreement whether it's 1876 or 36, but Gothic revival style which we love.
I don't think it will live up to some of the amazing renovation threads here, but I thought it would be a good way to document my progress and get some ideas from the PH collective. Due to a (very!) tight budget, progress will be slow and I'll try to use reclaimed and second hand where possible; it will be the house that ebay built! Either way, or aim is to restore the house to its former glory as much as possible. I'm a teacher, so hopefully will get a good run at it this holidays with the help of my retired father.
Bit of history - the house is the old headmasters house and attached (by approx 1ft of shared wall!) to the old school. The whole school plot was bought from the council by a developer in 2001. He then split it into three dwellings - It was a pretty basic 'renovation' - I suppose just a reflection of what was happening in the housing market at the time, although the house benefited from a re-wire, gas CH and new DPM, so hopefully most of my work left for me is cosmetic. The developer sold the other two and kept this as a rental until now when We bought from him.
The condition in the photos looks better than it is really - i have never seen so much gloss! It's over everything, you just wouldn't believe. I'm handy with a car, but DIY is a new venture. Wish me luck....
Pic time!
I'll admit to buying because of the turret!
Kitchen - it's an awkward width, wider than a standard galley, but not enough for much else:
Dining room. The plan is to knock through between kitchen and diner, then remove that (bloody awful!) fire and fit a log burner
Square bay in the dining room - how do I fit curtains?!
Hall. Nice flooring, just again needs a good tidy after years of gloss work. Carpets also smell of dog p...
Lounge is small buy cosy. We hope the kitchen diner will become our living space and the lounge will act as a snug. Not much needed apart from decor and some re-plastering due to a (now fixed) damp issue. Fireplace is quite offensive, but that can wait.
1st floor:
Bathroom isn't far off 'Trainspotting spec'
Anyway, we exchanged and completed today at lunch time, so I had chance to make some headway into removing the old kitchen units. The plan is to knock the dividing wall down - which luckily isn't supporting anything - then create one room with a kitchen island to the left of centre.
The Kitchen floor is concrete and dining room has floorboards. I wan't to fit reclaimed parquet - am I right in thinking the best move would be to fit ply to the whole floor to get a level base to begin with?
Thanks for looking,
Phil
Edited by hardcastlephil on Monday 27th July 19:55

Evening,
Sorry I keep bumping my own thread with updates - just nice to take stock.
Not much more today - I got the wall down, then as had no trailer made 5 tip runs with rubble.
Wall down:

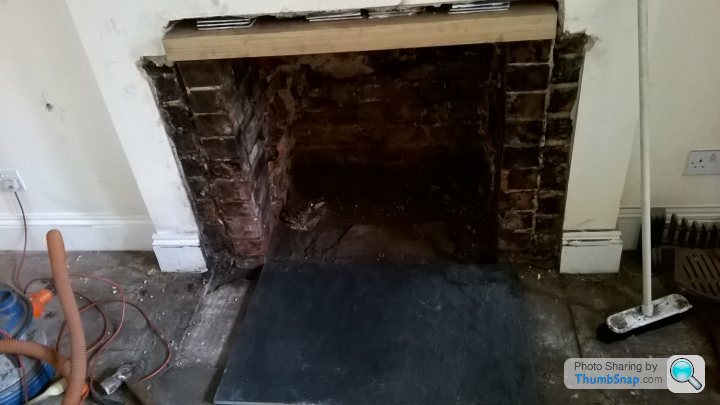
The fire came out pretty easily but had a slight lintel issue - there was a iron bar acting as a lintel, but only supported by the row of fire bricks which need to come out. I've got a piece of oak coming tomorrow which will fill the whole void, but not really sure how to get this in - current thinking = bottle jack?!
Hole:
I've just got back from viewing 25sqM of reclaimed oak parquet, as spied on eBay. Would have made an offer until I stood in his freshly laid concrete and had to make a hasty exit. Hope to do a deal on this in the next few days though as I dont think we're far from flooring time.
So all okay really. Plans for tomorrow are to get the lintel in, then look at running water to the far wall in prep for a new sink, and remove the old toilet from outhouse. Also need to source some stone for a hearth, and maybe to use as a base for the range cooker - is this a done thing? The range will go in the chimney breast hole - but as this is 1000 and I was planning on a 900 range, i thought sitting on a hearth would give a 'freestanding' look?!
P
Thanks - we had thought of something similar actually. Will have a think this week.
Not much to show for todays work - we pushed back some slipped tiles (turns out I had a nice 9" square hole in the roof) and got the remnants of the fireplace out before fitting an oak lintel. It looks like nothing, but there must have been 10 rubble bags worth.
We were planning on a sandstone base, but the previous owners had left this slate slab in the garage - rude not to use it!
P
Has anyone used these before?
http://www.shutters-direct.co.uk/
They seem much cheaper than I would have expected - which experience suggests is never a good thing!
Lots of progress down at the house today, although I was so busy I didn't get many pictures.
Begun work in the outhouse - removed old toilet and vinyl tiles. Has a horrid sewer smell which I thought was the toilet, but not really sure now. Under the tiles was wet so maybe that? Left open to dry off over the weekend anyway then I'll investigate further. The final plan is to create a nice utility area in there as there's plenty of room although not exactly usable as not connected to the house.
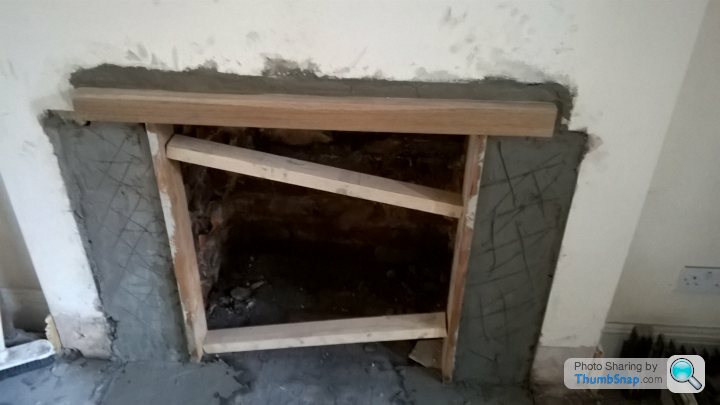
I left my old man mixing up a lime render to tidy up the fireplace - wooden shuttering will be removed, hopefully give a good edge to work with:
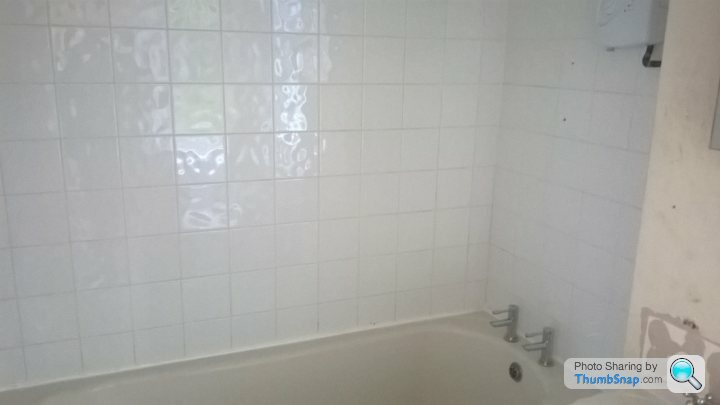
The bathroom was pretty grim but as we've just ordered a kitchen it will, like the rest of the house, have to be tidied up cheaply until funds allow something pretty. Who really would fit a shell bath in 2001?!
Anyway - I attacked the grout with some cleaner which did a cracking job. Then cut our the old sealing strip using the dremmel and filled and tidied with silicone - maybe a little 'bodge' but tis only to tide us over. Luckily we found some new bath taps from the last project so managed to fit them (although a little out of place here!). I can't pretend that it's nice, but at least we can live with it without the constant worry of legionnaires/aids etc.
Plans for tomorrow; find some flooring (I took the carpet out and it was hard with crustyness), get a new overflow and plug then have a tidy. I get a early finish as we're playing at a camper festival somewhere near Leeds. Yay.
Phil
Morning, thanks for the comments.
Elanfan - yes, there is a bent plastic track up at the moment, but it looks a bit Heath Robinson. I'm not the biggest plan of the plastic track either - not snob value but my parents used to swear by it, and their taste is questionable!!
Just went back to the blinds website and when I put in the measurements I want, the £50 blinds become £800, which would be £1200 for the whole bay. Back to the drawing board.
TVR - here is the floorplan from the agent:
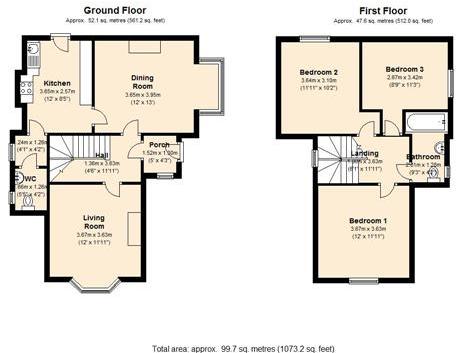
The diving wall between kitchen and diner has now gone. In an ideal world I wanted to block the door to the downstairs WC and access from the hall, but sadly the stairs are too low to fit a doorway. There is a small outhouse which is attached'above' the kitchen and dining room (it's about where the fireplace is), and I'll be making that into a utility - I took the toilet out yesterday but aside from a quick tidy I'll leave this until another time.
Man cave wise I've got a good sized single brick garage with pitched roof. It's not quite what I'm used to here as we have cow sheds and old garages etc to work with, but the plan is to rack it out, paint the floor and have the 3 wheeler in there only. I'll try get some more pics if I head down today.
Lighting is an interesting one - seen E36guy's name come up a bit so will look into that. I was hoping for some nice pendant lamps hanging down in the kitchen diner, but I need to agree on plans with Mrs H.
Cheers,
Phil
Evening all,
Radio silence due to having moved and no internet at the new house as yet – that’s another story as only Kingston Communications appear to be able to provide a line in our area?!
I’ve also been completely stupid today when nailing floorboards in preparation for the carpet fitters: Nail no. 1 – through a wire. Nail no. 2 – Through a heating pipe. No 1 was quickly fixed, but I only noticed the issue with No.2 about an hour ago which meant lifting newly laid carpets to see what I’d done. Luckily my new neighbor is a plumber and is coming round to fix tomorrow – sadly my living room ceiling hasn’t fared so well – more paint needed .
I guess as anyone else who has gutted a house knows, it can look like nothing’s been done when really you’ve spent weeks grafting – currently feeling a little like this, although we had carpets fitted today in two rooms to there is some light at the end of the tunnel!
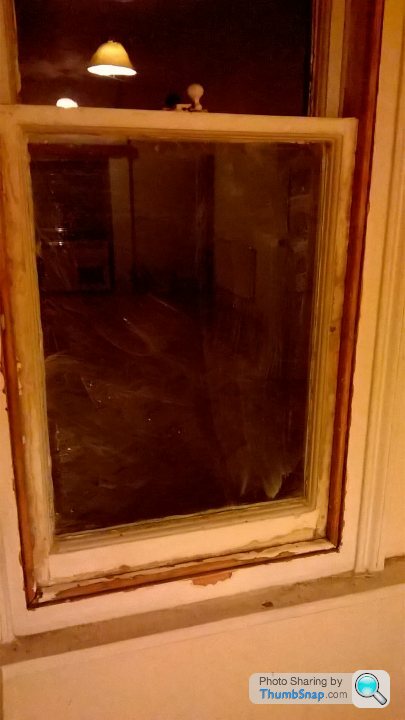
So, the lounge. Managed to get one of the windows working again after been painted shut for what must have been decades. I will try to get the others working, including tops, but sash cords are missing on the outer two windows and the amount of paint to get through here is incredible. Not much else has been done really; we’ve painted everything and currently waiting to get some paint and put a second coat of grey on two walls (2.5L gets you nowhere!). Also will head to Jewsons or similar tomorrow to get a picture rail and fit that. After reading comments here about compound mite saws I’ve plumped for the evolution fom Screwfix – nice present from my dad and I can’t wait to use it!
Carpet went down today too – not to everyone’s taste I guess, but we like it…
As above, the bathroom was a temporary fix and is now up and running- It’s not great, but will do until funds allow for something really nice next year (hopefully!!).
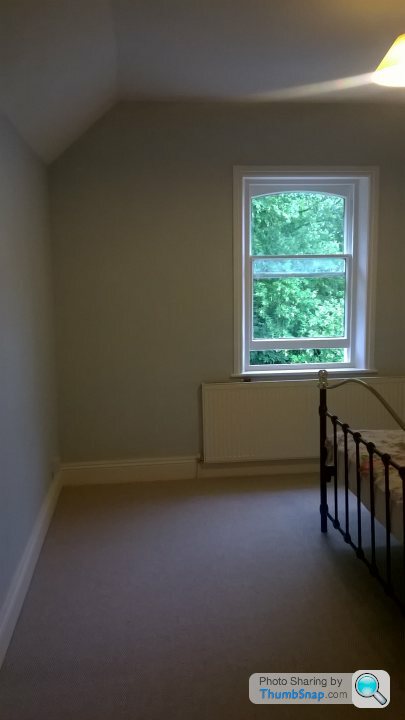
Bedroom painted and new carpet today – the wall behind the bed is waiting for wallpaper and again, a second coat on a couple of walls would help finish it off. Amazing what some decoration does though!
Kitchen ordered – Mrs H won’t let me keep this little gem we’re currently using:

The kitchen/diner hasn’t changed much really except some plaster on the walls and I’ve covered in ply to get a nice base for my parquet (which I hope to start over the weekend/Monday). Also on the look out for a nice range cooker to fit in the chimney gap. My parents use a Aga and although lovely I know we couldn’t manage without a ‘normal’ cooker too, which we don’t have room for. The gap is 104cm, but we’d quite like a 90cm range with room down the sides for a more free standing effect, thoughts?
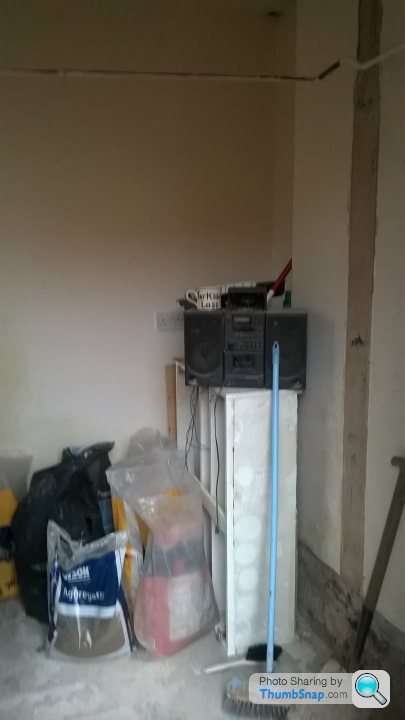
In the outhouse I’ve been trying to get rid of the smell still. Toilet now gone, as has the stud wall, then I spent today taking off the plaster which was damp – hoping this will dry quickly as I want to use it as a utility area. Washing machine is currently set up in there but it’s not ideal!
Outside I took the saw to some Holly Bushes which has opened it out a bit. Just cutting the grass has helped! Bless my mum, she came and did some gardening which is hard going there – the borders and pond area really need just taking back to nothing, but I don’t dare! Will persevere with it though.
Also found 3 fish in the pond! As yet to be named by Mrs H – who insists she must see them before she can give them names. Argh.

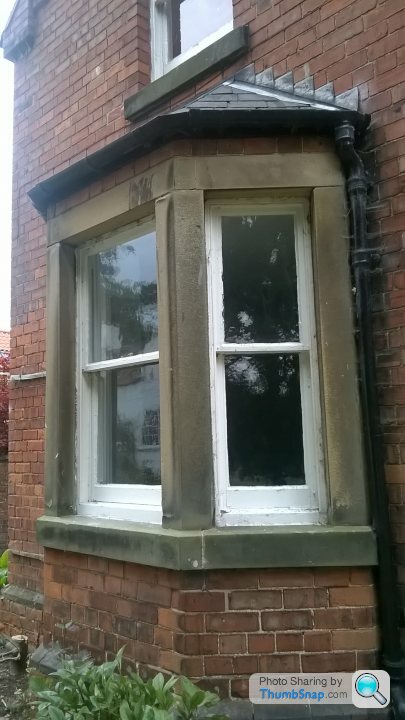
Hoping to tackle painting the windows before winter sets in, but before I do does anyone know how to clear up the stone work? Most of the stone is either turning black, or has black marks and it would be nice to get it cleaned up again.
Anyway thanks for reading – all comments welcomed!
Phil
Radio silence due to having moved and no internet at the new house as yet – that’s another story as only Kingston Communications appear to be able to provide a line in our area?!
I’ve also been completely stupid today when nailing floorboards in preparation for the carpet fitters: Nail no. 1 – through a wire. Nail no. 2 – Through a heating pipe. No 1 was quickly fixed, but I only noticed the issue with No.2 about an hour ago which meant lifting newly laid carpets to see what I’d done. Luckily my new neighbor is a plumber and is coming round to fix tomorrow – sadly my living room ceiling hasn’t fared so well – more paint needed .
I guess as anyone else who has gutted a house knows, it can look like nothing’s been done when really you’ve spent weeks grafting – currently feeling a little like this, although we had carpets fitted today in two rooms to there is some light at the end of the tunnel!
So, the lounge. Managed to get one of the windows working again after been painted shut for what must have been decades. I will try to get the others working, including tops, but sash cords are missing on the outer two windows and the amount of paint to get through here is incredible. Not much else has been done really; we’ve painted everything and currently waiting to get some paint and put a second coat of grey on two walls (2.5L gets you nowhere!). Also will head to Jewsons or similar tomorrow to get a picture rail and fit that. After reading comments here about compound mite saws I’ve plumped for the evolution fom Screwfix – nice present from my dad and I can’t wait to use it!
Carpet went down today too – not to everyone’s taste I guess, but we like it…
As above, the bathroom was a temporary fix and is now up and running- It’s not great, but will do until funds allow for something really nice next year (hopefully!!).
Bedroom painted and new carpet today – the wall behind the bed is waiting for wallpaper and again, a second coat on a couple of walls would help finish it off. Amazing what some decoration does though!
Kitchen ordered – Mrs H won’t let me keep this little gem we’re currently using:
The kitchen/diner hasn’t changed much really except some plaster on the walls and I’ve covered in ply to get a nice base for my parquet (which I hope to start over the weekend/Monday). Also on the look out for a nice range cooker to fit in the chimney gap. My parents use a Aga and although lovely I know we couldn’t manage without a ‘normal’ cooker too, which we don’t have room for. The gap is 104cm, but we’d quite like a 90cm range with room down the sides for a more free standing effect, thoughts?
In the outhouse I’ve been trying to get rid of the smell still. Toilet now gone, as has the stud wall, then I spent today taking off the plaster which was damp – hoping this will dry quickly as I want to use it as a utility area. Washing machine is currently set up in there but it’s not ideal!
Outside I took the saw to some Holly Bushes which has opened it out a bit. Just cutting the grass has helped! Bless my mum, she came and did some gardening which is hard going there – the borders and pond area really need just taking back to nothing, but I don’t dare! Will persevere with it though.
Also found 3 fish in the pond! As yet to be named by Mrs H – who insists she must see them before she can give them names. Argh.
Hoping to tackle painting the windows before winter sets in, but before I do does anyone know how to clear up the stone work? Most of the stone is either turning black, or has black marks and it would be nice to get it cleaned up again.
Anyway thanks for reading – all comments welcomed!
Phil
Sorry - been away. NDG - that's a good point, and something I didn't realise. I've done some research and I think you might be right. There's certainly no sign of any pulleys. Will investigate further later on.
Not much of an update, but the lounge is pretty much finished. Put a picture rail up yesterday which just finishes it off - sorry, no good pics really. Will be used for hanging pics, just the picture below is so heavy I thought it would be best to plug and screw into the wall! Really happy with the F&B grey though.
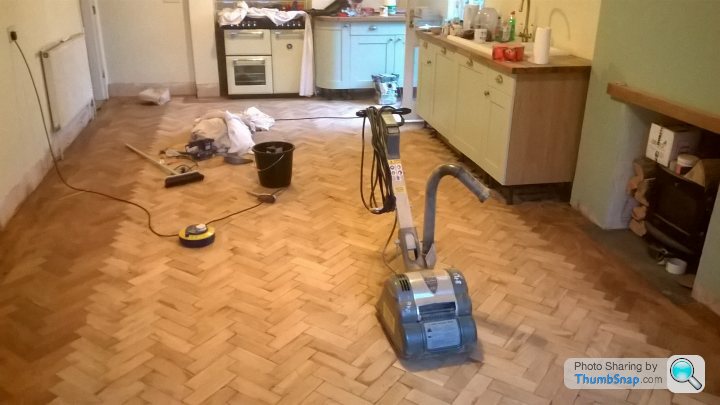
Kitchen is another point entirely. I've started my parquet and it's steady work! Made some huge rookie errors already but hoping that sanding and filling compound will cover it up and we'll just see how it goes. Had some good advice from Alex on here, so took his advice and started with the spine:

Spend a bit more time on it today and we're currently here:

That's 480 blocks down, and I've got about another 350 before I run out of what i've cleaned.
Kitchen units and sink come on Friday so hopefully that will spur us on a little.
Phil
Not much of an update, but the lounge is pretty much finished. Put a picture rail up yesterday which just finishes it off - sorry, no good pics really. Will be used for hanging pics, just the picture below is so heavy I thought it would be best to plug and screw into the wall! Really happy with the F&B grey though.
Kitchen is another point entirely. I've started my parquet and it's steady work! Made some huge rookie errors already but hoping that sanding and filling compound will cover it up and we'll just see how it goes. Had some good advice from Alex on here, so took his advice and started with the spine:
Spend a bit more time on it today and we're currently here:
That's 480 blocks down, and I've got about another 350 before I run out of what i've cleaned.
Kitchen units and sink come on Friday so hopefully that will spur us on a little.
Phil
Harry - I got them locally, from eBay. As much as I love the 'reclaimed' stuff, I'd go and buy the new solid oak blocks from Eastern Europe if I were doing it again. I think there's only one or two manufacturers over here, so costs are high, but in Poland its pretty common stuff - looked last night and there was good quality and delivered for about £20/sqm.
I made rookie error as checked the back for bitumen (not much) but hadn't spotted the glue on the sides which caused the pattern to lay with huge gaps, que hours cleaning it with a scraper, and it's still not good really! It took me 2 minutes per block to clean, and our room will take about 1600 blocks - I lost the will at one point and paid a labourer to come in and help me scrape blocks for two days solid. Awful job.
Phil
Thought i'd give a little update since I had logged in to reply to Harry.
I'm back to work now which means weekends and evenings are where the action is. The plan for this week was to get rid of the built in cooker - the last remnant of the old kitchen - and fit the new one. The gap was 106cm, but we both liked the look of the 90cm range cookers so got this little beauty (below). Will also admit to never having tiled before, so I watched plenty of youtube before having a go. Things i learnt:
An electric tile cutter is very useful
Ready mix grout won't stick quarry tiles
I'm no good using a notched spreader
Slightly sloppy group seems to work better (?!)
To try and minimize huge photos I made this lovely little collage:

I still need to sand the top beam, but after plenty of washing down and sugar soap its still sticky with the last tenant's grime. Ideas to get ride before i sand? Corner cabinet will cover the right hand side chimney wall and cover the mess there, so still plenty to do.
Not long after my last update this arrived from Wren:
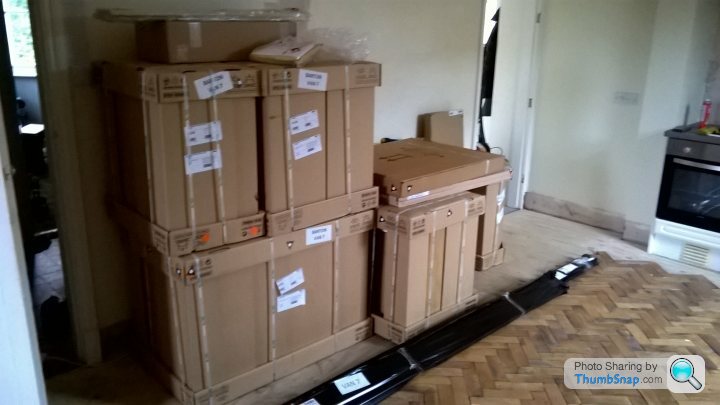
and so far so good. The price was in-line with DIY kitchens after a 'discount' and I'm glad we went for solid wood. Still not unpacked half of it but all seems to be there (touchwoodfingerscrossed).
Also, a friend had picked up a huge load of oak worktops from a bankrupt kitchen supplier; I only found out when I saw it burning on the BBQ! Anyway, he was using as firewood with no use beyond that. Some tops were pretty badly stained and bowed, but we managed to pull out a half decent one and I dropped off with 'pa to have a quick sand down at his place.
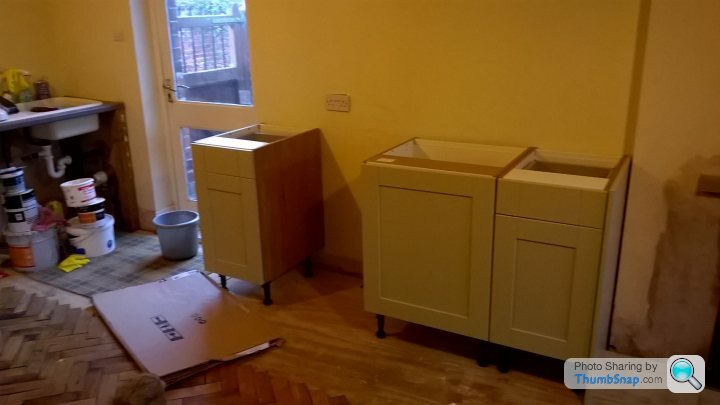
Had a little play with the base units - didn't realize just how much the floor sloped in the area, but I think i can overcome it
That was Friday evening.
Got up early Saturday AM and grouted the tiles behind the cooker and the plumber from next door sorted the gas connection and put my a hole in the wall for my new sink waste connection. Then my dad came round with (now sanded) worktops which we trail fitted and then cut out for the sink. Also decided to rout a shallow rad onto the edges as they were pretty sharp, even though I was dead against at first Mrs PH convinced me and I'm happy with the result. Quite hairy cutting the hole for the sink as it had to be within a few MM to all fit!
Lunch time trip to Wickes saw this little beauty in the car park:

Anyway, got back and cracked on, now looking something like this:
I appreciate I'm still miles off, but it was a big motivator seeing something which resembled a kitchen for the first time. So happy I stayed up late and put some more floor down...

I'm hoping now that once the Sink it fully plumbed in I can more the current temp sink and get some units into there. Everything just takes so much time!
One delay might be with the waste as I'd planned to run the sink and dishwasher waste through the wall into a fall pipe, que plumber next door suggesting that the fall pipe was running into a big cistern underground rather than the drain - anyone had experience of these before? To be sure I'll lift the tarmac in the yard and run a pipe to a definite drain near by if not done already.
Thanks for reading,
Phil
I'm back to work now which means weekends and evenings are where the action is. The plan for this week was to get rid of the built in cooker - the last remnant of the old kitchen - and fit the new one. The gap was 106cm, but we both liked the look of the 90cm range cookers so got this little beauty (below). Will also admit to never having tiled before, so I watched plenty of youtube before having a go. Things i learnt:
An electric tile cutter is very useful
Ready mix grout won't stick quarry tiles
I'm no good using a notched spreader
Slightly sloppy group seems to work better (?!)
To try and minimize huge photos I made this lovely little collage:
I still need to sand the top beam, but after plenty of washing down and sugar soap its still sticky with the last tenant's grime. Ideas to get ride before i sand? Corner cabinet will cover the right hand side chimney wall and cover the mess there, so still plenty to do.
Not long after my last update this arrived from Wren:
and so far so good. The price was in-line with DIY kitchens after a 'discount' and I'm glad we went for solid wood. Still not unpacked half of it but all seems to be there (touchwoodfingerscrossed).
Also, a friend had picked up a huge load of oak worktops from a bankrupt kitchen supplier; I only found out when I saw it burning on the BBQ! Anyway, he was using as firewood with no use beyond that. Some tops were pretty badly stained and bowed, but we managed to pull out a half decent one and I dropped off with 'pa to have a quick sand down at his place.
Had a little play with the base units - didn't realize just how much the floor sloped in the area, but I think i can overcome it
That was Friday evening.
Got up early Saturday AM and grouted the tiles behind the cooker and the plumber from next door sorted the gas connection and put my a hole in the wall for my new sink waste connection. Then my dad came round with (now sanded) worktops which we trail fitted and then cut out for the sink. Also decided to rout a shallow rad onto the edges as they were pretty sharp, even though I was dead against at first Mrs PH convinced me and I'm happy with the result. Quite hairy cutting the hole for the sink as it had to be within a few MM to all fit!
Lunch time trip to Wickes saw this little beauty in the car park:
Anyway, got back and cracked on, now looking something like this:
I appreciate I'm still miles off, but it was a big motivator seeing something which resembled a kitchen for the first time. So happy I stayed up late and put some more floor down...
I'm hoping now that once the Sink it fully plumbed in I can more the current temp sink and get some units into there. Everything just takes so much time!
One delay might be with the waste as I'd planned to run the sink and dishwasher waste through the wall into a fall pipe, que plumber next door suggesting that the fall pipe was running into a big cistern underground rather than the drain - anyone had experience of these before? To be sure I'll lift the tarmac in the yard and run a pipe to a definite drain near by if not done already.
Thanks for reading,
Phil
Evening all (few/some?!),
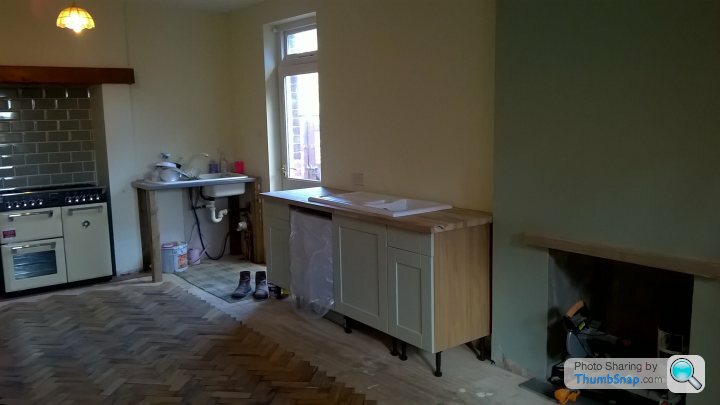
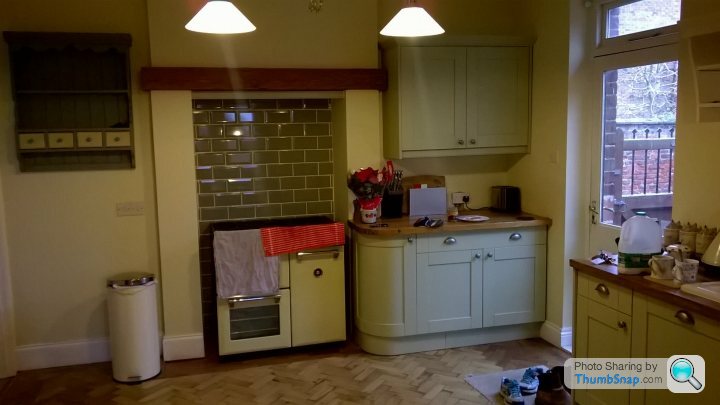
Posting a little update as finally got some work done on the kitchen this weekend. A quick trip to Cleethorpes (wow!) sat AM saw me with a multifuel fire, and then I got cracked on with fitting base and top units. It wen't something a little like this:
Temp sink taken out - to be used in the utility room for now.
And the new sink area sealed and oiled. I'm not sure about this worktop though as it's taken about 12 coats of oil and still isnt perfect. I put the last couple of coats on with a scouring pad which seemed to help, but think it really needs a fine sand and a few more coats to make a good job of it.

New units in - pretty close as it had to be within about 5mm to meet the side of the chimney breast. The only problem was the outside wall (right) isnt quite square with the rear wall, which has left a small gap. Hopefully to be covered with tiling..

Anyway, this left me with a unit cutting problem - how to cut the curve?! Looked on youtube etc and it seemed I needed to either make a template as a router guide, or screw in a length of wood with the right radius which the router would pivot round. I'm not sure about routers so I left these instructions with my dad and went to work.
As all things it turned out not to be quite so easy; I couldn't follow a simple curve because I wanted less overhang on the front than the side. Unsure what resulted but I came home to a worktop corner which began as a beautiful curve, before becoming a big bump. And some jigsaw marks in the wood.
Luckily I bought some rough sanding pads on the way back from Cleethropes and it ended up looking nice. Also spent the day fitting the one and only wall unit we're having:
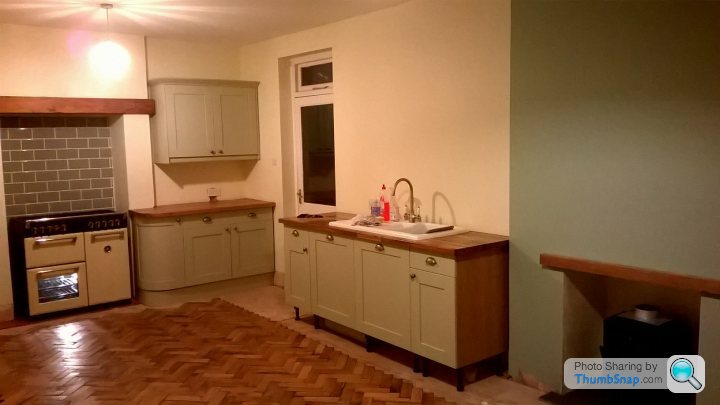
The tenants who lived here before us were quite frankly filthy; dog piss on carpets, nothing cleaned etc. And one hangover of this was the beam above the fire. Once a lovely piece of (oak?!), it was now so sticky with fat that it blocked up scouring, and sanding, pads to get it off. 2 hours later, with a lot of white spirit and sanding it was unstuck and oiled. You cant tell on the pictures but it looked awful before but actually looks nice now.
Final job for Sat was to watch my father-in-law wall paper. Bedroom = finished!

10 weeks in, and it's beginning to look like our house a little more.
Phil
Good evening,
As per usual, a pretty short update. It's over a month since I've updated and it seems like I've done nothing. I'm finding it hard to do much on an evening, so it's all down to weekends now. I did have half term the other week but found myself in darkest Berlin. No floor progress and one broken toe later...
So... I'd ran out of the oak parquet. To be honest I had made a massive mistake when buying it because they had loads of self leveling compound on the bottom, tongue cut off, and there wasn't enough. Bad decision. As a result, I needed to source some more. Found some nice stuff on ebay which (i think?) was described as oak, but the same size. Few emails with the seller and £80 for about 16sqm seemed fair. I headed upto Stockton on tees one morning and filled the 307 tip car - font seat, everything. The drive back featured the smell of tar + the smell of Middlesborough.
The blocks I'd bought were darker, but I was working on the principle that either it was a stain which would sand out, or it would stay darker and make a nice contrasting border. Also, I only needed about half of what i'd bought - this meant I could sort through all the bags I'd carted home, and cherry pick the easiest to clean. These only had tar on anyway, and cleaning was so much better. Average block cleaning time went from 2mins to 1min. I was a happy man! This gave me some motivation. You can see the contrast here:

A fellow Ph'er had given me some cracking advice, not least to mark the boarder on the floor, then lay the blocks just over this. This meant I could get the circular saw and run it in a straight line 150mm from the wall (I screwed a metal guide rail to the floor) - leaving room for a nice straight border.
Marking out:

I forgot to take one when it was cut. But after that I put the border in..
At this point, I took a weekend off. It went like this: Fist I popped down to Beverley Archives, where they had the original 1876 plans for the school. They charge £10 to take a photo, but I managed to sneak this...
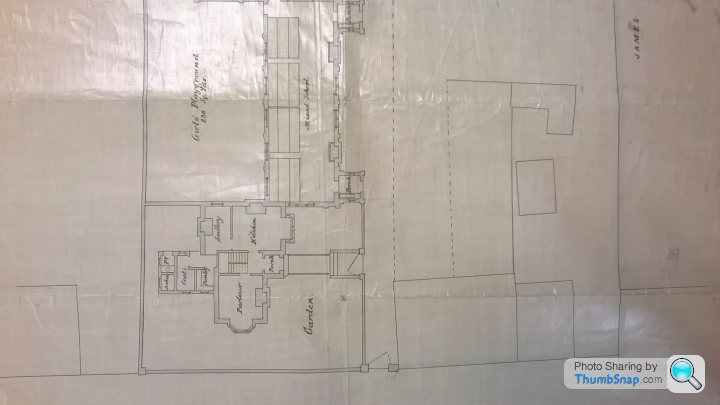
Pretty cool I thought, that's why I love old houses.
Then I polished the three wheeler, got the dog (and wife) and we went to scooter rally at Bridlington. Not before a classic Autumnal shot...
Back to the floor (and this weekend gone) and I bit the bullet and hired a sander. I wont go through the trials and tribulations, but this is a run down....
10 hours sanding!
The bags supplied are rubbish
The border is mahogany (I think)
Resin filler is ace, but almost impossible to use if you're not a pro
I ran out of resin filler very quickly
I got very angry
I filled some remaining gaps with pva/dust (although I dont think you should really)
Here is the pictorial version:
Start

Then

Gap filling
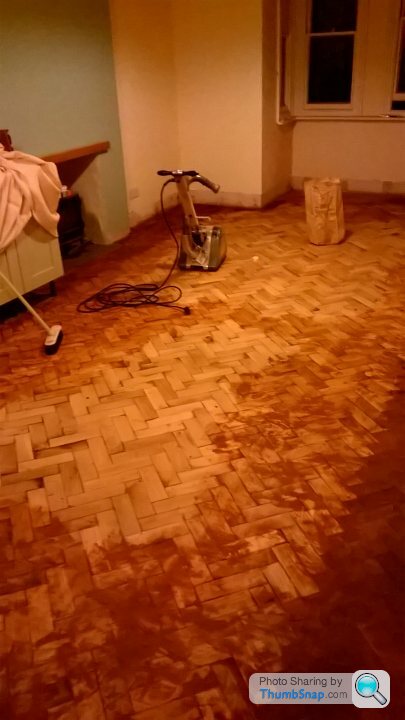
Ready to varnish
Done! (couple more coats to go actually)


Also managed to get a window open which must have been painted for a good 40 years. Cords have been cut, but I think it's salvageable...
Hopefully I can now get on with skirting, shelving and some lights. We've invited the family for Christmas dinner which has given me some motivation!
Cheers,
Phil
Evening, thanks for the comments - much appreciated.
I was only thinking about time the other day. I reckon it went something like this:
50 hours to clean all the blocks (1500 at 2 mins each)
15 hours to lay the main floor (inc marking out etc)
5 hours marking and cutting border
5 hours laying border
10 hours sanding
3 hours cleaning prep and varnishing
7 hours misc (collecting blocks, sorting them out etc)
so about 100 hours in total.
If I'd bought new it would have significantly reduced time. Obviously no cleaning, but also no collecting and sorting. Reduced time sanding, and less mess! You can't imagine the dirt created; my house and car stank of tar for ages, and after a session cleaning the blocks I looked like i'd been down a mine.
I could lay about 120 blocks per hour, so for the same floor think I could get the time down to 35 hours from start to finish. I think price wise it wouldn't be much different really either, and that's before thinking about the time involved.
I've seen these guys on ebay:
http://www.ebay.co.uk/itm/oak-parquet-flooring-22x...
That's £16/sqm for a mix of prime an graded, but they have different options. From what I understand, there is only one company in the UK who make parquet now, and it's pricey. In Poland, parquet is still a big thing. We have family over there and plenty of people can supply and fit cheaply - so shopping around should get you something.
Saying all that - i'd recommend putting it down as it looks great!
Cheers
Evening all,
short update, but I've got a few minutes to kill before heading out this evening so thought i'd post up some pics.
Since finishing the floor, I've found much more motivation to get things done. The skirting is now fitted (thanks to the mitre saw my dad had bought me earlier in the build) and wood work painted. This included recommissioning the sash windows which had so many coats of paint it was unbelievable. We tried a completely matt paint in for other woodwork, but found that unless the surface was perfect it would show the blemishes - hence the choice of an eggshell - which we're pretty pleased with.
I've put some wall units up as well - which only leaves:
Tiling a small splash back
Island (here on the 14th)
Fridge freezer (here on the 10th)
Then I think we'll be done for now and I can move into the utility.
Also managed to get the piano in today. It had been taking up valuable room in the garage and now means I can move some of the crap from the utility to the garage and see what I'm doing. The only problem of today was finding a couple of slipped tiles; one leaving about a 8" square hole in the roof. I've pushed it back up before, but it looks like it needs holding somehow? I'm not particularly knowledgeable on this so will have a google tomorrow (if the rest of the roof can take the current wind!).
Hope the pics explain better than I can:


As you can probably tell, we also manged a trip to Ikea to get some lights and little things. Quality isn't amazing, but for the price we're pretty happy. I always remember working with a high end developer who used to used quality furniture then dress with Ikea accessories - if it's good enough for him...
Cheers,
P
short update, but I've got a few minutes to kill before heading out this evening so thought i'd post up some pics.
Since finishing the floor, I've found much more motivation to get things done. The skirting is now fitted (thanks to the mitre saw my dad had bought me earlier in the build) and wood work painted. This included recommissioning the sash windows which had so many coats of paint it was unbelievable. We tried a completely matt paint in for other woodwork, but found that unless the surface was perfect it would show the blemishes - hence the choice of an eggshell - which we're pretty pleased with.
I've put some wall units up as well - which only leaves:
Tiling a small splash back
Island (here on the 14th)
Fridge freezer (here on the 10th)
Then I think we'll be done for now and I can move into the utility.
Also managed to get the piano in today. It had been taking up valuable room in the garage and now means I can move some of the crap from the utility to the garage and see what I'm doing. The only problem of today was finding a couple of slipped tiles; one leaving about a 8" square hole in the roof. I've pushed it back up before, but it looks like it needs holding somehow? I'm not particularly knowledgeable on this so will have a google tomorrow (if the rest of the roof can take the current wind!).
Hope the pics explain better than I can:
As you can probably tell, we also manged a trip to Ikea to get some lights and little things. Quality isn't amazing, but for the price we're pretty happy. I always remember working with a high end developer who used to used quality furniture then dress with Ikea accessories - if it's good enough for him...
Cheers,
P
Edited by hardcastlephil on Sunday 6th December 10:00
Harry - thanks for the comments. I love your new project; the house looks beautiful and the thread is bookmarked!
Looking back at what I've done so far I think that had I had the money available I would have paid somebody to come in and get the house to a good shell (plaster, electrics, plumbing etc) then would have done the rest myself. I found the demolition and dust/prep work to be the worst - but the putting it back together to be quite rewarding. It's a lot like old cars - all the hard graft is welding and cutting out which I can't stand, but the fun is when you have a solid shell and you put the shiny bits on. Hence why I built the 3 wheeler from new!
Just got back from taking Mrs. H. to a Star Wars convention at Manchester (don't ask) and had time to collect these from my dad who had dipped them in his 'gunk tank'. I didn't ask exactly what the gunk was, but it's removed a good 50 years of old paint. Welcome back original brass sash catches...

Phil
Evening,
Another small update - it's amazing how slow progress can be when you're only working on it a day a week. My attention is turning to the car and garage in preparation for summer too, so I can't see me getting on much faster anytime soon!
I'll keep to pics; a thousand words and all that..
Began by tiling the splash backs, and fairly happy with my handywork:

Then made a balls up with the grout. Thought that grey might be a bit too 'modern' and that white would loose the definition of the already white (although sold as cream?!) tiles. My arm was twisted because I'm tight and had soem ivory in the garage, and so I get on and used that. Great grouting job, but the ivory doesn't go at all with the white and it annoys me each time I see it. Current plan is to try some grout die and go to grey. Turns out there's a reason why people use it!
Next up was the kitchen island. Fantastic chap made it for us and very happy. We needed the extra work space, but didn't want units down both sides:

Christmas holidays meant I finally got some of the garage cleaned out. I've started a thread for it, and will update once I make some progress. I've now bought some of the Ikea PS meal cabinets and some red racking which should look good with white walls and a decent floor down. Watch this space.

Clearing some junk from the garage meant I could begin to clear the outhouse/utility (and re-fill the garage!). The outhouse was the original staff toilets and had been a state when we got the place - still with toilets in situ. I'd chipped plaster off due to a damp problem, which has dried off now. The roof is lead, but was leaking back in where it meets the wall (don't know the technical term, sorry!) and I'd had to take a bit of the ceiling down to inspect.
I'd been up on the roof the week before Christmas trying to fix a tile when the ladder slipped, luckily I landed on the outhouse roof - so a half drop rather than the full height of the house. Either way it put the fear of god into me about ladders and I got a roofer to fix the tiles (and relieve me of ££). About the same time we acquired a new adjoining neighbour who had his chap do some work on the guttering directly above my outhouse roof. I think between us we've fixed the leak now and I can get on with making a workable utility.
I got base units in around Christmas, and today have just finished the cladding. I'm aiming for 'classic' rather than 'American ranch'. Hopefully some nice paint will help:

Sorry - camera phone from the 90's:
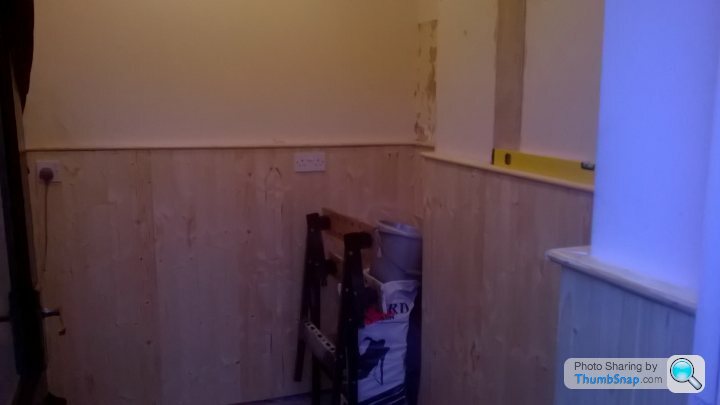

I also found that the unnamed switch on the left controls all power to my garage (about 100 yards away). I found this out the hard way of course.
Some poor phone pics from today showing the lounge almost done and finally got some pictures/art up in the kitchen.


So what's after the utility? The rear yard is a priority I think. The garden/main entrance etc are round the front, but this being Yorkshire everyone seems to use the back door (insert pun here) which means dirt constantly coming through into the kitchen. My plan was to build a store for the bins and logs to the left, then get something down on the ground to tidy it up. Would like sandstone but this must be budget job and I just need something to tide me over. Any ideas? Shale/slate stuff?


This one seems to be taking up plenty of time. Two today!

Thanks for reading,
P
Another small update - it's amazing how slow progress can be when you're only working on it a day a week. My attention is turning to the car and garage in preparation for summer too, so I can't see me getting on much faster anytime soon!
I'll keep to pics; a thousand words and all that..
Began by tiling the splash backs, and fairly happy with my handywork:
Then made a balls up with the grout. Thought that grey might be a bit too 'modern' and that white would loose the definition of the already white (although sold as cream?!) tiles. My arm was twisted because I'm tight and had soem ivory in the garage, and so I get on and used that. Great grouting job, but the ivory doesn't go at all with the white and it annoys me each time I see it. Current plan is to try some grout die and go to grey. Turns out there's a reason why people use it!
Next up was the kitchen island. Fantastic chap made it for us and very happy. We needed the extra work space, but didn't want units down both sides:
Christmas holidays meant I finally got some of the garage cleaned out. I've started a thread for it, and will update once I make some progress. I've now bought some of the Ikea PS meal cabinets and some red racking which should look good with white walls and a decent floor down. Watch this space.
Clearing some junk from the garage meant I could begin to clear the outhouse/utility (and re-fill the garage!). The outhouse was the original staff toilets and had been a state when we got the place - still with toilets in situ. I'd chipped plaster off due to a damp problem, which has dried off now. The roof is lead, but was leaking back in where it meets the wall (don't know the technical term, sorry!) and I'd had to take a bit of the ceiling down to inspect.
I'd been up on the roof the week before Christmas trying to fix a tile when the ladder slipped, luckily I landed on the outhouse roof - so a half drop rather than the full height of the house. Either way it put the fear of god into me about ladders and I got a roofer to fix the tiles (and relieve me of ££). About the same time we acquired a new adjoining neighbour who had his chap do some work on the guttering directly above my outhouse roof. I think between us we've fixed the leak now and I can get on with making a workable utility.
I got base units in around Christmas, and today have just finished the cladding. I'm aiming for 'classic' rather than 'American ranch'. Hopefully some nice paint will help:
Sorry - camera phone from the 90's:
I also found that the unnamed switch on the left controls all power to my garage (about 100 yards away). I found this out the hard way of course.
Some poor phone pics from today showing the lounge almost done and finally got some pictures/art up in the kitchen.
So what's after the utility? The rear yard is a priority I think. The garden/main entrance etc are round the front, but this being Yorkshire everyone seems to use the back door (insert pun here) which means dirt constantly coming through into the kitchen. My plan was to build a store for the bins and logs to the left, then get something down on the ground to tidy it up. Would like sandstone but this must be budget job and I just need something to tide me over. Any ideas? Shale/slate stuff?
This one seems to be taking up plenty of time. Two today!
Thanks for reading,
P
Good evening,
I thought it was about time I updated this thread a little as it’s been nearly 10 months since my last update. I’ve been inspired by Stewjohnst’s Georgian renovation thread which has been both brilliant to read and kept me going with my own renovation over summer.
We’ve been in the house for over a year now and although it sometimes feels as if we’ve not done anything, the place is at least hospitable and we can have friends round without panicking about them falling through the floor or telling them to come in ‘old clothes’. Work’s always a bit slow as its just Chloe (Mrs H) and myself doing it, but I’m beginning to realise that I actually enjoy the work and we’re slowly getting there.
I’ll try and update from Feb to now – it probably won’t be in order because I’ve flitted between rooms/jobs, but I’ll try and explain what we’ve done room by room...
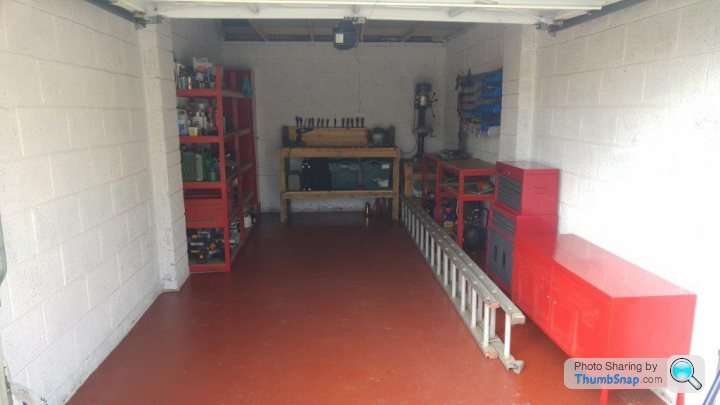
So, as this is PH i’ll begin with the garage. I’m sure I put some pics on another thread of this so I’ll keep this bit short. The garage is only a single but a decent size, and as I’ve only got the 3 wheeler and some tools it suits me well. The problem was that the block walls and concrete floor meant that after a week everything was covered in dust. After a bit of research I bought a cheap electric paint sprayer from ebay and set to work. The outcome was that the paint had to be thinned so far to get through the gun that it went on like milk and I got fed up of it. I’m sure that if I’d have hired a real system or maybe adapted a car paint gun and used the compressor, then spraying would be the answer – but to be honest I ended up with a roller and just went for it. Here is it with the walls done:

This was good but didn’t really help the dust. By this point i’d also got some cheap chipboard from Wickes and boarded the roof which made things a bit better. I really needed some flooring to stop the dust problem but with everything else on we didn’t have the cash spare to buy the ones I wanted so the answer came in the form of some floor paint my dad had held onto since the 70’s. Incredibly both tins of paint were still usable (I had to dremel the lids off though!). So as a short term solution I just poured the paint on the floor then rollered it on. I’m not sure what you’d describe the colour as? Rust?! It wouldn’t be my first choice but it was quick and free so it will stay for now. I might even get another coat on next year. I got some cheap eBay racking which matched the IKEA units I’d picked up from gumtree and to be honest I’m happy with the result:
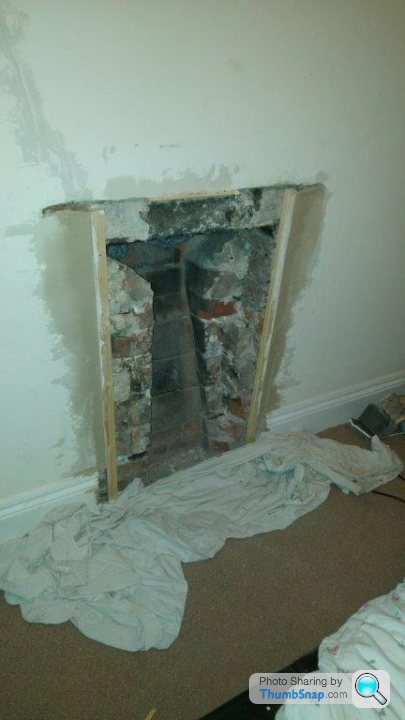
About the same time we thought we’d better work on the second bedroom. Chloe was having some friends to stay and you always find that these deadlines get you motivated. There wasn’t much wrong with the bedroom really; it needed painting and there were cracks all over in the plaster-work where a skim had been recently put over the original lime. I dug these out and filled which seems to have worked so far, but the biggest job was the fireplace. It was absolutely caked in black gloss paint. I tired scraping and nitromorse but it just didn’t seem to touch it, so the decision was made to take it out. In hindsight it probably wasn’t the best idea, but I hadn’t realised that it was the original and was tied and cemented into the wall – the result was a few hours work and finally pulling a load of bricks out of the chimney. This wasn’t as bad as it sounds as it gave me chance to have a go at some brickwork!
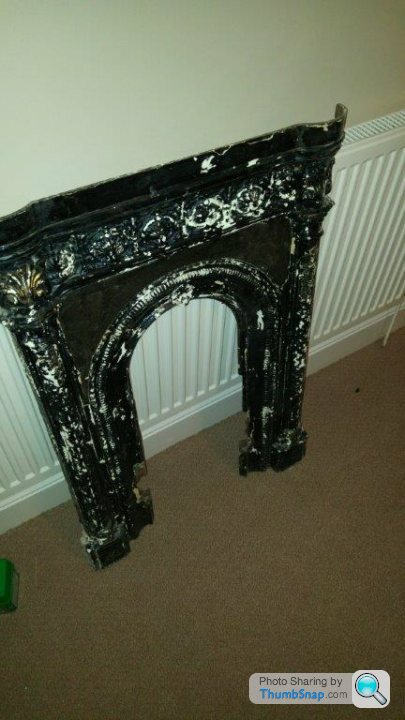

I sent the fireplace to be blasted whilst Chloe’s dad put the wallpaper on and Chloe painted.

Again we were happy with the result. The bed will need to go as it’s a relic of the early 2000’s – a time when a faux leather bed was the only option for the man about town. This room will probably end up with a day bed and a desk to make a bedroom come office space.
So now I guess we’re getting into summer. One of the reasons the house looked so run down was the garden. It’s a shame really as all the flowers had a nice ‘cottage garden’ look, but what you don’t get an idea of on the pictures is just howl out of of control it all was.

We spent a few days digging beds over but the weeks we’re something else. We made it tidy-ish but the aim is for next summer to pave over the pond area then put a low border hedge in and replant the beds. I’m not sure but we still might have to roundup parts of the garden so we can just do something with it.

It was this time that we had our first loss... One of the three fish (which we’d only discovered months after moving in) finally passed. It was a sad day, but on the brighter side we were 33% closer to filling in the pond...

I’ll continue the update in a bit – still lots to cover!!
I thought it was about time I updated this thread a little as it’s been nearly 10 months since my last update. I’ve been inspired by Stewjohnst’s Georgian renovation thread which has been both brilliant to read and kept me going with my own renovation over summer.
We’ve been in the house for over a year now and although it sometimes feels as if we’ve not done anything, the place is at least hospitable and we can have friends round without panicking about them falling through the floor or telling them to come in ‘old clothes’. Work’s always a bit slow as its just Chloe (Mrs H) and myself doing it, but I’m beginning to realise that I actually enjoy the work and we’re slowly getting there.
I’ll try and update from Feb to now – it probably won’t be in order because I’ve flitted between rooms/jobs, but I’ll try and explain what we’ve done room by room...
So, as this is PH i’ll begin with the garage. I’m sure I put some pics on another thread of this so I’ll keep this bit short. The garage is only a single but a decent size, and as I’ve only got the 3 wheeler and some tools it suits me well. The problem was that the block walls and concrete floor meant that after a week everything was covered in dust. After a bit of research I bought a cheap electric paint sprayer from ebay and set to work. The outcome was that the paint had to be thinned so far to get through the gun that it went on like milk and I got fed up of it. I’m sure that if I’d have hired a real system or maybe adapted a car paint gun and used the compressor, then spraying would be the answer – but to be honest I ended up with a roller and just went for it. Here is it with the walls done:
This was good but didn’t really help the dust. By this point i’d also got some cheap chipboard from Wickes and boarded the roof which made things a bit better. I really needed some flooring to stop the dust problem but with everything else on we didn’t have the cash spare to buy the ones I wanted so the answer came in the form of some floor paint my dad had held onto since the 70’s. Incredibly both tins of paint were still usable (I had to dremel the lids off though!). So as a short term solution I just poured the paint on the floor then rollered it on. I’m not sure what you’d describe the colour as? Rust?! It wouldn’t be my first choice but it was quick and free so it will stay for now. I might even get another coat on next year. I got some cheap eBay racking which matched the IKEA units I’d picked up from gumtree and to be honest I’m happy with the result:
About the same time we thought we’d better work on the second bedroom. Chloe was having some friends to stay and you always find that these deadlines get you motivated. There wasn’t much wrong with the bedroom really; it needed painting and there were cracks all over in the plaster-work where a skim had been recently put over the original lime. I dug these out and filled which seems to have worked so far, but the biggest job was the fireplace. It was absolutely caked in black gloss paint. I tired scraping and nitromorse but it just didn’t seem to touch it, so the decision was made to take it out. In hindsight it probably wasn’t the best idea, but I hadn’t realised that it was the original and was tied and cemented into the wall – the result was a few hours work and finally pulling a load of bricks out of the chimney. This wasn’t as bad as it sounds as it gave me chance to have a go at some brickwork!
I sent the fireplace to be blasted whilst Chloe’s dad put the wallpaper on and Chloe painted.
Again we were happy with the result. The bed will need to go as it’s a relic of the early 2000’s – a time when a faux leather bed was the only option for the man about town. This room will probably end up with a day bed and a desk to make a bedroom come office space.
So now I guess we’re getting into summer. One of the reasons the house looked so run down was the garden. It’s a shame really as all the flowers had a nice ‘cottage garden’ look, but what you don’t get an idea of on the pictures is just howl out of of control it all was.
We spent a few days digging beds over but the weeks we’re something else. We made it tidy-ish but the aim is for next summer to pave over the pond area then put a low border hedge in and replant the beds. I’m not sure but we still might have to roundup parts of the garden so we can just do something with it.
It was this time that we had our first loss... One of the three fish (which we’d only discovered months after moving in) finally passed. It was a sad day, but on the brighter side we were 33% closer to filling in the pond...
I’ll continue the update in a bit – still lots to cover!!
Gassing Station | Homes, Gardens and DIY | Top of Page | What's New | My Stuff