My *VERY* diy garden kitchen build, BBQ and pizza oven heavy
Discussion


Hey,
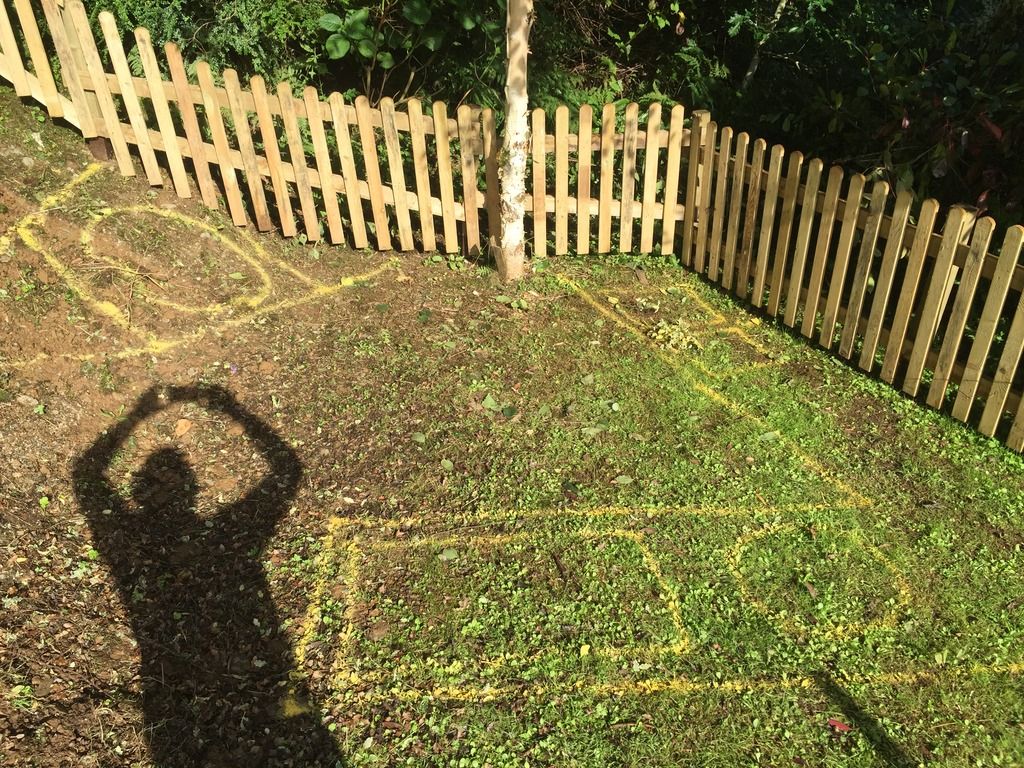
So last weekend I finally started my garden kitchen build, its going to be quite a beast.
I am basically planning to build 2 1/2 walls out of block work, one of which will be retaining part of a hill, I will then build the kitchen units, pizza oven base and table base also in block. The walls will be rendered and painted a nice dark colour, (thinking terracotta red or graphite grey at the moment), and all of the kitchen units, and table base will be clad with slate.
The worktop and table top will be distressed and varnished scaffold boards, and I may even try and do something funky with leftover wood off cuts on the left hand wall, but this is yet TBC.
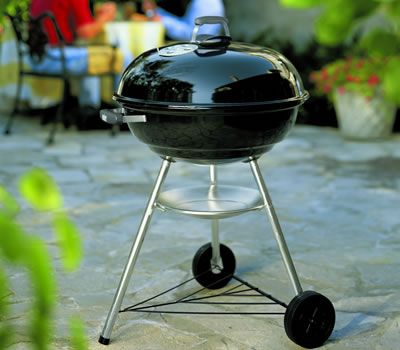
So, going in we have, for charcoal cooking, a Webber compact 47 sunken into the worktop:
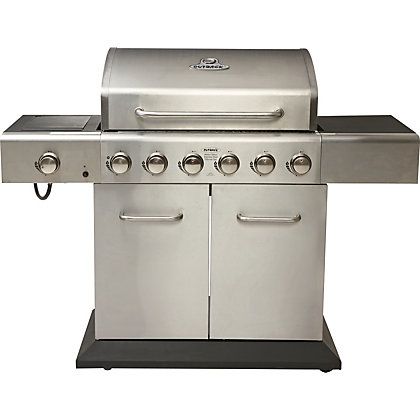
A Coleman 6 burner stainless steel gas BBQ
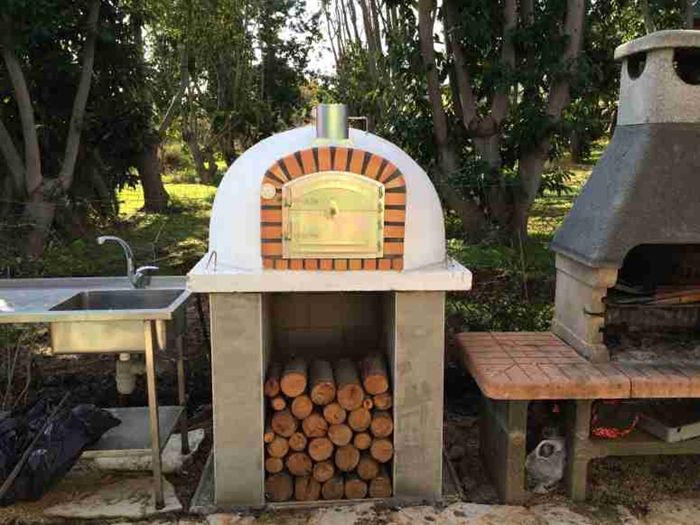
A 100cm wood fired pizza oven
And something I cant picture yet as its been built custom for me, but a 70cm by 30 cm gas fire pit for the centre of the dining table.
I also have a twin stainless steel under mount sink and pump tap, main reason for these is to use as a ice bucket for beers.
All of this is going to be finished off with a thick and durable waterproof canvas cover hanging off 200x200 wooden beams, this will enable me to remove it in the summer, and use it for cover in the winter.
And to top it off, I have never built anything more than a ikea bookshelf before..... wish me luck!
Here is a plan I mocked up, that's supposed to be a pizza oven in the corner and the 2nd grill on the right is the double sink.

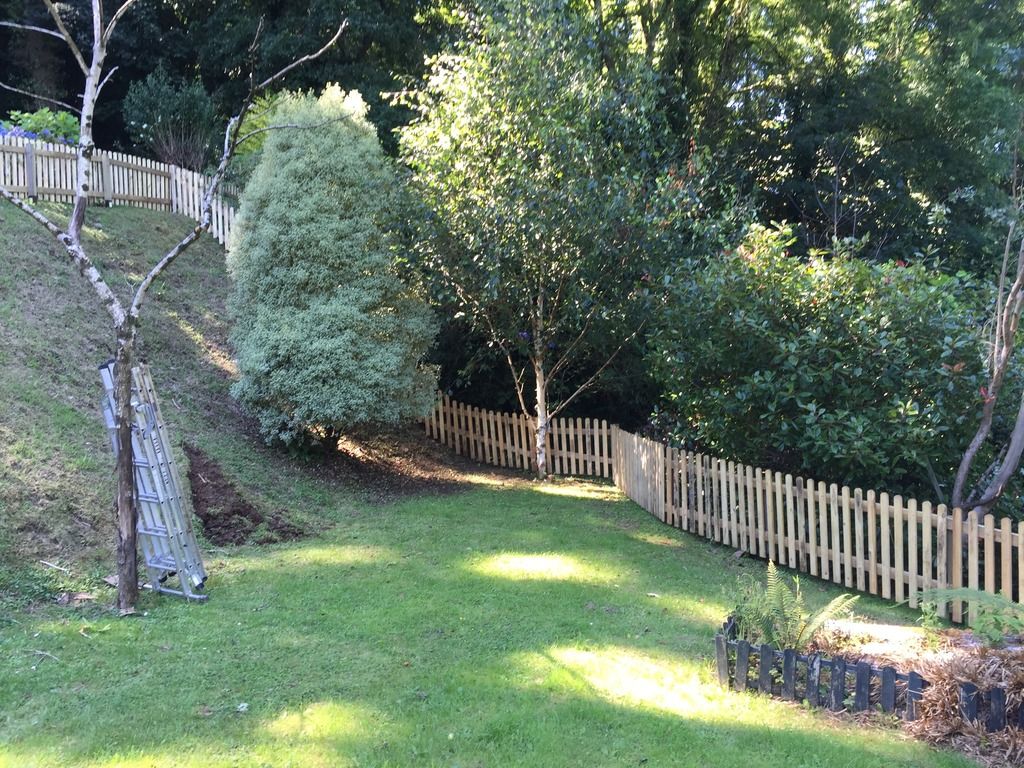
And this is where it's going:
Made a start already, but a lot more progress this weekend I hope!
Any comments or changes you would make much appreciated as nows the time to make any changes!
Thanks!
So last weekend I finally started my garden kitchen build, its going to be quite a beast.
I am basically planning to build 2 1/2 walls out of block work, one of which will be retaining part of a hill, I will then build the kitchen units, pizza oven base and table base also in block. The walls will be rendered and painted a nice dark colour, (thinking terracotta red or graphite grey at the moment), and all of the kitchen units, and table base will be clad with slate.
The worktop and table top will be distressed and varnished scaffold boards, and I may even try and do something funky with leftover wood off cuts on the left hand wall, but this is yet TBC.
So, going in we have, for charcoal cooking, a Webber compact 47 sunken into the worktop:

A Coleman 6 burner stainless steel gas BBQ

A 100cm wood fired pizza oven

And something I cant picture yet as its been built custom for me, but a 70cm by 30 cm gas fire pit for the centre of the dining table.
I also have a twin stainless steel under mount sink and pump tap, main reason for these is to use as a ice bucket for beers.
All of this is going to be finished off with a thick and durable waterproof canvas cover hanging off 200x200 wooden beams, this will enable me to remove it in the summer, and use it for cover in the winter.
And to top it off, I have never built anything more than a ikea bookshelf before..... wish me luck!
Here is a plan I mocked up, that's supposed to be a pizza oven in the corner and the 2nd grill on the right is the double sink.

And this is where it's going:

Made a start already, but a lot more progress this weekend I hope!


Any comments or changes you would make much appreciated as nows the time to make any changes!
Thanks!
Edited by sidekickdmr on Wednesday 10th August 17:42
scottri said:
Bookmarked. Looking forward to this. My only suggestion is to run some power to the kitchen area for lighting, music, beer fridge?
Yes I forgot to mention this, I didn’t want to run full electrics as I’m already near the very top of my budget and the armoured cable (Its about 50 meters from the house) and electricians time wouldn’t be cheap. But I have just yesterday purchased 4 LED spotlights and 2 hanging lights all based off a low voltage 12V system, so no need to armour the cable, all completely DIYable, and can be added to at any time. There may even be scope for a couple of USB ports somewhere for a phone charger and speaker power cable.
I'm only going by the blurb, it also says foundations on the Ceylon site, I hope this is right!
"Celcon Standard grade is extremely versatile and can be used below DPC as infill for Beam and Block flooring systems, as well as above the ground in walling applications
Extremely versatile
Water resistant
Frost resistant
Infill for beam and block floors"
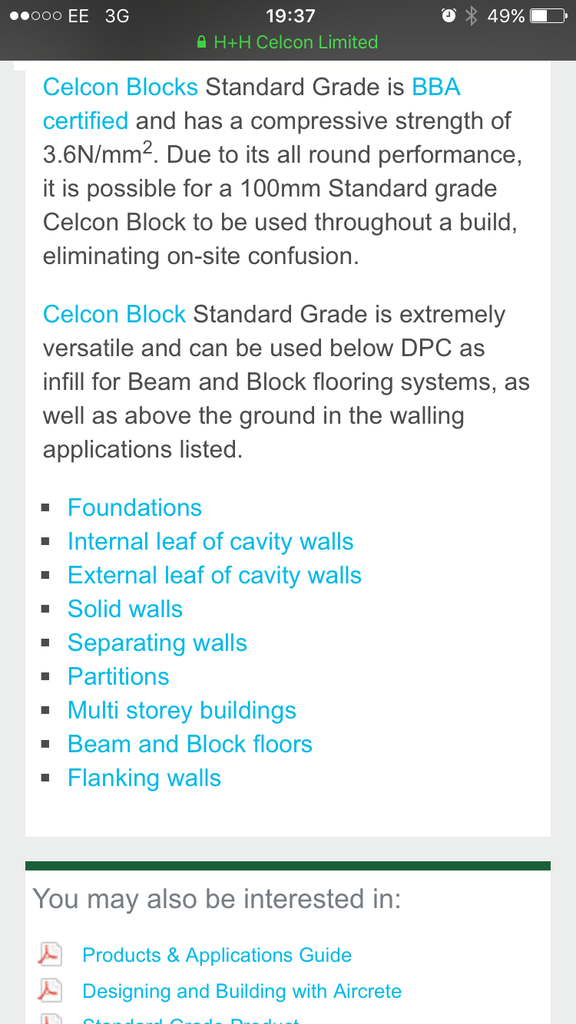
"Celcon Standard grade is extremely versatile and can be used below DPC as infill for Beam and Block flooring systems, as well as above the ground in walling applications
Extremely versatile
Water resistant
Frost resistant
Infill for beam and block floors"

Squiggs said:
Foundations?
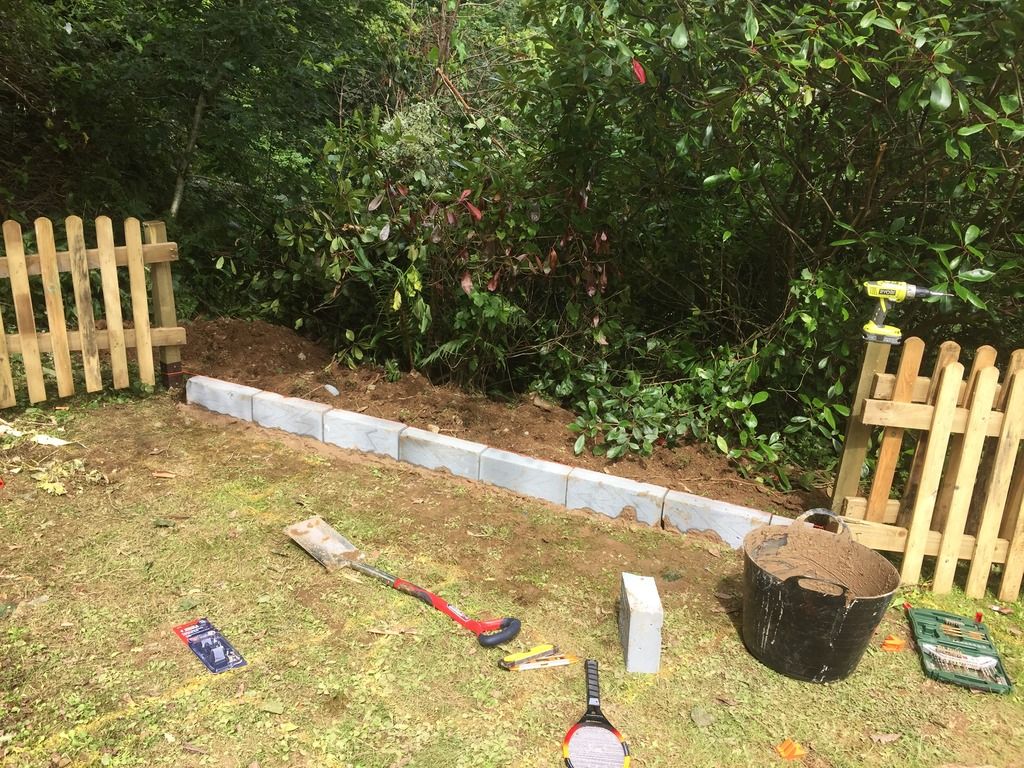
First job this weekend is to pour a little more concrete into the trench and beef the foundations on the other 2 walls when installing. The trench is quite deep and i cant see them going anywhere in a rush, they will also be supported by the kitchen "units" which will make the wall 3d and supported on all 4 sides.Rutter said:
Looks good, wish I had the space for similar. How are you going to manage air flow to the bottom of the Weber if you are building it in?
The compact 47CM doesnt have a bottom vent to the same extent of the larger webers, so im going to try it out and worst case will just remove a block at the back wall. 

Yes the wall will be double skinned on the retaining section, the soil is very solid and full of slate and the garden/woods has lots of steep non retained walls that havnt moved for years, so dont think it will be an issue.
Im going to make a heatsheld for the weber out of proper firebricks, so the wood wont be within scorching distance of anything hot.
21TonyK said:
Just an observation. The prep. space between the pizza oven and the webber is a tight corner. Going to get awful hot in there if both are fired up!
Maybe add portable island in the middle? Something that can be wheeled out for the summer and stored in winter? Something akin to a butchers block?
Edit: And the webber, does that sit "in" the top or just within a hole with an airspace between the bowl and the top? Just thinking about scorched timbers.
the walls are only worktop high (so good airflow) and the space is a little bigger than it looks on the pic, but yes it could get a little warm. There will also be some worktop space to either side of the pizza oven (the triangle gaps) so that will be extra worktop space. Maybe add portable island in the middle? Something that can be wheeled out for the summer and stored in winter? Something akin to a butchers block?
Edit: And the webber, does that sit "in" the top or just within a hole with an airspace between the bowl and the top? Just thinking about scorched timbers.
Edited by 21TonyK on Monday 15th August 10:21
Im going to make a heatsheld for the weber out of proper firebricks, so the wood wont be within scorching distance of anything hot.
alock said:
Sorry to hijack the thread, but I've been thinking of making a built-in BBQ in our garden and using an old off-cut of granite we have as a work top.
I really like the idea of the BBQ being flush with the worktop like this but not many people seem to build them this way.
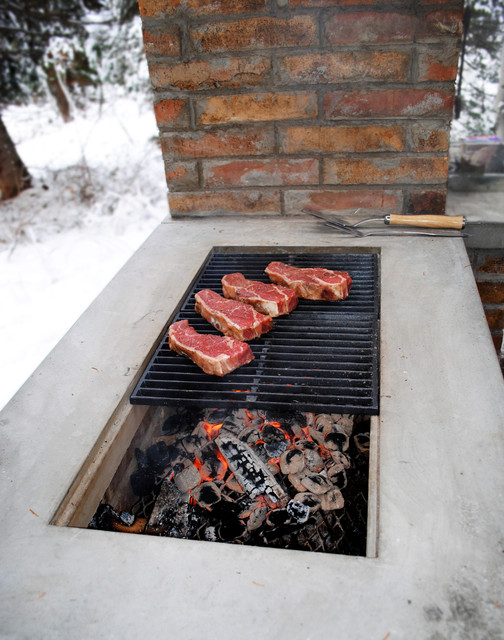
The downsides I can see are that getting a height adjustable coal rack is harder than a height adjustable grill and I will probably have to forgo the lid, but we rarely use it when using our current BBQ anyway.
Am I missing any other issues with building it like this?
I looked at using granite for some sections of my worktops but apparently it can crack with heat, and your design would get very hot.I really like the idea of the BBQ being flush with the worktop like this but not many people seem to build them this way.
The downsides I can see are that getting a height adjustable coal rack is harder than a height adjustable grill and I will probably have to forgo the lid, but we rarely use it when using our current BBQ anyway.
Am I missing any other issues with building it like this?
Ive no first hand experiance, and im sure it would be fine, but something to look into.
paul_y3k said:
OP ... waht did you use to draw that garden plan ?
Id never used it before but just googled garden design software and found it,you dont need to download anything and its free!
http://www.gardena.com/uk/garden-life/my-garden/


So, not for the structural walls, for the "unit" walls.
Currently the floor is a layer of compacted Type one, do you think I’m better off laying the walls directly to this with a good spread of mortar on the ground, and then paving around the units.
Or paving the whole area and then paying the blocks directly onto the paving?
doing the latter would give a more solid base for the walls, and would also mean the patio would be a lot easier to lay as just one big square really.
sidekickdmr said:
So, not for the structural walls, for the "unit" walls.
Currently the floor is a layer of compacted Type one, do you think I’m better off laying the walls directly to this with a good spread of mortar on the ground, and then paving around the units.
Or paving the whole area and then paying the blocks directly onto the paving?
doing the latter would give a more solid base for the walls, and would also mean the patio would be a lot easier to lay as just one big square really.
Only got two days to decide this, any comments or feedback at all?Currently the floor is a layer of compacted Type one, do you think I’m better off laying the walls directly to this with a good spread of mortar on the ground, and then paving around the units.
Or paving the whole area and then paying the blocks directly onto the paving?
doing the latter would give a more solid base for the walls, and would also mean the patio would be a lot easier to lay as just one big square really.
Just ordered the cladding for the units/table base, a slight hint of green, should offset the grey and wood nicely, and make it a bit more "garden" rather than bathroom.
http://www.stonetilecompany.co.uk/natural-stone-pr...
http://www.stonetilecompany.co.uk/natural-stone-pr...


Chr1sch said:
Looks like a great setup - for what its worth i have that weber and never have any issues with height - i always use 2 of those pre-bagged coal things and it works brilliantly (and hasnt fallen apart like the 3 homebase equivalents before it...)
What are you doing about drainage? I had a patio like that and it was a pain on that front without clear drain work around the permiter
That’s good to know, thanks!What are you doing about drainage? I had a patio like that and it was a pain on that front without clear drain work around the permiter
The patio has quite a natural fall, and the perimeter of the patio (where it meets walls/units) has a larger gap that will be backfilled with gravel, finally in the corner of the units there is a drainage void under the slabs, so it can drain off in that corner too.


Gassing Station | Homes, Gardens and DIY | Top of Page | What's New | My Stuff