Not another garage improvement thread...
Discussion


As the title, afraid it is another garage thread - but this I am using to record my efforts of taking a new build detached large double garage to something approaching the best garage thread (think reader's cars for garages). I am one for data and researching heavily, so will be recording that as I go and hopefully linking to the threads across here that have helped me make decisions (or probably added to the decision paralysis  )
)
Let's start at the beginning...
I go the keys to the property two years ago and was very pleased when the plans came through for the build that they had specced a rather nice garage space which sits attached to the property.
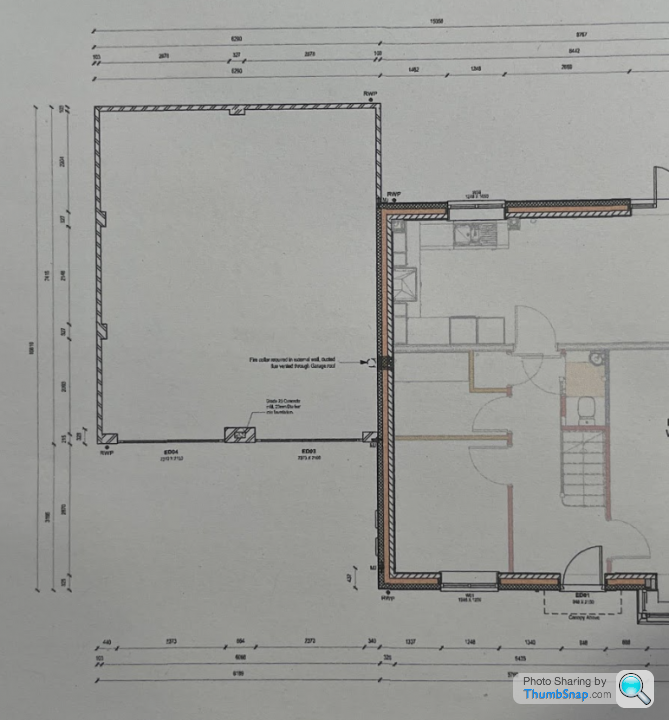
It is hard to see the dimensions here, but it measures internally 6.05m wide by 7.05m long, probably better represented by sticking in a 340i for representation.
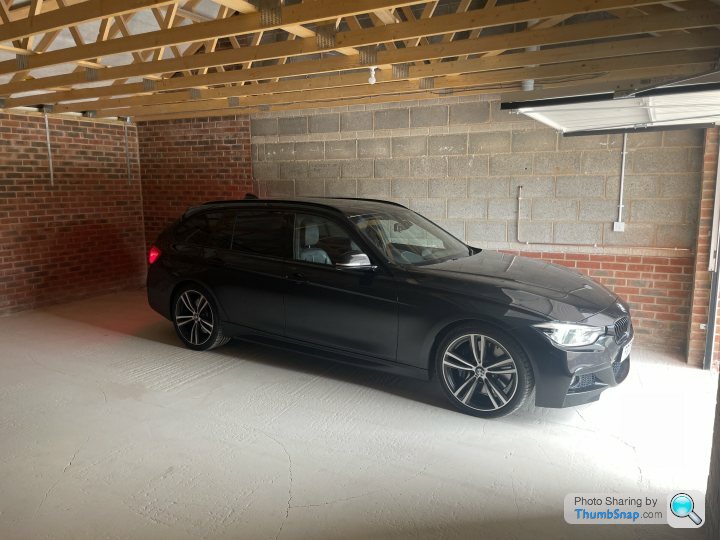
And that is probably the last time it was that empty with the inevitable addition of everything that comes with four kids and a mindset of that weird bit of mental offcut might come in useful some day.
The main annoying thing about the garage was that the builders, even though we bought off plan, would not put a door through to the utility room so I could access from the house to the garage... so that is the first part to sort out.
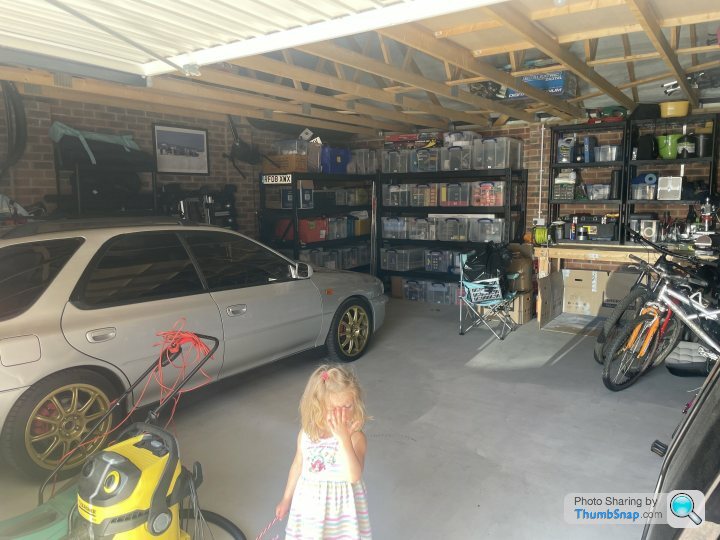
To finish, this is where we are starting from - a complete mess of stuff and I need to get it up in the loft area, make the ground floor practical but nice space.
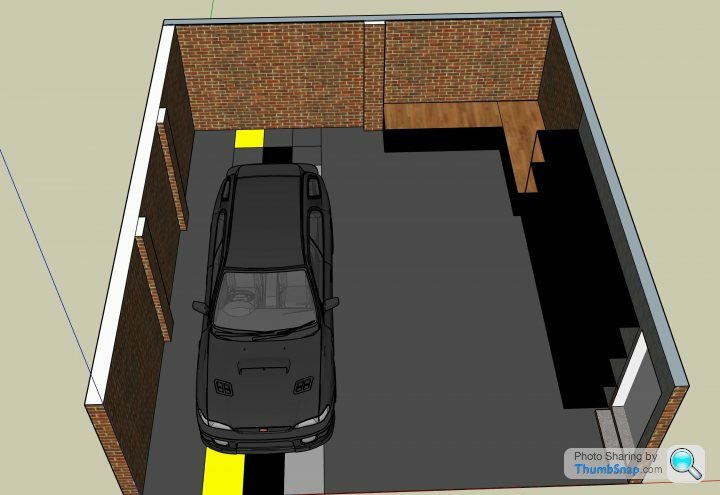
to get to somewhere near this (which may change)
)Let's start at the beginning...
I go the keys to the property two years ago and was very pleased when the plans came through for the build that they had specced a rather nice garage space which sits attached to the property.
It is hard to see the dimensions here, but it measures internally 6.05m wide by 7.05m long, probably better represented by sticking in a 340i for representation.
And that is probably the last time it was that empty with the inevitable addition of everything that comes with four kids and a mindset of that weird bit of mental offcut might come in useful some day.
The main annoying thing about the garage was that the builders, even though we bought off plan, would not put a door through to the utility room so I could access from the house to the garage... so that is the first part to sort out.
To finish, this is where we are starting from - a complete mess of stuff and I need to get it up in the loft area, make the ground floor practical but nice space.
to get to somewhere near this (which may change)
So order of the current things I am going to work through here in this thread (and they may come in different orders as I work through)
So to start with let's talk garage door to utility room as I have cheated here and had this done a couple of weeks back.
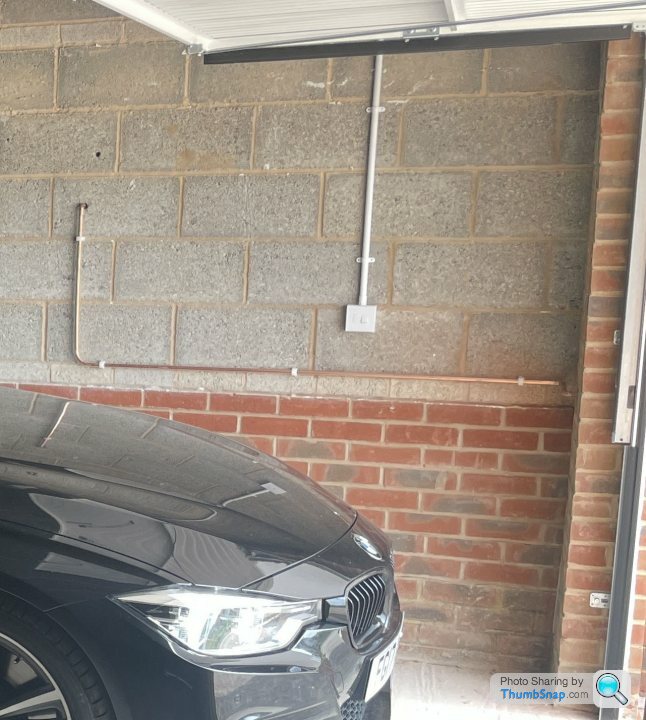
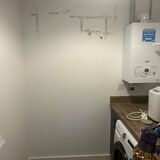
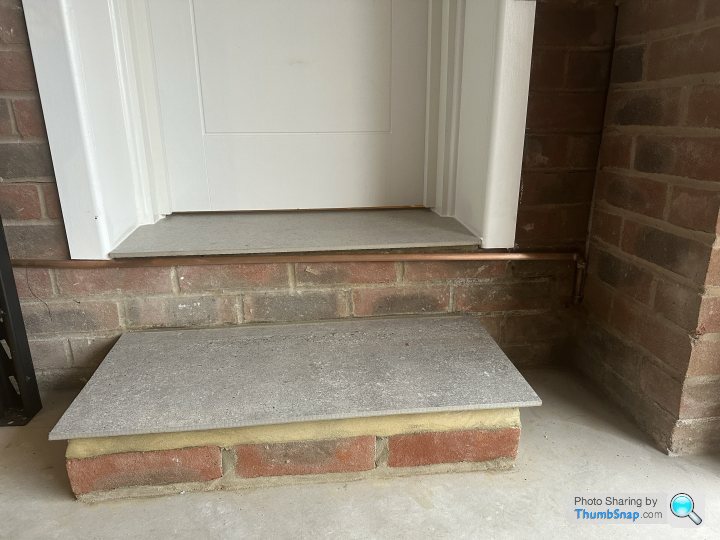
So the plan is to bash through the utility room into the garage, turns out there is a bit of a step and it is very close to the edge of the garage so we have had to think through the plan a little (plus building regs bloke didn't know whether it should be a fire escape regs, which is strange as I wasn't planning on running through the wall if there was a fire).
So need to go through this bit, which means we have a light switch and overflow condensation pipe thing from boiler in utility room to move, but easy enough to sort
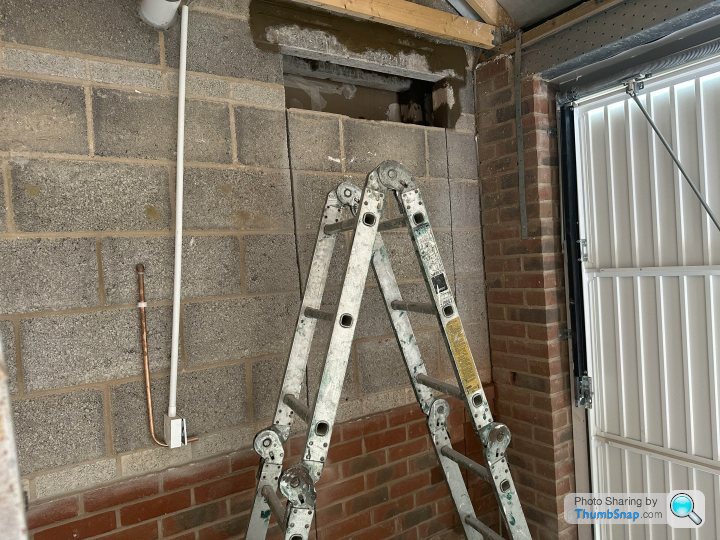
First up, we needed to put the lintels in and tried to do all the work from garage side to save the dust (issue is, that means the bit I care about is now all dusty). Drilling in straight line was obviously the challenge here, should have really used something from the really useful tools thread, particularly the light thing on this thread: https://www.pistonheads.com/gassing/topic.asp?h=0&...

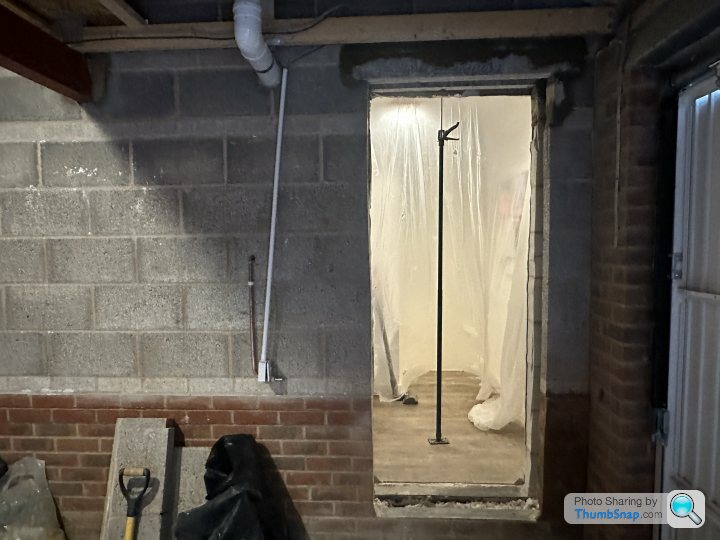
Anyway, we got close after a few tries and really going to replaster it all anyway, but this shows that it is a little bit tighter than I imagined.
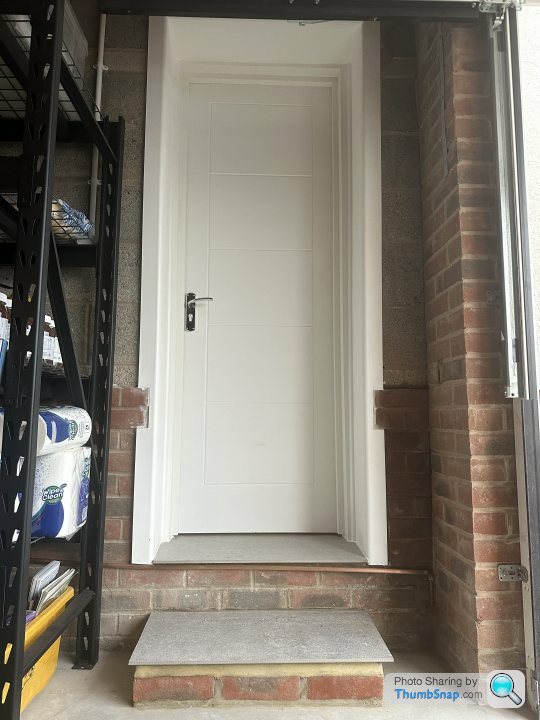
Looking at the door space etc have opted for a smaller door in to the garage of 680mm which is a shame as wanted to match the door in to the utility room of 760mm, but I don't think it will make that much difference. Also have gone for an integral chain in the door to automatically close is at per regs as hides any other mechanism from the room to close the door.
The breeze block (or whatever it is called) was pretty solid and granite like so took quite a bit to get through and chip away for the lintels
But eventually sorted and in place so we could open up the whole door space to the utility room and then that is the house connected and no more dodging the rain and opening a door to get in to the garage.
Next thing to think through was the step and entrance bit, worked out best to go for some tiles and even though the step down is fine for me without any need for a step into the garage floor was thinking for any resale it probably needs it for the less agile, so in went a step using the bricks we had removed as a base.
And with a little bit of painting and cleaning up we had completed the first phase of the garage transformation. I am still getting my head round this as a route to the garage, but it has made a big difference already in being to move some of the storage into the garage - which has now added more mess to the garage situation so up to the roof is the next thing to solve.
Finished doorway, with inevitable creep of house stuff on shelves..
- Garage door to house
- Get mess into the loft
- Flooring
- Lighting
- Power sockets
- Insulation - will probably multiple parts here but thinking garage doors first
- Walls, fixings, etc
So to start with let's talk garage door to utility room as I have cheated here and had this done a couple of weeks back.
So the plan is to bash through the utility room into the garage, turns out there is a bit of a step and it is very close to the edge of the garage so we have had to think through the plan a little (plus building regs bloke didn't know whether it should be a fire escape regs, which is strange as I wasn't planning on running through the wall if there was a fire).
So need to go through this bit, which means we have a light switch and overflow condensation pipe thing from boiler in utility room to move, but easy enough to sort
First up, we needed to put the lintels in and tried to do all the work from garage side to save the dust (issue is, that means the bit I care about is now all dusty). Drilling in straight line was obviously the challenge here, should have really used something from the really useful tools thread, particularly the light thing on this thread: https://www.pistonheads.com/gassing/topic.asp?h=0&...
Anyway, we got close after a few tries and really going to replaster it all anyway, but this shows that it is a little bit tighter than I imagined.
Looking at the door space etc have opted for a smaller door in to the garage of 680mm which is a shame as wanted to match the door in to the utility room of 760mm, but I don't think it will make that much difference. Also have gone for an integral chain in the door to automatically close is at per regs as hides any other mechanism from the room to close the door.
The breeze block (or whatever it is called) was pretty solid and granite like so took quite a bit to get through and chip away for the lintels
But eventually sorted and in place so we could open up the whole door space to the utility room and then that is the house connected and no more dodging the rain and opening a door to get in to the garage.
Next thing to think through was the step and entrance bit, worked out best to go for some tiles and even though the step down is fine for me without any need for a step into the garage floor was thinking for any resale it probably needs it for the less agile, so in went a step using the bricks we had removed as a base.
And with a little bit of painting and cleaning up we had completed the first phase of the garage transformation. I am still getting my head round this as a route to the garage, but it has made a big difference already in being to move some of the storage into the garage - which has now added more mess to the garage situation so up to the roof is the next thing to solve.
Finished doorway, with inevitable creep of house stuff on shelves..
Alex Z said:
I’d definitely want a fire door, given that the garage has things with petrol inside.
Sorry, should have been clearer - it is a fire door, building inspector wasn't sure if it should be a fire escape route and thus would need to be installed by a fire escape door approved person  - anyway, turns out it isn't a fire escape, but all regs done for fire door.
Hol said:
As you have a side entrance, If budget allows you should get rid of the central brick pillar between the doors and fit one big door.
It will future proof against wider cars or the need to fold in your mirrors each trip.
It is an interesting idea... at the moment I am not thinking of changing the garage doors, but if I get to that stage (insulation, moisture control etc part) then it is something to definitely consider. Though it has got these two in without issues and folding mirrors so think I am good for the types of cars I buy at the moment with the doors being 220cm - though if I suddenly find myself with a Murcielago I will reconsider It will future proof against wider cars or the need to fold in your mirrors each trip.


suffolk009 said:
Another vote for Hormann doors. I've not used them yet, but after much discussion, the architect specced them for our future new build.
The current doors are Hormann - but canopy with no insulation, something I am researching at the moment as think I am going to insulate the current ones first to see what that does before considering anything more pricey.Next update on the garage as we get the thread up to date with where I am at the moment.
Often in the best garage thread here: https://www.pistonheads.com/gassing/topic.asp?h=0&... a lot of people ask where is all the crap that usually sits in the garage and it appears most hide it in cupboards, stick it in another garage, or go up… without another place to put the stuff I need to go up.
Issue with new build garages is the roof trusses are specced to take a roof, and maybe a bit of snow leeway on top of that, so sticking all the boxes and things my wife wants to keep to hand down through the kids is going to overload the roof - well that is my thinking and I want to make sure we don’t sag the roof etc.
So out with the crayons to come up with a plan to support the truss and roof joists to put in a storage level above the garage.
Initially I looked at posi-joists and a helpful local team came up with the following drawings and solution, they specced it as if we were adding living space up there (which is something that could be done down the line but definitely not got the budget at the moment). So shout out to Clive at https://www.trusstecltd.co.uk/ for helping think through this plan.
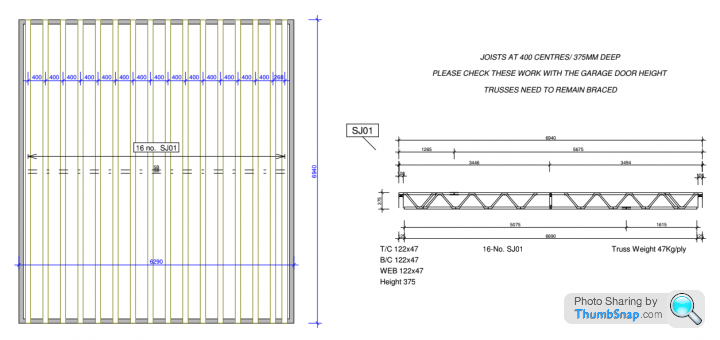
It came in at £2k+VAT so not too bad, only issue was they think the spec to support the roof put it at 400mm centres, which is hard to get anything up into the loft area so looked to other plans that weren’t so belt and braces.
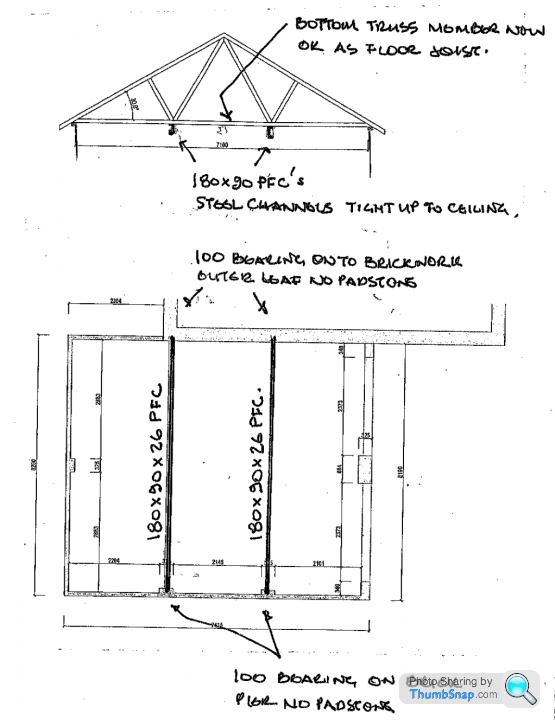
Step in bro-in-law to think through this (he is technical architect) and after several thoughts and calculations looking at the existing structure and deflections, trying an option of 225x47 C24 Timbers bolted together to support existing strusses, he said "Unfortunately timbers don’t work because of large span ( stiiffness required is proportional to cube of the span so if the span doubles the depth or stiffness required increases by a factor of eight. The maximum span of conventional timber joists is therefore around 5 metres )"
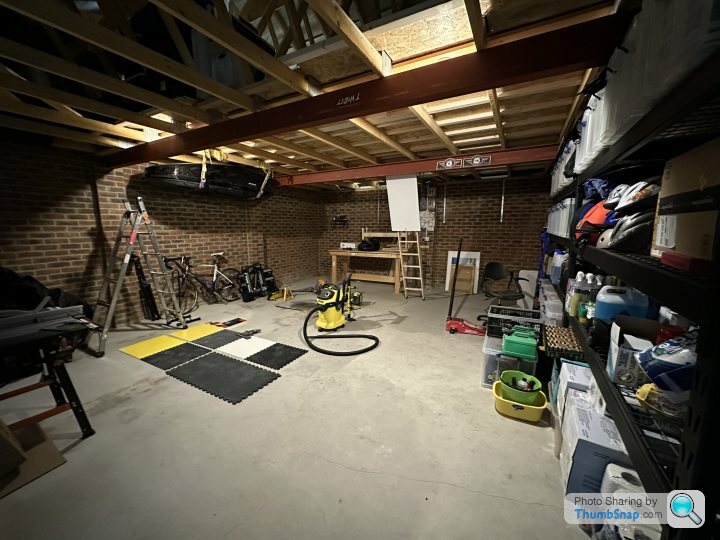
So eventual plan we went for two 180x90 PFCs (yes I don’t know what this all means but the calculations look good) perpendicular to the truss to hold the weight

And that created the following plan
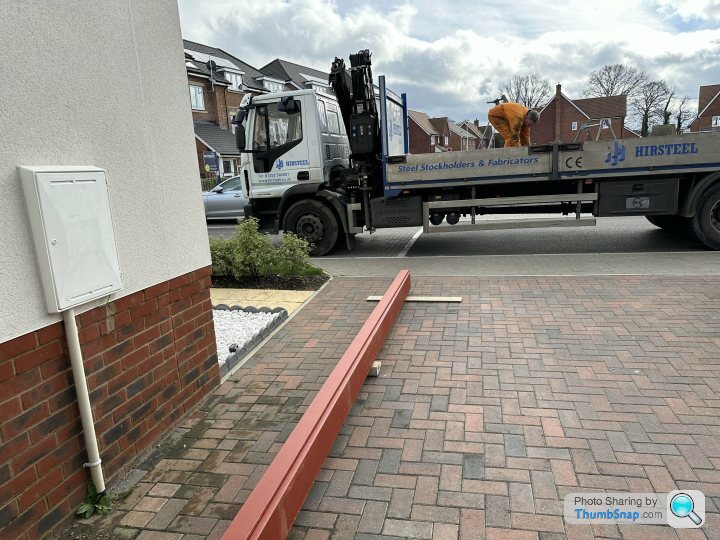
With that in hand, builder friend contacted we had the order in for the steel and a plan in place to get to work to create the support for the upper floor.
Beams arrived on nice loader and placed into the drive way, luckily as we were supporting the shorter way we could put them in the garage and rotate them round.
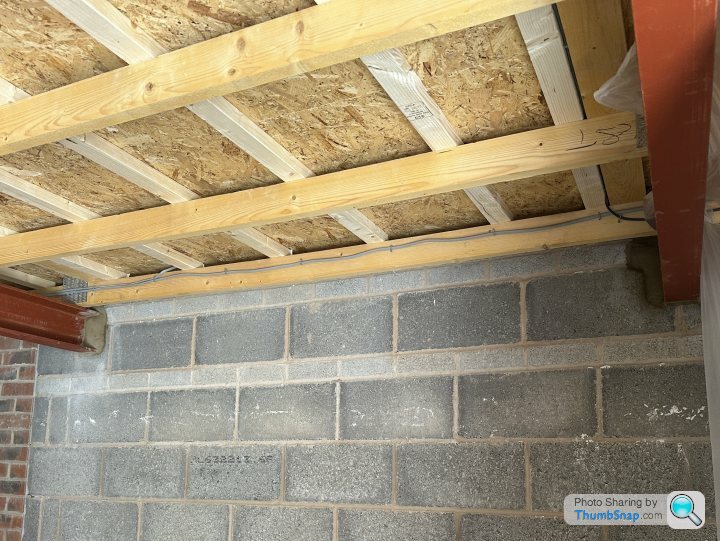
But first we needed to get drilling into the breeze block walls again to create the cavity to rest the beams on, as well as reducing the bricks on the pillars on the outside wall
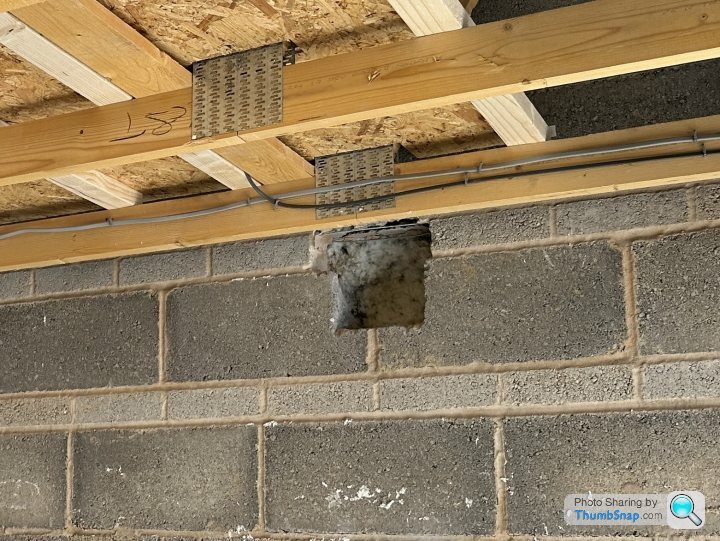
Got ourself a lift to pick up the beams and positioned them into place to sit directly under the truss joints to support the roof, raising them as close to the joists as possible before fixing in place on the walls and cementing in place
So beams in to give the support to the roof and time to start sorting the loft to put all the crap up there and leave downstairs to do some nice planning and thinking for the next stage.

You may notice that some of the floorboards in the roof are in place, more on that in the next update.
Often in the best garage thread here: https://www.pistonheads.com/gassing/topic.asp?h=0&... a lot of people ask where is all the crap that usually sits in the garage and it appears most hide it in cupboards, stick it in another garage, or go up… without another place to put the stuff I need to go up.
Issue with new build garages is the roof trusses are specced to take a roof, and maybe a bit of snow leeway on top of that, so sticking all the boxes and things my wife wants to keep to hand down through the kids is going to overload the roof - well that is my thinking and I want to make sure we don’t sag the roof etc.
So out with the crayons to come up with a plan to support the truss and roof joists to put in a storage level above the garage.
Initially I looked at posi-joists and a helpful local team came up with the following drawings and solution, they specced it as if we were adding living space up there (which is something that could be done down the line but definitely not got the budget at the moment). So shout out to Clive at https://www.trusstecltd.co.uk/ for helping think through this plan.
It came in at £2k+VAT so not too bad, only issue was they think the spec to support the roof put it at 400mm centres, which is hard to get anything up into the loft area so looked to other plans that weren’t so belt and braces.
Step in bro-in-law to think through this (he is technical architect) and after several thoughts and calculations looking at the existing structure and deflections, trying an option of 225x47 C24 Timbers bolted together to support existing strusses, he said "Unfortunately timbers don’t work because of large span ( stiiffness required is proportional to cube of the span so if the span doubles the depth or stiffness required increases by a factor of eight. The maximum span of conventional timber joists is therefore around 5 metres )"
So eventual plan we went for two 180x90 PFCs (yes I don’t know what this all means but the calculations look good) perpendicular to the truss to hold the weight
And that created the following plan
With that in hand, builder friend contacted we had the order in for the steel and a plan in place to get to work to create the support for the upper floor.
Beams arrived on nice loader and placed into the drive way, luckily as we were supporting the shorter way we could put them in the garage and rotate them round.
But first we needed to get drilling into the breeze block walls again to create the cavity to rest the beams on, as well as reducing the bricks on the pillars on the outside wall
Got ourself a lift to pick up the beams and positioned them into place to sit directly under the truss joints to support the roof, raising them as close to the joists as possible before fixing in place on the walls and cementing in place
So beams in to give the support to the roof and time to start sorting the loft to put all the crap up there and leave downstairs to do some nice planning and thinking for the next stage.
You may notice that some of the floorboards in the roof are in place, more on that in the next update.
Cow Corner said:
Insulating up and over doors like that properly isn’t easy, as they generally have (and need) large gaps around them.
Applying insulation to the panel isn’t going to achieve much if the wind is whistling through the gaps.
In my case, it wasn't very successful, so it made sense to change them to insulated sectional doors as they were old and tatty, but yours are obviously new… I think it might depend on whether you want your garage to be a just a nice place to store cars, or whether you are going to be spending hours in there in the winter tinkering.
I hear you... but they are pretty nicely fitted with not much gaps around them, prob 5mm max and for the price of some insulation and tape it is worth a go to remove them from being big radiators on the wall. I am having conversations with various companies who have things to fit into the gaps to stop wind blowing through them too so will see how it all works out.Applying insulation to the panel isn’t going to achieve much if the wind is whistling through the gaps.
In my case, it wasn't very successful, so it made sense to change them to insulated sectional doors as they were old and tatty, but yours are obviously new… I think it might depend on whether you want your garage to be a just a nice place to store cars, or whether you are going to be spending hours in there in the winter tinkering.
Pent said:
personally i couldnt live with that step in the garage i rather a nice jump in and out lol!
I am thinking the space to the right will make a nice display cabinet area, and to the left will be storage, so might not be so noticeable and in the way (plus it only goes as far out as the edge of the garage door)Moving on up…
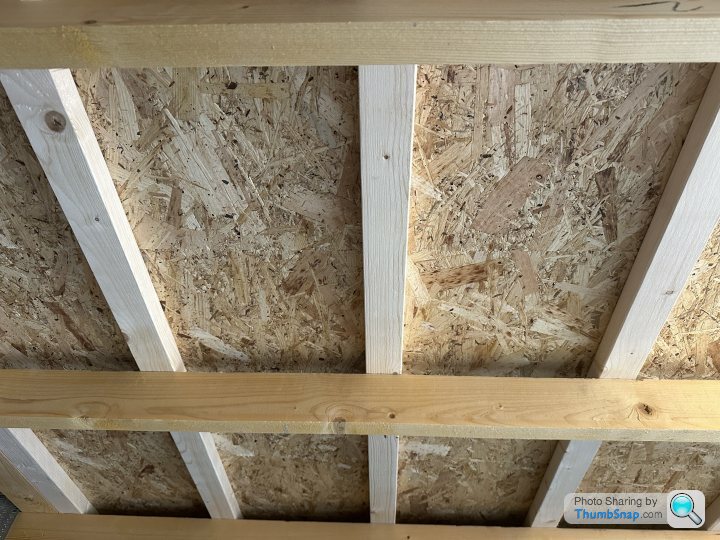
The next stage of the garage build is to now pile all the rubbish and stuff accumulated in a normal garage up to the loft, so down to Wickes to get a load of OSB boards and some battens and to get started on building an area.
I decided to go and put the battens perpendicular to the trusses, I am not sure it is really needed but did mean that I can space them for the end of the floor boards in the right places rather than relying on the builders actually sticking to 600mm centres, and then could overlap the joins to create more strength.
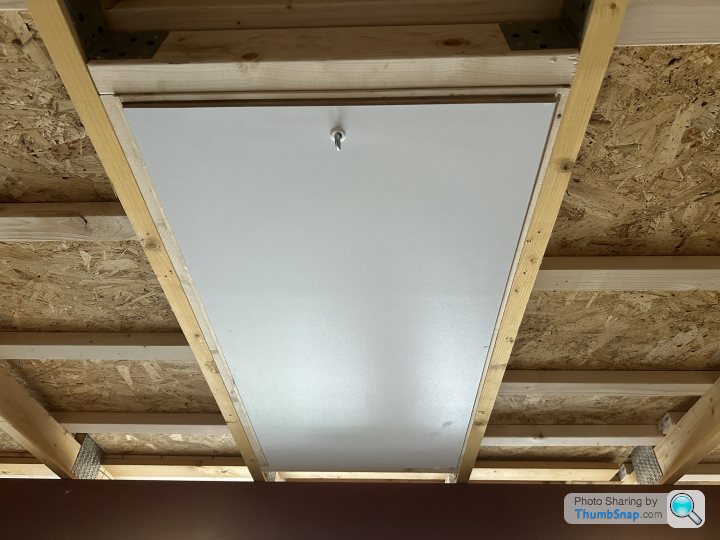
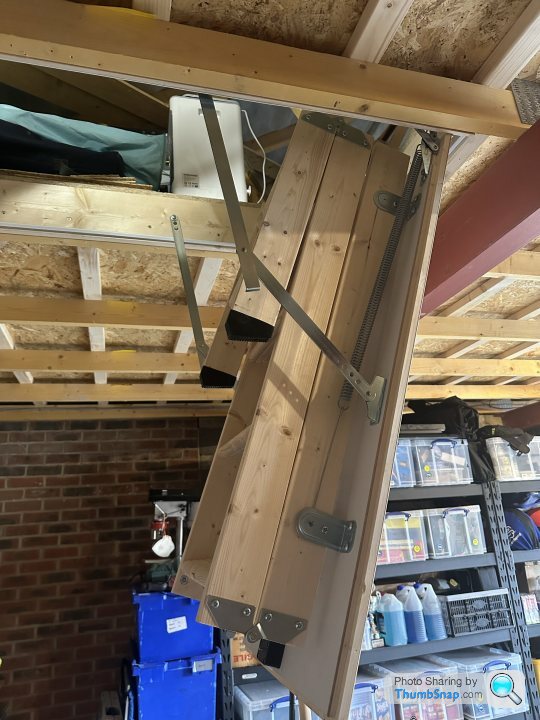
I also need a way of getting up and down, so I got from the local Costco a loft ladder which was pretty easy to fit and luckily only needed packing on one side to space between the joists and it makes a huge difference to getting up and down. Link to Costco loft ladder - https://www.costco.co.uk/Home-Improvement/Hardware...
Once boarded I instantly thought this shouldn’t be filled with rubbish and I should convert it into a massive scalextric track or model railway instead, but I remembered my goal of getting the big cars downstairs into a nice area - so something to think about in the future.
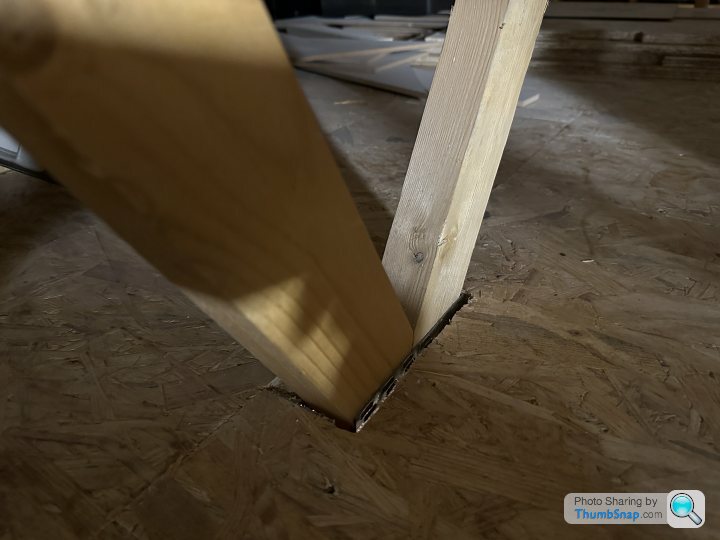
I also made sure to nicely cut around the trusses as didn’t want many gaps in the flooring either. I am thinking in the future it might be nice to carpet it with some cheap carpet too - but that will come with the scalextric I think
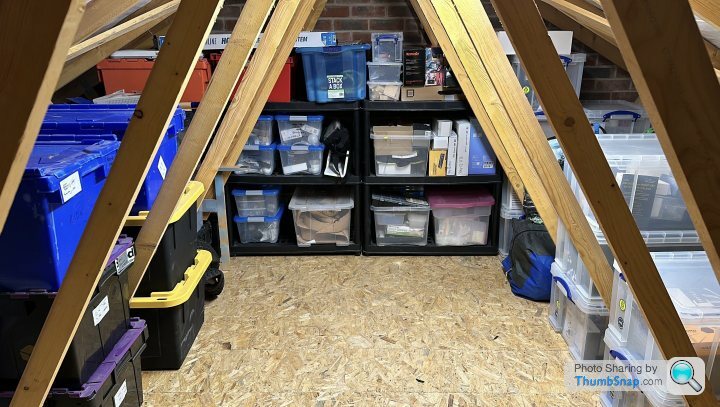
I have a few tyres from racing, so only boarded a third for the moment and will decide what to do with the last third - it was quite handy as I have not sorted the lighting out yet and the extra light from the front helps to keep it not fully dark.
So up goes all the crap…
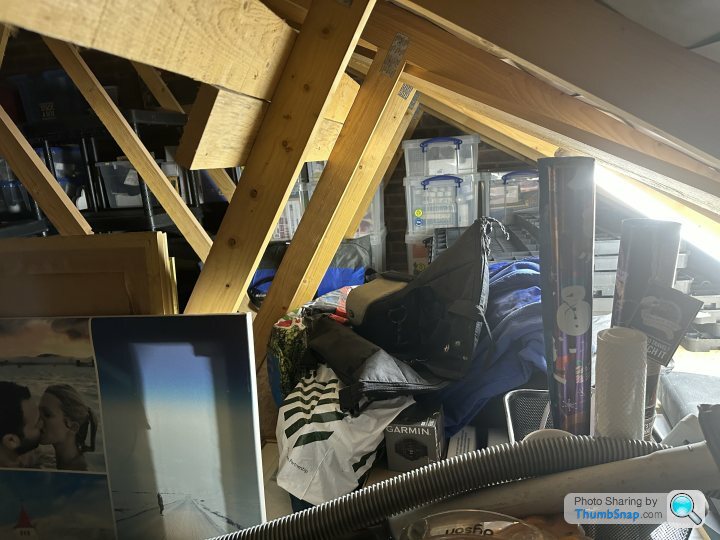
I will sort through this at some point to get to the scalextric zone, but at least this has got most of the stuff up from the garage floor and now have a bit more space to play with.
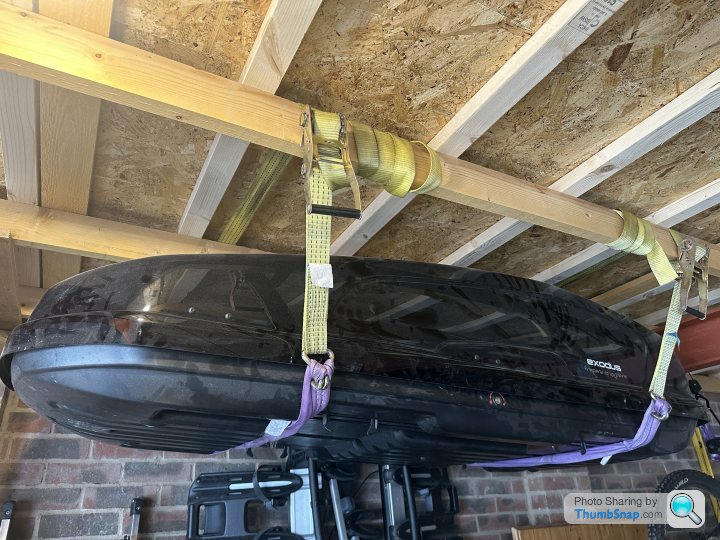
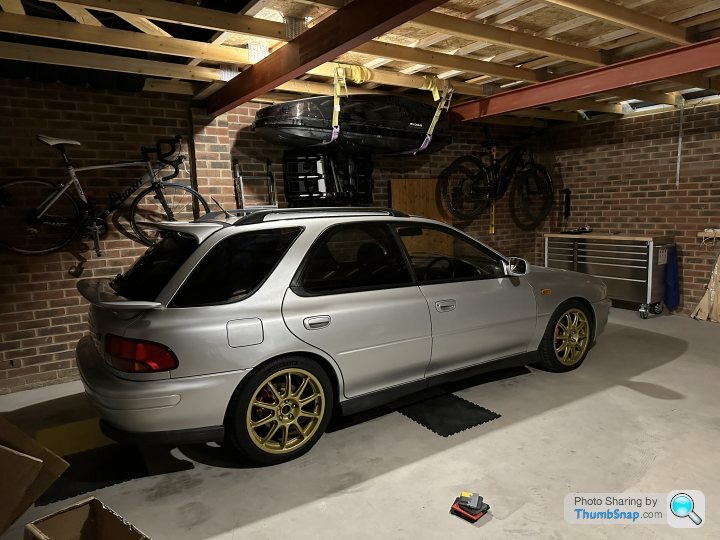
Other things I have played with - how to put stuff like bike rack, roof box, two bikes up out of the way…. This was with all stuff I already had apart from the pulley lift for the eMTB.
So in order of success:
Roof box works with the ratchet straps, but not the quickest to undo and takes two of my trailer straps out of action - so need to rethink this, maybe use the pulley system for the eMTB.
Which moves on to the pulley system, it kind of works but there is nothing on the back of the bike to put the holders on to - so I did ziptie across the holders but knocked it all off on to my head and the zip ties broke - lesson learned, used a wheel strap for now. I think this is a good solution and has a 30kg weighting for it so good enough.... but do I fully trust it above the car
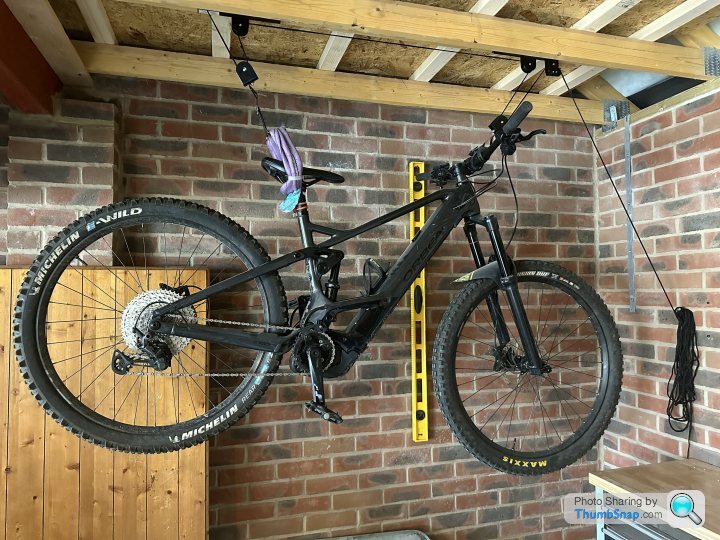
Bike rack - all good, just holders on wall, does the job nicely
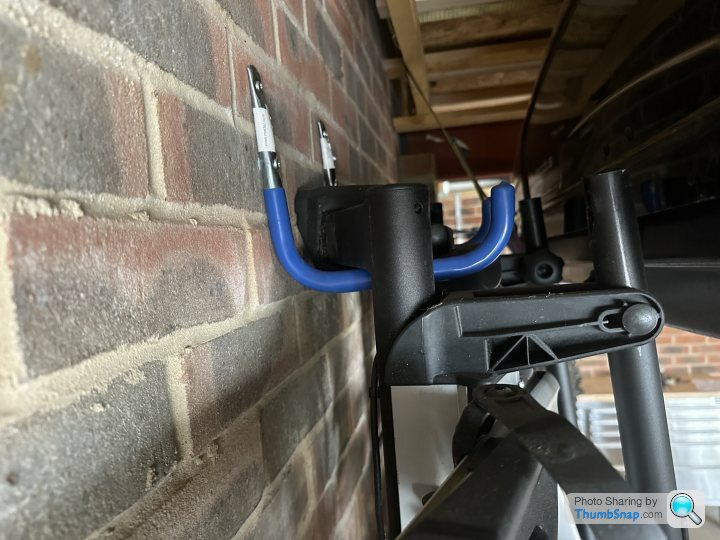
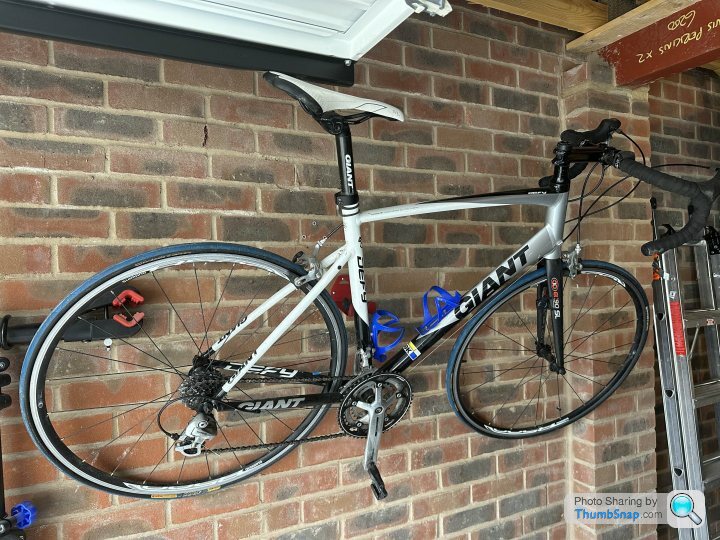
Pedal holder for road bike - I am not sure I like this too much, such an angle for the bike on the wall and may look for something else… also I imagined having the bike on the wall would be a nice feature, but not at this falling angle - will work on this.
As you can see from some of the pics I have moved on to tile samples - probably going to break the rule and go flooring next as I still can’t decide on what to do with the walls - but as going tiles, easy enough to pick back up to sort walls etc.
And for now the Scooby is back in the garage with space around it…
The next stage of the garage build is to now pile all the rubbish and stuff accumulated in a normal garage up to the loft, so down to Wickes to get a load of OSB boards and some battens and to get started on building an area.
I decided to go and put the battens perpendicular to the trusses, I am not sure it is really needed but did mean that I can space them for the end of the floor boards in the right places rather than relying on the builders actually sticking to 600mm centres, and then could overlap the joins to create more strength.
I also need a way of getting up and down, so I got from the local Costco a loft ladder which was pretty easy to fit and luckily only needed packing on one side to space between the joists and it makes a huge difference to getting up and down. Link to Costco loft ladder - https://www.costco.co.uk/Home-Improvement/Hardware...
Once boarded I instantly thought this shouldn’t be filled with rubbish and I should convert it into a massive scalextric track or model railway instead, but I remembered my goal of getting the big cars downstairs into a nice area - so something to think about in the future.
I also made sure to nicely cut around the trusses as didn’t want many gaps in the flooring either. I am thinking in the future it might be nice to carpet it with some cheap carpet too - but that will come with the scalextric I think
I have a few tyres from racing, so only boarded a third for the moment and will decide what to do with the last third - it was quite handy as I have not sorted the lighting out yet and the extra light from the front helps to keep it not fully dark.
So up goes all the crap…
I will sort through this at some point to get to the scalextric zone, but at least this has got most of the stuff up from the garage floor and now have a bit more space to play with.
Other things I have played with - how to put stuff like bike rack, roof box, two bikes up out of the way…. This was with all stuff I already had apart from the pulley lift for the eMTB.
So in order of success:
Roof box works with the ratchet straps, but not the quickest to undo and takes two of my trailer straps out of action - so need to rethink this, maybe use the pulley system for the eMTB.
Which moves on to the pulley system, it kind of works but there is nothing on the back of the bike to put the holders on to - so I did ziptie across the holders but knocked it all off on to my head and the zip ties broke - lesson learned, used a wheel strap for now. I think this is a good solution and has a 30kg weighting for it so good enough.... but do I fully trust it above the car
Bike rack - all good, just holders on wall, does the job nicely
Pedal holder for road bike - I am not sure I like this too much, such an angle for the bike on the wall and may look for something else… also I imagined having the bike on the wall would be a nice feature, but not at this falling angle - will work on this.
As you can see from some of the pics I have moved on to tile samples - probably going to break the rule and go flooring next as I still can’t decide on what to do with the walls - but as going tiles, easy enough to pick back up to sort walls etc.
And for now the Scooby is back in the garage with space around it…
I have been thinking about the walls most of today... I like the brick pillars but would prefer to have a better finish on the walls to put art up, and get better fixings for the bikes, tools on the walls. I would probably look at doing the brick work in between the pillars and up to the breeze block that connects to the house, but generally I want to control humidity and temp better in the garage, so slightly warmer in the winter and cooler in the summer - so that does say a little insulation might be good. Have read the threads I can find here and Equus makes great points here - https://www.pistonheads.com/gassing/topic.asp?h=0&... - so would probably look at following this a little.
Yes, I know I have a big radiator garage door on the front, but let's say that is in the works to get done down the line to avoid "heating or dehumidifying the county"...
Let's look at the current data... I picked up a Govee which is not some tall lanky politician but a wifi thermo-hygrometer (see here: https://uk.govee.com/collections/smart-sensor/prod...
Weather data is from Visual Crossing if you want to do the same - https://www.visualcrossing.com/weather/weather-dat...
Here is the current temp inside the garage vs outside

So generally it lags behind the outside temperature, but did well not to spike all the way down when outside went negative, so something is doing a reasonable job at keeping it temperate. Also in the recent teen temps it has trailed a little lower so generally not too bad for non insulated garage.
Humidity is another matter though...

OK, it has been raining for ever this year, and this data set is fist two weeks in March - but as I have cars and tools and machinery in there I am thinking regularly being above 80 is not great - so would like to control that better.
Thoughts from the think tank here?
Yes, I know I have a big radiator garage door on the front, but let's say that is in the works to get done down the line to avoid "heating or dehumidifying the county"...
Let's look at the current data... I picked up a Govee which is not some tall lanky politician but a wifi thermo-hygrometer (see here: https://uk.govee.com/collections/smart-sensor/prod...
Weather data is from Visual Crossing if you want to do the same - https://www.visualcrossing.com/weather/weather-dat...
Here is the current temp inside the garage vs outside
So generally it lags behind the outside temperature, but did well not to spike all the way down when outside went negative, so something is doing a reasonable job at keeping it temperate. Also in the recent teen temps it has trailed a little lower so generally not too bad for non insulated garage.
Humidity is another matter though...
OK, it has been raining for ever this year, and this data set is fist two weeks in March - but as I have cars and tools and machinery in there I am thinking regularly being above 80 is not great - so would like to control that better.
Thoughts from the think tank here?
Thanks for responding, I agree that controlling the temp is probably the first step and then a method for getting rid of the humid air as the second.
The second graph above is representation of outside and inside so it is following the outside with a little lag as expected I guess.
I have this week ordered insulation for the roof to control the temp fluctuations (should be enough left over to do the garage doors too), especially with the sun getting stronger and the majority of the roof south facing. I have also ordered stormdry for the outside walls to stop the brick being penetrated by water. And finally the floor will go down too (though can’t afford underfloor heating).
Once all installed I’m going to look at decent dehumidifiers I can plumb in to run off the smart humidity sensor to run when humid gets too high. But not researched that far.
I also went and bought a second car for the garage, so need to sort out storage and work bench better to fit with the two cars.
ingenieur said:
Looks like it would be around £600 for the under floor heating mat? And the controllers aren't a lot of money either.
https://www.screwfix.com/p/klima-underfloor-heatin...
Looks a nice solution, but would require something on top of that to get it to work and as I have already got a latex screed down on the floor and now going for interlocking PVC tile flooring I'm not sure that works under them - may give them a ring in the week though.https://www.screwfix.com/p/klima-underfloor-heatin...
dhutch said:
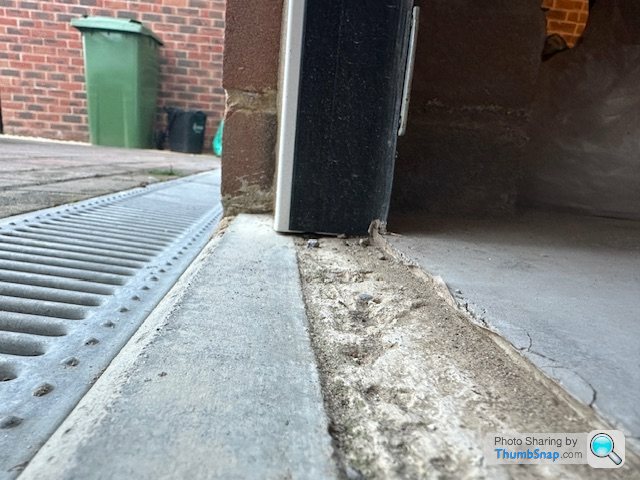
The other really obvious one for humidity is keeping the rain out.
Most garage doors have no threshold and allow rain to run in under the door, which will undo much of what heating and or dehumidifying would do.
When I have a steel frame steel clad garage, it would run under the walls too! Enough that on a cool evening after a warm day it would rain inside!
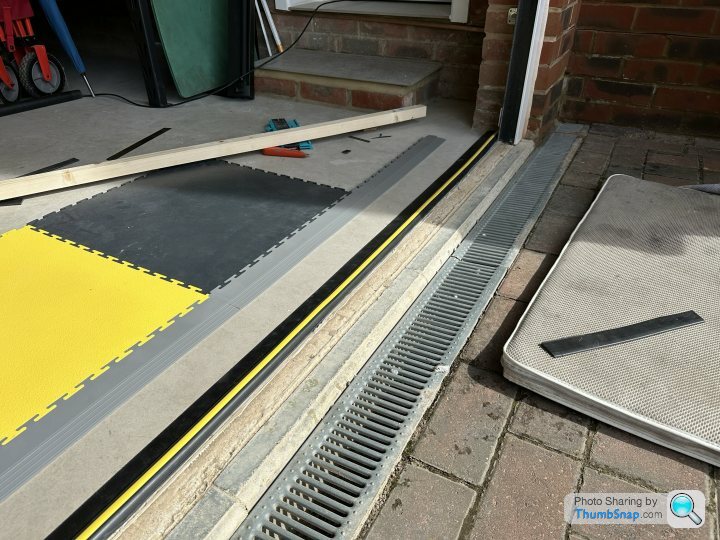
I have been speaking to garadry (https://uk.garadry.com/products/garage-door-seal-15mm) about a door seal underneath as I do see rain coming in underneath as per this pic...Most garage doors have no threshold and allow rain to run in under the door, which will undo much of what heating and or dehumidifying would do.
When I have a steel frame steel clad garage, it would run under the walls too! Enough that on a cool evening after a warm day it would rain inside!
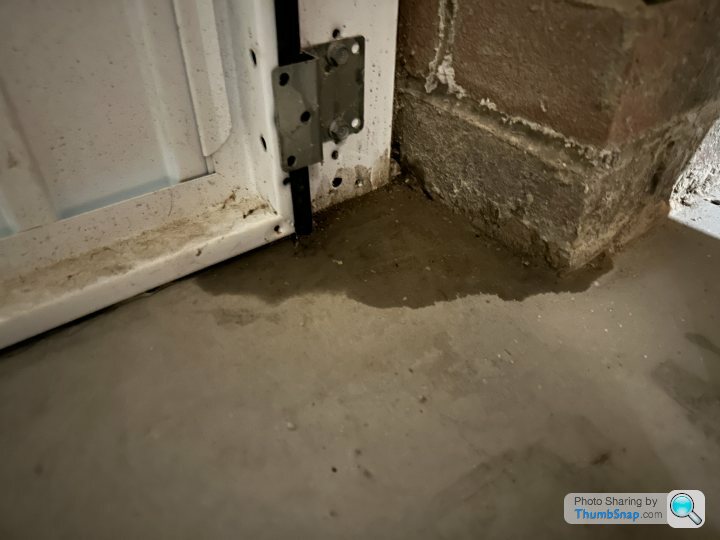
The challenge being as the screed was laid just to the door there is a lip down to the other side meaning it wouldn't be a standard fit due to the drop and it will be hard to then have the bottom flat glued
But I think we have a solution that will mean cutting the garadry just before the highest part to create the protection and fix down the half for each door as shown
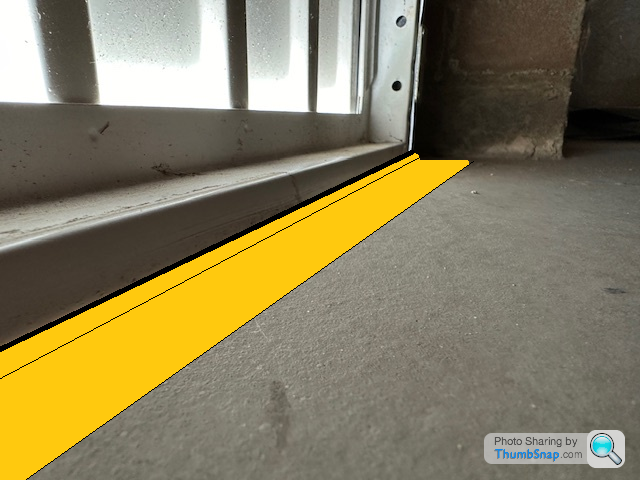
That combined with the stormdry masonry protection will hopefully stop water penetrating into the garage to help with humidity - and if it doesn't then at least you can all learn from my trying
Been a little while as I have been travelling and Easter but have made a bit of progress as follows.
Eventually got more loft flooring sorted and made it a much better upstairs so I can find everything. Plus the extra floor and sorting means I can get nearly everything from the main garage up in the loft to create more area.
This is all down to a new toy for the garage meaning I really need to make it fit two cars comfortably, so out goes racking and coming up with new plan for a work bench down the side and storage for the kitchen stuff.
The next thing was to sort the lighting out, haven’t taken any pictures as nothing exciting but got some 3foot led battens and wired them up. Light is so much better now, this is very temporary till I decide what to do with the ceiling and these won’t be wasted as they will go up into the loft once done.
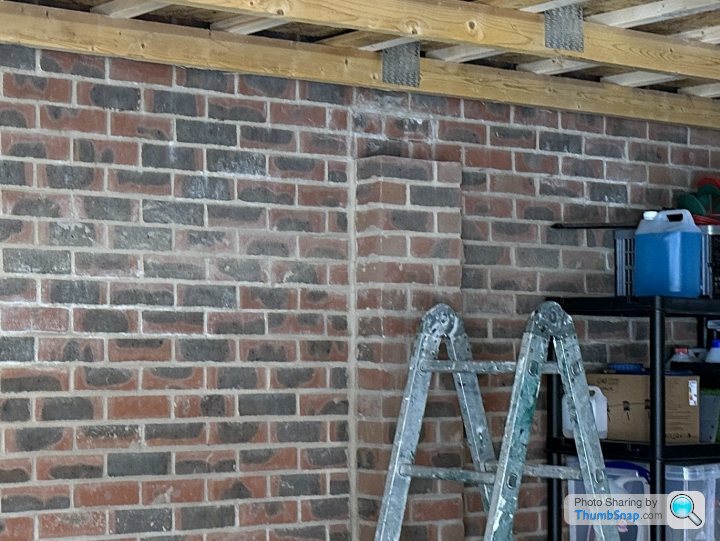
I have also got the brick protection on. It was quite a messy product to use so I have now storm guarded the front and half the side of the garage (the bit that gets most of the direct rain), also storm guarded bits of the driveway, part of my jeans and my shoes.
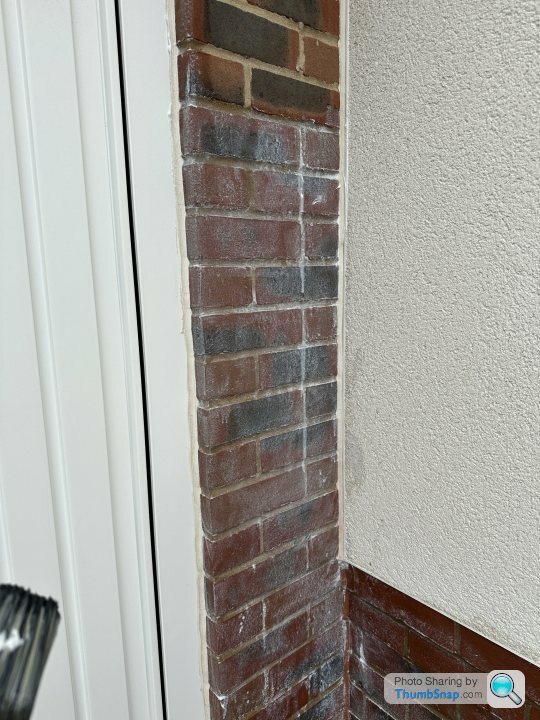
There was a bit of damp penetrating on the inside near the door so will be interested to see if this stops that.
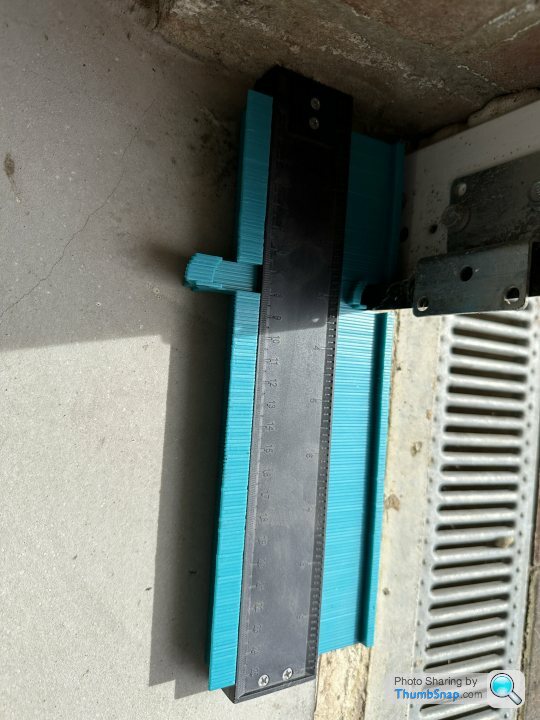
And last thing I have sorted is the garadry door seal. Pretty straight forward to fit but you definitely need a sharp knife (resorted to my Xacto instead of a Stanley) as if you don’t cut right in one go you end up with little nicks in the rubber.
And sometimes the random crap you buy off the internet ads came in handy for cutting around the doors.
And we are up to date for now.
Still working out what to do with walls, and tiles have been ordered, sudden change of colour scheme for new toy was needed there.
Eventually got more loft flooring sorted and made it a much better upstairs so I can find everything. Plus the extra floor and sorting means I can get nearly everything from the main garage up in the loft to create more area.
This is all down to a new toy for the garage meaning I really need to make it fit two cars comfortably, so out goes racking and coming up with new plan for a work bench down the side and storage for the kitchen stuff.
The next thing was to sort the lighting out, haven’t taken any pictures as nothing exciting but got some 3foot led battens and wired them up. Light is so much better now, this is very temporary till I decide what to do with the ceiling and these won’t be wasted as they will go up into the loft once done.
I have also got the brick protection on. It was quite a messy product to use so I have now storm guarded the front and half the side of the garage (the bit that gets most of the direct rain), also storm guarded bits of the driveway, part of my jeans and my shoes.
There was a bit of damp penetrating on the inside near the door so will be interested to see if this stops that.
And last thing I have sorted is the garadry door seal. Pretty straight forward to fit but you definitely need a sharp knife (resorted to my Xacto instead of a Stanley) as if you don’t cut right in one go you end up with little nicks in the rubber.
And sometimes the random crap you buy off the internet ads came in handy for cutting around the doors.
And we are up to date for now.
Still working out what to do with walls, and tiles have been ordered, sudden change of colour scheme for new toy was needed there.
pinchmeimdreamin said:
Errrr where are the pics of the new Toy …?
Little sneak preview then... coming to a PH Fleet story soonAnd so I have decided on new tile colour scheme to match the new car colours...
These tiles are from some very helpful lot at Flexi-tile https://flexi-tile.com/products/flexi-tile-7/ and went for the 7mm industrial tile - will talk more once laid them down on the different products I got samples for across ecotile, garage floor tile company, R-tec etc

triggerh4ppy said:
RacingPete said:
Did you not need concrete padstones? Is this ok with that sat on a mortar line like that? pinchmeimdreamin said:
Errrr where are the pics of the new Toy …?
Little more detail here on the new toy - https://www.pistonheads.com/gassing/topic.asp?h=0&...Gassing Station | Homes, Gardens and DIY | Top of Page | What's New | My Stuff