Help me build an aluminium racing toboggan....
Discussion


No idea where to put this thread, so thought I'd start in here and see where it gets moved to!
So, last season, a good friend of mine spent a couple of weeks out in the alps with me, and we got quite in to, and a little competitive, at tobogganing. This is 'proper' tobogganing, on a dedicated course, getting a ski lift up, and coming down through the pathways. About 4-6km runs. Also done at night.
We started of hiring toboggans, as most places have standard wooden things to hire. Although perfectly serviceable, they don't 'alf bruise the inside of your knees when you go over the bumps, which puts you out of action for a couple of days. At one mountain (Gaisberg in Kirchberg), they also hired 'racing' toboggans, made of aluminium, and don't give you bruises.

At 12 euros a time, this got a bit expensive, so we went shopping to buy one each. 300 Euros! Even a wooden one was at least 160 Euros.
So, plans were made to make one ourselves for next year. It's now October, and mate having recently split from his long term gf, has decided to come out to the alps for a month.
We both had quite different ideas on what makes a good toboggan for the courses we'll be on, so again, we've got a bit competitive.
Rules are;
1) No professional design to be used, and no 'paid-for' fabrication services (he knew I'd pay somebody else to do it professionally).
2) Maximum budget of £70 for materials only (not to include any shipping costs for materials, or any fabrication sundries such as paint, welding wire, etc.).
3) Three shakedown days to fettle, followed by three races on three separate courses.
So, I started looking at other designs for inspiration, and immediately hit on a rather nice looking model;

500 Euros plus shipping.
So last weekend, my old office was cleared out, I bought a second hand TIG welder on ebay, a mountain bike suspension unit, and bought some aluminium tubing and box section, and have made a start.

Office very roughly cleared for action. Note the Ikea table on the left, being used for a flat surface to make the jig. The green thing on the floor is the TIG welder.
Next up was to make some sort of bending jig to make sure the aluminium runners were the same shape (or near enough) left and right (and also top/bottom). I looked around for inspiration, and noticed the corner desks were just the right curve....

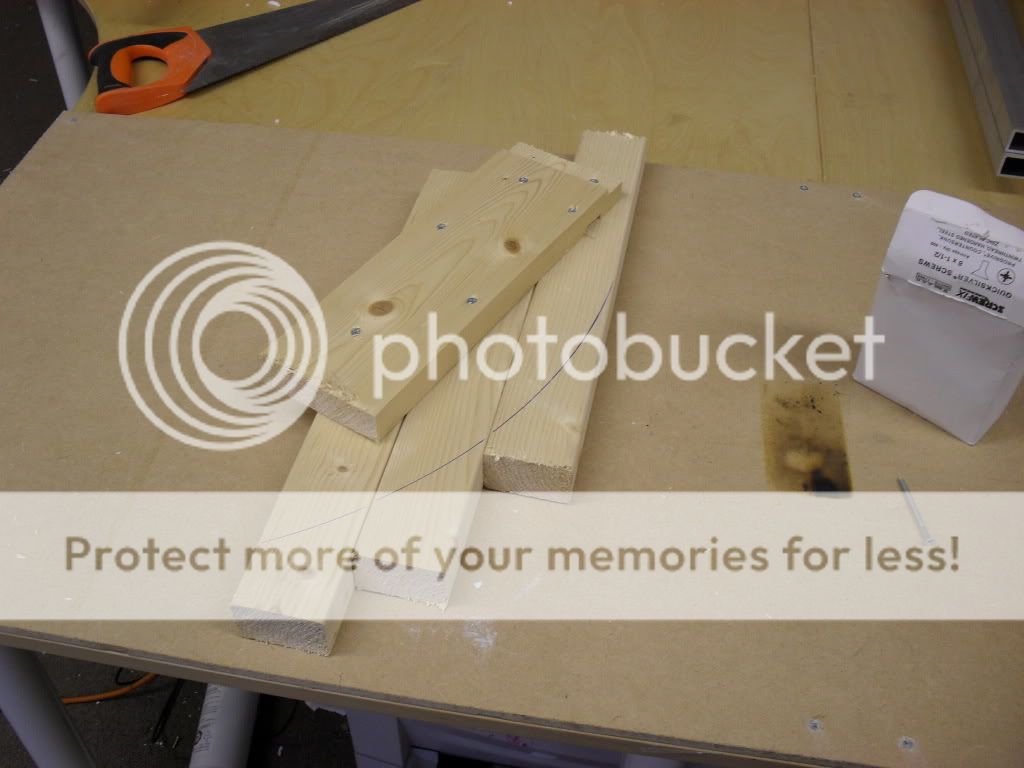
Some offcut CLS timber screwed together, with a perfect curve.
Screw the whole lot down firmly to the workbench, screw an anchor to the top end, and it's ready for bending.

I've also been getting a bit of welding practice in, with mixed success!
More to follow.....
So, last season, a good friend of mine spent a couple of weeks out in the alps with me, and we got quite in to, and a little competitive, at tobogganing. This is 'proper' tobogganing, on a dedicated course, getting a ski lift up, and coming down through the pathways. About 4-6km runs. Also done at night.
We started of hiring toboggans, as most places have standard wooden things to hire. Although perfectly serviceable, they don't 'alf bruise the inside of your knees when you go over the bumps, which puts you out of action for a couple of days. At one mountain (Gaisberg in Kirchberg), they also hired 'racing' toboggans, made of aluminium, and don't give you bruises.
At 12 euros a time, this got a bit expensive, so we went shopping to buy one each. 300 Euros! Even a wooden one was at least 160 Euros.
So, plans were made to make one ourselves for next year. It's now October, and mate having recently split from his long term gf, has decided to come out to the alps for a month.
We both had quite different ideas on what makes a good toboggan for the courses we'll be on, so again, we've got a bit competitive.
Rules are;
1) No professional design to be used, and no 'paid-for' fabrication services (he knew I'd pay somebody else to do it professionally).
2) Maximum budget of £70 for materials only (not to include any shipping costs for materials, or any fabrication sundries such as paint, welding wire, etc.).
3) Three shakedown days to fettle, followed by three races on three separate courses.
So, I started looking at other designs for inspiration, and immediately hit on a rather nice looking model;
500 Euros plus shipping.
So last weekend, my old office was cleared out, I bought a second hand TIG welder on ebay, a mountain bike suspension unit, and bought some aluminium tubing and box section, and have made a start.
Office very roughly cleared for action. Note the Ikea table on the left, being used for a flat surface to make the jig. The green thing on the floor is the TIG welder.
Next up was to make some sort of bending jig to make sure the aluminium runners were the same shape (or near enough) left and right (and also top/bottom). I looked around for inspiration, and noticed the corner desks were just the right curve....
Some offcut CLS timber screwed together, with a perfect curve.
Screw the whole lot down firmly to the workbench, screw an anchor to the top end, and it's ready for bending.
I've also been getting a bit of welding practice in, with mixed success!
More to follow.....
Bends done, about 95% successful.
Have started some of the non-structural welding (putting caps on the end middle piece) to get some more practice in, before I start on the serious stuff.
It's got to be all aluminium rather than a mix, as I can't weld aluminium to steel. Just have to be careful in the cross braces, and maybe add extra support if it's required later.
I've run out of aluminium filler rods from too much practice, just off to pick up some more so I can get going again!
Pics to follow.
OK, update from last night close of play.
The person above was right about my bending base not being strong enough, and I had to modify it a bit to make it work. It would have been better to use 18mm ply as it's a lot stronger, but it's soooo expensive, so made-do-and-mend was the way forward. Got there in the end. The little bit of distortion in the ends of the box section doesn't matter too much, as this will be lopped off when I weld on the front 'hinge' section. Both runners are pretty much (near enough) the same shape and bend, with only a very small amount of distortion on the top of the box. The bottom will have a stainless runner on it, so doesn't matter too much.
You can also see my attempts at playing with the welder to try and get the settings right!

I then moved on to making my angle brackets for the jig. A bit of offcut, Pythagoras, and a tape measure, and some careful sawing and sanding, to give me a set of 4 x 24 degree angle blocks.

Installed these on the jig, and glued some centre pieces on to hold the middle cross member in place for welding.

To make sure the bottom bars had the same angle on the bottom, I cut the whole length of two, marked the centre, and cut at an angle so they were both (approximately) the same.

Then I changed my mind on the track of the runners, they just looked too far apart, and that would just place more pressure on the bottom supporting bars, so a change of plan, moved the angle blocks further in, and changed my centre welding support to a more simple design. The 'track' is now 440mm outside edges, which looks similar to other racing designs.

Lastly, I cut the front of the supporting bars to butt up against the centre section. The centre section is purposely angled so that the force of the suspension unit pushes almost directly in to the rear bars, which (should) reduce the pressure on any single bar.

Now, with the rear bars welded in place, I started on the front ones, and the suspension unit bracket that will be fitted to the front of the centre support section. It's all cut, test fitted, and ready for welding. Unfortunately, I ran out of welding rods yesterday, and the only ones I could get locally were too thin for this sort of work, so I'll have to pick some up next week before I can get back to work.

At the moment, I've been working on the design of the front 'hinge', and I think I might have a solution....
The top and bottom sections can be cut 'square', and welded on to an aluminium tube, but I wasn't sure how to make it firm, until somebody suggested using car suspension bushes. Very good idea.
So, the plan now, is to get some 1", 1 1/4" or 1 1/2" very thick aluminium tubing, weld a 4" piece on either bottom runner (which will also act as a foot peg), and another centre piece in the middle, welded to the 'top' section (seat). Putting rubber bushes on the inside/outside of each will give a bit of flex, and put a threaded rod through the whole lot, with a locking nut on either end.
So, my problem now, is depending on which thickness of 'hinge' I go for, depends on the internal diameter that needs to fit the bushes. At the moment, the internal dimensions are;
1" - 12.7mm internal
1 1/4" - 19.05mm internal
1 1/2" - 25.4mm internal
At the moment, the 1 1/4" would be best, as I can use an offcut of the rods I already have here to use as 'sleeving' inside the sections to stop the bushes being pushed too far in to the tube.
I need to find a bush like this type, with a metal centre sleeve, and a diameter of 19mm if possible;

Budget is against me on this one, poly bushes would be excellent, but they're far too expensive. I need a set of six, ideally from a 'cheap' car like a Clio / old Mini / etc.
I could start machining the tube to fit a different type of bush, but that's going to take time I don't have, and cost money I don't want to spend!
So, any ideas chaps?
The person above was right about my bending base not being strong enough, and I had to modify it a bit to make it work. It would have been better to use 18mm ply as it's a lot stronger, but it's soooo expensive, so made-do-and-mend was the way forward. Got there in the end. The little bit of distortion in the ends of the box section doesn't matter too much, as this will be lopped off when I weld on the front 'hinge' section. Both runners are pretty much (near enough) the same shape and bend, with only a very small amount of distortion on the top of the box. The bottom will have a stainless runner on it, so doesn't matter too much.
You can also see my attempts at playing with the welder to try and get the settings right!
I then moved on to making my angle brackets for the jig. A bit of offcut, Pythagoras, and a tape measure, and some careful sawing and sanding, to give me a set of 4 x 24 degree angle blocks.
Installed these on the jig, and glued some centre pieces on to hold the middle cross member in place for welding.
To make sure the bottom bars had the same angle on the bottom, I cut the whole length of two, marked the centre, and cut at an angle so they were both (approximately) the same.
Then I changed my mind on the track of the runners, they just looked too far apart, and that would just place more pressure on the bottom supporting bars, so a change of plan, moved the angle blocks further in, and changed my centre welding support to a more simple design. The 'track' is now 440mm outside edges, which looks similar to other racing designs.
Lastly, I cut the front of the supporting bars to butt up against the centre section. The centre section is purposely angled so that the force of the suspension unit pushes almost directly in to the rear bars, which (should) reduce the pressure on any single bar.
Now, with the rear bars welded in place, I started on the front ones, and the suspension unit bracket that will be fitted to the front of the centre support section. It's all cut, test fitted, and ready for welding. Unfortunately, I ran out of welding rods yesterday, and the only ones I could get locally were too thin for this sort of work, so I'll have to pick some up next week before I can get back to work.
At the moment, I've been working on the design of the front 'hinge', and I think I might have a solution....
The top and bottom sections can be cut 'square', and welded on to an aluminium tube, but I wasn't sure how to make it firm, until somebody suggested using car suspension bushes. Very good idea.
So, the plan now, is to get some 1", 1 1/4" or 1 1/2" very thick aluminium tubing, weld a 4" piece on either bottom runner (which will also act as a foot peg), and another centre piece in the middle, welded to the 'top' section (seat). Putting rubber bushes on the inside/outside of each will give a bit of flex, and put a threaded rod through the whole lot, with a locking nut on either end.
So, my problem now, is depending on which thickness of 'hinge' I go for, depends on the internal diameter that needs to fit the bushes. At the moment, the internal dimensions are;
1" - 12.7mm internal
1 1/4" - 19.05mm internal
1 1/2" - 25.4mm internal
At the moment, the 1 1/4" would be best, as I can use an offcut of the rods I already have here to use as 'sleeving' inside the sections to stop the bushes being pushed too far in to the tube.
I need to find a bush like this type, with a metal centre sleeve, and a diameter of 19mm if possible;
Budget is against me on this one, poly bushes would be excellent, but they're far too expensive. I need a set of six, ideally from a 'cheap' car like a Clio / old Mini / etc.
I could start machining the tube to fit a different type of bush, but that's going to take time I don't have, and cost money I don't want to spend!
So, any ideas chaps?
MorrisCRX said:
I'm slightly concerned about the angle at which the billet meets the front tubes. b k kebab comes to mind. Top work though.
Yes, I thought that too, which is partly why I held fire on on welding.k kebab comes to mind. Top work though.Plan is to weld the suspension bracket on first, then cut a 90 degree angle in the trailing edge of the front support bars, and weld them under AND in front of the centre support. It's more work, but will give a better result I think. And less chance of 'penetration'.

Cheers for Morris suggestion, they are indeed very cheap, rubber ones are about 50p each, which would be perfect!
WJH said:
maser_spyder said:
MorrisCRX said:
I'm slightly concerned about the angle at which the billet meets the front tubes. bk kebab comes to mind. Top work though.
Yes, I thought that too, which is partly why I held fire on on welding.k kebab comes to mind. Top work though.Plan is to weld the suspension bracket on first, then cut a 90 degree angle in the trailing edge of the front support bars, and weld them under AND in front of the centre support. It's more work, but will give a better result I think. And less chance of 'penetration'.
Cheers for Morris suggestion, they are indeed very cheap, rubber ones are about 50p each, which would be perfect!
What you need is a mate in a fabrication shop who can do the welding as a homer for you.
Top plan though, and I like your design.
Beefmeister said:
Great thread. Have you been watching James May's Man Lab by any chance?
Actually, this was all conceived long before that, but it is very appropriate!I've had a second opinion on my 'hinge' design and we've worked out a better way.
To give the whole thing more strength, I'm going to weld a solid aluminium bar across the front of the runners.
Then, using a piece of large, thick, round tube, cut in half, with a block on either side to make a clamp. This will clamp over the solid bar, and be tightened with some machine screws.
It should make the whole thing stronger, and give the little bit of hinge required for the spring to work.
So, a 1" solid bar across the front runners, making it solid.
And a 1 1/2" tube (1/4" thick), cut in half to make a clamp that goes over the 1" bar. Add a couple of brackets to clamp it tightly back together again, and job done.
The hardest bit now is going to be bending the seat. I might end up welding it with angles rather than bending, but it would be a shame, I think bends would look much nicer.
More to follow once the materials show up!
Right, time for another update, even though the materials still haven't arrived.... Due Monday, which rather buggers up my weekend somewhat!
Anyway, here's the latest updates, which isn't much I'm afraid.
I've made a couple of brackets for the suspension unit, that just need to be drilled. Bolts coming tomorrow, so that will be test assembled at the weekend.

My attempts at welding haven't been a total disaster. I know it's not the tidiest weld, but I've had about 4 hours practice in my entire life, so cut me some slack!
It should hold....

So now, this is the whole 'bottom half', pretty much ready for the front hinge rod to be welded on. Then it's a case of bending the seat, and welding on the cross section and front 'hinge', which will be interesting!

And finally, this is roughly where the suspension unit will fit, with the bracket ready to be welded to the seat cross member.

I've had a good bounce on it, and it seems pretty strong!
My one last job to do, is to fit a horizontal rod across the rear two struts, to stop them spreading under load. Once that's done, I'm ready for the top.
So, for an idiot, what is the opinion of the PH masses?
Anyway, here's the latest updates, which isn't much I'm afraid.
I've made a couple of brackets for the suspension unit, that just need to be drilled. Bolts coming tomorrow, so that will be test assembled at the weekend.
My attempts at welding haven't been a total disaster. I know it's not the tidiest weld, but I've had about 4 hours practice in my entire life, so cut me some slack!
It should hold....
So now, this is the whole 'bottom half', pretty much ready for the front hinge rod to be welded on. Then it's a case of bending the seat, and welding on the cross section and front 'hinge', which will be interesting!
And finally, this is roughly where the suspension unit will fit, with the bracket ready to be welded to the seat cross member.
I've had a good bounce on it, and it seems pretty strong!
My one last job to do, is to fit a horizontal rod across the rear two struts, to stop them spreading under load. Once that's done, I'm ready for the top.
So, for an idiot, what is the opinion of the PH masses?
zcacogp said:
maser_spyder said:
My attempts at welding haven't been a total disaster. I know it's not the tidiest weld, but I've had about 4 hours practice in my entire life, so cut me some slack!
If that's the result of four hours of practice then I am deeply impressed. I thought that welding aluminium was meant to be very difficult?Bravo, sir. What model of welder did you buy?
Oli.
I think it's called a Cobel, WSE200, 200A AC/DC tig welder. Basically a cheap, basic, pedal operated welder.
You should see my practice bits though, they really are quite funny!
Actually, it's not that hard if you have a bit of a background in soldering. You heat both parts of the metal, and feed in the filler rod, which 'fills' the gap.
In fact, I reckon anybody could do this ^^^ in a few hours, but hats off to the guys that can 'lay dimes' and get all the ripples looking right, which is way, way beyond my talents, and very hard indeed.
In one of the youtube videos I watched, a guy referred to 'time under the helmet', which makes sense to me. The more you practice, the better you get. It's a steep initial learning curve, which shallows after a few hours. It's fairly quick to get a 'basic' weld (as seen above!), it's the tidy stuff that's very hard to get right.
Happy for any input, if anybody has any suggestions!
Just a little update for anybody listening.
Materials didn't ship in time to arrive for the weekend, so no major progress, apart from adding the bracing on the front and rear struts. I was just going to do the rear, and let the main front brace take the strain, but for the extra weight it was going to cost (about 150g), it was worth adding a small front cross brace.
So that all done, it's now very firm, you can jump up and down on the spring section with no distortion in the runners. Just a bit of flex, which is what I needed all along. Ive also drilled the holes for the suspension unit and test fitted, which is all good so far.
And I've run out of gas! maybe too much practice.... Will pick up a bottle tomorrow.
So, having done all of this by Saturday afternoon, I spent the evening working out the seat. I've made the bending jig for the rear part, which is similar to the one for the runners, the other front bends I'm going to do on the hop, and line it up by eye. There's seven bends to go in the front section, one at the rear, and three on each side to make it ergonomic and prevent your legs getting bruised, the three each side are the ones to line up by eye, which will be interesting!
So, I narrowed the seat down to;
1) Cordura - used for motorbike clothing and other heavy duty stuff. Stitched seam and strung from the seat frame. Cheap and flexible, but potentially uncomfortable if it sags.
2) GRP - cheap and solid, and less likely to hurt myself if any of my welding gives way!
3) Carbon fibre - relatively expensive, but strong, and would look good....
So in the end, I went for none of these. I found Kevlar to be just a little bit cheaper than CF for the cloth, so bought just enough to do a three layer lay-up.
Now, I've never made a plug or mould before, so it's a new one for me. I've bought some rather clever plasticine stuff that you melt in a pot, cover your plug, and it makes a nice solid mould good for up to ten pieces. Then melt it again, and start over. How good is that? So I need to make the metal part of the seat first, then make a wooden plug that's the same size and shape as the seat, cover it in mould stuff, then use epoxy resin and Kevlar cloth to get a nice, solid seat.
I plan to use machine screws to bolt it to the seat frame.
So materials have been purchased for that, once again, I've bought far too much, and probably have enough to make half a dozen seats!
Still, if my welding is anything to go by, I'll use it all just making one good one...
So, the question people are probably thinking, is why the heck are you doing this? Well, it's simple. I have a job where I have a lot of responsibility. I'm the crux of quite a few different hinges, and things tend to only happen if I make them happen. I love it, and wouldn't do anything else, but sometimes, you just have to let the inner child in you have some fun, and do something a bit different. I also love learning new skills, and find learning in general very fulfilling. I also seldom get chance to do anything practical, even though I find it very fulfilling. There's really nothing better than looking at something you've made, however shoddy, and knowing that you made it all happen! So far, I've learnt about aluminium cutting and shaping, welding, jig making, general fabricating, and in the next few days, I'll be making my first composite fabrication. Superb.
I heartily recommend doing stuff like this, it's been years since I actually made anything, and it's been great fun all along.
Pics to follow!
Materials didn't ship in time to arrive for the weekend, so no major progress, apart from adding the bracing on the front and rear struts. I was just going to do the rear, and let the main front brace take the strain, but for the extra weight it was going to cost (about 150g), it was worth adding a small front cross brace.
So that all done, it's now very firm, you can jump up and down on the spring section with no distortion in the runners. Just a bit of flex, which is what I needed all along. Ive also drilled the holes for the suspension unit and test fitted, which is all good so far.
And I've run out of gas!
maybe too much practice.... Will pick up a bottle tomorrow.So, having done all of this by Saturday afternoon, I spent the evening working out the seat. I've made the bending jig for the rear part, which is similar to the one for the runners, the other front bends I'm going to do on the hop, and line it up by eye. There's seven bends to go in the front section, one at the rear, and three on each side to make it ergonomic and prevent your legs getting bruised, the three each side are the ones to line up by eye, which will be interesting!
So, I narrowed the seat down to;
1) Cordura - used for motorbike clothing and other heavy duty stuff. Stitched seam and strung from the seat frame. Cheap and flexible, but potentially uncomfortable if it sags.
2) GRP - cheap and solid, and less likely to hurt myself if any of my welding gives way!
3) Carbon fibre - relatively expensive, but strong, and would look good....
So in the end, I went for none of these. I found Kevlar to be just a little bit cheaper than CF for the cloth, so bought just enough to do a three layer lay-up.
Now, I've never made a plug or mould before, so it's a new one for me. I've bought some rather clever plasticine stuff that you melt in a pot, cover your plug, and it makes a nice solid mould good for up to ten pieces. Then melt it again, and start over. How good is that? So I need to make the metal part of the seat first, then make a wooden plug that's the same size and shape as the seat, cover it in mould stuff, then use epoxy resin and Kevlar cloth to get a nice, solid seat.
I plan to use machine screws to bolt it to the seat frame.
So materials have been purchased for that, once again, I've bought far too much, and probably have enough to make half a dozen seats!
Still, if my welding is anything to go by, I'll use it all just making one good one...
So, the question people are probably thinking, is why the heck are you doing this? Well, it's simple. I have a job where I have a lot of responsibility. I'm the crux of quite a few different hinges, and things tend to only happen if I make them happen. I love it, and wouldn't do anything else, but sometimes, you just have to let the inner child in you have some fun, and do something a bit different. I also love learning new skills, and find learning in general very fulfilling. I also seldom get chance to do anything practical, even though I find it very fulfilling. There's really nothing better than looking at something you've made, however shoddy, and knowing that you made it all happen! So far, I've learnt about aluminium cutting and shaping, welding, jig making, general fabricating, and in the next few days, I'll be making my first composite fabrication. Superb.
I heartily recommend doing stuff like this, it's been years since I actually made anything, and it's been great fun all along.
Pics to follow!
eliot said:
maser_spyder said:
My attempts at welding haven't been a total disaster. I know it's not the tidiest weld, but I've had about 4 hours practice in my entire life, so cut me some slack!
As you probably know - everything must be 100% clean. If you touch tip onto the job and it goes all black you need to stop, clean it up and start again.
Get yourself a STAINLESS STEEL mini wire brush. Clean all work up before starting even if it looks clean!.
Finally that round tube in that photo looks like its been coated or anodised - if it has, you need to clean it back to bare ally.

I had sort of worked this out for myself (the hard way!), but cheers for the tip, it's noted for the next lot!
I've actually got quite a lot quicker at the welding bit now, what was taking me a few minutes to do previously, I can now do in 30 seconds or so. In, heat, filler rod, out. It's all practice.
Just waiting for the materials to arrive, then I'll get cracking again tonight!
Just some piccy updates....
The jig to bend the seat;

A nearly finished bottom half, with the suspension unit bolted in place. This is waiting for the materials to arrive at the weekend, couldn't do any more.

Test fit of the front 'hinge' bar. The middle tube is a solid aluminium rod, but it's quite heavy, and I might change it for tube instead. At the moment, it'll slide in and out, so still easy to change over.

Front bars welded on.

And the pretty much finished bottom half;

So, I managed to bend the rear part of the seat section, but there was no way I was bending the front bits as well, it's just too thick material. So I went for cutting slits and welding them up. To be honest, I'm not over-pleased with the seat. It might look better with the kevlar top on, but if I get chance, I might attempt another one made of 1" thick tube instead of square section. It should bend a lot easier, and be equally as strong. It's functional, but I'm not 100% proud of it.


The front of the seat will be welded to another of the large tube sections, fitted to the middle part of the front bar.
I also have to weld some supports on the seat, and put the cross member on the seat for the suspension mount. I ran out of 'noisy' time tonight (it's a bit rude to be cutting and grinding at gone 9pm), but will crack on again tomorrow.
I've also been investigating runners, and have had a change of plan from the stainless steel ones I was going to get. I managed to find a supplier that can cut me strips of UHMWPE (Ultra High Molecular Weight Polyethylene), which is much lighter than stainless, and slipperier than a politician. Not desperately expensive either. It's the same material they make the bases for skis from, so is repairable, and they'll be replaceable too, just in case I wreck them!
With a bit of luck, more updates tomorrow....
The jig to bend the seat;
A nearly finished bottom half, with the suspension unit bolted in place. This is waiting for the materials to arrive at the weekend, couldn't do any more.
Test fit of the front 'hinge' bar. The middle tube is a solid aluminium rod, but it's quite heavy, and I might change it for tube instead. At the moment, it'll slide in and out, so still easy to change over.
Front bars welded on.
And the pretty much finished bottom half;
So, I managed to bend the rear part of the seat section, but there was no way I was bending the front bits as well, it's just too thick material. So I went for cutting slits and welding them up. To be honest, I'm not over-pleased with the seat. It might look better with the kevlar top on, but if I get chance, I might attempt another one made of 1" thick tube instead of square section. It should bend a lot easier, and be equally as strong. It's functional, but I'm not 100% proud of it.
The front of the seat will be welded to another of the large tube sections, fitted to the middle part of the front bar.
I also have to weld some supports on the seat, and put the cross member on the seat for the suspension mount. I ran out of 'noisy' time tonight (it's a bit rude to be cutting and grinding at gone 9pm), but will crack on again tomorrow.
I've also been investigating runners, and have had a change of plan from the stainless steel ones I was going to get. I managed to find a supplier that can cut me strips of UHMWPE (Ultra High Molecular Weight Polyethylene), which is much lighter than stainless, and slipperier than a politician. Not desperately expensive either. It's the same material they make the bases for skis from, so is repairable, and they'll be replaceable too, just in case I wreck them!
With a bit of luck, more updates tomorrow....
Right, time for another update.
Materials having arrived, and noisy time allowed again, I pressed on to cutting the centre tube section to size, and welding on the seat;

Then adding the cross member that secures the suspension to the seat. I'll add some triangular supports to this, just to add a bit of extra strength, but ran out of time last night.

The whole thing, flipped over to finish the welding;

I then cut and welded the curved parts to the seat. Again, these will have some supports welded in tonight/tomorrow, just to add a little more strength. These prevent the back of the seat from bending. The force on the back of the seat travels through the curved tube, down to the front of the seat section, and in turn, helps the runners to lift left/right and aide turning. They look pretty funky too.

So, a couple of support and strengthening bits aside, that's pretty much the frame finished.


The one thing I'm not 100% happy with is the square section seat. Looking at it again, I would have preferred a tubular section to make it more curvy.
Because of the way it's made, I can actually remove the top half in seconds, so I could fabricate a completely new one to replace it. At the moment, I just want to get it finished, but I may well fettle and improve later.
There's about 10cm of travel at the rear of the seat where your arse will be, which is plenty to take out the worst of the bumps.
I forgot to mention, one of the other reasons for making a suspension toboggan, is that I fractured my spine a few years ago (T11, T12 and L1), and jolting it doesn't do it much good!
The materials to make the kevlar (or maybe carbon fibre) seat have just arrived, so I'll be getting on with the last few bits, and making the 'plug' for the seat tonight.
More updates to follow!
Materials having arrived, and noisy time allowed again, I pressed on to cutting the centre tube section to size, and welding on the seat;
Then adding the cross member that secures the suspension to the seat. I'll add some triangular supports to this, just to add a bit of extra strength, but ran out of time last night.
The whole thing, flipped over to finish the welding;
I then cut and welded the curved parts to the seat. Again, these will have some supports welded in tonight/tomorrow, just to add a little more strength. These prevent the back of the seat from bending. The force on the back of the seat travels through the curved tube, down to the front of the seat section, and in turn, helps the runners to lift left/right and aide turning. They look pretty funky too.
So, a couple of support and strengthening bits aside, that's pretty much the frame finished.
The one thing I'm not 100% happy with is the square section seat. Looking at it again, I would have preferred a tubular section to make it more curvy.
Because of the way it's made, I can actually remove the top half in seconds, so I could fabricate a completely new one to replace it. At the moment, I just want to get it finished, but I may well fettle and improve later.
There's about 10cm of travel at the rear of the seat where your arse will be, which is plenty to take out the worst of the bumps.
I forgot to mention, one of the other reasons for making a suspension toboggan, is that I fractured my spine a few years ago (T11, T12 and L1), and jolting it doesn't do it much good!
The materials to make the kevlar (or maybe carbon fibre) seat have just arrived, so I'll be getting on with the last few bits, and making the 'plug' for the seat tonight.
More updates to follow!
RacingPete said:
Looks very very good
Just a quick amateur hour question, but do you steer it the same way as a plastic sledge down your local snow covered hill? (i.e. by leaning and transferring weight?) Though quite a few of the car sledge designs I have seen recently have had a movable single ski.
Pete, yes, basically.Just a quick amateur hour question, but do you steer it the same way as a plastic sledge down your local snow covered hill? (i.e. by leaning and transferring weight?) Though quite a few of the car sledge designs I have seen recently have had a movable single ski.
There are three ways of turning, and you can use a combination of the three to get a good turn.
1) Push your foot on the outside runner to push it down. The inside runner lifts up, and changes the shape of the runners against the slope, so makes a turn.
2) Get your inside foot dug in the snow. Slows one side of the sled, to makes a turn. Down-side, it throws snow in your face!
3) Lean right back (more speed) and drag your inside hand behind you. Works in the same way as digging your foot in, but no snow in the face.
A mixture of all three gives you a good, clean turn.
The speed comes from leaning right back, lifting the front of the sled, and creating as little friction as possible with the snow, so a 'luge' type of sled is probably fastest on a flat surface. However, most of the toboggan runs where we're going are not perfectly flat, hence the suspension!
Beyond Rational said:
Amazing build. How is the budget looking at this stage?

Ummm. Not too bad.
OK, it's bad.
£400 on welding gear and consumables, which is the brunt of it.
£150 on aluminium so far, but I've got enough left over to make at least another two toboggans (some of the bits you only use a short length of a long piece).
About £30 on carbon fibre and moulding gear to make the seat, although this could be used to make an infinite number of them.
Breaking it down, I've used to make one sled;
£11 - 1 x 1 1/2" x 1" length for the bottom runners
£7 - 1" x 1" length for the seat frame
£10 - 2 x 3/4" length tube for the bottom rods and curved seat bits
£3 - 1 1/4" tube for the hinge
£2 - 1" tube for the hinge
£5 - suspension unit
£4 - Stainless bolts, nuts, etc.
£12 - Carbon fibre and epoxy to make the seat
left to spend - about £10 for the PE material to make the ultra slippy runners.
Makes a total spend, including welding rods and paint, of about £70.
Price to buy a 'professional' one is about £400, although the 'proper' one has a much nicer seat, and is far better welded than mine!
911motorsport said:
 top effort!
Constructive criticism though?
Once you start bumping your way down hill the load on that first weld after the curve on the seat will be considerable. The weld is sited parallel to the likely point point of flexion in the curved load bearers you've welded on. Although it would spoil the aesthetics a bit I would be tempted to weld a length of tube between the seat (just aft of the first weld) and the load rail to prevent it flexing under load. Just a thought

The seat will be fitted over the top and machine-screwed on to the frame, which will add a bit of strength, but not much.
Duly noted, I've got a bit of material that'll pad it out a bit so will use that. I might even put a cross-piece to brace it as well.
That particular point is where the small struts for the load bearers will be (once I get around to it), which should add a little strength, but again, not much.
I intended to bend that bit, rather than cut and weld it, but the material was just too strong to do it well.
Criticism more than welcome!
OK, time for another update from the weekend.
Not much I could do, other than the final bits, welding in the support sections, and plodding on with the seat (which I'm waiting to dry back).
So, the seat plug, at the very first stage....

The base in primer, at last.

And the top section, with the new support bars in place.

The new bracing should spread a bit of the force of the suspension unit in to the rest of the frame.....

I love paint. Hides all manner of sins (and shoddy welding).

Went for gloss black, sleek....

Just some decals to make and fit, then lacquer to finish it off, and that's the frame finished.


Watch this space for the seat!
Not much I could do, other than the final bits, welding in the support sections, and plodding on with the seat (which I'm waiting to dry back).
So, the seat plug, at the very first stage....
The base in primer, at last.
And the top section, with the new support bars in place.
The new bracing should spread a bit of the force of the suspension unit in to the rest of the frame.....
I love paint. Hides all manner of sins (and shoddy welding).
Went for gloss black, sleek....
Just some decals to make and fit, then lacquer to finish it off, and that's the frame finished.
Watch this space for the seat!
Anyway, while I'm waiting for the seat to dry back, I had a look at the materials I had left over, and there was easily enough to make another one (probably two).
So, I've gone for a slightly different design on the second one. Lower, sleeker, and with twin suspension on the rear.
Probably not quite as effective as having the suspension near the front, but still better than a traditional 'luge'.
So, started by bending another couple of runners in my superbly made jig ( ).
).

Then I had another look at how to join the two runners together. I could have got straight across, with an arch to join one side to the other, but this seemed a little dull, given my welding expertise.
So, I went for a 'chopper' type arrangement, with long, straight front rods, which I think look pretty sleek.

They also hide the bending distortion you get in the top of the runners!

My welding has gotten a bit tidier too!


Then I fashioned up a set of four brackets for the suspension mounts, to be set right at the back.


And welded them in place.


Finally, test mounted the suspension units, to see how it's going to play out.

They look fine, I think this one will be a lot stiffer to ride, but possibly faster as it's a bit lower to the ground. It looks a bit more like a traditional luge, but with suspension, compared to my other version.

That's all for now, I'll weld on the front hinge tube (similar design to the other one) tonight or tomorrow, and then start on another seat in the next couple of days. The seat for this one will be quite a lot smaller (mainly because I've only got a small amount of Kevlar left!).
So, I've gone for a slightly different design on the second one. Lower, sleeker, and with twin suspension on the rear.
Probably not quite as effective as having the suspension near the front, but still better than a traditional 'luge'.
So, started by bending another couple of runners in my superbly made jig (
).Then I had another look at how to join the two runners together. I could have got straight across, with an arch to join one side to the other, but this seemed a little dull, given my welding expertise.
So, I went for a 'chopper' type arrangement, with long, straight front rods, which I think look pretty sleek.
They also hide the bending distortion you get in the top of the runners!
My welding has gotten a bit tidier too!
Then I fashioned up a set of four brackets for the suspension mounts, to be set right at the back.
And welded them in place.
Finally, test mounted the suspension units, to see how it's going to play out.
They look fine, I think this one will be a lot stiffer to ride, but possibly faster as it's a bit lower to the ground. It looks a bit more like a traditional luge, but with suspension, compared to my other version.
That's all for now, I'll weld on the front hinge tube (similar design to the other one) tonight or tomorrow, and then start on another seat in the next couple of days. The seat for this one will be quite a lot smaller (mainly because I've only got a small amount of Kevlar left!).
BoRED S2upid said:
That looks fantastic, what an effort. Gutted if you got to a practice slope and a kid on a plastic sledge flies past you, still yours will look ace. I hope you will be kitted out top to toe in Oakley designer snowboarding gear.

Spyder ski gear!
I might even get a race suit.

rhinochopig said:
Very very impressive. One tip though, remove the paint from the runners and use some soap and a buffing wheel to get a mirror finish. It'll run much better.
Totally off-topic. Are you still involved with ride-on? If you are, what's last realistic date to order for delivery for Christmas.
Ah, the runners is another thing entirely! Totally off-topic. Are you still involved with ride-on? If you are, what's last realistic date to order for delivery for Christmas.
Getting some ultra high density PE strips made, the same material as ski bases, so it should be very fast....
Ride-ons, get your order in ASAP! Plenty of stock, but it leaves time for error if you order early. Our last shipping date is technically the 21st, but I'm hoping there won't be too many this late!
PH discount available if you put it through me, just drop me a pm.
Gassing Station | Homes, Gardens and DIY | Top of Page | What's New | My Stuff