DIY Surf bus / campervan build - The Yellow Peril
Discussion


So after many different cars, mainly big cruisers, normally estates because of the dogs, Omegas, Vectras and currently a Subaru Legacy ( hopefully sold soon) my wife and I decided we wanted a camper van. I drove to Ghana a year ago from London in two Nissan patrols

Little video
http://vimeo.com/47162711
Took 2 weeks, a few scary bits and a bit of hiding from Al-Qaeda camps in Mauritania but over all I loved it and after breaking down in the Iron mountains and having to sleep in 50 deg heat at night I thought I would like to try visiting somewhere cold. I had a idea and rang my wife from the Sahara on a sat phone and said I want to get a camper and drive to the arctic circle (not as hard as it first sounds, just go on a highway from Norway!).
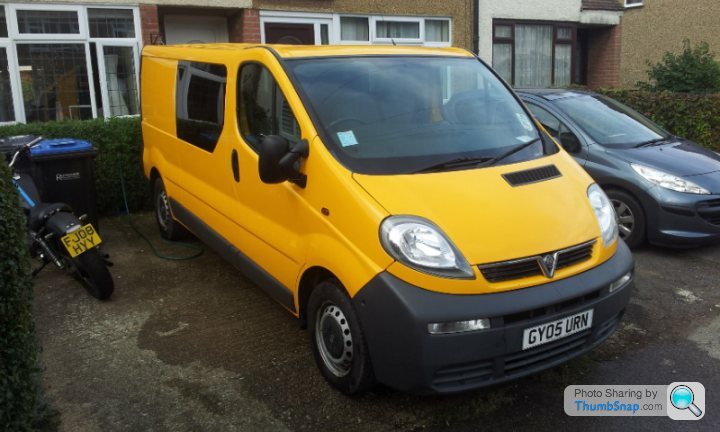
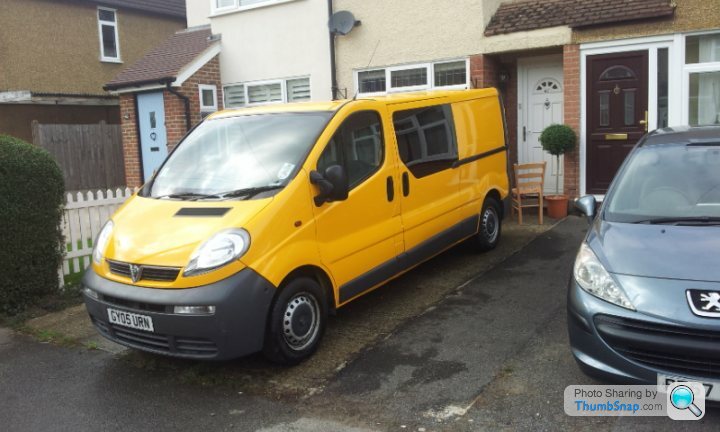
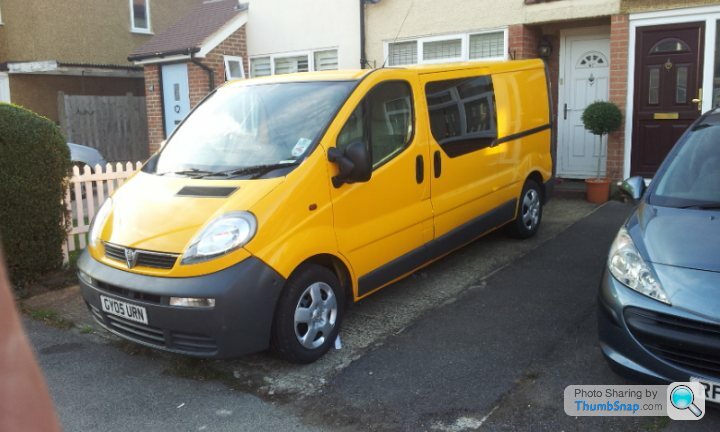
She said yes and then after a year of looking for a van, going to auctions, nearly buying a couple of post office vans we eventually came across this 43,000 mile vivaro on the south coast advertised.


Checked it out, test drive, little haggle and we bought it bargain.
First thing first check all known weak points ( ie gearbox and gear selector cables), second thing order rock and roll bed for the back and also get some windows put in her.
We rang round a few places and found a guy on eBay who did a deal for 2 side windows and two rear barn doors windows fitted for £375. I was going to do it myself but when I added the price of the glass alone it would have cost me £340 without the equipment or other materials so a no brainer really. Headed up to Derby from surrey and Alan had the windows in in 2 hrs. Left it a extra hour for the glue/sealant/mastic stuff to cure and we headed down to Warwickshire to pick up a roll and roll bed frame with a draw from these guys www.camperking.co.uk. When we got there we were very impressed with the set up and the amount of work they do, they must have had 7 newish VW in production and they let us wander round and get some ideas. Spencer gave me a hand to load my frame into the van and chatted for 20 mins about how I should go about different aspects of the build. Lovely guy.

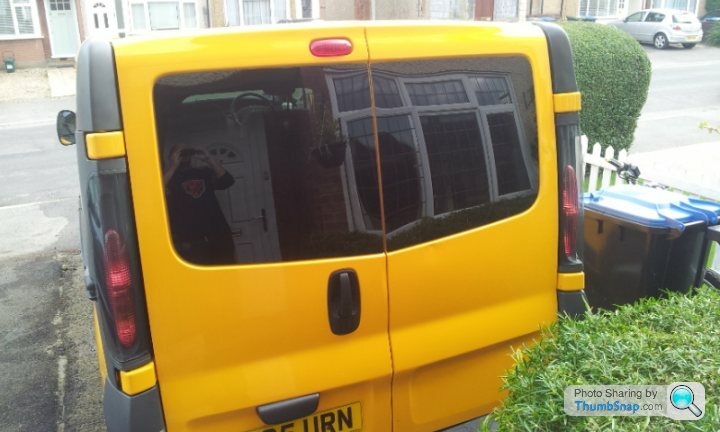
So the glass makes a MASSIVE difference. I have driven luton vans for work before and gotten used to no rear veiw mirro and blind spots. With this glass it is just like driving a car, so much easier and makes it less intimidating for the wife as well which is a good thing.
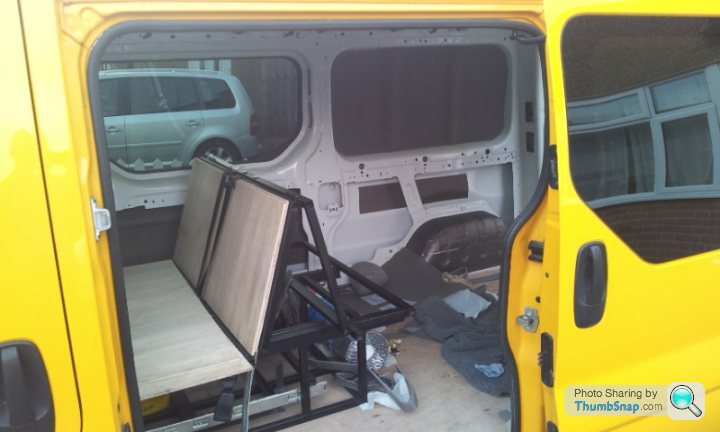
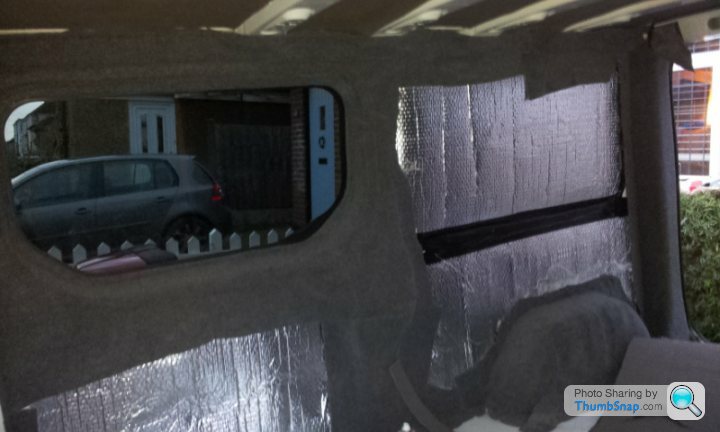
The biggest issue was the tinted glass or clear. I wanted tinted to add privacy when parked up ( and cos it looks cooler) and my wife wanted clear as she was worried it would be too dark inside. Well I won but she is happy as well. This is what it looks like from the outside ( ie blacked out)

And this is what it is like from the inside
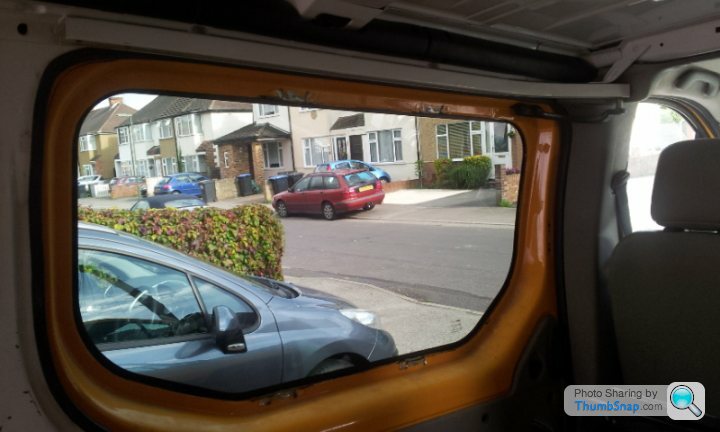
All in all every bodies a winner
Little video
http://vimeo.com/47162711
Took 2 weeks, a few scary bits and a bit of hiding from Al-Qaeda camps in Mauritania but over all I loved it and after breaking down in the Iron mountains and having to sleep in 50 deg heat at night I thought I would like to try visiting somewhere cold. I had a idea and rang my wife from the Sahara on a sat phone and said I want to get a camper and drive to the arctic circle (not as hard as it first sounds, just go on a highway from Norway!).
She said yes and then after a year of looking for a van, going to auctions, nearly buying a couple of post office vans we eventually came across this 43,000 mile vivaro on the south coast advertised.
Checked it out, test drive, little haggle and we bought it bargain.
First thing first check all known weak points ( ie gearbox and gear selector cables), second thing order rock and roll bed for the back and also get some windows put in her.
We rang round a few places and found a guy on eBay who did a deal for 2 side windows and two rear barn doors windows fitted for £375. I was going to do it myself but when I added the price of the glass alone it would have cost me £340 without the equipment or other materials so a no brainer really. Headed up to Derby from surrey and Alan had the windows in in 2 hrs. Left it a extra hour for the glue/sealant/mastic stuff to cure and we headed down to Warwickshire to pick up a roll and roll bed frame with a draw from these guys www.camperking.co.uk. When we got there we were very impressed with the set up and the amount of work they do, they must have had 7 newish VW in production and they let us wander round and get some ideas. Spencer gave me a hand to load my frame into the van and chatted for 20 mins about how I should go about different aspects of the build. Lovely guy.
So the glass makes a MASSIVE difference. I have driven luton vans for work before and gotten used to no rear veiw mirro and blind spots. With this glass it is just like driving a car, so much easier and makes it less intimidating for the wife as well which is a good thing.
The biggest issue was the tinted glass or clear. I wanted tinted to add privacy when parked up ( and cos it looks cooler) and my wife wanted clear as she was worried it would be too dark inside. Well I won but she is happy as well. This is what it looks like from the outside ( ie blacked out)
And this is what it is like from the inside
All in all every bodies a winner
Edited by Tampon on Thursday 17th November 22:47
So on to the next stage, the actual interior.
So I bought one of these
B6!~~60_12.JPG)
I also purchased 11 yoga mats off ebay for the princely sum of £15. The plan is to put squares of flashband on the panel wall and then glue the mats over the flat surfaces to take the ring and booming out of the van and then to use plastic bottle insulation in the voids with foil coated bubblewrap for insulation. With the metal beams having plastic fibres stuffed down them and then carpeting the walls and ply. The floor being flashbanded wheelarches, yoga mat on the floor with foil coated bubble insulation on top then ply then vinyl.
I have started on the wall panels and am doing a section at a time. The ply has been cut to fit the spaces so I will need to buy some carpet in the near future.
Having never done any of this it does feel a bit exciting but being a upholster by trade everything is similar to the skills I have.
I will update as things are done, or if anyone wants to know anything particular in more detail let me know before and I will try and document things as I do them.
So I bought one of these
I also purchased 11 yoga mats off ebay for the princely sum of £15. The plan is to put squares of flashband on the panel wall and then glue the mats over the flat surfaces to take the ring and booming out of the van and then to use plastic bottle insulation in the voids with foil coated bubblewrap for insulation. With the metal beams having plastic fibres stuffed down them and then carpeting the walls and ply. The floor being flashbanded wheelarches, yoga mat on the floor with foil coated bubble insulation on top then ply then vinyl.
I have started on the wall panels and am doing a section at a time. The ply has been cut to fit the spaces so I will need to buy some carpet in the near future.
Having never done any of this it does feel a bit exciting but being a upholster by trade everything is similar to the skills I have.
I will update as things are done, or if anyone wants to know anything particular in more detail let me know before and I will try and document things as I do them.
Edited by Tampon on Wednesday 2nd October 15:54
Guys name is Alan, number is 07711 797000.
Ebay ad
http://www.ebay.co.uk/itm/vauxhall-vivaro-trafic-p...
If you do go for him don't do what I did and drive to the "Glass Doktor" as they wont tell you your in the wrong place and Alan is next door, cheeky buggers
Ebay ad
http://www.ebay.co.uk/itm/vauxhall-vivaro-trafic-p...
If you do go for him don't do what I did and drive to the "Glass Doktor" as they wont tell you your in the wrong place and Alan is next door, cheeky buggers
Edited by Tampon on Wednesday 2nd October 16:57
silent k said:
Will be watching in with interest, as it's something I've just started looking at doing as well. A Vivaro is currently top of my list too, so it'll be interesting to see how you get on. My main concern at the minute is how big a van we'd need with 2 adults and 2 little children, I suspect we'd need raise the roof and put beds in there.
Depends on the size of the kids really. You can easily fit a 12 year old across the front seats, there are foam mats made especially for the job of covering that space, or there are hammocks like this .
. You can also get hammocks like in the old VW's. A high roof line lwb vivaro should be big enough. If not look at high roof transits or vw crafters.
Costs a packet to modify the roof of a standard van with a poptop. All depends if you need a low height van, we do.
Already sorted, the leisure battery (truck battery) will go behind the middle front seat under a small bench. The main battery is under the floor in the cab so this leaves only short runs of wire from 1 to the other, Then the wiring to the plugs ( only 12v) will run under the Ikea Faktum cabinets at the side that are lifted a touch off the floor on batterns to hide the wires and allow for under cabinet lighting. The roof lighting will run up the door pillar on the drivers side and have switches on the side of the cabinets at the back.
Idea is to make it as simple as possible. 240 hookup will come in the form of a standard camping hook up lead with circuit breakers with a double socket that can be plugged in and trailed through a window with wind deflector on. We will be wild camping mainly, not really campsite types.
Also there is a plastic trunking that runs along the nearside panel at the wall/roof line which will be removed and carpeted underneath and refitted on display (pretty smart) to allow for any future wiring needed.
Garlick said:
Is that single gazing Tampon, as in normal van glass? Heading to the Arctic did you not consider some double glazing?
It is single glazing. The idea of a trip to the Arctic was what set this all off, but is isn't the sole purpose of the bus, it will be one of many trips that we do round the UK, Europe and north Africa over the next few years. The van is my main car as well and will be used for trips to the shops and ferrying crap to the dump.I wanted the van to look as cool as possible so we decided not to design it round a single trip. We will get internal thermal blackout blinds for the windows for general use around Europe but for the arctic trip I think we will also get a external wrap around for the windscreen. The double glazing looks a bit pants and is alot more expensive which is something we couldn't afford even if we wanted to.
That, decent sleeping bags and hot water bottle should do us for the trip. I would imagine we would be a bit cool but that is kind of the point! We have camped out in minus 3 deg before as a silly Valentines day night on the beach in Studland once without no heating just lots of clothes. Nooky was funny that night with only what needed exposing being exposed!
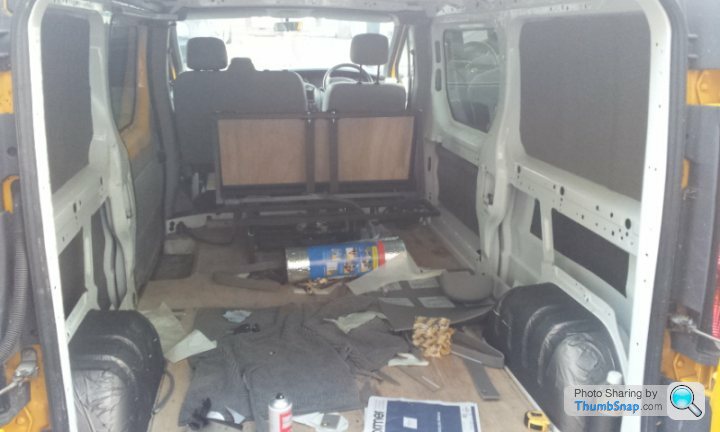
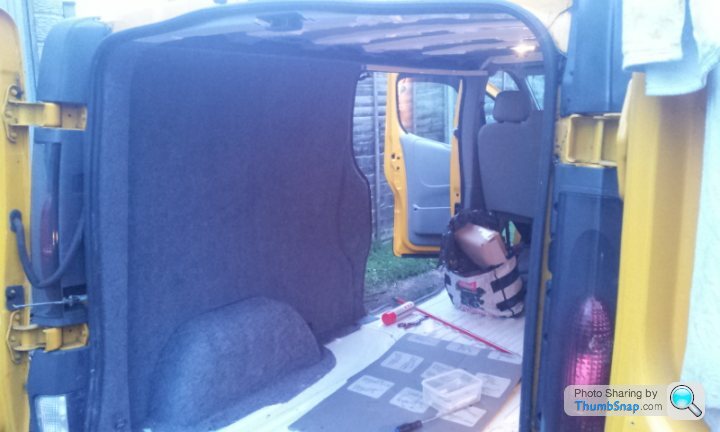
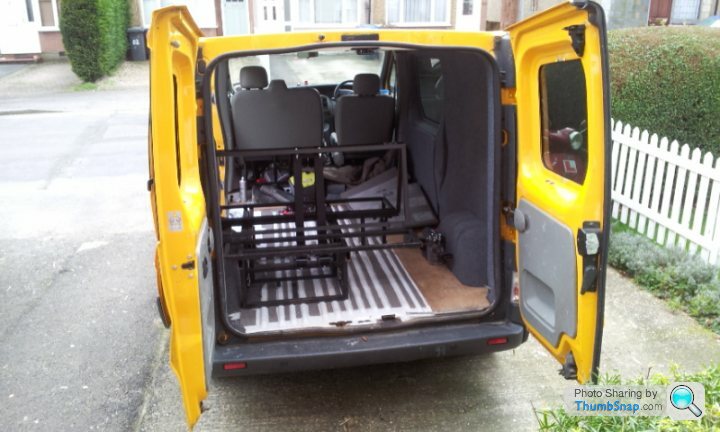
So a bit more work this weekend. The back of the bus is a mess die to it being the storage space for the rock and roll bed and all the insulation and tools whilst I am doing it. That and I am a messy bugger.
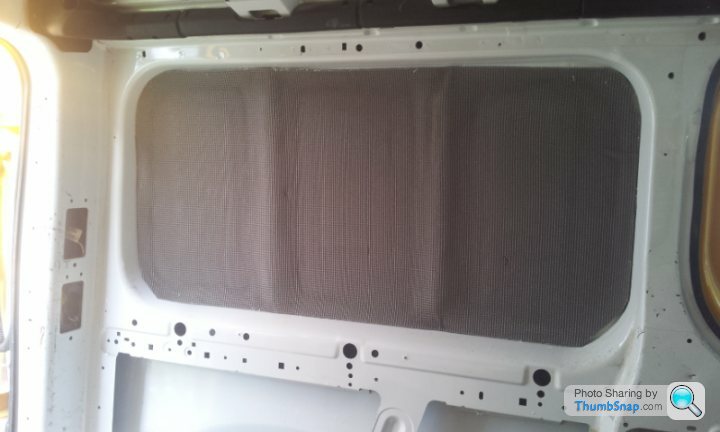
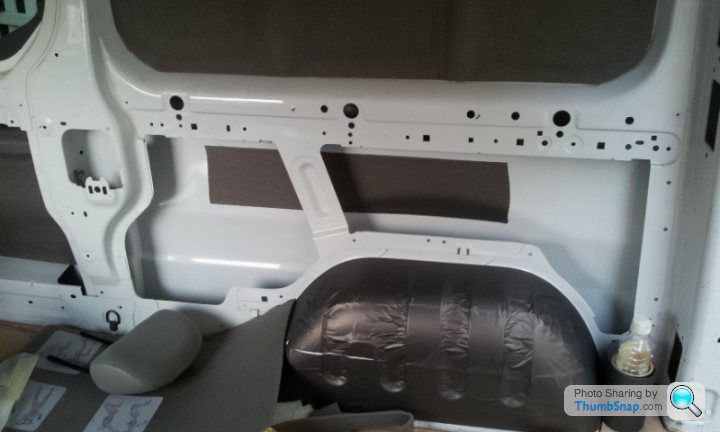
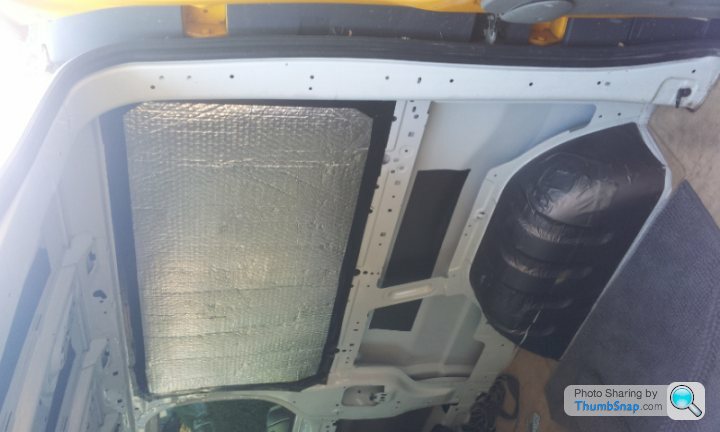
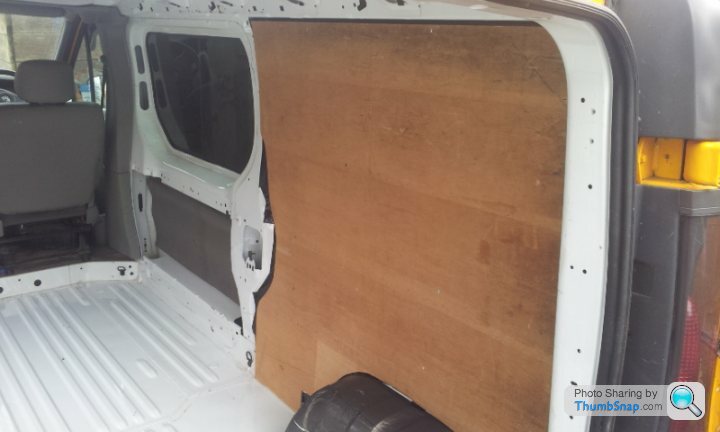
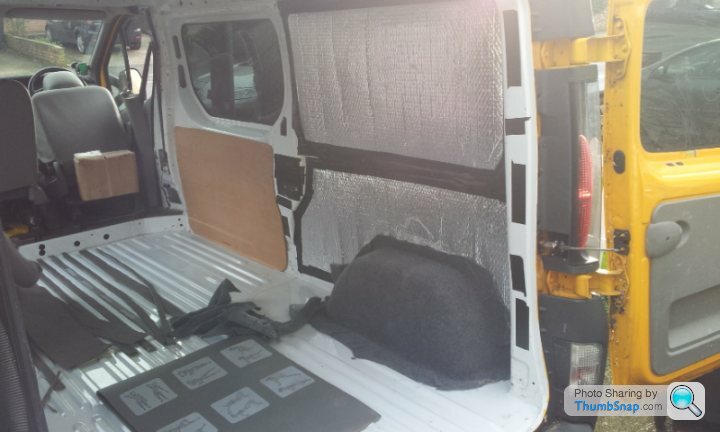
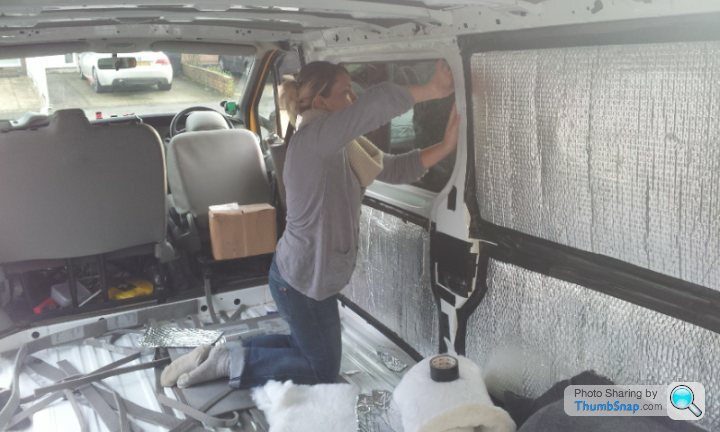
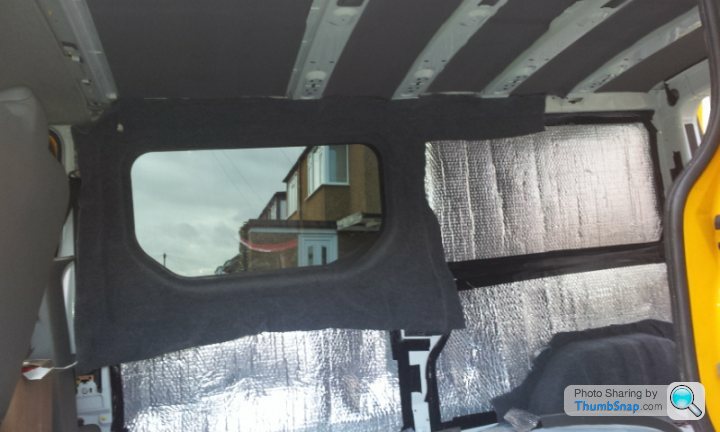
So I have added flashbanding to the ceiling and wheelarches and also started glue recycled bottle insulation to the yoga mats and then seal that in with foil sided bubble thermal wrap. All the hollows in the beal has got the insulation ripped up and pushed into it to fill those voids. I used gaffer tape to attach the bubble wrp to the beams and seal the small holes to try and prevent as much condensation from us sleeping in there to move around behind the walls.
Flashbanding
 |http://thumbsnap.com/WfruBoci[/url]
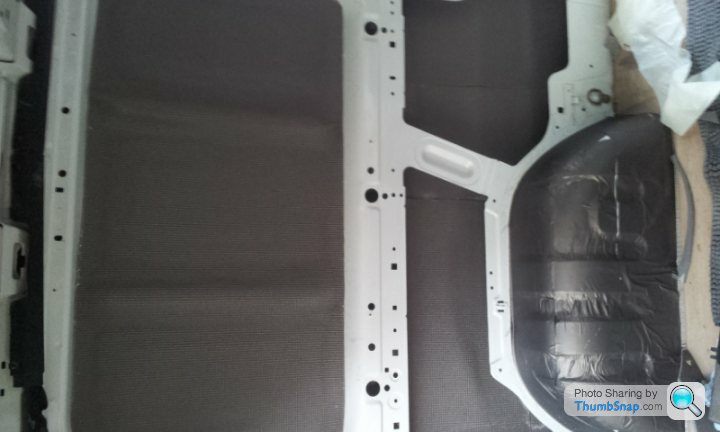

Then the plastic insulation covered with the therma wrap

Sorry about the sideways pics, the quick upload function here doesn't recognise portrait photos
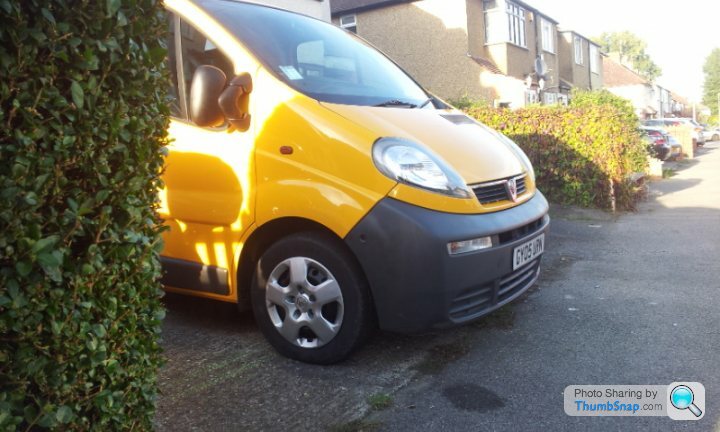
Also I wanted to get alloys for the van next year, but the look of it with though slightly pitted steels looks a touch "traveler". So I had a hunt around and found that vauxhall did a alloy like hibcap but these were £150 a set new.
I eventually found a proper vivaro set for sale second hand on ebay that finished at 2 in the morning on a thursday, which I won for £40.
So today I spent a while sanding, cleaning and priming the steels, then used a whole 500ml can of matt black to spray them to hide the steel part behind the wheel trims.
I think they have turned out pretty well for a £40 stop gap
Before
After
So I have added flashbanding to the ceiling and wheelarches and also started glue recycled bottle insulation to the yoga mats and then seal that in with foil sided bubble thermal wrap. All the hollows in the beal has got the insulation ripped up and pushed into it to fill those voids. I used gaffer tape to attach the bubble wrp to the beams and seal the small holes to try and prevent as much condensation from us sleeping in there to move around behind the walls.
Flashbanding
|http://thumbsnap.com/WfruBoci[/url]Then the plastic insulation covered with the therma wrap
Sorry about the sideways pics, the quick upload function here doesn't recognise portrait photos
Also I wanted to get alloys for the van next year, but the look of it with though slightly pitted steels looks a touch "traveler". So I had a hunt around and found that vauxhall did a alloy like hibcap but these were £150 a set new.
I eventually found a proper vivaro set for sale second hand on ebay that finished at 2 in the morning on a thursday, which I won for £40.
So today I spent a while sanding, cleaning and priming the steels, then used a whole 500ml can of matt black to spray them to hide the steel part behind the wheel trims.
I think they have turned out pretty well for a £40 stop gap
Before
After
Edited by Tampon on Sunday 6th October 18:27
The flooring has been ordered so I think the next stage is to get the ply floor up ( not as easy as it sounds as alot of the screws are made of toffee and rounded out). Clean and then mark out and drill 9 bolt holes through the floor for the rock and roll bed, Bolt it in via 5mm steel bars underneath that runs side to side for the bolts to go through to prevent the bed bolts pulling through the floor in a accident.
Then glue yoga mats and maybe a layer of thermal wrap then relay the ply and cut out and attach the vinyl flooring, then bolt the rock and rock bed upwards so the nuts are in the van rather than underneath to make removing the bed for moving motorbike and large things a touch easier.
Then glue yoga mats and maybe a layer of thermal wrap then relay the ply and cut out and attach the vinyl flooring, then bolt the rock and rock bed upwards so the nuts are in the van rather than underneath to make removing the bed for moving motorbike and large things a touch easier.
Lynch91 said:
Interesting read, are you gonna fit a van heater? We insulated a sprinter van for karting weekends away using loft insulation and then that foil bubble wrap stuff and it still got rather cold when it was around freezing or colder outside.
No bud, I am trying to keep it as simple and cheap as possible with a decent finish. Also thinking about get a small 12v car heater and running that from the leisure battery to take the chill out o the air as and when it is needed ( thinking stripping it down and wiring it in with a timer relay from a extractor fan so we don;t leave it on and drain the battery). Something like this looks good, can charge it up whilst driving and use the internal battery then use the leisure batteyr if needed. It isn't going to make it toasty warm but should take the chill off a touch.
http://www.maplin.co.uk/12v-4-in-1-rechargeable-ca...
I can build that into the bottom of one of the cuboards with vents to draw air so it looks a bit less heath robinson.
I guess we will run the engine for a bit to get some heat in the van if it is seriously cold (thinking arctic), and use hot water bottle to warm the bed before we get in.
Do you use any thermal window covers to help? if so which ones.
We have managed a good few nights freezing at festivals and sorted that with taking proper feather duvets and decent PJ's, you look a bit of a numpty walking around with proper blow up queen sized beds and wheel barrows full of proper bedding and pillows but it makes it proper comfy and warm.
Lynch91 said:
We had insulated the bulk head so didn't use any so can't help with that.
Idk if it would be possible for you to wire it so that it comes on at a certain temperature? As we found that it got really cold around 4am?
I suppose I could do that but I think it might push my electronic competence a bit far.Idk if it would be possible for you to wire it so that it comes on at a certain temperature? As we found that it got really cold around 4am?
So you van was better insulated than mine not having windows and being insulated on every side. I might have to rethink heating once we start using it.
Having read a few reviews of those heaters they seem to say that it is a bit s
 te, it is only 150w but they used it to try and warm the car in a minute or defrost the window before they drive off. Not to raise a space a few degrees over a period of time so there might be hope.
So the issue is getting cold in the night when alseep rther than before sleep? hummmm don't think my ideas would stop that. Yours of a heater that comes on later but via timer might work, ie set it to come on in 4 hrs and stay in for 30 mins or whatever time to take the chill off. Think I could butcher some device that already does that on to the heater.
More thought needed.
Lynch91 said:
I ended up wearing a balaclava to stop my nose getting cold and buying a really good sleeping bag as I couldn't justify the cost of a night heater. Although that was a lwb sprinter, so hopefully the body heat you produce will help to keep your van warmer!?
Was yours a high roof one ? We will be sleeping roughly 1/3 to halfway up the total height of the back of the van on the bed( if that makes sense).
If you had one of the sprinters I can stand up in ( I am 6ft 6in) then you would have had a massive space above you for all that lovely heat to sit and give you no benefit.
Got me slightly worried about this now.
So I am starting to get my head around the wiring of the leisure battery. Here is my very professional diagram
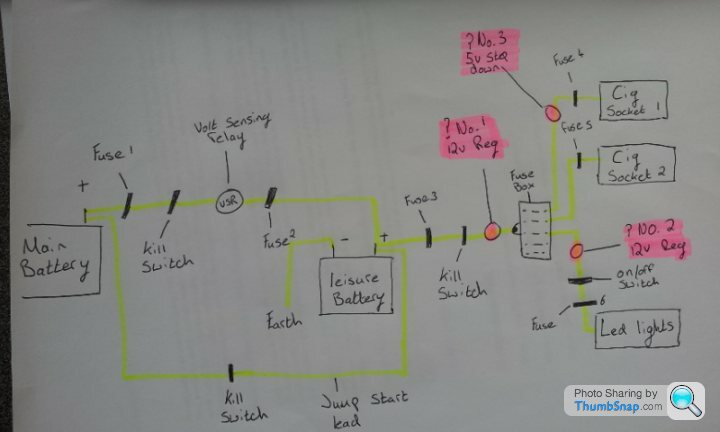
So my questions are
1) what size do the fuses for 1, 2 and 3 ideally need to be?
2) I have found that 12v led lights need a regulator to stop 14v from the alternator frying them when they are on and engine is on, I have found one for led lights but wondered if it would be a good idea to put a regulator on before the fuse box (? no.1 on diagram)to help with the cigarette lighter sockets as well or is there no need? if so I can't seem to find the right thing, would this solor reg do the trick ? if not do you know where or what I am looking for ?
http://www.maplin.co.uk/12v-30a-solar-charge-regul...
3) If there is no need to put the reg before the the fuse box and use a proper led regulator in line to the lights, would it be a good idea to have a 12v-5v step down going to at least one of the cigarette lighters to help protect moble phones that are on charge or again is it not nessary ?
4) What size fuse should be on 4, 5 going to the cigarettte lighter sockets ?
5) The jump start lead will be switched off all the time and only turned on to bypass the relay if the main battery needs help, does this need to be fused ? if so what size? The main battery is under the passender seat and will have a run of about 2-3ft of cable to the leisure battery, they will be very close.
Hopefully that makes sense.
mojitomax said:
are you going to the arctic circle in winter?
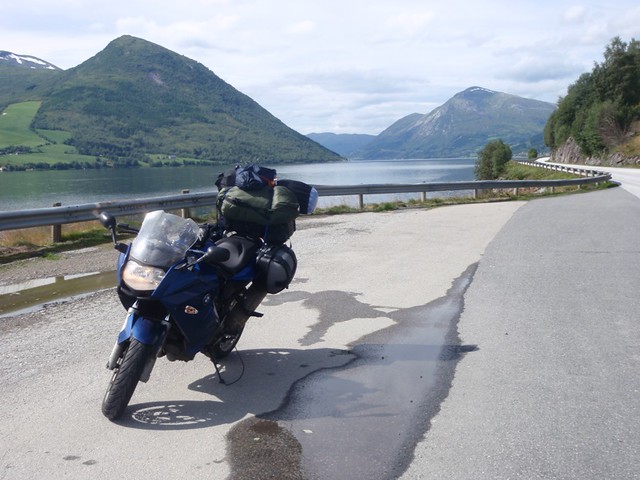
My wife and I went in September and it was warm. We went on one bike with a tent and the weather was great and you have the benefit of the midnight sun. It would be tough in the winter because it never really brightens up properly in the day.
Literally no idea as of yet. Although the whole idea of the trip was to experience seriously cold weather because i was ridiculously hot in Mali, so probably winter.My wife and I went in September and it was warm. We went on one bike with a tent and the weather was great and you have the benefit of the midnight sun. It would be tough in the winter because it never really brightens up properly in the day.
mojitomax said:
Good luck if you're going in winter.
It'll be VERY dark most of the time so may not be that enjoyable. make sure you have good snow/winter tyres.
we went to the North Cape on the bikes and the roads were fantastic. Im not sure i'd be so keen with them covered in snow. Lots of twists and gradients. Definately NOT on a bike in the winter, but might be fun in a 4WD.
It was a cracking adventure.
Any idea of the route yet?
This is the route we took. It took 4 weeks, but the last day was a full day in the saddle from stockholm to bremmen. Not pleasant.

P8011291 2 by mojitomax, on Flickr
Enjoy. I'd love to do it again in a campervan. there are loads of lakes on the way that you can have a swim in. not so practical on the bike. I'd say take the atlantic highway but i don't know what it will be like in the winter. Also there are lots of fjord/river crossings that are done on small ferries. Check that these will run in the winter. Seeing as it's Norway and not the UK, I'm sure they will be open!
Yeah it is just a bit of fun, going to africa made me realise that we in the west tend to worry and plan things way way way too much, most people just crack on and get things done. We tend to think about everything that can go wrong and buy stuff to try and eliminate that fear. I would imagine winter tyres and snow chains would be enough, maybe snow tyres but they wouldn't be any good to me back home so probably try winter tyres. Big duvet and sleeping bags, hot water bottles and jump pack in the van should see us through.It'll be VERY dark most of the time so may not be that enjoyable. make sure you have good snow/winter tyres.
we went to the North Cape on the bikes and the roads were fantastic. Im not sure i'd be so keen with them covered in snow. Lots of twists and gradients. Definately NOT on a bike in the winter, but might be fun in a 4WD.
It was a cracking adventure.
Any idea of the route yet?
This is the route we took. It took 4 weeks, but the last day was a full day in the saddle from stockholm to bremmen. Not pleasant.
P8011291 2 by mojitomax, on Flickr
Enjoy. I'd love to do it again in a campervan. there are loads of lakes on the way that you can have a swim in. not so practical on the bike. I'd say take the atlantic highway but i don't know what it will be like in the winter. Also there are lots of fjord/river crossings that are done on small ferries. Check that these will run in the winter. Seeing as it's Norway and not the UK, I'm sure they will be open!
This lad has gone up there on a Honda C90 that he has bashed all around the world after he was using it a commuter here and realise he couldn't kill it. Nothing special, not prep'ed, few quid and quick think about things before he goes and he has adventures everywhere.
http://c90adventures.co.uk/index.php?option=com_co...
I know now that I could walk out of the front door and get in a 10 year old standard nissan micra and drive to ghana with a wallet and a passport without much fuss at all. No need to prep it, service it or anything else.
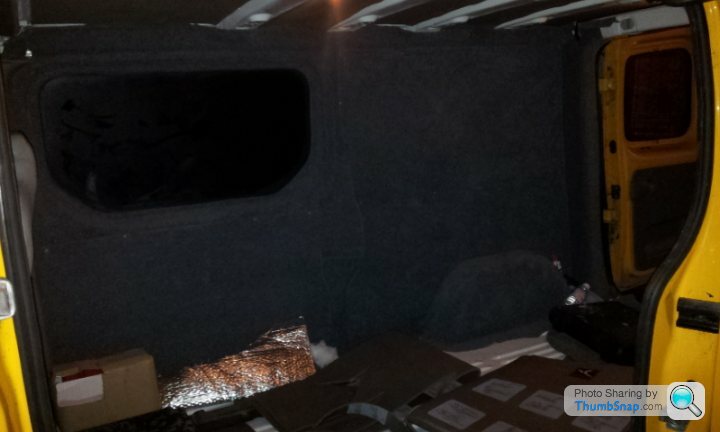
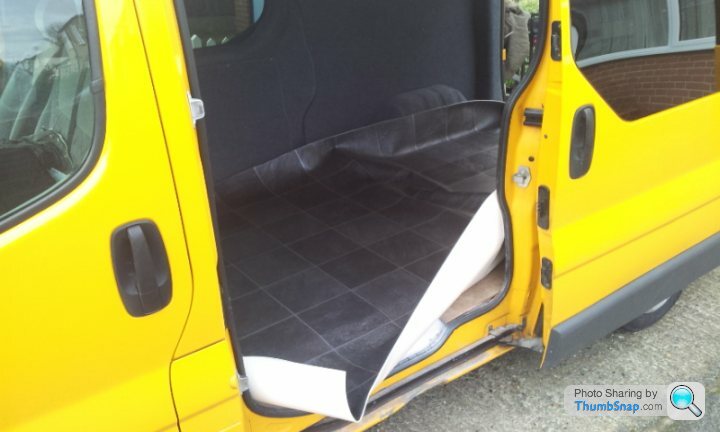
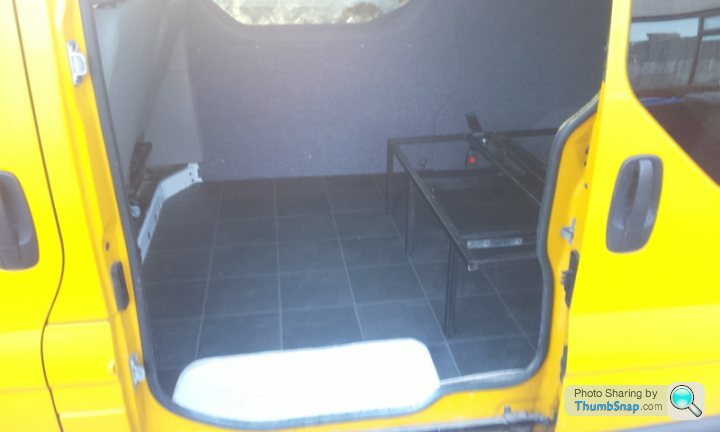
OK so been a while due to University commitments and also work but got started on carpeting out the back of the van. Pulled the floor up to find untold amounts of st there. Started on the easy sections and it is relatively easy.
I have done mine in sections, about 8 in the final pic, but being a upholsterer for 10 years means I can hid the joins well, so would suggest to others they try and do it in one piece to make the job as easy as possible.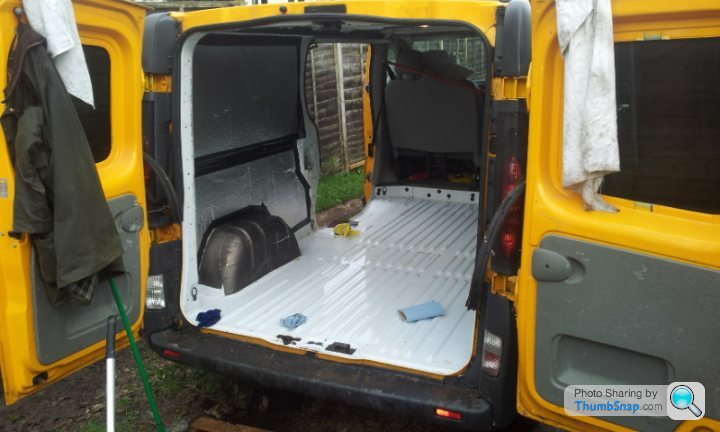

t there. Started on the easy sections and it is relatively easy. I have done mine in sections, about 8 in the final pic, but being a upholsterer for 10 years means I can hid the joins well, so would suggest to others they try and do it in one piece to make the job as easy as possible.
Edited by Tampon on Sunday 19th January 17:29


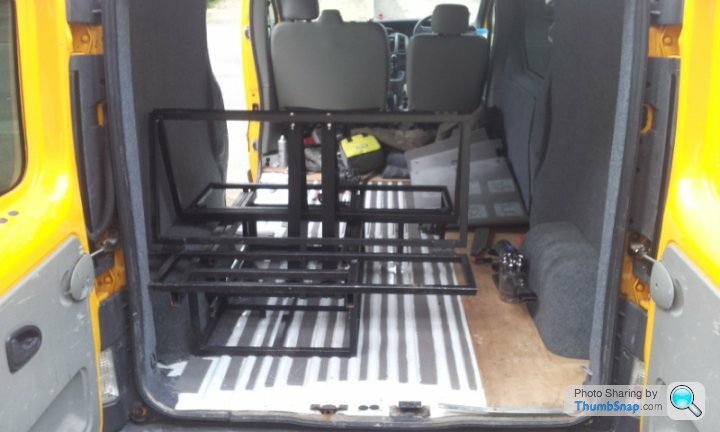
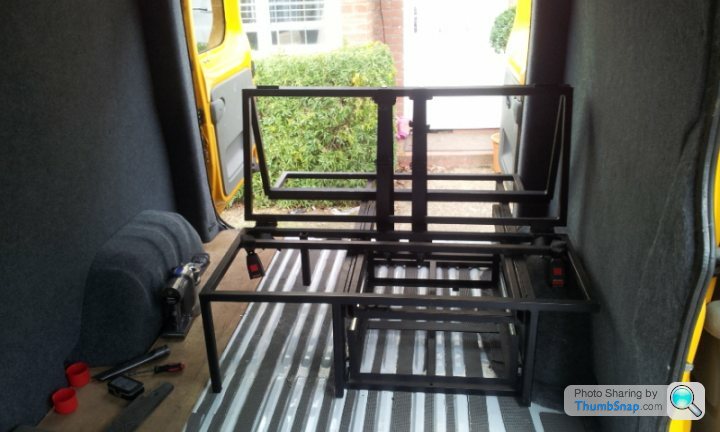
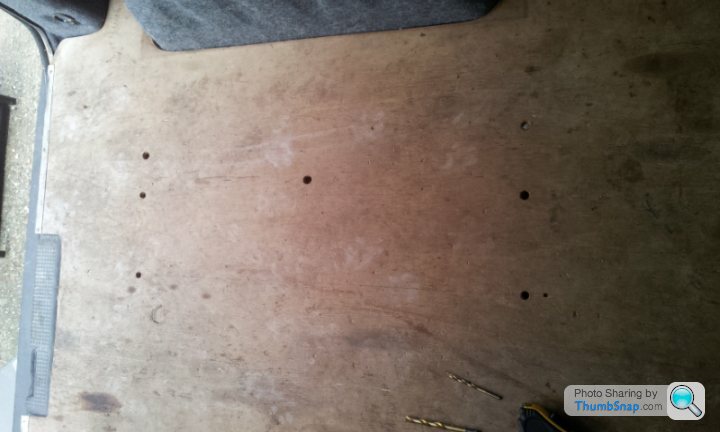
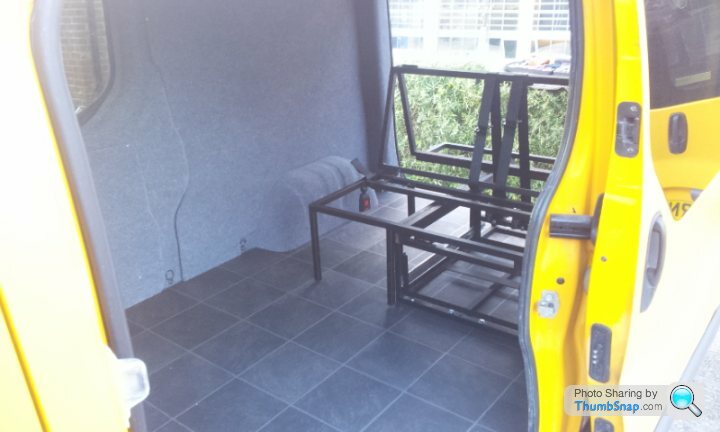
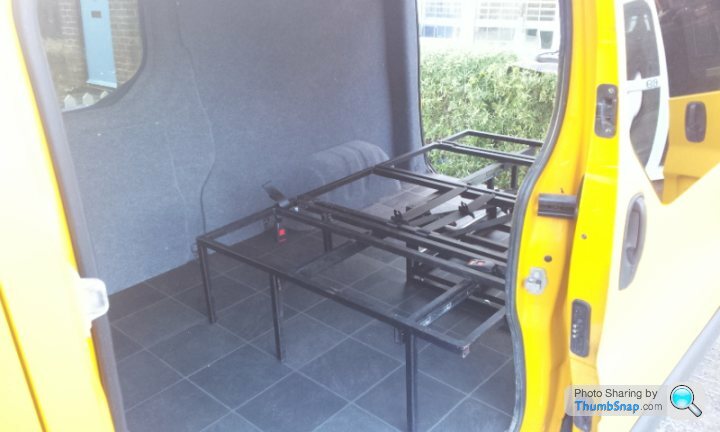
So I thought I would line up the bed frame and drill the holes through the floor. Thought that will take a hour job done. Just locate the hole, drill through, drill wood floor, tidy up. job done. Well four hours later I am done but what a faff.
I haven't seen any how to's on fitting a rock and roll bed frame so I thought I would put up so detail about how I did it.
So the bed I bought is for a VW T5, so I had to play about with it to fit in a Vivaro. The pre drilled holes that line up with strengthened sections in the floor of a T5 are useless to me so I have to make sure it was in safely to prevent the frame ripping up through the floor if I had a accident.
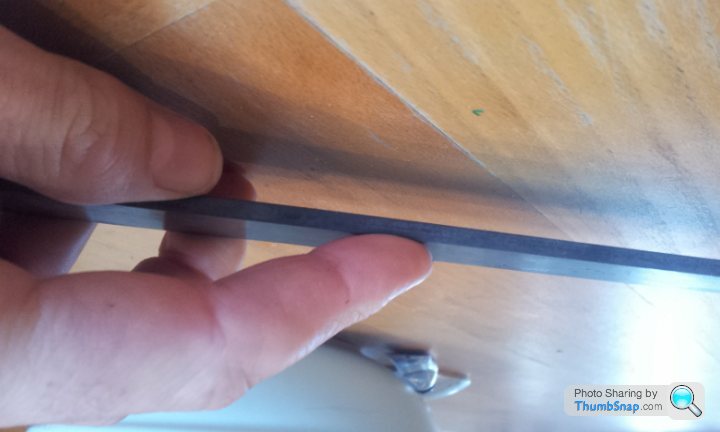
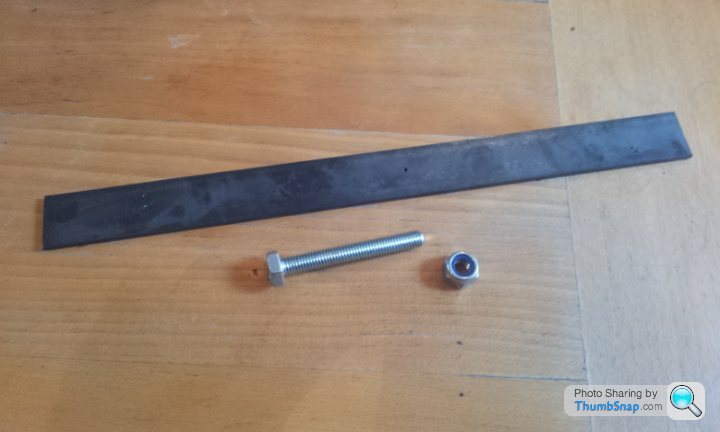
Some of the installs I have seen have been shocking, literally bolt through the 1mm steel floor and then a washer and nut, just 4 of those holding the frame down. I am putting in 7 high tensile M10 bolts, through the floor with 1/4 inch steel plate running underneath to spread the load finished off with Nyloc nuts.
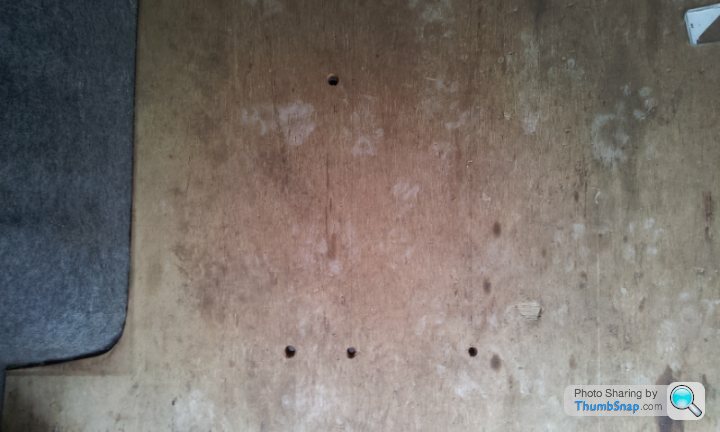
First thing is to pull up the wood floor again so I can line up the frame with the ridges in the floor. Then try and find any supporting members underneath to help with strength.
Luckily one of the predrilled T5 holes in the frame lined up on top of a ridge so I started there. 2mm hss bit, then a 8mm, finished off with the 10 mm ( did it that way as I didn;t want to risk snapping the 10 mm).
So drilled through the frame and then continued through the floor so they all line up. tt that I am decided to move the frame half way through to double check they are going through the floor. Not the brightest idea, took an age to line up a 50kg frame mm perfect again. Anyway once all the frame holes and floor holes were piloted, I went through with the 8mm whilst in situ, then removed the bed and could drill through the floor of the van with the 10mm and widen the bed frame holes from underneath the frame with the 10mm as it was too long a bit to do from the top.
Everything was fine until I couldn't see the holes underneath the van for the back section nor the front section ? bit of investigation and I realised that the front hole were above the centre box on the exhaust so a night mare to get to and the rear bolt (the ones that take the real load in a collision) were only half way through a box section that ran the width of the van, brilliant ! extra re-enforcement.
Snapped the 8 mm drill bit on the extra part of the box section so had to be more careful now as only had the 10mm bit left. Got through and tested the bolts.
Perfect, the section above the centre box will be a faff to get top but it is the best place for the bolts strength wise. The rear section has three bolts going through box section finished off with a half metre 1/4 inch steel plate spreading the load as a giant washer between the three bolts. That couldn't have gone any better if I had tried.
Next step lay wood floor back down and get under the van and drill up from underneath through the van floor hole to make hole in the wooden floor. Back holes, not a problem, front holes...... fecking exhaust box is in the way. Not a problem I will drill them from the top inside the van. Ah, no markings. So using a dowsing stick and a bit of measuring I guesstimated where they should be and finished the job.
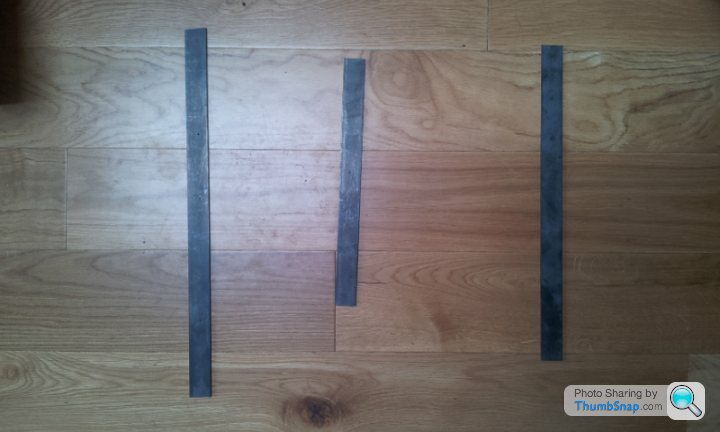
So now I cut the steel plate, 2 sections half a metre long with three bolt going through it for the front and back sections, then one piece for the centre bolt about 40cm long.
Next day for action is Sunday were I should lay the vinyl floor and bolt down the bed frame. Then upholster the sections for the rock and roll bed. Go to Ikea and buy cupboards for the van, and a new kichten for the house. Then fit it all ! If there is anything in particular anyone wants to see as it is done let me knwo because I am pretty ste at remembering to take pics and keep thinking "they don't want to see that".
I haven't seen any how to's on fitting a rock and roll bed frame so I thought I would put up so detail about how I did it.
So the bed I bought is for a VW T5, so I had to play about with it to fit in a Vivaro. The pre drilled holes that line up with strengthened sections in the floor of a T5 are useless to me so I have to make sure it was in safely to prevent the frame ripping up through the floor if I had a accident.
Some of the installs I have seen have been shocking, literally bolt through the 1mm steel floor and then a washer and nut, just 4 of those holding the frame down. I am putting in 7 high tensile M10 bolts, through the floor with 1/4 inch steel plate running underneath to spread the load finished off with Nyloc nuts.
First thing is to pull up the wood floor again so I can line up the frame with the ridges in the floor. Then try and find any supporting members underneath to help with strength.
Luckily one of the predrilled T5 holes in the frame lined up on top of a ridge so I started there. 2mm hss bit, then a 8mm, finished off with the 10 mm ( did it that way as I didn;t want to risk snapping the 10 mm).
So drilled through the frame and then continued through the floor so they all line up. t
t that I am decided to move the frame half way through to double check they are going through the floor. Not the brightest idea, took an age to line up a 50kg frame mm perfect again. Anyway once all the frame holes and floor holes were piloted, I went through with the 8mm whilst in situ, then removed the bed and could drill through the floor of the van with the 10mm and widen the bed frame holes from underneath the frame with the 10mm as it was too long a bit to do from the top.Everything was fine until I couldn't see the holes underneath the van for the back section nor the front section ? bit of investigation and I realised that the front hole were above the centre box on the exhaust so a night mare to get to and the rear bolt (the ones that take the real load in a collision) were only half way through a box section that ran the width of the van, brilliant ! extra re-enforcement.
Snapped the 8 mm drill bit on the extra part of the box section so had to be more careful now as only had the 10mm bit left. Got through and tested the bolts.
Perfect, the section above the centre box will be a faff to get top but it is the best place for the bolts strength wise. The rear section has three bolts going through box section finished off with a half metre 1/4 inch steel plate spreading the load as a giant washer between the three bolts. That couldn't have gone any better if I had tried.
Next step lay wood floor back down and get under the van and drill up from underneath through the van floor hole to make hole in the wooden floor. Back holes, not a problem, front holes...... fecking exhaust box is in the way. Not a problem I will drill them from the top inside the van. Ah, no markings. So using a dowsing stick and a bit of measuring I guesstimated where they should be and finished the job.
So now I cut the steel plate, 2 sections half a metre long with three bolt going through it for the front and back sections, then one piece for the centre bolt about 40cm long.
Next day for action is Sunday were I should lay the vinyl floor and bolt down the bed frame. Then upholster the sections for the rock and roll bed. Go to Ikea and buy cupboards for the van, and a new kichten for the house. Then fit it all ! If there is anything in particular anyone wants to see as it is done let me knwo because I am pretty s
te at remembering to take pics and keep thinking "they don't want to see that".Edited by Tampon on Tuesday 4th February 10:48
So todays work.
Started at 10.30 and finished at 4.30. Considering "all" I had to do was to cut to shape and glue down the floor, then bolt down the bed it seemed to take forever. I a realising with this doing this van that you need to use one skill once ( and learn it) then you never seem to use it again. That why it seems to take forever.
First job, drill the holes in the steel plate for underneath the floor and hammerite the holes in the floor and the steel plate to prevent rusting.
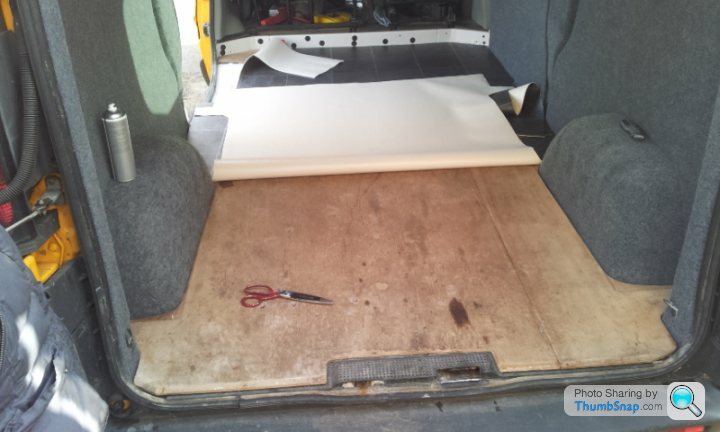
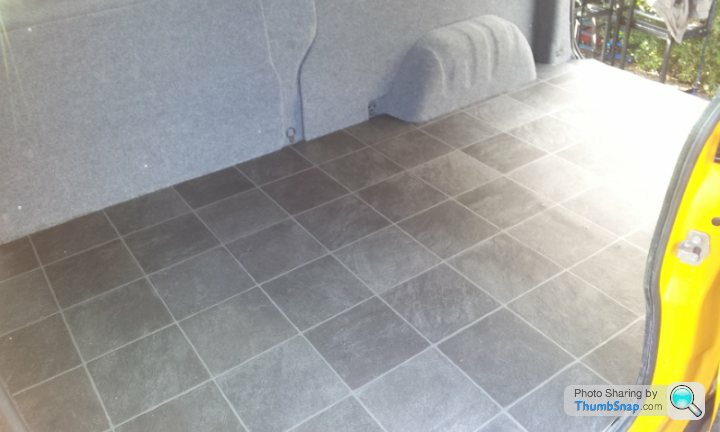
Next was to lay the vinyl flooring out on the van, cut it about 20cm wider than needed and left the whole length out the back of the van.
I picked one edge that was straight in the van ( the front bulhead) and started from there. Glued down a section in the middle and worked my way back to the wheel arches. Taking time as this would be the section that would be seen and used as wheel arches bac would have the bed on top.
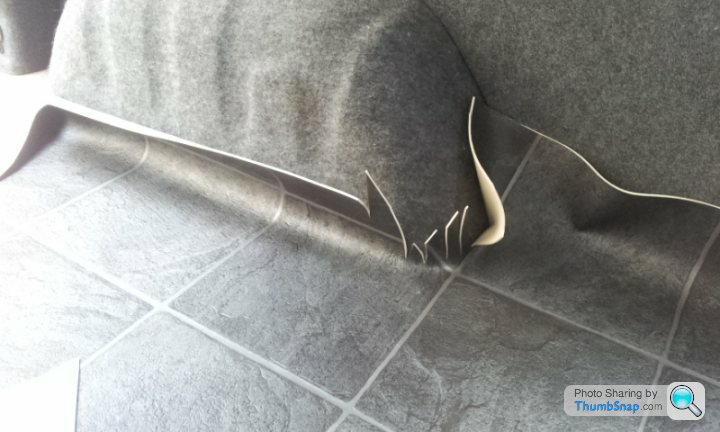
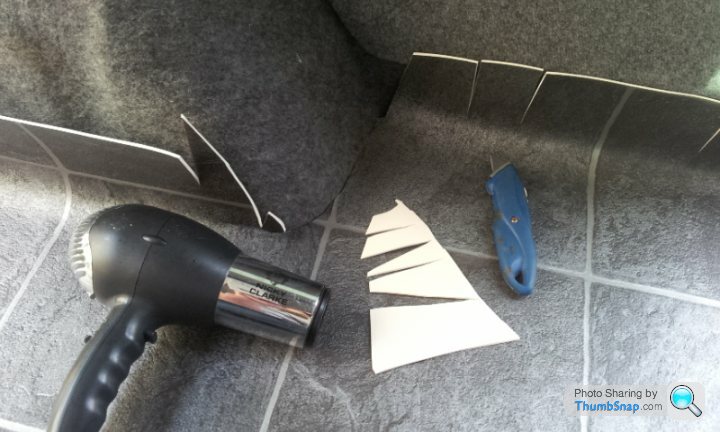
The vinyl was extremely stiff once I took it outside so I used a hairdryer (obviously not mine!) to heat it up to shape it round the beginning of the wheel arches really important to do cut like this to relive any stress on one particular cut and prevent tearing. Go a little bit deeper each time rather than doing it all in one go. Then when it is formed perfectly, run a Stanley round with a finger leading the blade by a few inches to ensure the vinyl is in the right position and make sure the blade is cutting toward the wall rather than to the floor as the vinyl will look like it is short as opposed to butting up against the wall.
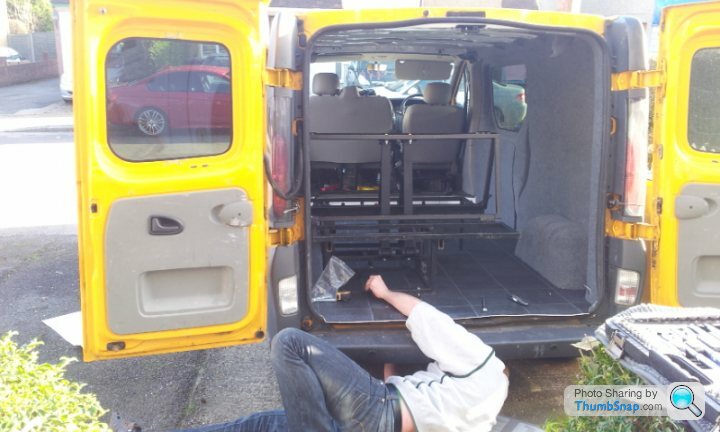
Next bit was to put the bed in and line it up with the holes I made last week, and then marry up the bolts with the plates underneath and tighten everything up. Again sounds simple but again what a complete dick of a job.
Discovered quickley that the presion work I had done when the plates and the bolts fitted perfectly on t a dry run didn;t translate to fitting when I was upside down under the van. Out with the hole sizer to make the holes 1mm larger on all the plates then spray them again.
The company that were supposed to spend Nyloc nuts somehow desided to send normal ones. I had 3 Nyloc bolts kicking around so put two of them on the back rail and on on the front and just locked the other four bolts down with a second nut on the thread to ensure they don;t come off when moving.
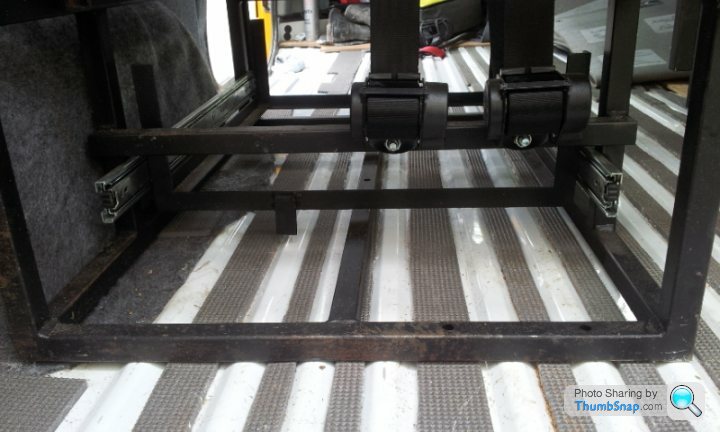
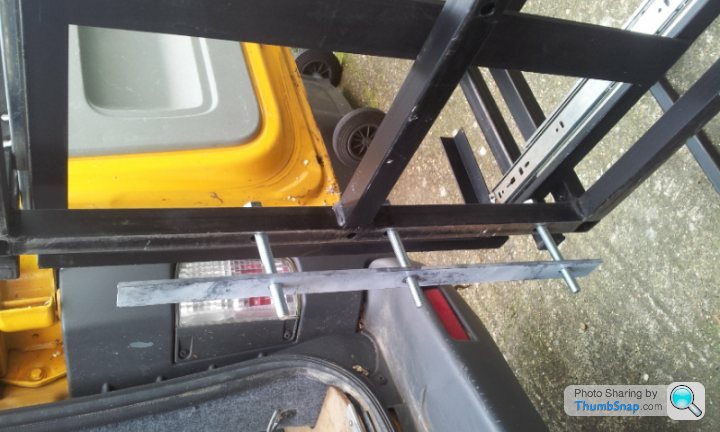
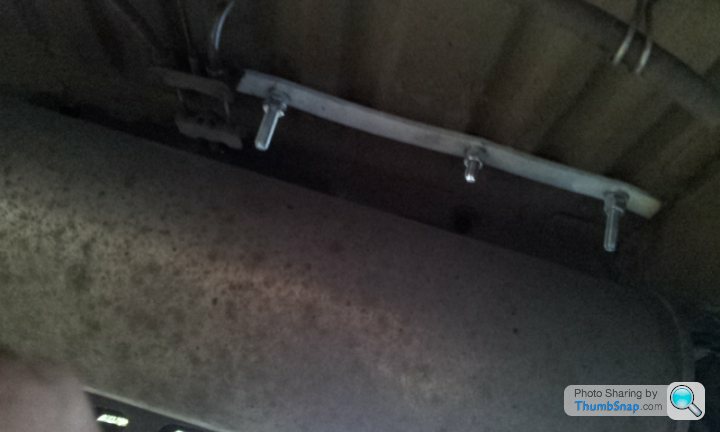
This is the looking back at the centre middle plate to the main support of the back plate bolted through the boc rail at the bac of the van
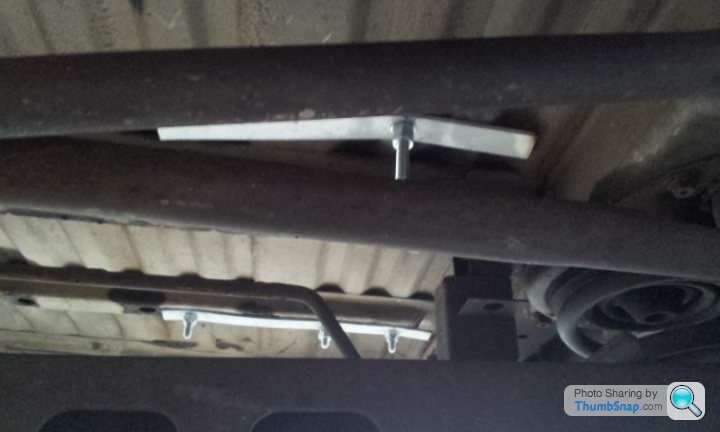
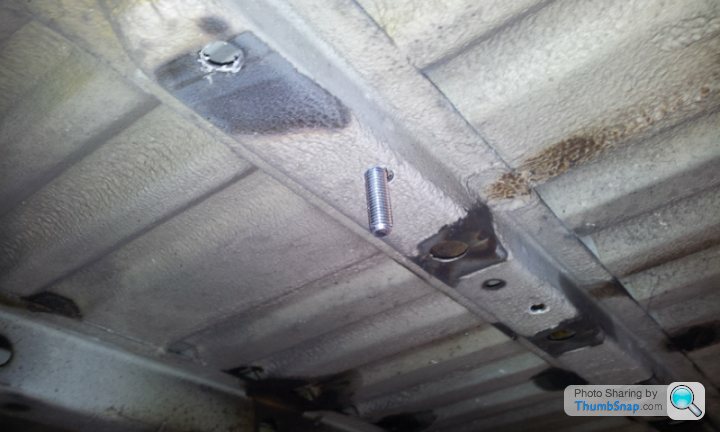
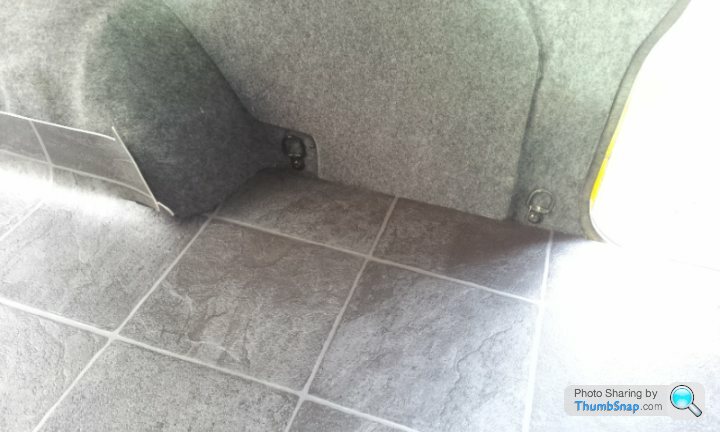
This is the front plate bolt just above the Back box of the exhaust, you might notice the handbrake cables that I didn't account for so had to cut the plate down.
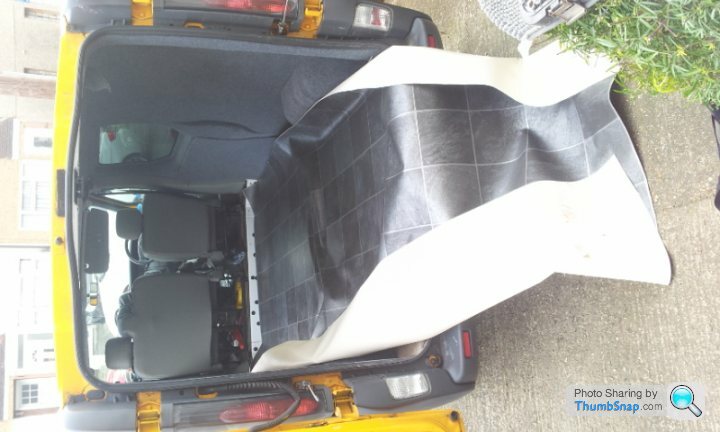
So the rock and roll bed is in !
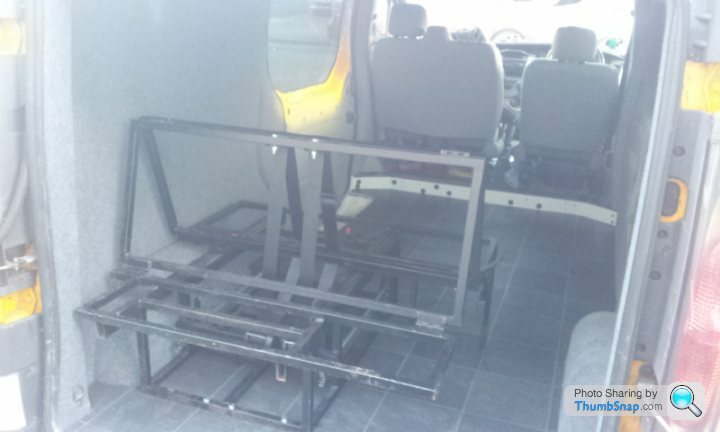
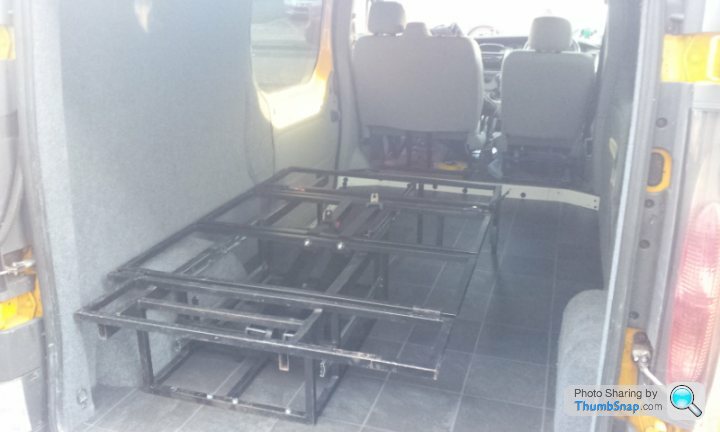
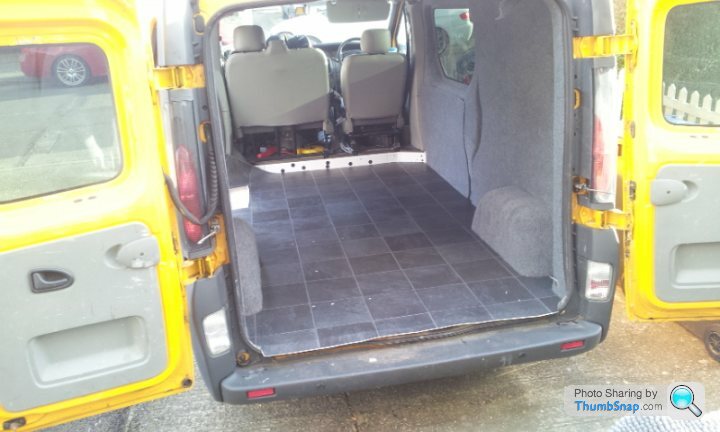
This is the amount of space we have to put the dogs in when the bed is down and we are asleep, also mean we can leave the bed down when camping and use the "kitchen".
Next bit of work will be upholstering the panels for the bed so we can finally carry passenders. A trip to ikea is on the cards for a week or so's time.
Started at 10.30 and finished at 4.30. Considering "all" I had to do was to cut to shape and glue down the floor, then bolt down the bed it seemed to take forever. I a realising with this doing this van that you need to use one skill once ( and learn it) then you never seem to use it again. That why it seems to take forever.
First job, drill the holes in the steel plate for underneath the floor and hammerite the holes in the floor and the steel plate to prevent rusting.
Next was to lay the vinyl flooring out on the van, cut it about 20cm wider than needed and left the whole length out the back of the van.
I picked one edge that was straight in the van ( the front bulhead) and started from there. Glued down a section in the middle and worked my way back to the wheel arches. Taking time as this would be the section that would be seen and used as wheel arches bac would have the bed on top.
The vinyl was extremely stiff once I took it outside so I used a hairdryer (obviously not mine!) to heat it up to shape it round the beginning of the wheel arches really important to do cut like this to relive any stress on one particular cut and prevent tearing. Go a little bit deeper each time rather than doing it all in one go. Then when it is formed perfectly, run a Stanley round with a finger leading the blade by a few inches to ensure the vinyl is in the right position and make sure the blade is cutting toward the wall rather than to the floor as the vinyl will look like it is short as opposed to butting up against the wall.
Next bit was to put the bed in and line it up with the holes I made last week, and then marry up the bolts with the plates underneath and tighten everything up. Again sounds simple but again what a complete dick of a job.
Discovered quickley that the presion work I had done when the plates and the bolts fitted perfectly on t a dry run didn;t translate to fitting when I was upside down under the van. Out with the hole sizer to make the holes 1mm larger on all the plates then spray them again.
The company that were supposed to spend Nyloc nuts somehow desided to send normal ones. I had 3 Nyloc bolts kicking around so put two of them on the back rail and on on the front and just locked the other four bolts down with a second nut on the thread to ensure they don;t come off when moving.
This is the looking back at the centre middle plate to the main support of the back plate bolted through the boc rail at the bac of the van
This is the front plate bolt just above the Back box of the exhaust, you might notice the handbrake cables that I didn't account for so had to cut the plate down.
So the rock and roll bed is in !
This is the amount of space we have to put the dogs in when the bed is down and we are asleep, also mean we can leave the bed down when camping and use the "kitchen".
Next bit of work will be upholstering the panels for the bed so we can finally carry passenders. A trip to ikea is on the cards for a week or so's time.
Edited by Tampon on Sunday 9th February 22:01
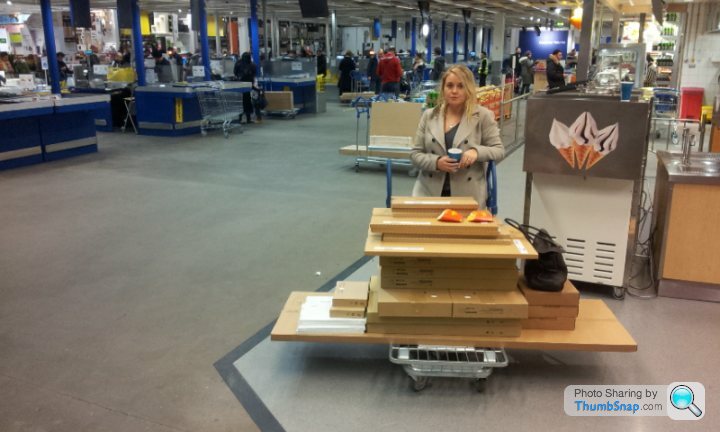
This weekend work. Ikea kitchen run and start of the upholstery of the rock and roll bed.
Go to Ikea Wembley Valentines days at 2pm for a romantic afternoon looking at house purchases and a meatball lunch. First trip round, buy stuff for the house, lights, lamps, etc etc. stop at the kitchen department for some advise for the camper, get given a order book, told to pick what we need then order, simples.
Buy the stuff for the house, sit down have a coffee and try and decipher the enigma code that is the billion options of the kitchen Metod range. Figure it out, go back to order the kitchen. Get told we are number 32 in the queue. What number are the 3 advisers on right now? 27, time 3pm. No problems.
Well a long story short, 8.30pm we place our order !!!!
Van loaded up, Valnetines night a wash out but ready to go for the weekend.

Saturday morning bright and early off to my workshops to do something I know about, Upholstery!
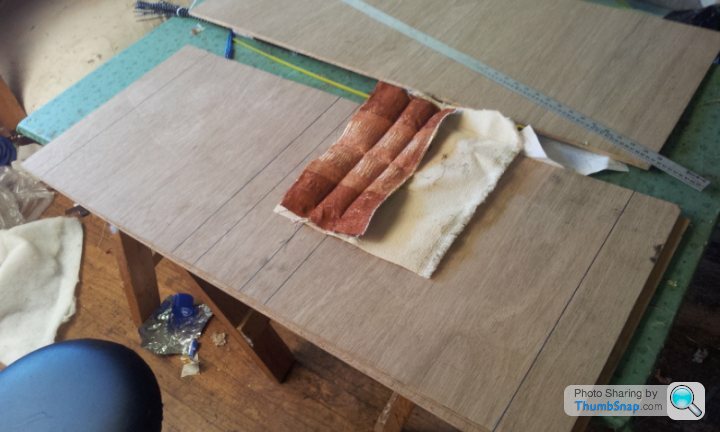
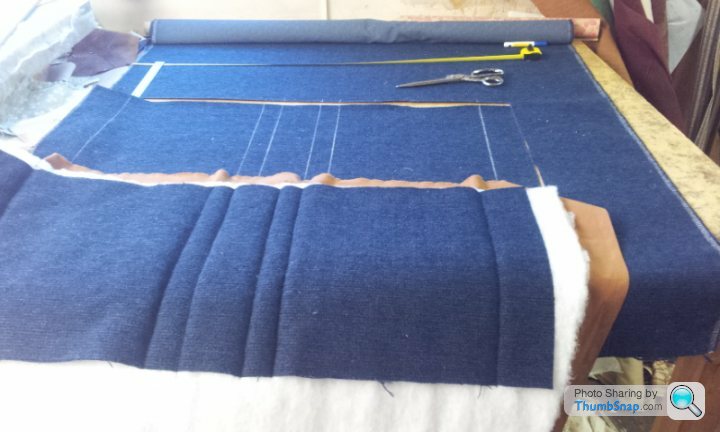
First job mark out what pattern we want on the seats
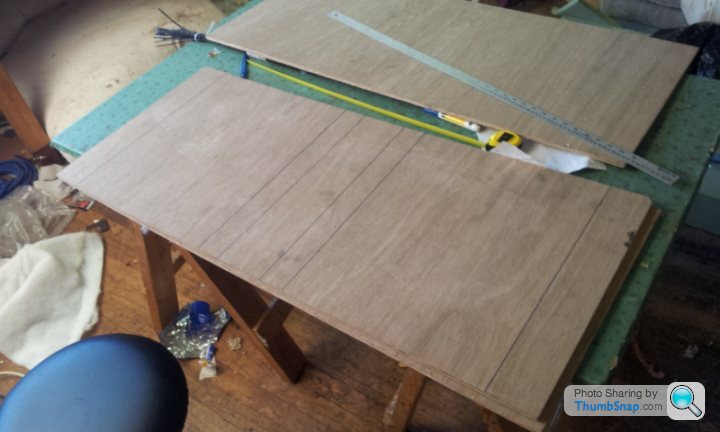
Try a test panel for padding and stitch length
Double check against pattern
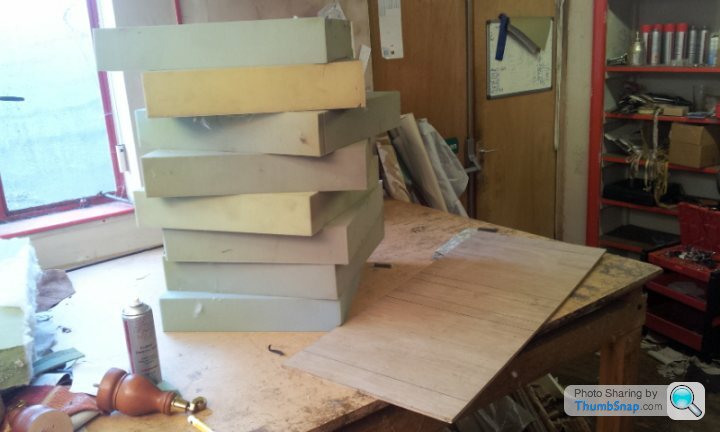
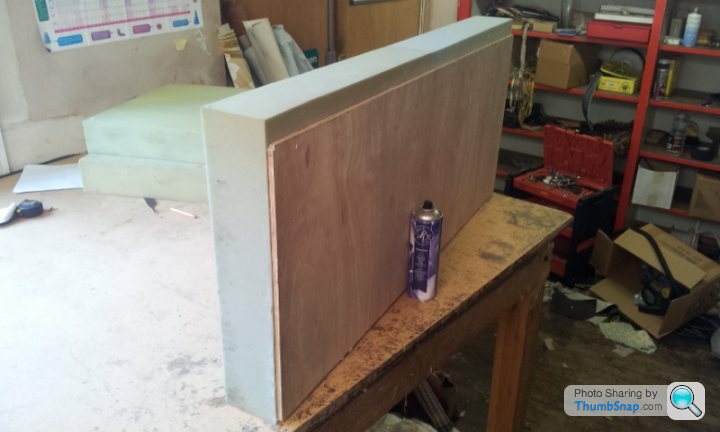
Start foaming up the seat panels, for anyone in the future reading, trim up 1/2 inch larger than the size of the boards for a pro finish ( we use a Industrial band saw for perfect cuts ).
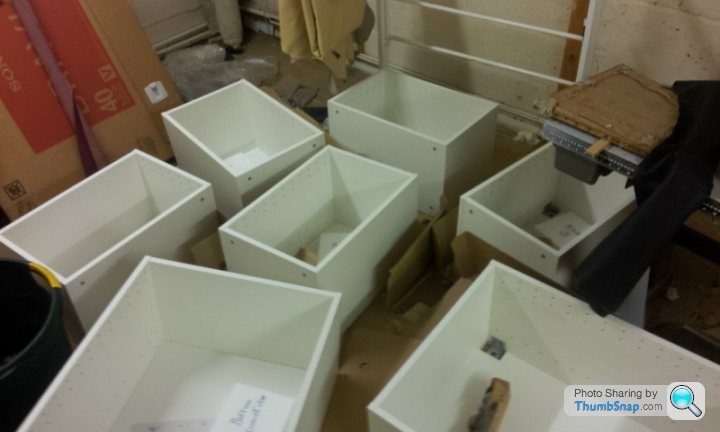
Lovely wife in the other room building the carcasses for the kitchen for me to start on wednesday.

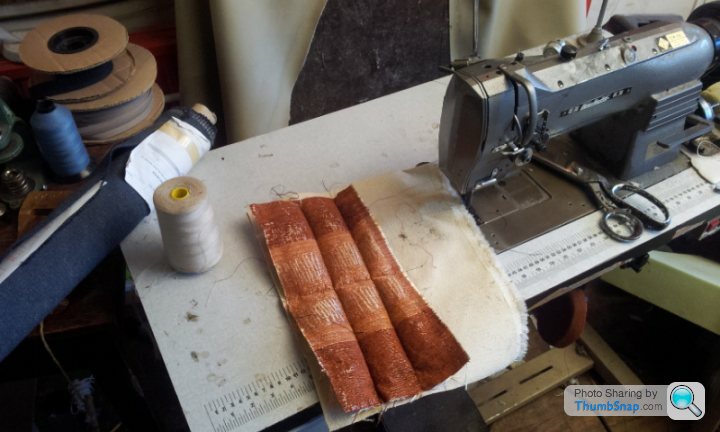
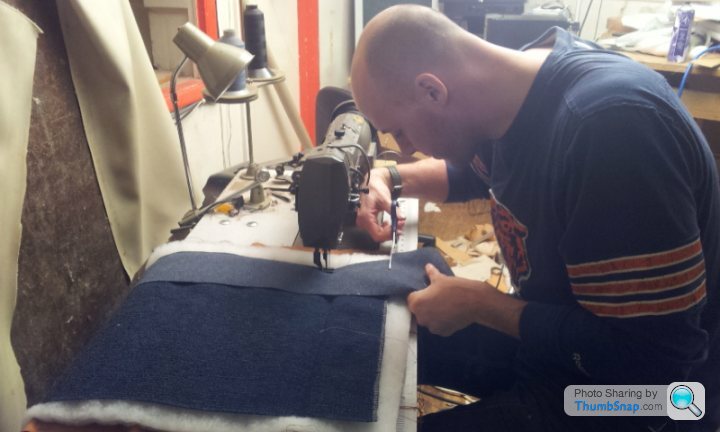
Transfer of pattern onto finished fabric, cut, marked out, sewn up.
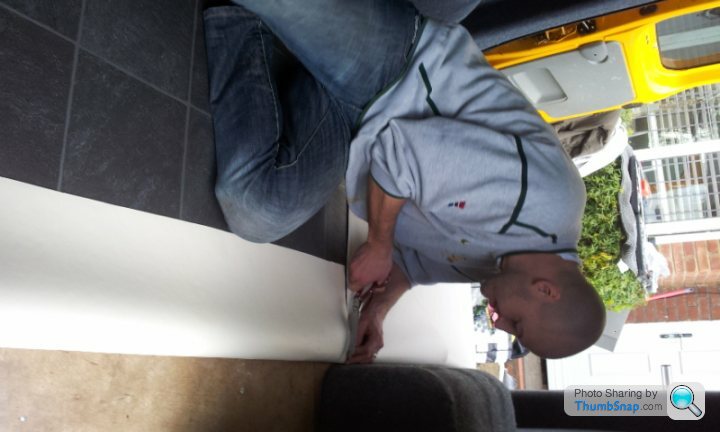
Little action shot of a 6ft 5in man on a sewing machine
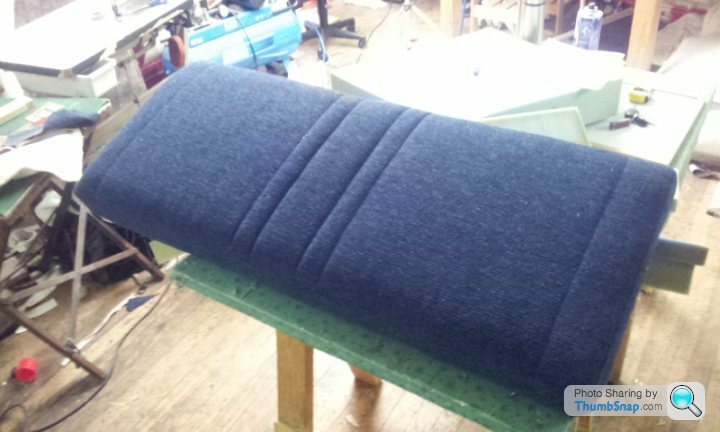
Finished article
Wife did a cracking job getting all the stiuff ready for later.
So Wednesday I will fit the seats to the frames, start trying to fit the units into the van, then cut work surface and fit doors sink etc.
Tickets for this Easter trip booked, down to the house in the south of France then to the Alps on the way back with a quick stop off in Bruges on the night before the return trip in Dunkirk. No campsites, wild camping and city centre dossing.
Summer trip booked, Spanish Villa near Barcelona booked for a week, so a stop in the Pyrenees mountains on the way down, campsite on the coast booked after for a day, then off up to St Tropay to soak up the money, then off to Paris and maybe a stop or two on the way as well.
Go to Ikea Wembley Valentines days at 2pm for a romantic afternoon looking at house purchases and a meatball lunch. First trip round, buy stuff for the house, lights, lamps, etc etc. stop at the kitchen department for some advise for the camper, get given a order book, told to pick what we need then order, simples.
Buy the stuff for the house, sit down have a coffee and try and decipher the enigma code that is the billion options of the kitchen Metod range. Figure it out, go back to order the kitchen. Get told we are number 32 in the queue. What number are the 3 advisers on right now? 27, time 3pm. No problems.
Well a long story short, 8.30pm we place our order !!!!
Van loaded up, Valnetines night a wash out but ready to go for the weekend.
Saturday morning bright and early off to my workshops to do something I know about, Upholstery!
First job mark out what pattern we want on the seats
Try a test panel for padding and stitch length
Double check against pattern
Start foaming up the seat panels, for anyone in the future reading, trim up 1/2 inch larger than the size of the boards for a pro finish ( we use a Industrial band saw for perfect cuts ).
Lovely wife in the other room building the carcasses for the kitchen for me to start on wednesday.
Transfer of pattern onto finished fabric, cut, marked out, sewn up.
Little action shot of a 6ft 5in man on a sewing machine
Finished article
Wife did a cracking job getting all the stiuff ready for later.
So Wednesday I will fit the seats to the frames, start trying to fit the units into the van, then cut work surface and fit doors sink etc.
Tickets for this Easter trip booked, down to the house in the south of France then to the Alps on the way back with a quick stop off in Bruges on the night before the return trip in Dunkirk. No campsites, wild camping and city centre dossing.
Summer trip booked, Spanish Villa near Barcelona booked for a week, so a stop in the Pyrenees mountains on the way down, campsite on the coast booked after for a day, then off up to St Tropay to soak up the money, then off to Paris and maybe a stop or two on the way as well.
Edited by Tampon on Monday 17th February 21:09
Gassing Station | Tents, Caravans & Motorhomes | Top of Page | What's New | My Stuff