Tunnel cooling Mod Complete!!
Discussion


Here are a few pics of the tunnel cooling mod being carried out, few awkward screws to get to, while the hell they put the screws to remove the tunnel access panel behind the steering rack bolts is beyond me, but apart from that it was quite an easy and very effective cooling mod.
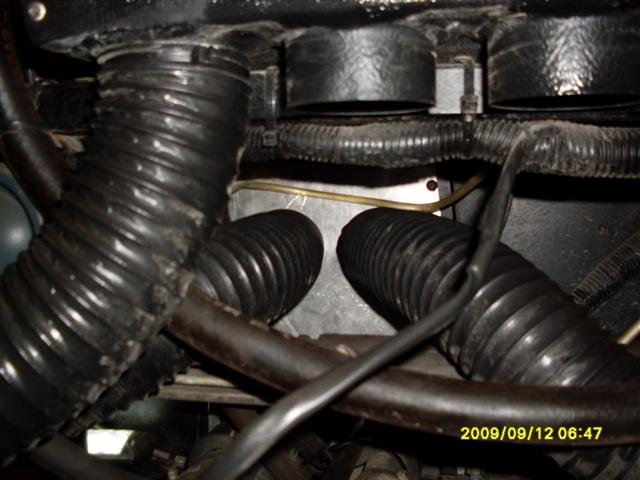
Pic showing the four intake pipes from the front going into the airbox.

I removed the middle two because these were longer and route to the tunnel perfectly with a few inches spare.

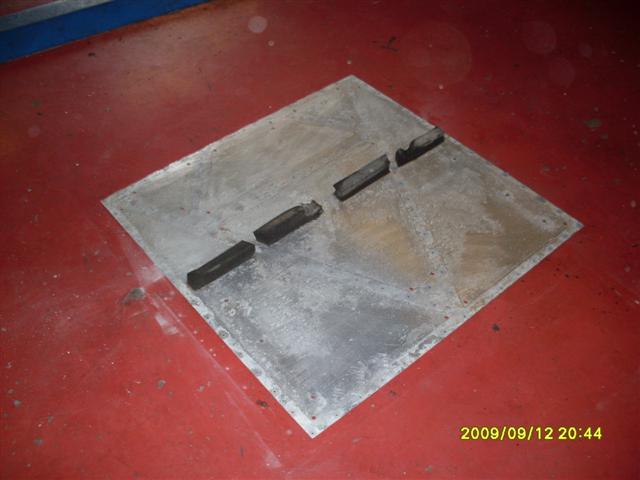
A pic showing the modified tunnel access plate, with a dummy run of the two air hoses attcahed.

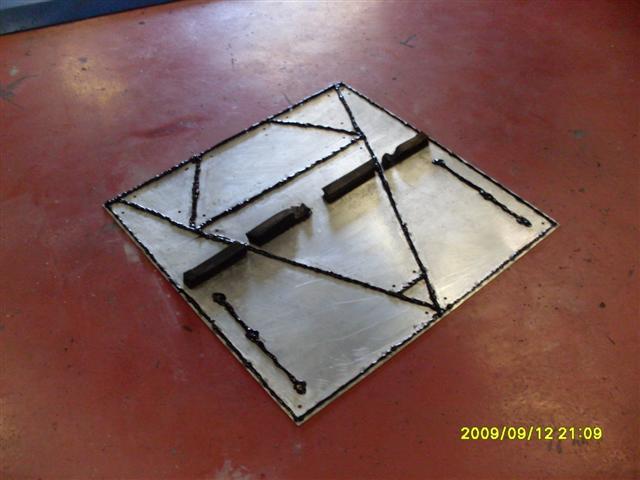
Below is a pic of the tunnel access plate back in place with the air intake pipes firmy fed through and locked into place.
At 15k miles the silicone sealant Noble has applied had done its job, once the silicone was removed the chassis was in perfect condition, for once they had sealed something correctly.
The underpan as always had shown signs of oxidization, local to all the rivets, but was not too bad.
Below is the underpan with lashings of fresh silicone sealant ready to go back into place.
Below is the undepan back in place, i decided to fix with S/S screws so that you do not have to drill out rivets everytime you want access.

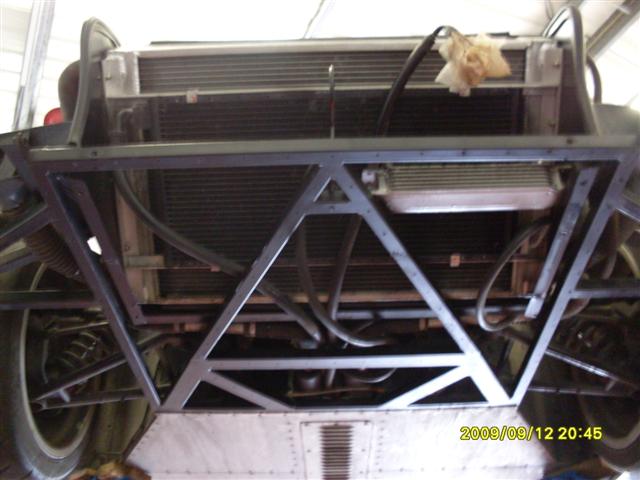
Then finally fans and heat shield back into place and job done, this modification takes the air ram effect of air from the front of the car, and pushes it through the tunnel and into the engine bay.
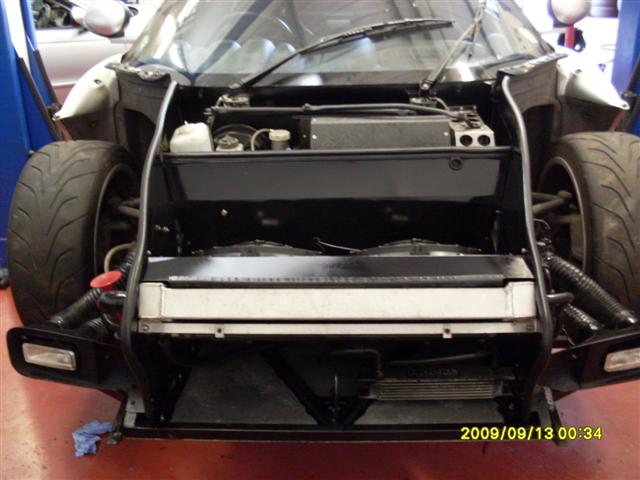
This is a great cooling mod, as it can gets stinking hot in the tunnel, the vents under the car do not work very well, all the pipes in the tunnel lay on top of the underpan, almost blocking air from getting in from the unerpan vents, anybody who has felt the hand brake or gear lever get hot, must know the benefits of this mod, the fact the handbrake can be hot to the touch can only mean there is a build of of really hot air in the tunnel, in fact Hoover reported finding heat damage to materials and pipes running through the tunnel, he said everything looked scorched.
This air that comes out the engine side of the tunnel also helps remove a lot of the stagnant hot air around the front turbo, more air in, so we need to let more air out hence the Adrians aero mods to the rear clamshell, better air flow in and out. it can also be argued that opening up the rear clamshell helps reduce drag, as the whale tail acts like a big parachute internally and traps hot air.
Pic showing the four intake pipes from the front going into the airbox.
I removed the middle two because these were longer and route to the tunnel perfectly with a few inches spare.
A pic showing the modified tunnel access plate, with a dummy run of the two air hoses attcahed.
Below is a pic of the tunnel access plate back in place with the air intake pipes firmy fed through and locked into place.
At 15k miles the silicone sealant Noble has applied had done its job, once the silicone was removed the chassis was in perfect condition, for once they had sealed something correctly.
The underpan as always had shown signs of oxidization, local to all the rivets, but was not too bad.
Below is the underpan with lashings of fresh silicone sealant ready to go back into place.
Below is the undepan back in place, i decided to fix with S/S screws so that you do not have to drill out rivets everytime you want access.
Then finally fans and heat shield back into place and job done, this modification takes the air ram effect of air from the front of the car, and pushes it through the tunnel and into the engine bay.
This is a great cooling mod, as it can gets stinking hot in the tunnel, the vents under the car do not work very well, all the pipes in the tunnel lay on top of the underpan, almost blocking air from getting in from the unerpan vents, anybody who has felt the hand brake or gear lever get hot, must know the benefits of this mod, the fact the handbrake can be hot to the touch can only mean there is a build of of really hot air in the tunnel, in fact Hoover reported finding heat damage to materials and pipes running through the tunnel, he said everything looked scorched.
This air that comes out the engine side of the tunnel also helps remove a lot of the stagnant hot air around the front turbo, more air in, so we need to let more air out hence the Adrians aero mods to the rear clamshell, better air flow in and out. it can also be argued that opening up the rear clamshell helps reduce drag, as the whale tail acts like a big parachute internally and traps hot air.
JLSELAN said:
Looks good.
But it will also help if the vents cut into the removable plates that seal off the bottom of the tunnel are directed towards the rear of the car so that the air you are forcing into the front of the tunnel has another way to exhaust out of the tunnel and into the low pressure area under the car.
I have thought about this myself, but i am waiting for somebody else to do the testing, i tend to follow what other people have tried and tested, the vents can easily be reversed. But it will also help if the vents cut into the removable plates that seal off the bottom of the tunnel are directed towards the rear of the car so that the air you are forcing into the front of the tunnel has another way to exhaust out of the tunnel and into the low pressure area under the car.
Our US counterparts seem to be leading the way on cooling mods as they race them in the Californian desert, Hoover has not mentioned any benefit of reversing the vents and he is heavily into development with mods, so i am just going to follow suit.
paulcundy said:
JLSELAN said:
Looks good.
another way to exhaust out of the tunnel and into the low pressure area under the car.
Low pressure under the car helps it stick to the road. Don't go reducing it. another way to exhaust out of the tunnel and into the low pressure area under the car.
The front collectors can be opened out by removing the baffle plate.
If you carefully remove the redundant collar that the re-directed pipes used to clamp onto, you can then bond or rivet them to the tunnel blanking plate with it in situ which means you can do the job without having to remove it.
see http://paulcundy.smugmug.com/gallery/359222#336603...
Regards
Paul C
 lol, in situ would have been musch easier i must admit.
Gadgeroonie said:
great write up urbiliser
have you made mods to the actual scoops at the front of the car ?
could they be opened up for more airflow ?
lol, you may have noticed i have fog lamps fitted in front of my front air scoops have you made mods to the actual scoops at the front of the car ?
could they be opened up for more airflow ?
, kind of messing up the ram effect, but the front mesh was modified to suit, still gets a lot of air forced in through these front intakes, the below pic you will see the fogs with the clam in place and the modified mesh to the intakes at either side, it looks worse than what it is, there is loads of room around the fog lamps with regards to the front air scoops.these fog lamps were actually factory fitted from new, customer request, as were the air horns, seems all he wanted by better night vision and a louder horn, lol, i bought it 1 year old.
MadMacMcMad said:
This has inspired me to get on and do it.
Started last Thursday and now, a week on it's all done. Took my time, but I had to remove the middle section and drop the sides of the cabin section too.
All done, re-sealed, tunnel mod and back in one piece. After removing a bucket load of grit and muck from under the car, It is now cleaner than it has been in 5 years. All that is needed now is buy some Optrex to try and get the the other bucket load from my eyes.
lol, i think i emptied about a kg of stones out of my front underpan, so did you refix it all with S/S screws then?Started last Thursday and now, a week on it's all done. Took my time, but I had to remove the middle section and drop the sides of the cabin section too.
All done, re-sealed, tunnel mod and back in one piece. After removing a bucket load of grit and muck from under the car, It is now cleaner than it has been in 5 years. All that is needed now is buy some Optrex to try and get the the other bucket load from my eyes.
Gassing Station | Noble | Top of Page | What's New | My Stuff