Mac#1 Motorsport Worx Build
Discussion


Well I've just stumbled across this forum, so I thought I'd join in and add this post as I haven't seen many build threads on here.
I've recently began building a Mac#1 Motorsport Worx kit car, here she is...
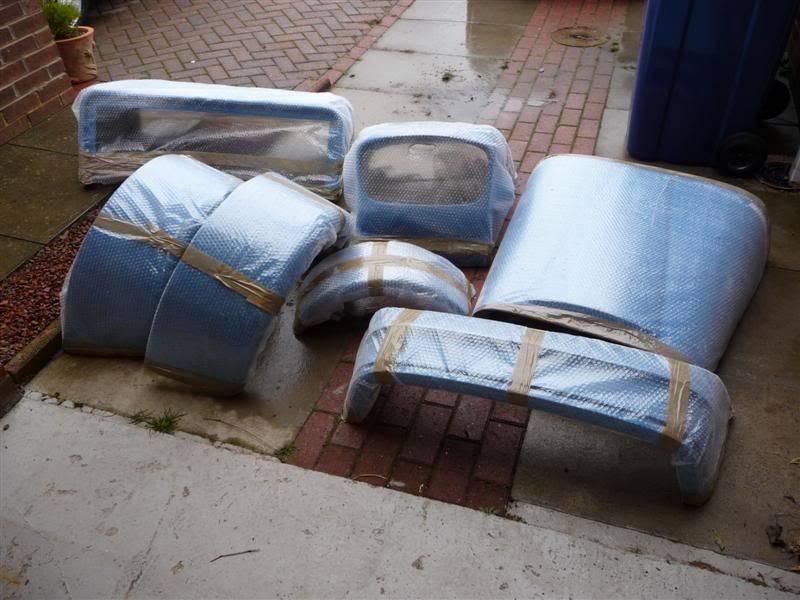
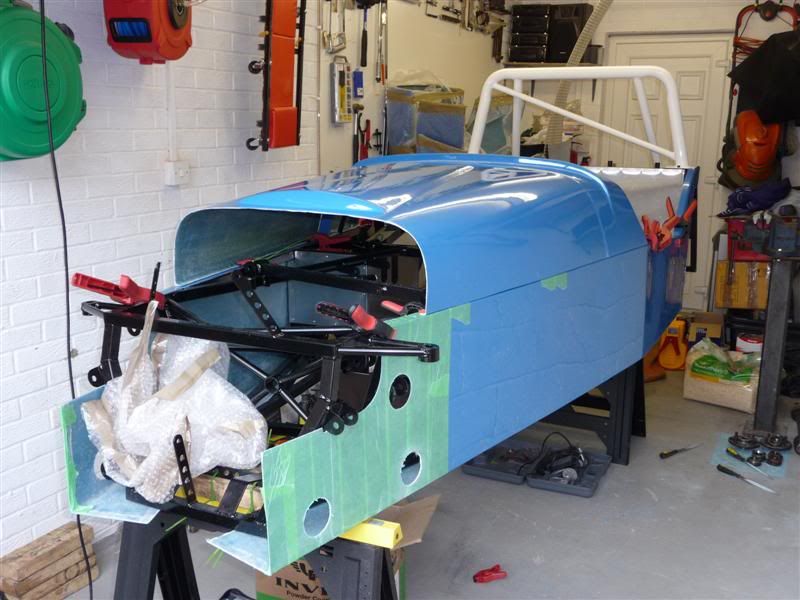
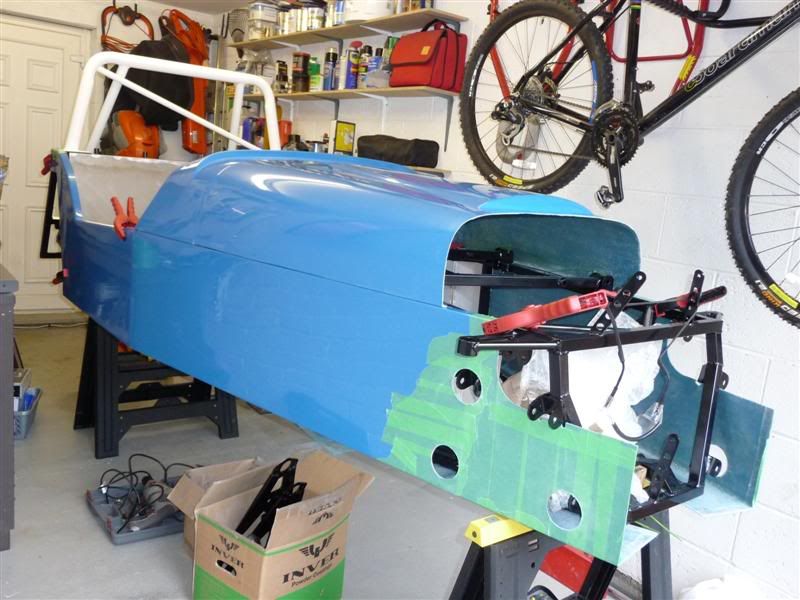
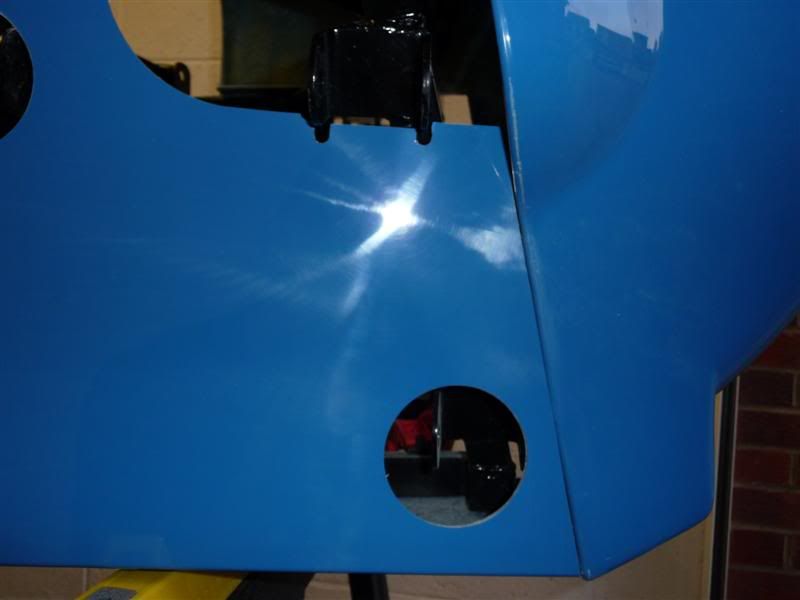
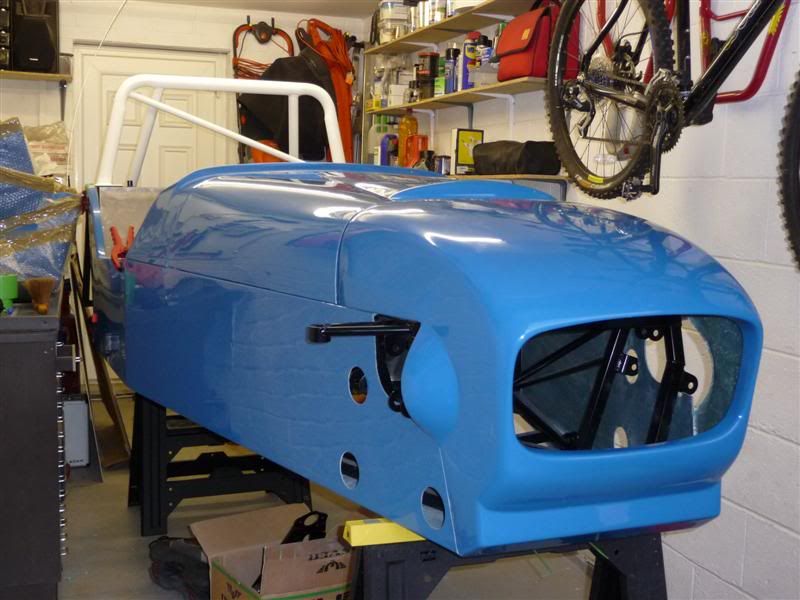
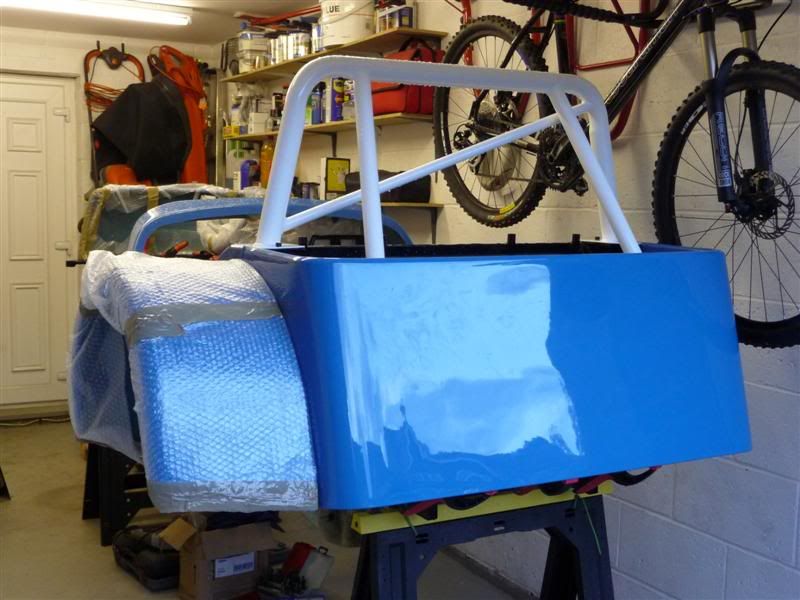
Body panels in light french blue gel coat
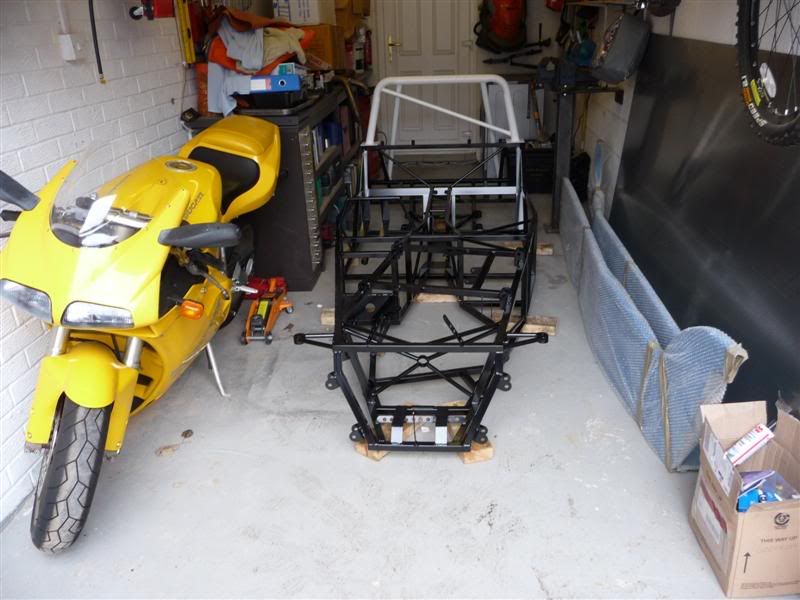
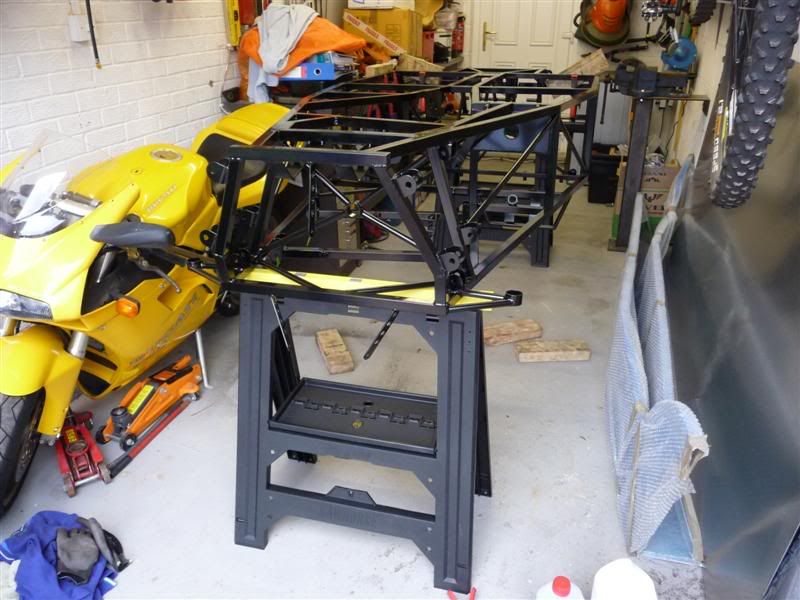
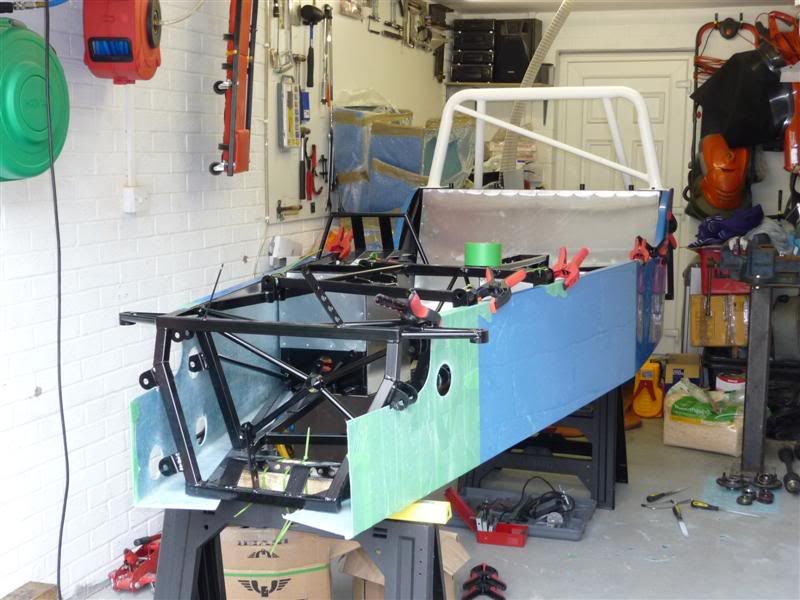
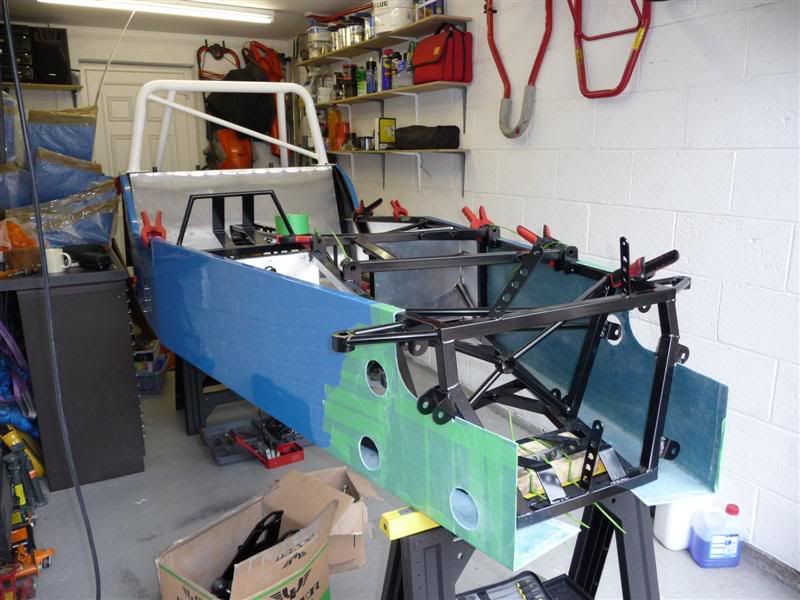
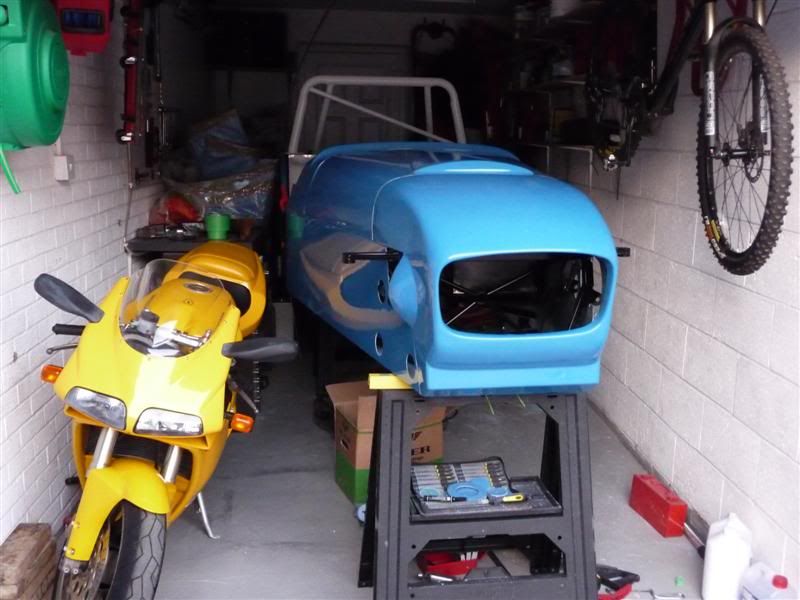
Chassis squashed into its new home... my huge garage
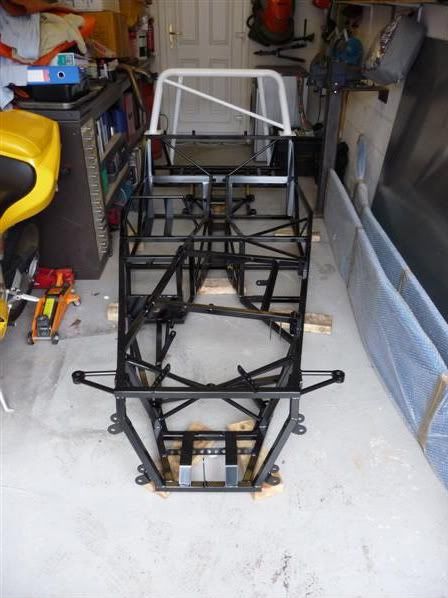
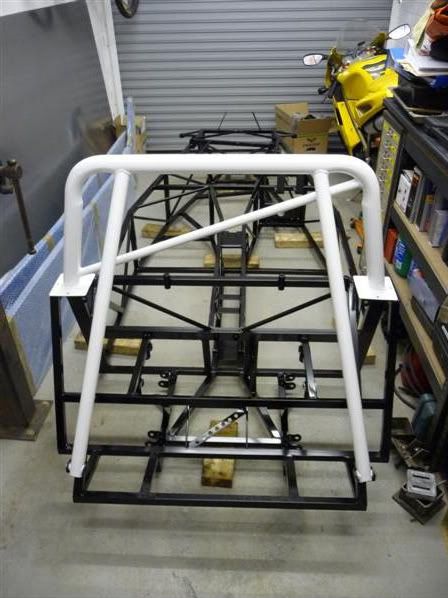
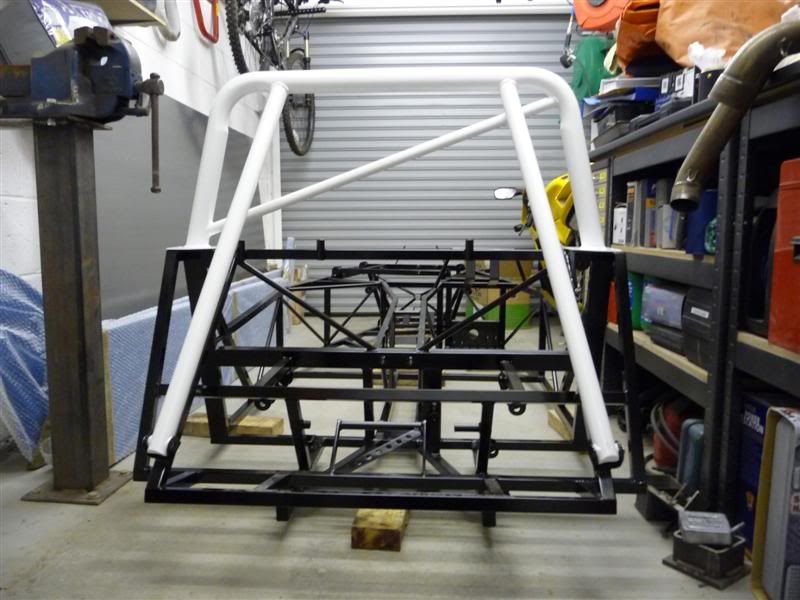
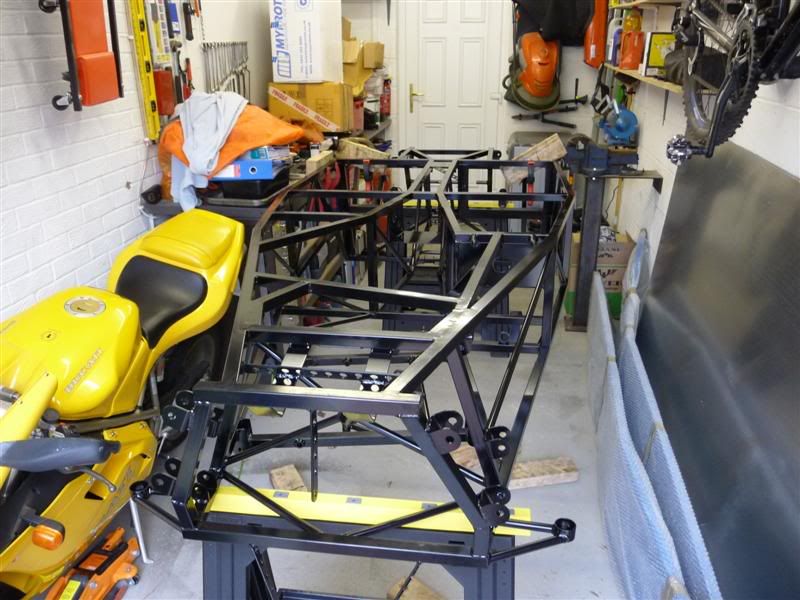
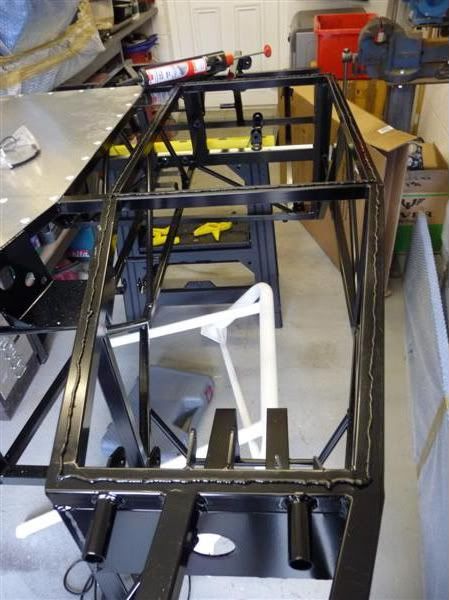
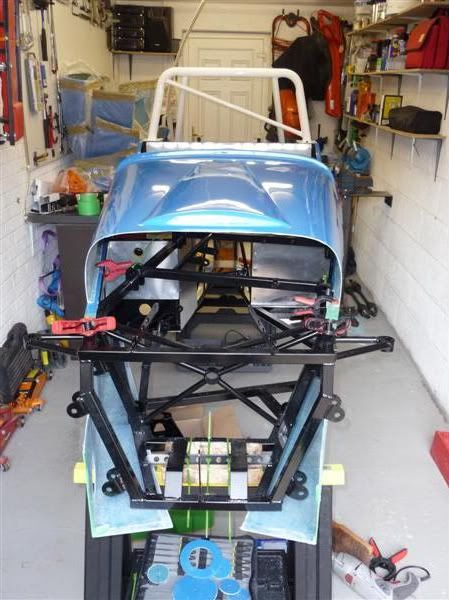
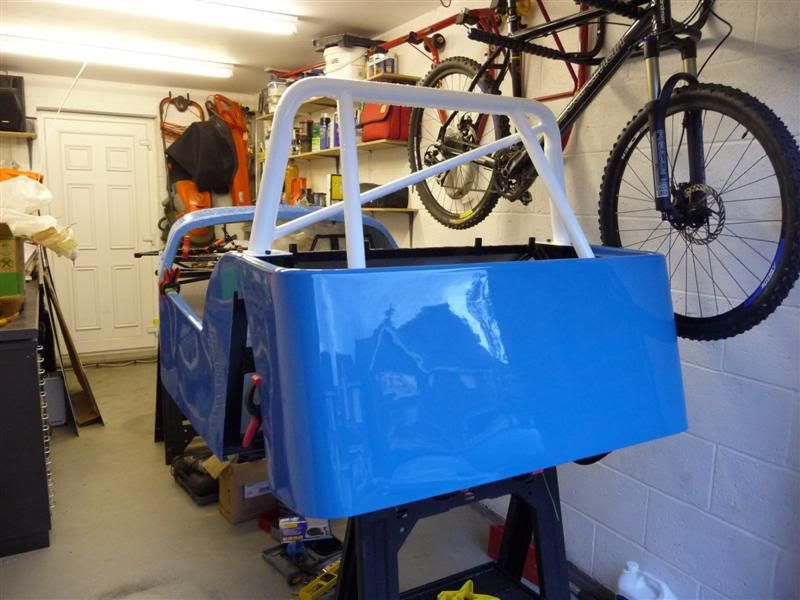
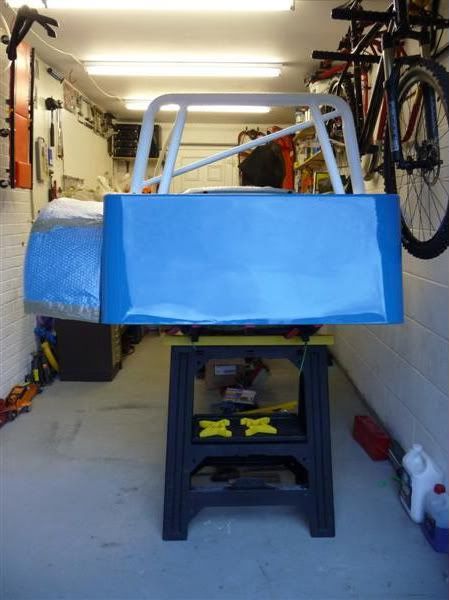
Chassis viewed from the rear
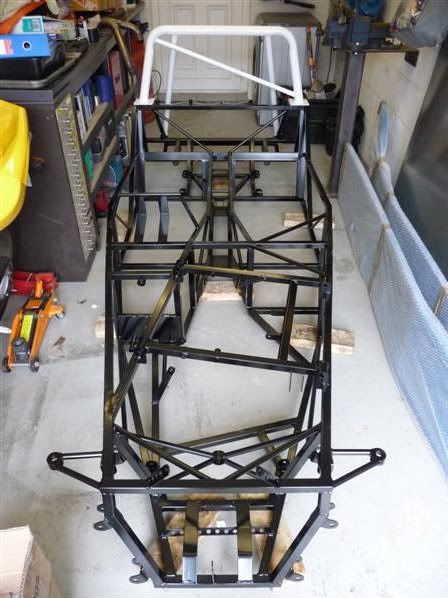
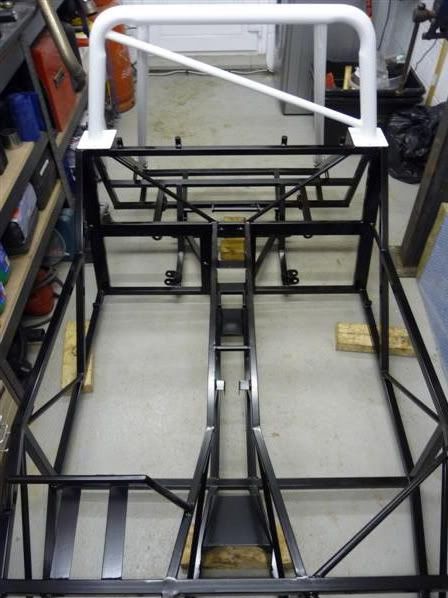
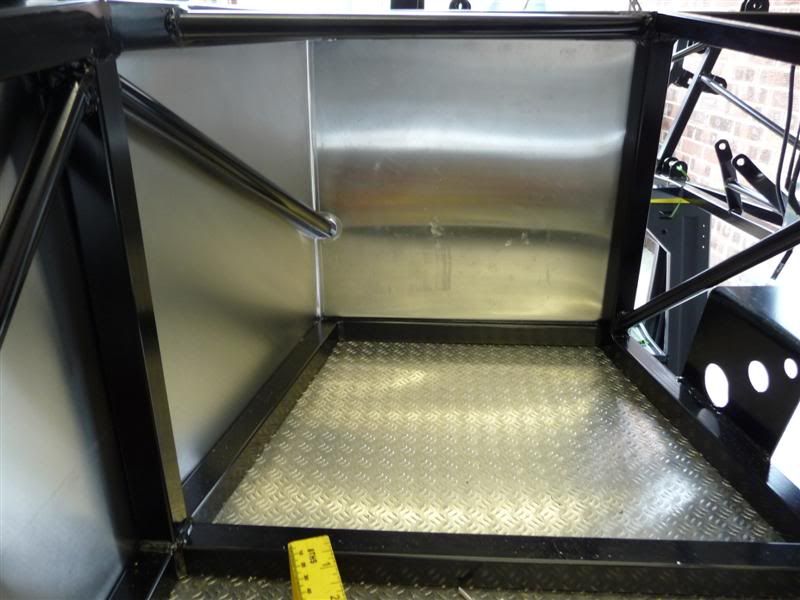
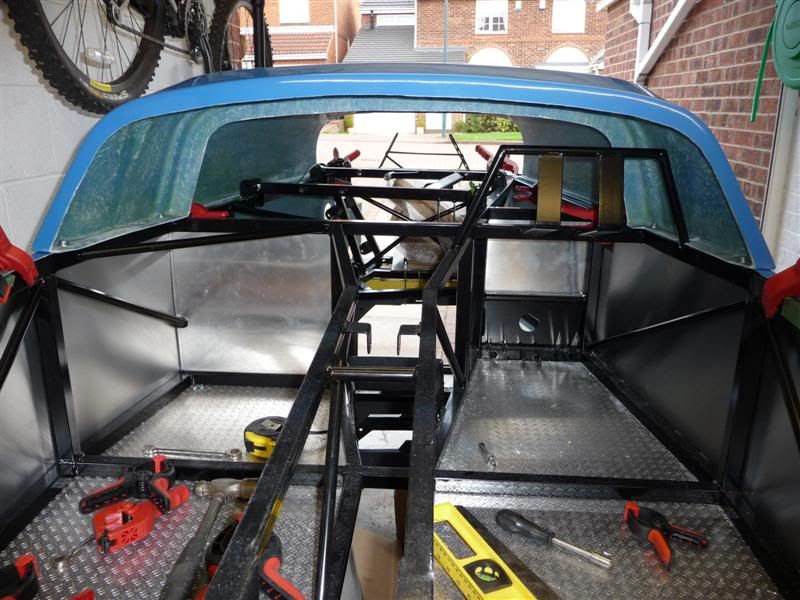
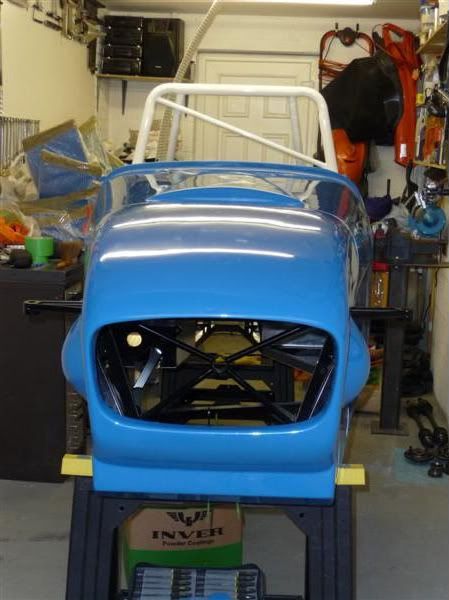
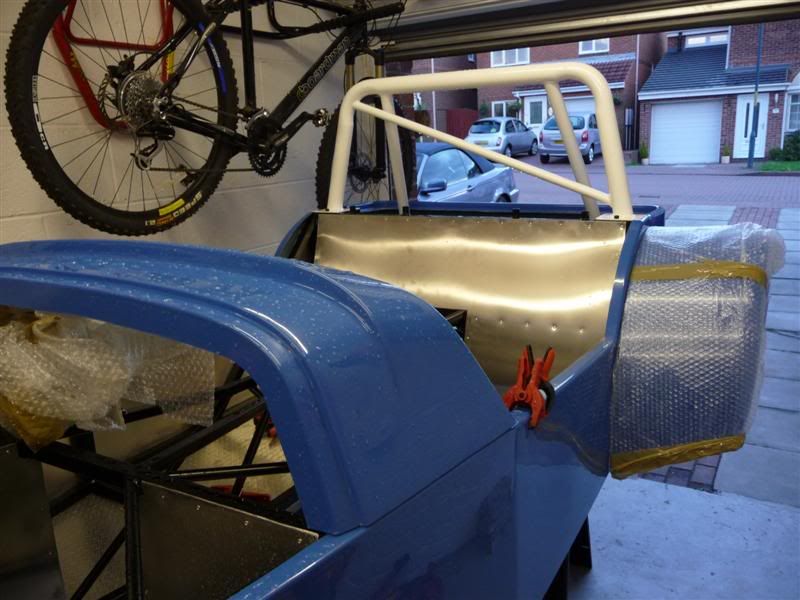
Cockpit
Engine bay

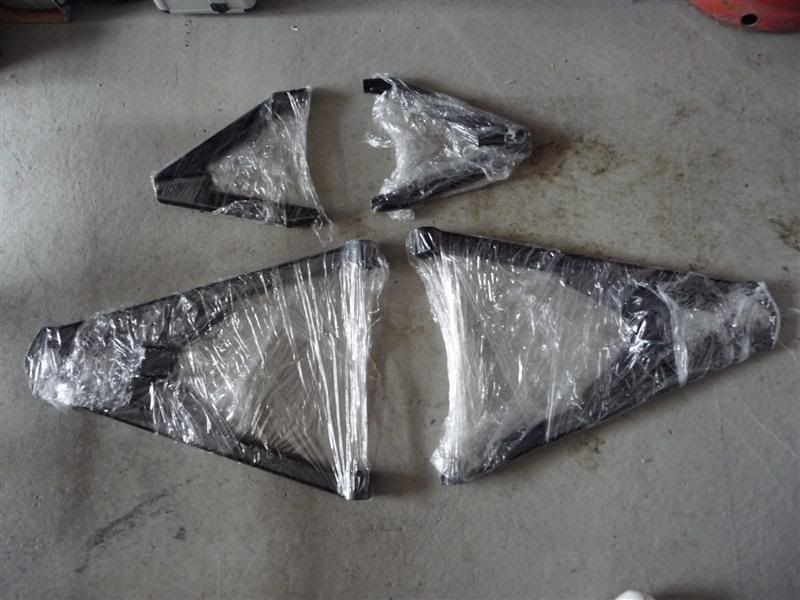
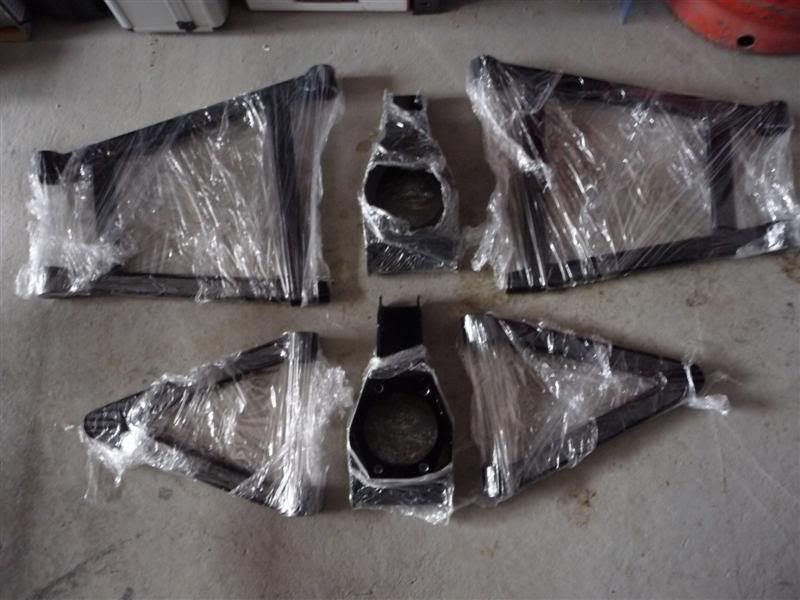
Front wishbones
Rear wishbones and uprights
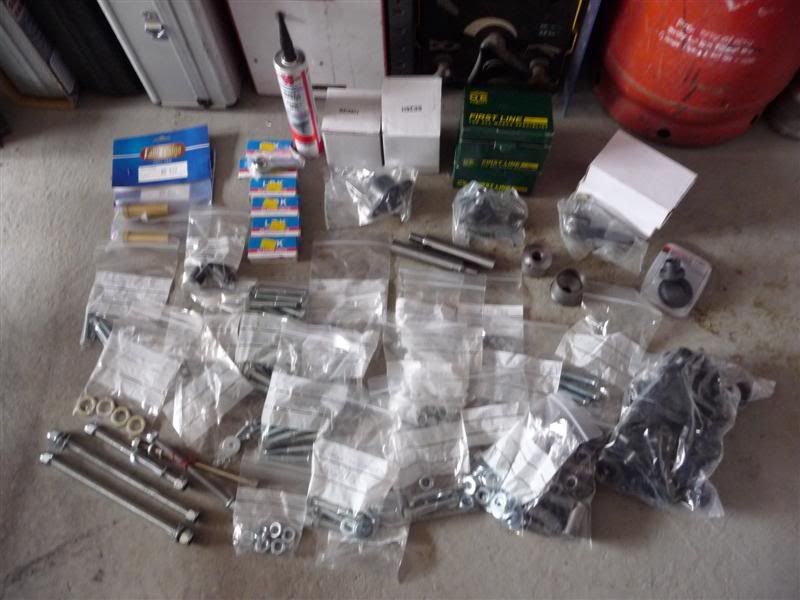
Nuts, bolts, bushes, tie rods, steering rack extensions, mushroom adaptors, balljoints, rosejoints etc
I've recently began building a Mac#1 Motorsport Worx kit car, here she is...
Body panels in light french blue gel coat
Chassis squashed into its new home... my huge garage
Chassis viewed from the rear
Cockpit
Engine bay
Front wishbones
Rear wishbones and uprights
Nuts, bolts, bushes, tie rods, steering rack extensions, mushroom adaptors, balljoints, rosejoints etc
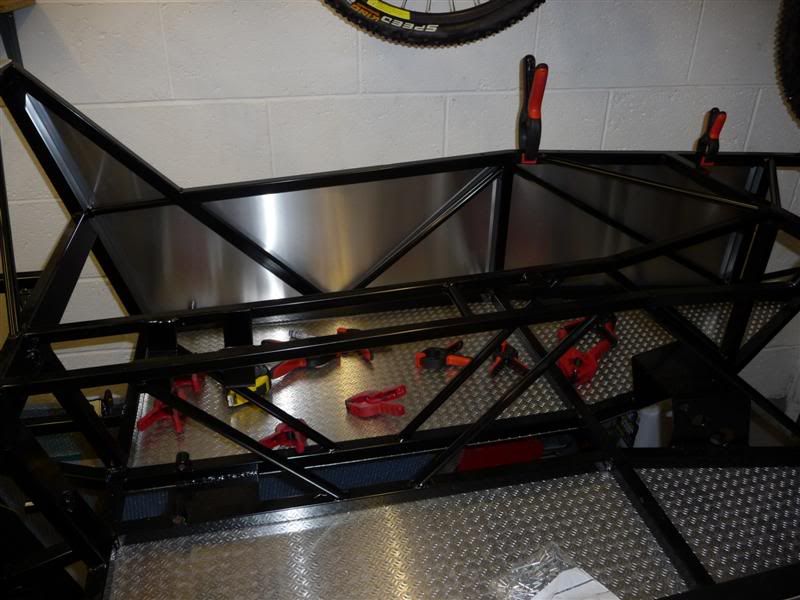
With the help of a neighbour the upturned chassis was rested on a pair of saw horses
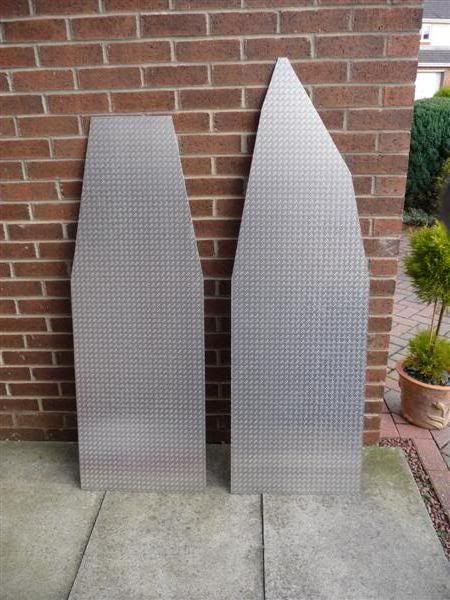
The cricket weave aluminium sheet was then rested on the chassis so i could mark the outline of the floorpan,
a few minutes of playing with the jigsaw and this was the result.
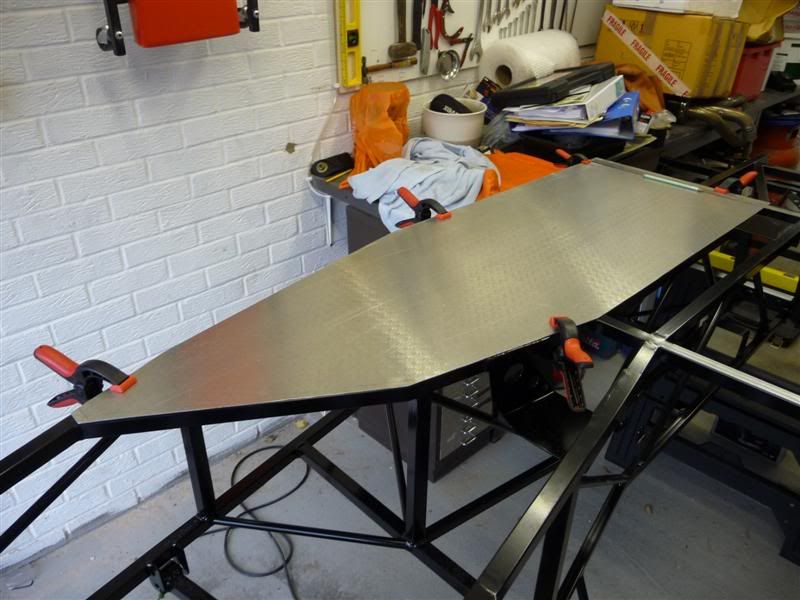
Passenger side floor clamped in position
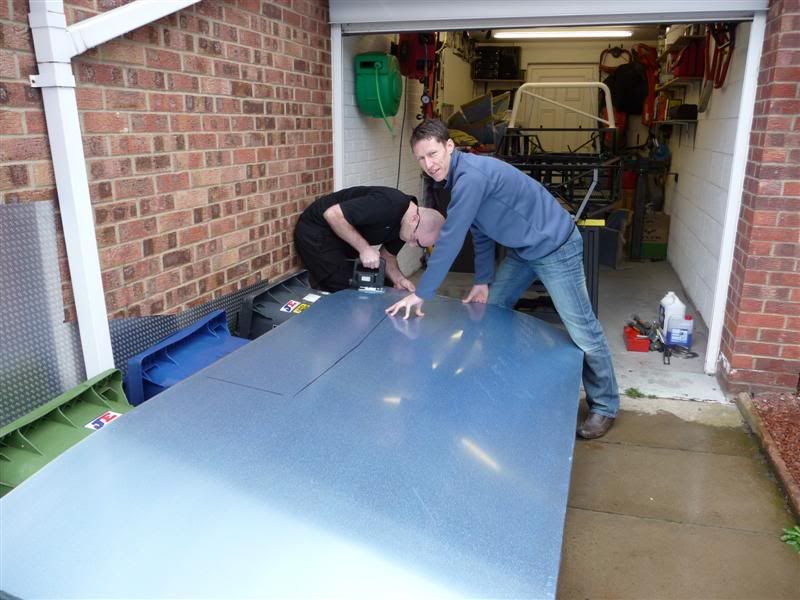
A mate popped round to make coffee and poke his nose in, while he was here he took a few photos of me in action
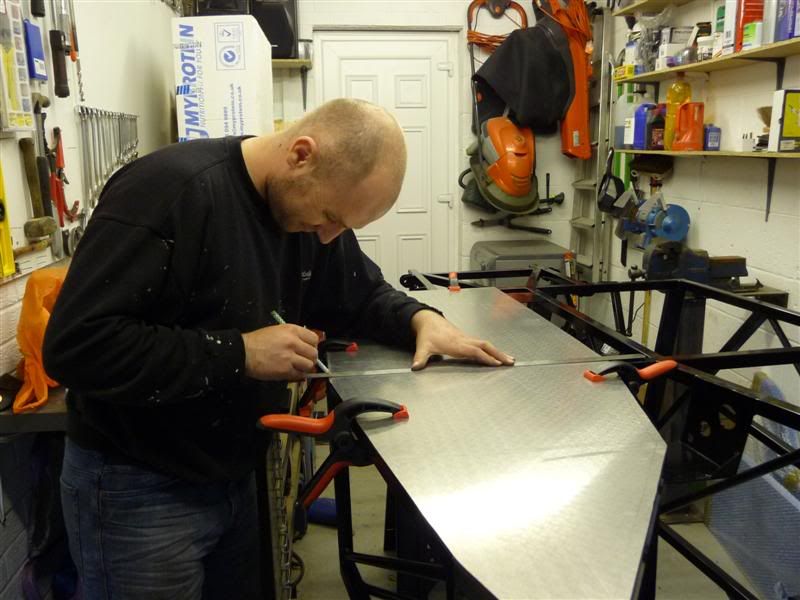
marking out rivet locations
centre punching the rivet locations ready to be drilled

My battery drill died midway through drilling the holes for the rivets, so this is how it was left while I nipped out to B&Q for a 240v drill.
An application of Wurth Bond + Seal stops water/dirt getting into the chassis and also into the cockpit
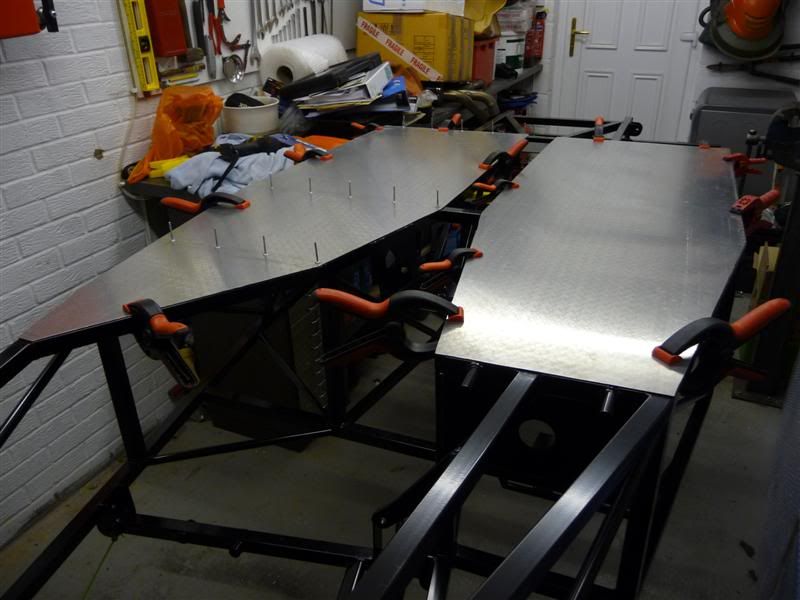
Finally all the rivets were fastened up and the edges of the panels clamped into position while the sealant cures, the extreme left/right sides of the panels have been intentionally left without rivets as this is where the outer body panels are riveted to the chassis later in the build.
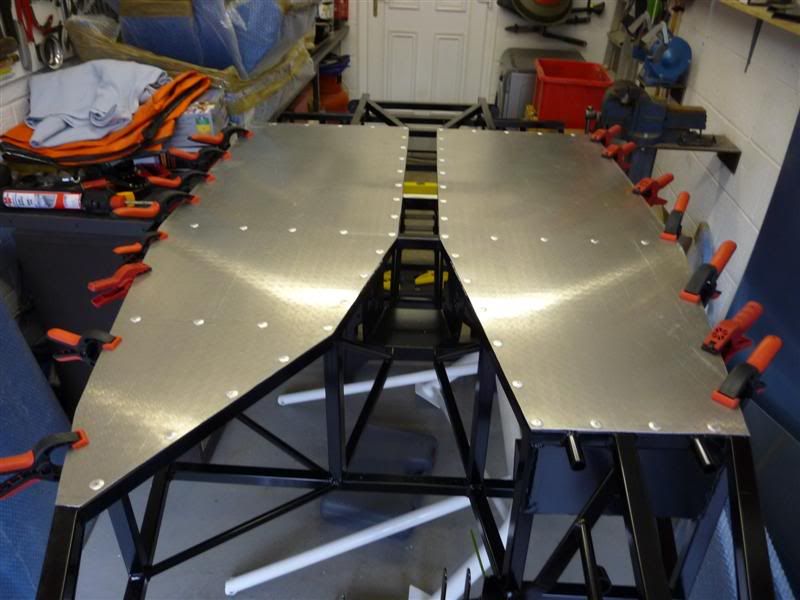
The cricket weave aluminium sheet was then rested on the chassis so i could mark the outline of the floorpan,
a few minutes of playing with the jigsaw and this was the result.
Passenger side floor clamped in position
A mate popped round to make coffee and poke his nose in, while he was here he took a few photos of me in action
marking out rivet locations
centre punching the rivet locations ready to be drilled
My battery drill died midway through drilling the holes for the rivets, so this is how it was left while I nipped out to B&Q for a 240v drill.
An application of Wurth Bond + Seal stops water/dirt getting into the chassis and also into the cockpit
Finally all the rivets were fastened up and the edges of the panels clamped into position while the sealant cures, the extreme left/right sides of the panels have been intentionally left without rivets as this is where the outer body panels are riveted to the chassis later in the build.
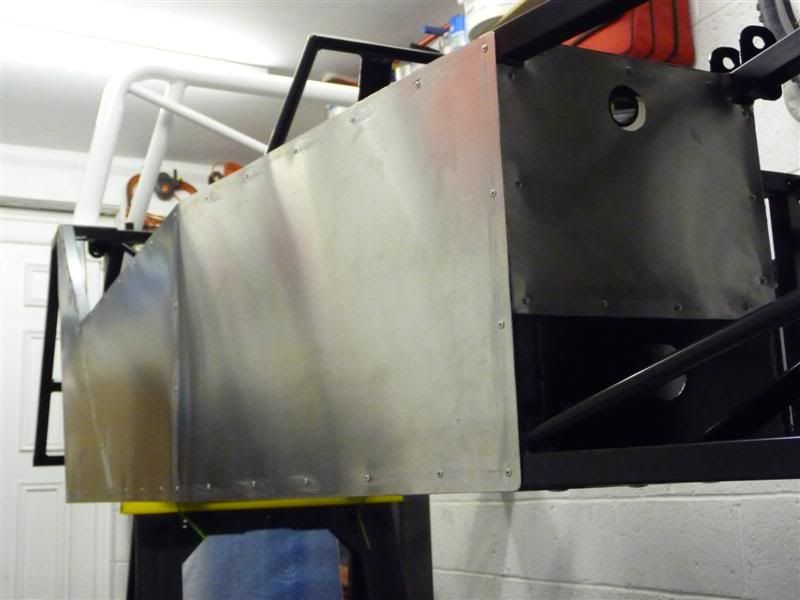
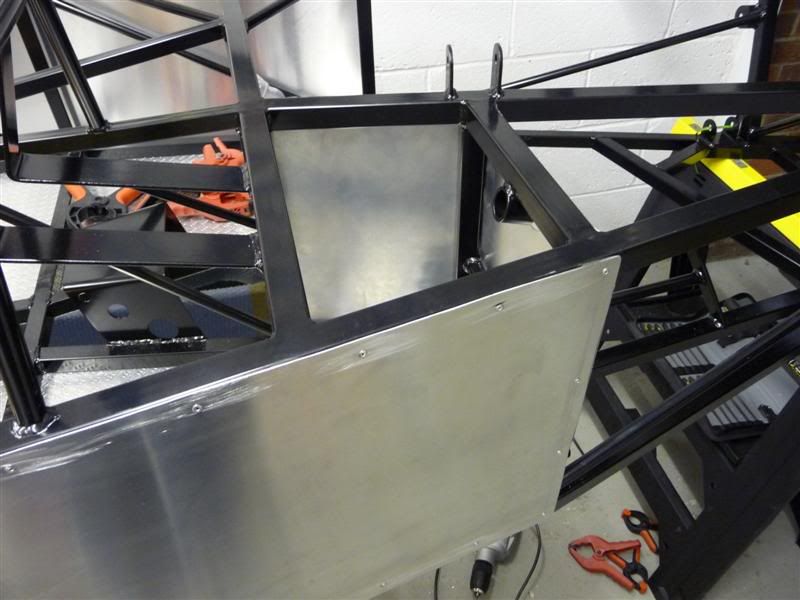
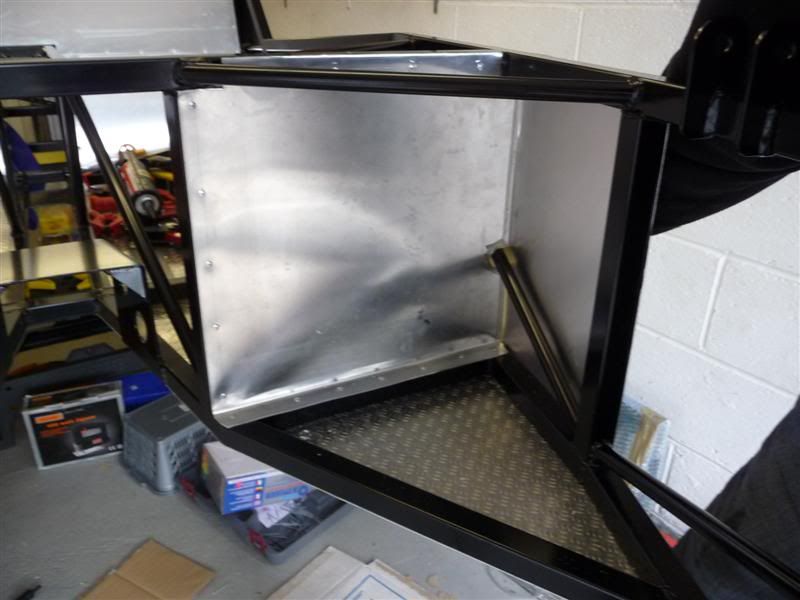
Marked out one interior side panel and cut it out using 3 wheelie bins in an unorthodox fashion, lol.
Marked out, drilled and then bonded and riveted the panel to the chassis
From the inside of the car it now looks like this

Then cut out and mounted the other side panel in the same way but didn't bother to get any more photos as it looks exactly the same as the other side.
Hopefully tomorrow it'll progress a bit more
Marked out, drilled and then bonded and riveted the panel to the chassis
From the inside of the car it now looks like this
Then cut out and mounted the other side panel in the same way but didn't bother to get any more photos as it looks exactly the same as the other side.
Hopefully tomorrow it'll progress a bit more
deviant said:
I dont think I could stop at that stage...I'm hoping to buy a kit soon and I think I will end up living in the shed until I have run out of bits to fit!
You may be suprised but to hear but I was well overdue a break at that stage, think I had been in the garage for about 10 hours on that particular day.Well if and when you do buy a kit, shove a thread up on here so we can keep an eye on your progress
singlecoil said:
In the second picture I can see grp sides, and yet you are fixing aluminium to the sides. Any particular reason?
Good pictures BTW, I'll be interested to see the rest of the build.
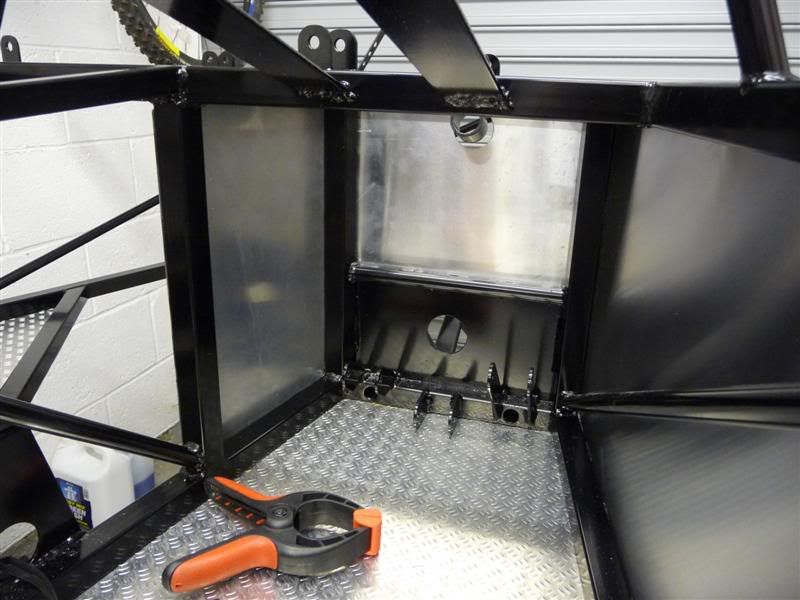
The fibreglass side panels are fastened over the top of the aluminium sides, the aluminium sides are there to isolate the cockpit area and they also look a damn sight nicer than the rear of the fibreglass panels, lol. I still have aluminium sheet to cut and fix to the rear of the cockpit and also to the bulkhead area too.Good pictures BTW, I'll be interested to see the rest of the build.
The Black Flash said:
Cool stuff
Might be too late now, but Dax recommend keying the powdercoat where you are going to put wurth onto it, to get a better bond.
Thanks for the tip, worth noting for future reference Might be too late now, but Dax recommend keying the powdercoat where you are going to put wurth onto it, to get a better bond.

singlecoil said:
The usual thing is to fit the inner panels on the inside of the cockpit, that way you don't see the chassis either. Not that it matters, I suppose, it's just seeing it done so differently made me wonder if there was any particular reason.
That's just the way it's done on the Mac#1 cars, a factory built car will be exactly the same. I actually like to see the chassis, it fits in with the raw nature of the car but each to their own, some don't... the good thing is you can build the kit to suit your taste.American iv said:
would you by chance work for the company? Just all the links in bold scream of someone trying to use Pistonheads for SEO
No i dont work for Mac#1... they're in Sheffield and I live in South Shields, some 130 miles away. 
singlecoil said:
Not trying to make an issue of this, but it seems that you don't like seeing the glassfibre reverse side, but do want to see the chassis? Why not leave the aluminium off the sides altogether, that would be raw, and lighter too.
The reverse of the fibreglass panels don't look too great in my opinion, and I didn't want to be able to see that so the aluminium panels are fitted the way they are, as already said i like the look of the chassis inside the cockpit.Edited by Red16 on Thursday 1st April 22:32
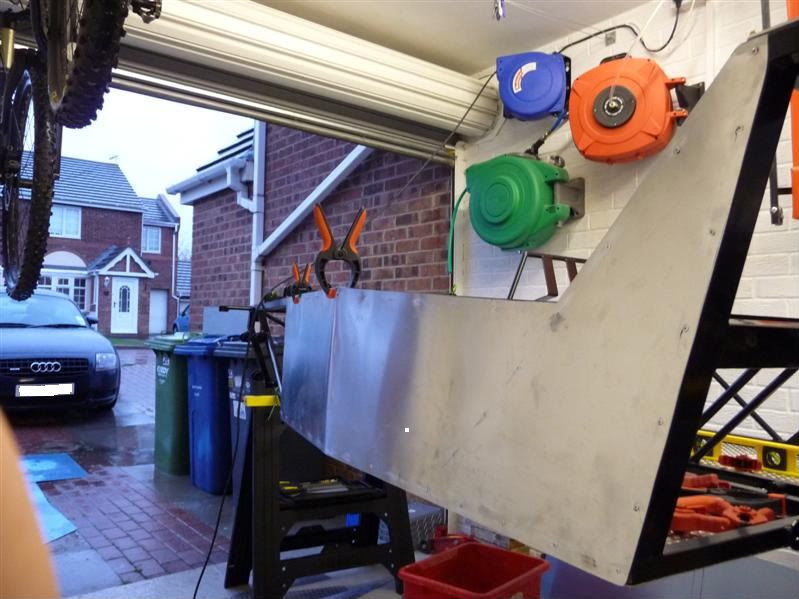
I've been in the garage tonight pottering about, knocked up a some panels for the drivers side of the cockpit.
Bulkhead panel
Bulkhead panel and start of the centre console/drive tunnel.
How it looks from the inside at the end of play today.
Bulkhead panel
Bulkhead panel and start of the centre console/drive tunnel.
How it looks from the inside at the end of play today.
American iv said:
s'ok, just teasing you anyway. Nice to see build stories as I'd love to build a kit-car!
South Sheilds eh, I'm out the other side of Newcastle
No worries South Sheilds eh, I'm out the other side of Newcastle
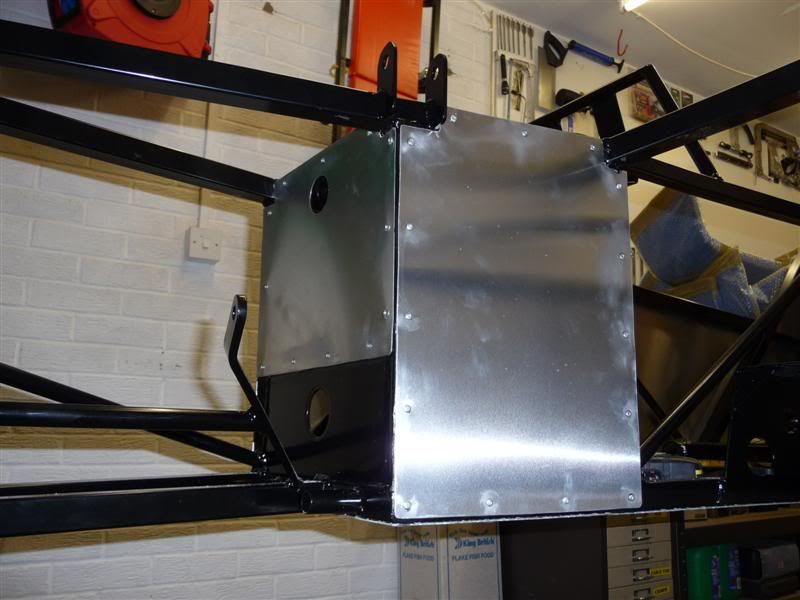
Finally got round to cutting out and mounting the large panel to the rear end of the cockpit area.
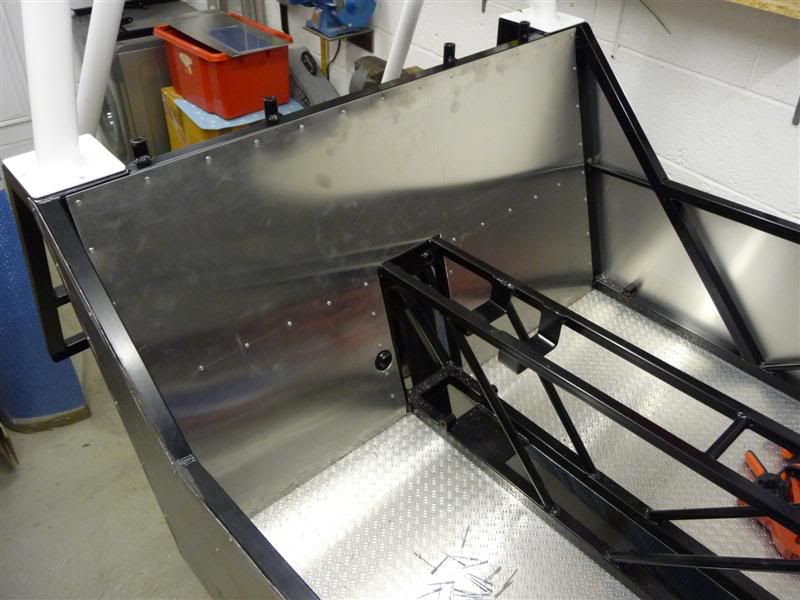
Here it is viewed from the back of the car
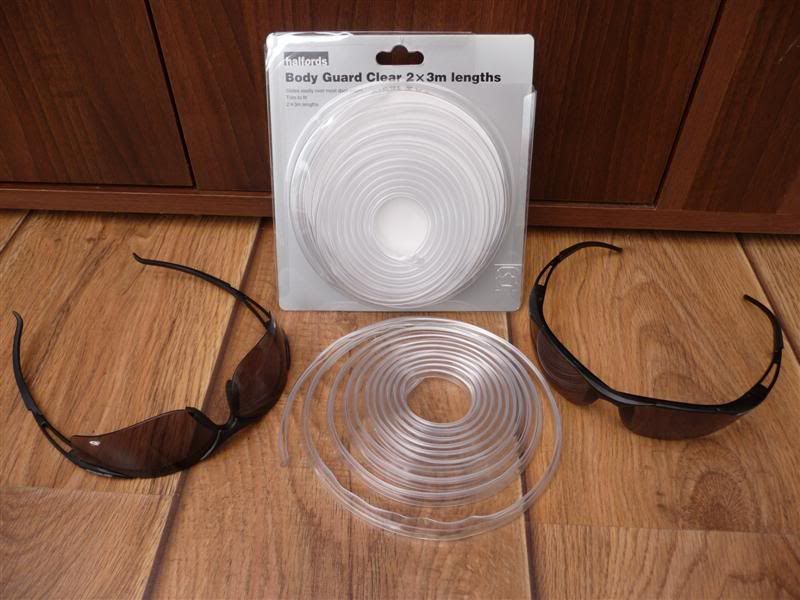
Kinda jumping the gun a bit here, but I seen the Bolle tinted safety glasses and couldn't resist buying them, lol. Also bought a roll of clear edging from Halfords, i'm sure it'll come in handy at some point during the build.
Here it is viewed from the back of the car
Kinda jumping the gun a bit here, but I seen the Bolle tinted safety glasses and couldn't resist buying them, lol. Also bought a roll of clear edging from Halfords, i'm sure it'll come in handy at some point during the build.
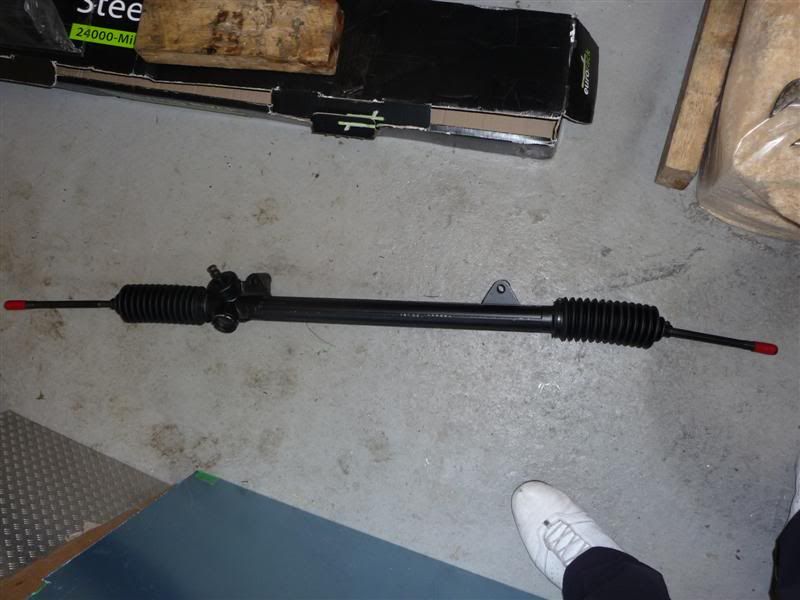
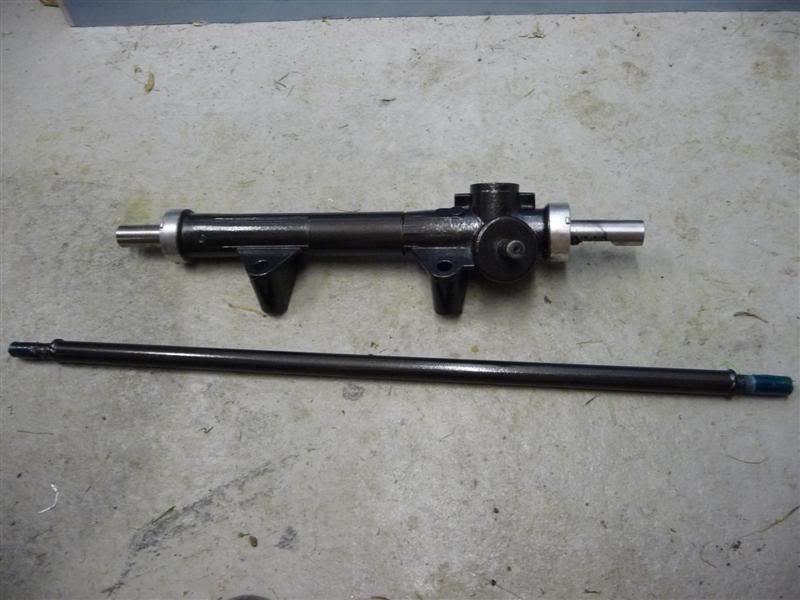
One brand new Sierra steering rack, which has since been packaged up and sent to Mac Motorsport to be shortened.
I've been in the garage today and made a bit of progress, the drivers side panel was notched to fit around the steering column support bracket and then the front end had its first cut to accomodate the brackets for headlight, strut top and upper wishbone arm.
Holes were then cut into the side panel to allow access to the wishbone mounting brackets. The drivers side of the scuttle panel was notched to fit around the steering column support bracket and then secured to the chassis using rivnuts.

Doesn't look much in the photo's but it took me ages in the garage to get to this stage!
I've been in the garage today and made a bit of progress, the drivers side panel was notched to fit around the steering column support bracket and then the front end had its first cut to accomodate the brackets for headlight, strut top and upper wishbone arm.
Holes were then cut into the side panel to allow access to the wishbone mounting brackets. The drivers side of the scuttle panel was notched to fit around the steering column support bracket and then secured to the chassis using rivnuts.
Doesn't look much in the photo's but it took me ages in the garage to get to this stage!
Well it's been another busy day in the garage for me...
Drivers side panel with notch and rivnuts as mentioned earlier

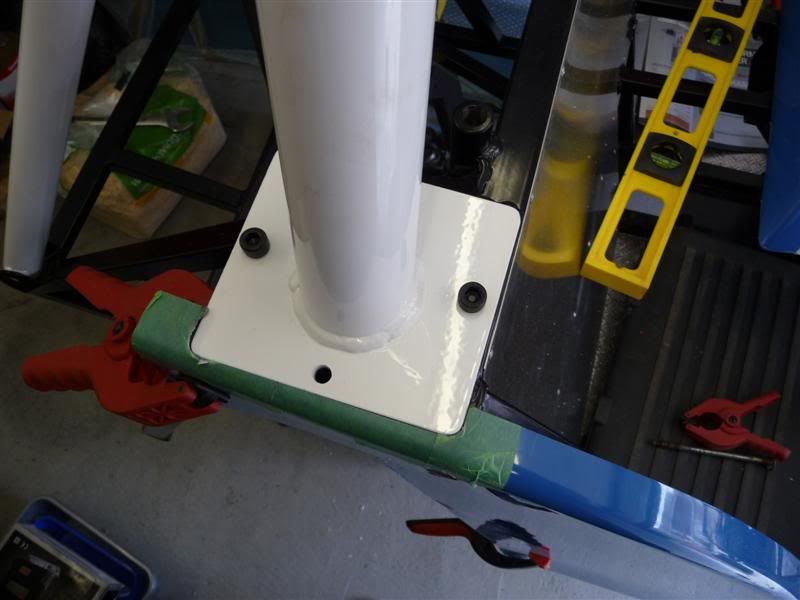
Rear of the drivers side panel modified to fit around the base of the roll bar
Began cutting and fitting the passenger side panel
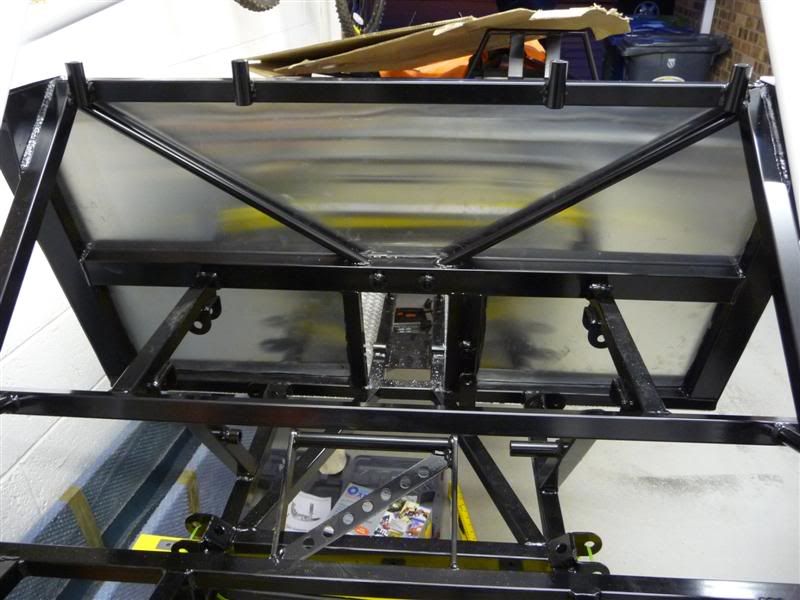
Scuttle panel fastened into position at both sides
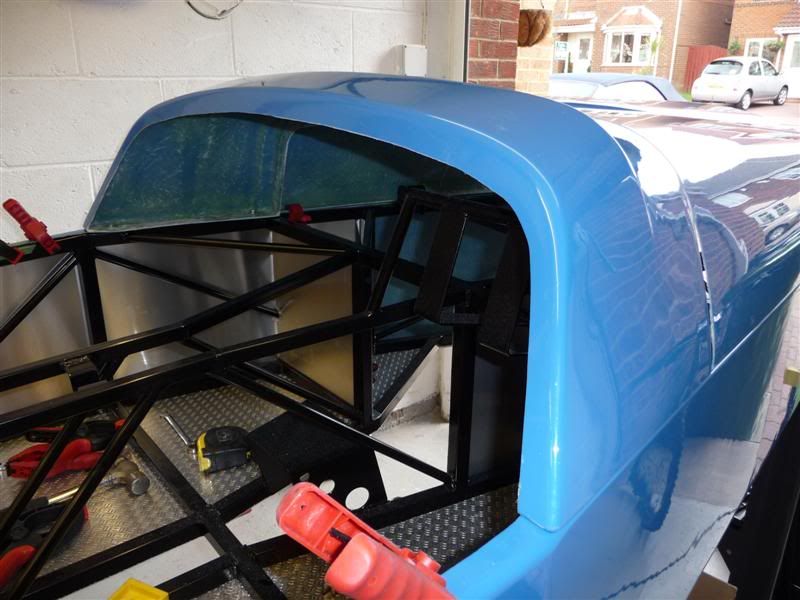
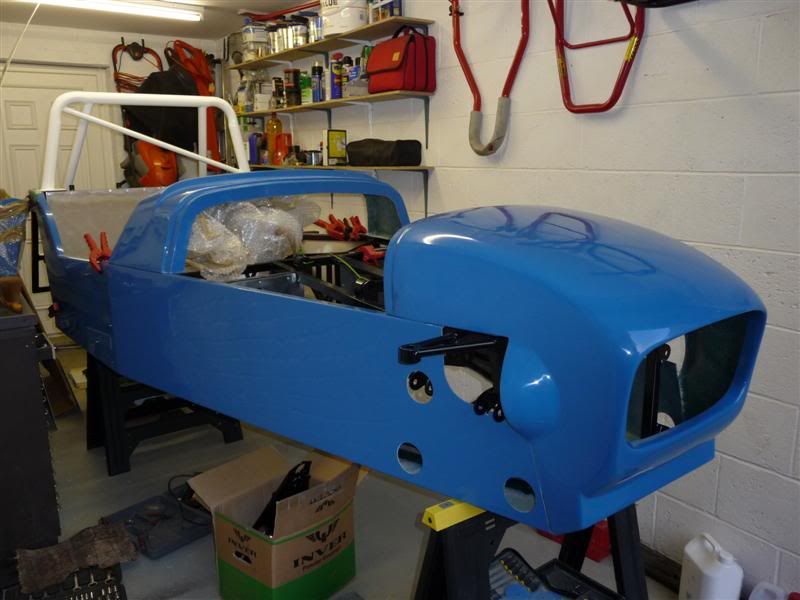
With the bonnet on it finally begins to resemble a car
Drivers side panel with notch and rivnuts as mentioned earlier
Rear of the drivers side panel modified to fit around the base of the roll bar
Began cutting and fitting the passenger side panel
Scuttle panel fastened into position at both sides
With the bonnet on it finally begins to resemble a car
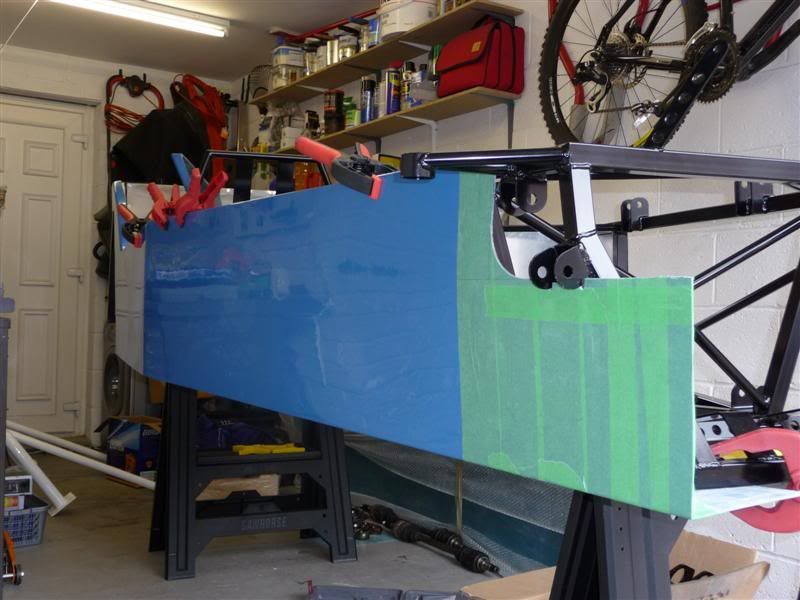
Todays plan of attack... get the side panels chopped down and have the nose cone mounted by the end of play.
Nose cone provisionally mounted to mark out where the side panels need to be cut

Passenger side cut, still masked off
Drivers side, cut and unmasked
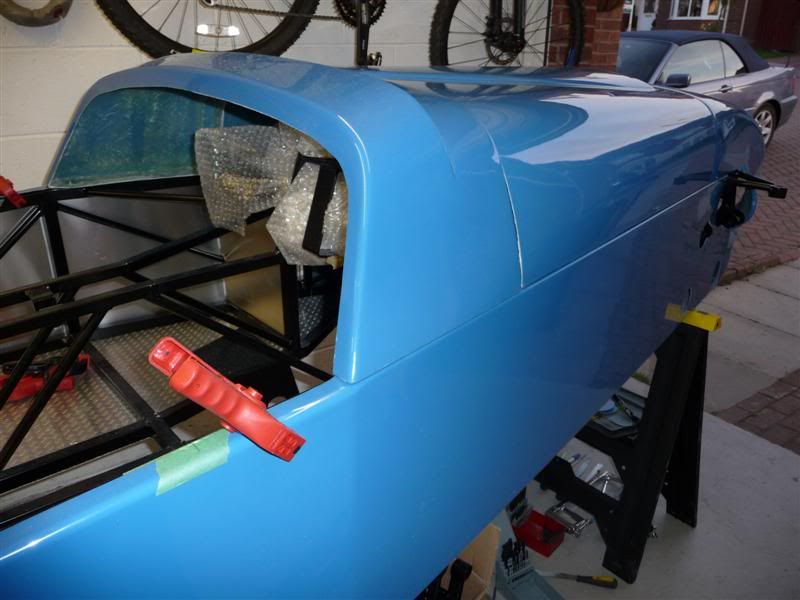
How it looks without the bonnet
Bonnet rested in place, to pose for the camera
A full frontal shot
I couldn't help one last glance back to the garage before closing the door
Nose cone provisionally mounted to mark out where the side panels need to be cut
Passenger side cut, still masked off
Drivers side, cut and unmasked
How it looks without the bonnet
Bonnet rested in place, to pose for the camera
A full frontal shot
I couldn't help one last glance back to the garage before closing the door
singlecoil said:
I'm always impressed at what people manage to achieve in a single garage. Careful planning, good discipline and resistance to claustrophobia needed.
You've got to be tidy and organised, it's a pain getting started as i have to move things like the bikes every time... one day i'll have a huge garage (hopefully)
MH said:
Great progress. It's looking really good.
Mike
Cheers Mike Mike
I've been in the garage again today and managed to get the rear end cut and clamped into position.
And while I was at it I couldn't resist clamping one of the rear arches on to see how it'd look
Looking a lot more car like now

Toilet Duck said:
Do you have to decide which engine you will be using before you order the kit, or can you decide later? Are all the engine mounting points for a ZX10 lump all ready located on the chassis? If so, is it easy to make up new mounting points for any engine of your choice, or do you need to order a different chassis?
I'm not too clued up on kit cars. However, it is my intention some time in the not too distant future to own one. If its not economic madness, I may consider buying one at the right price if it has a crap engine which I can swap for something more suitable to my needs (I am torn between a BEC and Honda S2000 running gear, the later could be supercharged at a later date). Appologies for the slight derail.
Cheers
You decide on which engine you want to run before ordering the kit, because the engine mounts are welded to the front lower chassis rails aswell as in the removable engine cradle, to suit your choice of engine. Also depending on which engine you choose, you will choose a different rear diff, so mounts could change for that too.I'm not too clued up on kit cars. However, it is my intention some time in the not too distant future to own one. If its not economic madness, I may consider buying one at the right price if it has a crap engine which I can swap for something more suitable to my needs (I am torn between a BEC and Honda S2000 running gear, the later could be supercharged at a later date). Appologies for the slight derail.
Cheers
If you wanted to change engines at a later date it's quite a big job, a new cradle would be required aswell as new mounts on the chassis. Changing from bike engine to car engine would require new propshaft, gearbox mounts, a suitable gearbox, different exhaust, new dash as clocks, probably different rear diff or at least diff ratio etc. You'd probably be better off selling the car and building a new one to be honest.
Not been doing a lot on the car lately, been too busy playing Modern Warfare 2 on the PS3, the big kid that I am, lol.
Anyway, I took delivery of a package from Mac#1 this morning
A new steering column and linkages, and a my Sierra rack which has been shortened
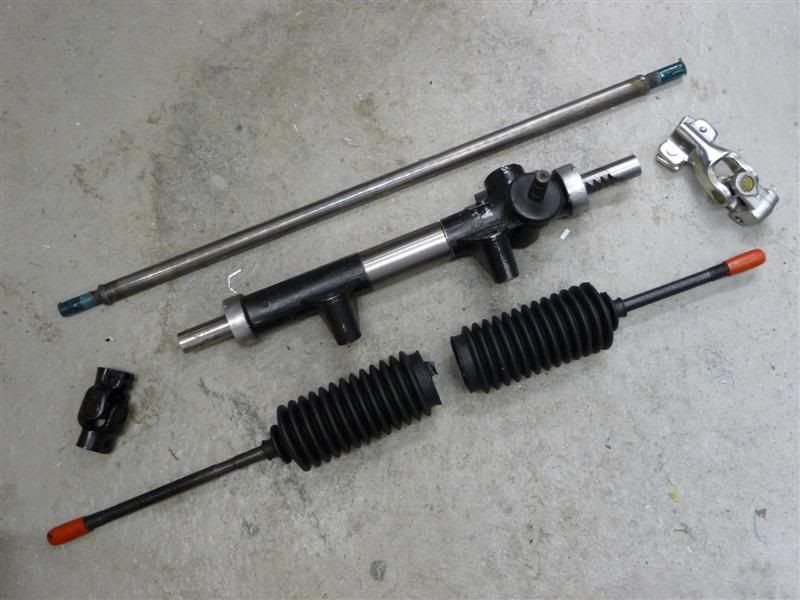
Anyway, I took delivery of a package from Mac#1 this morning
A new steering column and linkages, and a my Sierra rack which has been shortened
Edited by Red16 on Thursday 6th May 16:46
Here's possibly the poorest update ever...
A coat of Hammerite Hammered spray paint and the steering rack and link arm look like this
I might get round to fitting the rack and cutting the holes in the bodywork for the rack arms to come through tomorrow, then if i'm really lucky fix the bodywork to the chassis permanently
A coat of Hammerite Hammered spray paint and the steering rack and link arm look like this
I might get round to fitting the rack and cutting the holes in the bodywork for the rack arms to come through tomorrow, then if i'm really lucky fix the bodywork to the chassis permanently
Not much progress of late due to work, but I've managed to spend a bit of money and get some new parts
A set of Team Dynamics Pro 1.2 wheels with Toyo R888 tyres in 205/60/13 for the rear and 185/60/13 for the front.
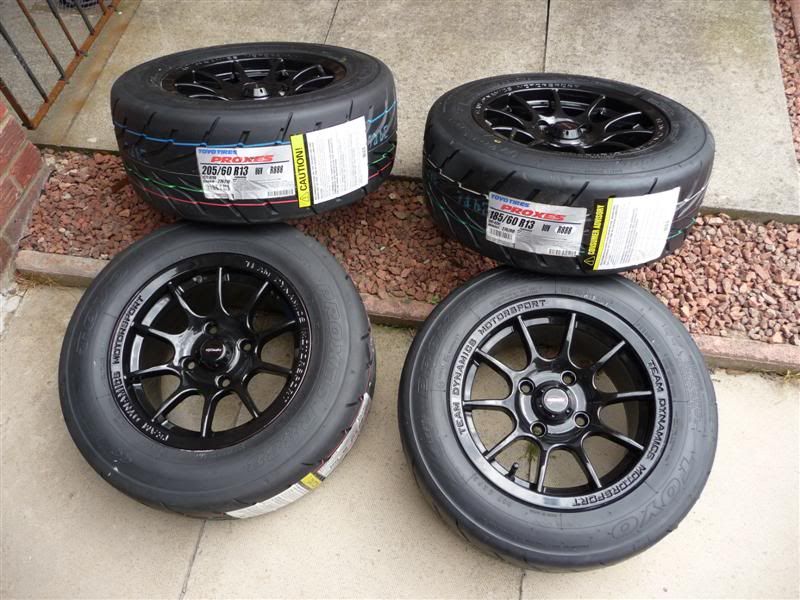
The fronts weigh in at 12.5kg per corner and the rears 13.6kg per corner.
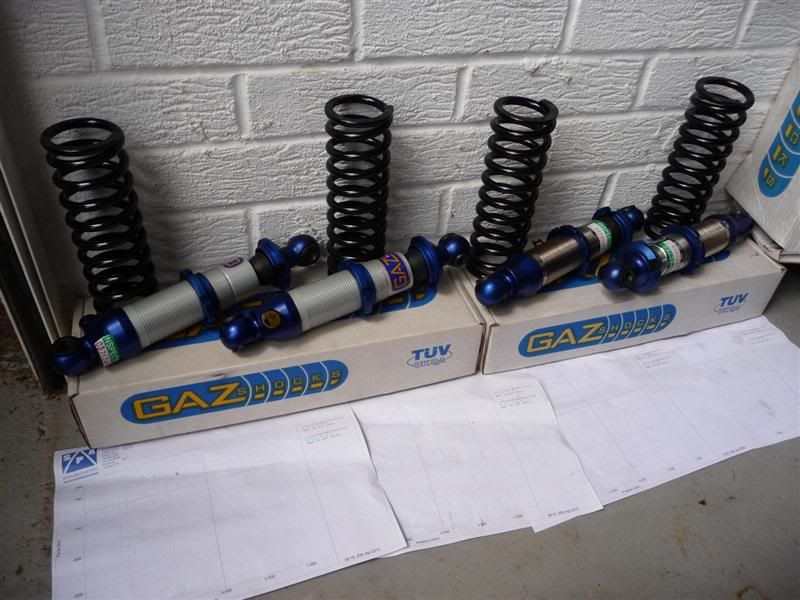
A set of Gaz Gold coilovers, revalved to work upside down.
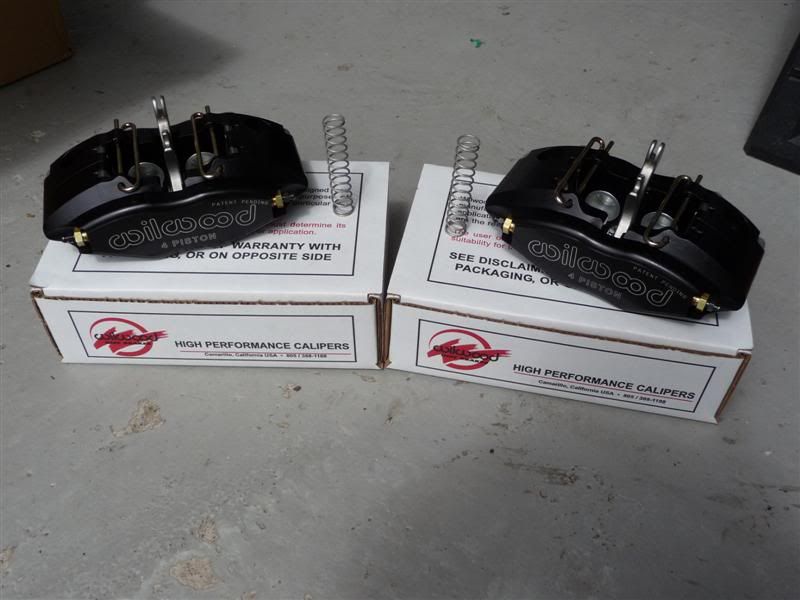
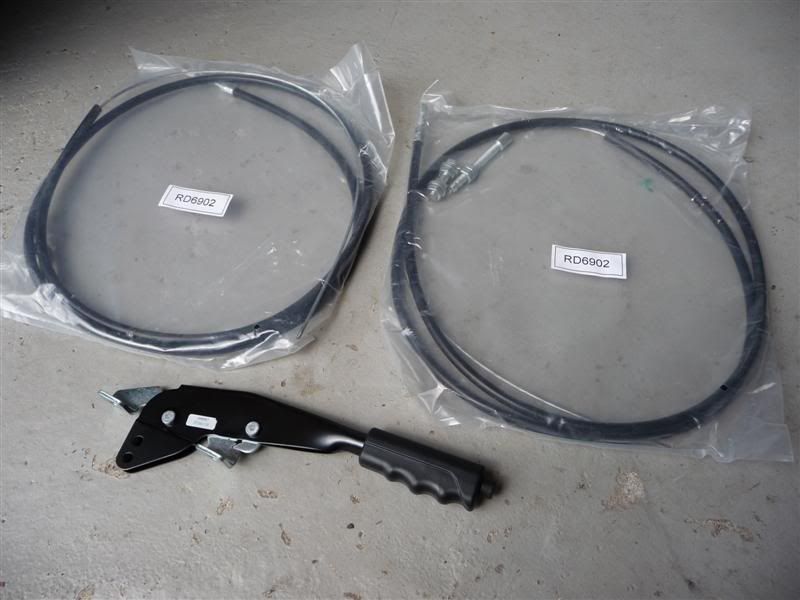
Wilwood 4 pot rear handbrake calipers.
Handbrake lever and cables to suit the above calipers.
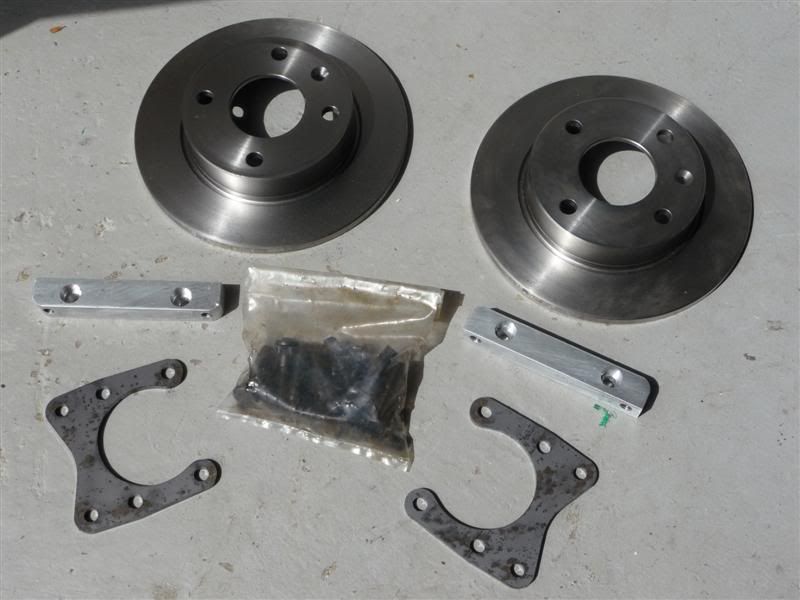
Solid rear discs, rear caliper mounting brackets and a bag of longer wheel studs to suit the Pro 1.2 wheels.
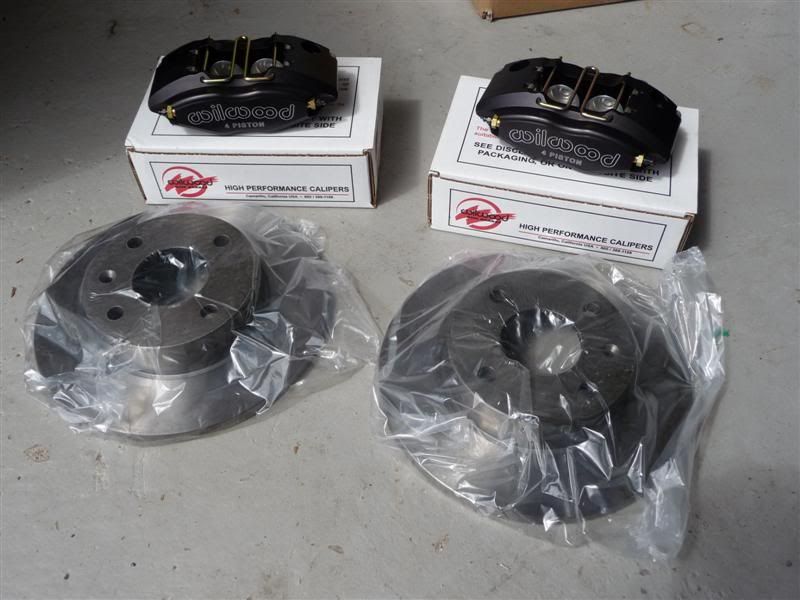
Solid front discs and Wilwood 4 pot calipers.
Front brake caliper mounting brackets, bolts and brake fittings.
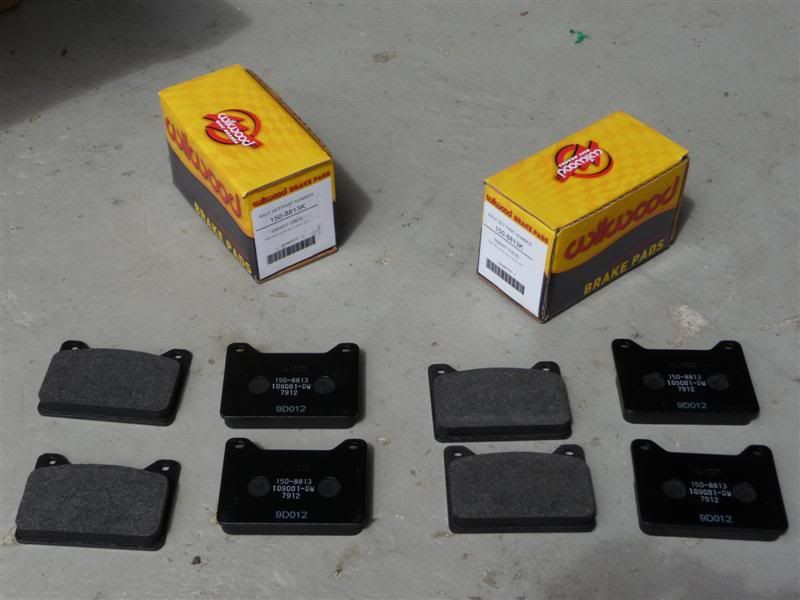
And a set of brake pads,
A set of Team Dynamics Pro 1.2 wheels with Toyo R888 tyres in 205/60/13 for the rear and 185/60/13 for the front.
The fronts weigh in at 12.5kg per corner and the rears 13.6kg per corner.
A set of Gaz Gold coilovers, revalved to work upside down.
Wilwood 4 pot rear handbrake calipers.
Handbrake lever and cables to suit the above calipers.
Solid rear discs, rear caliper mounting brackets and a bag of longer wheel studs to suit the Pro 1.2 wheels.
Solid front discs and Wilwood 4 pot calipers.
Front brake caliper mounting brackets, bolts and brake fittings.
And a set of brake pads,
Some more new parts arrived today
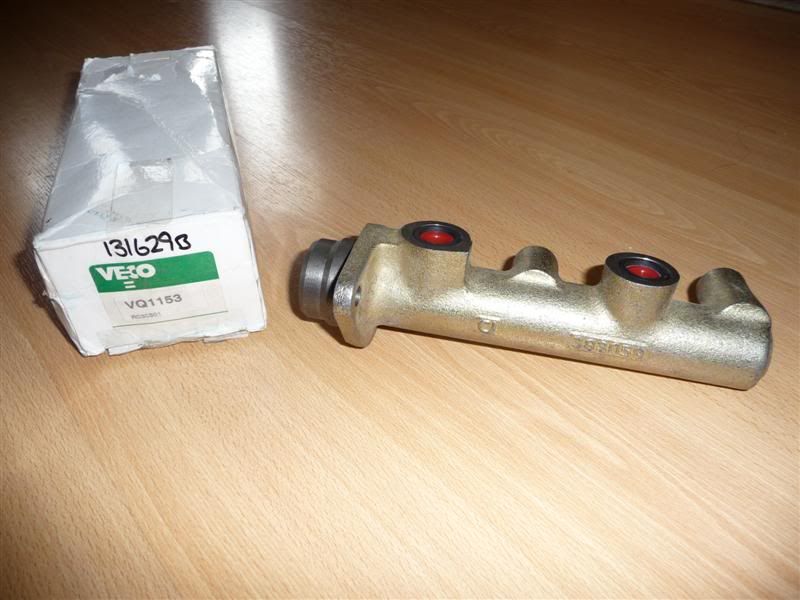
One Sierra master cylinder
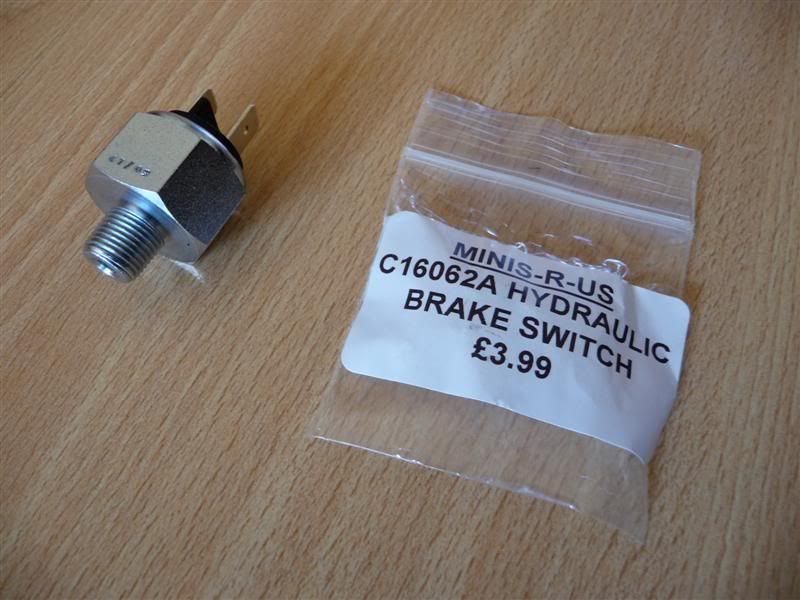
A hydraulic switch for the brake lights
A Freelander rear differential

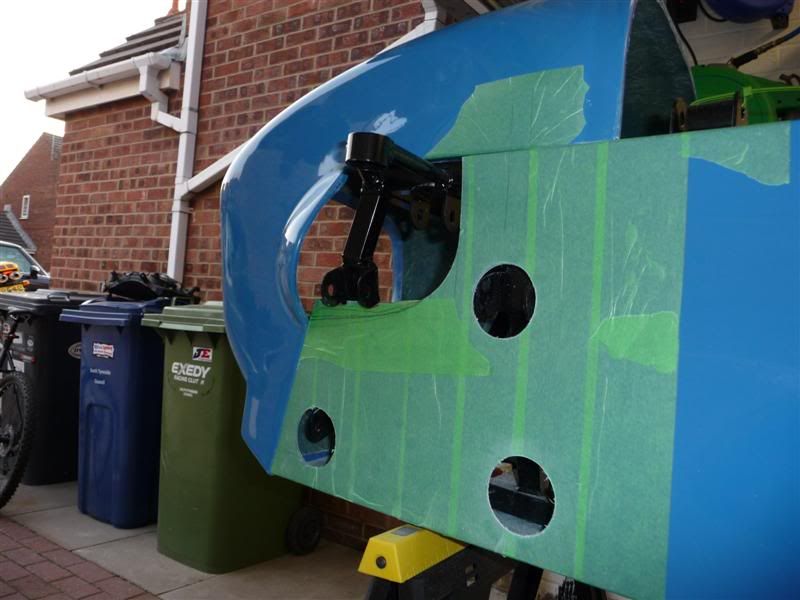
Finally got round to fitting the steering rack and quickly mocked up the suspension to see how it looks
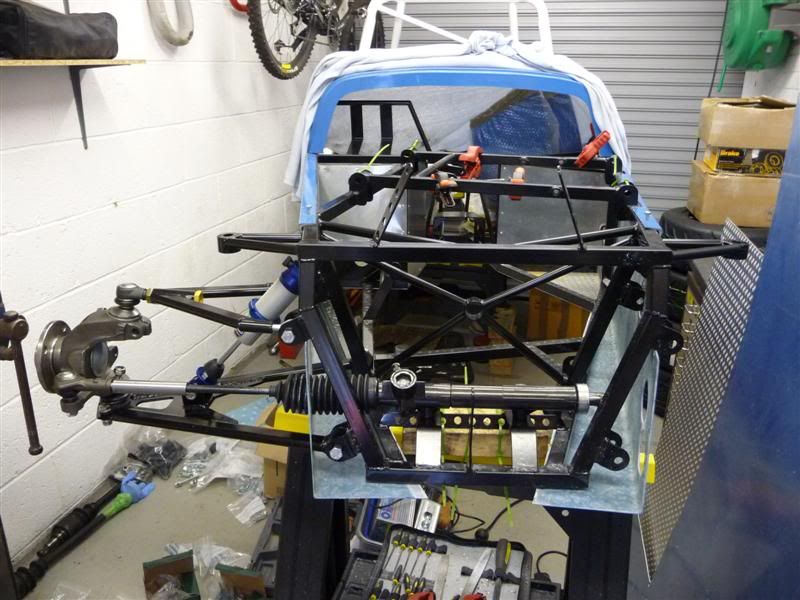

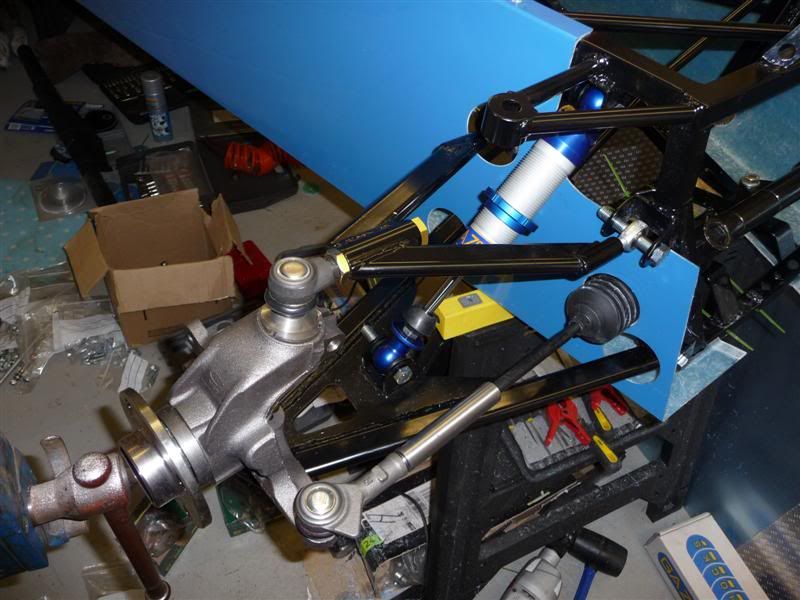
PS Yes I know the track rod end should mount underneath the upright not above like I had it, I only realised after I had taken the photos, doh!
No drama though as nothing is tightened up, and it all needs to come off so I can finish cutting the side panels.
Looking back through those photos really hits home how messy the garage has become, I'll be sorting that out tomorrow too!
One Sierra master cylinder
A hydraulic switch for the brake lights
A Freelander rear differential
Finally got round to fitting the steering rack and quickly mocked up the suspension to see how it looks
PS Yes I know the track rod end should mount underneath the upright not above like I had it, I only realised after I had taken the photos, doh!
No drama though as nothing is tightened up, and it all needs to come off so I can finish cutting the side panels.
Looking back through those photos really hits home how messy the garage has become, I'll be sorting that out tomorrow too!
Gassing Station | Kit Cars | Top of Page | What's New | My Stuff