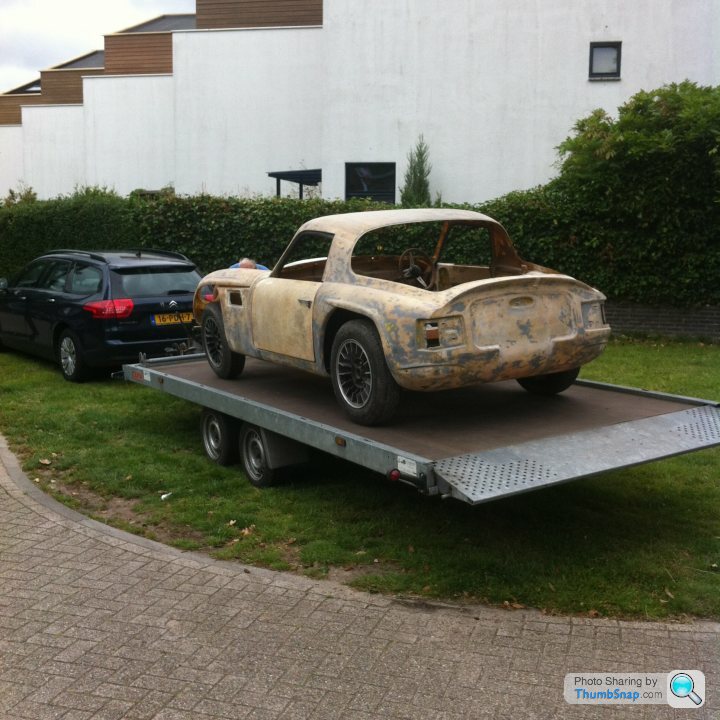
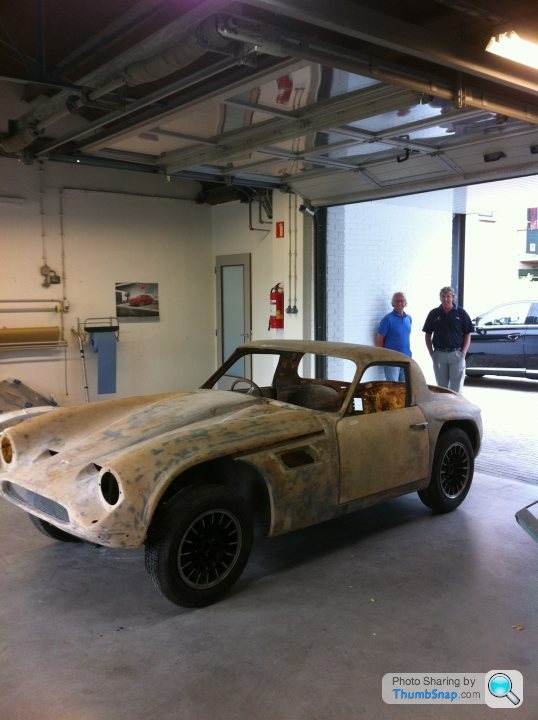
Restoring TVR Vixen S3 RDO I 06J
Discussion


Hello, I need some advise.
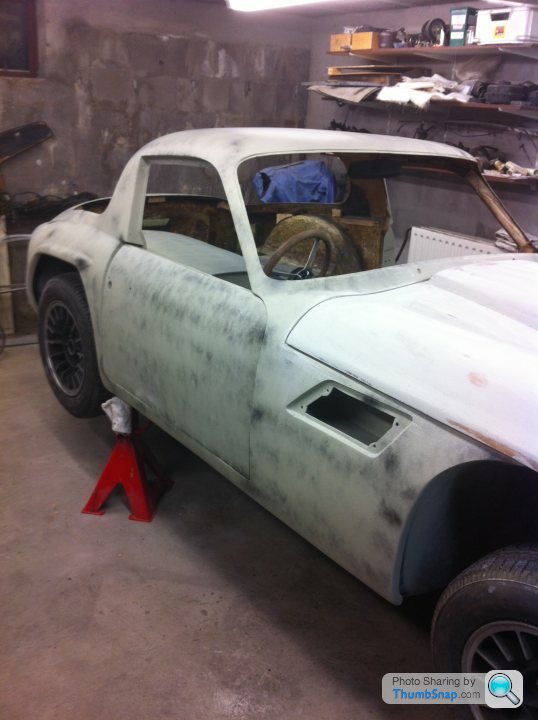
As you can read in other discussions I am preparing the body.
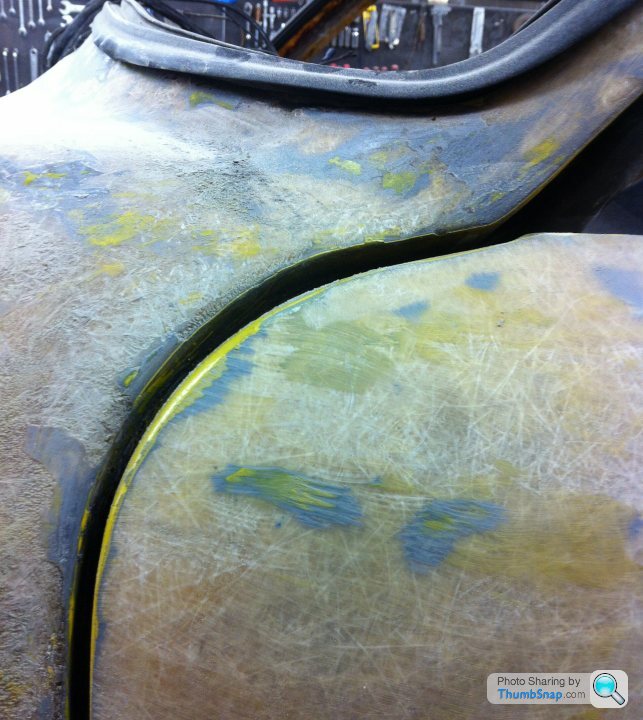
After trial fitting the doors I found the gap on the top front corner to big.
See pic.
What do you think. Can I enlarge the doorskin so become a smaller gap without a problem after painting?
I have already done so on the 2 bottom corners on the lock side and the result was fine (in my opinion).
Also made the holes for the doorhandles smaller because they were too big and water could come in easily. That's why the steel gutters in the doors were rotten away.
Hans
As you can read in other discussions I am preparing the body.
After trial fitting the doors I found the gap on the top front corner to big.
See pic.
What do you think. Can I enlarge the doorskin so become a smaller gap without a problem after painting?
I have already done so on the 2 bottom corners on the lock side and the result was fine (in my opinion).
Also made the holes for the doorhandles smaller because they were too big and water could come in easily. That's why the steel gutters in the doors were rotten away.
Hans
Thanx David for the reaction.
I have made the gutter from alu profiles so no problem with steel/alu windowframe corrosion.
And finding a better water seal between glass and frame is another item to be solved.
My TR 250 had no problem with the rain dripping in the doors so I will look in that direction.
Have any other restorer tackled that detail?
Hans
Good advice Chris,
I fiddled a bid or better a lot and found a better position of the door.
But still the door gaps front and rear are to big so extra work.
Left door fits worse than the right one, however doorcorner R-side hits underside A-pillar.
Another strange thing is the top hinges, they are bolted to the car with 1 bolt (also 1 hole in body), but there are 2 holes in the hinge?
Is this weight saving?
Keeps me from the street.
Hans
Hi there,
Preping the body I find some original holes of which I have some queries
At the back I have pinholes for badges, but it is not clear for what. I have put a nail in them for indication see pic.
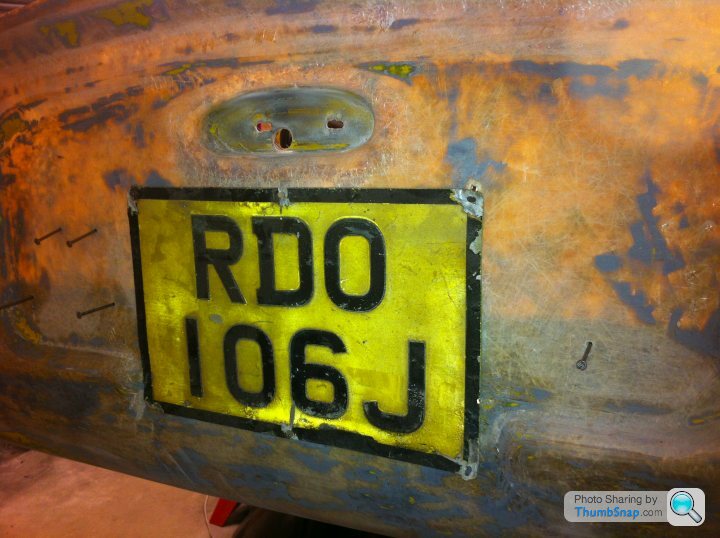
I found 1 hole on the right site. For what badge?
I found 2 times 2 paired holes at the left. For what?
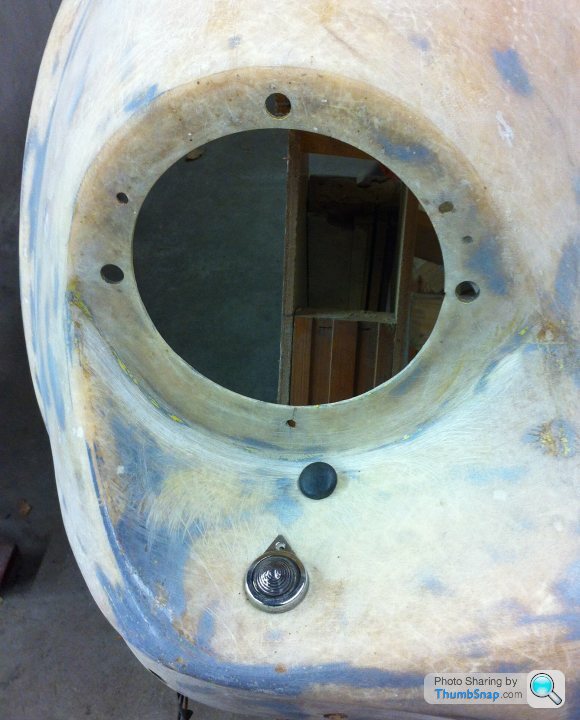
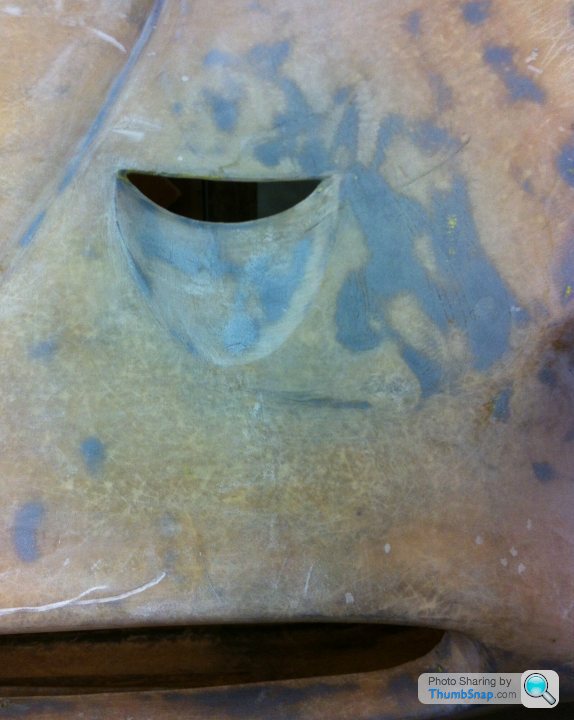
In the nose cone I see to small holes in front of main lights. One for (small) light and the other for ?????. I have a rubber stop to close it but as it not of any use I want to fill it.
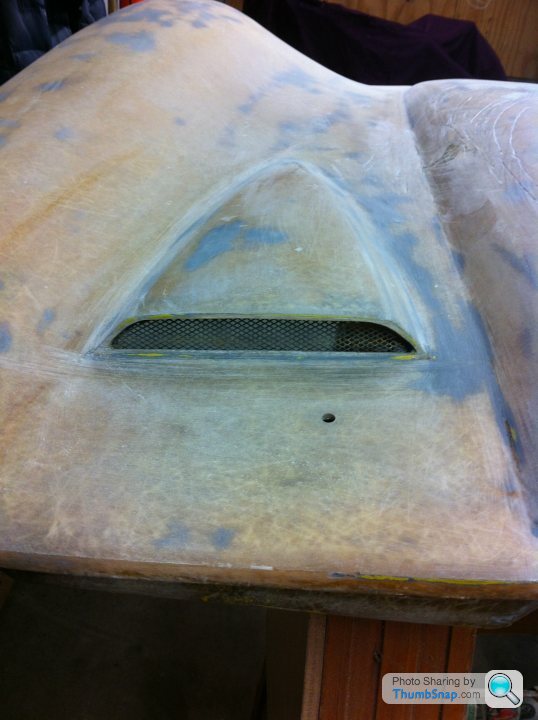
Then the ventilation openings.
Which one is original covered with mesh? I do see different options.
Realistic the smaller openings do not need any mesh, but on mine the ones facing backwards have mesh and the forwarding ones nut???
Curious what your reactions will be.
Hans
Preping the body I find some original holes of which I have some queries
At the back I have pinholes for badges, but it is not clear for what. I have put a nail in them for indication see pic.
I found 1 hole on the right site. For what badge?
I found 2 times 2 paired holes at the left. For what?
In the nose cone I see to small holes in front of main lights. One for (small) light and the other for ?????. I have a rubber stop to close it but as it not of any use I want to fill it.
Then the ventilation openings.
Which one is original covered with mesh? I do see different options.
Realistic the smaller openings do not need any mesh, but on mine the ones facing backwards have mesh and the forwarding ones nut???
Curious what your reactions will be.
Hans
Oke Fellows,
Lots of info.
I subtracted the following;
engine cover; no mesh but for the radiator, fill the hole near headlamp. And yes leaf the holes for the window washer.
at the back; I do not see the light. And yes the shell has been (mis)used by others.
but the holes are not for the reverse light because than you need 3 holes (extra for cable which is not inside the car). I also have a license plate light with revers light.
so filling all the small holes and stick on the badges. (shame for such a cheap badging. I am used to Triumph bling bling)
So back to the garage, some holes to fill this weekend.


Hans
Lots of info.
I subtracted the following;
engine cover; no mesh but for the radiator, fill the hole near headlamp. And yes leaf the holes for the window washer.
at the back; I do not see the light. And yes the shell has been (mis)used by others.
but the holes are not for the reverse light because than you need 3 holes (extra for cable which is not inside the car). I also have a license plate light with revers light.
so filling all the small holes and stick on the badges. (shame for such a cheap badging. I am used to Triumph bling bling)
So back to the garage, some holes to fill this weekend.
Hans
Cerberus90 said:
I believe the hole on the bonnet near the lights, which you've got the rubber bung in, is there to allow you to put a screwdriver through from the other side to screw on the headlamp rim.
Hi Thomas,I checked your remark with the original headlamp and you are right.
See pic.
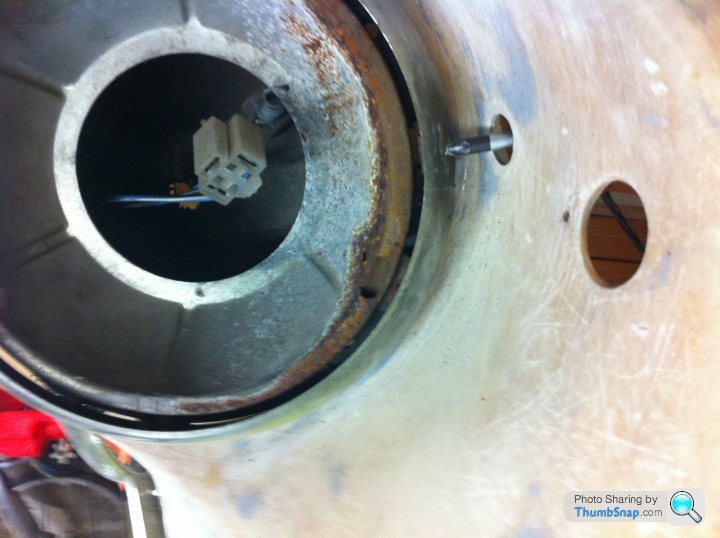
The later headlamp rim models do not have the extra fixing, they are just clamped.
Learned another thing.
Hans
I have a (non original) good running engine in the Vixen.
But I am curious to my original 711 engine.
Head and valves look good but lot of carbonate.
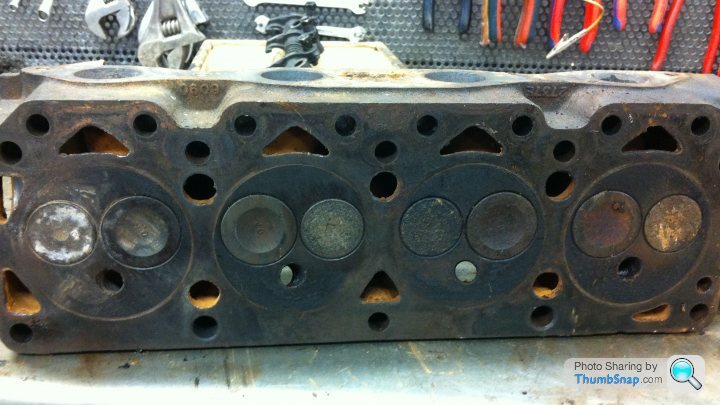
But one piston marked badly. However nothing seen on the valves/head. Does anybody know what happened?
All bores nice without marks.
Crank turns (too???) easy by hand.
Will dismantle further to check the straightness of the rod under the damaged piston.
Hans
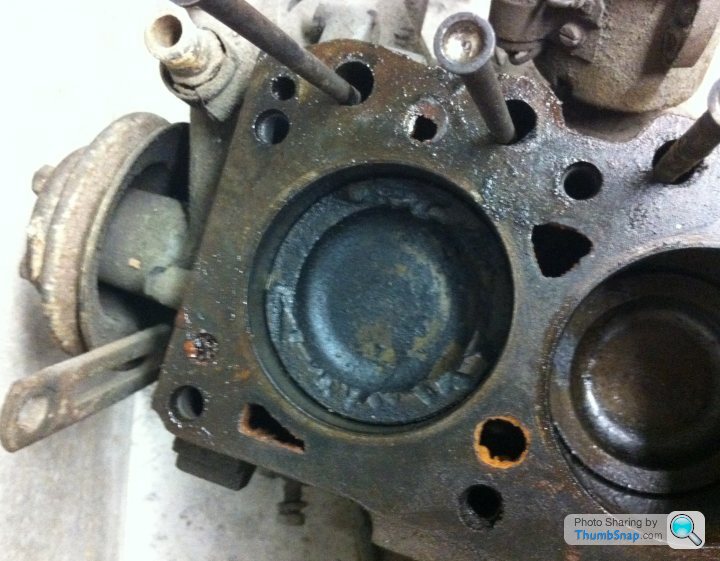
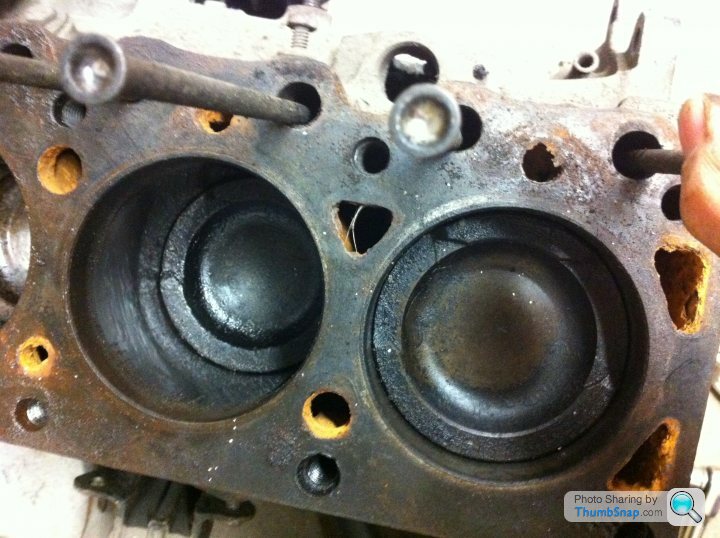
Taken out all the pistons and found no further damage or excessive wear.
The pistons have blank sites and darker sides so were .... Have the bores checked for roundness.
Can anybody tell me by the picture what they think of it?
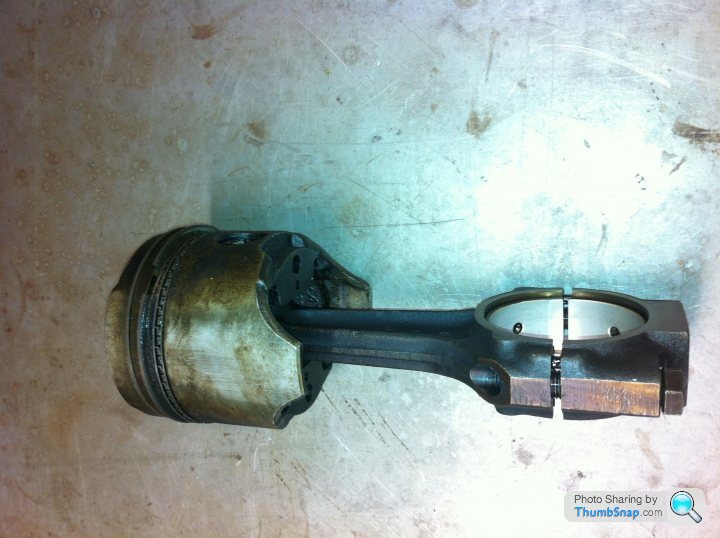
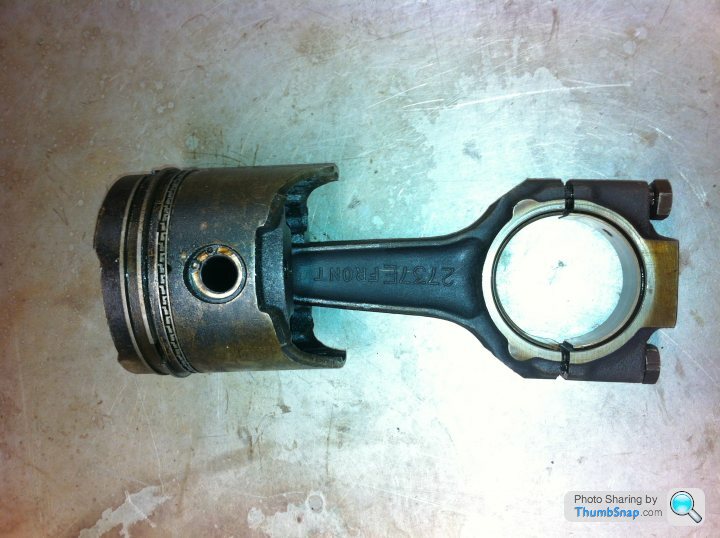
Damaged piston number 1 has no other bad points on rod, crank, bearings or cilinder.
Another question is what is the meaning of the numbers on the left hand front site of the block see pic. It says " 0F 19 ".
It looks as if it is a small plate with screws, but totally corroded.
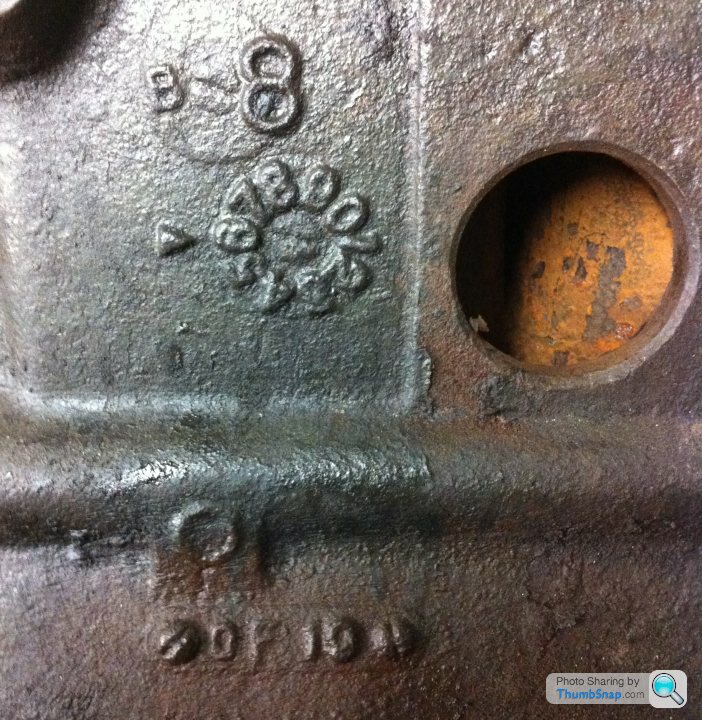
Thanx for anybody's help.
Hans
I was.looking for prices of the parts needed.
Piston prices varies the most without indication for what reason. From 60 to 180 for 4 pistons.
Anybody a good advice. I do not need the most expensive ones.
I know the piston rings and oil scrapper must be right, but what is good?
Than cam followers are sometimes overlooked regarding quality.
Any suggestions on these?
With this info I will have a word with some engine firms about costs and material.
Hans
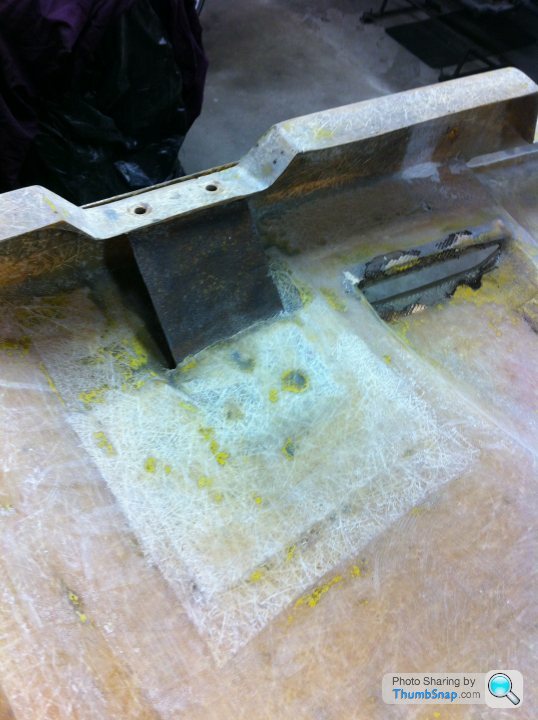
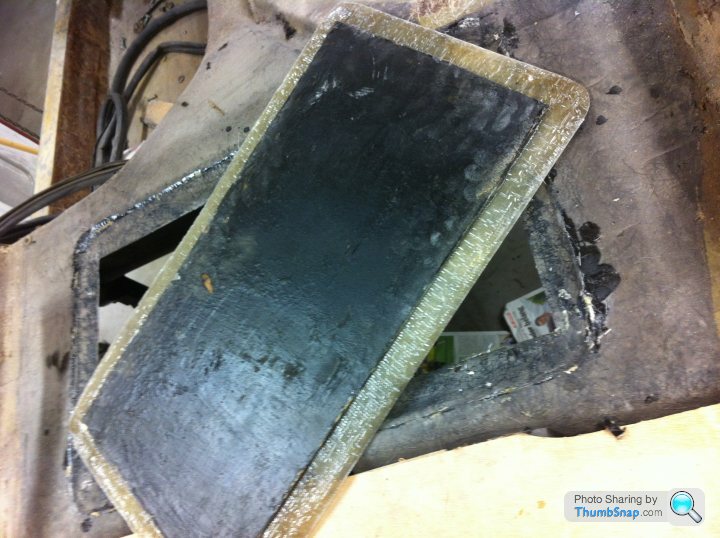
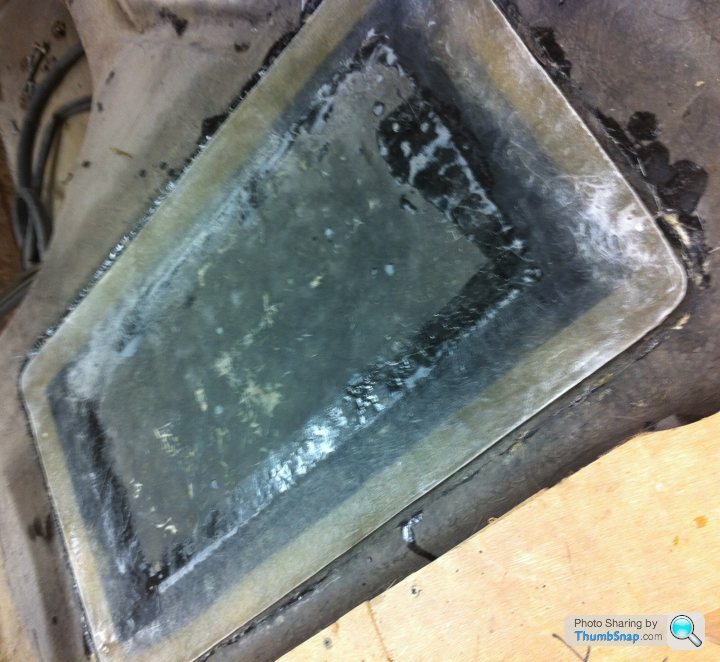
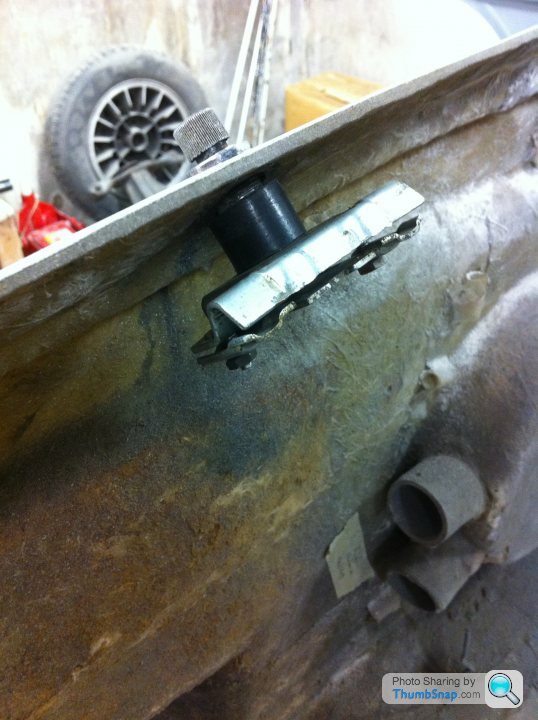
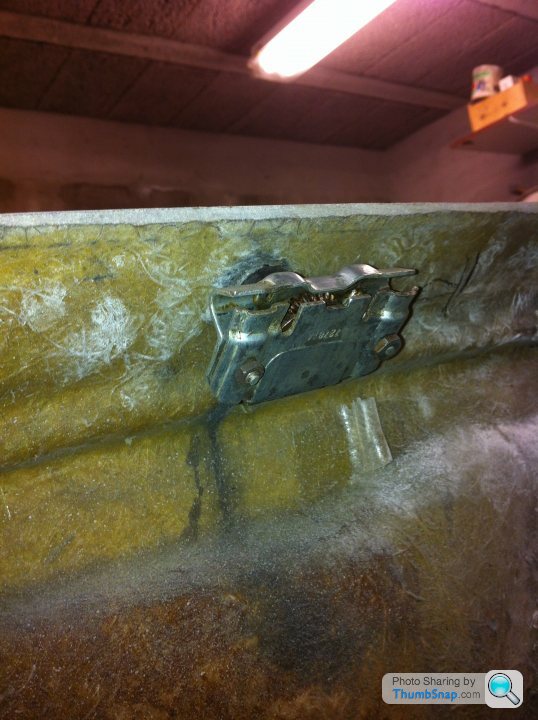
Still busy with the nose.
Strenghtening plate for the ... looked rusted also under the glasfiber so cutting them out, painting and reinstalling.
Another 6 hours gone.
Before

After

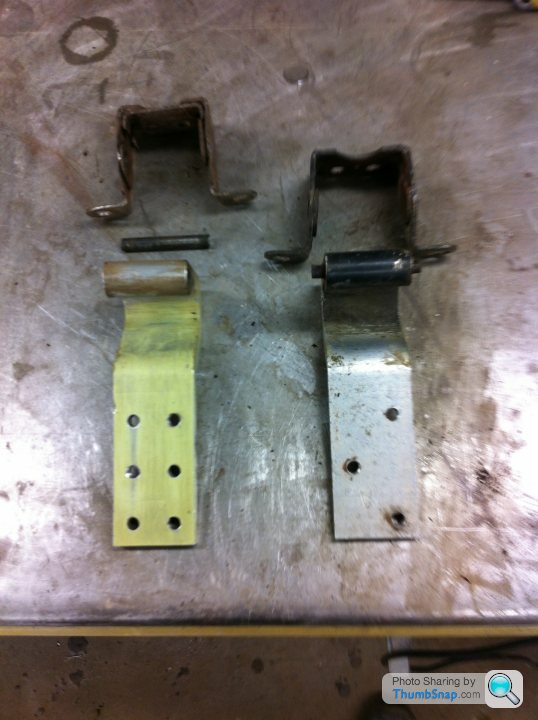
Also reaping the hinges because of too many play. See elsewhere on the forum for info.
My Vixen with better and nicer detailing won't drive any faster.
Hans


After a lot of preparation work to the body, it went to to paintshop.
He did some remedial works and applied a new polyester base coat ( do no know the english word for it) .
Now the car is back in the garage for me for sanding with 180 and filling small holes, dents (???), blisters, edges aso.
Did it for the first time so asked for info as much as possible.
Cost me a lot of time learning to work with steel filler. The rubbing was just a matter of taking enough time, long strokes, circling and a lot of patience.
Brought the engine cover back to the painter for check whether I did the right thing.
I passed my exam so now stat with the body.
After this they will apply an extra polyester coating which is thinner and then I start all over again with 280 sanding paper.
I am thinking and dreaming of Vixen only.
Hans
Hello,
I was checking the fitting of the wiper boxes, wiring and wiper motor.
Was surprised by the lousy solution, long spacer and box hanging in the air.
Has anybody an better solution for it?
Wheel box with shorter rotorarm?
But with the correct wiper movement on the frontscreen.
It also rains in Holland so an good working system is what I need.
Hans
Gassing Station | TVR Classics | Top of Page | What's New | My Stuff