Defender 110 Restoration
Discussion


Hello Everyone...
I have been keeping my eyes on a few build threads here and thought I might share my latest project!... Perhaps not going to get the pulses racing but we'll see!
Firstly abit of previous on me..
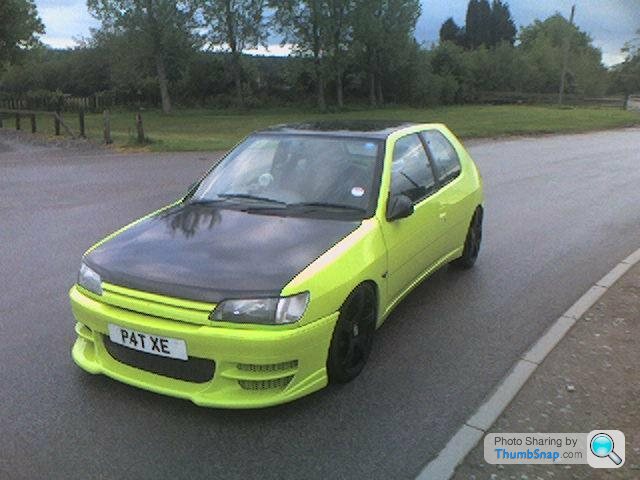
First car... Spent lots of effort making my Peugeot 306 look like this.. Wasted lots of time and money in the process but it made me feel good about myself at the time
After the Peugeot I had a company car for a while then I bought a S2 Lotus Exige..
After the lotus which I didnt keep nearly long enough I opted into the bangernomics car scheme and have run bangers for the last few years up until recently spending slightly more than banger money to own a Saab 93 Aero.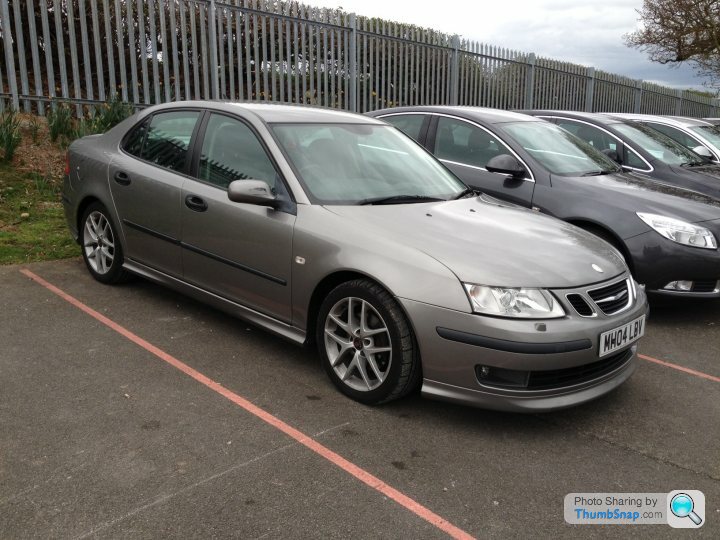
Last year I restored a Defender 90....
The defender kept me busy for most of the year then when I sold that I hankered for another project so that leads me onto the subject of this thread...
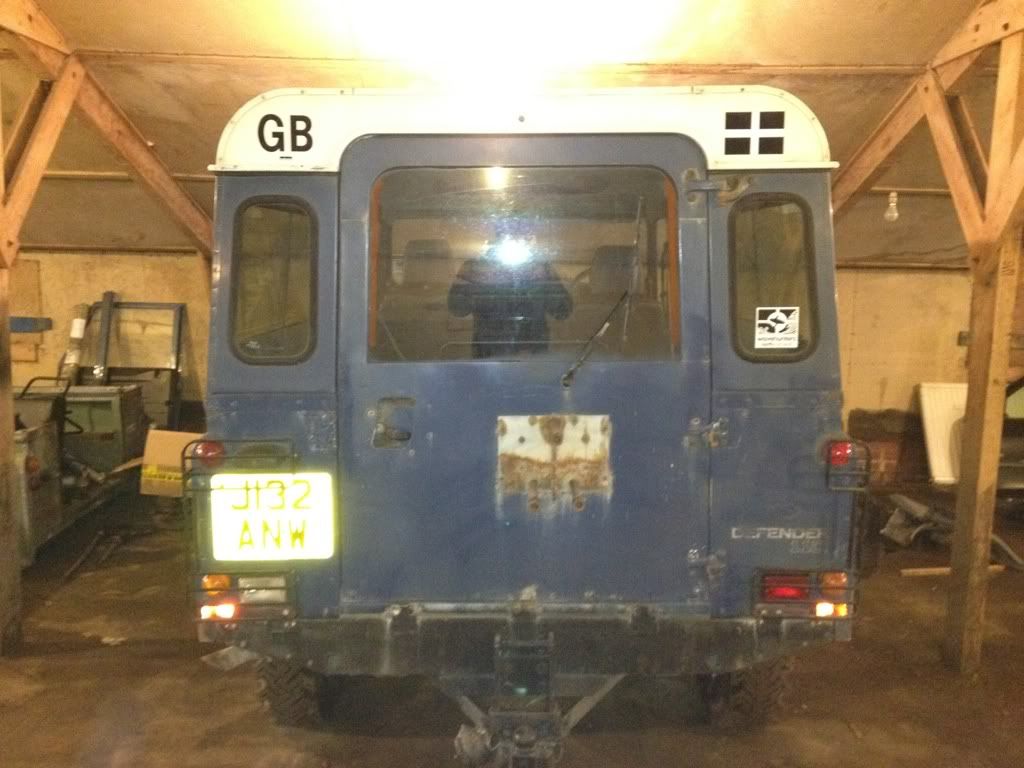
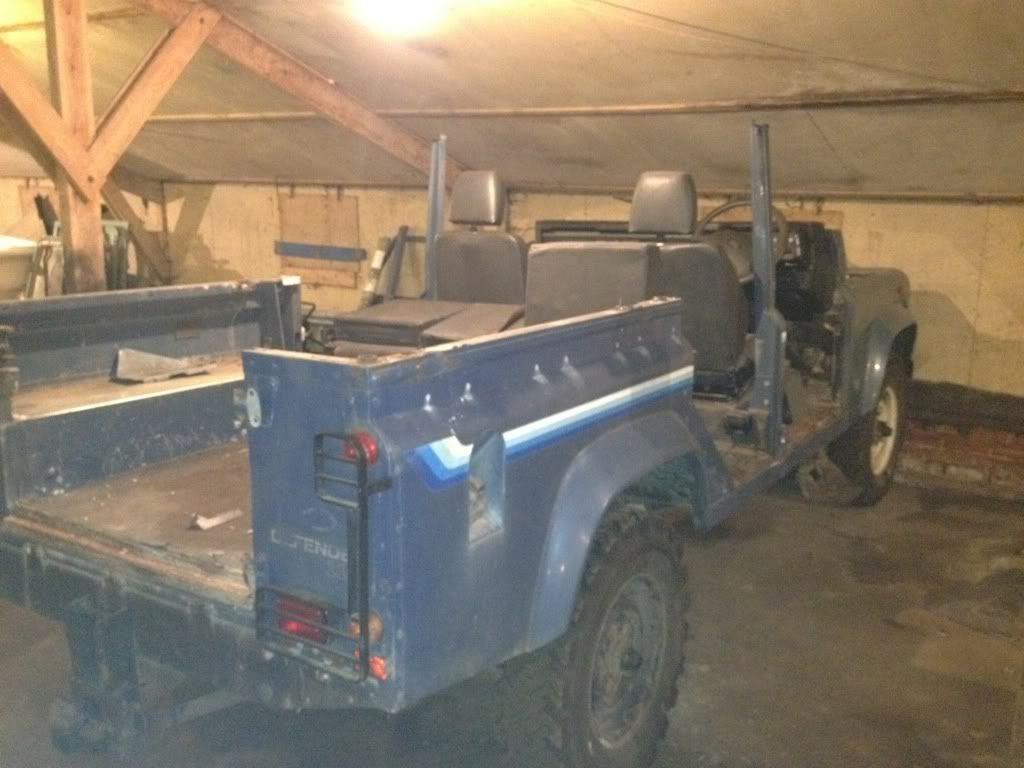
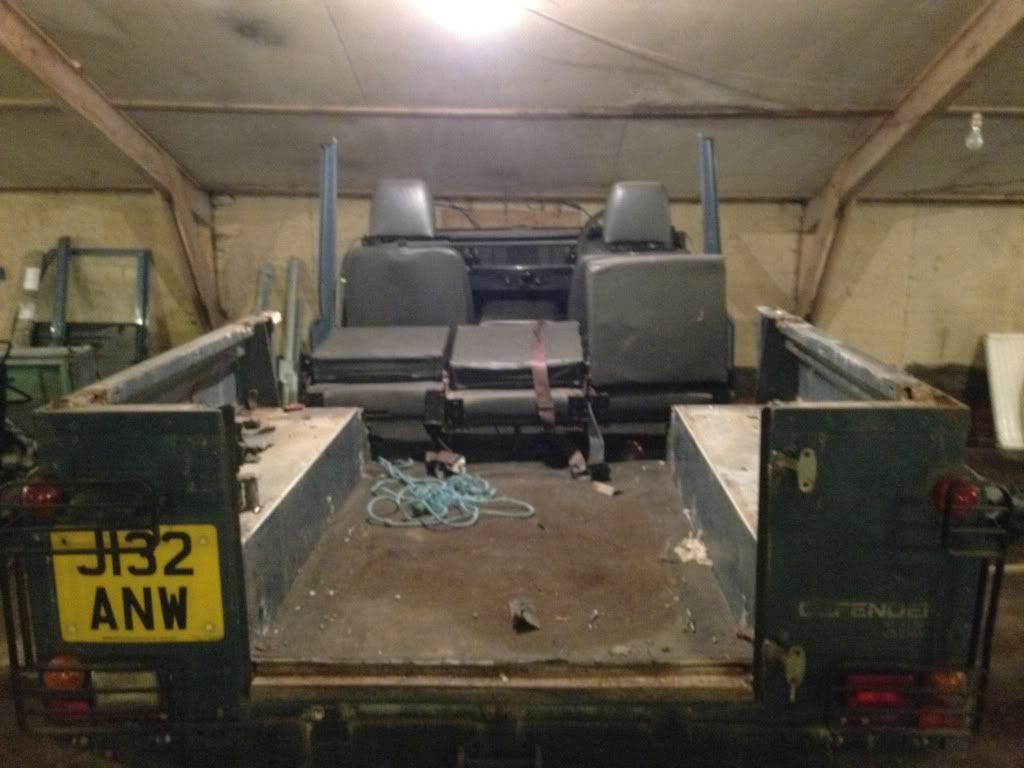
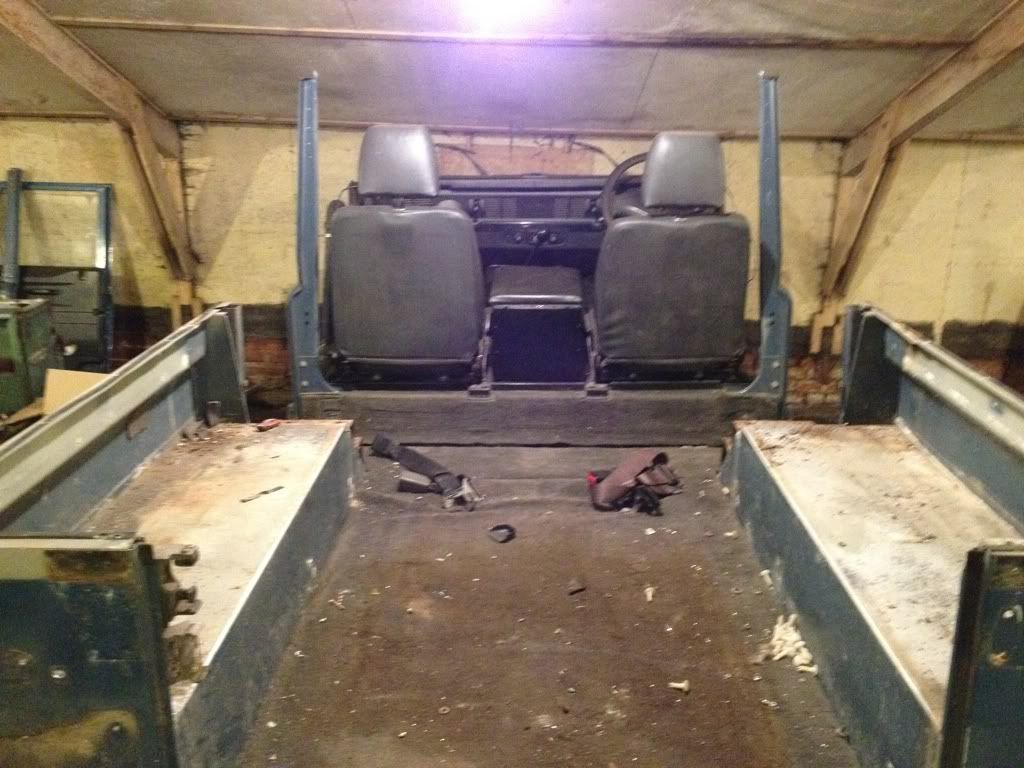
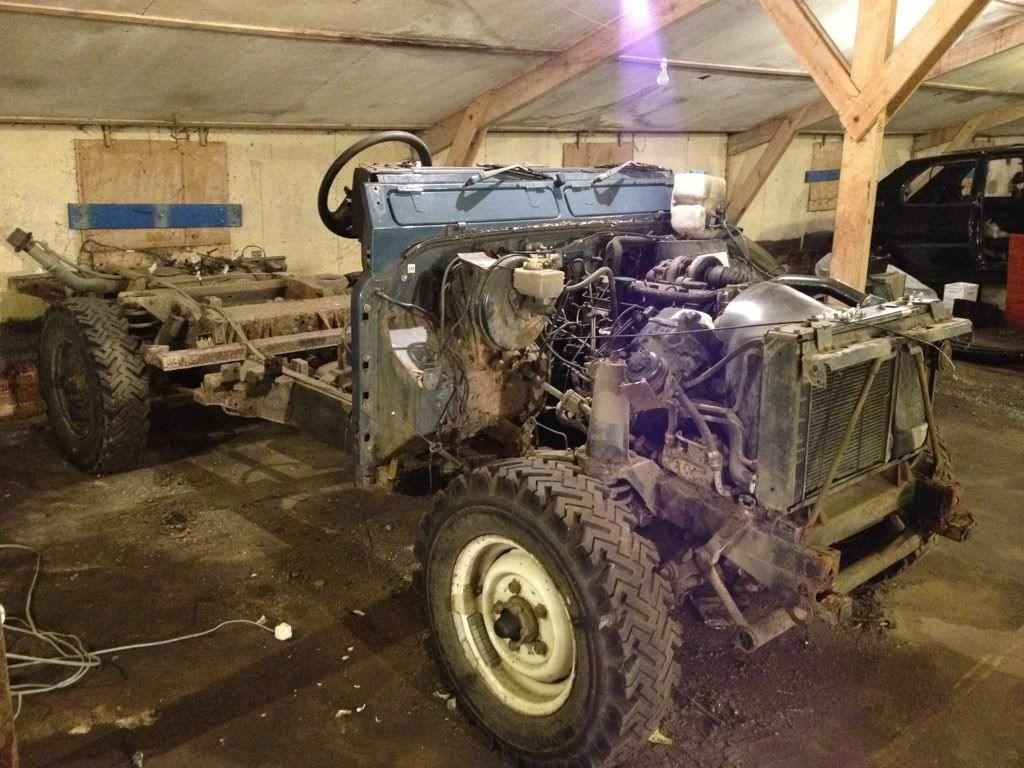
1991 Land Rover Defender 110 200tdi... The plan with this defender was to do a similar refurbishment to the last defender however as work has progressed it has turned into more of a nut and bolt restoration. I would say Im on the home straight on the 110 and have already got 230 photos but I think I will need to be selective with what I do and dont post otherwise it will be very photo heavy!.. Anyway this is how it did look.. You'll have to excuse the crap photos as I didnt think to take any before I parked her in the shed!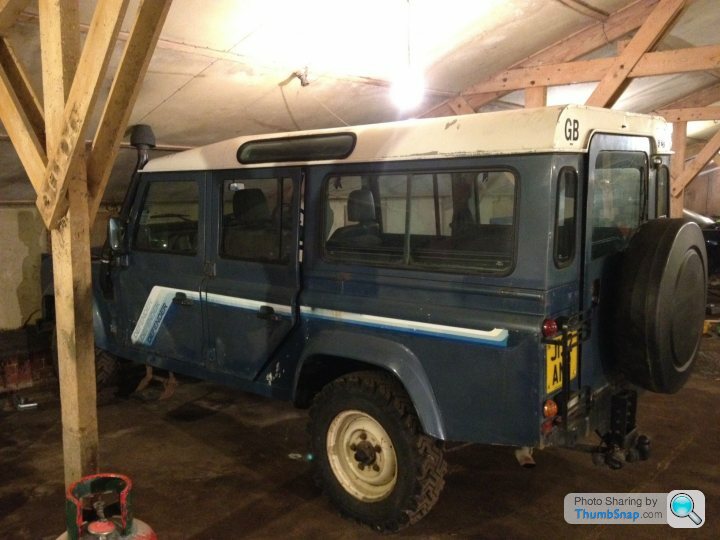 [url]
[url]
 |http://thumbsnap.com/ZZcBQfB5[/url]
Ok Im trying to get the hang of the photo uploading aspect on here... Can anyone help with transferring a photo straight from photobucket.. (Im abit of a thicko when it comes to technology Im afraid!)..
More photos and info to follow........
I have been keeping my eyes on a few build threads here and thought I might share my latest project!... Perhaps not going to get the pulses racing but we'll see!
Firstly abit of previous on me..
First car... Spent lots of effort making my Peugeot 306 look like this.. Wasted lots of time and money in the process but it made me feel good about myself at the time
After the Peugeot I had a company car for a while then I bought a S2 Lotus Exige..
After the lotus which I didnt keep nearly long enough I opted into the bangernomics car scheme and have run bangers for the last few years up until recently spending slightly more than banger money to own a Saab 93 Aero.
Last year I restored a Defender 90....
The defender kept me busy for most of the year then when I sold that I hankered for another project so that leads me onto the subject of this thread...
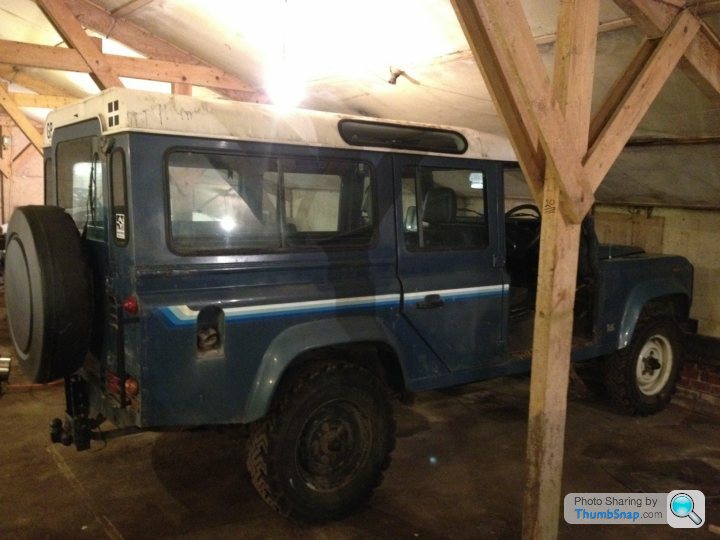
1991 Land Rover Defender 110 200tdi... The plan with this defender was to do a similar refurbishment to the last defender however as work has progressed it has turned into more of a nut and bolt restoration. I would say Im on the home straight on the 110 and have already got 230 photos but I think I will need to be selective with what I do and dont post otherwise it will be very photo heavy!.. Anyway this is how it did look.. You'll have to excuse the crap photos as I didnt think to take any before I parked her in the shed!
[url]|http://thumbsnap.com/ZZcBQfB5[/url]Ok Im trying to get the hang of the photo uploading aspect on here... Can anyone help with transferring a photo straight from photobucket.. (Im abit of a thicko when it comes to technology Im afraid!)..
More photos and info to follow........


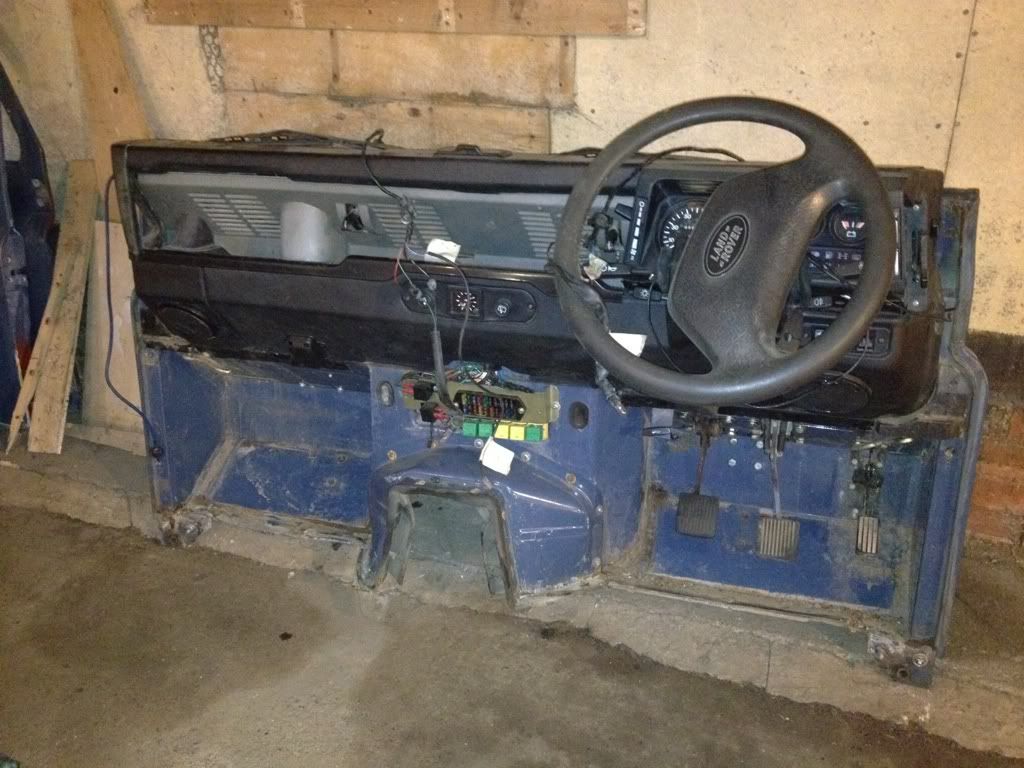
As i was stripping down I decided to do all the necessary repair work to the doors which were very rusty. One of those jobs that with the benefit of hindsight I would probably not have bothered with and just bought 4 new doors instead.. Still worried that when everything is painted up and I go to shut the doors for the first time everything will come apart!..
Anyway below are some photos of the repair process for one of the doors.
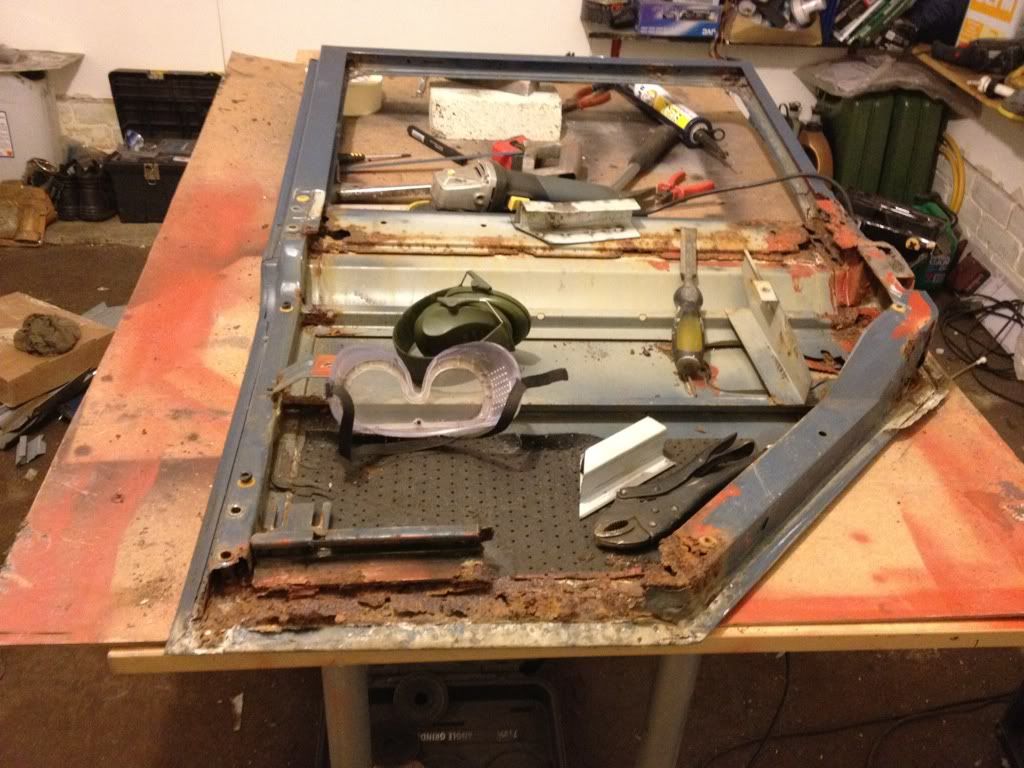
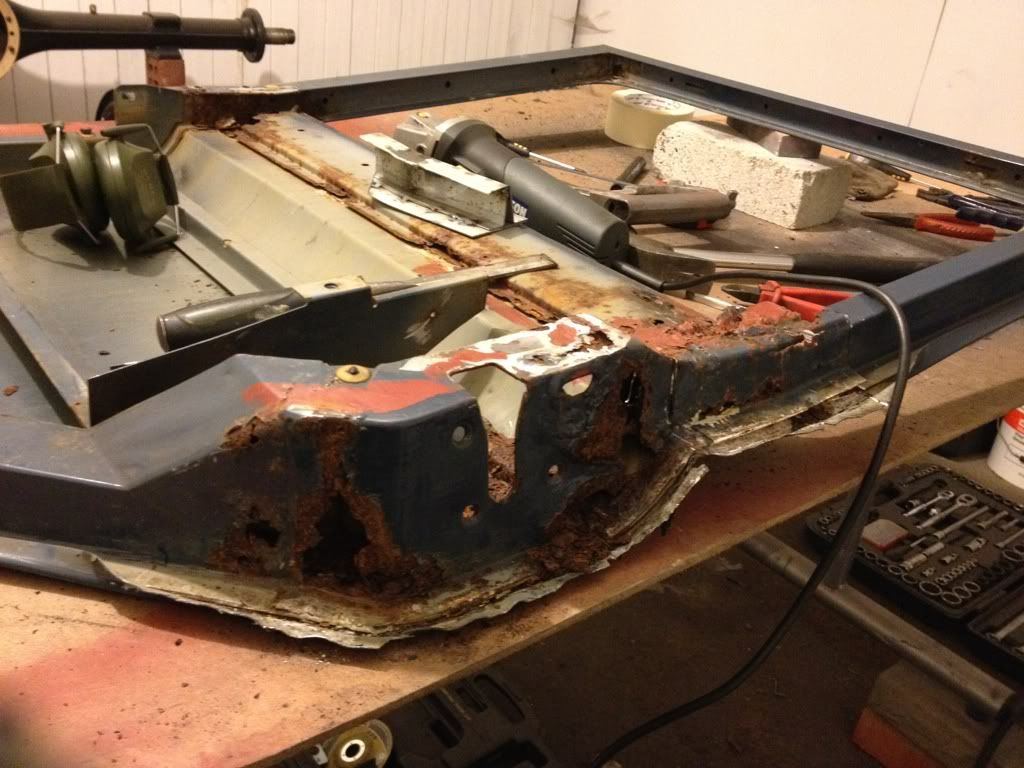
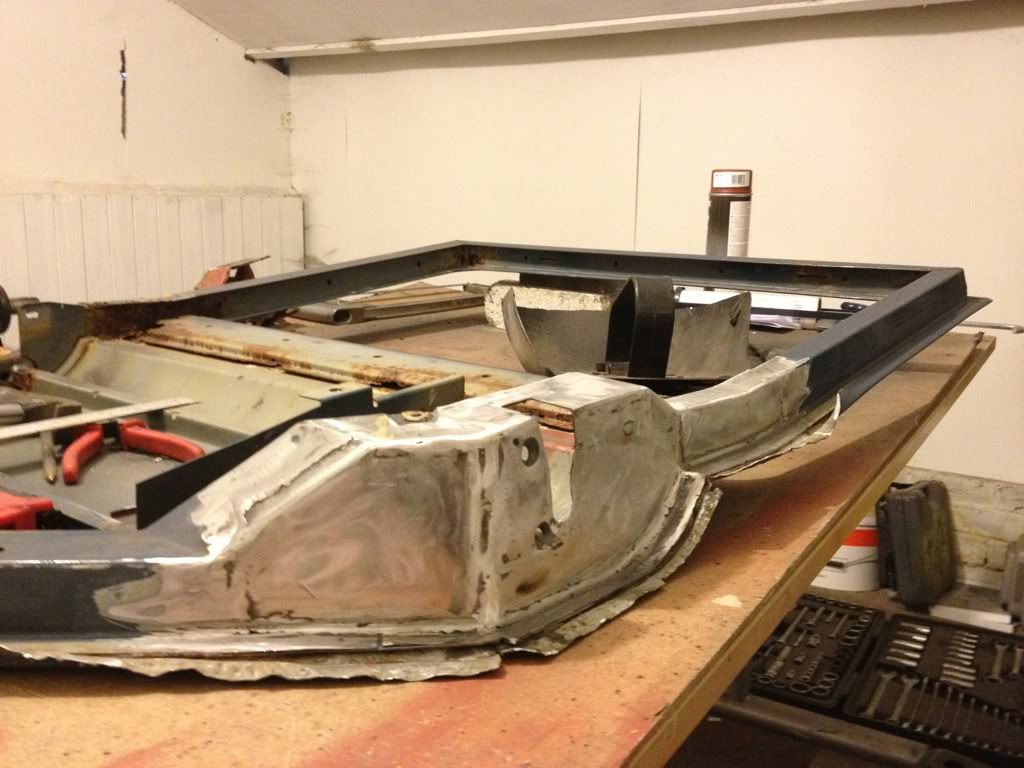
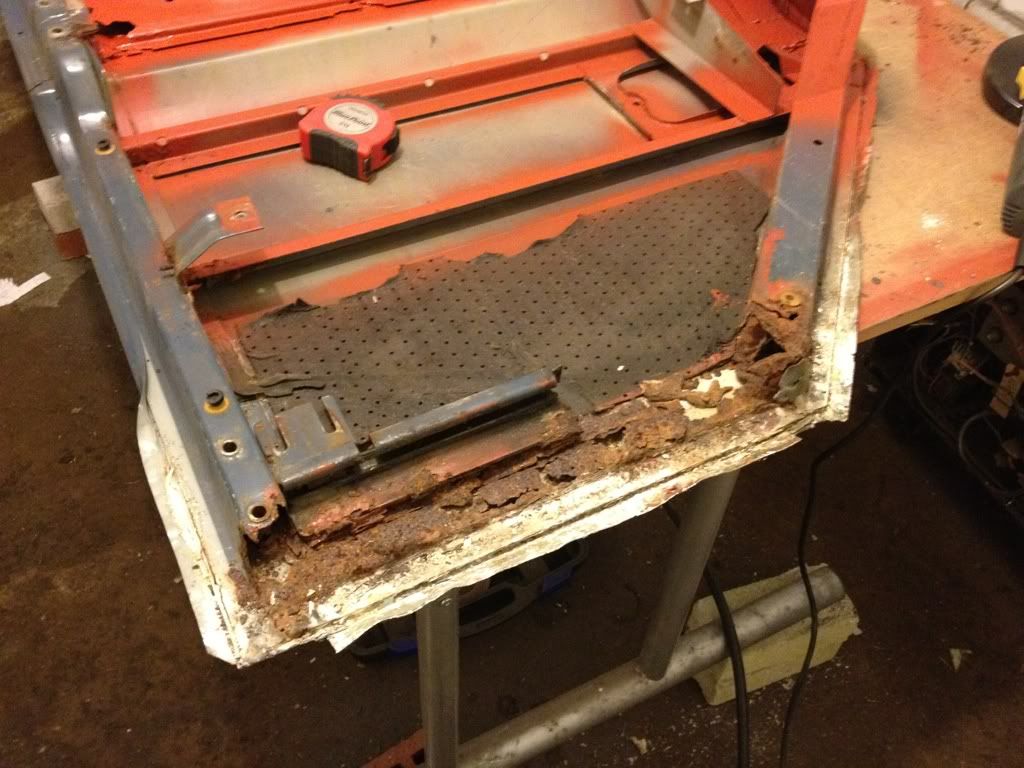
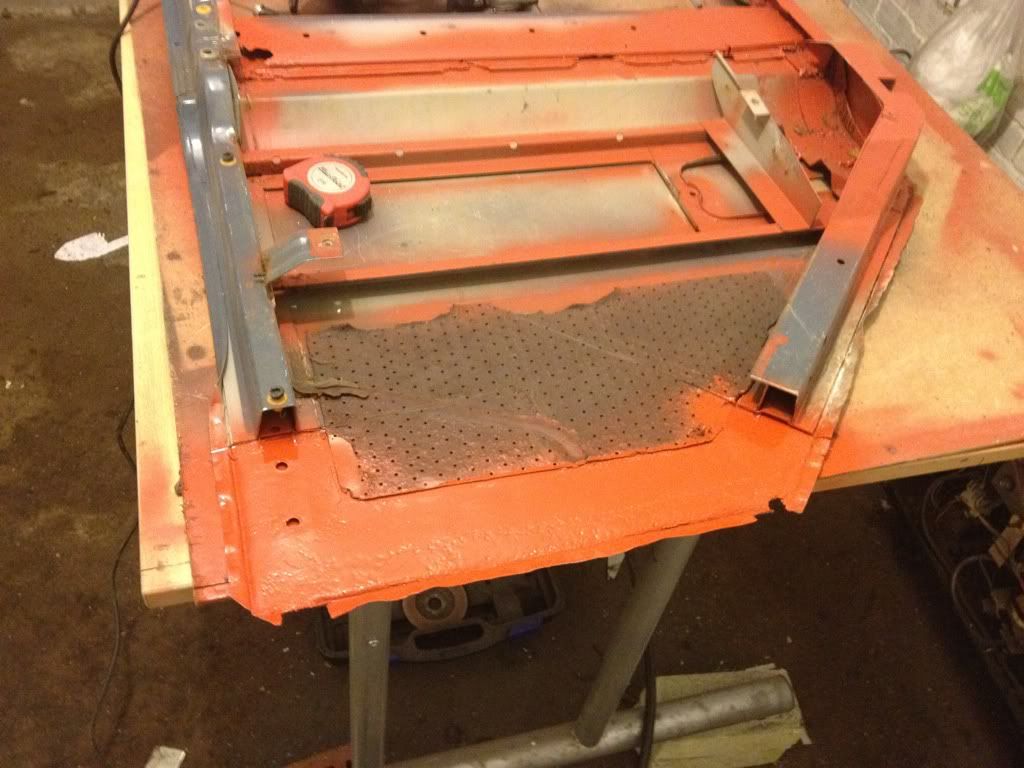
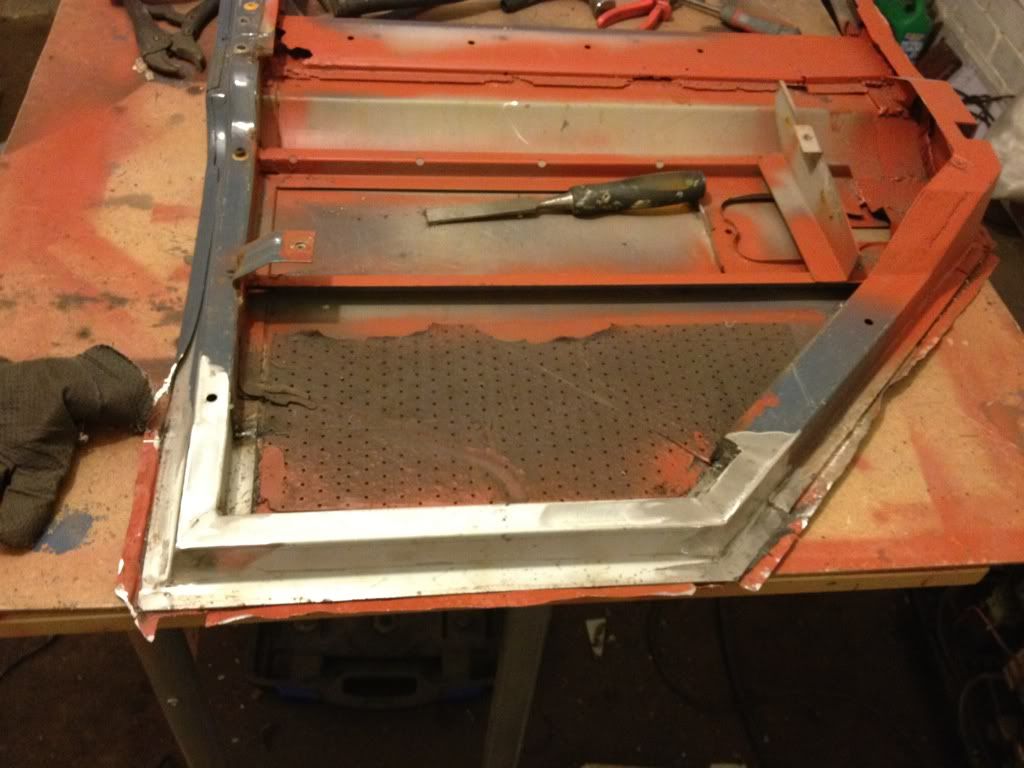
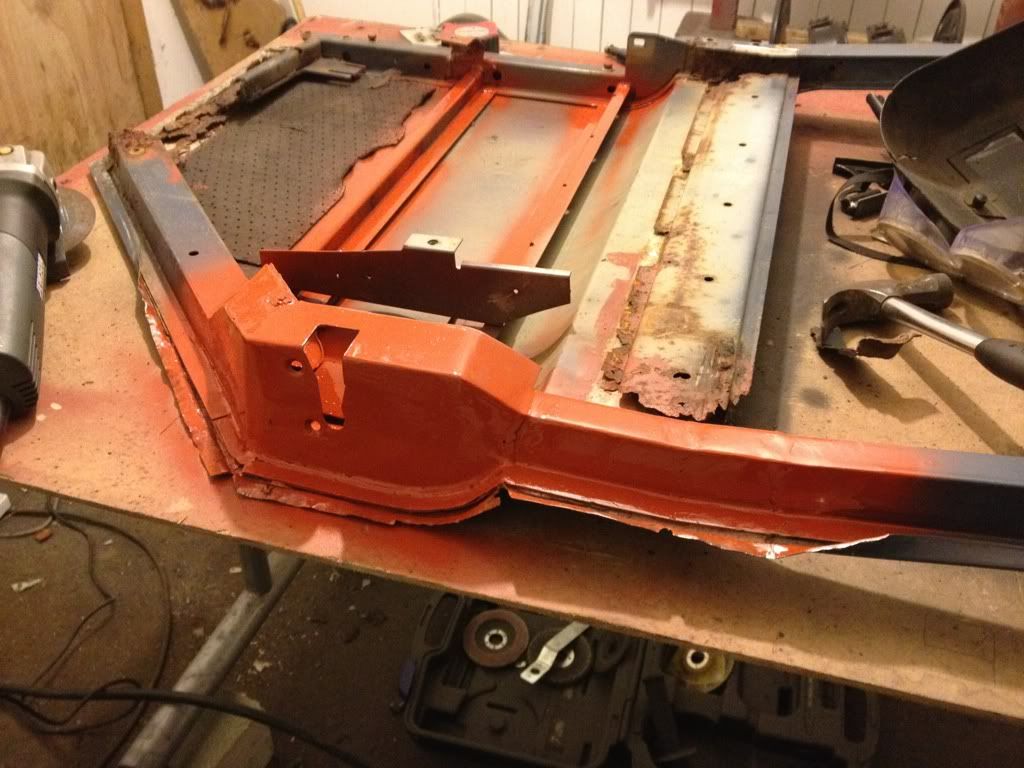
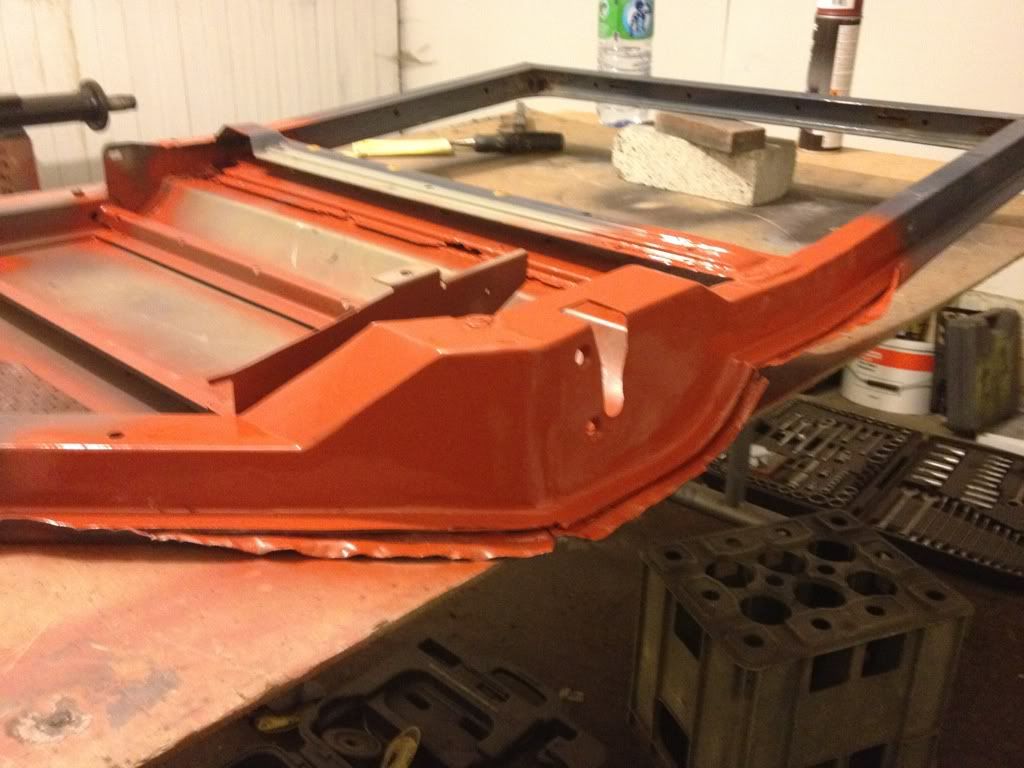
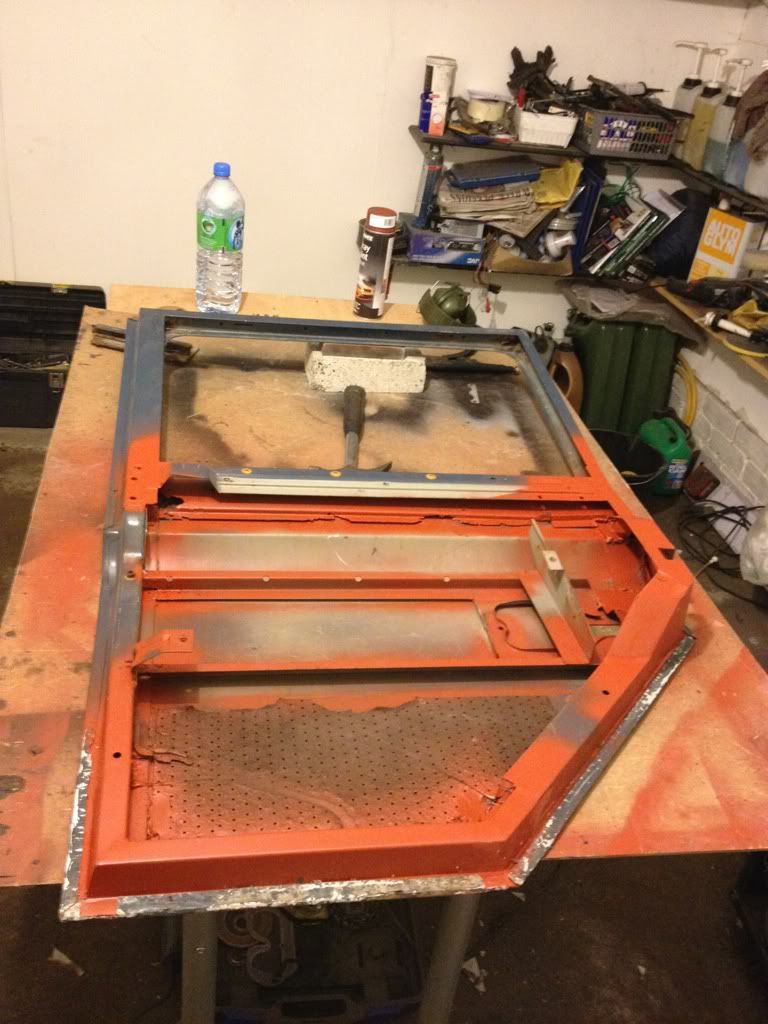
This was one of the rear doors which were by far in the worst condition.. I repeated this process with all four side doors and decided to just buy a new rear end door as for what they cost its a no brainer... The process of repairing the doors was quite a time consuming one but will save about a £1000 in new doors (touch wood!)
Anyway below are some photos of the repair process for one of the doors.
This was one of the rear doors which were by far in the worst condition.. I repeated this process with all four side doors and decided to just buy a new rear end door as for what they cost its a no brainer... The process of repairing the doors was quite a time consuming one but will save about a £1000 in new doors (touch wood!)
The strip down continued...
I had decided that I wanted this defender to be to a higher standard than the last one so the plan was to get everything off the chassis so it could go to be blasted, repaired then powder coated.
To make everyone aware the plan with the 110 is to do the same colour scheme as I did with the 90.. Land Rover Stornoway grey with black wheels and chequer plate. Standard ride height as Im not a big fan of suspension lifts but with some new chunky tyres as with the 90. True Chelsea tractor style..
Ok so anyway as I was saying... The strip down continued...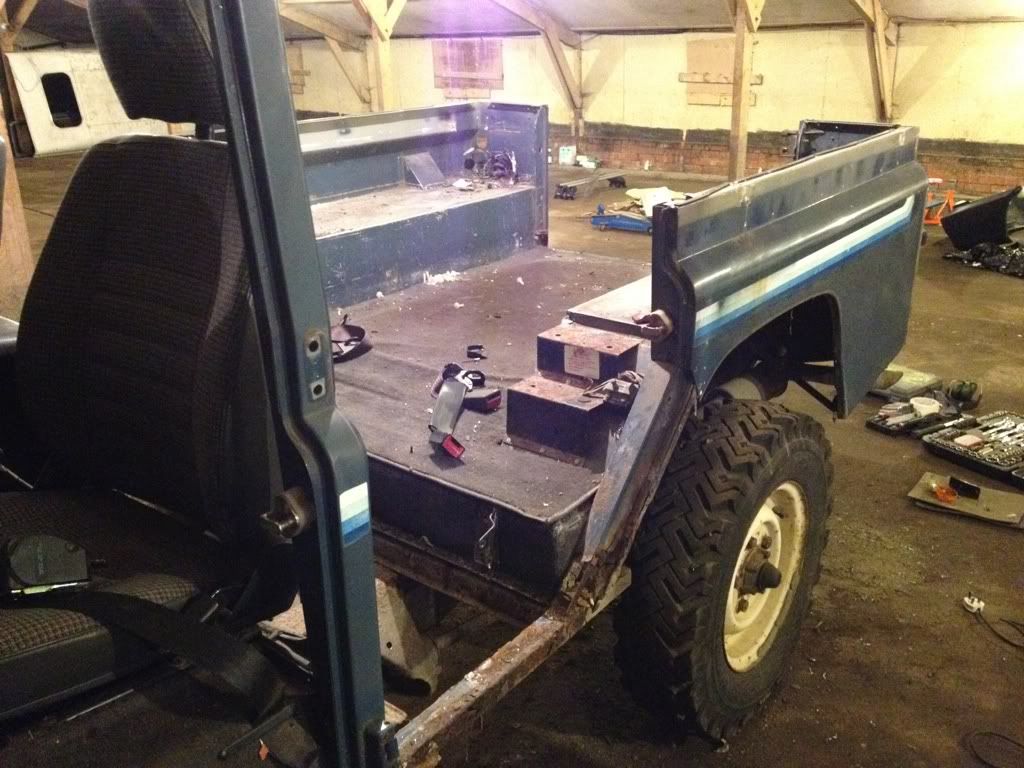
KP328 said:
Hi, looking forward to future updates, are you are not tempted to fit a galvanised chassis on the rebuild?
Well I decided not to use a galvanised chassis for a couple of reasons... 1) Rate vs Reward... £1600 for a new galvanised chassis is a lot of money when for a third of the price I could have the original blasted and powder coated.. Personally I dont think galvanising is 3 times better than powder coating. 2) I think a chassis should be black so even if I bought a galvanised chassis I would have had it painted black so that would have been more money and time..I will be posting some photos of the powder coated chassis soon.. I was pleased with the results.
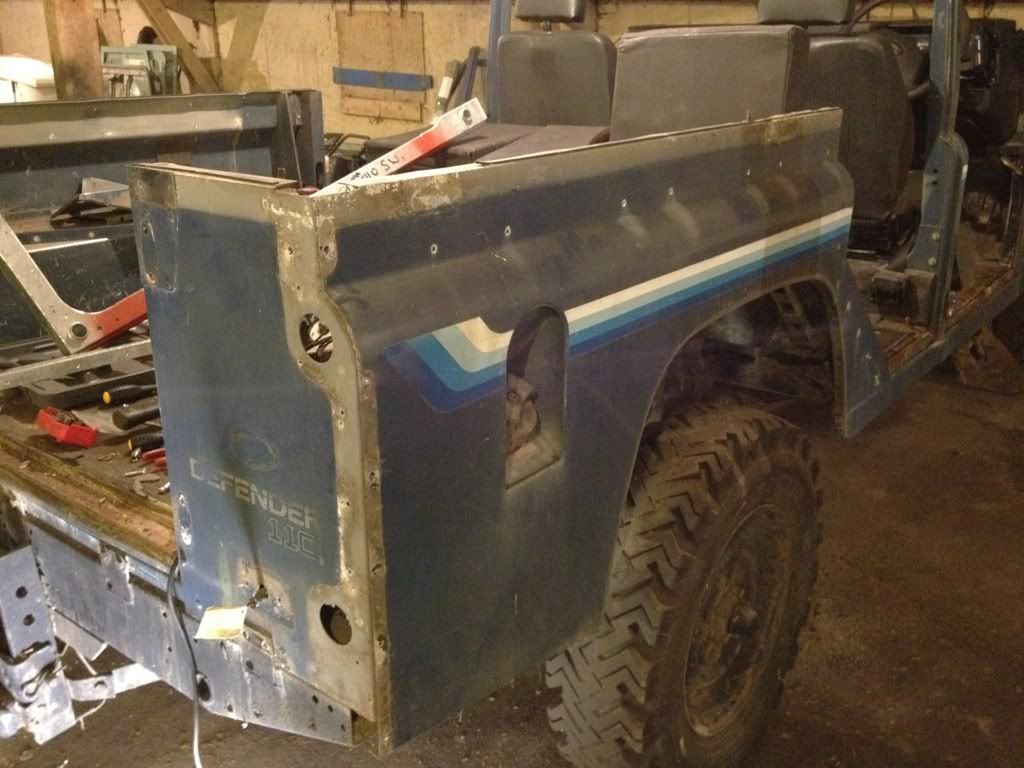
So anyway the tear down continued.. This part of the job is never pleasant as you have to deal with years worth of mud, oil and other associated pains in the arse.
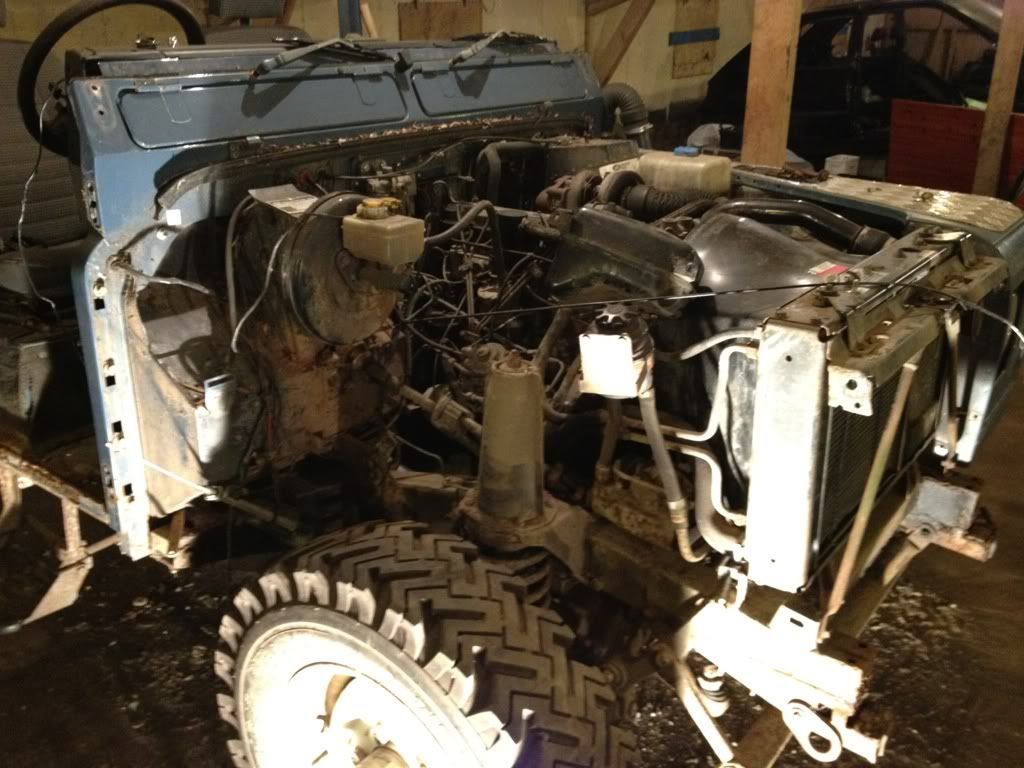
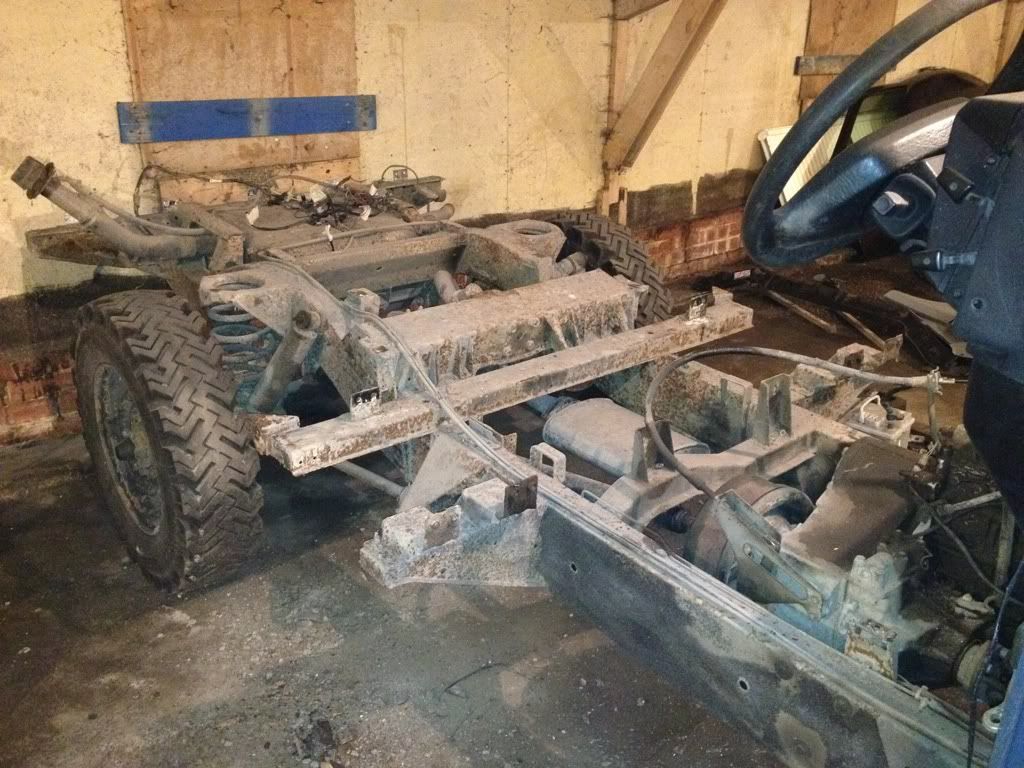
The sill rails on the 110 were well Fudged but fortunately I had a spare set.. The C pillars were completely rotted out so I had to order some c-pillar repair sections which were eventually welded onto my replacement sill rails.
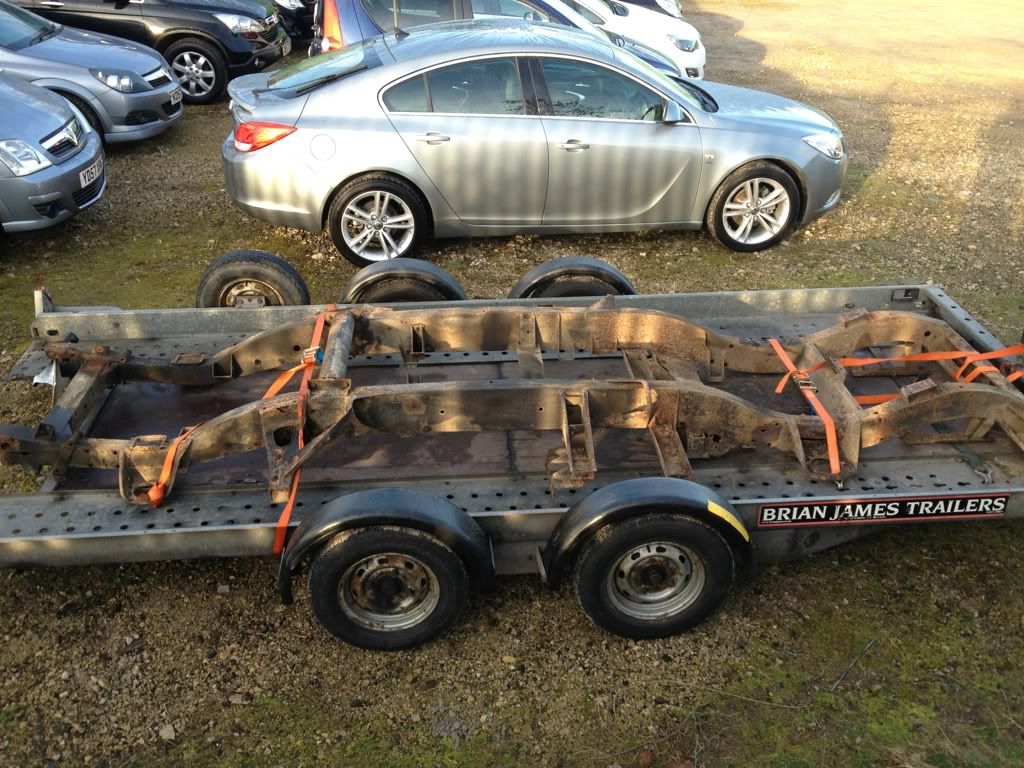
Still a few more photos of the process of stripping the defender down to a bare chassis so it could go and get blasted..
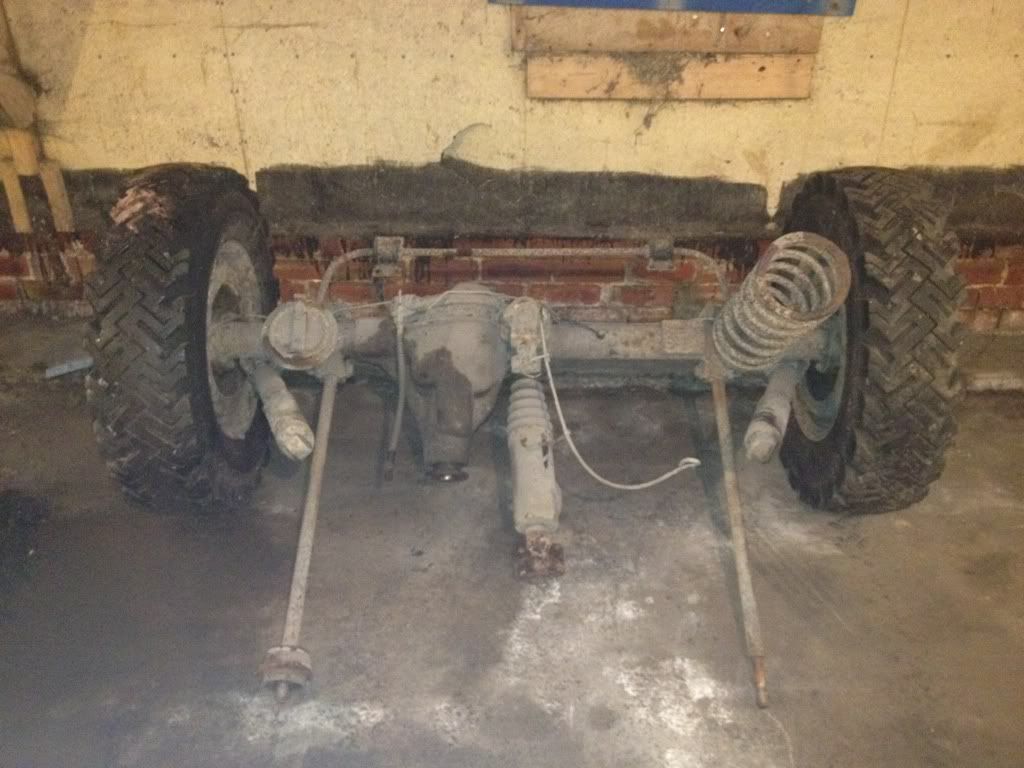
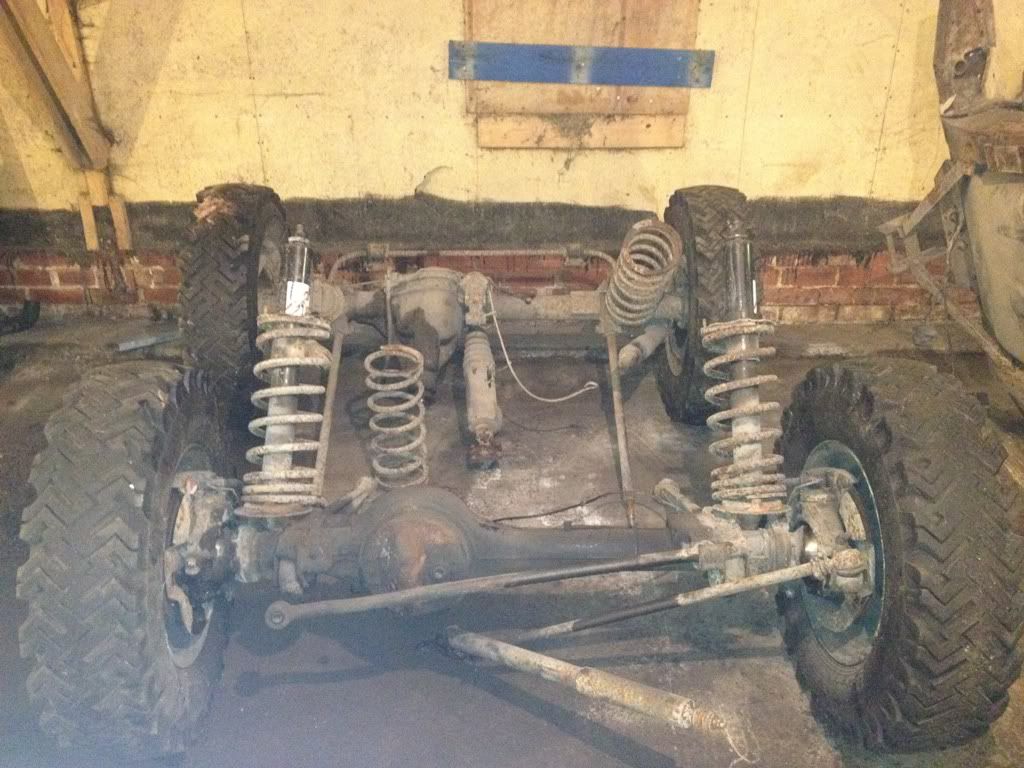
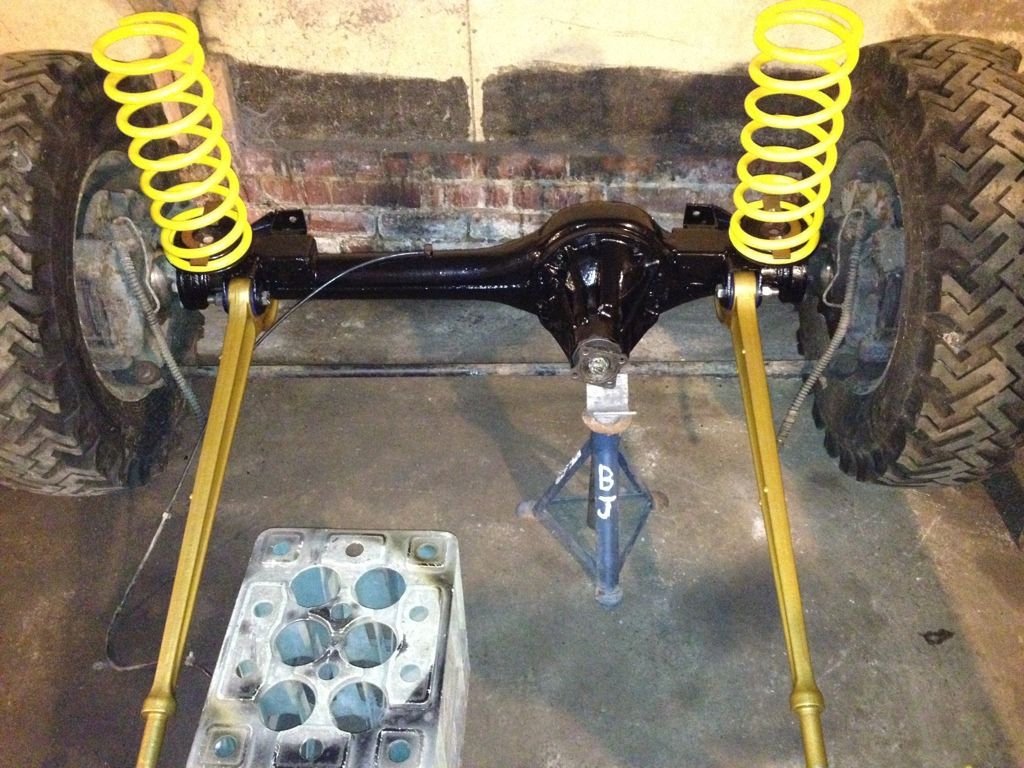
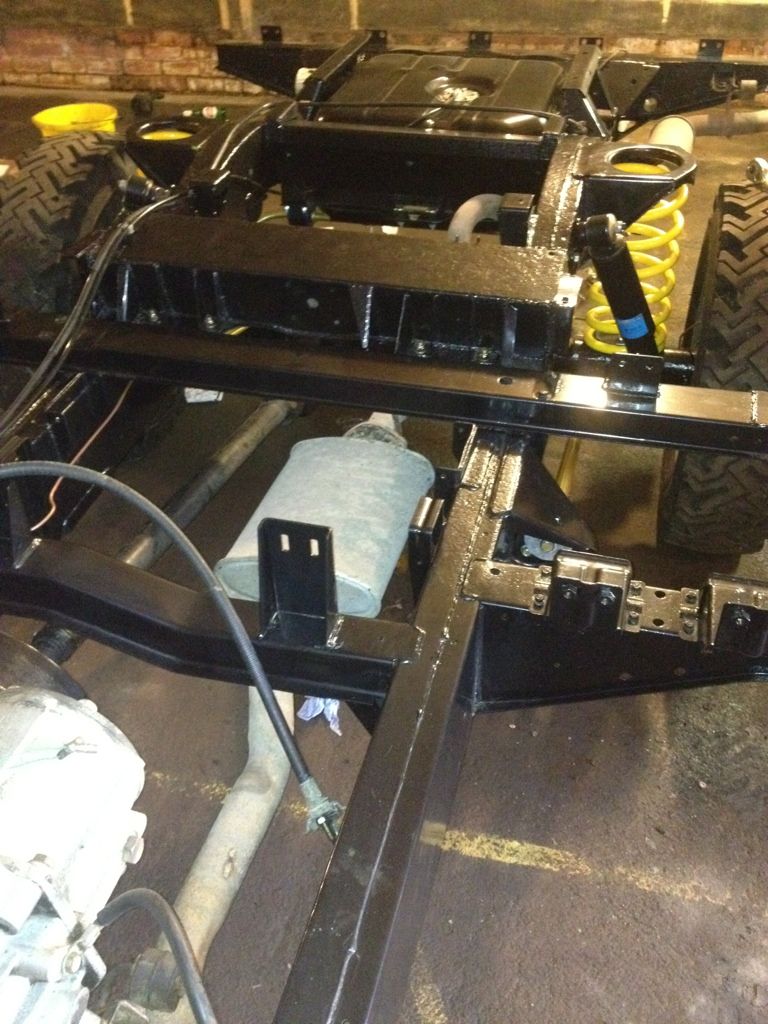
As i was doing the strip down I encountered my Boge unit... (The purpose of this bit of kit is to self-level the suspension) My best guess was that the boge unit would be goosed and I had no easy way of telling if that was the case or not.. You are meant to load the vehicle up with as much weight as poss to get it to sit low on the rear then go for a spin and if everything is OK, when you get back the suspension should be at normal ride height despite all the weight. I didnt have the luxury of being able to do the above test as i had already stripped the rear tub and I had a seized transmission brake so a drive was out of the question.
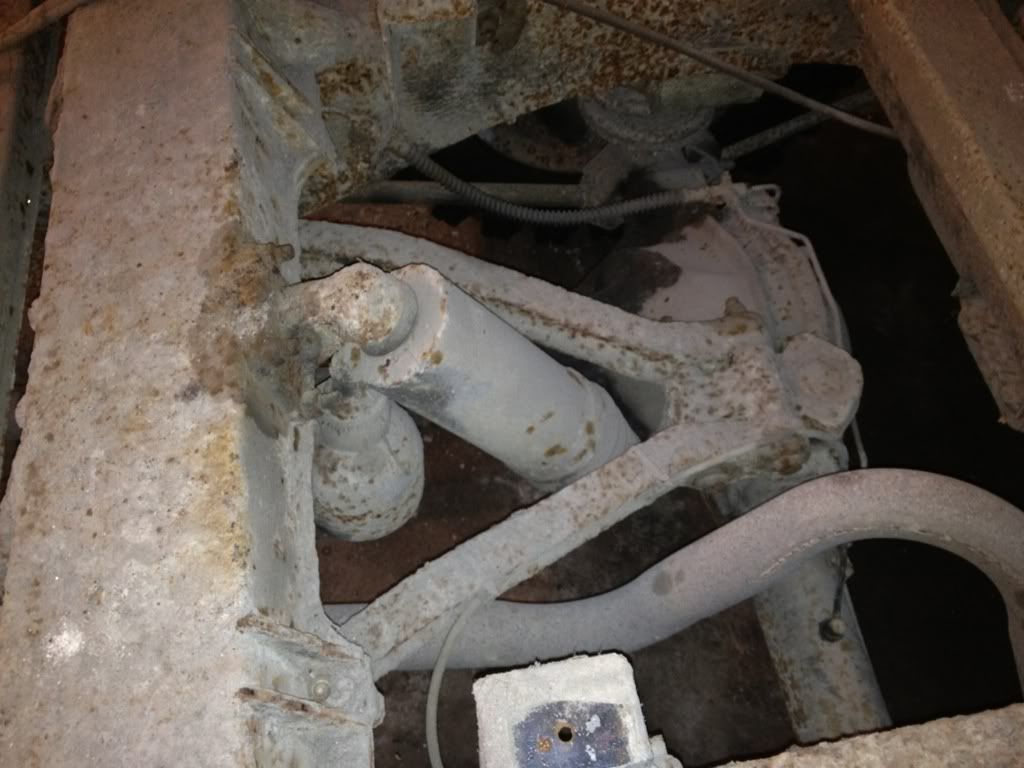
After doing a bit of research the decision was made to do away with the boge unit all together and get some heavy duty rear springs... Some people might be of the opinion that LR wouldnt have put it on there if it was ok to just do away with it however you cannot buy a replacement non genuine unit, cant buy repair parts and the genuine LR item costs way more money than its worth!.. So after listening to everyone say "do away with it".. I did!
The sill rails on the 110 were well Fudged but fortunately I had a spare set.. The C pillars were completely rotted out so I had to order some c-pillar repair sections which were eventually welded onto my replacement sill rails.
Still a few more photos of the process of stripping the defender down to a bare chassis so it could go and get blasted..
As i was doing the strip down I encountered my Boge unit... (The purpose of this bit of kit is to self-level the suspension) My best guess was that the boge unit would be goosed and I had no easy way of telling if that was the case or not.. You are meant to load the vehicle up with as much weight as poss to get it to sit low on the rear then go for a spin and if everything is OK, when you get back the suspension should be at normal ride height despite all the weight. I didnt have the luxury of being able to do the above test as i had already stripped the rear tub and I had a seized transmission brake so a drive was out of the question.
After doing a bit of research the decision was made to do away with the boge unit all together and get some heavy duty rear springs... Some people might be of the opinion that LR wouldnt have put it on there if it was ok to just do away with it however you cannot buy a replacement non genuine unit, cant buy repair parts and the genuine LR item costs way more money than its worth!.. So after listening to everyone say "do away with it".. I did!
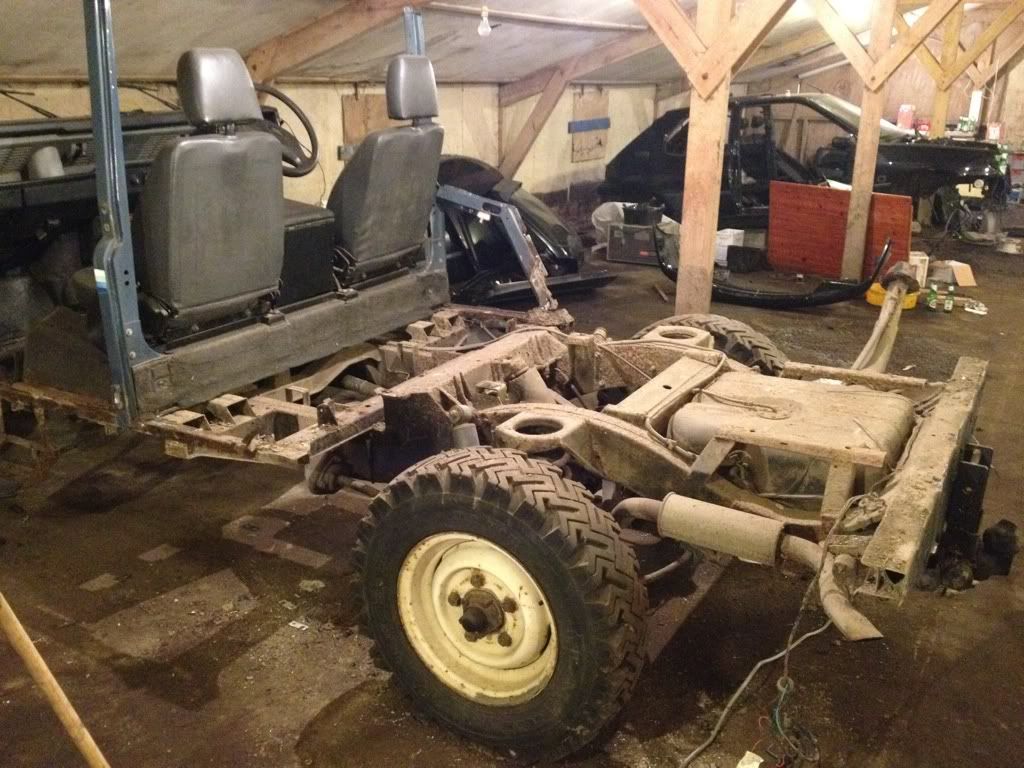
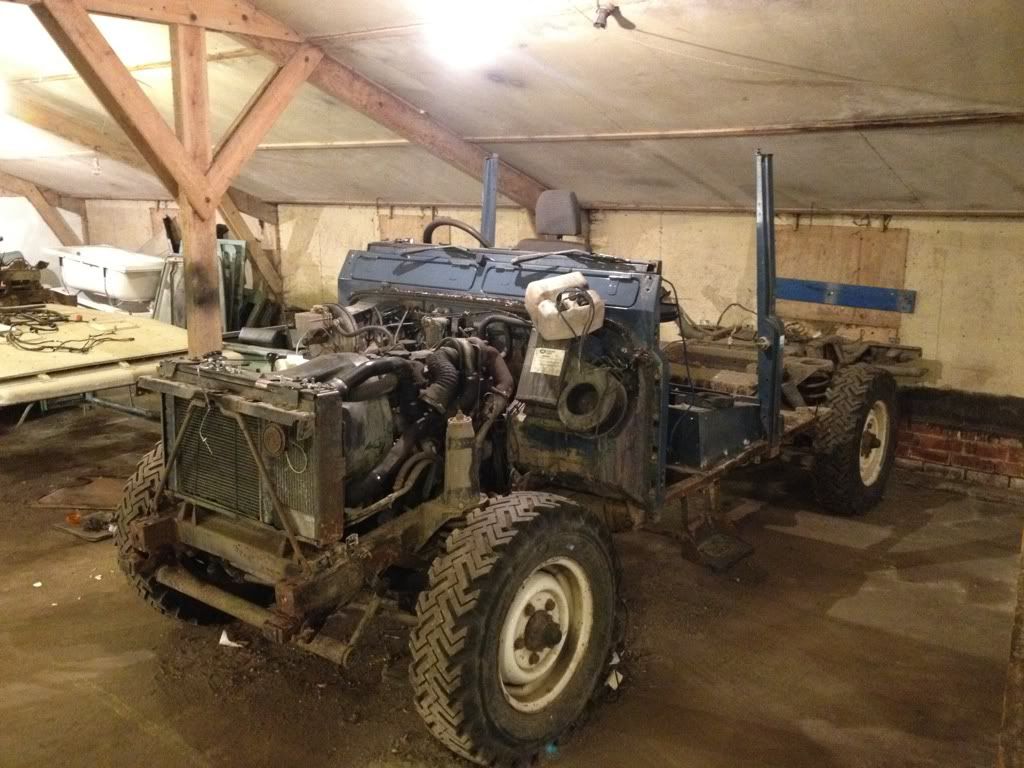
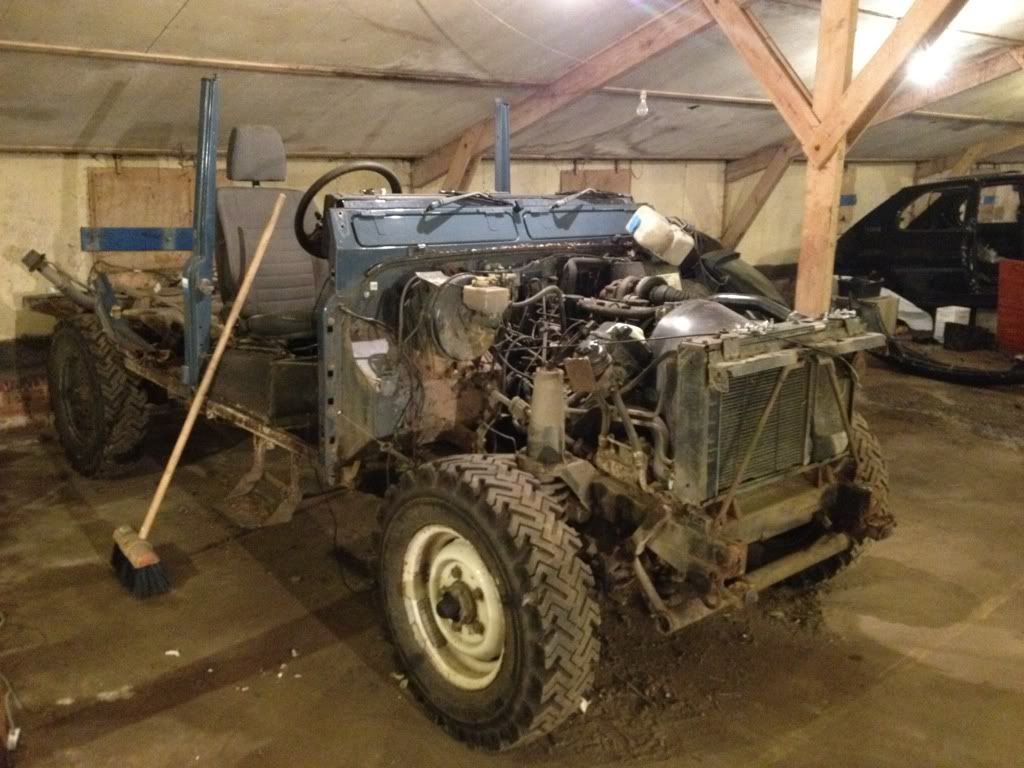
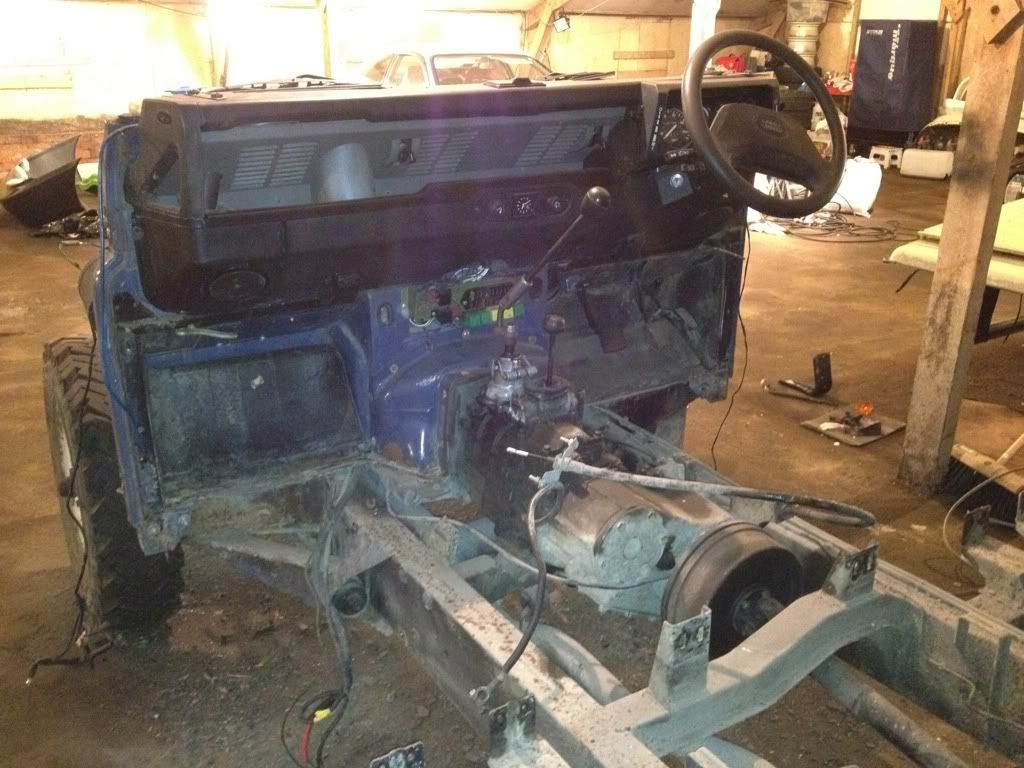
Time for a my engine lift to come into action... Its not mine, I've borrowed it from a friend but Im pretty sure it could lift a lot more than an engine!
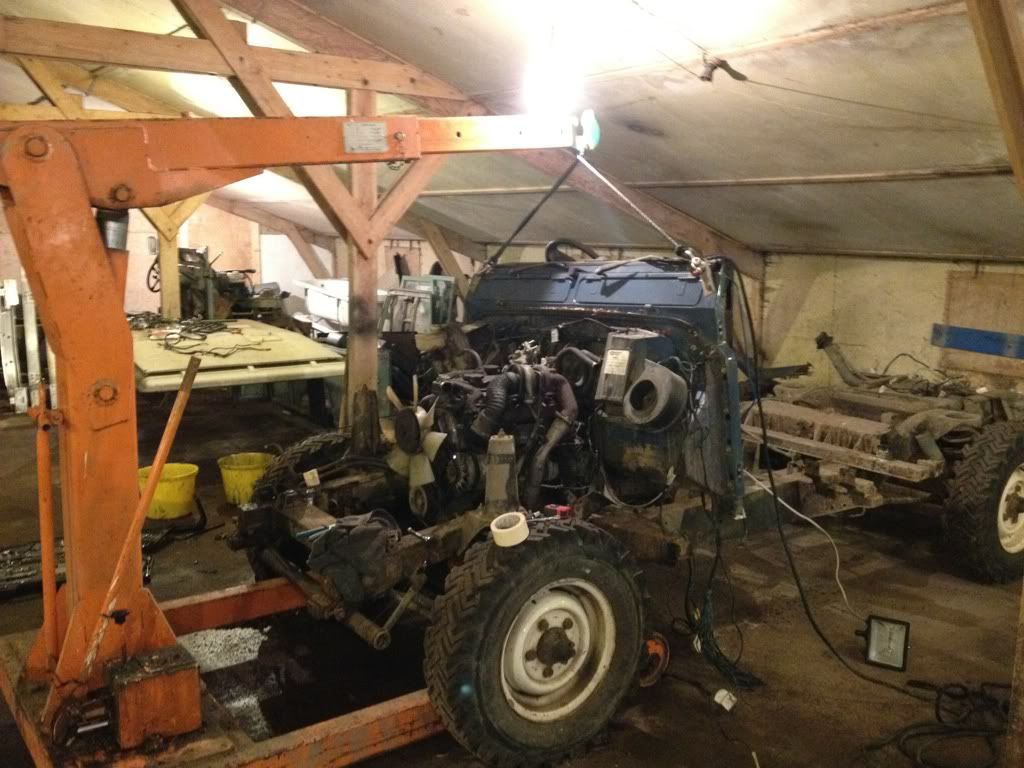
With the bulkhead off the next job was the engine and box...

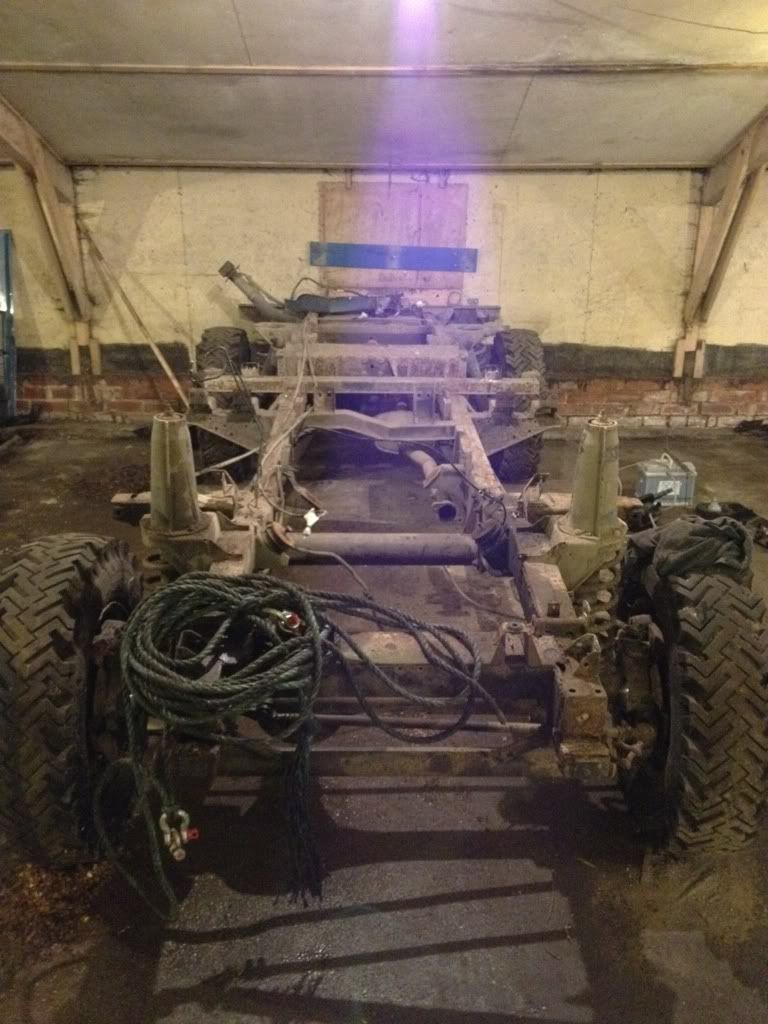

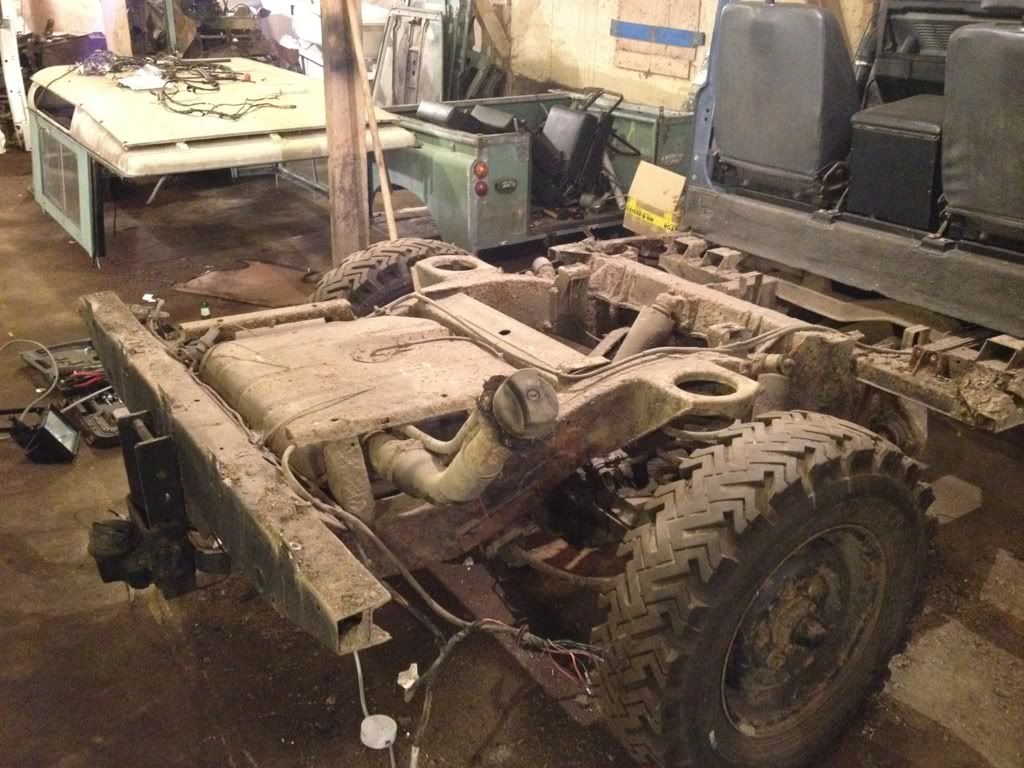
With the engine and box out it was time to get the axles off.. I used my crane to take the weight as I rolled each axle out..
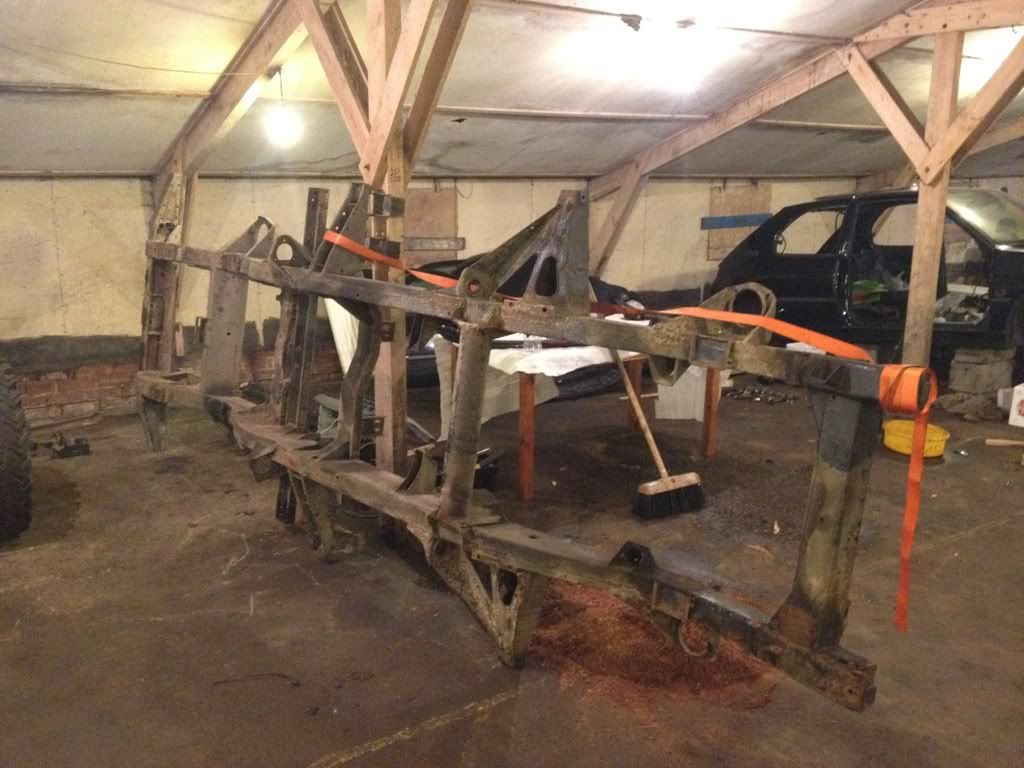
With the axles out the chassis was suspended so I could access all the associated brackets and pipework still attached..
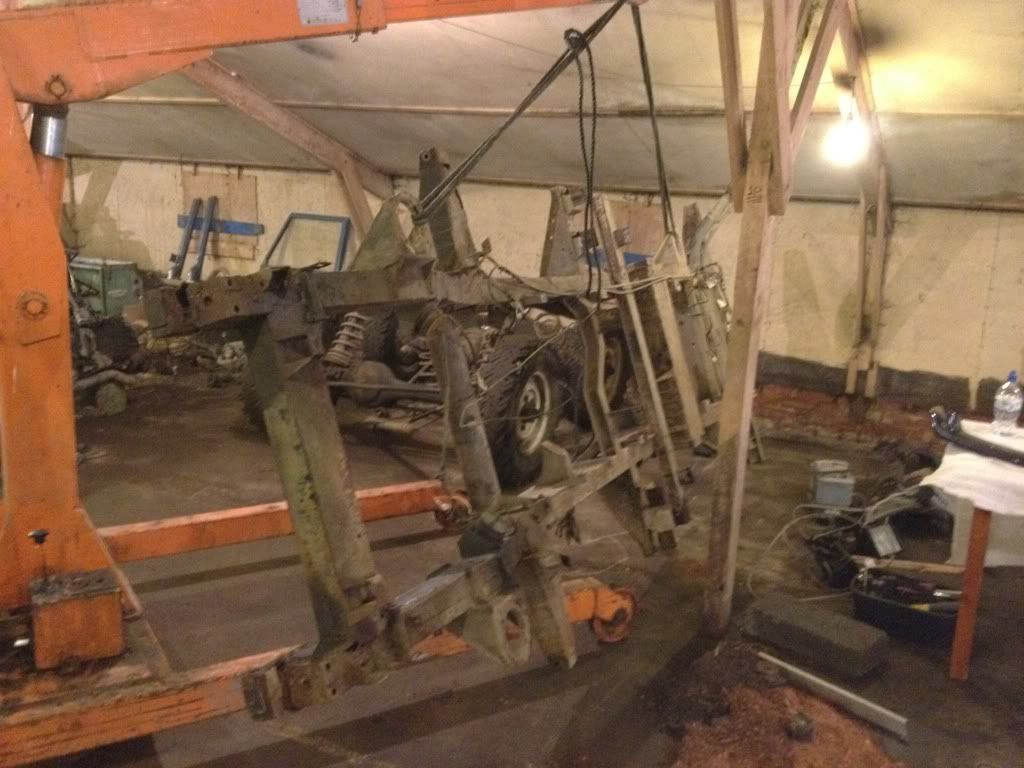
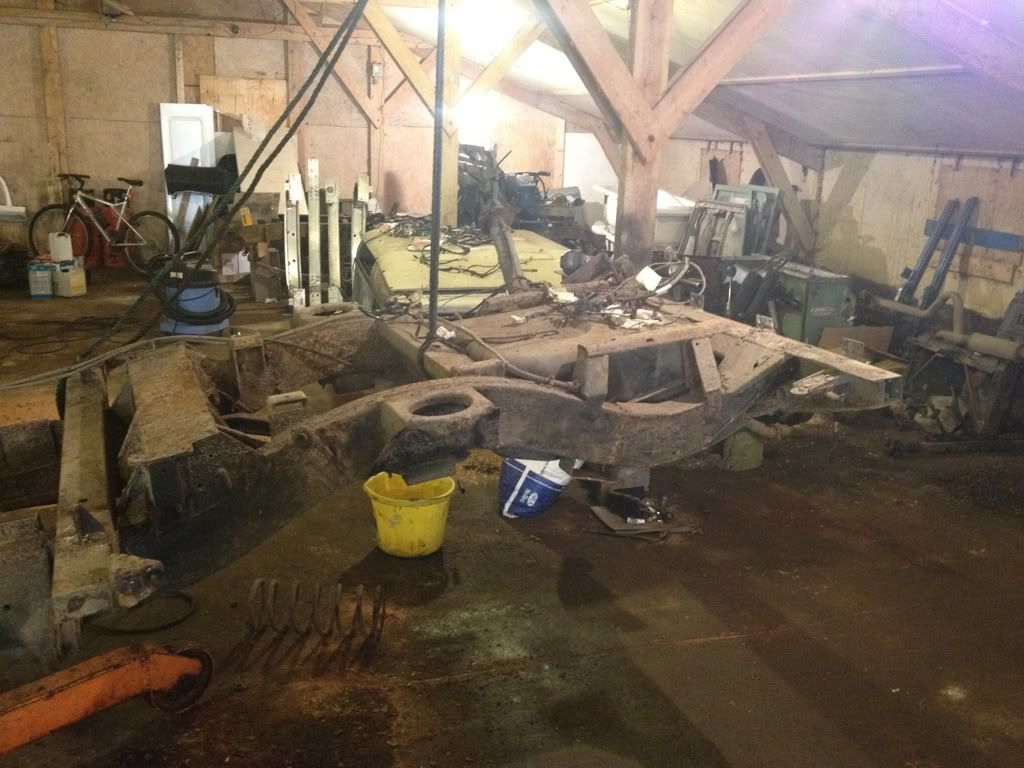
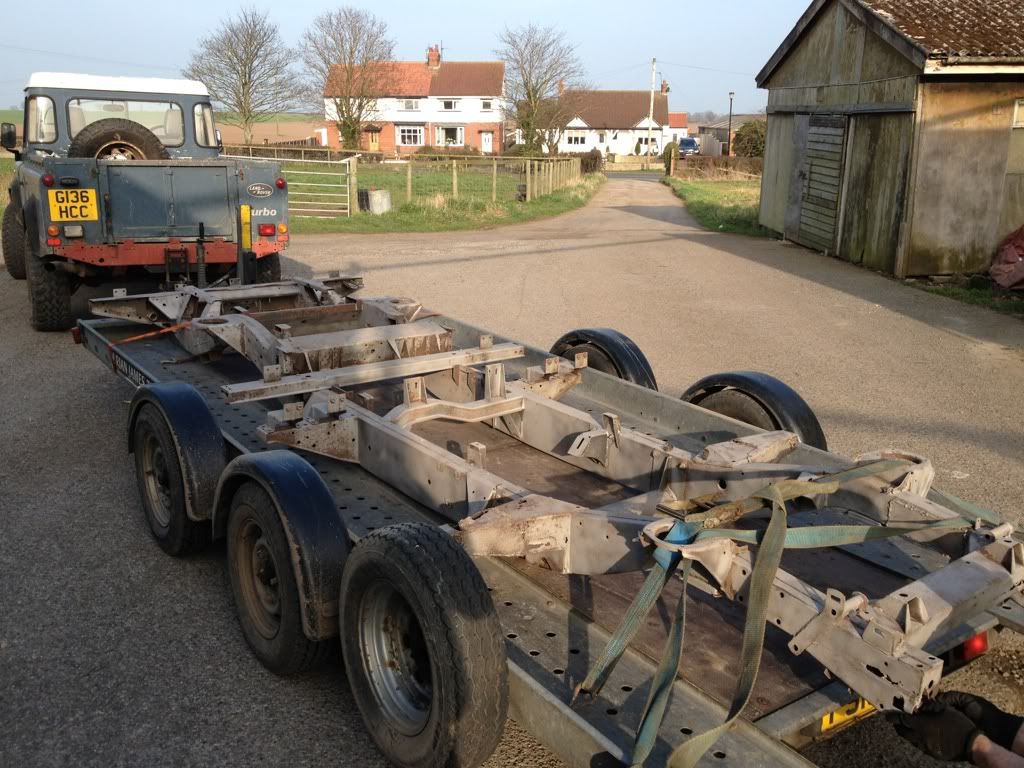
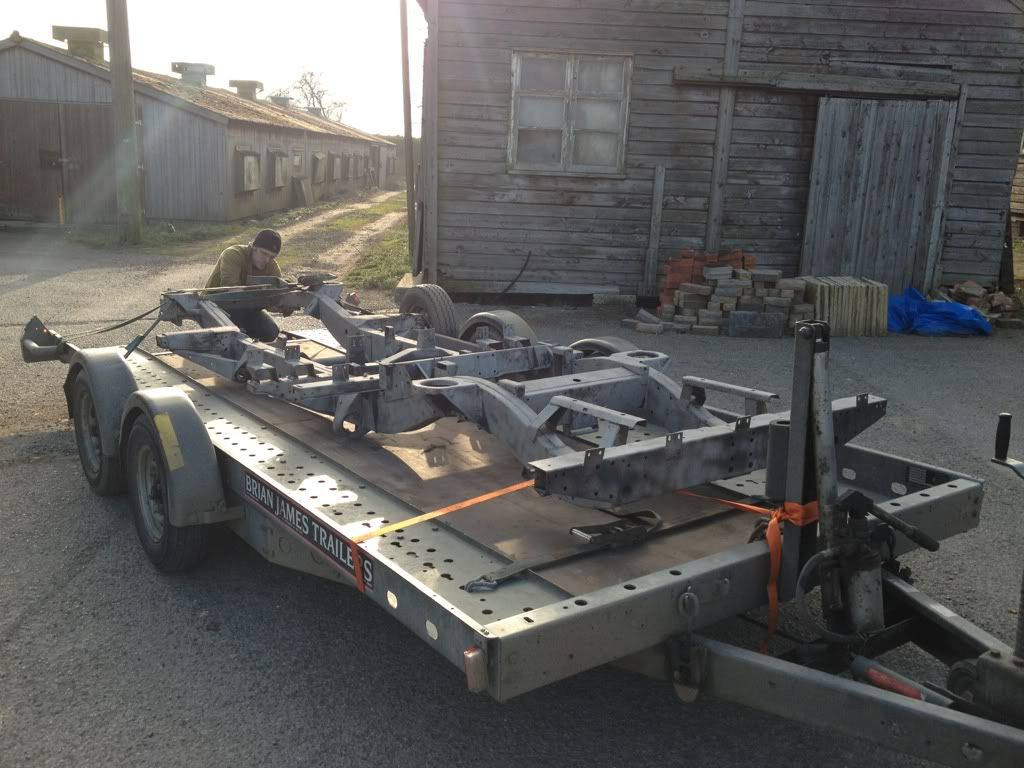
With everything off the chassis was propped up waiting to get trailered away to be blasted.
On its way...
With the bulkhead off the next job was the engine and box...
With the engine and box out it was time to get the axles off.. I used my crane to take the weight as I rolled each axle out..
With the axles out the chassis was suspended so I could access all the associated brackets and pipework still attached..
With everything off the chassis was propped up waiting to get trailered away to be blasted.
On its way...
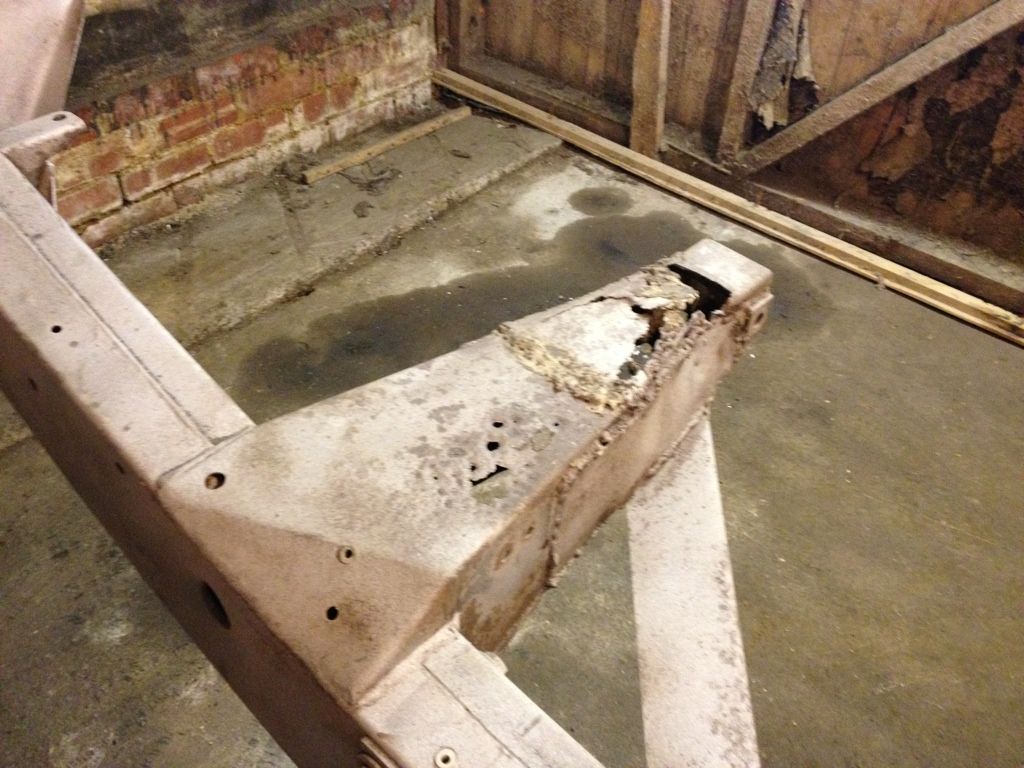
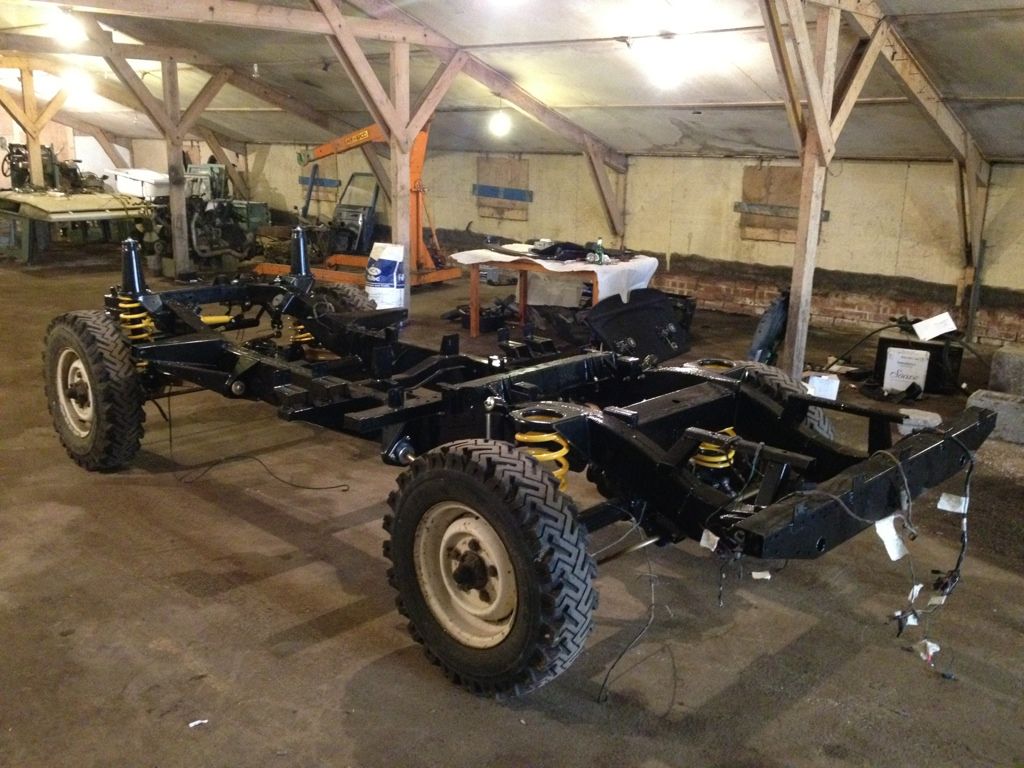
Well the chassis had its first sand blast and came back looking like this....
The blasting was certainly helpful to enable me to see the bits of rust that needed repairing.. The chassis was set up on some old stands ready for me to get to work! The most obviously corroded parts were the bulkhead outriggers however there were other small areas.
New items were welded into place..
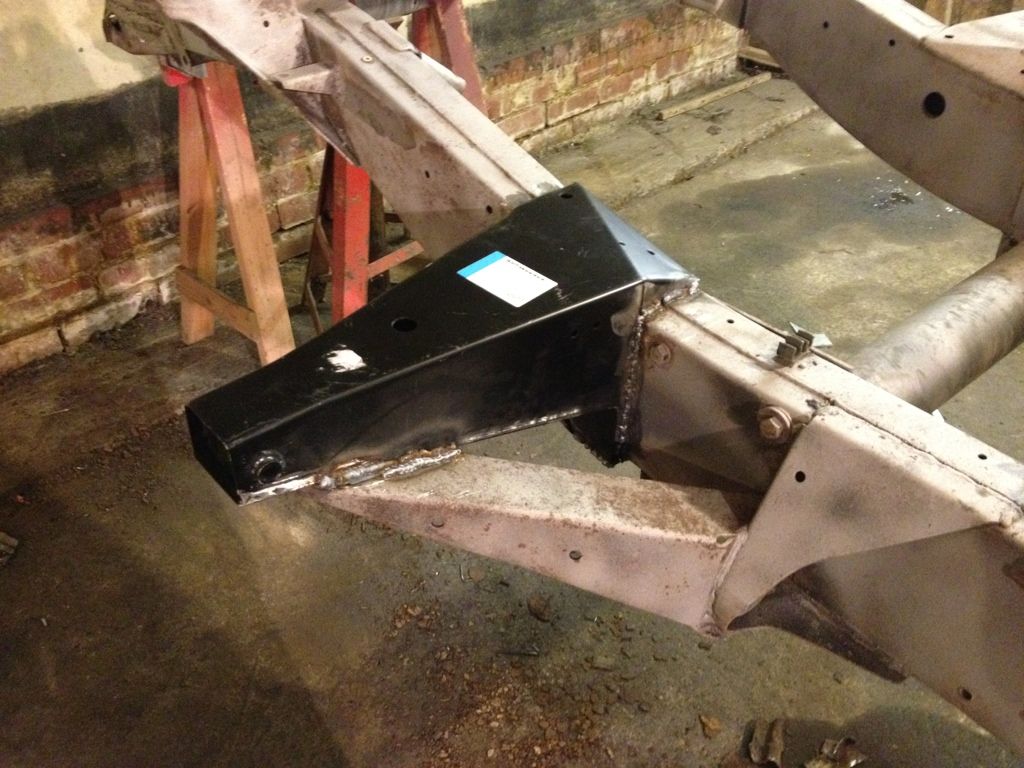
After a bit of work the chassis was ready to go back to the blasters for another blast and then a few coats of powder. Along with the chassis I took the opportunity to get various other small components such as radius arms powder coated at the same time.
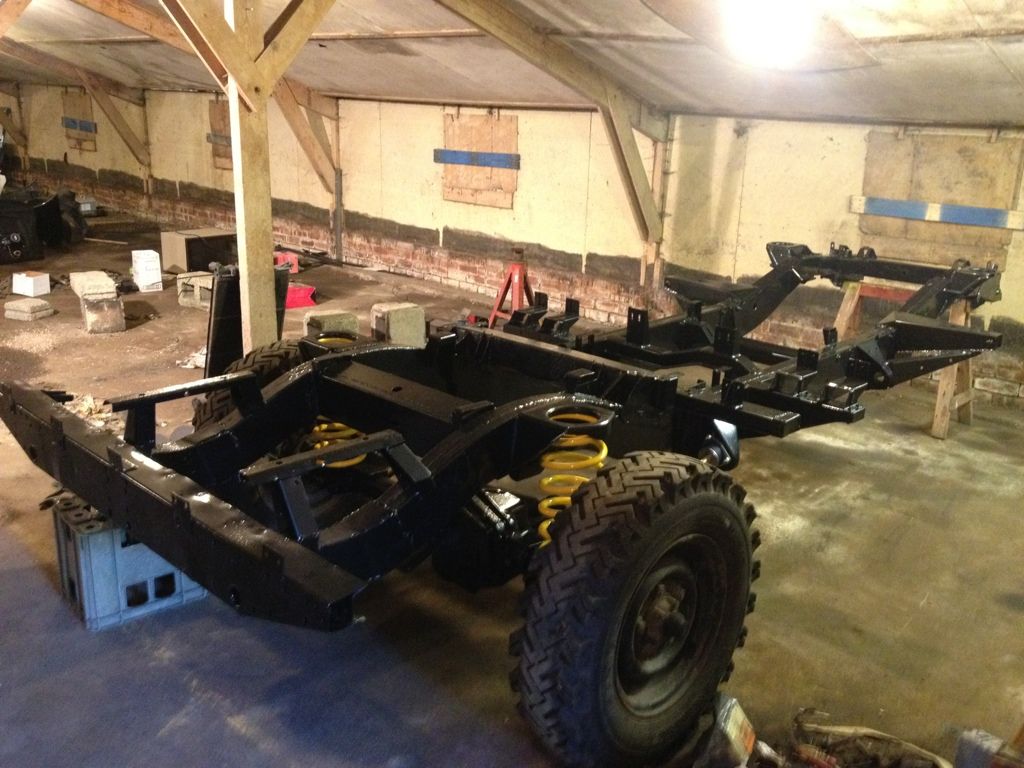
Anyway after a couple of days I was given the shout to collect the chassis so off I went.. Anyway this is how it looked after its coating.
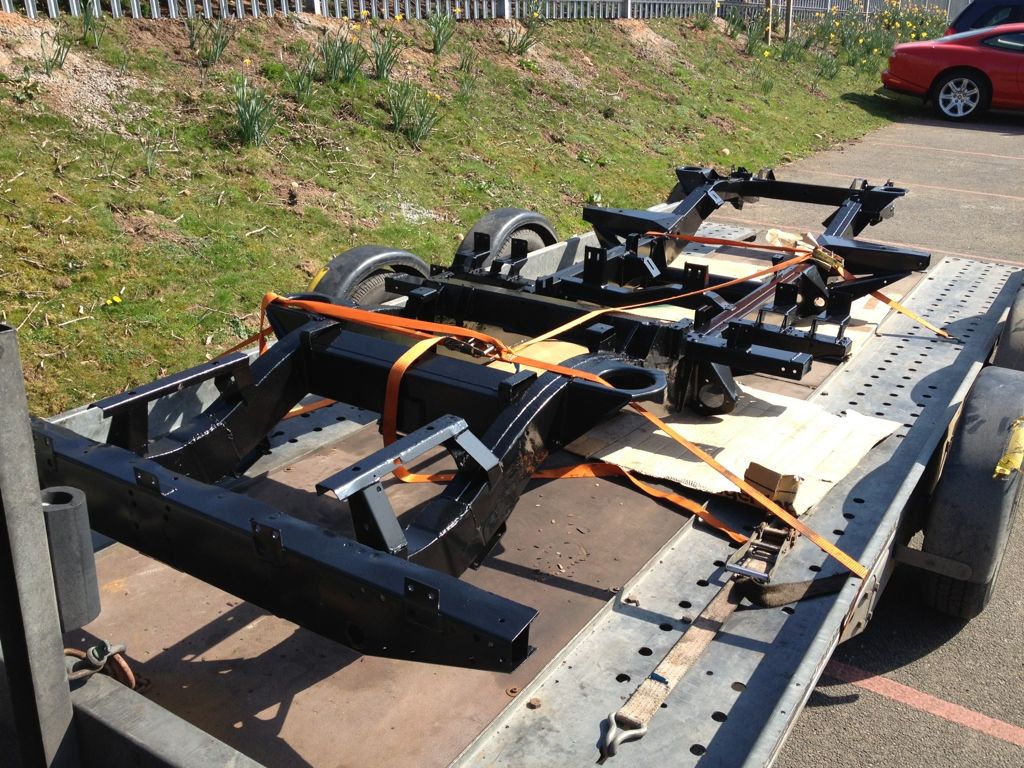

And my associated parts looked like this..
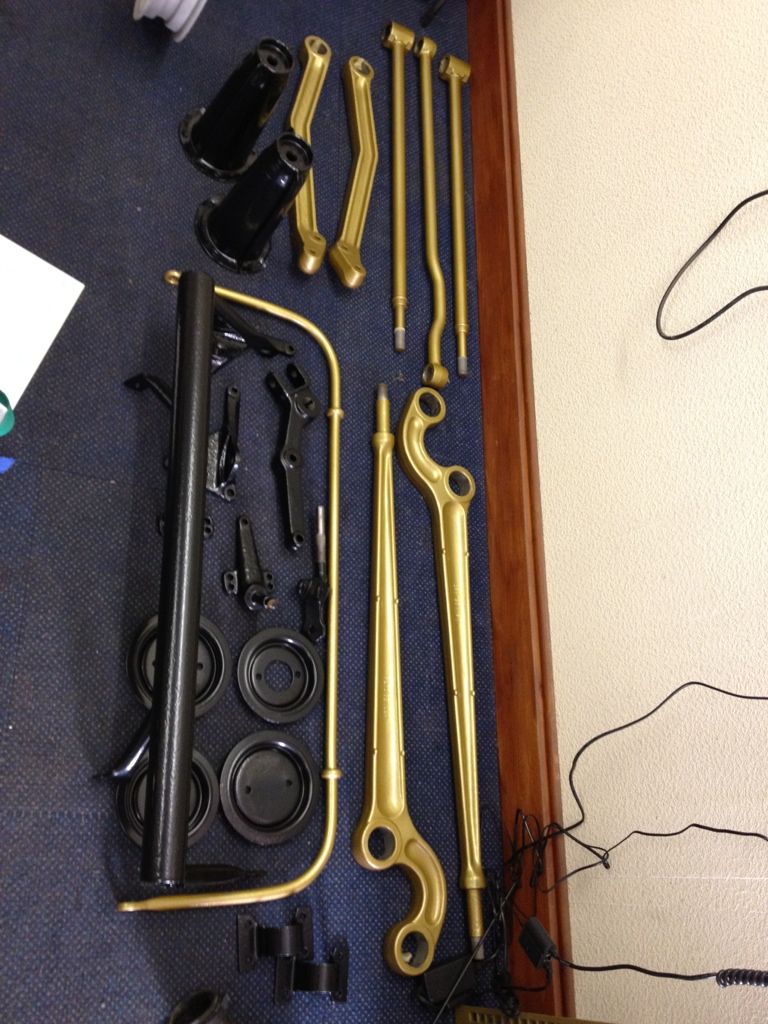
So it was time to get busy with a big box of new parts I had bought to get the chassis back into rolling status...
The blasting was certainly helpful to enable me to see the bits of rust that needed repairing.. The chassis was set up on some old stands ready for me to get to work! The most obviously corroded parts were the bulkhead outriggers however there were other small areas.
New items were welded into place..
After a bit of work the chassis was ready to go back to the blasters for another blast and then a few coats of powder. Along with the chassis I took the opportunity to get various other small components such as radius arms powder coated at the same time.
Anyway after a couple of days I was given the shout to collect the chassis so off I went.. Anyway this is how it looked after its coating.
And my associated parts looked like this..
So it was time to get busy with a big box of new parts I had bought to get the chassis back into rolling status...
Right well a bit of an update... (did this once and laptop crashed so we'll try again!)
It was time to try and get my newly coated chassis to the rolling stage so I set about it.. Whilst the chassis was away at the coaters I gave my axles a freshen up with the wire brush and some hammerite..At the same time I took the opportunity to put a new diff pinion oil seat onto the rear diff as it seemed to have failed.
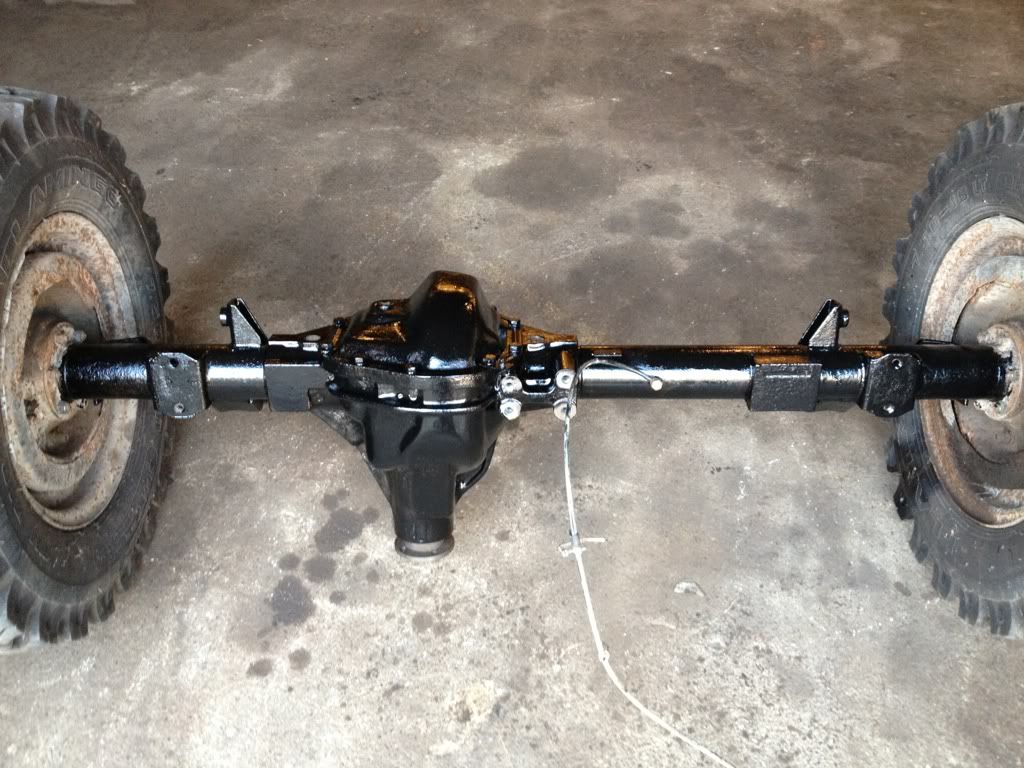
Some of you might pick up on the fact the hubs havn't been touched.. My plan was to wait til the axles were back on the chassis as in my opinion it makes it a bit easier. Anyway the front axle with some new shiny bits bolted on..
With the rear axle in place..
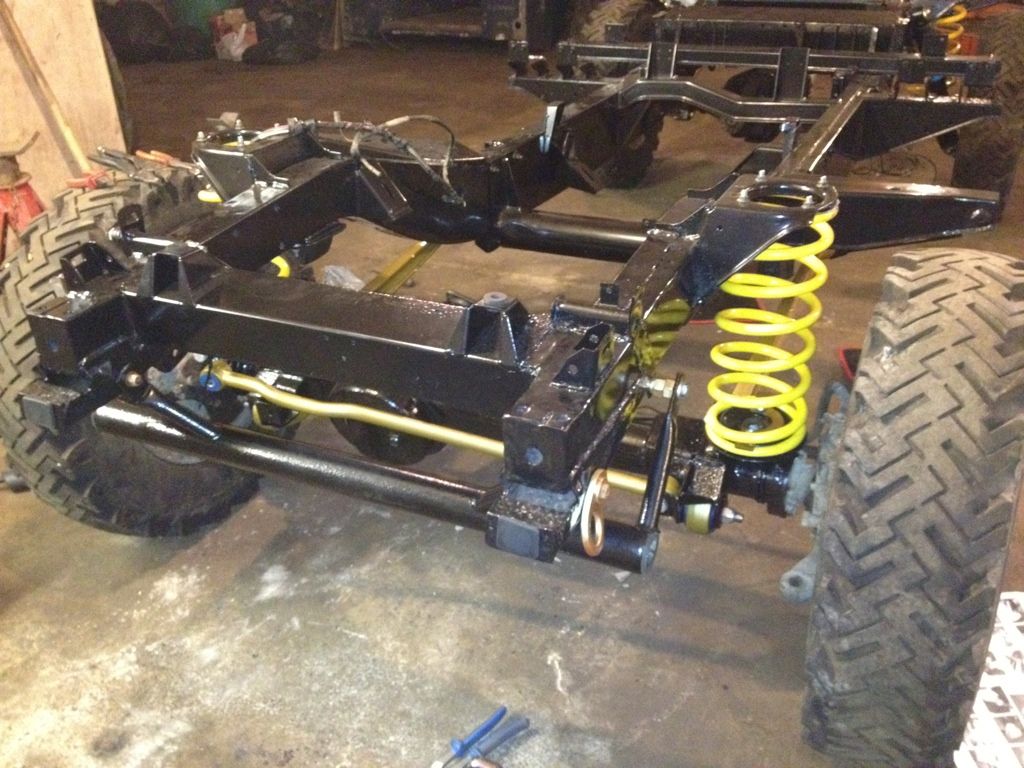
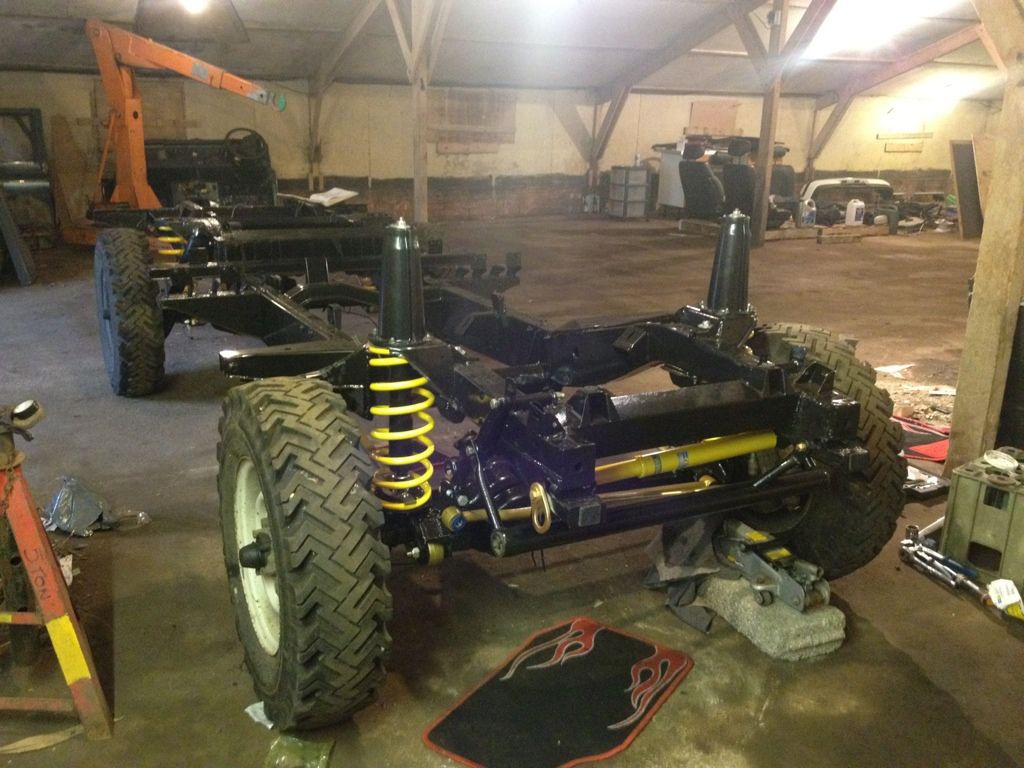
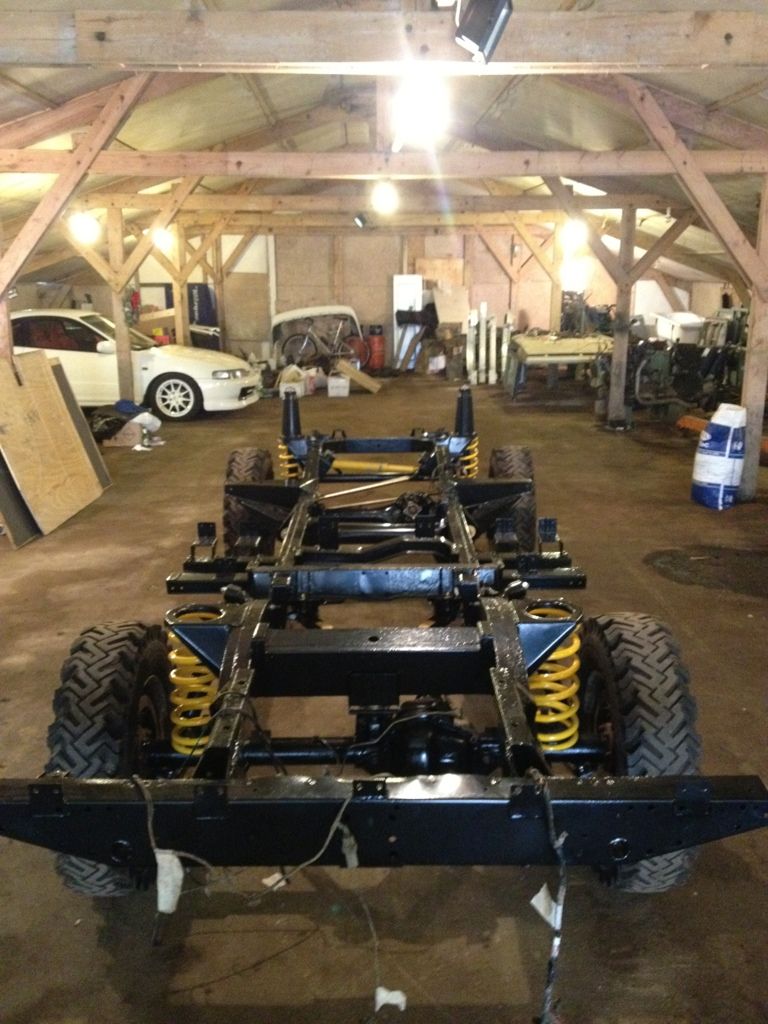
And back on all four wheels
Looks pretty naff on the original wheels however there is a new set awaiting refurbishment..
Rear anti roll bar in place.. not tightened up yet as need access for the new fuel tank..
Rear dampers in place...
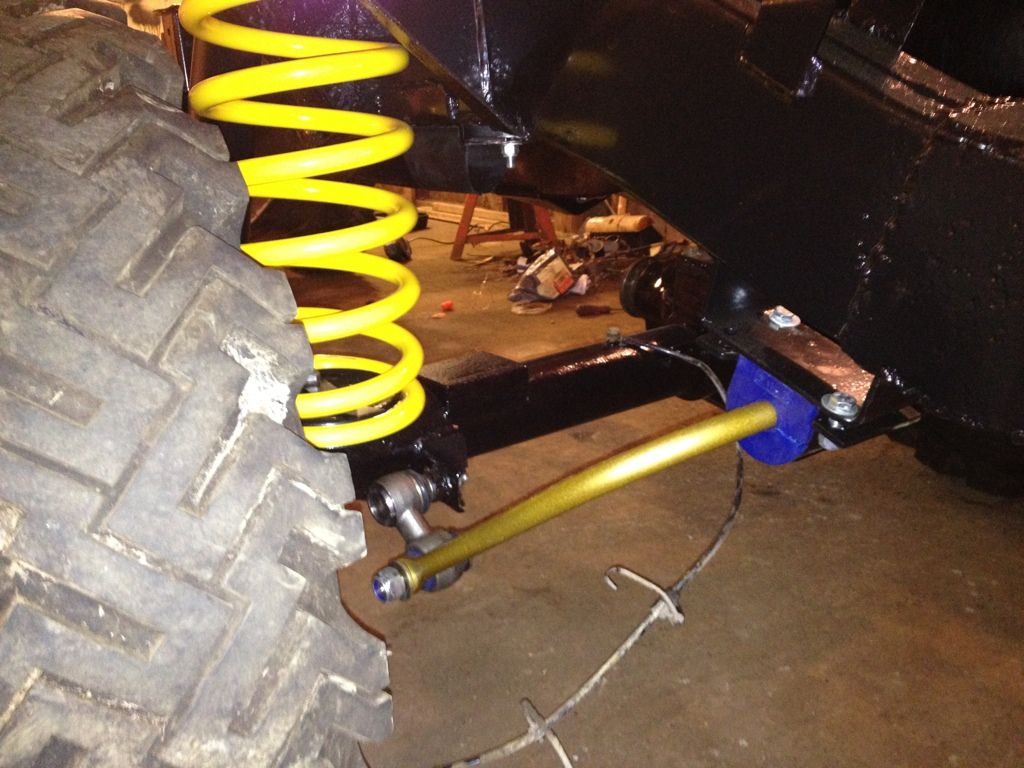
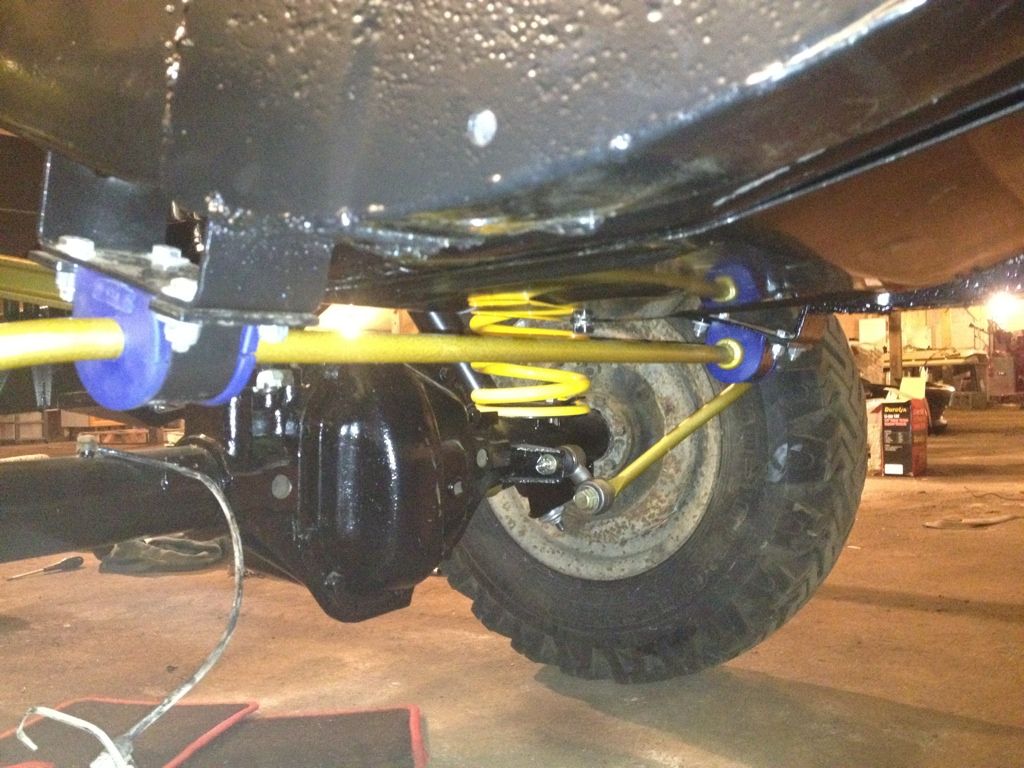
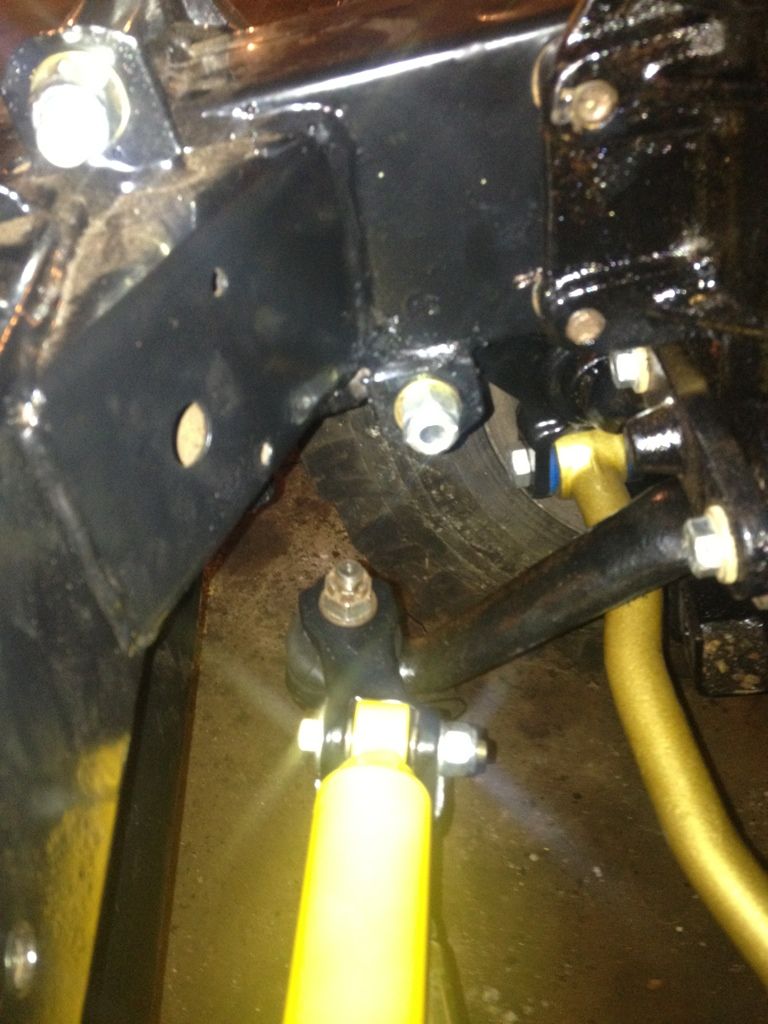
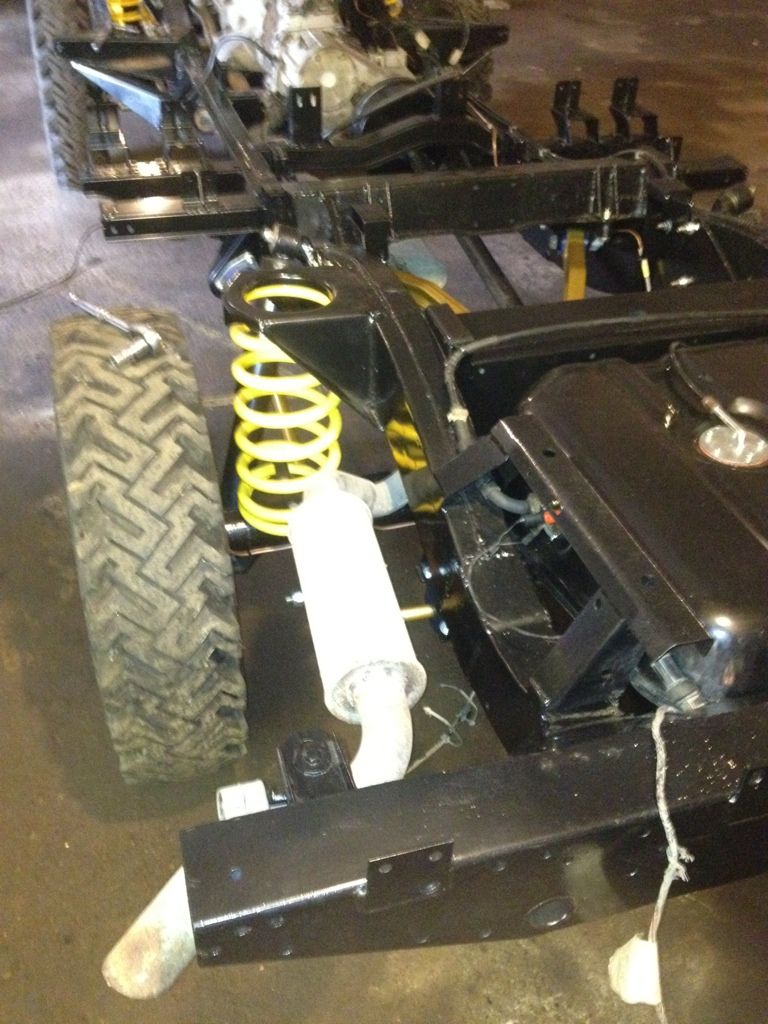
Front end coming together with new steering damper and new heavy duty steering arms(the basis for my gold under body colour scheme!)

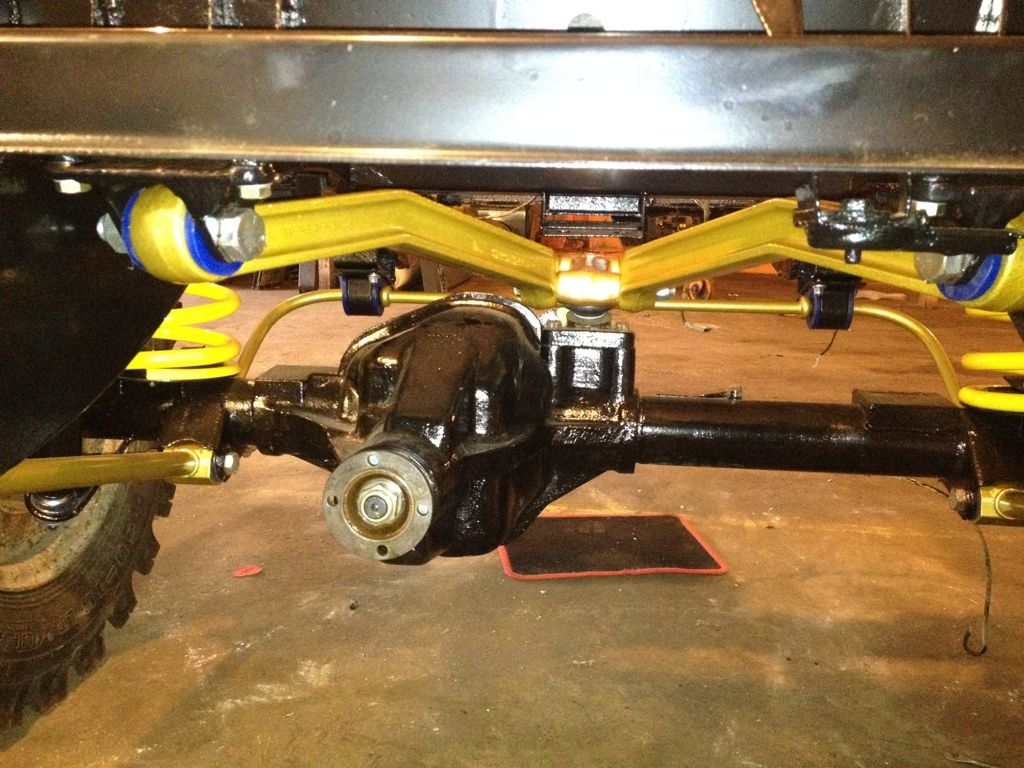
I put a new A-frame ball joint in and got the A-frame back together...
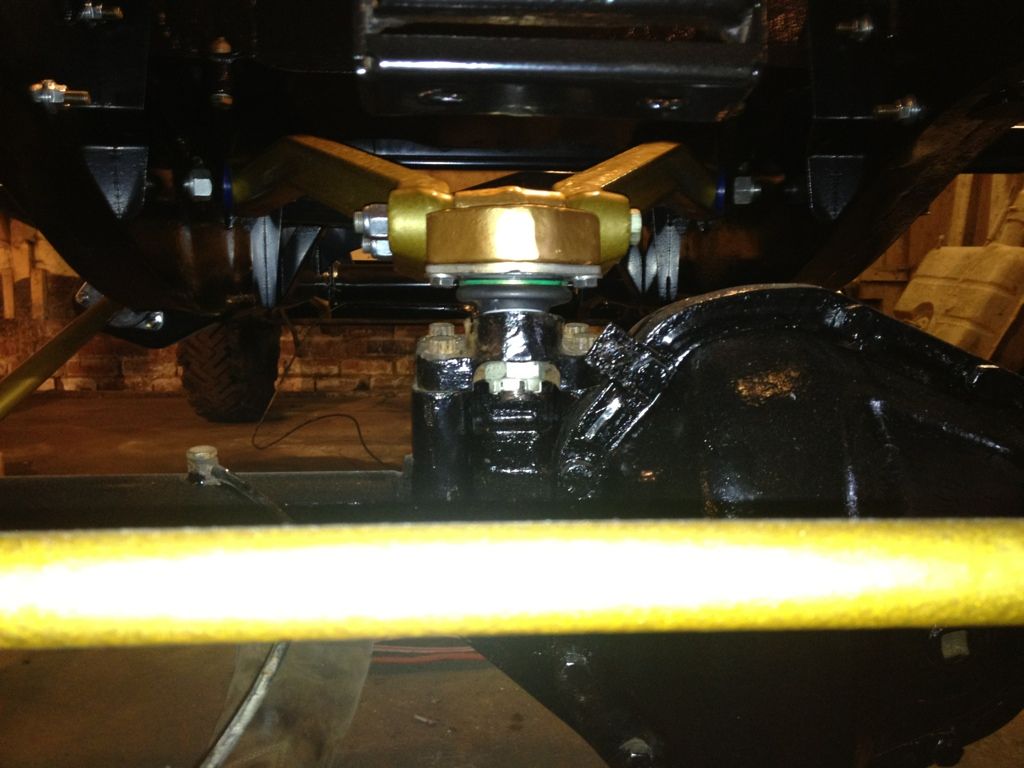
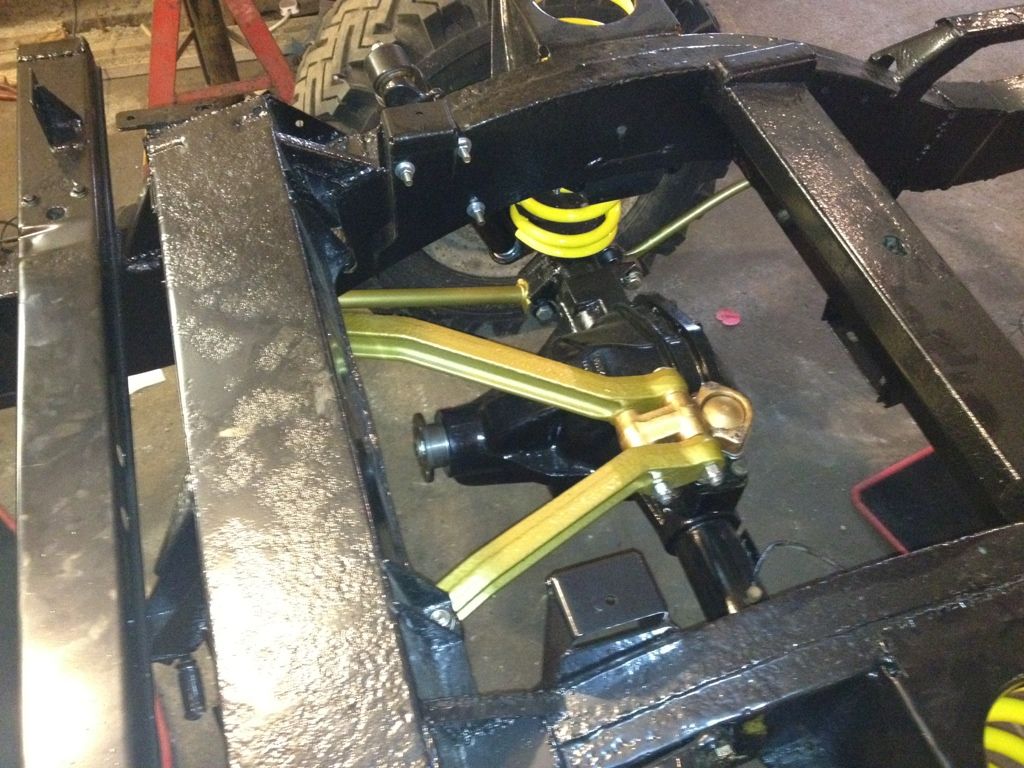
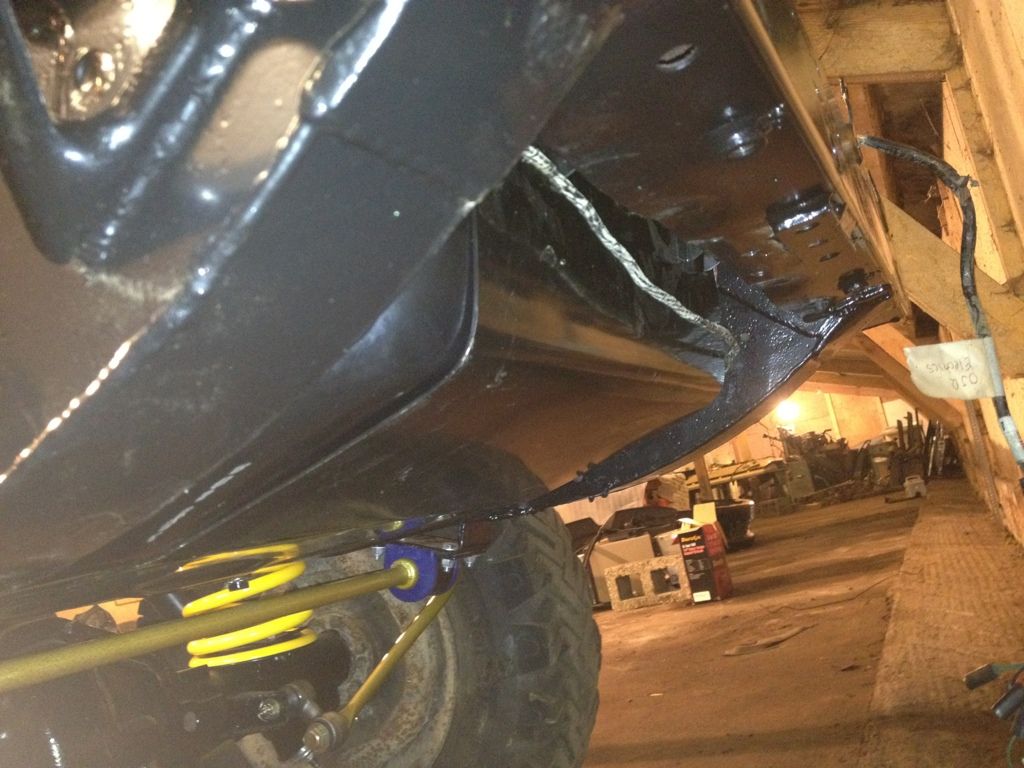
And Ill leave you with a nice shot of the underneath showing the A-frame and polybushes...
It was time to try and get my newly coated chassis to the rolling stage so I set about it.. Whilst the chassis was away at the coaters I gave my axles a freshen up with the wire brush and some hammerite..At the same time I took the opportunity to put a new diff pinion oil seat onto the rear diff as it seemed to have failed.
Some of you might pick up on the fact the hubs havn't been touched.. My plan was to wait til the axles were back on the chassis as in my opinion it makes it a bit easier. Anyway the front axle with some new shiny bits bolted on..
With the rear axle in place..
And back on all four wheels
Looks pretty naff on the original wheels however there is a new set awaiting refurbishment..
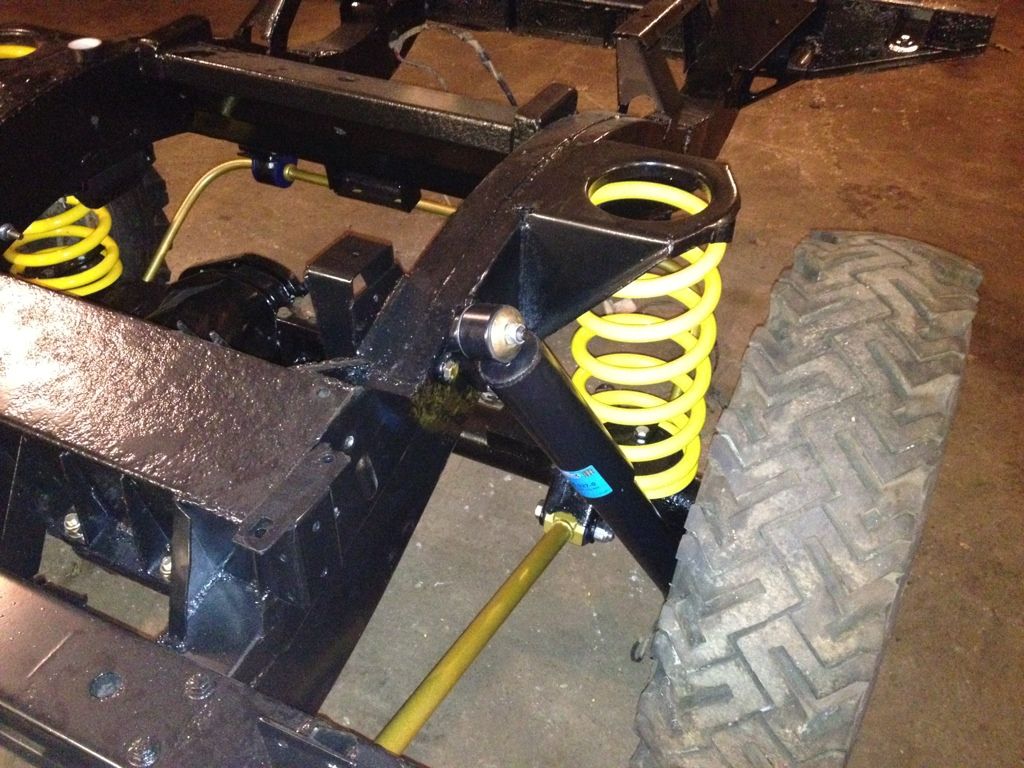
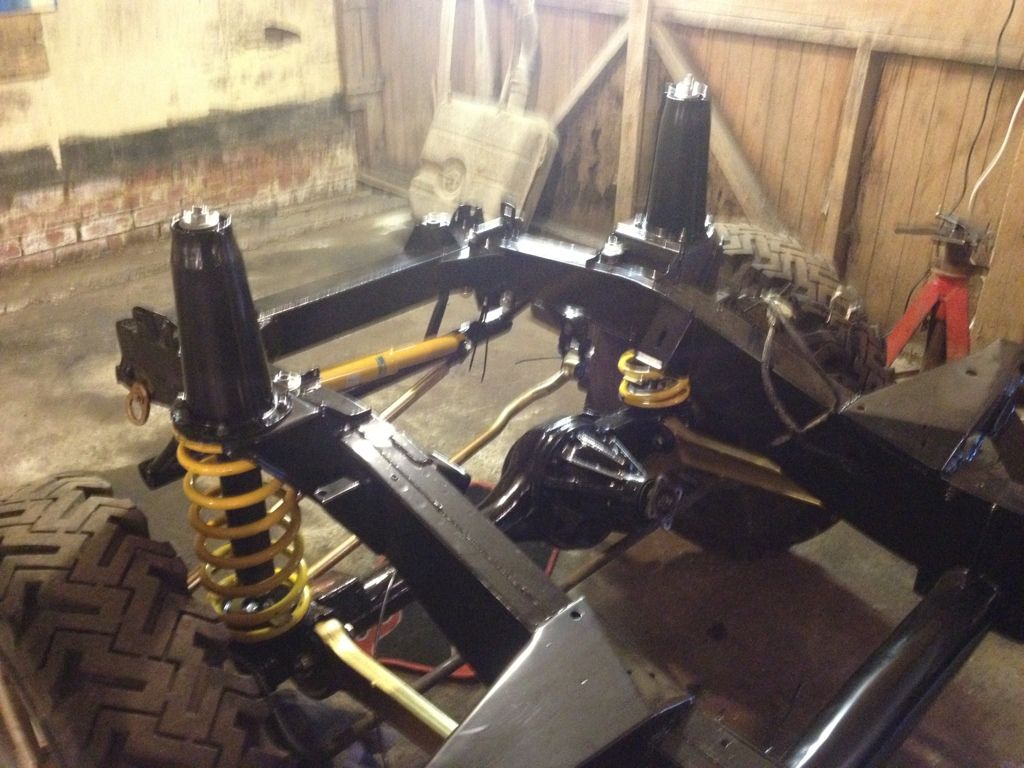
Rear anti roll bar in place.. not tightened up yet as need access for the new fuel tank..
Rear dampers in place...
Front end coming together with new steering damper and new heavy duty steering arms(the basis for my gold under body colour scheme!)
I put a new A-frame ball joint in and got the A-frame back together...
And Ill leave you with a nice shot of the underneath showing the A-frame and polybushes...
Ok, a bit of an update for those interested...
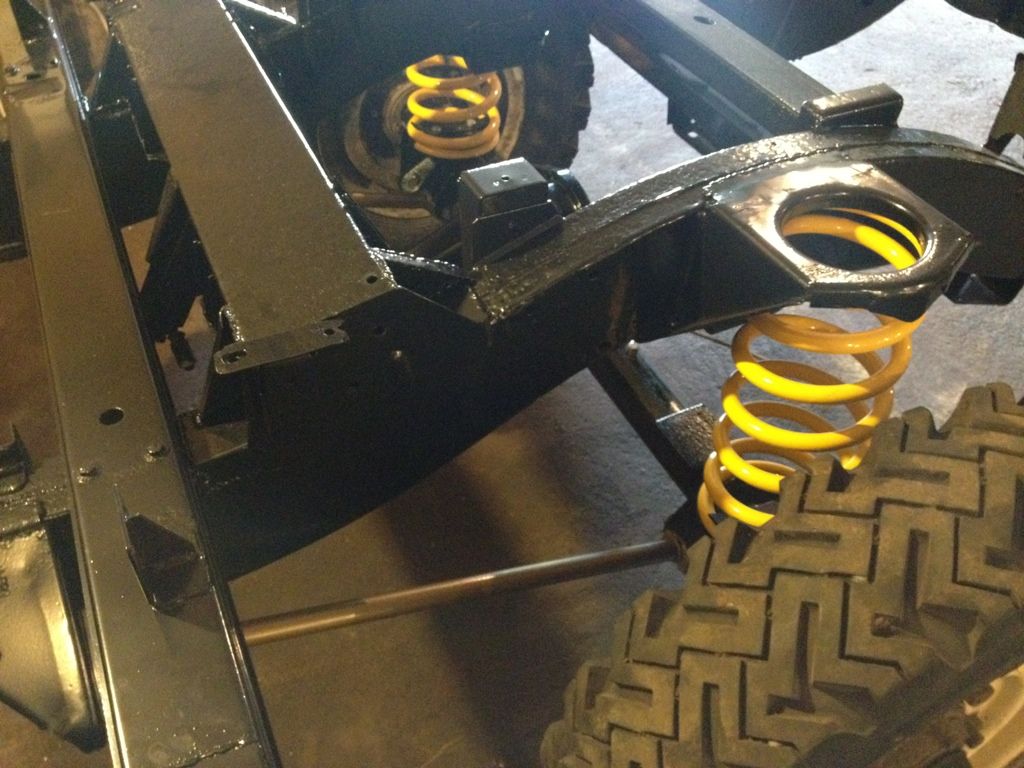
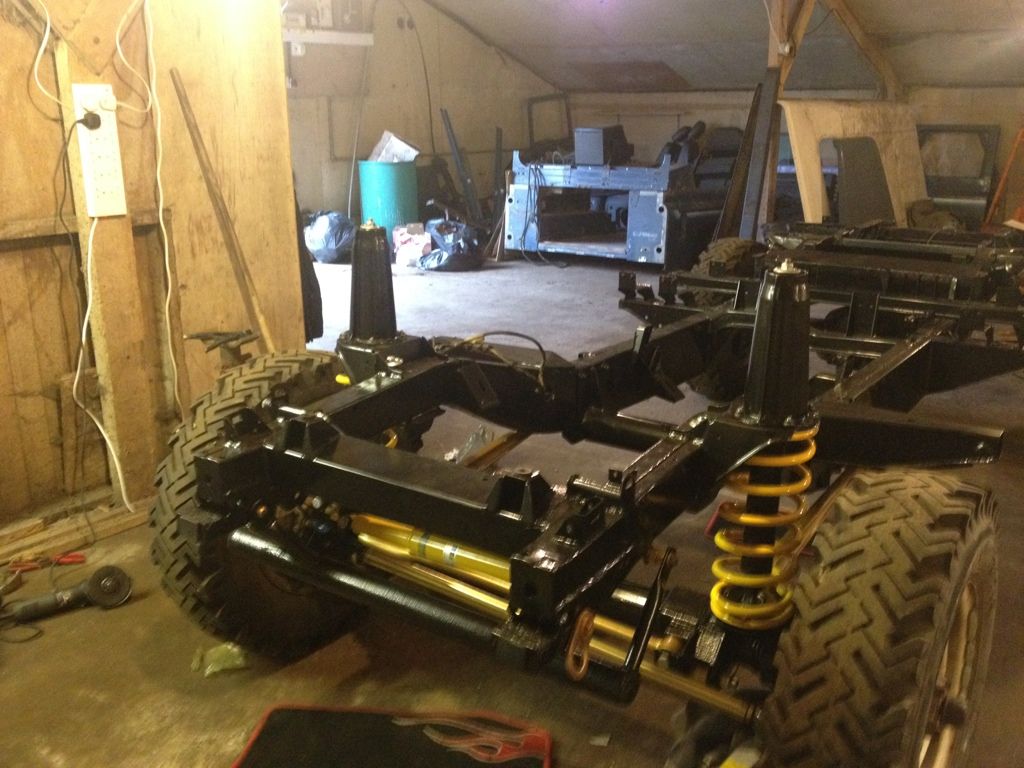
The chassis was rolling now but there are still lots of associated jobs to do before any of the bodywork can start going back on.. First step was to put my front dampers and turrets on..
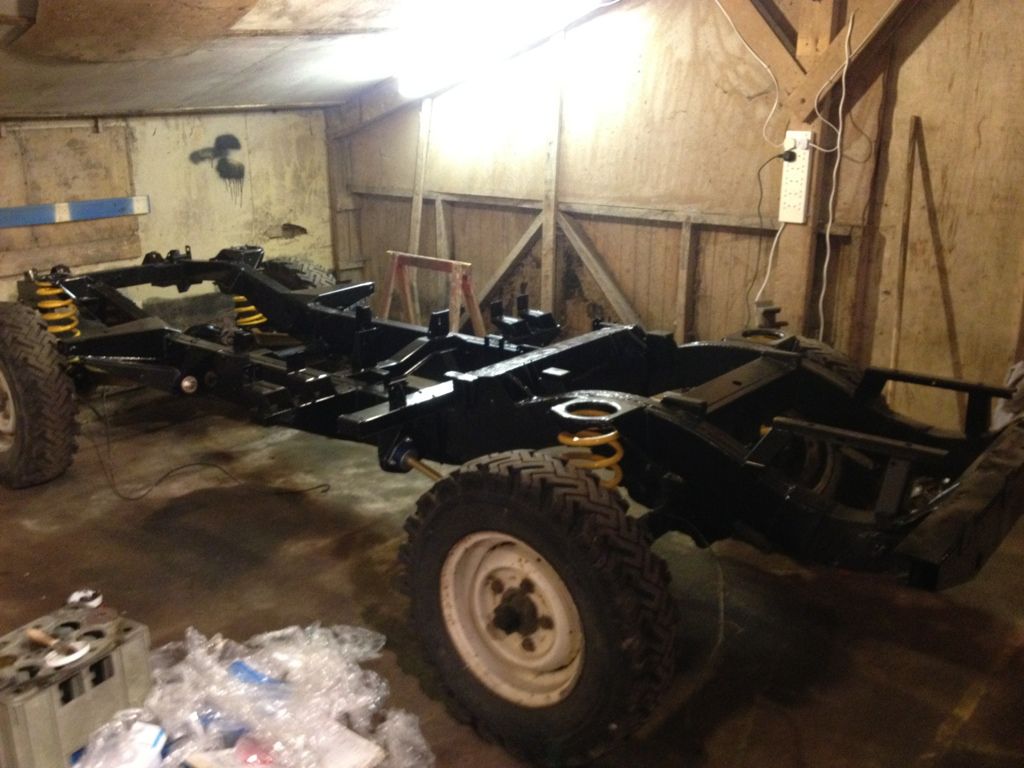
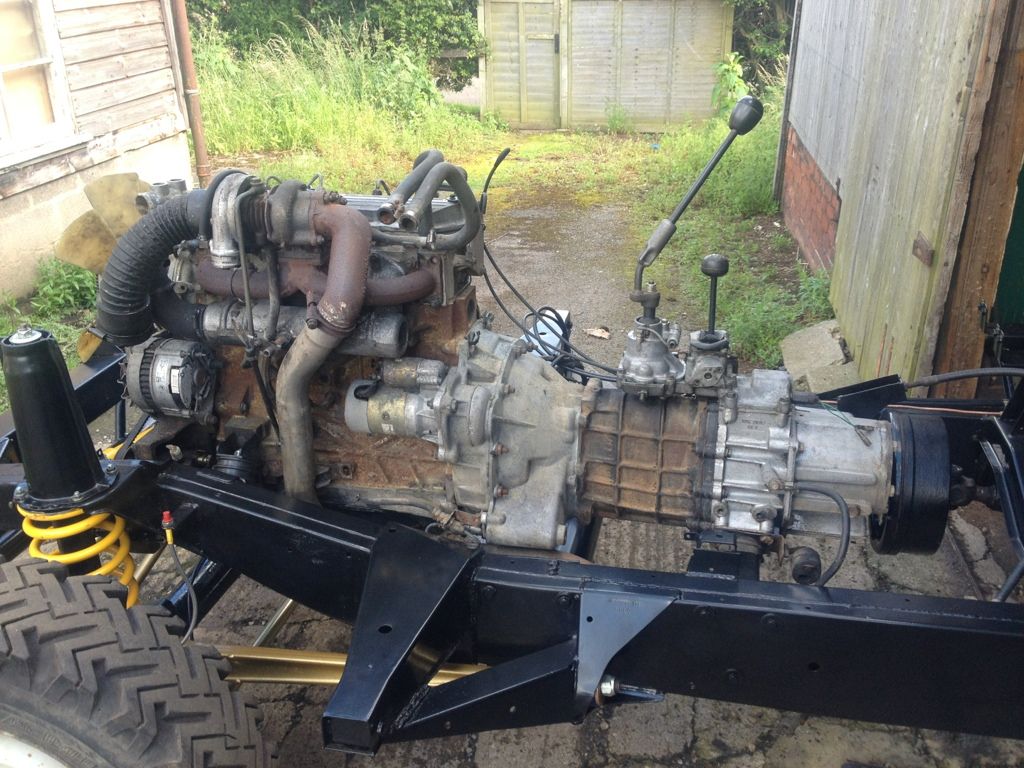
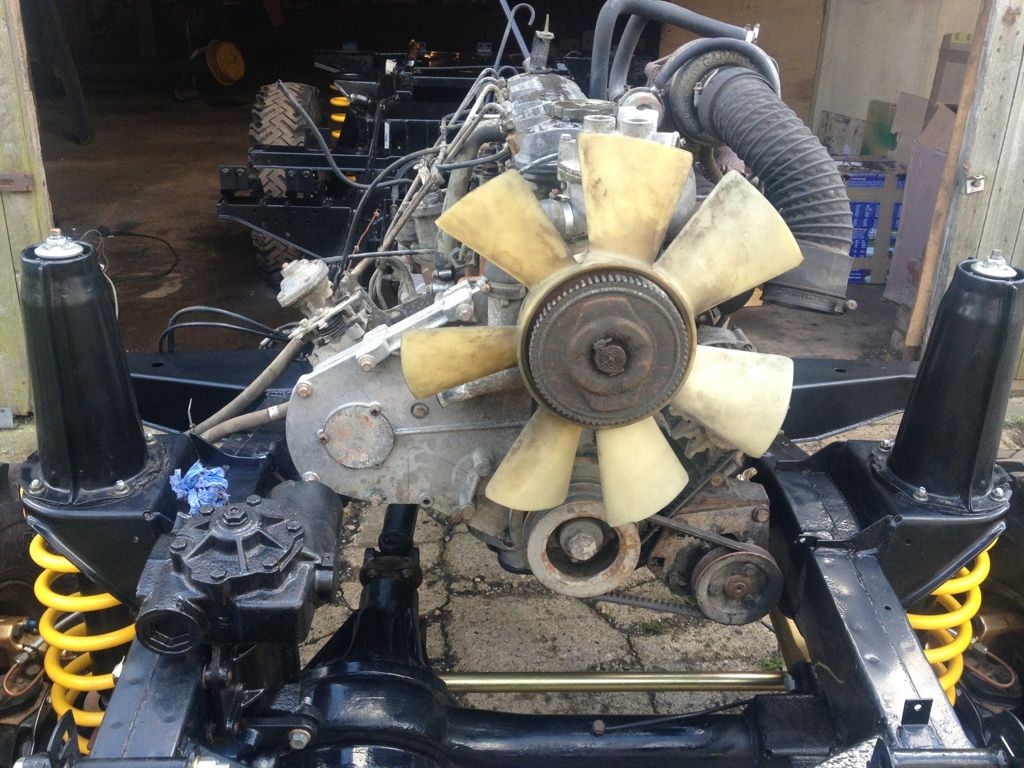
The wiring loom was threaded back through the chassis which was a bit of a bind however needed doing and then the rolling chassis was rolled into a position to enable me to drop the engine and gearbox back into place..
The running gear almost in...
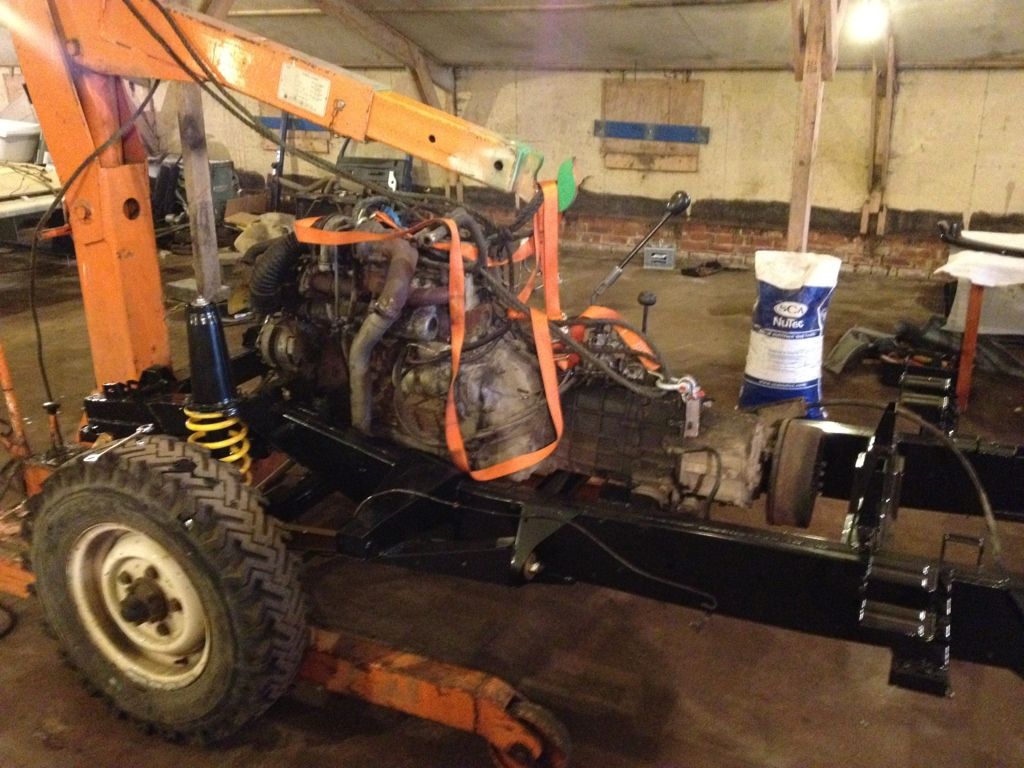
Now after putting lots of effort into making the chassis and associated parts look good it pains me to look at the engine and box looking soo crap and dirty so before things go too far back together they will be getting a good clean and perhaps a lick of paint..
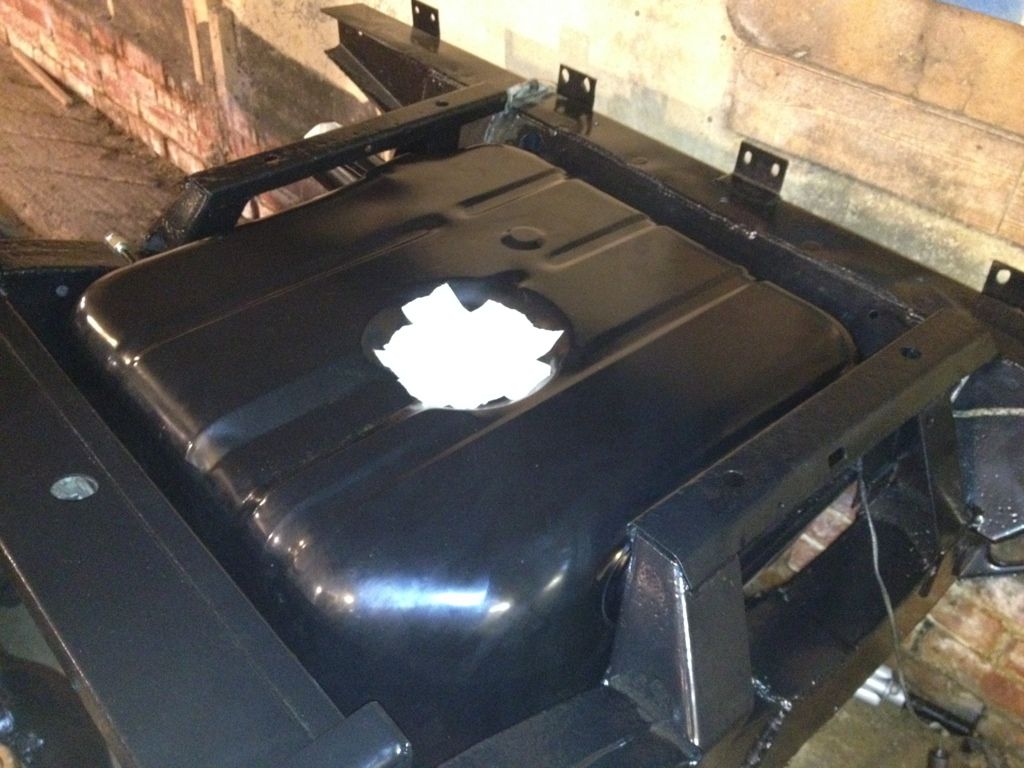
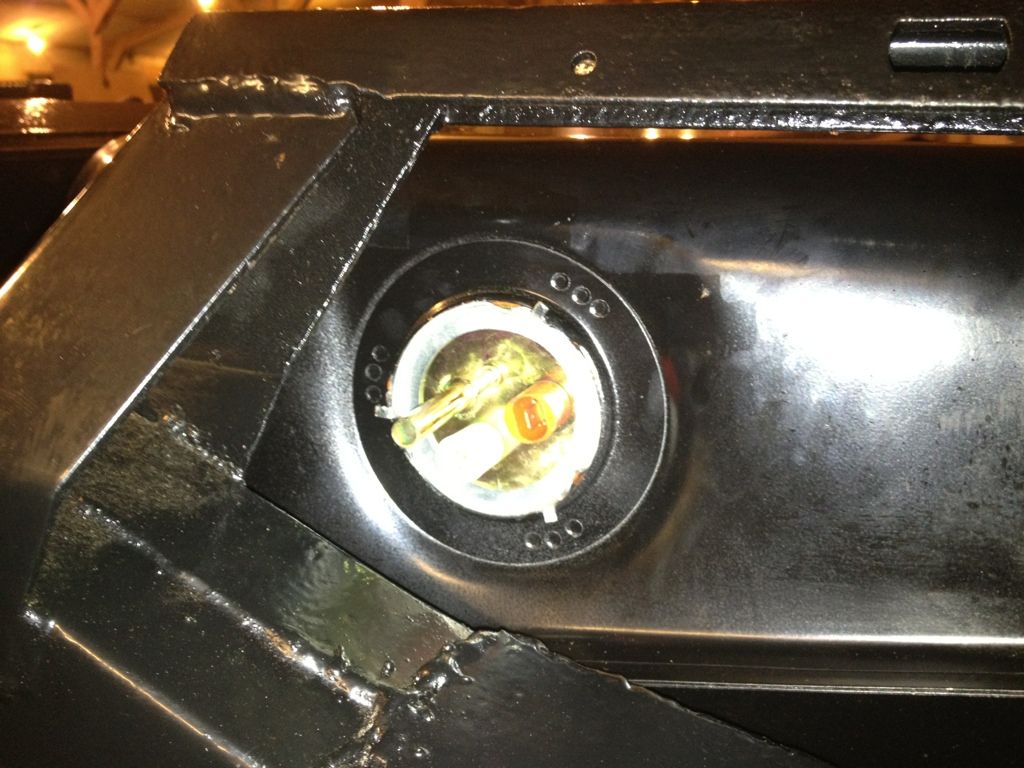
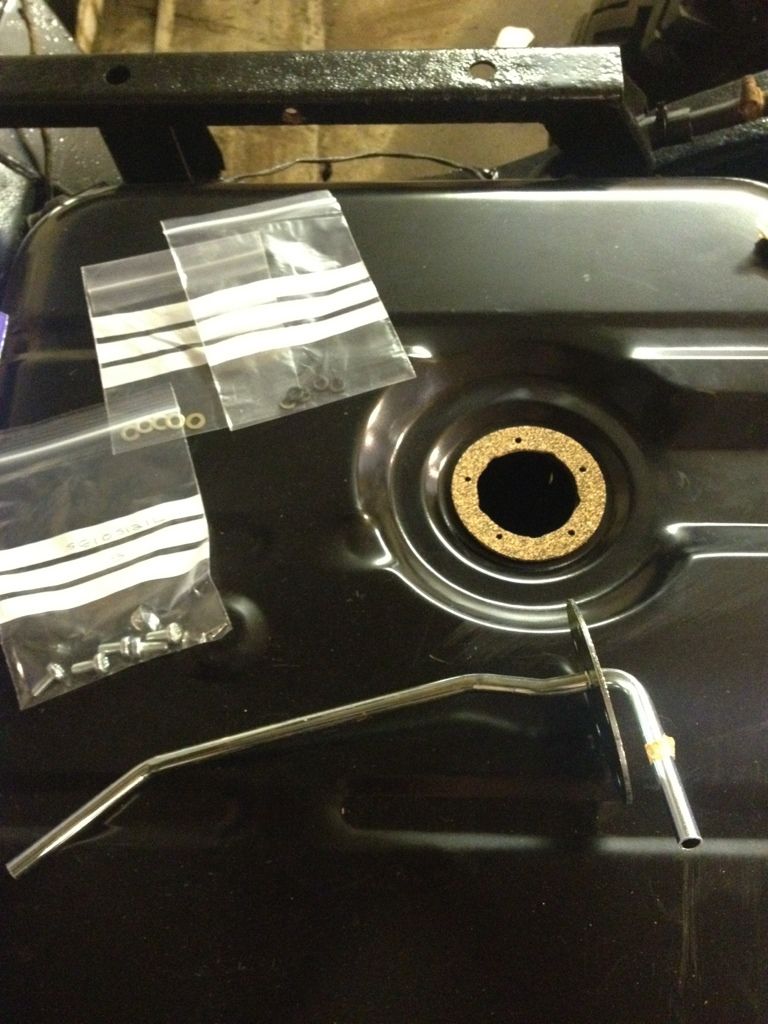
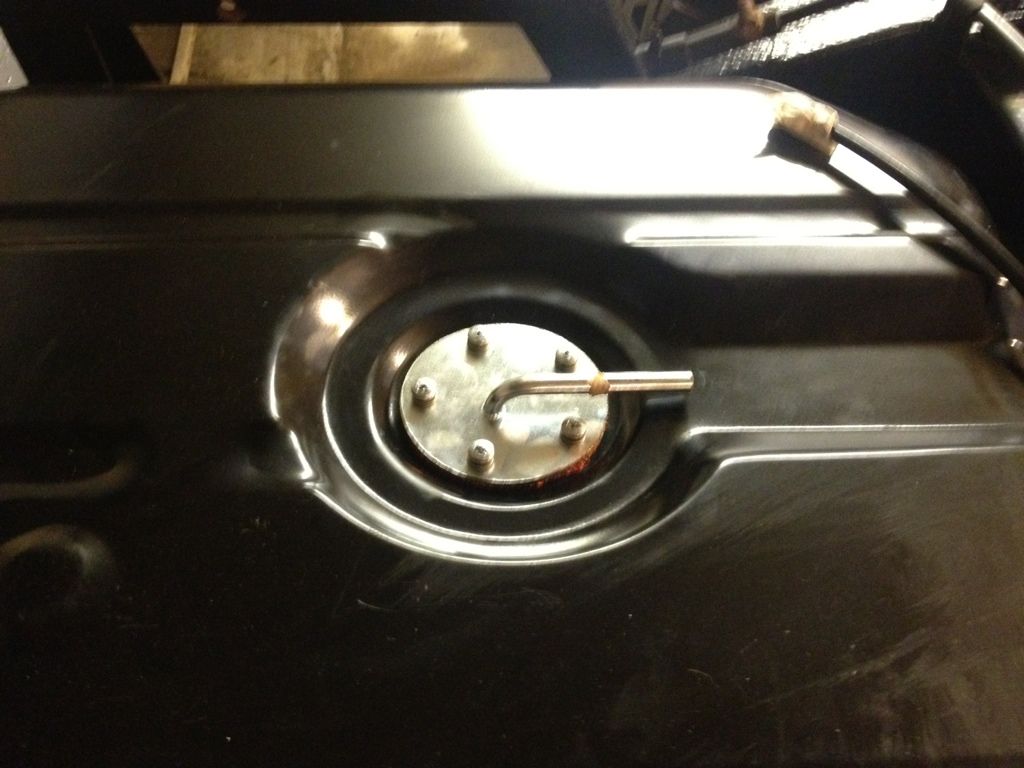
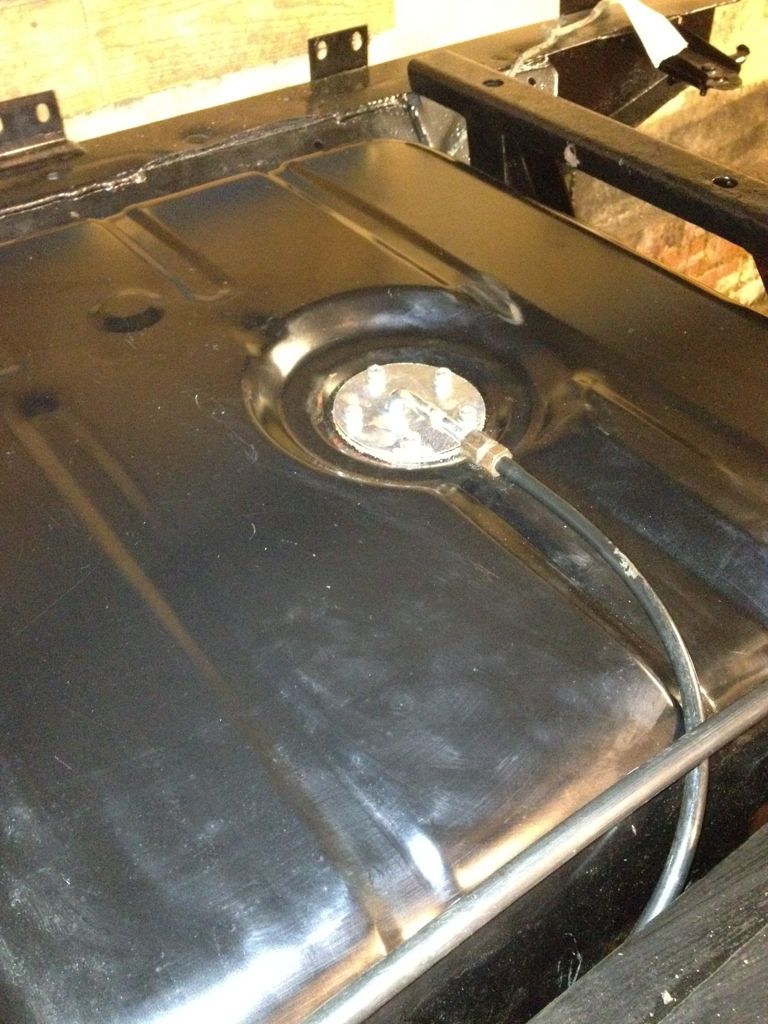
The next job was to put my new fuel tank in place along with a new sender unit..
With the fuel tank in place I was able to tighten up my anti roll bar..
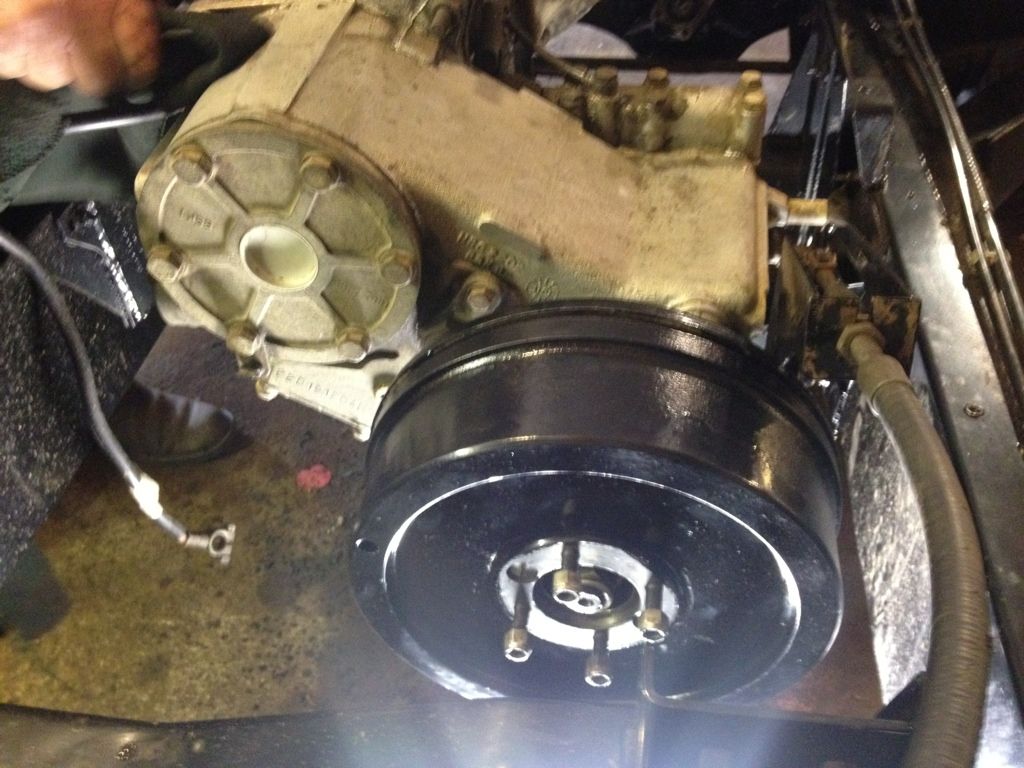
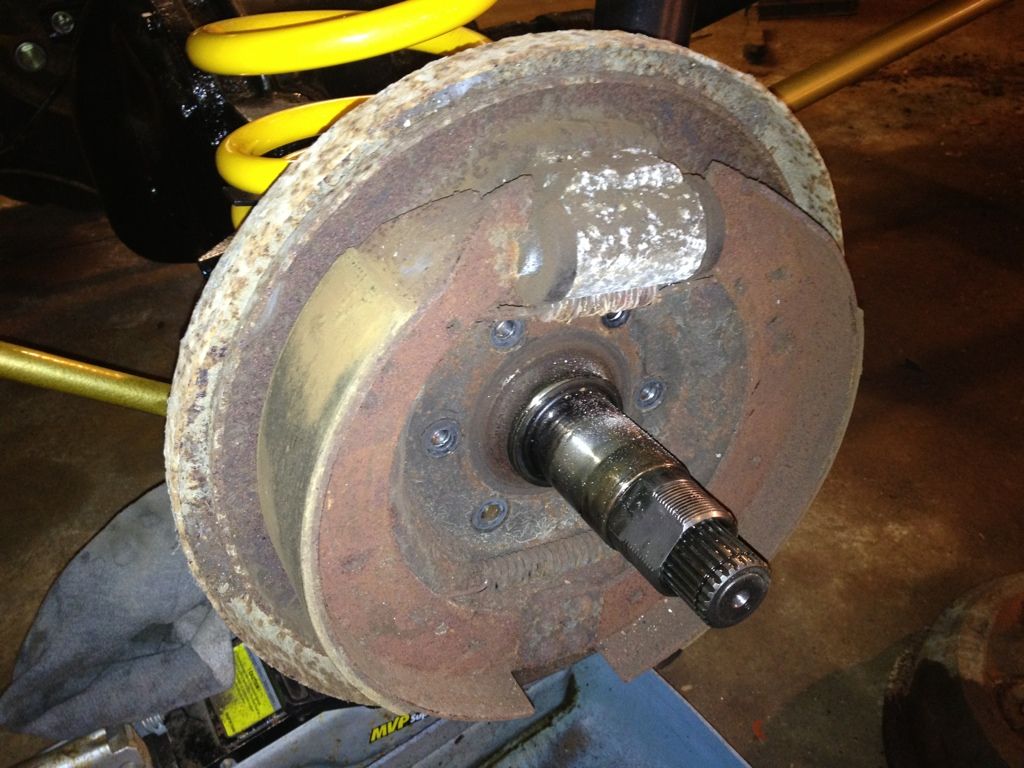
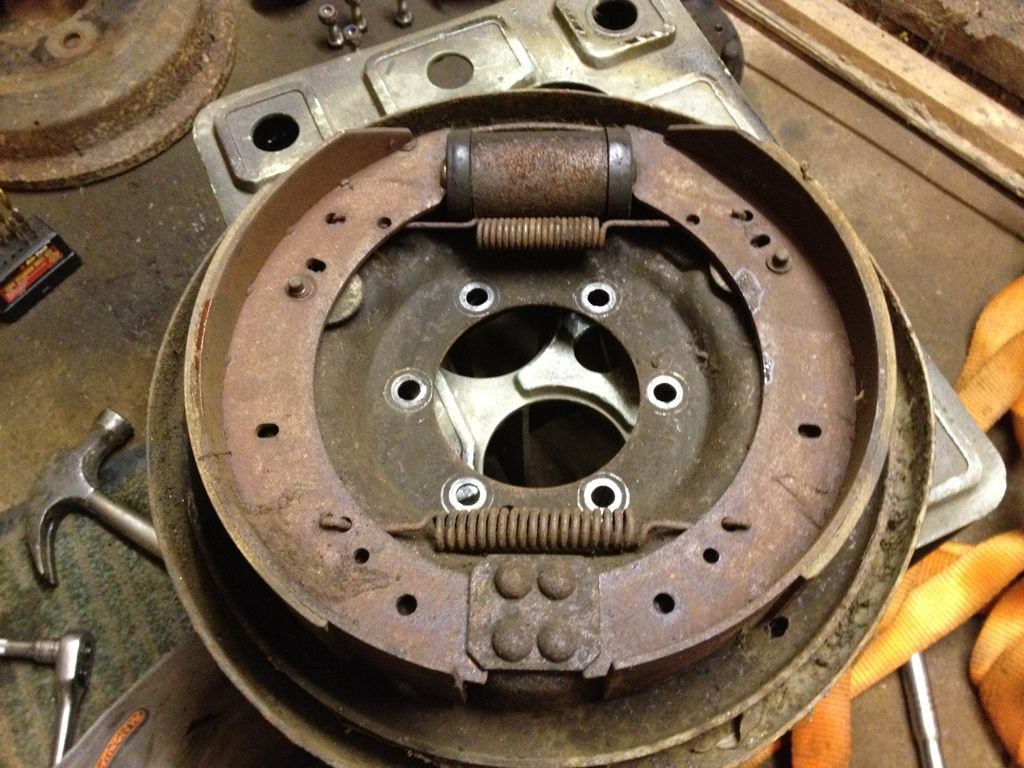
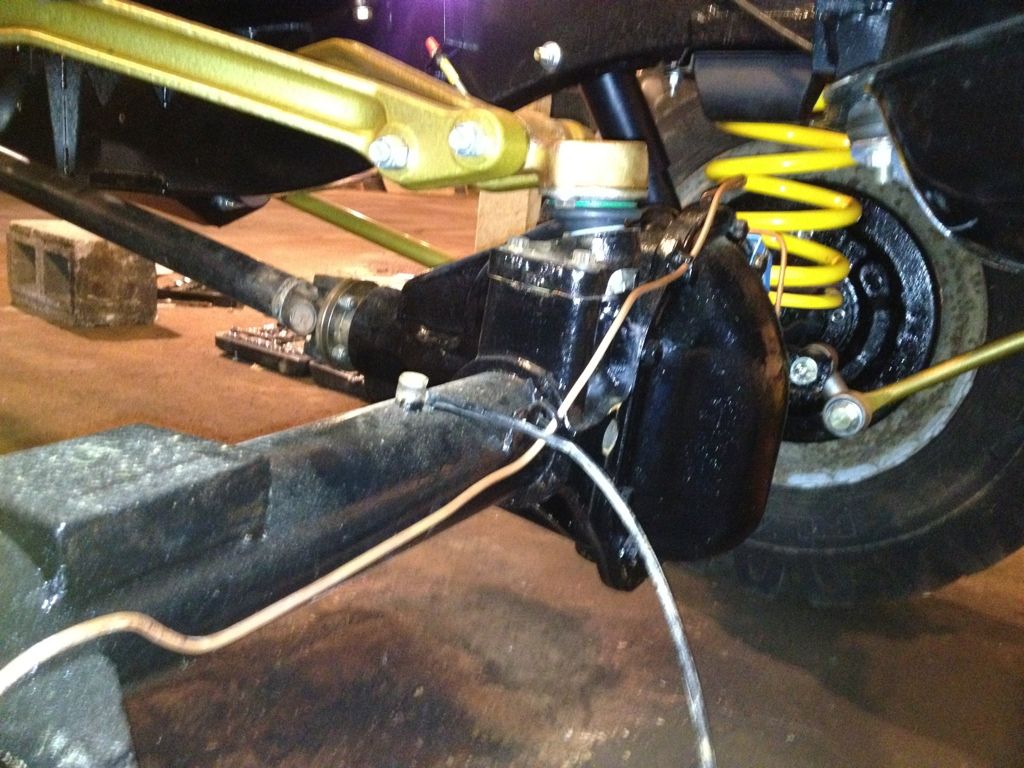
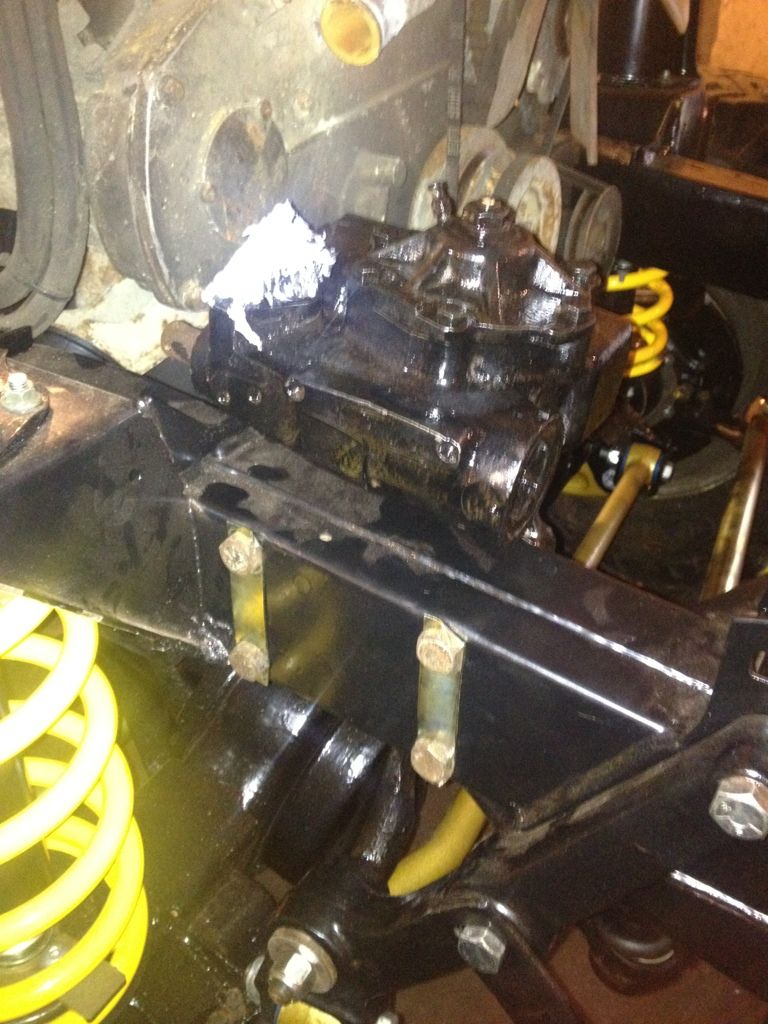
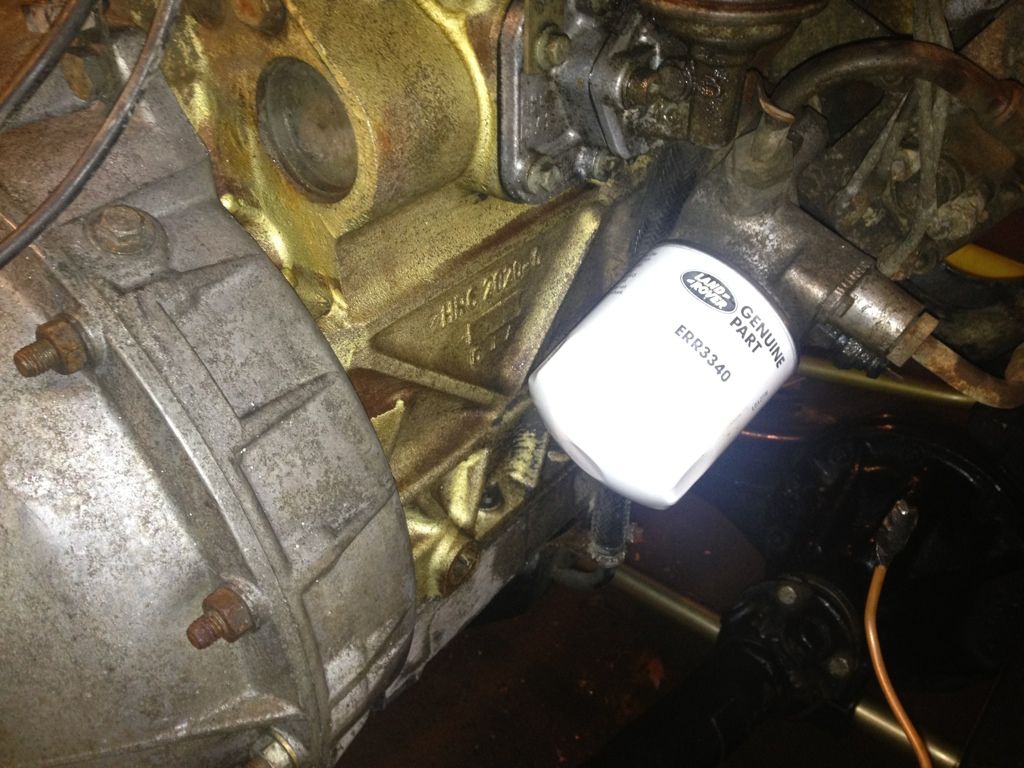
When I bought the 110 I was led to believe it had a seized rear brake drum but this turned out to be a seized transmission brake so I set about replacing the transmission brake shoes, springs and shoe expander.. Whilst in the area I also replaced the transfer box front output flange oil seal.
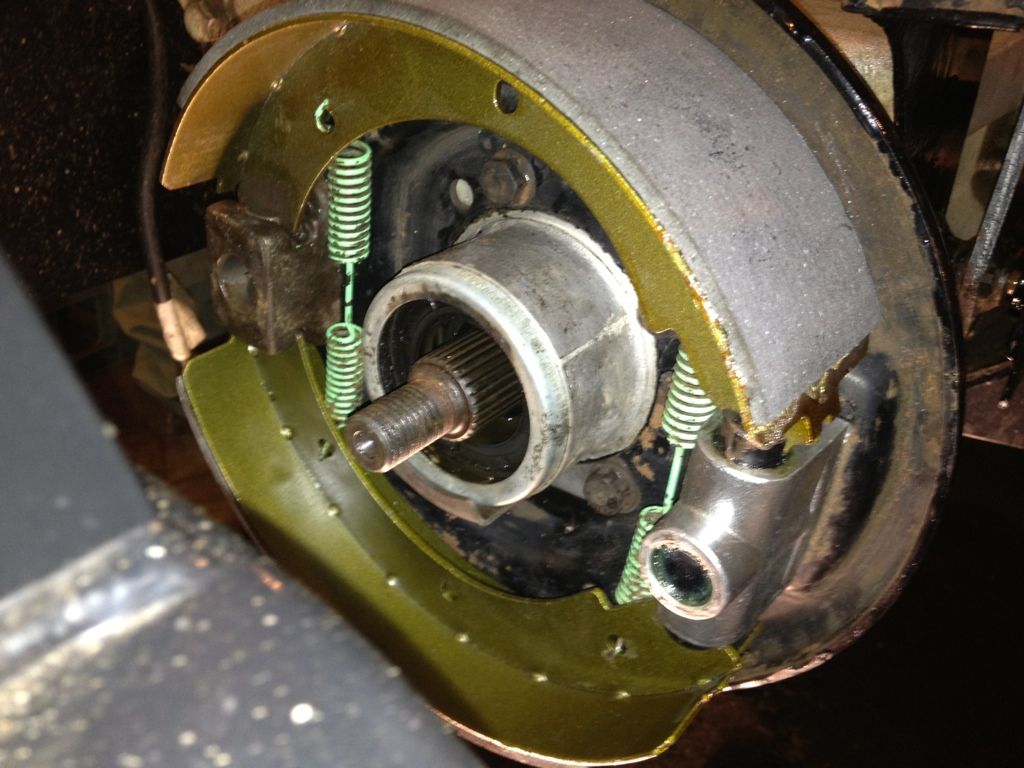
I gave the cover and back plate a lick of paint in the process.. You can see a hand in the following photo which is starting to clean the gearbox!
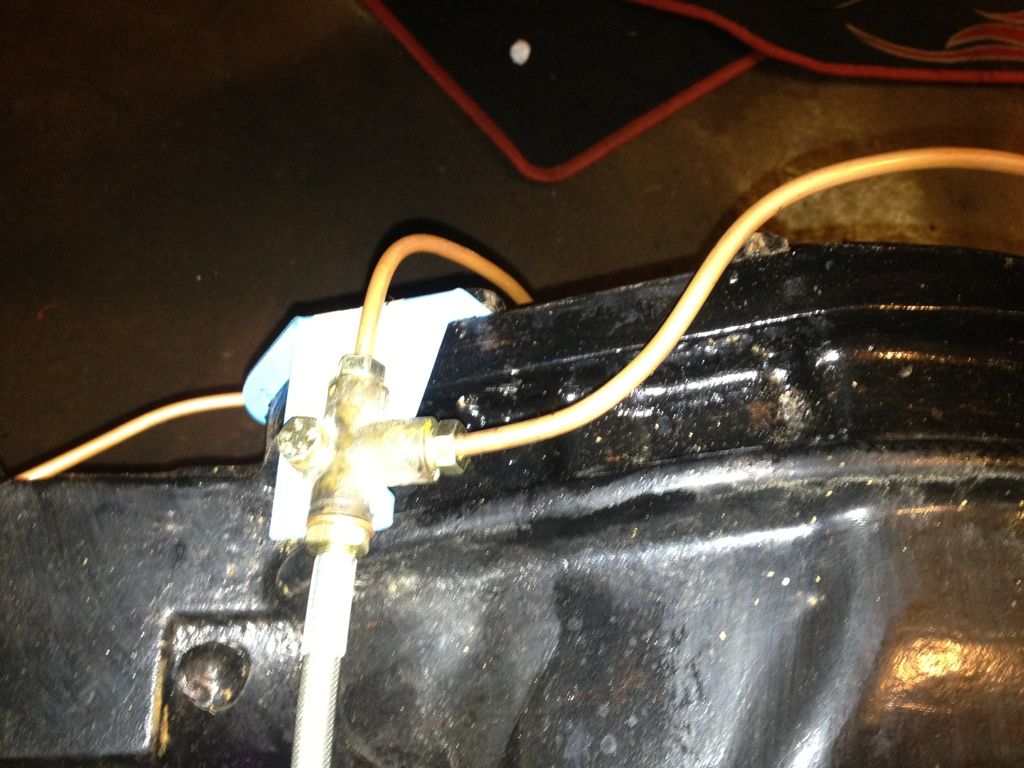
Next job was to fit the new fuel return to the tank..
I hope the above has kept people entertained... Until next time..
The chassis was rolling now but there are still lots of associated jobs to do before any of the bodywork can start going back on.. First step was to put my front dampers and turrets on..
The wiring loom was threaded back through the chassis which was a bit of a bind however needed doing and then the rolling chassis was rolled into a position to enable me to drop the engine and gearbox back into place..
The running gear almost in...
Now after putting lots of effort into making the chassis and associated parts look good it pains me to look at the engine and box looking soo crap and dirty so before things go too far back together they will be getting a good clean and perhaps a lick of paint..
The next job was to put my new fuel tank in place along with a new sender unit..
With the fuel tank in place I was able to tighten up my anti roll bar..
When I bought the 110 I was led to believe it had a seized rear brake drum but this turned out to be a seized transmission brake so I set about replacing the transmission brake shoes, springs and shoe expander.. Whilst in the area I also replaced the transfer box front output flange oil seal.
I gave the cover and back plate a lick of paint in the process.. You can see a hand in the following photo which is starting to clean the gearbox!
Next job was to fit the new fuel return to the tank..
I hope the above has kept people entertained... Until next time..
Mark Benson said:
Off topic slightly, looking at your profile, I think you recently sold a Fabia to my parents 
Hi Mark.. I think it must have been an associate company of ours that sold the Fabia to your parents as it wasn't us! It can get abit confusing with the names! I'll let you know if/when the 110 is for sale.
Ok so the progress continued.. Im getting a bit fed up of this now.. so far its been EVERY Tuesday and Thursday night and Sat afts and Sunday since January... I am a bit ahead of these posts though but not close enough to the finishing line!..
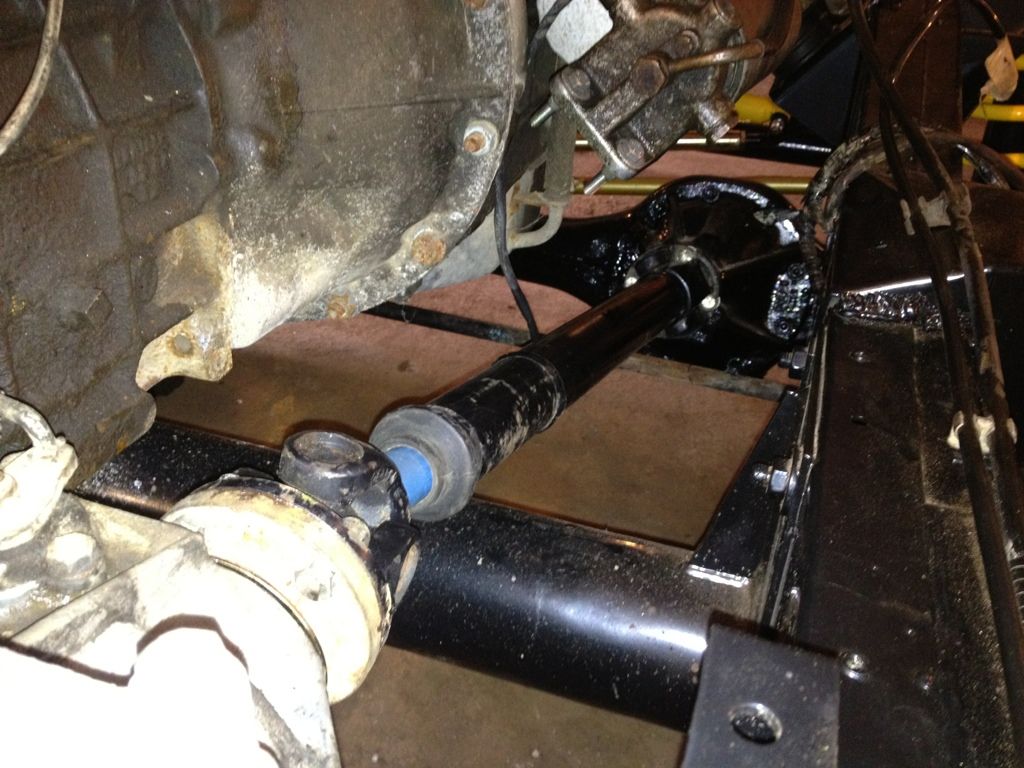
So the next jobs that got done were the prop shafts were put back into place..
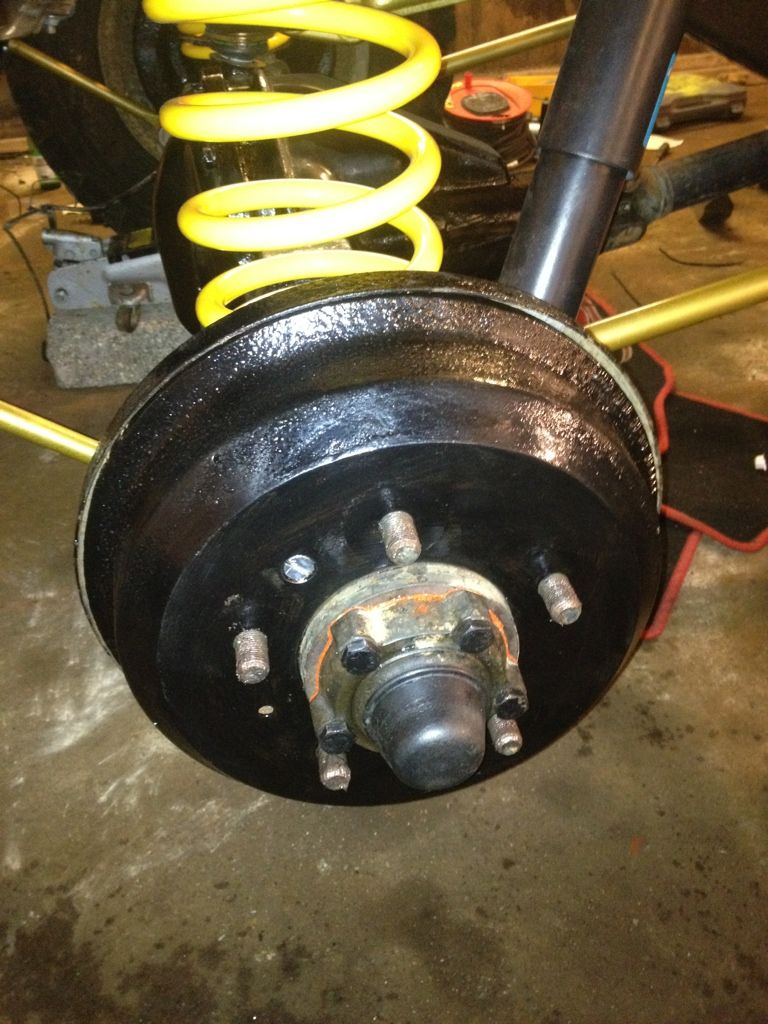
It now came time to deal with my hubs/brakes.. First job was the rears..
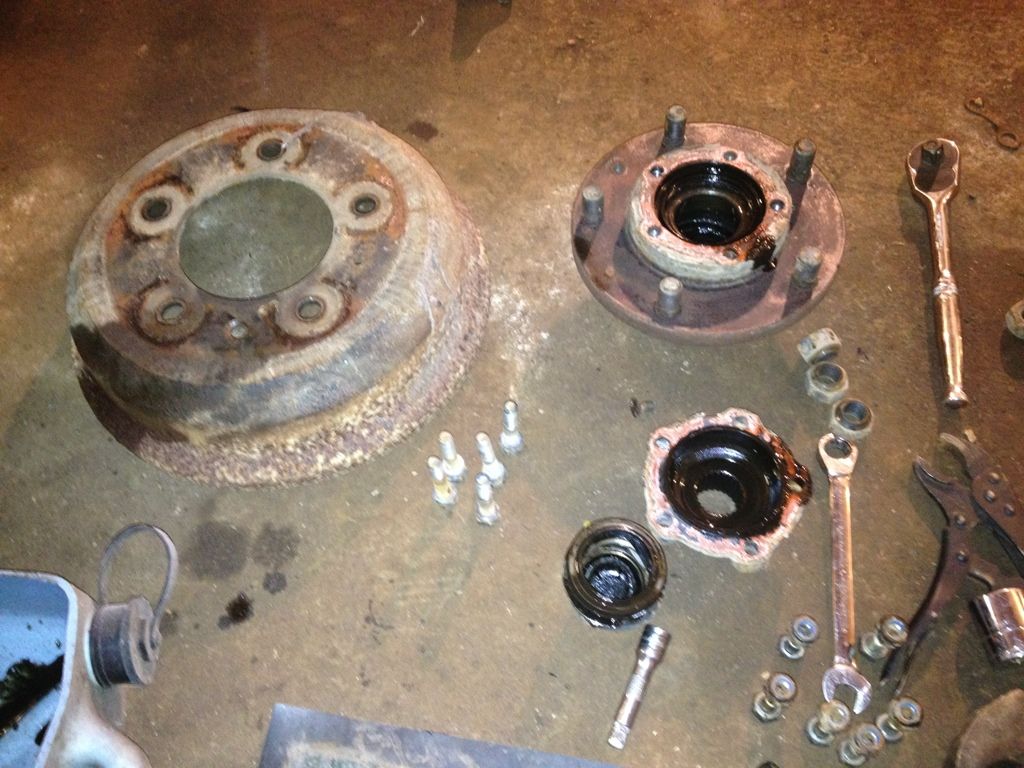

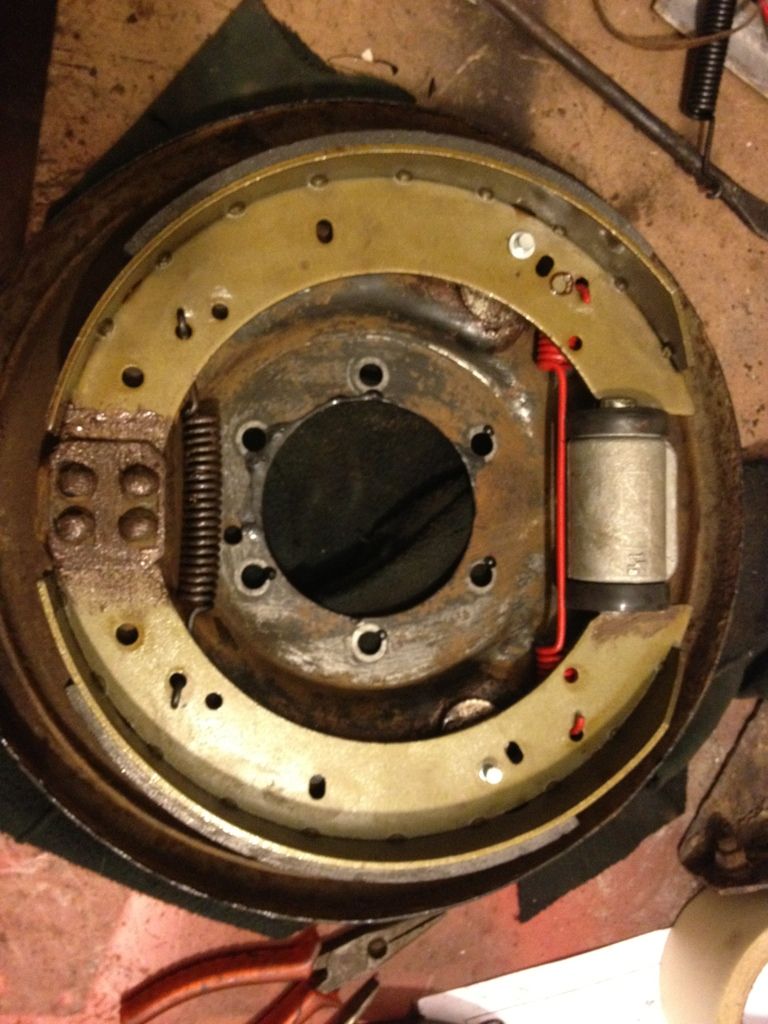
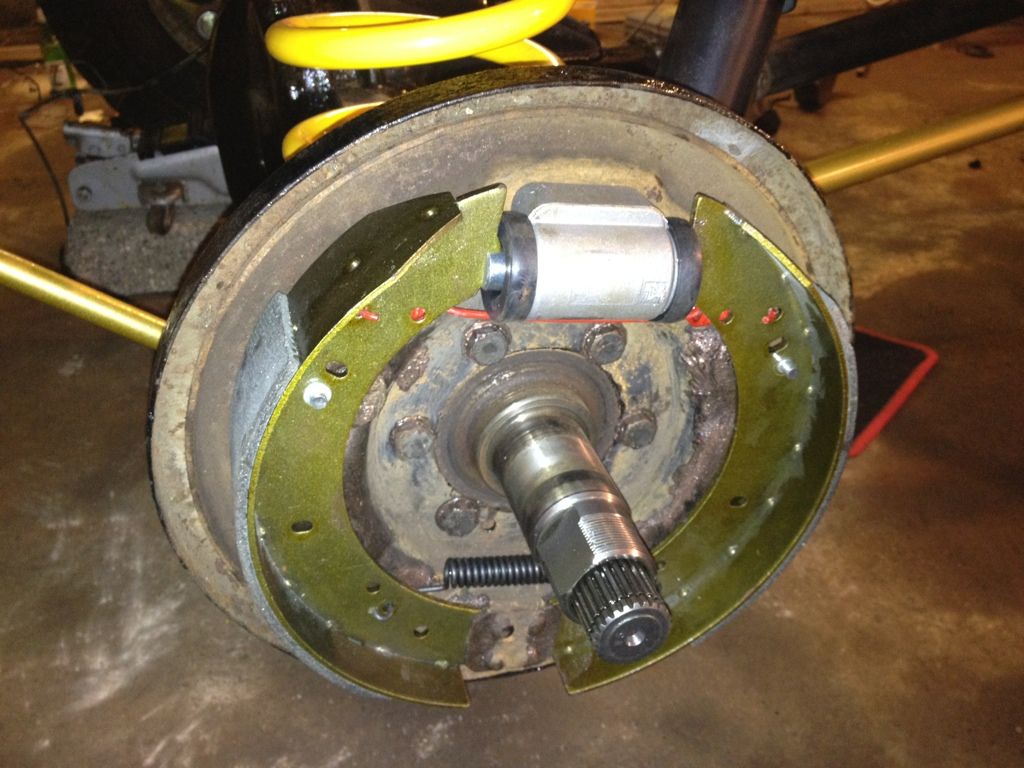
The rear brake drums and backing plates got a lick of paint and everything was re assembled with new wheel cylinders, shoes, springs, seals etc...
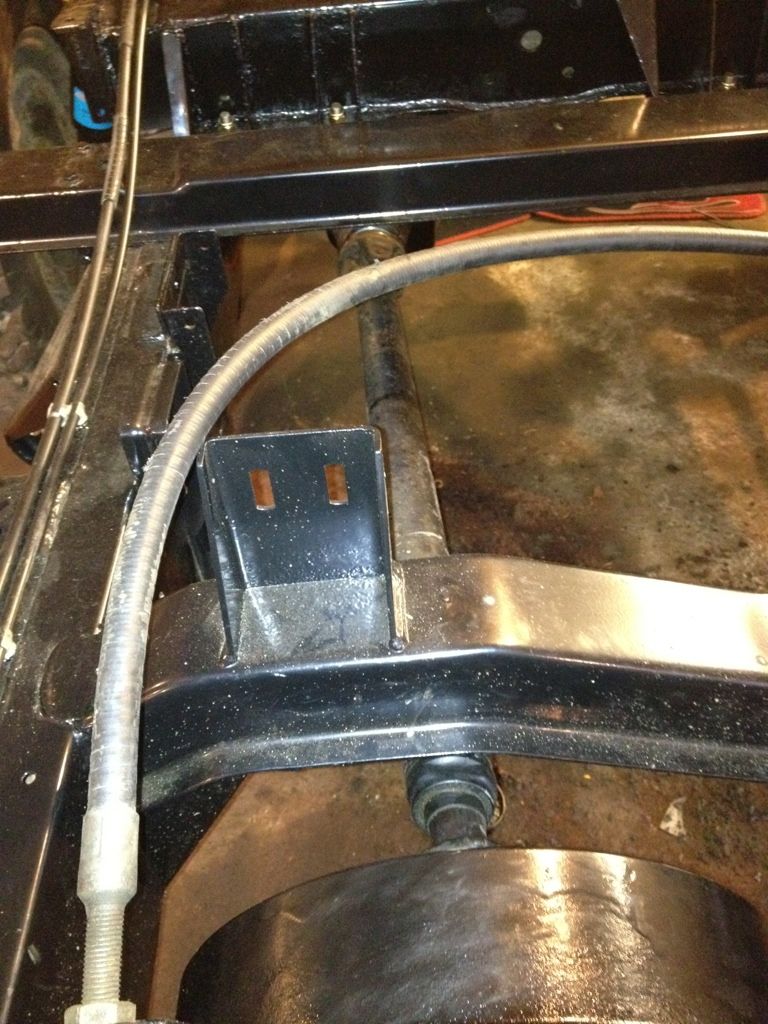
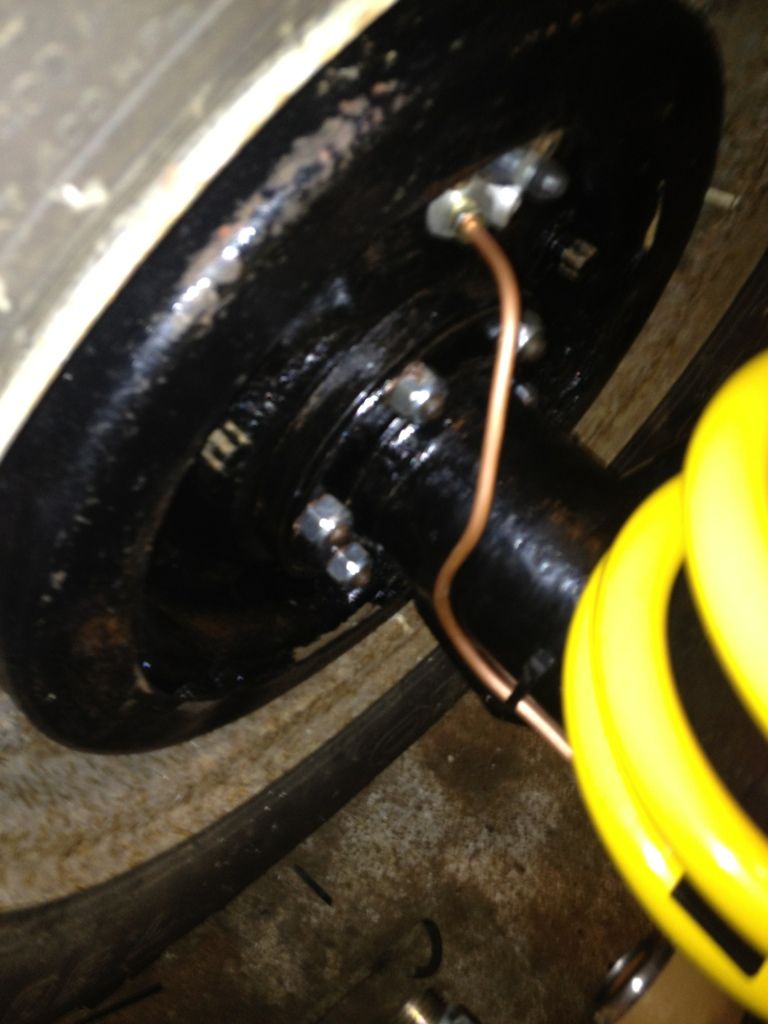
Whilst at the back end I ran new brake lines accross the axle..
Next Job on the list was the front hubs/ brakes... updates to follow.
So the next jobs that got done were the prop shafts were put back into place..
It now came time to deal with my hubs/brakes.. First job was the rears..
The rear brake drums and backing plates got a lick of paint and everything was re assembled with new wheel cylinders, shoes, springs, seals etc...
Whilst at the back end I ran new brake lines accross the axle..
Next Job on the list was the front hubs/ brakes... updates to follow.
Ok so again.. Ive been plodding along..
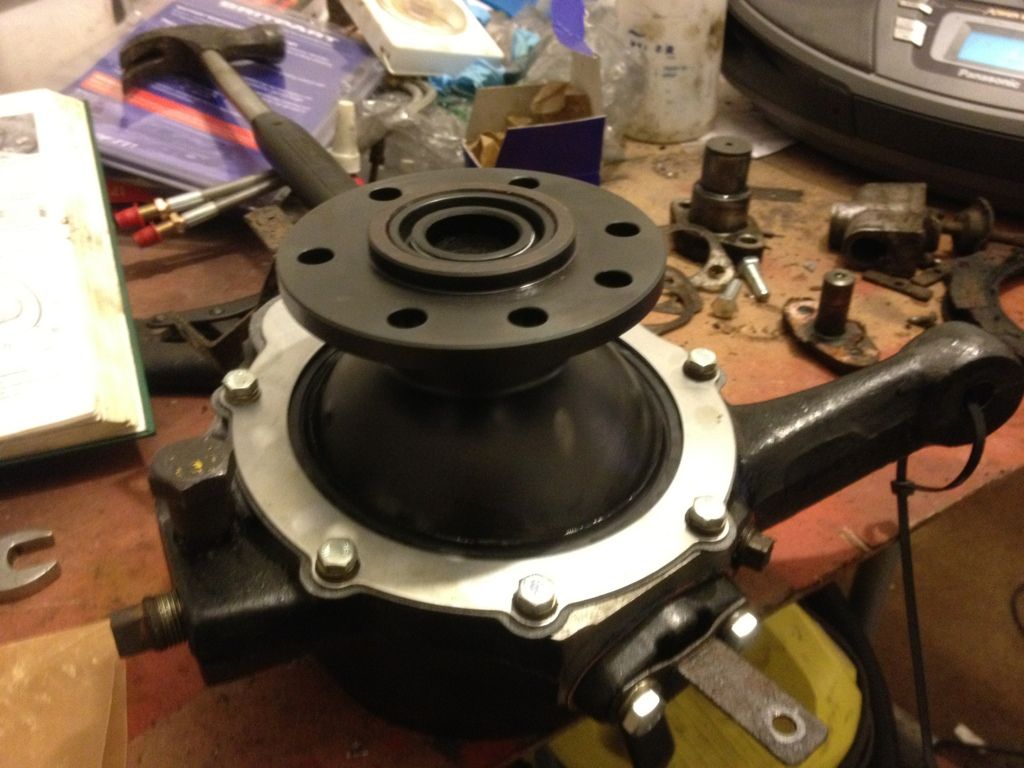
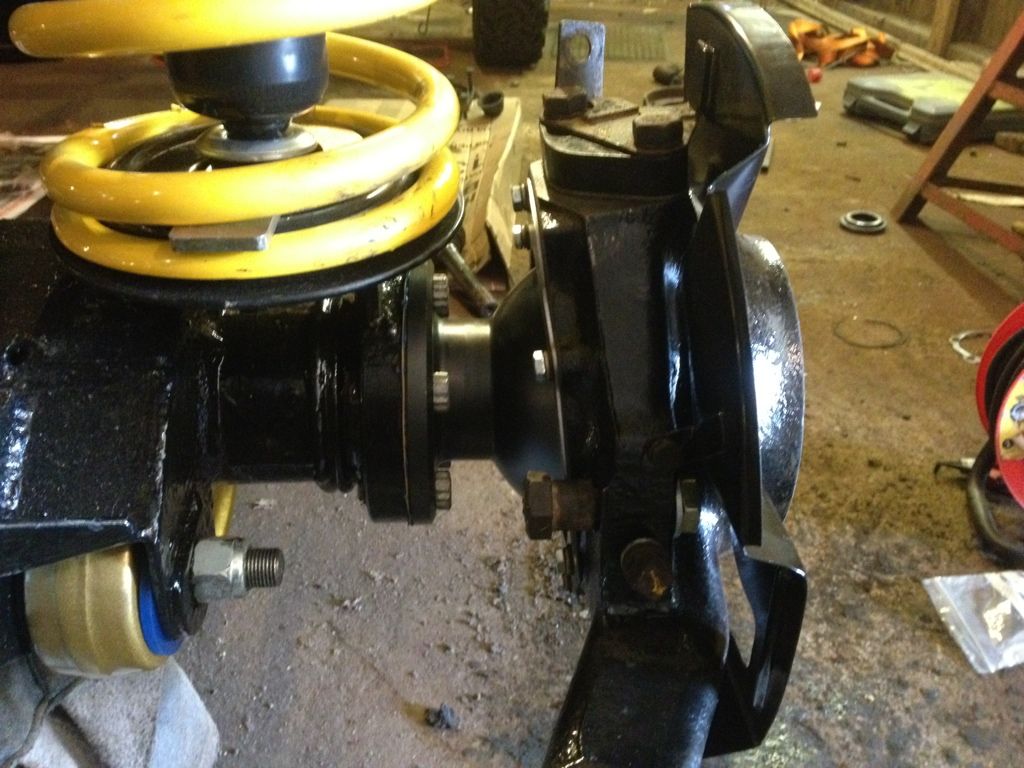
The next job on the list was the front hub assemblies and brakes... So this is what things currently look like.
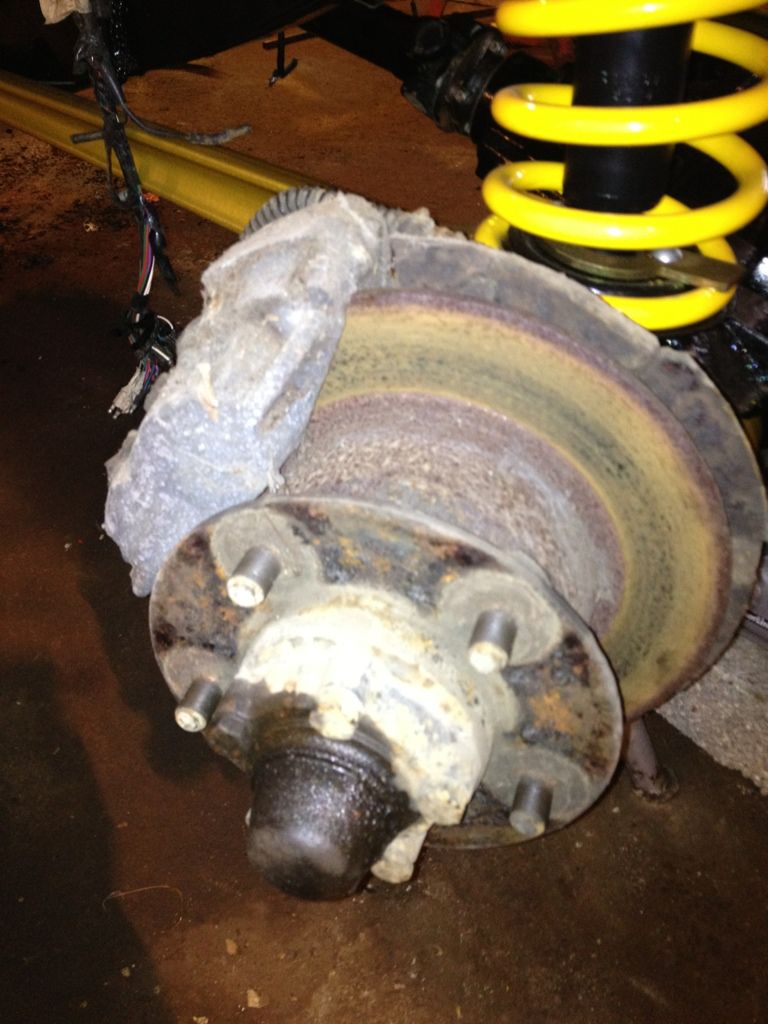
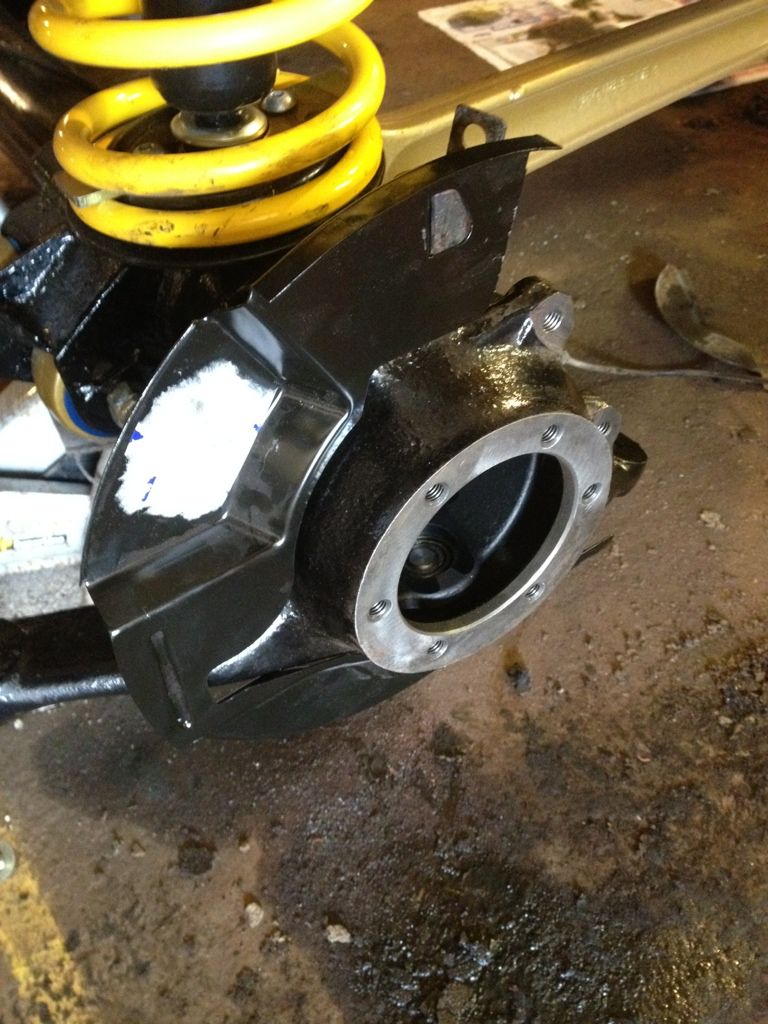
Off the car the whole hub assembly.
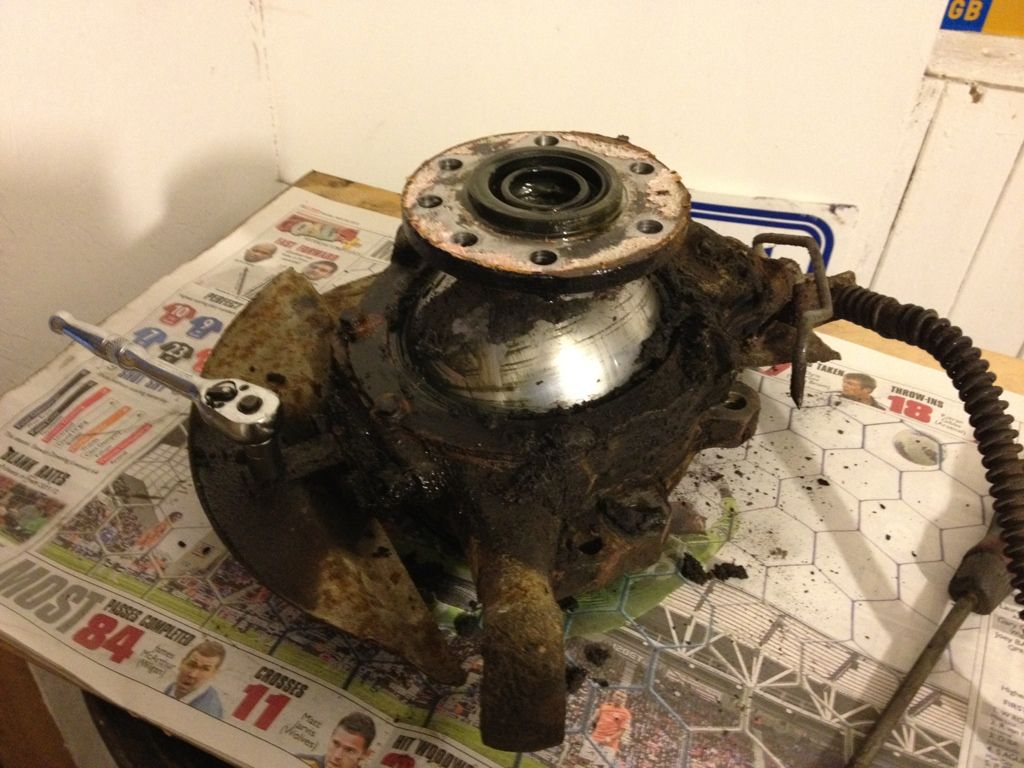
And the hub less axles!
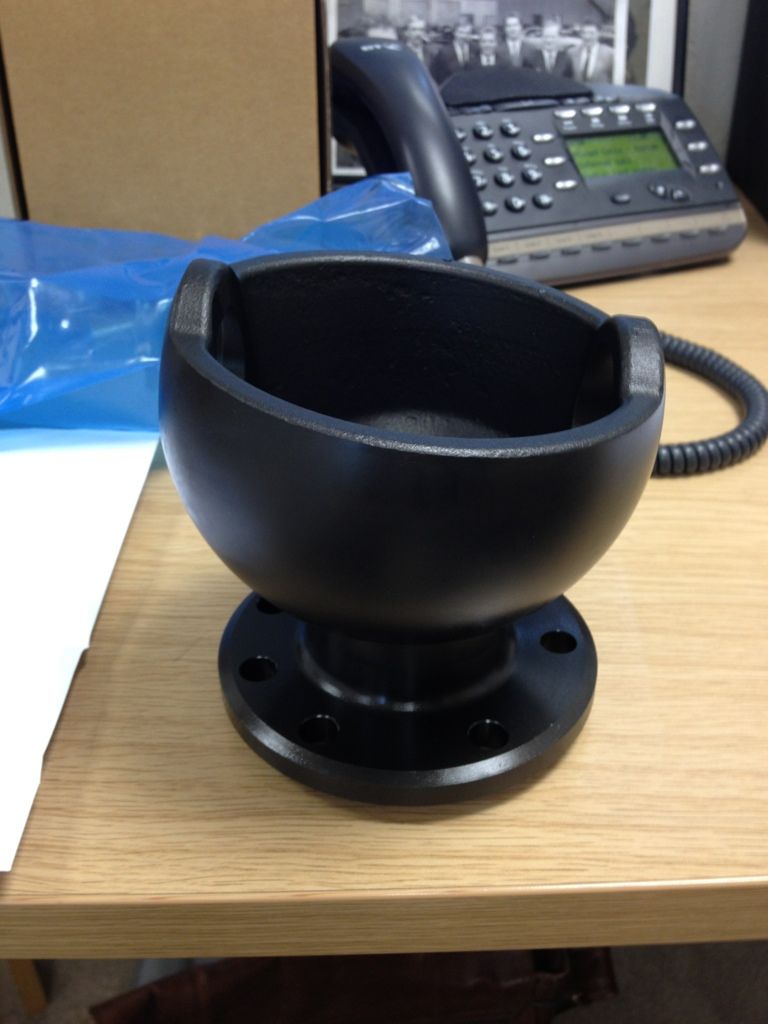
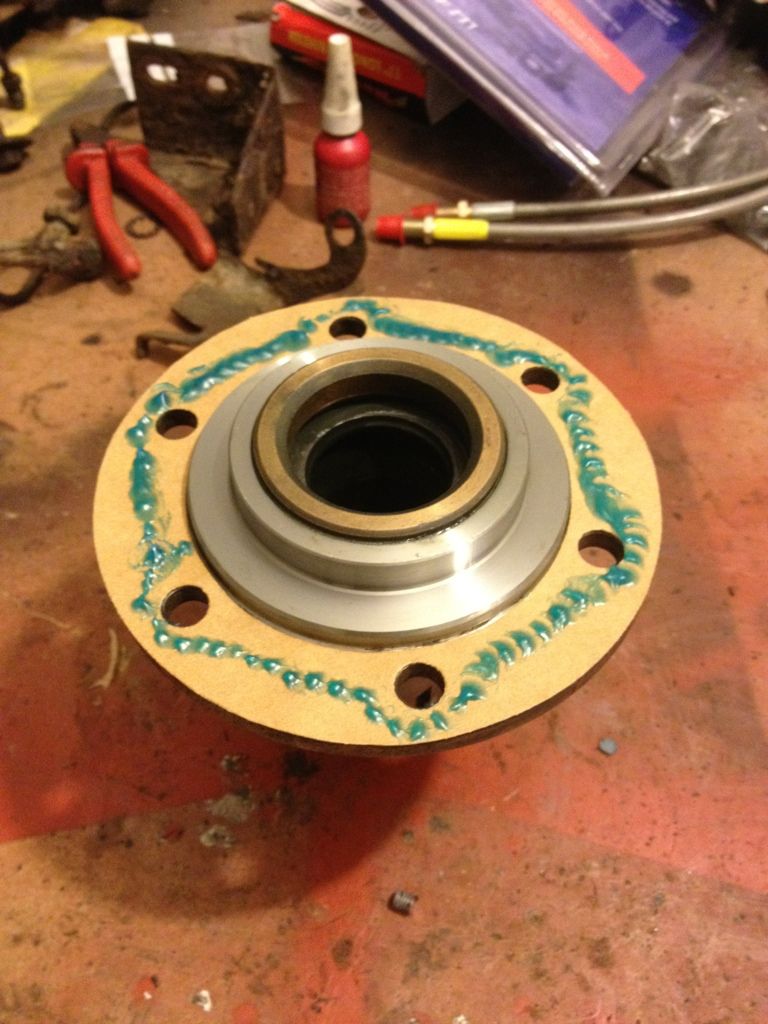
New swivel hubs are teflon coated instead of the chrome originals which regularly get pitted causing leaks..
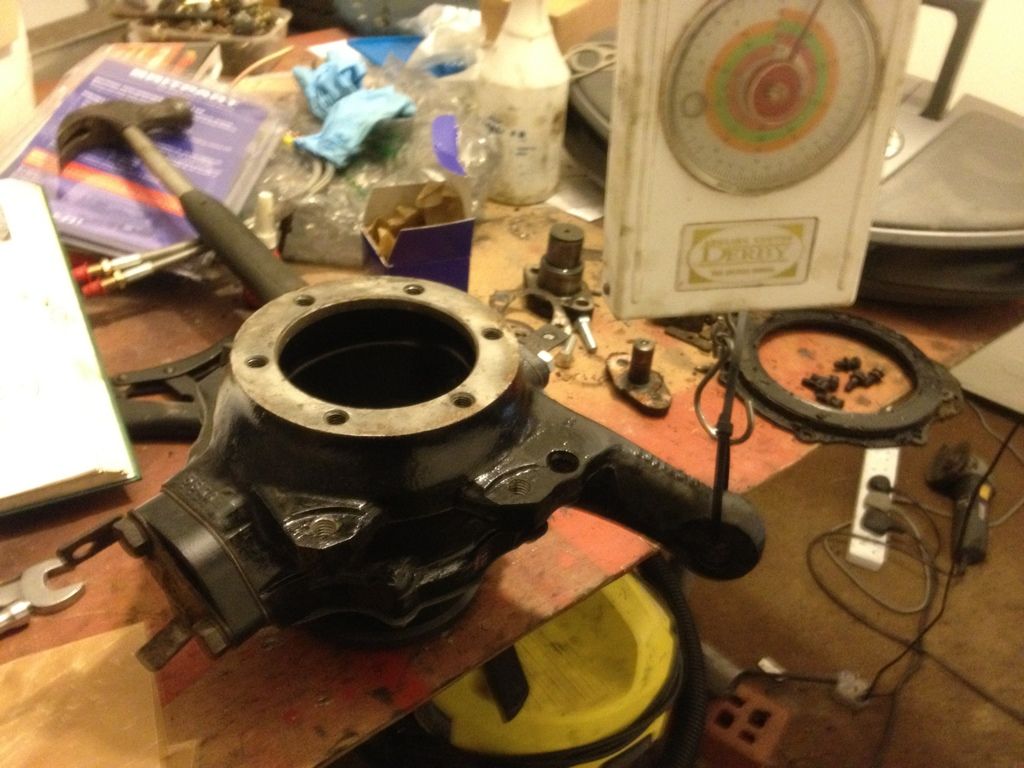
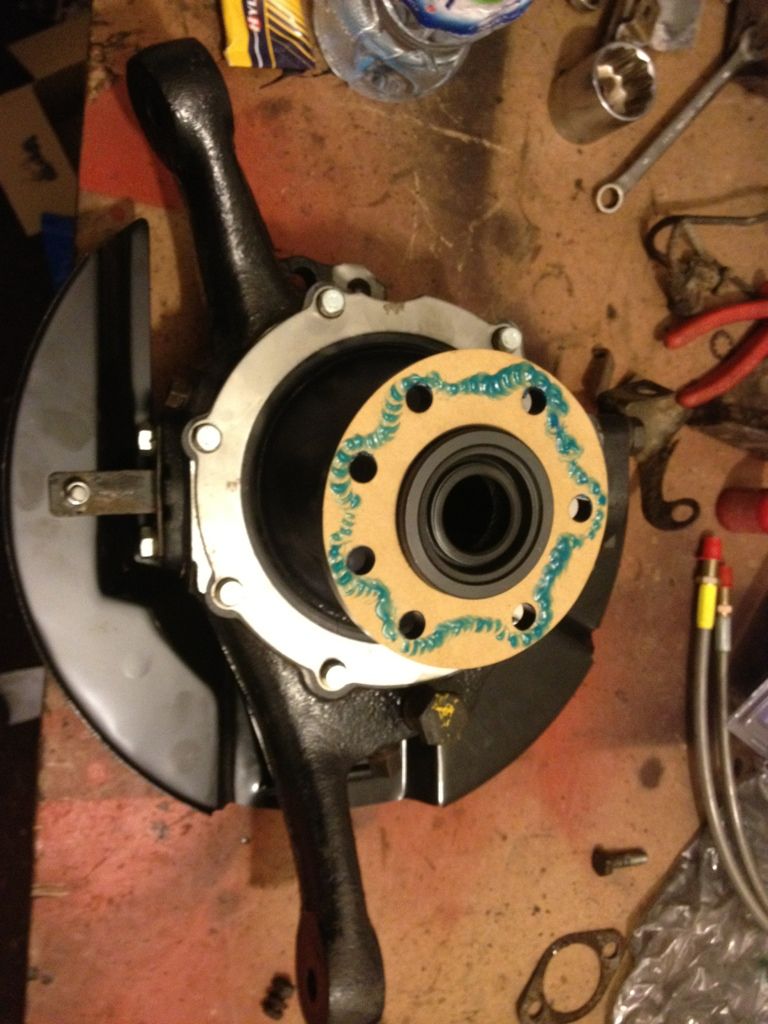
Part of the swivel hub rebuild requires the drag to be set at a certain pressure.. This required me to borrow my brother's fishing scales!
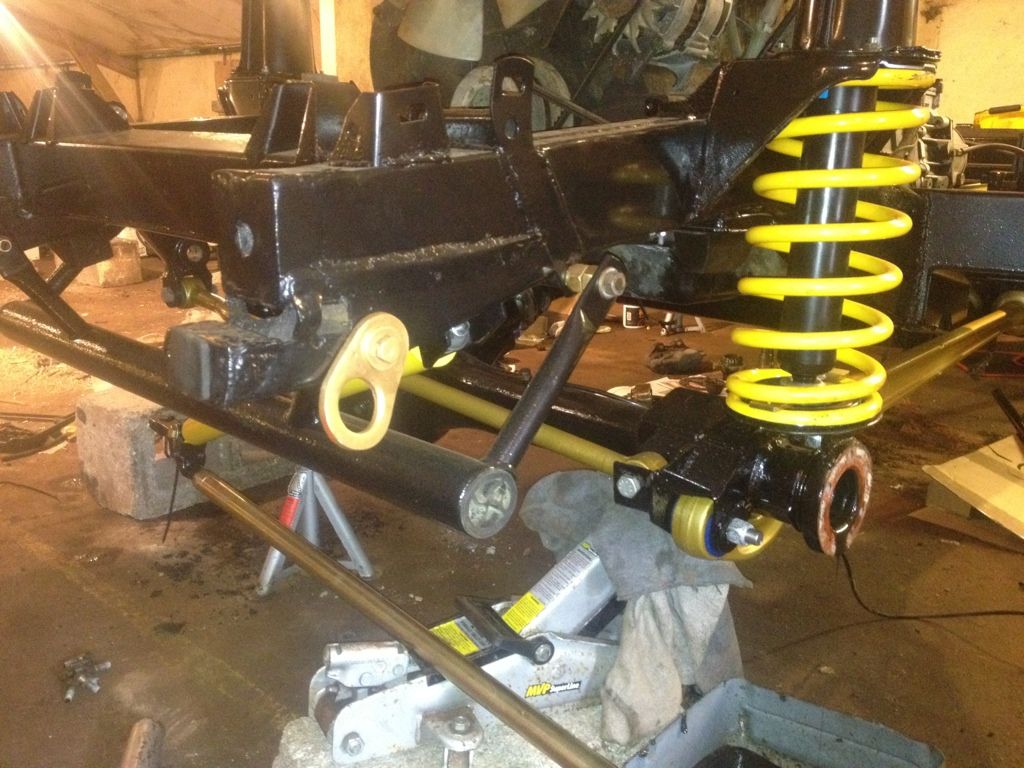
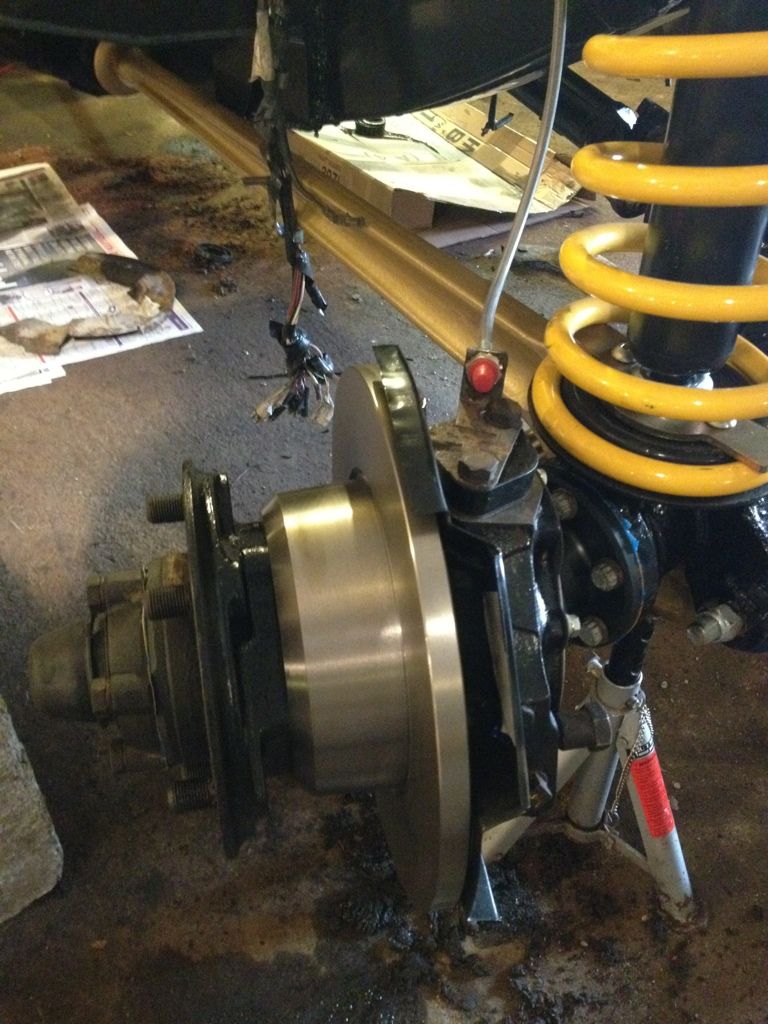
And back on the car..
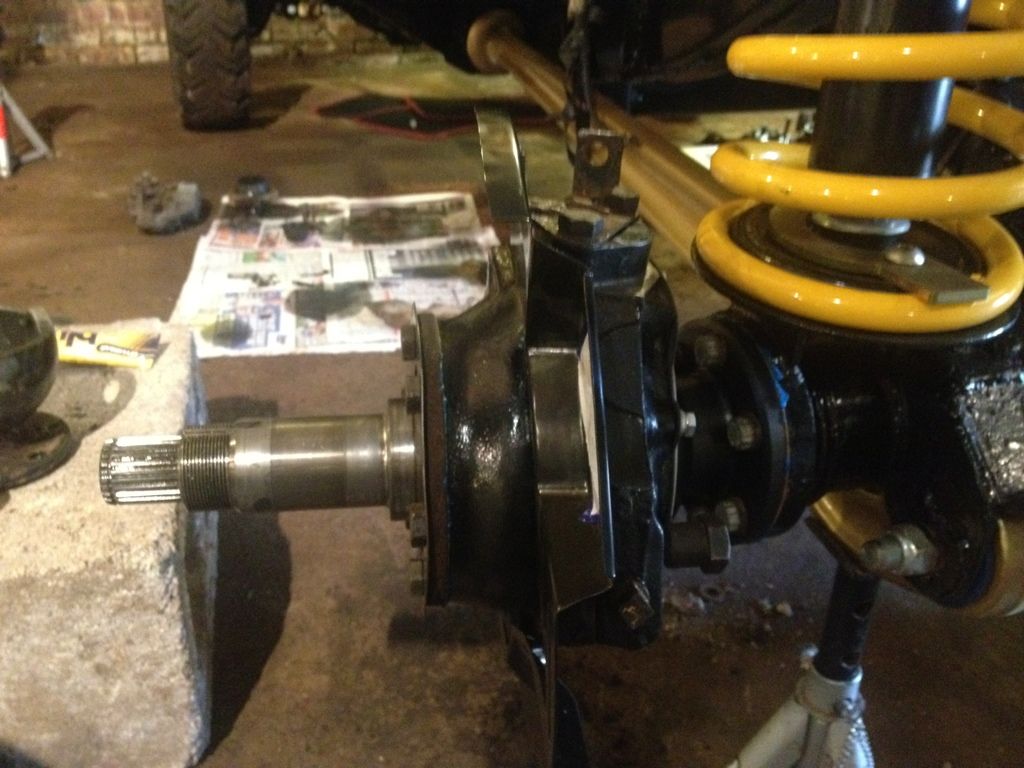
And the NS...

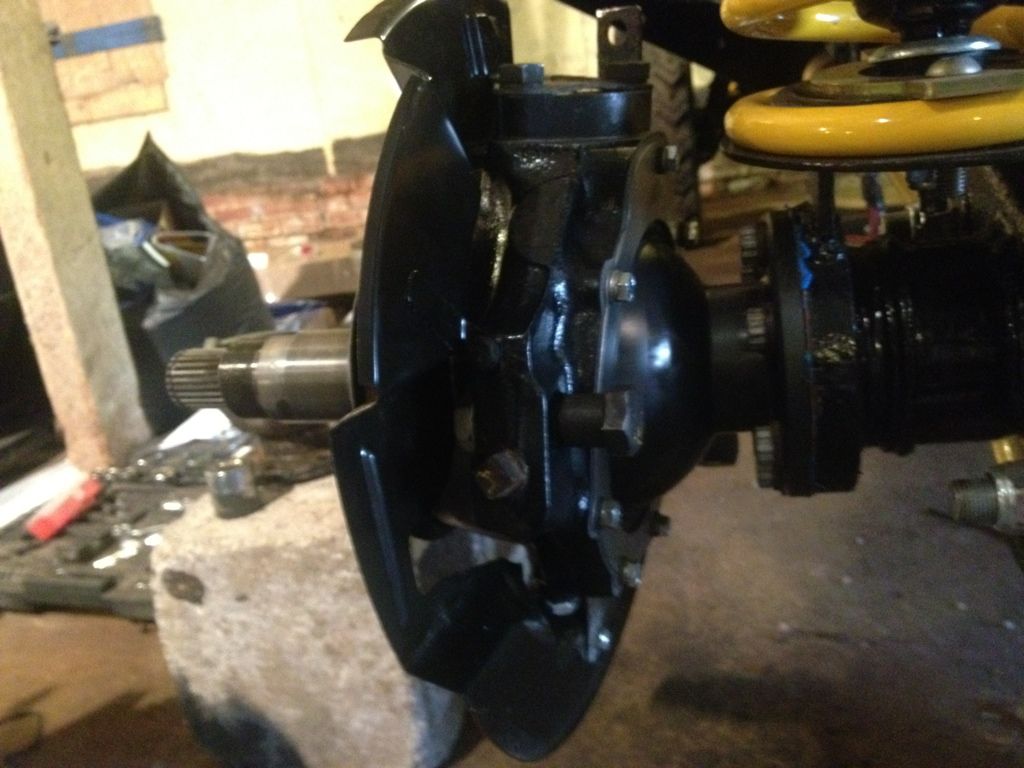
Back together including new brake discs..
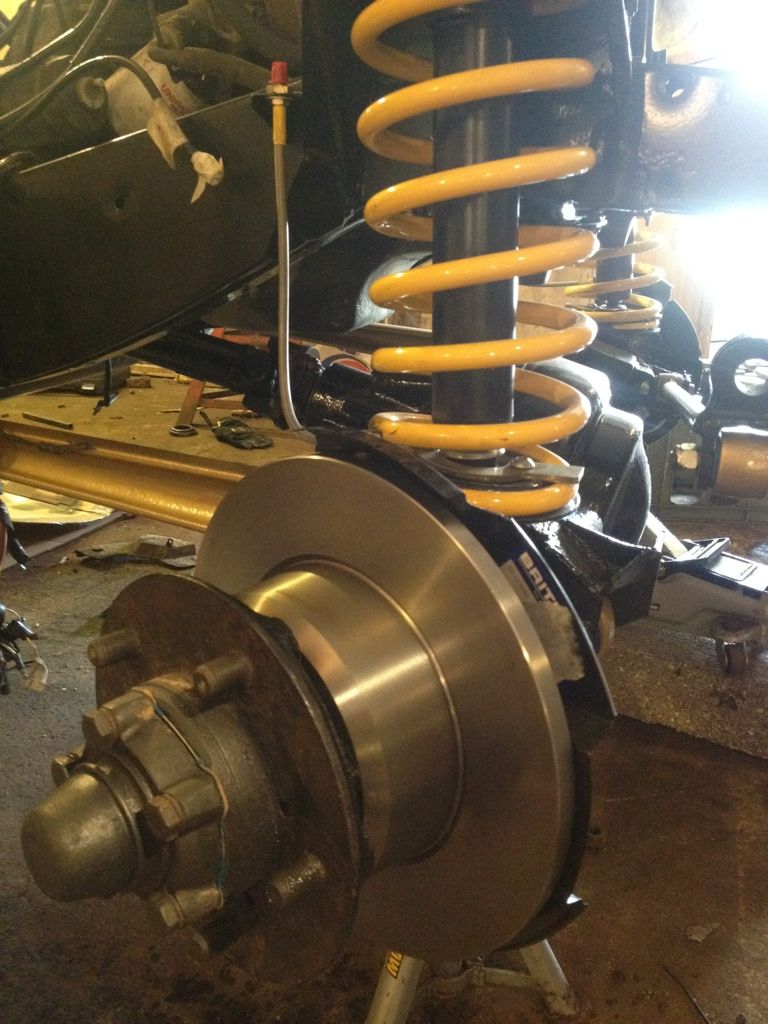
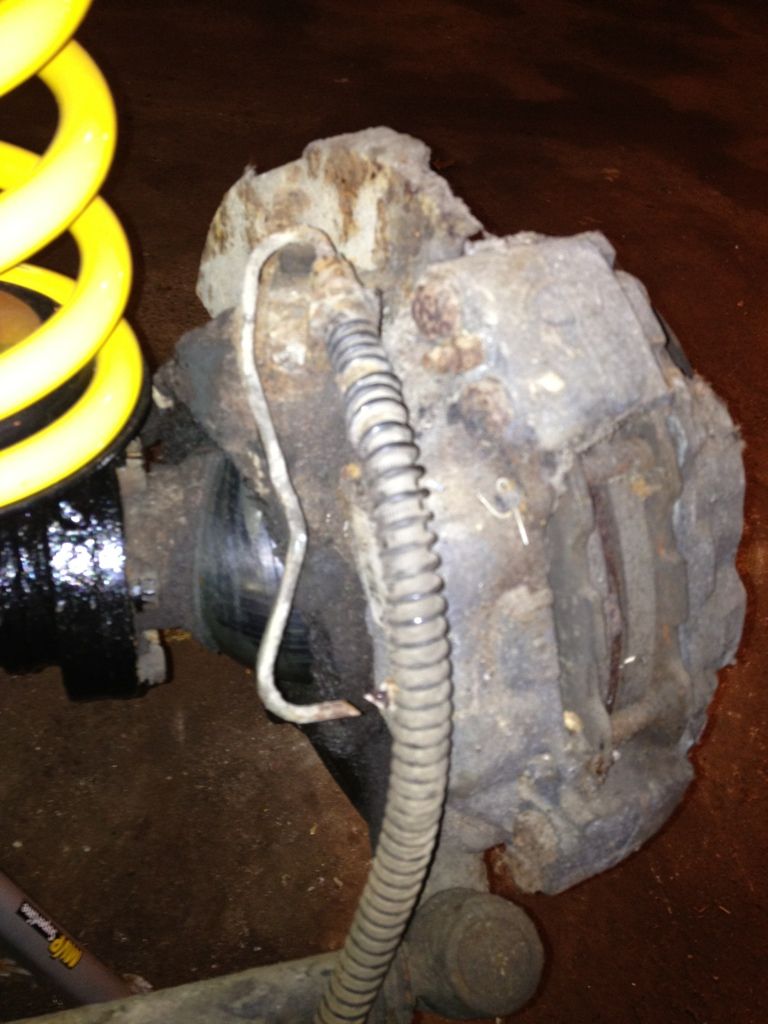
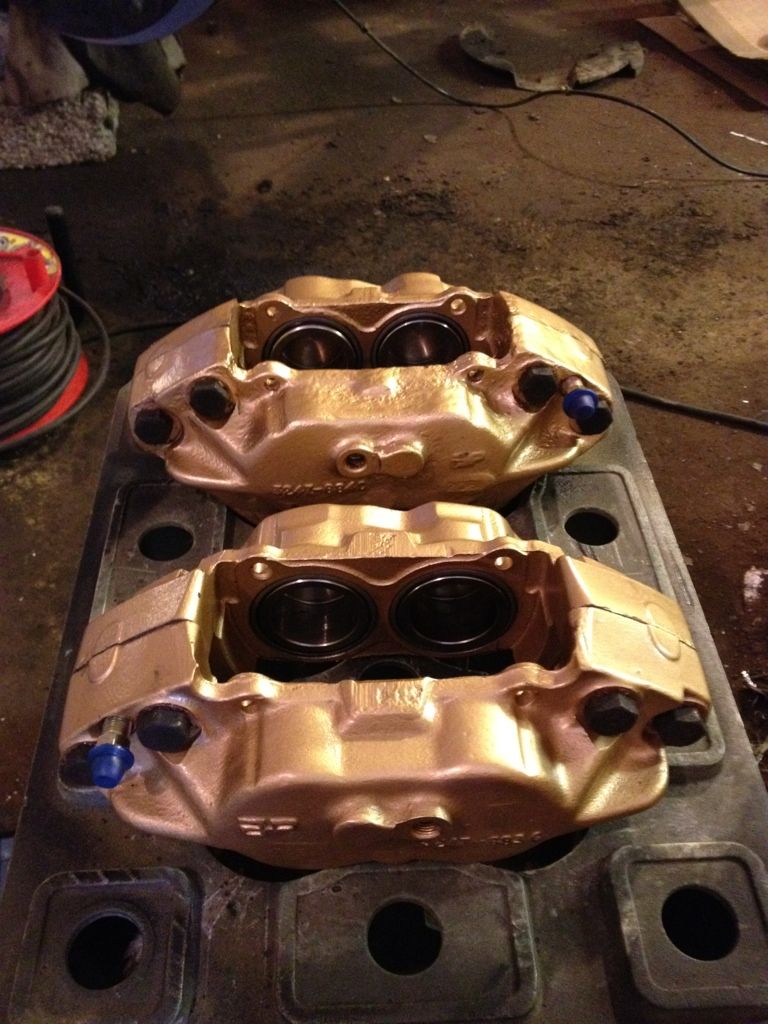
Ok so next job was to recondition my brake calipers with new seals and pistons.. Went from this...
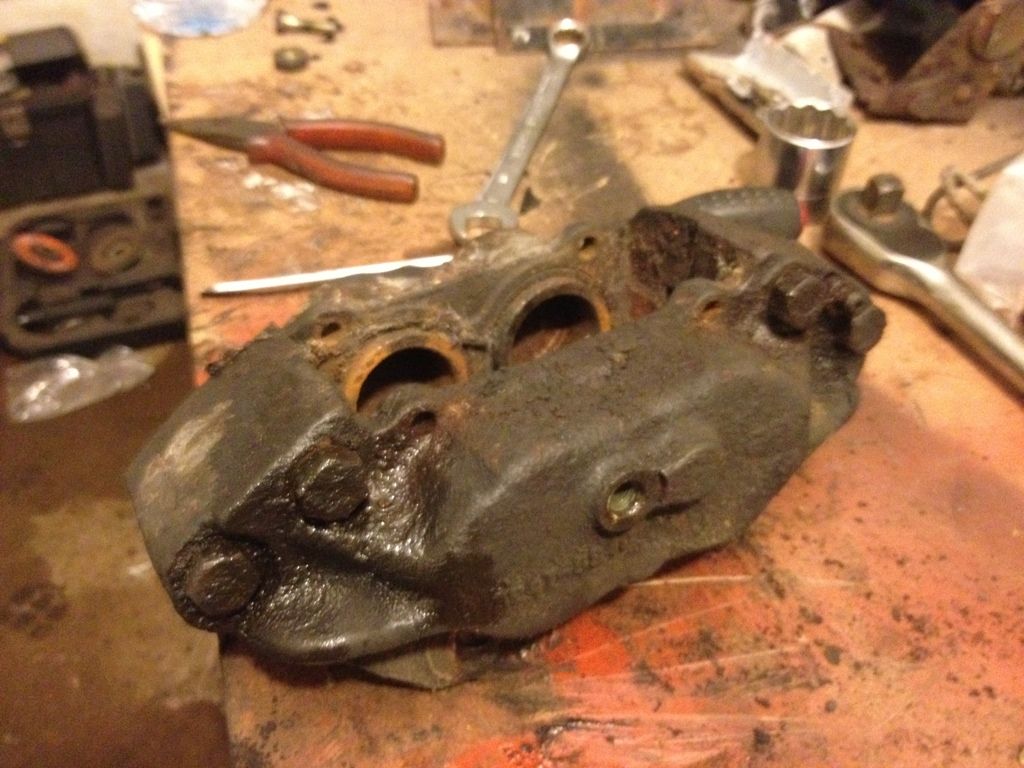
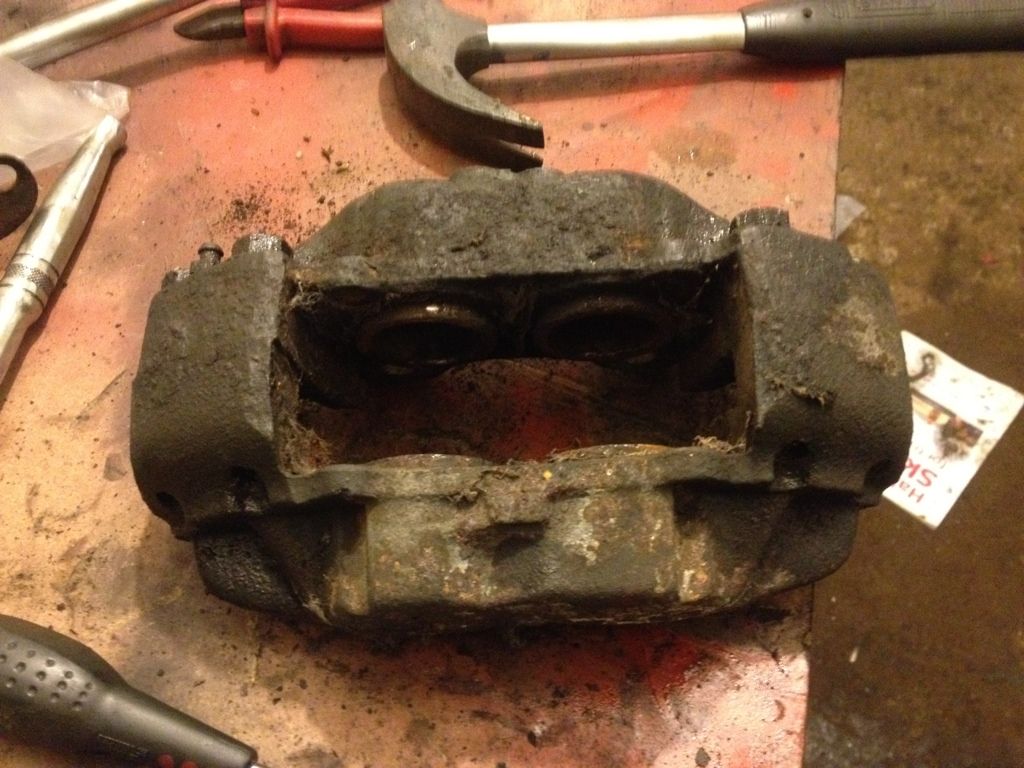
And after abit of time and effort (aswell as new components and a lick of paint) we got to this...
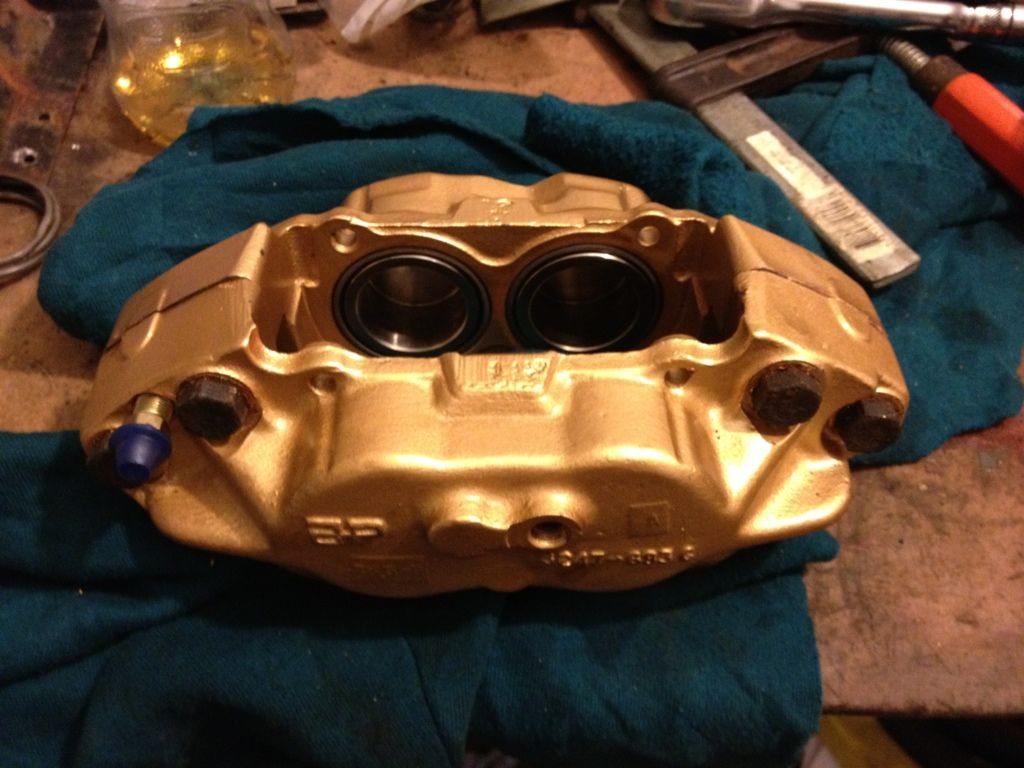
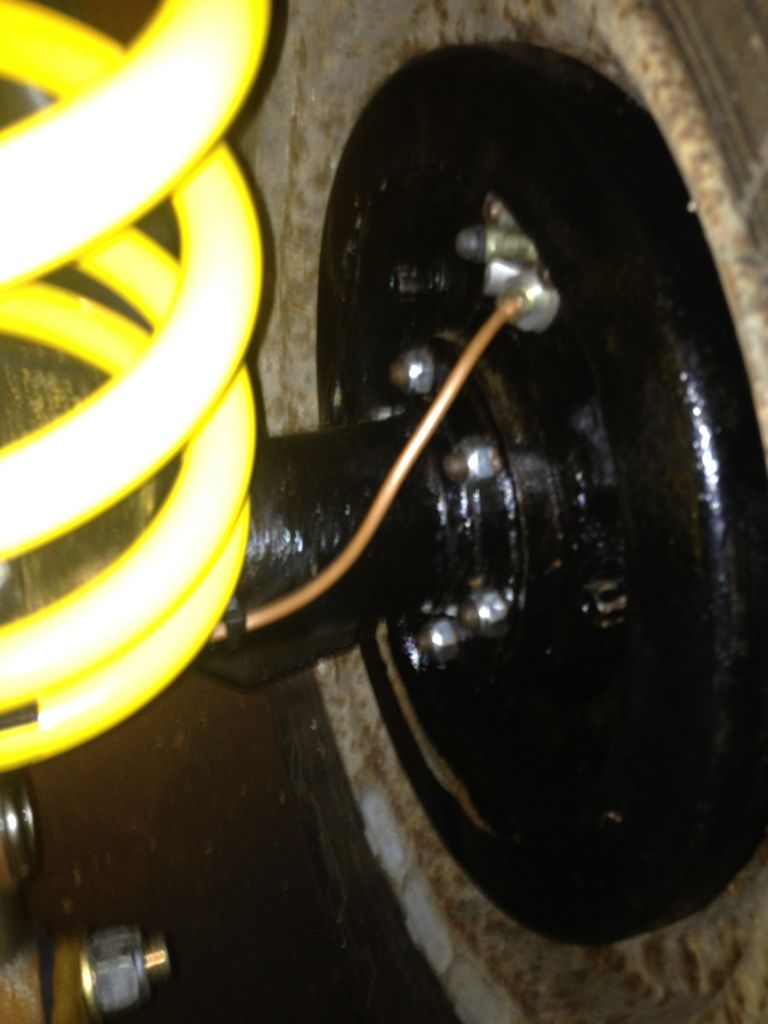
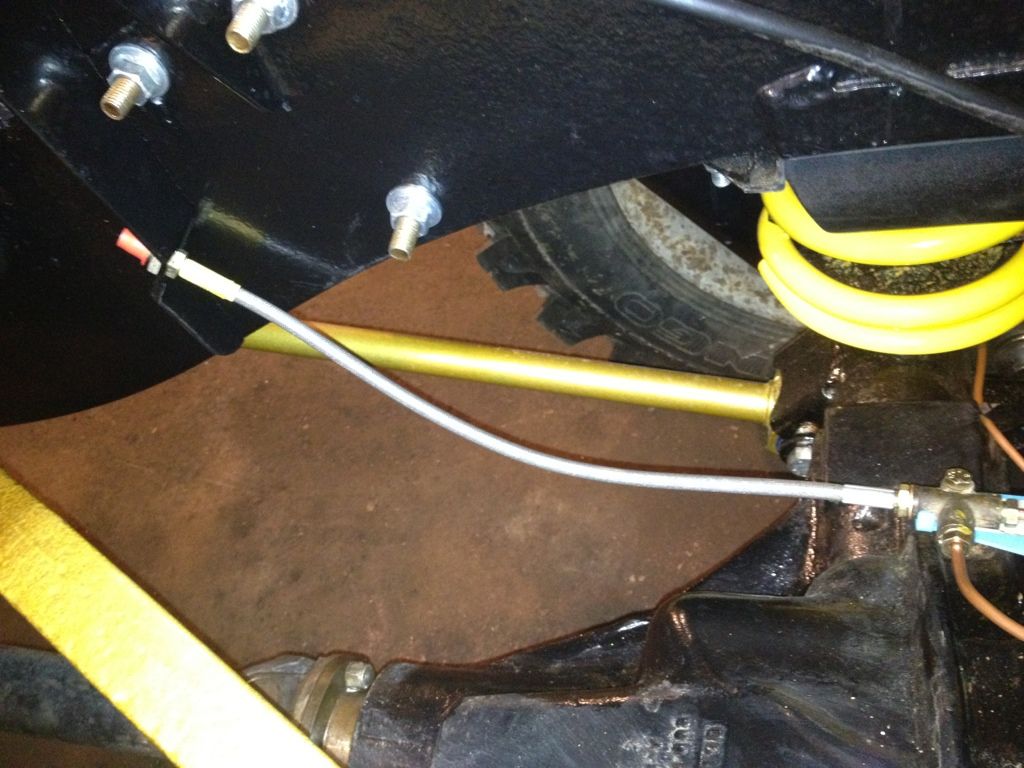
And with both calipers back on to the hubs with new brake pads, braided hoses and fresh copper lines....
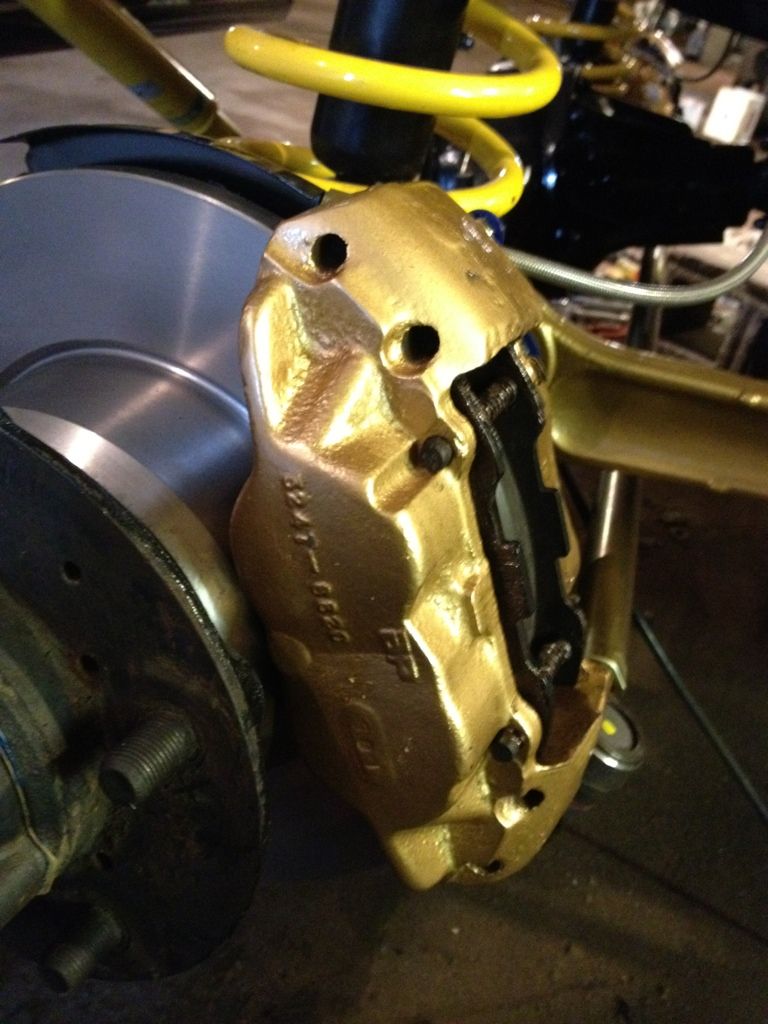
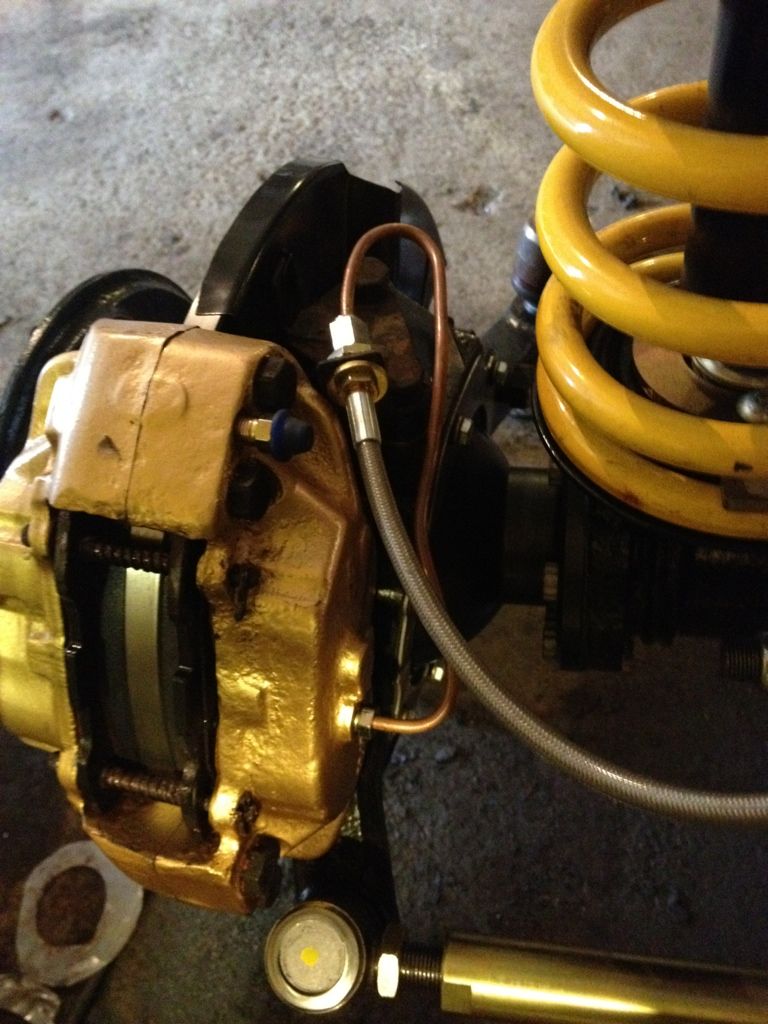
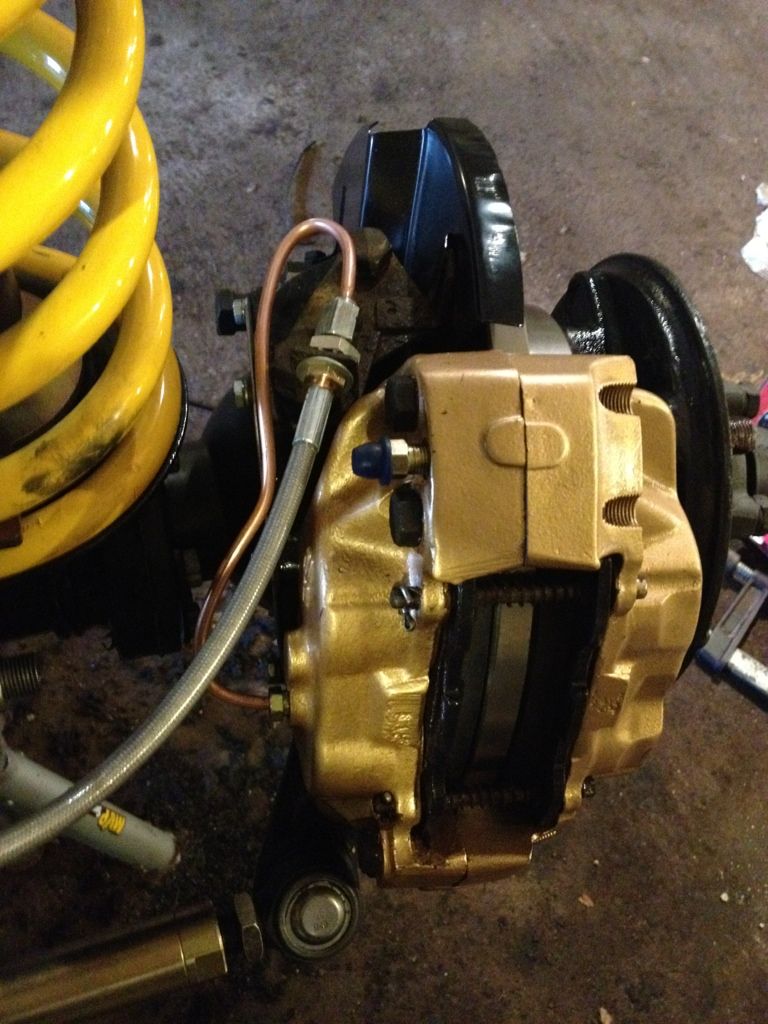

Im very pleased with how my hubs and brakes have turned out... Worth the time and effort!
The next job on the list was the front hub assemblies and brakes... So this is what things currently look like.
Off the car the whole hub assembly.
And the hub less axles!
New swivel hubs are teflon coated instead of the chrome originals which regularly get pitted causing leaks..
Part of the swivel hub rebuild requires the drag to be set at a certain pressure.. This required me to borrow my brother's fishing scales!
And back on the car..
And the NS...
Back together including new brake discs..
Ok so next job was to recondition my brake calipers with new seals and pistons.. Went from this...
And after abit of time and effort (aswell as new components and a lick of paint) we got to this...
And with both calipers back on to the hubs with new brake pads, braided hoses and fresh copper lines....
Im very pleased with how my hubs and brakes have turned out... Worth the time and effort!
Watchman said:
I'm interested in the teflon coating - when Mark Evans built his Landy on Discovery's "A 4x4 is born" he just reconditioned the originals. I think yours looks better and is bound to last longer. Any idea why he wouldn't have used the teflon coating too?
Im not sure why Mark didnt use the teflon coated ones..I think that Maybe there is a view that because they are cheaper, non standard items the quality may not be as high. In my view they seem perfectly up to the job and I have read about many other people using the items without issue... I suppose only time will tell!A bit of an update...
Next job on the list was to give the steering box a bit of a refurb..
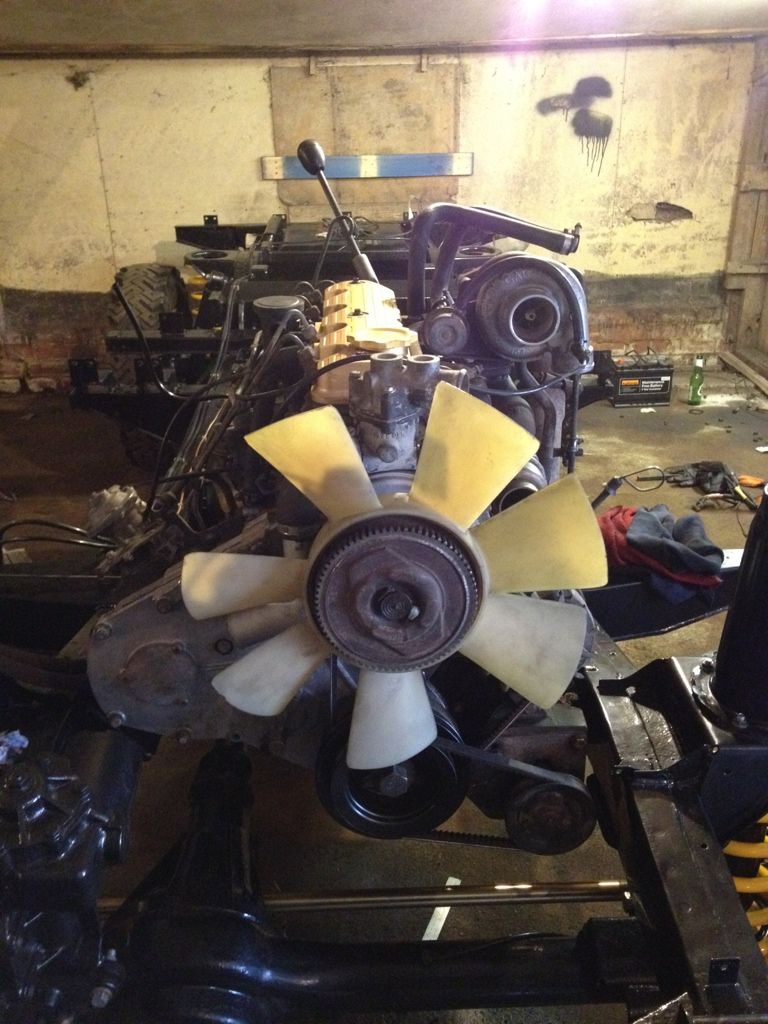
The next job on the list was to deal with the "elephant in the room".. The engine and gearbox were letting the the whole project down. I ended up putting them back in whilst getting carried away one day wanting to get things back together!.
I took the decision to have a go at pressure washing the drivetrain in situ on the chassis. It would have been better doing this off the chassis however I decided the quickest way would be in situ and then to dry everything down after..
Well I got down and dirty.. literally and the results are below.
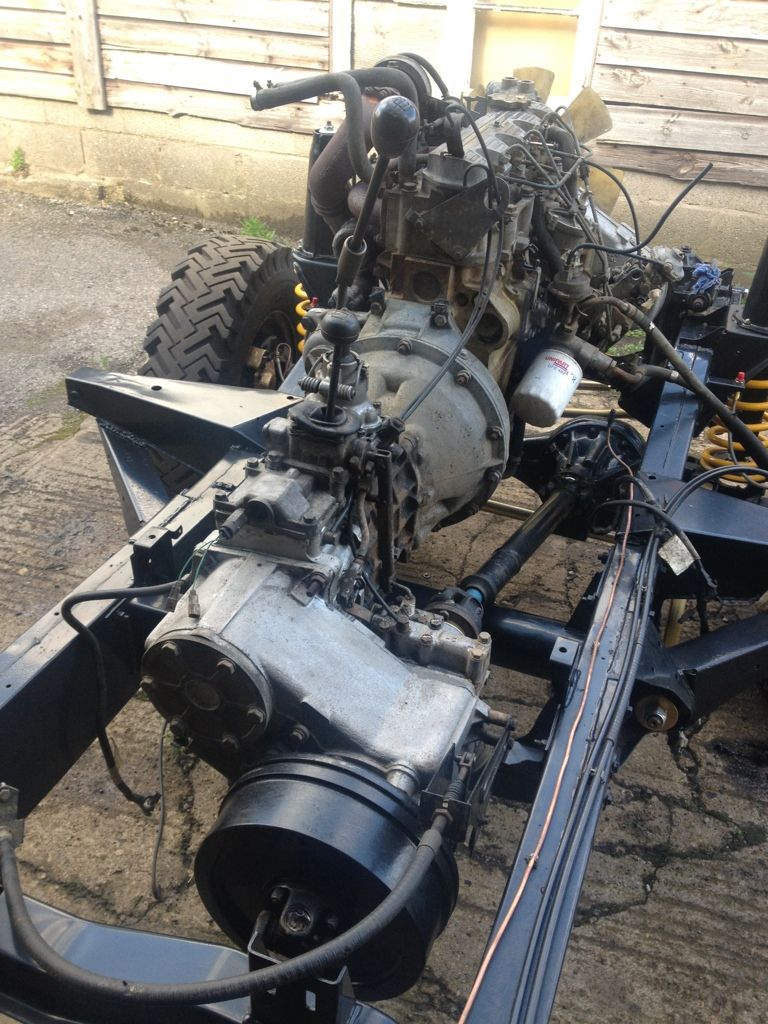
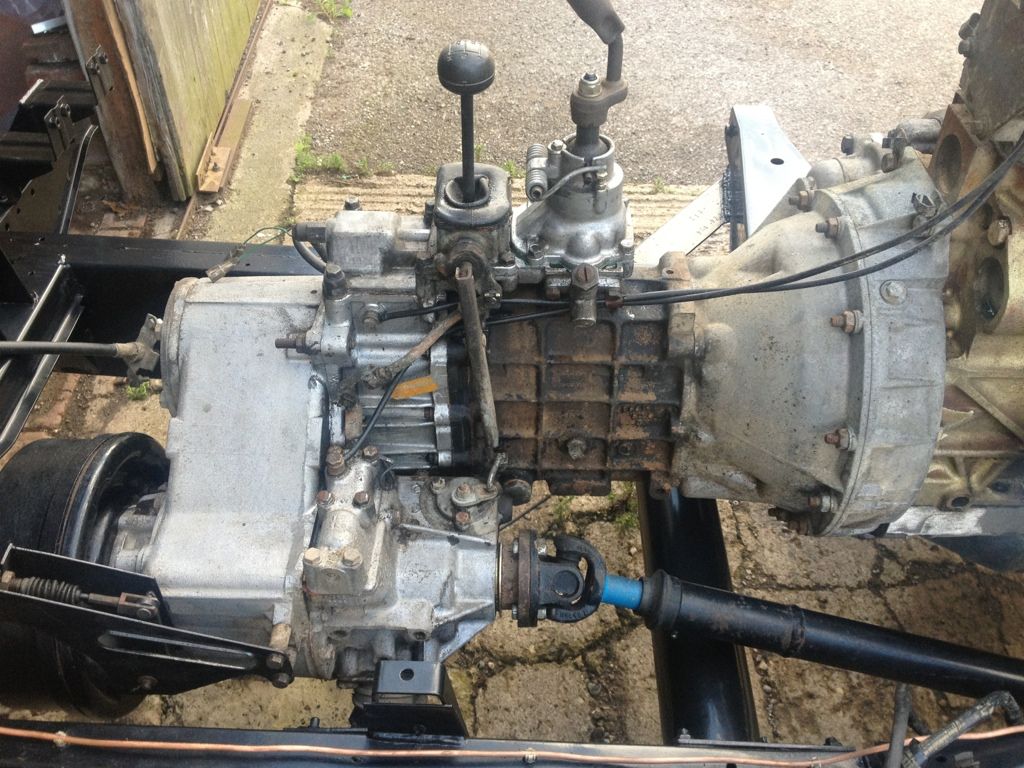
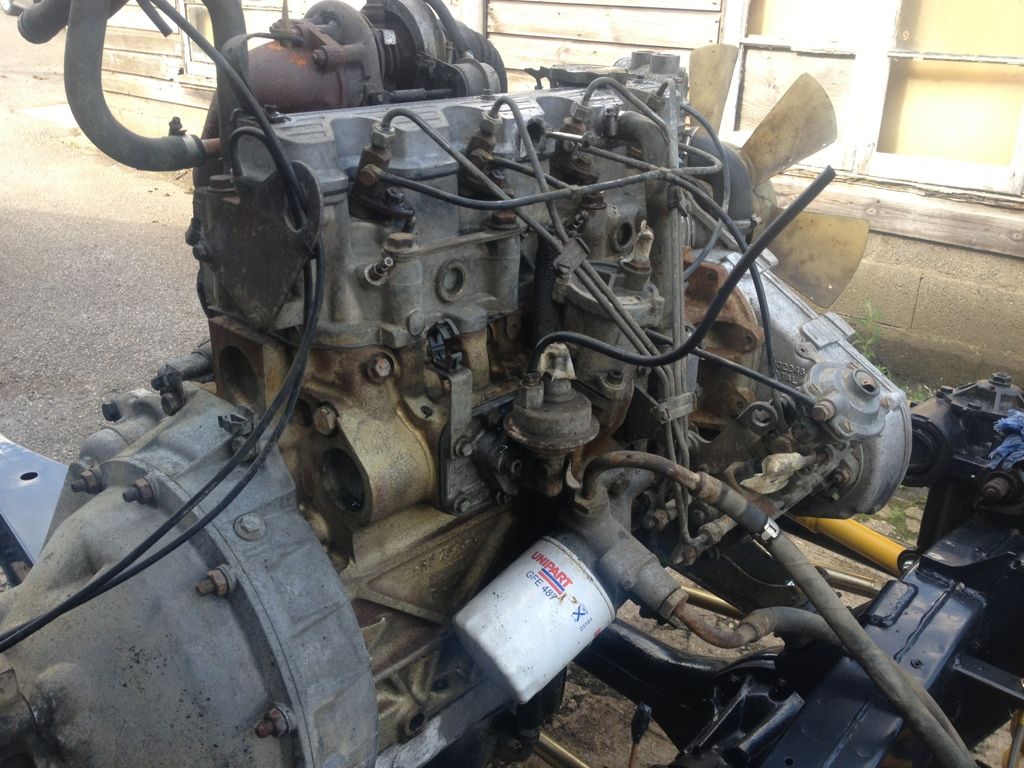
I was very pleased with the results... I was tempted to give the block and gearbox a lick of paint but then i gave myself a talking to!..
Next job was to service the engine and as it transpired, rebuild the turbo... Pics and write up to follow.
Now time to concentrate on how Im going to get round the nurburgring in one piece on Friday without crashing/breaking the Bangernomics Saab!.. Wish me luck!
Next job on the list was to give the steering box a bit of a refurb..
The next job on the list was to deal with the "elephant in the room".. The engine and gearbox were letting the the whole project down. I ended up putting them back in whilst getting carried away one day wanting to get things back together!.
I took the decision to have a go at pressure washing the drivetrain in situ on the chassis. It would have been better doing this off the chassis however I decided the quickest way would be in situ and then to dry everything down after..
Well I got down and dirty.. literally and the results are below.
I was very pleased with the results... I was tempted to give the block and gearbox a lick of paint but then i gave myself a talking to!..
Next job was to service the engine and as it transpired, rebuild the turbo... Pics and write up to follow.
Now time to concentrate on how Im going to get round the nurburgring in one piece on Friday without crashing/breaking the Bangernomics Saab!.. Wish me luck!
Well last weekend I was doing this..

But now its time to get back to more important things.. Namely the defender!..
Next job after giving the engine and box a clean was to give the engine a service.. Oil, filter and glow plugs were changed.
The timing belt was changed too, this wasnt too difficult..
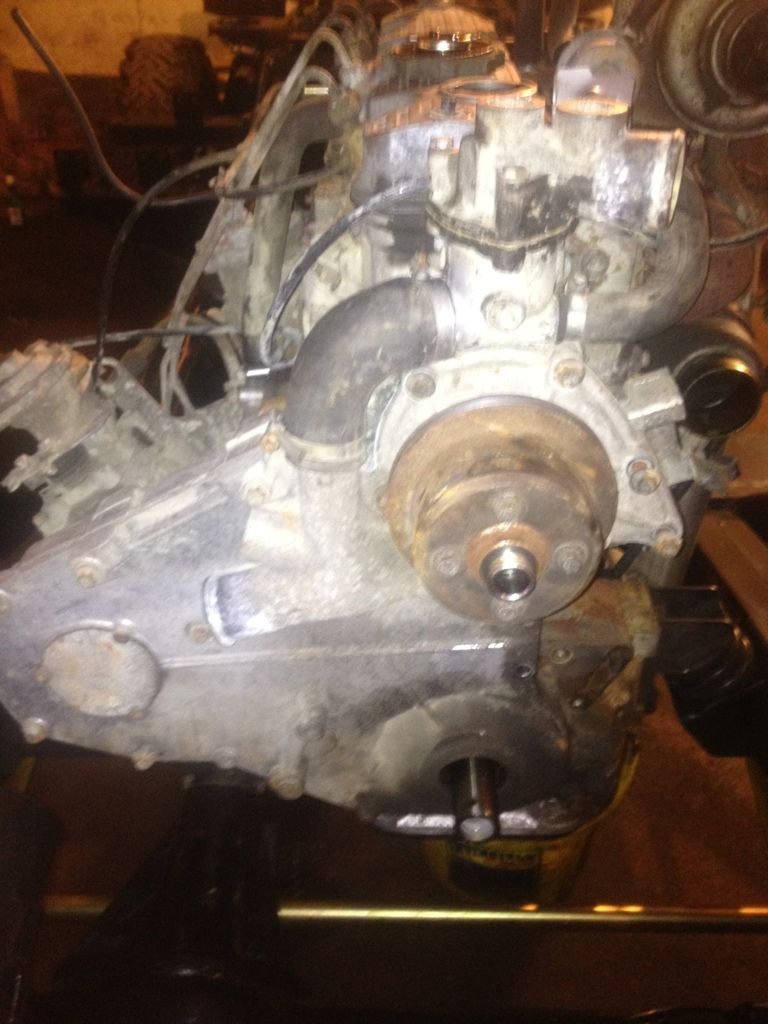
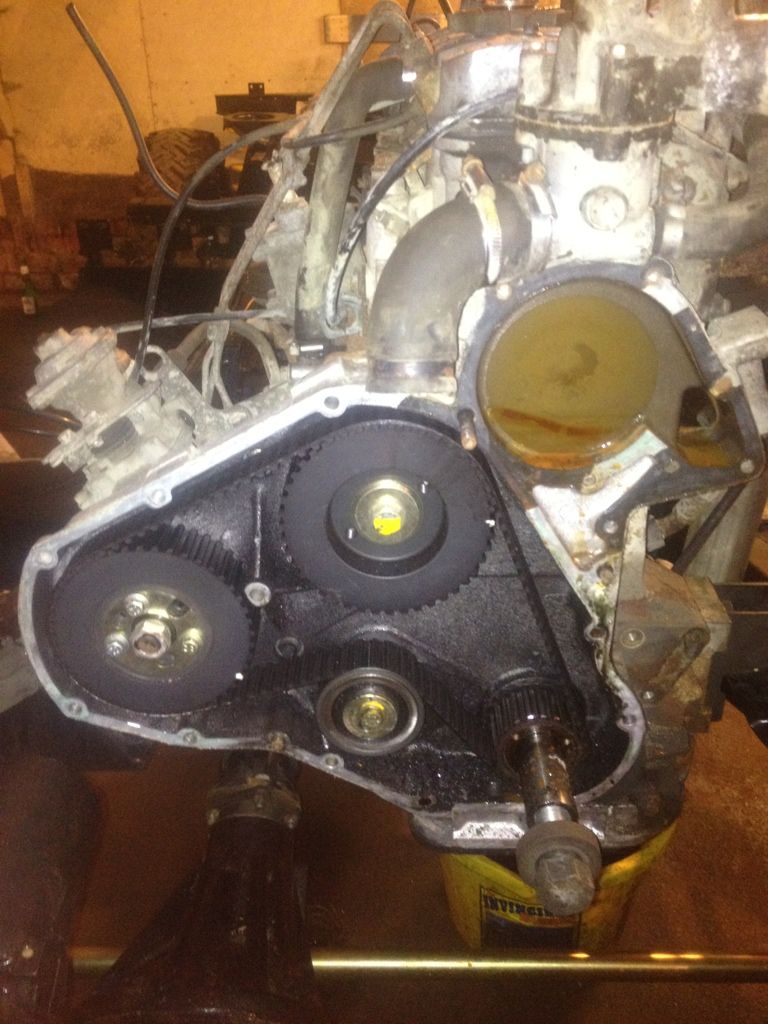
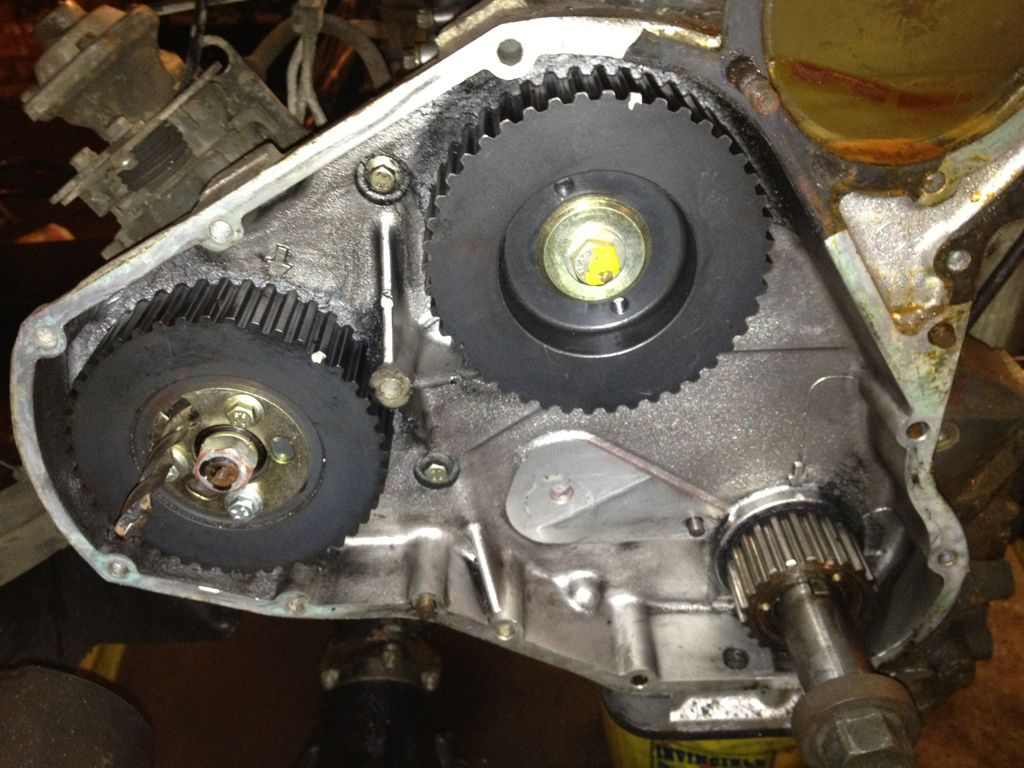
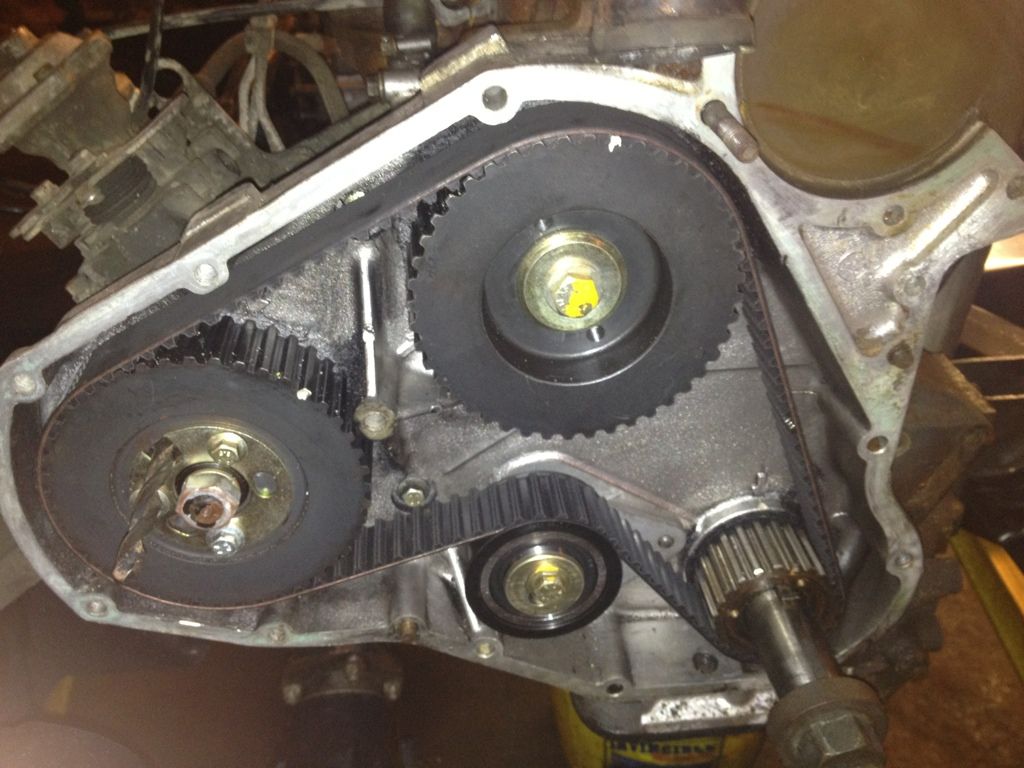
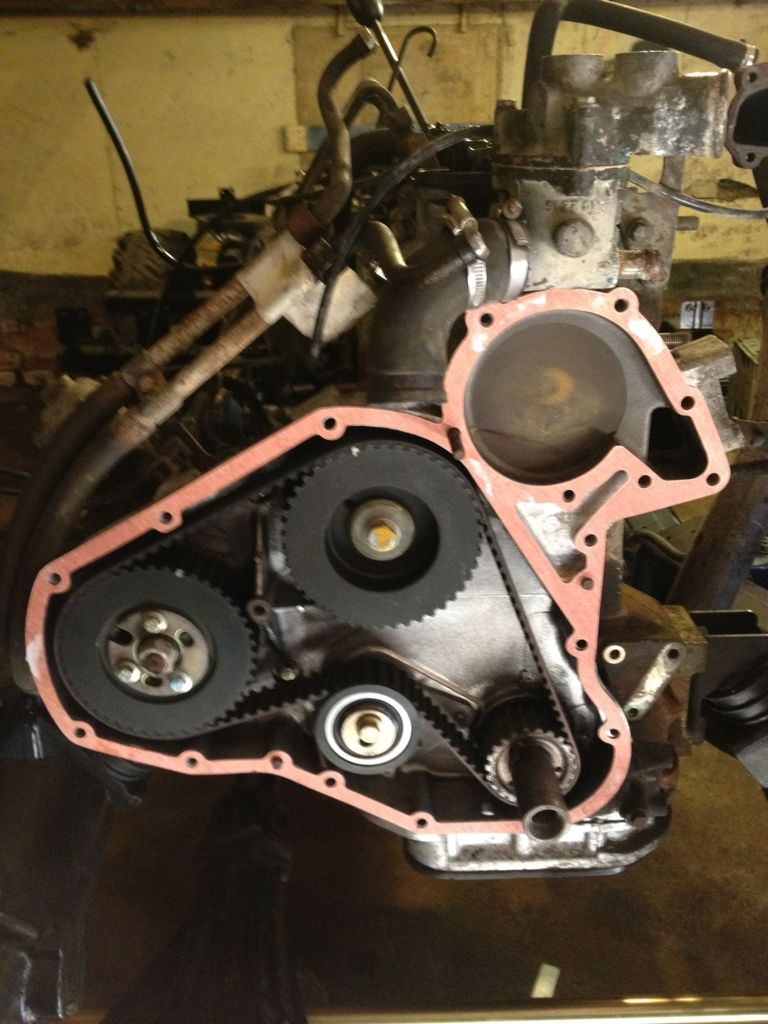
And the timing case back on with a new water pump.
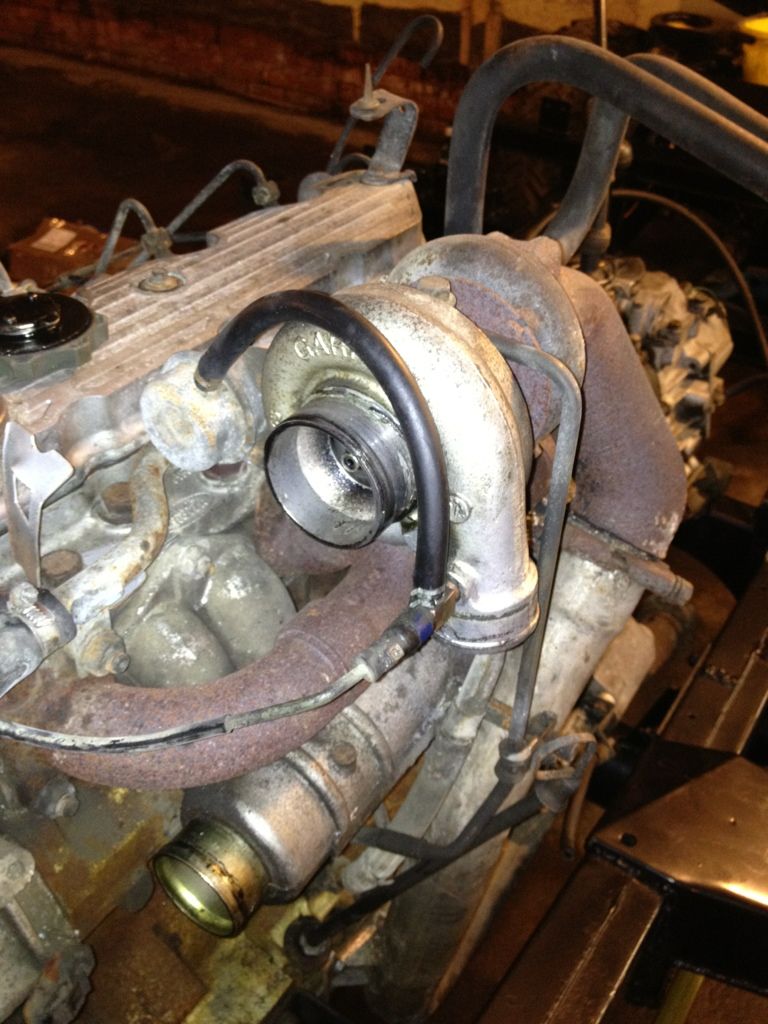
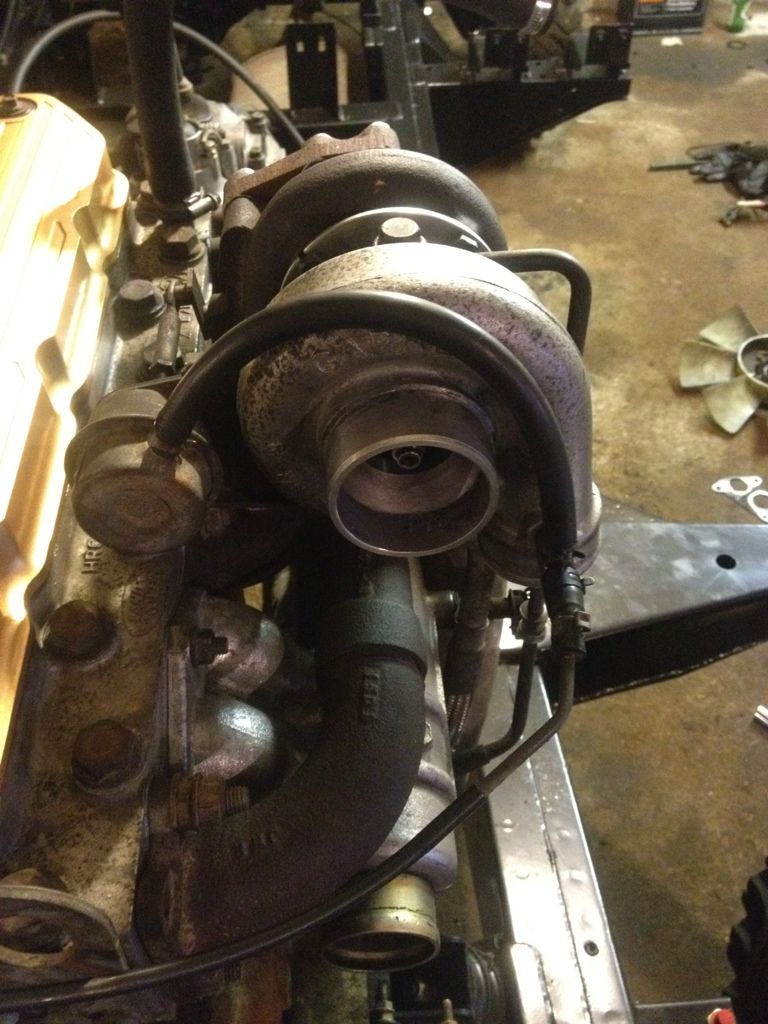
The next job on the long list of inevitable work on the defender was to check the turbo over.... Didnt take much to realise there was too much play in the impeller shaft meaning a re-build was in order. On my previous 200tdi i had to do the same job so I wasnt too daunted by it.. It would have gone smoothly if it wasnt for a snapped stud on the exhaust manifold which took too much time to drill out..
Anyway it went from this...
To this...
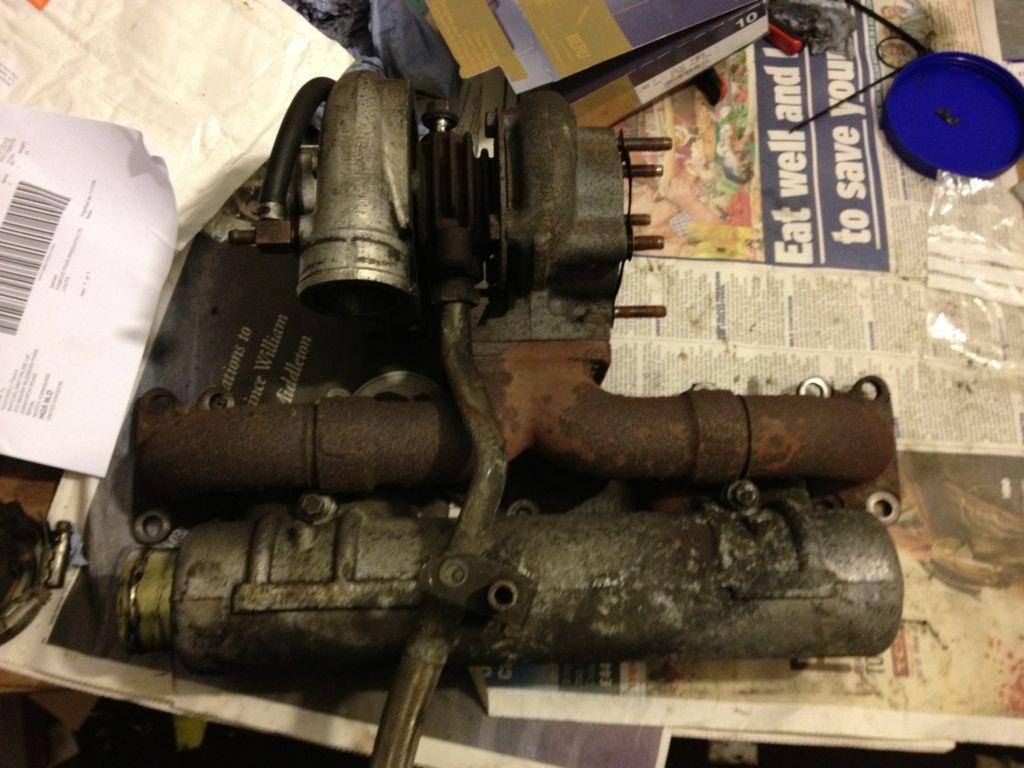
To this...
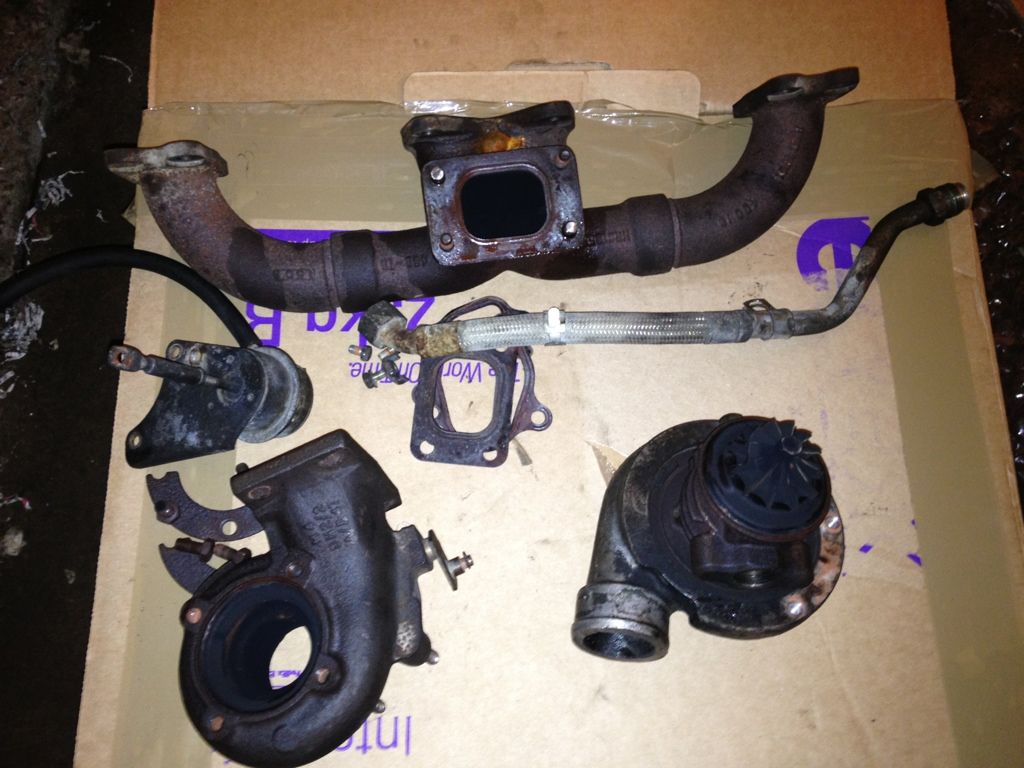
To this...
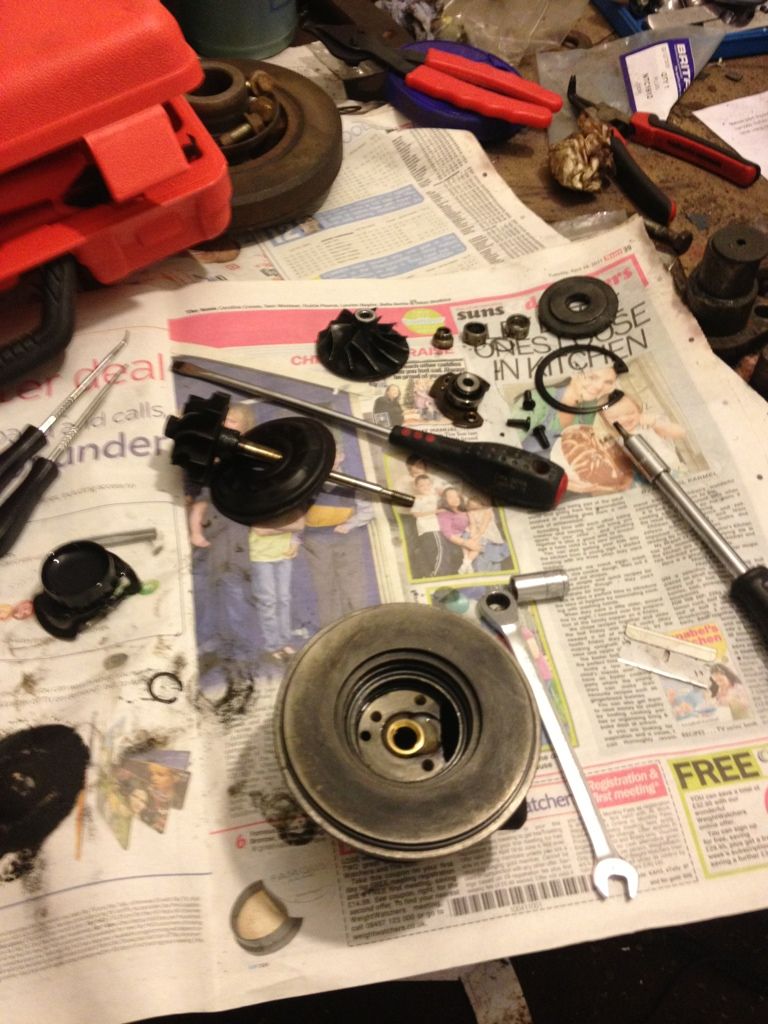
And with the addition of some new bearings, seals and circlips (And balancing) it went back to this...
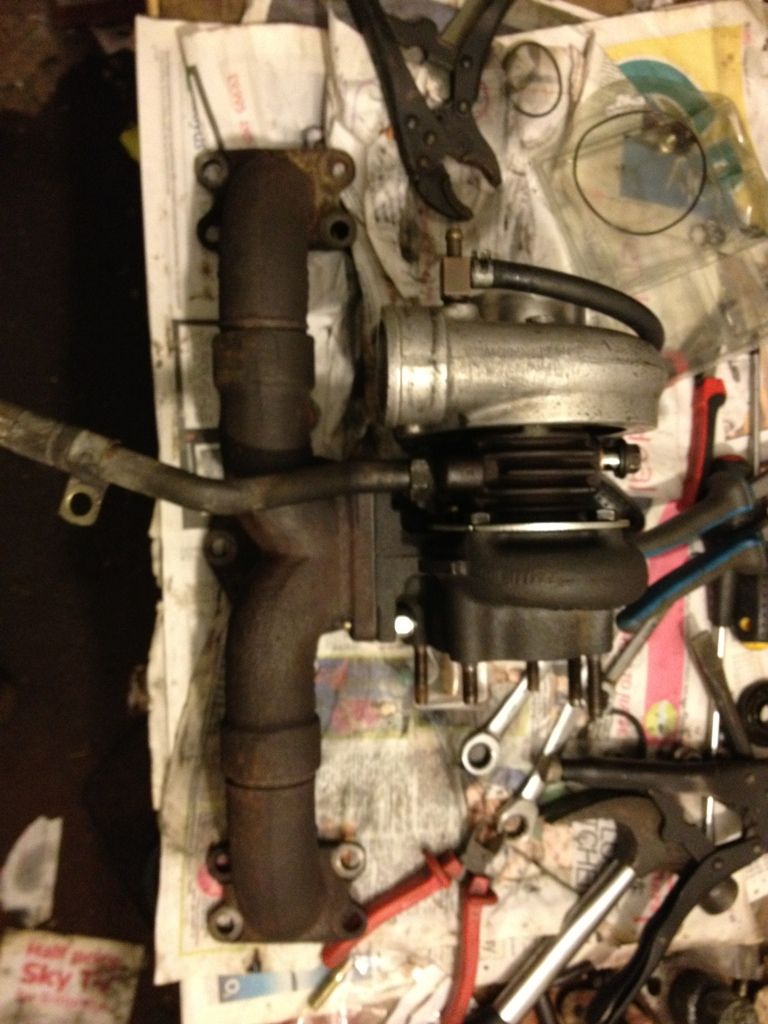
Next job was to put the exhaust back on...
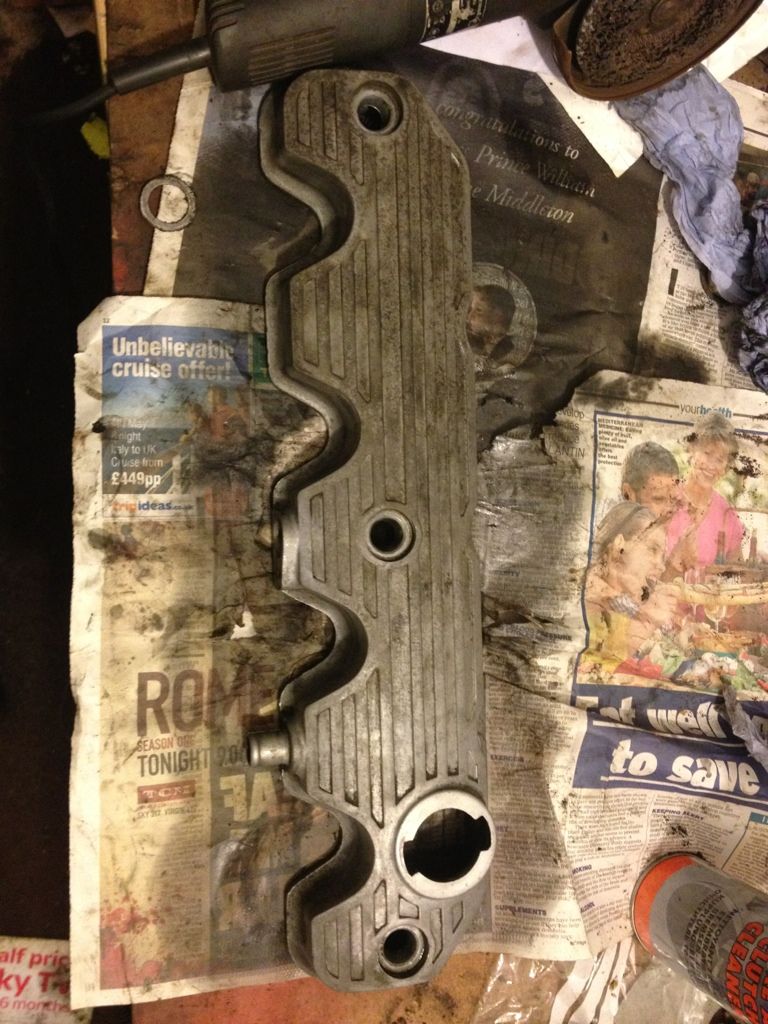
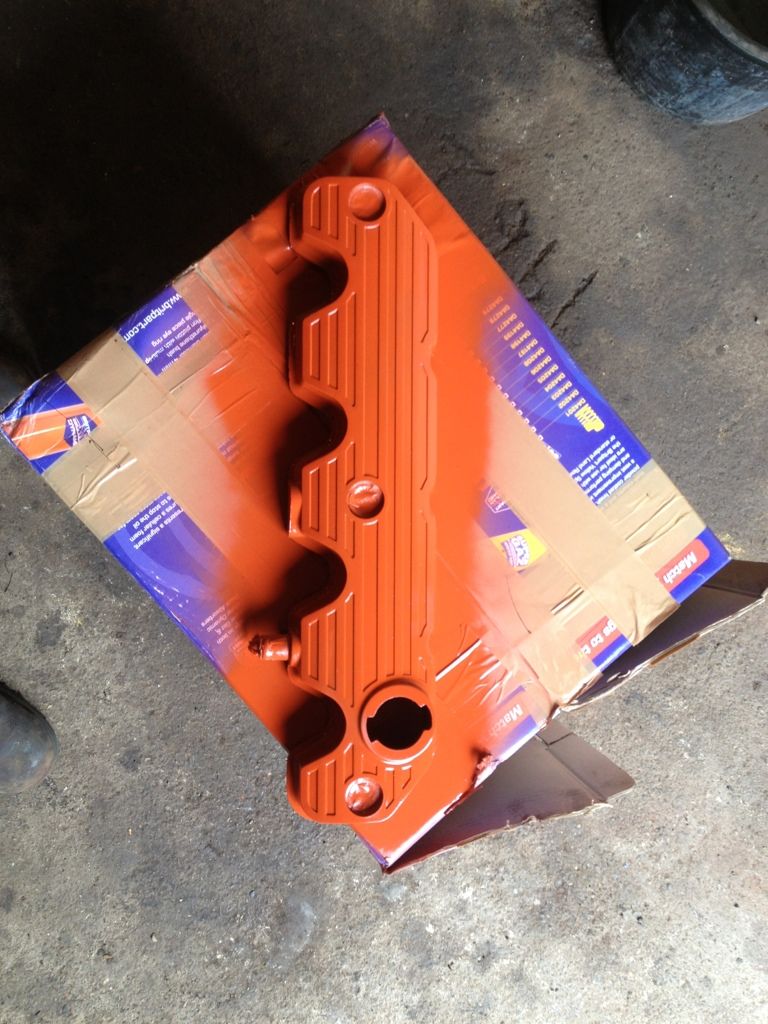
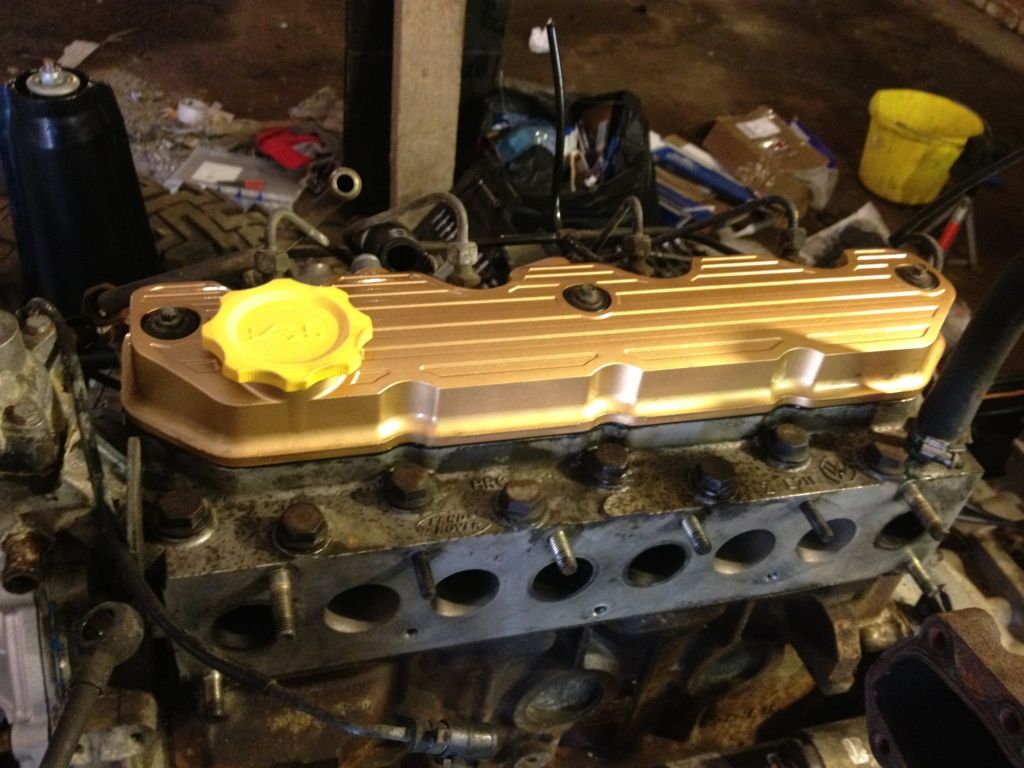
Now to bring everyone up to date the latest job was to give me rocker cover a lick of paint and a fresh seal and filler cap...
Now as I say you are now in real time so updates might be a bit slower... I am expecting all the body panels back from the bodyshop at the end of the month so things should start to appear to be making more progress soon!..
But now its time to get back to more important things.. Namely the defender!..
Next job after giving the engine and box a clean was to give the engine a service.. Oil, filter and glow plugs were changed.
The timing belt was changed too, this wasnt too difficult..
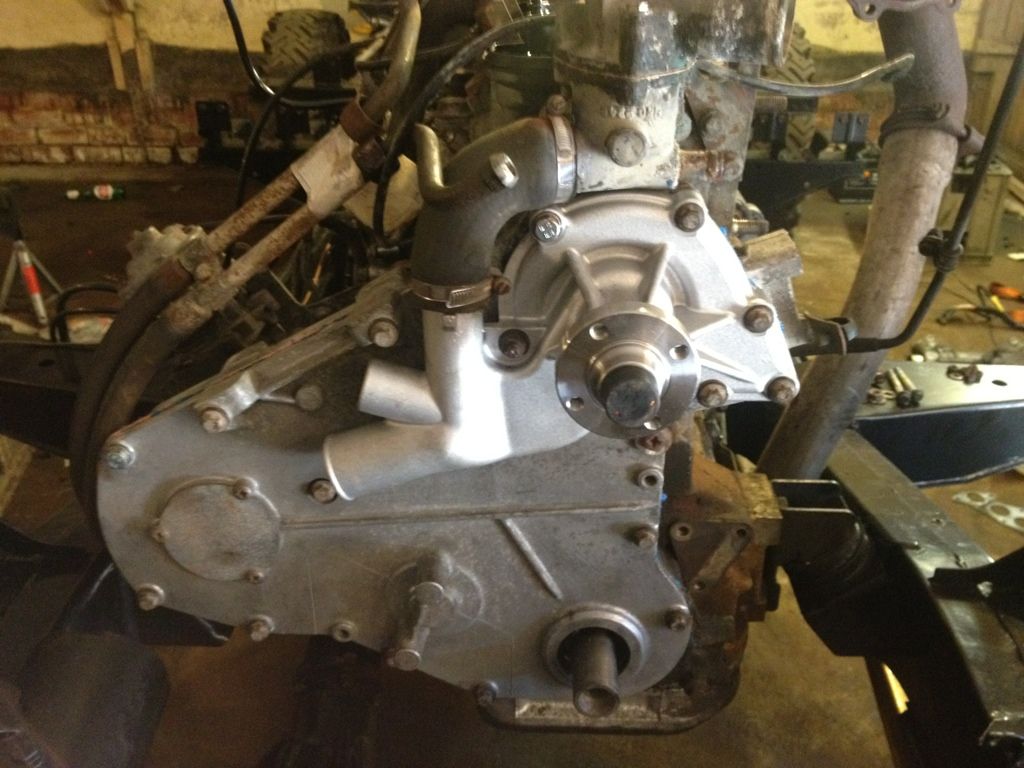
And the timing case back on with a new water pump.
The next job on the long list of inevitable work on the defender was to check the turbo over.... Didnt take much to realise there was too much play in the impeller shaft meaning a re-build was in order. On my previous 200tdi i had to do the same job so I wasnt too daunted by it.. It would have gone smoothly if it wasnt for a snapped stud on the exhaust manifold which took too much time to drill out..
Anyway it went from this...
To this...
To this...
To this...
And with the addition of some new bearings, seals and circlips (And balancing) it went back to this...
Next job was to put the exhaust back on...
Now to bring everyone up to date the latest job was to give me rocker cover a lick of paint and a fresh seal and filler cap...
Now as I say you are now in real time so updates might be a bit slower... I am expecting all the body panels back from the bodyshop at the end of the month so things should start to appear to be making more progress soon!..
Ok well the Defender is now 100% ready to start putting the body back on... I have done some final work as detailed below...
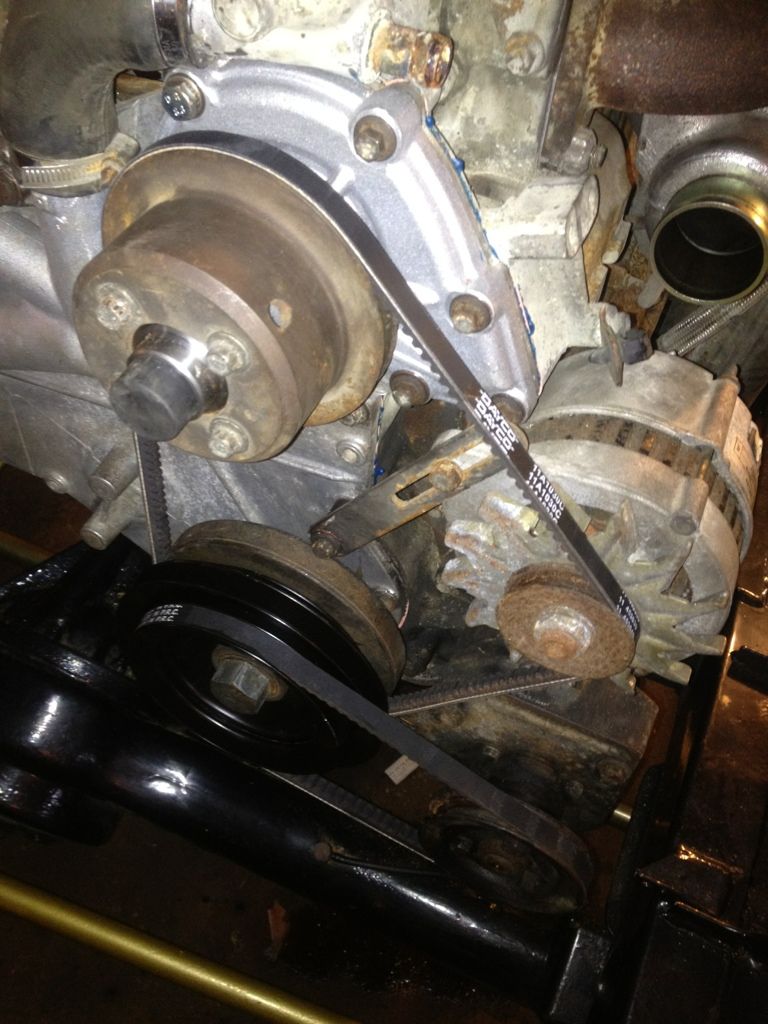
Once the rebuilt turbo and timing case cover were back on the next job was to put the Alternator, power steering pump and drive belts back on..
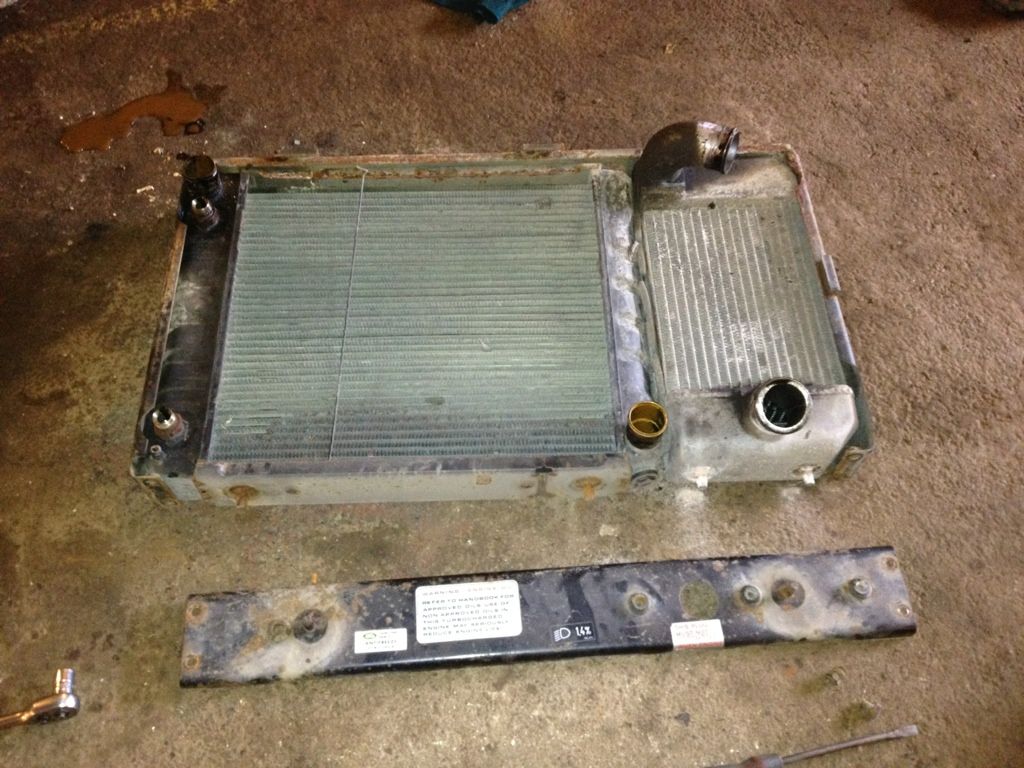
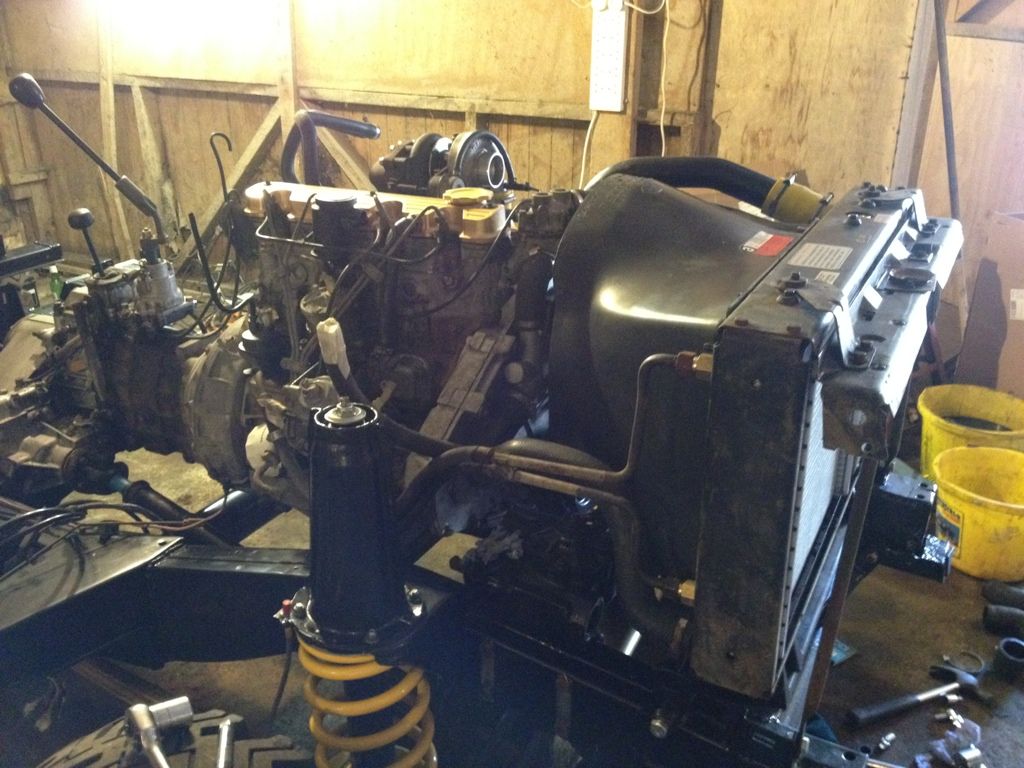
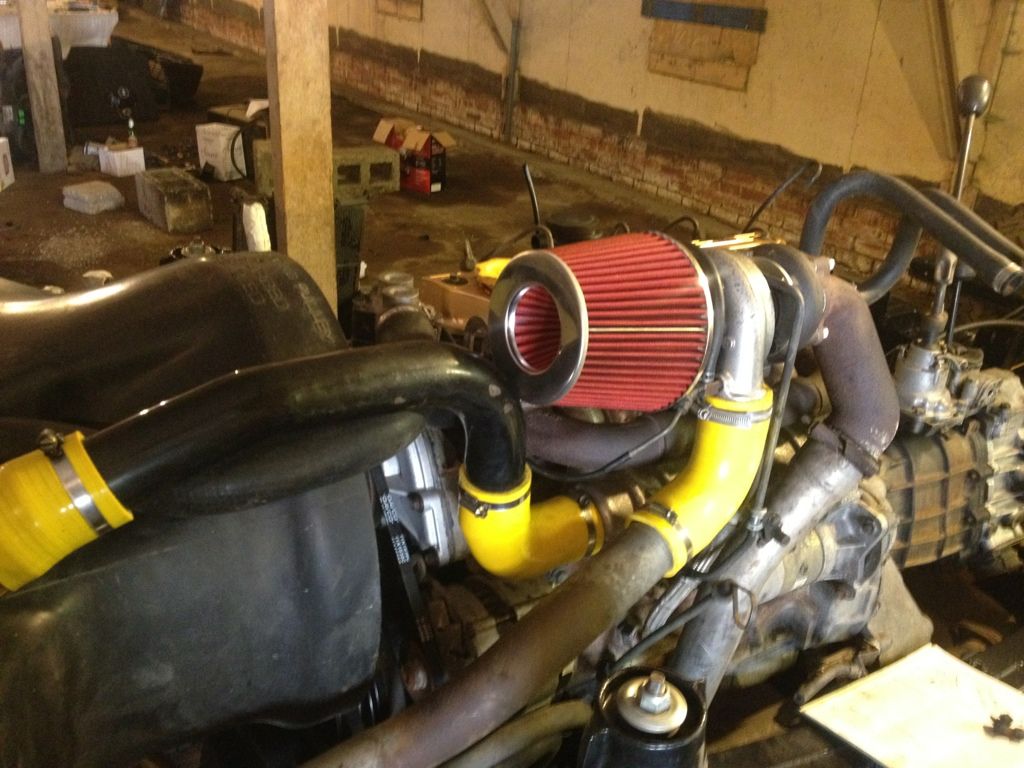
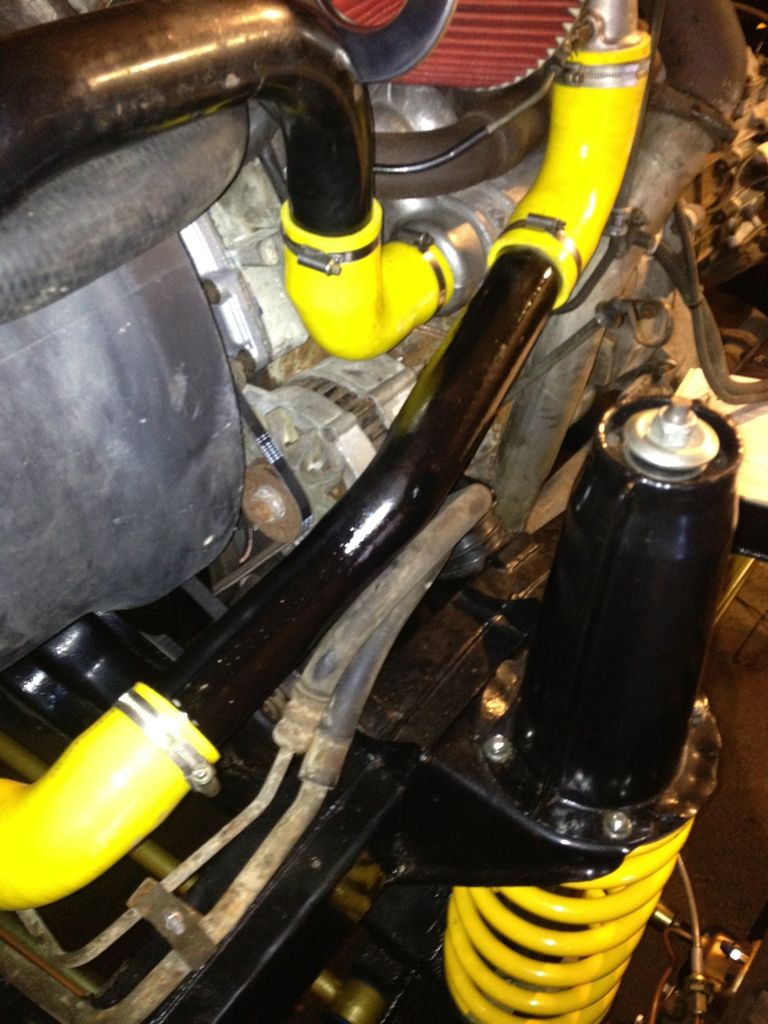
The next job was to replace the shot radiatior, flush any oil out of the intercooler and re fit the units with fresh silicone hoses..
Old...
Back in place...
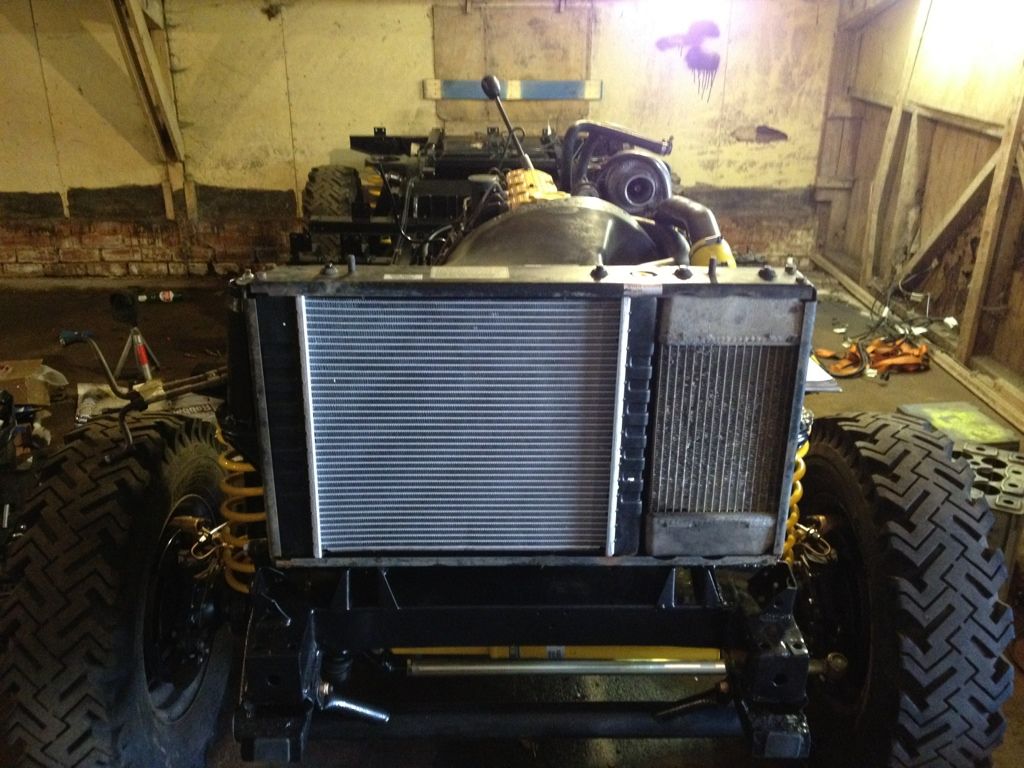
Plumbed in...
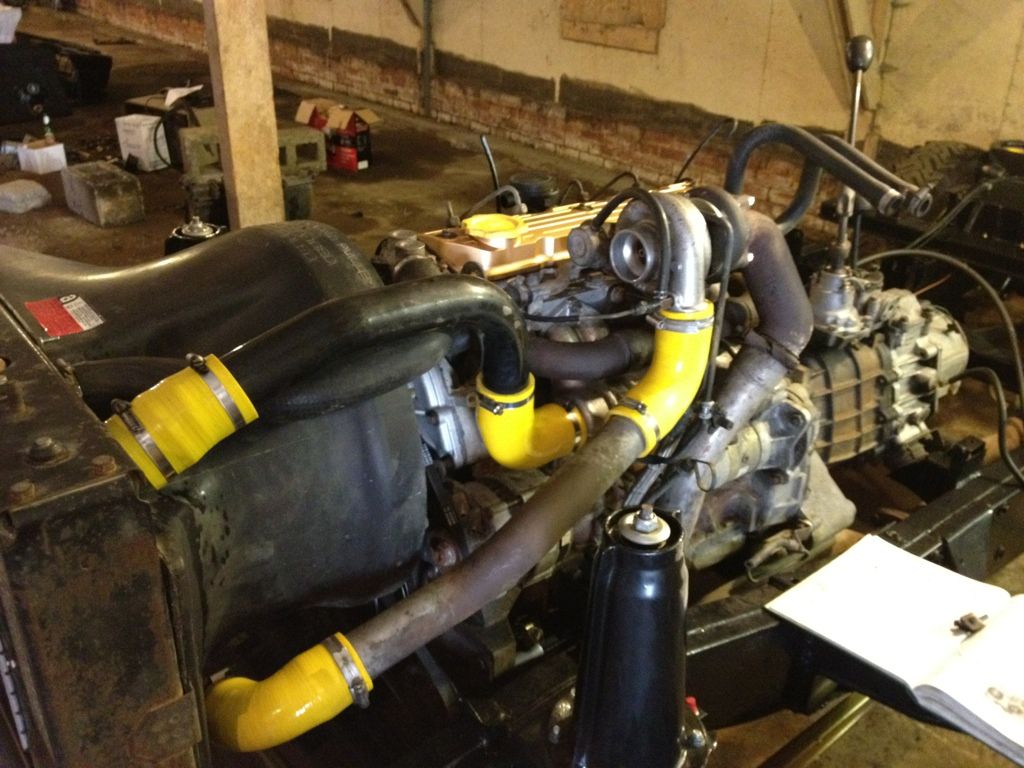
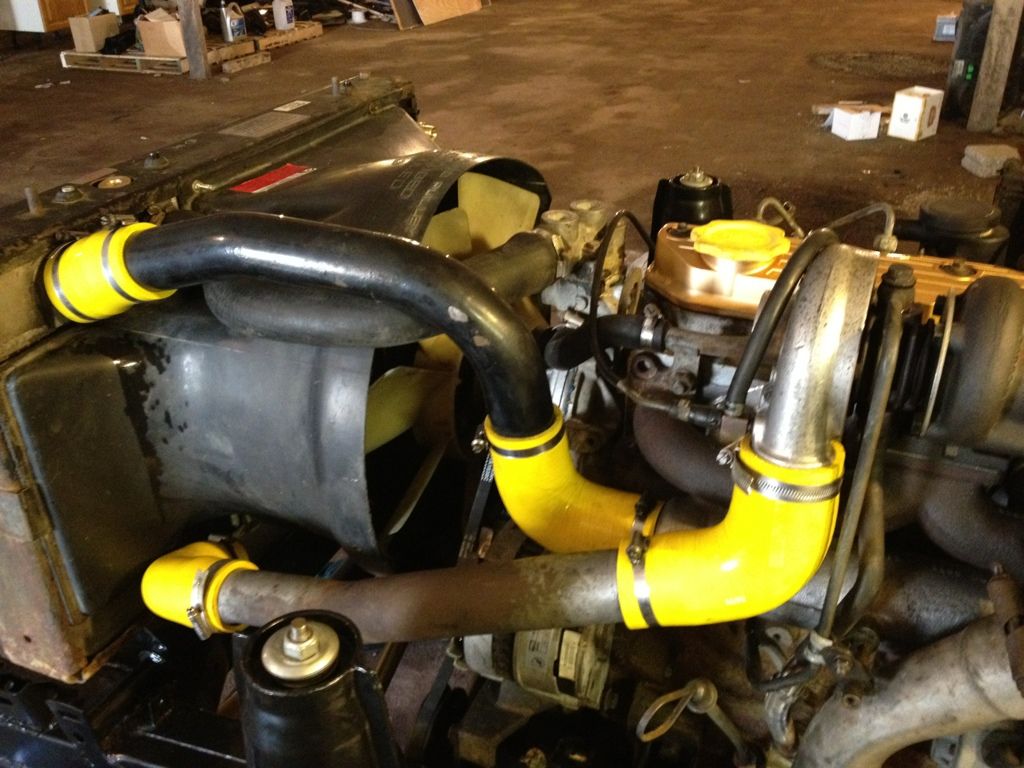
With Oil cooler lines plumbed back in..
Air filter on... (Needs adjustment as currently sat a bit crooked!)
Power steering pipes back in place..
Radiator and intercooler support bracket after a lick of paint!..
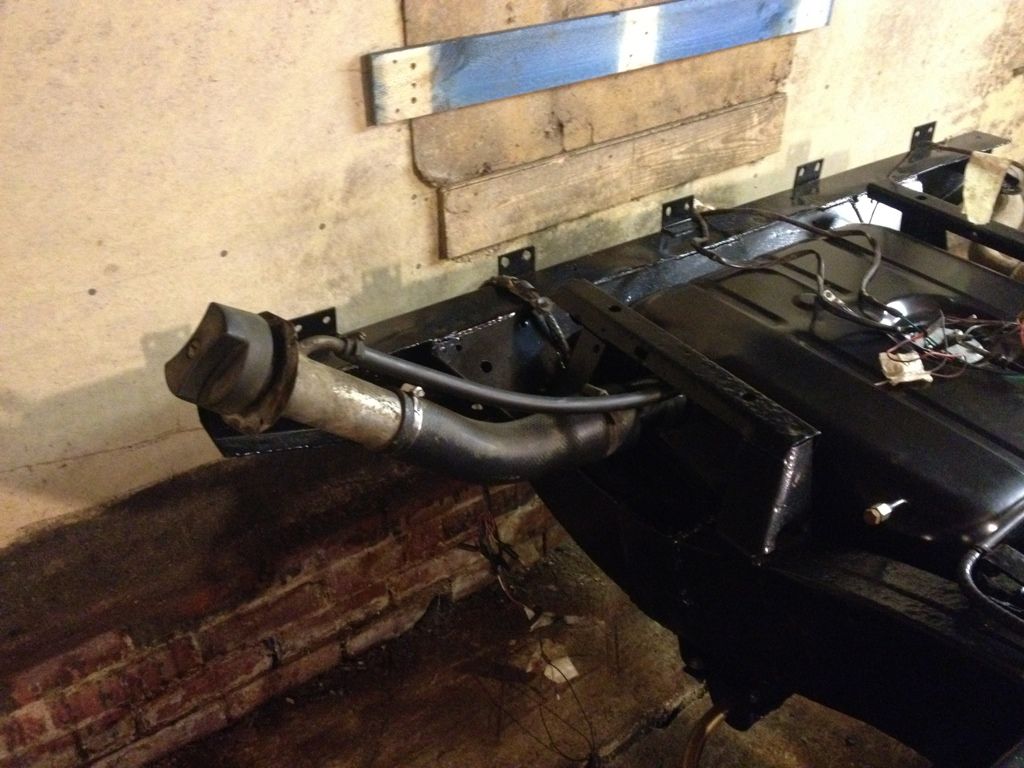
Fuel filler neck in place...
There has been a couple of other odd jobs to do but thats about it now!.. I am waiting for my painted body to come back and then I can start to put things back together! Once the body is back things should start to appear to be making some progress and it might actually start to look like a defender again!..
Once the rebuilt turbo and timing case cover were back on the next job was to put the Alternator, power steering pump and drive belts back on..
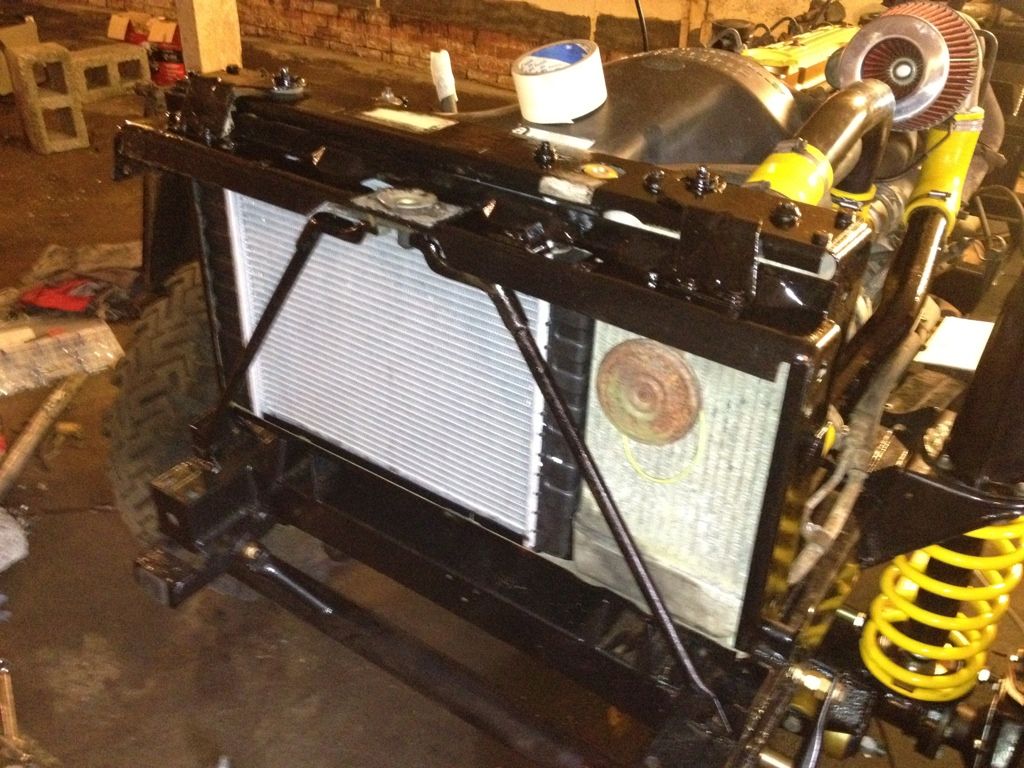
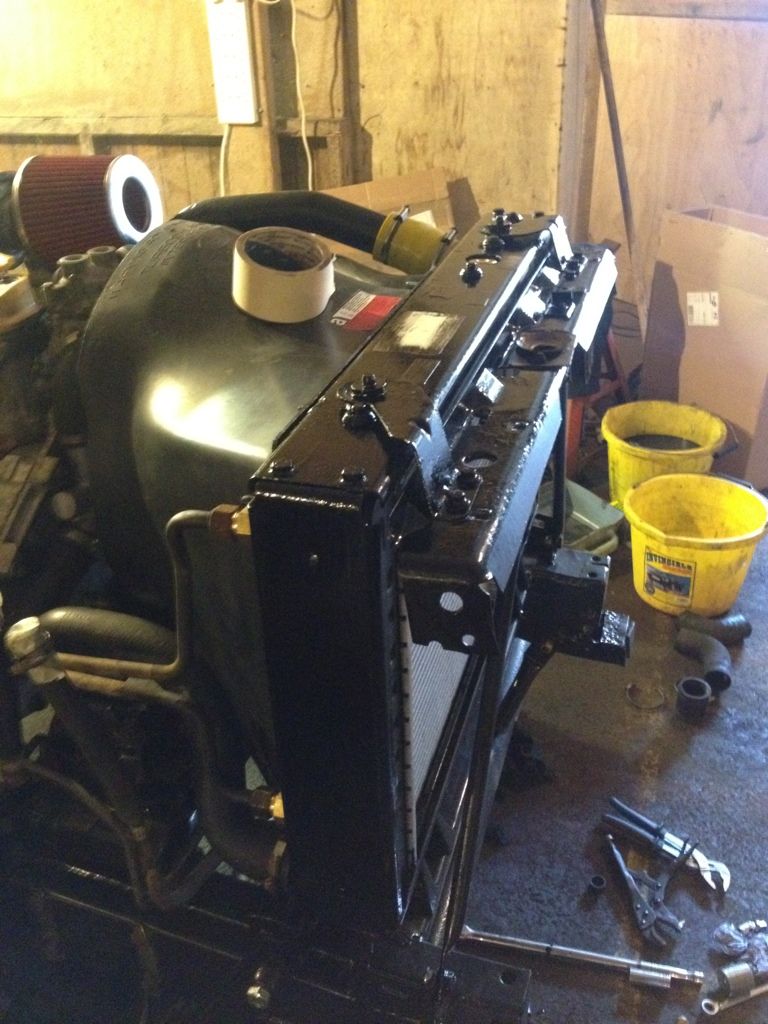
The next job was to replace the shot radiatior, flush any oil out of the intercooler and re fit the units with fresh silicone hoses..
Old...
Back in place...
Plumbed in...
With Oil cooler lines plumbed back in..
Air filter on... (Needs adjustment as currently sat a bit crooked!)
Power steering pipes back in place..
Radiator and intercooler support bracket after a lick of paint!..
Fuel filler neck in place...
There has been a couple of other odd jobs to do but thats about it now!.. I am waiting for my painted body to come back and then I can start to put things back together! Once the body is back things should start to appear to be making some progress and it might actually start to look like a defender again!..
Caulkhead said:
Looks great - did you consider fitting a Zeus timing gear conversion instead of the belt? I hate timing belts! 
In all honesty I hadn't even heard of it! Since your comment I googled it and can see how it might be benefitial and it looks an interesting set up!.. Maybe for the next one!Gassing Station | Readers' Cars | Top of Page | What's New | My Stuff