E46 M3 Project
Discussion


Hi All,
I haven't given up on the Fiesta project http://www.pistonheads.com/gassing/topic.asp?h=0&a... but have devoted a couple of months to my M3 in order to create my ultimate version of the model. The CSL is awesome but too focused for daily use, and what I really want is something that's a half way house (the CS can't genuinely be called that) which can deal with the kind of regular long trips I make as well as be entertaining when required to be.
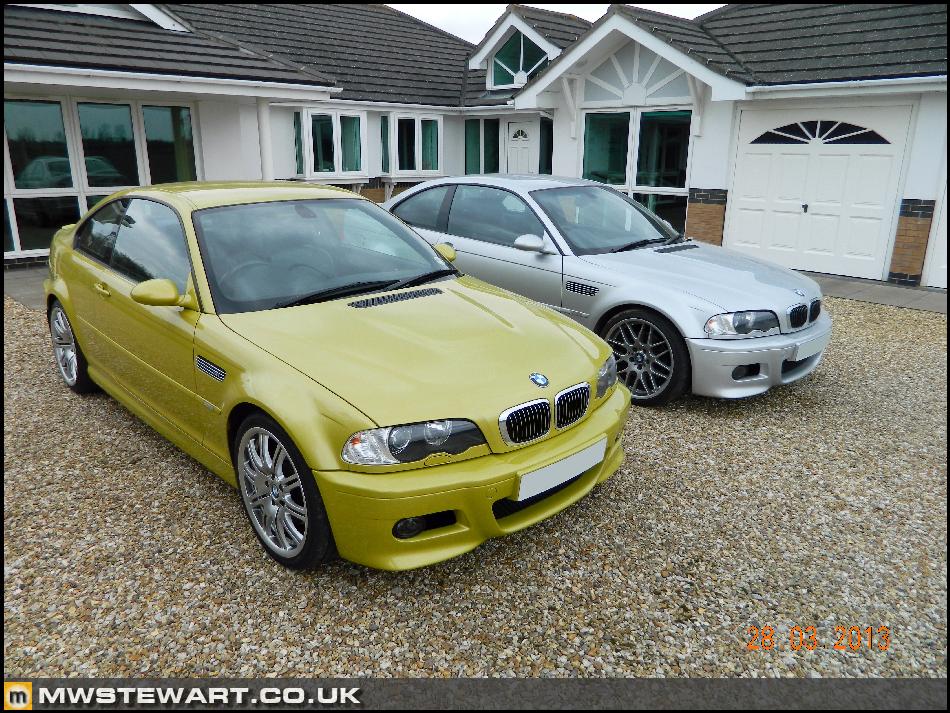
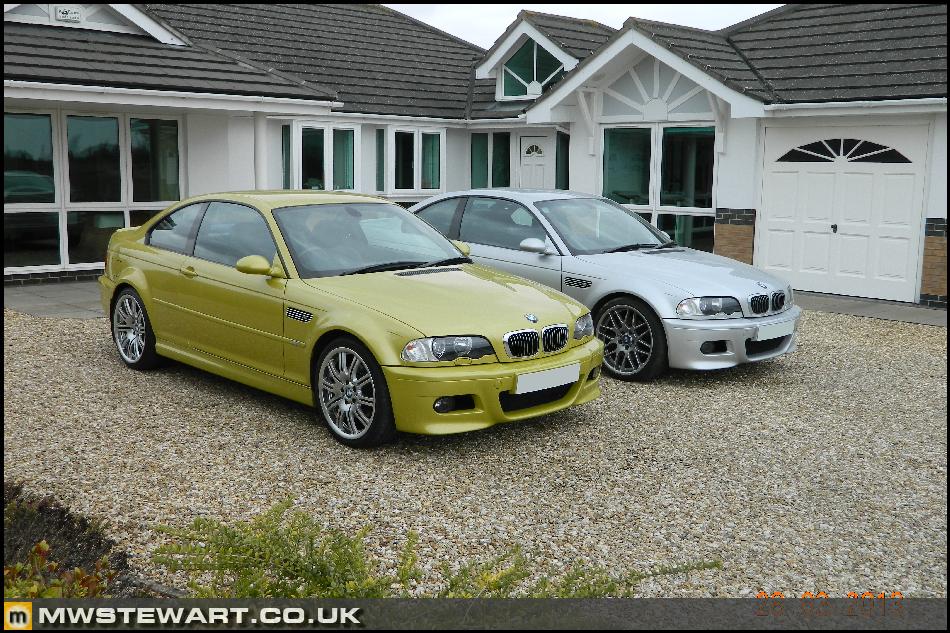
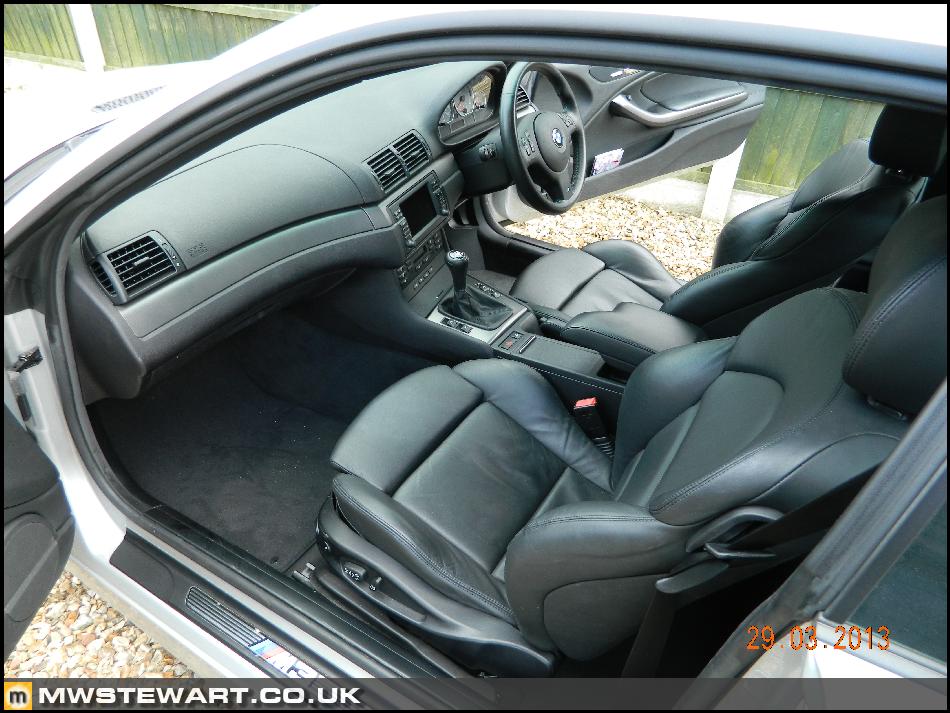
The car is a 2004 E46 M3 finished in Titanium Silver and manual gearbox. It car popped up on eBay and was only six miles from me in London, so I went to view it, liked it, and ended up buying it. Two previous owners and has covered just 27,600 miles. It has been garaged all of its life and still smells new inside; the black plastics are perfect and even the parcel shelf is not faded.
This post represents phase 1 of the project which documents upgrades the interior trim and options. The second phase will be suspension and the third powertrain.
The Beginning
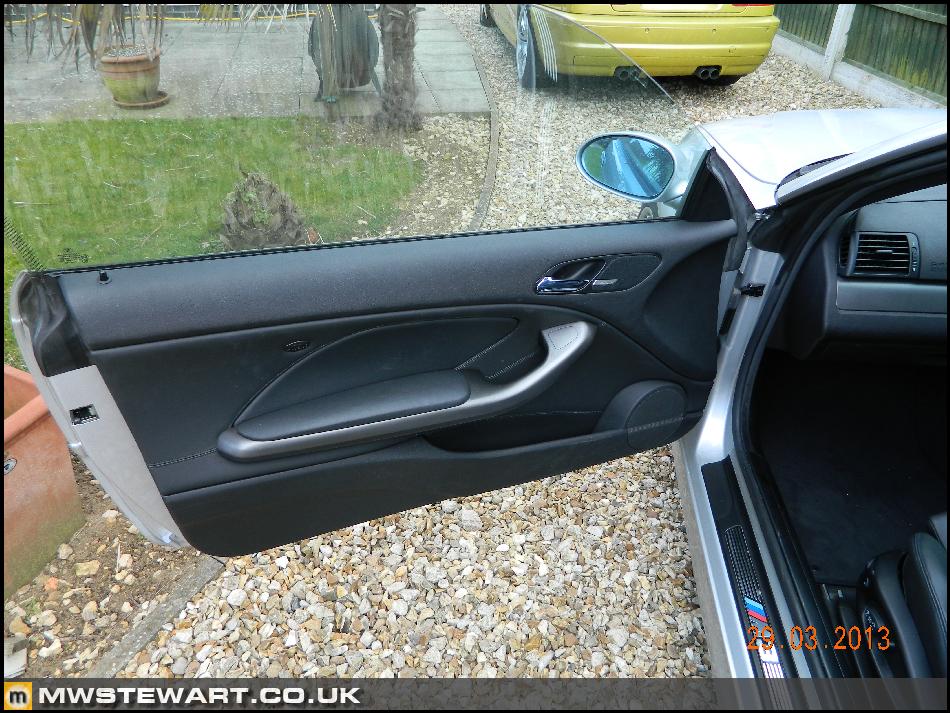
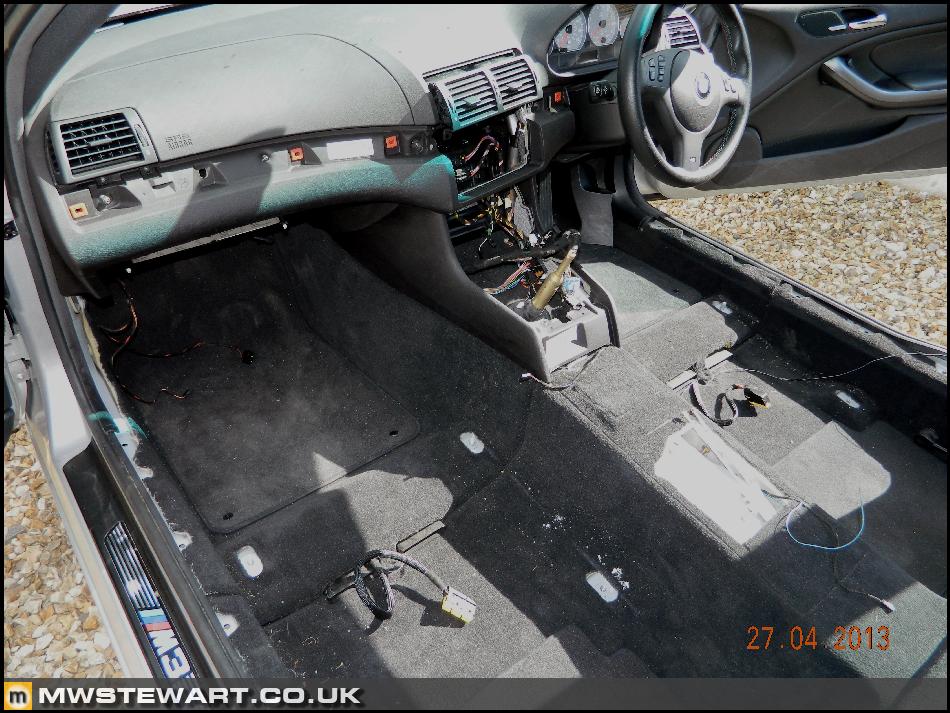
Here's are some photos of the standard car.
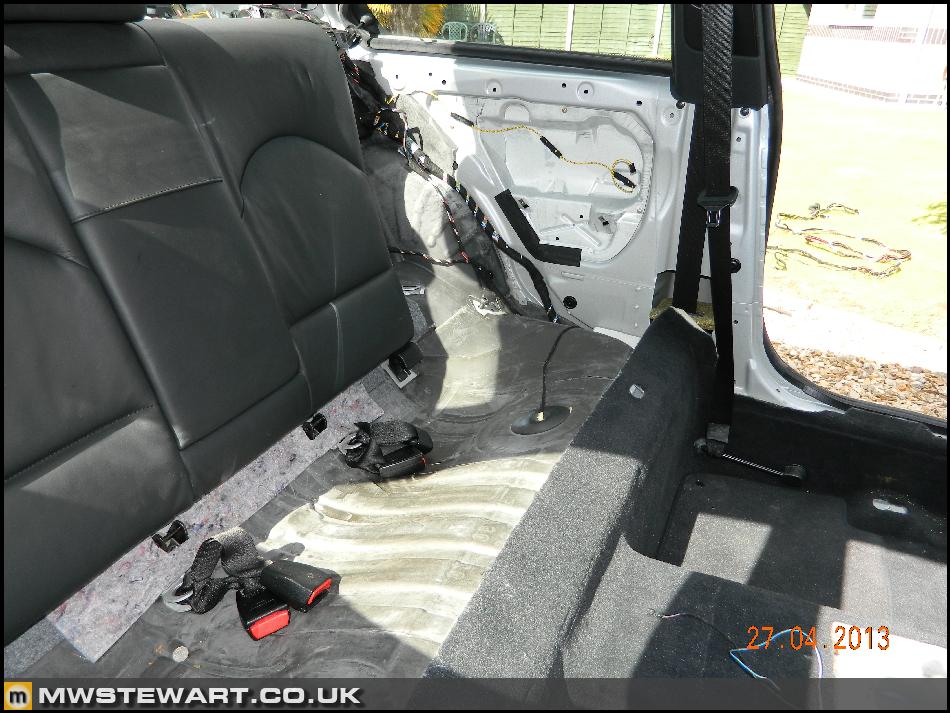
The first task was to strip the interior to gain access to a number of areas.
Bluetooth Retrofit
I wrote up a Bluetooth guide years ago which was based on using a touring loom to retrofit a Convertible:
http://www.mwstewart.co.uk/articles/e46bluetooth/
http://www.mwstewart.co.uk/articles/e46btretrofit/
This time around I am taking the same approach by removing the BT element from another infotainment loom and creating a retrofit loom for my own car. Please note that if you are taking this approach you will need the donor loom to match your head unit type i.e. Nav or in-dsah head unit. I started with a Saloon Nav, TV & Bluetooth loom.
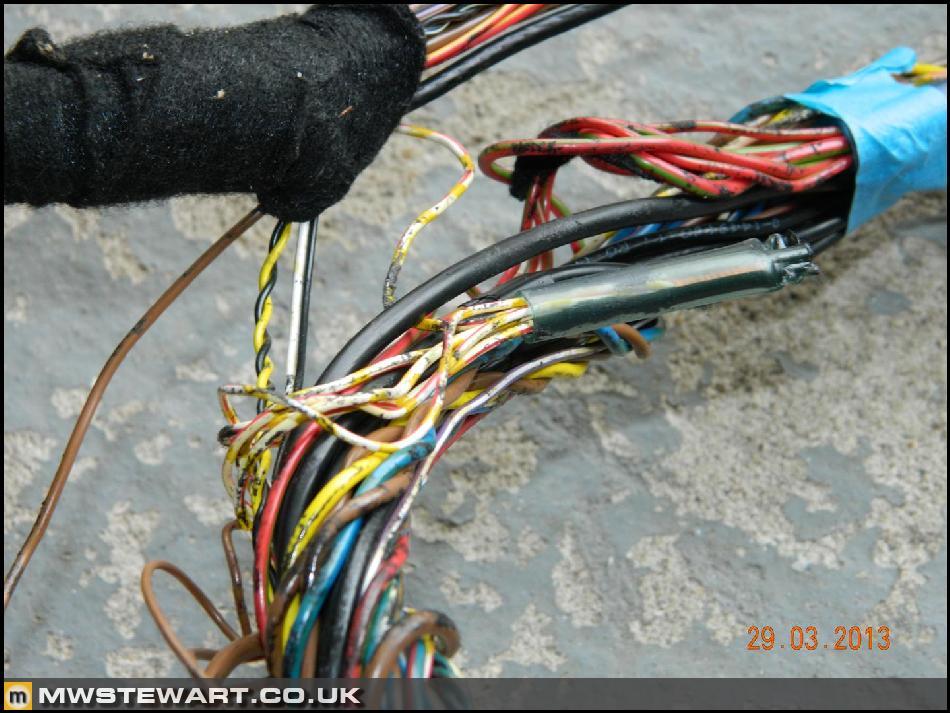
What I have done is strip out the Bluetooth element of the loom without cutting any of the host loom wires. I found the BT loom is joined to the rest of the infotainment loom in the following places:
1)Behind head unit - Red/Yellow wire to Pin 1 of the car loom connector

2)Behind head unit - Grey/Red wire to factory splice/junction point taped up close to car loom connector
(No photo)
3)Behind head unit - Purple/Grey wire to factory splice/junction point taped up close to car loom connector
(No photo)
4)Boot area - Brown wire to common ground
5)Boot area - White/Red with yellow spots (i-bus) to factory splice/junction point taped in loom
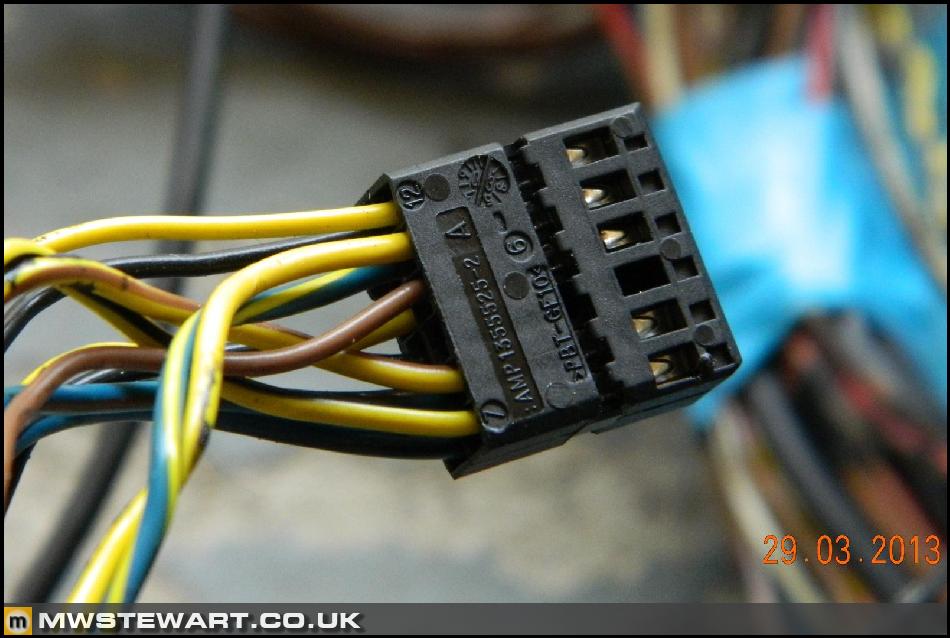
6)Black removable plug (Aux) in Quadlock - Black wire to pin 6
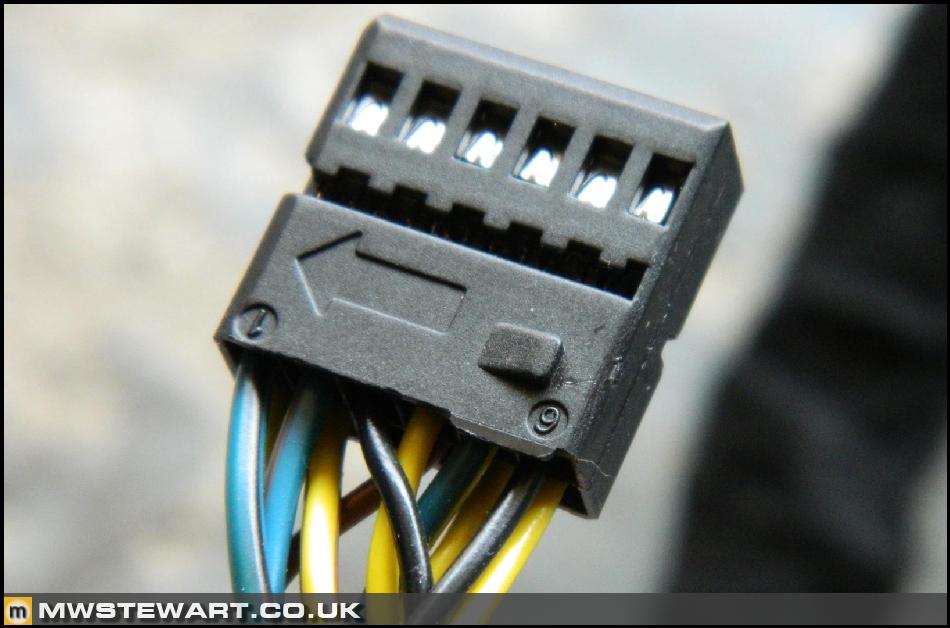
7)Black removable plug (Aux) in Quadlock - Yellow wire to pin 12
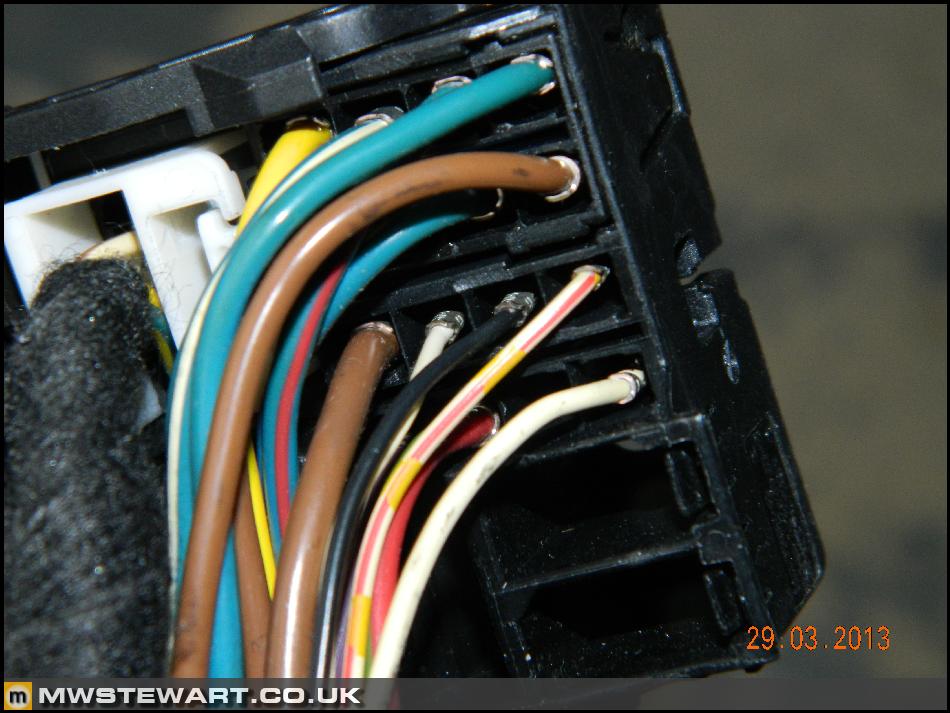
8)Centre fixed plug in Quadlock - Black wire to pin 10 and White wire to pin 11
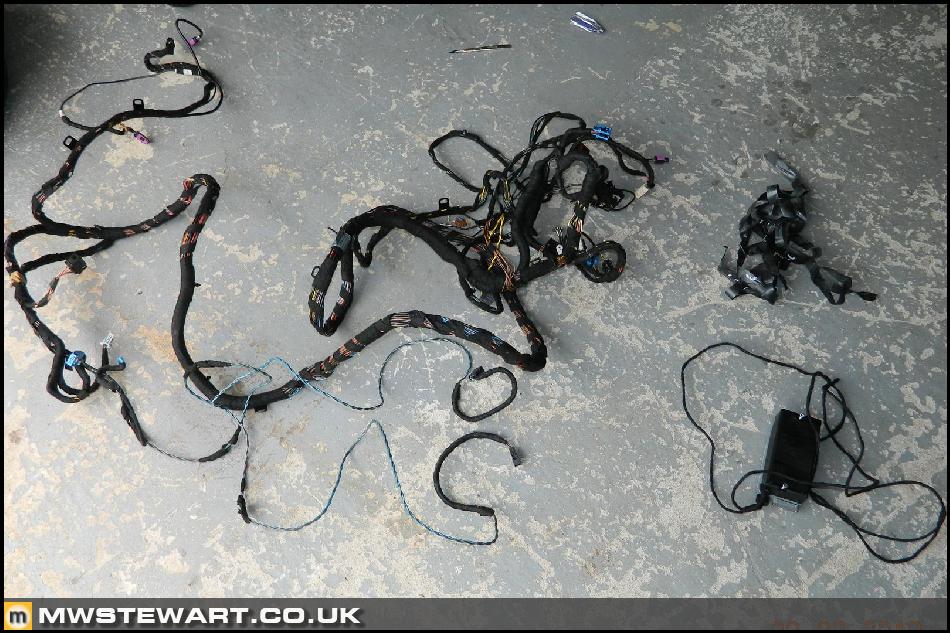
So what I am left with is a Bluetooth loom complete with pins ready to insert into my existing loom, and a completely uncut Saloon Sat Nav & TV loom (not shown) that I will recover in fleece tape and sell on.

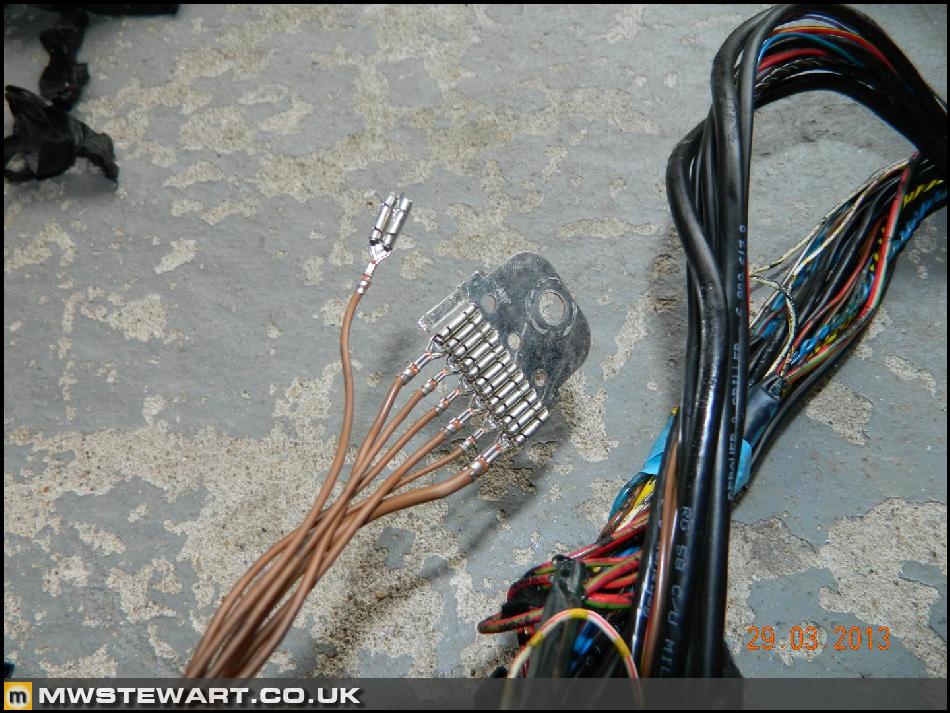
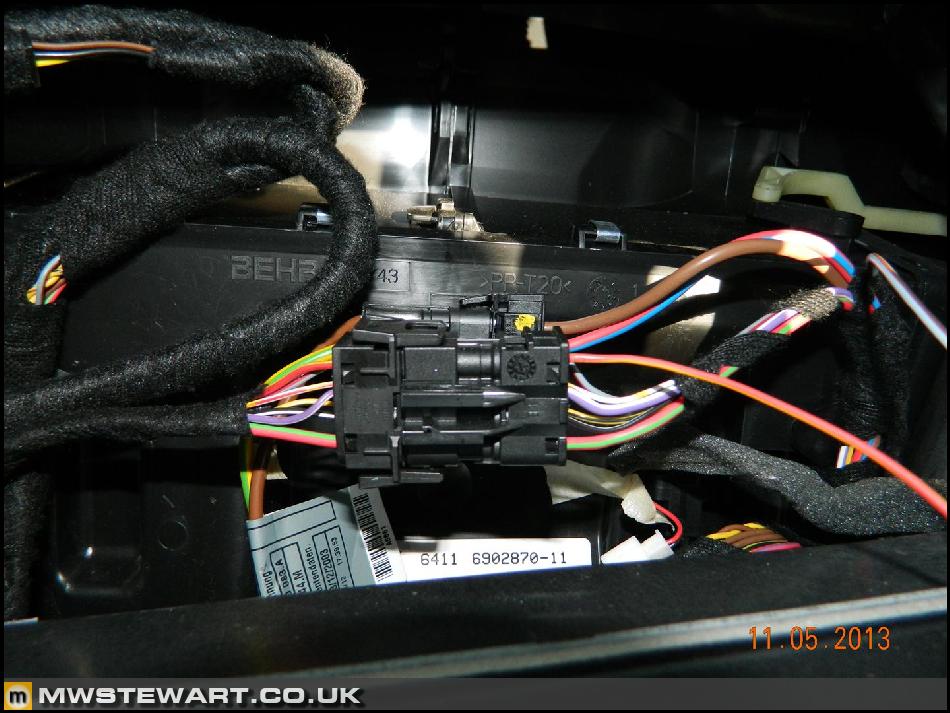
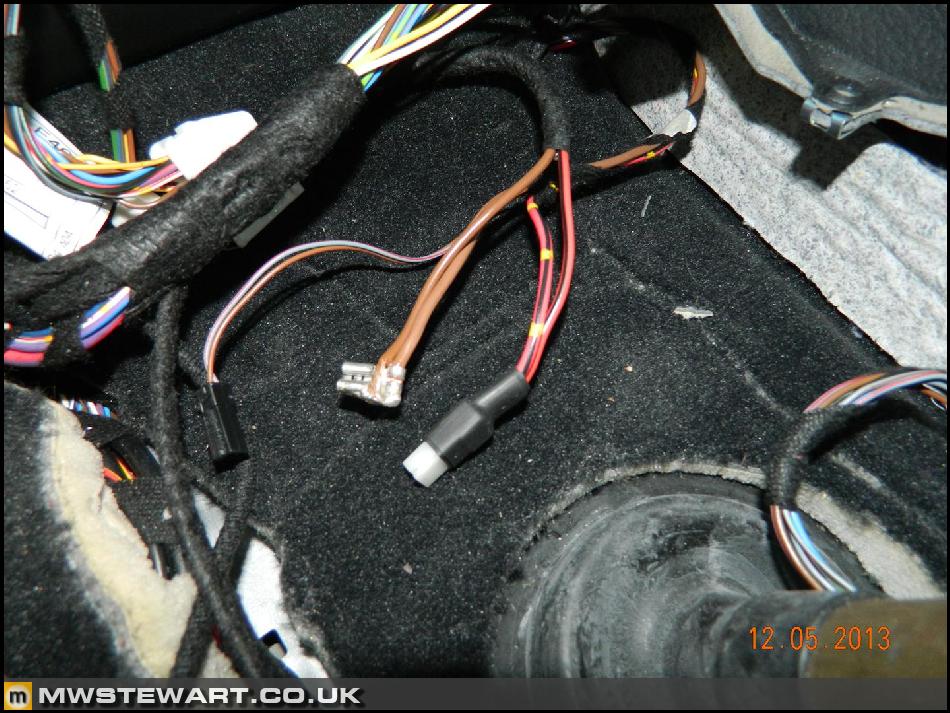
The following two photos show how I have joined to existing splices on my car loom, rather than cutting wires half way along their lengths etc. This takes a far greater amount of time to achieve but means that the car can be diagnosed with factory wiring diagrams including location of terminal positions.
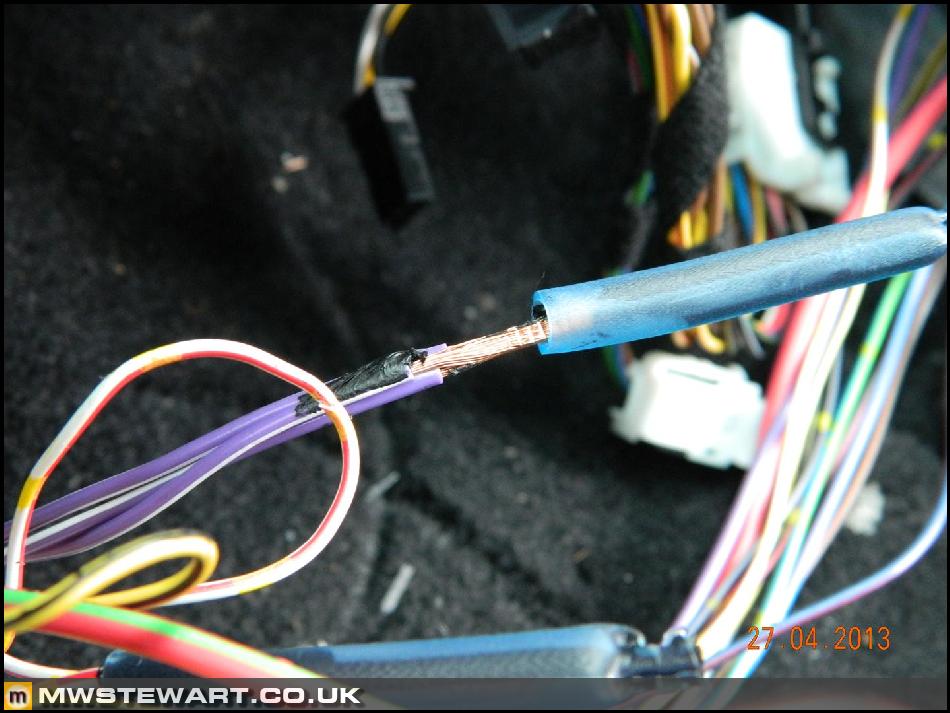

The Bluetooth loom was wrapped in fleece tape and follows the factory wiring routes.
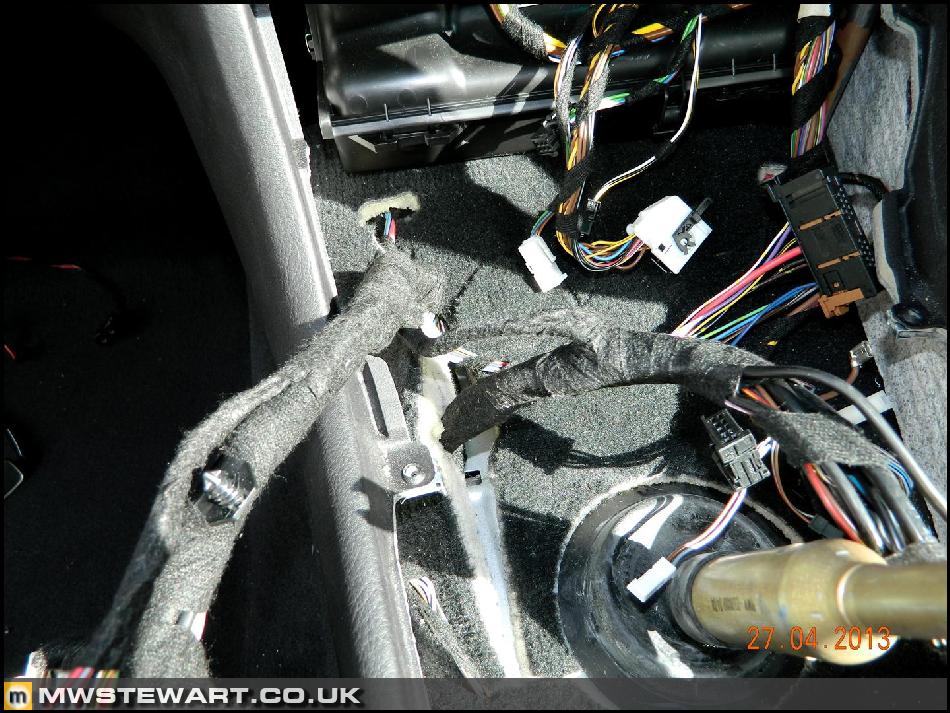
Eject Box and internal antenna wiring in place.
Next on to the overhead Microphone. I know that cars with a sunroof have a separate binnacle up here in the roof lining which makes adding a microphone very easy, my car however did not have this so I've added the microphone directly to the headlining. A template was made and the headlining cut with a scalpel.
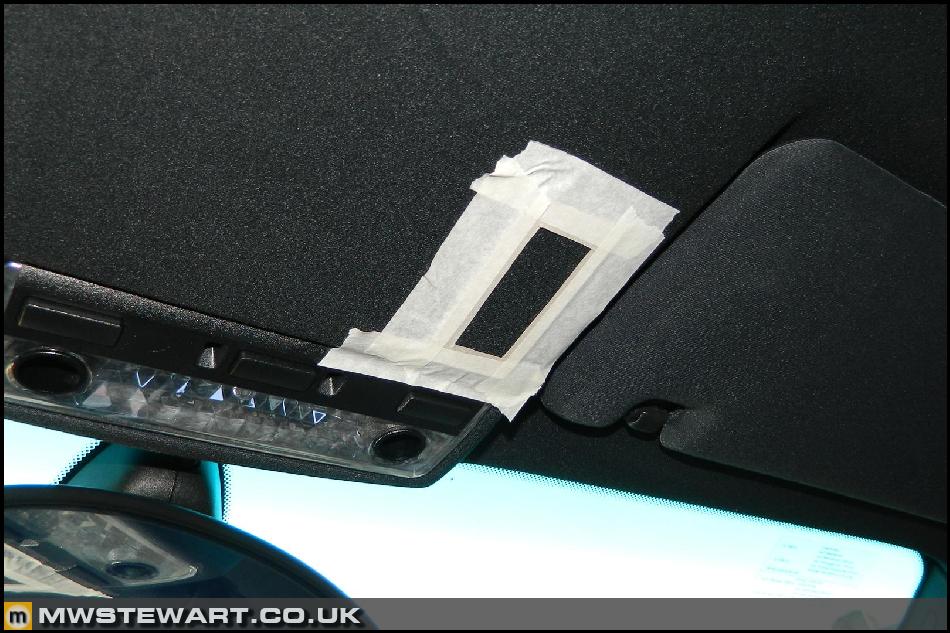
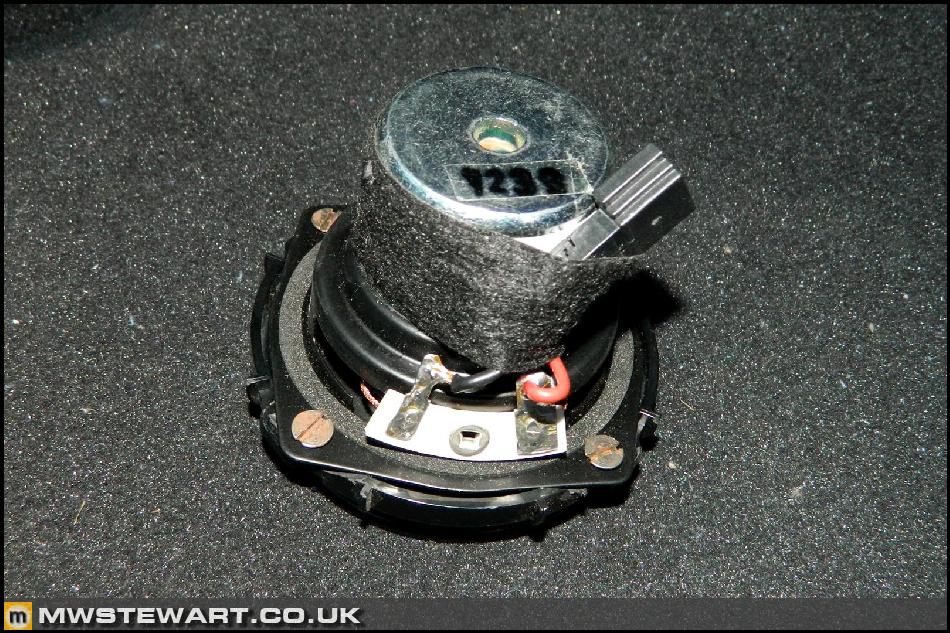
The later type microphone was used, as identified by the green back plate. This supposedly provides better voice quality.
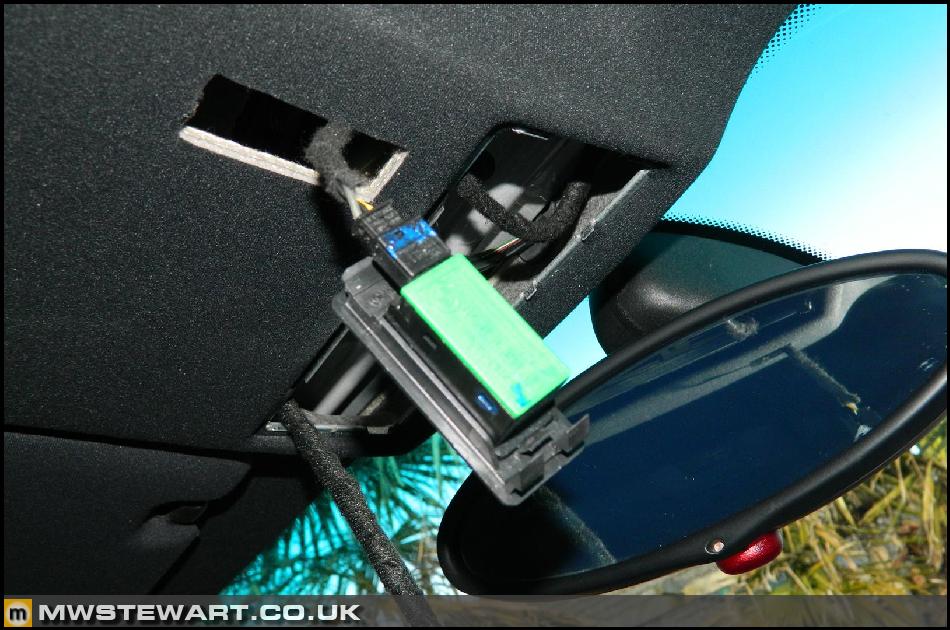
Grille pushed into place.
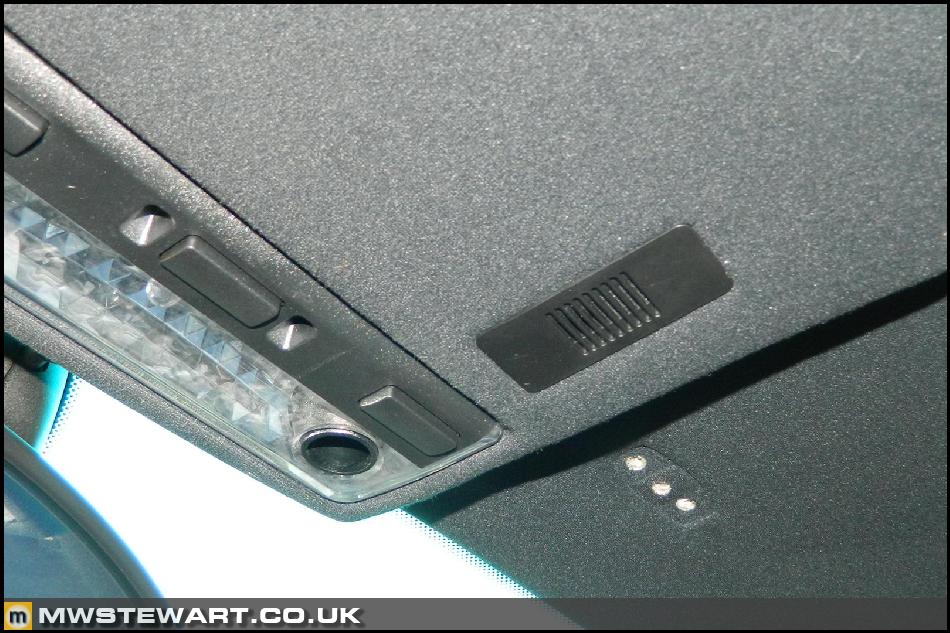
Again, wiring follows OEM routes.
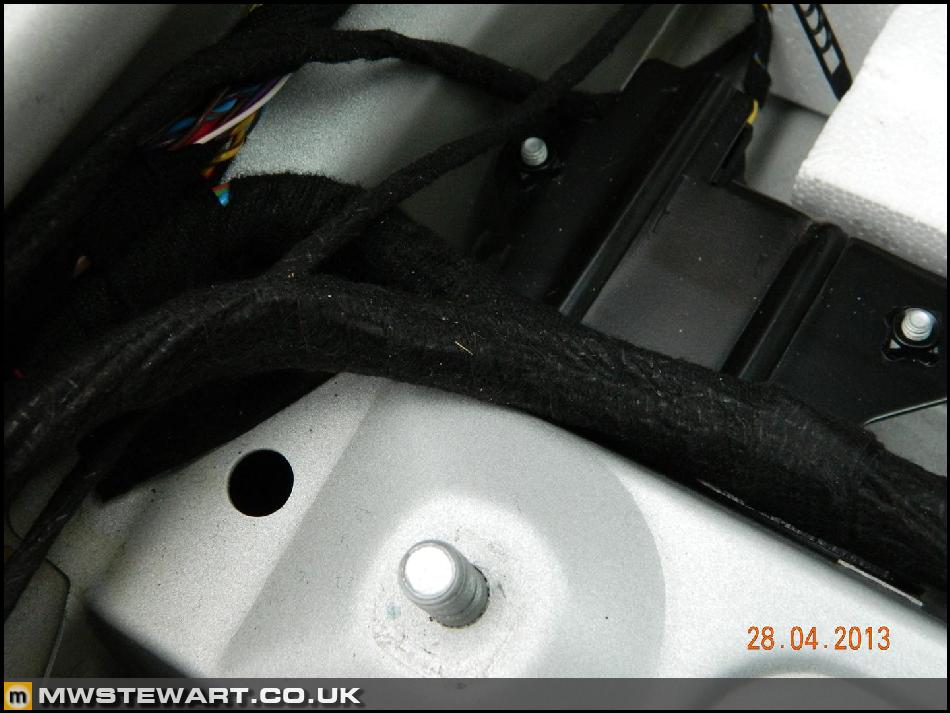
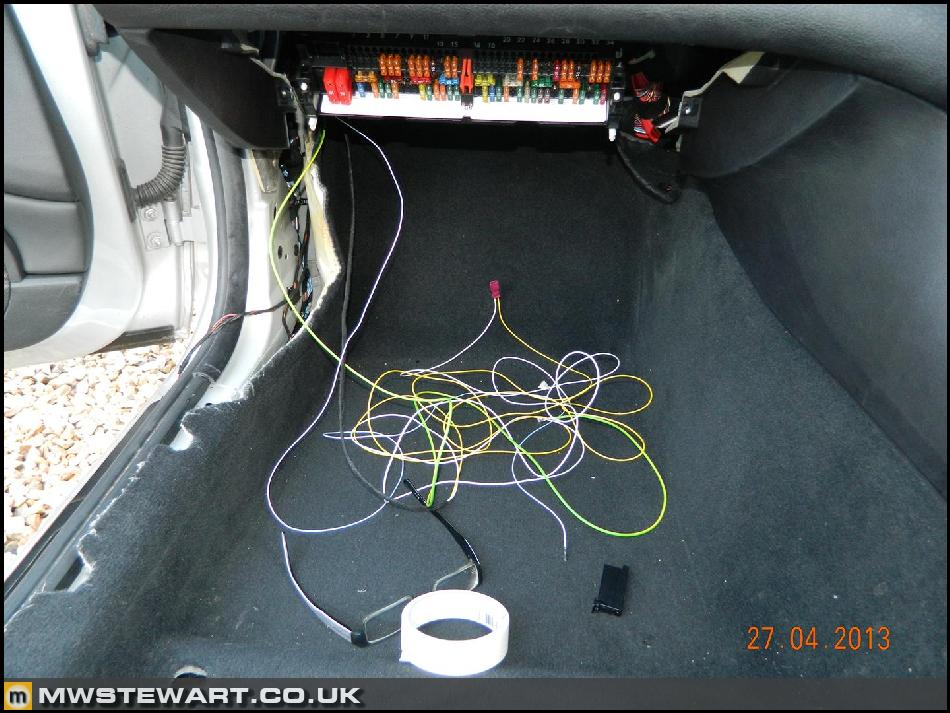
Now on to power for the Bluetooth system. As I wrote in my previous guides, despite the infotainment loom being of a modular construction, if the host car never came from the factory with Bluetooth then it will not have a Terminal 30 wire (Red/Yellow) at pin 1 of the car connector. By far the quickest solution is to bridge the Bluetooth power feed to a neighbouring wire in the car loom around the boot area, however I wanted to wire my car to be OEM so looked to add the missing fused feed. Here is the missing wire added to the car connector using new BMW terminals.
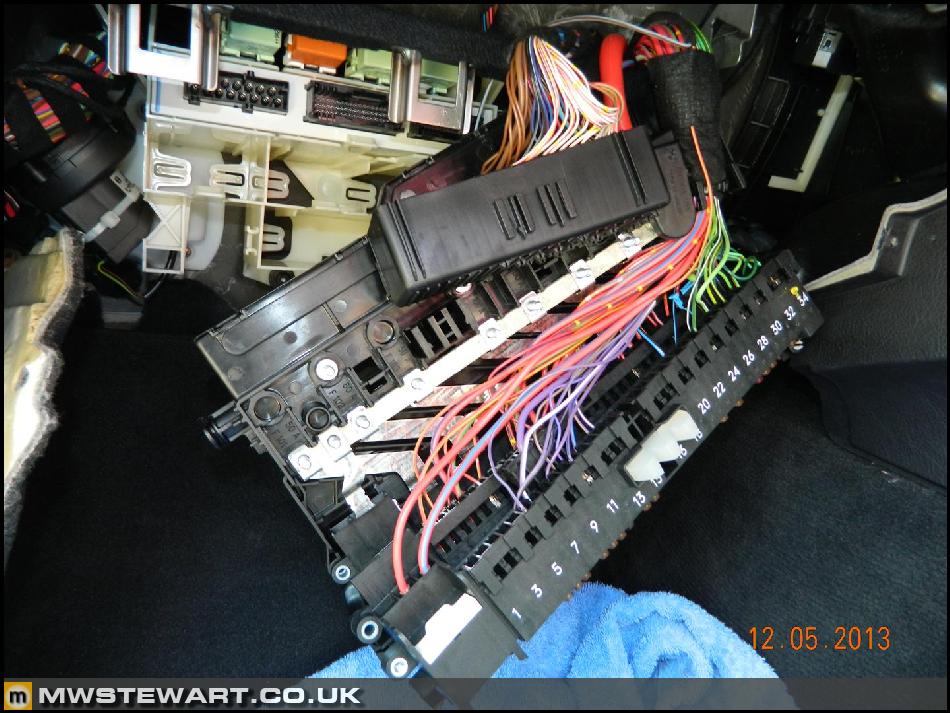
The wire run to the fuse box to position 39
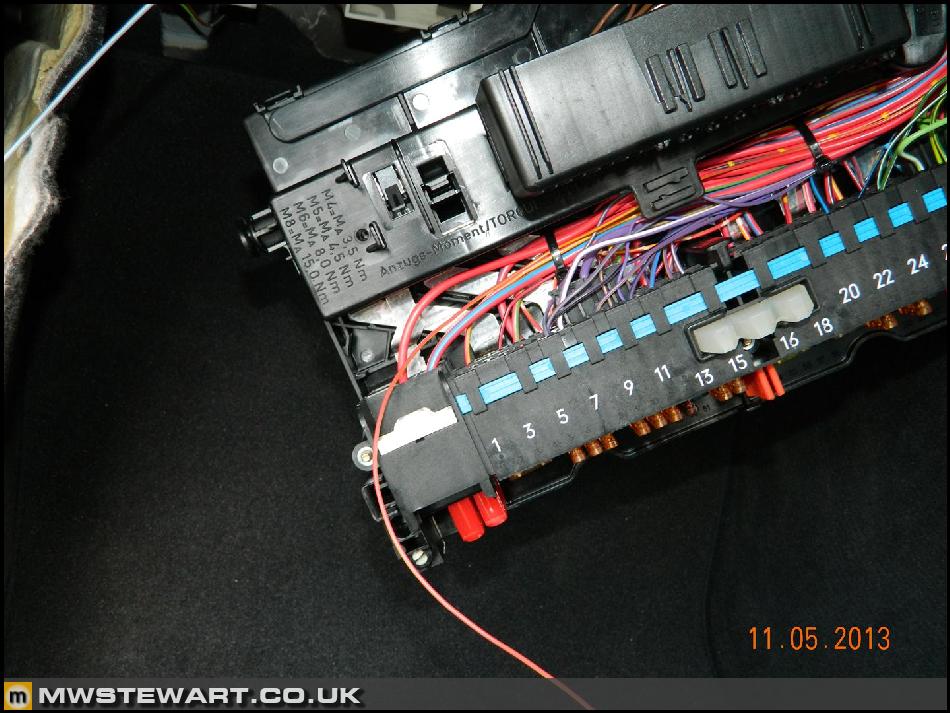
I found that the box had to be stripped down to its constituent parts before I could insert a new fuse leaf. The design of the fuse box is really very good.
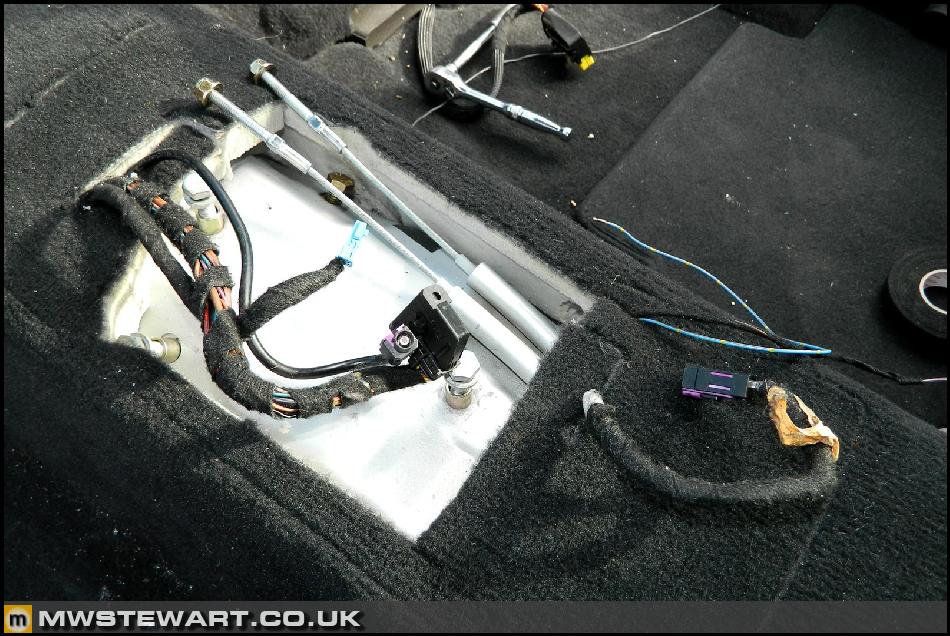
New internal antenna, bracket and screws etc. were used.
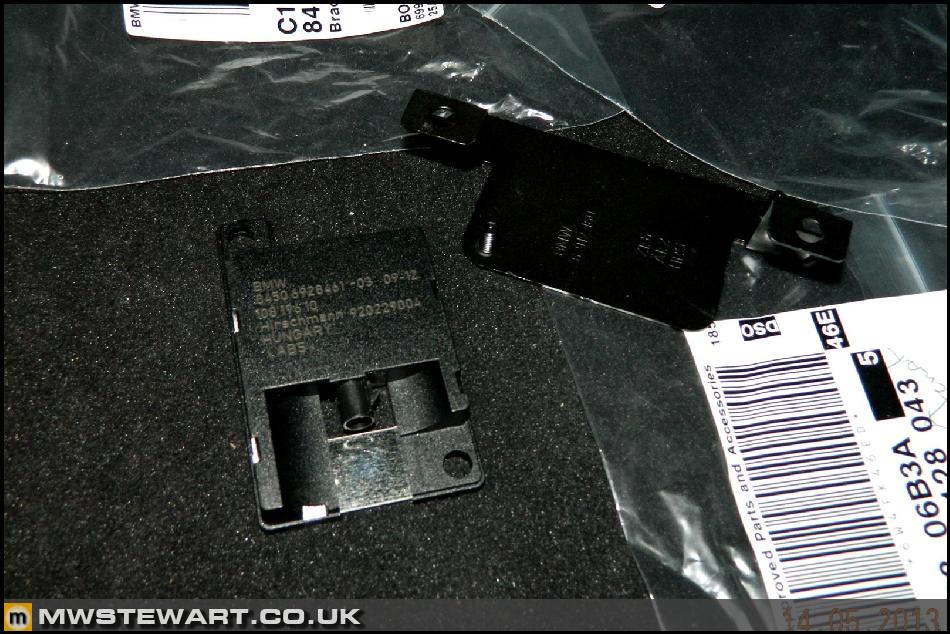
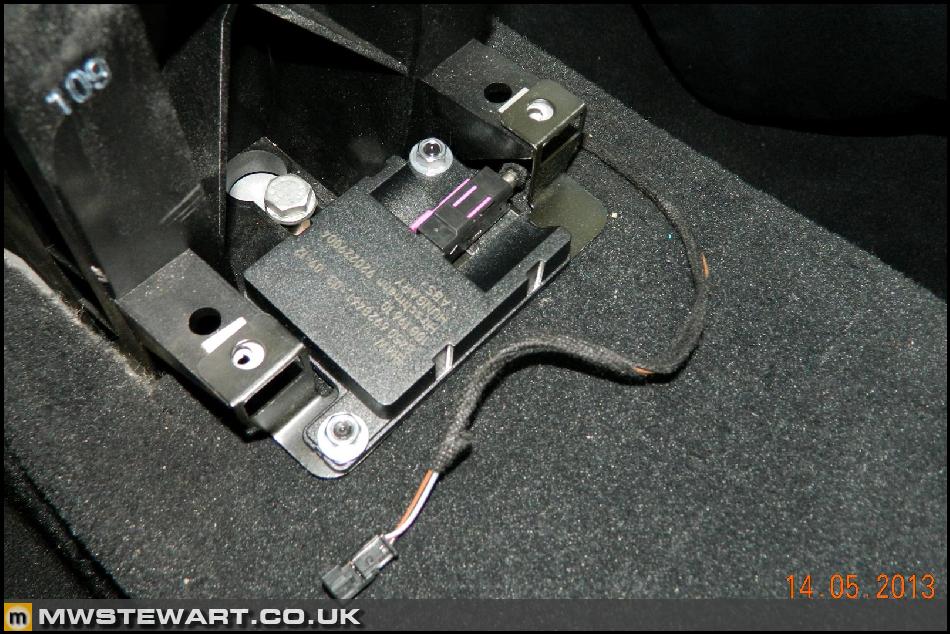
Internal antenna mounted.
I bought a second hand Shark Fin and sprayed it with Titanium Silver.

There is more to come on the BT retrofit.
I haven't given up on the Fiesta project http://www.pistonheads.com/gassing/topic.asp?h=0&a... but have devoted a couple of months to my M3 in order to create my ultimate version of the model. The CSL is awesome but too focused for daily use, and what I really want is something that's a half way house (the CS can't genuinely be called that) which can deal with the kind of regular long trips I make as well as be entertaining when required to be.
The car is a 2004 E46 M3 finished in Titanium Silver and manual gearbox. It car popped up on eBay and was only six miles from me in London, so I went to view it, liked it, and ended up buying it. Two previous owners and has covered just 27,600 miles. It has been garaged all of its life and still smells new inside; the black plastics are perfect and even the parcel shelf is not faded.
This post represents phase 1 of the project which documents upgrades the interior trim and options. The second phase will be suspension and the third powertrain.
The Beginning
Here's are some photos of the standard car.
The first task was to strip the interior to gain access to a number of areas.
Bluetooth Retrofit
I wrote up a Bluetooth guide years ago which was based on using a touring loom to retrofit a Convertible:
http://www.mwstewart.co.uk/articles/e46bluetooth/
http://www.mwstewart.co.uk/articles/e46btretrofit/
This time around I am taking the same approach by removing the BT element from another infotainment loom and creating a retrofit loom for my own car. Please note that if you are taking this approach you will need the donor loom to match your head unit type i.e. Nav or in-dsah head unit. I started with a Saloon Nav, TV & Bluetooth loom.
What I have done is strip out the Bluetooth element of the loom without cutting any of the host loom wires. I found the BT loom is joined to the rest of the infotainment loom in the following places:
1)Behind head unit - Red/Yellow wire to Pin 1 of the car loom connector
2)Behind head unit - Grey/Red wire to factory splice/junction point taped up close to car loom connector
(No photo)
3)Behind head unit - Purple/Grey wire to factory splice/junction point taped up close to car loom connector
(No photo)
4)Boot area - Brown wire to common ground
5)Boot area - White/Red with yellow spots (i-bus) to factory splice/junction point taped in loom
6)Black removable plug (Aux) in Quadlock - Black wire to pin 6
7)Black removable plug (Aux) in Quadlock - Yellow wire to pin 12
8)Centre fixed plug in Quadlock - Black wire to pin 10 and White wire to pin 11
So what I am left with is a Bluetooth loom complete with pins ready to insert into my existing loom, and a completely uncut Saloon Sat Nav & TV loom (not shown) that I will recover in fleece tape and sell on.
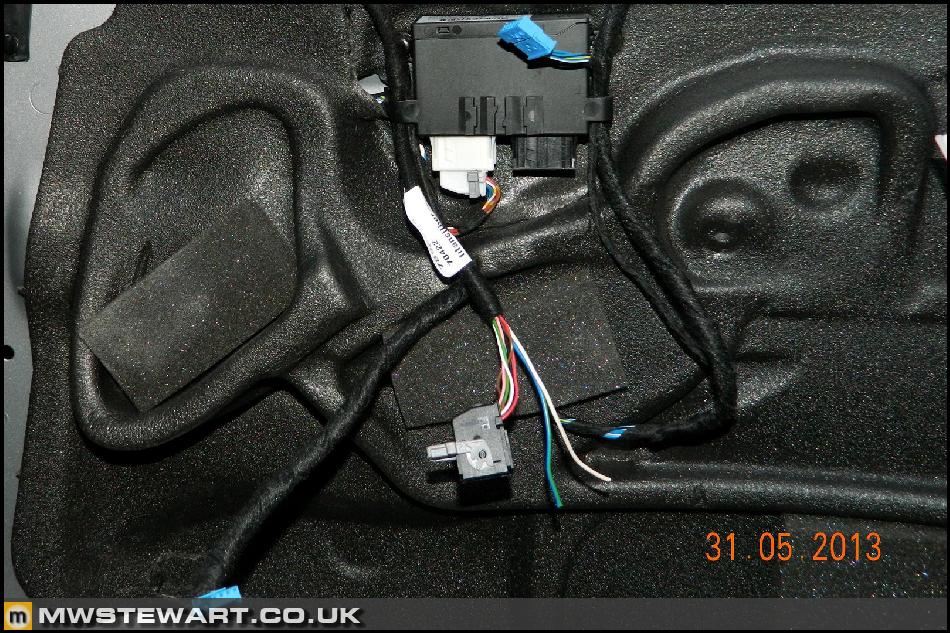
The following two photos show how I have joined to existing splices on my car loom, rather than cutting wires half way along their lengths etc. This takes a far greater amount of time to achieve but means that the car can be diagnosed with factory wiring diagrams including location of terminal positions.
The Bluetooth loom was wrapped in fleece tape and follows the factory wiring routes.
Eject Box and internal antenna wiring in place.
Next on to the overhead Microphone. I know that cars with a sunroof have a separate binnacle up here in the roof lining which makes adding a microphone very easy, my car however did not have this so I've added the microphone directly to the headlining. A template was made and the headlining cut with a scalpel.
The later type microphone was used, as identified by the green back plate. This supposedly provides better voice quality.
Grille pushed into place.
Again, wiring follows OEM routes.
Now on to power for the Bluetooth system. As I wrote in my previous guides, despite the infotainment loom being of a modular construction, if the host car never came from the factory with Bluetooth then it will not have a Terminal 30 wire (Red/Yellow) at pin 1 of the car connector. By far the quickest solution is to bridge the Bluetooth power feed to a neighbouring wire in the car loom around the boot area, however I wanted to wire my car to be OEM so looked to add the missing fused feed. Here is the missing wire added to the car connector using new BMW terminals.
The wire run to the fuse box to position 39
I found that the box had to be stripped down to its constituent parts before I could insert a new fuse leaf. The design of the fuse box is really very good.
New internal antenna, bracket and screws etc. were used.
Internal antenna mounted.
I bought a second hand Shark Fin and sprayed it with Titanium Silver.
There is more to come on the BT retrofit.
Edited by mwstewart on Saturday 27th January 12:01

Mark Benson said:
I do love your attention to detail, the Fiesta thread is one of my favourites and this looks to be no less impressive in attention to detail - adding another feed with BMW plugs to keep it OEM rather than doing what 99.9% of us would do and just splicing into a nearby feed 
Thank youNotNormal said:
No supposedly about it. When I bought my car it had the older microphone and it was really bad, the person the other end of the line just couldn't hear any voice. I swapped it out for the newer green backed version and its a MASSIVE improvement.
That's good to hear (no pun intended)  - cheers!
Here's some more. I didn't give enough consideration to how long this would take to write up. Must take less photographs.
AV Inputs
I purchased a BMW Aux input socket which I will fit to the centre console, however I since decided to go for an Alpine iPod interface with Intravee which does make this lead kind of redundant.
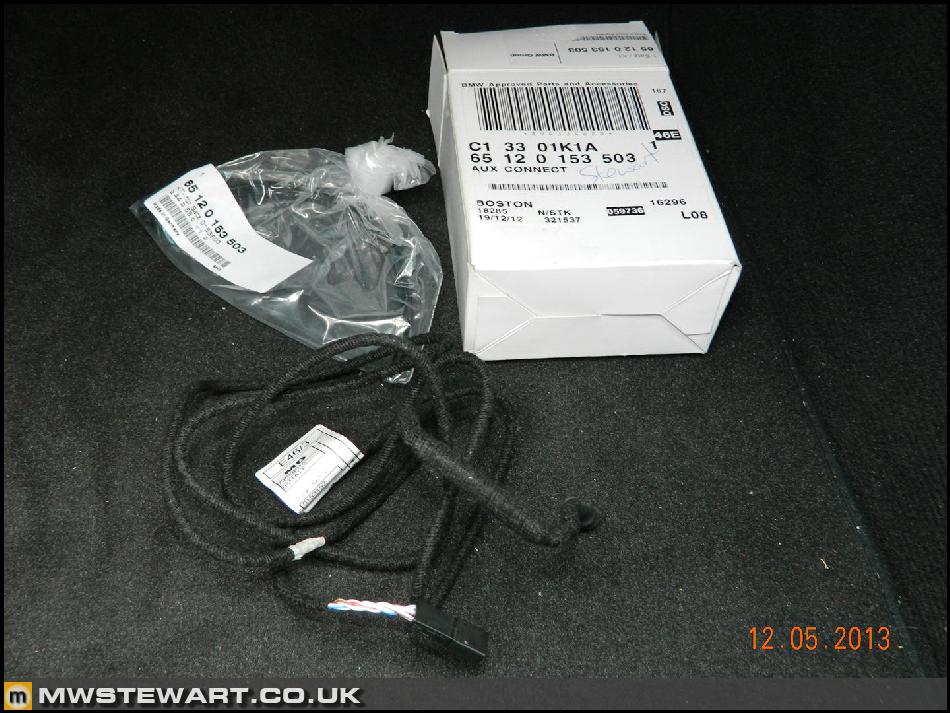
I have bought an AV input/output lead for the TV tuner and run a set of Audio/Video RCA leads to the centre console area, ready for an iPod AV lead.
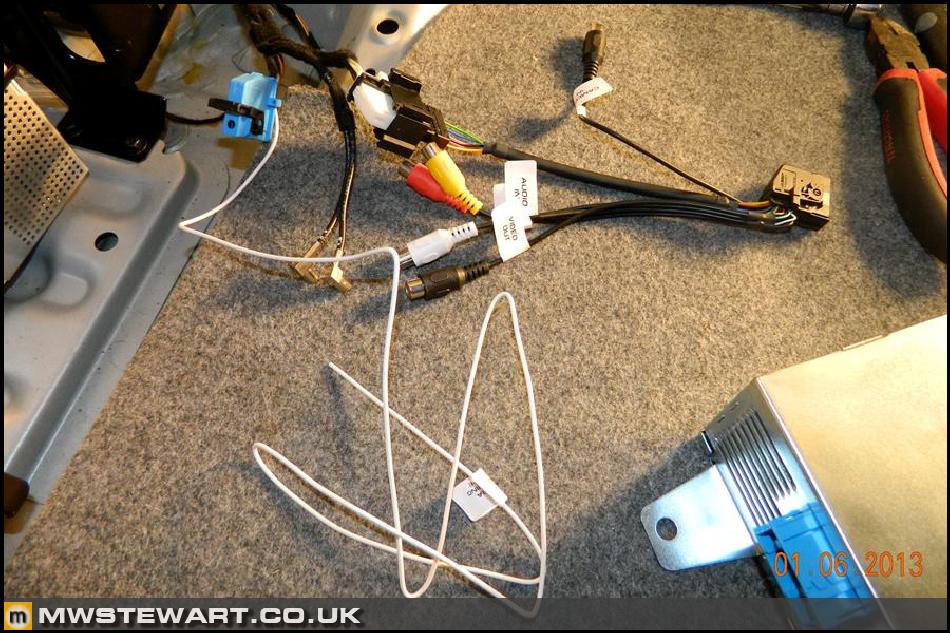
I'm also wiring in a reversing camera, which I'll cover in a later update.
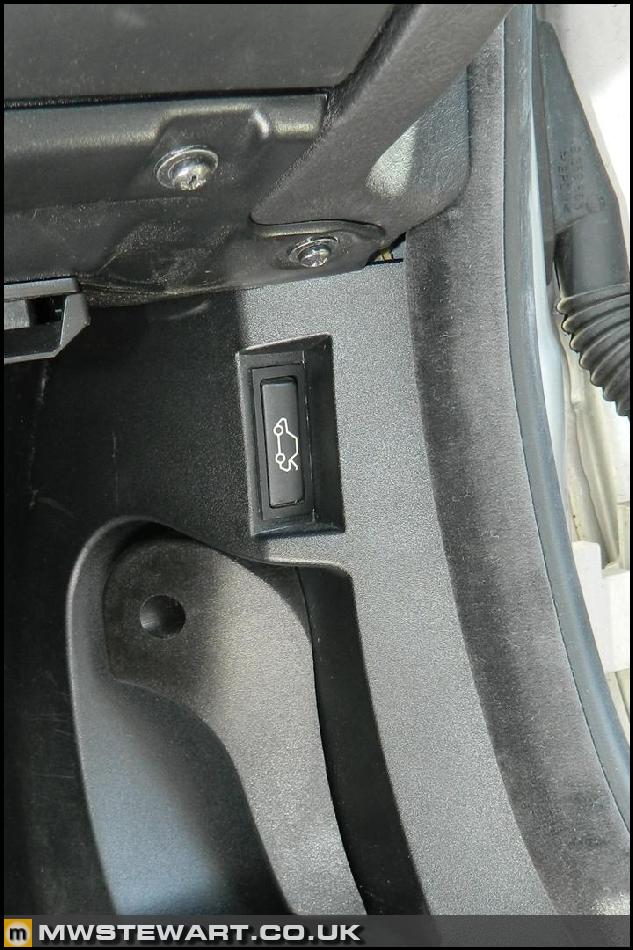
Boot Release Button
I have added a boot release button which came from an E39 Touring. It is illuminated. I used new BMW connectors/pins and also the correct OEM wiring colours throughout.
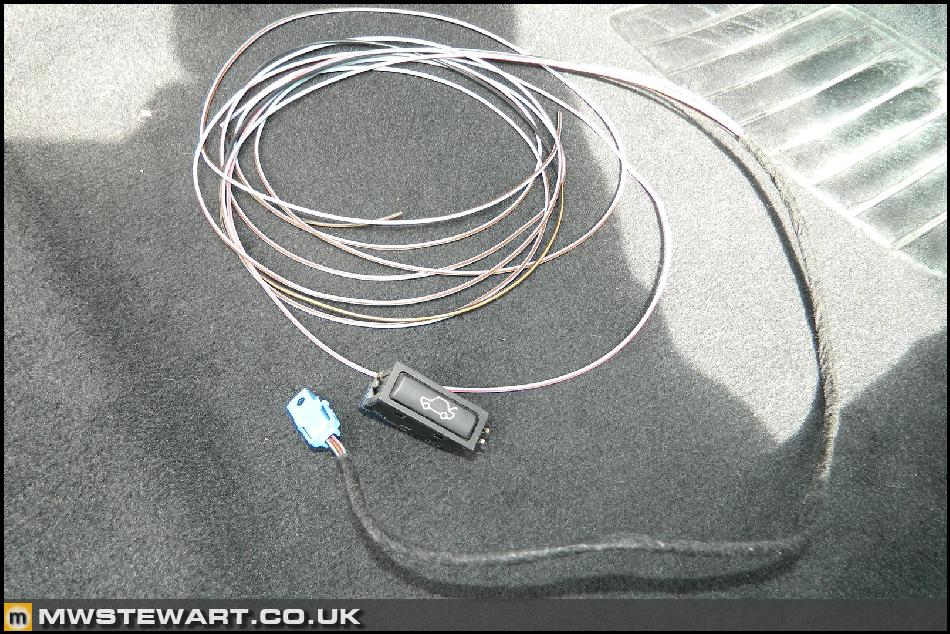
Switch fitted.
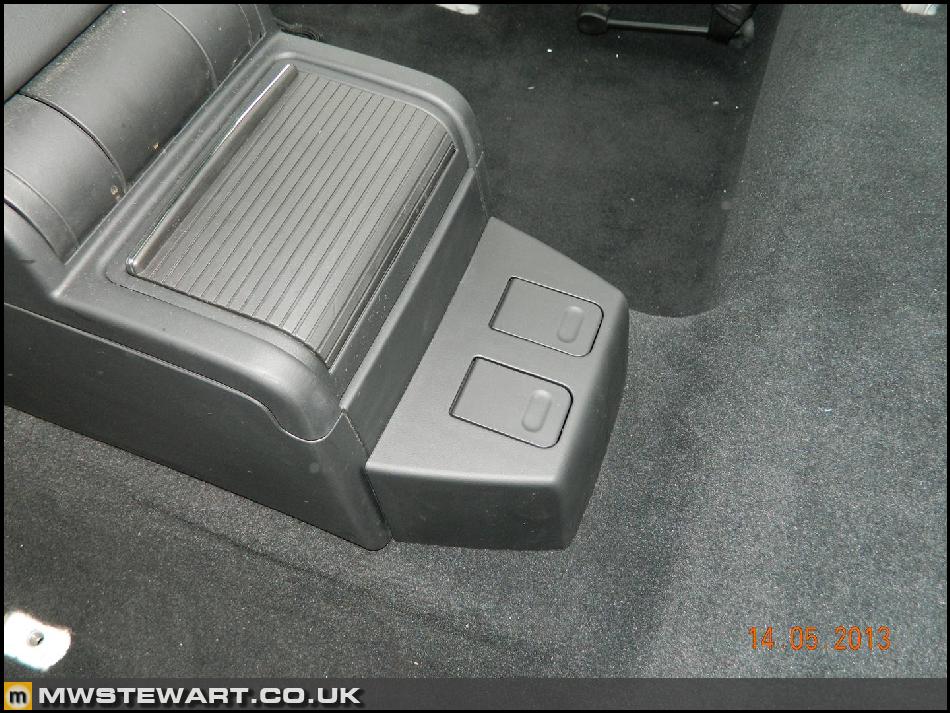
Extended Storage (Power) Pack
The extended storage pack turns the rear ashtray into a storage bin and adds two handy flip-up power sockets to the rear. I bought everything new from BMW and the correct wiring from www.Autosparks.co.uk.
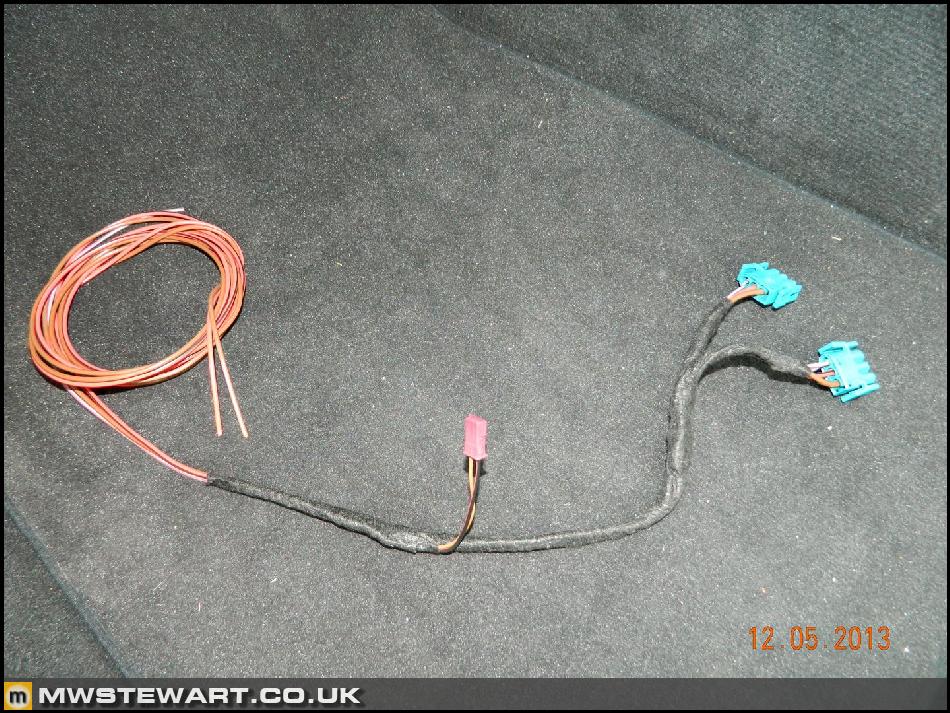
Here's the loom I made. I also added a small two pin (purple) OEM connector just underneath the centre console storage tray area so that I can easily add a USB charging socket that can be removed when required..
I soldered my loom to the front cigarette lighter terminals. Note matching wiring colours.
The rear of the centre console had to be modified slightly to provide clearance.
Here's everything fitted.
Sound Deadening
In preparation for some upgraded speakers I have chosen to vibration damp key areas of the car.
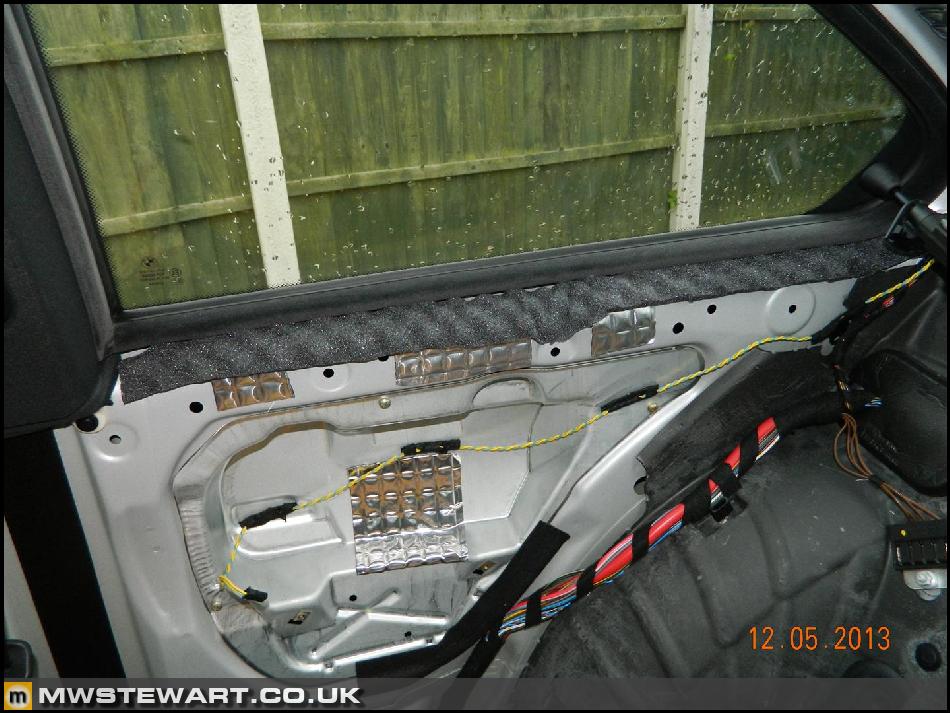
Here is the rear bulkhead/parcel shelf area exposed which is where the factory Harman / Kardon Subwoofers mount to. I noticed that the three rear seatbelts did produce some noise and vibration when the radio was on, so these were an area I wanted to focus on.
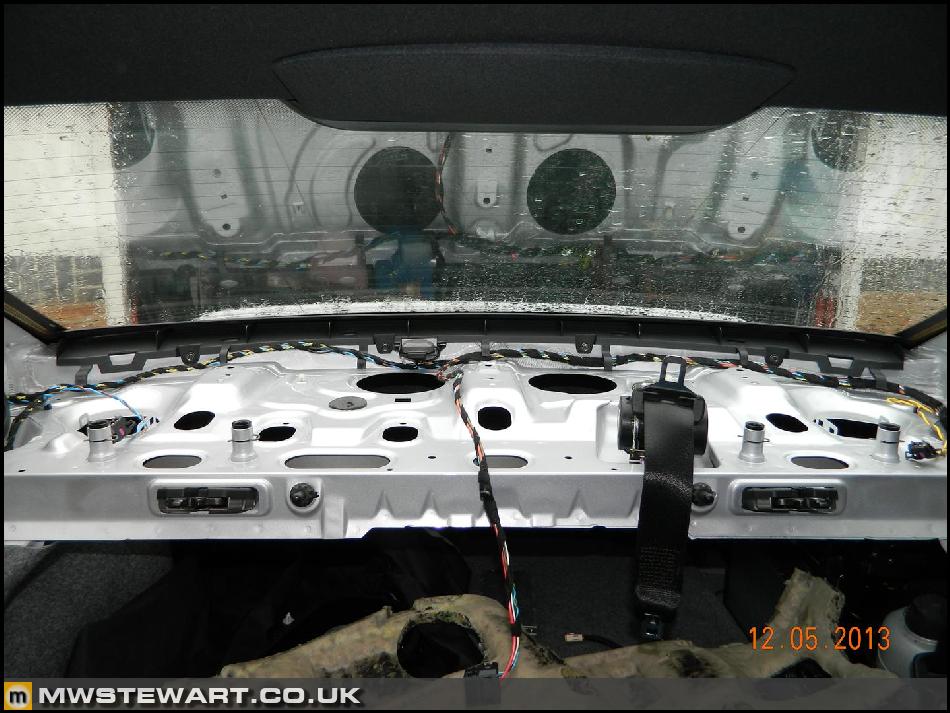
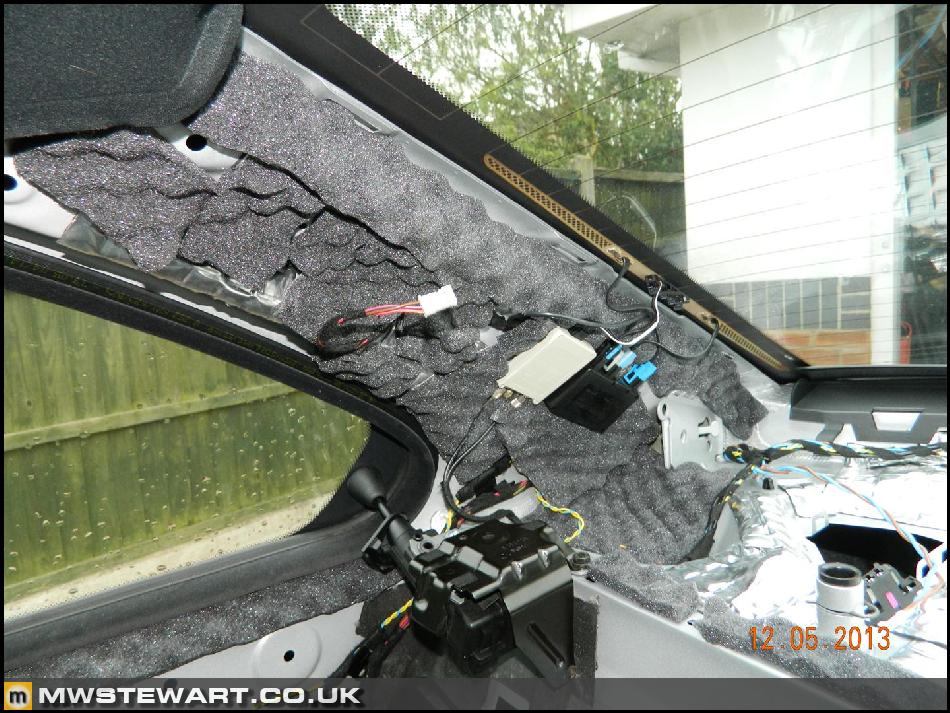
I have used Silent Coat 2mm Damping Mat to reduce resonance and damp vibrations in the rear panels. The rear quarter panels were actually already well damped from the factory and so didn't require much material at all.
The parcel shelf area on the other hand, did.
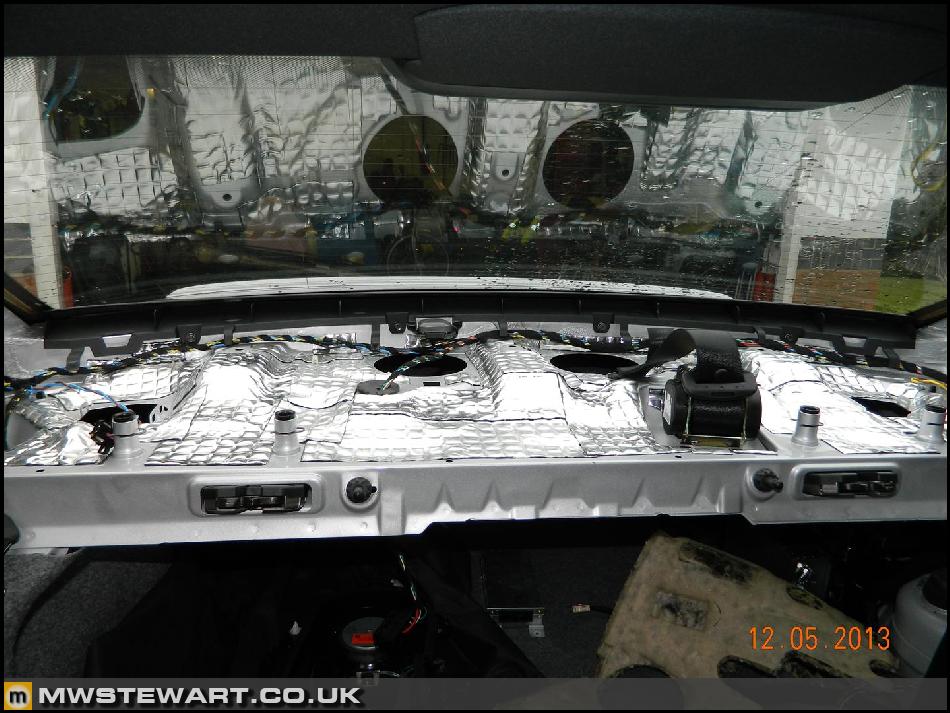
It turns out that the seat belt mechanisms 'float' on these hard plastic springs, which can make a horrible buzz on the exposed metal bulkhead.
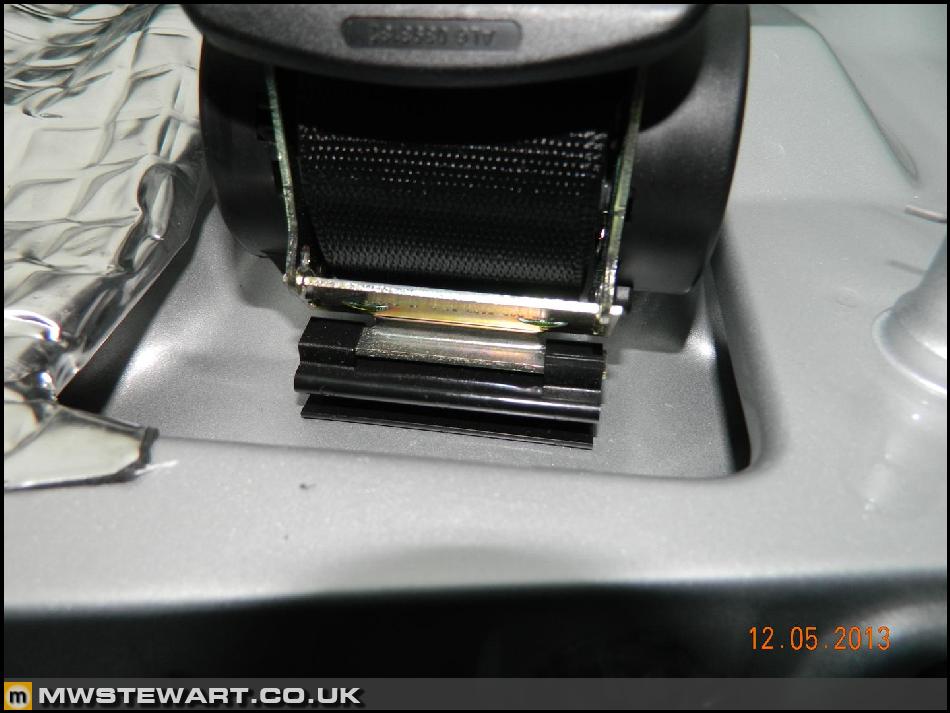
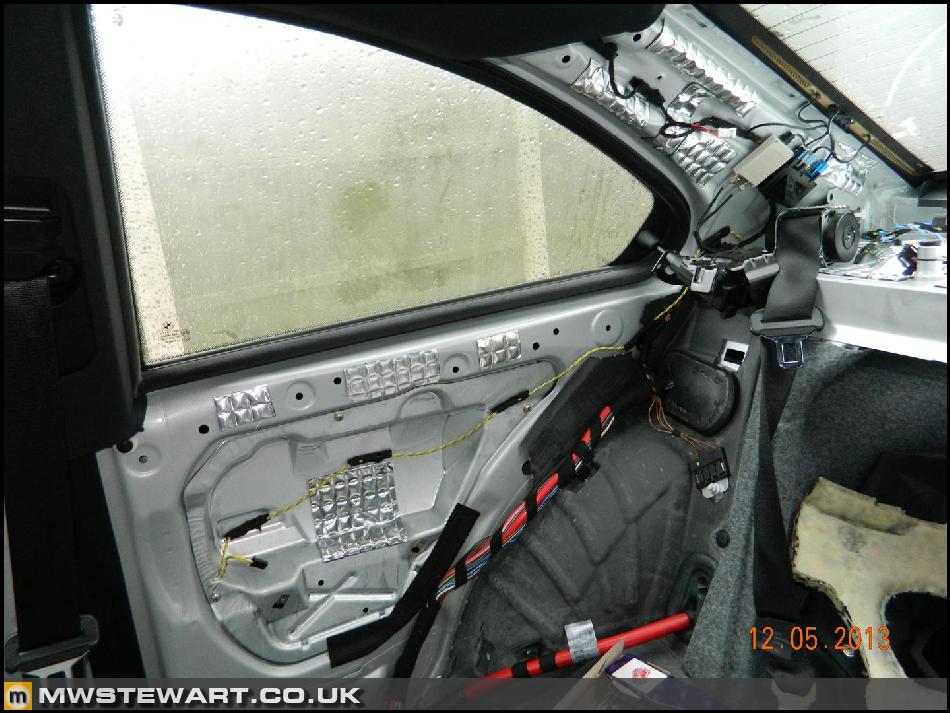
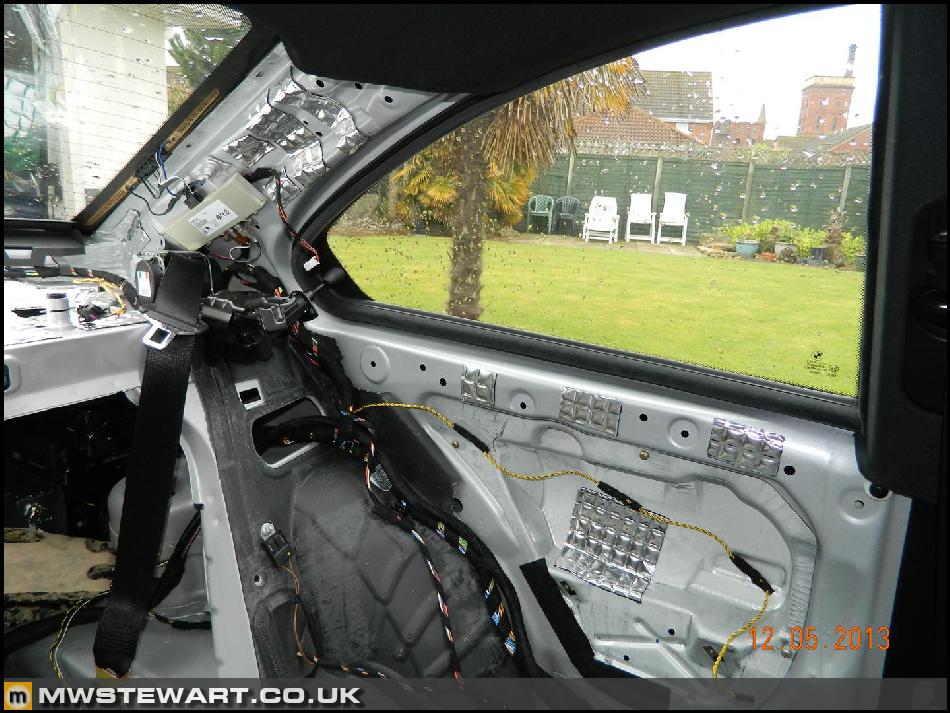
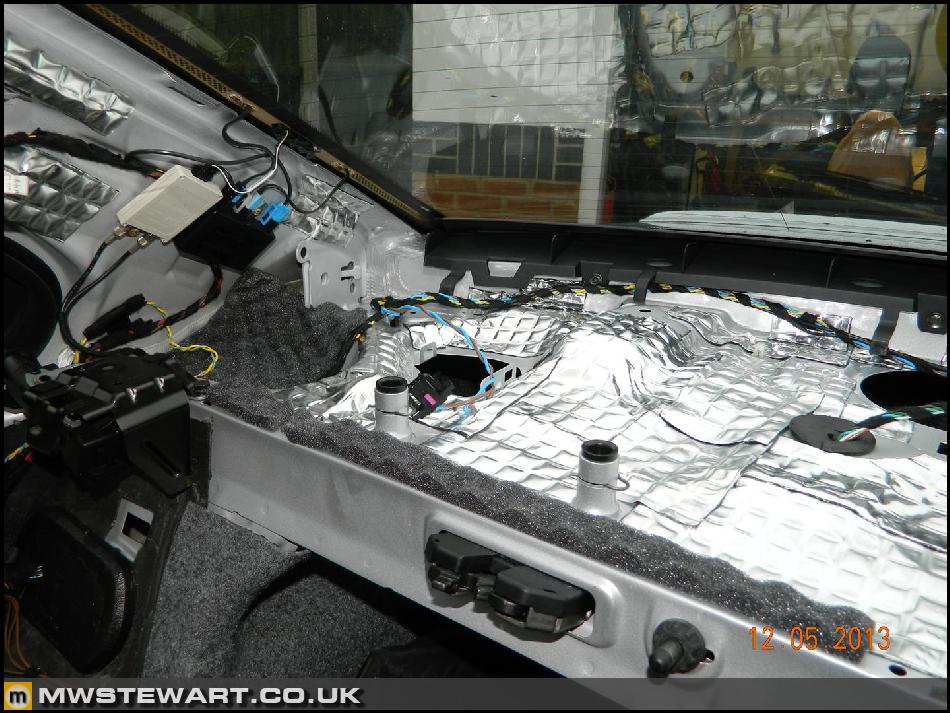
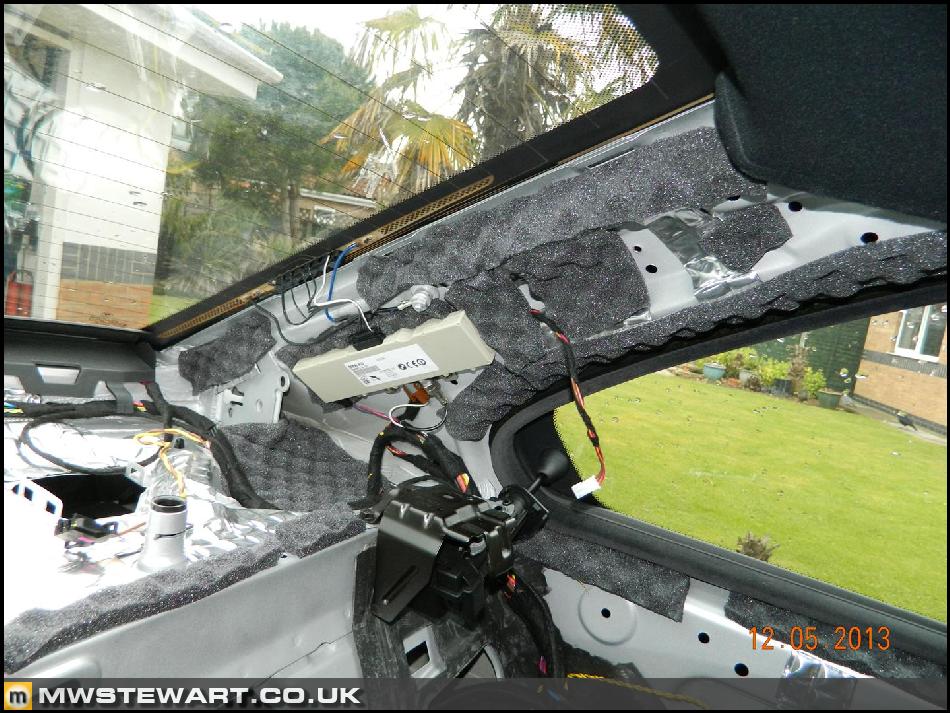
To combat the seatbelt noise and other sources of vibration such as the diversity amplifiers, I'm using Silent Coat Sound Absorber 15.
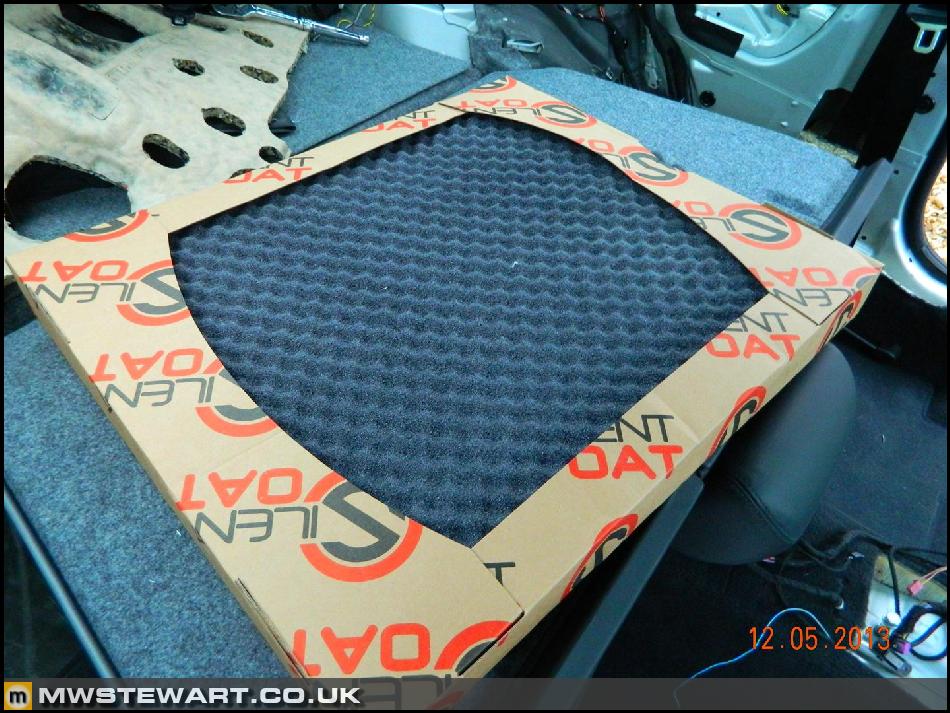
I applied Sound Absorber 15 to all rear trim surfaces and in the seat belt mechanism mounting areas.
Harman / Kardon Speaker Replacement and Upgrade
The Harman / Kardon system has a reputation as being pretty poor, and I happen to agree. The standard system comprises 12 speakers; two subs, four midbass, four mid-range, and two tweeters. I am going to replace all of them with Dayon Audio Reference Series drivers.
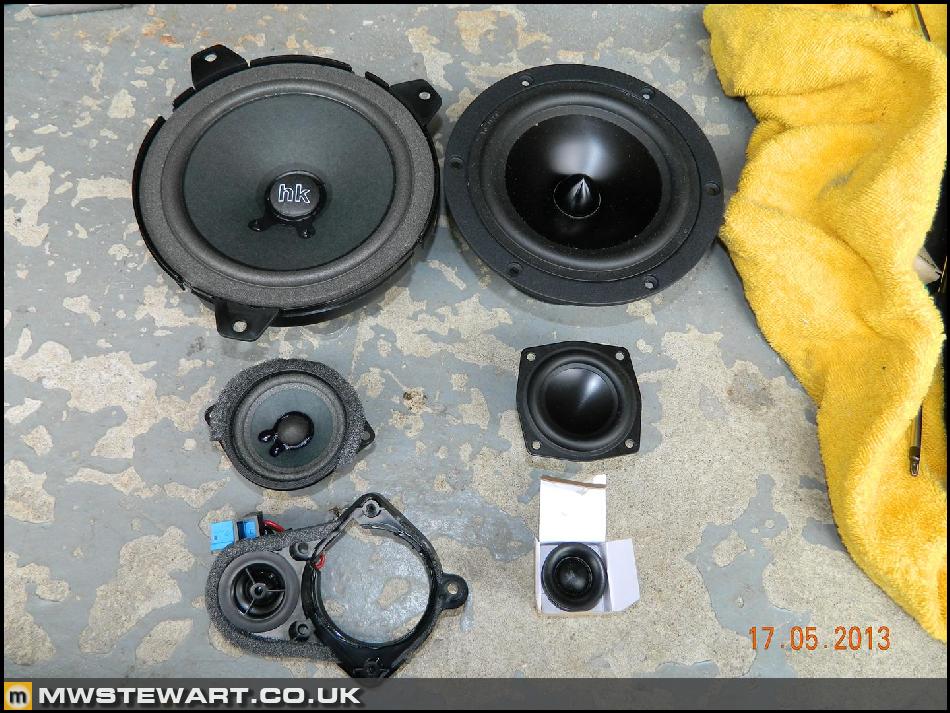
Starting with the front doors, which each have three drivers.
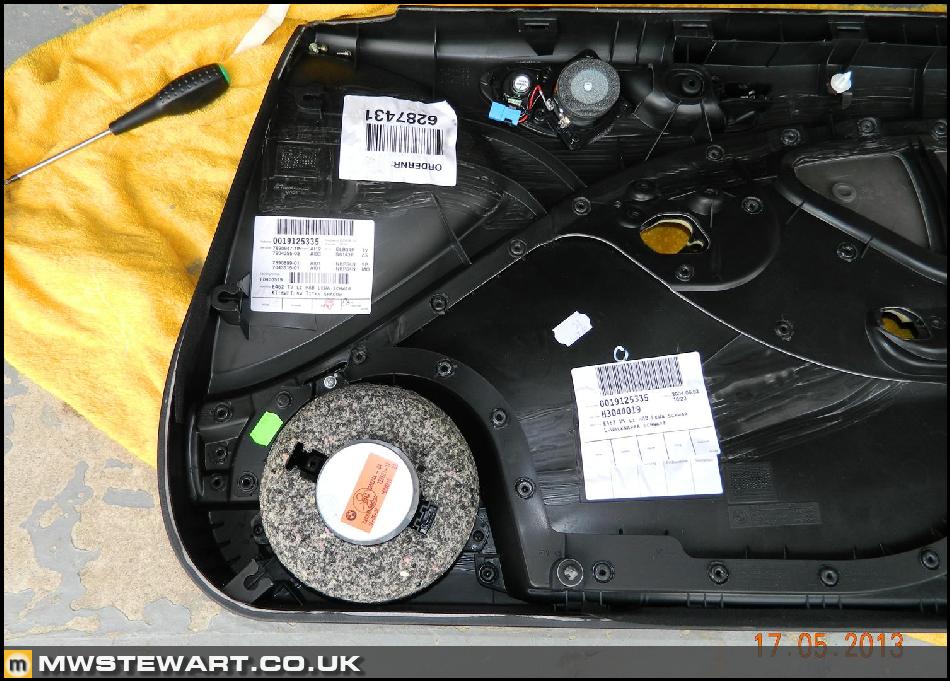
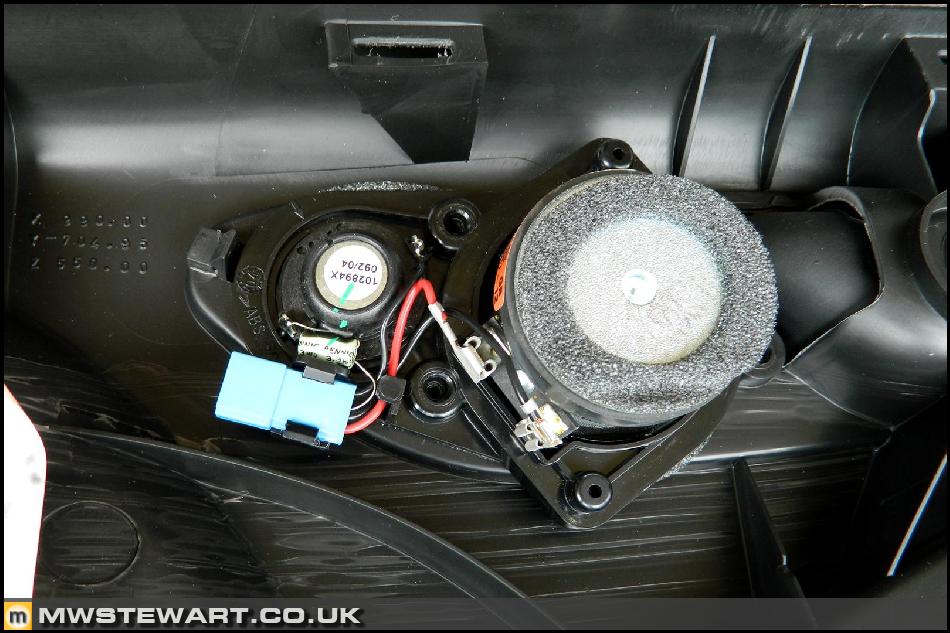
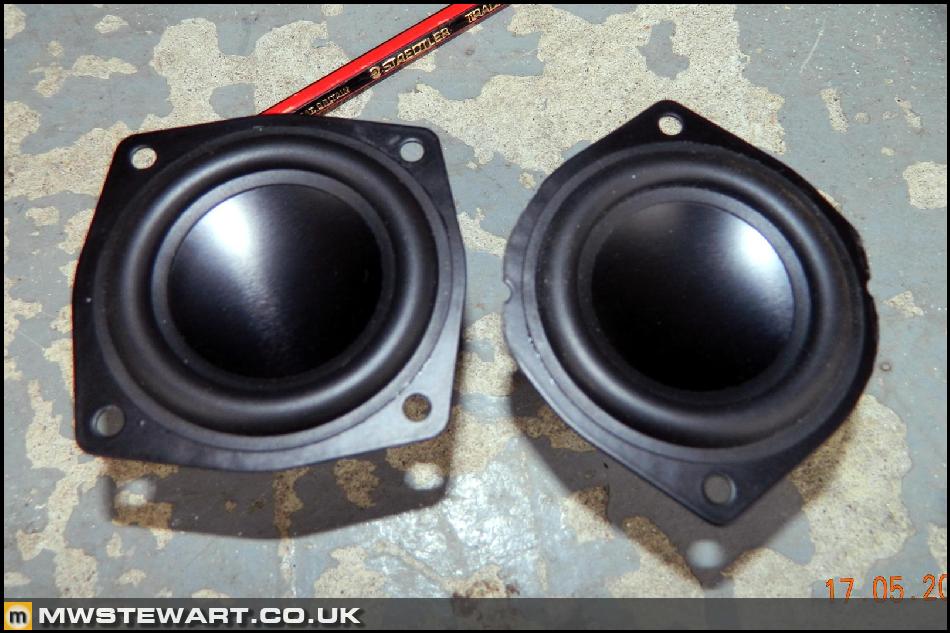
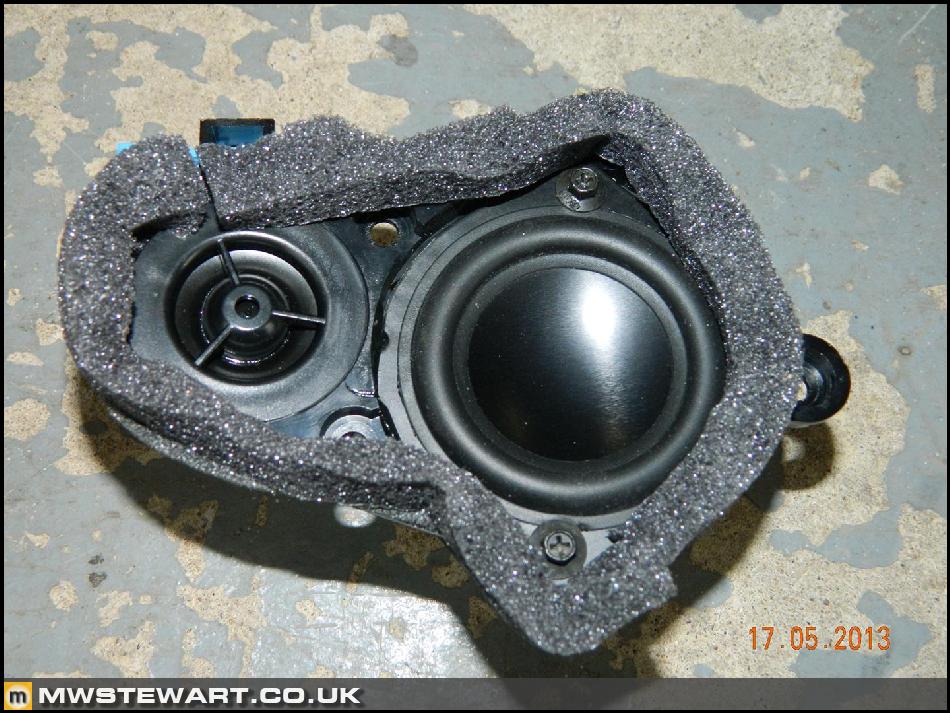
The tweeter/mid pods were unscrewed from the door cards, and I adapted the Dayton mids so they would screw into the OEM housing. Unmodified on the left, and modified on the right.
The OEM tweeters were removed and the replacements glued in their place, and Sound Absorber 15 used to replicate the original material which had to be removed. I also used a bead of black Tiger Seal behind the drivers to prevent unwanted vibrations.
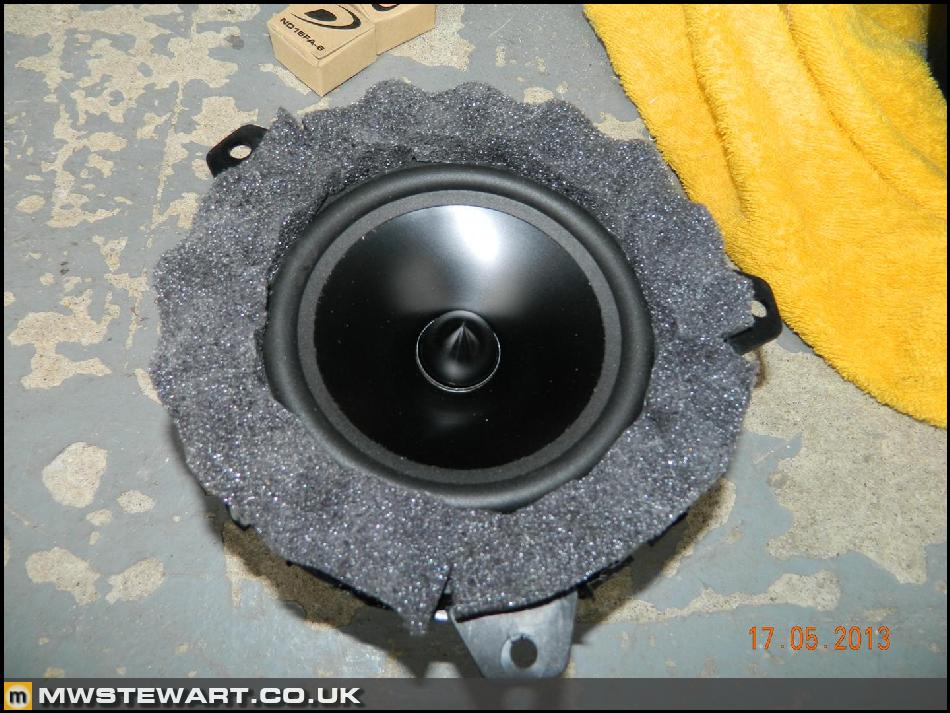
Moving on to the midbass drivers, I chose to disassemble the HK speakers to salvage their mounting rings, which were actually fairly sturdy. I bonded and screwed the Dayton drivers to the HK housings which meant they would mount straight up to the original locations. I did this for both front and rear Midbass drivers as all use the same mounting. Again Sound Absorber 15 was used to replicate the original noise reduction material which had to be removed during the process.
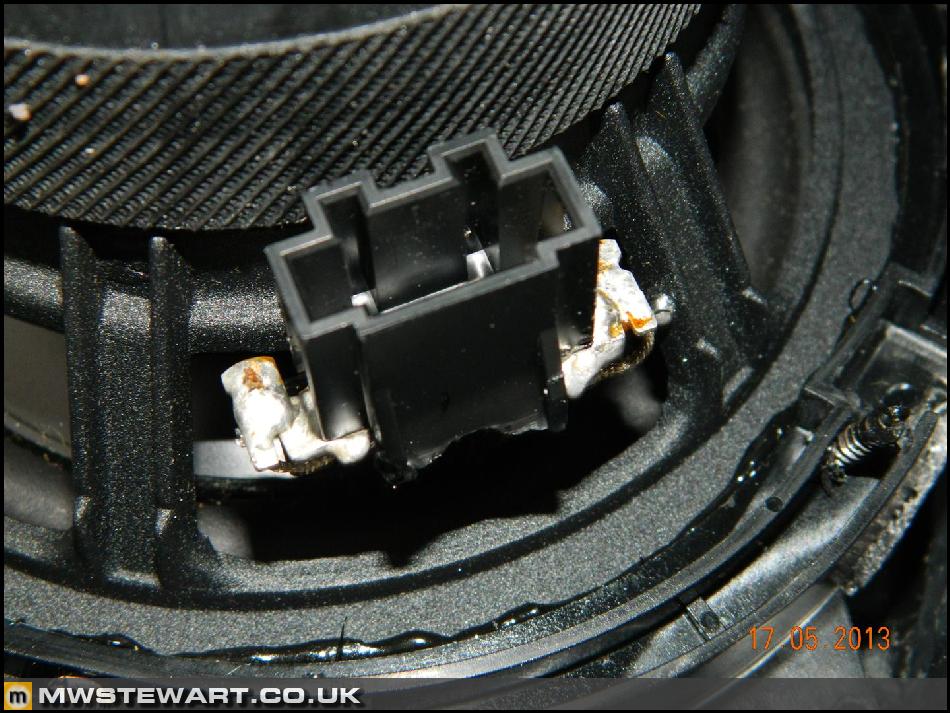
I then cut off the original BMW/HK speaker plugs and soldered these on to the Dayton drivers so I could keep the factory looms in tact.
The speakers were then mounted to the doors.
I finished by applying vibration damping to the rear of the door cards and also the doors themselves.

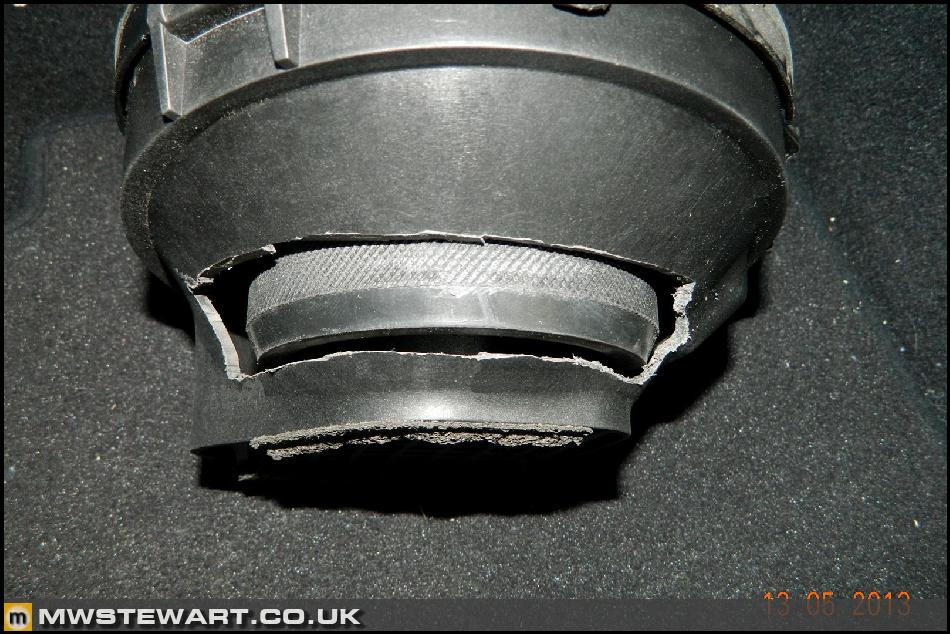
I wanted to keep the original speaker baskets at the rear of the car as their secondary function is to keep the parcel shelf secure against the rear deck. I made clearance holes in the baskets so that the new speakers would work with them.
To fit the smaller Midrange drivers in the rear quarter cards I first removed the HK speakers from their mounting ring, then screwed in the Dayton versions. This part was straight-forward.
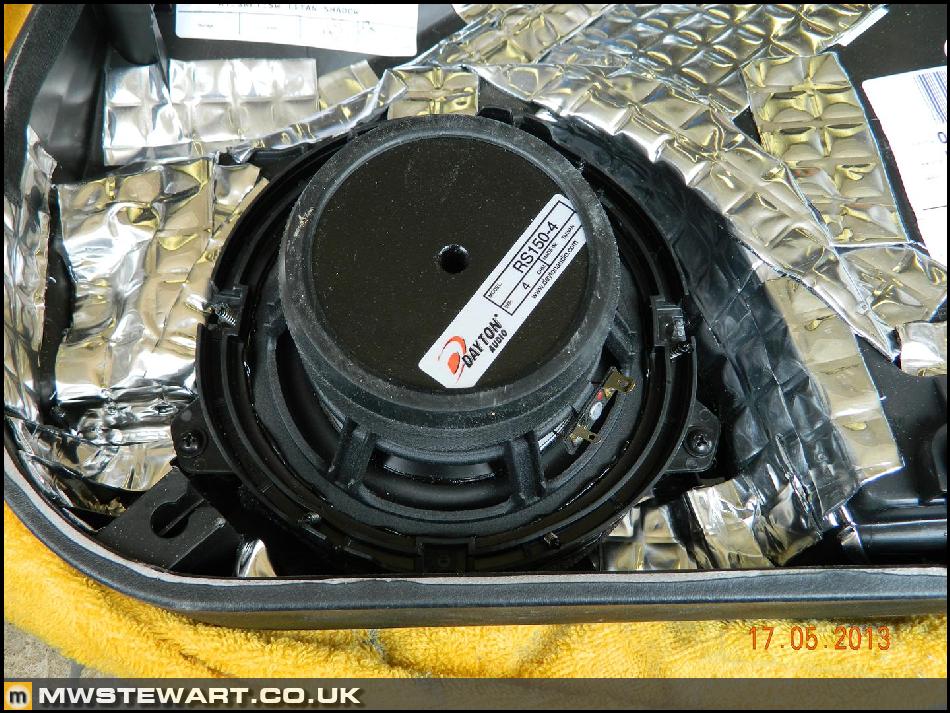
The rear subs were mounted on adapter plates and then wired in parallel in order to match the original HK impedance.

Electric Rear Blind
I purchased the rear blind loom from BMW and it is simply a yellow and a white wire with the required terminals at each end. The loom runs from the centre console area to the rear parcel shelf.
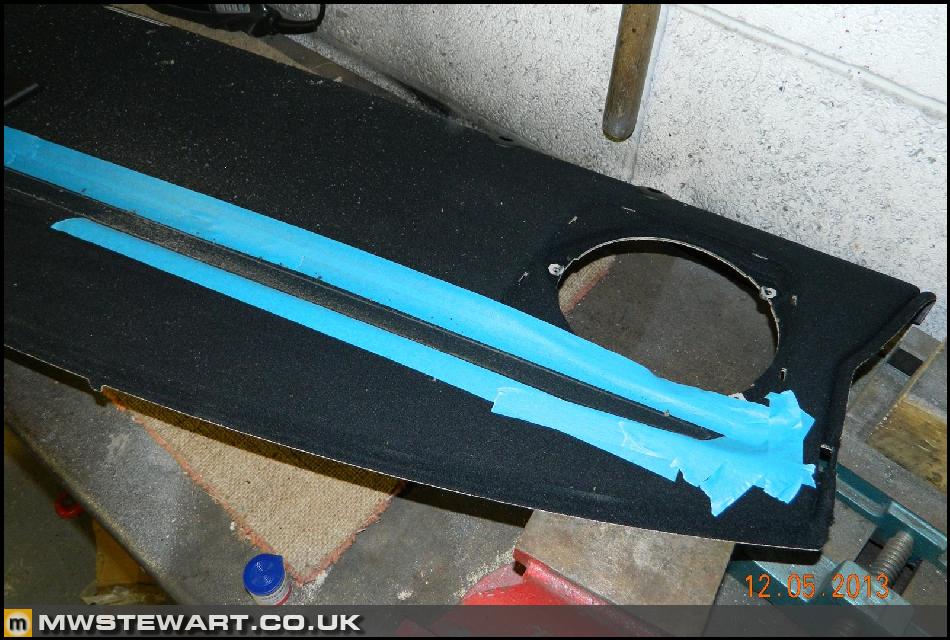
The rear blind I bought from eBay came with a parcel shelf however it had faded, so I chose to use it as a template to cut the required aperture in my un-faded shelf. I used a Dremel for this.
Here's the blind fitted.

Silver Cube Interior Trim
I have decided to go for Silver Cube interior trim. I purchased a second-hand set from eBay but hardly any of it was up to the required standard, so I ended up buying most of it new from BMW.
Heated Seats
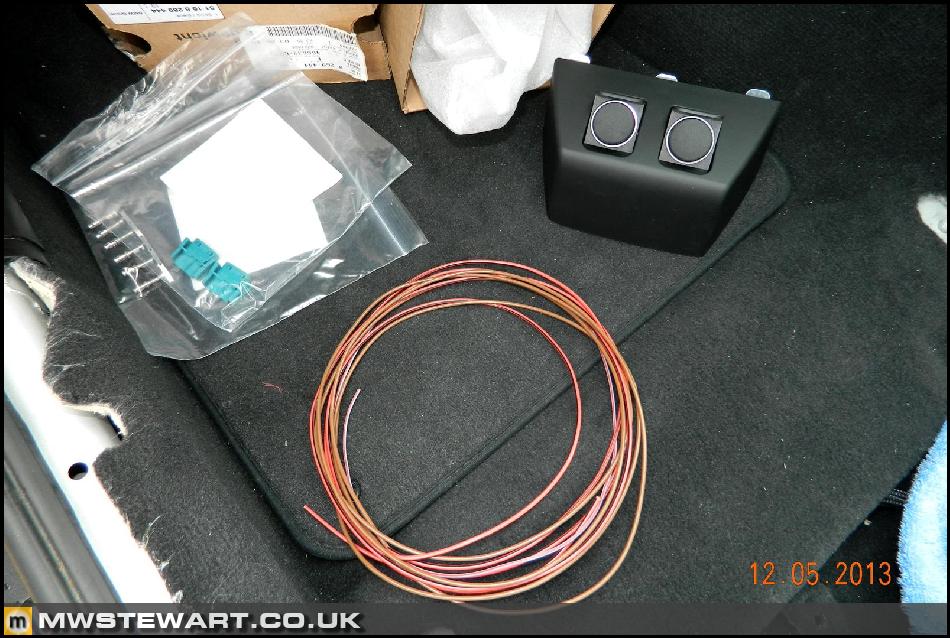
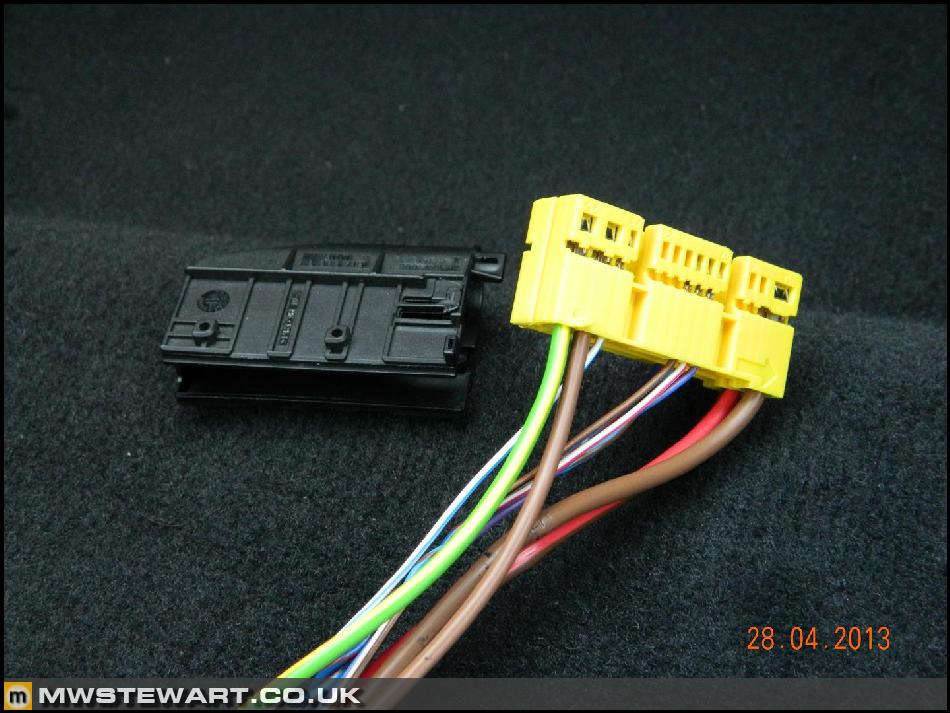
I bought the retrofit looms and switch block from BMW.
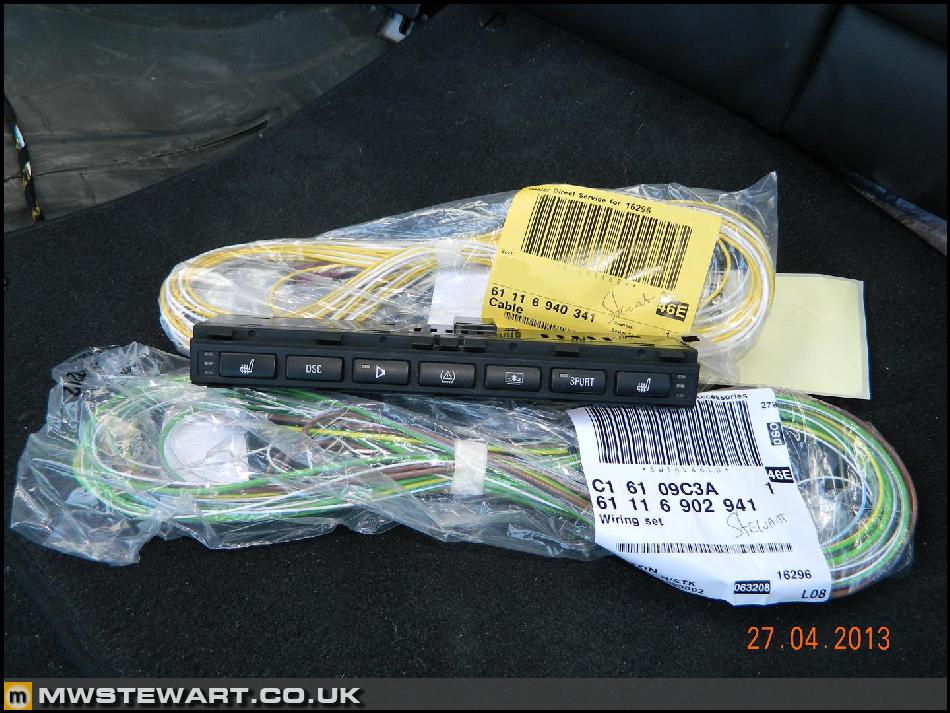
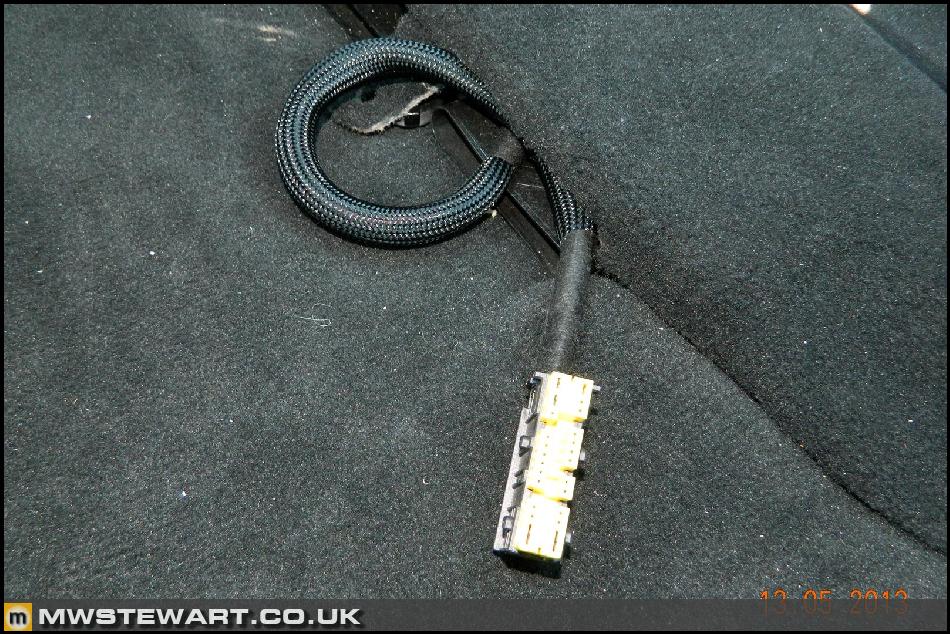
The looms were covered in fleece tape and run to the factory termination points.
The original looms were reassembled and look totally original.
I now need to purchase a new set of seat covers from BMW with the integral elements, but I'm going to wait until my car has a few more miles under its belt and the seats are more worn, as currently my existing covers are nearly perfect.
Intensive Wash Program
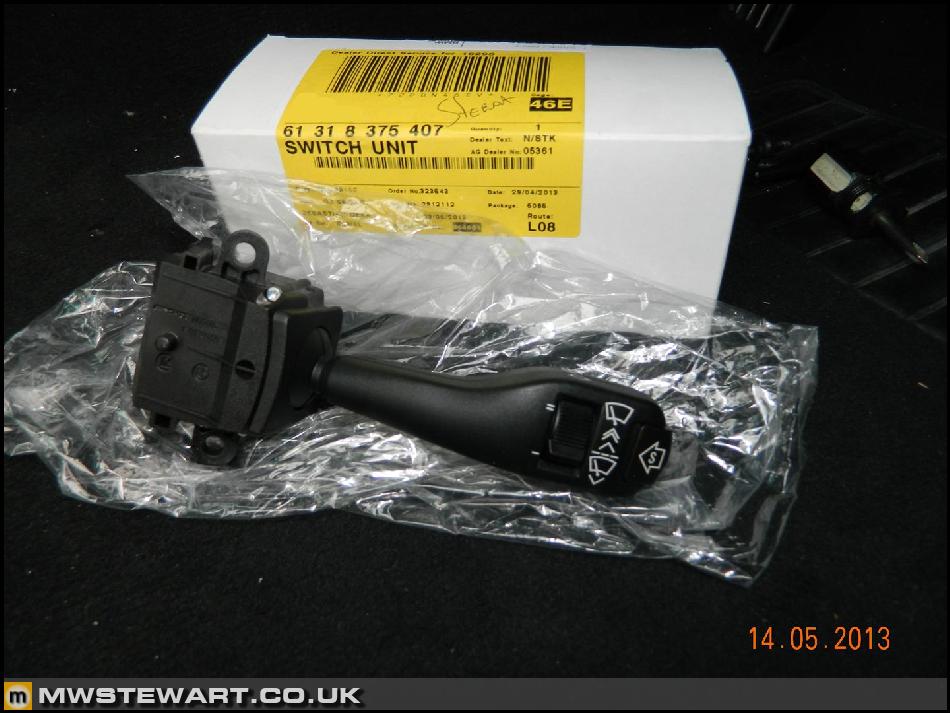
The E39 and X5 have an 'intensive wash program' which sprays the washers at intermittent intervals when the wipers are also on intermittent. This is useful for example when the roads are salty and the windscreen is frequently soiled. The wiper stalk is interchangeable between E39 and E46 models.
I got this idea from a guide on e46fanatics, however when I cross checked the wiring diagrams it soon became clear that the E39 uses a completleydifferent generation of GEM - General Electric Module - and this mod would not be possible. What I did instead was wire the 'S' button up to the headlamp washer pump instead.
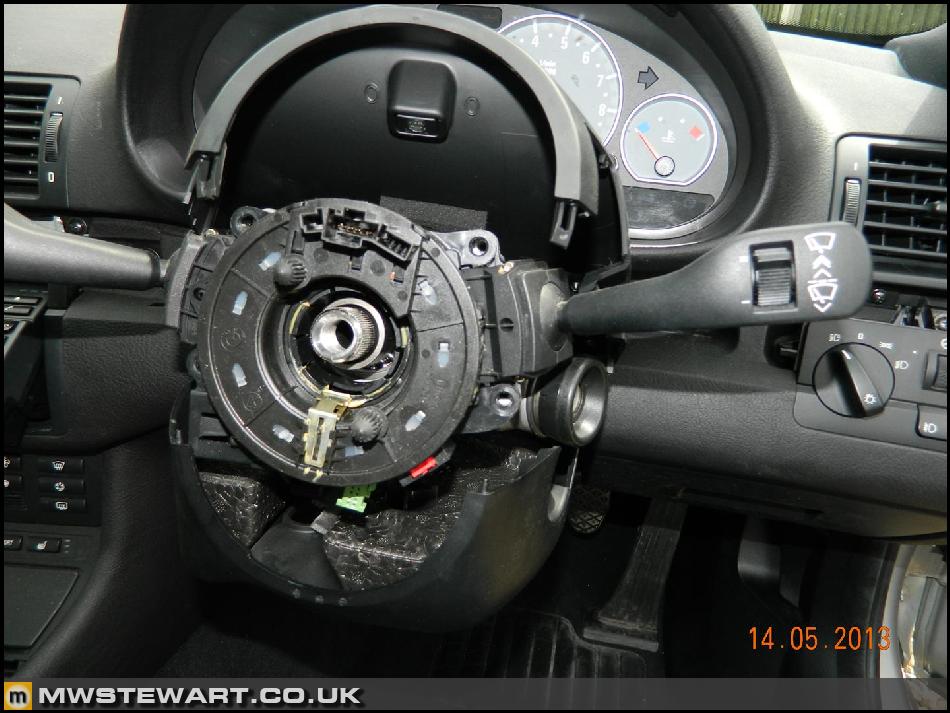
First the standard stalk is removed.
New stalk and pins purchased from BMW.
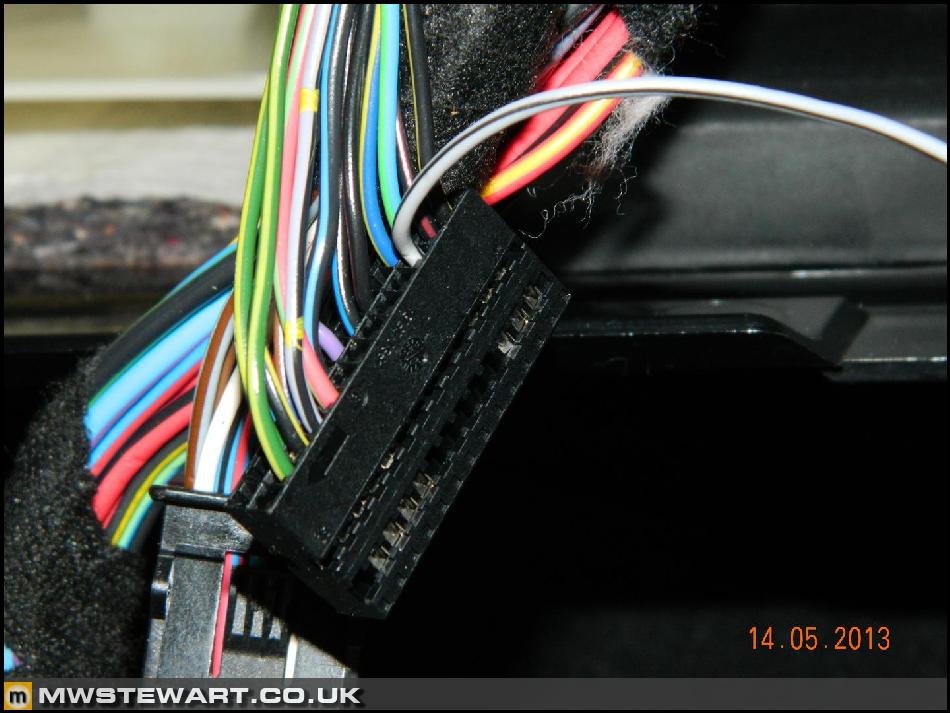
A grey/Black wire is added to pin 10 of the wiper stalk plug.
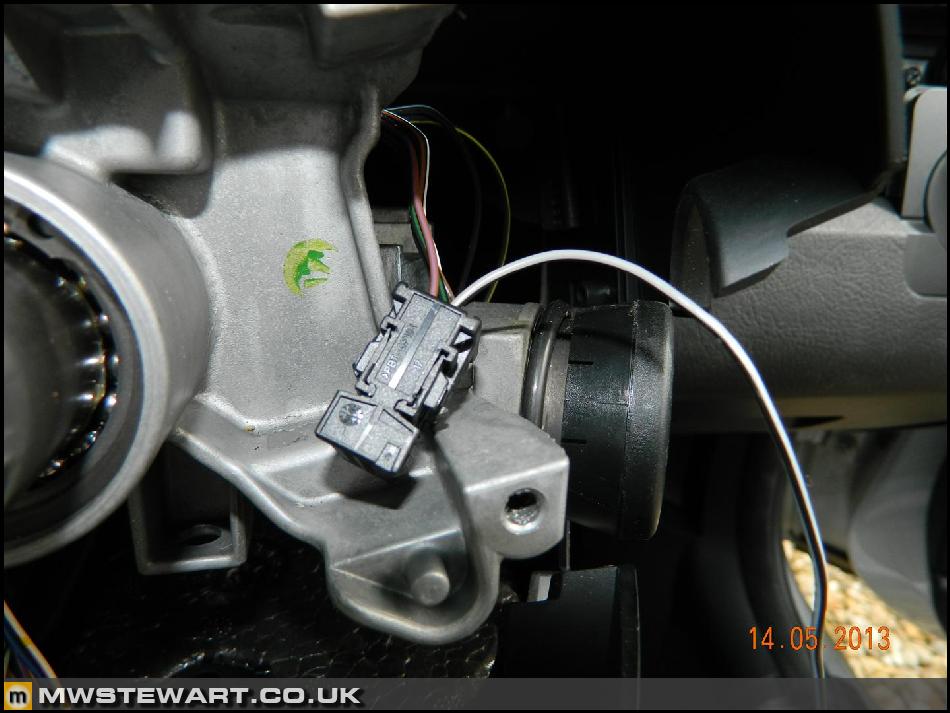
And run to Pin the General Module pin which earths the headlamp washer relay coil.
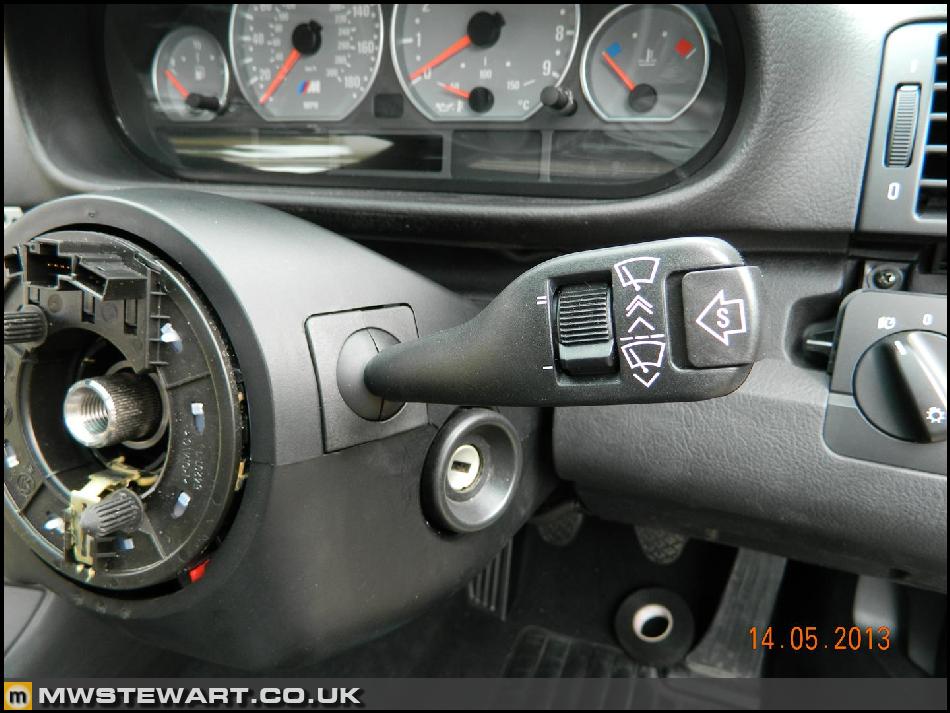
Everything refitted.
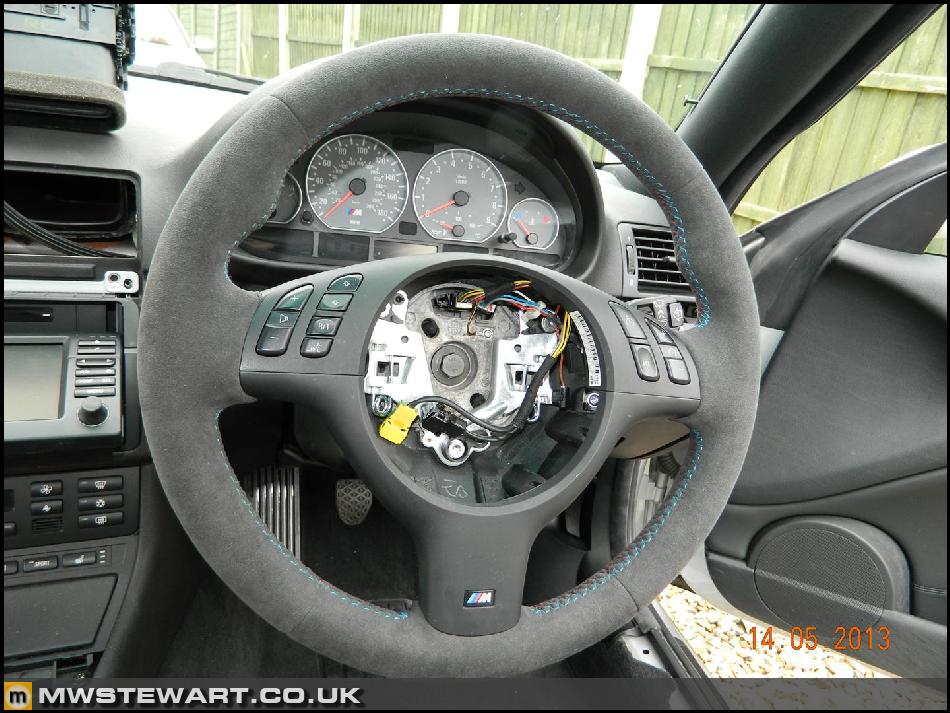
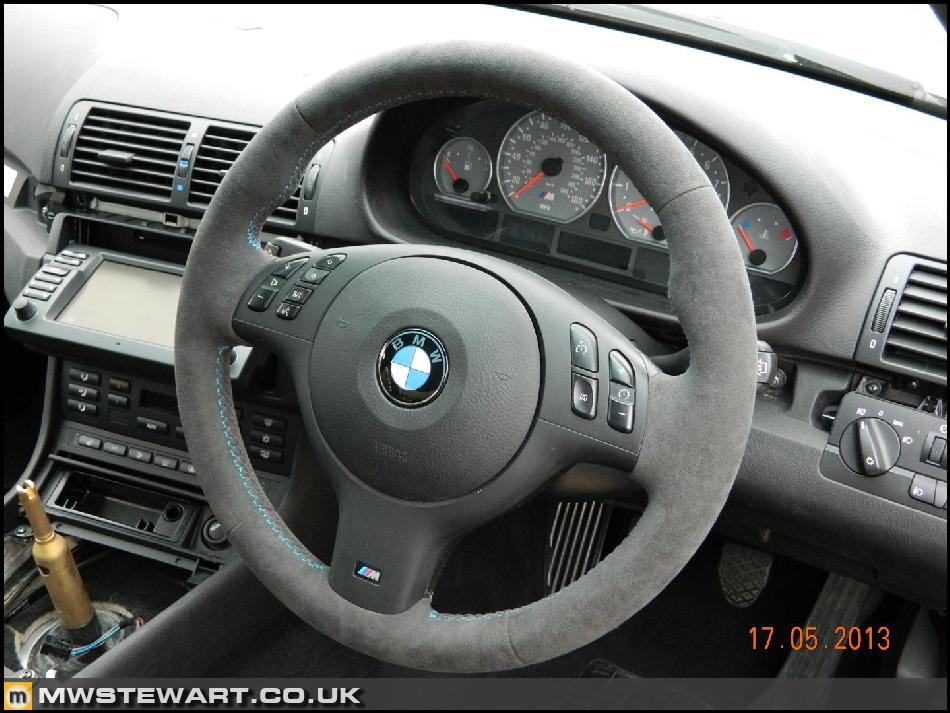
Alcantara Trimming
I bought another steering wheel and had it trimmed in the CSL style.
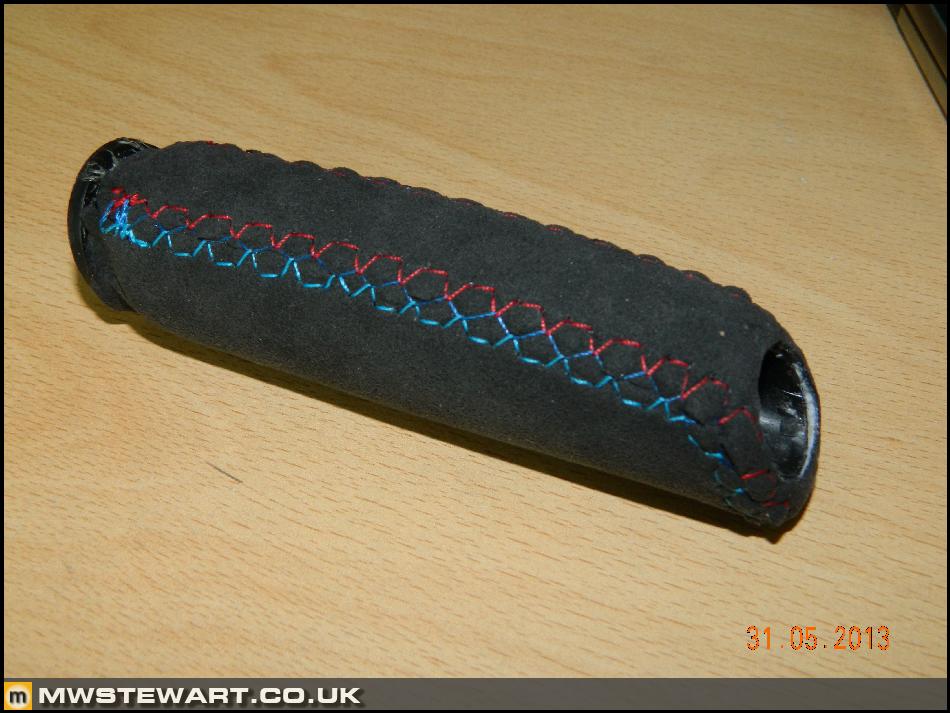
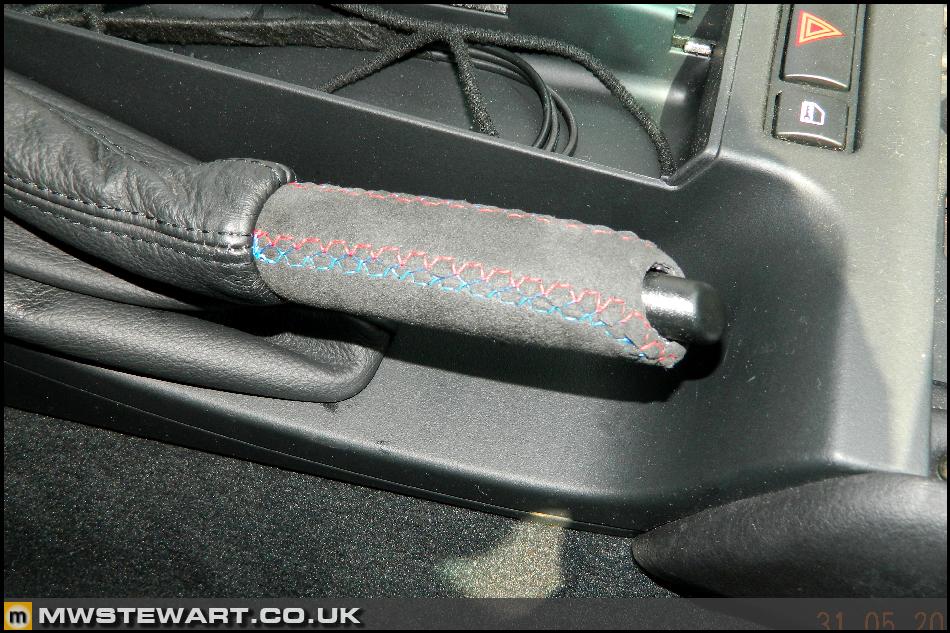
And likewise with a handbrake handle, however I first had the CSL style replicated which is a plain grey stitching, though I have since decided to get another trimmed with tri-colour M stitching. I'm waiting for that to arrive.
AV Inputs
I purchased a BMW Aux input socket which I will fit to the centre console, however I since decided to go for an Alpine iPod interface with Intravee which does make this lead kind of redundant.
I have bought an AV input/output lead for the TV tuner and run a set of Audio/Video RCA leads to the centre console area, ready for an iPod AV lead.
I'm also wiring in a reversing camera, which I'll cover in a later update.
Boot Release Button
I have added a boot release button which came from an E39 Touring. It is illuminated. I used new BMW connectors/pins and also the correct OEM wiring colours throughout.
Switch fitted.
Extended Storage (Power) Pack
The extended storage pack turns the rear ashtray into a storage bin and adds two handy flip-up power sockets to the rear. I bought everything new from BMW and the correct wiring from www.Autosparks.co.uk.
Here's the loom I made. I also added a small two pin (purple) OEM connector just underneath the centre console storage tray area so that I can easily add a USB charging socket that can be removed when required..
I soldered my loom to the front cigarette lighter terminals. Note matching wiring colours.
The rear of the centre console had to be modified slightly to provide clearance.
Here's everything fitted.
Sound Deadening
In preparation for some upgraded speakers I have chosen to vibration damp key areas of the car.
Here is the rear bulkhead/parcel shelf area exposed which is where the factory Harman / Kardon Subwoofers mount to. I noticed that the three rear seatbelts did produce some noise and vibration when the radio was on, so these were an area I wanted to focus on.
I have used Silent Coat 2mm Damping Mat to reduce resonance and damp vibrations in the rear panels. The rear quarter panels were actually already well damped from the factory and so didn't require much material at all.
The parcel shelf area on the other hand, did.
It turns out that the seat belt mechanisms 'float' on these hard plastic springs, which can make a horrible buzz on the exposed metal bulkhead.
To combat the seatbelt noise and other sources of vibration such as the diversity amplifiers, I'm using Silent Coat Sound Absorber 15.
I applied Sound Absorber 15 to all rear trim surfaces and in the seat belt mechanism mounting areas.
Harman / Kardon Speaker Replacement and Upgrade
The Harman / Kardon system has a reputation as being pretty poor, and I happen to agree. The standard system comprises 12 speakers; two subs, four midbass, four mid-range, and two tweeters. I am going to replace all of them with Dayon Audio Reference Series drivers.
Starting with the front doors, which each have three drivers.
The tweeter/mid pods were unscrewed from the door cards, and I adapted the Dayton mids so they would screw into the OEM housing. Unmodified on the left, and modified on the right.
The OEM tweeters were removed and the replacements glued in their place, and Sound Absorber 15 used to replicate the original material which had to be removed. I also used a bead of black Tiger Seal behind the drivers to prevent unwanted vibrations.
Moving on to the midbass drivers, I chose to disassemble the HK speakers to salvage their mounting rings, which were actually fairly sturdy. I bonded and screwed the Dayton drivers to the HK housings which meant they would mount straight up to the original locations. I did this for both front and rear Midbass drivers as all use the same mounting. Again Sound Absorber 15 was used to replicate the original noise reduction material which had to be removed during the process.
I then cut off the original BMW/HK speaker plugs and soldered these on to the Dayton drivers so I could keep the factory looms in tact.
The speakers were then mounted to the doors.
I finished by applying vibration damping to the rear of the door cards and also the doors themselves.
I wanted to keep the original speaker baskets at the rear of the car as their secondary function is to keep the parcel shelf secure against the rear deck. I made clearance holes in the baskets so that the new speakers would work with them.
To fit the smaller Midrange drivers in the rear quarter cards I first removed the HK speakers from their mounting ring, then screwed in the Dayton versions. This part was straight-forward.
The rear subs were mounted on adapter plates and then wired in parallel in order to match the original HK impedance.
Electric Rear Blind
I purchased the rear blind loom from BMW and it is simply a yellow and a white wire with the required terminals at each end. The loom runs from the centre console area to the rear parcel shelf.
The rear blind I bought from eBay came with a parcel shelf however it had faded, so I chose to use it as a template to cut the required aperture in my un-faded shelf. I used a Dremel for this.
Here's the blind fitted.
Silver Cube Interior Trim
I have decided to go for Silver Cube interior trim. I purchased a second-hand set from eBay but hardly any of it was up to the required standard, so I ended up buying most of it new from BMW.
Heated Seats
I bought the retrofit looms and switch block from BMW.
The looms were covered in fleece tape and run to the factory termination points.
The original looms were reassembled and look totally original.
I now need to purchase a new set of seat covers from BMW with the integral elements, but I'm going to wait until my car has a few more miles under its belt and the seats are more worn, as currently my existing covers are nearly perfect.
Intensive Wash Program
The E39 and X5 have an 'intensive wash program' which sprays the washers at intermittent intervals when the wipers are also on intermittent. This is useful for example when the roads are salty and the windscreen is frequently soiled. The wiper stalk is interchangeable between E39 and E46 models.
I got this idea from a guide on e46fanatics, however when I cross checked the wiring diagrams it soon became clear that the E39 uses a completleydifferent generation of GEM - General Electric Module - and this mod would not be possible. What I did instead was wire the 'S' button up to the headlamp washer pump instead.
First the standard stalk is removed.
New stalk and pins purchased from BMW.
A grey/Black wire is added to pin 10 of the wiper stalk plug.
And run to Pin the General Module pin which earths the headlamp washer relay coil.
Everything refitted.
Alcantara Trimming
I bought another steering wheel and had it trimmed in the CSL style.
And likewise with a handbrake handle, however I first had the CSL style replicated which is a plain grey stitching, though I have since decided to get another trimmed with tri-colour M stitching. I'm waiting for that to arrive.
Edited by mwstewart on Monday 23 December 21:13
S3_Graham said:
how hard was it to fit he AUX lead for the TV tuner? plug and play? or did you have to use the intravee?
It is simply plug and play http://www.car-vision.co.uk/bmw-3-series-e46/12431...Thanks guys.
Graham - Not yet. I paid a little more for a version which is wired for a reversing camera. It has an additional video in for the camera together with a trigger wire to activates the TV (therefore Camera) when reverse is selected.
All you do is select 'Television' on the Nav unit, then tune one of the channels to the iPod video or whatever other source you are using.
Thanks all. I know it's a bit chaotic leaving the Fiesta for this, but I now have all but three parts to finish the M3 so it makes sense to finish and enjoy it whilst I return to complete the Fiesta.
I ordered this today:


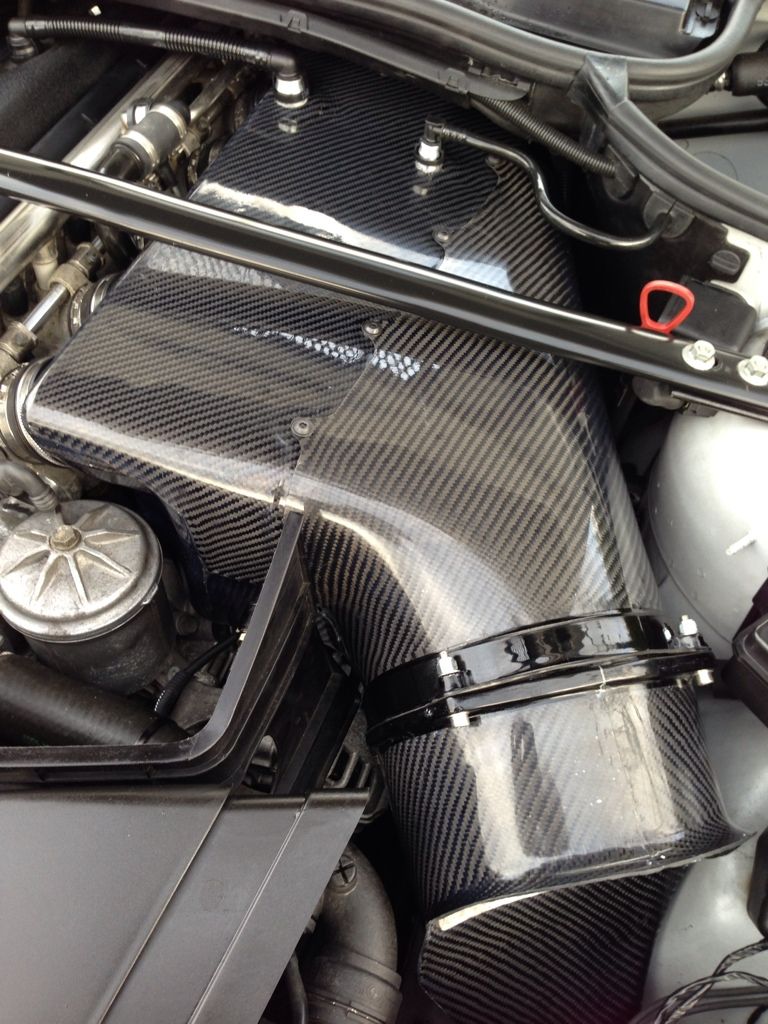
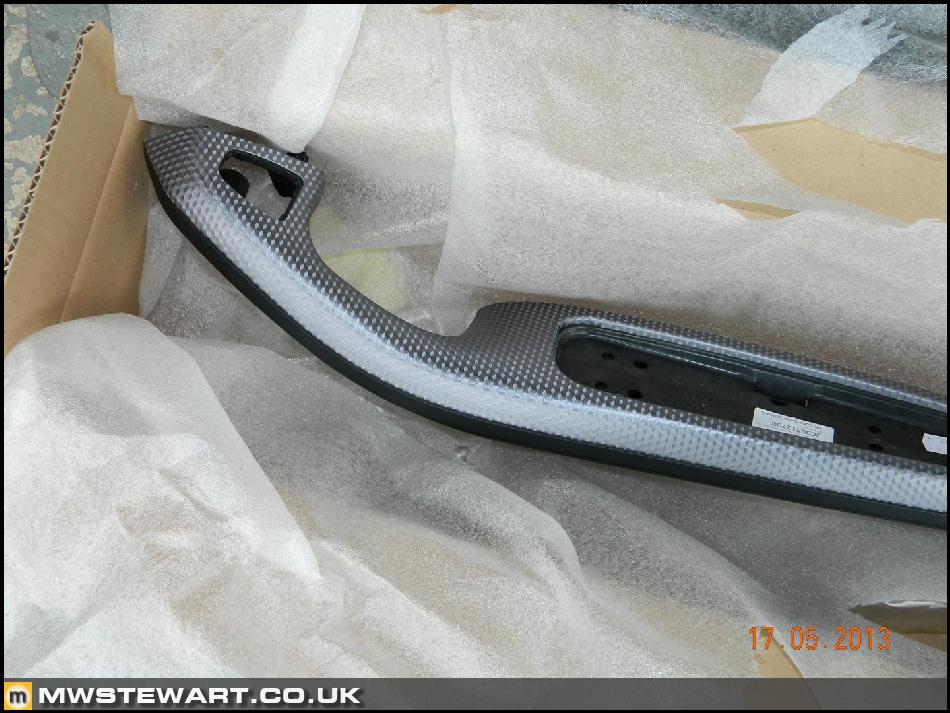
It's a replica of the CSL Airbox. I'm going for as much OEM as possible but £4k for the OEM version doesn't represent good value. This (very good) replica costs considerably less
I ordered this today:
It's a replica of the CSL Airbox. I'm going for as much OEM as possible but £4k for the OEM version doesn't represent good value. This (very good) replica costs considerably less
e46acs said:
Ta muchly. Liking that very much.
no maf? will you need an AlphaN map?
Yes, correct on both counts.no maf? will you need an AlphaN map?
Here's a clip of an E46 with it fitted: http://www.youtube.com/watch?v=gE80p-HvJMI
The white E46 is a wrapped CSL, and the red car is an M3 with the GSR airbox and Alpha-N map. In terms of sound there's nothing in it.
olly22n said:
I hope you have a better experience than a mate who bought one a few years back
That's interesting, are you sure it was a GSR box? I'm not sure they have been released for much more than a year and a half. I'm part of a group buy for the box and everyone else so far has been delighted. Apparently it completely transforms the engine.What was your friends experience?
benny.c said:
I fitted my GSR box last week and had it mapped at Evolve yesterday. It is quite simply an awesome bit of kit and the boys at Evolve know their onions  It's the best mod I've done to a car since fitting a supercharger to the Mustang.

I really can't wait It's the best mod I've done to a car since fitting a supercharger to the Mustang.
 Do you have any more M Power decals available?
olly22n said:
iirc his was for an e36 evo. I'll point him in this direction, but seem to remember the thing was full of gaps.
Hopefully they have got better since.
OK, I think they must have. Thanks.Hopefully they have got better since.
wjb said:
Talk about attention to detail. Superb effort!
Cheers RenesisEvo said:
Incredible attention to detail, thanks for sharing!
How have you got on with the Alcantara steering wheel? My car has one from the factory (retrimmed a few months ago), and I must admit I think for longer journeys a leather wheel is nicer, and much less difficult to keep in good condition.
I like them. I try to get them in my cars whenever possible though I wouldn't want one in a daily driver (leather steering wheel equipped Golf GTi for those duties How have you got on with the Alcantara steering wheel? My car has one from the factory (retrimmed a few months ago), and I must admit I think for longer journeys a leather wheel is nicer, and much less difficult to keep in good condition.
); for me they add to the sense of occasion in a car. Given the retrim costs have become very reasonable these days I tend to view them as something to be refreshed every couple of years.
M159V8 said:
I keep checking for updates 
I will have some over the weekend. I've been waiting for the next batch of parts to make their way from Germany to my local BMW dealer.WojaWabbit said:
Wunderbar!
As others have already said, your attention to detail is only to be applauded. I have similar levels of vehicle-based OCD, but I don't have the funds available (yet) to satisfy my needs! Though the running costs on my old barge are getting on for that of an M3, so maybe I should just take the plunge :manmathsmiley:
Do it! You won't regret it.As others have already said, your attention to detail is only to be applauded. I have similar levels of vehicle-based OCD, but I don't have the funds available (yet) to satisfy my needs! Though the running costs on my old barge are getting on for that of an M3, so maybe I should just take the plunge :manmathsmiley:
S6OOH said:
Kindly sent here from your Fiesta thread - always checking for updates. Great work sir
Thank you cerb4.5lee said:
Love this thread OP, fantastic attention to detail, look forward to following your developments.
From one 'yellowbelly' to another 
The second handbrake handle/grip arrived and I'm much happier with the 'M' stitching.
Fitting the thing was far from easy, it took a lot of force to get onto the lever.
It seems that summer has returned for a few hours which has made things considerably more pleasant for the PDR chap I booked to remove a small crease in the N/S wheelarch. The dent was too small to photograph before he started, so I won't even attempt an 'after' shot
I wanted this out of the way whilst the rear quarter cards were still out to save removing them later for access. Every piece of trim I have removed will be refitted with brand new clips.
Edited by mwstewart on Monday 23 December 22:09
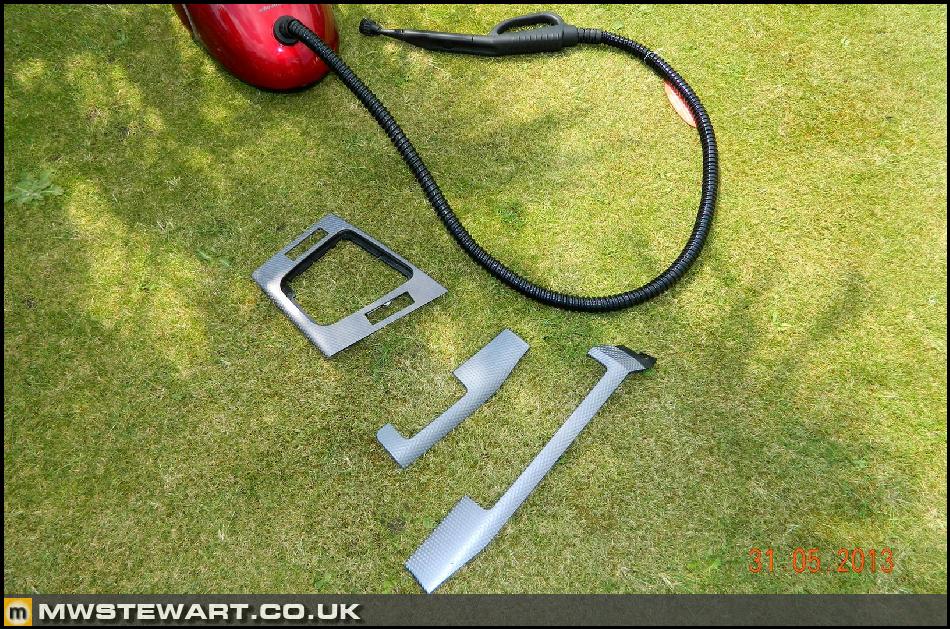
I have Steam cleaned the second-hand pieces of Silver Cube trim which I felt were good enough to use.
F10 M5 Gearknob
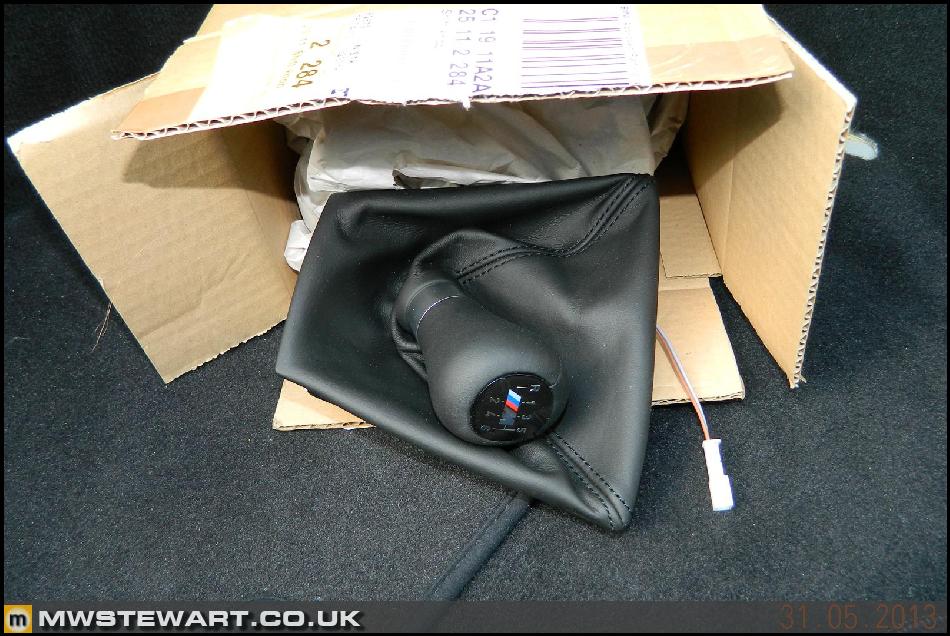
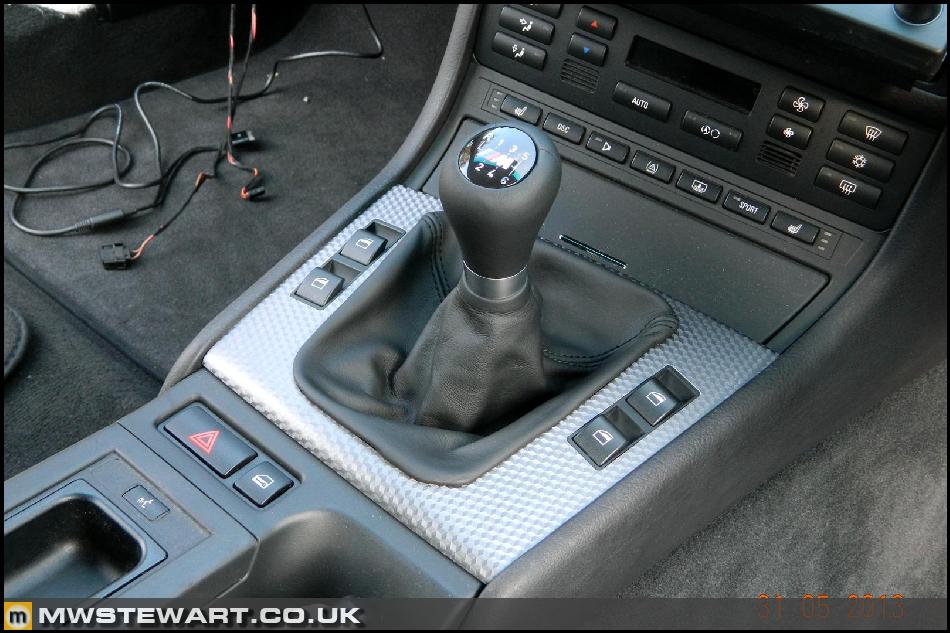
I really don't like the look or feel of the standard E46 M3 gearknob but thankfully BMW gearknob fitment has remained the same from around the E36 era to the present day, so there are plenty of options. I've chosen to use an F10 M5 gearknob which is weighted and also illuminated like the original E46 gearknob. It's reasonably priced too given it comes with a Nappa leather gaiter.
The F10 gearstick aperture is obviously different to the E46, so what I did was to remove the staples and glue from the F10 gaiter and then gently peel it from its trim piece (left). I did the same on a scrap E46 gaiter to remove its trim piece (right).
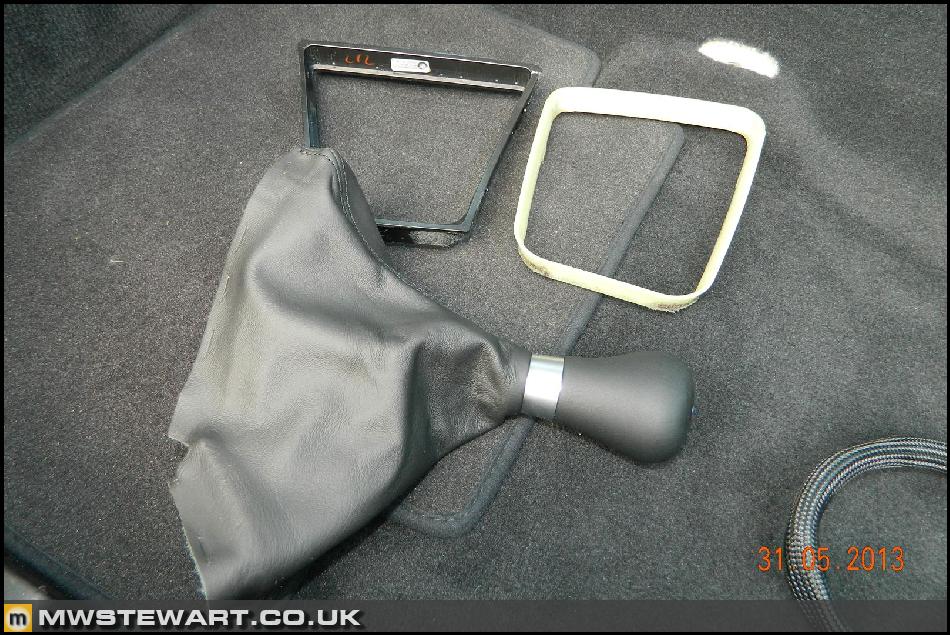
I then carefully stretched the F10 gaiter over the E46 trim piece and bonded the two together with Tiger Seal.
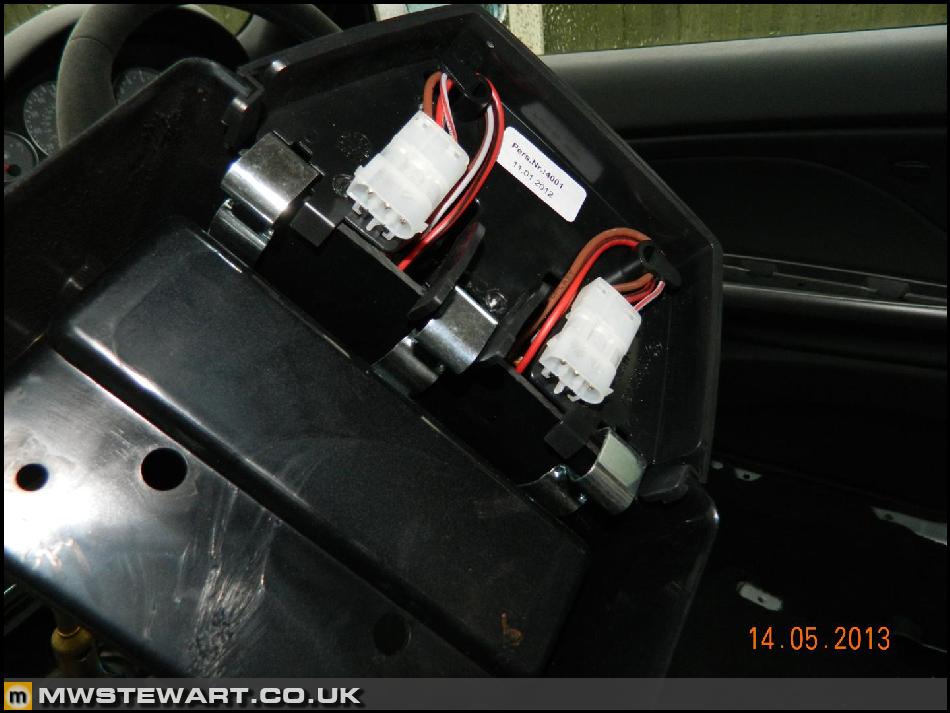
Here's the gearknob & gaiter fitted, and also some of the Silver Cube. The F10 illumination multiplug is identical to that used in the E46, making this aspect is plug and play.
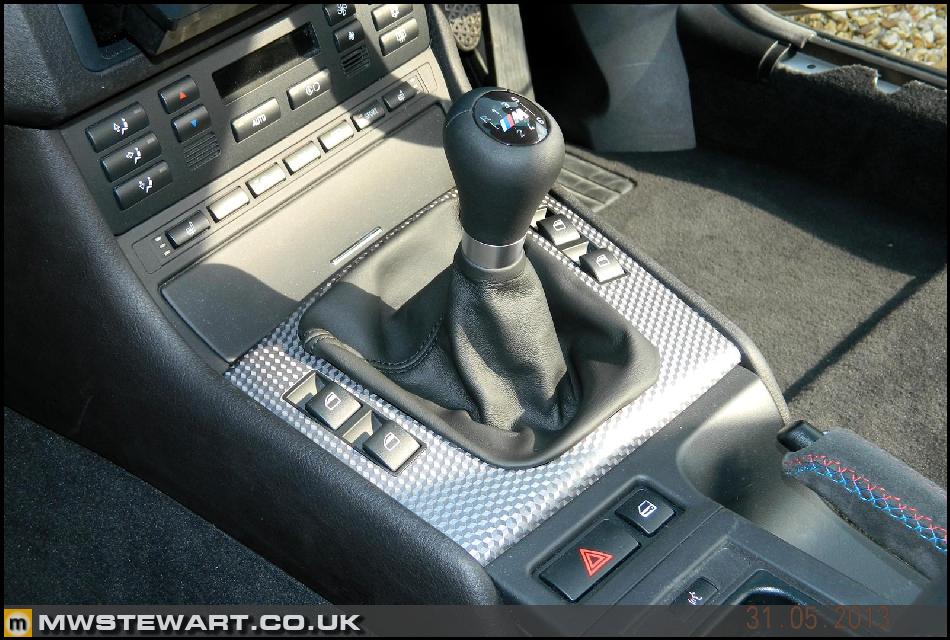
I also test fitted a Bluetooth 'Eject Box' with phone storage tray.
Alpine KCA-420i iPod Interface
I have a multitude of AV/Aux input options already wired in but I also want an actual interface. Using Alpine products with something called an 'Intravee' http://www.toysinyourcar.com/acatalog/intravee.htm... is a well-known option, and enables display of iPod details on the Factory Sat Nav screen.
I bought my KCA-420i from eBay, and also a 10m Ai-Net cable so I can mount the KCA-420i at the front of the car to allow iPod connection in the glovebox. The Intravee will be mounted in the boot with the rest of the OEM infotainment modules.
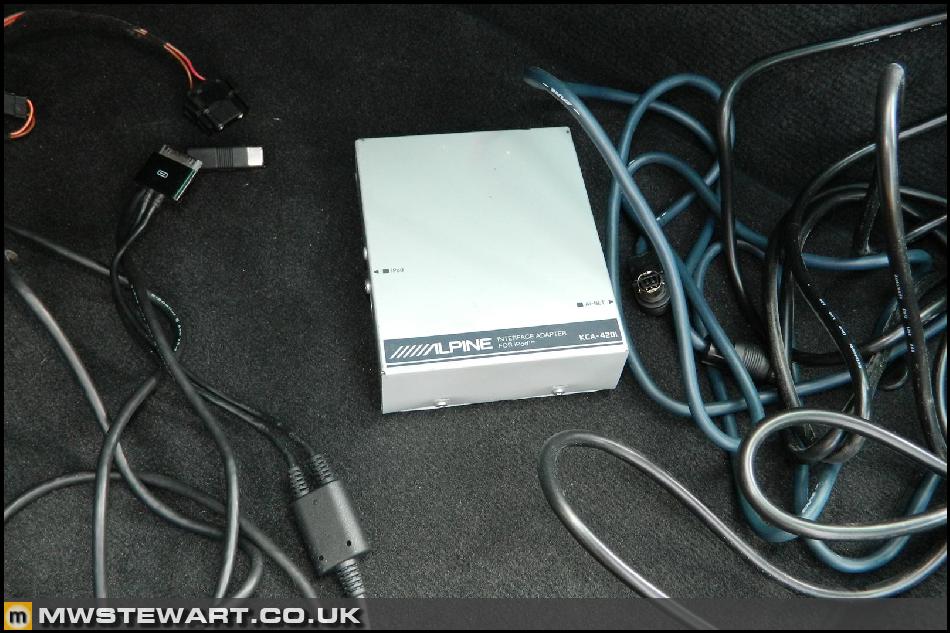
There is a handy module rack system behind the glove box which on my car it is mostly empty. This due to the gradual evolution of the electrical system over the period of the E46's life which has meant that a lot of the functions which used to be provided in discreet modules, are now combined in the one General Module. This is good news as the KCA-420i fits snugly in one of the free slots!
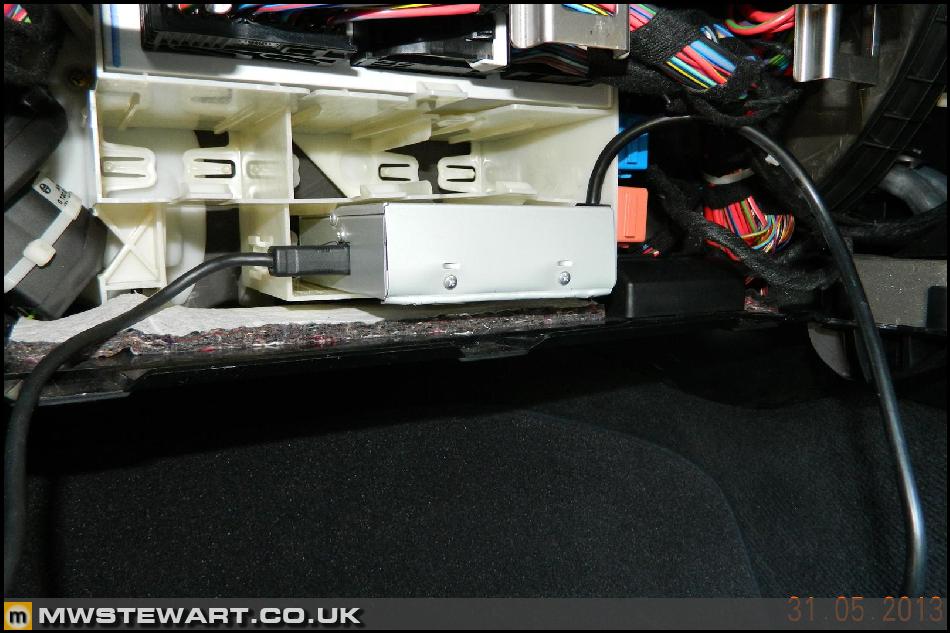
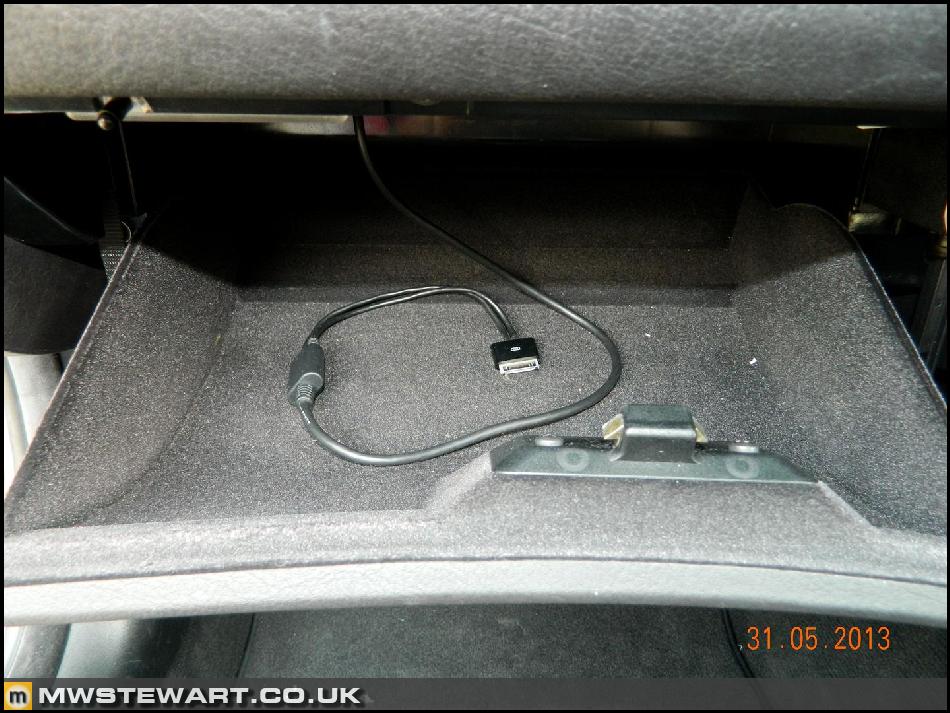
All cables were covered in fleece tape and the glove box refitted with just the right amount of iPod lead available inside.
Electrically Folding Mirrors
I wanted to add folding mirrors as they do sometimes come in handy. They tend to fetch a premium which in my opinion is not justified. I found a tatty set on eBay minus one mirror glass and got them for £120, which isn't too bad.

There are a few types of E46 mirror electronics depending on year for one and also whether memory seats are installed. The mirrors I purchased were an older non-memory type, so my plan was to strip the mirrors and transplant the folding motor alone into my mirrors.
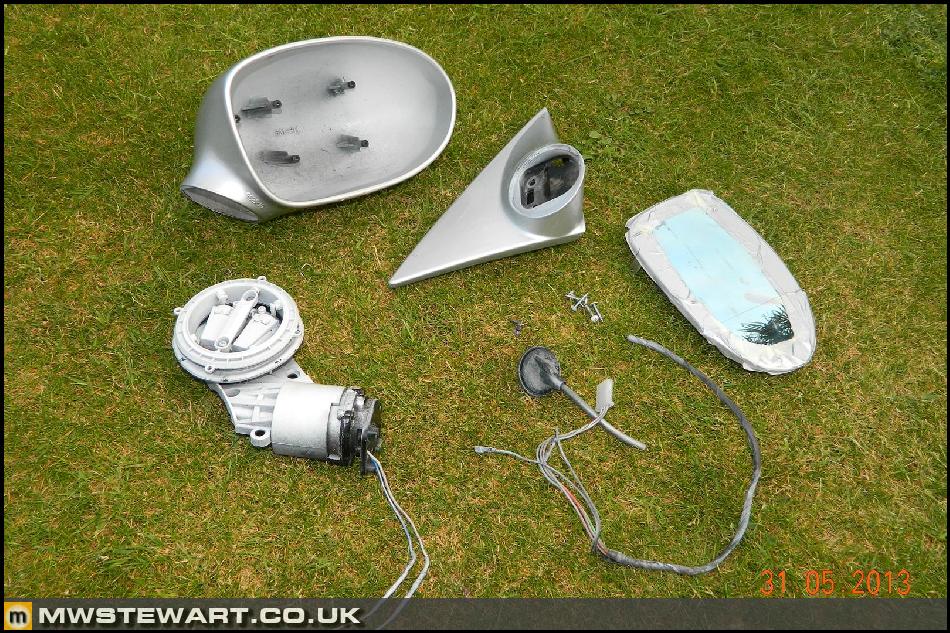
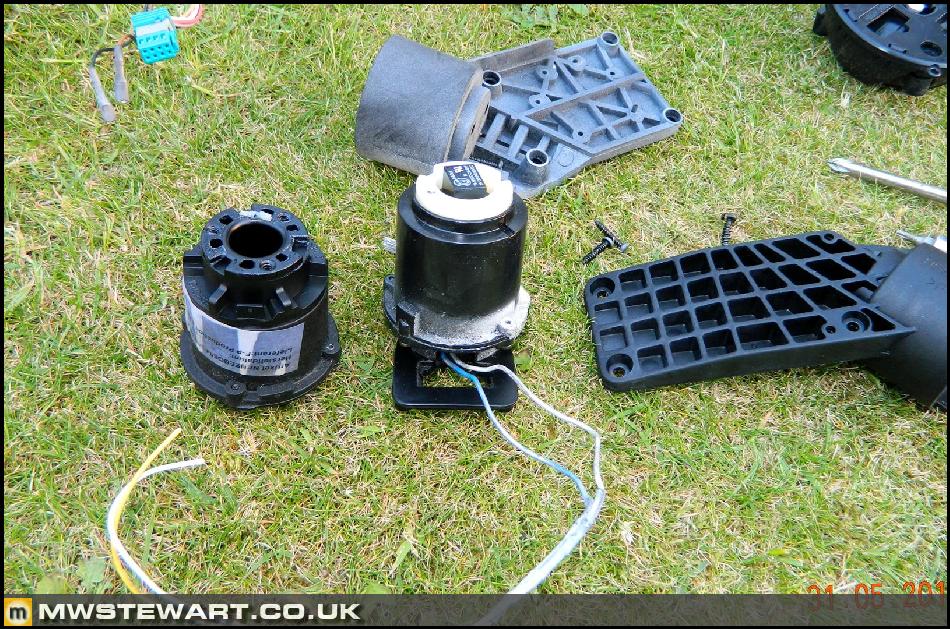
Here's what it all comes down to. The manual folding mirror has a spring loaded cartridge (left) whereas the electronically folding mirrors have a cartridge of the same dimensions, only motorised. It's a great piece of design and probably only costs £15 perm unit to manufacture in bulk- hardly worth the premium these units often fetch second-hand.
I simply swapped the motorised cartridge into my mirrors (which are far better condition than the donors!)
I extended the folding motor wires and covered with fleece tape, and I will now add these wires (blue and white) to empty pins in the existing mirror multiplugs (white to pin 1 and blue to pin 2).
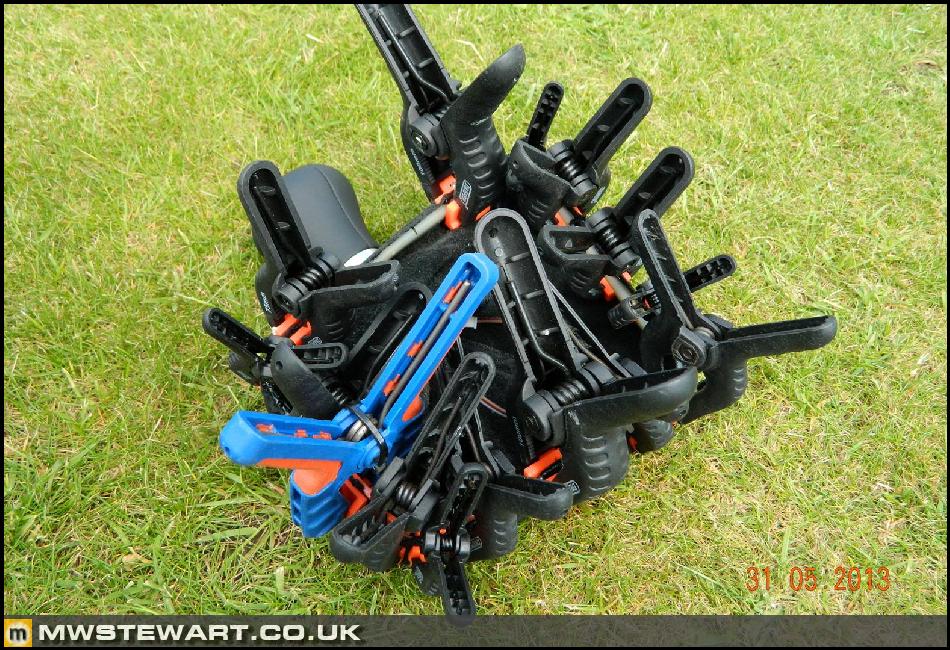
Misc Trim
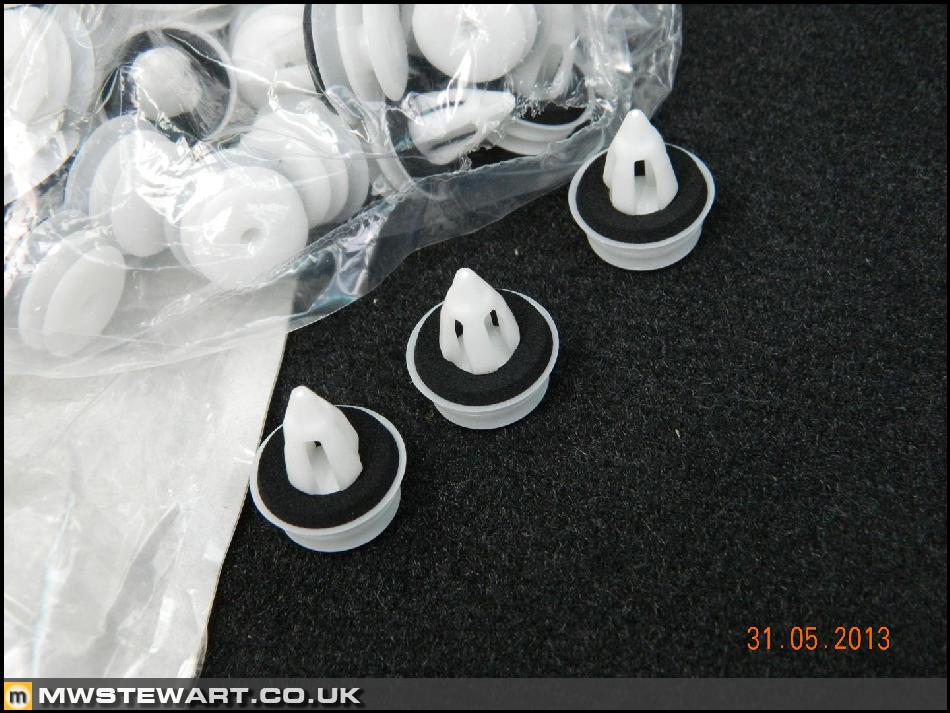
I'm replacing all of the trim clips in the interior with the later foam backed type which cut down on vibrations.
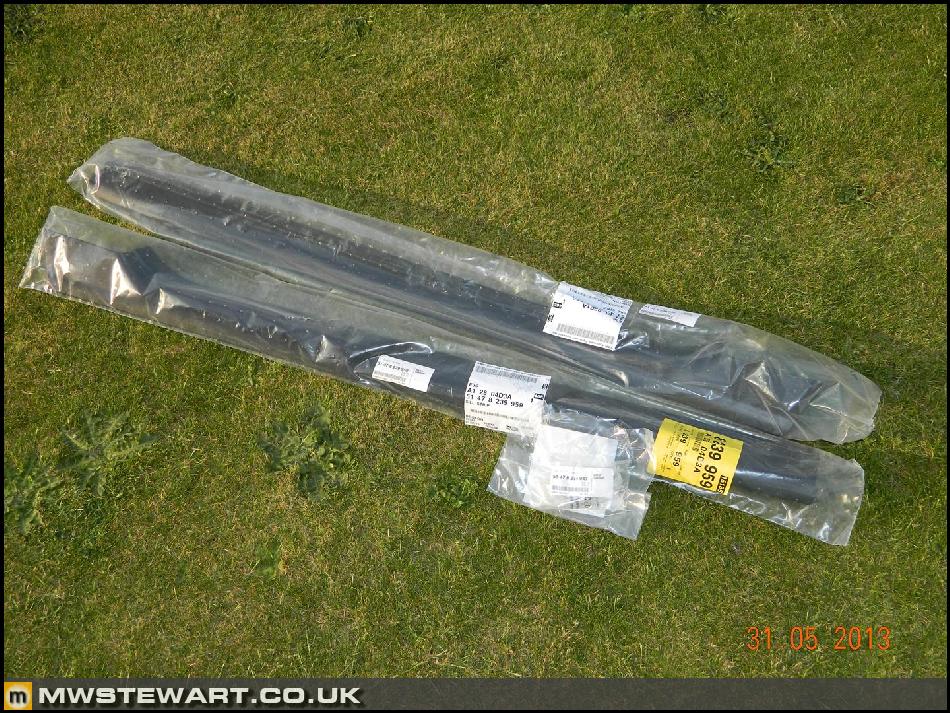
I also purchased new interior sill trims and clips, as my trims had a few small scuff marks.
F10 M5 Gearknob
I really don't like the look or feel of the standard E46 M3 gearknob but thankfully BMW gearknob fitment has remained the same from around the E36 era to the present day, so there are plenty of options. I've chosen to use an F10 M5 gearknob which is weighted and also illuminated like the original E46 gearknob. It's reasonably priced too given it comes with a Nappa leather gaiter.
The F10 gearstick aperture is obviously different to the E46, so what I did was to remove the staples and glue from the F10 gaiter and then gently peel it from its trim piece (left). I did the same on a scrap E46 gaiter to remove its trim piece (right).
I then carefully stretched the F10 gaiter over the E46 trim piece and bonded the two together with Tiger Seal.
Here's the gearknob & gaiter fitted, and also some of the Silver Cube. The F10 illumination multiplug is identical to that used in the E46, making this aspect is plug and play.
I also test fitted a Bluetooth 'Eject Box' with phone storage tray.
Alpine KCA-420i iPod Interface
I have a multitude of AV/Aux input options already wired in but I also want an actual interface. Using Alpine products with something called an 'Intravee' http://www.toysinyourcar.com/acatalog/intravee.htm... is a well-known option, and enables display of iPod details on the Factory Sat Nav screen.
I bought my KCA-420i from eBay, and also a 10m Ai-Net cable so I can mount the KCA-420i at the front of the car to allow iPod connection in the glovebox. The Intravee will be mounted in the boot with the rest of the OEM infotainment modules.
There is a handy module rack system behind the glove box which on my car it is mostly empty. This due to the gradual evolution of the electrical system over the period of the E46's life which has meant that a lot of the functions which used to be provided in discreet modules, are now combined in the one General Module. This is good news as the KCA-420i fits snugly in one of the free slots!
All cables were covered in fleece tape and the glove box refitted with just the right amount of iPod lead available inside.
Electrically Folding Mirrors
I wanted to add folding mirrors as they do sometimes come in handy. They tend to fetch a premium which in my opinion is not justified. I found a tatty set on eBay minus one mirror glass and got them for £120, which isn't too bad.
There are a few types of E46 mirror electronics depending on year for one and also whether memory seats are installed. The mirrors I purchased were an older non-memory type, so my plan was to strip the mirrors and transplant the folding motor alone into my mirrors.
Here's what it all comes down to. The manual folding mirror has a spring loaded cartridge (left) whereas the electronically folding mirrors have a cartridge of the same dimensions, only motorised. It's a great piece of design and probably only costs £15 perm unit to manufacture in bulk- hardly worth the premium these units often fetch second-hand.
I simply swapped the motorised cartridge into my mirrors (which are far better condition than the donors!)
I extended the folding motor wires and covered with fleece tape, and I will now add these wires (blue and white) to empty pins in the existing mirror multiplugs (white to pin 1 and blue to pin 2).
Misc Trim
I'm replacing all of the trim clips in the interior with the later foam backed type which cut down on vibrations.
I also purchased new interior sill trims and clips, as my trims had a few small scuff marks.
Edited by mwstewart on Monday 23 December 21:22
Thanks everyone
I recommend a trim tool for removing the sill trims:

Pry up the top of the trim slightly to get sight of where the clips are attached, and lever the clips away from the body (not away from the trim). The trims themselves are actually some of the cheapest in the interior, both in terms of cost and quality
You can find all part numbers at http://www.realoem.com/bmw/
darreni said:
Sup[erb detail, love it.
Do the foam backed trim clips fit all of the trim/door panels on the E46? Do you have a price for the clips?
Looking forward to the Interior sill trim replacement, one of mine on the CSL is a bit gappy & i suspect one of the clips has broken. I've had a quick go at taking it off, but i'm afraid of breaking it.
Yes, the foam backed clips fit pretty much all of the trim panels; front & rear cards, C pillars, A pillar base trims. The sill trims have unique clips, eight per trim.Do the foam backed trim clips fit all of the trim/door panels on the E46? Do you have a price for the clips?
Looking forward to the Interior sill trim replacement, one of mine on the CSL is a bit gappy & i suspect one of the clips has broken. I've had a quick go at taking it off, but i'm afraid of breaking it.
I recommend a trim tool for removing the sill trims:
Pry up the top of the trim slightly to get sight of where the clips are attached, and lever the clips away from the body (not away from the trim). The trims themselves are actually some of the cheapest in the interior, both in terms of cost and quality
You can find all part numbers at http://www.realoem.com/bmw/
em177 said:
I'm presuming the F10 M5 manual gearknob had to come from the states?
It was a special order from Germany, but still through my local dealer.Thanks both. I'm glad I kept the Aux now; I'm still using 5th gen video so wasn't aware of the change.
Bluetooth Retrofit Completed
I've been finishing off the Bluetooth wiring this weekend. This is all in the boot of the car, where the Bluetooth loom integrates with the rest of the Nav and Audio system. The pint is optional
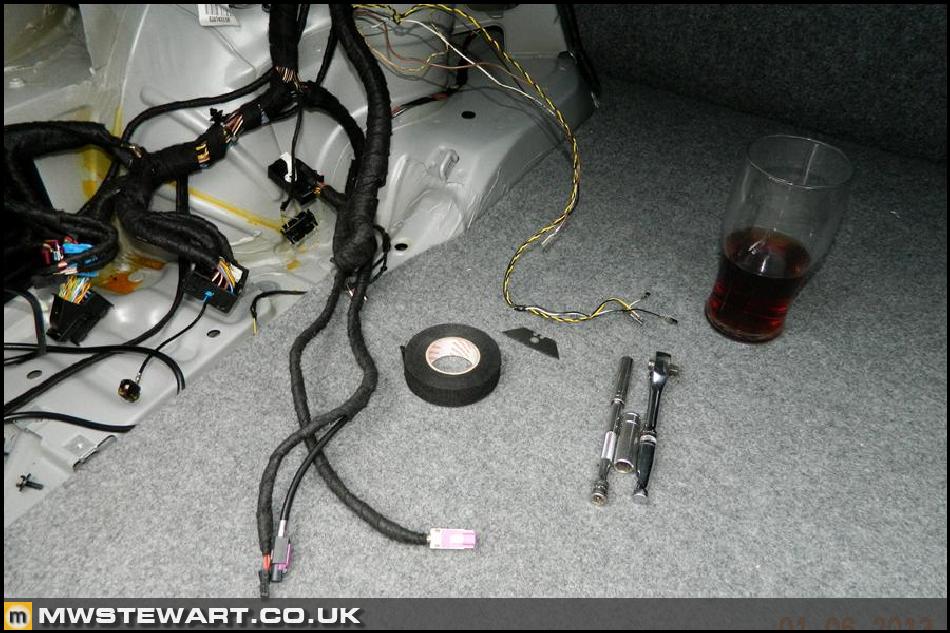
Additional pins added to the BM54 tuner Quadlock.
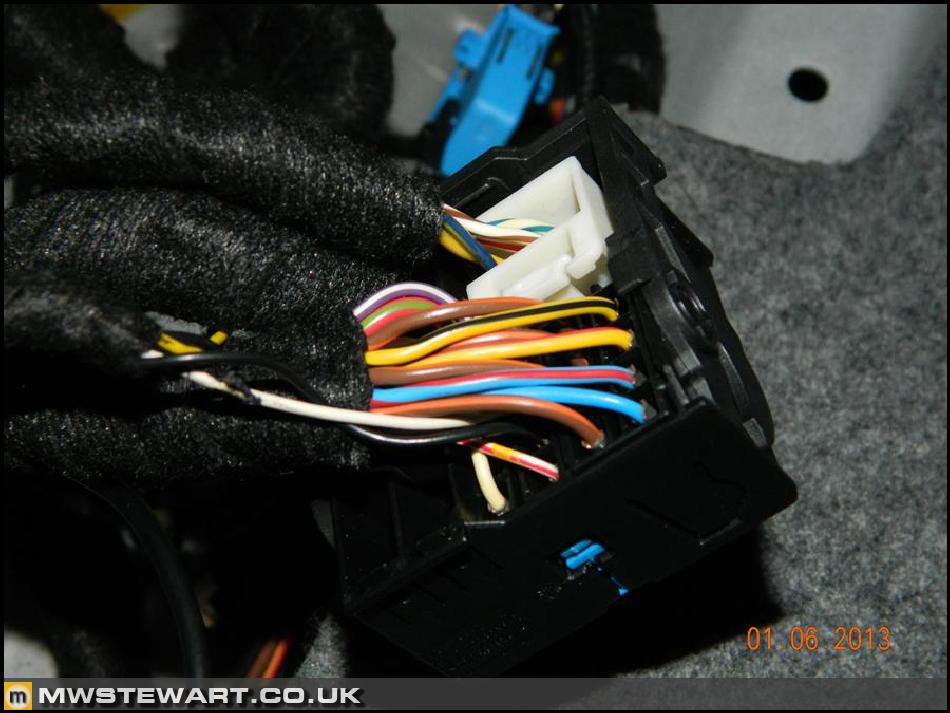
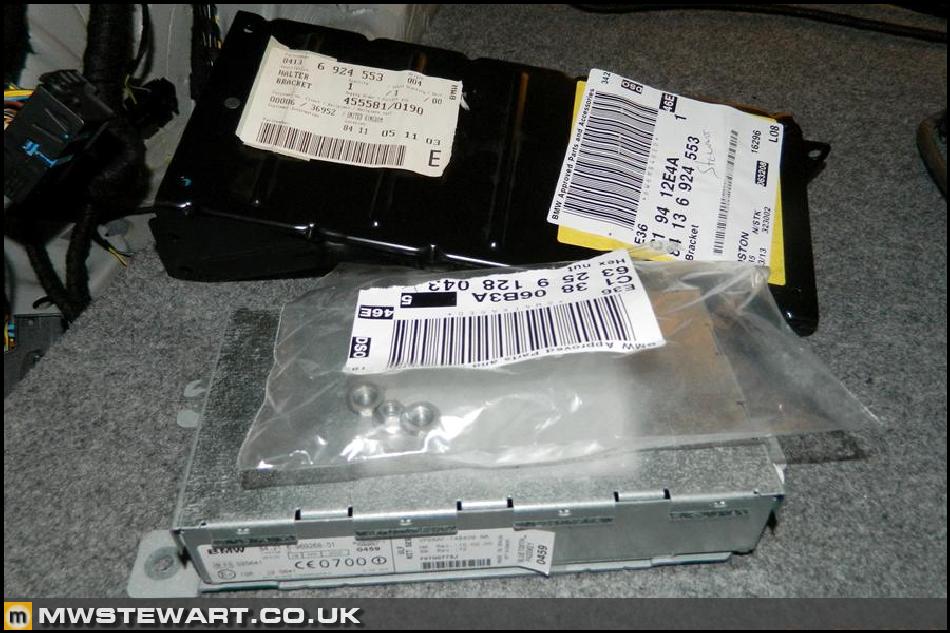
Now to mount the Bluetooth module, which in BMW speak is called a 'ULF'. I have a 7th generation module which is an 11th revision of the hardware and a 55th revision of the OS software - incredible really. The ULF was second-hand and the mounting bracket and nuts were new from BMW.
Here's the AV lead connected to the TV tuner plugs. The white wire in the foreground is a trigger wire that switches to the reverse camera screen when reverse is selected. The wire needs pulling to earth so I'll have to set up a relay to switch earth from the reverse lamp positive feed.
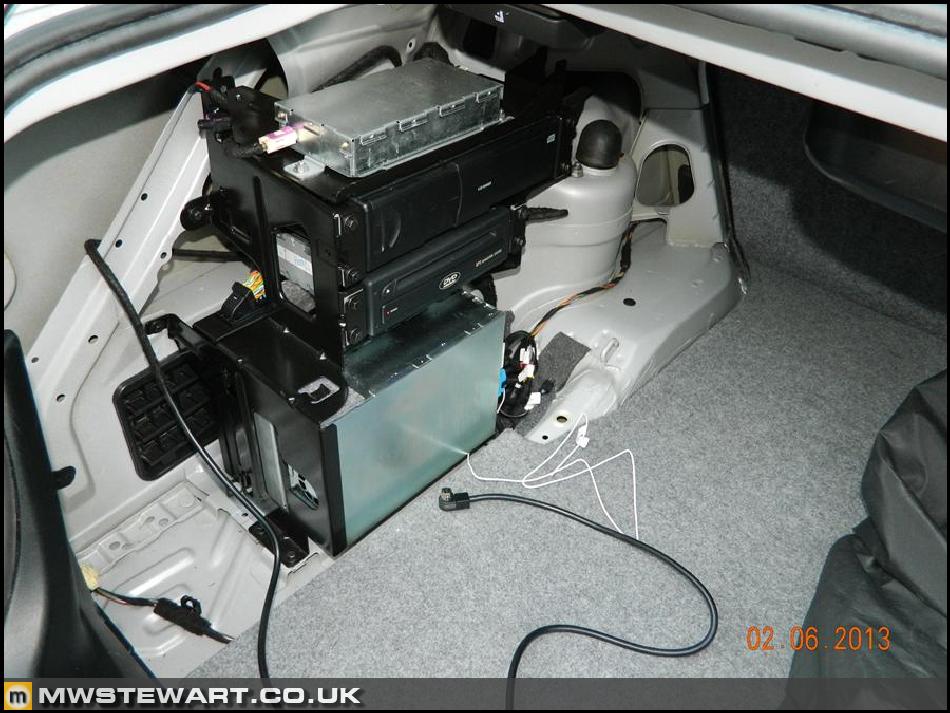
All of the modules back in the car and wired in.
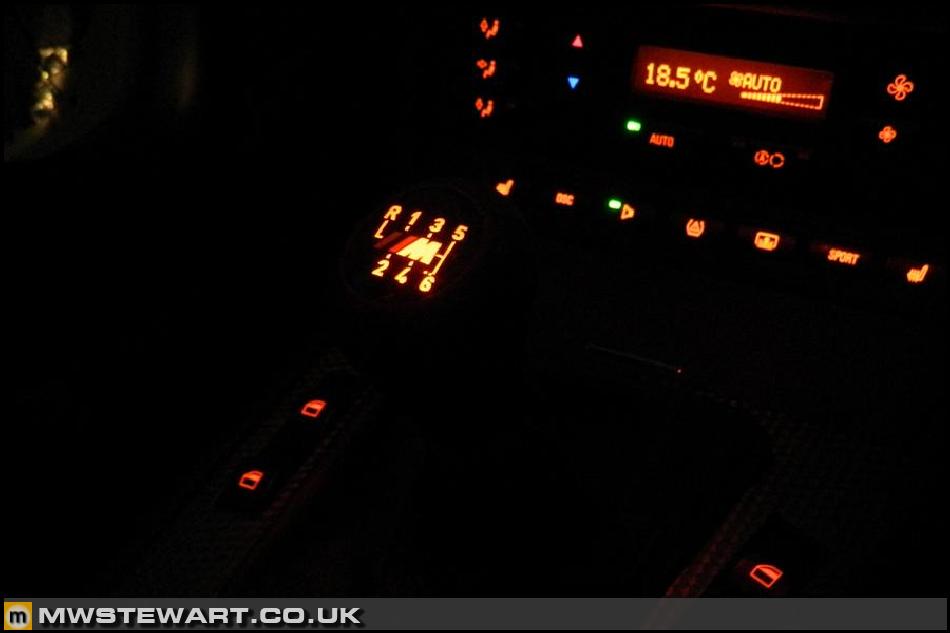
Most of the electrical work is now completed, sop I could reconnect the battery. Here's a shot of the F10 M5 gearknob illuminated. It actually matches the rest of the illumination far better than the original gearknob, which lit up in more of a red and not amber.
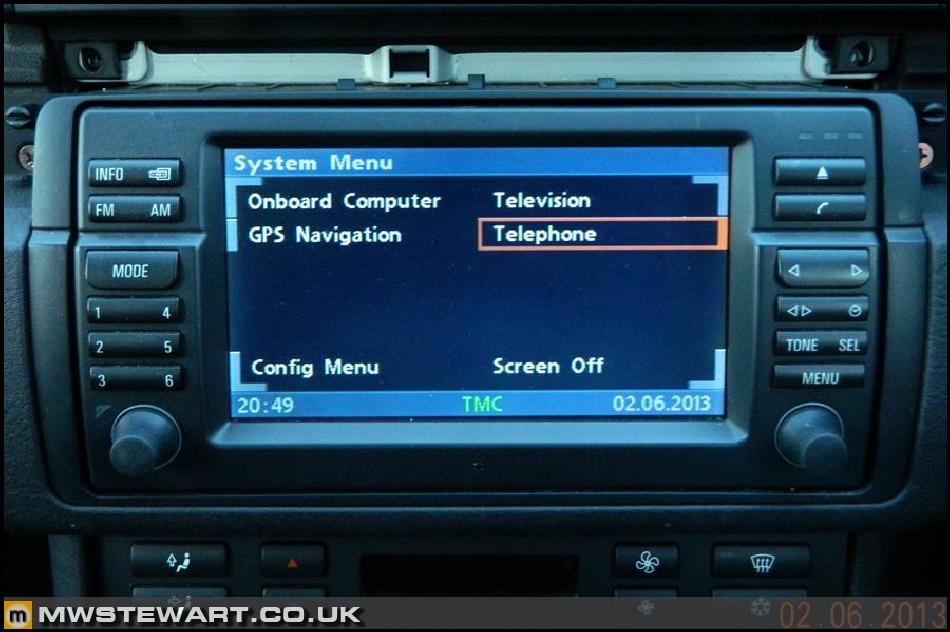
With the battery connected I could test the Bluetooth system. A new 'Telephone' menu item had appeared on the screen which was a good start.
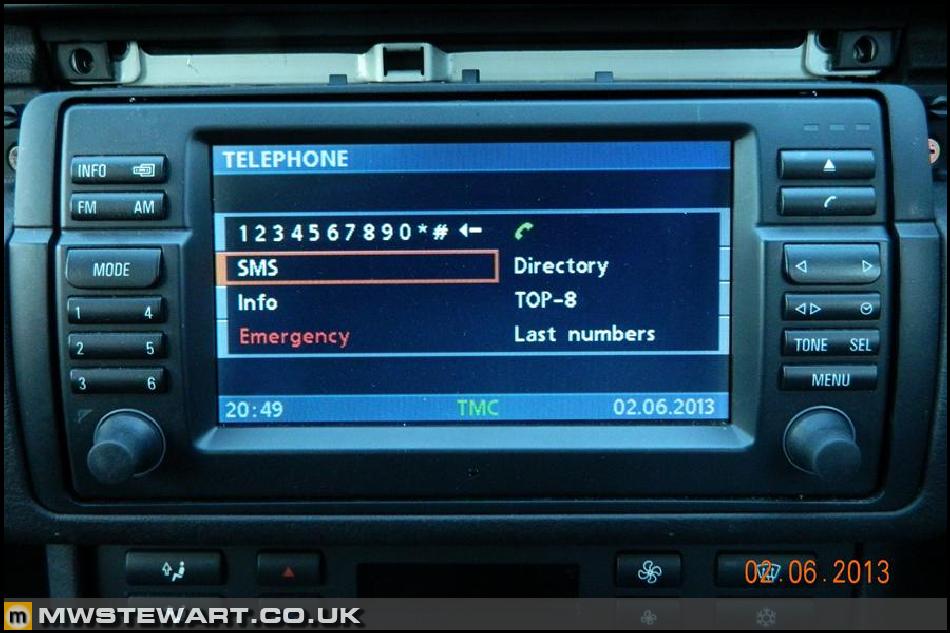
My phone also paired successfully. I made test a call and I was pleased with the sound quality, so the conversion has been a success.
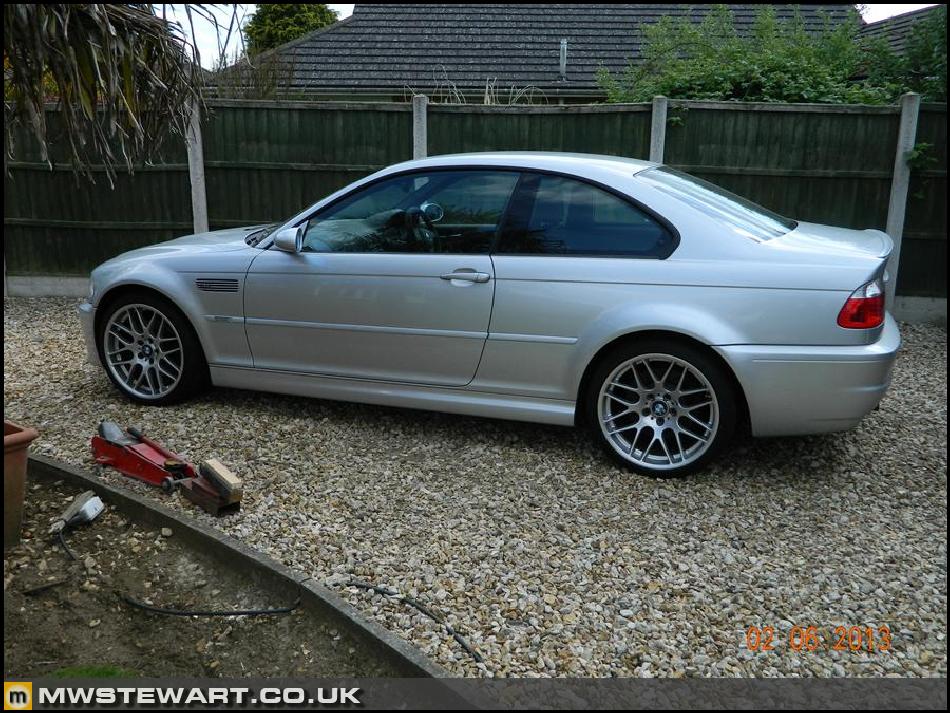
CSL Suspension - Part 1
Although I haven't quite finished phase 1 of the project, it doesn't make sense to delay phase two whilst I wait for a parts order to arrive at BMW. I'm going to convert the entire suspension system to CSL specification, as it is very well judged performance road suspension. Before I start, here's a before shot of car on standard suspension:
Here are the front struts/springs and rear springs; I haven't yet ordered the rear struts from BMW. The front struts, springs, bump stops, and bump stop retainers are all different to the standard M3. The rear components are much the same.
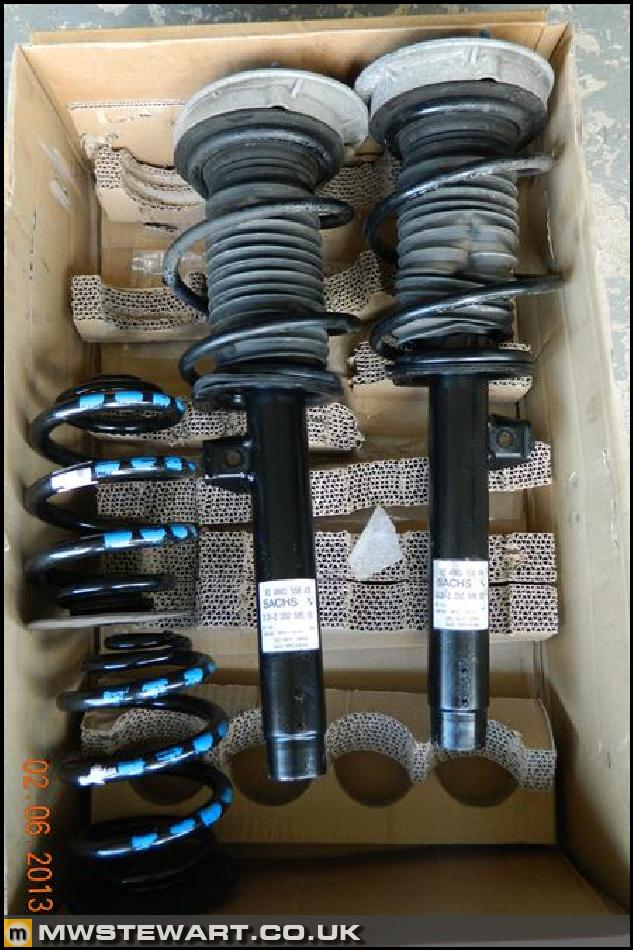
Labelling.

Here's a comparison of the standard M3 strut/spring (left) and the CSL versions (right).
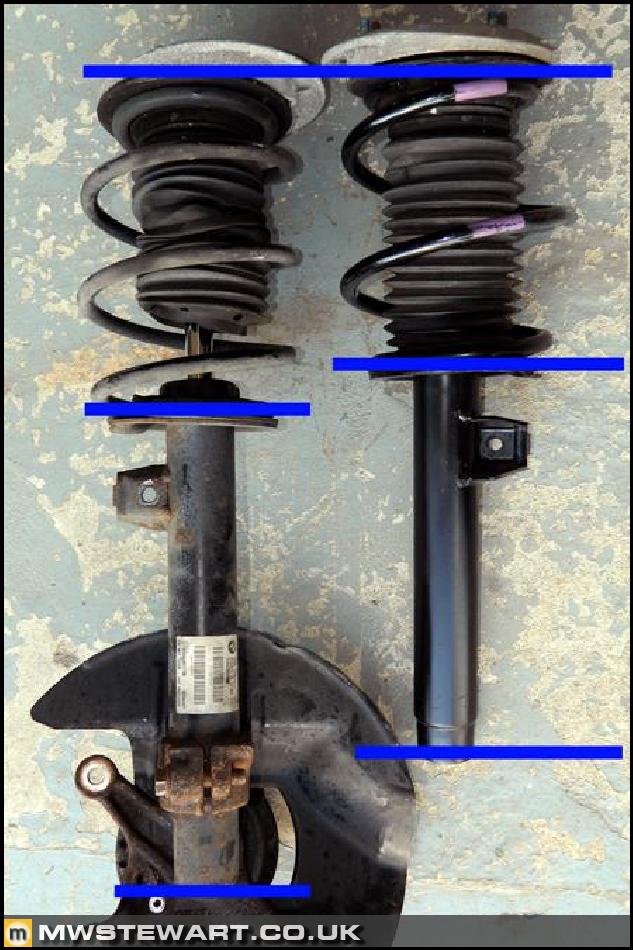
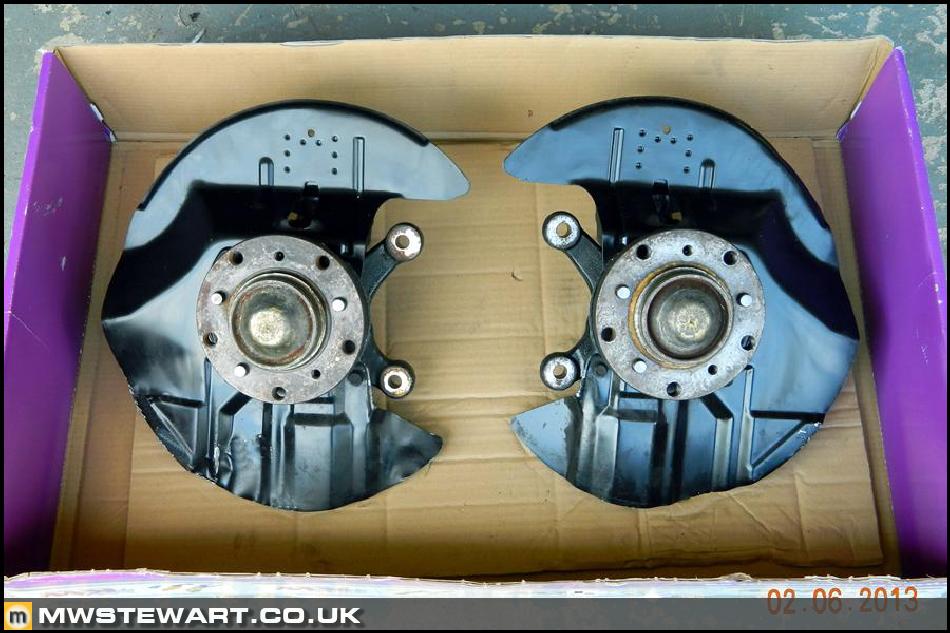
The front uprights were also modified on the CSL so I have a pair of those to fit. It's not uncommon for manufacturers to make changes here on the sports models, for example extra bracing, lighter castings, modified ball joint position etc. however when comparing to the standard hub/upright assembly I just couldn't spot anything obvious. There must be some change however and my assumption is that it's of benefit to handling.
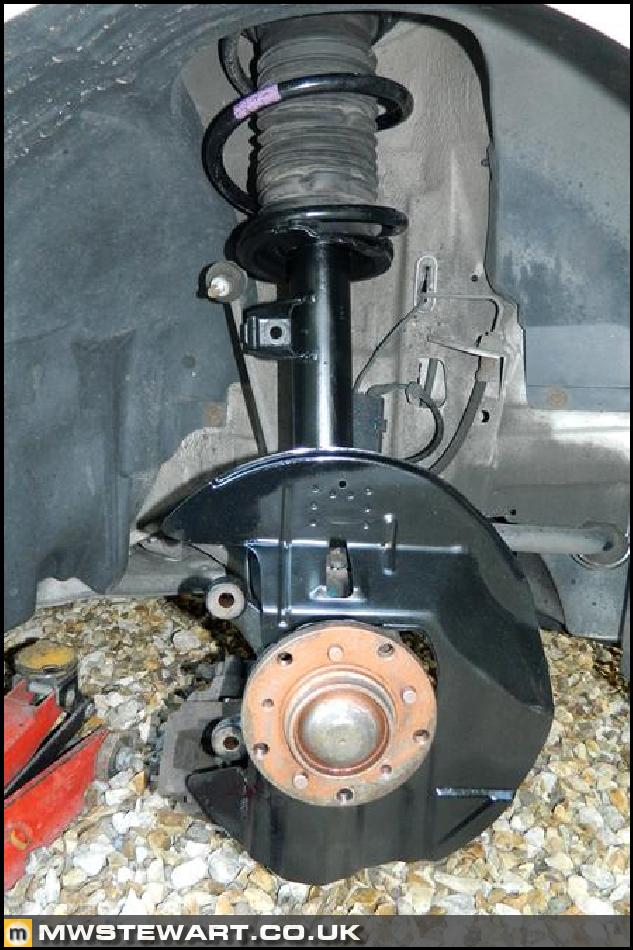
I have the hubs and struts fitted. Everything is just loosely bolted together at the moment as I'm going to order brand new nuts and bolts for everything that was removed.
CSL Exhaust System
The CSL exhaust is slightly lighter than the standard M3 being made of thinwall tubing. The manifolds flow better than the versions fitted to my car, and the cats are 200 cell rather than the 400 cell versions in the regular M3. In terms of a complete exhaust system it's a relatively subtle change, but that suits me.
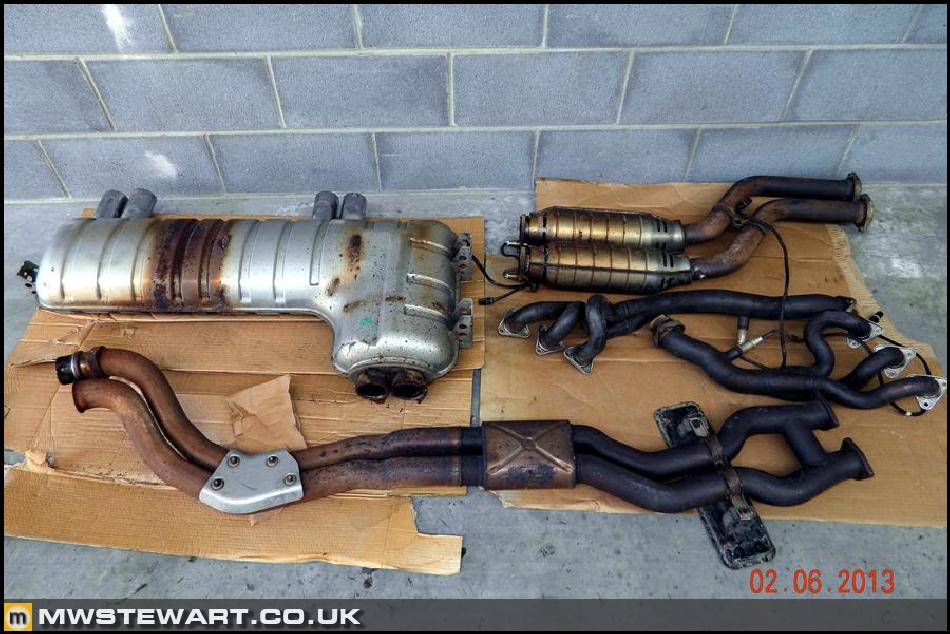
CSL systems are stamped with green 'CSL' lettering. Corroded clamps come as standard on the M3 They will be replaced.
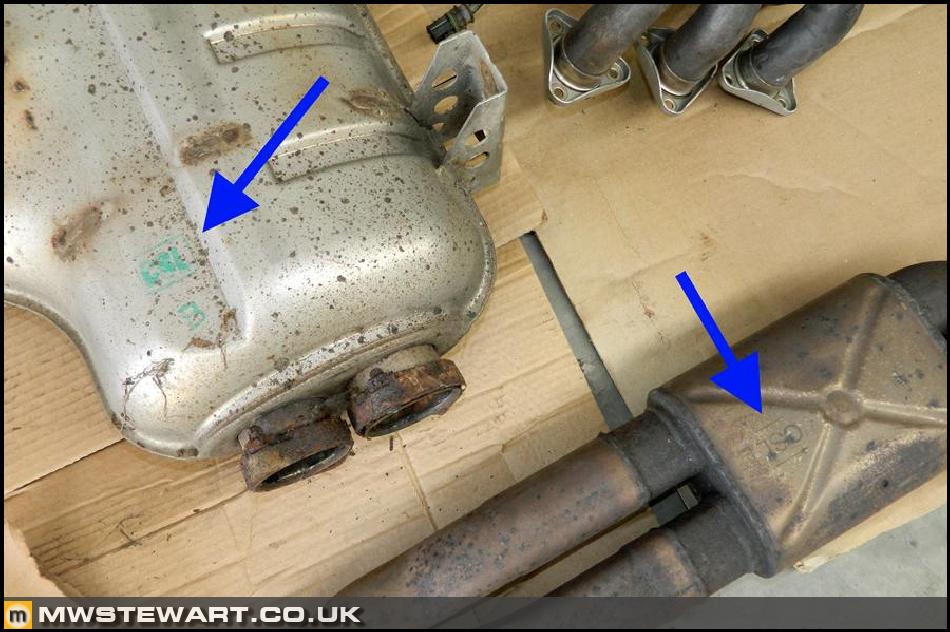
After buying the system I decided the condition wasn't good enough to go on to my car, so I'm now going with s complete Supersprint system.
Bluetooth Retrofit Completed
I've been finishing off the Bluetooth wiring this weekend. This is all in the boot of the car, where the Bluetooth loom integrates with the rest of the Nav and Audio system. The pint is optional
Additional pins added to the BM54 tuner Quadlock.
Now to mount the Bluetooth module, which in BMW speak is called a 'ULF'. I have a 7th generation module which is an 11th revision of the hardware and a 55th revision of the OS software - incredible really. The ULF was second-hand and the mounting bracket and nuts were new from BMW.
Here's the AV lead connected to the TV tuner plugs. The white wire in the foreground is a trigger wire that switches to the reverse camera screen when reverse is selected. The wire needs pulling to earth so I'll have to set up a relay to switch earth from the reverse lamp positive feed.
All of the modules back in the car and wired in.
Most of the electrical work is now completed, sop I could reconnect the battery. Here's a shot of the F10 M5 gearknob illuminated. It actually matches the rest of the illumination far better than the original gearknob, which lit up in more of a red and not amber.
With the battery connected I could test the Bluetooth system. A new 'Telephone' menu item had appeared on the screen which was a good start.
My phone also paired successfully. I made test a call and I was pleased with the sound quality, so the conversion has been a success.
CSL Suspension - Part 1
Although I haven't quite finished phase 1 of the project, it doesn't make sense to delay phase two whilst I wait for a parts order to arrive at BMW. I'm going to convert the entire suspension system to CSL specification, as it is very well judged performance road suspension. Before I start, here's a before shot of car on standard suspension:
Here are the front struts/springs and rear springs; I haven't yet ordered the rear struts from BMW. The front struts, springs, bump stops, and bump stop retainers are all different to the standard M3. The rear components are much the same.
Labelling.
Here's a comparison of the standard M3 strut/spring (left) and the CSL versions (right).
The front uprights were also modified on the CSL so I have a pair of those to fit. It's not uncommon for manufacturers to make changes here on the sports models, for example extra bracing, lighter castings, modified ball joint position etc. however when comparing to the standard hub/upright assembly I just couldn't spot anything obvious. There must be some change however and my assumption is that it's of benefit to handling.
I have the hubs and struts fitted. Everything is just loosely bolted together at the moment as I'm going to order brand new nuts and bolts for everything that was removed.
CSL Exhaust System
The CSL exhaust is slightly lighter than the standard M3 being made of thinwall tubing. The manifolds flow better than the versions fitted to my car, and the cats are 200 cell rather than the 400 cell versions in the regular M3. In terms of a complete exhaust system it's a relatively subtle change, but that suits me.
CSL systems are stamped with green 'CSL' lettering. Corroded clamps come as standard on the M3
They will be replaced.After buying the system I decided the condition wasn't good enough to go on to my car, so I'm now going with s complete Supersprint system.
Edited by mwstewart on Monday 23 December 21:29
Gassing Station | Readers' Cars | Top of Page | What's New | My Stuff