S.L.R race car build
Discussion


Hi all, been floating around these forums for a while, taking a lot of inspiration from some of the projects on here, and I think now I probably have made enough progress to start a project thread.
S.L.R stands for Student Loan Racing, a bit gimmicky I know!
Basically I'm a motorsport engineering degree student, I was building a bit of a budget race car for myself at home, as and when I could afford the parts. I'm now approaching my final year of uni in which I have to under take a bit of a in-depth project and I've decided to base mine around the calibration of the engine which will be powering this project race car.
This means I will be searching for all the help I can get with component costs and technical information so I thought I would try and act as professional as possible with a small website and a few public online project threads to showcase anyone's generosity that helps me along the way.
I have some good names in the motorsport industry on my c.v, from where I've worked around my educational commitments over the past 5 years, mainly working in competition engine preparation, but the rest of the car design and preparation is still relatively new to me so this project is a bit of a learning process. I have a student copy of the CAD software Catia so I will be putting to practice many of my experiences in a class room to design and develop solutions to this build.
This is a progress thread so I will stop talking and invite you to have a look at (and like!) my little webpage I've created if you wish to find out more. https://www.facebook.com/StudentLoanRacing (don't worry you don't have to be a facebook user to view it!)
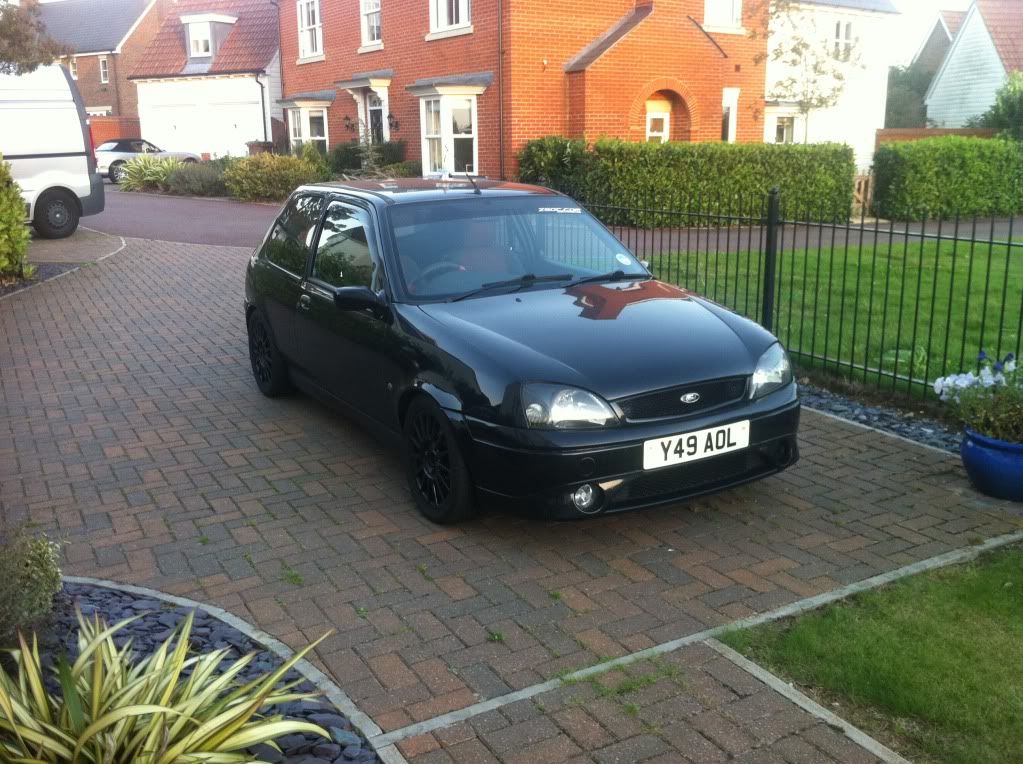
Right, the car is based on a 2000 mk5 Ford Fiesta Zetec S, with the 1.6L sigma engine. A great handling revy little road car which I'm sure will replace the Pug 205 in a few years time as a popular budget track car.
The main focus for this car is to be eligible for the Canons Tin Tops race series which is pretty much free in development terms as long as the standard suspension type, body silhouette, engine block, head and gearbox casings are kept. There is a minimum weight for this championship but I would also like to have a go at a bit of time attack and maybe a few other championships so the plan is to get it as light as possible (without getting into the silly money mods!)for those, just adding a bit of ballast for the canons series. It shouldn't be ridiculous amounts needed.
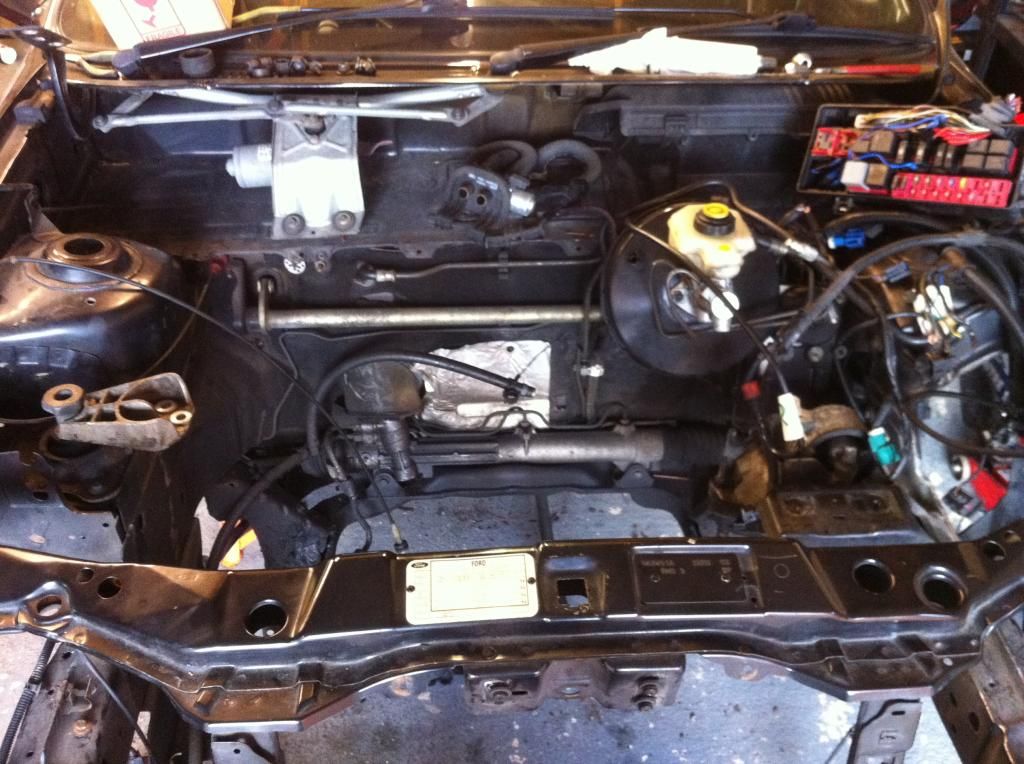
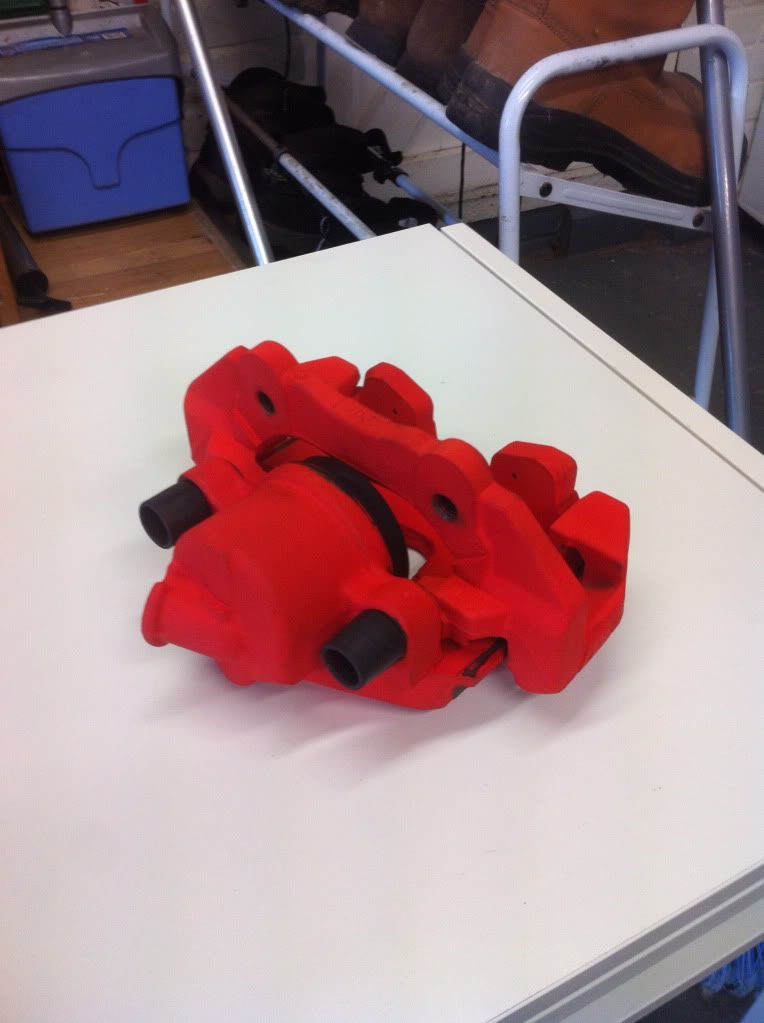
I started off by buying a 120k miles road car from a guy I know that worked for Ford and had looked after the car very well. I stripped every nut and bolt off of the car as I wanted to be confident in everything that ends up on the finished version. The plan was to re-furb and re-use the suspension and geometry components, the brakes (which had already been upgraded to a popular more powerful upgraded version from another model of Ford as well as a rear disc conversion) and re-build the engine to a bit more of a competitive spec.
S.L.R stands for Student Loan Racing, a bit gimmicky I know!
Basically I'm a motorsport engineering degree student, I was building a bit of a budget race car for myself at home, as and when I could afford the parts. I'm now approaching my final year of uni in which I have to under take a bit of a in-depth project and I've decided to base mine around the calibration of the engine which will be powering this project race car.
This means I will be searching for all the help I can get with component costs and technical information so I thought I would try and act as professional as possible with a small website and a few public online project threads to showcase anyone's generosity that helps me along the way.
I have some good names in the motorsport industry on my c.v, from where I've worked around my educational commitments over the past 5 years, mainly working in competition engine preparation, but the rest of the car design and preparation is still relatively new to me so this project is a bit of a learning process. I have a student copy of the CAD software Catia so I will be putting to practice many of my experiences in a class room to design and develop solutions to this build.
This is a progress thread so I will stop talking and invite you to have a look at (and like!) my little webpage I've created if you wish to find out more. https://www.facebook.com/StudentLoanRacing (don't worry you don't have to be a facebook user to view it!)
Right, the car is based on a 2000 mk5 Ford Fiesta Zetec S, with the 1.6L sigma engine. A great handling revy little road car which I'm sure will replace the Pug 205 in a few years time as a popular budget track car.
The main focus for this car is to be eligible for the Canons Tin Tops race series which is pretty much free in development terms as long as the standard suspension type, body silhouette, engine block, head and gearbox casings are kept. There is a minimum weight for this championship but I would also like to have a go at a bit of time attack and maybe a few other championships so the plan is to get it as light as possible (without getting into the silly money mods!)for those, just adding a bit of ballast for the canons series. It shouldn't be ridiculous amounts needed.
I started off by buying a 120k miles road car from a guy I know that worked for Ford and had looked after the car very well. I stripped every nut and bolt off of the car as I wanted to be confident in everything that ends up on the finished version. The plan was to re-furb and re-use the suspension and geometry components, the brakes (which had already been upgraded to a popular more powerful upgraded version from another model of Ford as well as a rear disc conversion) and re-build the engine to a bit more of a competitive spec.


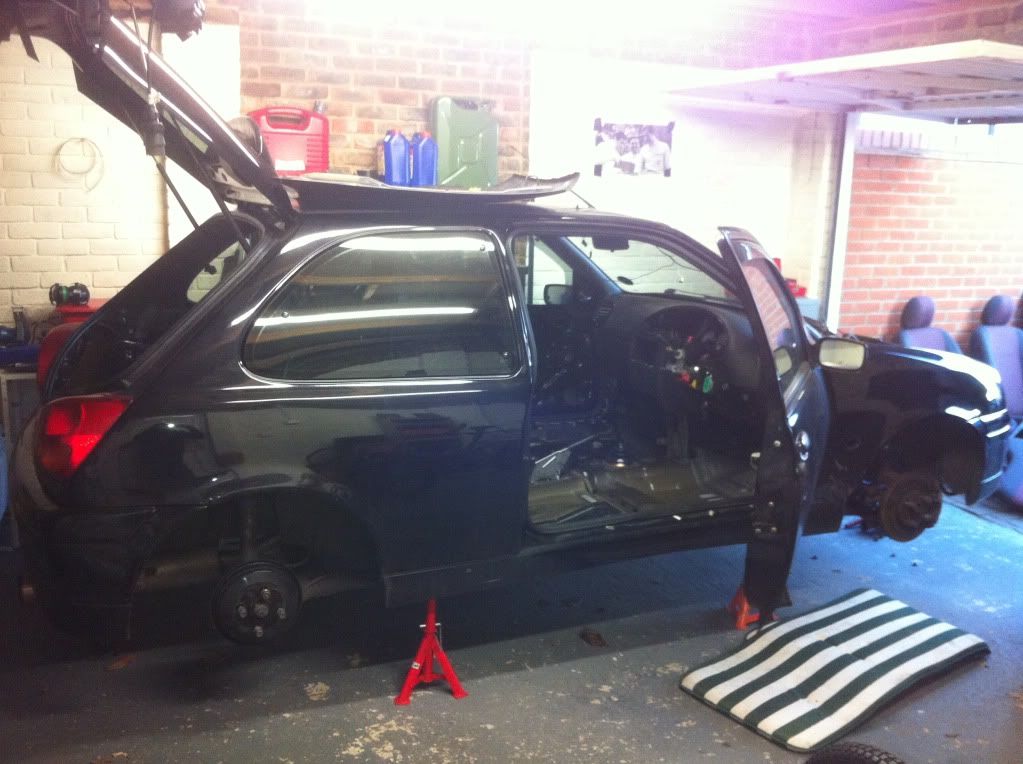
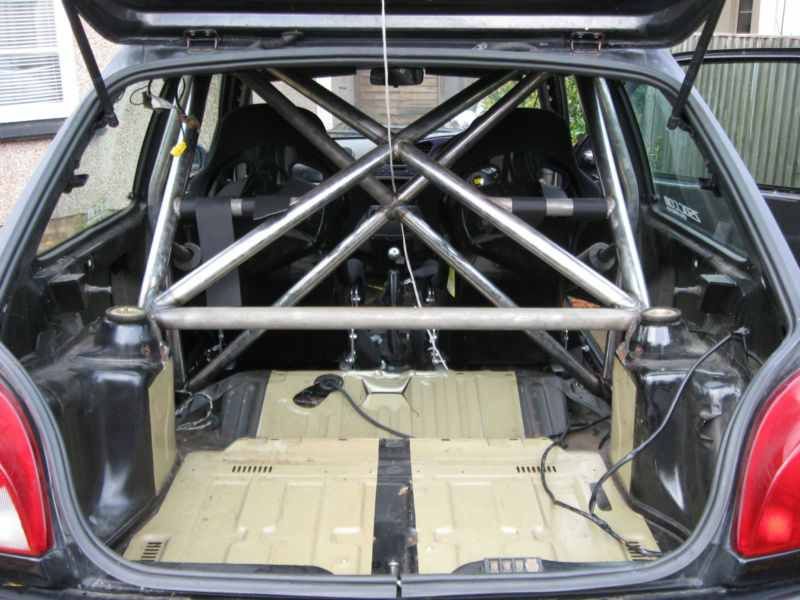
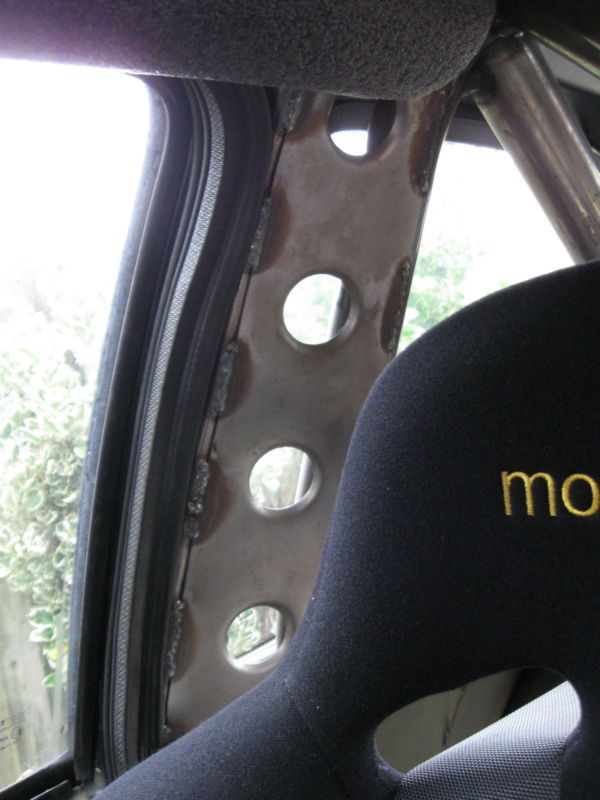
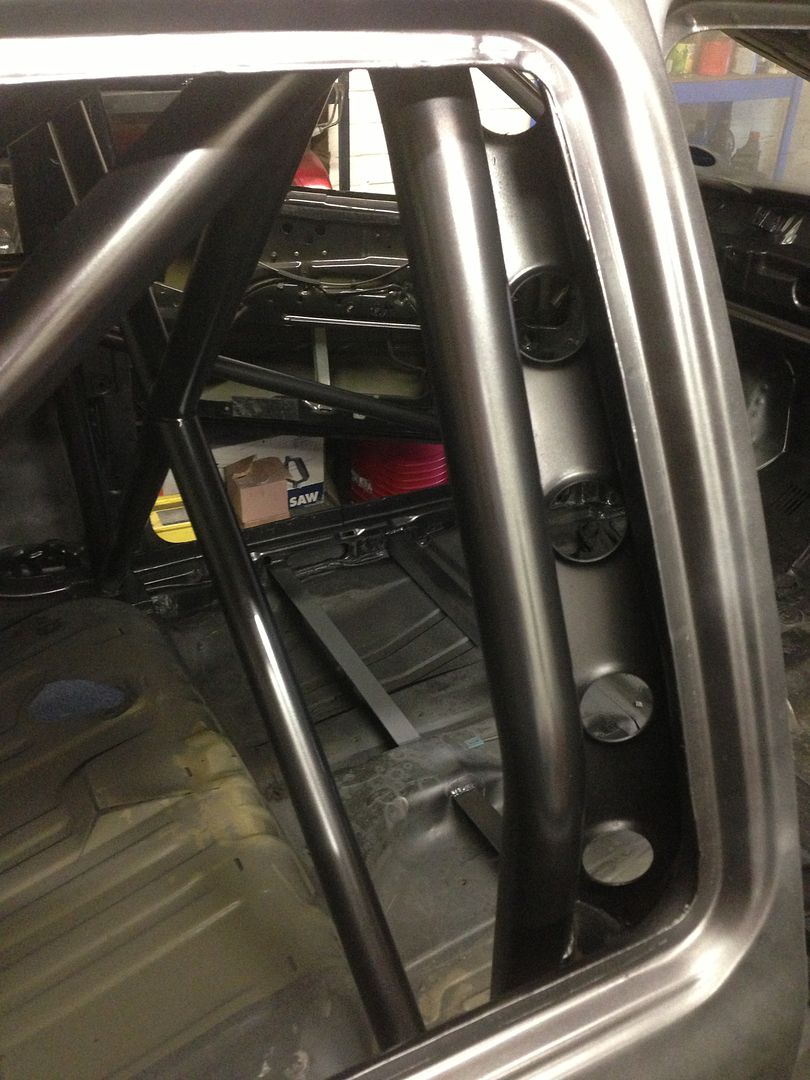
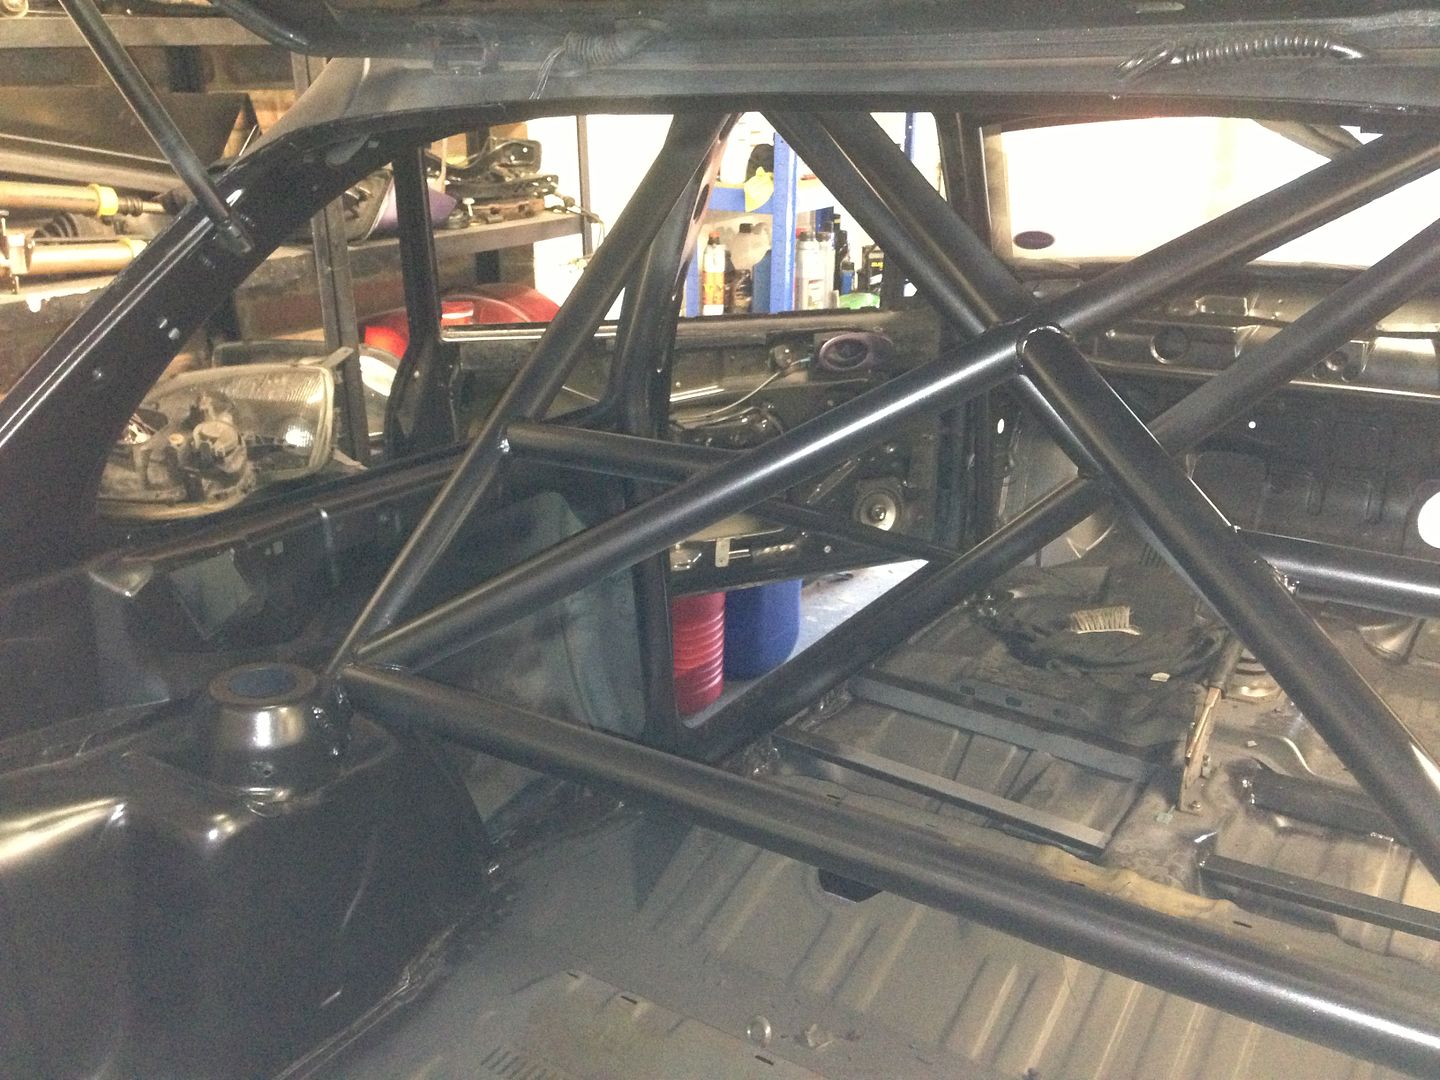
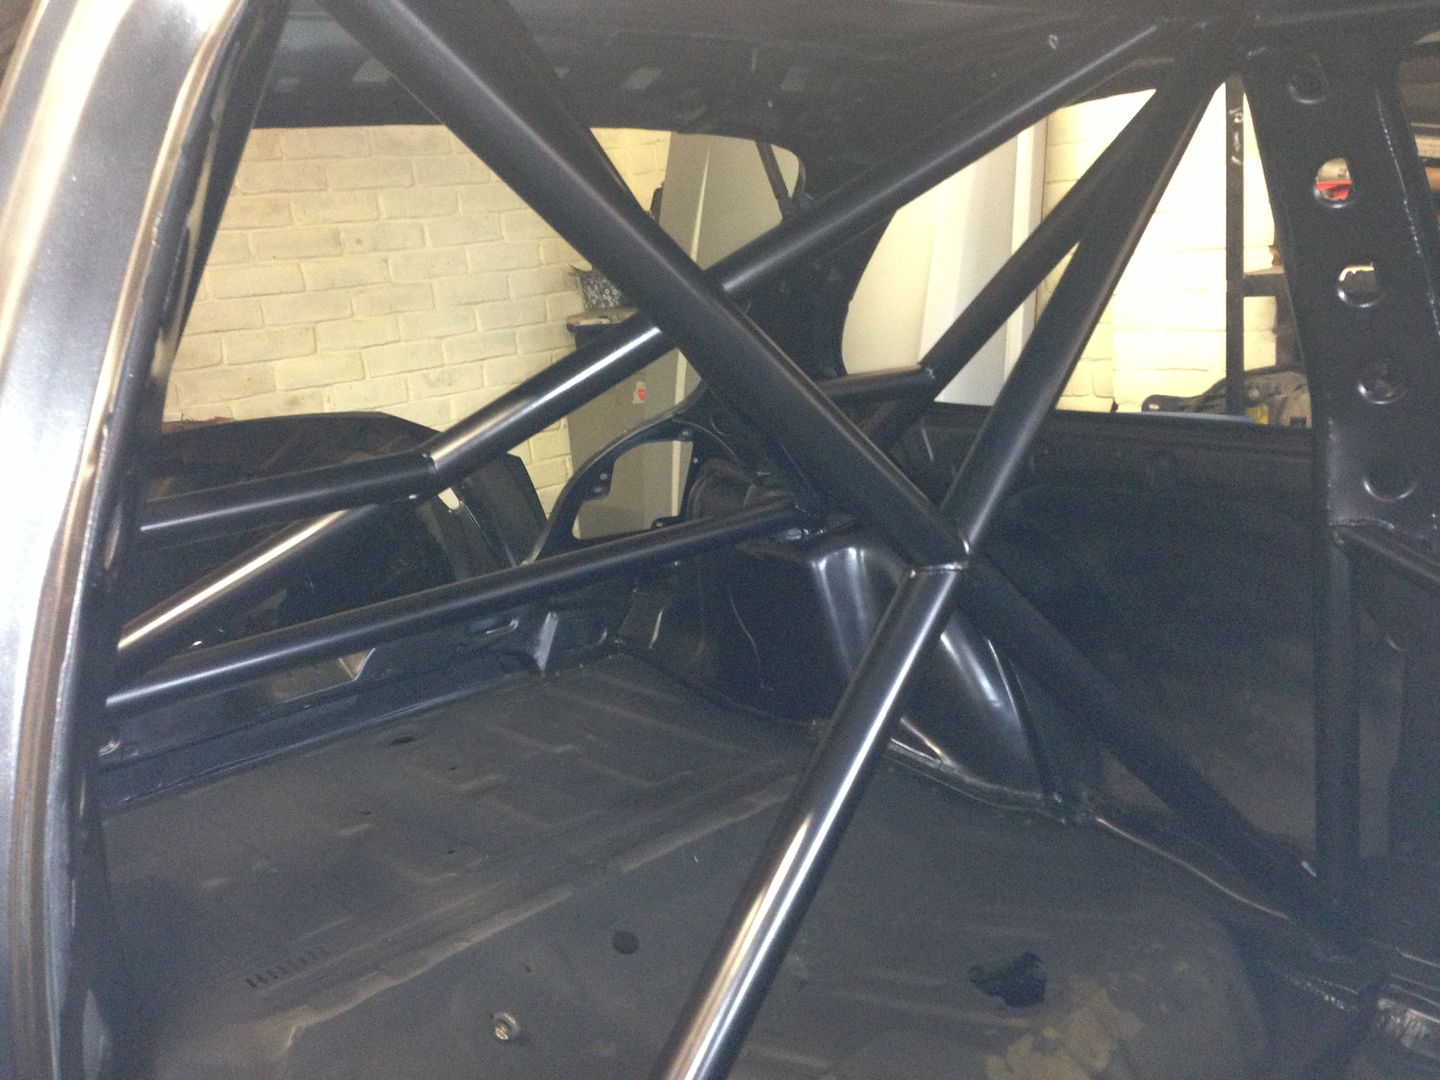
I had planned to fit an OMP or similar bolt-in roll cage to this shell. At the time of pricing up the cage, an unfinished project came up on the fiesta forum with a good quality welded in cage already installed. I ended up scrapping the previous bare shell, keeping the components I had already started to re-furb and went to pick up the caged shell from the forum. A lot of the up-rated parts I had already owned from the previous shell were fitted to the new one so I ended up selling all of them for more than I paid for the car, giving me a free roll cage basically.
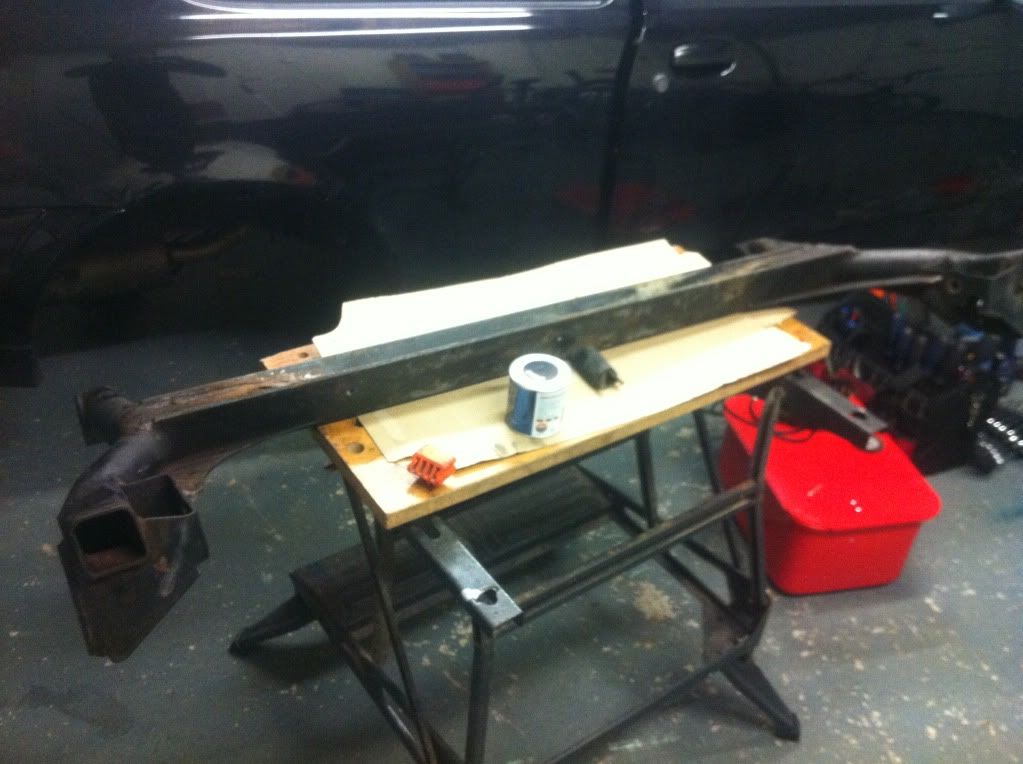
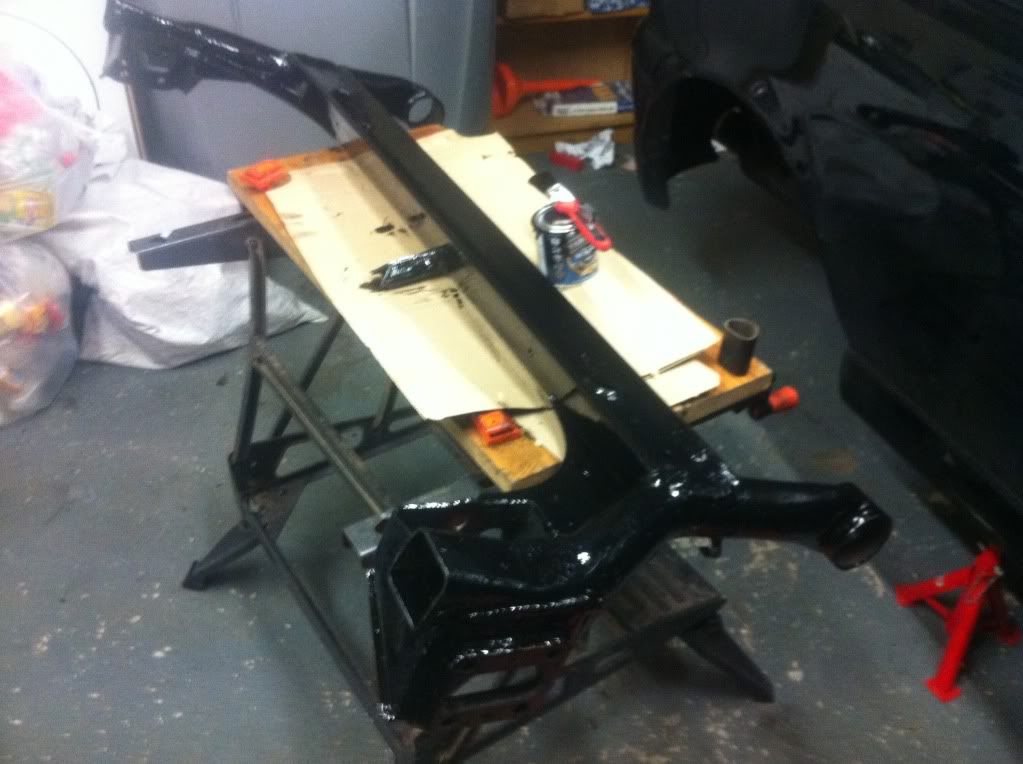
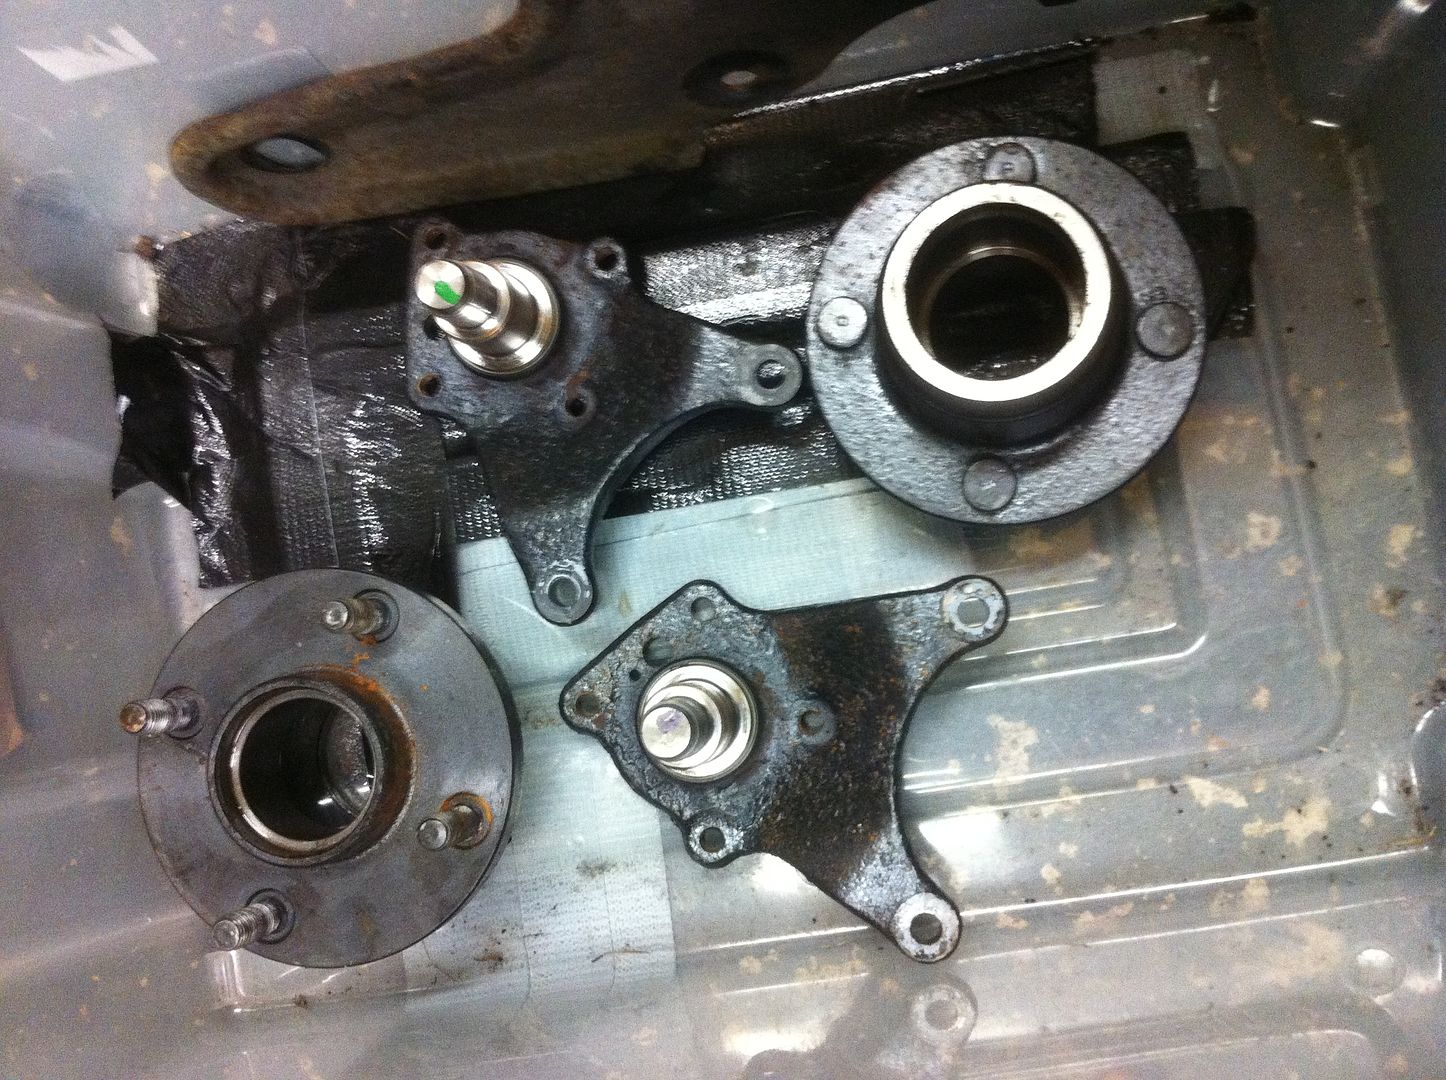
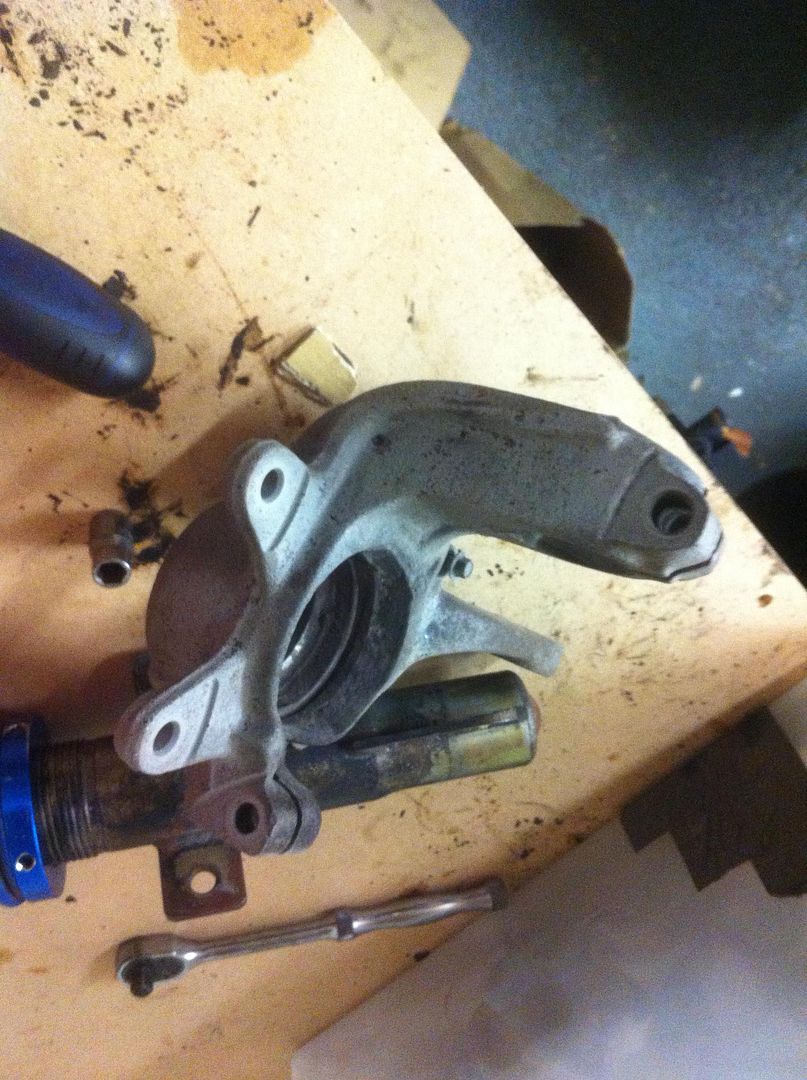
I continued with the preparation of the front sub-frame, steering rack and wishbones. All of the main 120k miles components were kept but all of the bolts were replaced with new ones, competition spec bushes fitted and the wishbones were adapted to give camber adjustment. There is a non power steering rack available for this car but it has a lot more turns lock to lock so I'm sealing the standard hydraulic steering rack with a bit of fluid in it for lubrication and running that without a pump.
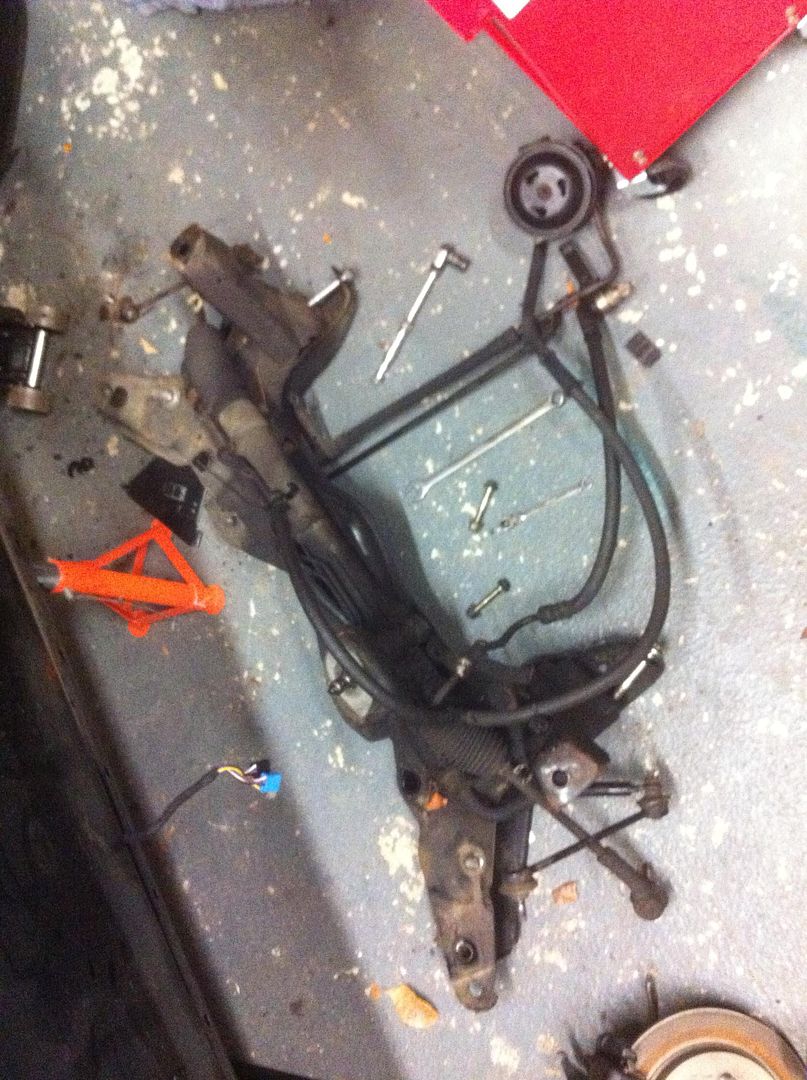


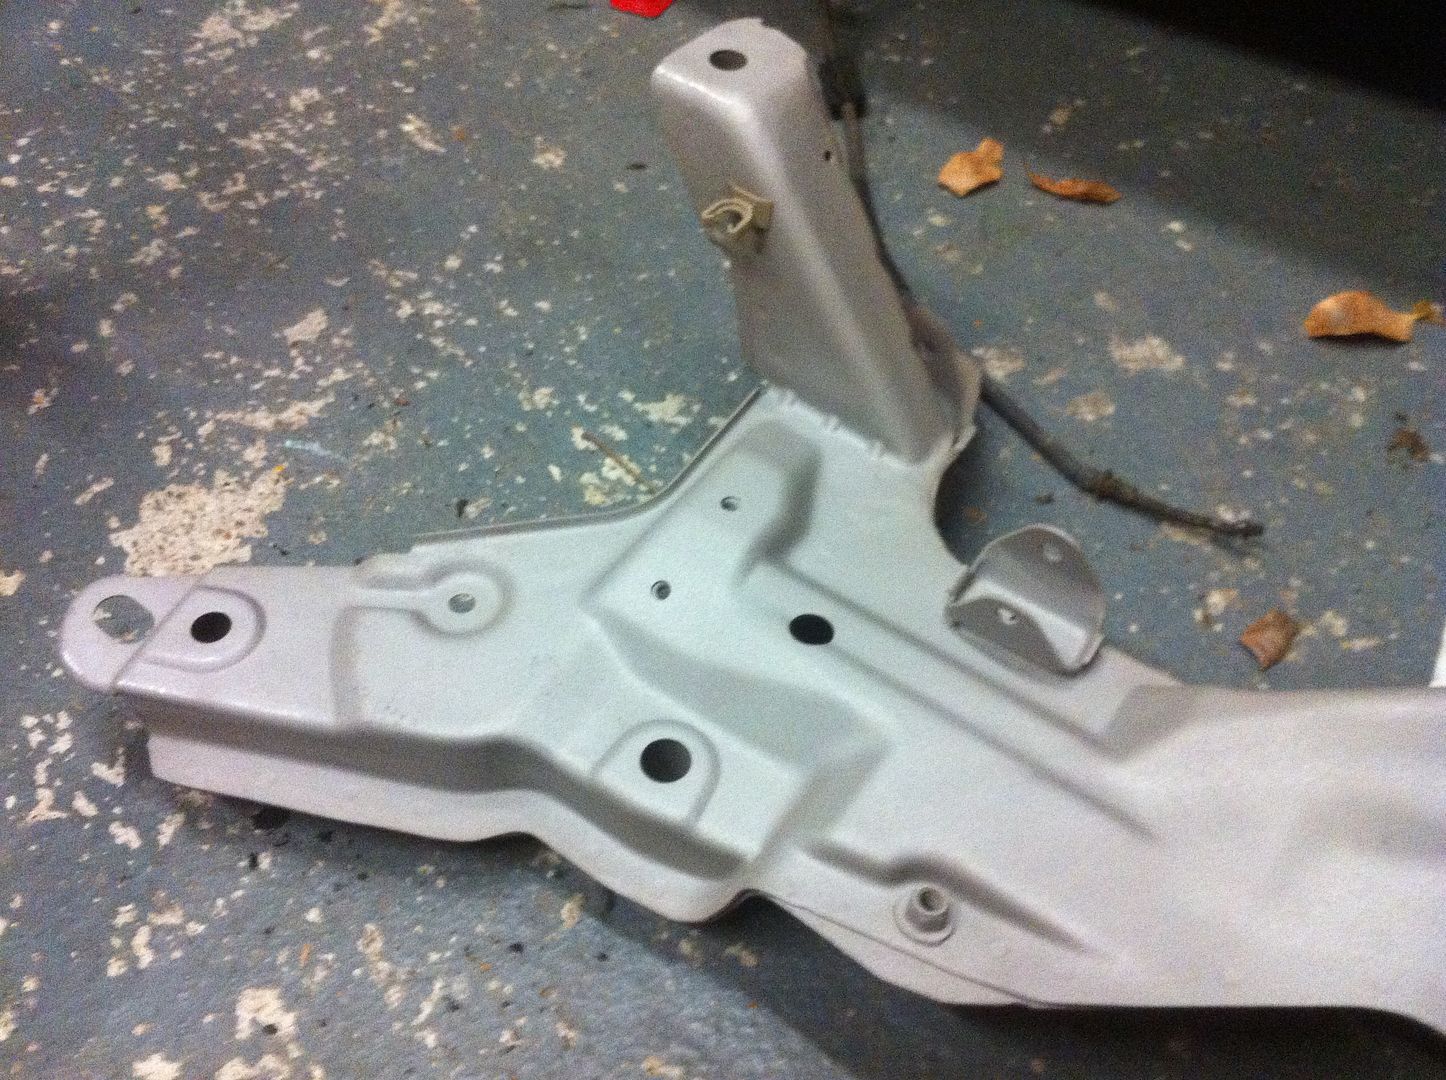
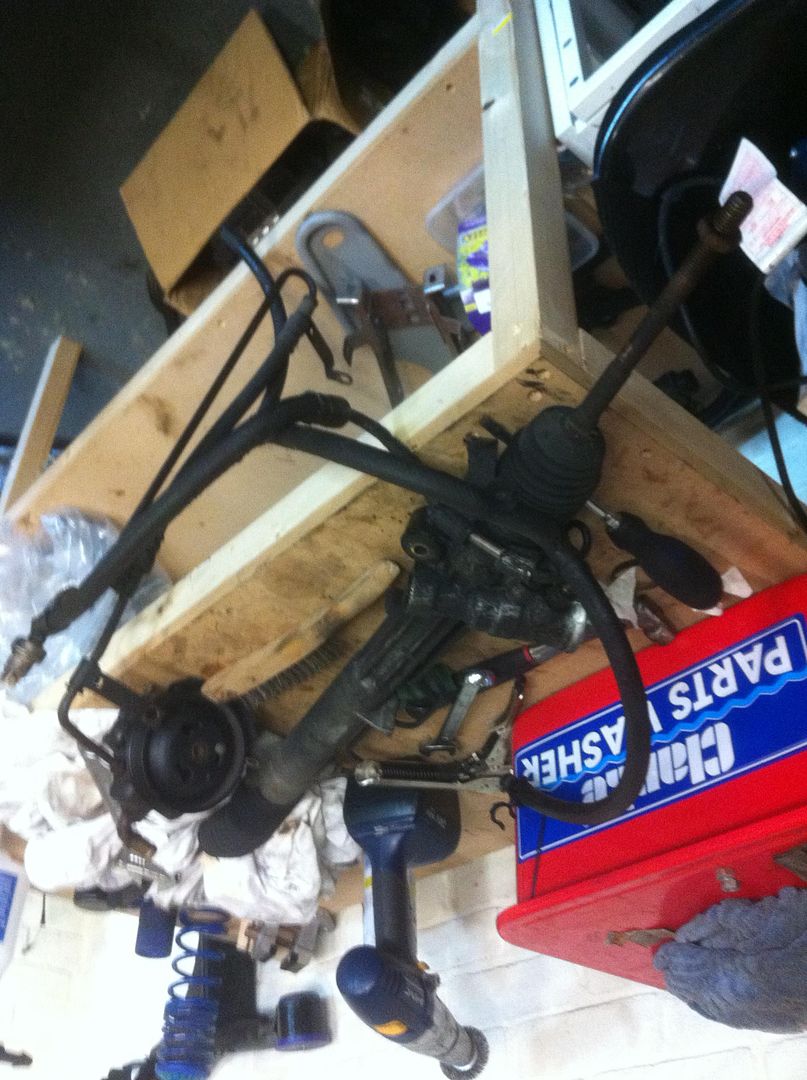
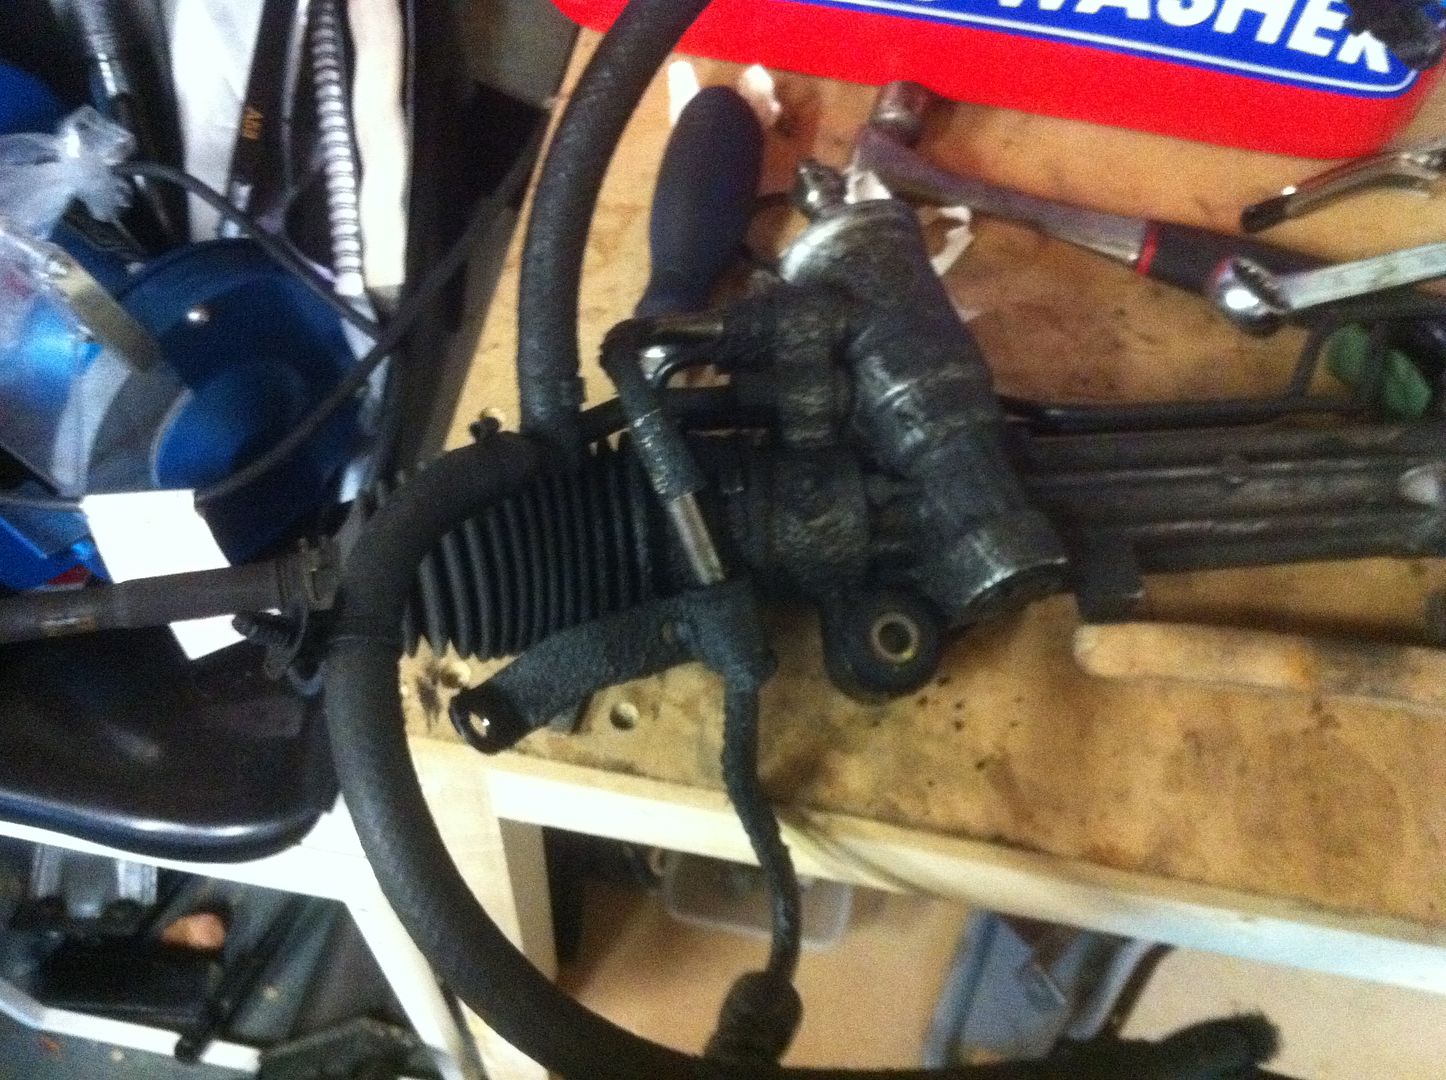
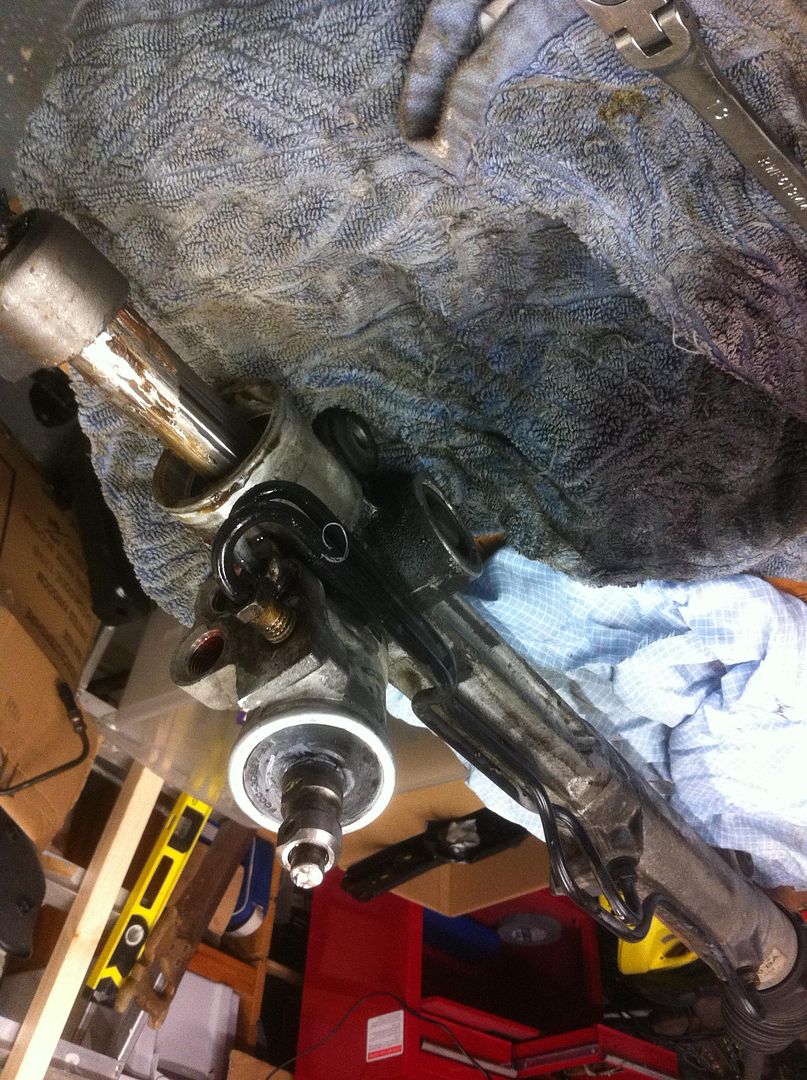

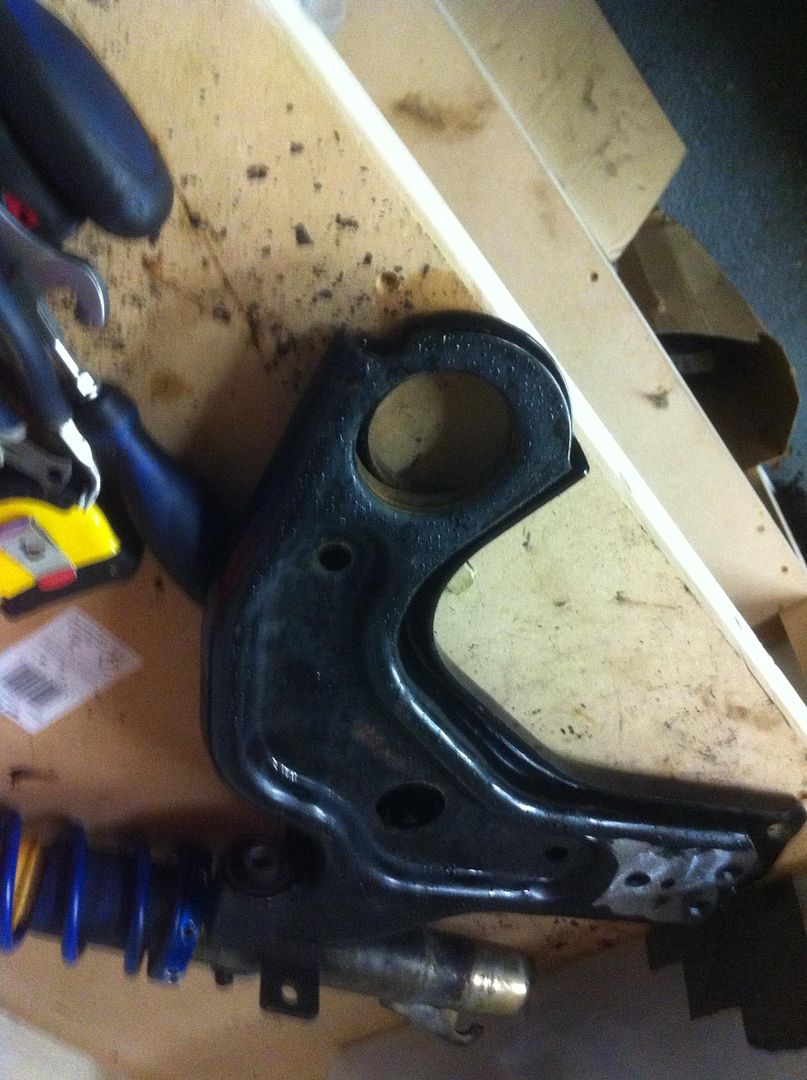
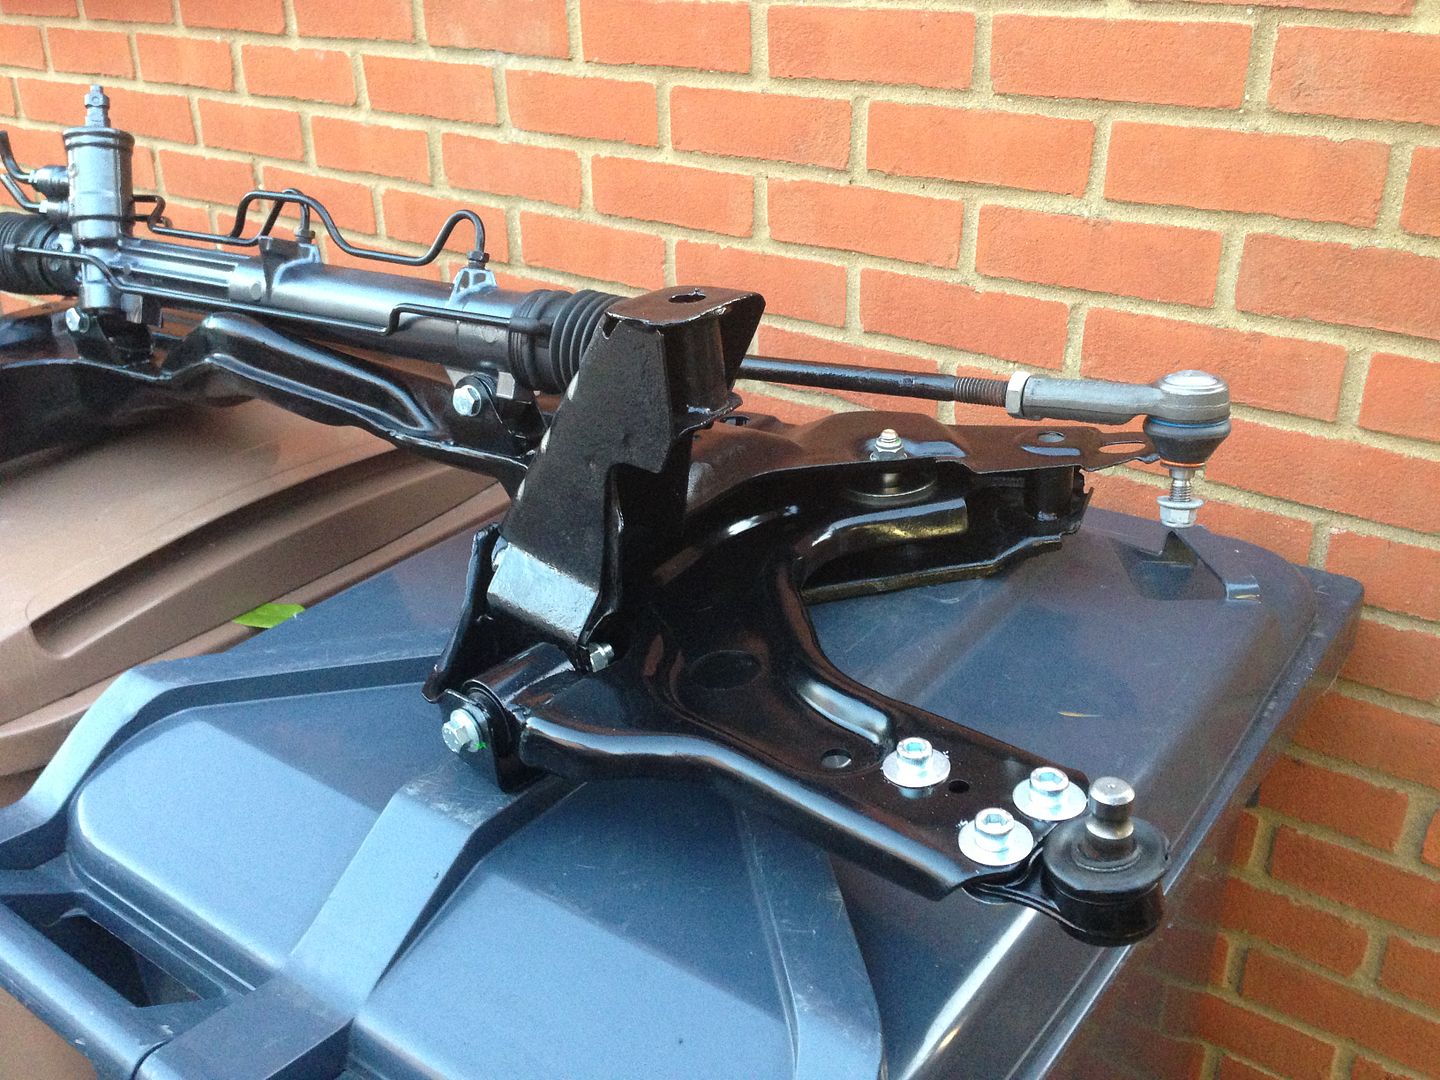
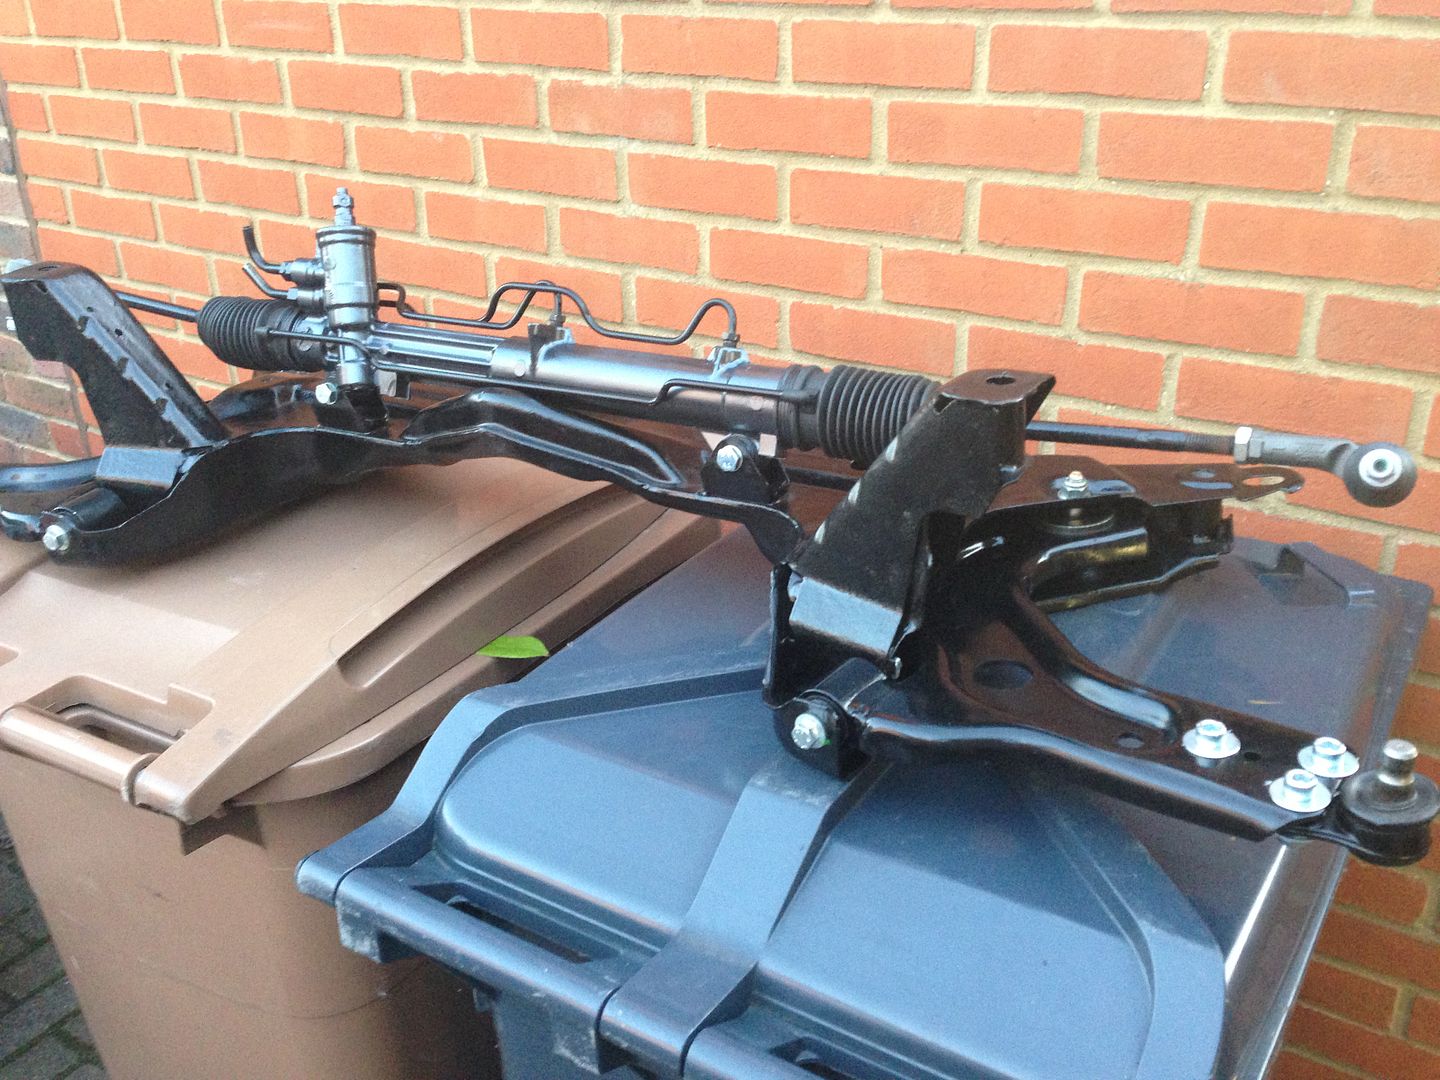


I continued with the preparation of the front sub-frame, steering rack and wishbones. All of the main 120k miles components were kept but all of the bolts were replaced with new ones, competition spec bushes fitted and the wishbones were adapted to give camber adjustment. There is a non power steering rack available for this car but it has a lot more turns lock to lock so I'm sealing the standard hydraulic steering rack with a bit of fluid in it for lubrication and running that without a pump.


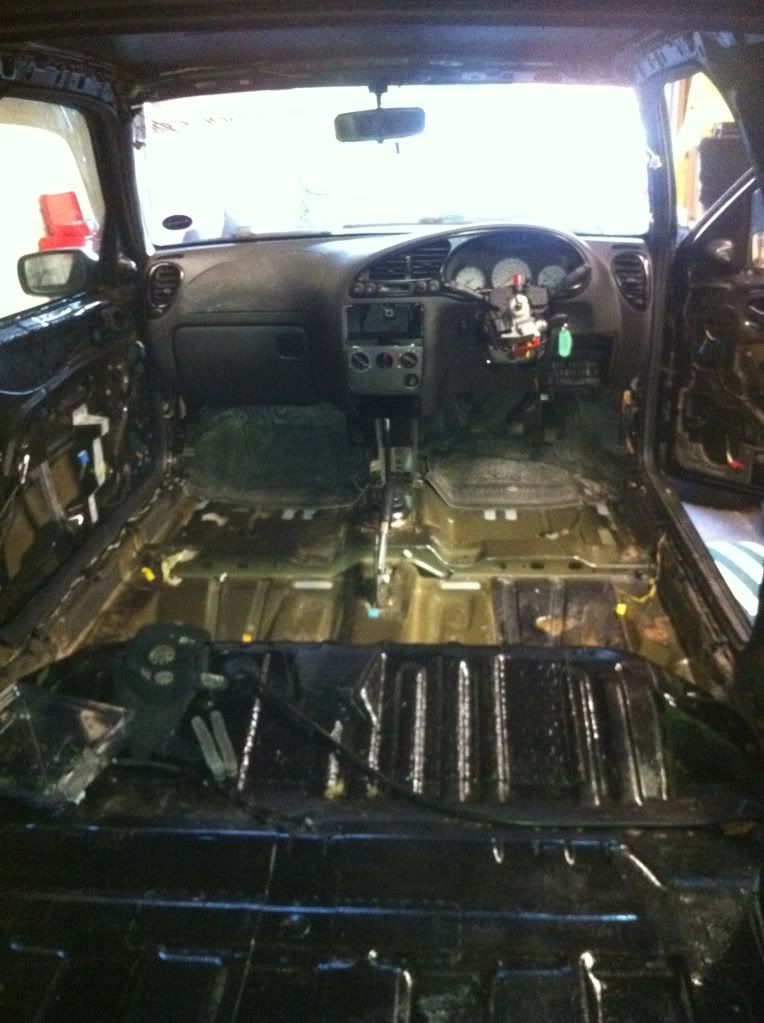
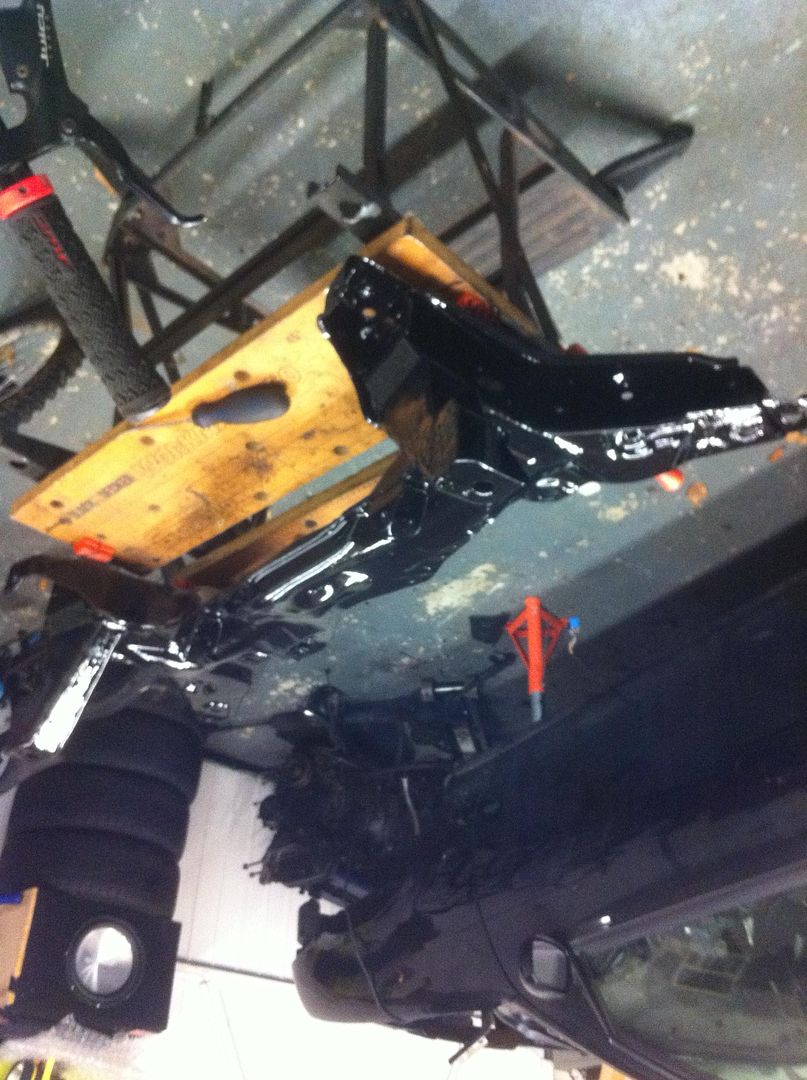
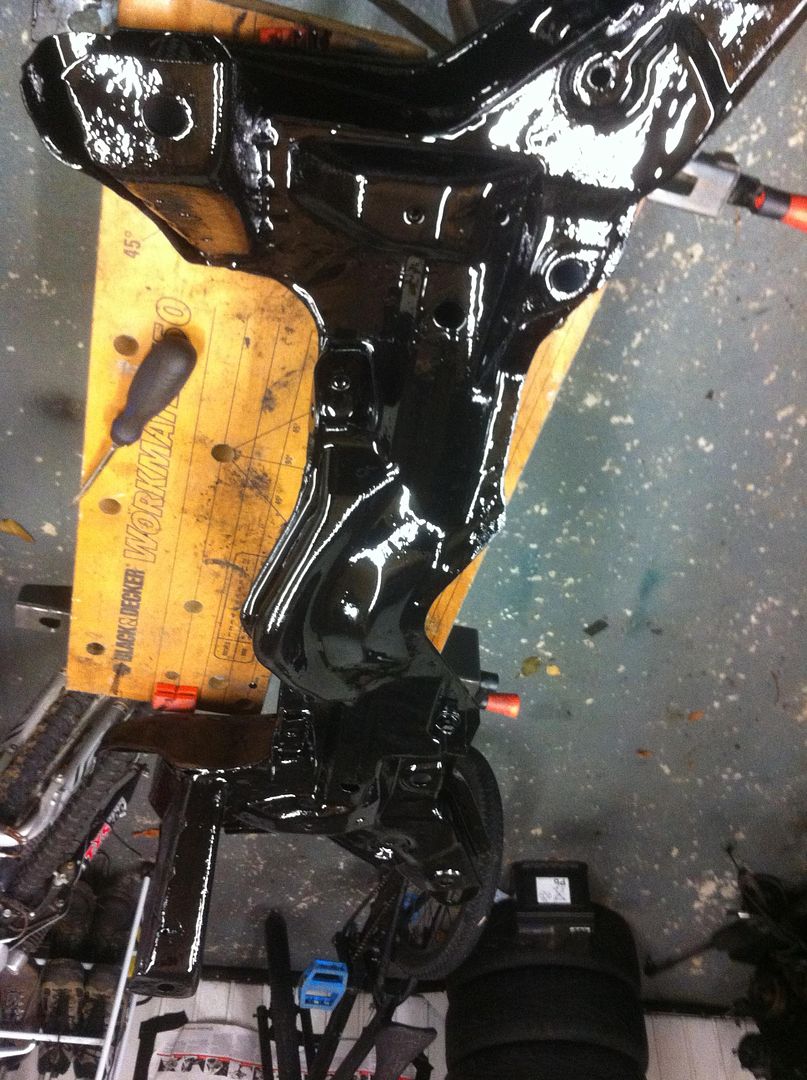
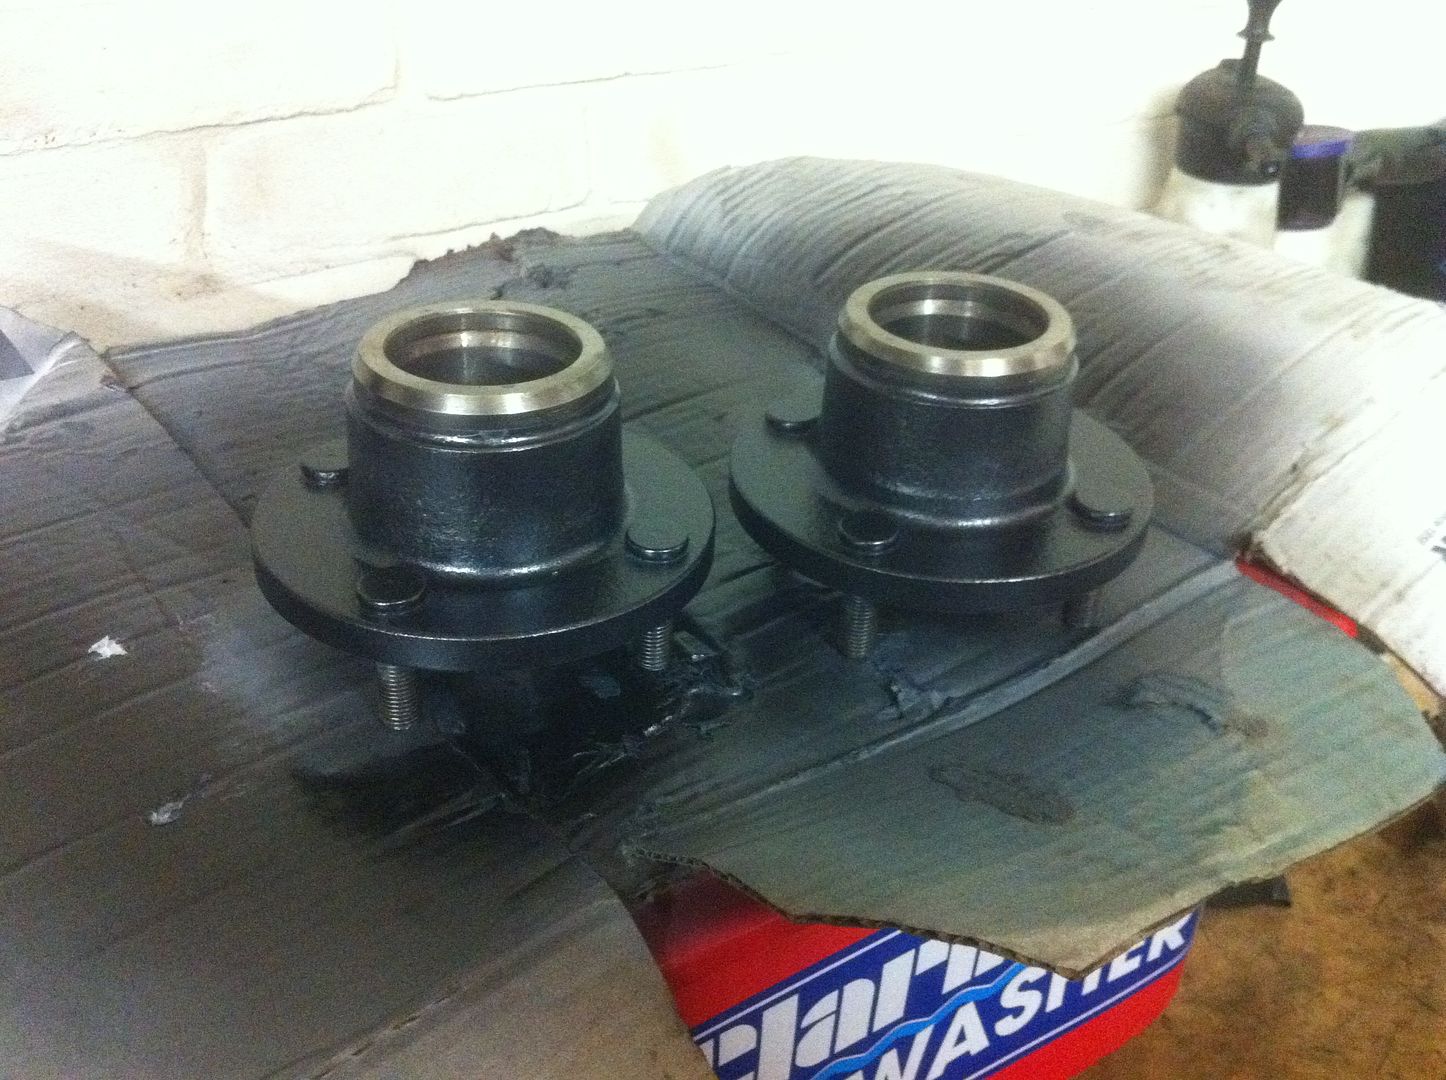
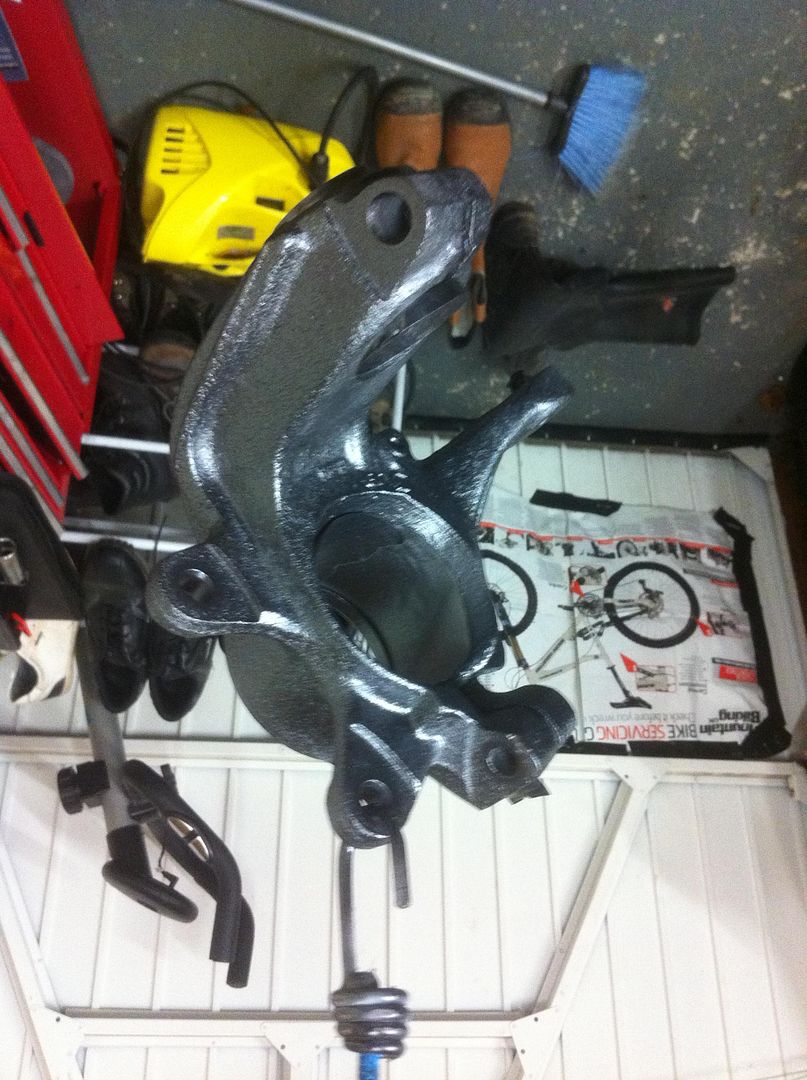
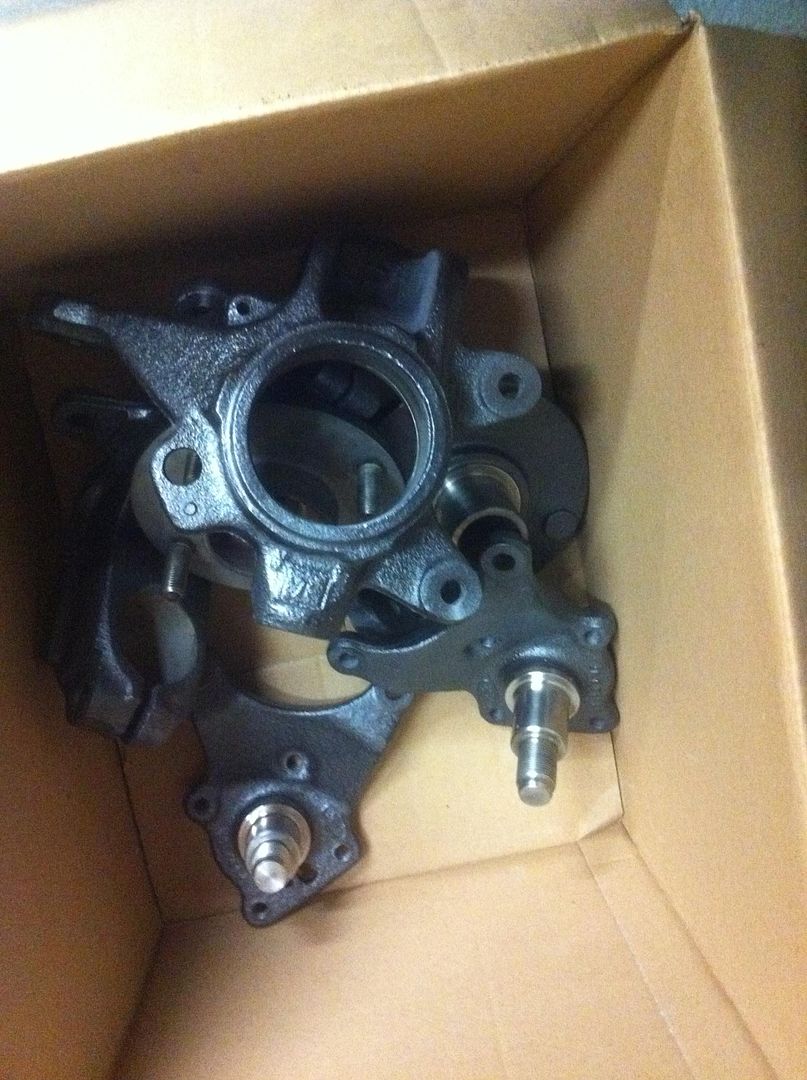
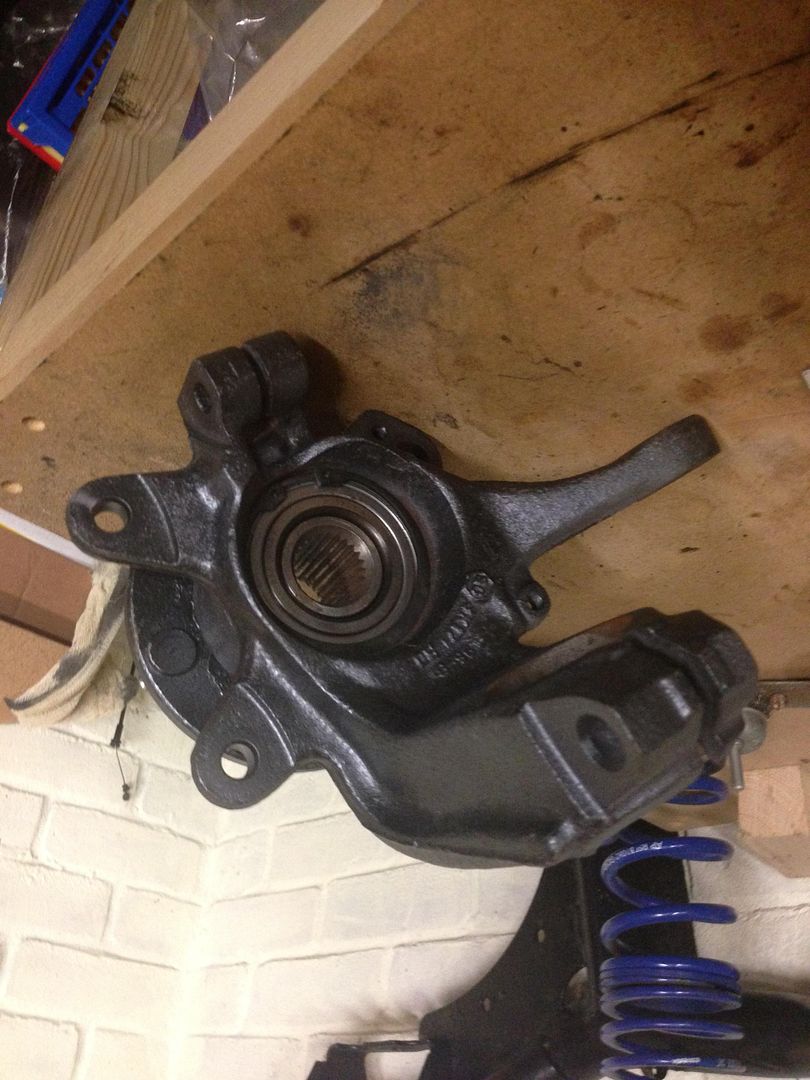
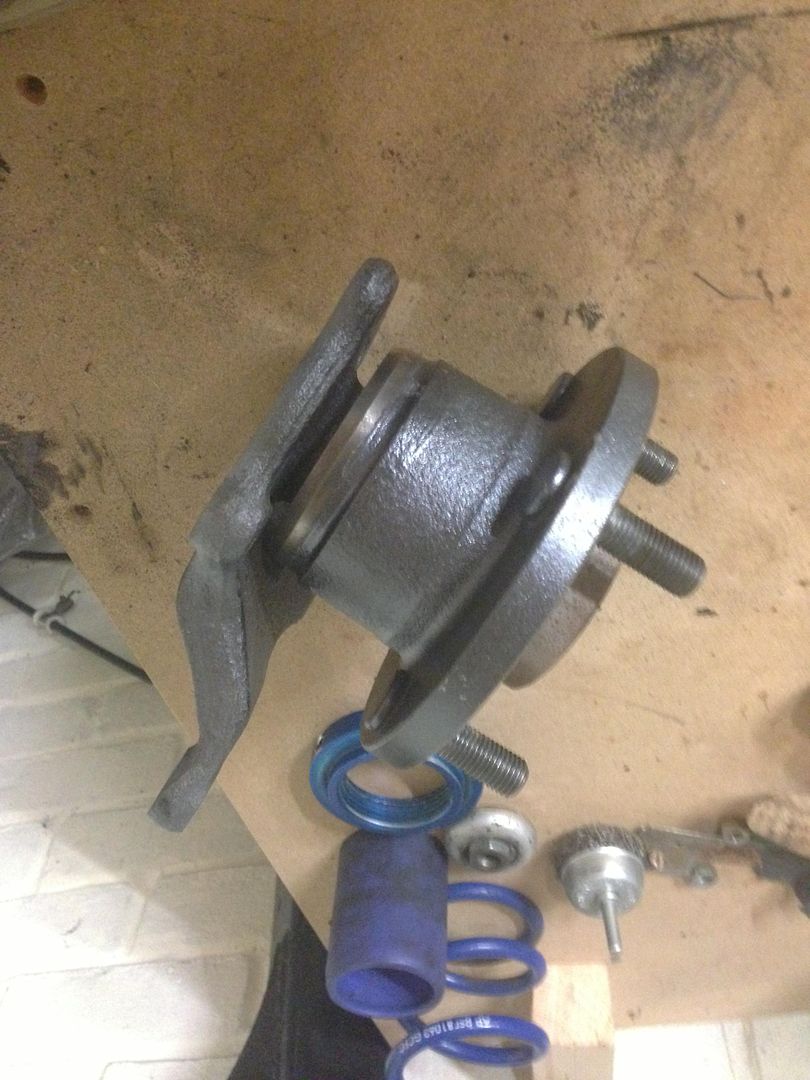
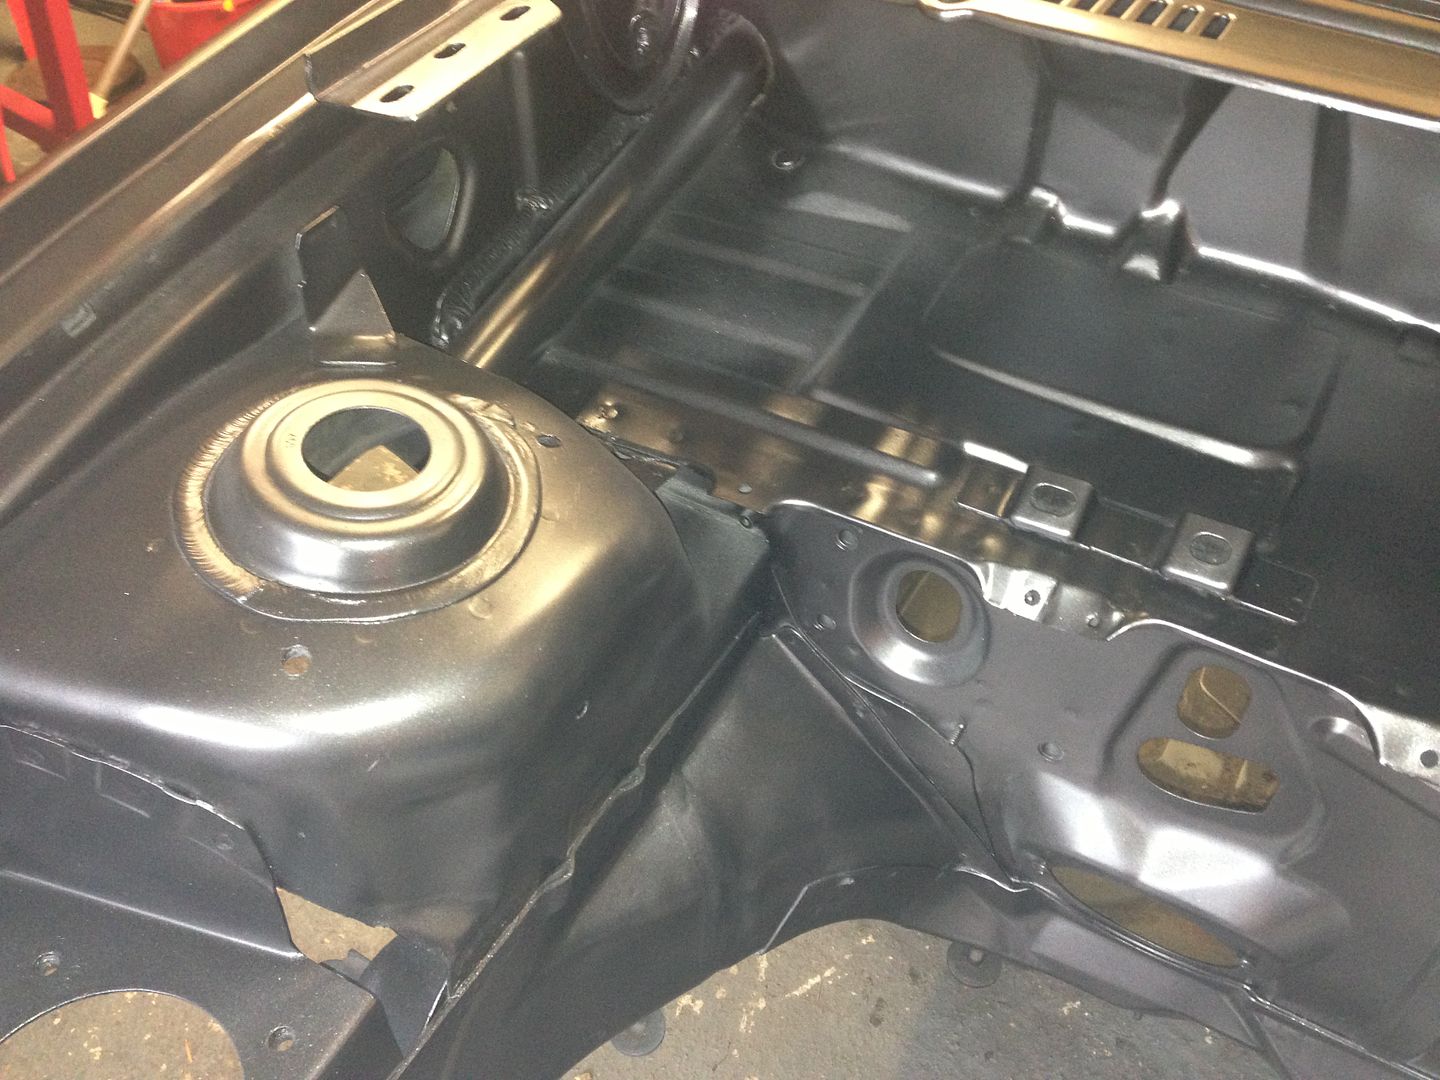
The up rights and hubs were re-furbed and fitted with new standard bearings. I get asked a lot about the colour it's BMW sparkling graphite from Halfords.
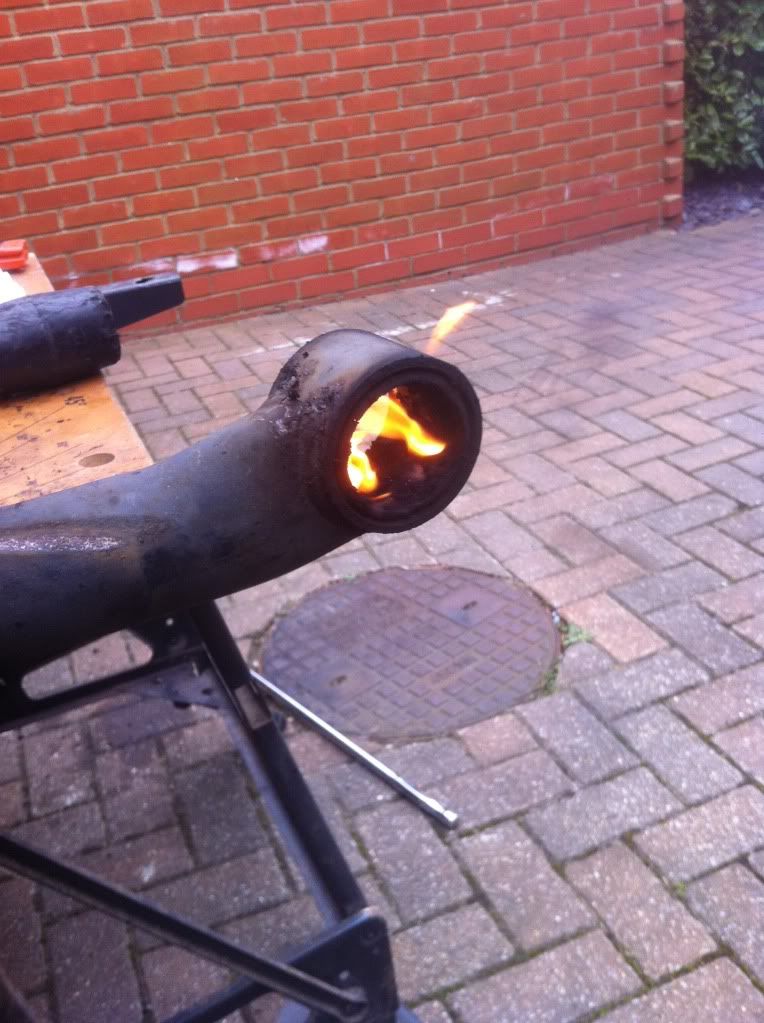
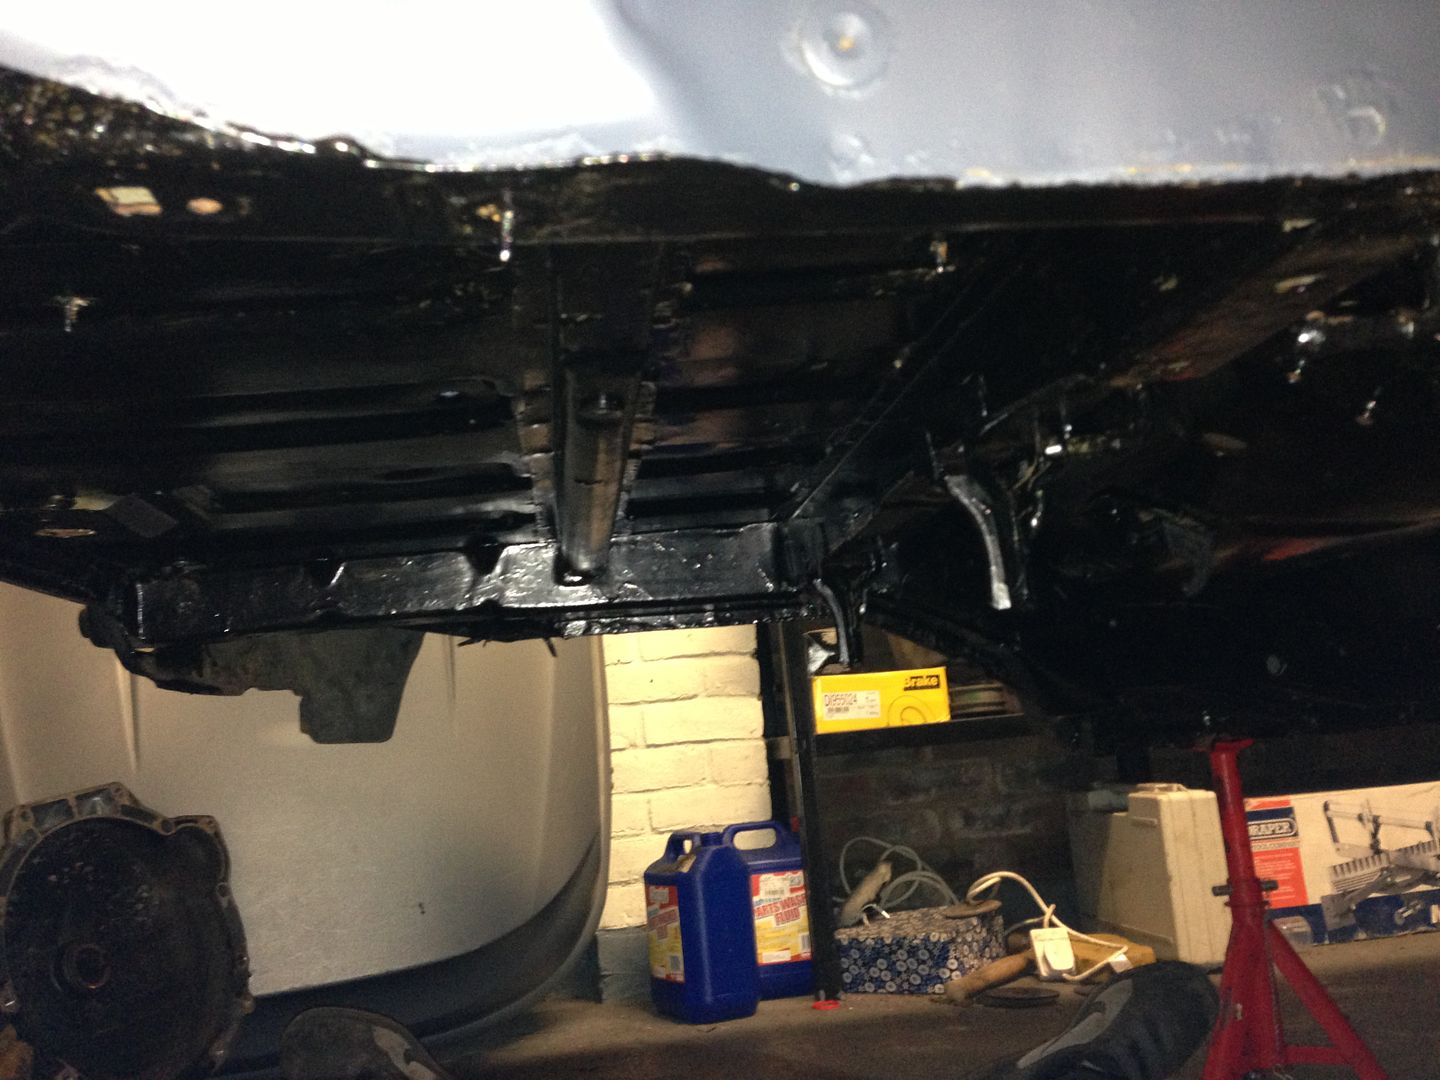
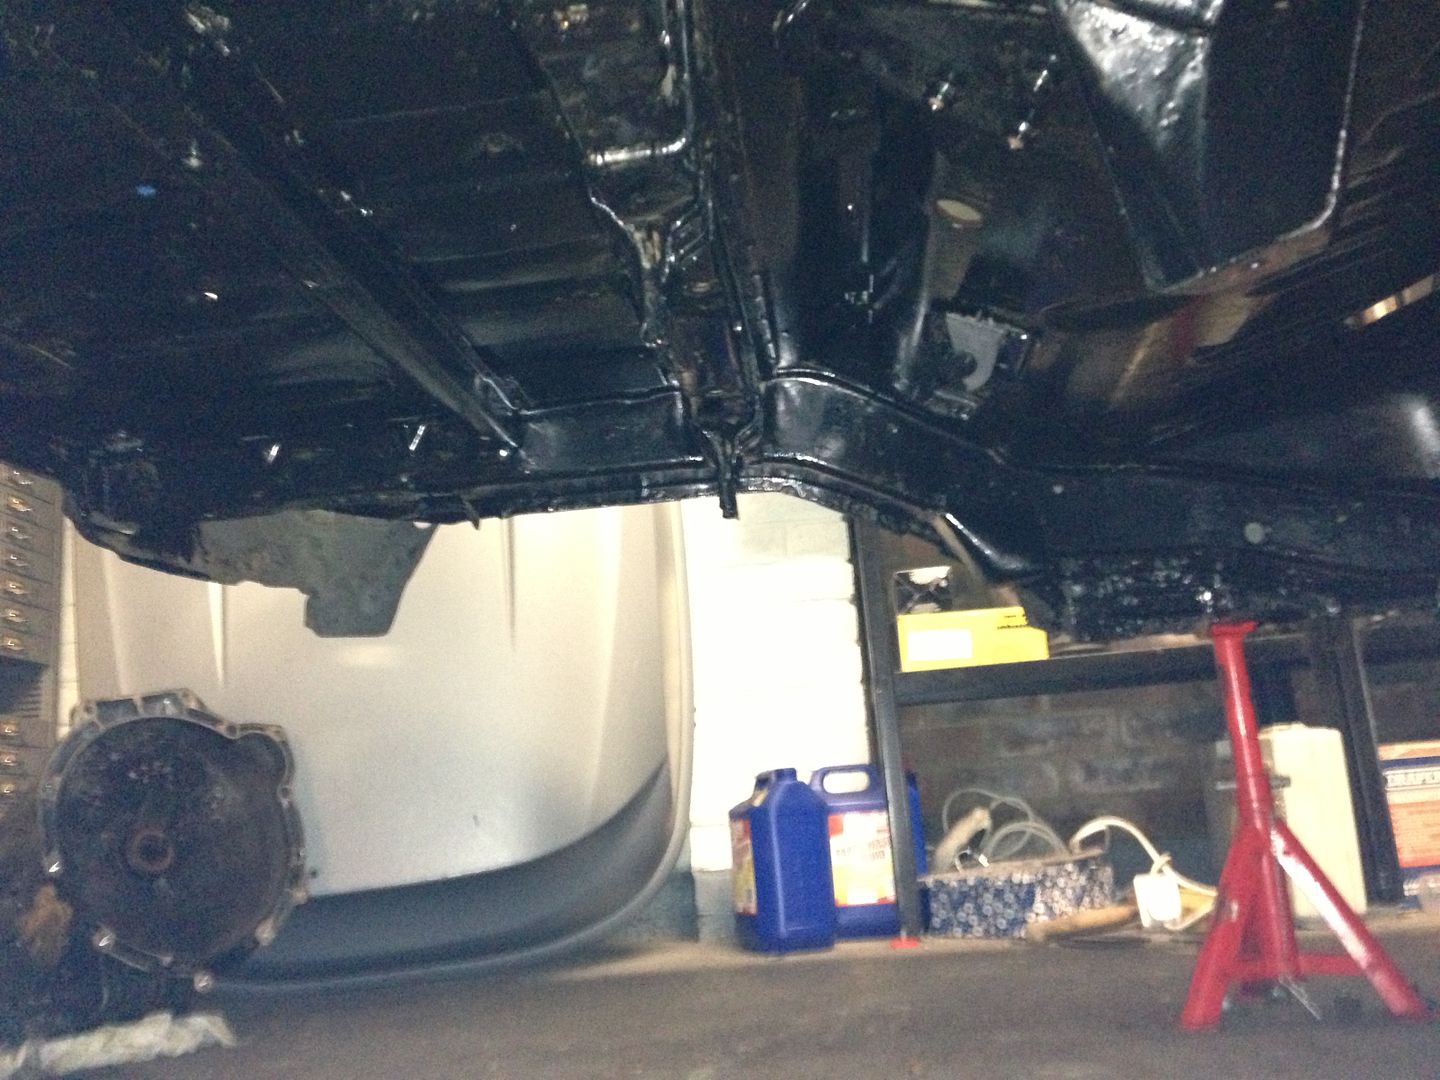
With it being a 10+ year old Ford rust was present, although not too serious yet, so a weekend was spent on my back with rust killer and wire brushes treating the underside and the arches before a coat of black hammerite was applied to seal it.
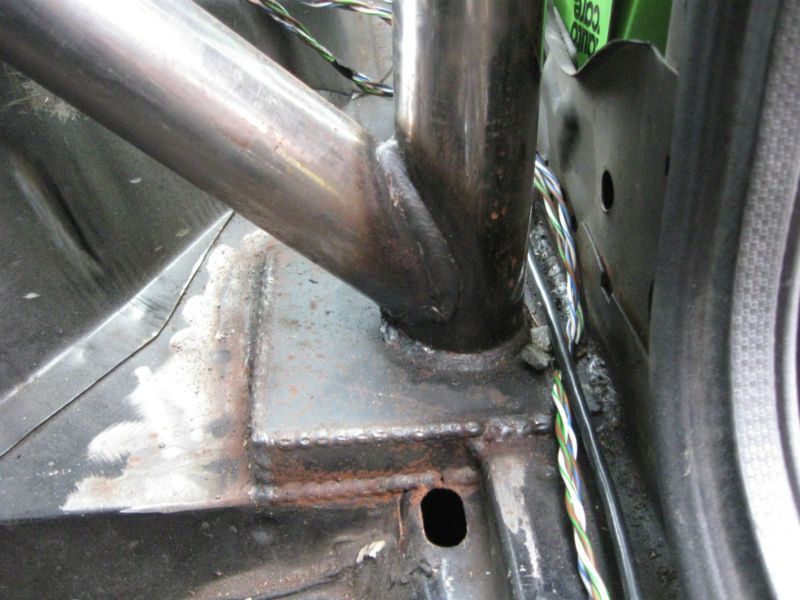
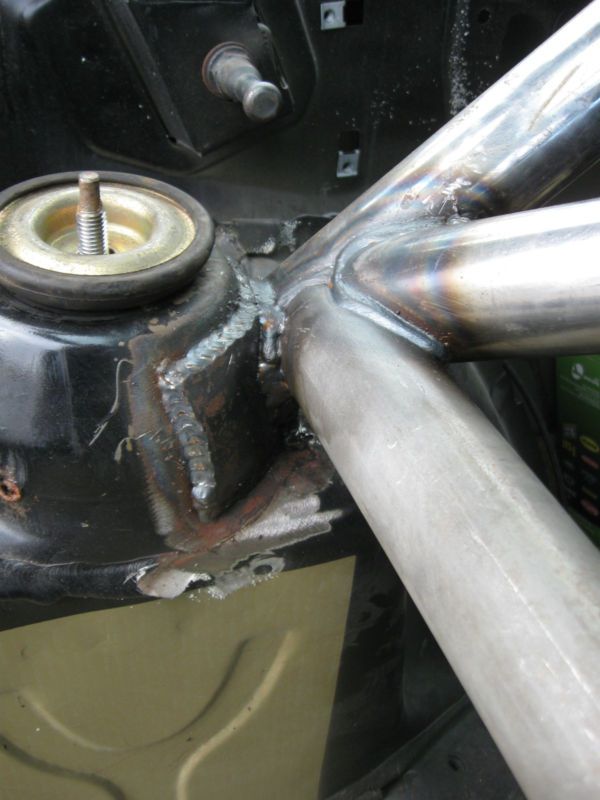
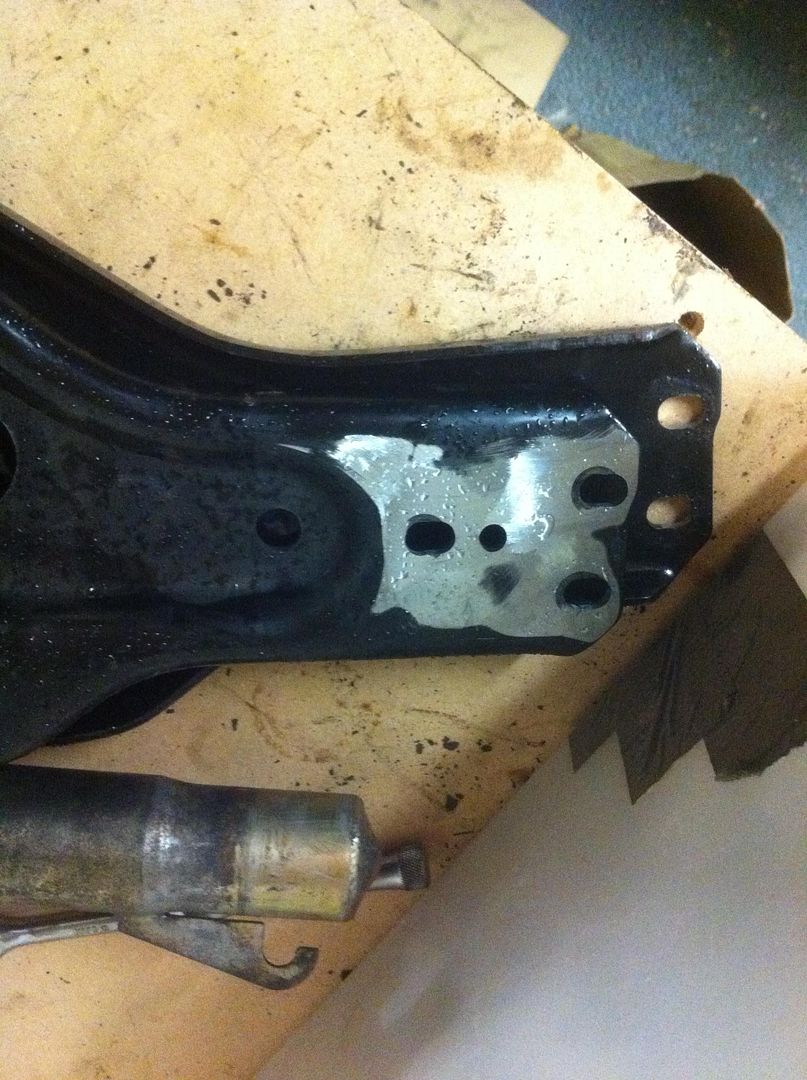
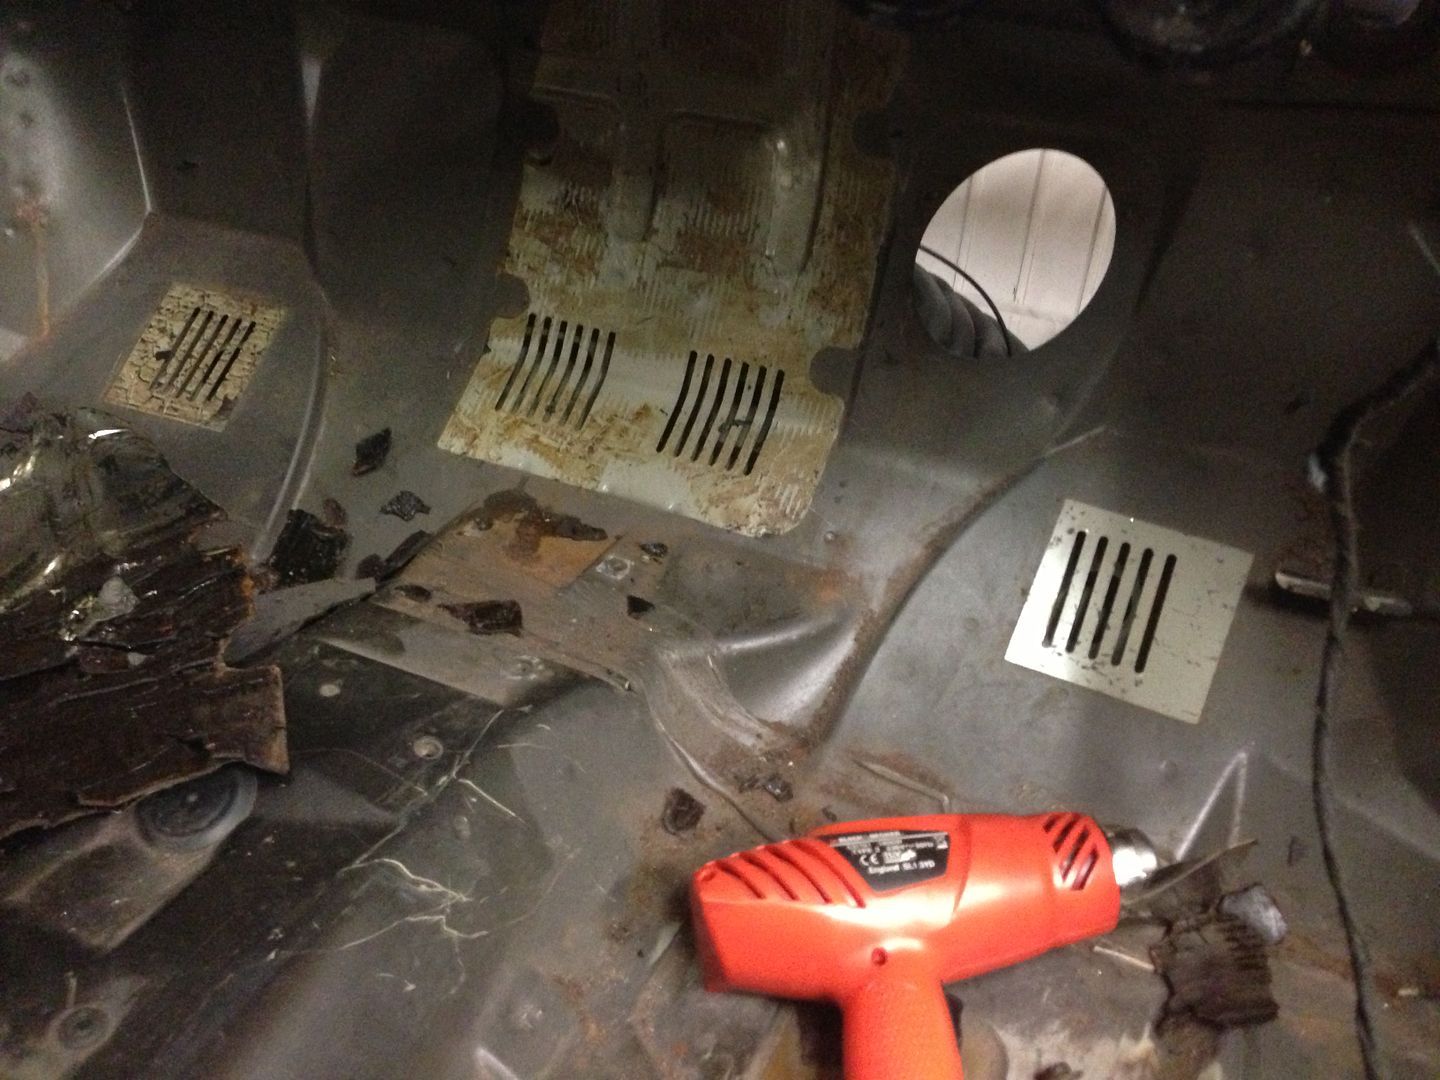
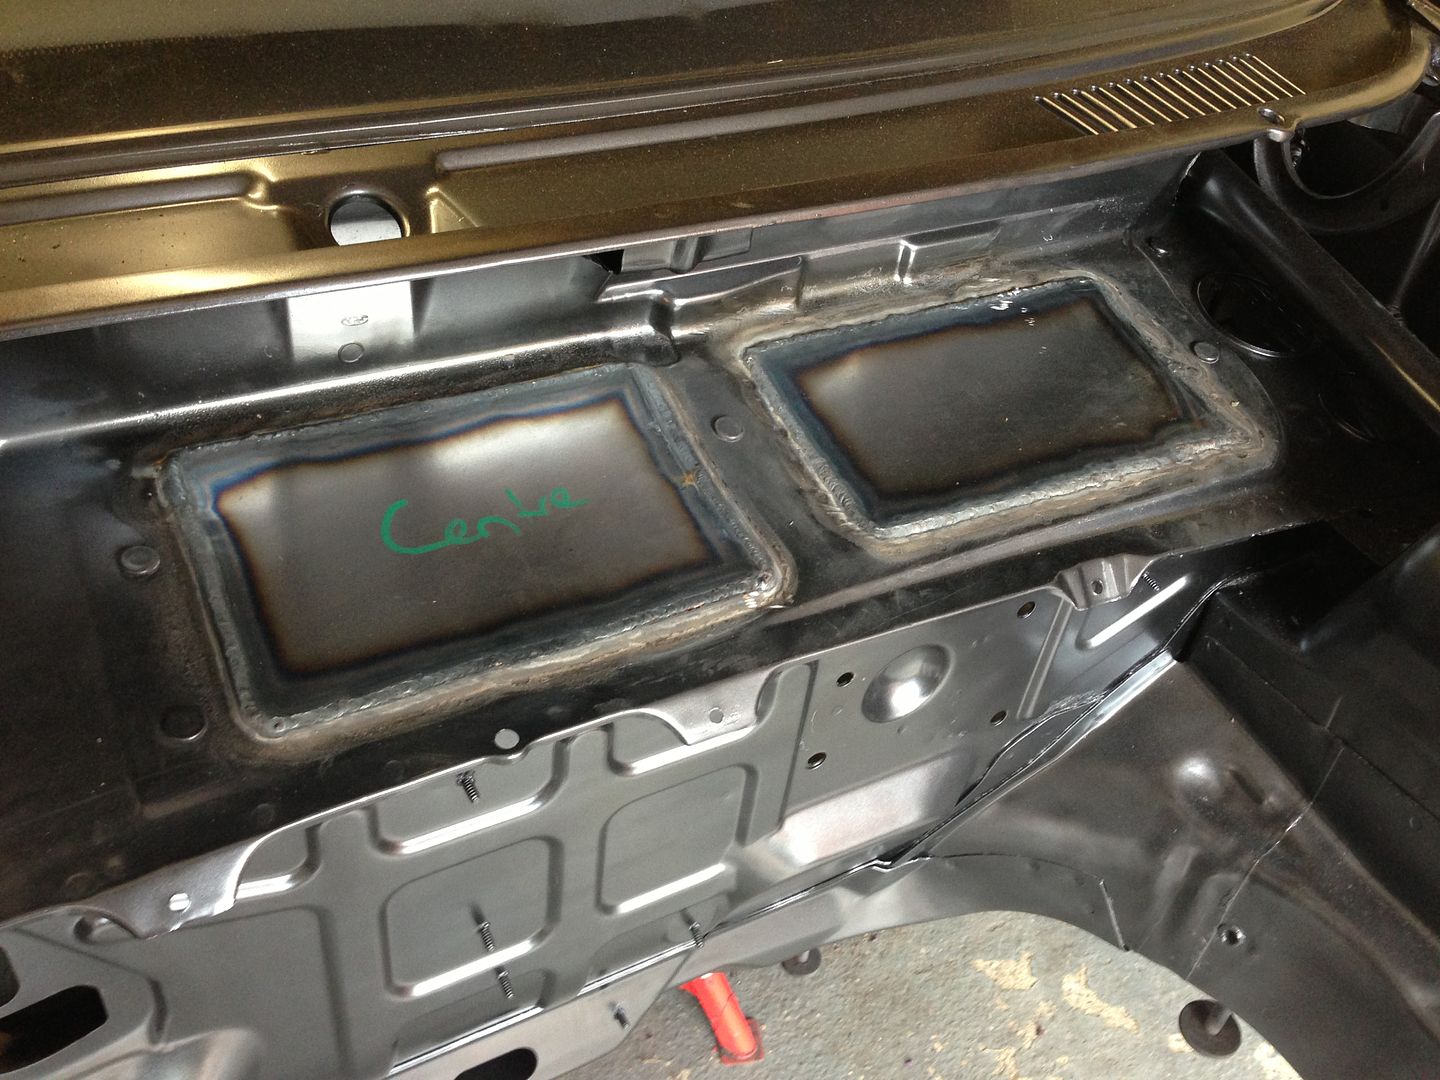
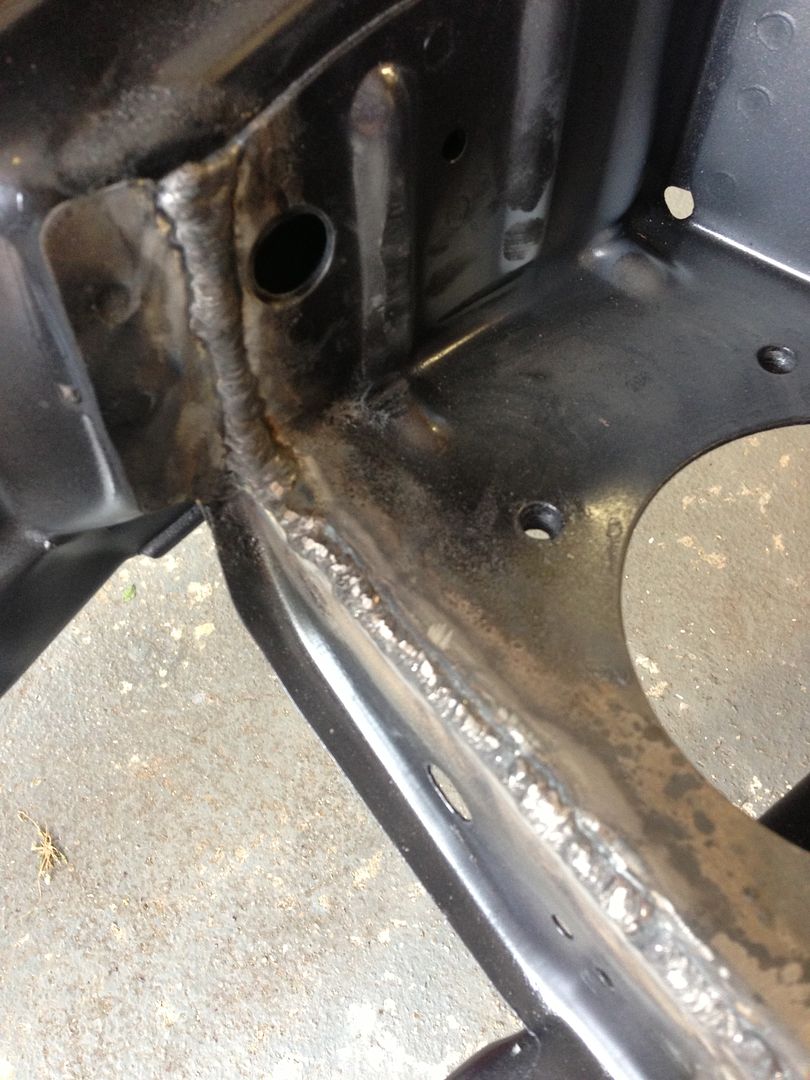
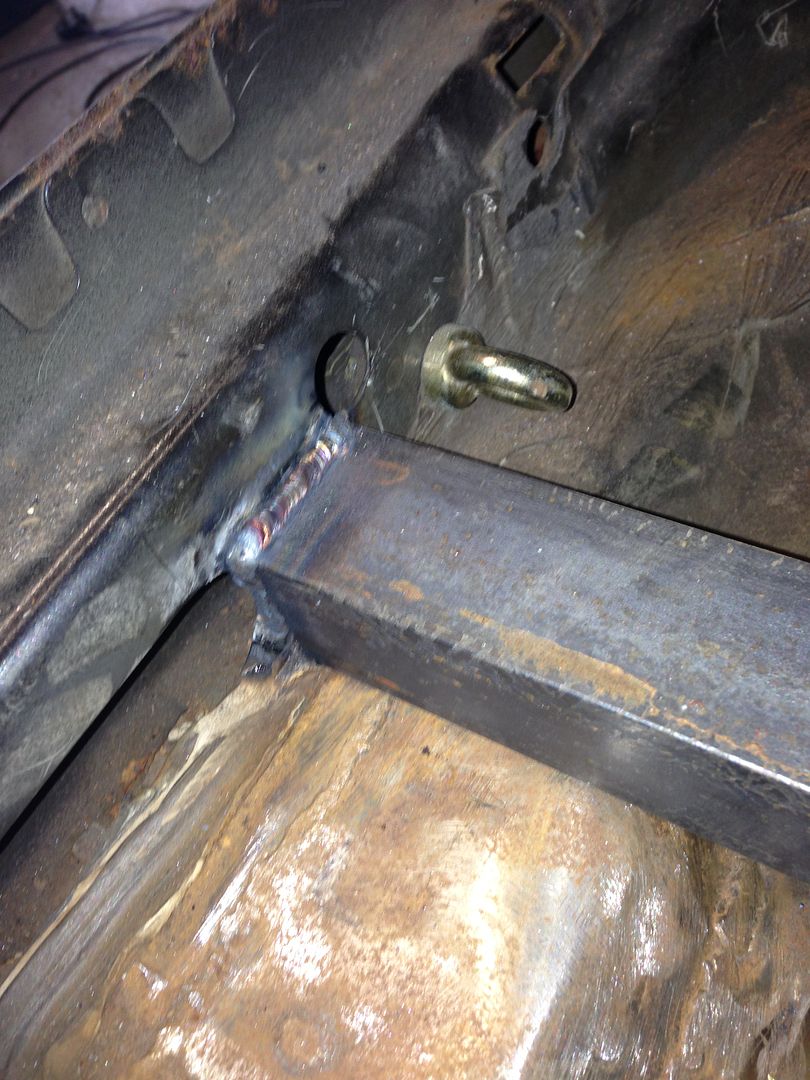
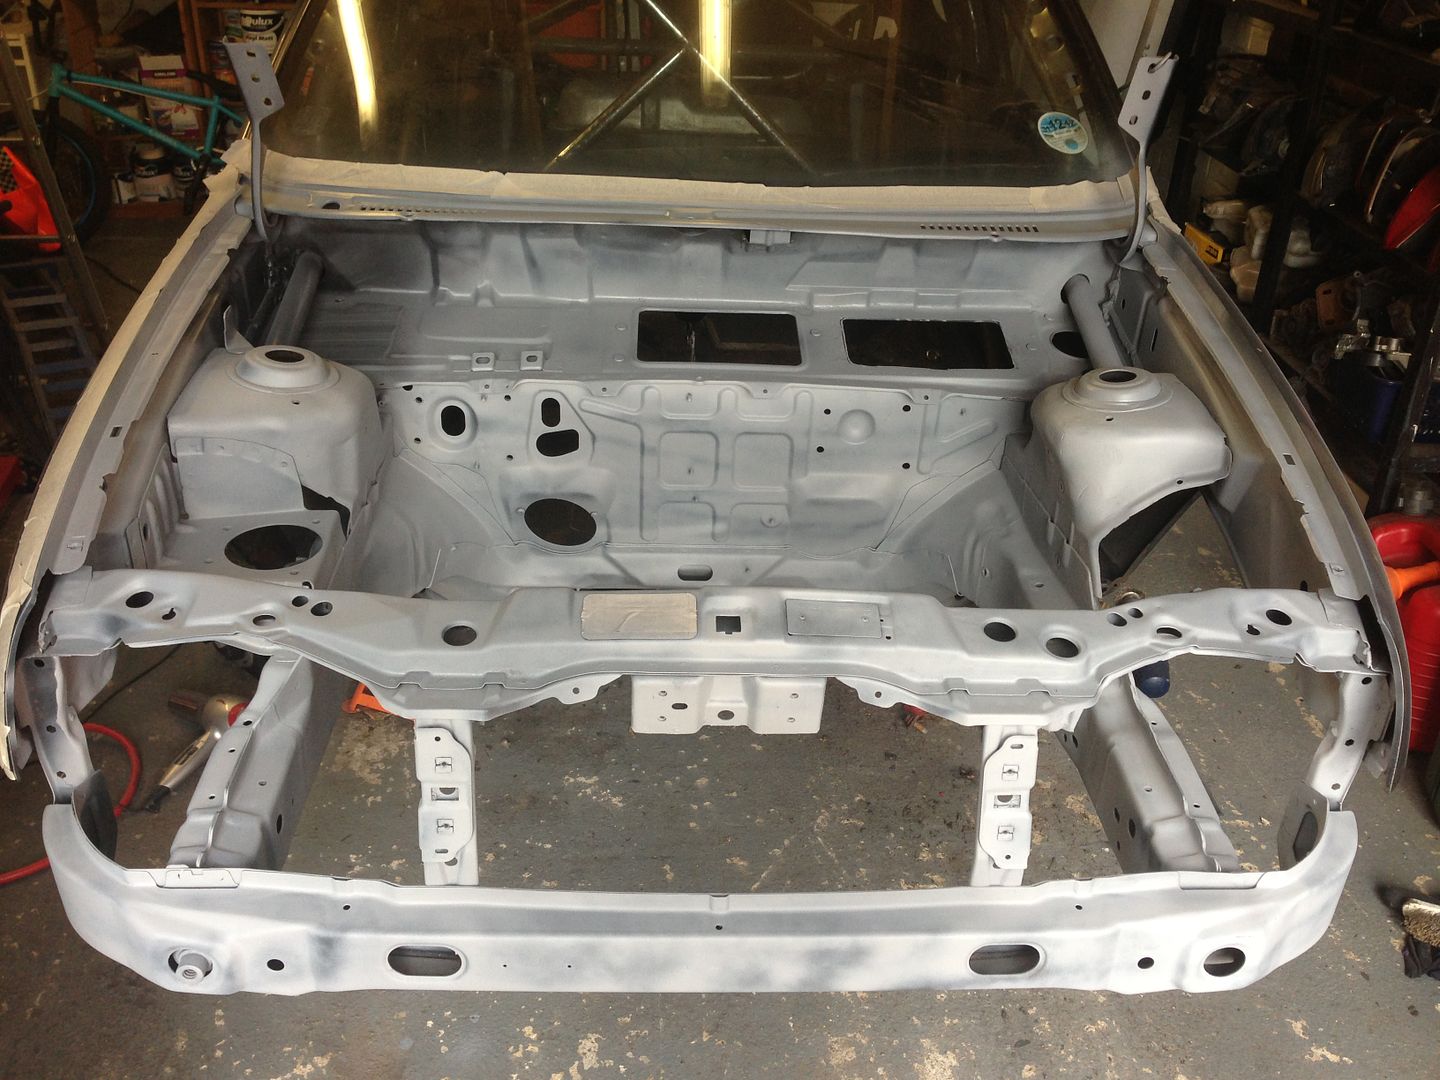
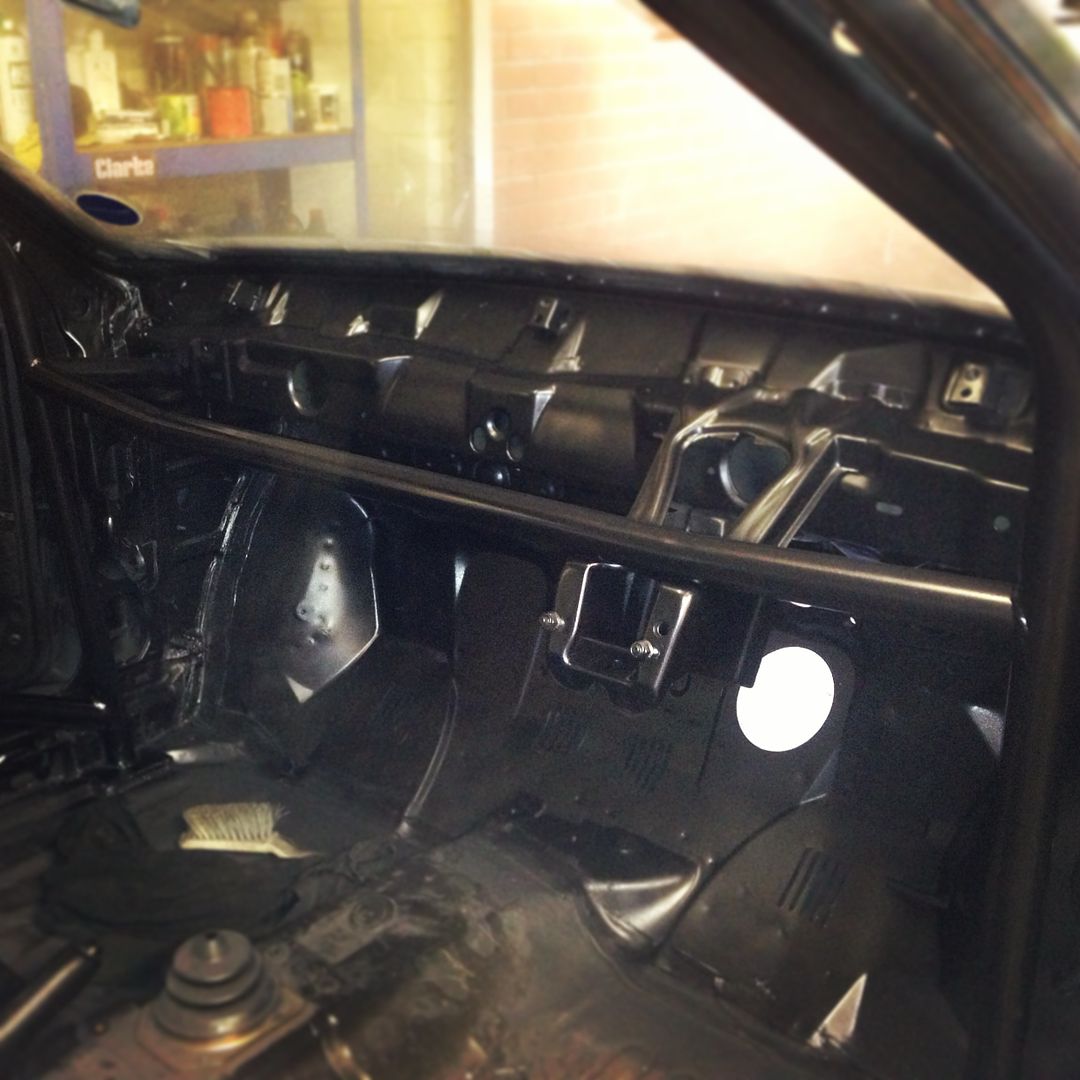
There was still some preparation to do to the un-painted interior and to the engine bay. Unfortunately I can't weld but one of my dad's welders was looking to get involved in some car prep on the side so helped me out one of afternoon, performing some lovely tig welds to seal up the front bulkhead, an engine mount and install some seat mounts in the car. This was all then prepped for paint and the engine bay and roll cage was sprayed the sparkling graphite gray from before. I was looking at quotes close to 4 figures to have t professionally painted, my budget just can't stretch to that so I'm extra happy with the finish I have achieved with 60 quids worth of rattle cans!


With it being a 10+ year old Ford rust was present, although not too serious yet, so a weekend was spent on my back with rust killer and wire brushes treating the underside and the arches before a coat of black hammerite was applied to seal it.


There was still some preparation to do to the un-painted interior and to the engine bay. Unfortunately I can't weld but one of my dad's welders was looking to get involved in some car prep on the side so helped me out one of afternoon, performing some lovely tig welds to seal up the front bulkhead, an engine mount and install some seat mounts in the car. This was all then prepped for paint and the engine bay and roll cage was sprayed the sparkling graphite gray from before. I was looking at quotes close to 4 figures to have t professionally painted, my budget just can't stretch to that so I'm extra happy with the finish I have achieved with 60 quids worth of rattle cans!


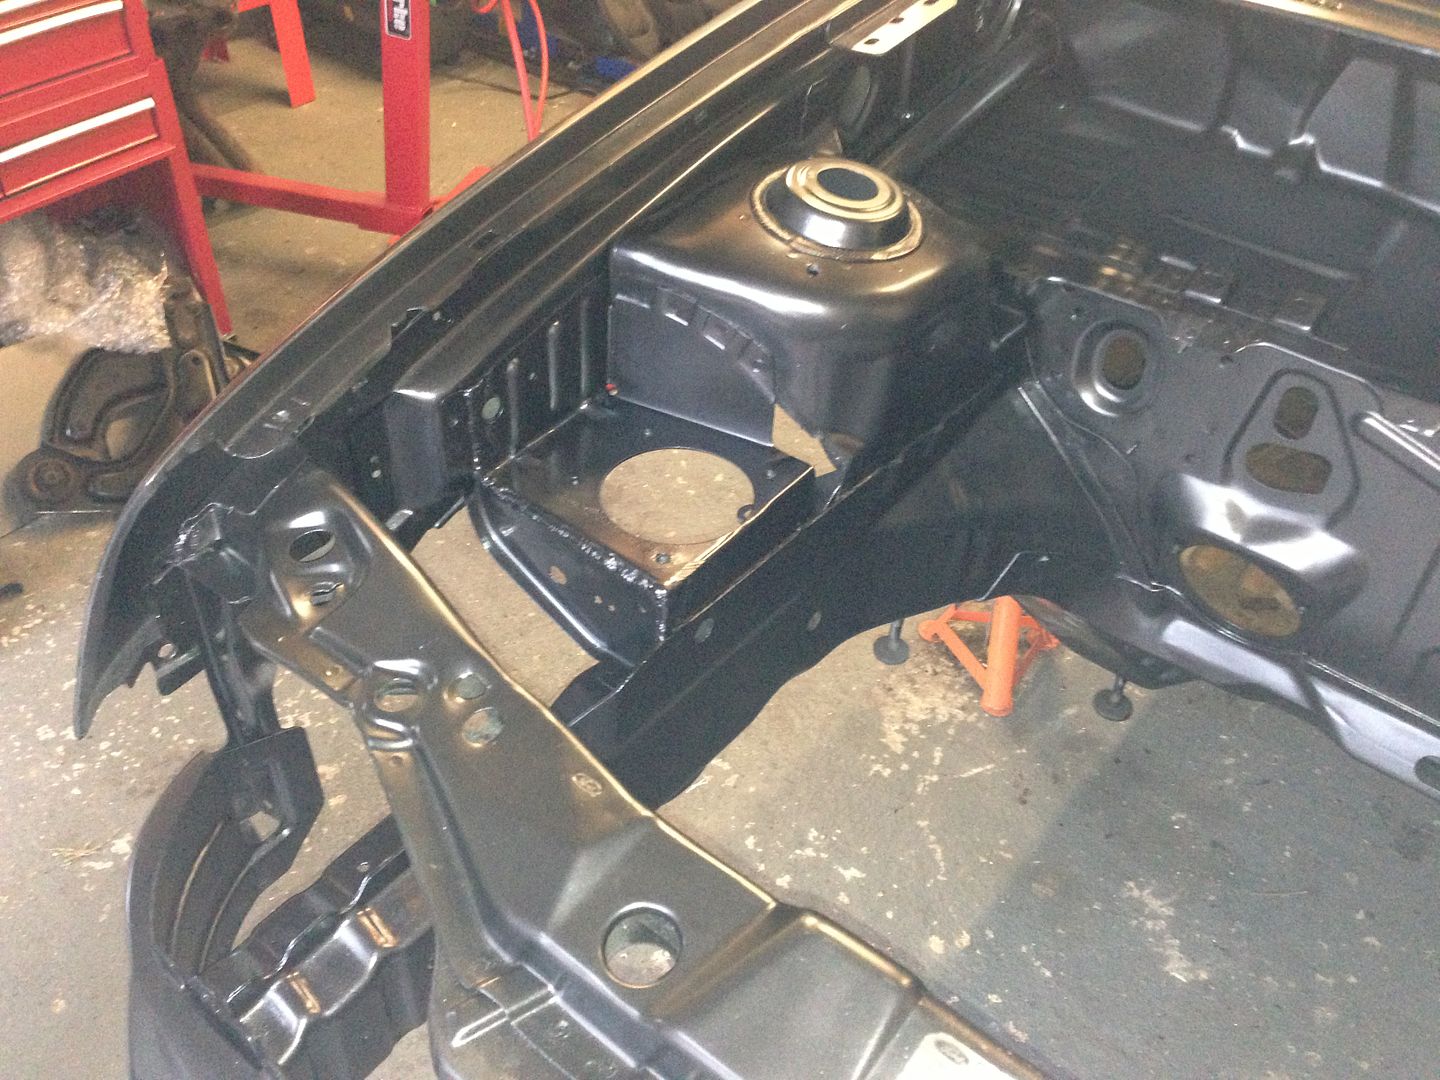
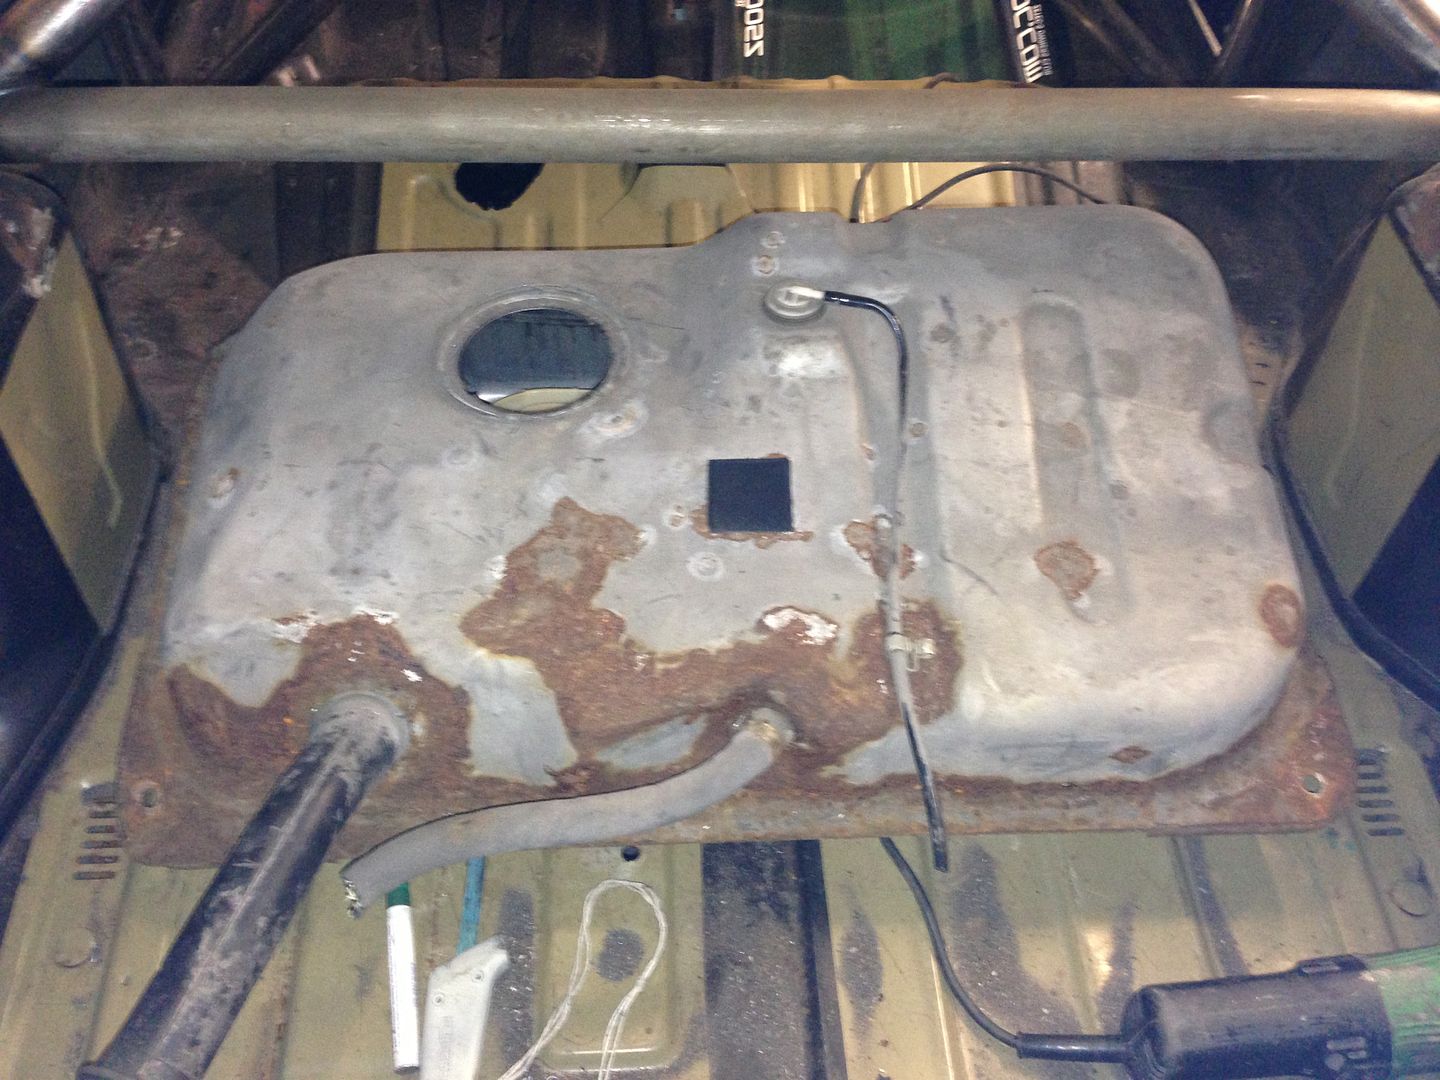
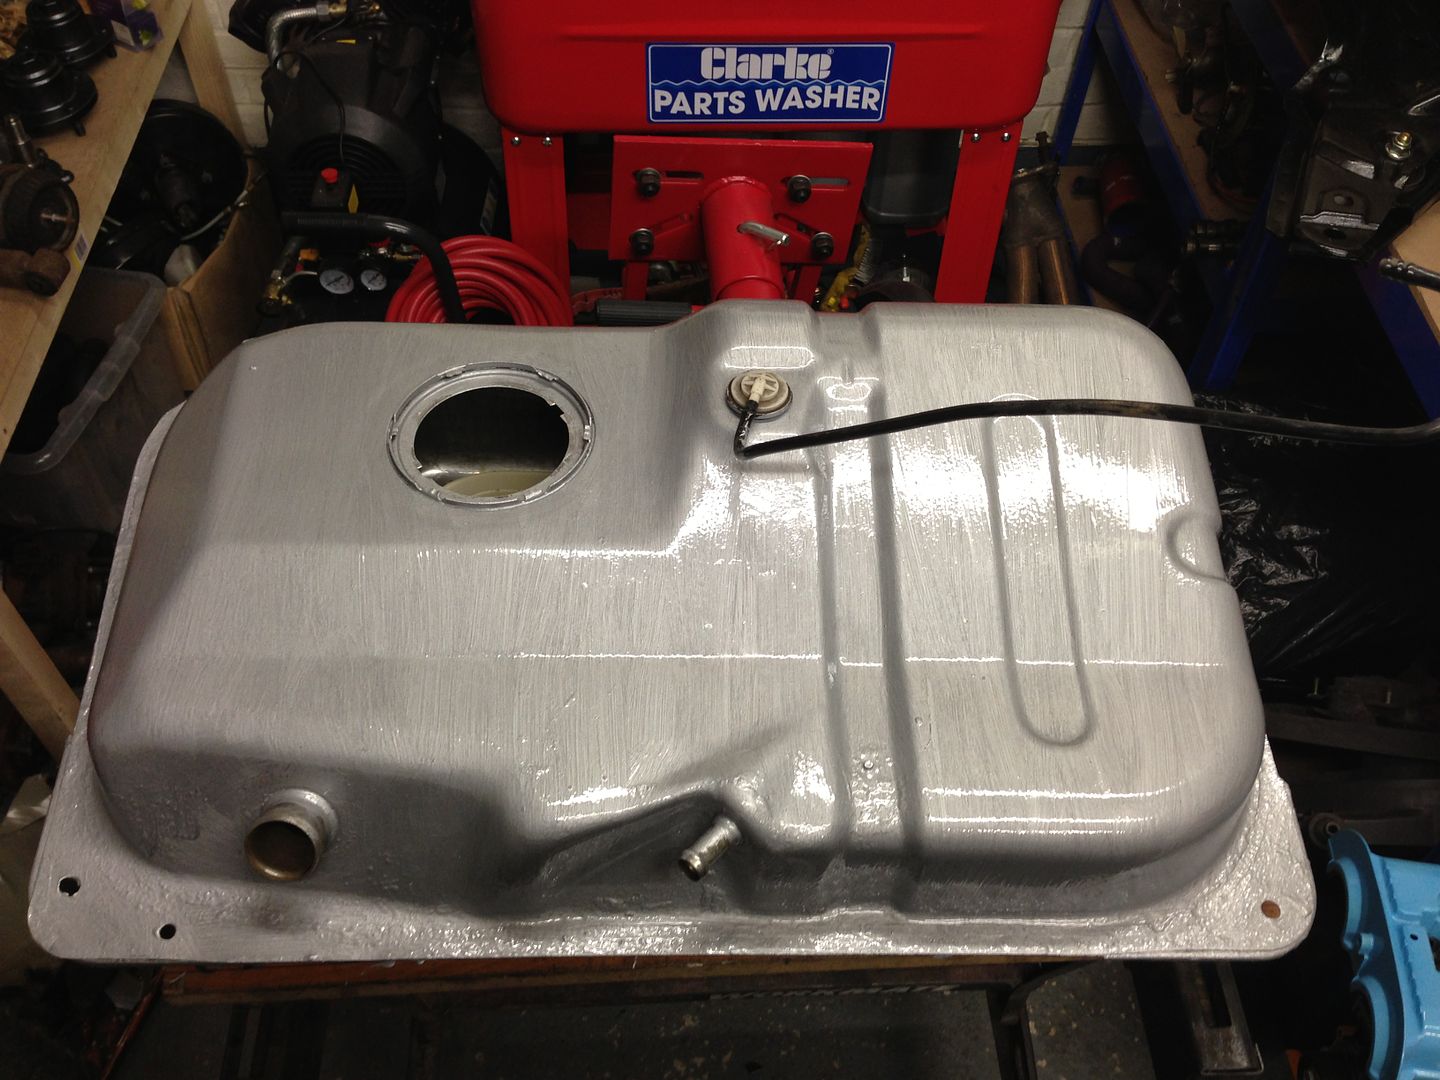
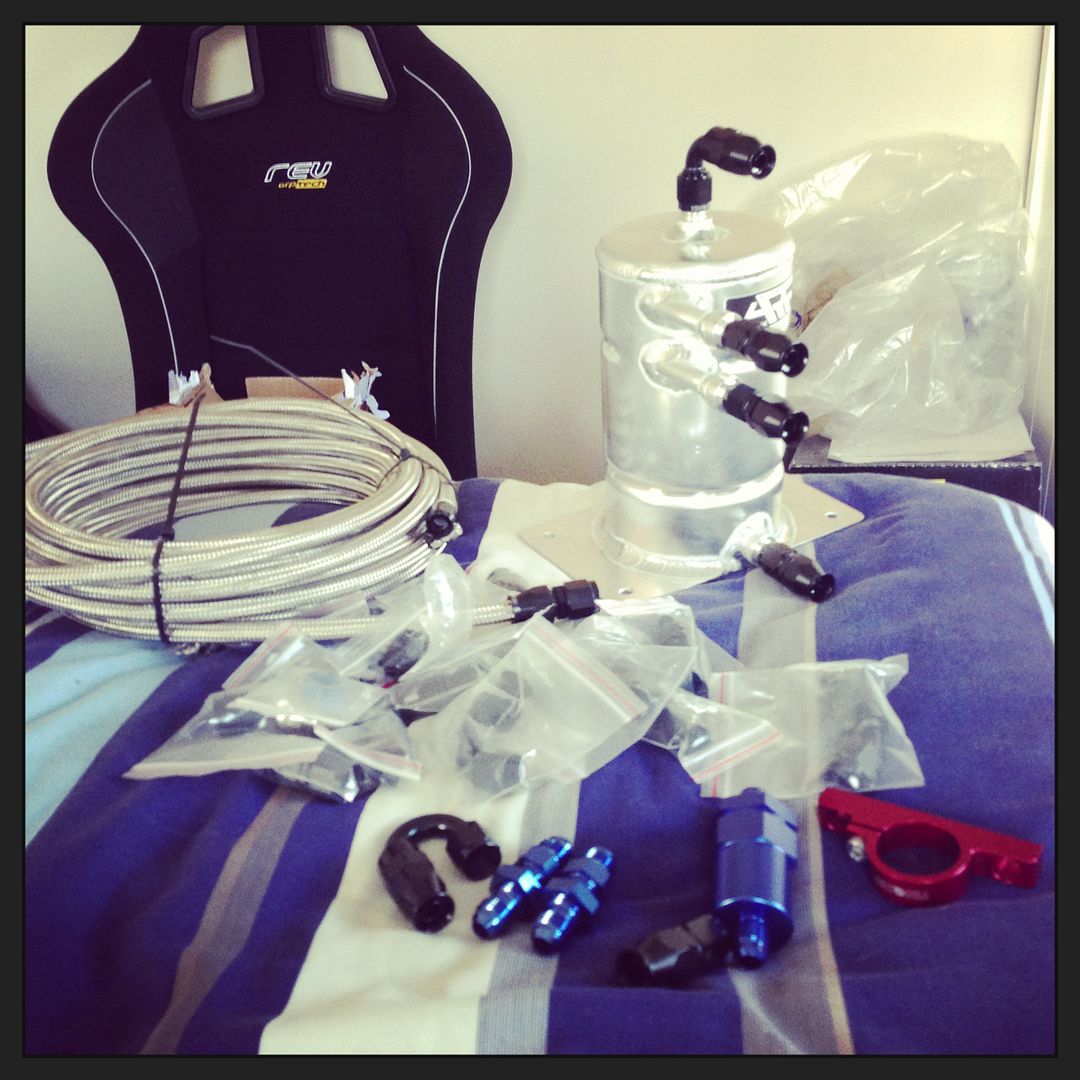
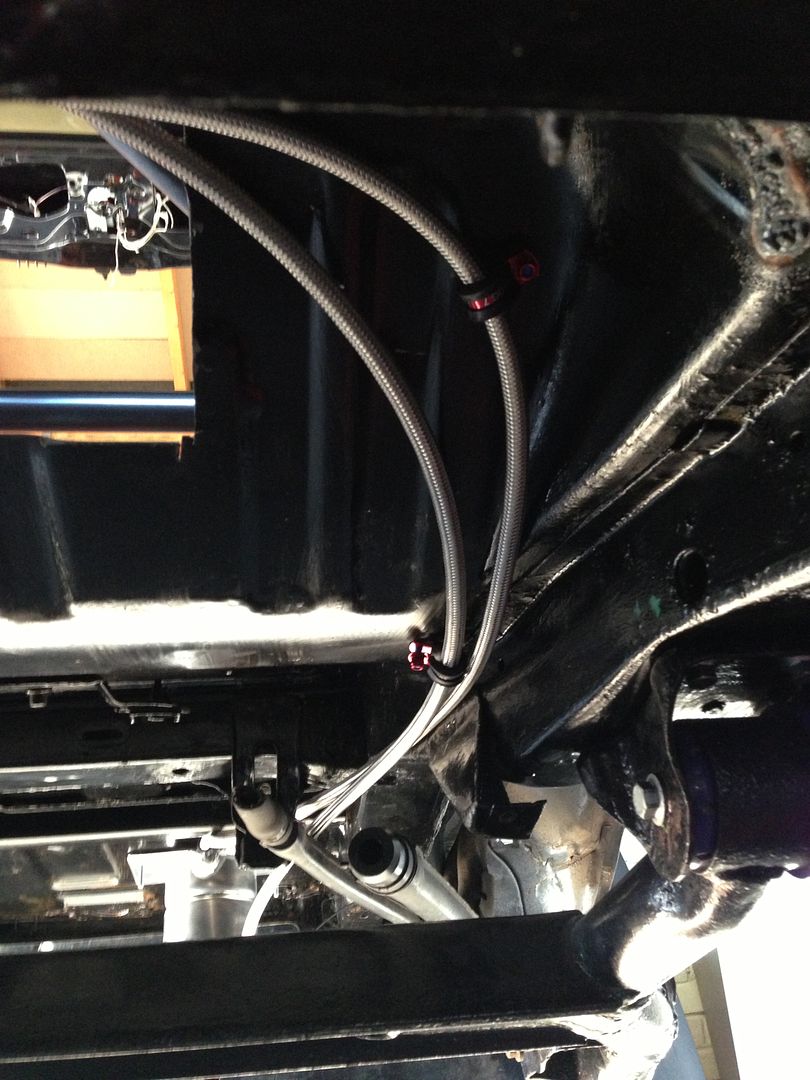
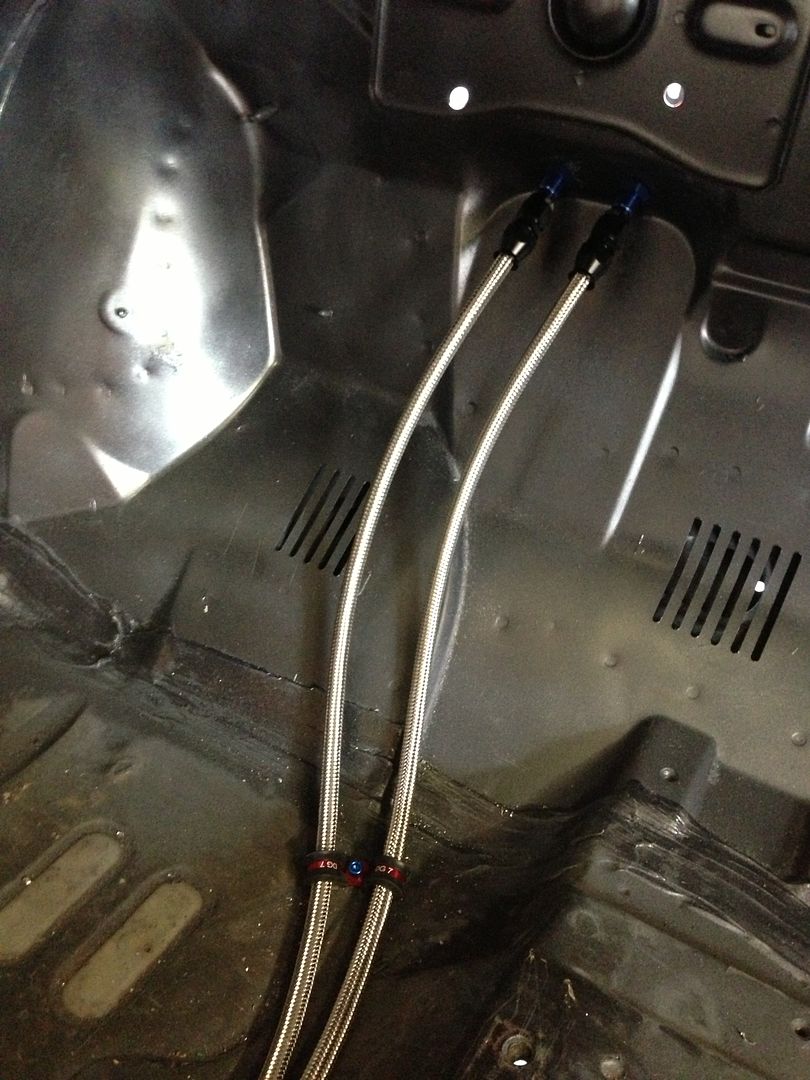
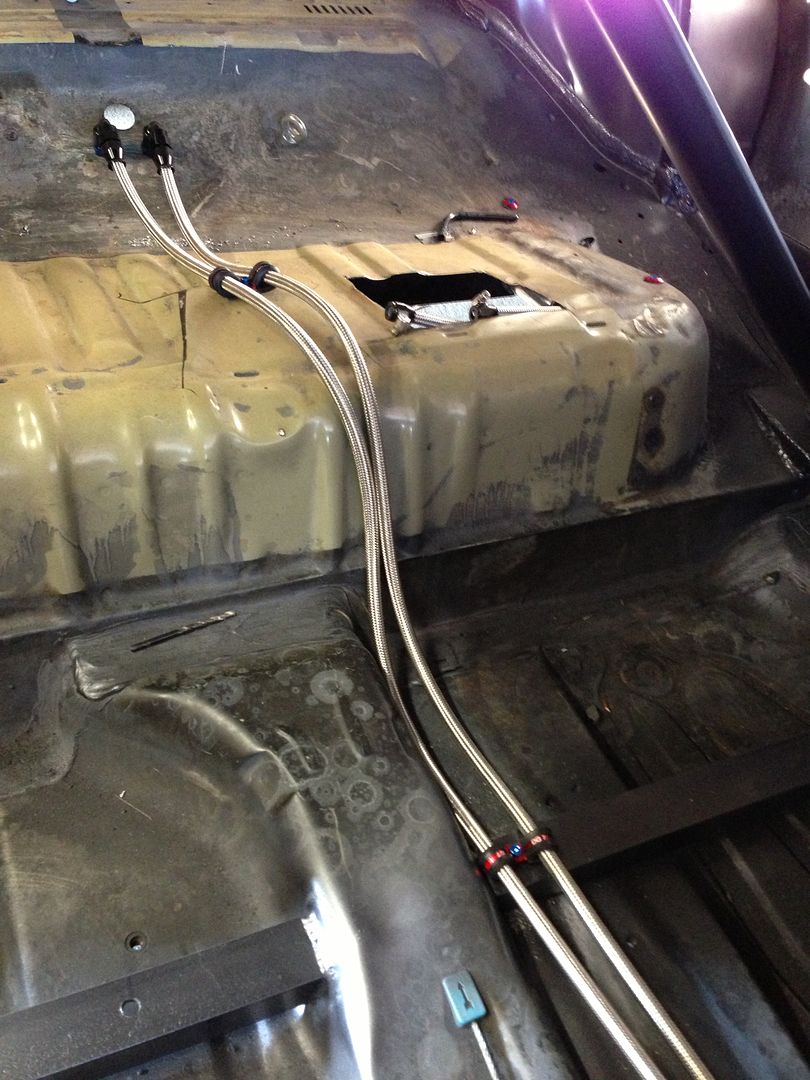
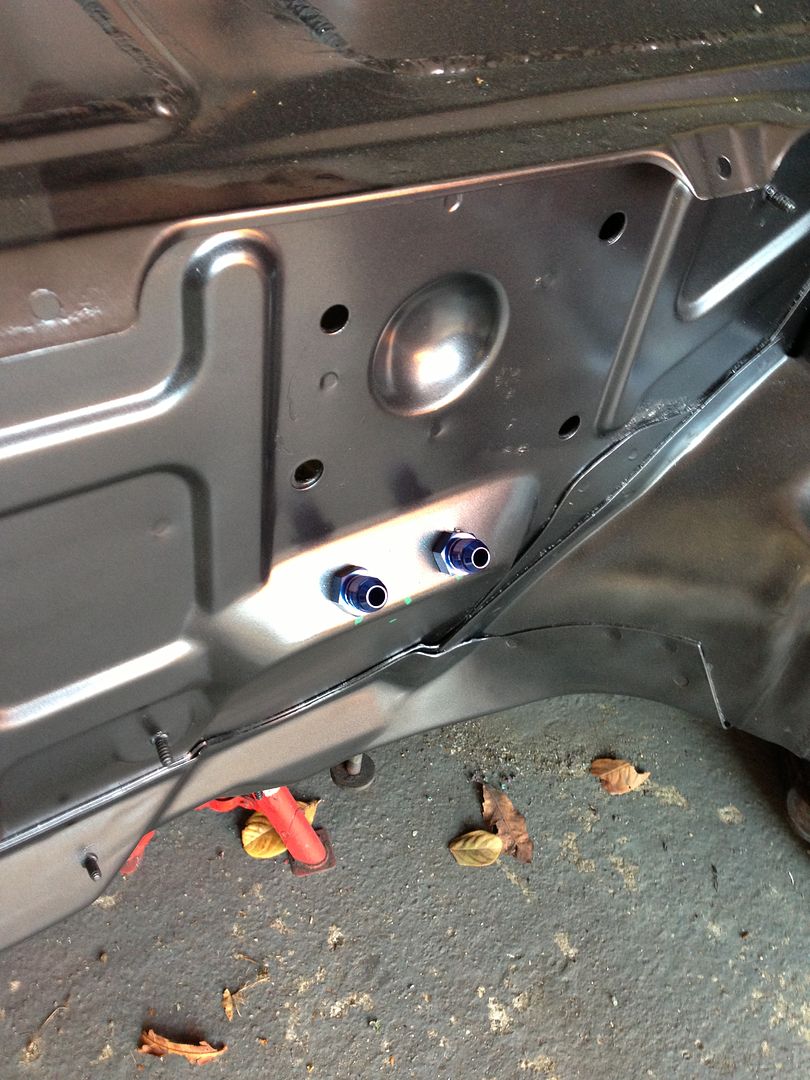
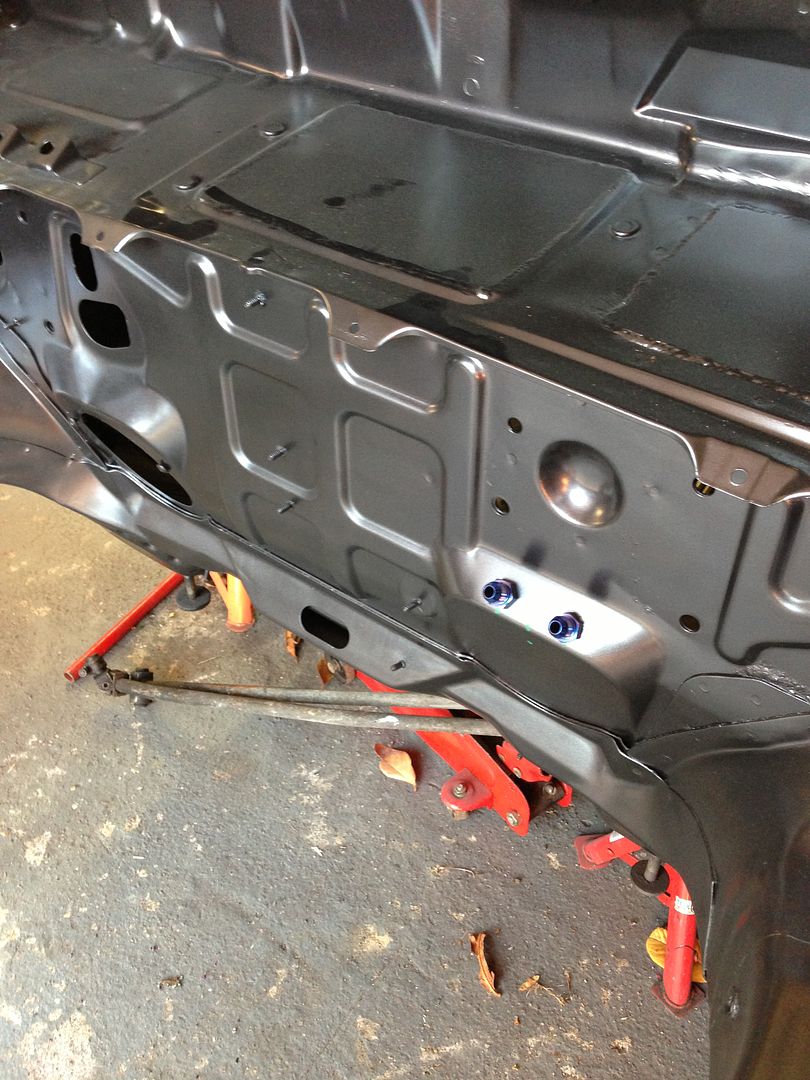
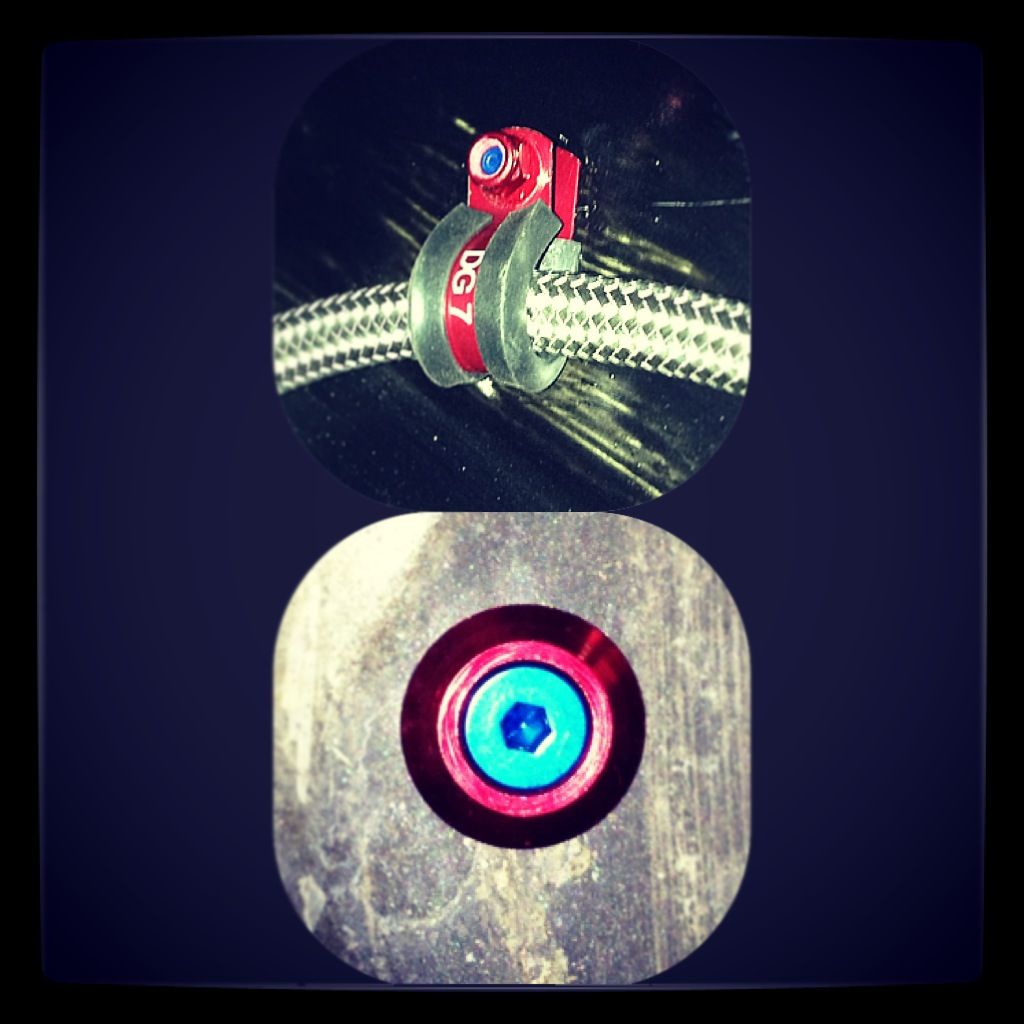
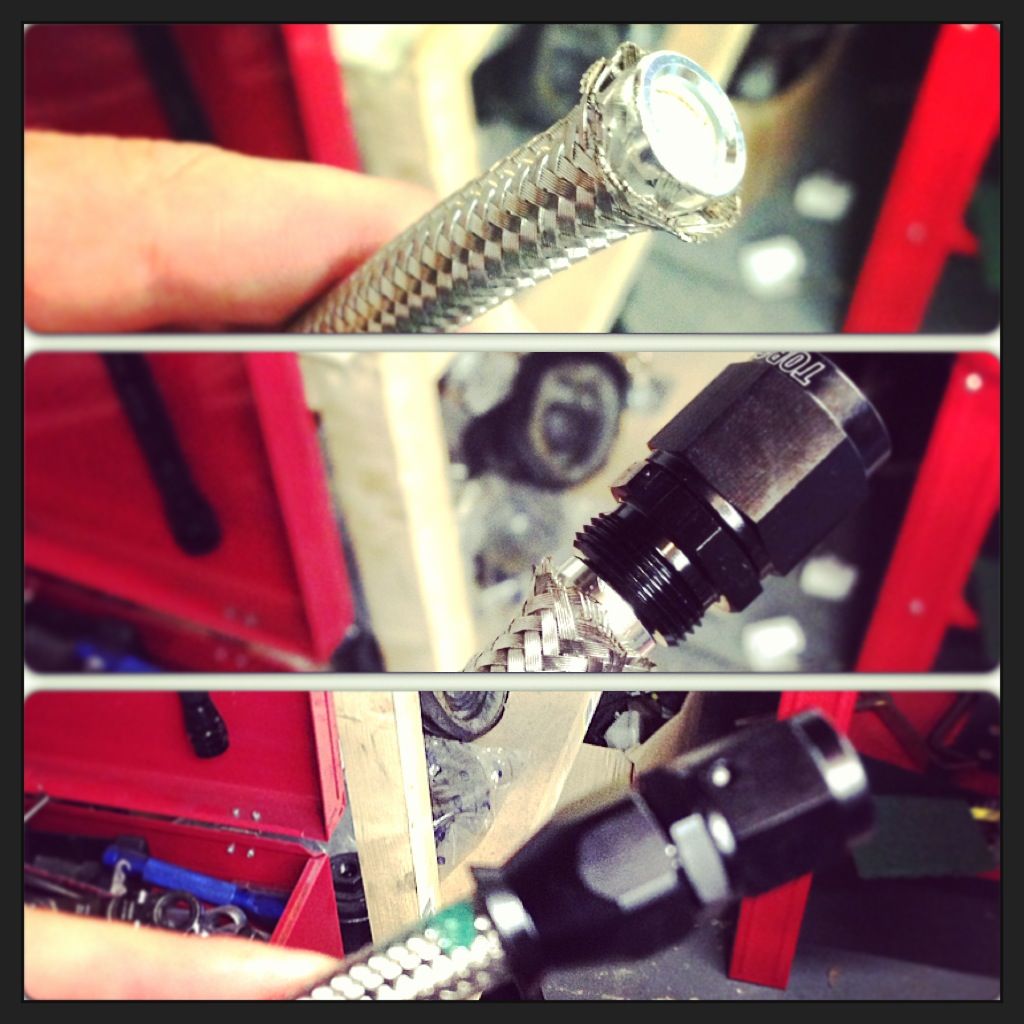
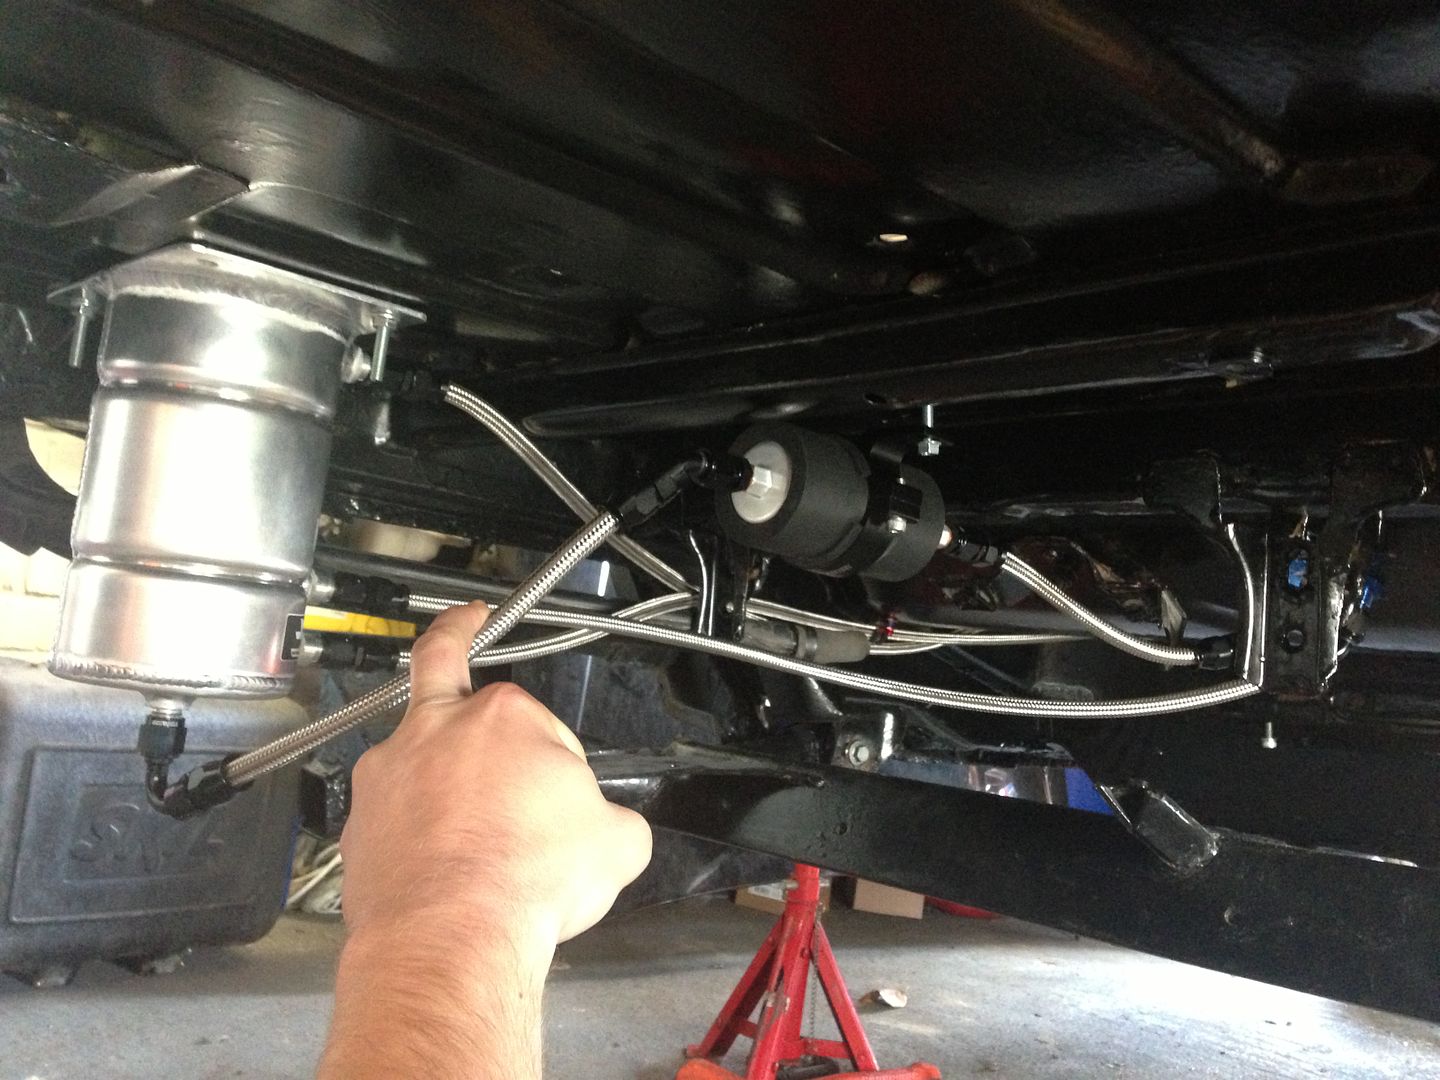
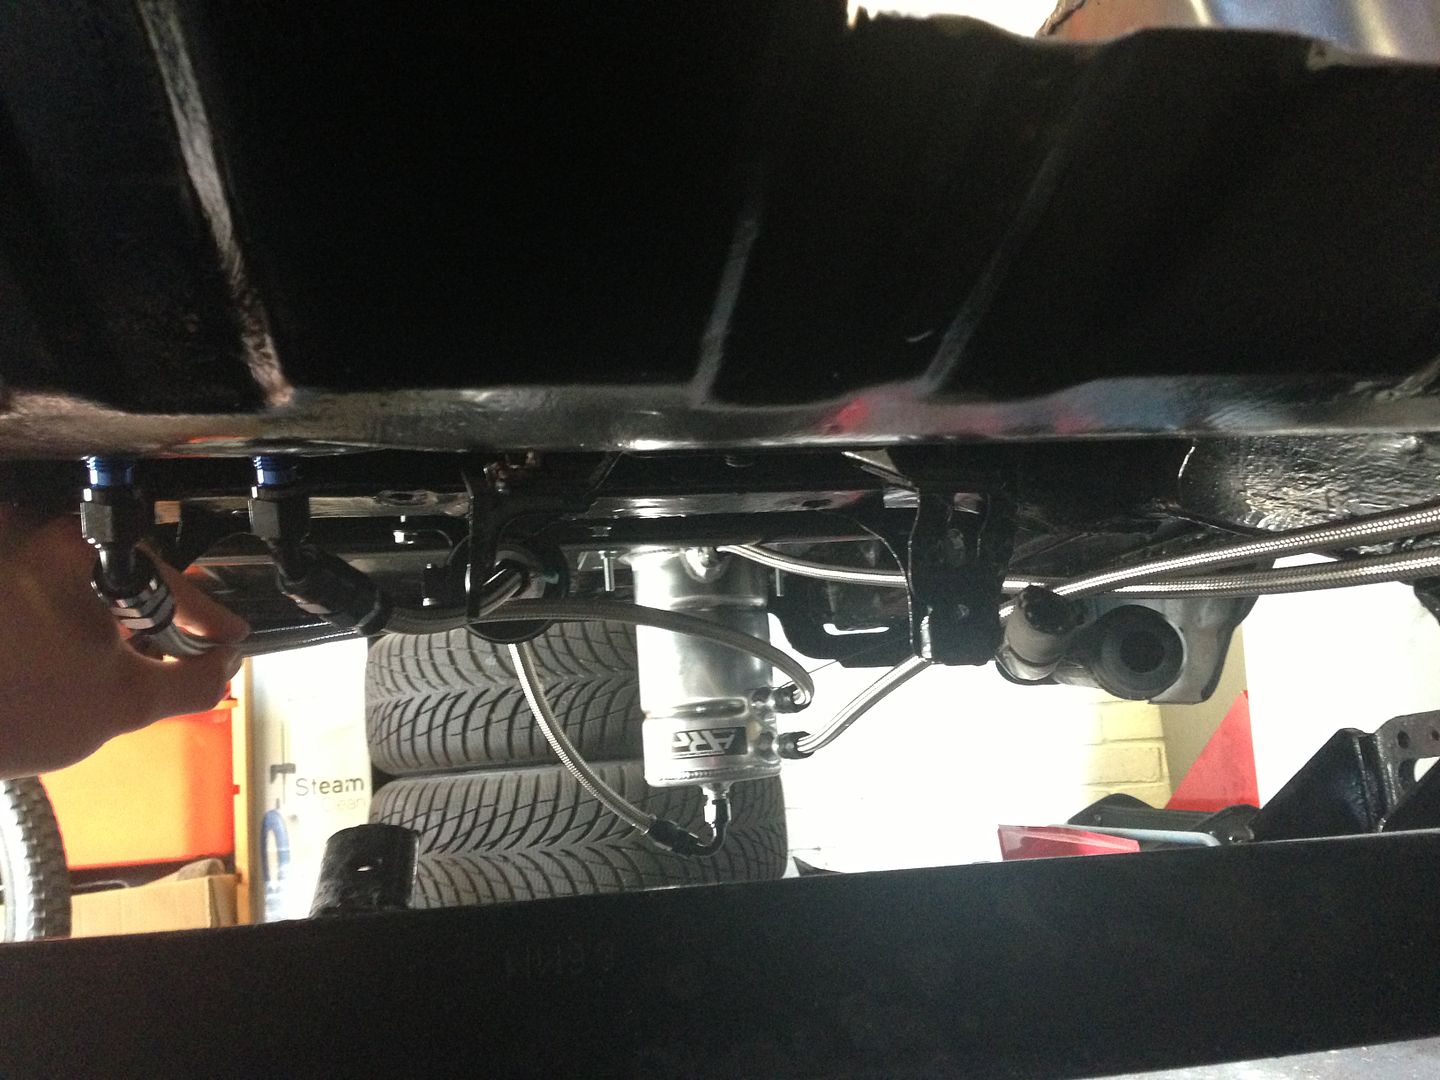
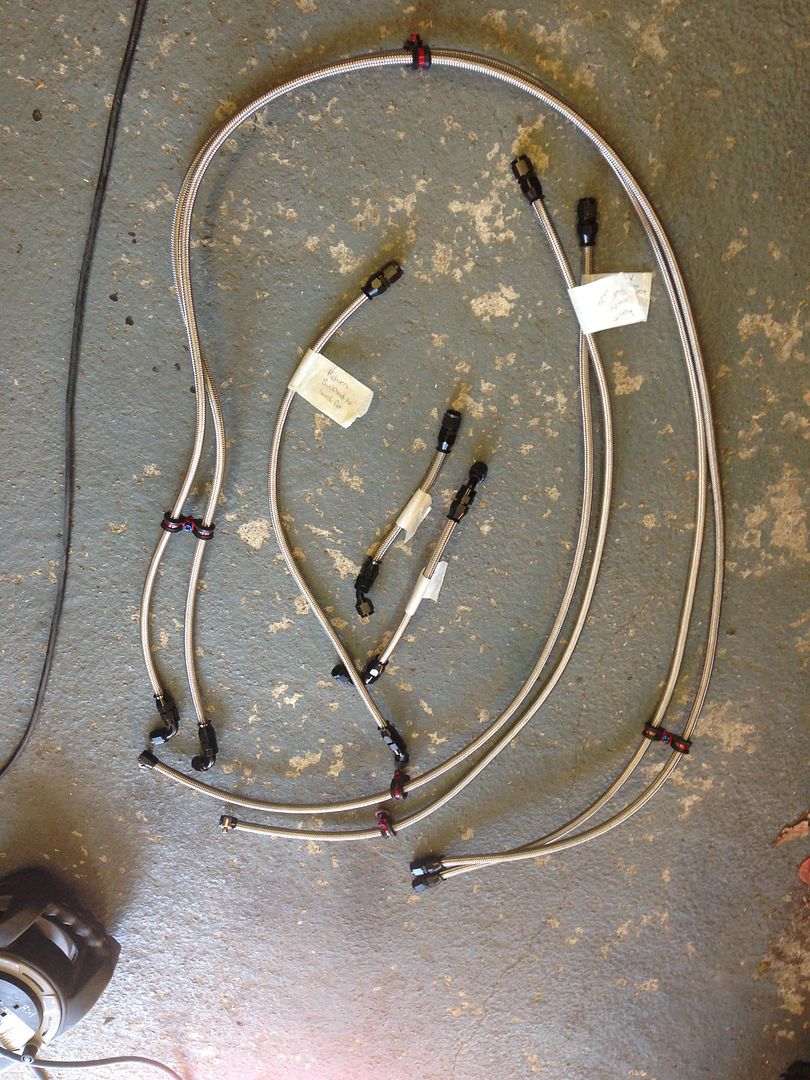
The fuel system was up next. The standard tank is un-baffled and I've heard surge can be a problem on track with them. I couldn't justify the cost at the moment to have a custom tank made so I settled on using the standard tank and fuel pump to feed a swirl pot which feeds a separate external fuel pump. The MSA dictates all of the fuel system has to have a bulkhead between it and the driver's compartment although fuel lines can pass through the car if they are made from a certain spec hose and use the proper bulkhead fittings. I got all of the lines and fittings from torques.co.uk. I'm being a bit anal and using red anodized ali P clips, washers and nuts and blue anodized bolts where there isn't a high load


Edited by motorsportbeng on Tuesday 6th August 18:50
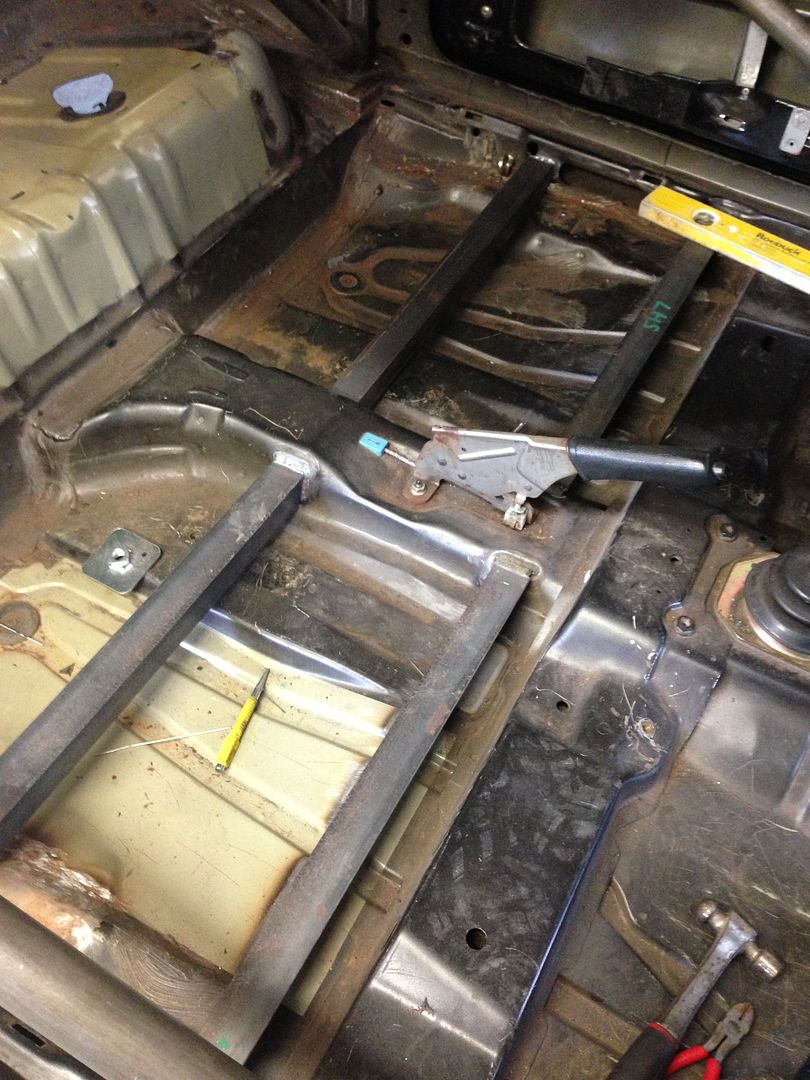
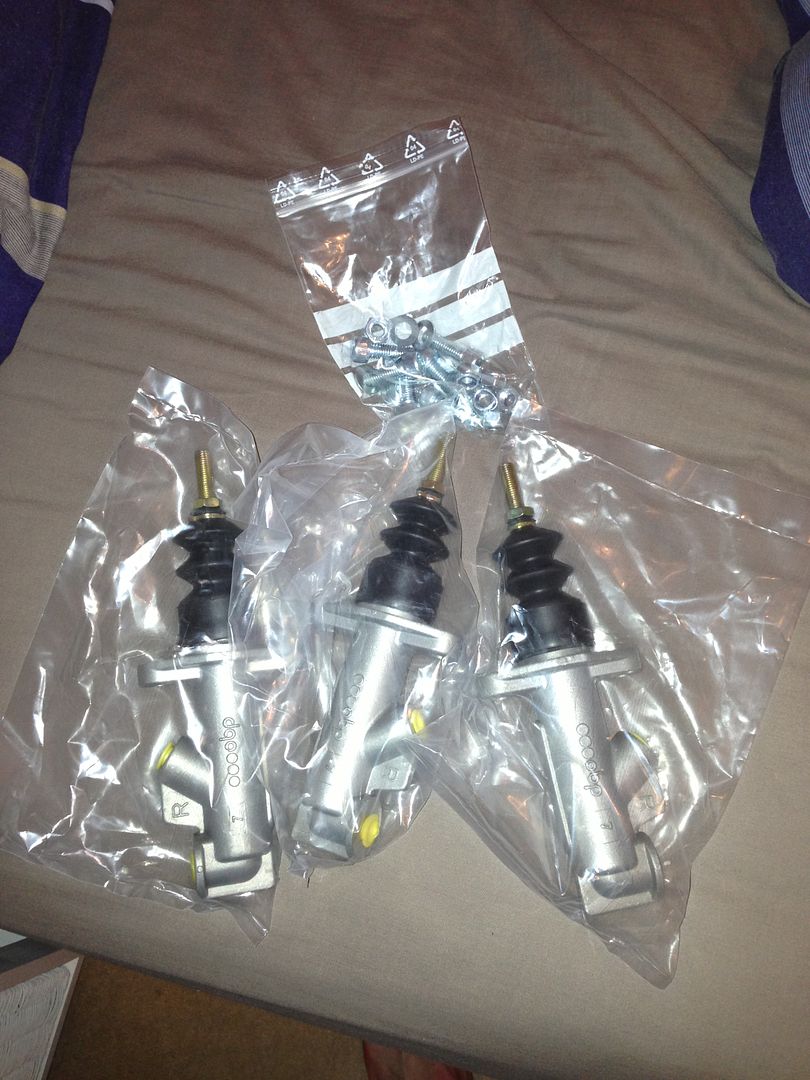
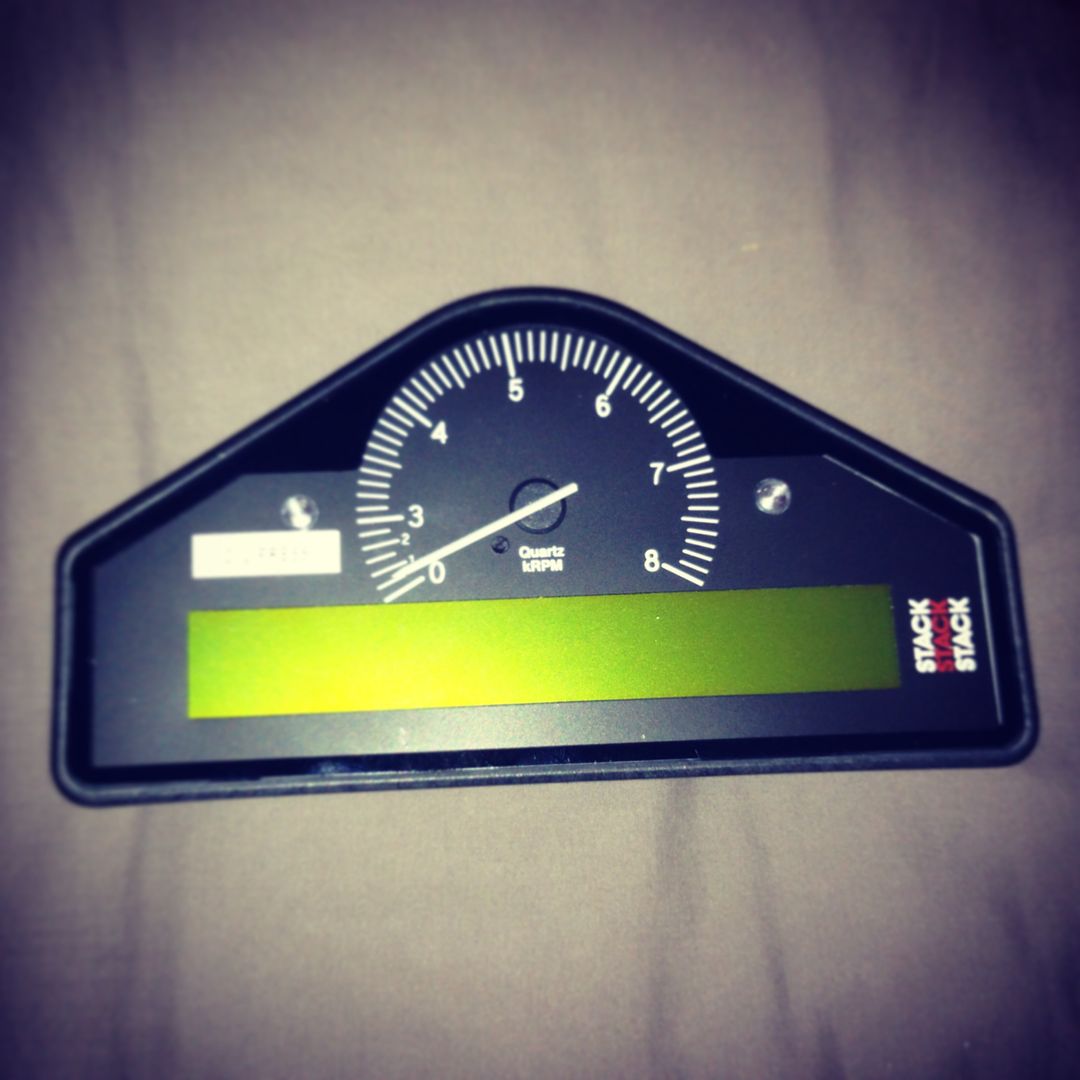
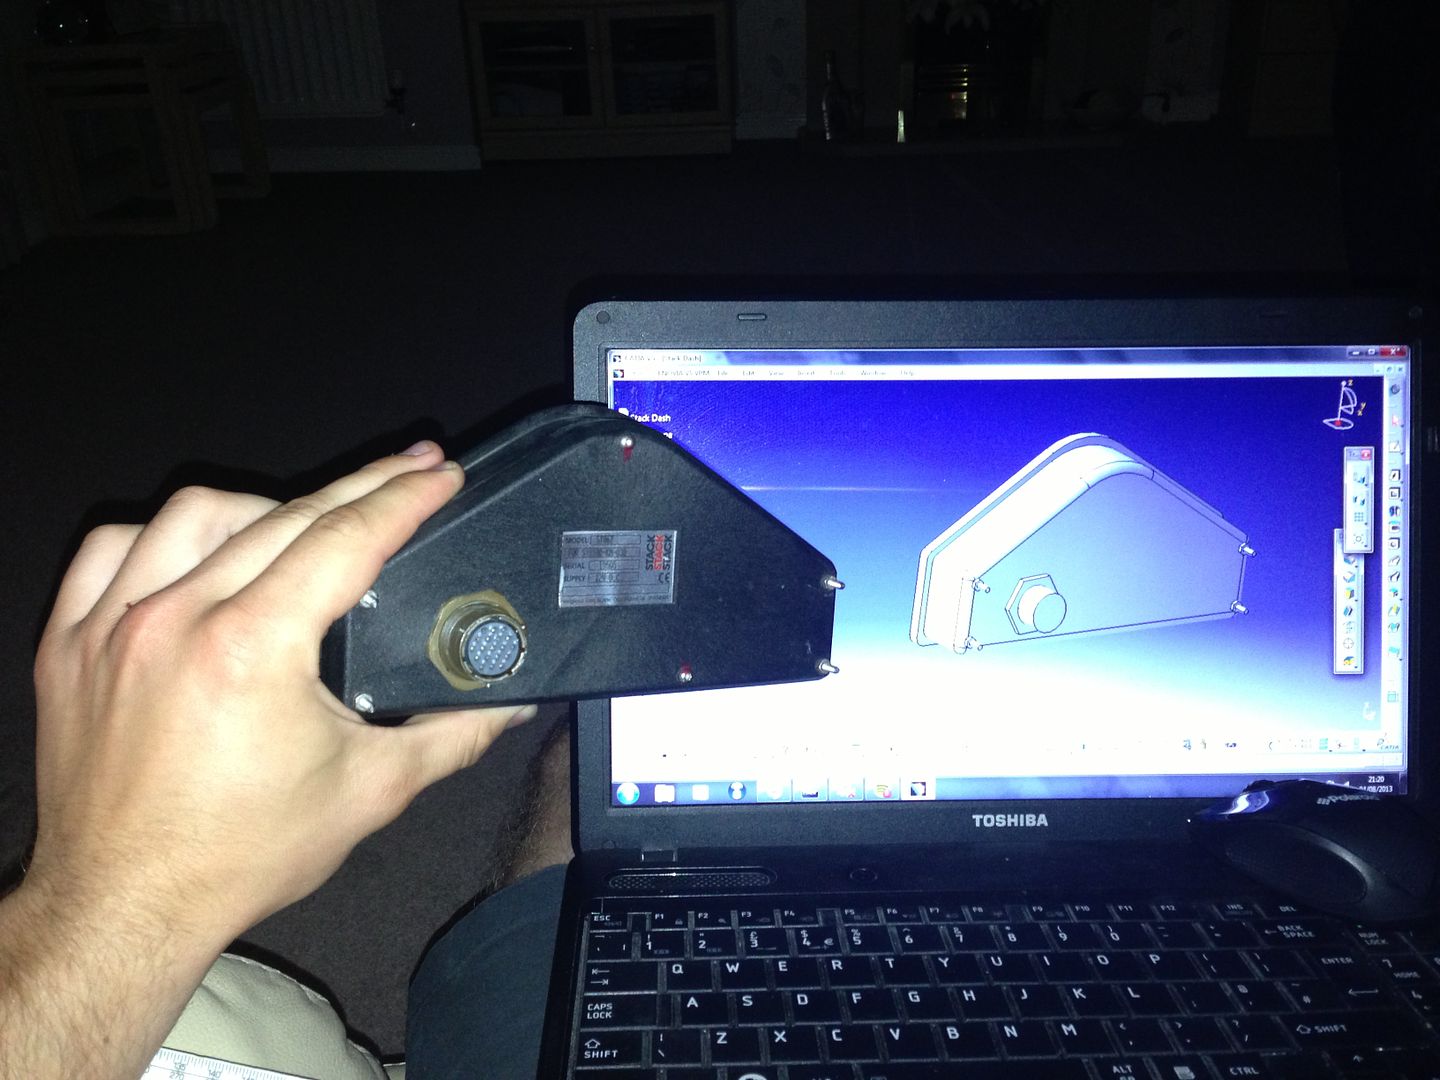
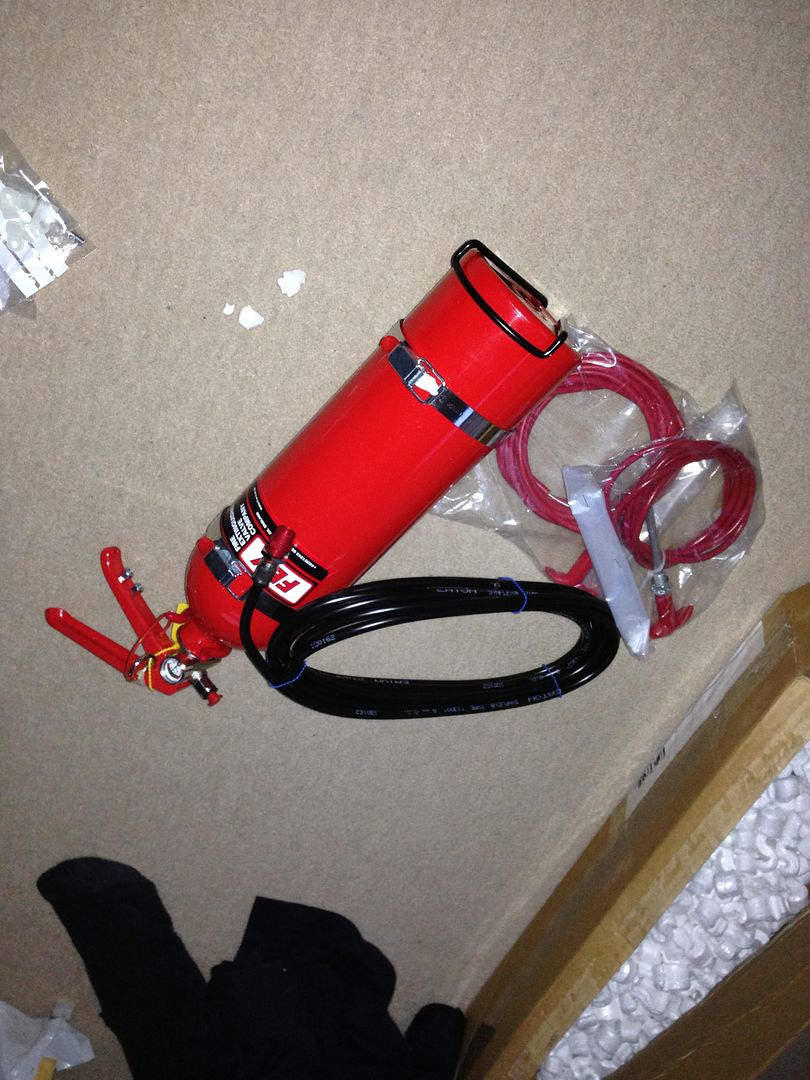
I think that's about where I'm up to now. I need to get some small spacers made up to mount my fire extinguisher where I want to in the passenger footwell. I've got to heat line the front bulkhead closest to the exhaust and then the front sub-frame can go on. I've got some dampers being made by Gaz at the moment that once they go on will allow me to bolt all of the hubs etc. on and get the thing on the ground and rolling if necessary. I need to order some carbon sheet to make a cover for the service hatch I made to access the standard fuel pump as well as some smaller holes in the bulkhead that are now redundant due to my decision to run a pedal box which I'm still yet to design and make although I've got the master cylinders already so I can model them on CAD. I've CAD modeled my Stack Digi dash so I can design my dash mount and switch panel, all of which will be mounted off of the roll cage as I don't have to run the standard dash. It will then be time to start rebuilding engines ready for my university project and designing and making wiring looms.


Not as such, I'm trying to do affordable modifications but also making sure the car is finished to a good standard. The end result will be a bit of a showcase for myself really so I don't want to skimp out and bodge bits together. The going rate for a decent tin top race car in the classifieds is around £4-5K and it shouldn't be going much over that. I should imagine it would cost you between £7-8K if you were to have something similar built so I'm saving myself alot on the labour side of things

Had Friday off so I popped over to my mate at http://www.lightningmotorsport.co.uk/ to split my engine mounts, he specialises in these cars so had the wrench big enough for the nut! Then went back to visit http://www.geoffpageracing.com/ who let me have an hour in the bead blaster to clean off 120k miles worth of road dirt from various mounts that will be needed fairly soonish. Popped into http://www.fieldmotorsport.com/ to get the final few nuts and bolts to complete the fuel system install.


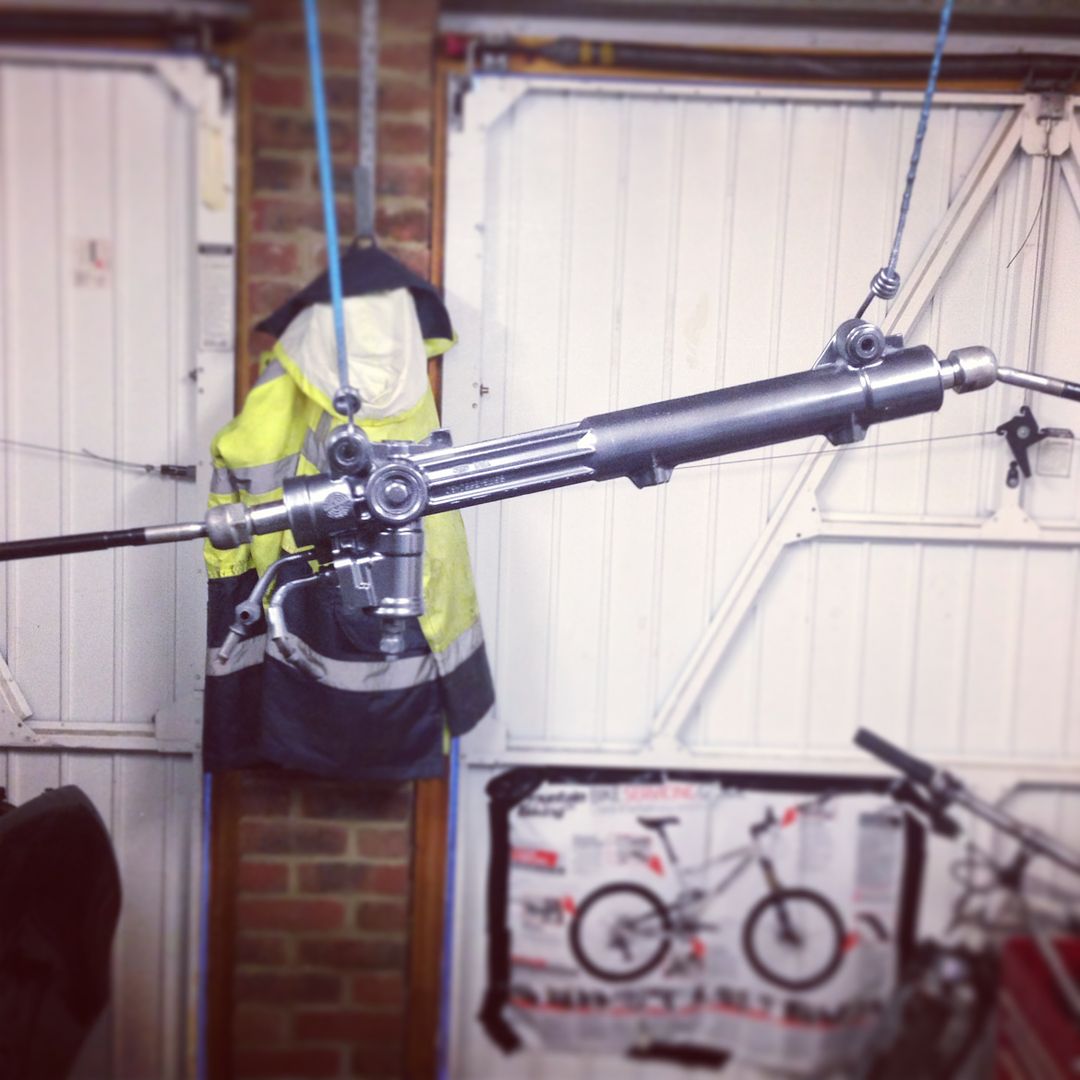
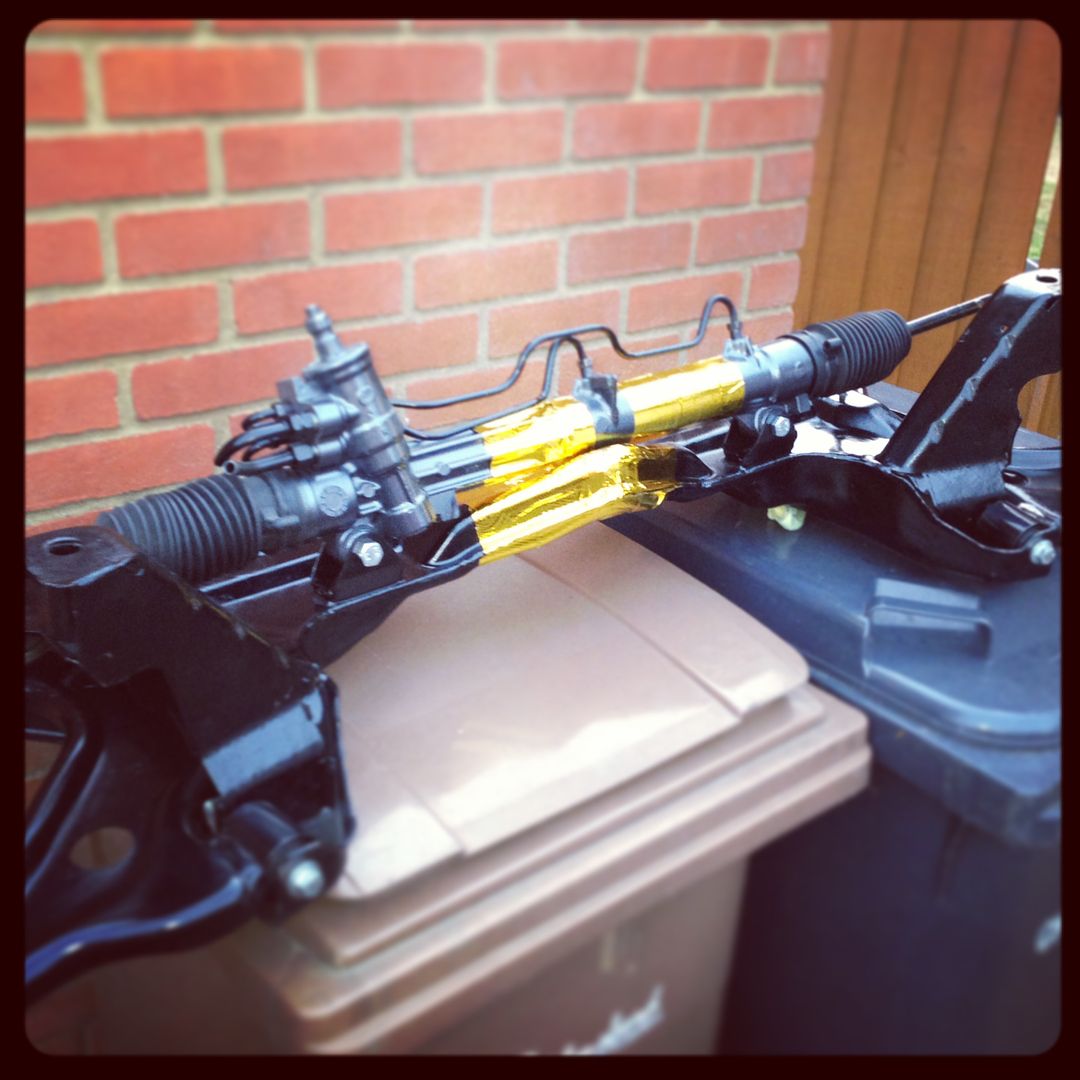
Cleaned, painted and heat wrapped the plastic bulkhead cover for the steering rack


Cleaned, painted and heat wrapped the plastic bulkhead cover for the steering rack


Yeh I know what you mean from the photos but I'm confident with it for the moment at least. When I'm near completion I plan to take advantage of a local scrutineer's generosity and get their opinion on the car as a whole and the swirl pot location before I turn up to a meeting. I'm confident that there's more than enough clearance for it.
To be honest If I was going to go to the trouble of making an ali sheet compartment for it I would just take the sacrifice of moving a couple of kilos up half a meter and mount it in the boot of the car for ease of access.
To be honest If I was going to go to the trouble of making an ali sheet compartment for it I would just take the sacrifice of moving a couple of kilos up half a meter and mount it in the boot of the car for ease of access.
I see what you're saying and a flat floor as you suggest would be a good solution should it be flagged up as a problem. It's no more exposed than the standard fuel tank that's on there that a lot race with and I'm sure the swirl pot is probably stronger than the tank so I'm confident it should be fine.
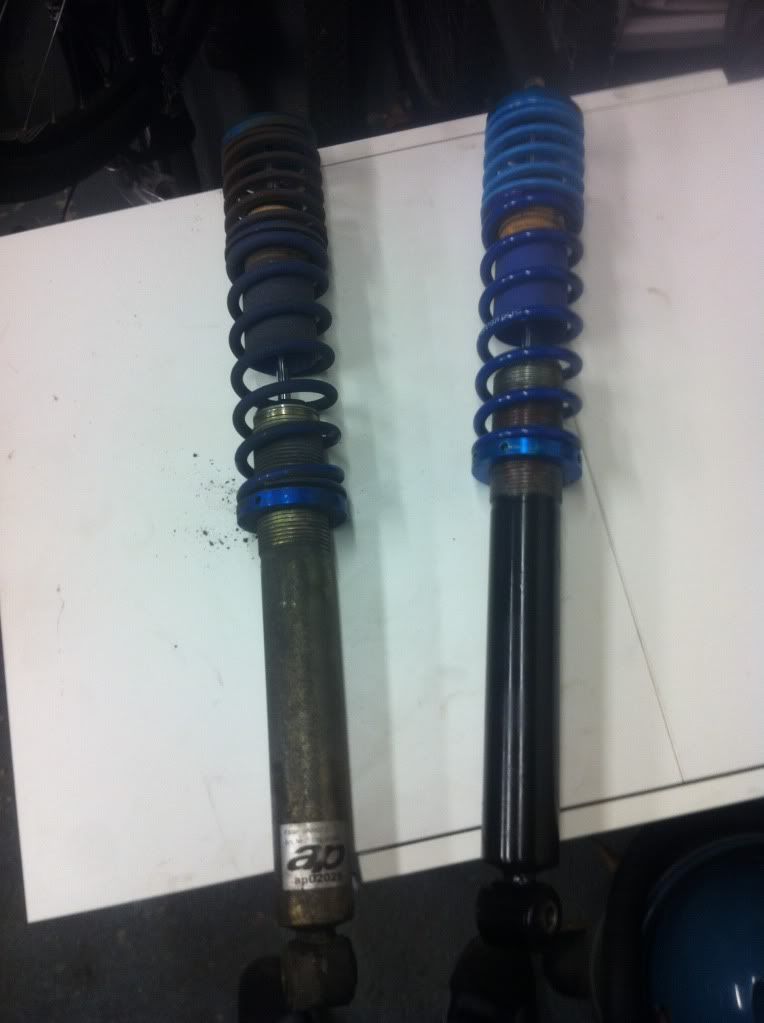
Picked up my coilover's from www.GazShocks.com after they took an interest and kindly helped me out nicely on a set of their Gaz Gold kits. Pictures to follow when I upload them to photobucket or alternatively check them out (and like!) my website. www.facebook.com/studentloanracing
Picked up my coilover's from www.GazShocks.com after they took an interest and kindly helped me out nicely on a set of their Gaz Gold kits. Pictures to follow when I upload them to photobucket or alternatively check them out (and like!) my website. www.facebook.com/studentloanracing
Haven't updated this in a while. Gaz shocks have kindly taken a bit of interest in my project and I got a nice discount on their gold kit. I fitted them to the car with the previously re-furbed hubs/hub carriers using new bolts and standard top mounts for now. I just need to get new pinch bolts for the front hub carrier and make some anti-roll bar drop links.


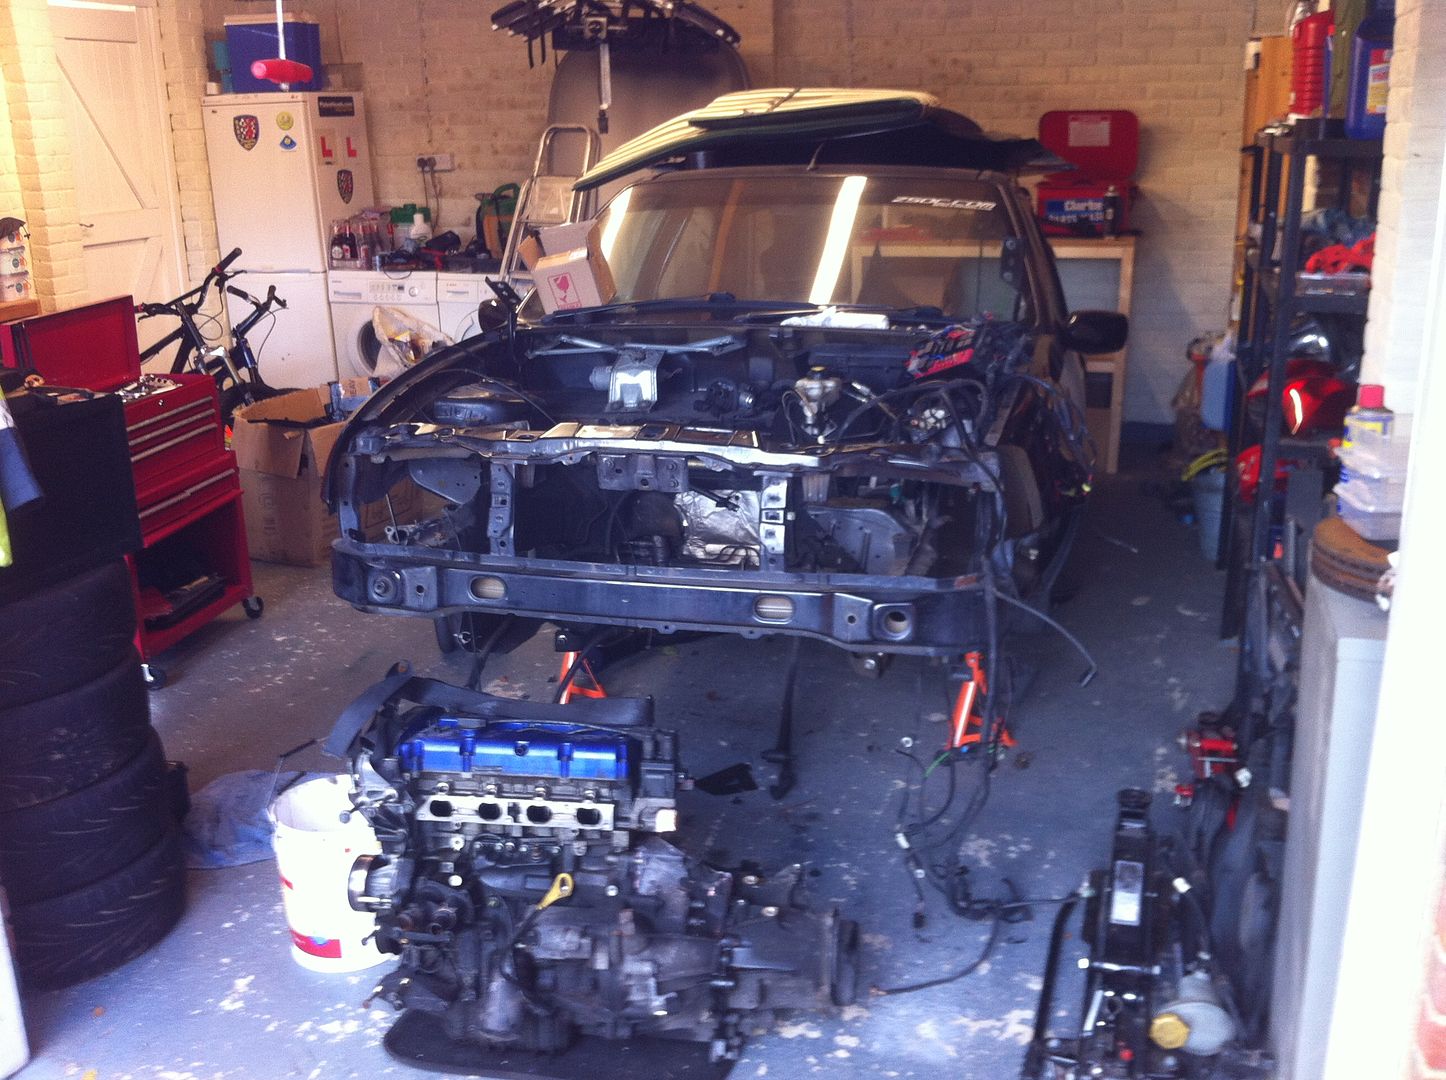
I started stripping 2 of the 3 engines I have, one of them was the one i built 2 years ago that never ran and sat around uncovered in my garage. I decided the gulf colour scheme I originally went for didn't quite work so started removing that. I won't be using the phase 1 head due to wanting to run lairy cams and the biscuit shims have been known to flick out I believe. noticed a significant design and 3kg in weight difference between the phase 1 and phase 2 cranks so that's what I will be running!


had a bit of progress with this on the engine side of things thanks to FMS letting me go back and use their facilities. First though popped down to GPR to use their bead blaster to prep some bits. pics speak for themselves.


Then started prepping bits down at FMS. De-coked the valves and cleaned the cylinder head enough that I could lap in the standard valves, managed to get a good seat in the end, exhaust's were proving tricky. De-burred the various water jacket and oil ways in the head face and paralleled off the head face and all the other mating surfaces. Then a bit of elbow grease and a few stages of cleaning got it to the stage it was ready to build back up. I ordered the Burton head gasket set but unfortunately one of the stem seals was damaged when I opened it. Using the standard valve springs that came out of my dad's caterham when he got their engine upgrade as the springs have done less work than the springs that were in the engine.


lapped the cams to the pulleys, important because there aren't any locating dowels or key ways.

standard rods and pistons have been cleaned up, same with the oil pump and various other components.


The engine block was prepped in the same fashion as the head with the de-burring and paralleling of mating faces. It was also given a light ball hone just to break up the glazing in the bores.


I then painted the block with the same sparkling graphite as the car mainly so it looks good but also to stop surface corrosion.


I then got some nice and shiny lightweight bolts for the low load fasteners such as cam cover and breather box.

My carbon sheet turned up so hopefully this weekend I can make a few of the carbon HT lead covers I designed

Gassing Station | Readers' Cars | Top of Page | What's New | My Stuff