Jensen Interceptor restoration
Discussion


I am starting a thread on my restoration as I really like reading similar threads and think there are not enough of these on here, so hopefully this will inspire other PH's to either start their own story or post on here with mine.
I bought this car in September 2011 as a project, the car was in one piece and just about running, with a flat tyre inflated and a jump start I was able to drive it round the industrial estate where I bought it but it was clearly in need of a lot of work. A deal was done and the car was transported up to me a few weeks later.
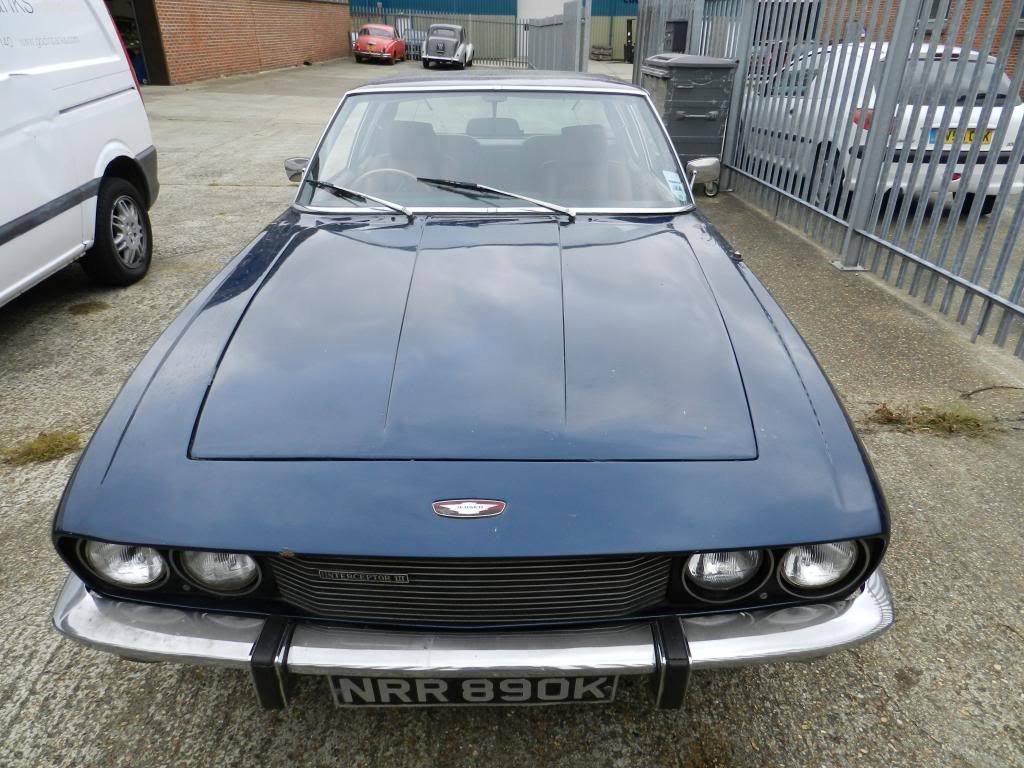
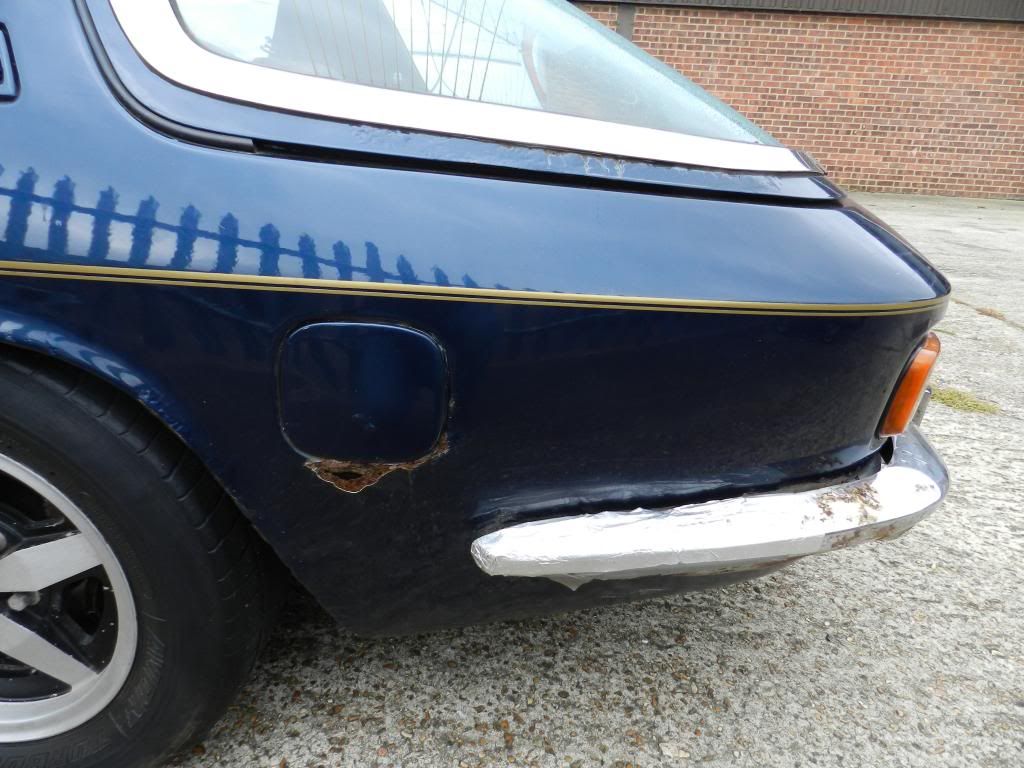
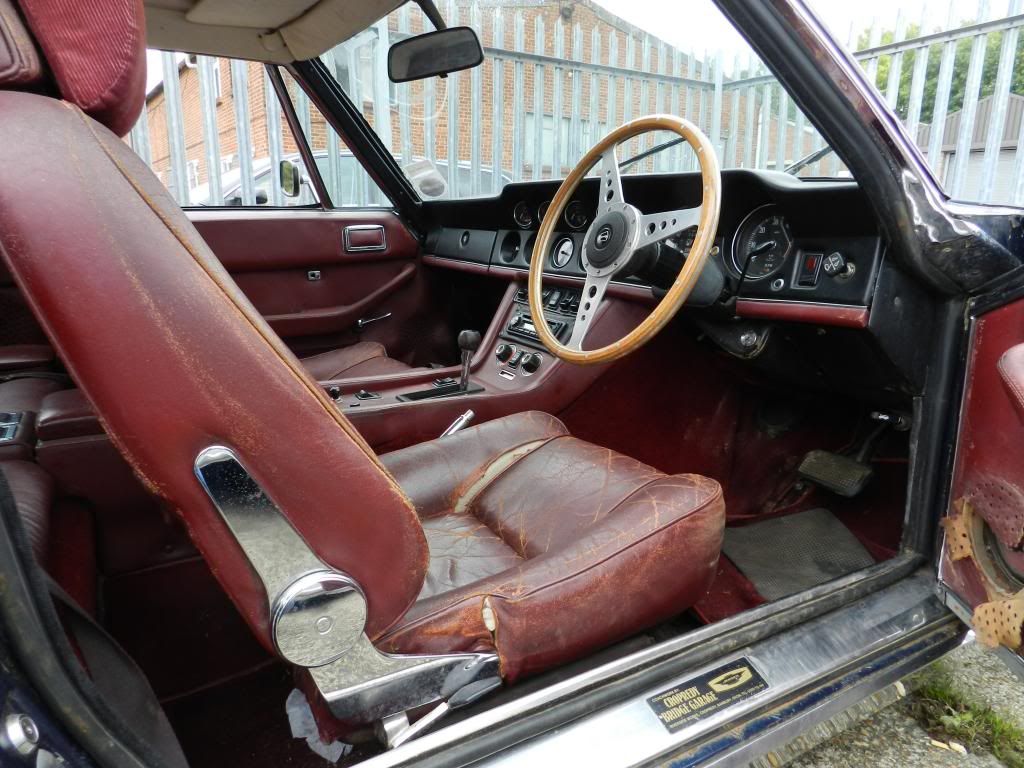
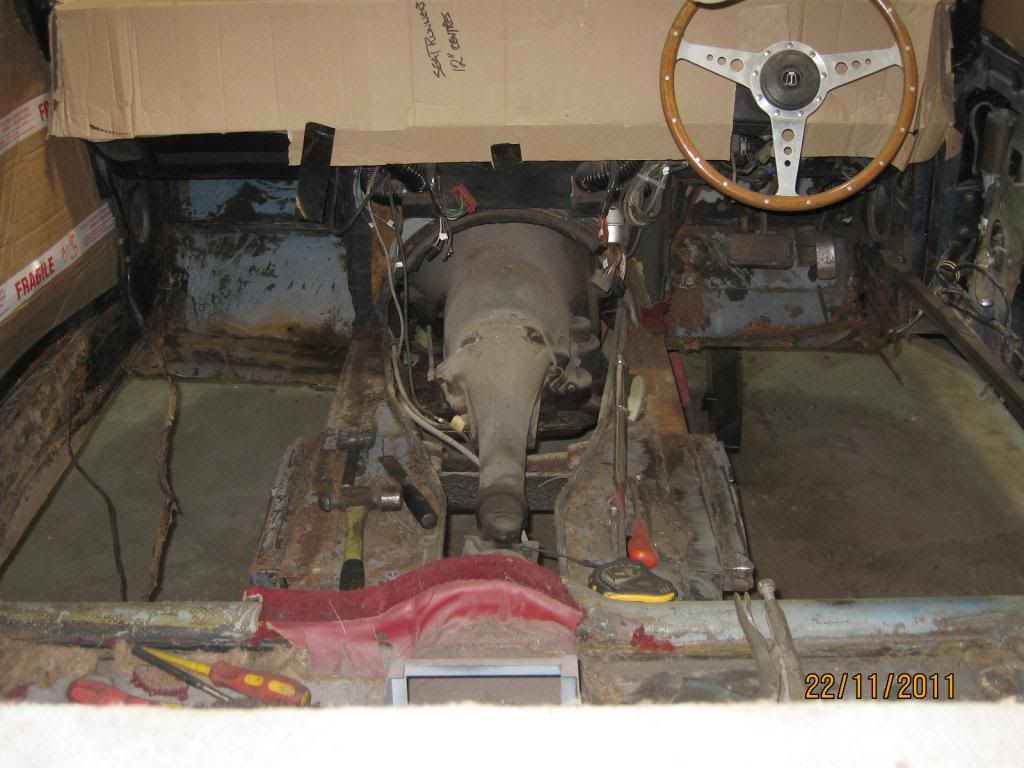
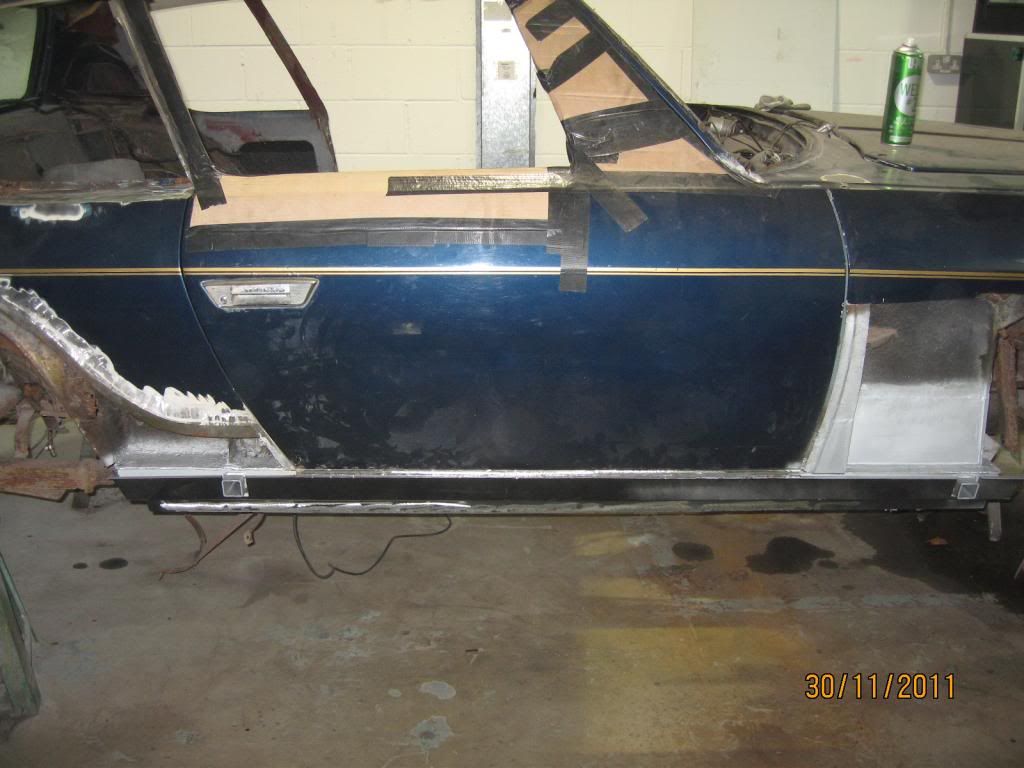
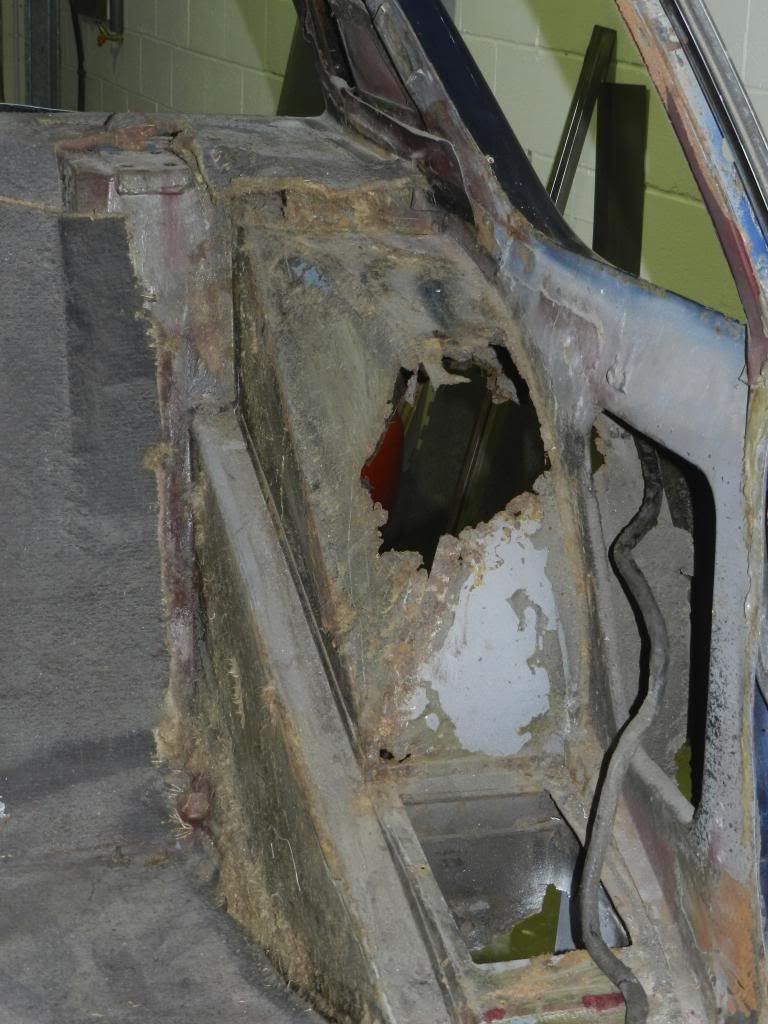
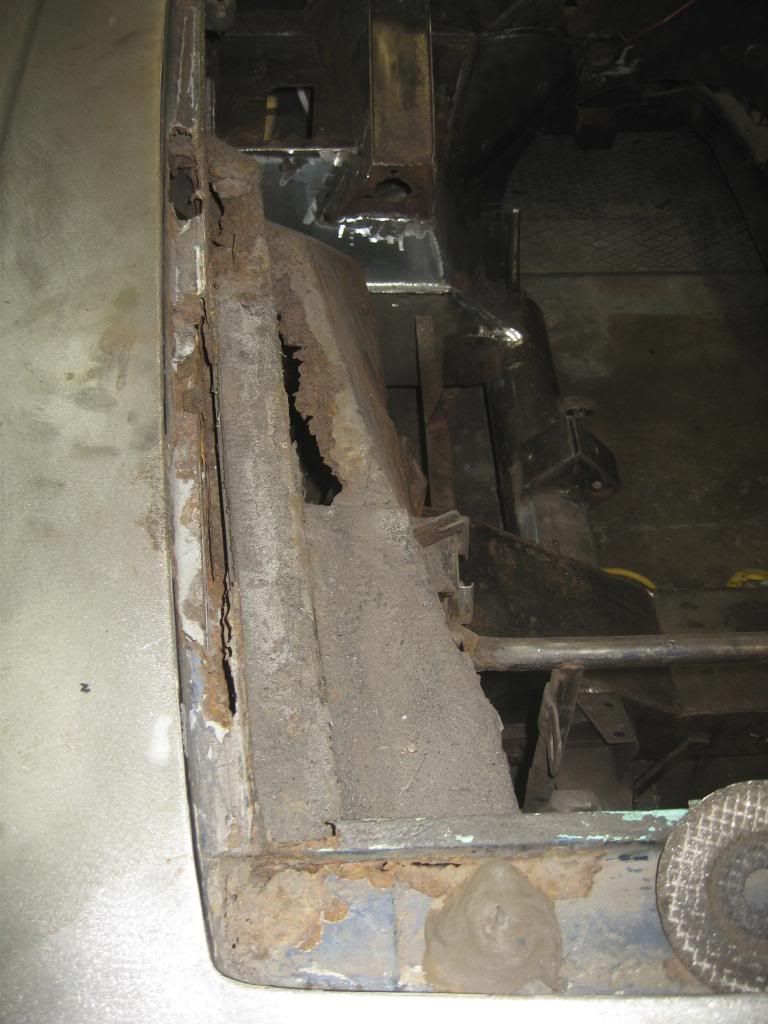
As you can see it has been through some hard times with recent owners only spending what was necessary to keep it on the road, the bodywork has lots of bubbling that cannot be seen by the camera and lots of cracks in the thick bog hiding more horrors. The interior was a mess but that didn't concern me too much as I like a nice interior and didn't have to worry about retrimming something that was reasonable.
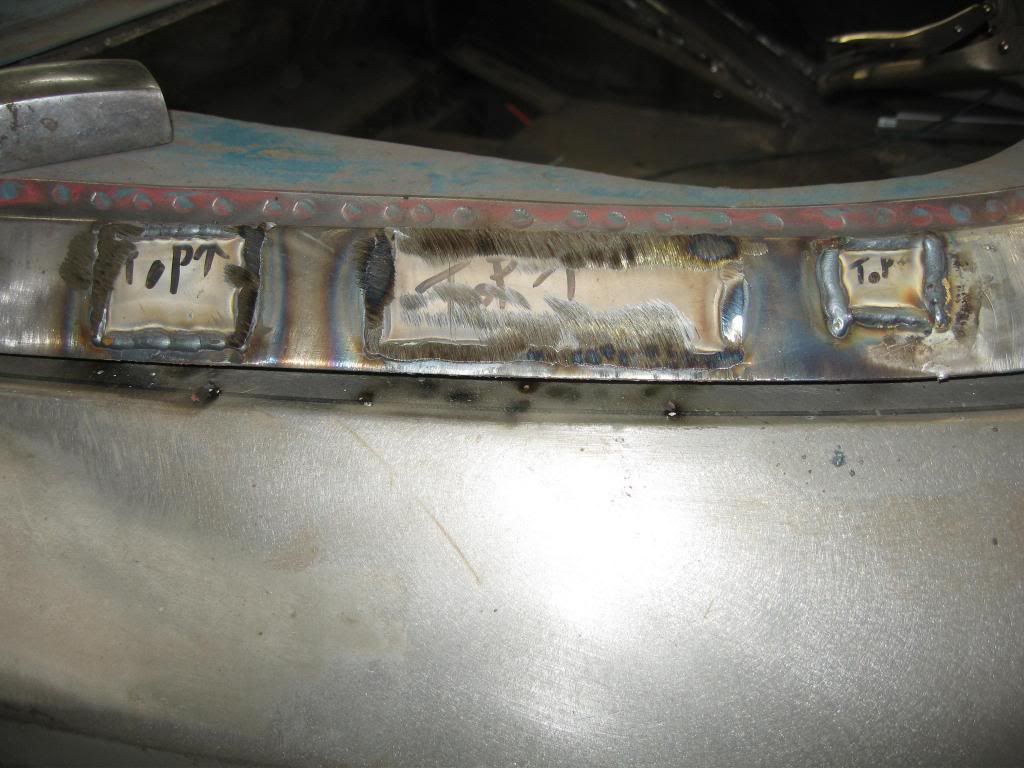
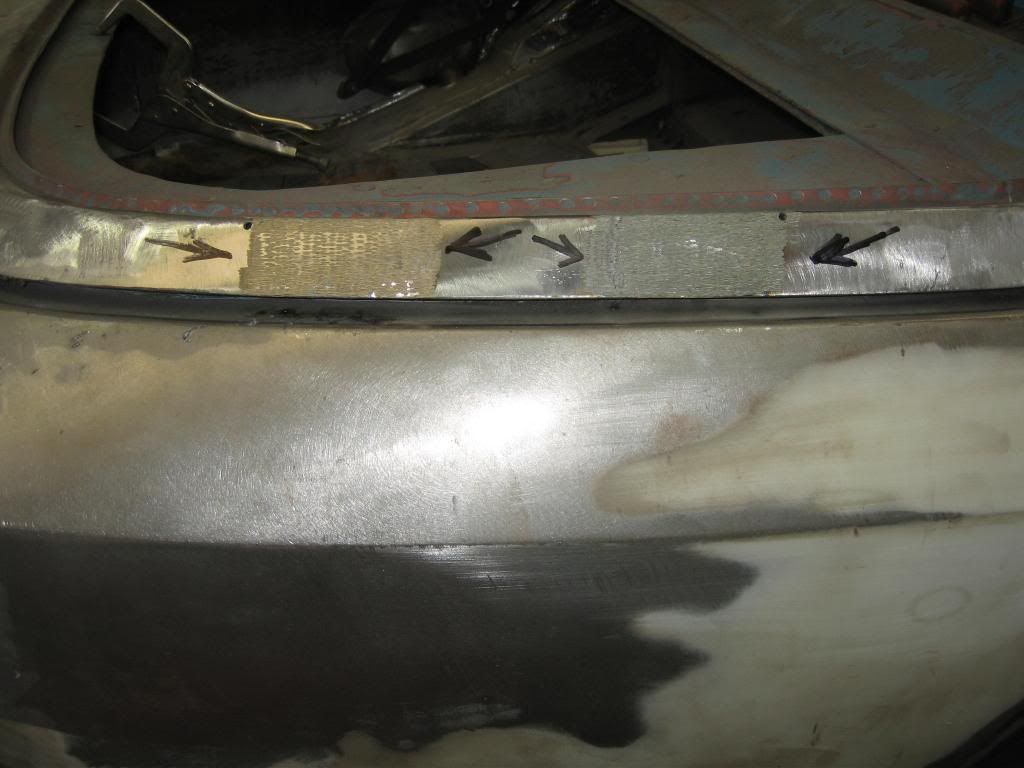
The duct tape on the photo of the rear bumper was there to bridge the gap where it had rusted away completely.
Anyway thats it for today I will make regular posts over the coming weeks until we are up to date.
I bought this car in September 2011 as a project, the car was in one piece and just about running, with a flat tyre inflated and a jump start I was able to drive it round the industrial estate where I bought it but it was clearly in need of a lot of work. A deal was done and the car was transported up to me a few weeks later.


As you can see it has been through some hard times with recent owners only spending what was necessary to keep it on the road, the bodywork has lots of bubbling that cannot be seen by the camera and lots of cracks in the thick bog hiding more horrors. The interior was a mess but that didn't concern me too much as I like a nice interior and didn't have to worry about retrimming something that was reasonable.
The duct tape on the photo of the rear bumper was there to bridge the gap where it had rusted away completely.
Anyway thats it for today I will make regular posts over the coming weeks until we are up to date.
Im glad you are all ready for another restoration thread as I said I enjoy reading these and I have been following all the threads like Surveyors great Mexico thread for some time and decided I would put my car on, but please post about your own projects on here if you want.
A few of you have guessed where the car came from, it was advertised on EBAY and I made a trip South to see the car at Godin Banks and bought the car from Justin who was nice to deal with.
Anyway lets get started, a couple of months after buying the car it was time to start stripping it so that Geff the Welder (no prizes for guessing what he does) could make a start.
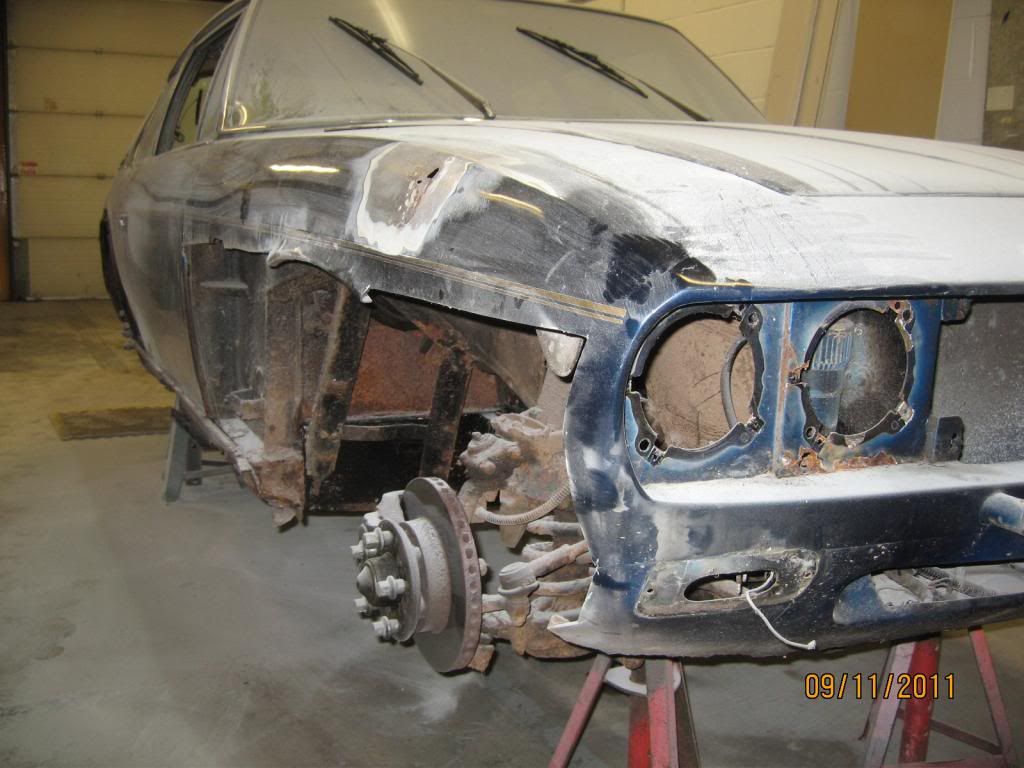
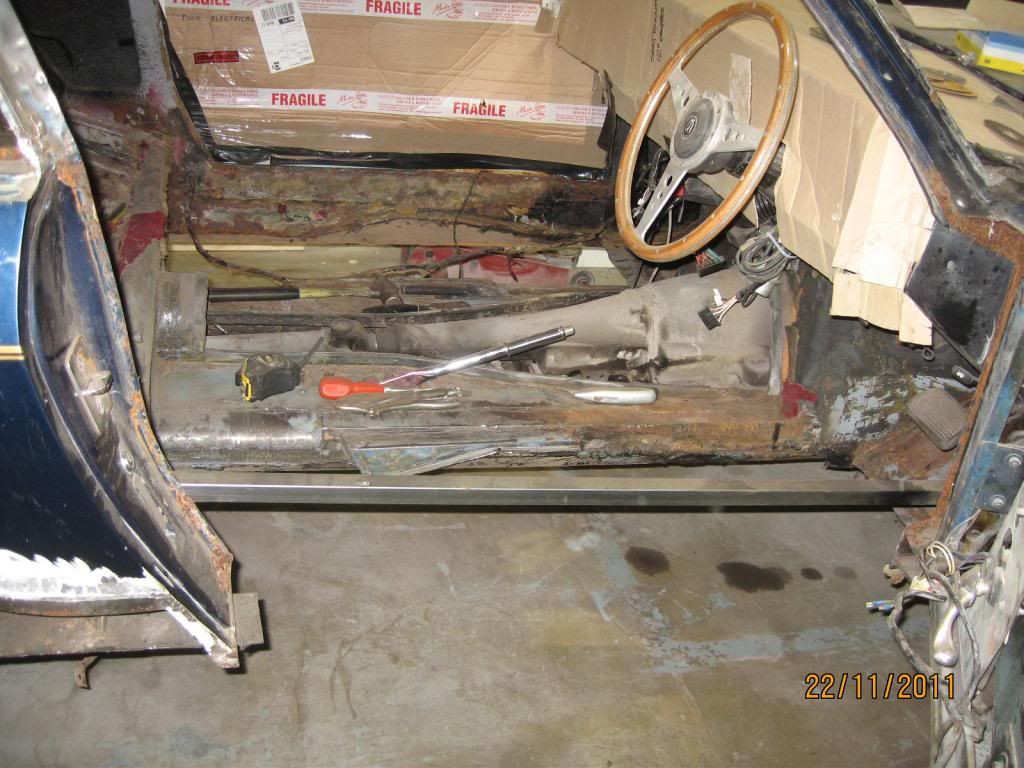
The bottom half of the wing was a mess so Geff cut it off out of the way
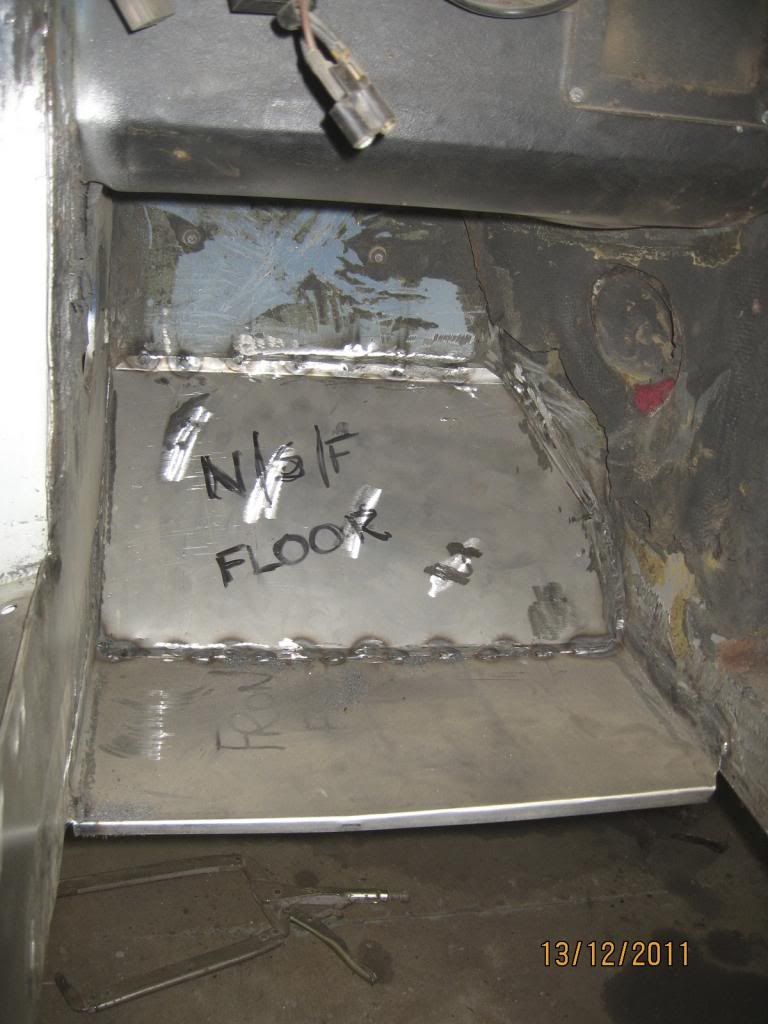
Floors don't look too bad

Shame I didn't want to live with patched up floors though
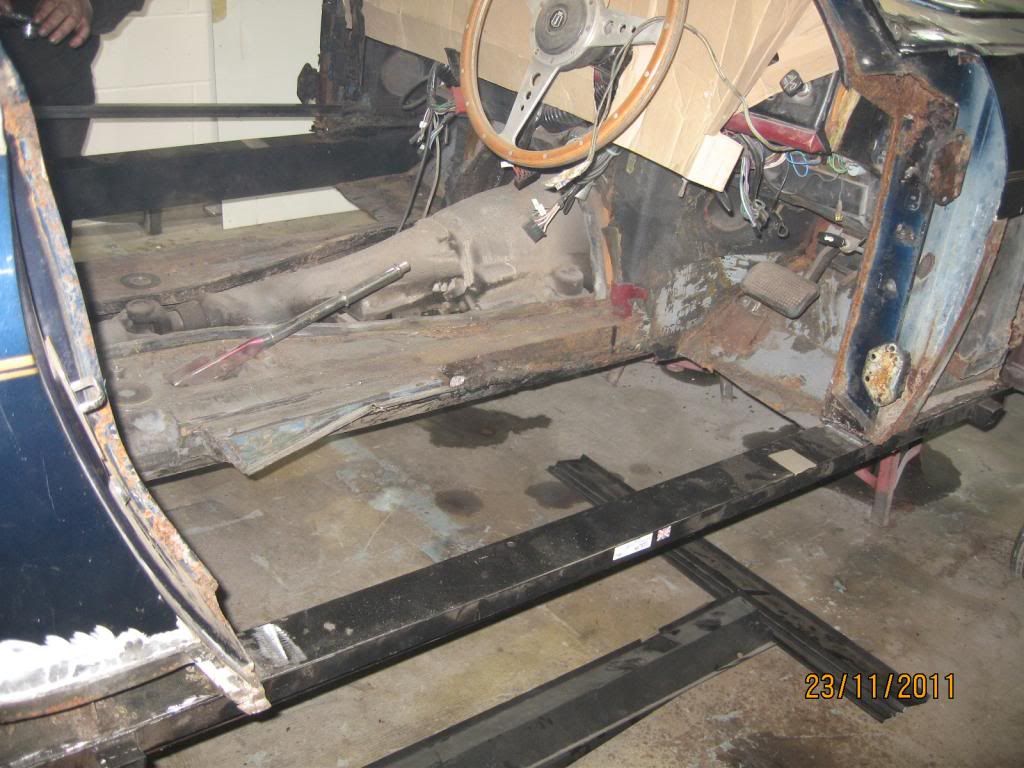
I wasn't interested in how good the sills were as these are a major job to replace I thought I would take the pain now knowing they will last at least my lifetime so out with the first one
Dont worry about the rust round the fuel filler Benjj thats just a minor repair, more to come tomorrow.
A few of you have guessed where the car came from, it was advertised on EBAY and I made a trip South to see the car at Godin Banks and bought the car from Justin who was nice to deal with.
Anyway lets get started, a couple of months after buying the car it was time to start stripping it so that Geff the Welder (no prizes for guessing what he does) could make a start.
The bottom half of the wing was a mess so Geff cut it off out of the way

Floors don't look too bad

Shame I didn't want to live with patched up floors though

I wasn't interested in how good the sills were as these are a major job to replace I thought I would take the pain now knowing they will last at least my lifetime so out with the first one

Dont worry about the rust round the fuel filler Benjj thats just a minor repair, more to come tomorrow.
The car is still being stripped but the welding is underway as I want to get things moving and not wait until the car is stripped before the welding is started.
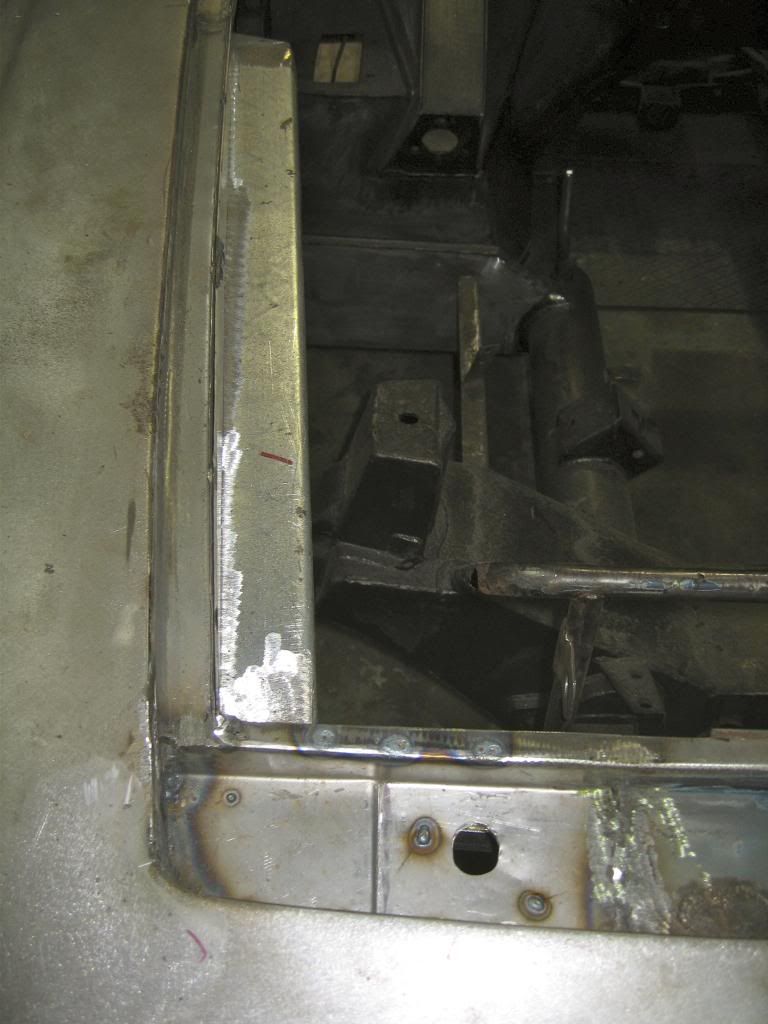
The sill centre sections go in, this a substantial box section with the jacking points built in.
If you buy a Jensen get them to jack it up on all 4 off these to see if they are ok.
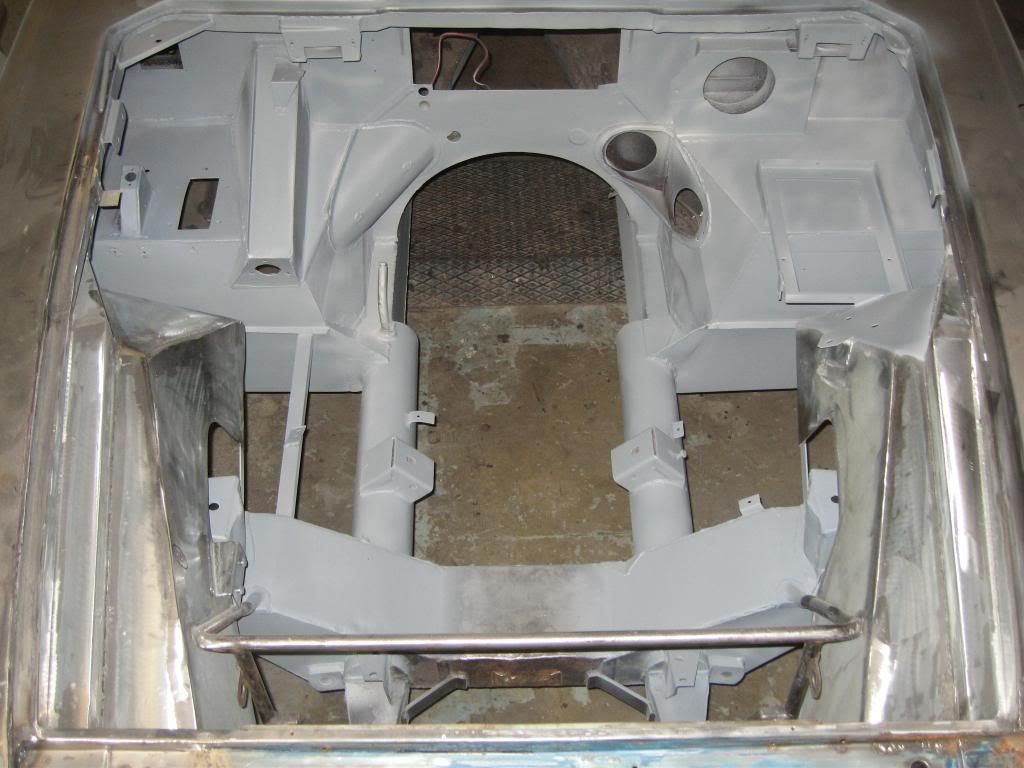
The dash comes out.
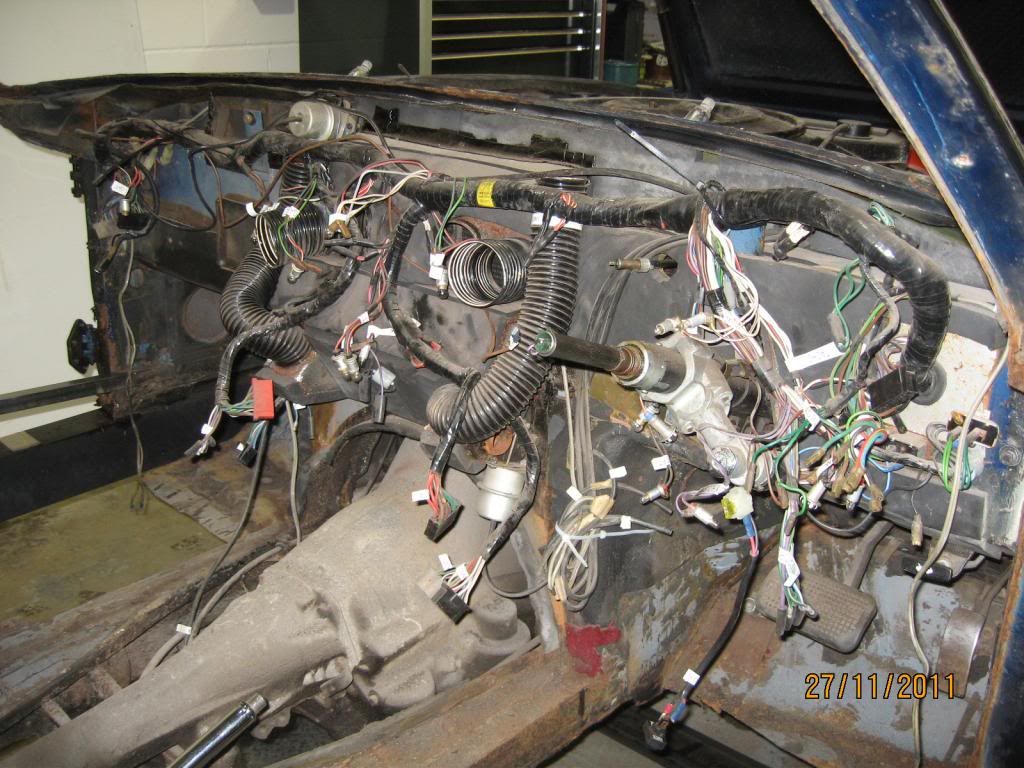
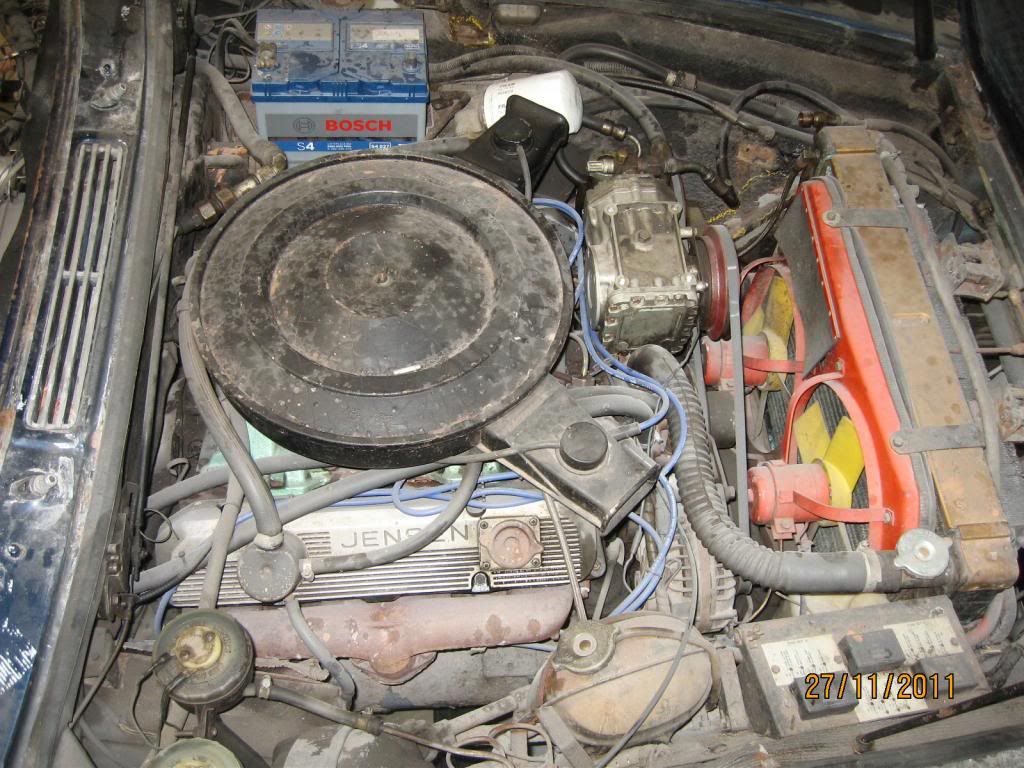
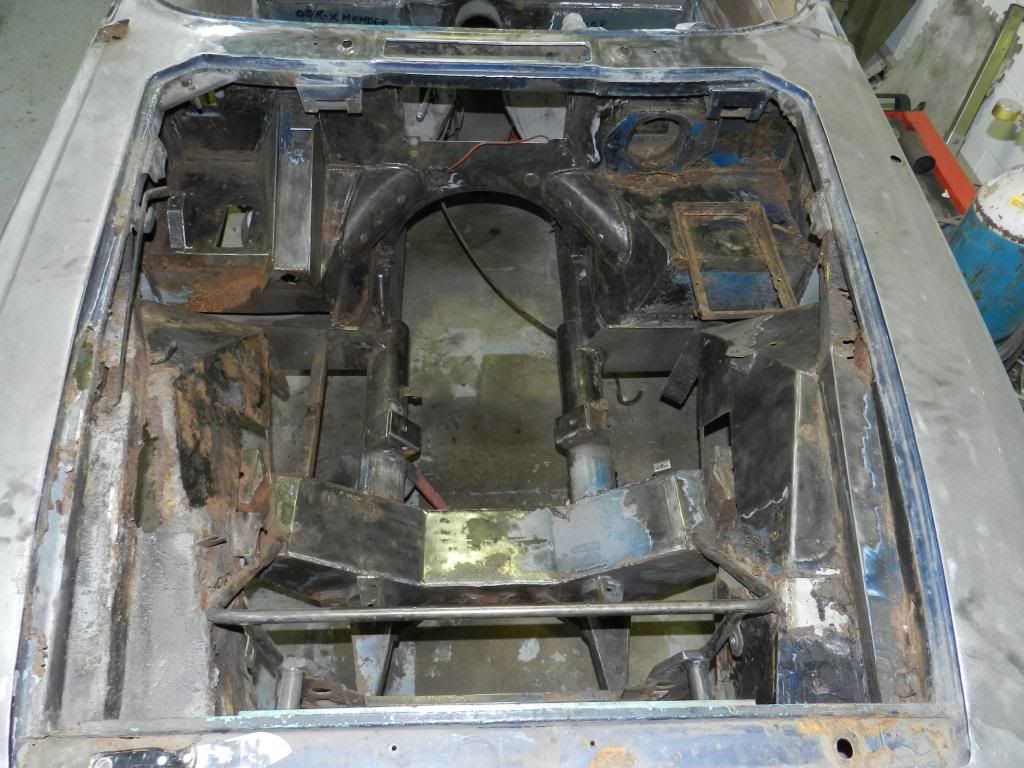
This is the engine bay which will get a tidy up later.
The cover sill was fitted and a few repairs to the A post and surrounding areas and I now have a rusty old Jensen with good sills
The sill centre sections go in, this a substantial box section with the jacking points built in.
If you buy a Jensen get them to jack it up on all 4 off these to see if they are ok.

The dash comes out.

This is the engine bay which will get a tidy up later.

The cover sill was fitted and a few repairs to the A post and surrounding areas and I now have a rusty old Jensen with good sills

It is a nut and bolt job but I like to get things moving so I am trying to strip the car and keep ahead of Geff and Brian who are doing 1 or 2 days a week on the bodywork. In hindsight I should have given myself a months head start on the welders but it still worked out okay.
The car was just about running when I bought it and I had driven it slowly so the engine and gearbox were working but a bit rough and were an unknown quantity.
Once the sills were on and the inside plate fabricated and fitted the 2 piece front footwells could be fitted.
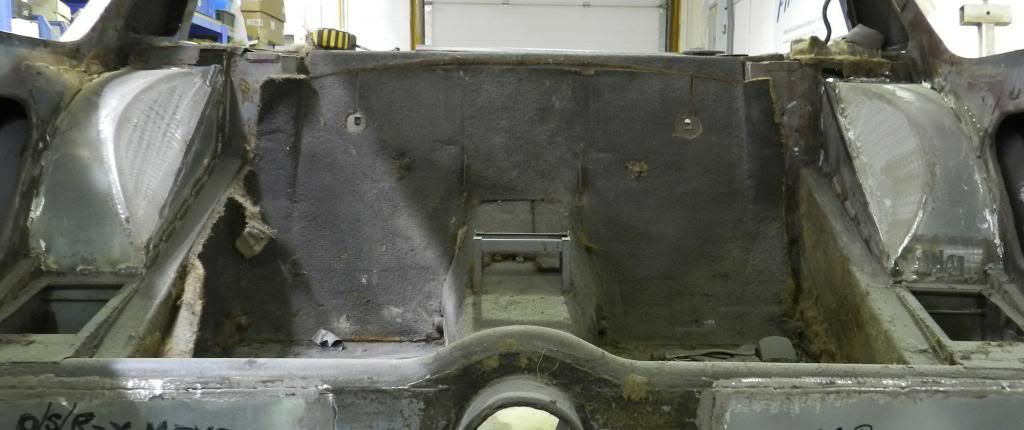
Then a small issue of some rot on the rear crossmember needed to be repaired before the floors could go in.


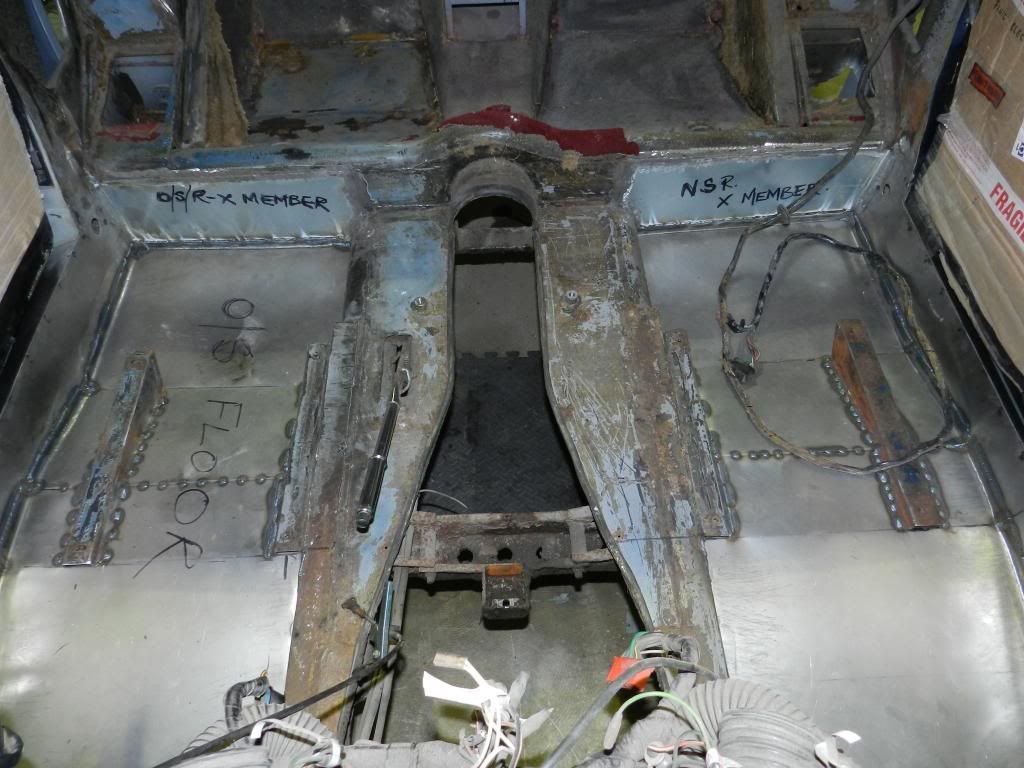
The problem with restoring (Jensen) cars is that there is always more rust that was supposed to be the seat belt anchor point on the rear arch!!
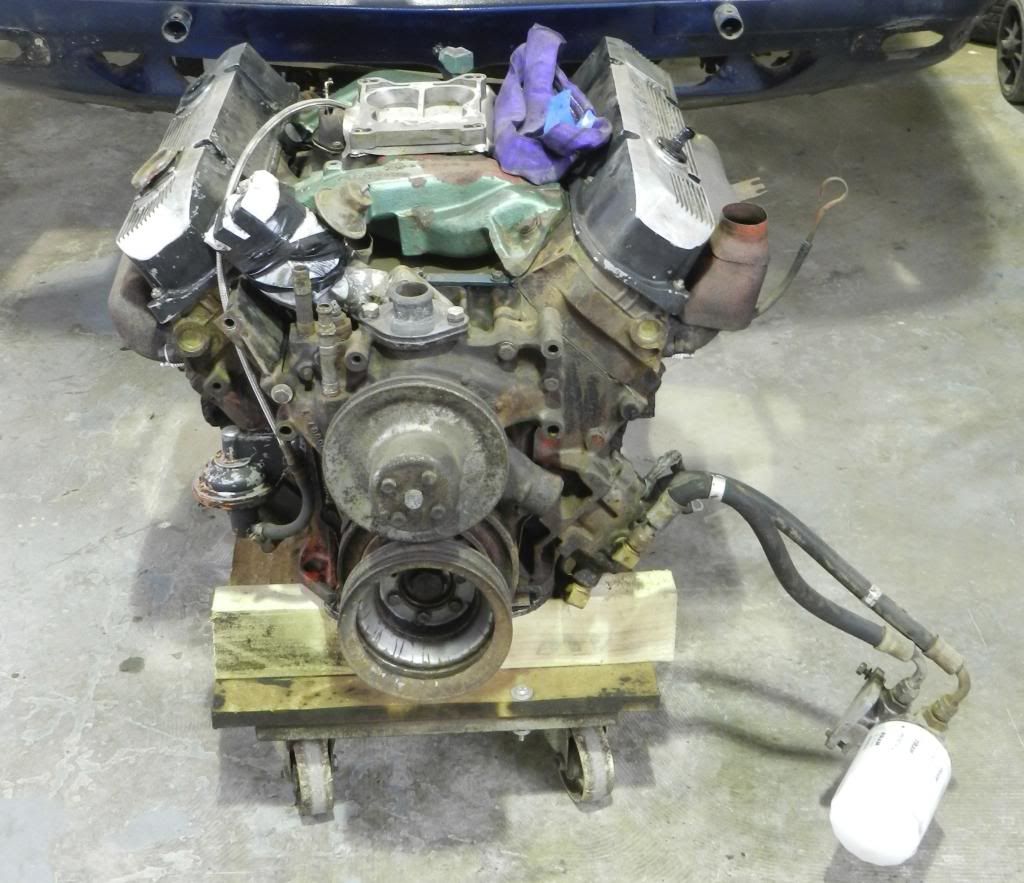
Anyway I did some work myself and pulled the engine out and degreased it.
The car was just about running when I bought it and I had driven it slowly so the engine and gearbox were working but a bit rough and were an unknown quantity.
Once the sills were on and the inside plate fabricated and fitted the 2 piece front footwells could be fitted.

Then a small issue of some rot on the rear crossmember needed to be repaired before the floors could go in.


The problem with restoring (Jensen) cars is that there is always more rust that was supposed to be the seat belt anchor point on the rear arch!!

Anyway I did some work myself and pulled the engine out and degreased it.

The plan for the car is to keep it as original as possible although there may be some small deviations from this and I am not planning any upgrades to start with.
This car was nearly 40 years old when I bought it and running an original setup which was one of the things I liked as though in need of some TLC it had not be messed about. So until it is finished and I have driven it for a while it will remain as it left the factory. I am sure upgrades could make it much better but I want an old car with an old car feel, I am fed up of computers controlling my life and constant flashing lights on the dash because a sensor missed a pulse.
SV8Predator you are correct the car is a G series running a Holley carb, this will be rebuilt and tried on the car but I have been reliably informed they will never run right but for the cost of a rebuild kit and a bit of my time I will give it a go.
So lets continue with the first of the outer panels which when fitted brought a big smile to my face as the beautiful Interceptor shape emerged.
Offside outer wheelarch
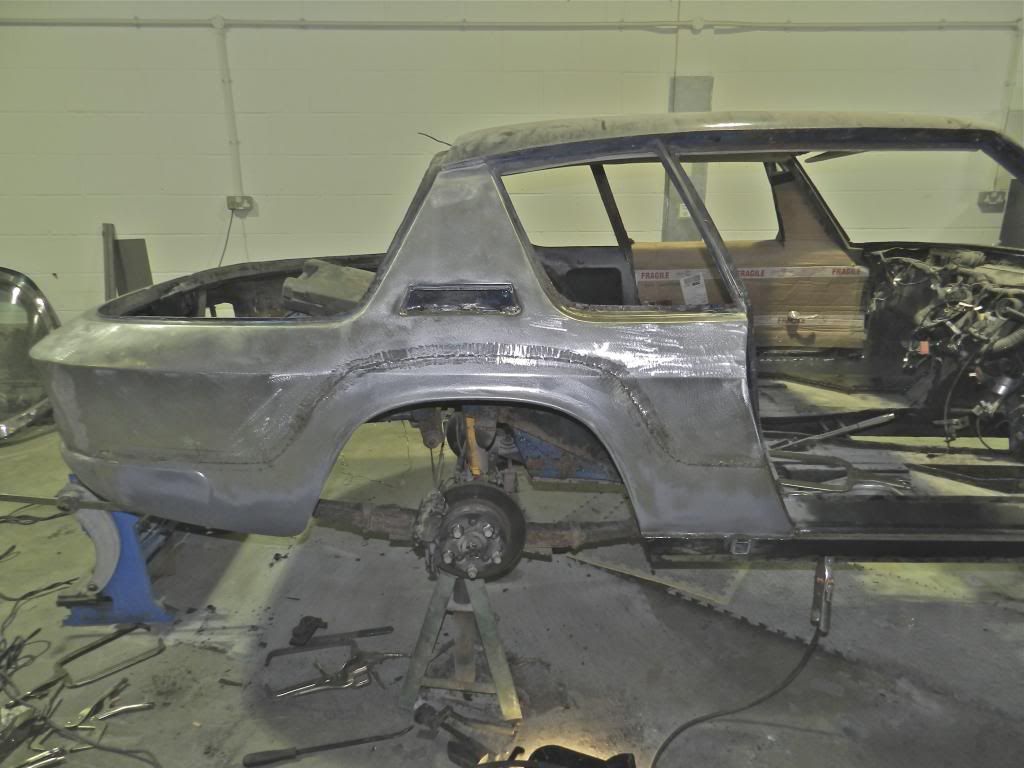
The nearside rear arch with just a minor piece requiring fabricating and the horrible looking rust on the original photos is repaired with a minimum of work
The entire inner wheelarches were replaced these started with Jensen panels which were only the first couple of inches and then the rest was made and fitted to suit
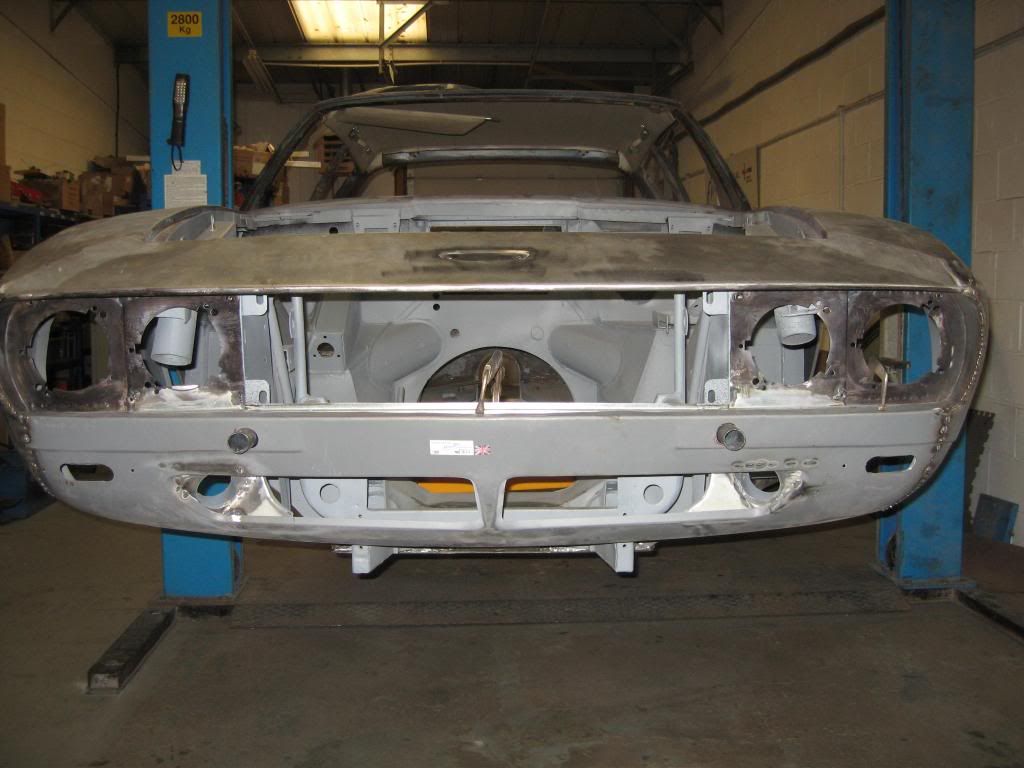
The car is being stripped to bare metal the hard way as I didn't fancy dipping and was thinking of having it blasted but by the time we had cut the rotten bits out it was easier to do it with a DA and blasting would not have removed the underseal anyway.
The engine bay is looking a bit empty now
Lastly to cheer me up the first parts came back from powder coating
This car was nearly 40 years old when I bought it and running an original setup which was one of the things I liked as though in need of some TLC it had not be messed about. So until it is finished and I have driven it for a while it will remain as it left the factory. I am sure upgrades could make it much better but I want an old car with an old car feel, I am fed up of computers controlling my life and constant flashing lights on the dash because a sensor missed a pulse.
SV8Predator you are correct the car is a G series running a Holley carb, this will be rebuilt and tried on the car but I have been reliably informed they will never run right but for the cost of a rebuild kit and a bit of my time I will give it a go.
So lets continue with the first of the outer panels which when fitted brought a big smile to my face as the beautiful Interceptor shape emerged.
Offside outer wheelarch

The nearside rear arch with just a minor piece requiring fabricating and the horrible looking rust on the original photos is repaired with a minimum of work

The entire inner wheelarches were replaced these started with Jensen panels which were only the first couple of inches and then the rest was made and fitted to suit

The car is being stripped to bare metal the hard way as I didn't fancy dipping and was thinking of having it blasted but by the time we had cut the rotten bits out it was easier to do it with a DA and blasting would not have removed the underseal anyway.
The engine bay is looking a bit empty now

Lastly to cheer me up the first parts came back from powder coating

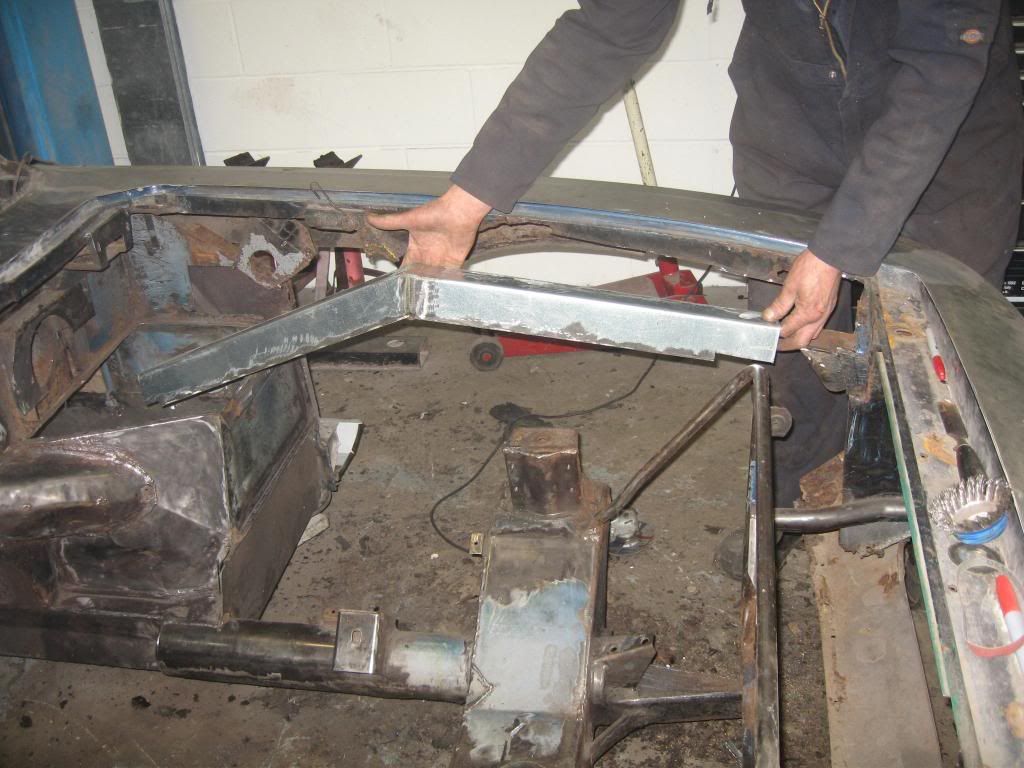
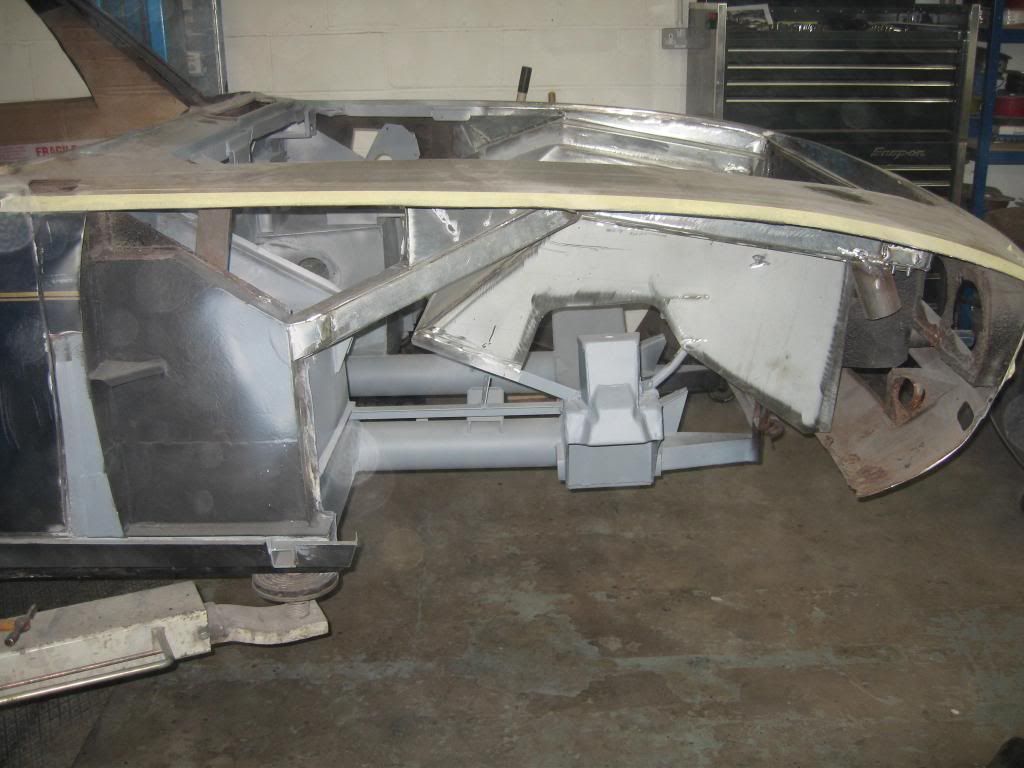
With the back end coming together it was time to sort out the front inner wings which had been repaired in the past and were still losing the fight against rust.
It was decided to completely replace them with the replacement parts being made by Geff rather than new panels so after a bit more cutting and grinding the first side was removed

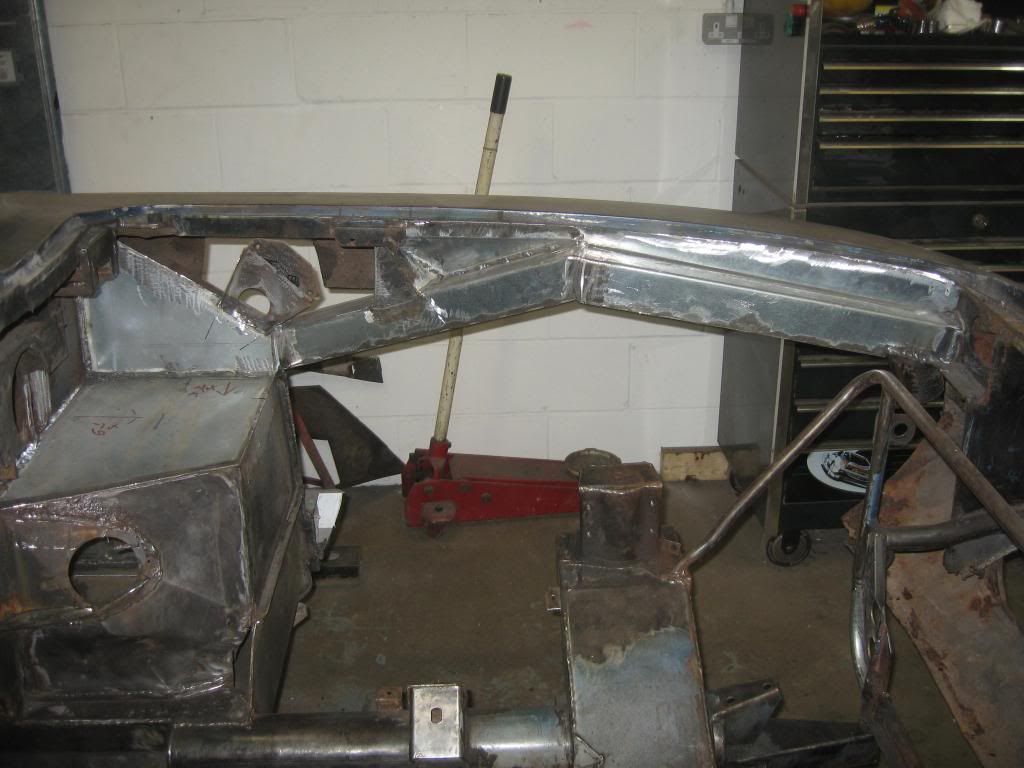
A new box section was made
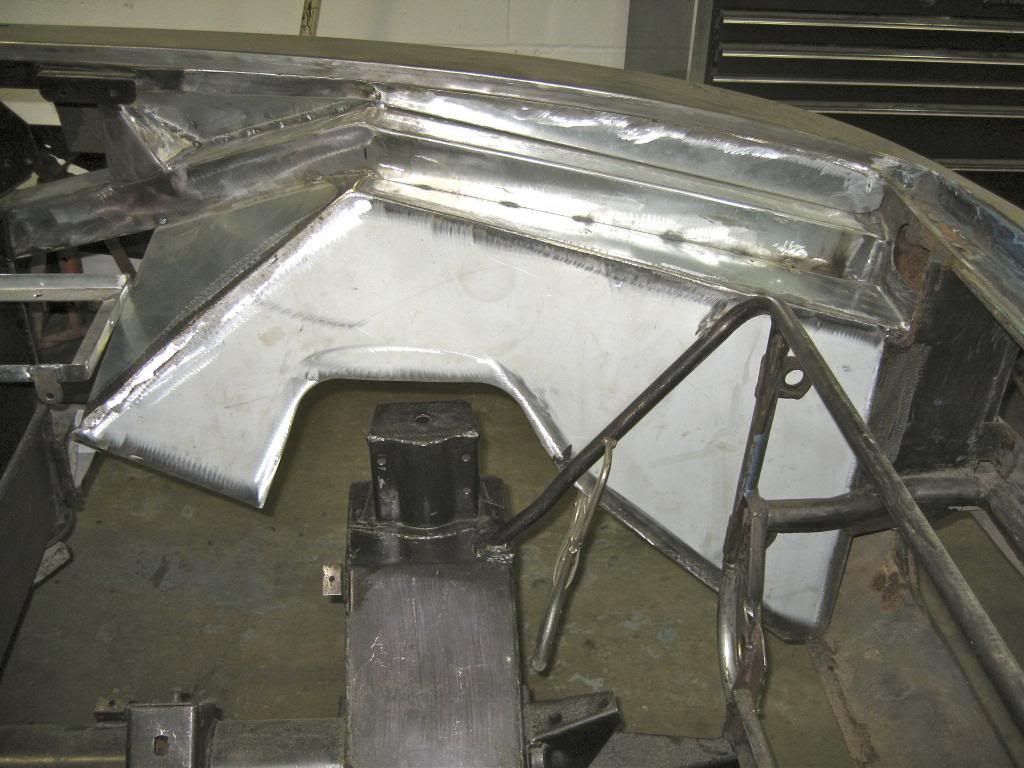
It was then fitted along with other repair sections around the footwell
I decided to make my own new battery tray ready for Geff to fit

This was fitted along with the new inner wings
Then the same was done on the other side along with some extra repairs to the channel where the inner and outer wings meet and the bonnet fixing points were replaced on both sides
Now the car was really starting to take shape and I could begin the task of prepping and priming some of the steel that had been replaced


It was decided to completely replace them with the replacement parts being made by Geff rather than new panels so after a bit more cutting and grinding the first side was removed

A new box section was made

It was then fitted along with other repair sections around the footwell

I decided to make my own new battery tray ready for Geff to fit

This was fitted along with the new inner wings

Then the same was done on the other side along with some extra repairs to the channel where the inner and outer wings meet and the bonnet fixing points were replaced on both sides

Now the car was really starting to take shape and I could begin the task of prepping and priming some of the steel that had been replaced
P5Nij said:
Only two pages in and already it's starting to resemble the great Maserati Ghibli restoration thread elsewhere!
This guy is in a different league to me not only has he carried out his own bodywork and paint he even fabricated his own door skins. I on the other hand have paid for professional fabrication and welding to be carried out as although I can make 2 pieces of steel stick together I do not have the skills to try to do this kind of work to even a simple car never mind the extra complexities a Jensen adds.
I will try to do everything I can myself as long as I can make as good a job as leaving it to the pros. A lot of things are just labour intensive so stripping cleaning and painting parts to go back on is not too difficult and my advantage over a garage is that it costs me nothing for every hour I put in so I can take as long as I want to achieve the best job.
Im now 6-7 months into this project and time to get some primer on to protect the new metalwork the steel had a coat of ferrozinc to protect it from flash rusting as I cleaned it up over a few weeks and was then sprayed with zinc 182 it will later be seam sealed and the sprayed again with zinc 182 before schultz is applied.
Meanwhile Geff and Brian cut the front lower wings and front off the car
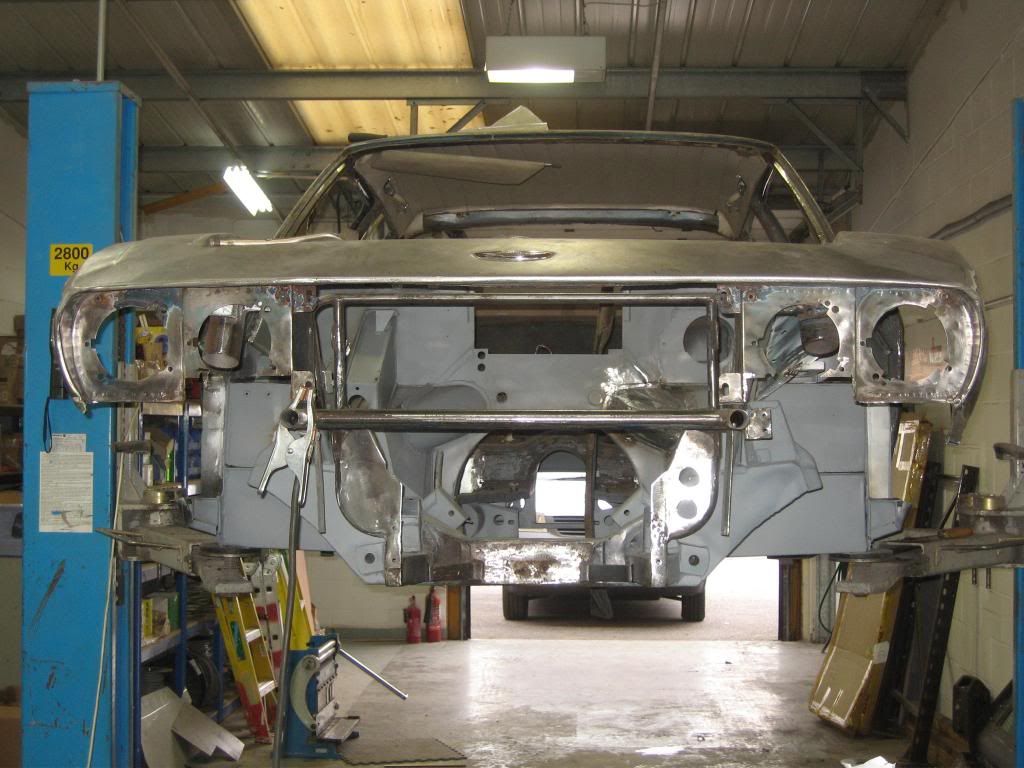
This gave me great access to clean and paint this area
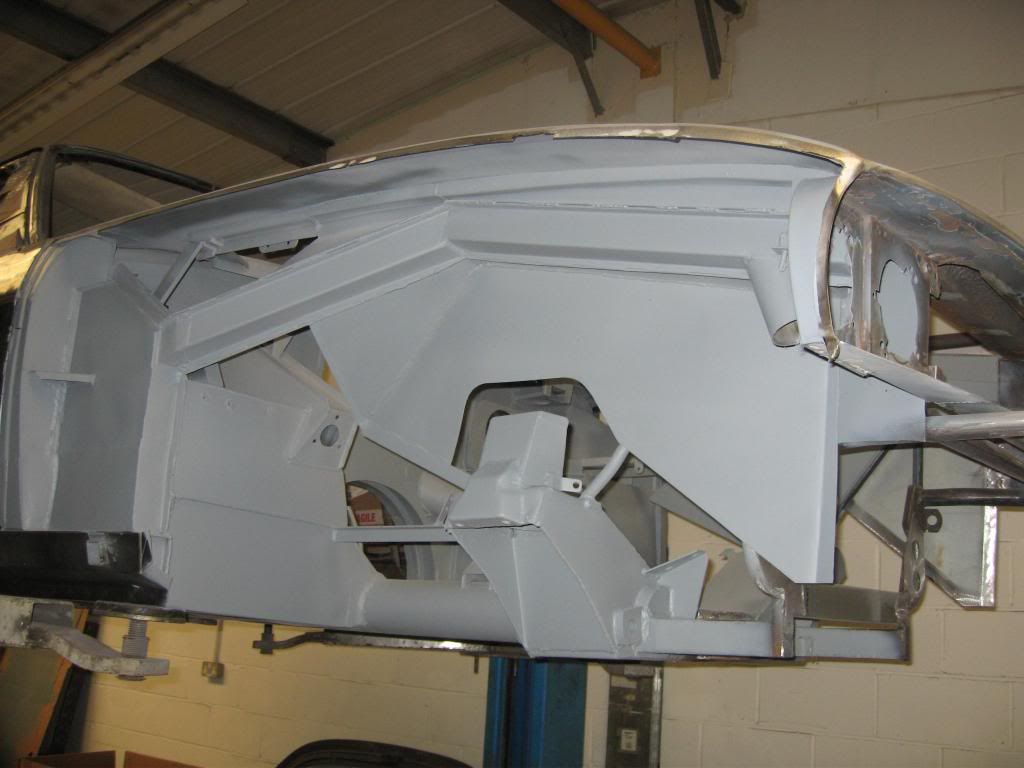
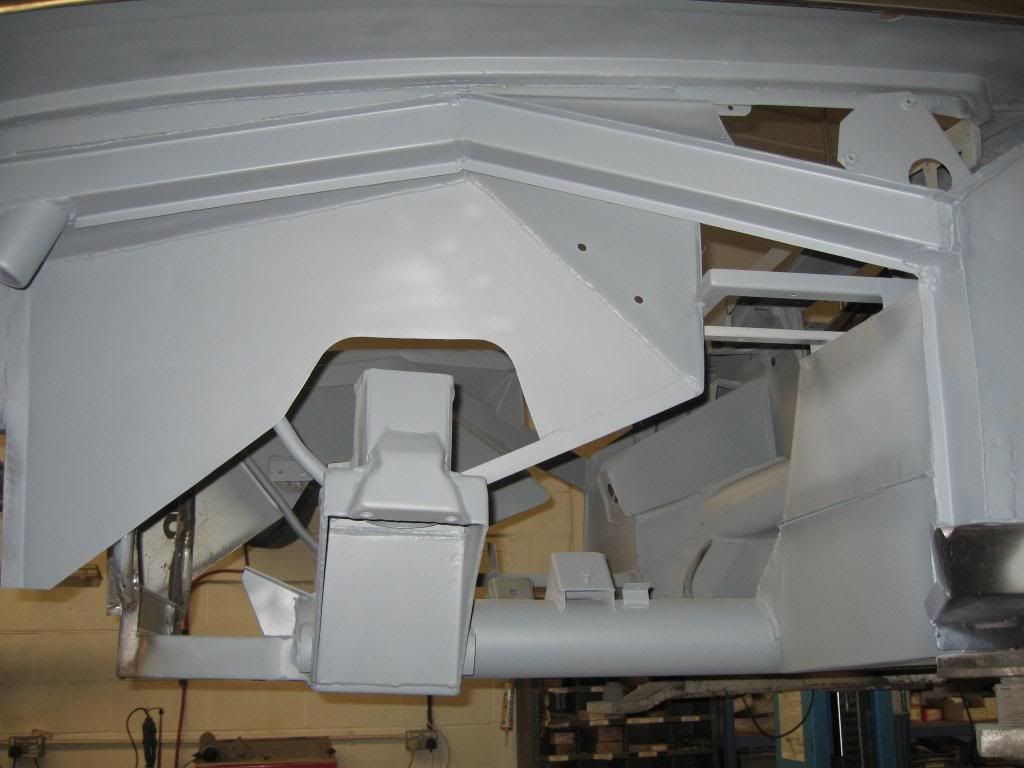
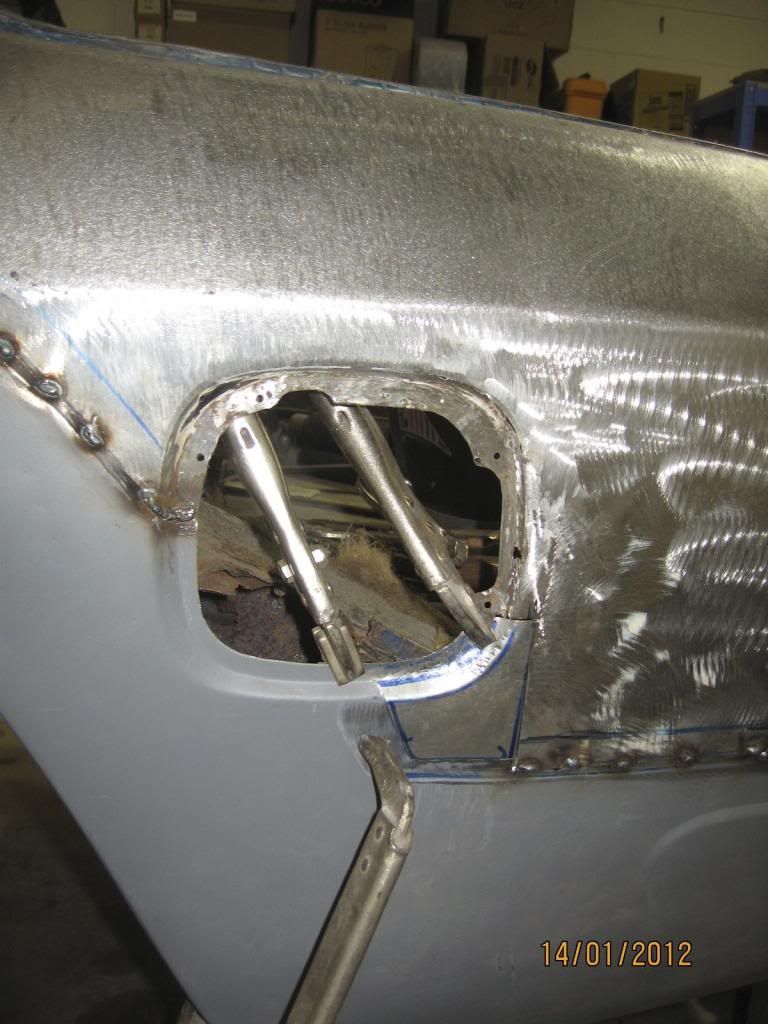
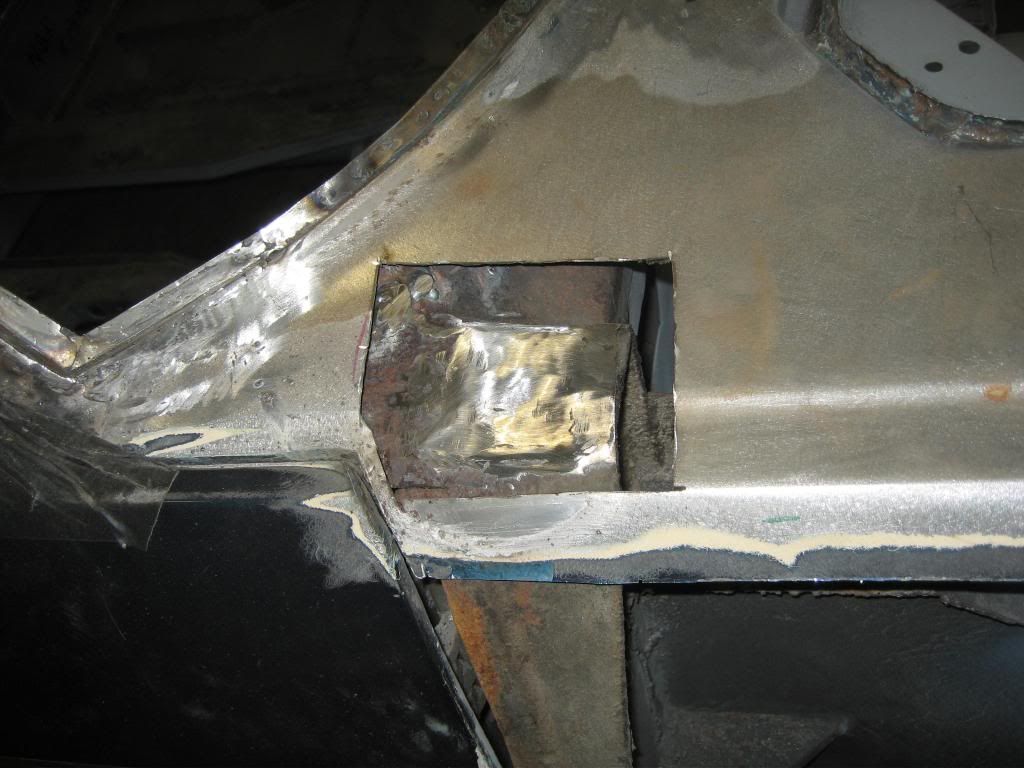
A few small repairs were carried out around the windscreen frame and a strange hole in the wing top section

Meanwhile Geff and Brian cut the front lower wings and front off the car


This gave me great access to clean and paint this area


A few small repairs were carried out around the windscreen frame and a strange hole in the wing top section

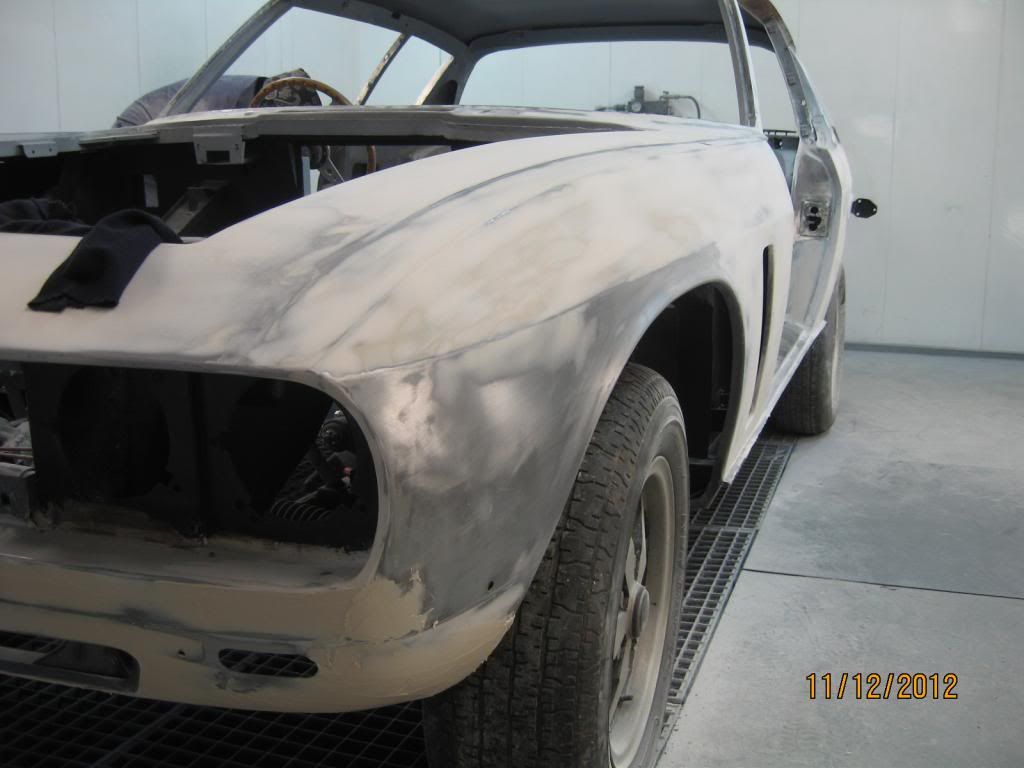
After all the underbonnet repairs it was finally time to fit new front lower wing sections and a front lower panel this was quite time consuming work as we found out the front of the car is longer on 1 side than the other by about 15mm which I later found out is quite common on these cars.
The first side took quite a while but the second side was much quicker once we had worked out they weren't meant to fit and you are buying something that resembles what you need and the rest is up to you to make them fit.

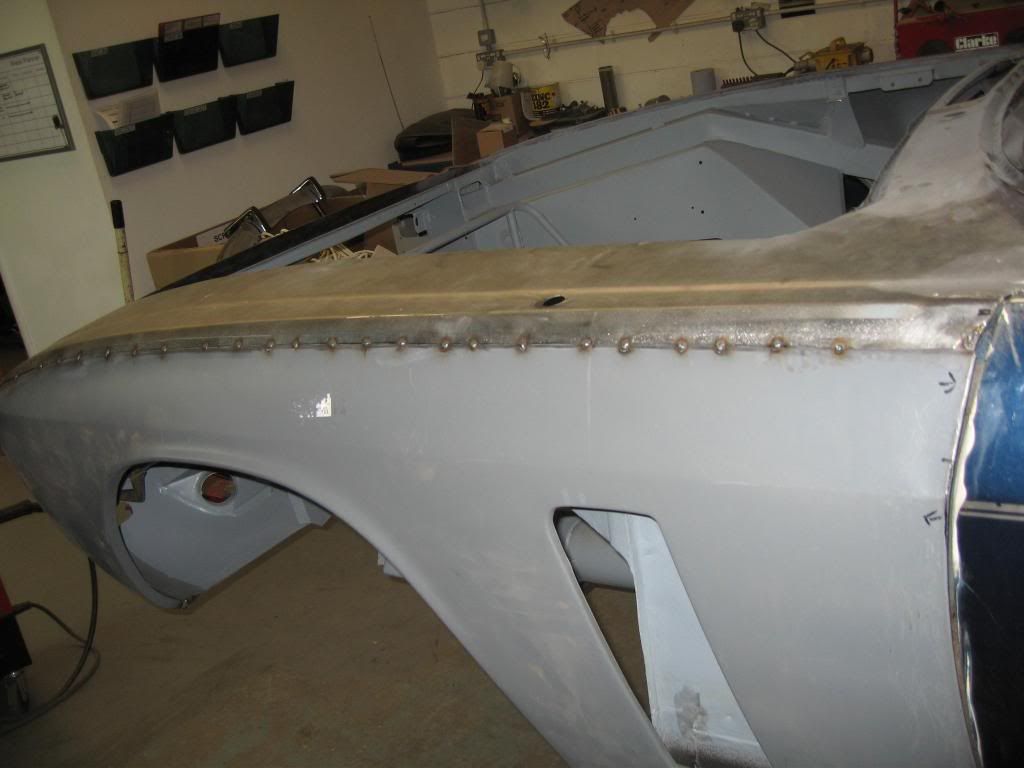
There was additional work around the side vents to make the hole resemble the vent shape and as mine is an early MK111 it needed some fresh air scoops making and fitting to the lower front panel, I made and fitted these under the tuition of Geff and Brian
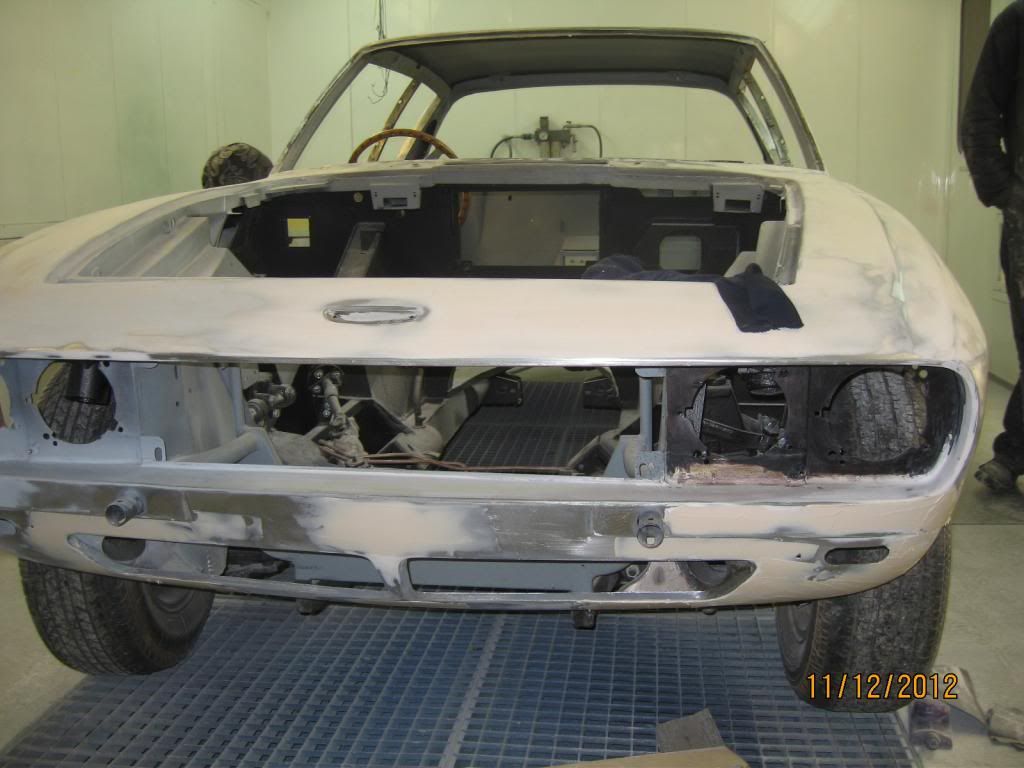
Next it was roughly levelled out and a guide coat of primer put on, this really lifted my spirits as by now I was just throwing money at the car and didn't have much to show for it
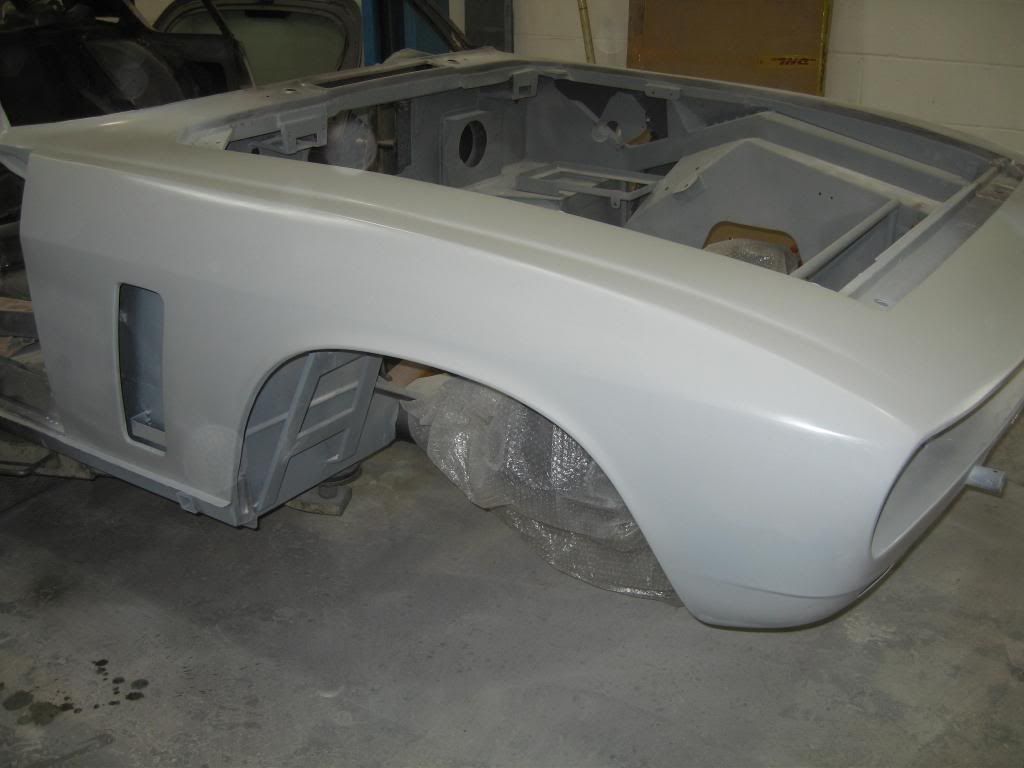
With the front end complete I could start to paint the front crossmember and put the front suspension back on.
The first side took quite a while but the second side was much quicker once we had worked out they weren't meant to fit and you are buying something that resembles what you need and the rest is up to you to make them fit.


There was additional work around the side vents to make the hole resemble the vent shape and as mine is an early MK111 it needed some fresh air scoops making and fitting to the lower front panel, I made and fitted these under the tuition of Geff and Brian
Next it was roughly levelled out and a guide coat of primer put on, this really lifted my spirits as by now I was just throwing money at the car and didn't have much to show for it

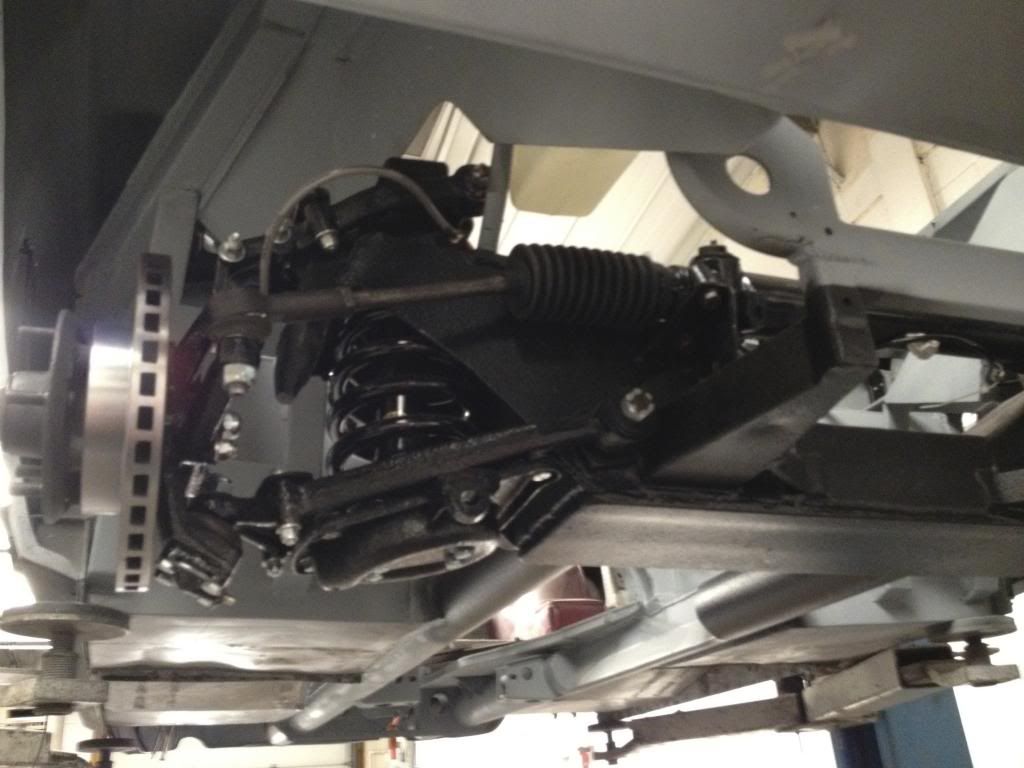
With the front end complete I could start to paint the front crossmember and put the front suspension back on.

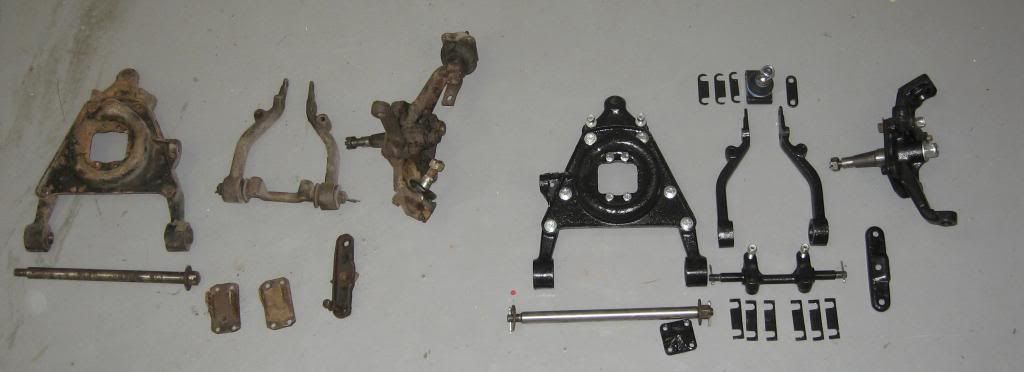
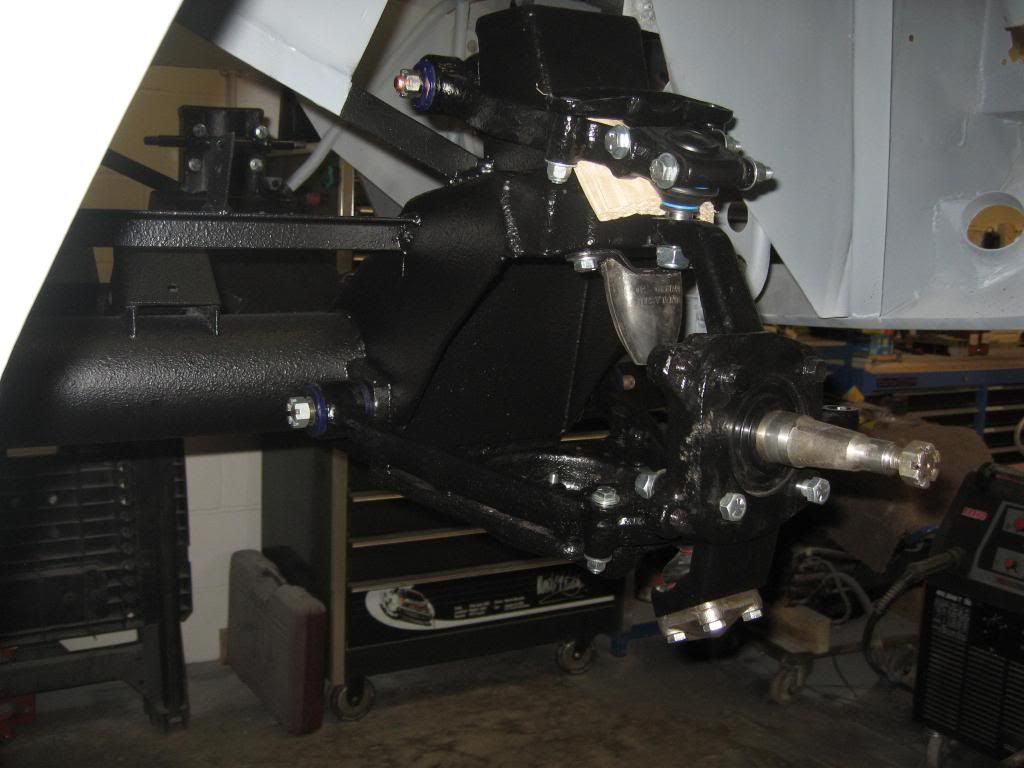
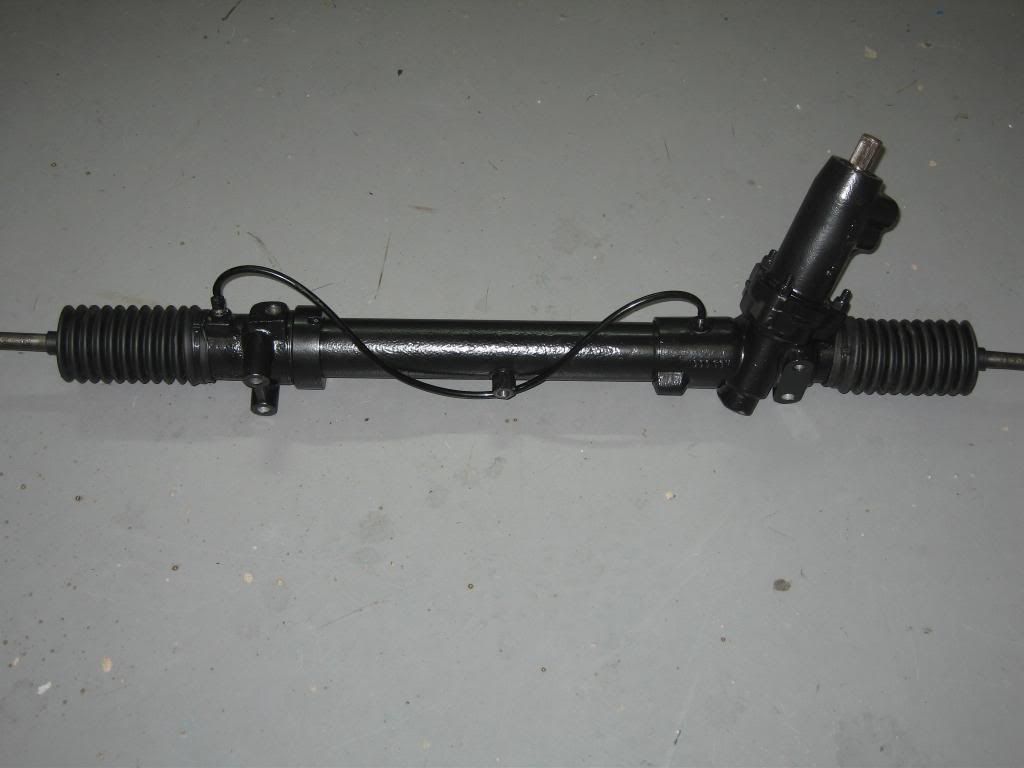
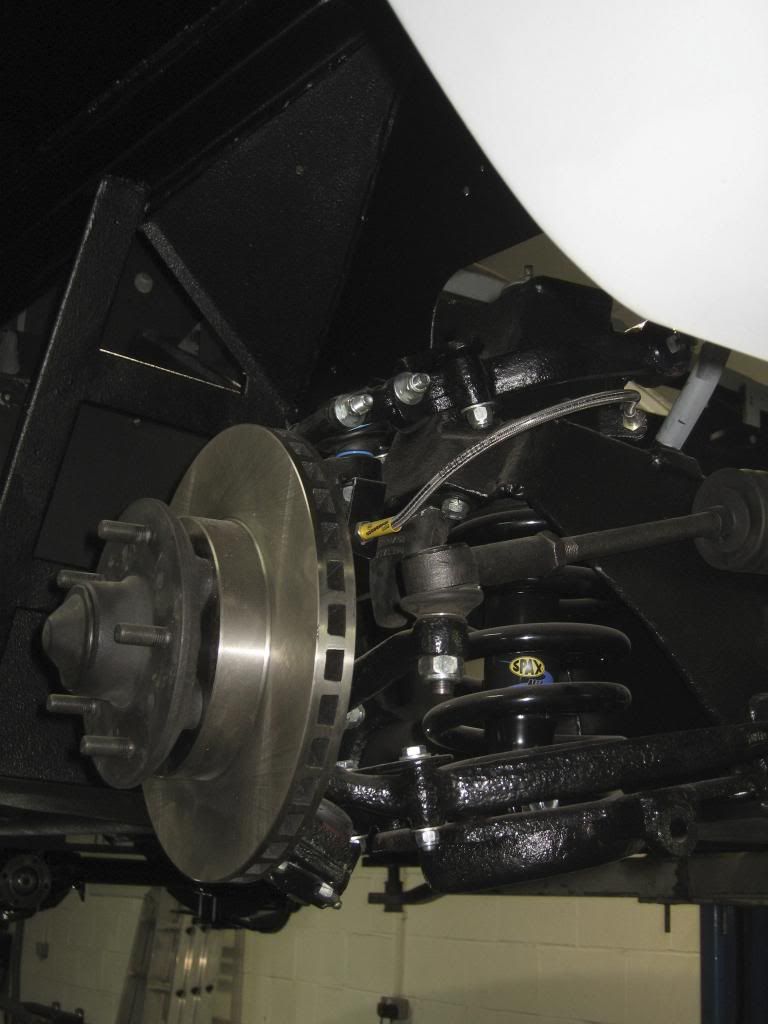
Whilst we have a break from welding I can get on with the front steering and suspension, the rack was stripped painted and a new seal kit fitted.

This was then refitted along with new springs which had been away to be powder coated and the new discs which had arrived
Then I set about cleaning and painting various parts and test fitting them to the new inner wings.


This was then refitted along with new springs which had been away to be powder coated and the new discs which had arrived

Then I set about cleaning and painting various parts and test fitting them to the new inner wings.

Although the outer shell was now complete the car still required repairs to the rear hatch, doors and some issues under the rear of the car. I stripped my original hatch to find it was far worse under the paint than we had thought.
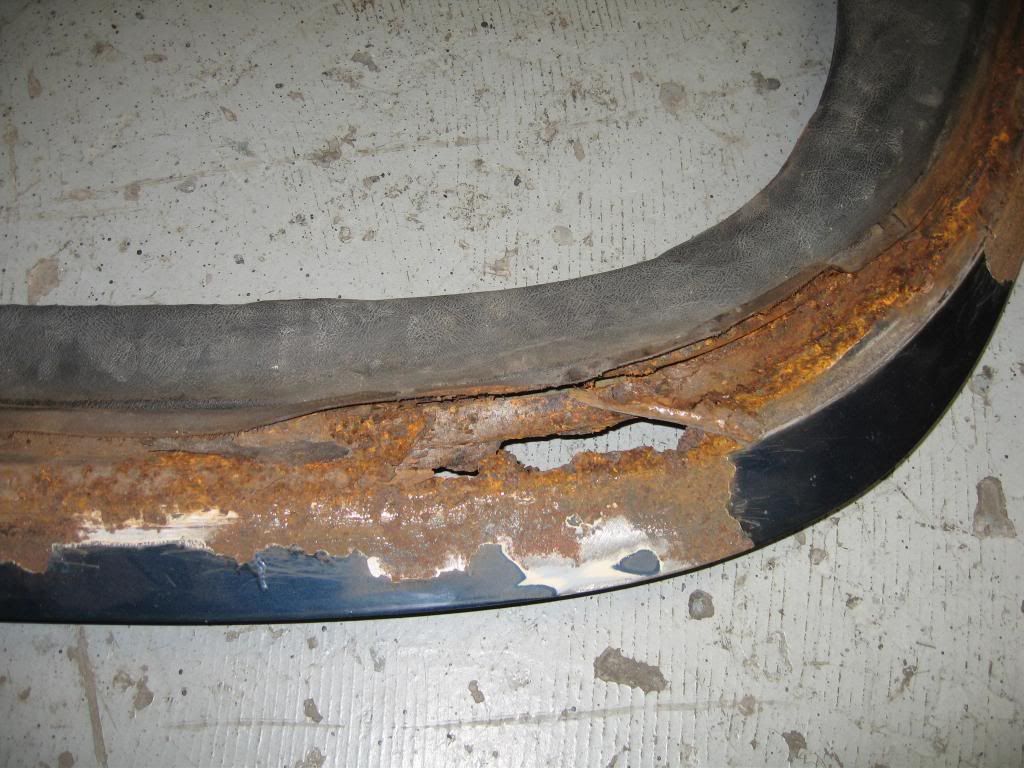
This and the roof are the only exterior panels not available for these cars which I hadn't realised when I bought the car and this may have stopped me from buying the car.
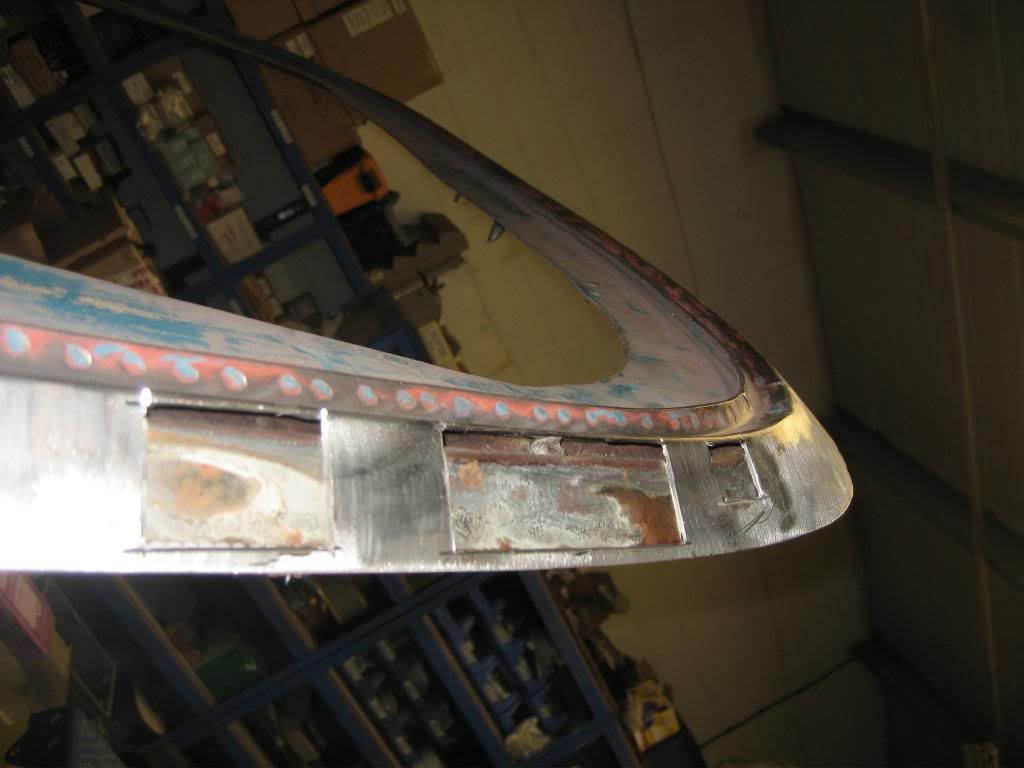
Luckily I grabbed a spare which rarely come up on ebay and had a 500 mile trip to collect it which turned out to be a very good decision, when I stripped the replacement hatch there were only a few small repairs needed so Geff cut the rot out and welded in some new metal.
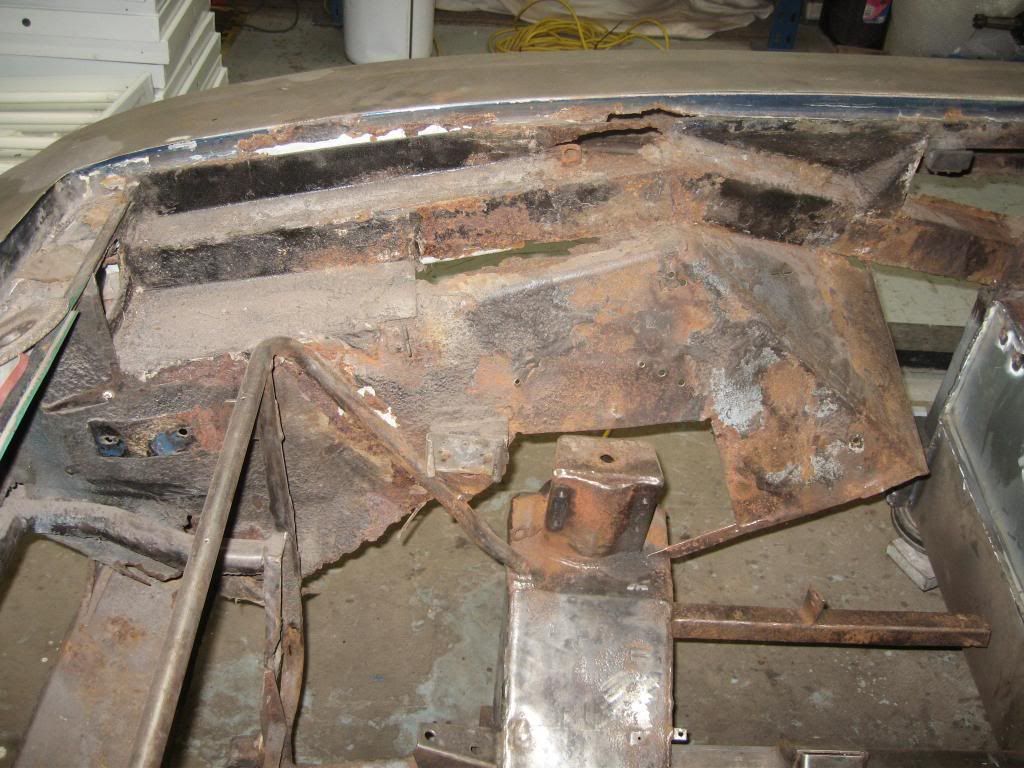
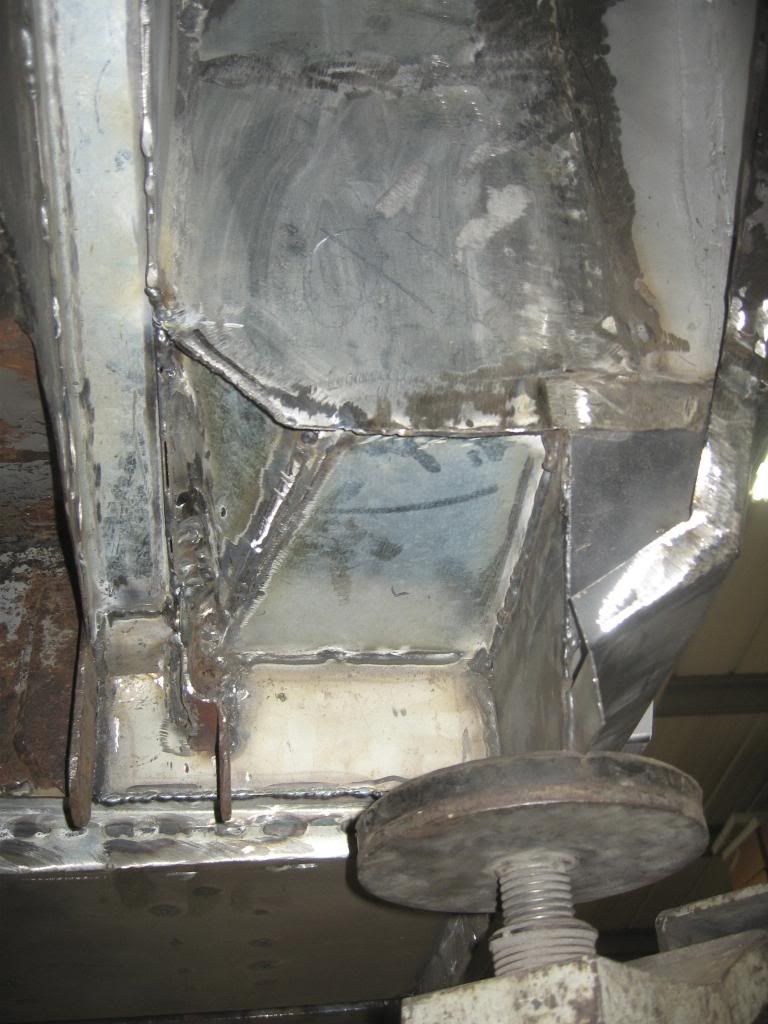
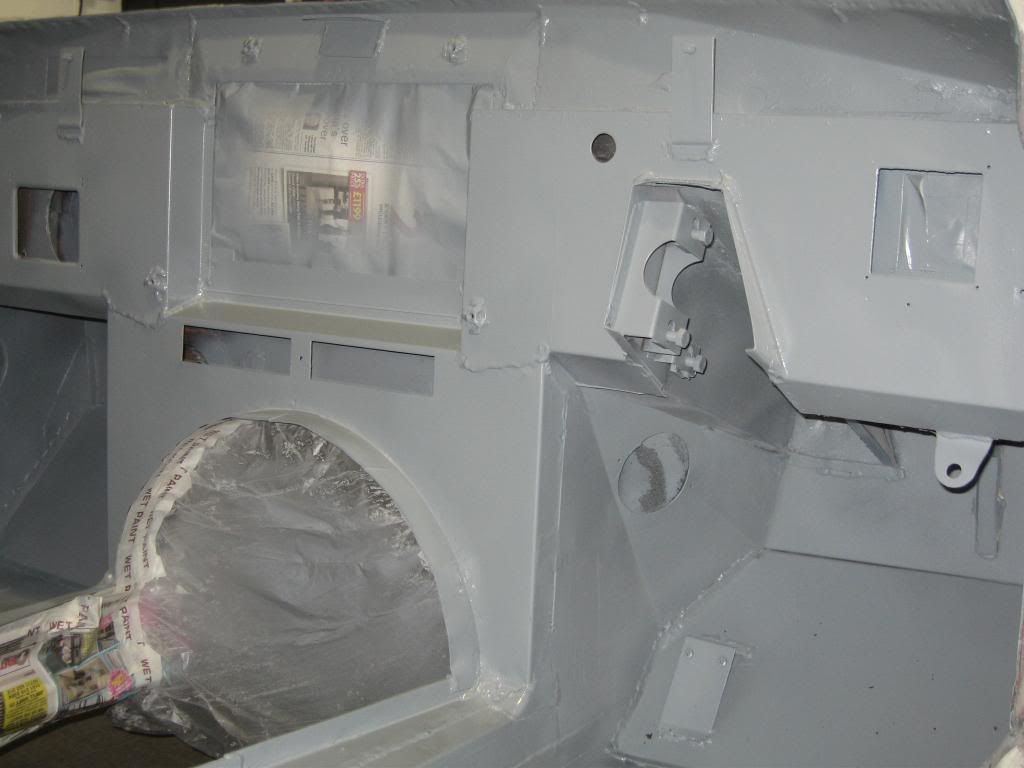
Next came the awkward looking repairs around the front mounting for the rear spring and under the inertia reel box
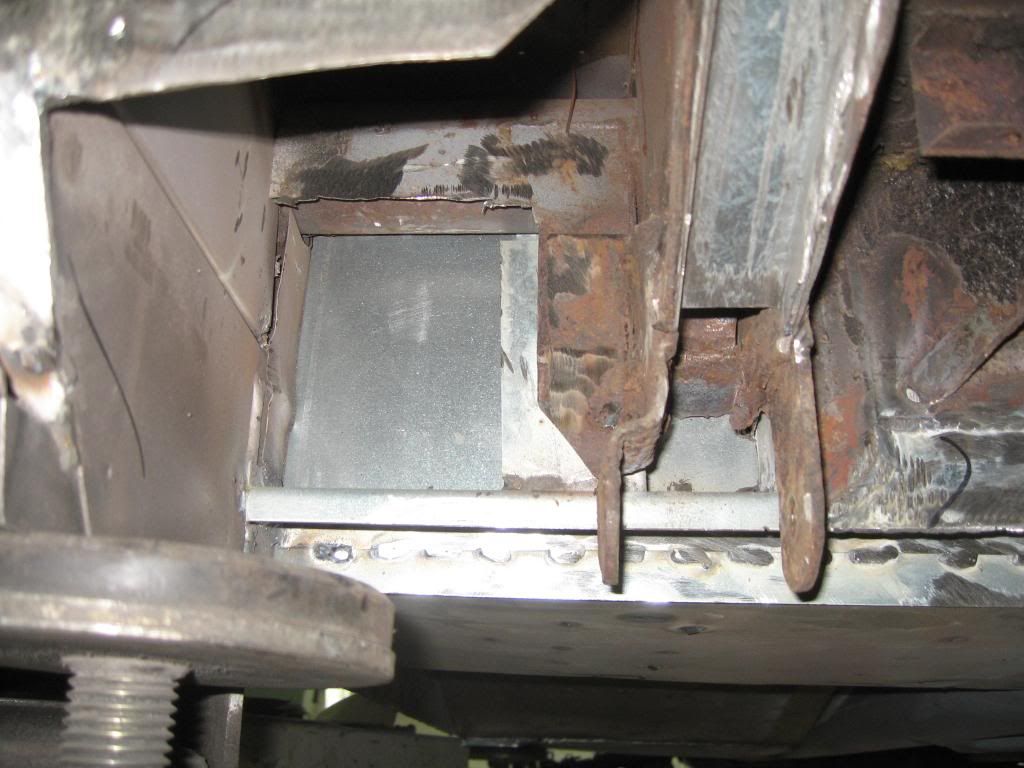
The photos show opposite sides as I didnt get before and after photos of the same side but they were very similar

This and the roof are the only exterior panels not available for these cars which I hadn't realised when I bought the car and this may have stopped me from buying the car.
Luckily I grabbed a spare which rarely come up on ebay and had a 500 mile trip to collect it which turned out to be a very good decision, when I stripped the replacement hatch there were only a few small repairs needed so Geff cut the rot out and welded in some new metal.


Next came the awkward looking repairs around the front mounting for the rear spring and under the inertia reel box

The photos show opposite sides as I didnt get before and after photos of the same side but they were very similar

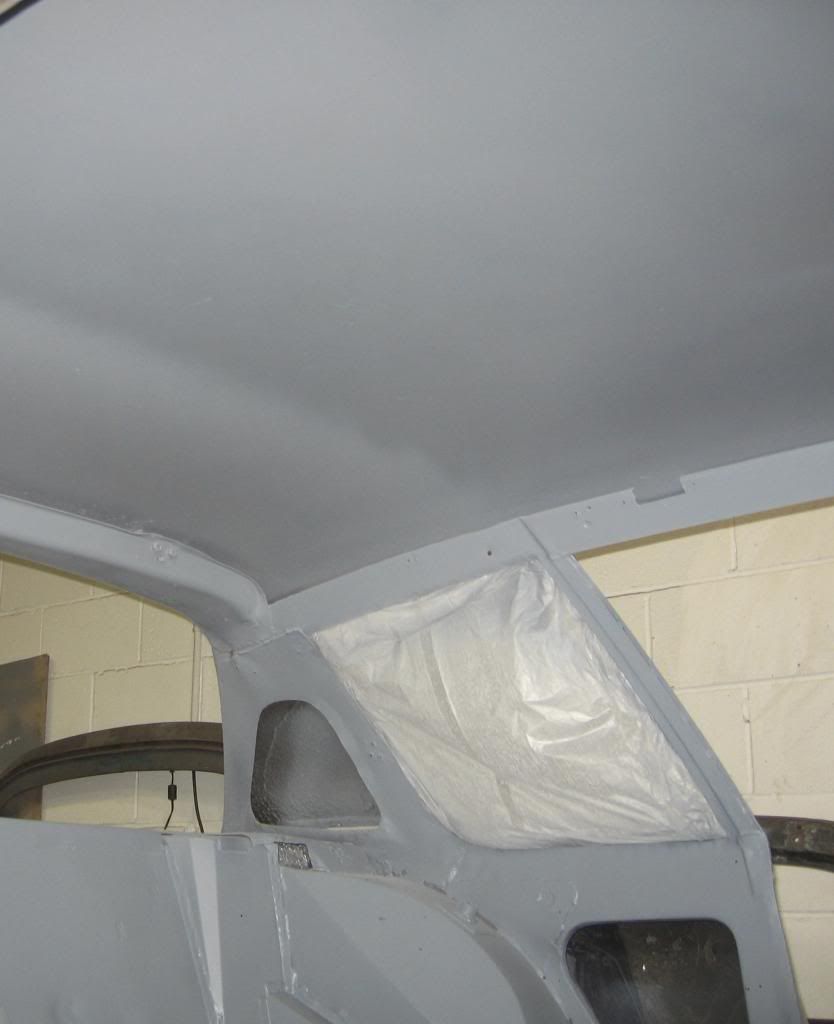
With the welding now completed I had to get the underside, inside and boot painted this was all done the hard way by sanding and scraping but it was great to see the results when the paint went on and to know that there is no more rust lurking.
The metalwork was treated to a coat of ferrozinc before spraying zinc 182 everywhere followed by seam sealer and another coat of zinc 182.
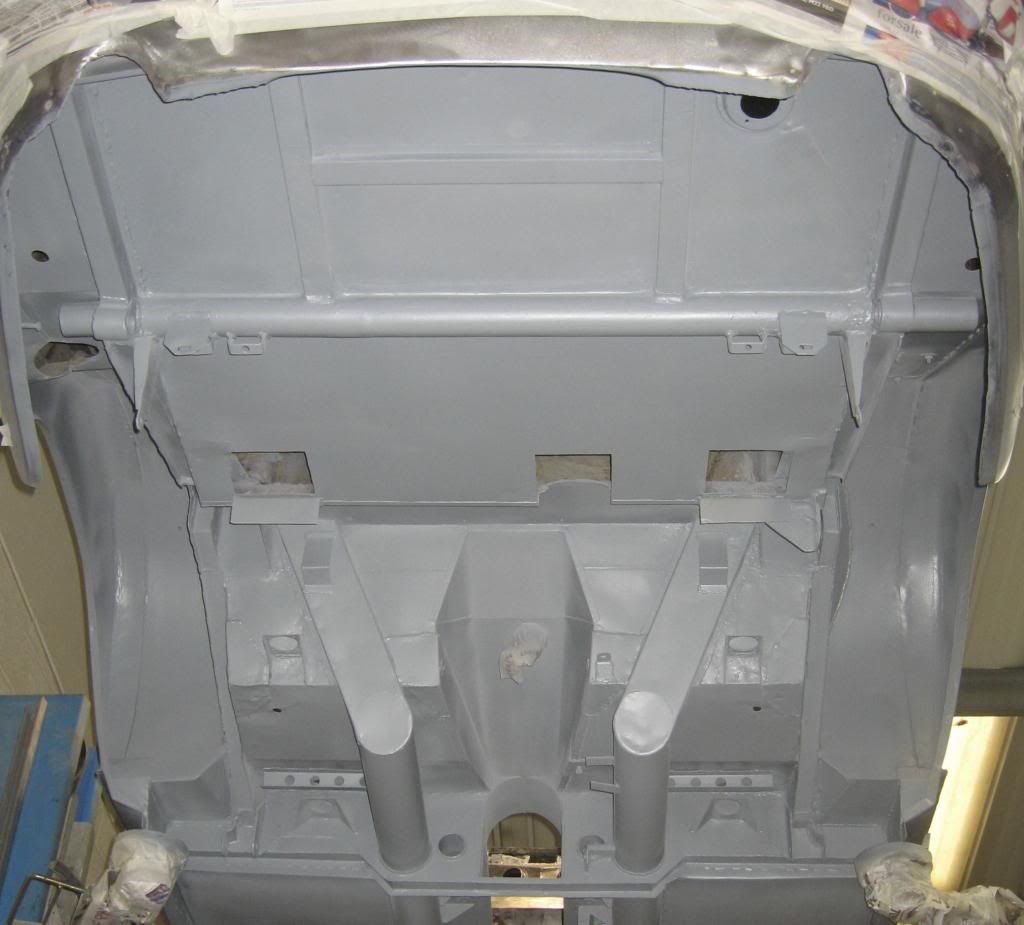
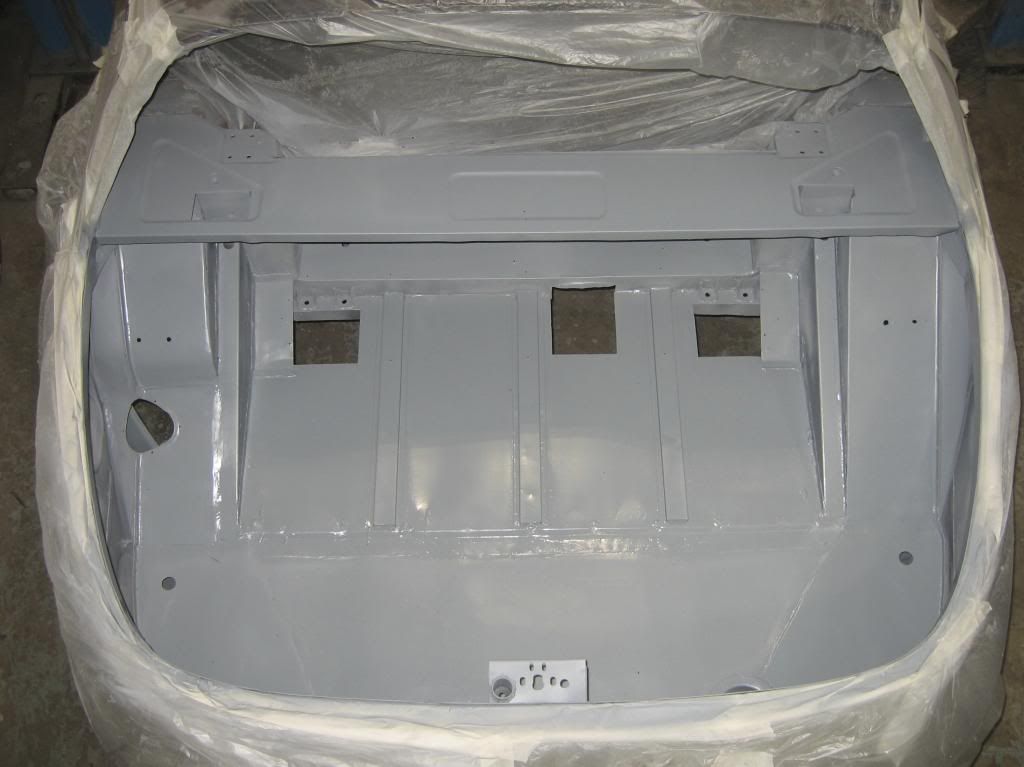
The boot had a coat of schultz
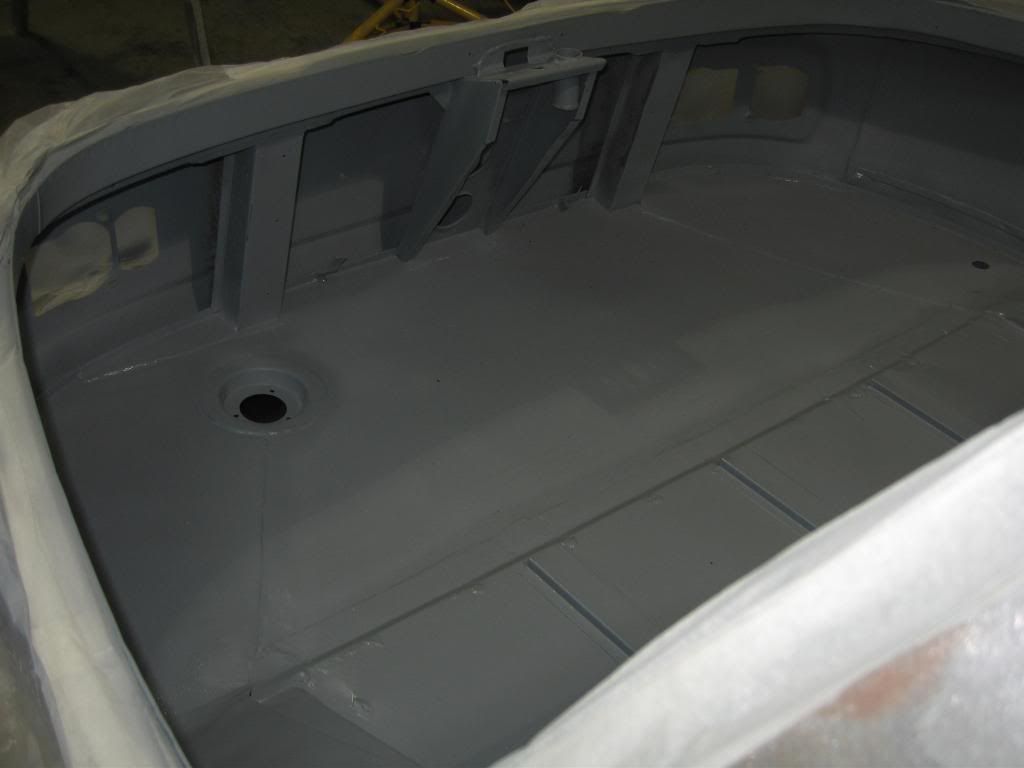
The metalwork was treated to a coat of ferrozinc before spraying zinc 182 everywhere followed by seam sealer and another coat of zinc 182.


The boot had a coat of schultz


SV8Predator said:
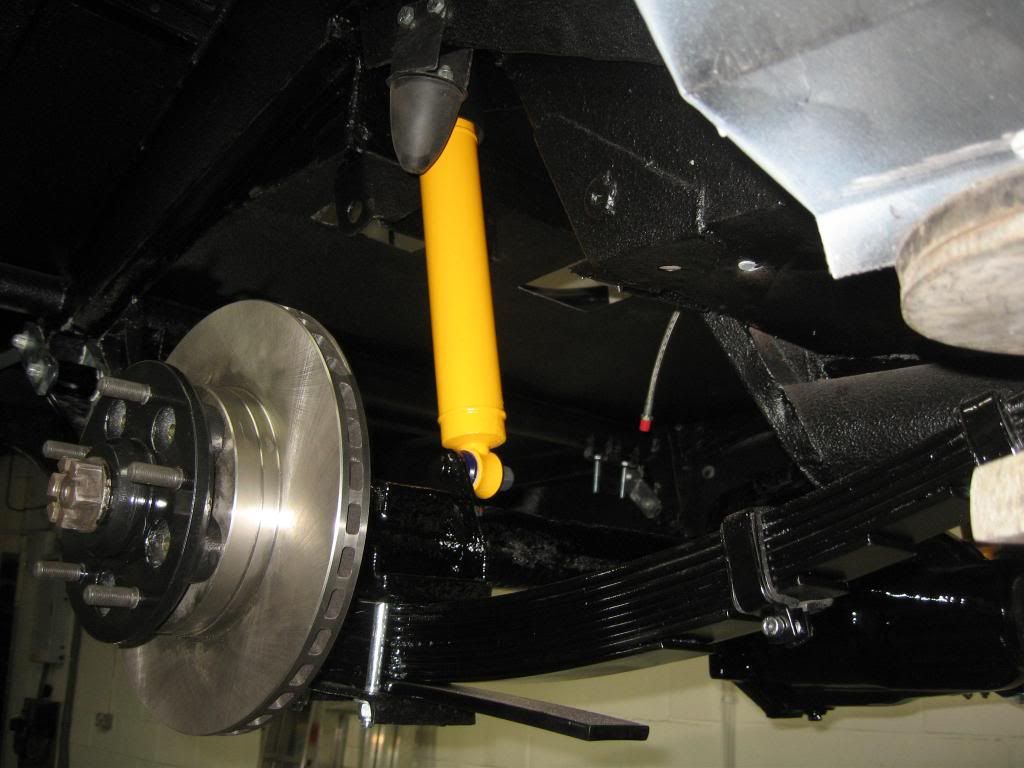
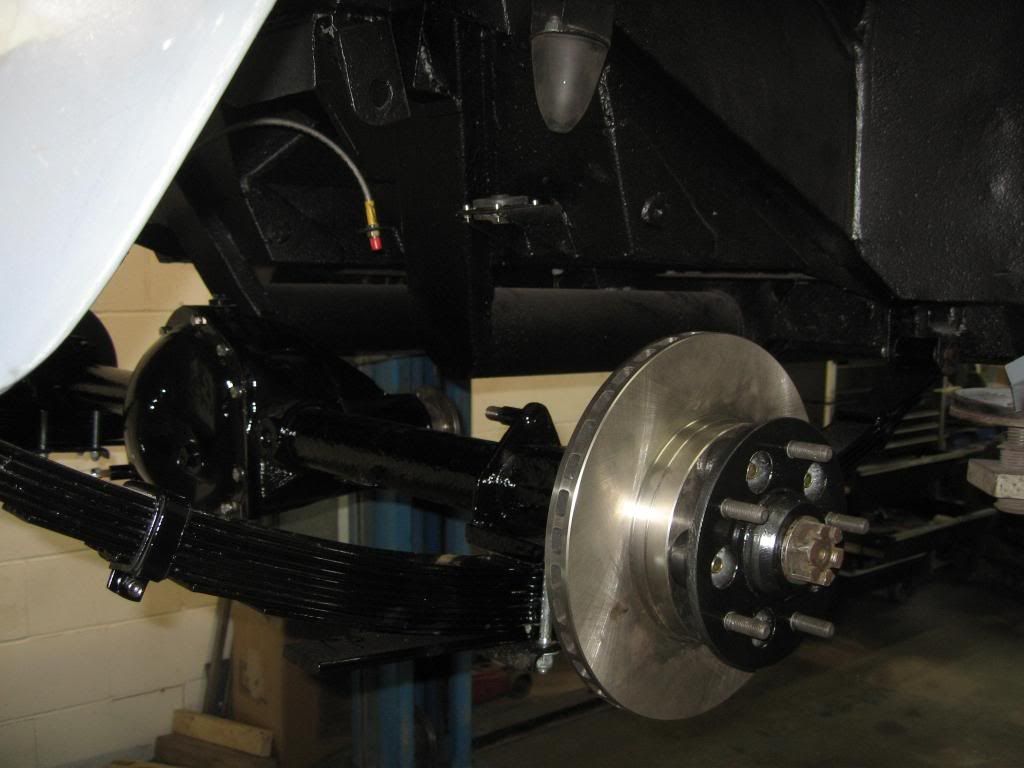
Will the paint act as a lubricant between the spring leaves (as is normally required with leaf springs) or would it have the opposite effect?
The springs came painted and have some nylon between some of the leaves, all I have done is strip the crap paint off and repaint them. When it came to put them back together I used lashing of grease between all leaves.With the underside all painted it was time to get the rear axle fitted and front suspension completed so that the car could go back on its wheels to be delivered to the paint shop.
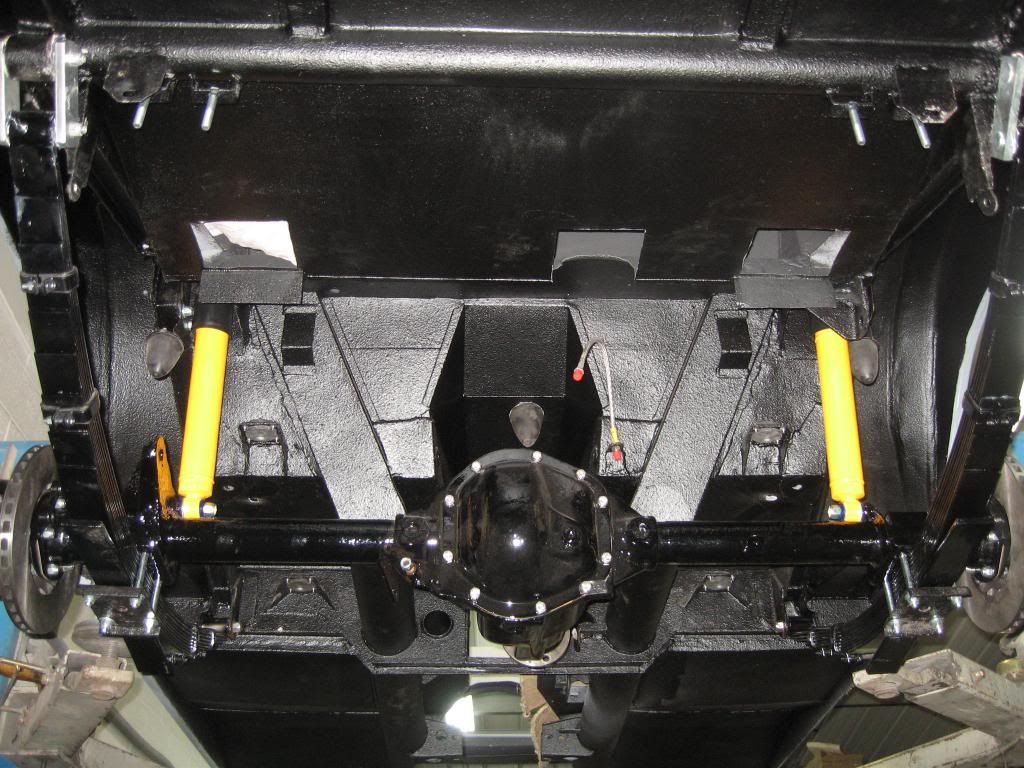
We are now 13 months into the project and I was really pleased with the progress so far with Geff and Brian completing all of the welding to the shell including lots of bits not shown on here and the car ready to be delivered to the paint shop, I was now getting very excited at the prospect of having a clean freshly painted shell to start rebuilding.


We are now 13 months into the project and I was really pleased with the progress so far with Geff and Brian completing all of the welding to the shell including lots of bits not shown on here and the car ready to be delivered to the paint shop, I was now getting very excited at the prospect of having a clean freshly painted shell to start rebuilding.
aeropilot said:
That's their charm for me, along with Cobras, Gordon-Keebles, DeTomaso Mangustas, Iso Grifos & Facel-Vegas.
Exactly my thoughts a strong easy to work on V8 with a cheap and plentiful parts supply or an expensive engine which needs specialist attention. I have always liked these cars but I also wanted something that I could work on myself without farming too much out to specialists.With the car finally at the paintshop I took a rest from the constant work I had been carrying out on the car especially after the frantic last few weeks finishing all the jobs required before paint.
I was told to expect around a 10-12 week turnaround on paintwork and made weekly visits to see Steve and see how it was progressing, I was amazed at how much work was involved in this stage.
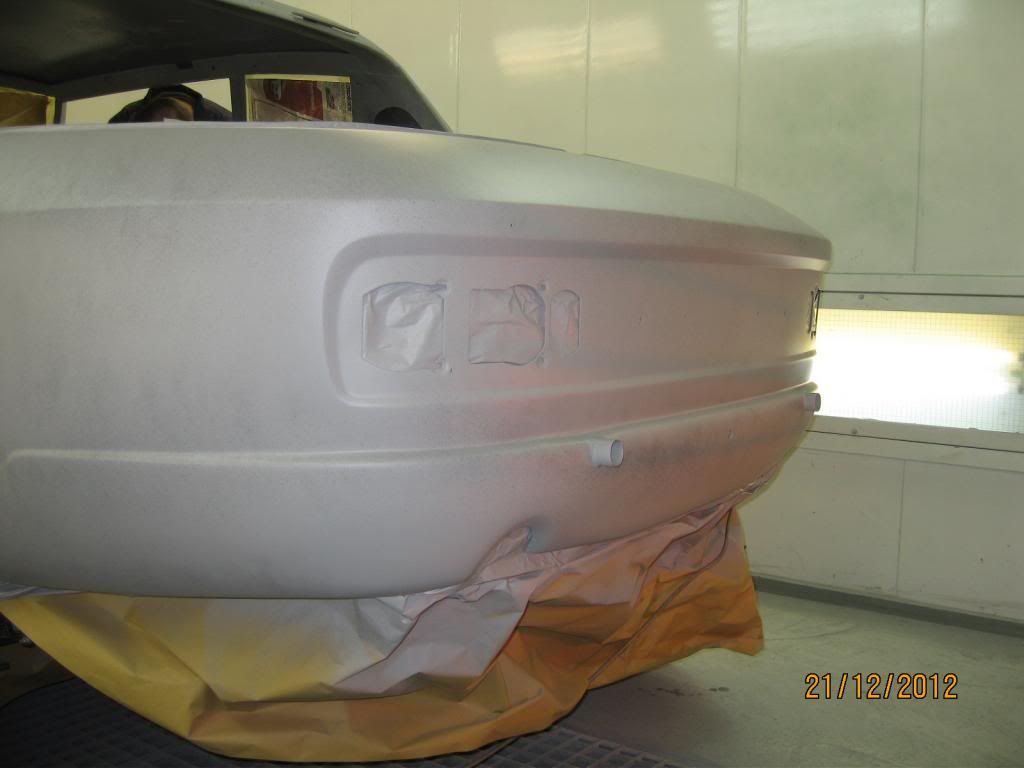
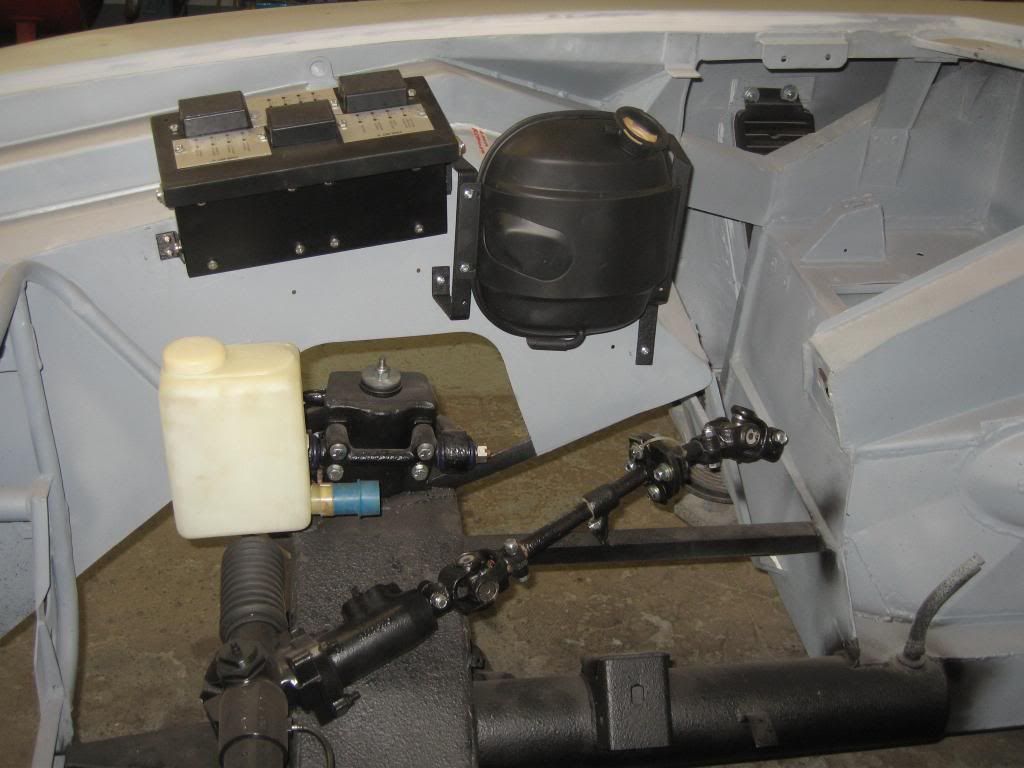
With the car now in primer I went down to see the colour being sprayed in the engine bay as I had worried over the final colour decision for months. I know that the engine bay should be a black schultz like finish but could not bear to do this after all the great work Geff carried out in making the new panels so you will have to excuse this deviation from standard.
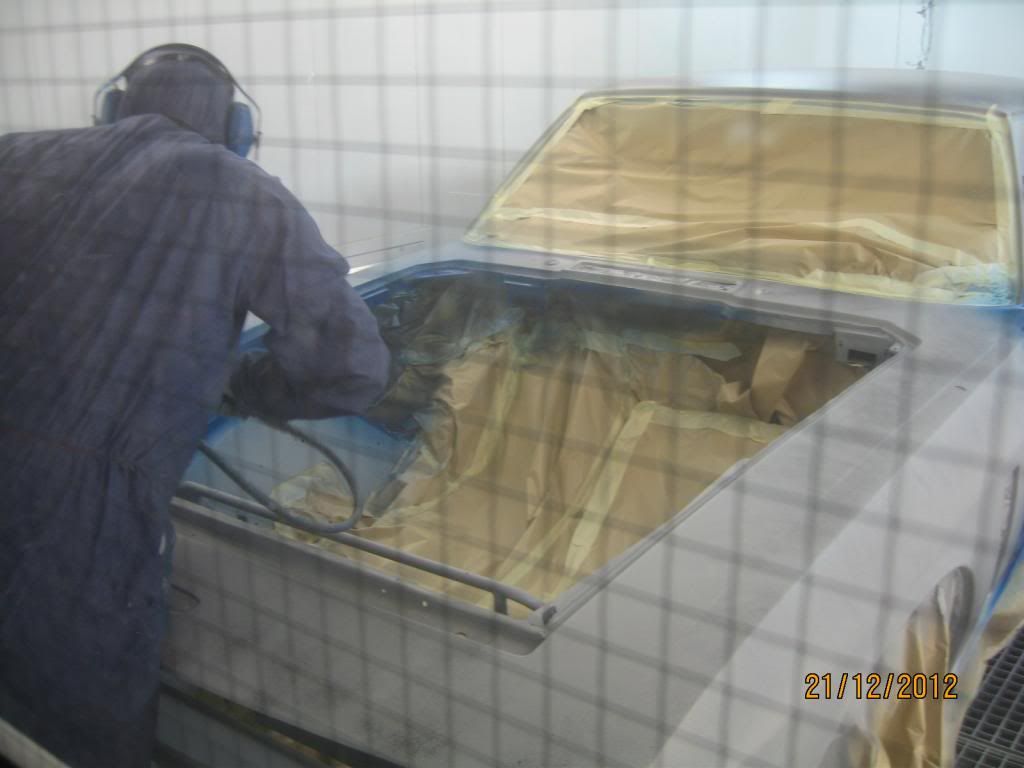

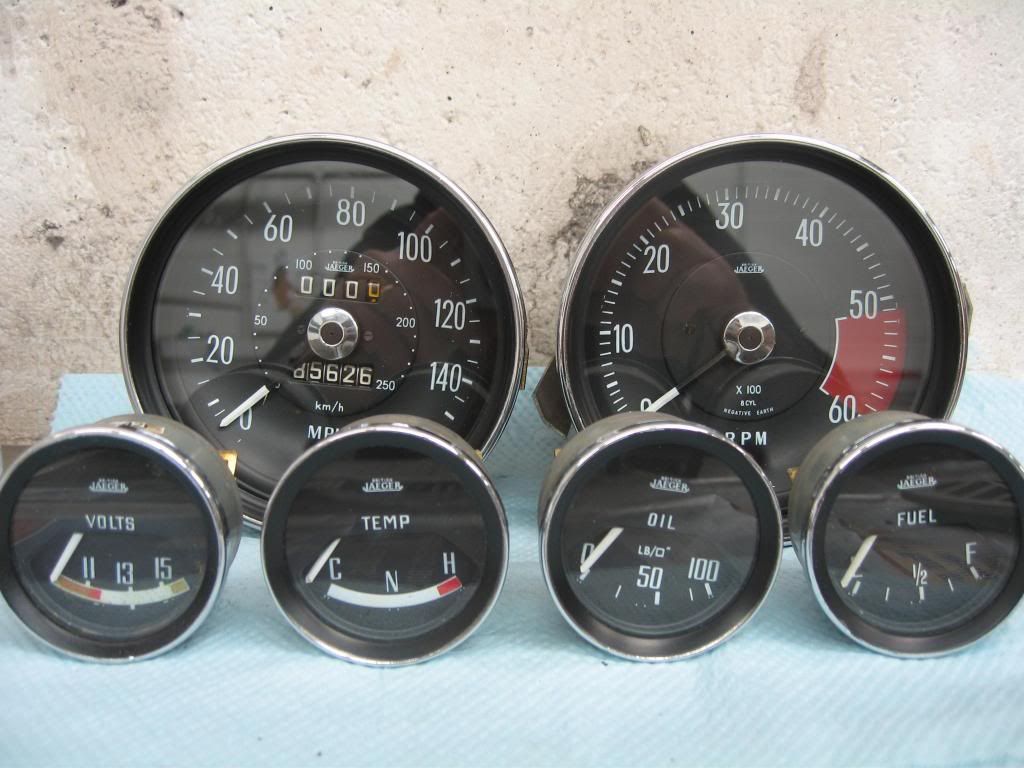
I didn't achieve much whilst the car was away for paint but I did manage to strip and clean the gauges which had a slightly crusty look to them

All that was required was some paint and new rubber seals along with some elbow grease and they were looking much better
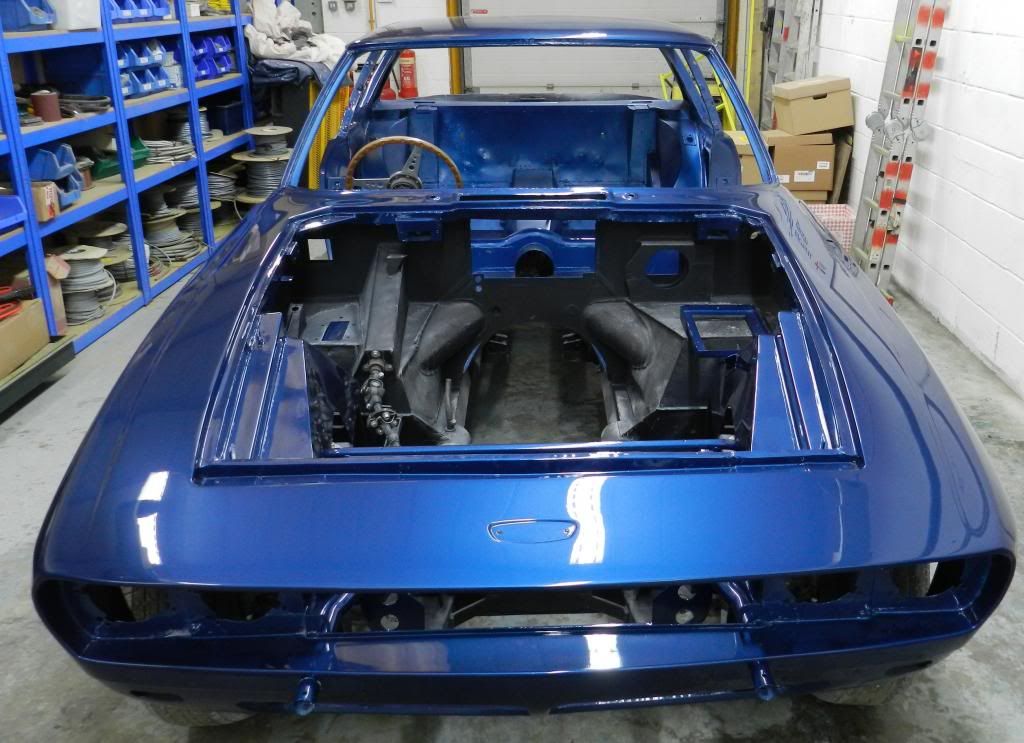
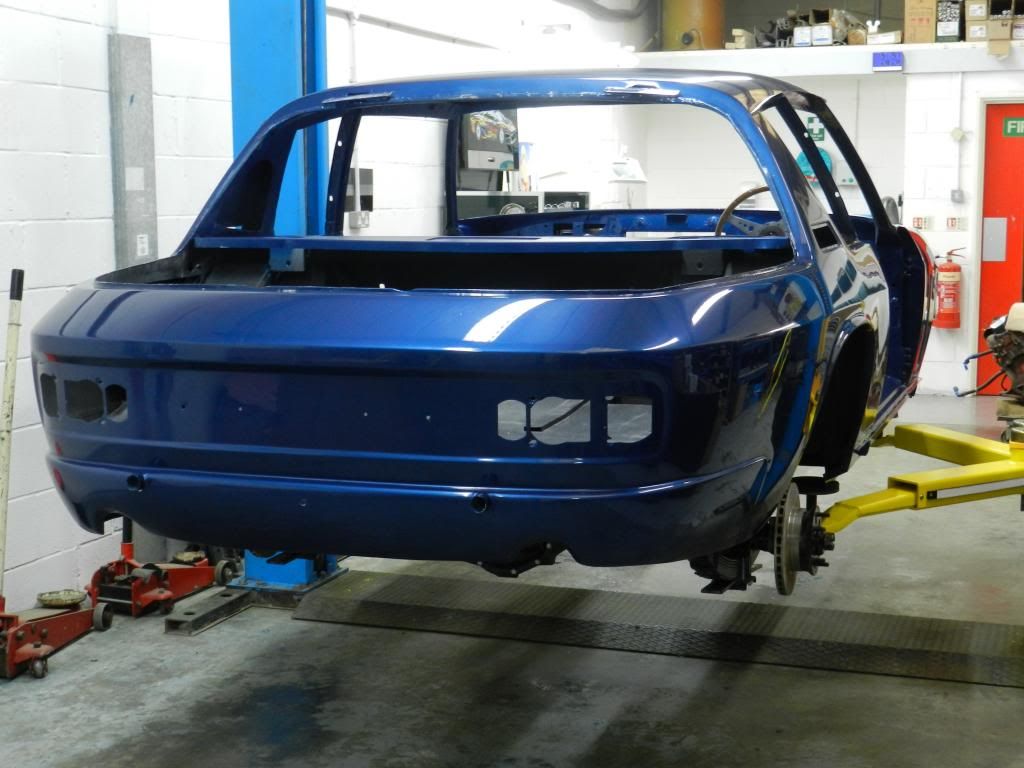
Steve completed the paintwork in 12 weeks as promised and the car looks great in its new paint, this is not the original colour which was a dark blue, I finally decided after months of looking at other cars and buying lots of aerosols to have it painted the colour of a small model my wife had bought me, so Steve had his paint supplier mix this colour which is not specific to any car and has a little mica in it to lift the colour.

As you will also see my OCD meant that I had the ramp arms powdercoated whilst the car was away

All that was required was some paint and new rubber seals along with some elbow grease and they were looking much better

Steve completed the paintwork in 12 weeks as promised and the car looks great in its new paint, this is not the original colour which was a dark blue, I finally decided after months of looking at other cars and buying lots of aerosols to have it painted the colour of a small model my wife had bought me, so Steve had his paint supplier mix this colour which is not specific to any car and has a little mica in it to lift the colour.


As you will also see my OCD meant that I had the ramp arms powdercoated whilst the car was away
Gassing Station | Readers' Cars | Top of Page | What's New | My Stuff