Caterham 7 rebuild
Discussion


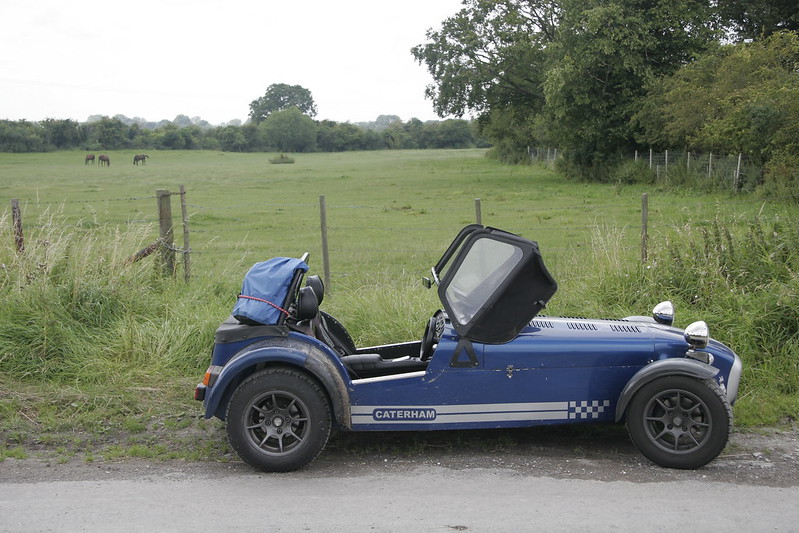
I'm rebuilding my Caterham over the next few months to bring it back into top nick before shipping it abroad. Having not originally built the car, as I bought it second hand (Caterham factory built), it'll be a nice way to get to know it better and basically be the same as building it in the first place. I had done a few jobs to it over the years so I had a little experience but I'm never completely stripped it.
The bodywork is in a shabby state, bubbling in areas, marked in others. It's a 1999 vintage 7 which has lived outside for the last few years of it's life. I don't find myself with a sponge in my hand that often either. It was my daily car for a few years on the trot, so it racked up a few miles and saw all the seasons weather.

I've managed to convinced a friend to have a busman's holiday and to help me strip it and then rebuild it. He's the real expertise behind the scenes! I take photos and do as I'm told. It's where my skills lie.
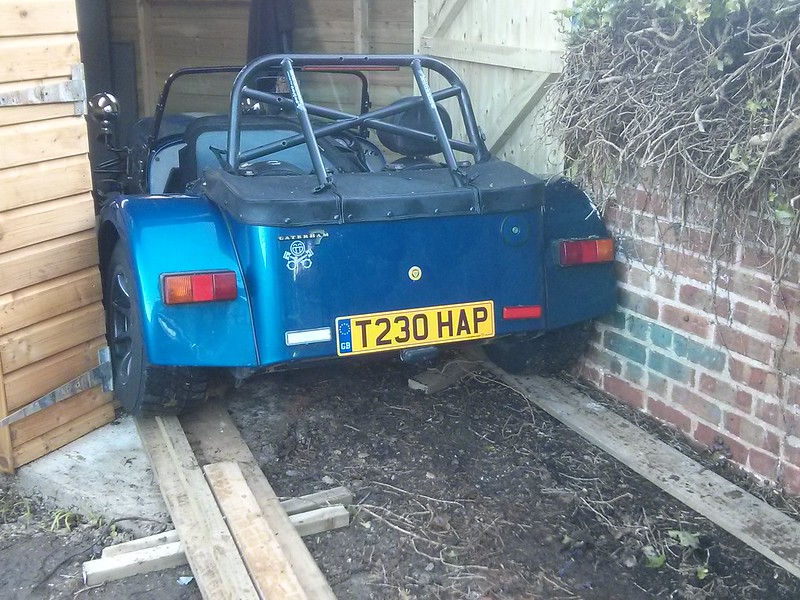
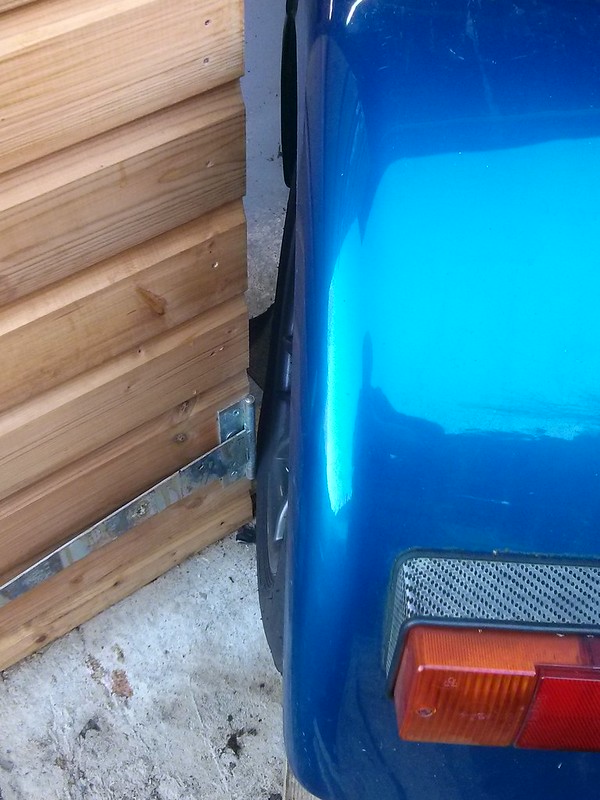
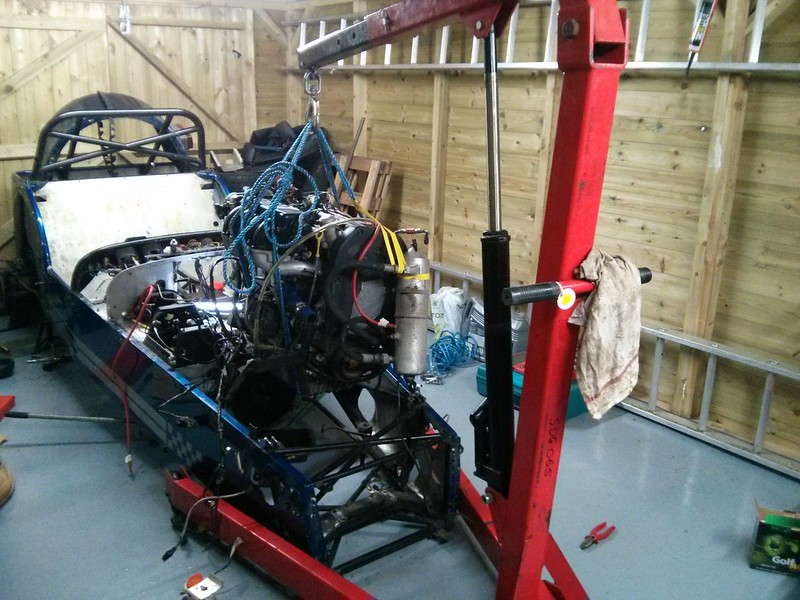
The first step was squeezing the car into his newly built garage. The old wall is still yet to come down, so this made things a wee bit tight.
Anyhow, we got it in after removing one of the garage doors (!) and quite a bit of luck!


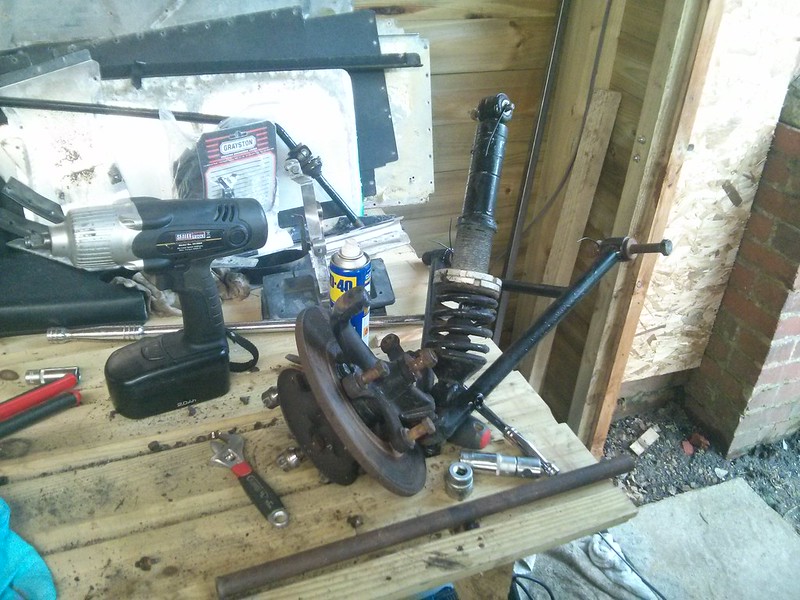
The strip down then commenced. Jacked up, the wheels checked for play in the joints/ bearings to see what we're starting with.
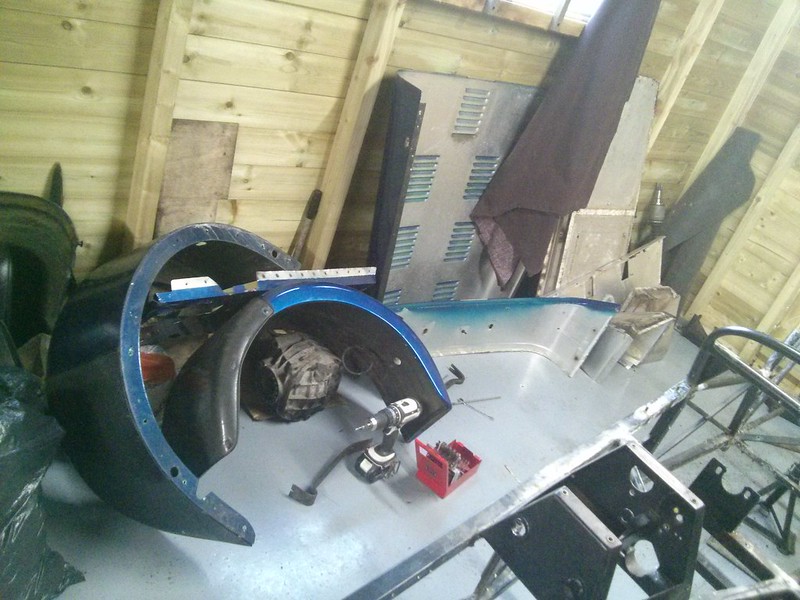
By the end of the day the engine was ready to come out, the front wings had been removed. The inner cockpit panels had started to come off. The scuttle had been removed.
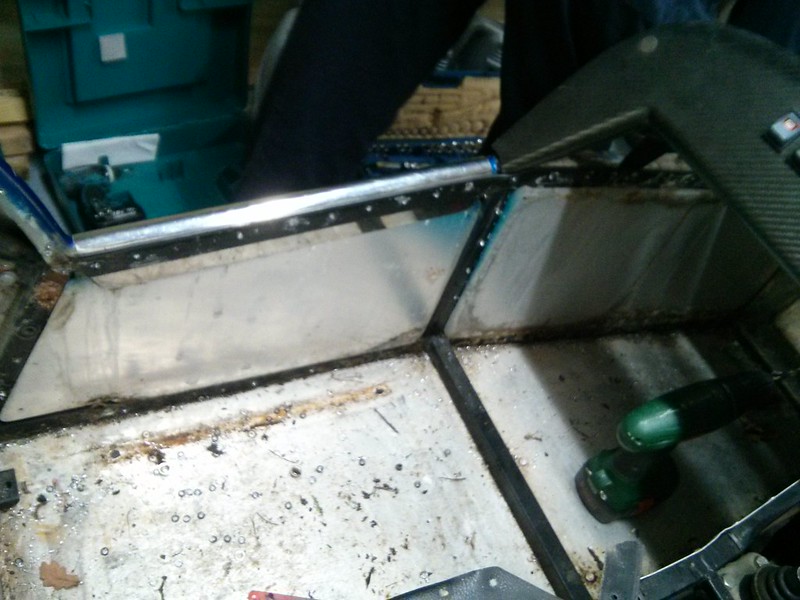

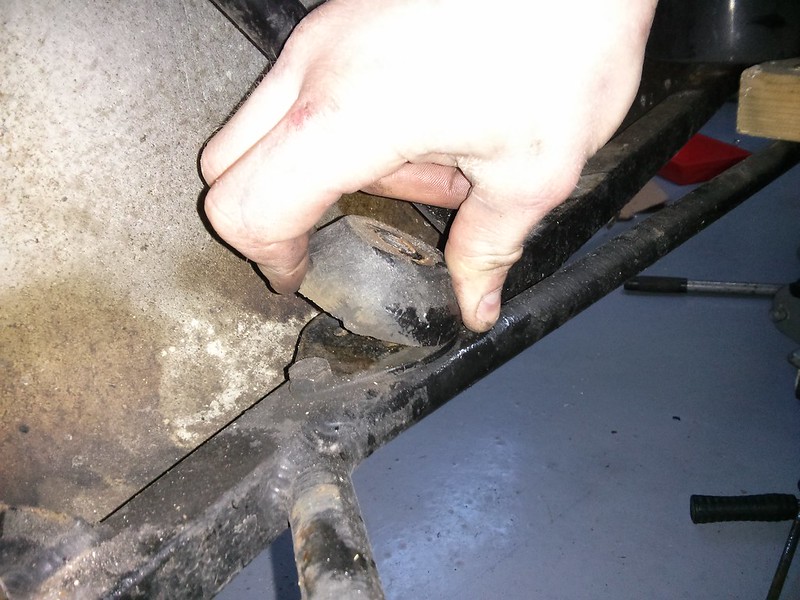
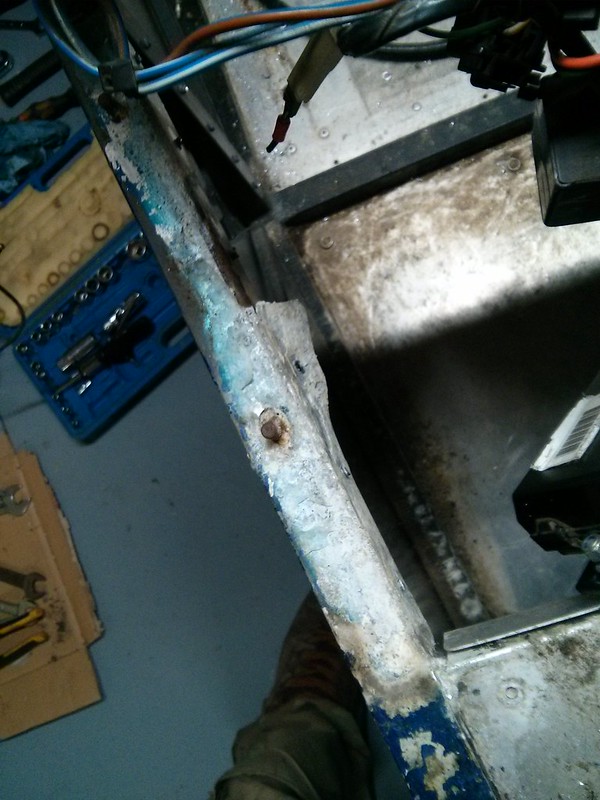
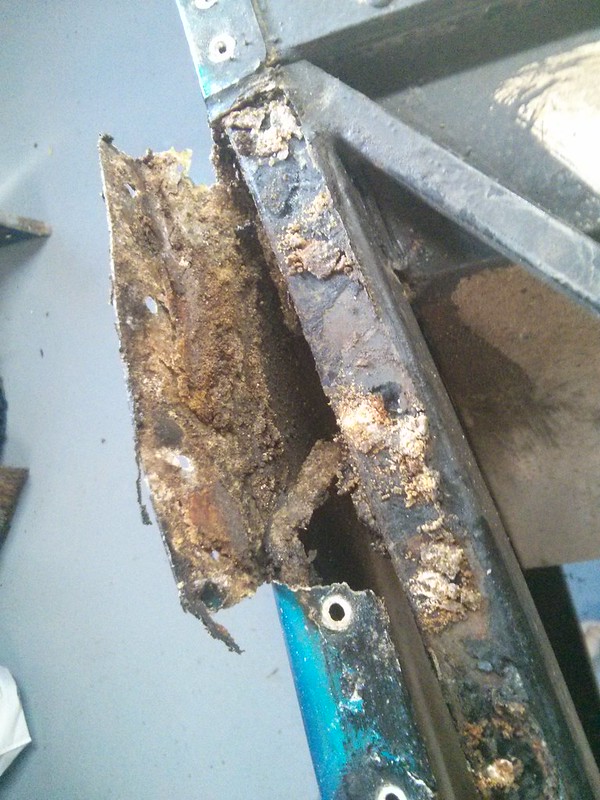
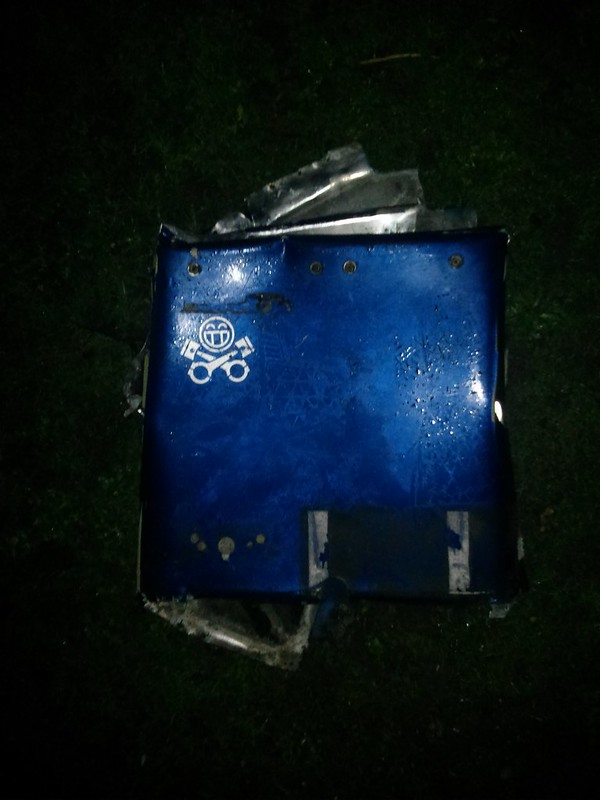
The above shows the honeycomb protection within the panels next to where you sit, the footwell if you will. This area is a well known 'grot trap' where water washes grit and other debri into this area between the steel chassis and the aluminum skin. Here it stays moist and doesn't help the galvanic reaction/ corrosion situation between the two metals.
The area seems to be full of muck on the passenger side only. I can only assume that being on UK roads, the passenger side tends to hit more puddles and debri than the drivers side which is out on the clearer road as opposed to nearer the verge.
I'll attempt to waxoyl (or similar) this area to help future proof it against unwanted corrosion after I receive the chassis back. Maybe I'll drill a hole and grommet it for future access with a squirty tube. I don't think it'll be noticed against the black of the panel and within a footwell location.
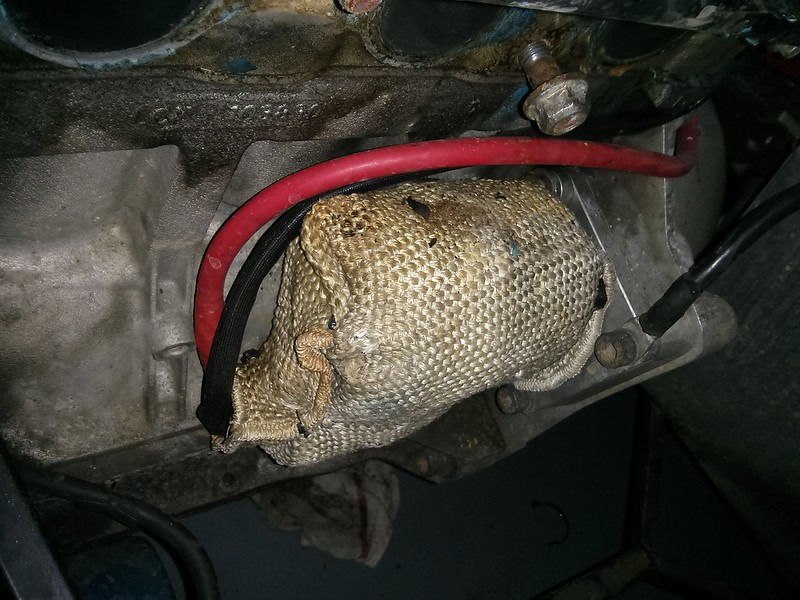
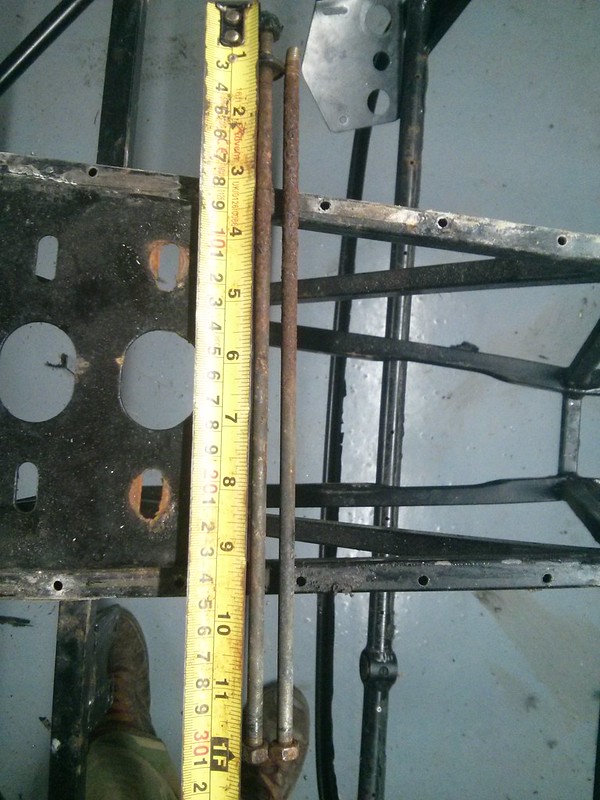
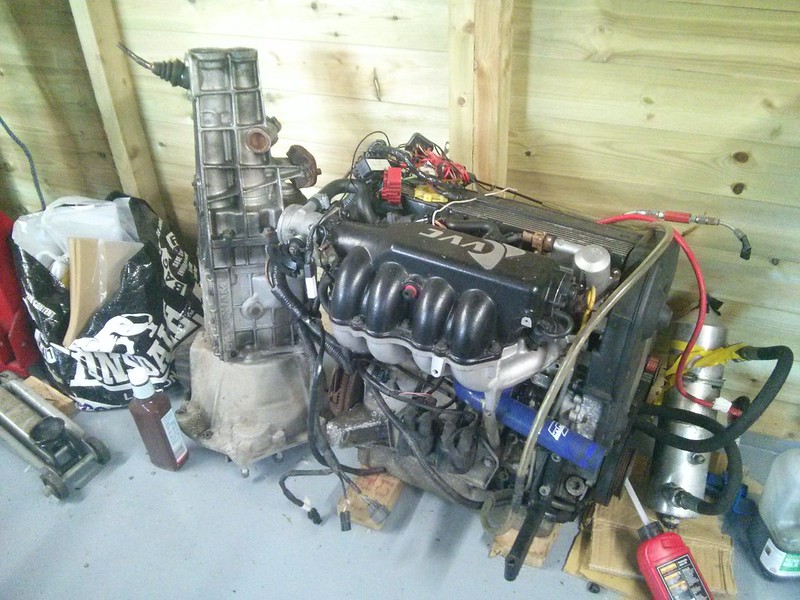
Also a photo of the starter motor. A common problem for K Series engined Caterhams. The starter motor seems to get affected by heat. A different exhaust configuration or similar in the original Rover car didn't prove this to be a problem. Some people spend quite a bit on new Brise starter motors. Some people alter the electrics relating to the starter motor with relays and a slightly different 12v feed. I have carried out the wiring and relay modifications. But two plumbers heat mats wrapped around the starter motor seems to help matters.
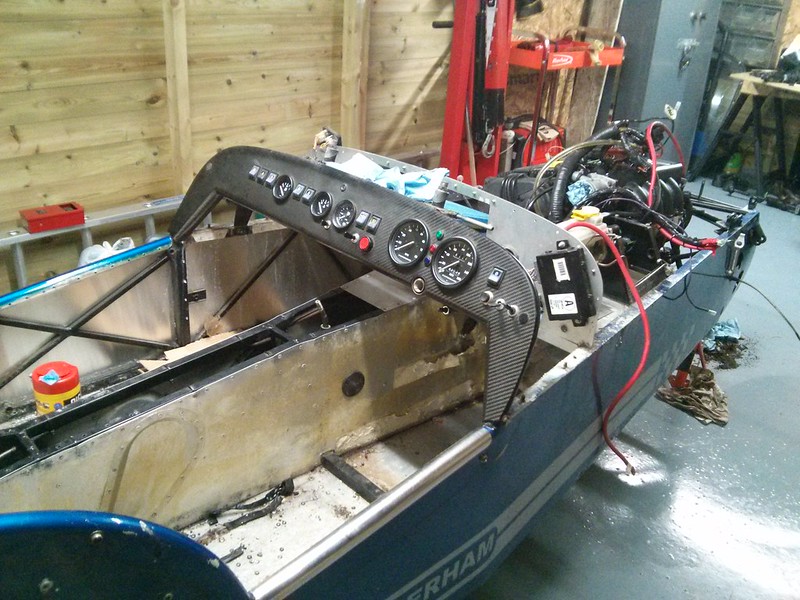
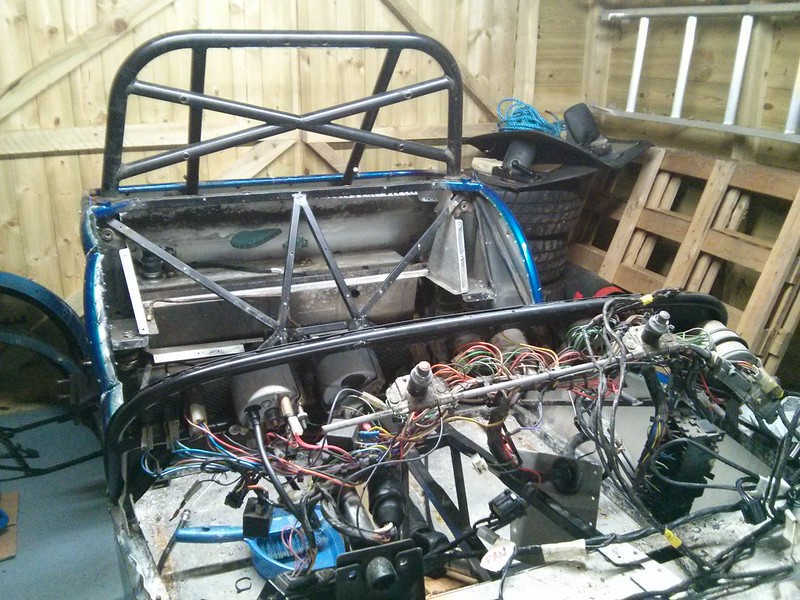
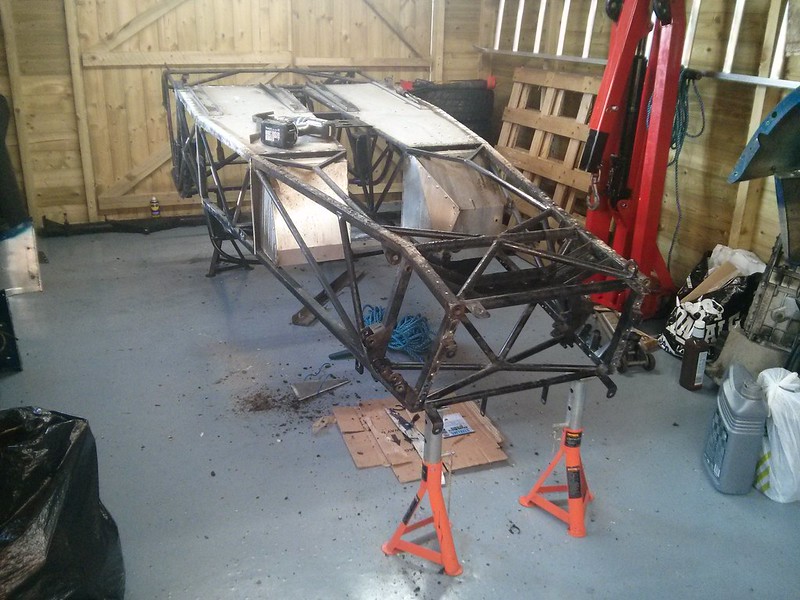
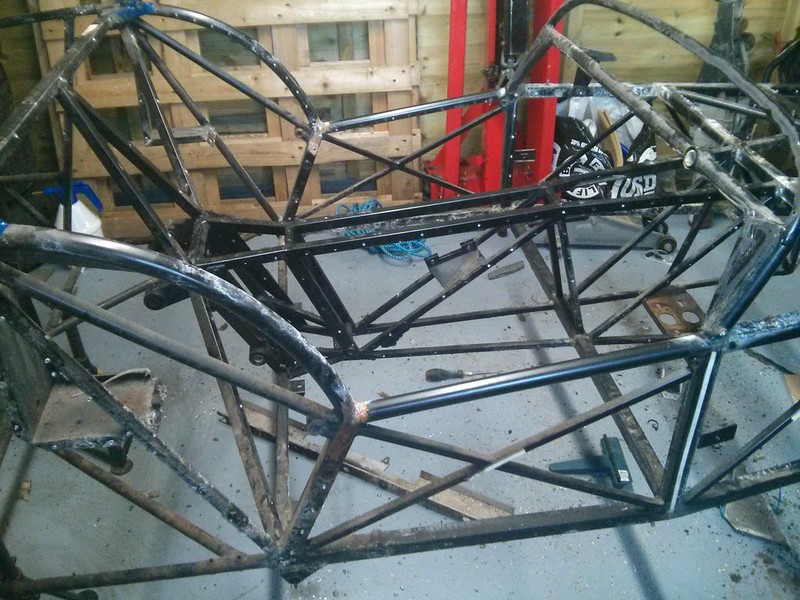
And this is an overview of how it was left after day one.
By the end of the second day, the rear wings have gone, the engine is out. The engine bay is empty. The gearbox is out, the prop shaft and rear axle are just sitting in the car, A frame and drive shafts removed. Rear brake setups removed. The brake and fuel lines are out. The rear diff is also out.
The rear shocks are hanging in my a imperial allen key bolt which we didn't have to hand to remove. I happened to find the required imperial size for the brake master cylinder, otherwise that would still be sitting there too!
Once the rear shocks are out, the final two bolts holding the roll bar in can come out.
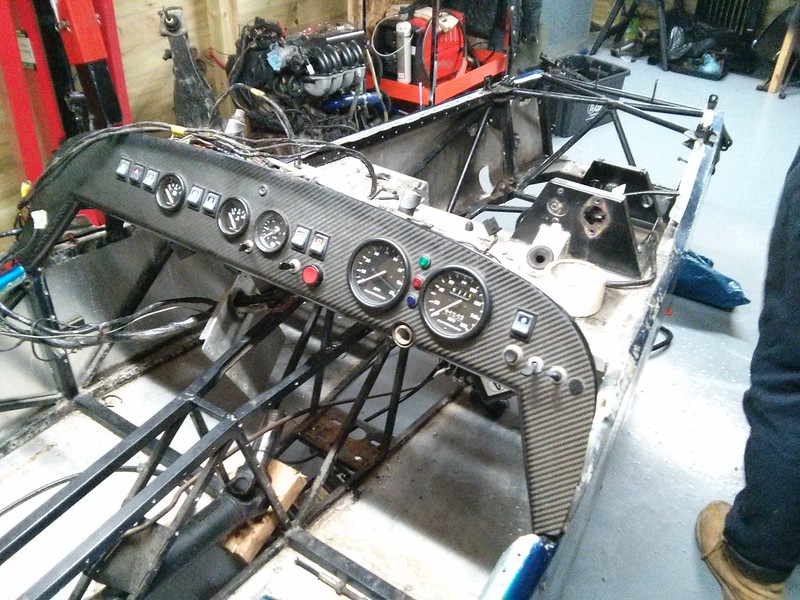
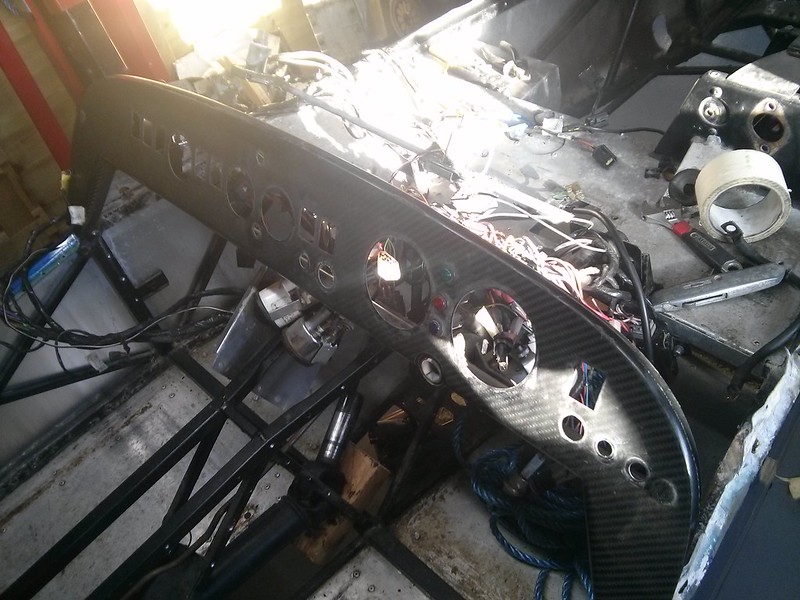
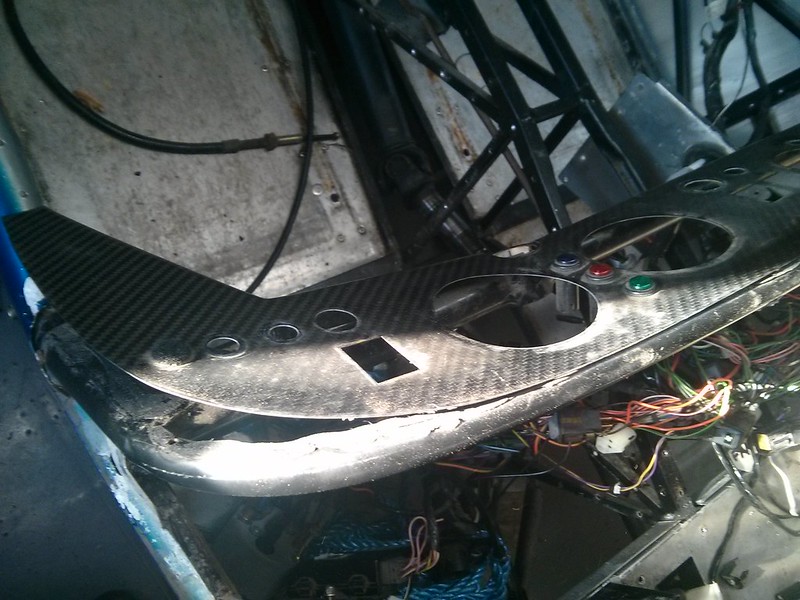
The hardest challenge seems to be removing the carbon dash from the chassis frame. It was stuck on with mastic. A simple run of a stanley knife blade along the top freed this section up. But the bottom of the dash is rolled around the bottom chassis/ dash frame. Also not having a clear line of attack with a blade won't help matters. I think the gauges and switches may have to be removed to aid access. The last thing I want to do is damage it and have to buy new! Eeek.
When we received the engine crane, it was empty of oil. A quick top up and all appeared well. Until we got the engine hoisted to find it didn't lift high enough! Cue the front of the Caterham being dropped off it's axle stands and placed on the floor to meet the lax engine crane halfway! Luckily it's pretty light. One of the engine mounts has had it's day.
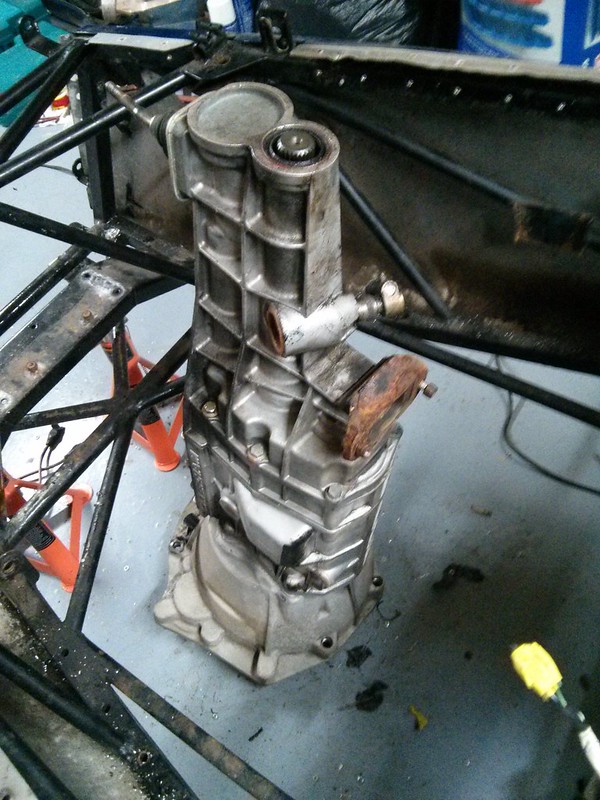
6 speed Caterham gearbox out. This and the diff will be taken to a specialist where the gearbox will be overhauled and checked over. The diff will be subject to a Titan LSD transplant to keep things fun.
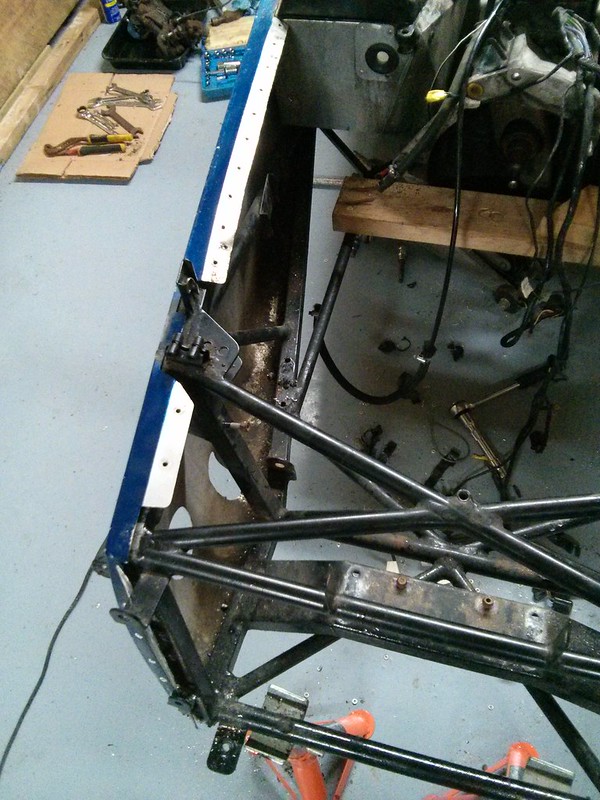
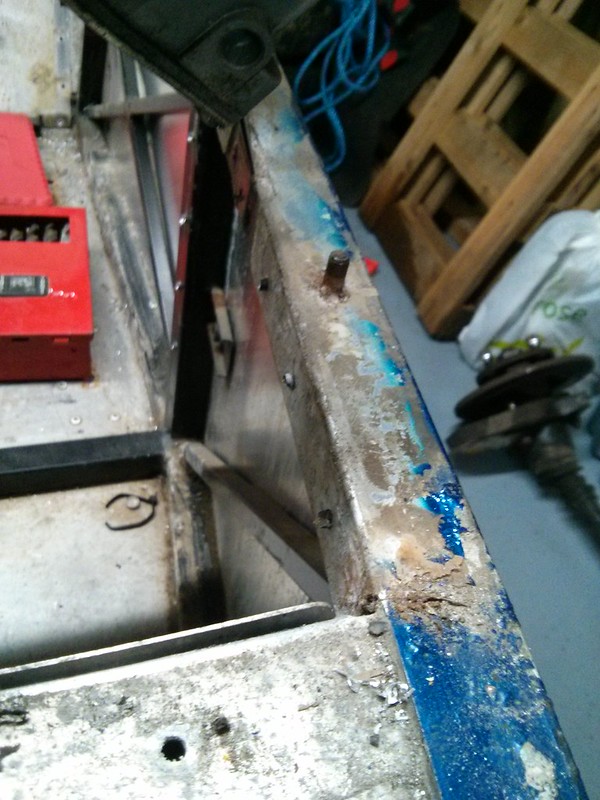
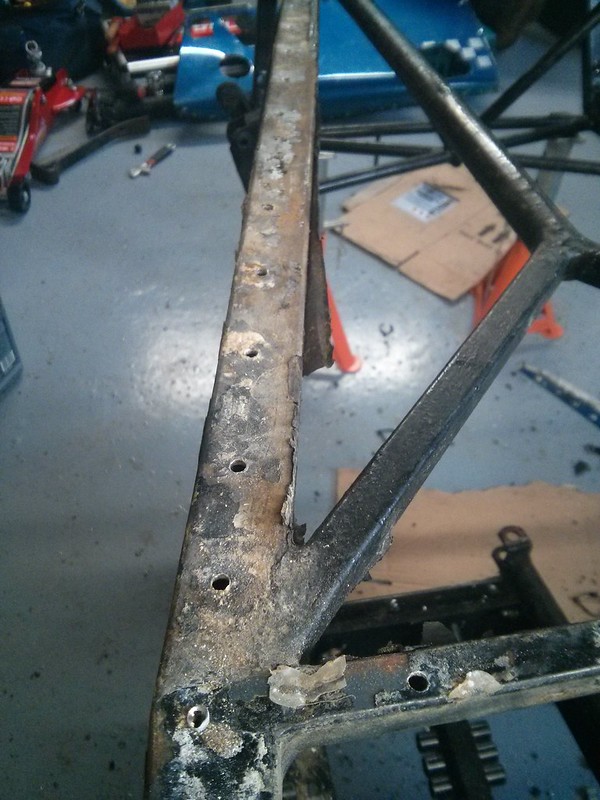
The panels are starting to be removed. The rivets slowly drilled out and the panels peeled back. The powder coat underneath looks quite good on the top rail. The most affected area is under the scuttle where the aluminium seems to have been affected most. I assume that water runs down the scuttle and then capillaries into the joint between the body and the scuttle. This area is also above the bad area in the foot wells.
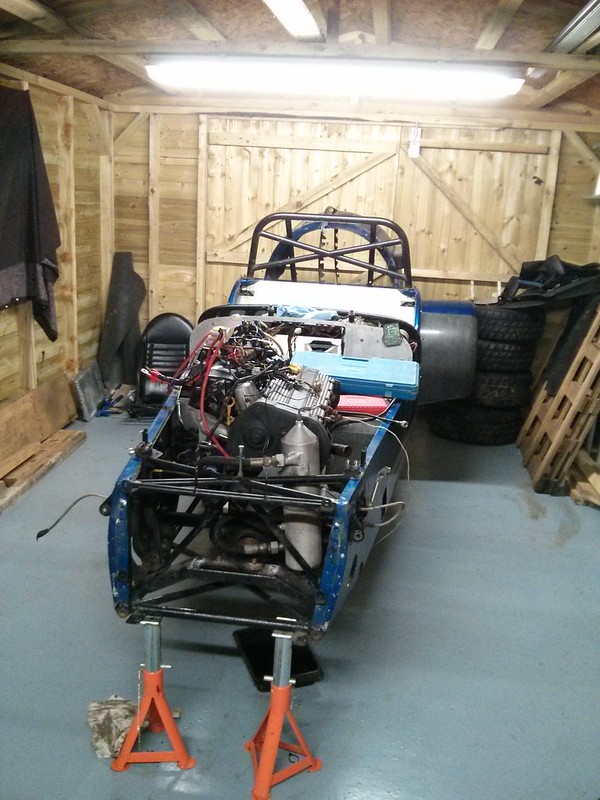
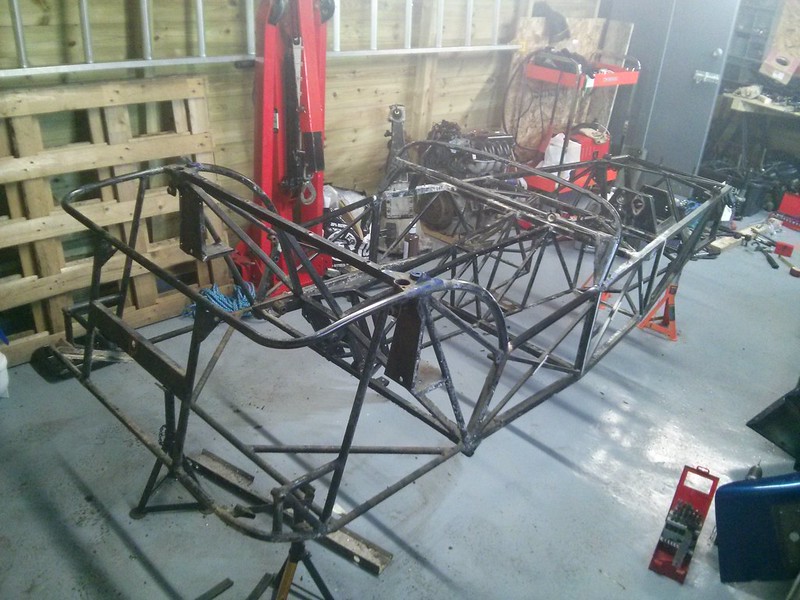
How she was left end of day two.
I'm now busy putting together a shopping list of new and replacement items. I've also learnt that Rivnuts are a pain in the arse. The amount that spun instead of staying put was infuriating. Fortunately I'm taking panels off anyway so can get to the other sides of them if they become an issue. Otherwise I could see how they'd turn a simple job of replacing a wing into a nightmare.
The bodywork is in a shabby state, bubbling in areas, marked in others. It's a 1999 vintage 7 which has lived outside for the last few years of it's life. I don't find myself with a sponge in my hand that often either. It was my daily car for a few years on the trot, so it racked up a few miles and saw all the seasons weather.
I've managed to convinced a friend to have a busman's holiday and to help me strip it and then rebuild it. He's the real expertise behind the scenes! I take photos and do as I'm told. It's where my skills lie.
The first step was squeezing the car into his newly built garage. The old wall is still yet to come down, so this made things a wee bit tight.
Anyhow, we got it in after removing one of the garage doors (!) and quite a bit of luck!
The strip down then commenced. Jacked up, the wheels checked for play in the joints/ bearings to see what we're starting with.
By the end of the day the engine was ready to come out, the front wings had been removed. The inner cockpit panels had started to come off. The scuttle had been removed.
The above shows the honeycomb protection within the panels next to where you sit, the footwell if you will. This area is a well known 'grot trap' where water washes grit and other debri into this area between the steel chassis and the aluminum skin. Here it stays moist and doesn't help the galvanic reaction/ corrosion situation between the two metals.
The area seems to be full of muck on the passenger side only. I can only assume that being on UK roads, the passenger side tends to hit more puddles and debri than the drivers side which is out on the clearer road as opposed to nearer the verge.
I'll attempt to waxoyl (or similar) this area to help future proof it against unwanted corrosion after I receive the chassis back. Maybe I'll drill a hole and grommet it for future access with a squirty tube. I don't think it'll be noticed against the black of the panel and within a footwell location.
Also a photo of the starter motor. A common problem for K Series engined Caterhams. The starter motor seems to get affected by heat. A different exhaust configuration or similar in the original Rover car didn't prove this to be a problem. Some people spend quite a bit on new Brise starter motors. Some people alter the electrics relating to the starter motor with relays and a slightly different 12v feed. I have carried out the wiring and relay modifications. But two plumbers heat mats wrapped around the starter motor seems to help matters.
And this is an overview of how it was left after day one.
By the end of the second day, the rear wings have gone, the engine is out. The engine bay is empty. The gearbox is out, the prop shaft and rear axle are just sitting in the car, A frame and drive shafts removed. Rear brake setups removed. The brake and fuel lines are out. The rear diff is also out.
The rear shocks are hanging in my a imperial allen key bolt which we didn't have to hand to remove. I happened to find the required imperial size for the brake master cylinder, otherwise that would still be sitting there too!
Once the rear shocks are out, the final two bolts holding the roll bar in can come out.
The hardest challenge seems to be removing the carbon dash from the chassis frame. It was stuck on with mastic. A simple run of a stanley knife blade along the top freed this section up. But the bottom of the dash is rolled around the bottom chassis/ dash frame. Also not having a clear line of attack with a blade won't help matters. I think the gauges and switches may have to be removed to aid access. The last thing I want to do is damage it and have to buy new! Eeek.
When we received the engine crane, it was empty of oil. A quick top up and all appeared well. Until we got the engine hoisted to find it didn't lift high enough! Cue the front of the Caterham being dropped off it's axle stands and placed on the floor to meet the lax engine crane halfway! Luckily it's pretty light. One of the engine mounts has had it's day.
6 speed Caterham gearbox out. This and the diff will be taken to a specialist where the gearbox will be overhauled and checked over. The diff will be subject to a Titan LSD transplant to keep things fun.
The panels are starting to be removed. The rivets slowly drilled out and the panels peeled back. The powder coat underneath looks quite good on the top rail. The most affected area is under the scuttle where the aluminium seems to have been affected most. I assume that water runs down the scuttle and then capillaries into the joint between the body and the scuttle. This area is also above the bad area in the foot wells.
How she was left end of day two.
I'm now busy putting together a shopping list of new and replacement items. I've also learnt that Rivnuts are a pain in the arse. The amount that spun instead of staying put was infuriating. Fortunately I'm taking panels off anyway so can get to the other sides of them if they become an issue. Otherwise I could see how they'd turn a simple job of replacing a wing into a nightmare.
Edited by Gingerbread Man on Saturday 4th January 16:55
B'stard Child said:
Fast work - but then if you'd blagged your way into a brand new built garage (which I assume was built for a purpose) then you'll need to be quick 
I'm trying to talk the owner into a TVR once the 7 is back out again. I don't think he needs much persuasion, just more room out front to get it in!I don't like the number plate light which hangs down on a bracket. Simple things, but I'm not a fan. I've already changed the fog and reverse items
Something like this is what I'm thinking, but I'll have to drill my new rear panel, so it has to be right! Once exported, the new plates (see I'm thinking!) seem to be the same size as UK plates from a quick Google, so once drilled, they should remain hidden, correct.

Or could I chop off the threaded section and glue to the number plate, while hiding the wires behind it and then under the car and across to the loom.
I'm not 100%.
This is the current item;
+Rear+Detail.jpg)
Something like this is what I'm thinking, but I'll have to drill my new rear panel, so it has to be right! Once exported, the new plates (see I'm thinking!) seem to be the same size as UK plates from a quick Google, so once drilled, they should remain hidden, correct.
Or could I chop off the threaded section and glue to the number plate, while hiding the wires behind it and then under the car and across to the loom.
I'm not 100%.
This is the current item;
Markgenesis said:
Fast work, awesome to see one that's been used as a daily in all weathers.
Those numberplate bolt/lights are a good, neat idea, used a pair years ago on a 70 Ford Mustang and they worked really well.
To avoid drilling the rear panel you could mount the bolts in the bottom corners of the plate then stick the plate to the rear panel, then you are just drilling the plate and not the panel.
And sit the plate slightly lower than the car? I could maybe mount the plate flush with the bottom. Maybe using some carbon fibre to create two bits lower to mount those lights. I think I'll have to mock it all up.Those numberplate bolt/lights are a good, neat idea, used a pair years ago on a 70 Ford Mustang and they worked really well.
To avoid drilling the rear panel you could mount the bolts in the bottom corners of the plate then stick the plate to the rear panel, then you are just drilling the plate and not the panel.
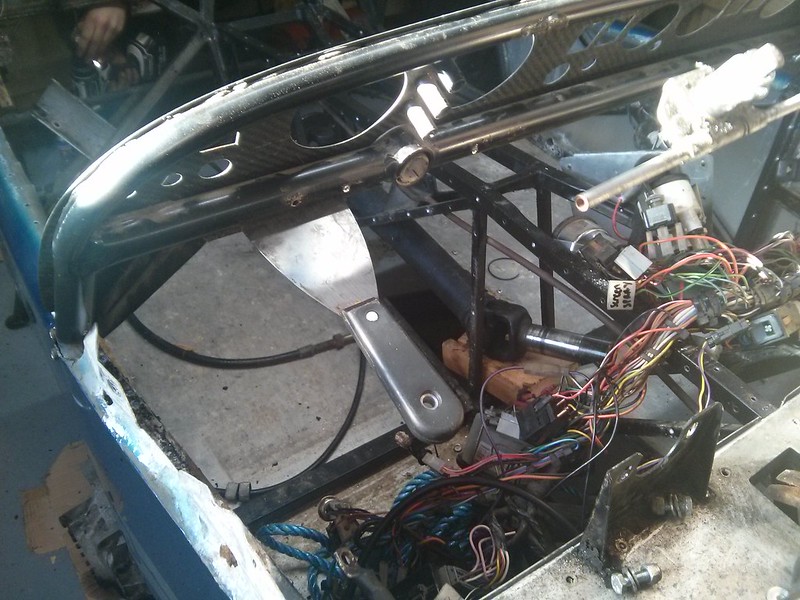
I'm currently looking at making my scuttle removable and replacing the current bulkhead panel with carbon sheet as it currently has a big hole in it where the heater belongs. The heater, which be coming out for ever.
The problem with carbon is that it depletes your wallet tremendously. But yet, on the plus side, it's light and shiney.
williamp said:
Remember the most mportant part of any rebuild is to blow the budget with lots of shiny bits before you even know what you must buy!!
Loving this rebuild
I've so far resisted touching the engine again as the budget will be destroyed. My only engine bay mod is a lightweight flywheel.Loving this rebuild
The big crux being, after rebuilding it, it's only part of my cost. I've got to ship and then comply with Australian vehicle regs to get it road legal out there. Like buying some crappy harnesses with a seat belt type press button to get through Oz regs. I can't personally think of a worse harness, but they could fall off and end up being replaced after I pass the Oz regs. Who does know.
HustleRussell said:
Good progress! The engine mount is actually an old Jaguar bumper mount by the way... Bit cheaper than buying the same thing from Caterham! Is this going back to Bruce for re-skinning?
Correct, back to Arch. He's hopefully powder coating many things for me alongside the chassis. I'm not sure what spray shop I'm then shipping the completed chassis to. Organised as ever.I found two engine mounts for half the price of what Caterham wanted. Currently looking into returning brake callipers and sorting new rotors.
I'm shipping it abroad myself. I thought with it being built in England, it'd be best to rebuild it here.
If the worst happens and my relocation goes tits up, it'll have to be sold over in Oz. Short of a loto win, I can't afford to ship it back.
I've been buying things of late. 2 new engine mounts have arrived. 4 new drilled and grooved rotors are on their way out to me. The allure of uprated calupers all round blew the budget, so I held off. Oh and Powerflex bushes throughout are with the postie too.
Luckily I have a blacksmith friend with a big press to help with the bushes.
Still getting quotes for paint. It's odd but I was thinking late 3 figures painted. It seems the going rate is ~£1500. For an unpainted, bare metal, empty shell. The front and rear wings will be bare. The car is small. All is removable. No door returns etc to paint. Seemed expensive to my untrained eye.
But if that's the going rate, then c'est la vie!
Day 3 of the big brother rebuild.
The fuel line, prop shaft and rear axle swiftly came out as they were basically left resting there.
The rear suspension then easily followed as it was just one bolt each side, made impossible previously due to lack of AF tools. Once sourced during the week, a 5 second job. This opened up the possibility to remove the two remaining bolts for the roll bar. The fuel tank was removed, but one of the retaining bolts twisted and sheared at the top. Best add that to the shopping list then.
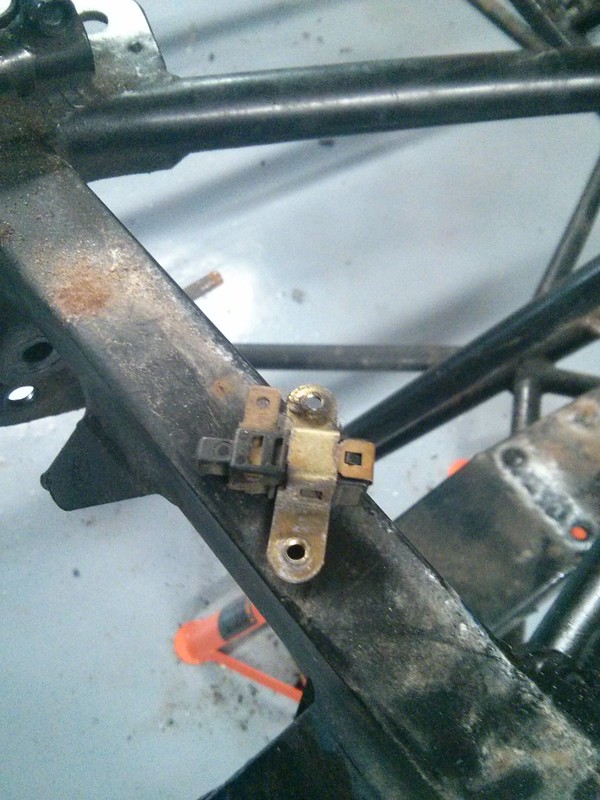
My weight saving measure of the build was the removal of the handbrake on switch. A envisaged hacking away at it with my grinder watching it rip through the item shredding the unneeded weight away with it's sparks. So I rolled up my sleeves, squared up to my victim, and then realised it was held on with two screws so undid them with a screwdriver. This'll help me win all the traffic light grand prixs.
The dash was going to be an arse due to it being siliconed in. The top edge was cut clear of the chassis on day 2. The iffy access to the bottom of dash was left till another day as it didn't look a 5 minute job! Today it was tackled. Today it was decided for me that I'd be buying a new one. Today it was split. Today....Bugger.
We just couldn't gain access to the area under the wiper motor plate/ bracket which didn't help. Edging a few tools along breaking the bond was looking good. Then okay with a little tear. Then expensive as another tear formed and then gash became the situation.
[pic]I haven't got a picture of being crying when it tore[/pic]
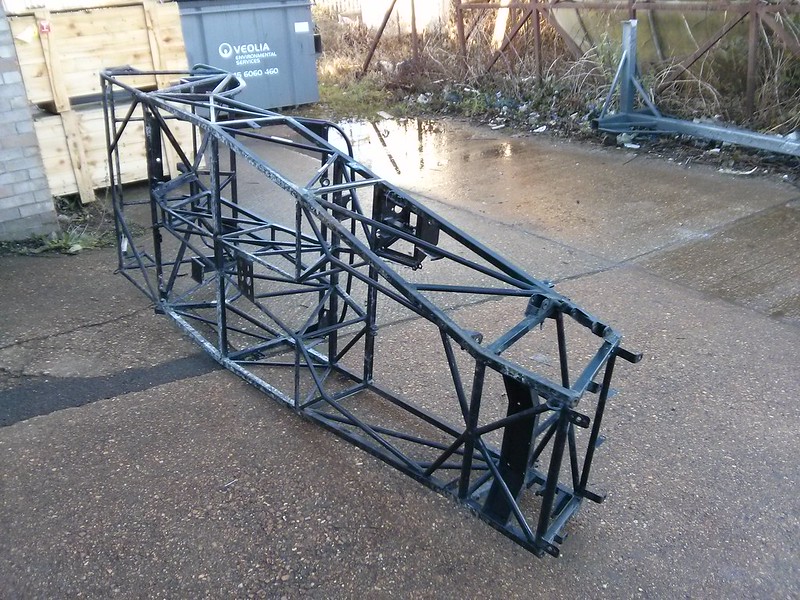
But while the car was still say upright on the stands, all of the rivets were drilled out. 4mm drill bit for any future undertakers of this task. The panels were eased and the car flipped over. We continued the task of drilling out the rivets (a lot of rivets!) on the underside. It wasn't too long before all the panels were off. This then left the clear up of making sure all of the rivets were knocked through correctly to leave clear holes for the new panels to be fitted in due course. This has left a car chassis which can also be used as a big rattle if held by two chaps.


The chassis was in really good nick for being 15 years old. It had a white patina over a lot of it. This seems to be left from the ally panels that clad the chassis. This rubs off to reveal perfectly good powder coating. I thought that it would be worse in places such as were the exterior panels are bubbling away. On the bottom edges in places the powder coat has come away but only slight surface rust is starting to show, nothing to worry about at all. The worse points were actually at the back of the 'doors'. This is also where the rear panel which wraps around the boot area joins the side panels. Would this be welded up in situation and maybe therefore slightly damaging the powder coat? Who knows but it is noticeable on both sides inside and out.
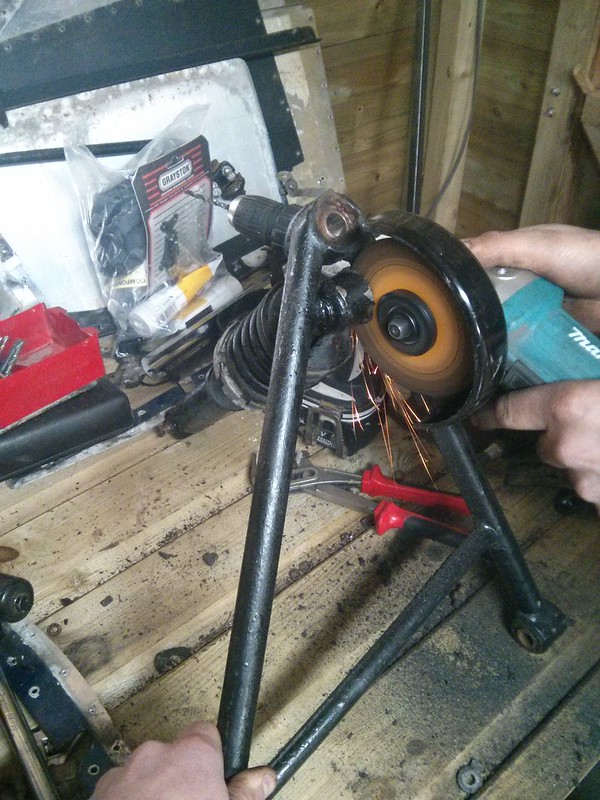
Previously the front corners (wishbones, suspension, cycle wings) came off as one unit each side. Today we split them up. The first big problem that we had both sides was that the bottom bolt holding the suspension in was stuck solid. We tried many techniques, but after the heads were rounded and the hex key twisted, we gave up and got the angle grinder out to split the joint. I now have the task of removing a stuck bolt which seems to have welded itself into the wishbone. Joys. Typical.
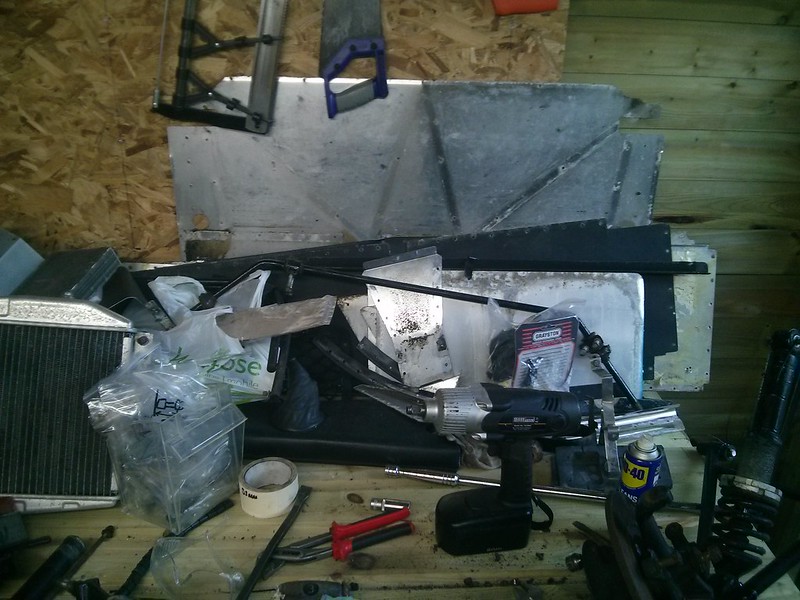
So this leaves lots of car bits and pieces littering the garage mainly split up in my head into more groups, so there is an organised chaos of sorts;
A pile of scrap panels.
Bits to have the bushes pushed out prior to powder coating such as A frames, Wishbones.
Internal panels in another ready to go back in, maybe some powder coating there too.
The diff and gearbox ready to go off to been looked at and modified.
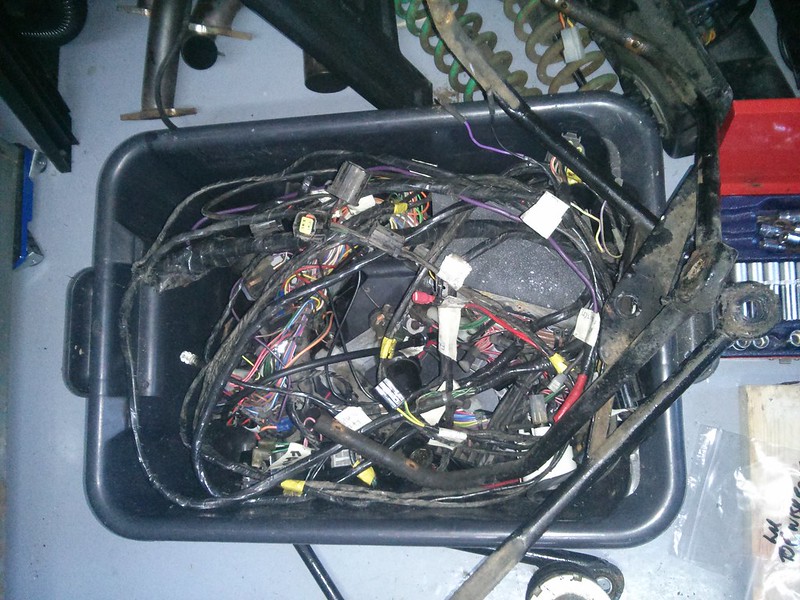
Bits ready to go back on. The fuel tank, boot floor, gauges, wiring loom, rad, engine etc.
I also marked where the exhaust sat so I can hopefully get the hole cut in the side skin when it's being paneled. Saves me a job and they're probably more than set up for this.

The wheels and doors have come away with me so I can get them sorted out in the mean time. The wheels need refurbing. Not the outside edge, my parking is sublime. But the inner edges got wrecked on the rears. The wheels were balanced with weights on the outer and inner edge. Upon driving out of the tyre fitters, the rear weights were ripped off my wheels by the anti roll bar which sits millimeter perfect from the inner wheel surface. Cue a problem, now it's at the top of the list to be fixed.
So, getting there. I need to ring Arch, the original chassis builder and paneler to see if he's alright coating all of my extras. Press out the old bushes and to sort the stuck bolt in the forge. Then arrange a day to swing up to the Dartford area and drop all of this off at the individual locations. Then hopefully pick it all up a few weeks later ready to start assembling items. I can hopefully get stuck in assembling the front corners before the car comes back from the painters (who I've yet to find!).
I thinking that it'll take a little longer than 3 days to rebuild it though....
Thanks for tuning in.
The fuel line, prop shaft and rear axle swiftly came out as they were basically left resting there.
The rear suspension then easily followed as it was just one bolt each side, made impossible previously due to lack of AF tools. Once sourced during the week, a 5 second job. This opened up the possibility to remove the two remaining bolts for the roll bar. The fuel tank was removed, but one of the retaining bolts twisted and sheared at the top. Best add that to the shopping list then.
My weight saving measure of the build was the removal of the handbrake on switch. A envisaged hacking away at it with my grinder watching it rip through the item shredding the unneeded weight away with it's sparks. So I rolled up my sleeves, squared up to my victim, and then realised it was held on with two screws so undid them with a screwdriver. This'll help me win all the traffic light grand prixs.
The dash was going to be an arse due to it being siliconed in. The top edge was cut clear of the chassis on day 2. The iffy access to the bottom of dash was left till another day as it didn't look a 5 minute job! Today it was tackled. Today it was decided for me that I'd be buying a new one. Today it was split. Today....Bugger.
We just couldn't gain access to the area under the wiper motor plate/ bracket which didn't help. Edging a few tools along breaking the bond was looking good. Then okay with a little tear. Then expensive as another tear formed and then gash became the situation.
[pic]I haven't got a picture of being crying when it tore[/pic]
But while the car was still say upright on the stands, all of the rivets were drilled out. 4mm drill bit for any future undertakers of this task. The panels were eased and the car flipped over. We continued the task of drilling out the rivets (a lot of rivets!) on the underside. It wasn't too long before all the panels were off. This then left the clear up of making sure all of the rivets were knocked through correctly to leave clear holes for the new panels to be fitted in due course. This has left a car chassis which can also be used as a big rattle if held by two chaps.
The chassis was in really good nick for being 15 years old. It had a white patina over a lot of it. This seems to be left from the ally panels that clad the chassis. This rubs off to reveal perfectly good powder coating. I thought that it would be worse in places such as were the exterior panels are bubbling away. On the bottom edges in places the powder coat has come away but only slight surface rust is starting to show, nothing to worry about at all. The worse points were actually at the back of the 'doors'. This is also where the rear panel which wraps around the boot area joins the side panels. Would this be welded up in situation and maybe therefore slightly damaging the powder coat? Who knows but it is noticeable on both sides inside and out.
Previously the front corners (wishbones, suspension, cycle wings) came off as one unit each side. Today we split them up. The first big problem that we had both sides was that the bottom bolt holding the suspension in was stuck solid. We tried many techniques, but after the heads were rounded and the hex key twisted, we gave up and got the angle grinder out to split the joint. I now have the task of removing a stuck bolt which seems to have welded itself into the wishbone. Joys. Typical.
So this leaves lots of car bits and pieces littering the garage mainly split up in my head into more groups, so there is an organised chaos of sorts;
A pile of scrap panels.
Bits to have the bushes pushed out prior to powder coating such as A frames, Wishbones.
Internal panels in another ready to go back in, maybe some powder coating there too.
The diff and gearbox ready to go off to been looked at and modified.
Bits ready to go back on. The fuel tank, boot floor, gauges, wiring loom, rad, engine etc.
I also marked where the exhaust sat so I can hopefully get the hole cut in the side skin when it's being paneled. Saves me a job and they're probably more than set up for this.
The wheels and doors have come away with me so I can get them sorted out in the mean time. The wheels need refurbing. Not the outside edge, my parking is sublime. But the inner edges got wrecked on the rears. The wheels were balanced with weights on the outer and inner edge. Upon driving out of the tyre fitters, the rear weights were ripped off my wheels by the anti roll bar which sits millimeter perfect from the inner wheel surface. Cue a problem, now it's at the top of the list to be fixed.
So, getting there. I need to ring Arch, the original chassis builder and paneler to see if he's alright coating all of my extras. Press out the old bushes and to sort the stuck bolt in the forge. Then arrange a day to swing up to the Dartford area and drop all of this off at the individual locations. Then hopefully pick it all up a few weeks later ready to start assembling items. I can hopefully get stuck in assembling the front corners before the car comes back from the painters (who I've yet to find!).
I thinking that it'll take a little longer than 3 days to rebuild it though....
Thanks for tuning in.
Some Gump said:
Excellent tread op.
Respect for various things, but daily driver with half hood is pretty close to the top of the list
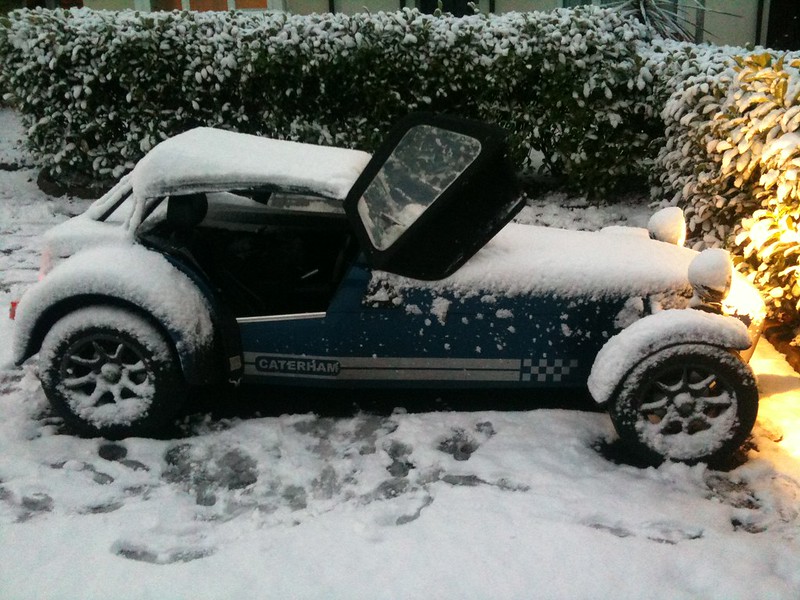
When I first had it, a coolant leak lead to a HGF. I could never get the heater matrix to seal correctly. So I shelved it over a winter of -10 a few year ago. Roof off when poss, but the wind chill on the face was rotten!Respect for various things, but daily driver with half hood is pretty close to the top of the list
rdodger said:
Looks like a fun project!
When Arch re-panel the chassis do they weld the holes up and re drill for the new panels or do they line up with the existing holes?
They reuse the old holes as it's all part of the jig. I'll need to squirt some wax or similar into the tubes to catch some of the rivets from rattling about. But once rebuilt and the engine is in, I don't think I'll notice the rattle.When Arch re-panel the chassis do they weld the holes up and re drill for the new panels or do they line up with the existing holes?
B'stard Child said:
We talking painting the chassis here?
I reckon shot blasting and powder coating at £250-350 for the chassis would be more the ball park - that's what I'd pay round here for a reasonable quality job - after all very little of it will be seen (Norfolk)
No sorry, that's the going rate to spray the newly paneled tub. Just seemed a lot, but I'm probably wrong. I often am!I reckon shot blasting and powder coating at £250-350 for the chassis would be more the ball park - that's what I'd pay round here for a reasonable quality job - after all very little of it will be seen (Norfolk)
Justaredbadge said:
As someone who speaks from experience, it will be less hassle and stress just to get two new bottom front wishbones. Those bolts never come out, they always have to be ground out and nine times out of ten the remaining stub of the bolt will refuse to come out.
Consider the brand new parts a considerable saving upon your time.
They're probably very wise words. I'll look into the costs. Glad to know I'm not the only one who had trouble removing them. Well I say me, the other two blokes who were around for the day. I was taping old rivets away, a job of the most importance.Consider the brand new parts a considerable saving upon your time.
Right, it's been a while, but today was the next step forward.
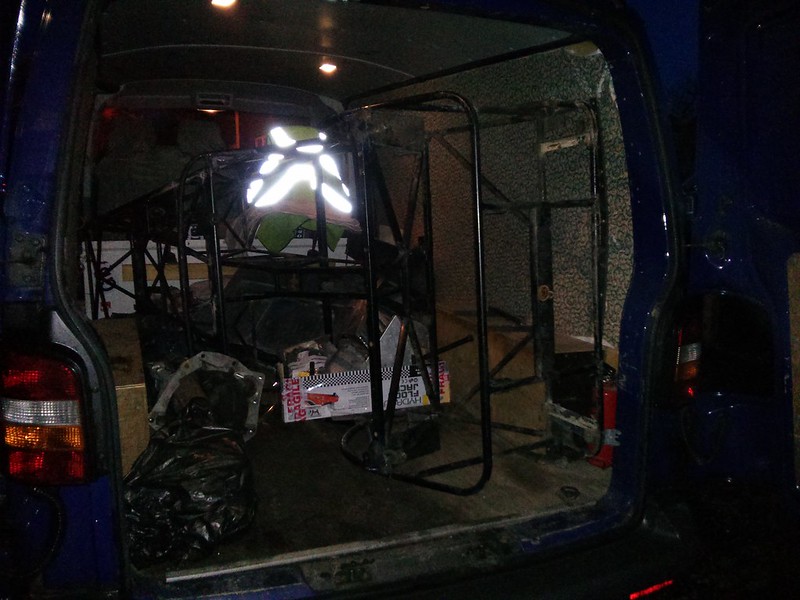
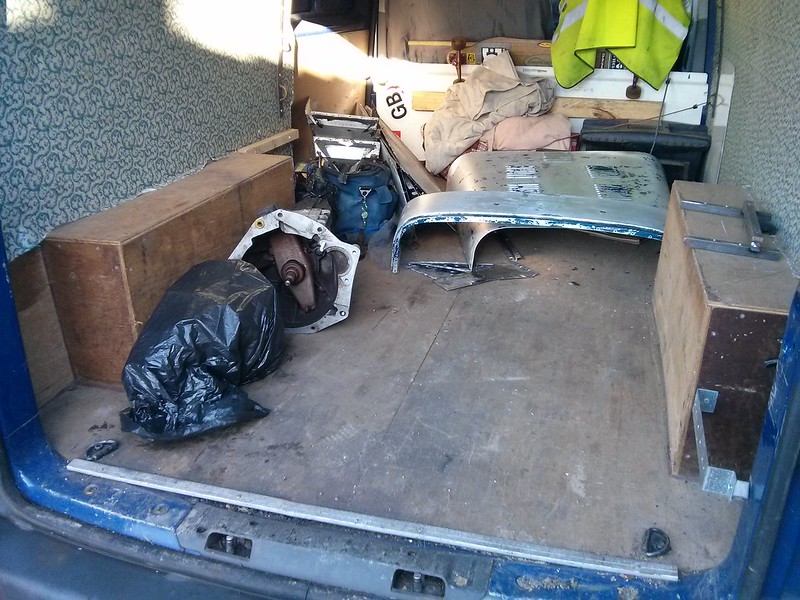
I had to borrow van as I had no other way to get the chassis to Arch Motors to have it repowdercoated and repaneled. A long wheelbase VW Transporter just about squeezes it in at an angle. Emphasis on the just, millimeter perfect. The picture isn't brilliant, in fact it's hardly worth uploading, but to keep the thread rolling, here it is. I was nearly midnight in the pissing rain when I loaded it up.
I arranged to be at Arch for 9:30am. I falsely believed that they were based near to Caterham, a mere 1 hour 30 drive away. A quick google maps plotting of my route last night threw up Arch's location to be near Cambridge much to my surprise! Bugger.
So, an unwelcome hour extra on the drive up. So last night I picked up the chassis and some items to be powdercoated, then at 6:30am this morning, I left home to pick up some panels from my parents garage. 7am I was heading to Arch Motors. A good 2 hours later...I arrived. After a natter and a look around, I helped unload my chassis so that Phil could have a look at it and we could speak options.

The chassis was checked for square and alignment and all found to be fine. I tried in vain to reuse some of my old panels on my car. I didn't want to shell out for new ones if the old were fine. Most of the panels had signs of corrosion so we decided between us to bin them and to renew. I think the only panels I kept were the rear panel behind the seats as it is carpeted and the transmission tunnel panels as they are also carpeted on mine. I chose to keep the carpet (oh think of the weight penalty!) as it adds a little something over bare aluminium throughout so it doesn't look totally stripped out tin can. An option he said many people often regret as they arrive to pick up their newly paneled car to see the old reused panels sticking out like a sore thumb, but I've got to keep money saved somewhere. This seemed like an option as the chosen areas won't be seen once installed and the car put back together again. We'll see if I live to regret it.
I also took along a few bits to have repowdercoated, although the items which had bushes that had to be pressed out were forgotten. I took these down to a local Blacksmith friend to use his press and when I brought them back home, I stored them out of the way. So the wishbones, A frame, rear trailing arms etc need to go to be shot blasted and powercoated else where. Not quite sure where yet, but somewhere. Gash.
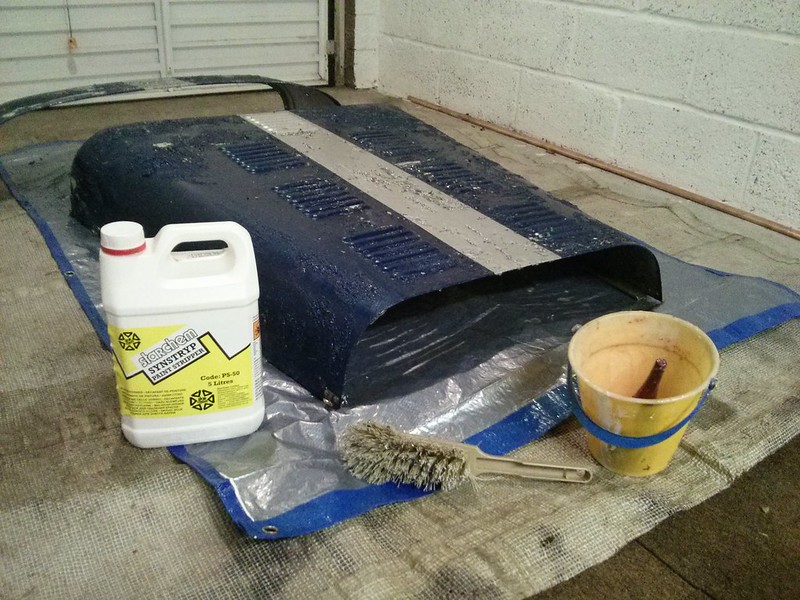
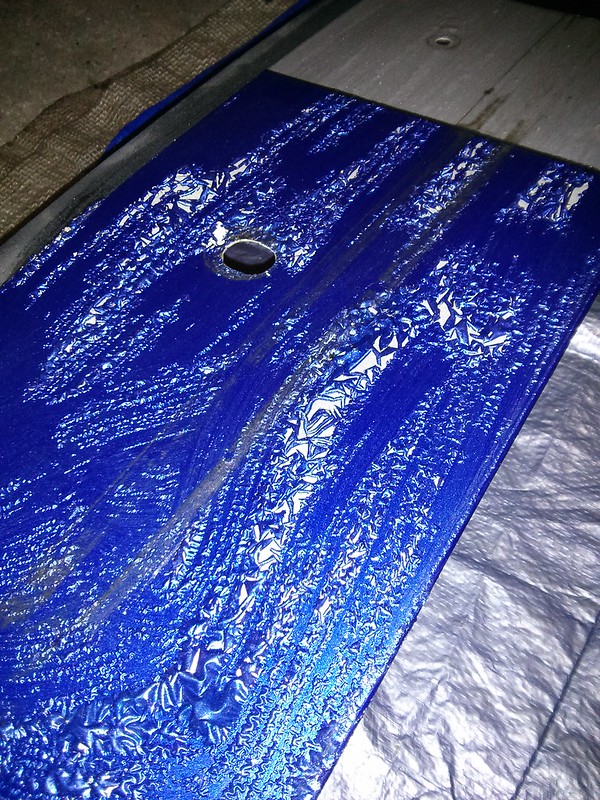
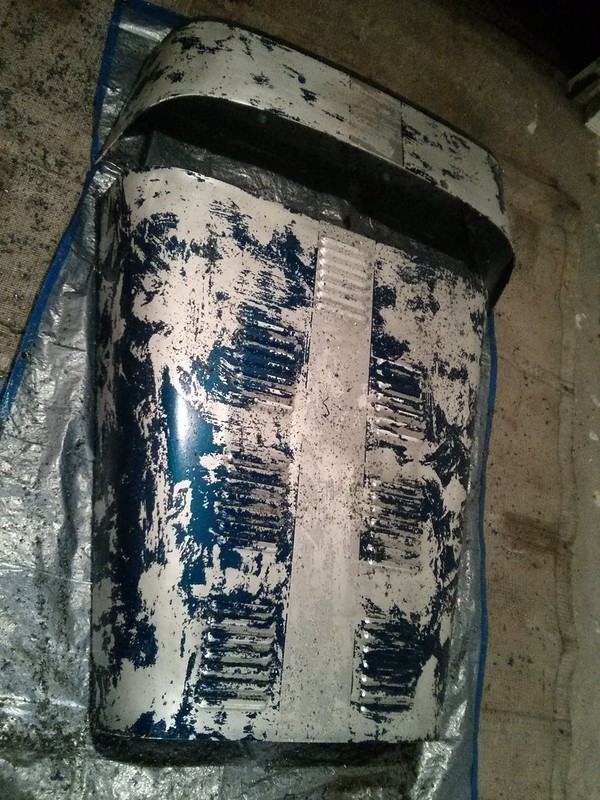
I've also stripped the paint from the bonnet and scuttle in an attempt to help me along.
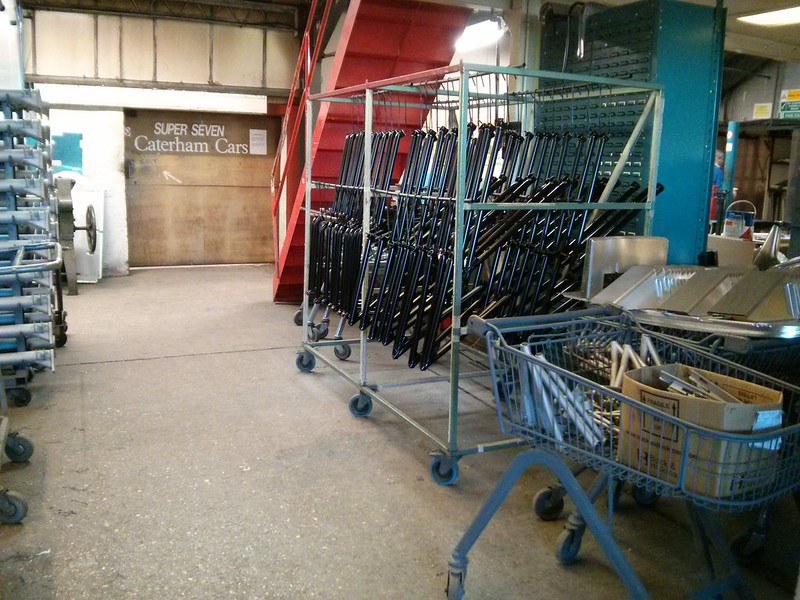
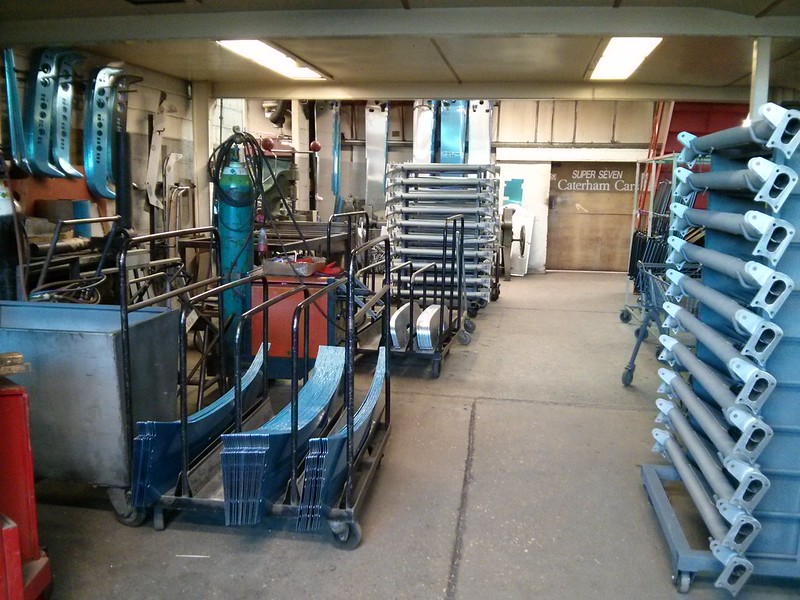
Arch Motors is an interesting place with quite a nice back catalogue of chassis's to their name. Currently they have a lot of Caterham chassis in for repair, mainly race cars. They still make the CSR on site. The other areas of the workshop are dedicated to Ariel Atoms. In their past they have worked for Lola, Lotus, McLaren to name a few. They made a lot of the original Ford GT40 chassis which was of interest as it's a car my partner in crime on my rebuild works on almost daily amongst others.
I then popped back into the van to drive the start of the return leg to Road and Race Transmissions near Sevenoaks. I dropped my gearbox and diff off at owner Phil's house as the company doesn't open over the weekends. A short 1hr30 drive from Arch, but the traffic had picked up now.
Overall, including stops and chatting I had a 7 hour round trip. A bit of a long start, but I will set off again to collect it all in about a months time.
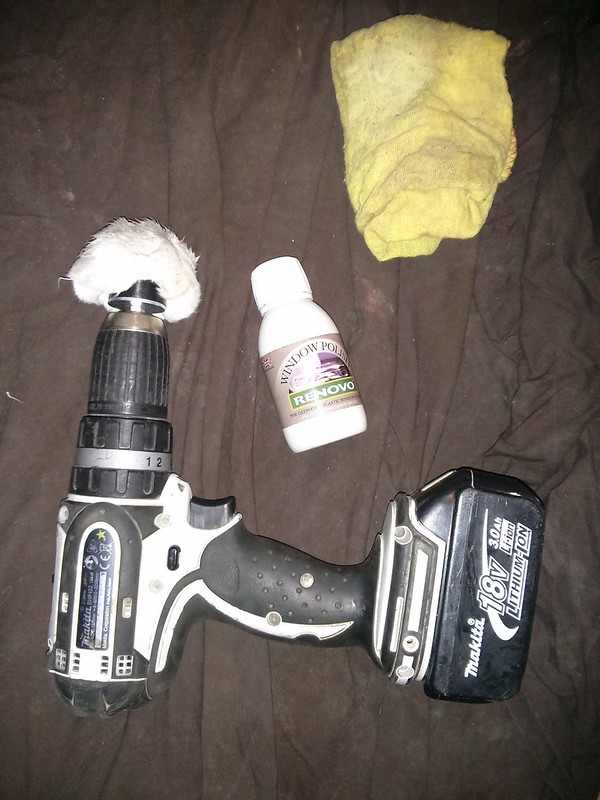
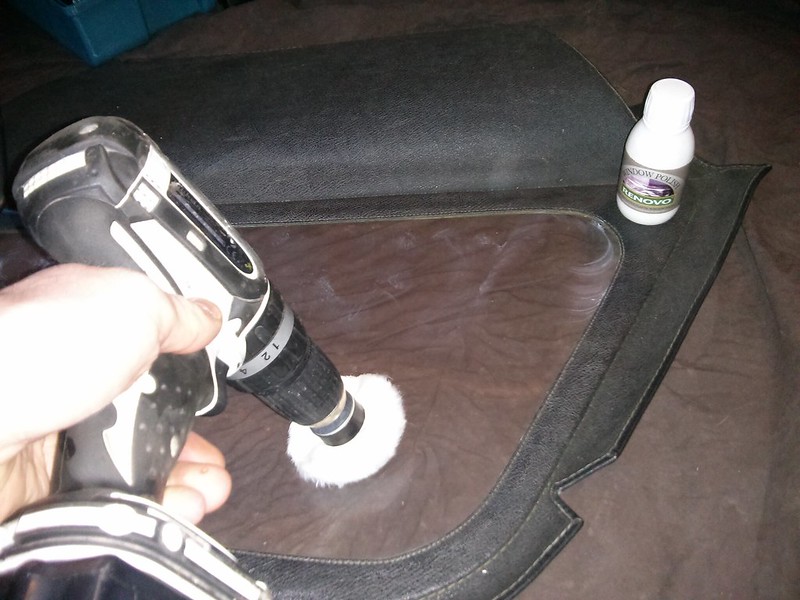
In the mean time... my doors have windows which have developed a blueish hue to them. The car is 15 years old and has lived outside for the last few years knowingly in my ownership. The sun has taken it's toll. A quick call to Oxted trimming who were the original manufactures of the doors to enquire about a new window panel didn't turn up the answers I wanted. I'd have to buy new doors it seems. At ~£200 per side, I'm a little reluctant to buy new. So I set about trying to revive them with Renovo window polish. I've had one bash, but I'll try to do it again before refitting to hopefully achieve a satisfactory finish for the time being.
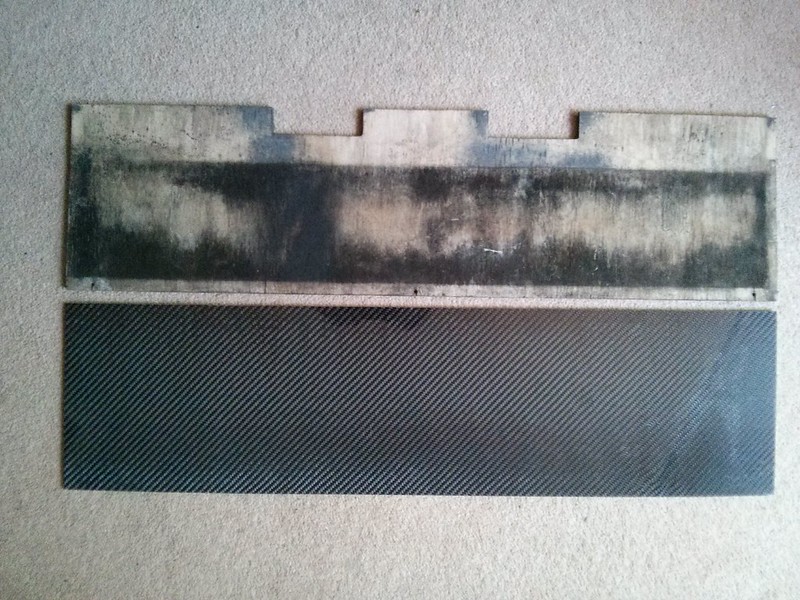
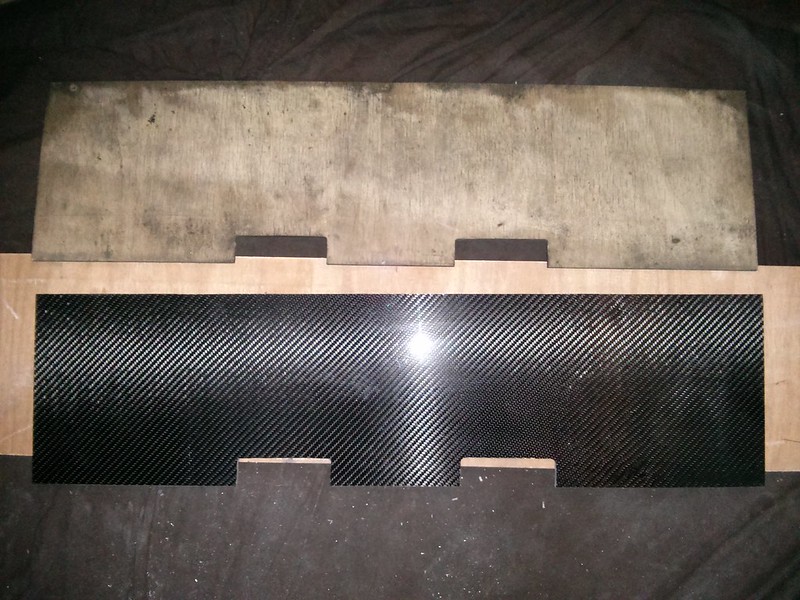
I've also ordered some carbon panel. Maybe this is an unnecessary expense, well probably, but I fancied some. An expensive addiction. Carbon vinyl is an option, but I'd know that it wasn't the real McCoy. Something that would niggle me endlessly, so not an option here.
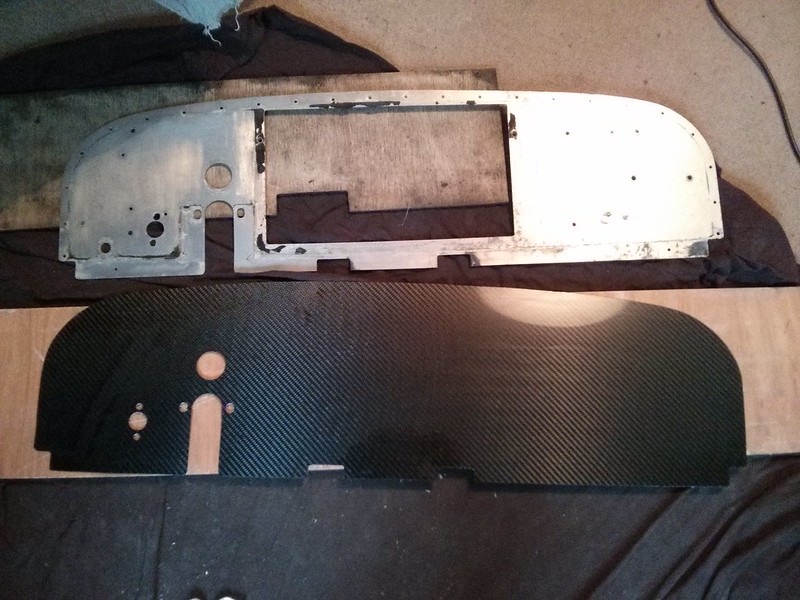
I'm replacing part of the boot floor from a ~4mm ply to a carbon sandwich. I'm then fabricating the rear heater panel out of a carbon sheet instead of patching the old heater hole up with aluminium sheeting. Should hopefully look nice. I'll smile anyway, it's what counts.

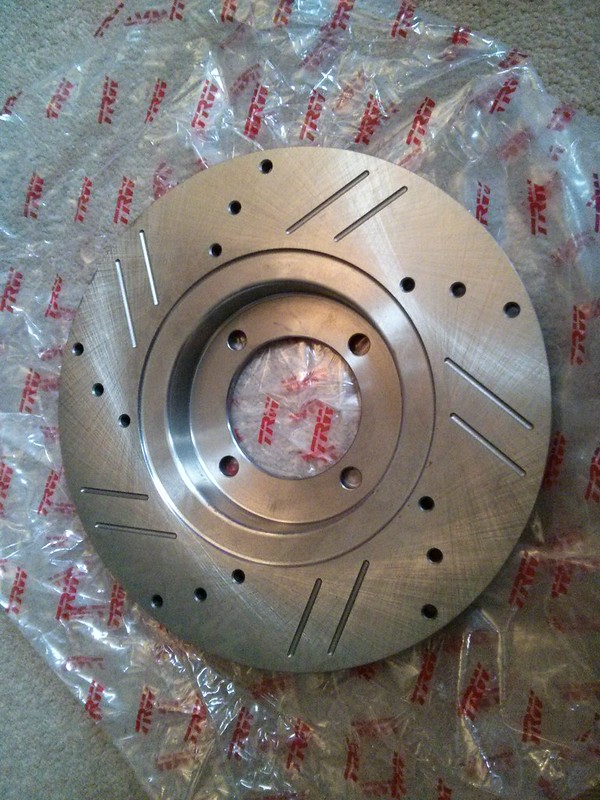
The postman has been and delivered the new disc rotors to replacing the worn current items. Shiney.
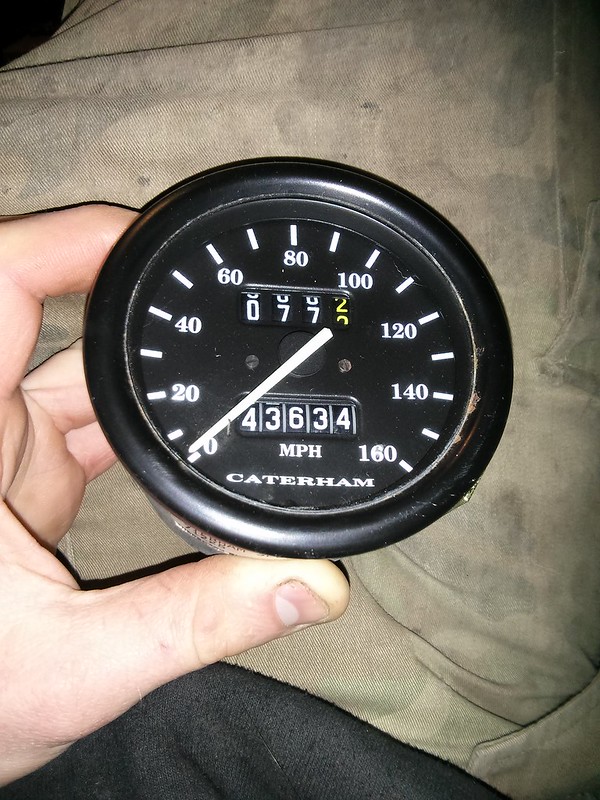
I'm having to modify my current Caterham speedometer. It currently only displays MPH which is a yearly pain that crops up in June for my annual Le Mans trip. This year will sadly be my last for a while, as the drive down from Australia wouldn't be quite as straightforward. It would be epic, but not the straight forward trip it currently is now.
I've rung a few people about sorting this out. The going rate seems to be around the £200 mark plus postage. I ideally want KPH to be the default reading with MPH as a smaller secondary marking so I can easily drive about in OZ but also the MPH reading will mean something to be without thinking and converting in my head!
The other option would be to install an electronic speedometer instead of the current model which runs off a worm drive from the gearbox. This seems to add up slightly more due to having to buy a new gauge and then also the sensor to run it. I'd also lose the Caterham branding which isn't the end of the world but it's nice to keep some original features. I've been looking at Stack gauges in this regard.
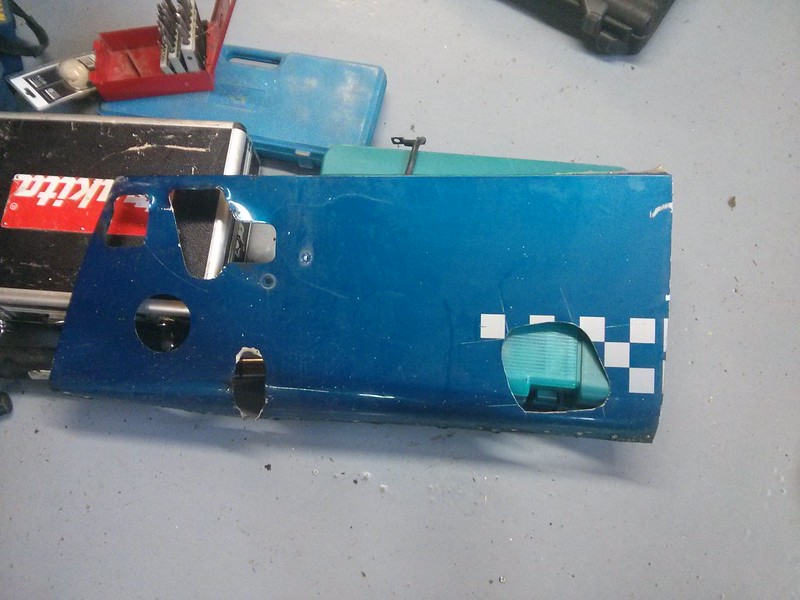
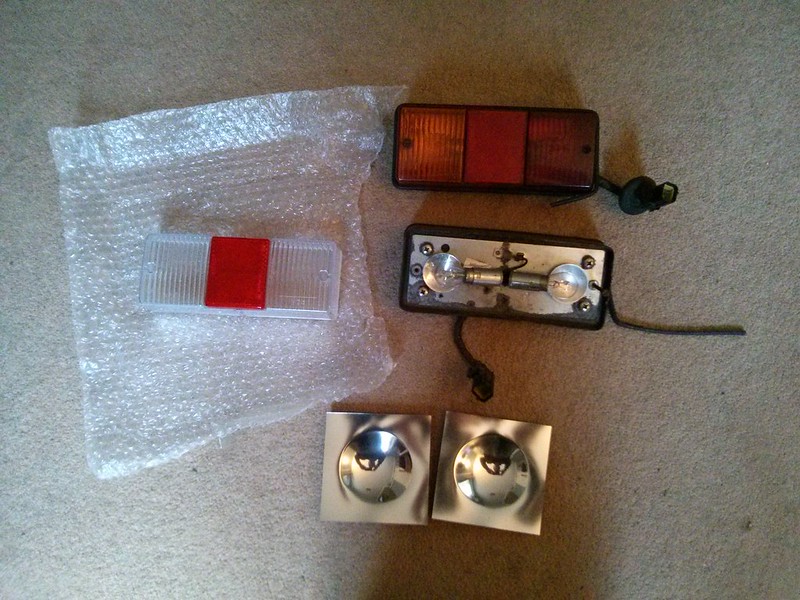
Finally, I'm modifying my rear lights in a feeble attempt to increase their luminosity. LED bulbs as are option, but most bulbs as well as rear light setups had the bulbs facing backwards and as such the LEDs tend to be on the end of the bulb. In the 7 the bulbs lie flat in parallel with the rear panel of the car. So with most LED bulbs, the concentration of the LEDs would be facing to the left and right of the car as opposed to backwards towards the intended viewers. I've also heard that they can be bright at night but a bit weaker in daylight useage.
So this mod includes some school science reflectors. The idea is to remove the small concave reflectors that are currently residing behind the bulbs and insert these shiny reflective numbers. Watch this space. It'll be blindingly obvious when it's done... ahahha.
As mentioned, I've stripped the paint from the bonnet and scuttle in an attempt to be able to reuse them again when it comes to being painted once more. I've also hopefully sourced a few contacts that will not charge £1500 to paint a Caterham. A more heartwarming three figure number is hopefully the end game and to a good standard.
Getting there slowly.
That's where I'm currently at. Now I wait and try to find some money to pay for all of this.
I had to borrow van as I had no other way to get the chassis to Arch Motors to have it repowdercoated and repaneled. A long wheelbase VW Transporter just about squeezes it in at an angle. Emphasis on the just, millimeter perfect. The picture isn't brilliant, in fact it's hardly worth uploading, but to keep the thread rolling, here it is. I was nearly midnight in the pissing rain when I loaded it up.
I arranged to be at Arch for 9:30am. I falsely believed that they were based near to Caterham, a mere 1 hour 30 drive away. A quick google maps plotting of my route last night threw up Arch's location to be near Cambridge much to my surprise! Bugger.
So, an unwelcome hour extra on the drive up. So last night I picked up the chassis and some items to be powdercoated, then at 6:30am this morning, I left home to pick up some panels from my parents garage. 7am I was heading to Arch Motors. A good 2 hours later...I arrived. After a natter and a look around, I helped unload my chassis so that Phil could have a look at it and we could speak options.
The chassis was checked for square and alignment and all found to be fine. I tried in vain to reuse some of my old panels on my car. I didn't want to shell out for new ones if the old were fine. Most of the panels had signs of corrosion so we decided between us to bin them and to renew. I think the only panels I kept were the rear panel behind the seats as it is carpeted and the transmission tunnel panels as they are also carpeted on mine. I chose to keep the carpet (oh think of the weight penalty!) as it adds a little something over bare aluminium throughout so it doesn't look totally stripped out tin can. An option he said many people often regret as they arrive to pick up their newly paneled car to see the old reused panels sticking out like a sore thumb, but I've got to keep money saved somewhere. This seemed like an option as the chosen areas won't be seen once installed and the car put back together again. We'll see if I live to regret it.
I also took along a few bits to have repowdercoated, although the items which had bushes that had to be pressed out were forgotten. I took these down to a local Blacksmith friend to use his press and when I brought them back home, I stored them out of the way. So the wishbones, A frame, rear trailing arms etc need to go to be shot blasted and powercoated else where. Not quite sure where yet, but somewhere. Gash.
I've also stripped the paint from the bonnet and scuttle in an attempt to help me along.
Arch Motors is an interesting place with quite a nice back catalogue of chassis's to their name. Currently they have a lot of Caterham chassis in for repair, mainly race cars. They still make the CSR on site. The other areas of the workshop are dedicated to Ariel Atoms. In their past they have worked for Lola, Lotus, McLaren to name a few. They made a lot of the original Ford GT40 chassis which was of interest as it's a car my partner in crime on my rebuild works on almost daily amongst others.
I then popped back into the van to drive the start of the return leg to Road and Race Transmissions near Sevenoaks. I dropped my gearbox and diff off at owner Phil's house as the company doesn't open over the weekends. A short 1hr30 drive from Arch, but the traffic had picked up now.
Overall, including stops and chatting I had a 7 hour round trip. A bit of a long start, but I will set off again to collect it all in about a months time.
In the mean time... my doors have windows which have developed a blueish hue to them. The car is 15 years old and has lived outside for the last few years knowingly in my ownership. The sun has taken it's toll. A quick call to Oxted trimming who were the original manufactures of the doors to enquire about a new window panel didn't turn up the answers I wanted. I'd have to buy new doors it seems. At ~£200 per side, I'm a little reluctant to buy new. So I set about trying to revive them with Renovo window polish. I've had one bash, but I'll try to do it again before refitting to hopefully achieve a satisfactory finish for the time being.
I've also ordered some carbon panel. Maybe this is an unnecessary expense, well probably, but I fancied some. An expensive addiction. Carbon vinyl is an option, but I'd know that it wasn't the real McCoy. Something that would niggle me endlessly, so not an option here.
I'm replacing part of the boot floor from a ~4mm ply to a carbon sandwich. I'm then fabricating the rear heater panel out of a carbon sheet instead of patching the old heater hole up with aluminium sheeting. Should hopefully look nice. I'll smile anyway, it's what counts.
The postman has been and delivered the new disc rotors to replacing the worn current items. Shiney.
I'm having to modify my current Caterham speedometer. It currently only displays MPH which is a yearly pain that crops up in June for my annual Le Mans trip. This year will sadly be my last for a while, as the drive down from Australia wouldn't be quite as straightforward. It would be epic, but not the straight forward trip it currently is now.
I've rung a few people about sorting this out. The going rate seems to be around the £200 mark plus postage. I ideally want KPH to be the default reading with MPH as a smaller secondary marking so I can easily drive about in OZ but also the MPH reading will mean something to be without thinking and converting in my head!
The other option would be to install an electronic speedometer instead of the current model which runs off a worm drive from the gearbox. This seems to add up slightly more due to having to buy a new gauge and then also the sensor to run it. I'd also lose the Caterham branding which isn't the end of the world but it's nice to keep some original features. I've been looking at Stack gauges in this regard.
Finally, I'm modifying my rear lights in a feeble attempt to increase their luminosity. LED bulbs as are option, but most bulbs as well as rear light setups had the bulbs facing backwards and as such the LEDs tend to be on the end of the bulb. In the 7 the bulbs lie flat in parallel with the rear panel of the car. So with most LED bulbs, the concentration of the LEDs would be facing to the left and right of the car as opposed to backwards towards the intended viewers. I've also heard that they can be bright at night but a bit weaker in daylight useage.
So this mod includes some school science reflectors. The idea is to remove the small concave reflectors that are currently residing behind the bulbs and insert these shiny reflective numbers. Watch this space. It'll be blindingly obvious when it's done... ahahha.
As mentioned, I've stripped the paint from the bonnet and scuttle in an attempt to be able to reuse them again when it comes to being painted once more. I've also hopefully sourced a few contacts that will not charge £1500 to paint a Caterham. A more heartwarming three figure number is hopefully the end game and to a good standard.
Getting there slowly.
That's where I'm currently at. Now I wait and try to find some money to pay for all of this.
Smitters said:
Cracking work. Watching with interest as I've a mechanically great, well specced 1600, but I'd like to do some cosmetic work over the next few years, ultimately, including a full reskin. No worries if you don't want to, but a ballpark tot up at the end would be really interesting, if you can bear it!
I'll try keep an eye on the figures for you. No worries sharing costs.Smitters said:
Cracking work. Watching with interest as I've a mechanically great, well specced 1600, but I'd like to do some cosmetic work over the next few years, ultimately, including a full reskin. No worries if you don't want to, but a ballpark tot up at the end would be really interesting, if you can bear it!
I'll try keep an eye on the figures for you. No worries sharing costs.Hoonigan said:
Gingerbread Man said:
Hoonigan said:
Excellent update, really enjoying this 
You say your mate works on GT40s... he wouldn't happen to have any secondhand/spare parts kicking around that he's looking to sell?

You're only 20 minutes down the road. How's the build going?You say your mate works on GT40s... he wouldn't happen to have any secondhand/spare parts kicking around that he's looking to sell?
20 mins away, Southern GT?
Hoonigan said:
Ahh I see, We have met, I used to have the noisy old grey Carerra 3.2 
Don't get out as much now as it's not as much fun dragging a partially built GT40 to the local meets as it was taking the Porka, but when it' s finished...
Paul
Originally Paulbrav or similar? I know the one. Hello again then!Don't get out as much now as it's not as much fun dragging a partially built GT40 to the local meets as it was taking the Porka, but when it' s finished...
Paul
I've been playing with the carbon. I'm trying to keep the costs down, but when I see the shininess of Carbon Fibre, I buckle. Anyhow, all dremeled out. A good little tool that. I'll fight off buying on for the mean while.
Mean while the diff is due on the bench come Monday and the Chassis is starting it's refresh.
Mean while the diff is due on the bench come Monday and the Chassis is starting it's refresh.
A minor update. A minor next step has happened.
The chassis was finally ready for collection from Arch. So I popped up today to collect it along with some powdercoated goodies they had prepared for me.
I then dropped back via the Gearbox and Diff man (Phil at Road and Race). One last stop before home was dropping the chassis off at the spray shop. So hopefully it'll all be ready to pick up in a few weeks after I come back from holiday and I can crack on putting it back together and enjoying the nice weather we have been having lately.
This time last year I believe that we had snow...?
It was all a bit tight in the van but all arrived to their destinations in one piece!
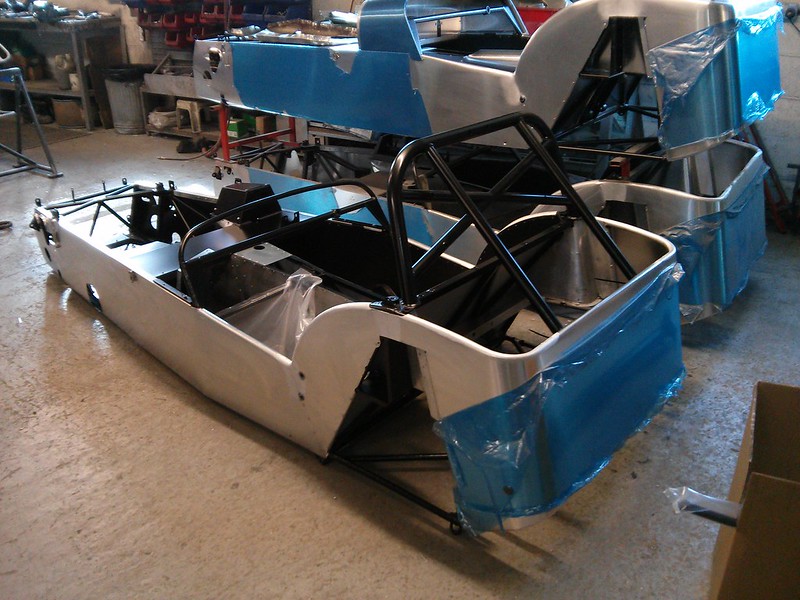
Awaiting loading. Powdercoated engine bay. Should keep it in better nick.
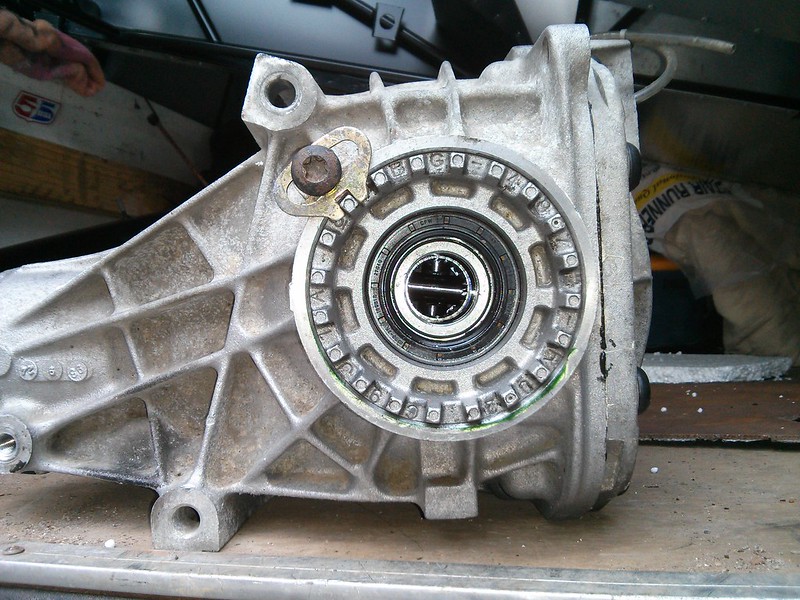
Diff with new LSD goodness.
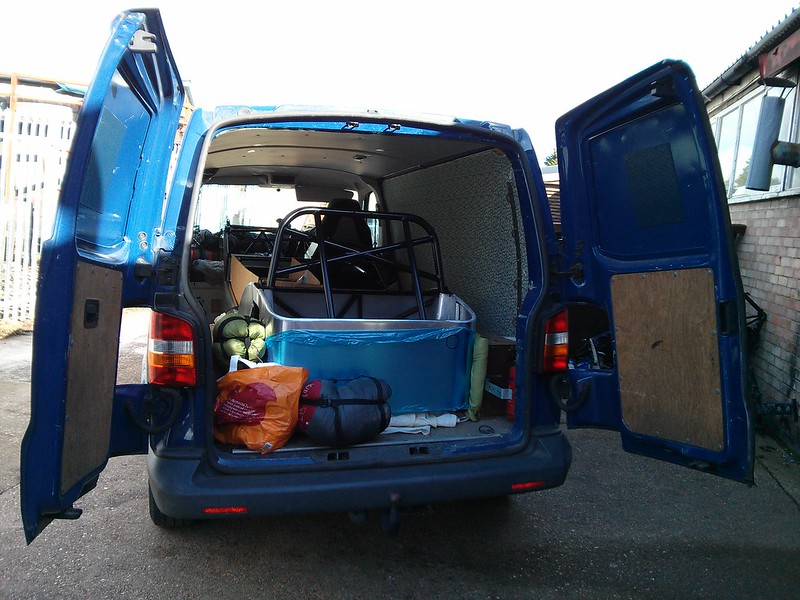
Sleeping bags and rugs to stop it sliding about and denting all their hard work.
The paneler came running out asking if I was having a bag fuel tank or a traditional filler cap. The question wasn't asked, so luckily he remembered. So he then cut the filler hole for me in the car park just before I shut the door and drove off!
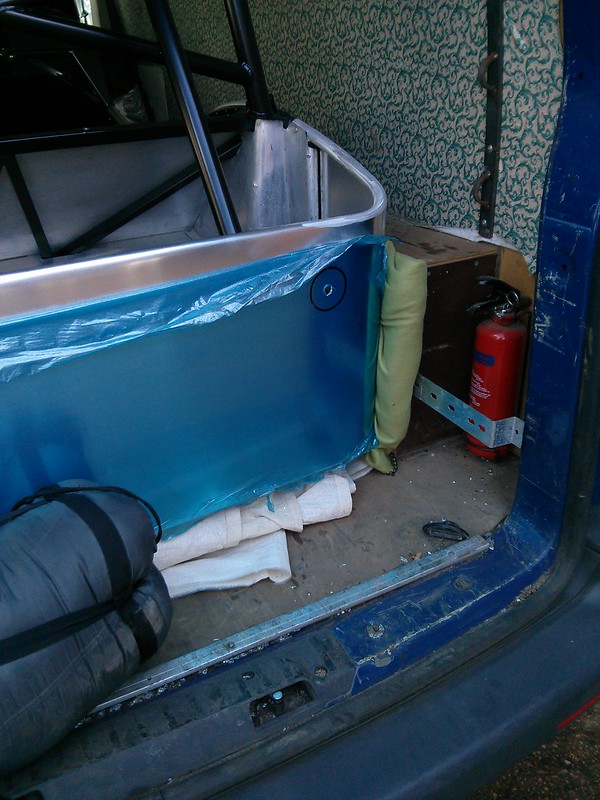
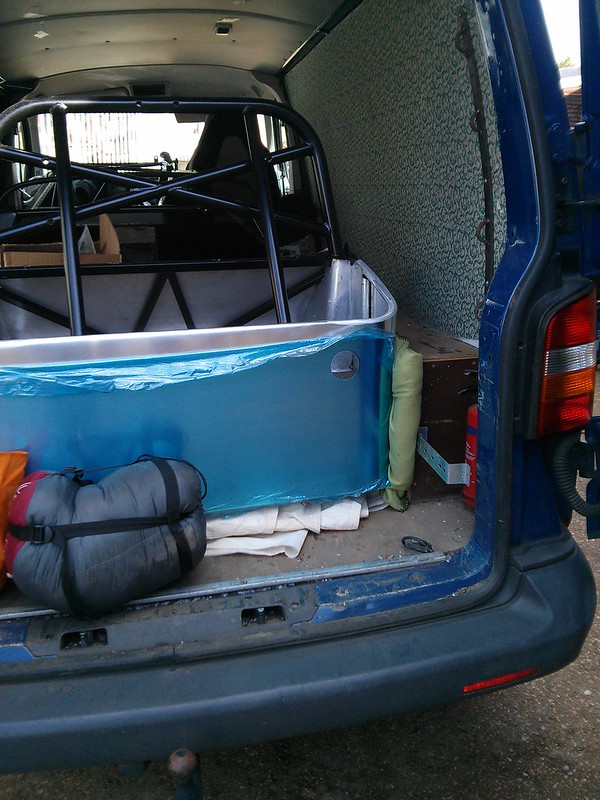
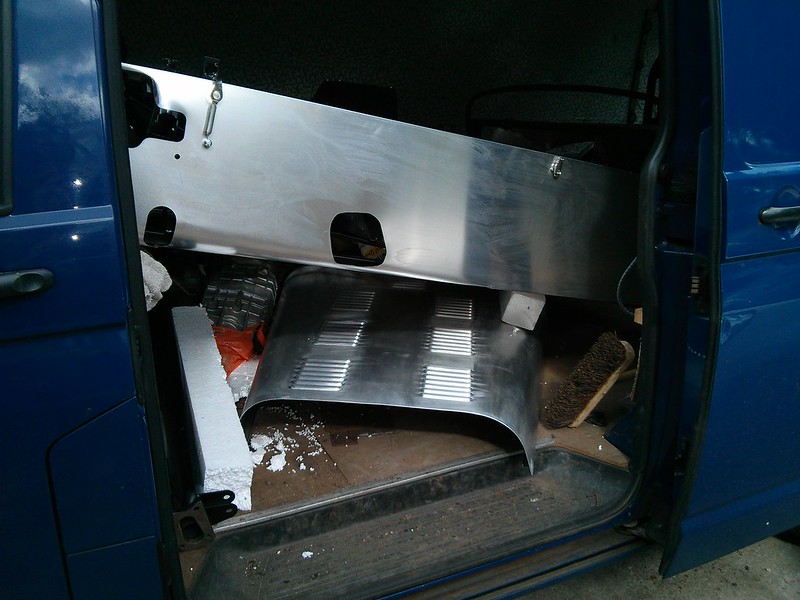
There's a gearbox in there somewhere. The Diff sat in the passenger foot well.
The chassis was finally ready for collection from Arch. So I popped up today to collect it along with some powdercoated goodies they had prepared for me.
I then dropped back via the Gearbox and Diff man (Phil at Road and Race). One last stop before home was dropping the chassis off at the spray shop. So hopefully it'll all be ready to pick up in a few weeks after I come back from holiday and I can crack on putting it back together and enjoying the nice weather we have been having lately.
This time last year I believe that we had snow...?
It was all a bit tight in the van but all arrived to their destinations in one piece!
Awaiting loading. Powdercoated engine bay. Should keep it in better nick.
Diff with new LSD goodness.
Sleeping bags and rugs to stop it sliding about and denting all their hard work.
The paneler came running out asking if I was having a bag fuel tank or a traditional filler cap. The question wasn't asked, so luckily he remembered. So he then cut the filler hole for me in the car park just before I shut the door and drove off!
There's a gearbox in there somewhere. The Diff sat in the passenger foot well.
gez c16b said:
Brilliant read so far. Love it when someone uses something like this as a daily.
Only being able able to afford one car at the time. It was a practical, fairly boring car that's expected. Or a wild card. A car with no radio, no toys or gadgets, no decent source of warmth (above your waist). A car you'd have to pretty much love and crave to put up with it in all weathers such as England displays.
If you didn't love the 7, you'd have pulled your hair out long ago.
I'm ploughing probably more money than I can realisticly afford too into this car, but that's life!
Slow progress I know. I'm just home from a few weeks holiday. Before I left, I had delivered the chassis to a spray shop. I then farted about deciding what colour to go for as at the last hour I saw an even brighter shade of green and fell in love.
I'm going to ring today to check progress and then hopefully pick it up on Sunday. Looking at my calendar, my weekends seem to be choca, so hopefully it all gets built in time for Le Mans!
I'm going to ring today to check progress and then hopefully pick it up on Sunday. Looking at my calendar, my weekends seem to be choca, so hopefully it all gets built in time for Le Mans!
Gassing Station | Readers' Cars | Top of Page | What's New | My Stuff