Mini 1275 rebuild
Discussion


Having been pestered by a couple of friends and previous owners of my 1960 Beetle, which I've owned on and off for the last 20 years, I finally succumbed to temptation and crumbled in a moment of weakness and decided to sell once again.
I gave both of my friends and pesterers the option to flash the cash before I changed my mind and grease my palm within the week. Unfortunately for me one of them stumped up the readies and I lost my postion in Beetle ownership once again.
In truth I had storage problems with it and was never really able to give it the use it deserved. I knew it would be going to a good home where it would be looked after and cared for .......and anyway i'll probably have it back in 10 years time when it's my turn to take it apart again.
Having said that this was still a very sad moment
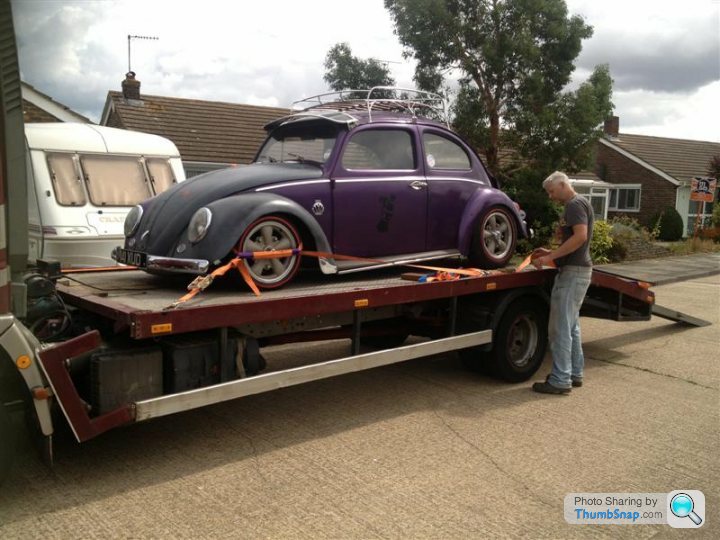
With the Beetle out of the way, I now had a spare bit of cash burning a hole in my pocket for a new project. I think the money desperately hung on in there for about two whole days, before giving up and falling out into another friends pocket.
I had been eyeing this up for a while at his garage and in the end decided to revisit my teenage years once again.
A friend and good customer of mine was selling the car for a young guy he knew. Having done some mild repairs on the car with his dad, I believe the seller broke down on Dartford bridge. Mortified at the hold up he had caused and not trusting it any longer, wanted it gone.
To be honest, all I wanted was a good solid shell as it would all be changed anyway. Apart from a few scabby patches in the front floor ( as per usual ) it was a rust free example, a good basis for a project without too much body work issues. It had just been resprayed and put through MOT so all good.
Anyway after a few uuuummmms, aaarrhhhs, low punches and crafty upper cuts, £1500 was handed over and my mate delivered it to my house for me.
Unfortunately it was about this point I decided to fall down a cellar at a customers house landing on my ribs and in the process breaking four of them. Unsurprisingly this put me out of action for a good few months and nothing at all got done .....trust me you don't wanna be doing that if you can help it!
So here it sat for months on end all sad and dejected.
The first weekend when I felt ok and not in too much pain, I decided to have a little prod and poke about.
And so the fun began.....
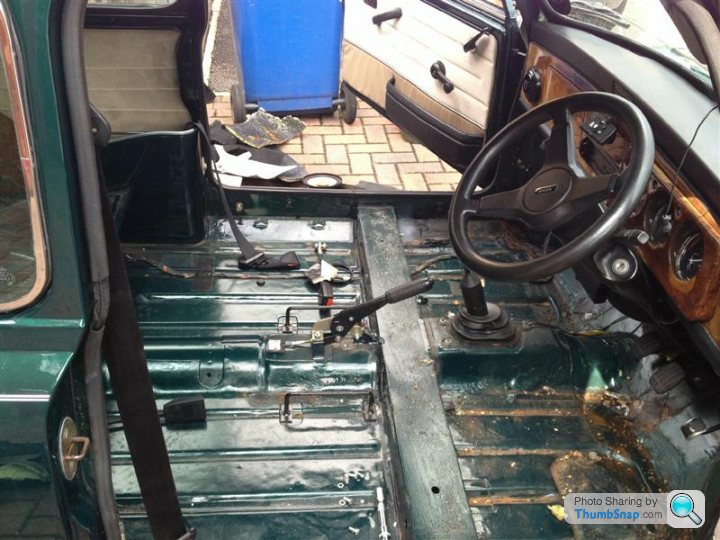
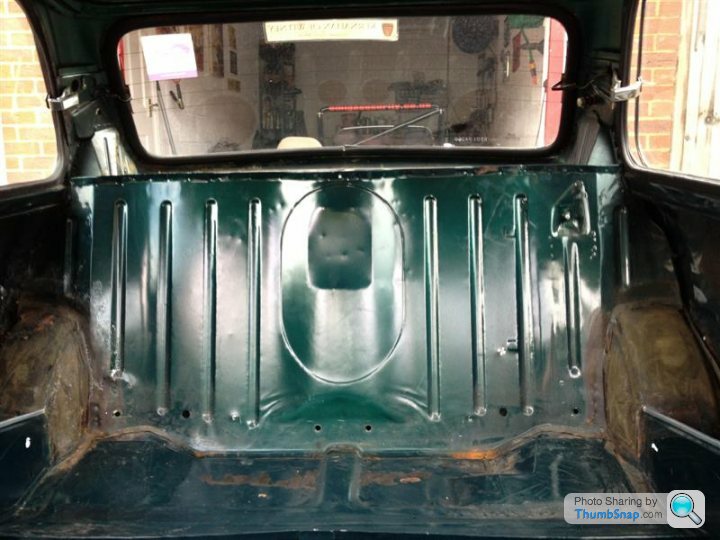
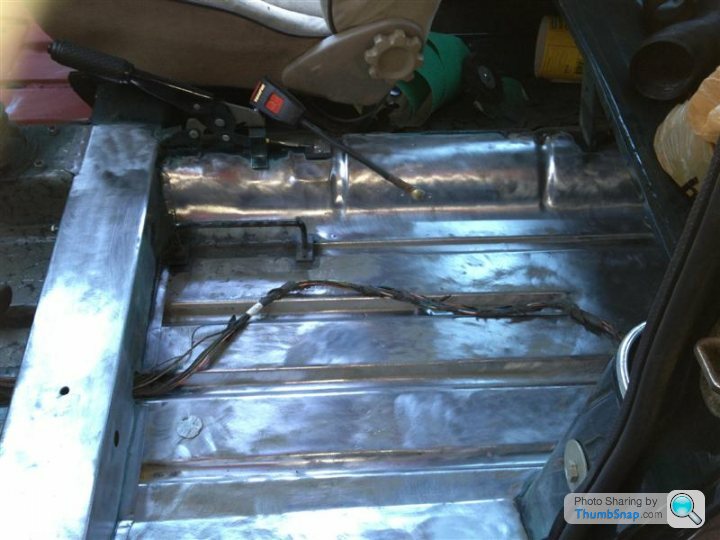
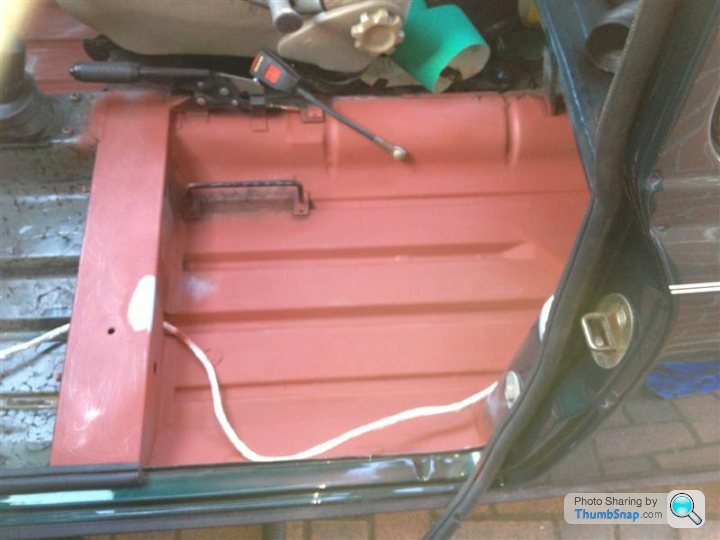
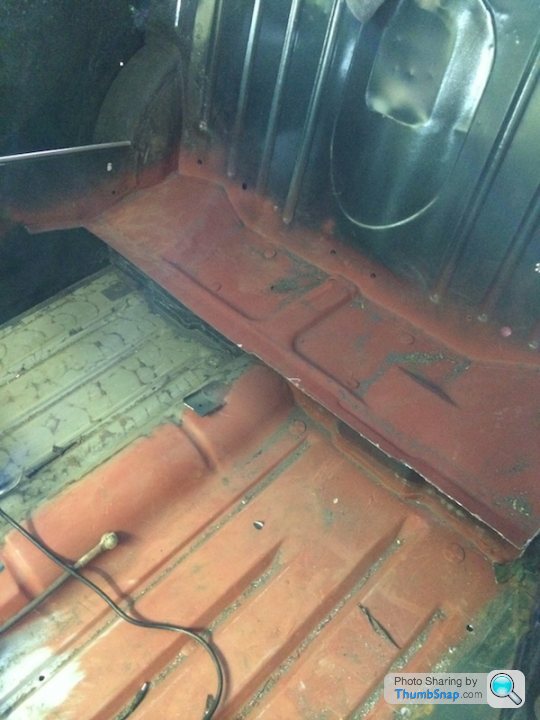
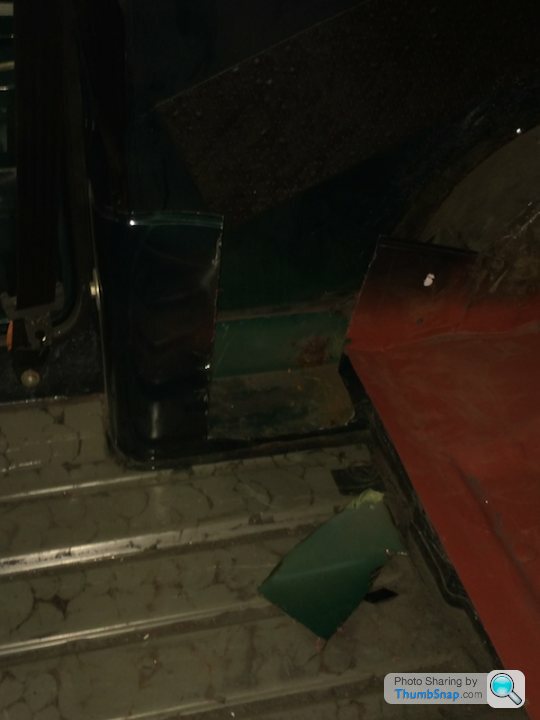
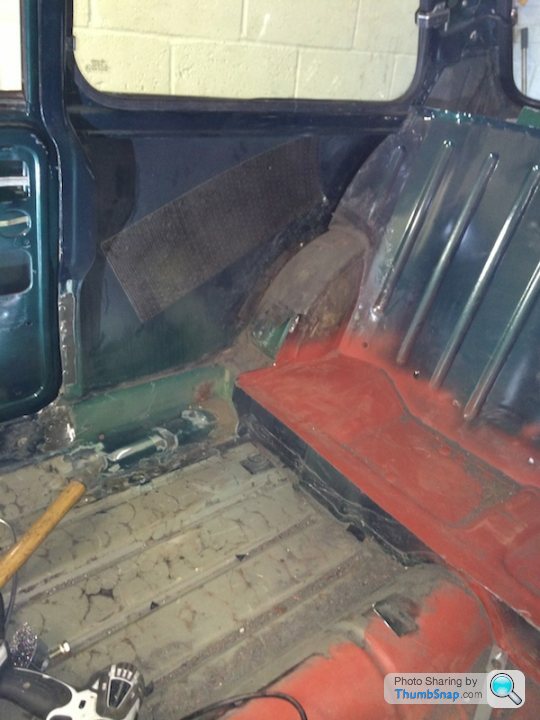
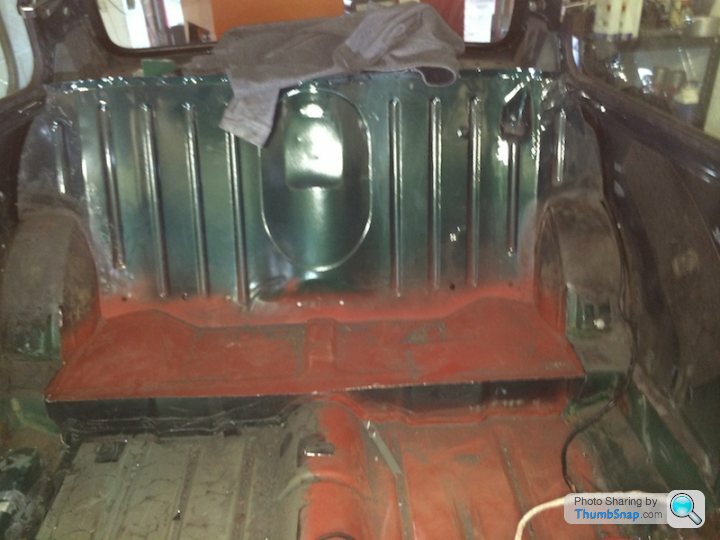
A few weeks later the sound deadening was removed, which is easier said than done!, and the floor and rear seat pan taken back to bare metal. It was then given a quick primer coat to protect it, although this will be removed again and done properly at a later date.
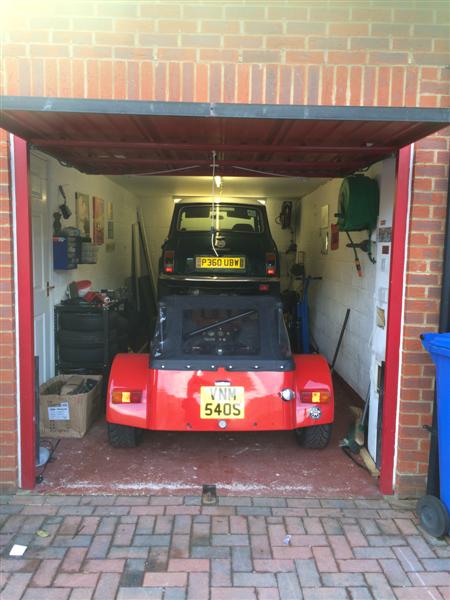
The Mini up until now had been left outside and ideally I wanted it in the garage, but with the Westfield in there I had a problem as both wouldn't fit. I had a few builder mates pop round to see what I could do with re-engineering the garage i.e. I have an understairs cupboard I could knock into to gain the space required, but finally came up with a lift Idea.
So having read a few threads on here and looked about, I found this. It's a superb piece of kit and imho an excellent investment, am well made up with it. Working on the car is so much easier now and it does exactly what I wanted it to do.
Here's a link if anyone is interested.
http://www.ebay.co.uk/itm/CAR-LIFT-MID-RISE-SCISSO...
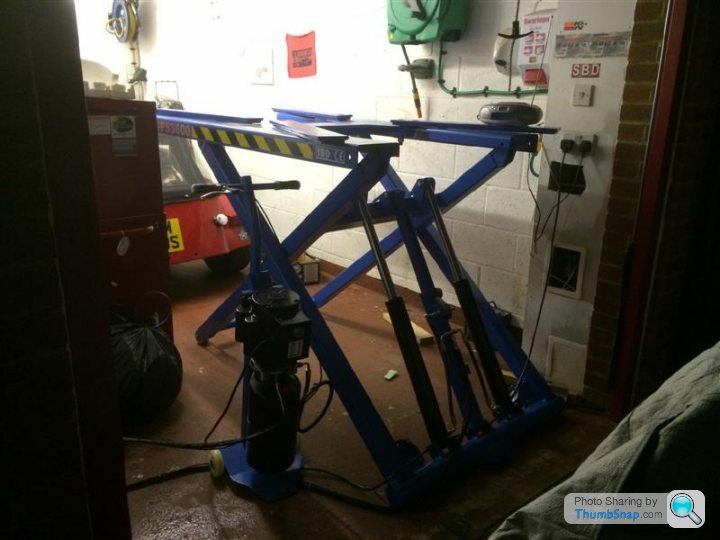
PerfectO
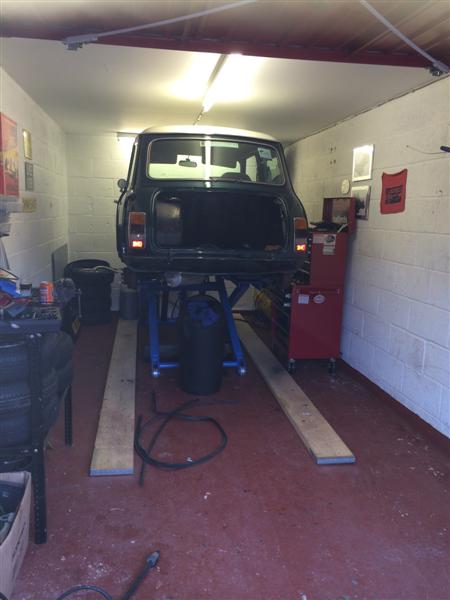
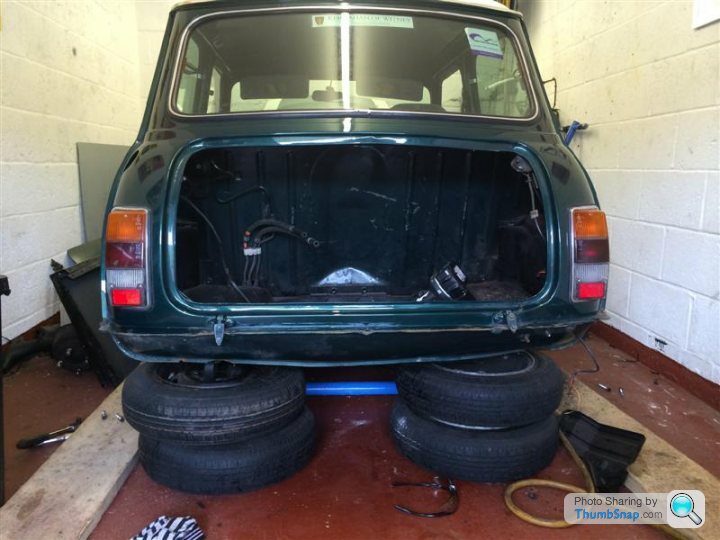
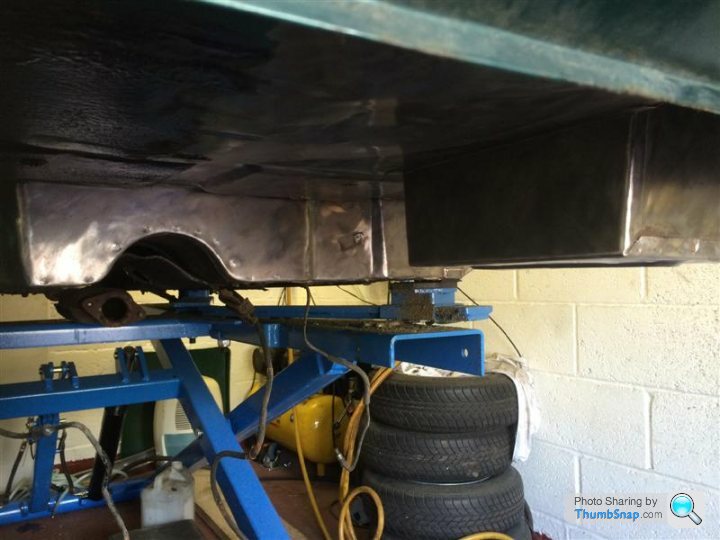
Now In the garage I could start with the strip down.
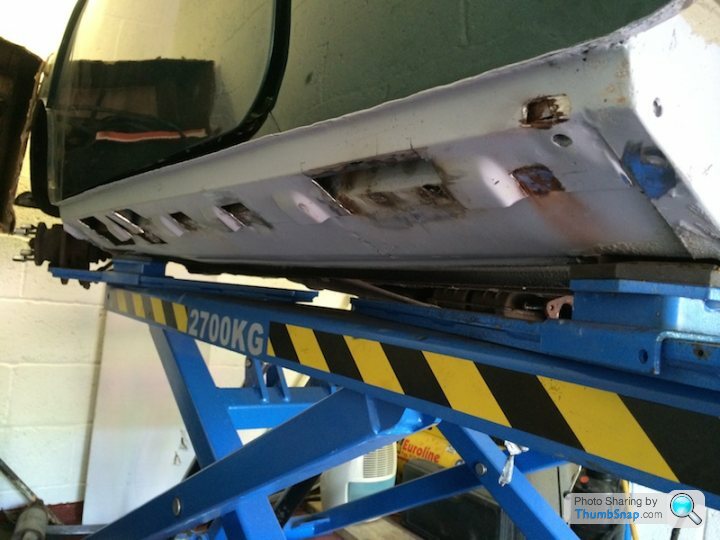
With the use of a lift, subframe removal is a piece of cake.
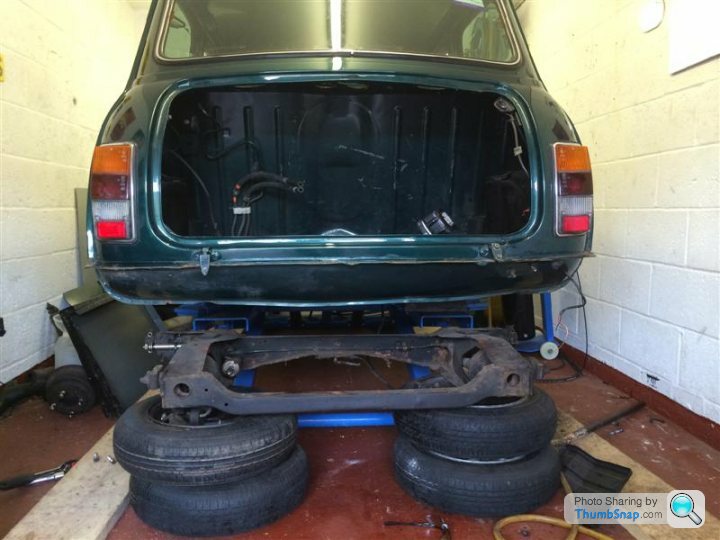
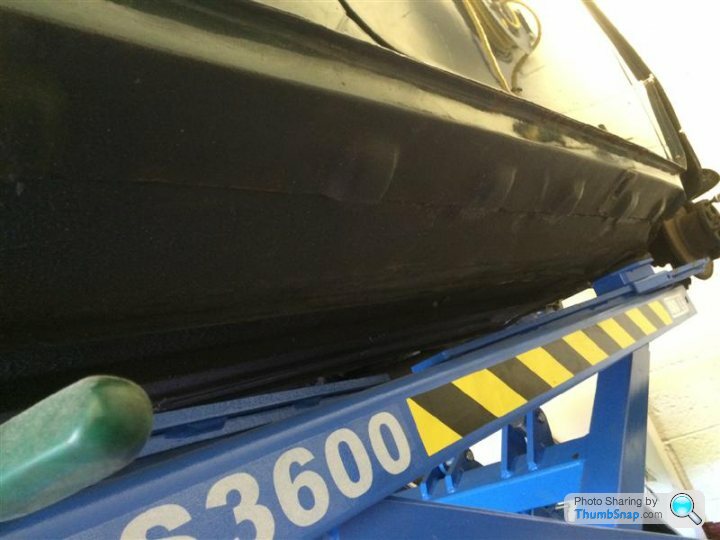
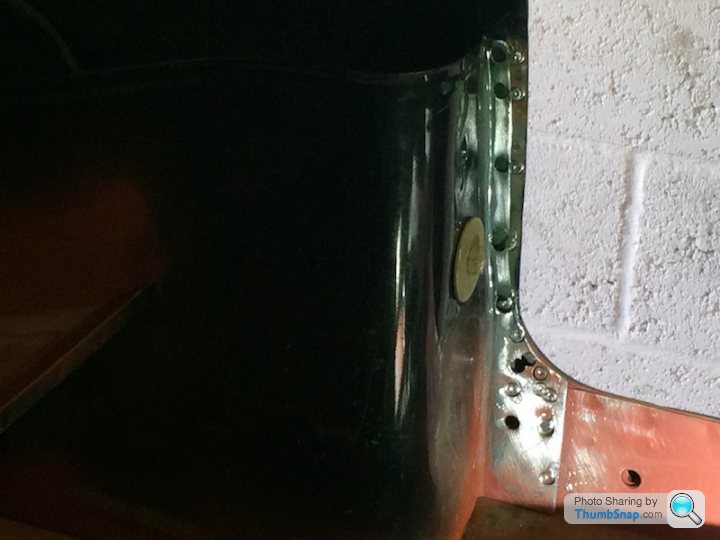
Subframe looks in pretty good condition, bar a few scabby spots at the top which I'll sort out later.
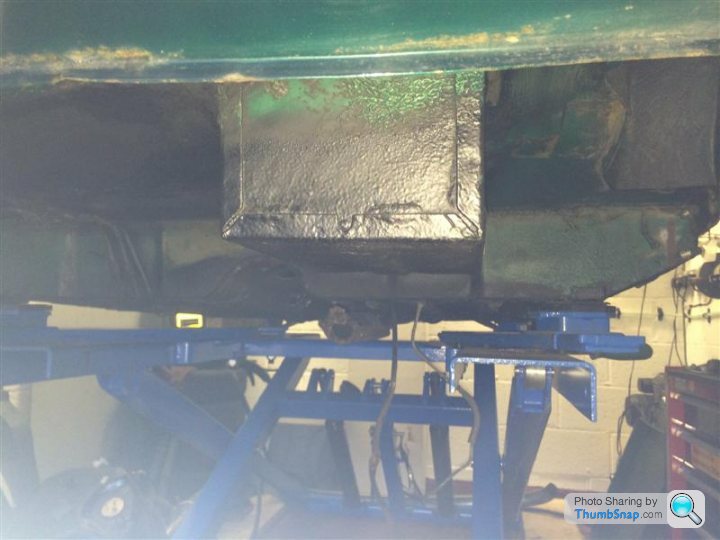
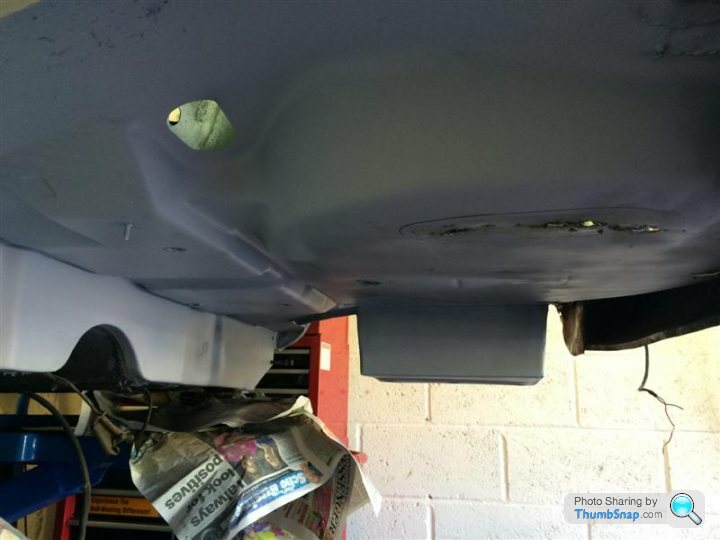
I then de-greased the underside of the rear end of the car. Surprising no rust to talk of.

This is where I am at as of this weekend. I hope to update the thread when I'm able for those that are interested.
I gave both of my friends and pesterers the option to flash the cash before I changed my mind and grease my palm within the week. Unfortunately for me one of them stumped up the readies and I lost my postion in Beetle ownership once again.
In truth I had storage problems with it and was never really able to give it the use it deserved. I knew it would be going to a good home where it would be looked after and cared for .......and anyway i'll probably have it back in 10 years time when it's my turn to take it apart again.
Having said that this was still a very sad moment
With the Beetle out of the way, I now had a spare bit of cash burning a hole in my pocket for a new project. I think the money desperately hung on in there for about two whole days, before giving up and falling out into another friends pocket.
I had been eyeing this up for a while at his garage and in the end decided to revisit my teenage years once again.
A friend and good customer of mine was selling the car for a young guy he knew. Having done some mild repairs on the car with his dad, I believe the seller broke down on Dartford bridge. Mortified at the hold up he had caused
and not trusting it any longer, wanted it gone. To be honest, all I wanted was a good solid shell as it would all be changed anyway. Apart from a few scabby patches in the front floor ( as per usual ) it was a rust free example, a good basis for a project without too much body work issues. It had just been resprayed and put through MOT so all good.
Anyway after a few uuuummmms, aaarrhhhs, low punches and crafty upper cuts, £1500 was handed over and my mate delivered it to my house for me.
Unfortunately it was about this point I decided to fall down a cellar at a customers house landing on my ribs and in the process breaking four of them. Unsurprisingly this put me out of action for a good few months and nothing at all got done
.....trust me you don't wanna be doing that if you can help it! So here it sat for months on end all sad and dejected.
The first weekend when I felt ok and not in too much pain, I decided to have a little prod and poke about.
And so the fun began.....
A few weeks later the sound deadening was removed, which is easier said than done!, and the floor and rear seat pan taken back to bare metal. It was then given a quick primer coat to protect it, although this will be removed again and done properly at a later date.
The Mini up until now had been left outside and ideally I wanted it in the garage, but with the Westfield in there I had a problem as both wouldn't fit. I had a few builder mates pop round to see what I could do with re-engineering the garage i.e. I have an understairs cupboard I could knock into to gain the space required, but finally came up with a lift Idea.
So having read a few threads on here and looked about, I found this. It's a superb piece of kit and imho an excellent investment, am well made up with it. Working on the car is so much easier now and it does exactly what I wanted it to do.
Here's a link if anyone is interested.
http://www.ebay.co.uk/itm/CAR-LIFT-MID-RISE-SCISSO...
PerfectO
Now In the garage I could start with the strip down.
With the use of a lift, subframe removal is a piece of cake.
Subframe looks in pretty good condition, bar a few scabby spots at the top which I'll sort out later.
I then de-greased the underside of the rear end of the car. Surprising no rust to talk of.
This is where I am at as of this weekend. I hope to update the thread when I'm able for those that are interested.
Edited by Westy Pre-Lit on Sunday 26th January 18:46

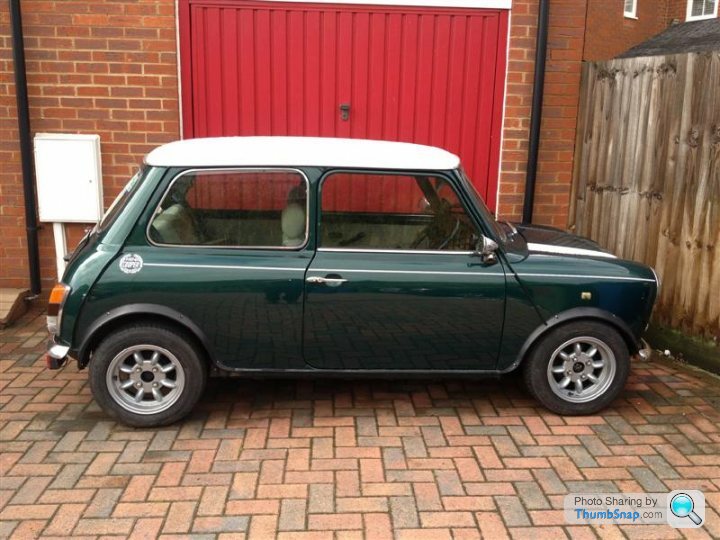
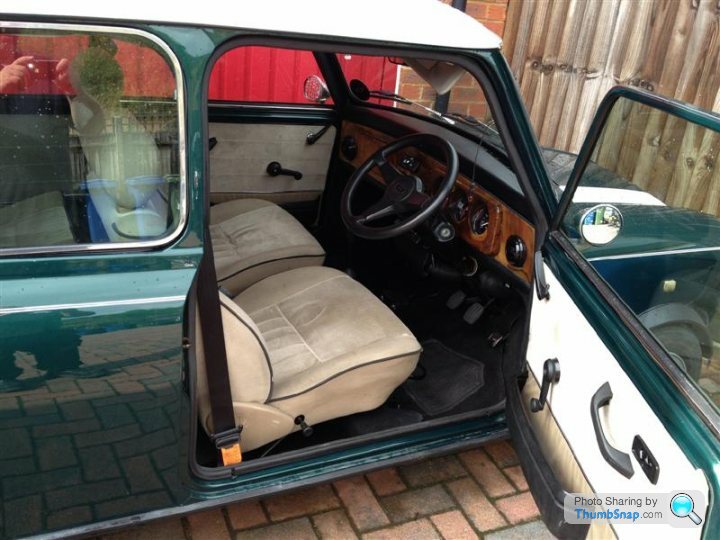
Nice looking Mini Mark
Will be going for 10's as well and track orientated but mainly for road use.
Got so many ideas atm but keep changing my mind lol. Colour is somewhat of an issue at the moment but it will be something in the pastel range.
Yes I know what you mean about the roof rack and visor. They were put on the car by the guy I bought it back from. I wasn't sure to be honest but kept them on anyway.
The paint was a one off mix at the time (18 years ago) as I couldn't find the colour I wanted. Funnily enough when I chose it it looked a lot darker and a deeper shade which I was looking for. When the car was painted it came out quite a bit lighter than expected so had to go with it in the end.
Edited by Westy Pre-Lit on Sunday 26th January 18:36

Would more than likely go the Rose Petal route / Mini Light as you can't go wrong with them.
Was also looking at Golf cart wheels a while back but there seems to be quite a lot of debate as to whether they are able to cope with the stresses etc. Some people say they are perfectly fine and race with them, others say no chance.
Something like this maybe.

I believe they are Gianni Potenza Wheels or the like.
I don't know, so many choices to make.
Some nice looking cart wheels here.
http://www.golfcarttirestore.com/chrome_wheels.htm
Might go for something like this


Engine wise I think I'll go 1380 A series atm, originally was going to go VTEC or Bike etc but keep coming back to what I know, but always open to suggestion.
http://www.golfcarttirestore.com/chrome_wheels.htm
Might go for something like this
Engine wise I think I'll go 1380 A series atm, originally was going to go VTEC or Bike etc but keep coming back to what I know, but always open to suggestion.
Justin S said:
Go metro turbo, big boy........... get the boost up.........
You mean like this http://www.youtube.com/watch?v=u0NhCK5jqoA
It's a bit of a sleeper to say the least. Would see it in the car park every day and never took any notice of it, until I spotted the R888's one day lurking under the arches.
When I saw the owner I asked what he was doing with them and he started laughing, the work done on the car is superb.
Thanks for the comments and the links so far, although a long way off yet, am thinking the A series with a straight cut box is the way to go. ZTec or bike would be nice but having looked into the work involved seems a lot of hassle to get it right.
Ideally If I can I want to junk ECU's and all the electronic junk that goes with them and go back to basics. Is that possible to do that with all the emission regs these days ? all that gadgetry leaves me cold and uninterested.
Edited by Westy Pre-Lit on Monday 27th January 23:13
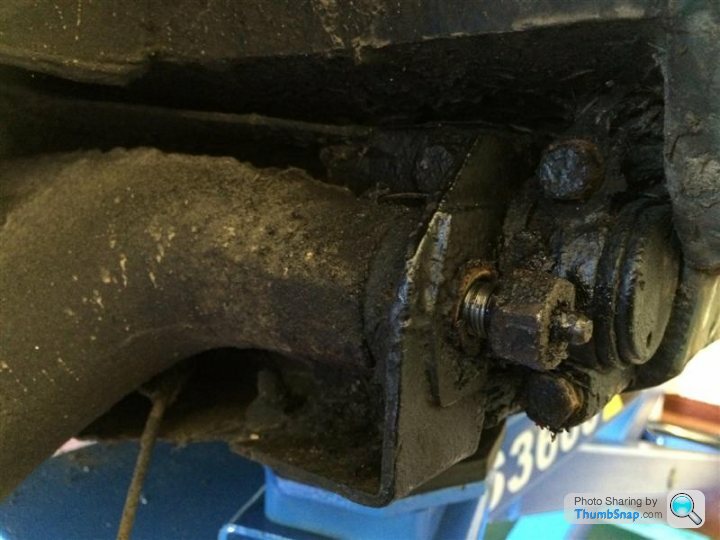
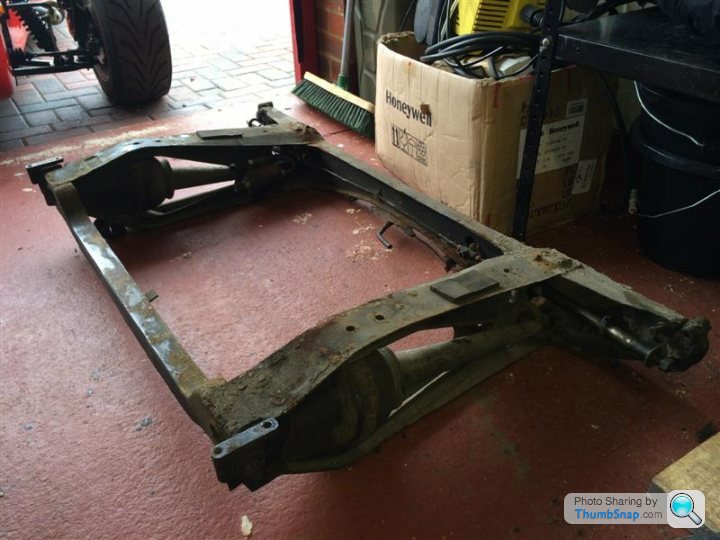
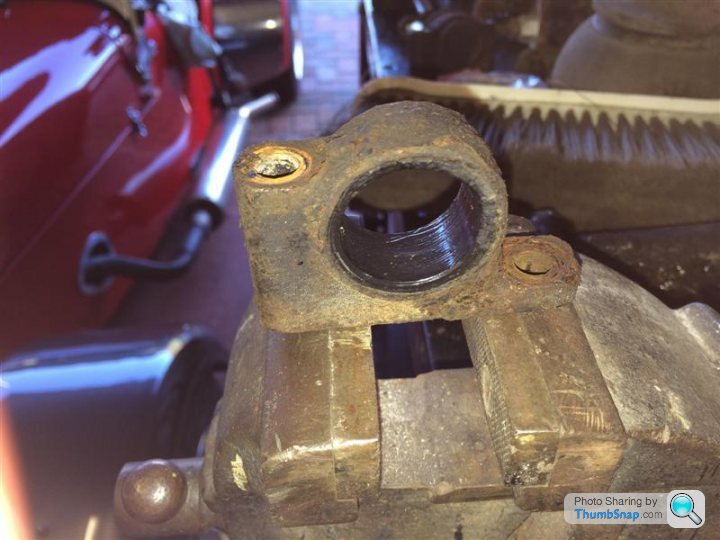
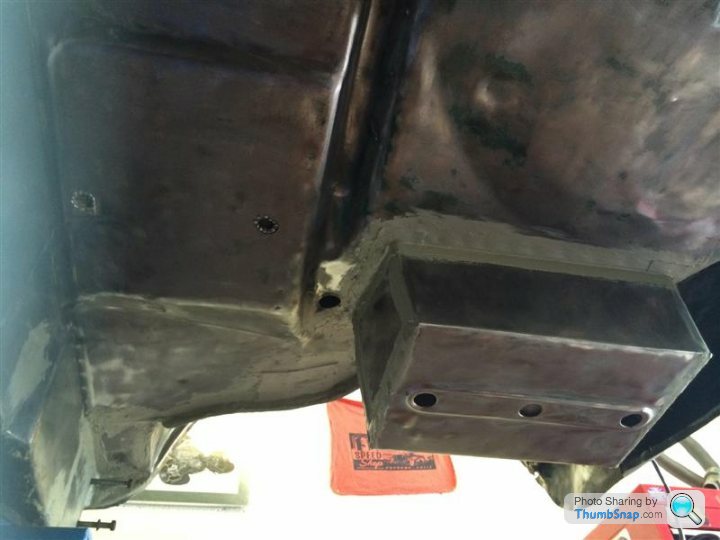
With the rear subframe removed I was able to get a good look at it's condition.
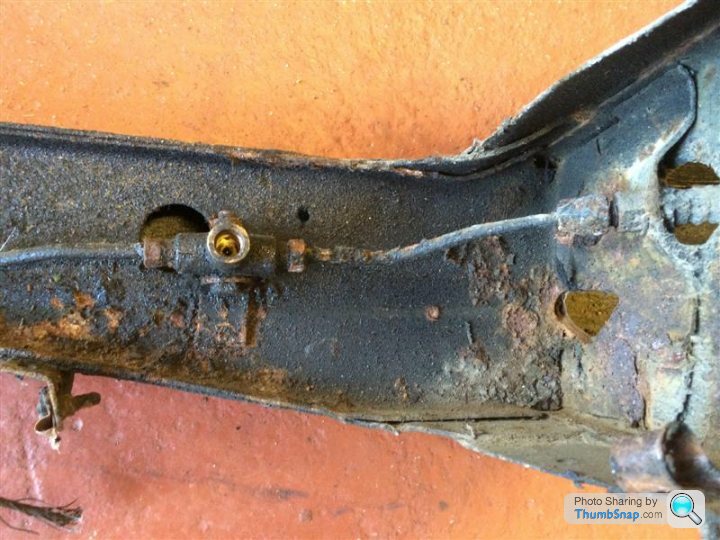
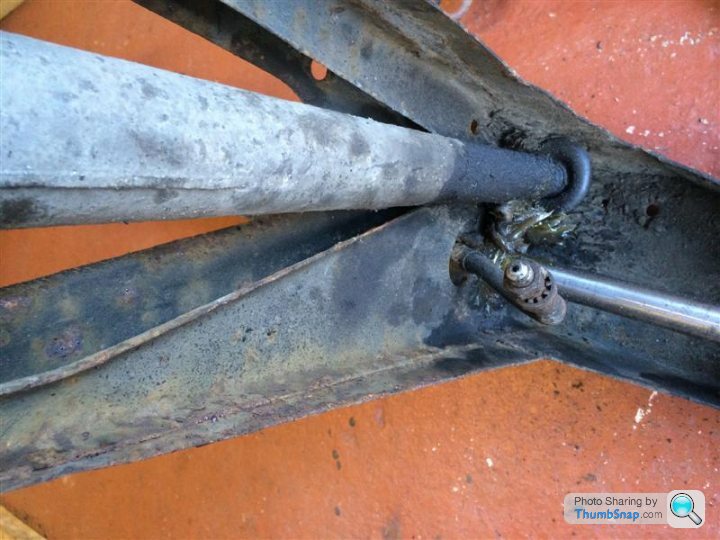
Apart from being caked in dirt / grease and some surface rust it didn't look too bad.
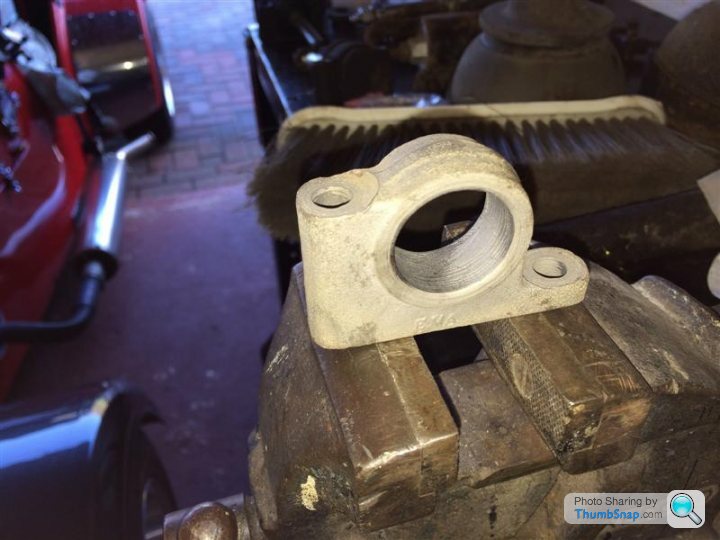
So I gave it a quick clean and degrease and was left with this.
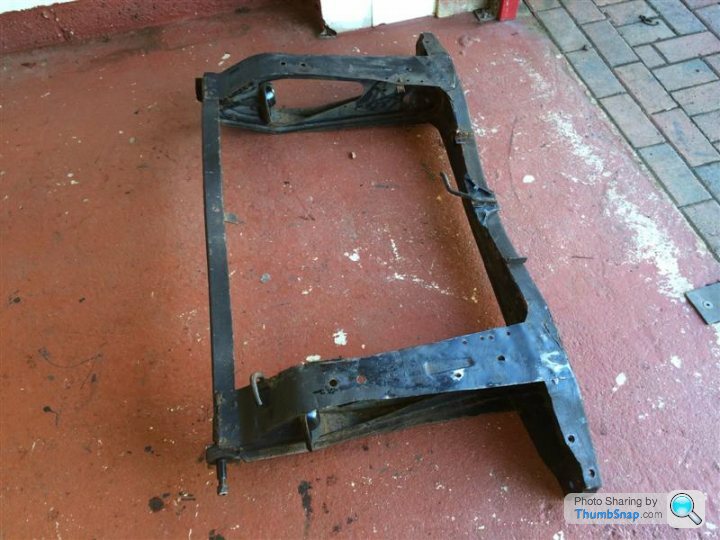
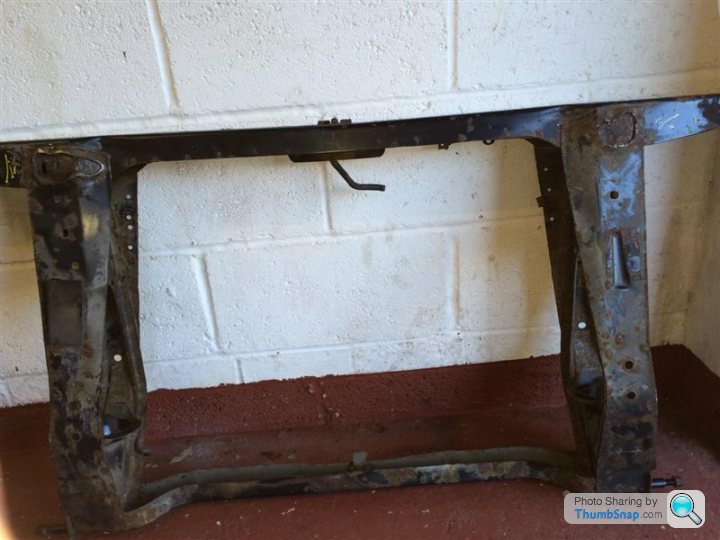
After a good poke and prod about it didn't look too bad, apart from these rather scabby bits on the top part of the frame. I cut out all the crusty bits and was left with these either side.
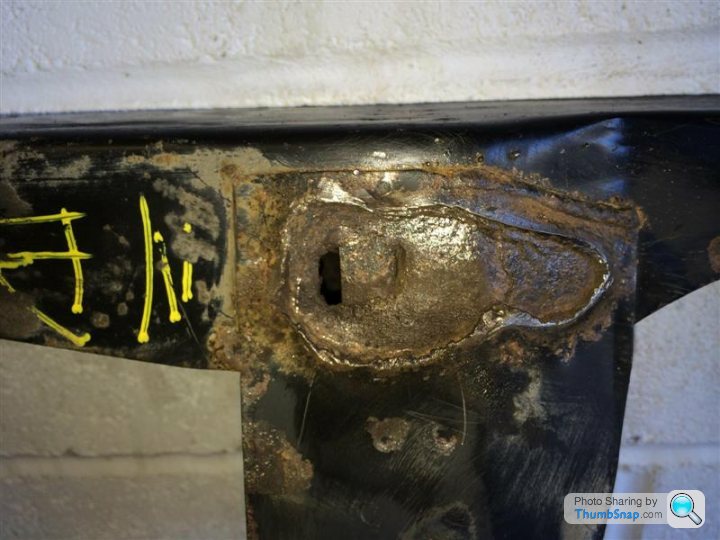

The frame has now been taken to work for a welder friend of mine to have a look at. He hasn't seen it yet but hopefully he should be able to do something with it. If he can repair it and I'm sure he will be able to, it will then be off for blasting then powder coating.
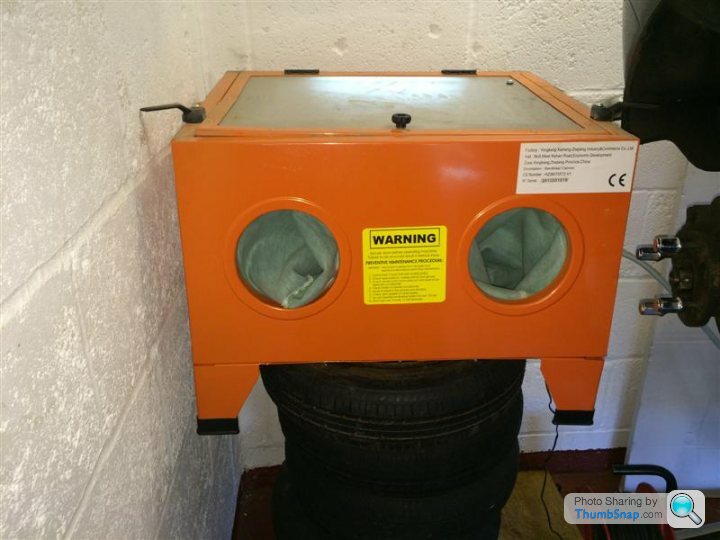
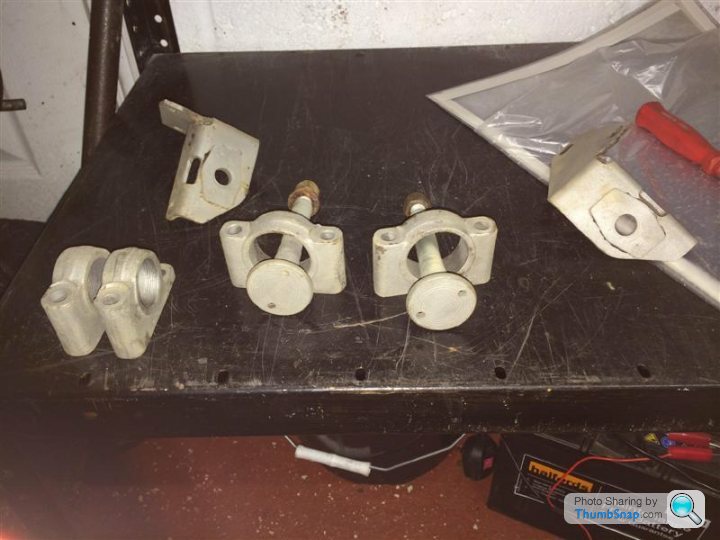
Wanting to make my life as easy as possible, last week I had the bright idea of buying a sand blaster. As soon as I got it home I couldn't wait to set it all up and position it at the back of the garage out of the way....Oh yeaaahh, I couldn't wait to use the new toy.
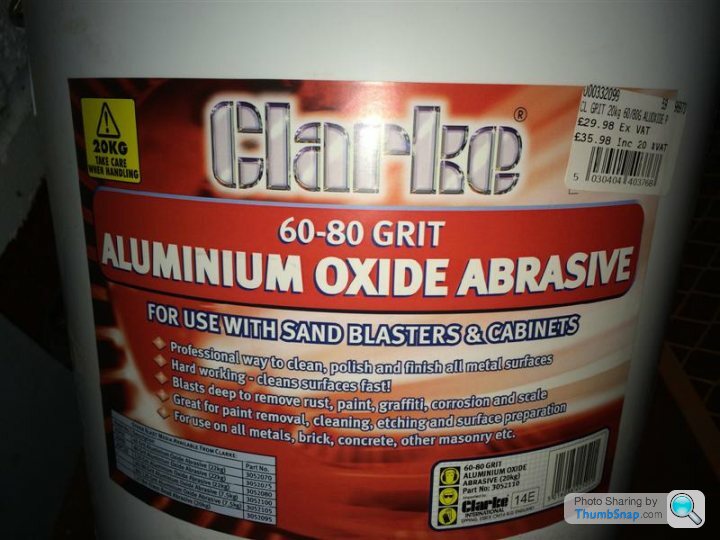
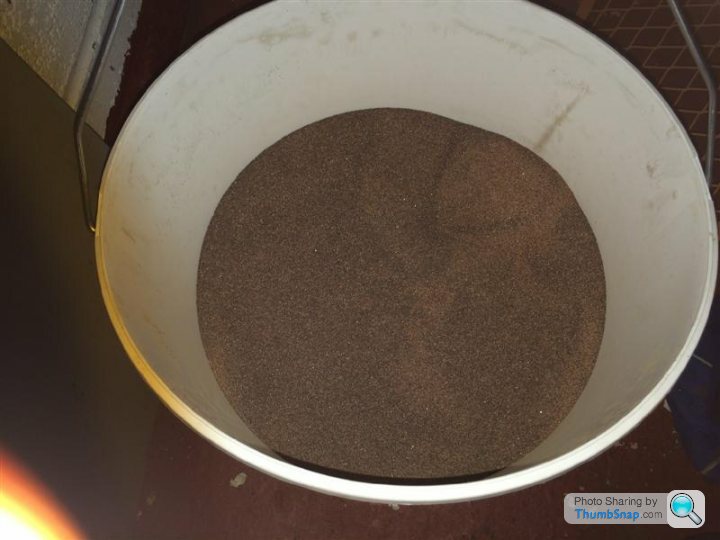
Then it was off to Machine Mart to get a load of this stuff to fill it with.
..........................You know those bright idea's you think are good at the time In my haste and as per usual I cast aside the instructions and got to work. I connected it up to the compressor, whacked up the pressure and cracked on....... Why O why do I never read the instructions of anything.
Thankfully I was wearing a mask and safety glasses because within a few short minutes the garage was full of dust and I couldn't see a thing. Last time I had done this was over 20 years ago and I don't remember anything like this. Within just a few minutes there was crap literally everywhere and everything in sight was covered in a thick layer of pink dust.
Anyway to cut a long story short and a good few hours worth of cleaning up, I think I've now got the hang of the thing. I've also now managed to get it connected up to a hoover which was being thrown out. I'm yet to try it out in anger but trials so far seem pretty promising.
Anyway here's a few before and after shots of some subframe brackets etc, pre reading of instructions and hoover connection.
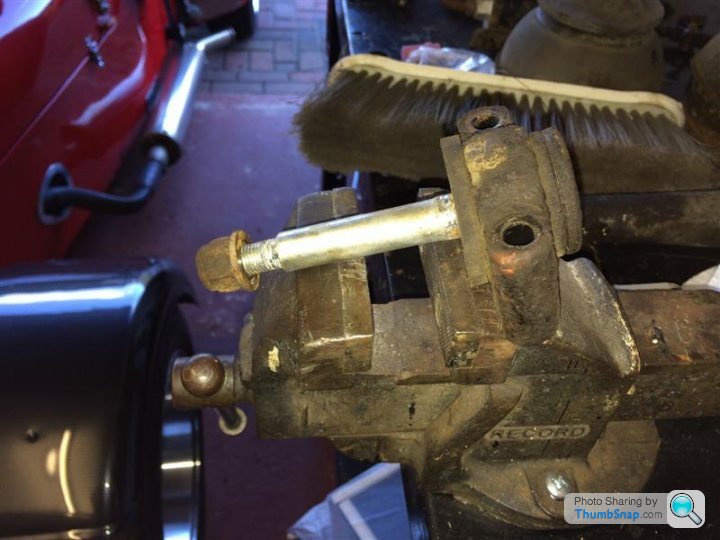
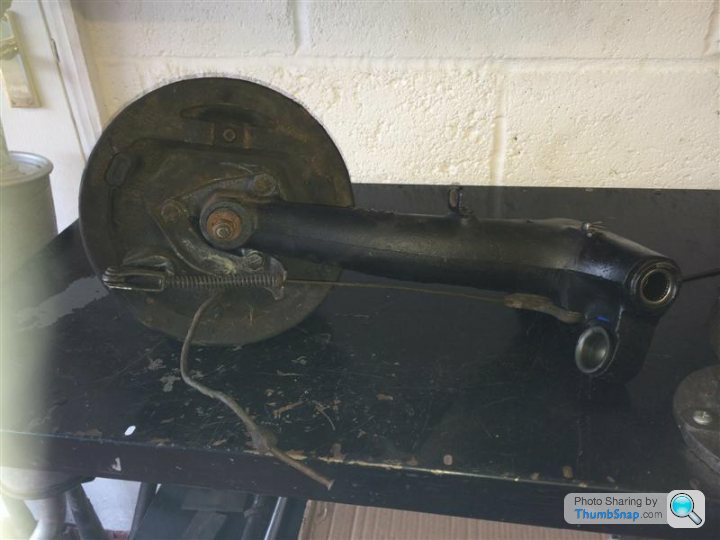
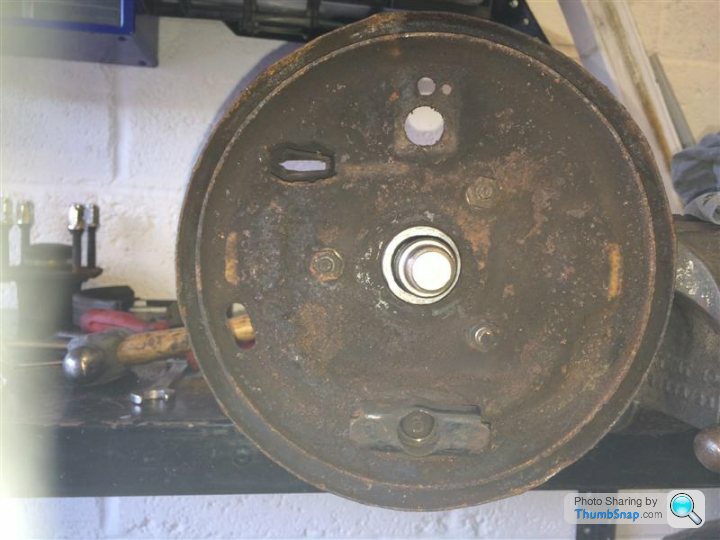
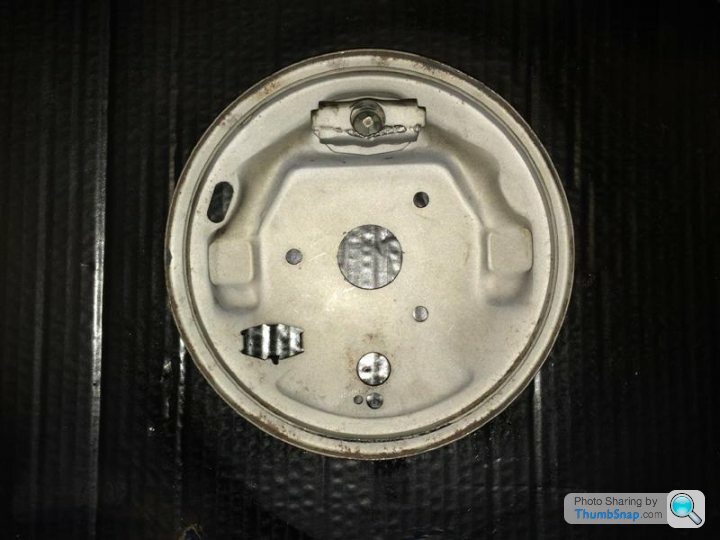
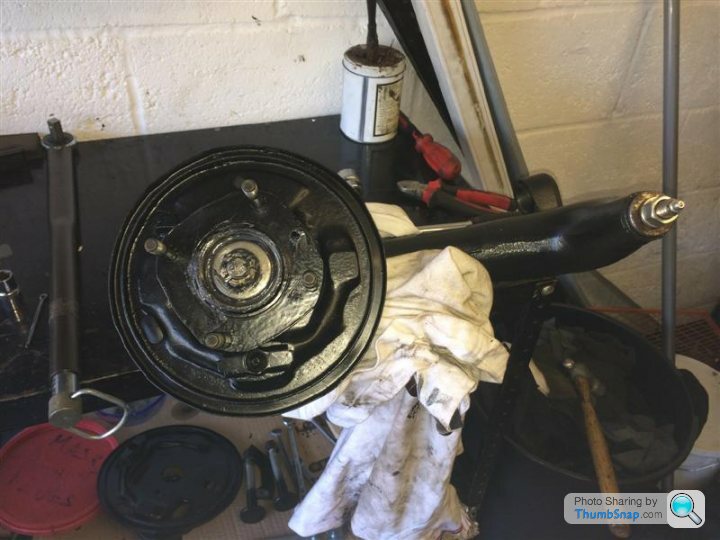
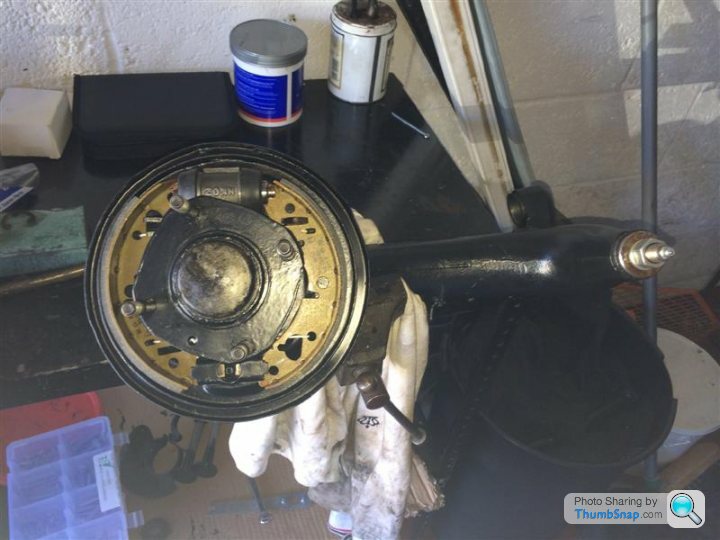
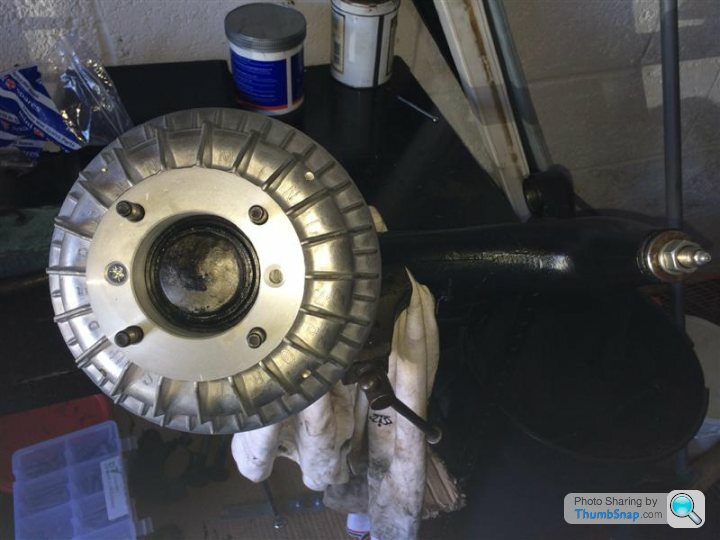
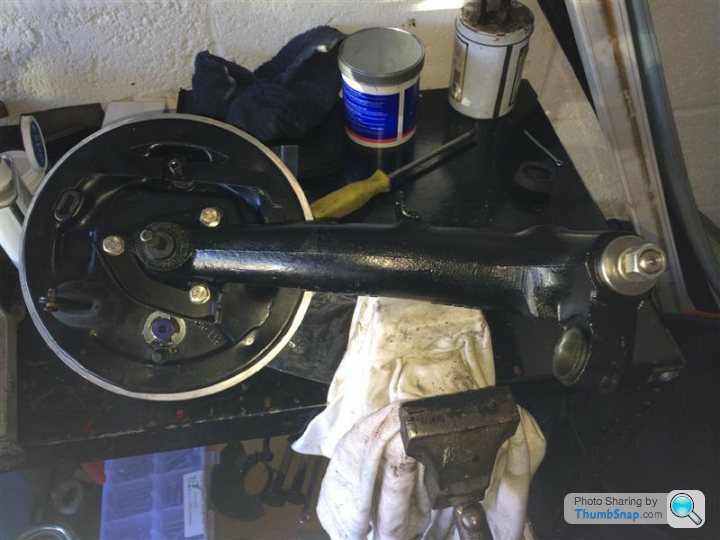
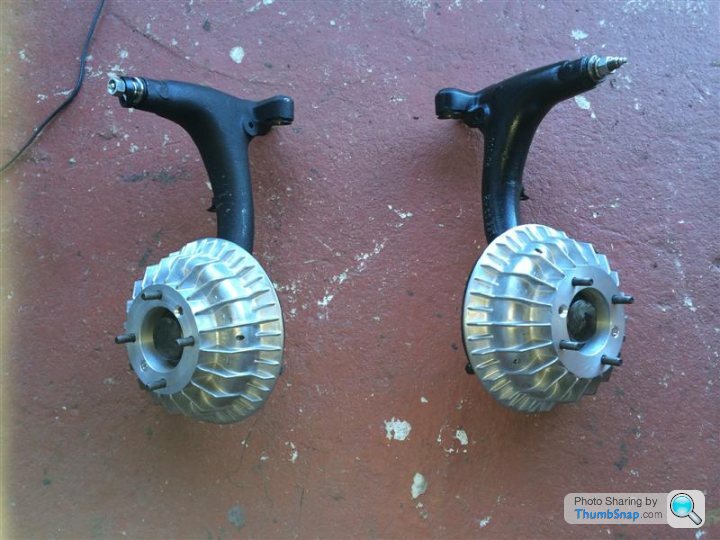
I then stripped down one of the radius arms and it's drum brake ready for cleaning.

That's it so far, hopefully by the next write up I should have a few shiney bits delivered.
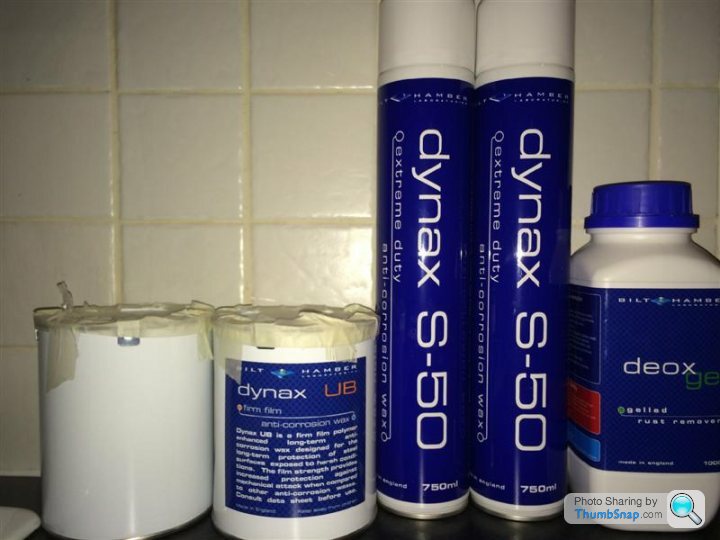
During the week, thinking and reading about future wax protection and rust removal, I decided to buy this lot direct from Bilt Hamber. I haven't used any of it yet, but by all accounts it does seem to get some very good reviews. So thought it was worth a punt and bought some of the stuff I thought I will be needing in the future.
http://www.bilthamber.com/
Apart from being caked in dirt / grease and some surface rust it didn't look too bad.
So I gave it a quick clean and degrease and was left with this.
After a good poke and prod about it didn't look too bad, apart from these rather scabby bits on the top part of the frame. I cut out all the crusty bits and was left with these either side.
The frame has now been taken to work for a welder friend of mine to have a look at. He hasn't seen it yet but hopefully he should be able to do something with it. If he can repair it and I'm sure he will be able to, it will then be off for blasting then powder coating.
Wanting to make my life as easy as possible, last week I had the bright idea of buying a sand blaster. As soon as I got it home I couldn't wait to set it all up and position it at the back of the garage out of the way....Oh yeaaahh, I couldn't wait to use the new toy.
Then it was off to Machine Mart to get a load of this stuff to fill it with.
..........................You know those bright idea's you think are good at the time
In my haste and as per usual I cast aside the instructions and got to work. I connected it up to the compressor, whacked up the pressure and cracked on....... Why O why do I never read the instructions of anything.Thankfully I was wearing a mask and safety glasses because within a few short minutes the garage was full of dust and I couldn't see a thing. Last time I had done this was over 20 years ago and I don't remember anything like this. Within just a few minutes there was crap literally everywhere and everything in sight was covered in a thick layer of pink dust.
Anyway to cut a long story short and a good few hours worth of cleaning up, I think I've now got the hang of the thing. I've also now managed to get it connected up to a hoover which was being thrown out. I'm yet to try it out in anger but trials so far seem pretty promising.
Anyway here's a few before and after shots of some subframe brackets etc, pre reading of instructions and hoover connection.
I then stripped down one of the radius arms and it's drum brake ready for cleaning.
That's it so far, hopefully by the next write up I should have a few shiney bits delivered.
During the week, thinking and reading about future wax protection and rust removal, I decided to buy this lot direct from Bilt Hamber. I haven't used any of it yet, but by all accounts it does seem to get some very good reviews. So thought it was worth a punt and bought some of the stuff I thought I will be needing in the future.
http://www.bilthamber.com/
Edited by Westy Pre-Lit on Saturday 15th February 14:52


Due to my computer deciding to no longer wanting to start up , it's taken till now to finally be able post any updates.
Although this isn't going to be the quickest of builds I have taken quite a lot of pictures of the work carried out so far, will try to upload them over the next few days as and when I get the chance.
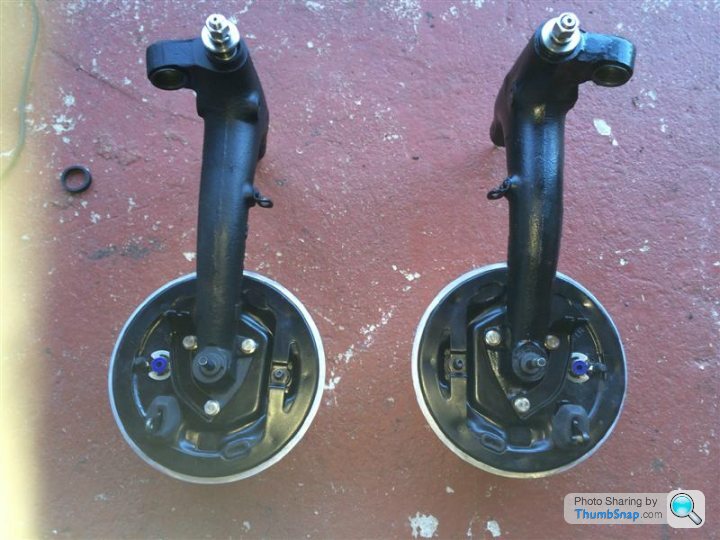
I had toyed with the idea of putting disks on the back but after much reading up decided to keep to drums.
New parts to rebuild the brakes.
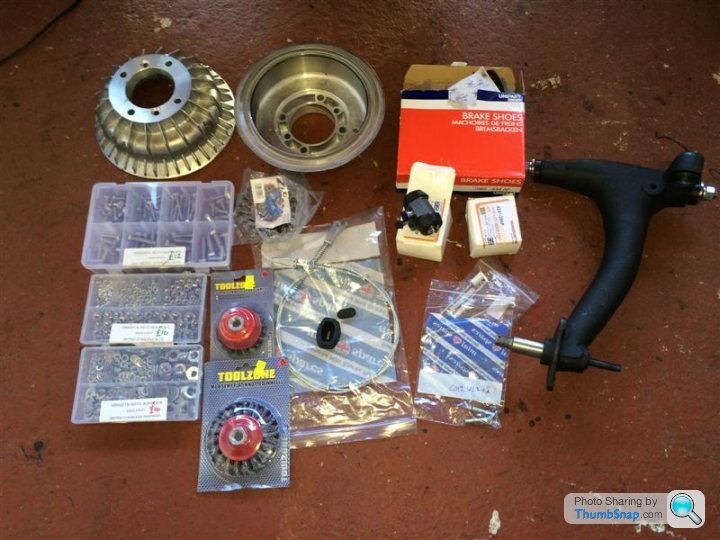
All the usable brake parts were blasted and painted then rebuilt. The slave cylinders actually looked ok but for £10 each thought I might as well stick some new ones in. I believe the bearings had previously not long been done and looked fine so just packed and refitted them.
, it's taken till now to finally be able post any updates.Although this isn't going to be the quickest of builds I have taken quite a lot of pictures of the work carried out so far, will try to upload them over the next few days as and when I get the chance.
I had toyed with the idea of putting disks on the back but after much reading up decided to keep to drums.
New parts to rebuild the brakes.
All the usable brake parts were blasted and painted then rebuilt. The slave cylinders actually looked ok but for £10 each thought I might as well stick some new ones in. I believe the bearings had previously not long been done and looked fine so just packed and refitted them.
Edited by Westy Pre-Lit on Saturday 7th June 13:08
One rainy saturday I found myself with not much to do, so rather than kick my feet about I found myself a 'Job'. Yep you know them jobs you should just leave alone, you know you should just leave them alone but you do them anyway knowing full well it's all going to go pear shaped in the end but carry on regardless.........Yep it was one of them jobs
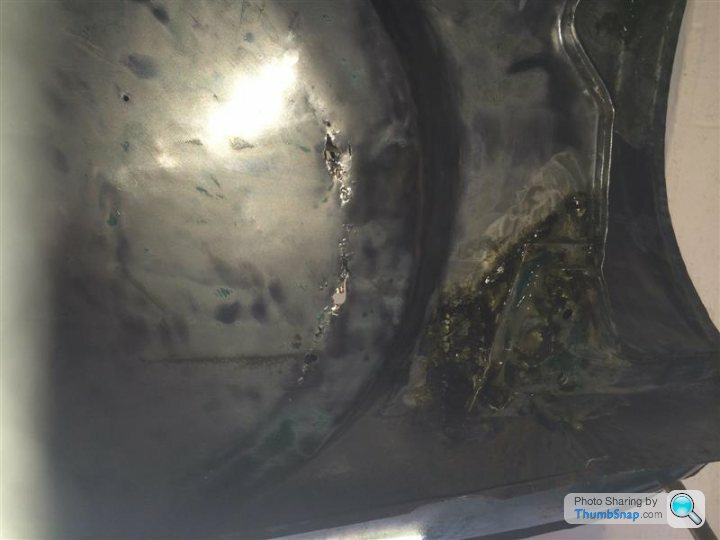
Having already cleaned and degreased the rear underside of the mini a few weeks earlier and found it in a pretty good condition, I decided to give it a coat of black satin hammerite.
This wasted a good few hours and to be honest once I had finished I was rather pleased with my days work.
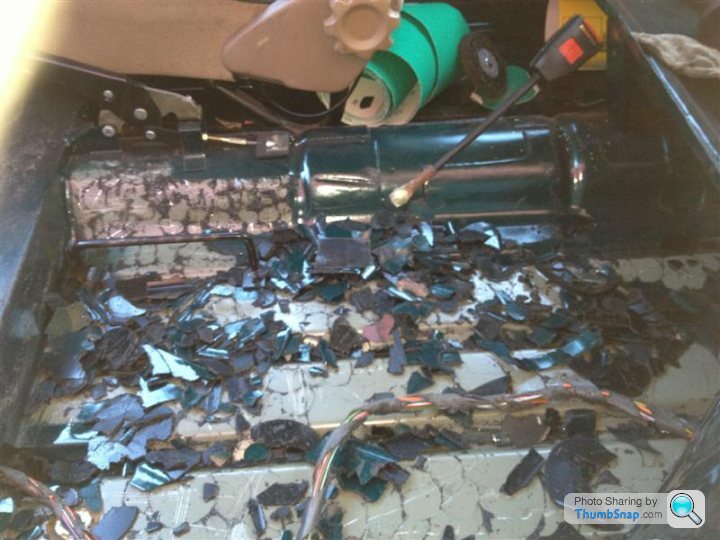
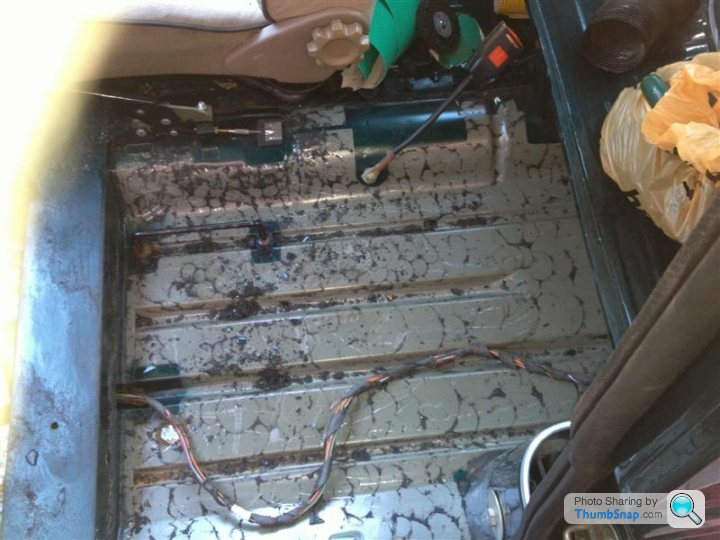
Here started the first lesson.......When i read about what I should have done, every single thing I read said 'DON'T paint the underside with hammerite !'
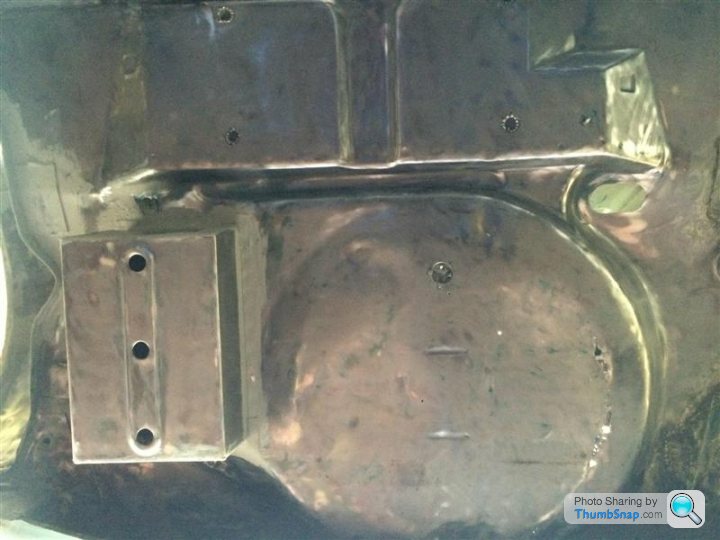
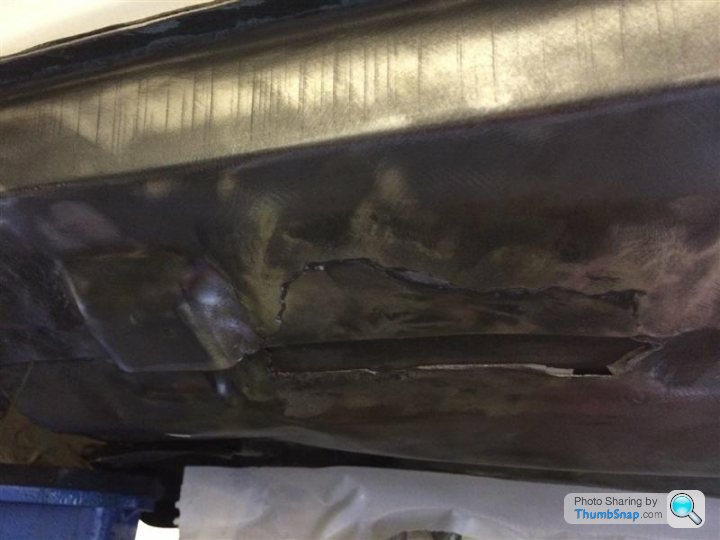
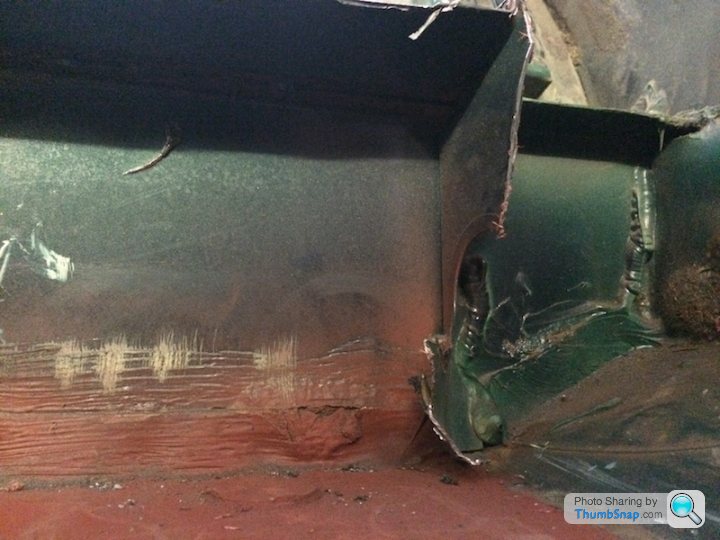
So the week after, I took it all back off and went back to bare metal. To be honest I'm glad I did as it's shown up quite a few bits that need to be welded up and will hopefully be a better job in the end.

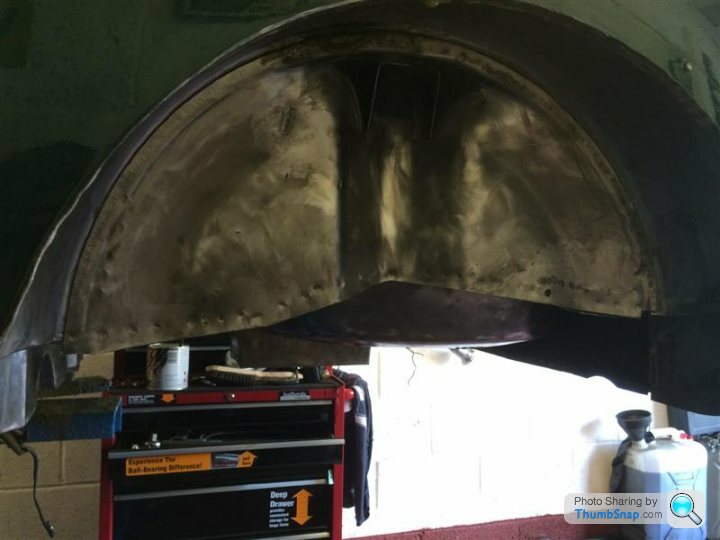
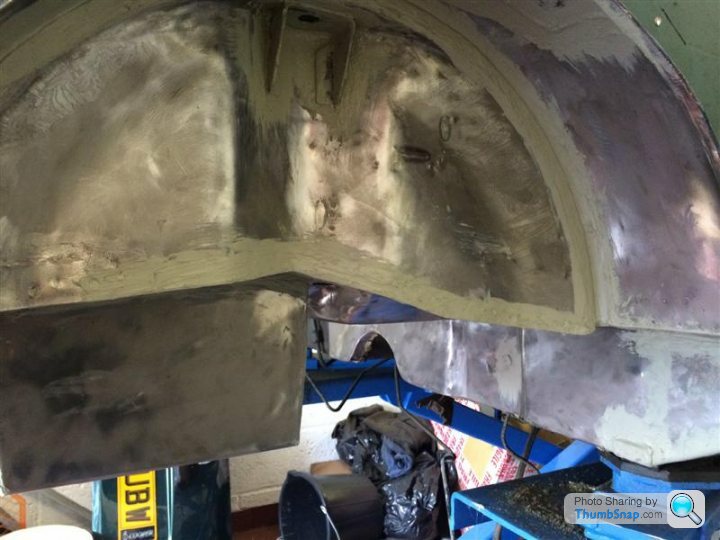

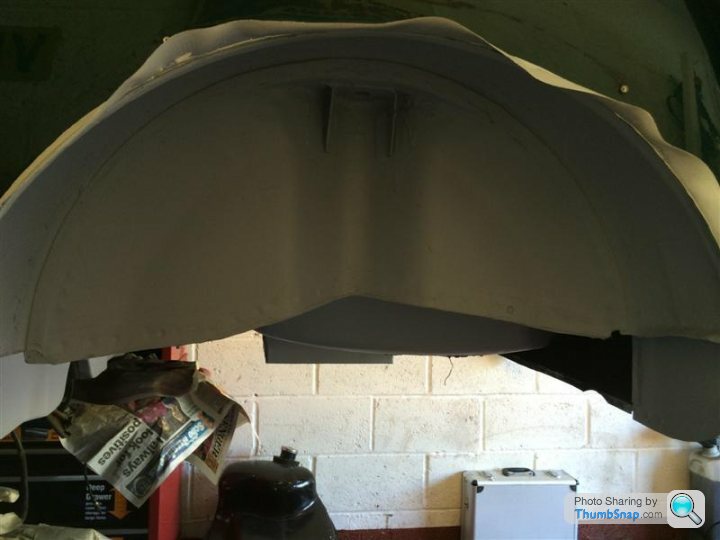
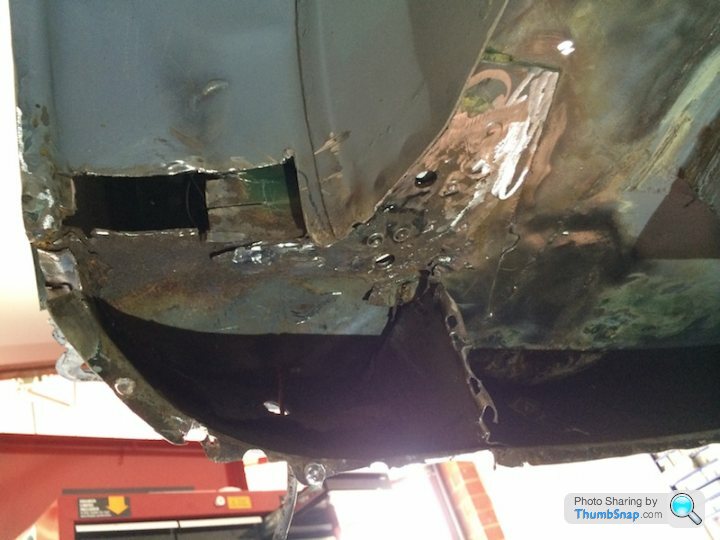
Here you can see daylight through the wheel well which wasn't visible or apparent before taking it back to bare metal. This will need to be sorted out later.
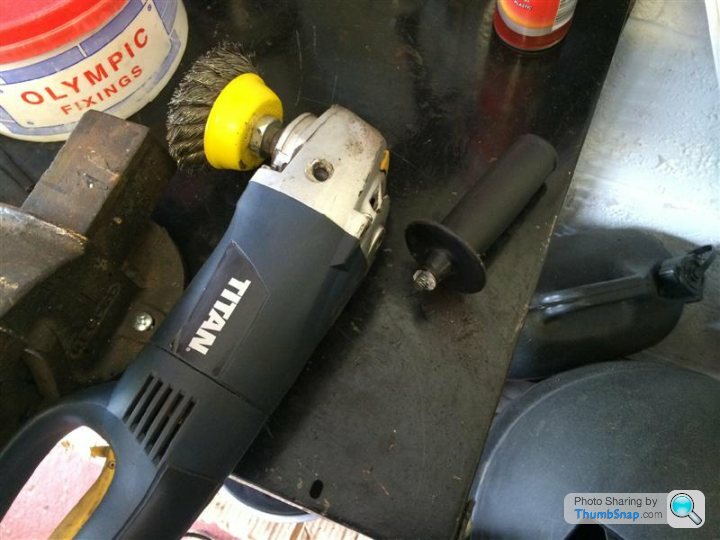
And a warning to always wear gloves when using an angle grinder, when they bite back they tend to hurt a tad.
Having already cleaned and degreased the rear underside of the mini a few weeks earlier and found it in a pretty good condition, I decided to give it a coat of black satin hammerite.
This wasted a good few hours and to be honest once I had finished I was rather pleased with my days work.
Here started the first lesson.......When i read about what I should have done, every single thing I read said 'DON'T paint the underside with hammerite !'
So the week after, I took it all back off and went back to bare metal. To be honest I'm glad I did as it's shown up quite a few bits that need to be welded up and will hopefully be a better job in the end.
Here you can see daylight through the wheel well which wasn't visible or apparent before taking it back to bare metal. This will need to be sorted out later.
And a warning to always wear gloves when using an angle grinder, when they bite back they tend to hurt a tad.
Edited by Westy Pre-Lit on Saturday 7th June 12:50

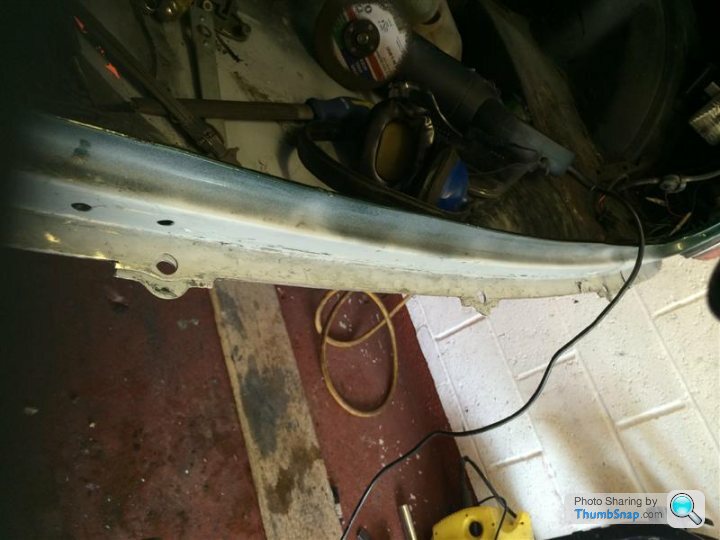
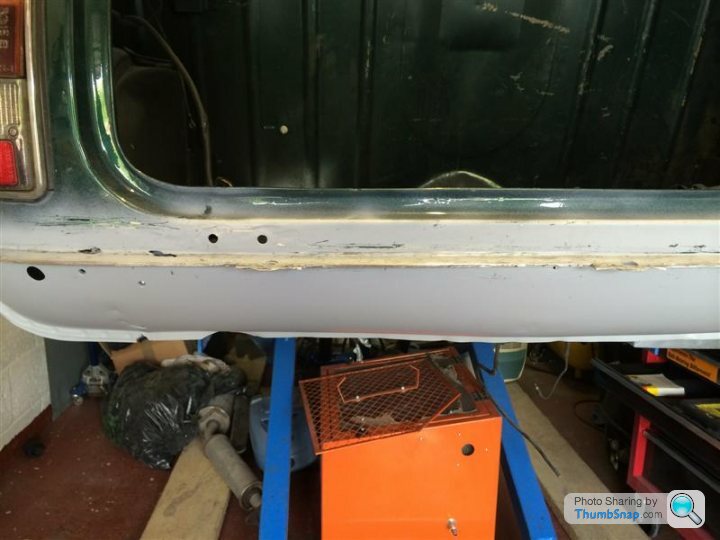
As they say, I've started so I'll finish........so it was on to the sills........
Now these looked pretty good and straight to be honest until I started to attack them with the grinder, but as soon as I started I hit filler which didn't bode well.
Unfortunately I didn't take many pics at this point, so there will be more in a later post. What I should do really is replace the sills, but at the moment I'm going to use them to practice my welding on. The last time I touched a welder was over 20 years ago, so with the help of my neighbour ( who thinks they are salvageable ) we are going to have a go at making them good. So far, but not showing in these pics, I have cut back to good metal ready for repair and as already said will touch on these in a later post.
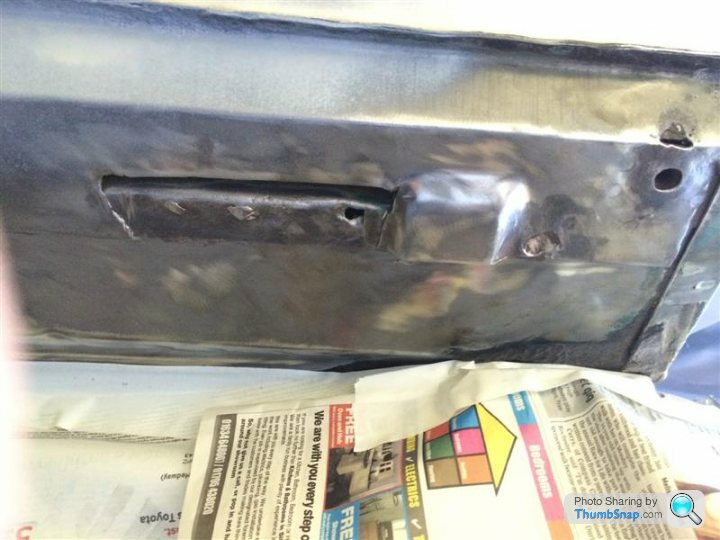
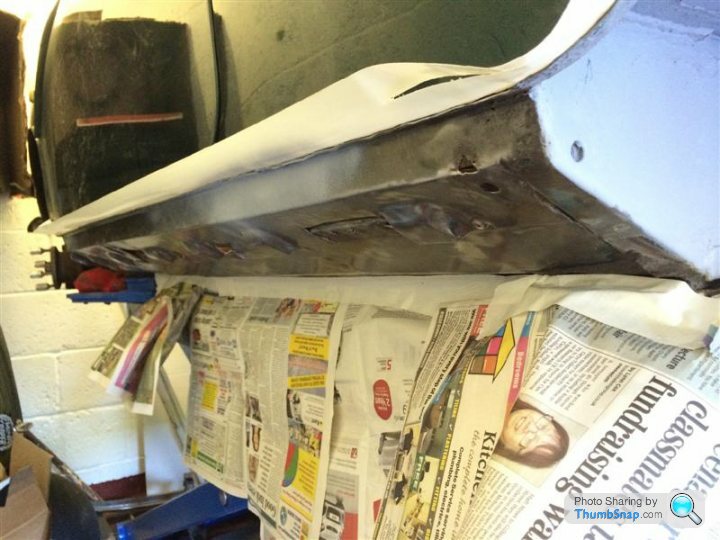
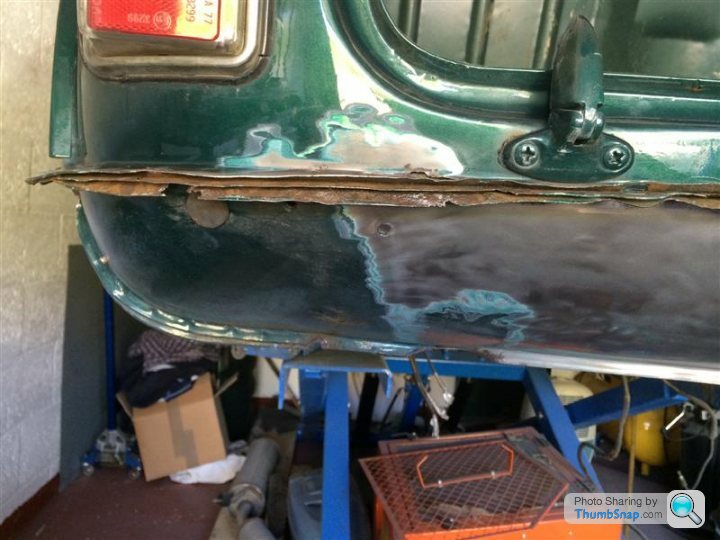
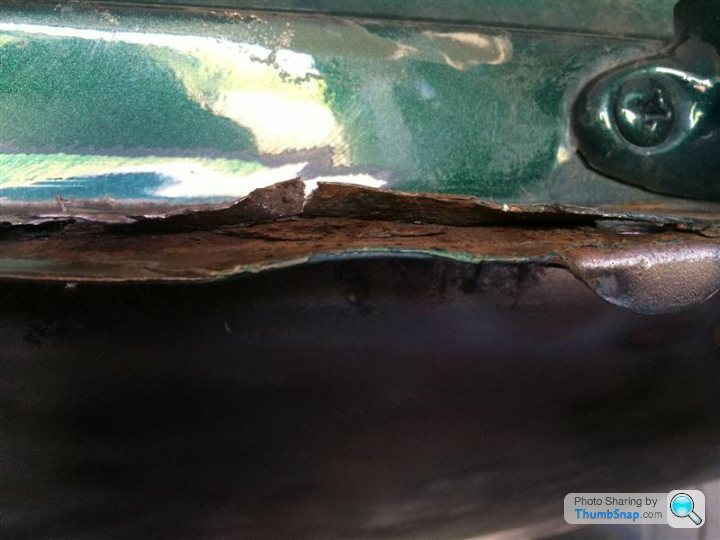
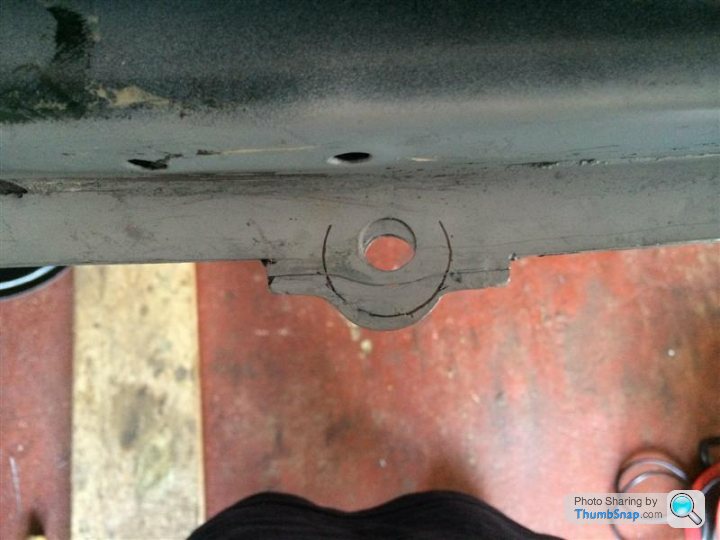
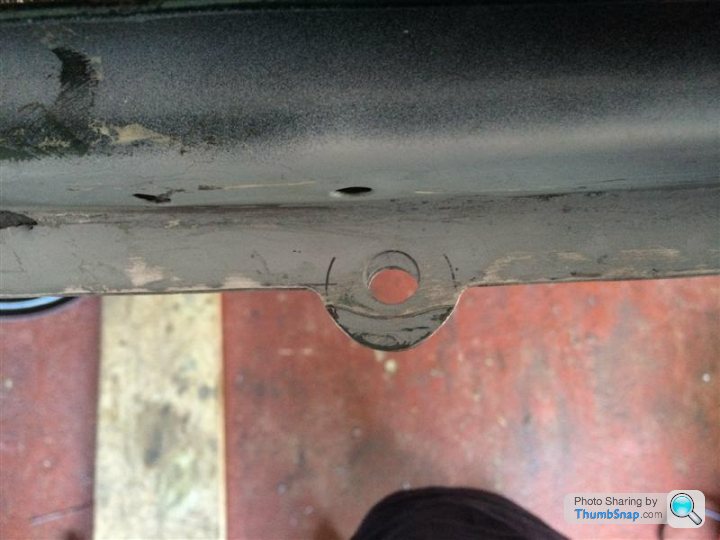
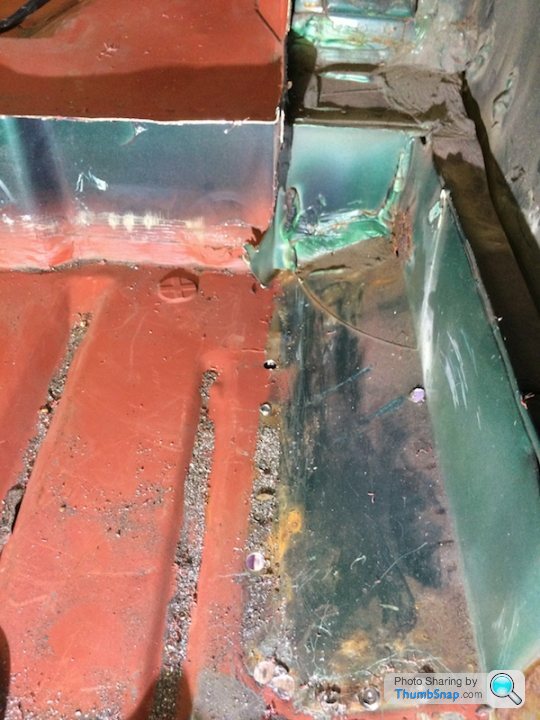
It was then onto the rear valance.
The join was quite frankly a mess, having been replaced before but overall a good panel which just needed sorting out. I opened up the join, wire brushed the rust out and left over night coated in Bilt Hamber Deox Gel.
Wrapped it in Cling Film so it wouldn't dry out.

Once the rust eater had done it's job I washed it off and sprayed inside the join to give it some added protection.
I then tidied up the join and made straight again.
....I now need to work out how to resize my pictures so I can post the rest of them, I'm not very good on this new thing
The join was quite frankly a mess, having been replaced before but overall a good panel which just needed sorting out. I opened up the join, wire brushed the rust out and left over night coated in Bilt Hamber Deox Gel.
Wrapped it in Cling Film so it wouldn't dry out.
Once the rust eater had done it's job I washed it off and sprayed inside the join to give it some added protection.
I then tidied up the join and made straight again.
....I now need to work out how to resize my pictures so I can post the rest of them, I'm not very good on this new thing
Finally worked out how to resize the images so can now carry on posting.
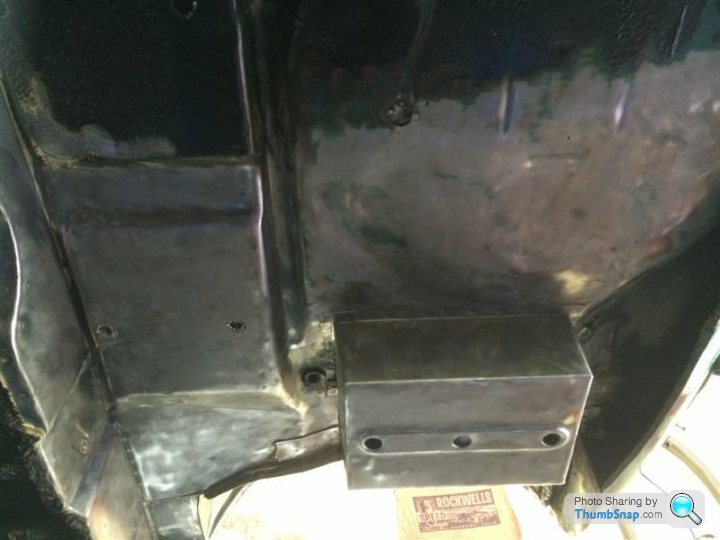
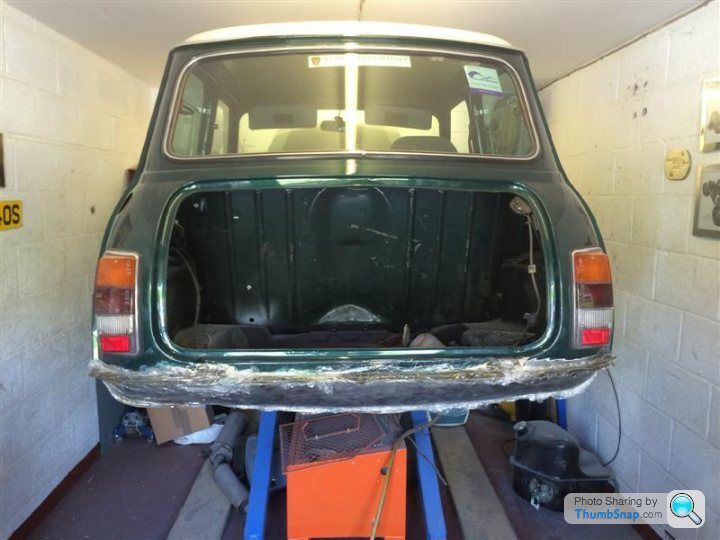
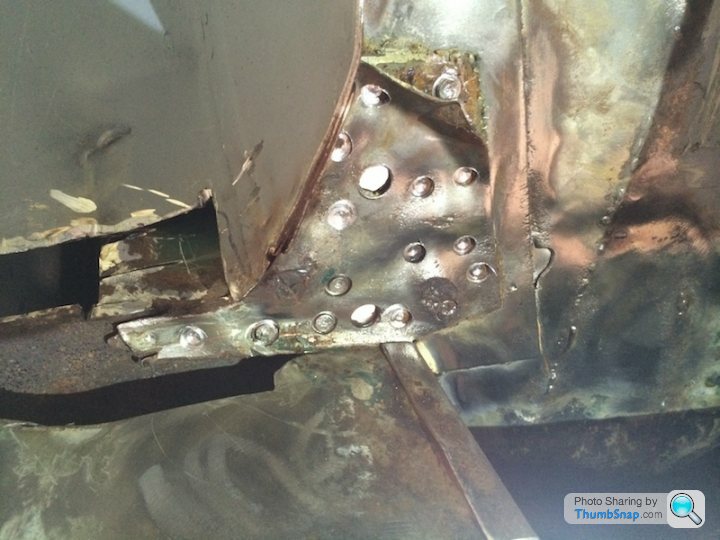
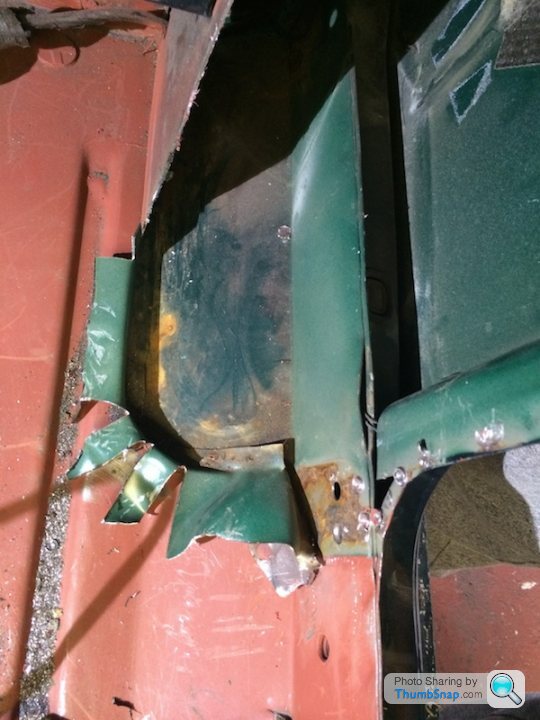
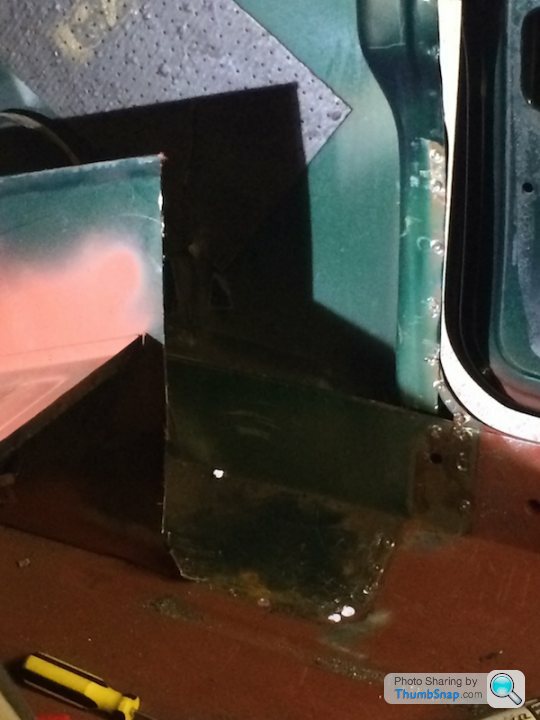
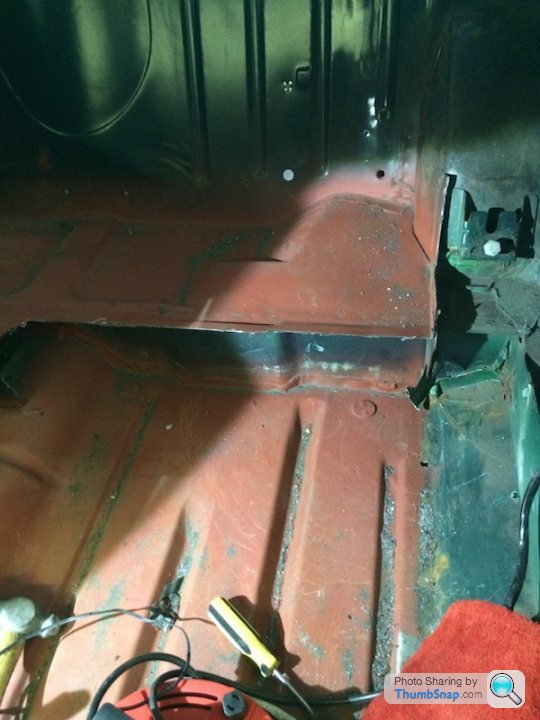
The drivers side rear valance closing panel was a bit of a state so chopped it out for fitment of a new one....getting the thing out was a pig to say the least which in the end prompted me to get an air hammer.
It was then on to the job of cutting out the rear bins and seat squab so that the roll cage can be fitted at a later date.
I looked everywhere but just couldn't find any close enough pictures or write ups on how it's done and didn't really want to make it up as I went along. All write ups just seemed to show the before and after pictures with no explanation at all. Then a guy on 'The Mini Forum' was able to point me in the right direction and provided some close up pics for me to look at, so was very grateful to him. Hopefully my pics may be of some help if somebody is thinking of doing the same thing.
So this is the way I tackled it anyway. Apparently according to some people who's write ups I've read, the whole job should take about an hour.....yeah right O
First drill out the spot welds using a spot weld drill bit....... when you can find them that is. Just when you think you have got them all, you can bet your life there's another just around the corner gripping on for grim death.
Then using the grinder with a cut off disk I cut down half the bin exposing more spot welds connecting the bin to the floor. I managed on a few occasions to drill straight through the floor with the drill bit so not the easiest thing to get just right but it is effective and does the job.
It was then just a matter of cutting around for a basic shape of what I wanted.
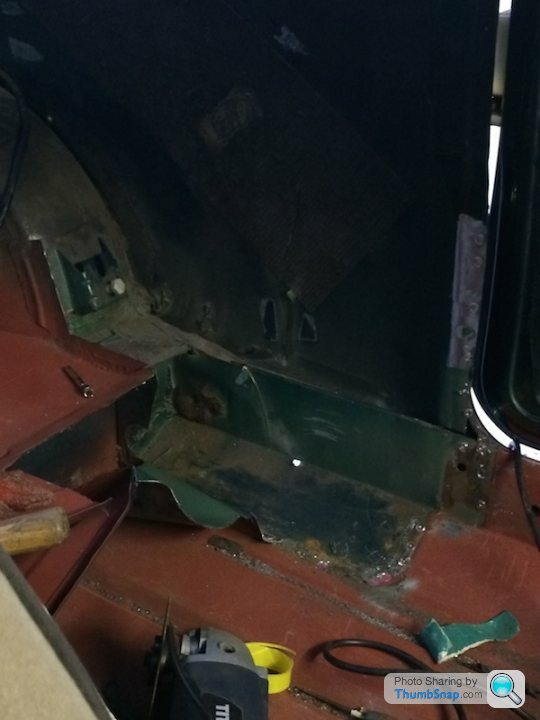
This pic shows the amount of over hang I have at the moment, this will be cut down when I tidy it all up
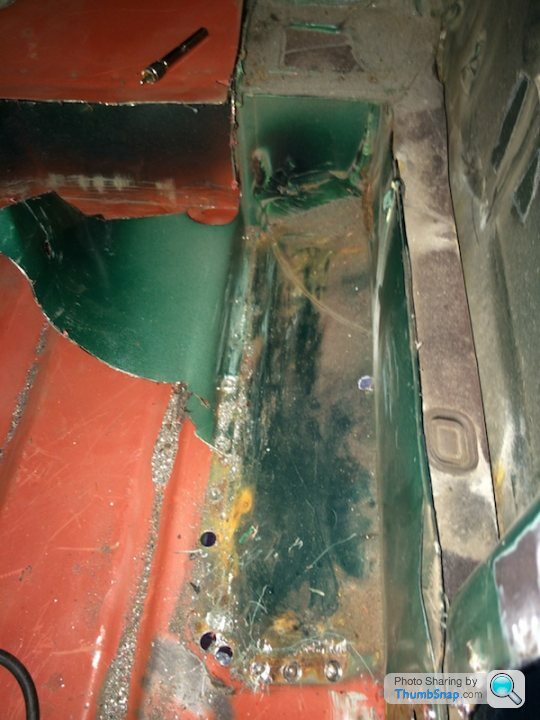
Then just cut straight across the seat squab.
Rinse and repeat

Another pic showing the under cut I have at the moment before tidying up.

And this is where I am at the moment.
I have a holiday this week so hopefully able to get out in the garage for some more fun and games.
The drivers side rear valance closing panel was a bit of a state so chopped it out for fitment of a new one....getting the thing out was a pig to say the least which in the end prompted me to get an air hammer.
It was then on to the job of cutting out the rear bins and seat squab so that the roll cage can be fitted at a later date.
I looked everywhere but just couldn't find any close enough pictures or write ups on how it's done and didn't really want to make it up as I went along. All write ups just seemed to show the before and after pictures with no explanation at all. Then a guy on 'The Mini Forum' was able to point me in the right direction and provided some close up pics for me to look at, so was very grateful to him. Hopefully my pics may be of some help if somebody is thinking of doing the same thing.
So this is the way I tackled it anyway. Apparently according to some people who's write ups I've read, the whole job should take about an hour.....yeah right O
First drill out the spot welds using a spot weld drill bit....... when you can find them that is. Just when you think you have got them all, you can bet your life there's another just around the corner gripping on for grim death.
Then using the grinder with a cut off disk I cut down half the bin exposing more spot welds connecting the bin to the floor. I managed on a few occasions to drill straight through the floor with the drill bit so not the easiest thing to get just right but it is effective and does the job.
It was then just a matter of cutting around for a basic shape of what I wanted.
This pic shows the amount of over hang I have at the moment, this will be cut down when I tidy it all up
Then just cut straight across the seat squab.
Rinse and repeat
Another pic showing the under cut I have at the moment before tidying up.
And this is where I am at the moment.
I have a holiday this week so hopefully able to get out in the garage for some more fun and games.
Edited by Westy Pre-Lit on Saturday 7th June 18:52
SteellFJ said:
Love it! love it alot, cannot wait to see this finished.
hope to own anrestore one of these in time for the boys being able to drive, gives me 10 years to get going!!
Thanks hope to own anrestore one of these in time for the boys being able to drive, gives me 10 years to get going!!

It'll probably take me about that length of time to finish it as well.
Edited by Westy Pre-Lit on Saturday 7th June 18:53
Have a few days off this week so today was able to get into the garage for some more fun and games.
My neighbour also had the day off, so he kindly came out to give me a hand with welding up the holes I'd previously cut out in the passenger side sill. As said before under normal circumstances the sill would really need to be changed but I wanted to use it to get some experience with welding again.
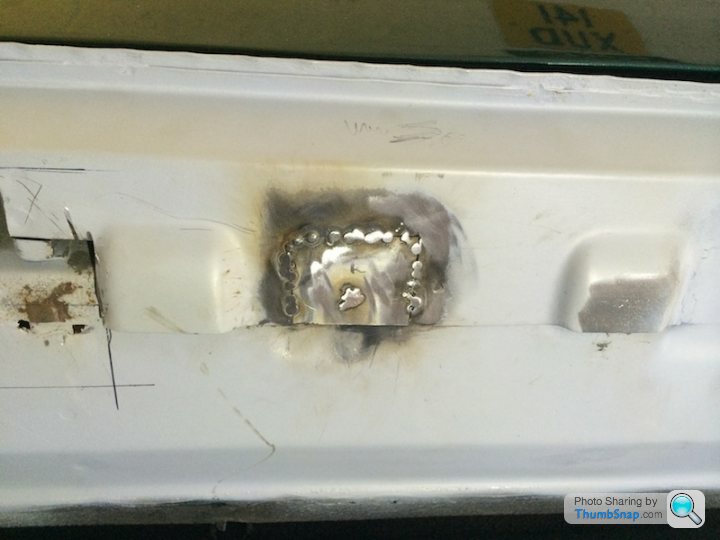
This is what the sill looked like at the start of play
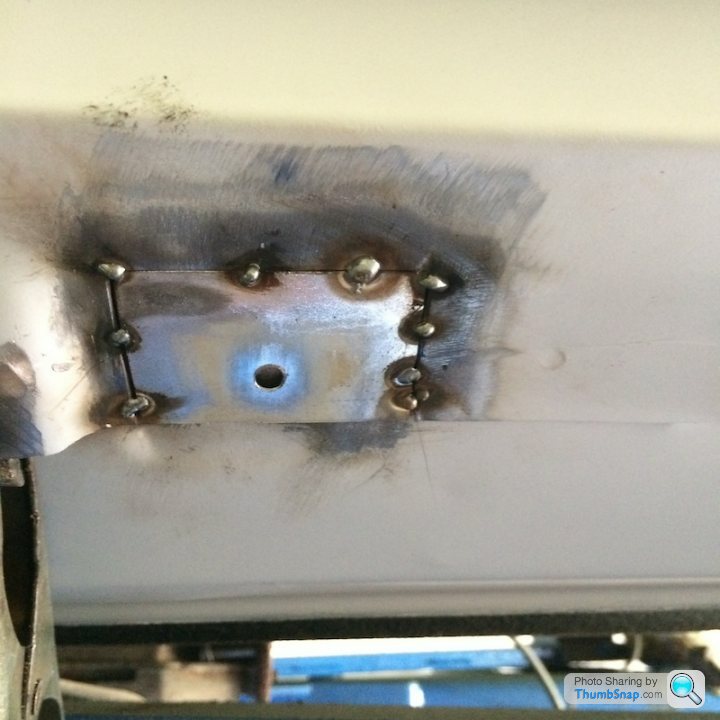
We then had a go at filling a few holes.
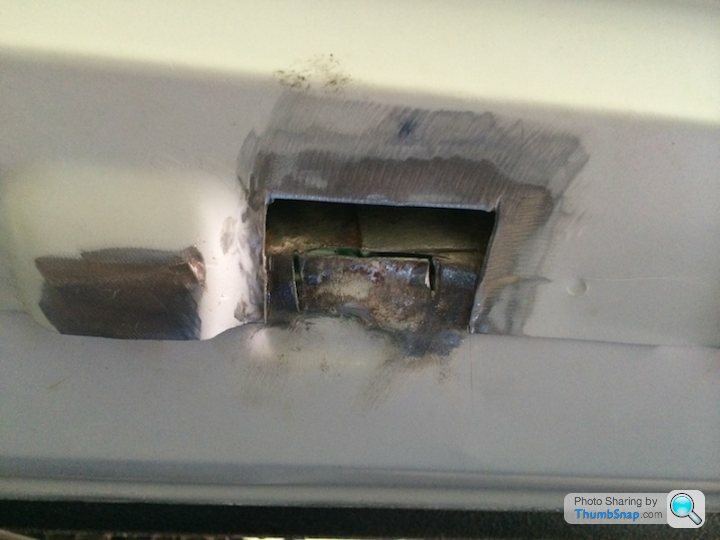
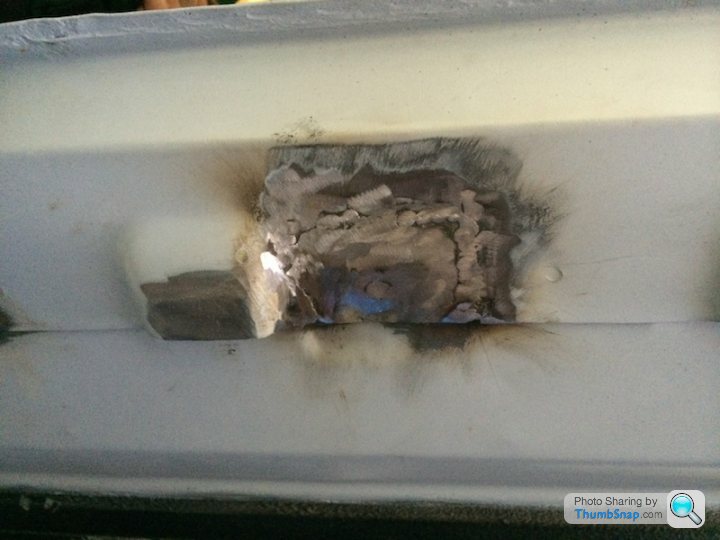
Then it was onto this one which was one of the largest holes in the sill
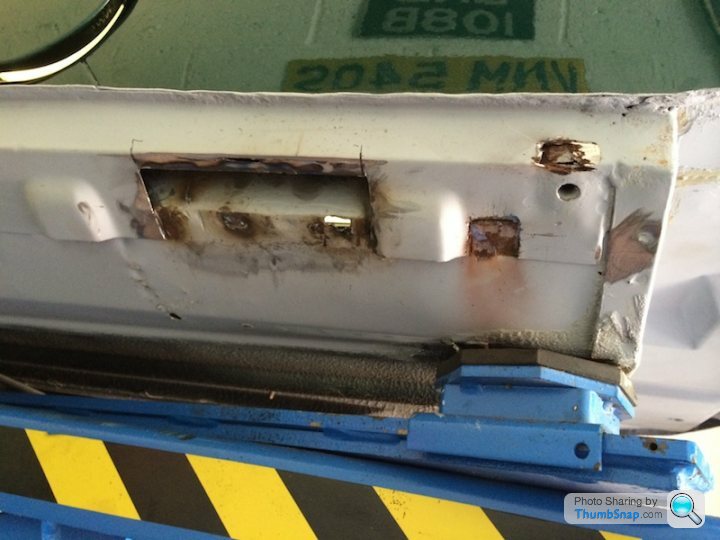
What happened at this point I'm not going to show because I ballsed it up, so it got a bit little bit bigger.

My neighbour then tacked the new plate in for me.....
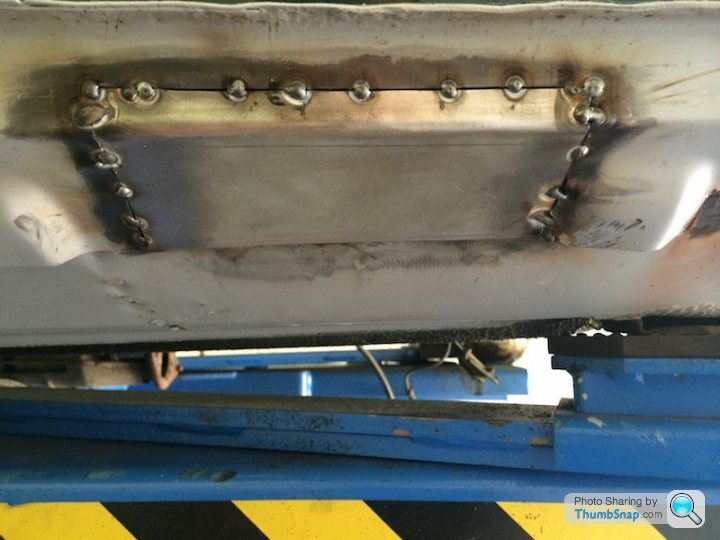
...and having to pick his son up from school left me on my own to fend for myself......
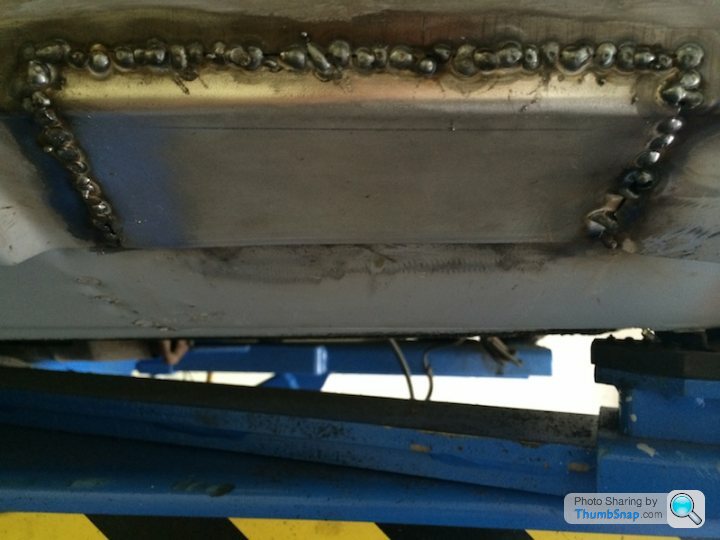
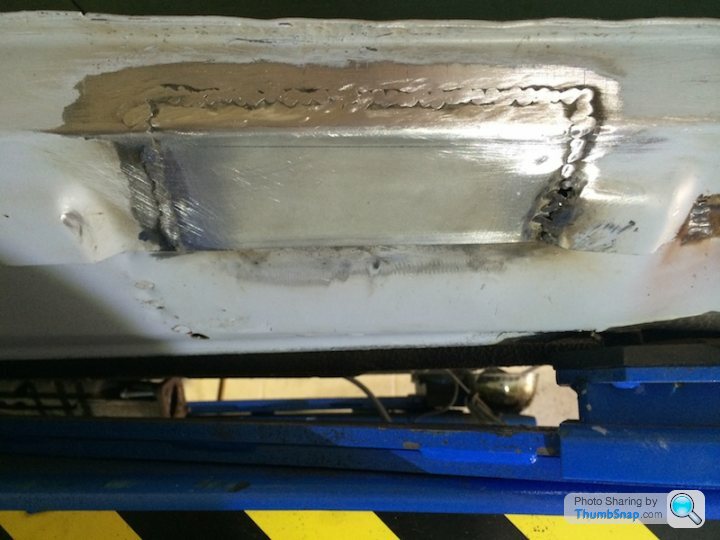
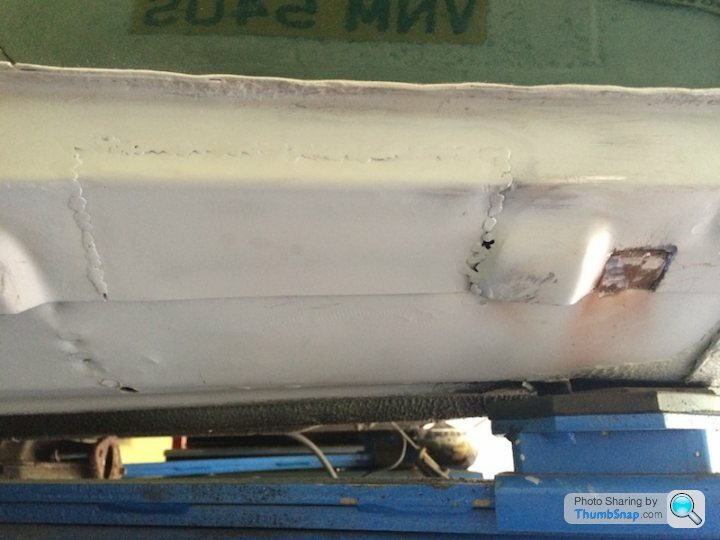
I had to leave a few bits on it as I was blowing holes and making a small area worse, so for now I cleaned it up as best I can until my neighbour can take a look in the morning. Apart from that I'm really happy with how the patch has turned out so far.
My neighbour also had the day off, so he kindly came out to give me a hand with welding up the holes I'd previously cut out in the passenger side sill. As said before under normal circumstances the sill would really need to be changed but I wanted to use it to get some experience with welding again.
This is what the sill looked like at the start of play
We then had a go at filling a few holes.
Then it was onto this one which was one of the largest holes in the sill
What happened at this point I'm not going to show because I ballsed it up
, so it got a bit little bit bigger.My neighbour then tacked the new plate in for me.....
...and having to pick his son up from school left me on my own to fend for myself......
I had to leave a few bits on it as I was blowing holes and making a small area worse, so for now I cleaned it up as best I can until my neighbour can take a look in the morning. Apart from that I'm really happy with how the patch has turned out so far.
- ****Arselickin' hat on*******
Thanks Pixel-Snapper
Have always admired the skill and workmanship that goes into some of the amazing builds on this and other forums, but now I can hopefully look at them and yours in a totally different light. I must admit I didn't realise ( forgot ) how long it can take to just do a small relatively easy repair patch, let alone a more complicated section or full panel........before we started I thought it was going to be one of them "five minute" Jobs and we would be done and dusted in a few days.
A small welded patch might not mean much to some, but for me to get a patch to a nearly finished state without blowing a load of holes, with enough weld to hold the dam thing in place and not potentially ruining hours of work within a few seconds because my hand slipped or I held the trigger for a split second longer, was a right mission to say the least....hopefully it should get easier
Gassing Station | Readers' Cars | Top of Page | What's New | My Stuff