Project Berg Stormer (1984 mk1 Golf 20vT Berg cup racer)
Discussion


Hey guys.
Thought I would introduce you to my latest project.
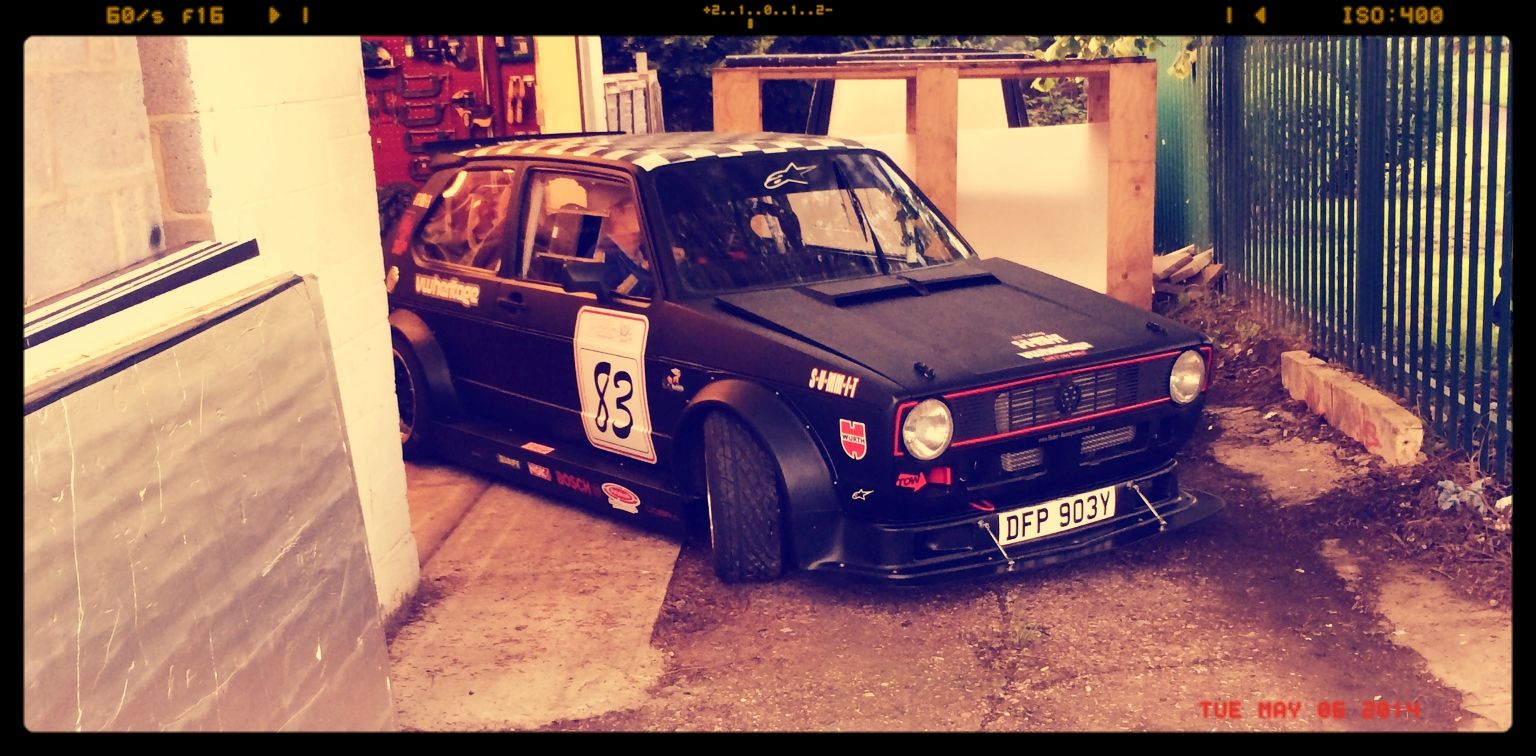
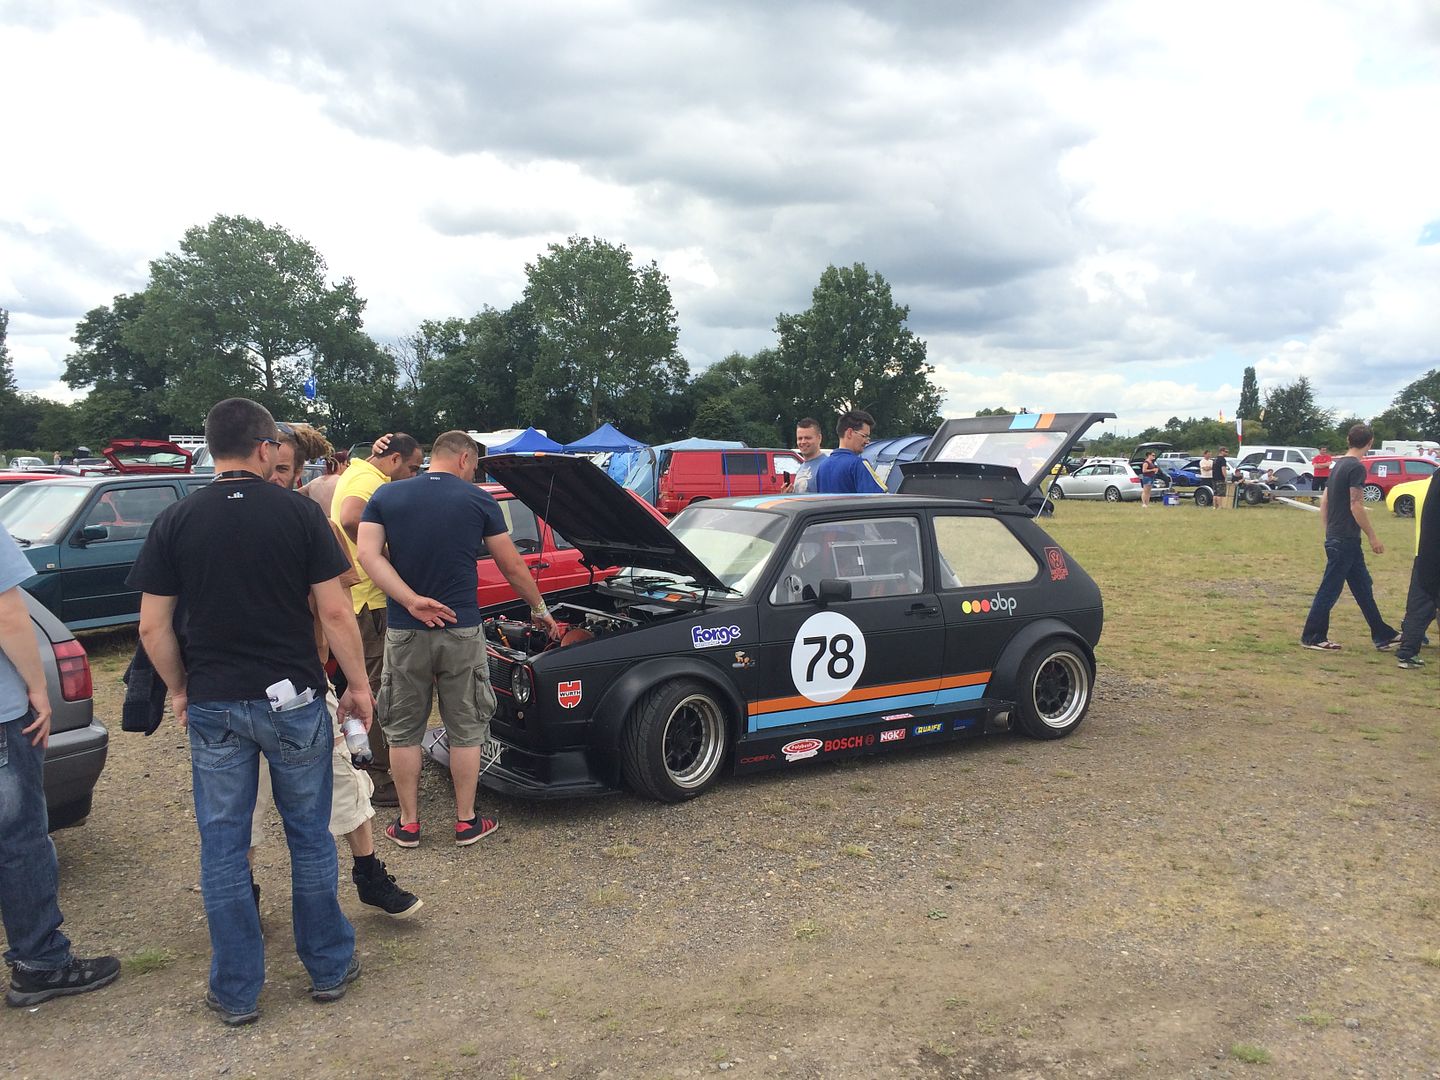
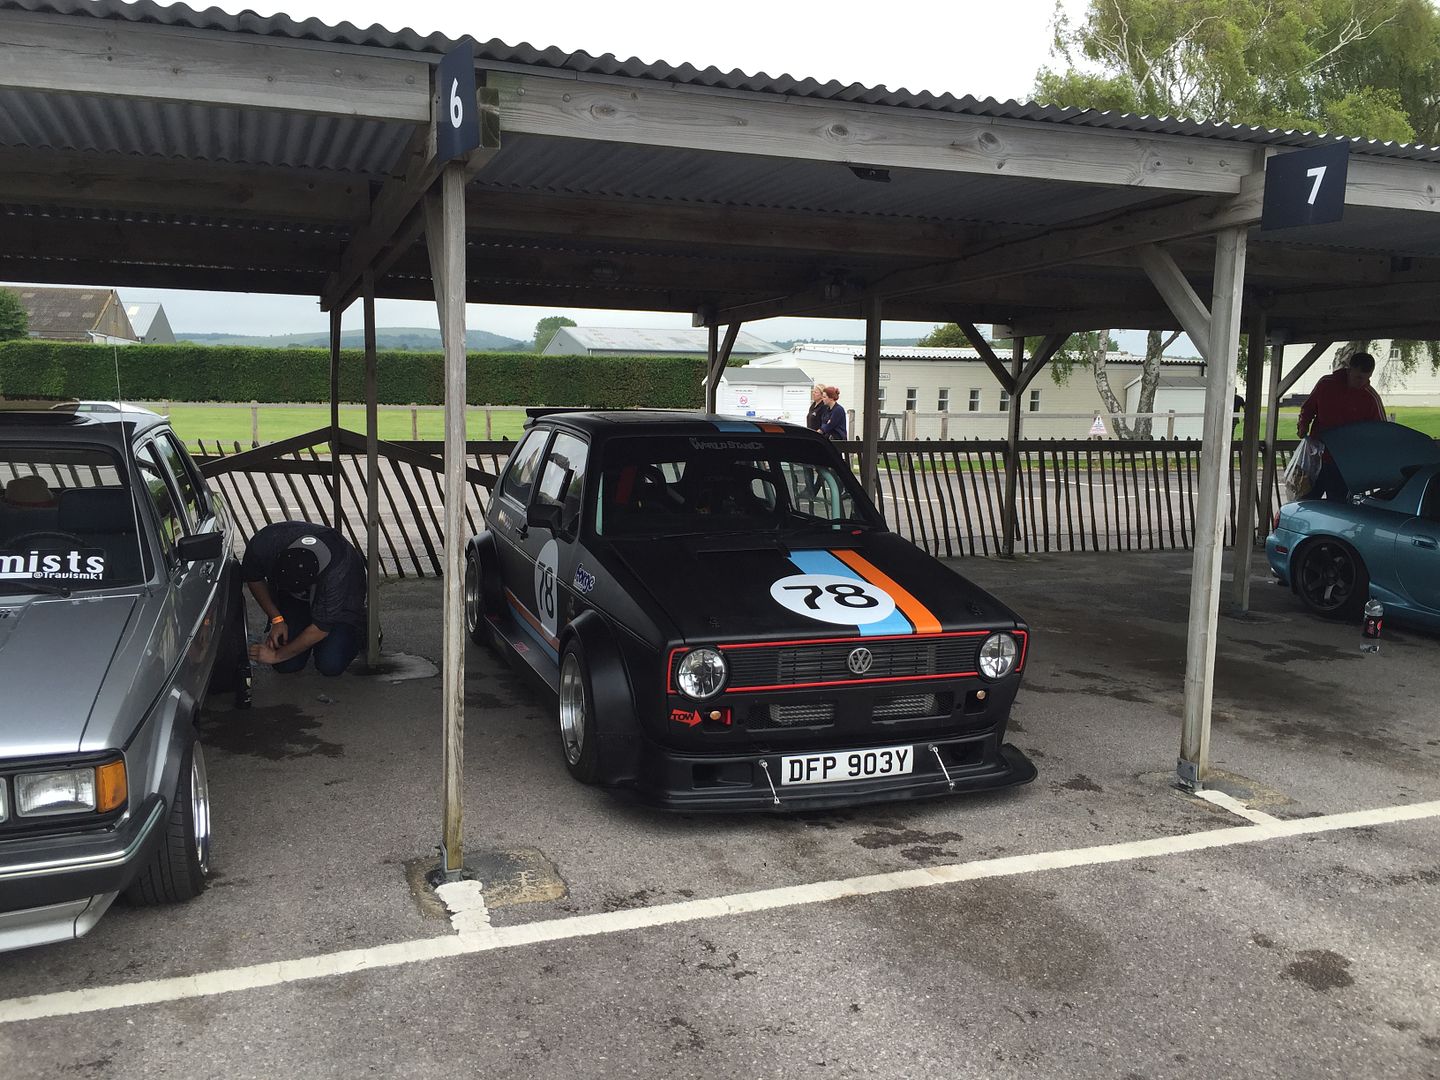
I have always wanted a berg cup car, and just happened across this car on FB when it came up for sale.
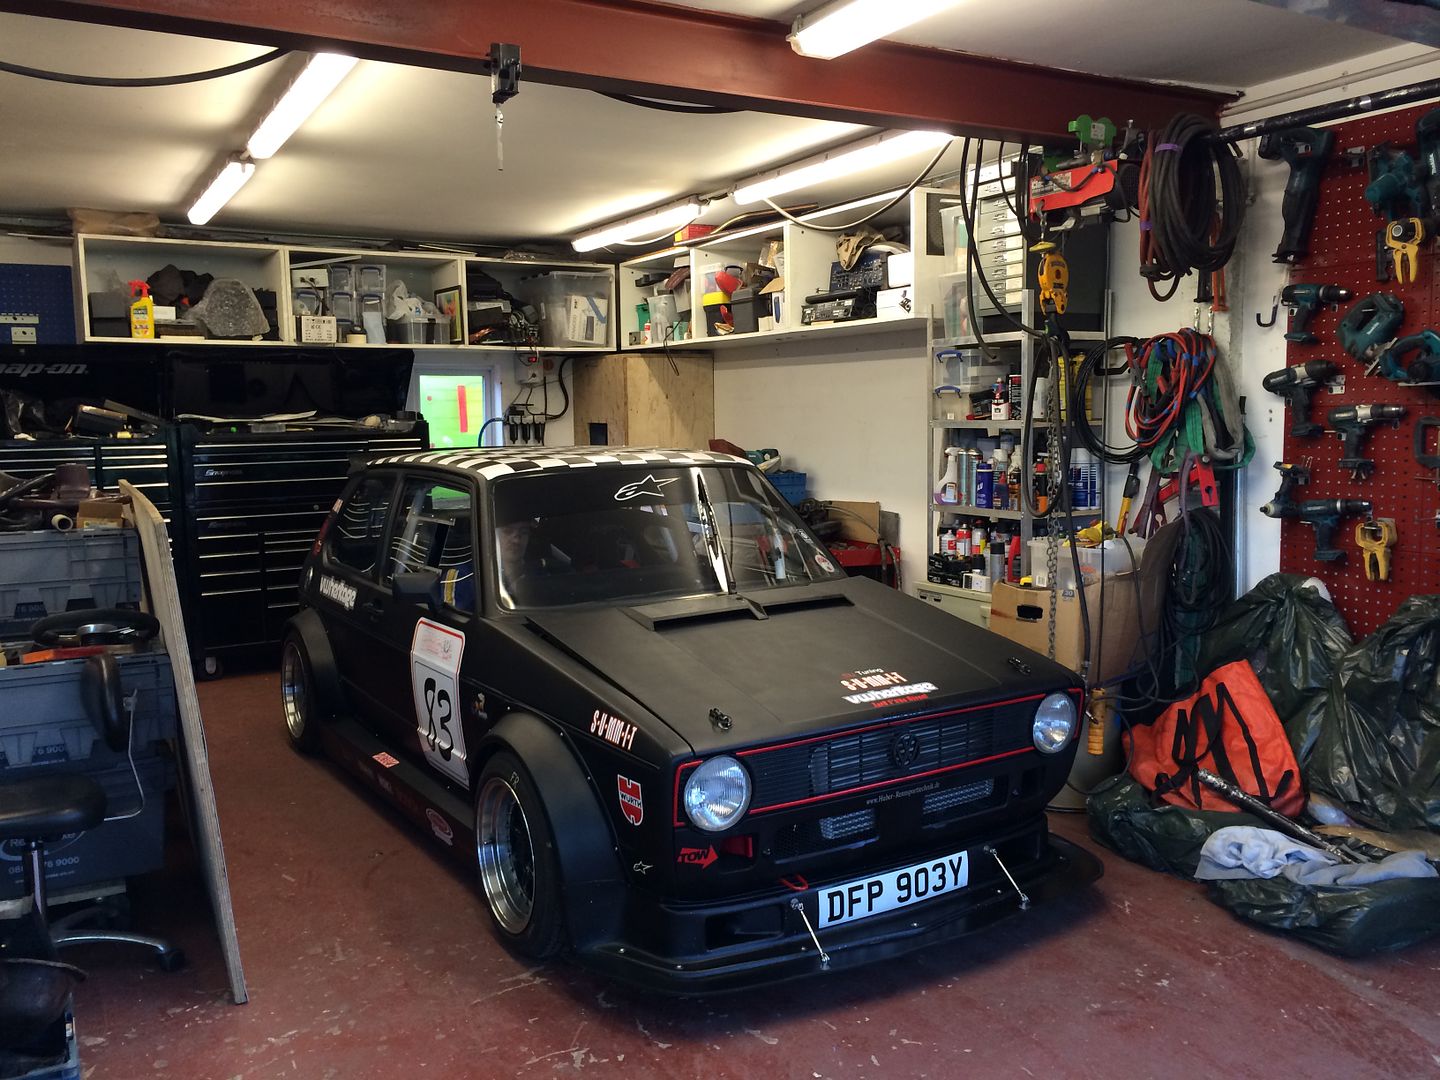
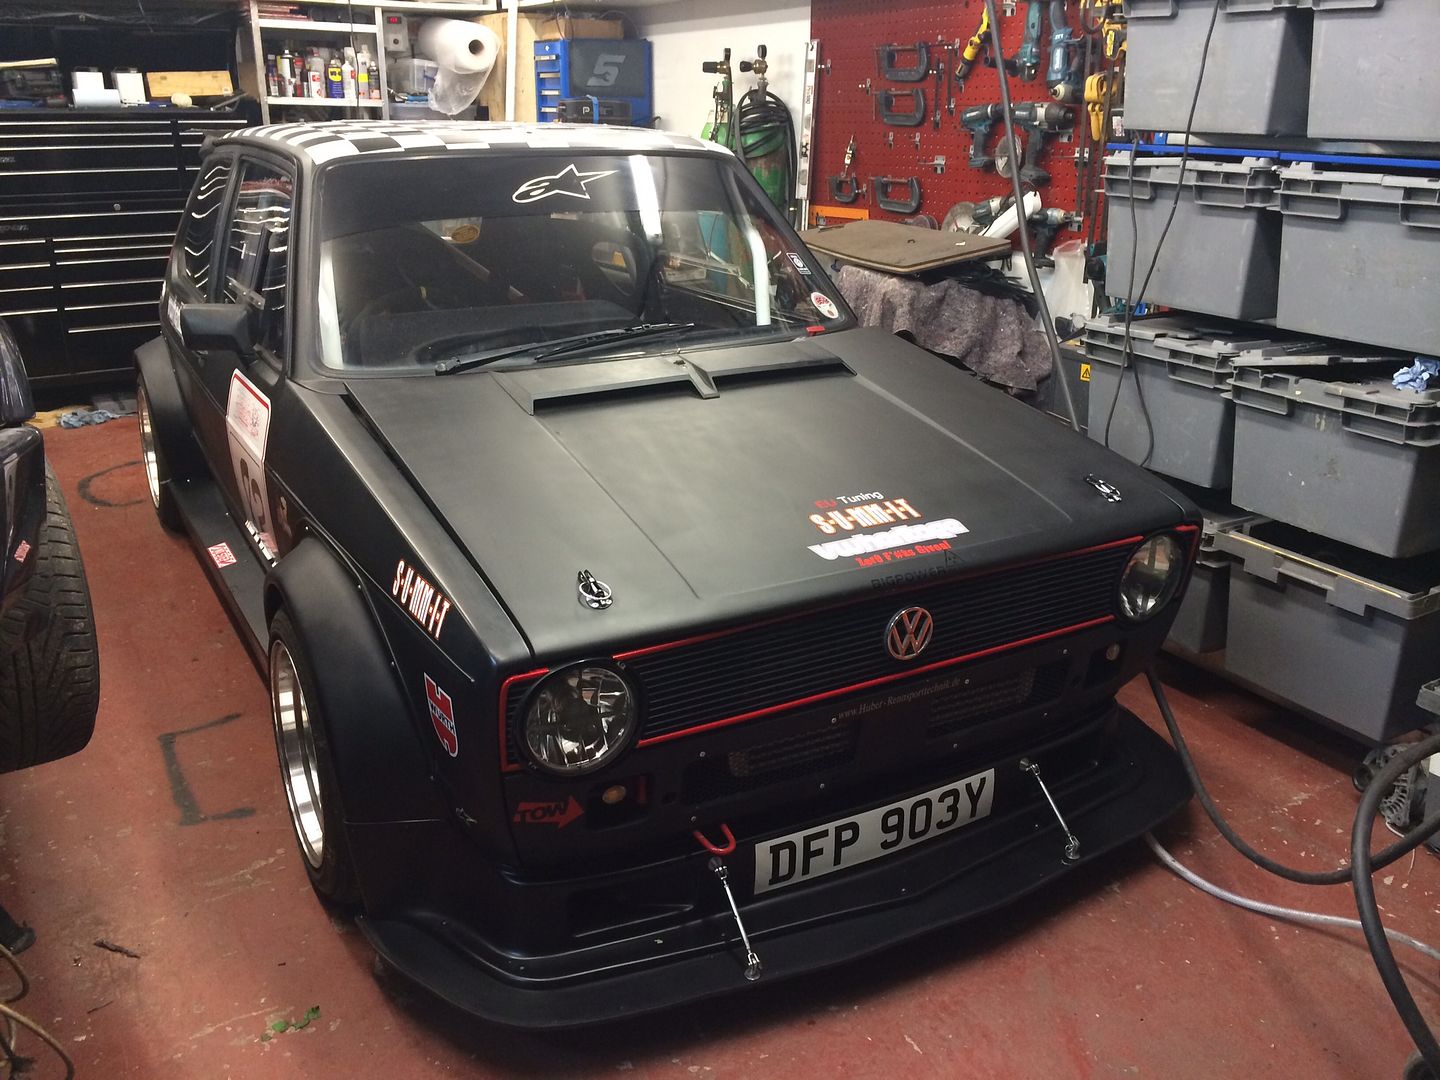
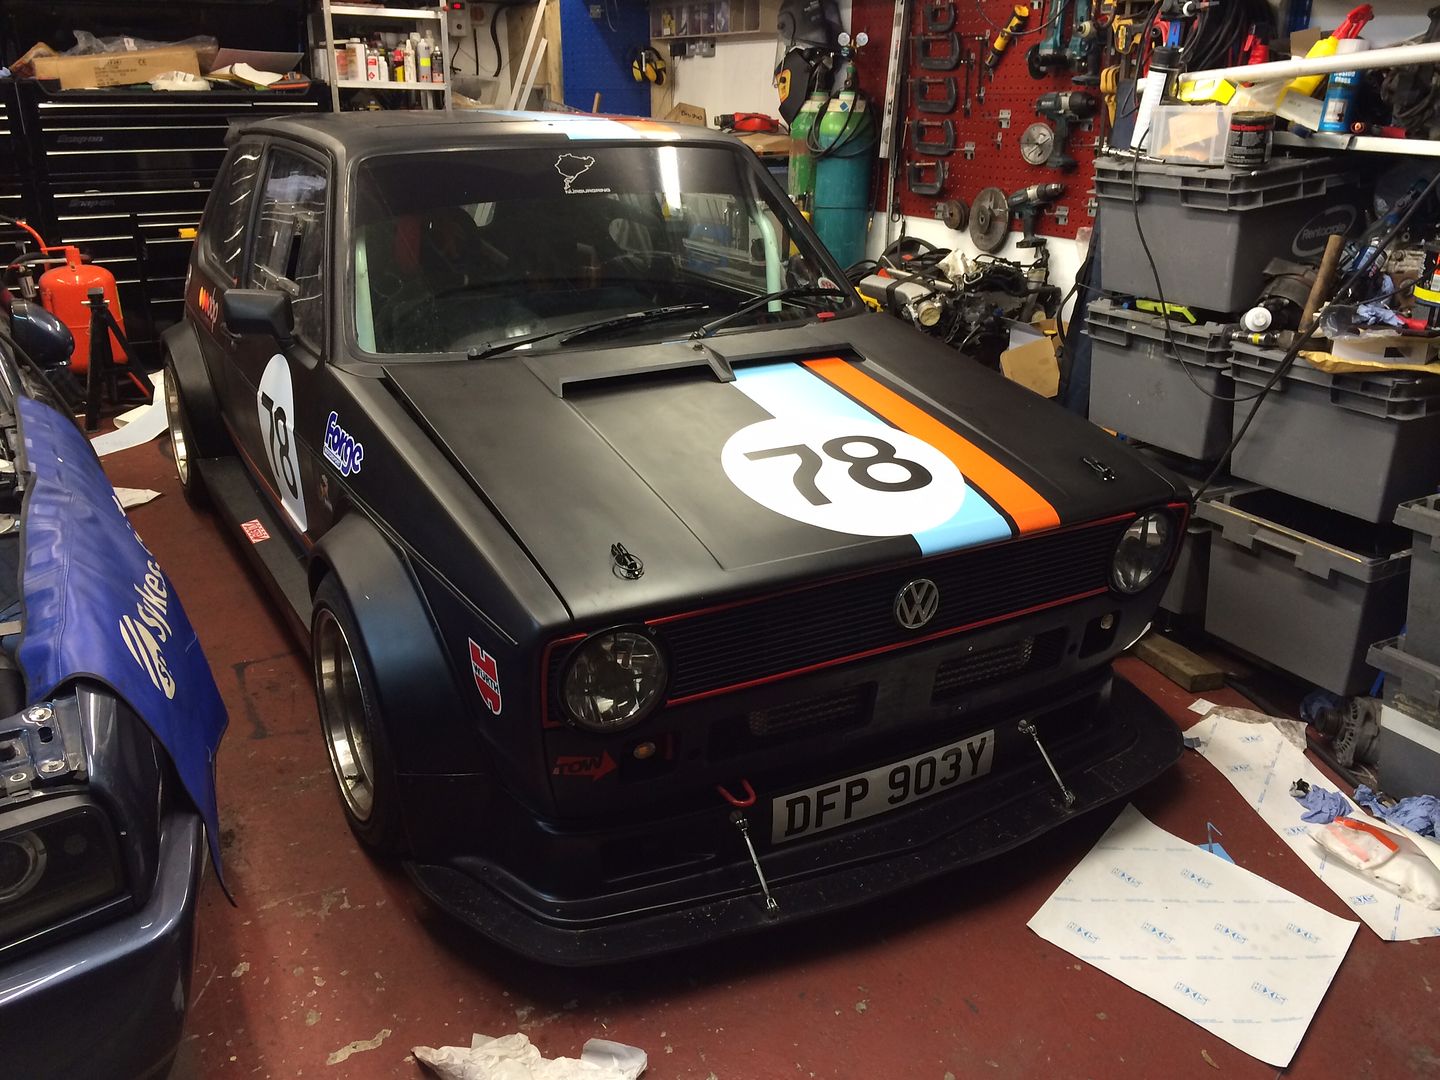
I practically bit Jamies arm off and collected the car last weekend. Its looks right at home in my garage
Its flipping awesome.
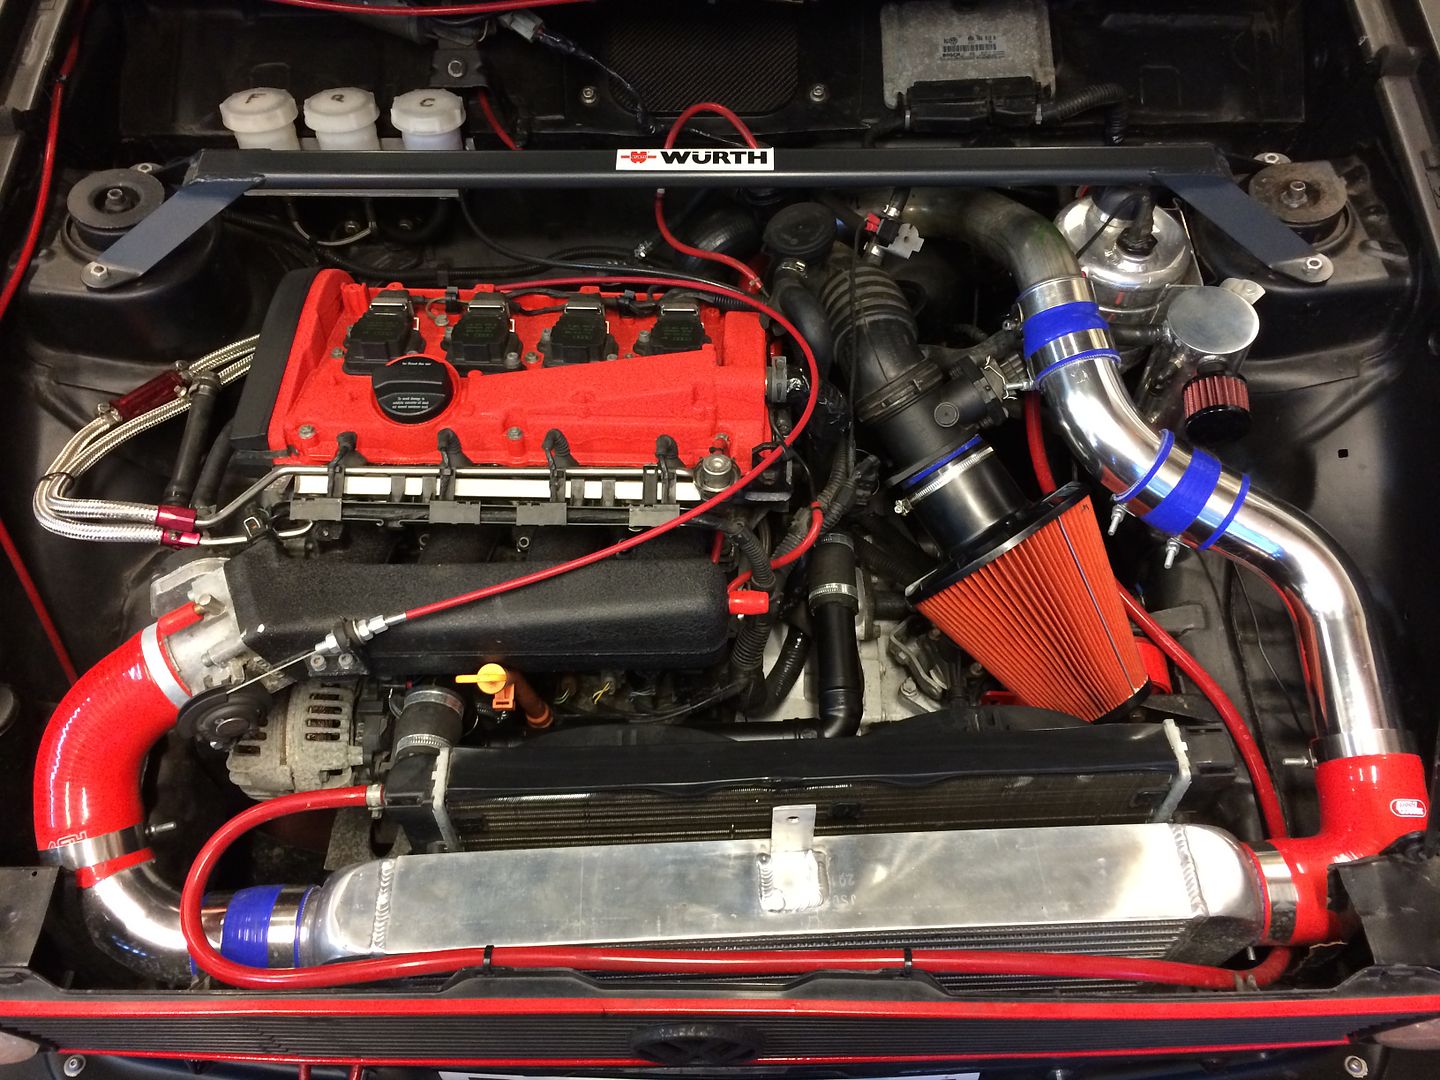
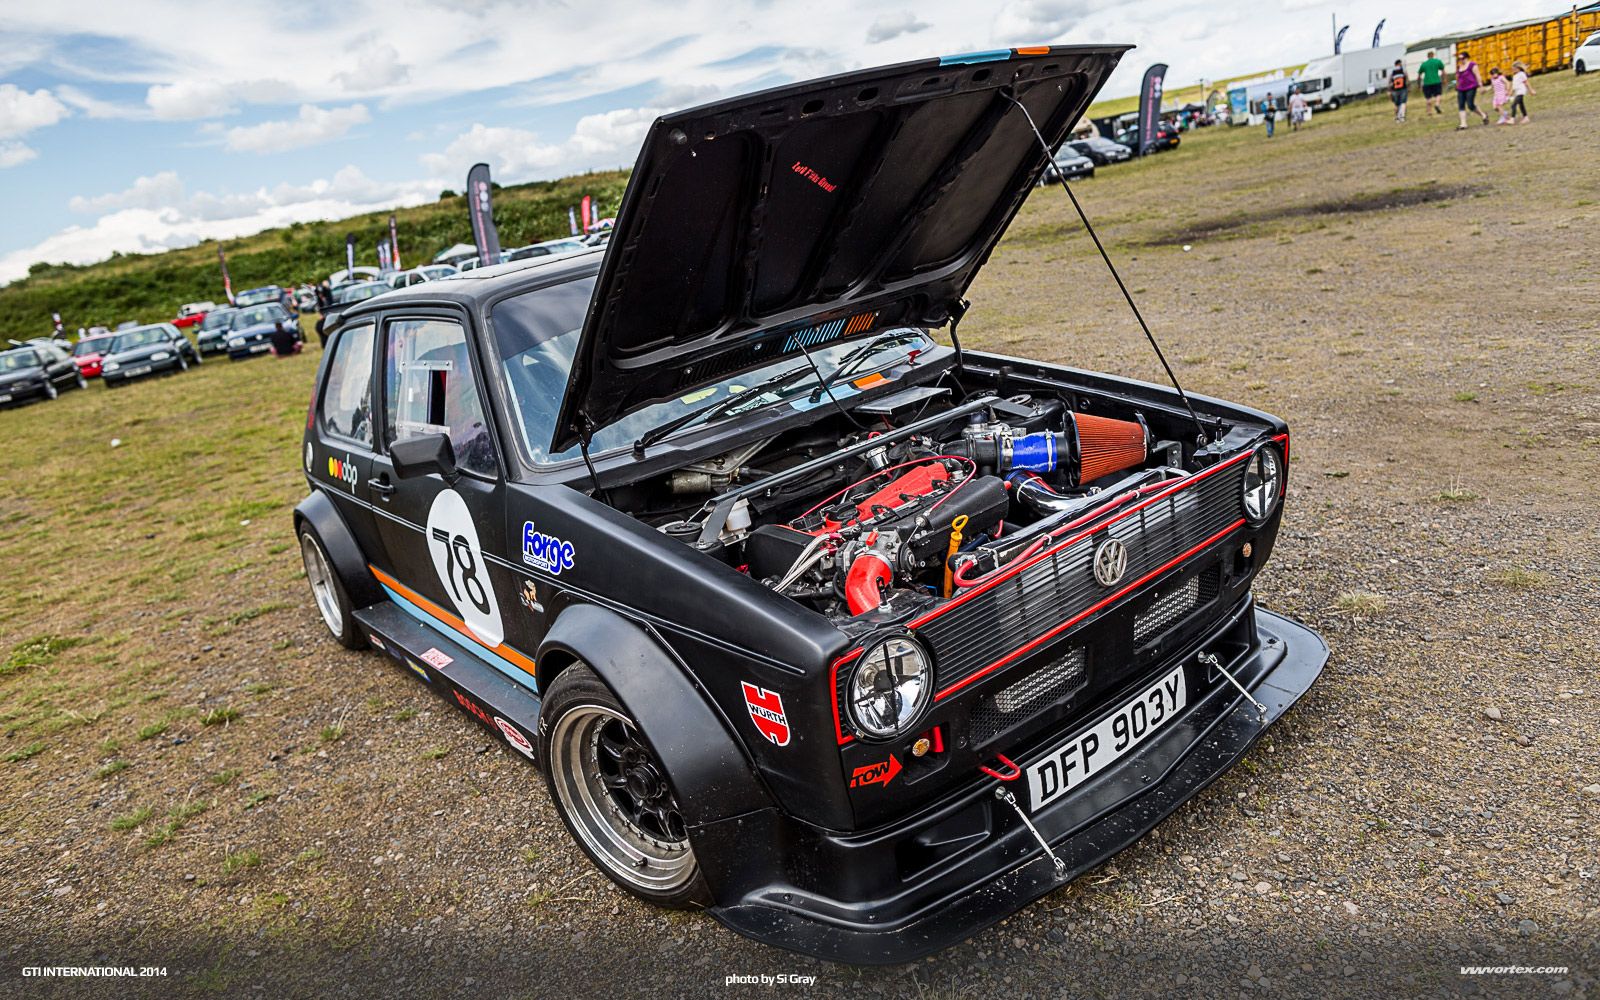
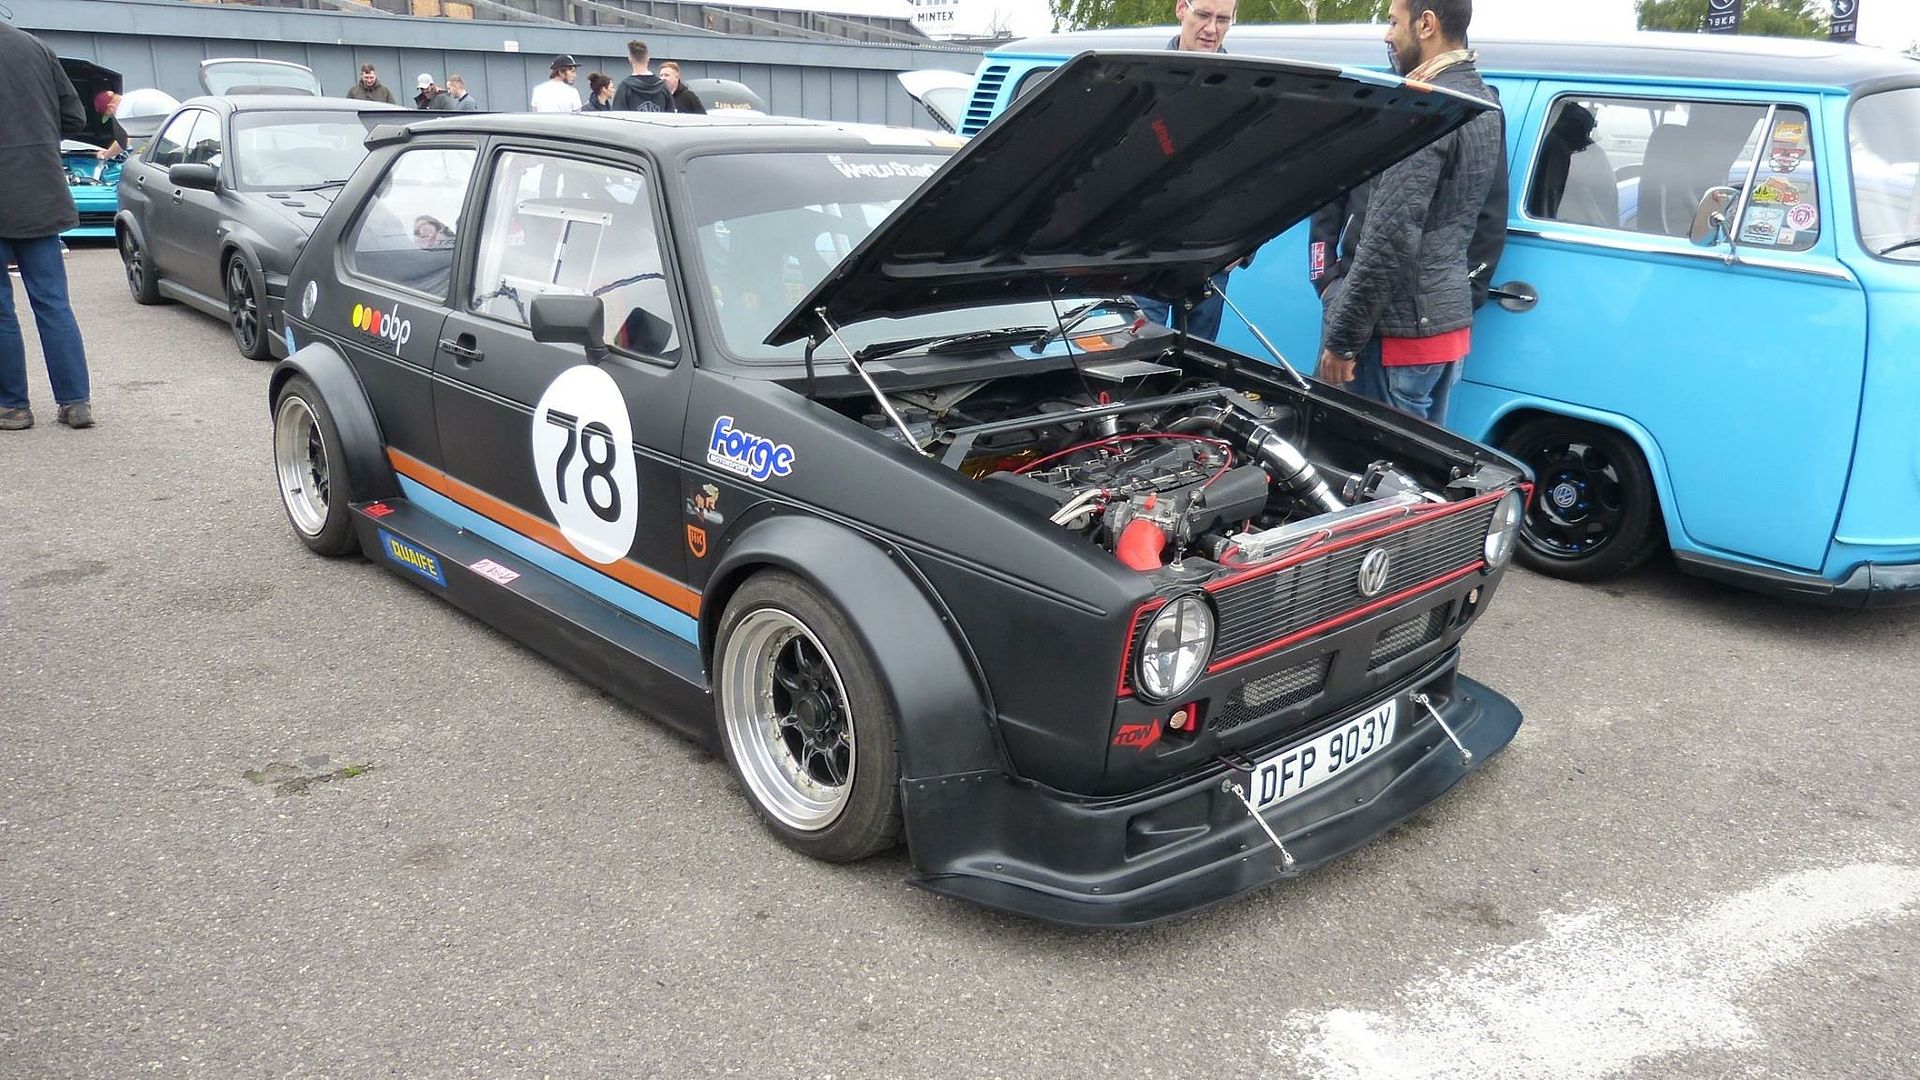
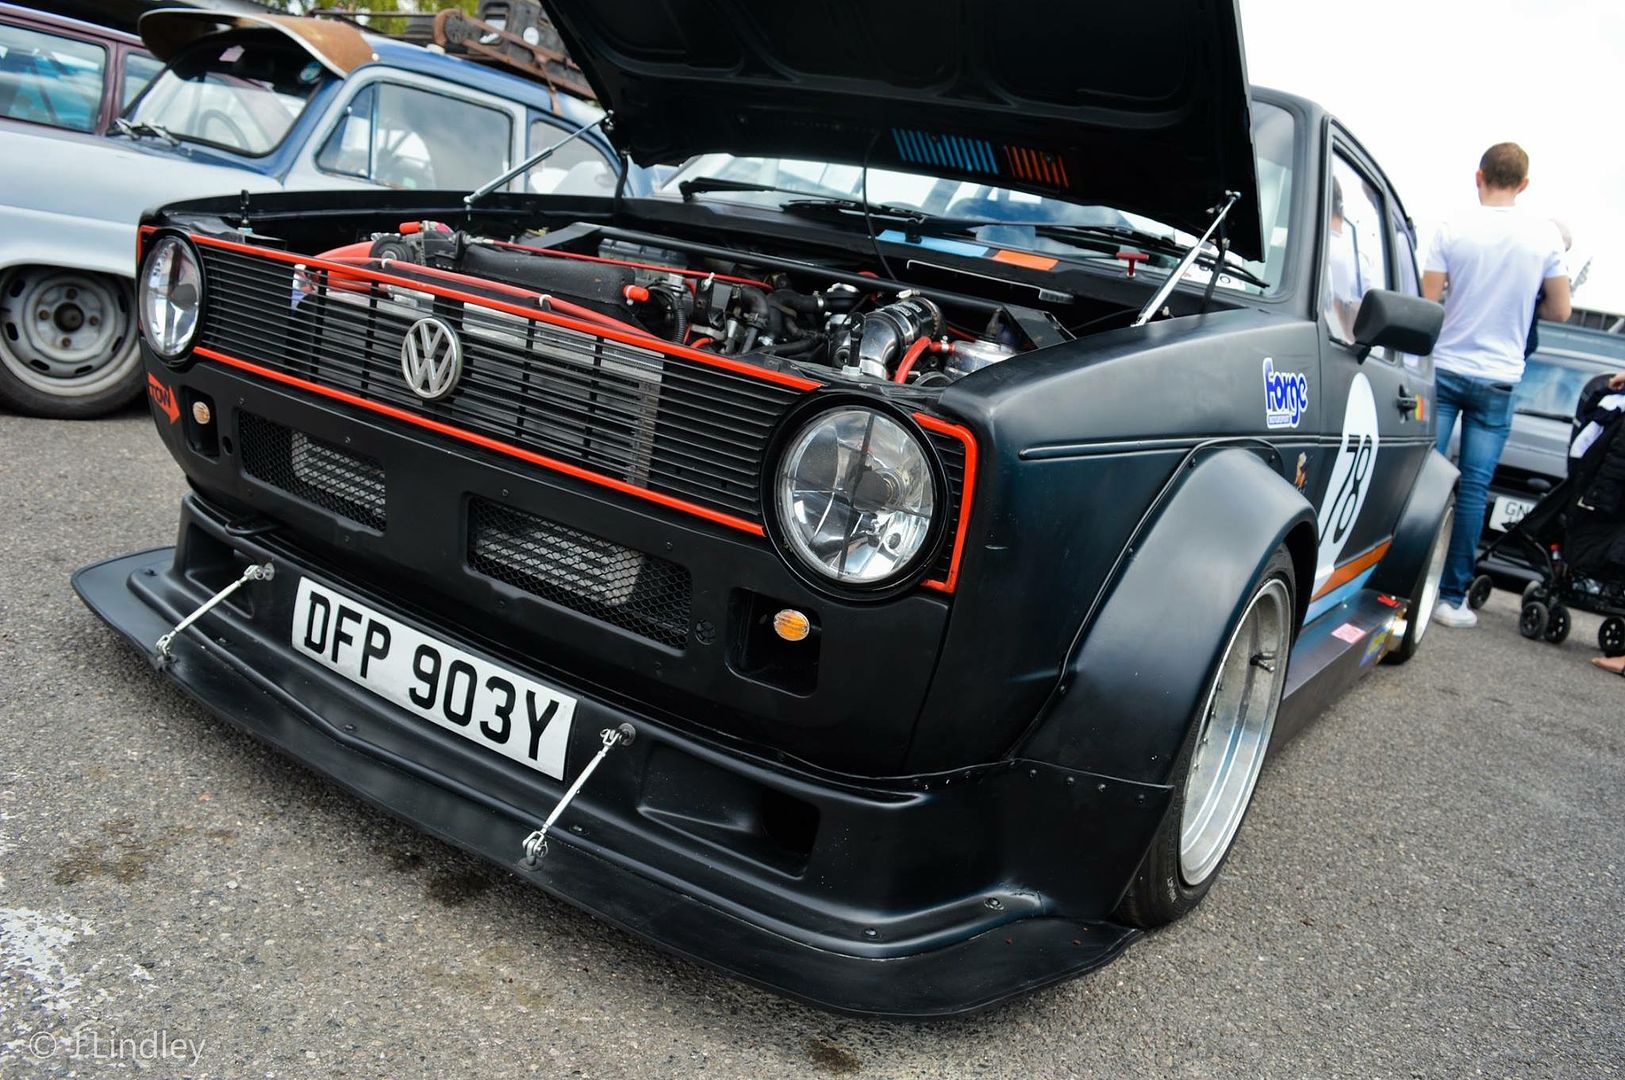
packing heat in the form of a 20v conversion
With credit to Jamie, he has built a great track car, but there is plenty of scope for improvement to make the car mine.
My plans are to turn it into a show/track car.
That means new paint job and graphics, new interior, and some trick performance upgrades.
Watch this space for some exciting upgrades.
Just to give you a flavor,
watch out for a sequential dog box,
full custom re wire,
50's bomber inspired interior,
custom wheels and much more,
Carbon panels,
power upgrades and much more.
Anyone interested in sponsoring the build, get in touch :P
Amit
Thought I would introduce you to my latest project.

I have always wanted a berg cup car, and just happened across this car on FB when it came up for sale.
I practically bit Jamies arm off and collected the car last weekend. Its looks right at home in my garage

Its flipping awesome.
packing heat in the form of a 20v conversion

With credit to Jamie, he has built a great track car, but there is plenty of scope for improvement to make the car mine.
My plans are to turn it into a show/track car.
That means new paint job and graphics, new interior, and some trick performance upgrades.
Watch this space for some exciting upgrades.
Just to give you a flavor,
watch out for a sequential dog box,
full custom re wire,
50's bomber inspired interior,
custom wheels and much more,
Carbon panels,
power upgrades and much more.
Anyone interested in sponsoring the build, get in touch :P
Amit
The plan for this car was always to just do a quick tidy up and enjoy it while we gather parts for a major rebuild.
Well my trusty side kick paul came round and got itchy fingers so the car is now in bits :P
When we bought the car, we new the first job was going to be to sort out wiring. Jamie was let down by his auto electrician so he never got passed the get it in and working stage.
Our eventual plan is to replace all the wiring with a proper motorsport loom and fuse box, but in the mean time, paul decided to have a little tidy and get all the gauges wired up so out came the dash.

He then got carried away with the wire cutters lol

Then decided the best way to get access so install the senders was to remove half the front of the car!. While it was bits, we started looking at relocating the air filter and building an air box for it.

While the front was in bits, Paul riveted the grille in place rather than glue which was coming off

and added some more obvious indicators. The original ones were a little to subtle for london. We also replaced the IC for taller, but narrower IC to give a little more space for better routing of the charge pipes

Then looking through my stash, we found an ally mk1 rad that fits perfectly!

While all that was going on,
This arrived. Is there anything you cant do with cable ties?

:O
mmm dog cogs

and I started working on this. Can anyone guess what it is?

So the wiring tidy up continues
When the new motor was fitted, the original loom was transferred as is. This meant LOTS of excess cable tucked around the engine bay.
Paul got to work pulling it all out, and cutting it to length
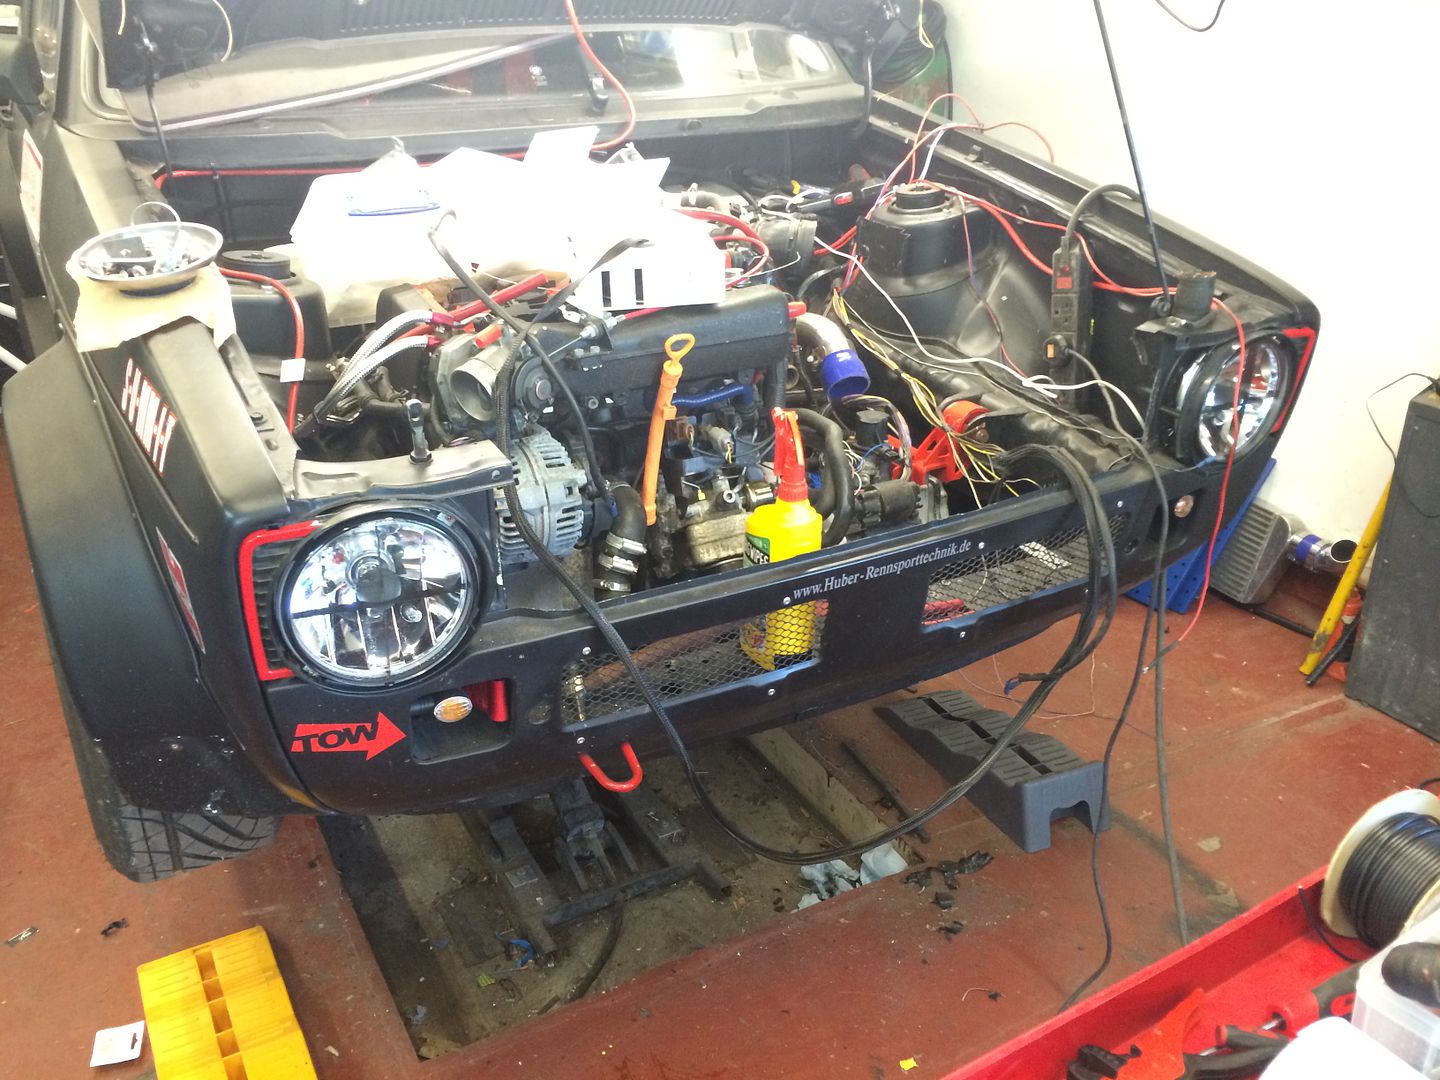
Properly terminating the ends with solder and crimps, and protecting with heat shrink
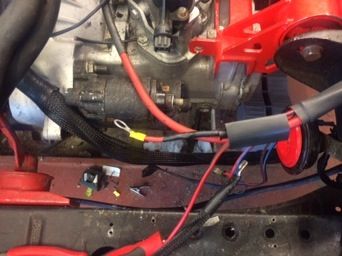
Then covering the lot with nylon overbraid
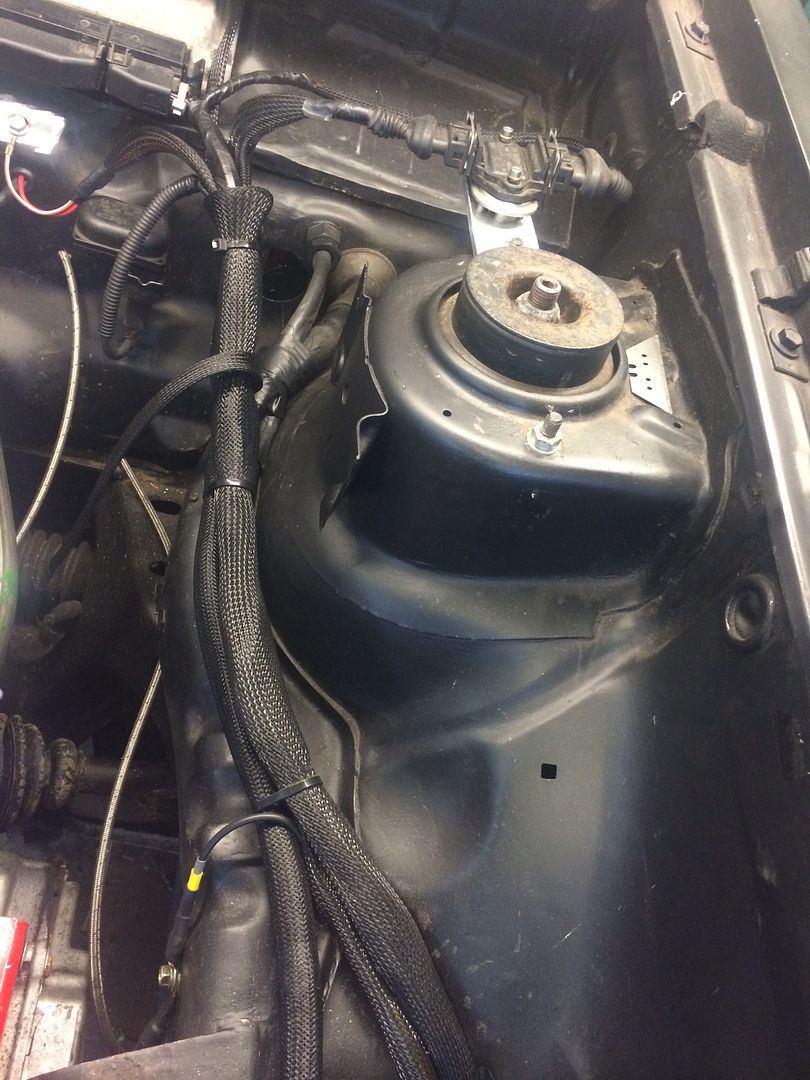
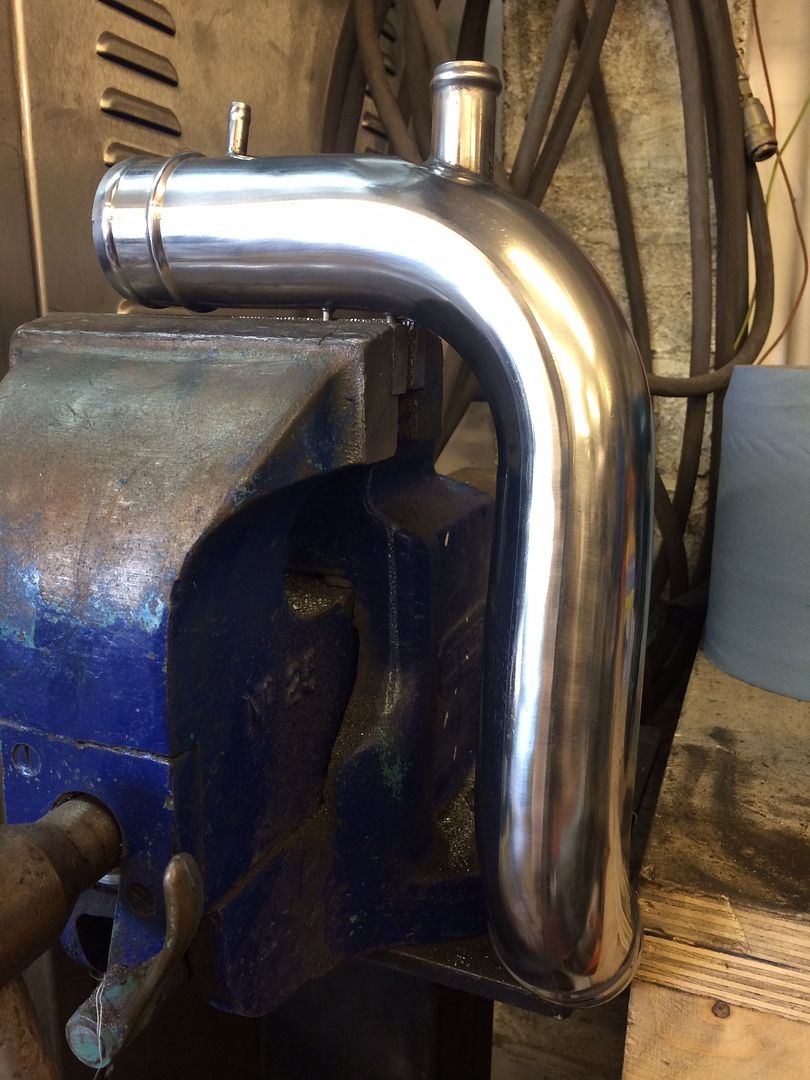
While the charge system was in bits, it would be rude not give it some love so we went from this
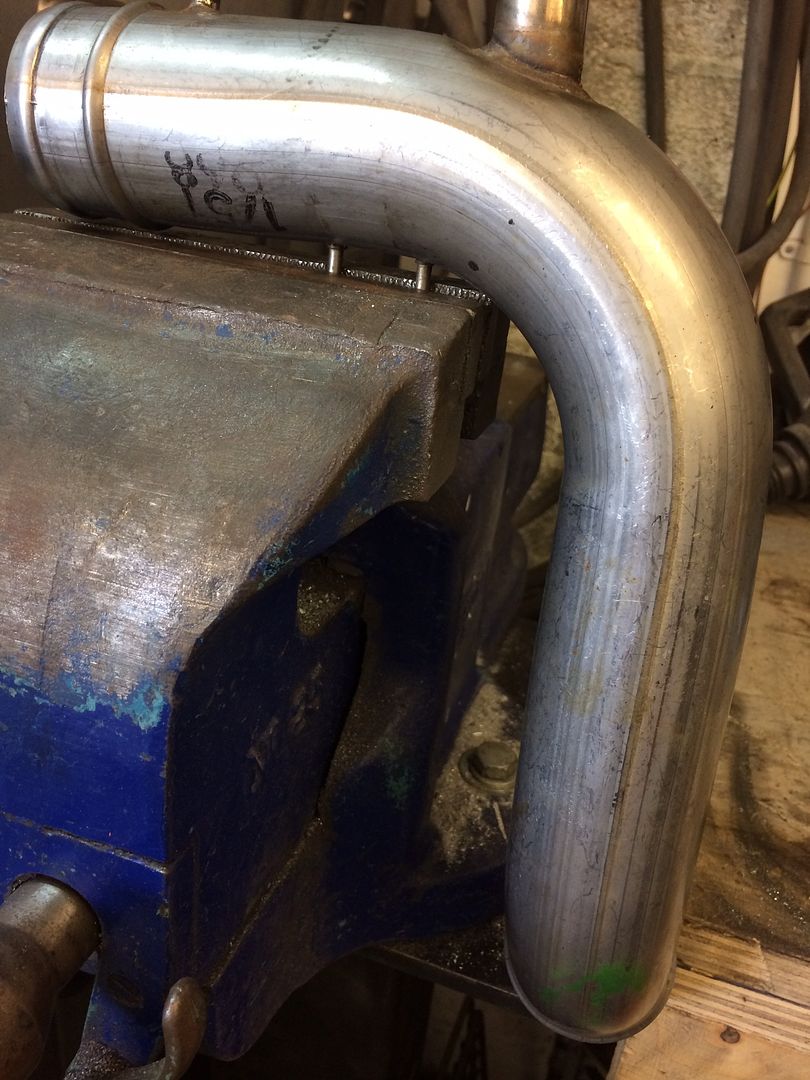
to this
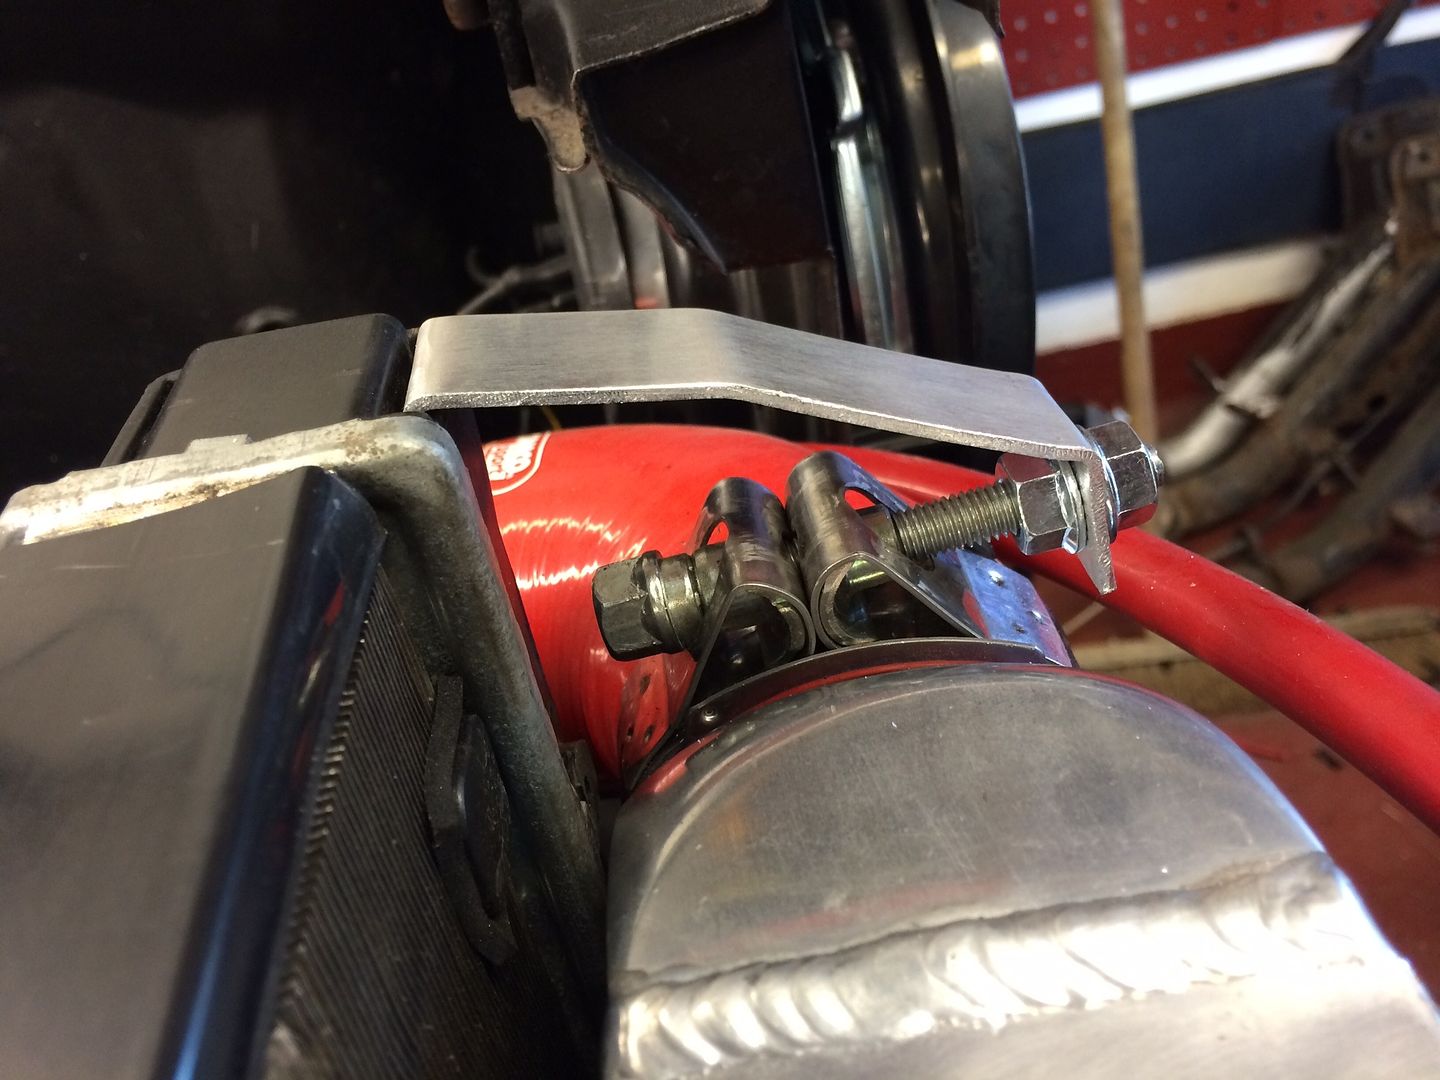
Paul also knocked up a little bracket to support the rad against the intercooler as this was free floating previously,only held in place by the water pipes
While playing with the car, we also made some important decisions. This car is too good to mess with much further than a tidy up, and it would be shame to take it off the road before we got to have some fun in it, so its staying as is except minor tweaks and will act as a test bed.
This now means I am on the hunt for a new rolling shell to build a berg car from scratch with seam welded shell, weld in cage and lots of carbon!
Watch this space
Amit
When the new motor was fitted, the original loom was transferred as is. This meant LOTS of excess cable tucked around the engine bay.
Paul got to work pulling it all out, and cutting it to length

Properly terminating the ends with solder and crimps, and protecting with heat shrink

Then covering the lot with nylon overbraid

While the charge system was in bits, it would be rude not give it some love so we went from this

to this

Paul also knocked up a little bracket to support the rad against the intercooler as this was free floating previously,only held in place by the water pipes

While playing with the car, we also made some important decisions. This car is too good to mess with much further than a tidy up, and it would be shame to take it off the road before we got to have some fun in it, so its staying as is except minor tweaks and will act as a test bed.
This now means I am on the hunt for a new rolling shell to build a berg car from scratch with seam welded shell, weld in cage and lots of carbon!
Watch this space
Amit
Update time.
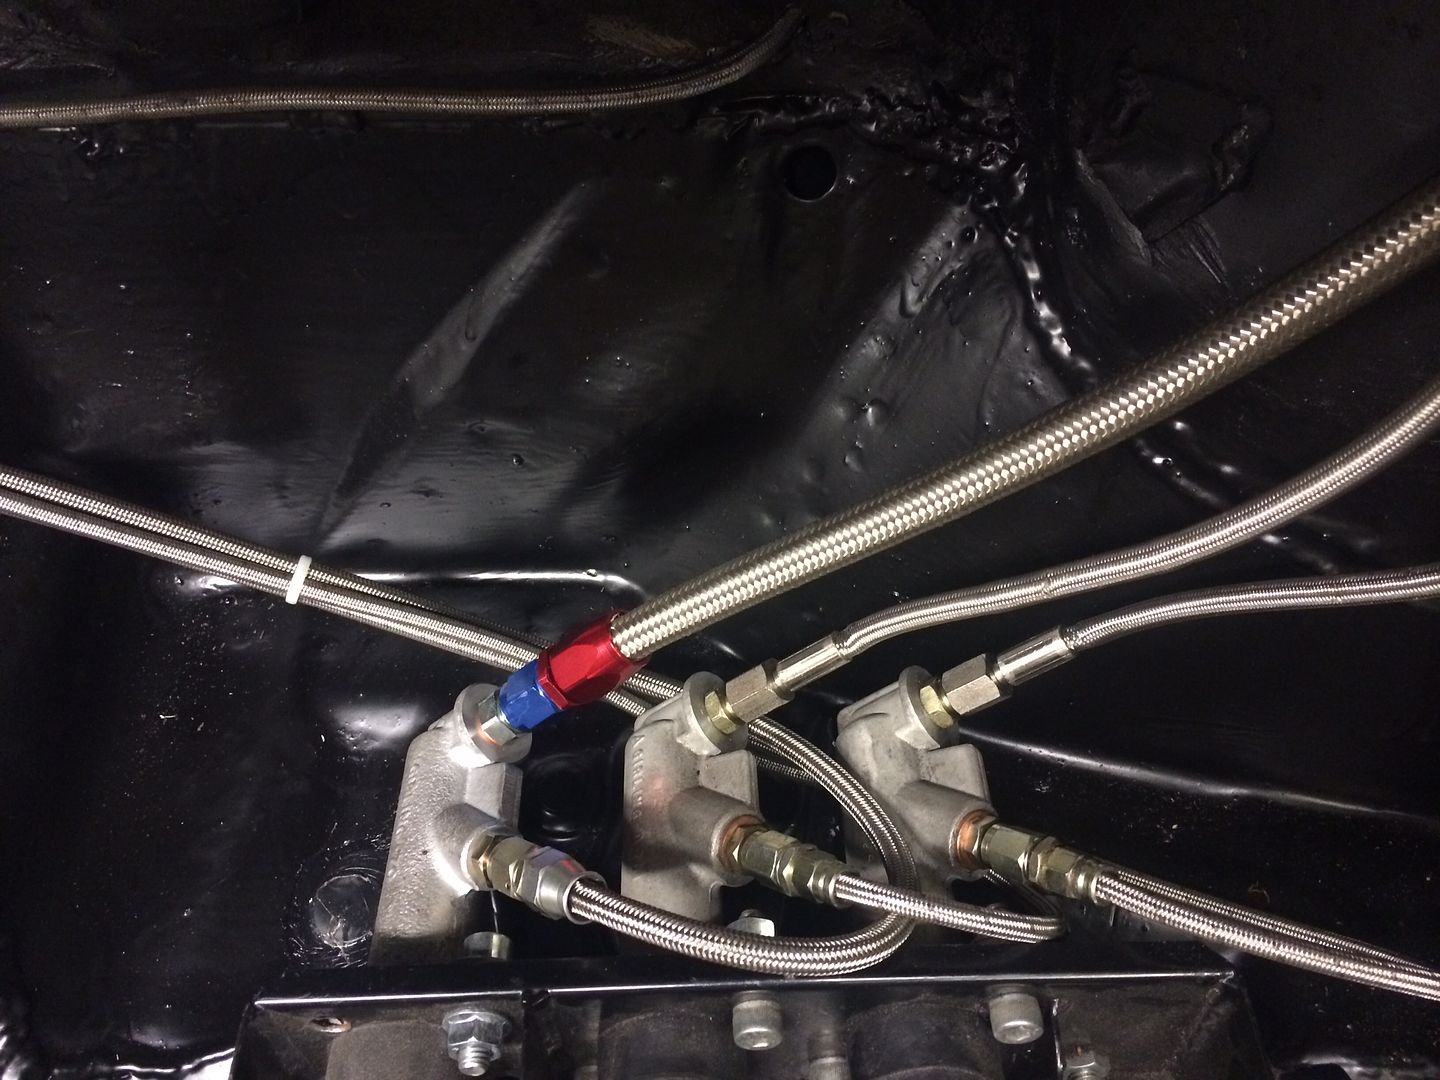
Continuing the improvements on the current car, we decided to tackle the way the fuel lines are routed.
We didnt like that the fuel lines were free floating and secured by cable ties.

So we modified some billet hose separators so they could be panel mounted. Simply be counter sinking the clamp hole

These were then used to secure the fuel lines to the chassis


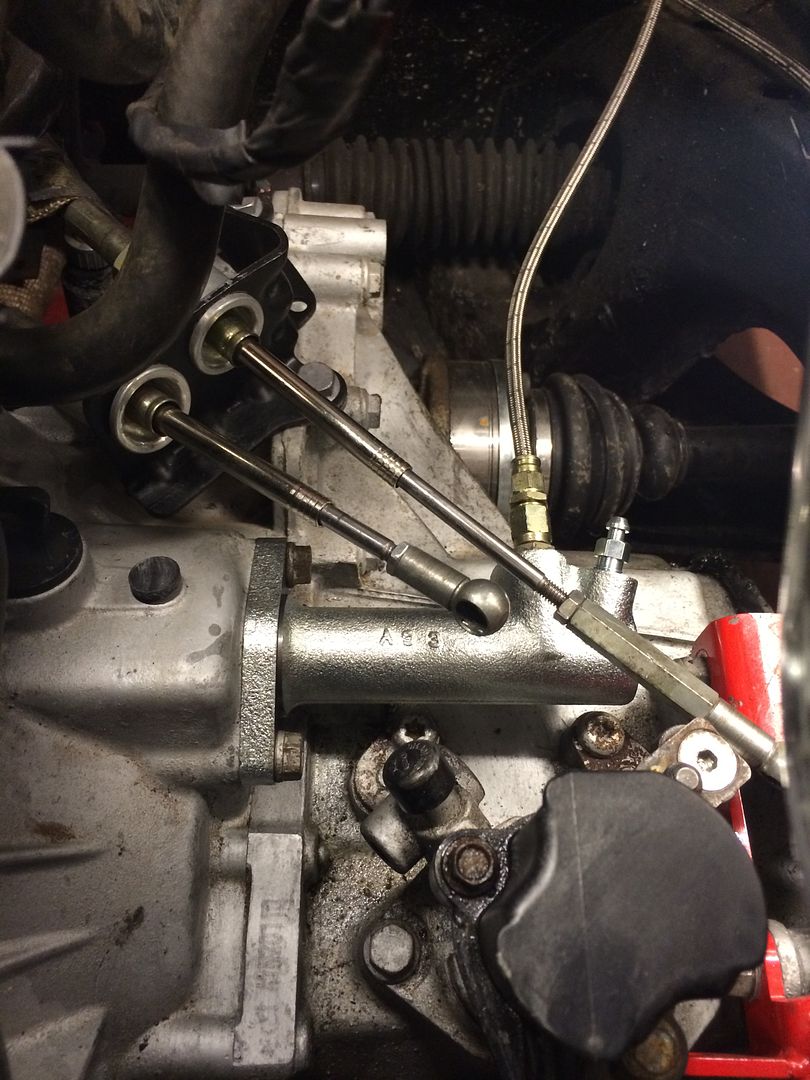
The next area to tackle was the gear shifter and the shifter tower. The Current shifter was just an OEM O2A shifter and it was a floppy mess with a throw about a mile and a half between gears. Not cutting the mustard in a precision sports car! Also the platform the shifter sits on was a thin folded steel secured by self tappers so more flop there.


So we whipped that off and made a template for a base plate out of poster board. Awesome stuff this for prototyping and pattern making

The transferred the pattern to 5mm Ally sheet and cut it out

We then made a new platform from a folded ally

Added a brace, and then Ally mig welded the lot together for strength. As this is the test bed car, we arent using our best fab skills to make and tig welded skeletal frames, just quick dirty and functional. The clever stuff we will save for car number 2.

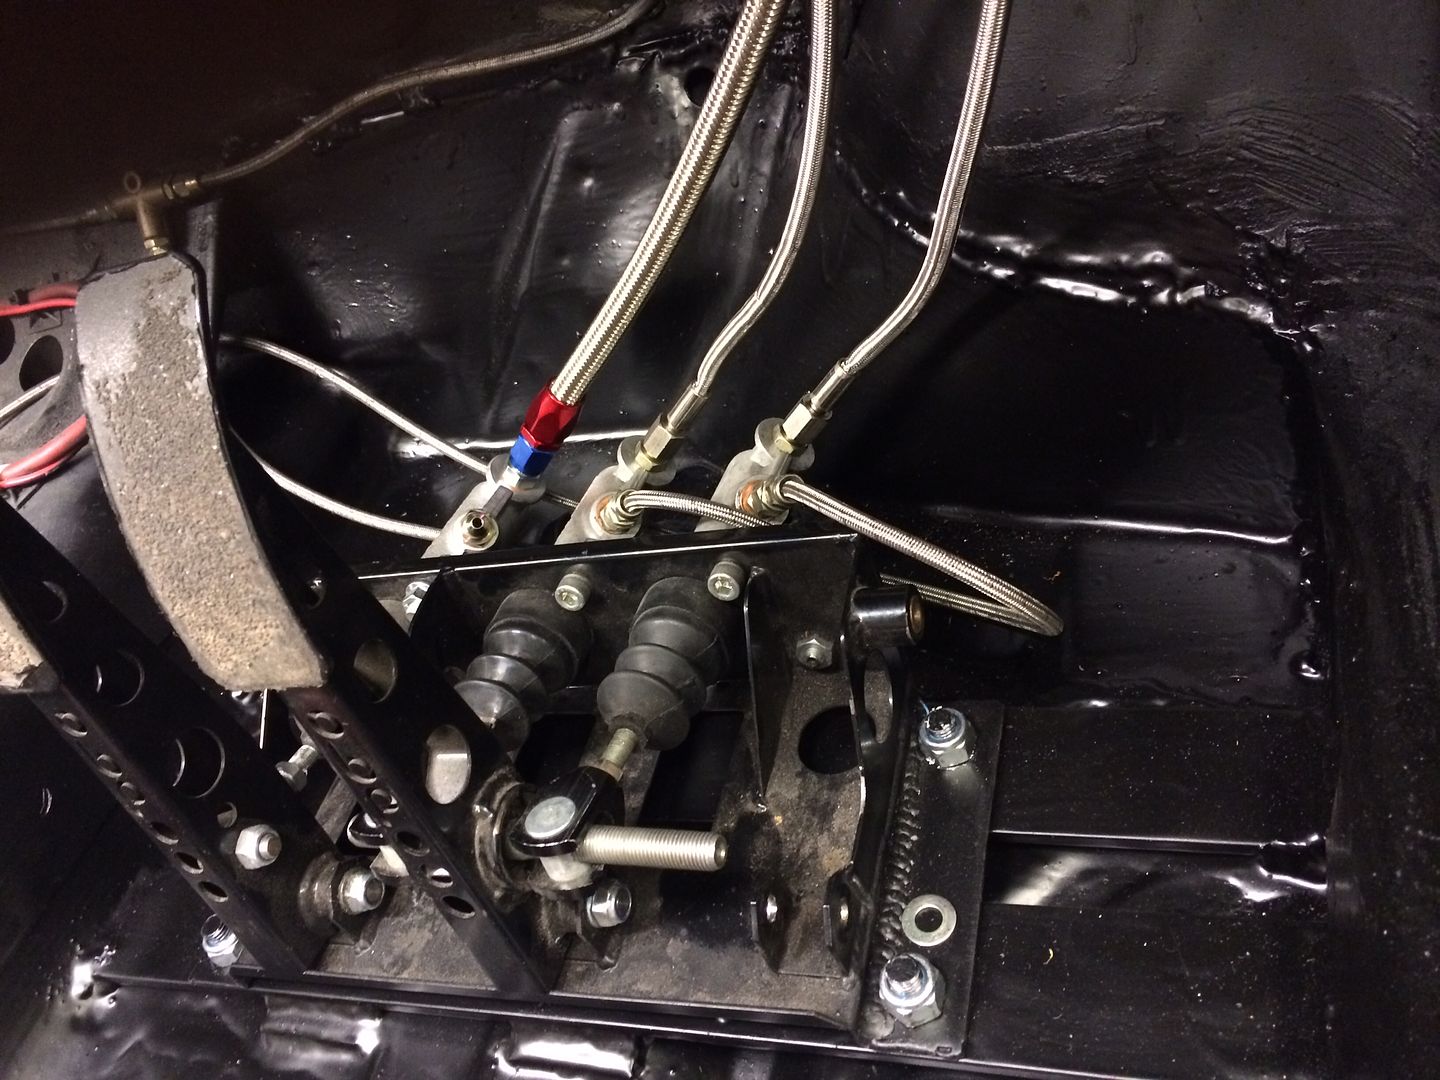
The new tower was then fixed to the car using rivnuts around the base of the frame, and the new crown put in place for a test fit

The J turn device was then mounted to the tower
 We had to spin the master cyclinder upside down to relax the brake lines which were tight and twisted before. A quick google revealed that this should be ok, but may cause problems during bleeding time if air gets in the system. It will be fine for now until we can make some new brake lines.
Next we tackled the hardest part of the build. Installing and setting up the CAE shifter. What a b
 h!! the instructions are shocking. The cables and ball sockets are all different lengths meaning about a 100 different combinations on how they can go together. We spent a good couple hours installing them, trying it, adjusting all sorts, scratching our heads, taking them out again and trying a different combo, repeat about 10 times, and we eventually got it all in and working. Sweet!!!
The gear change is now magic except for a little bit of slop in the old worn shift tower in the gearbox. In the next installment, we will be looking at uprating that with some needle bearings and bushes for a super precise gear change.

In the mean time, we have also located a 1979 mk1 rolling shell which will form the basis of the new car. There maybe a few weeks till the next installment while we reconfigure the garage and Paul needs to finish his ex Turbo Technics 300bhp BAM corrado and get it sold to make space on the other side of the garage.
Look forward to your comments.
Amit
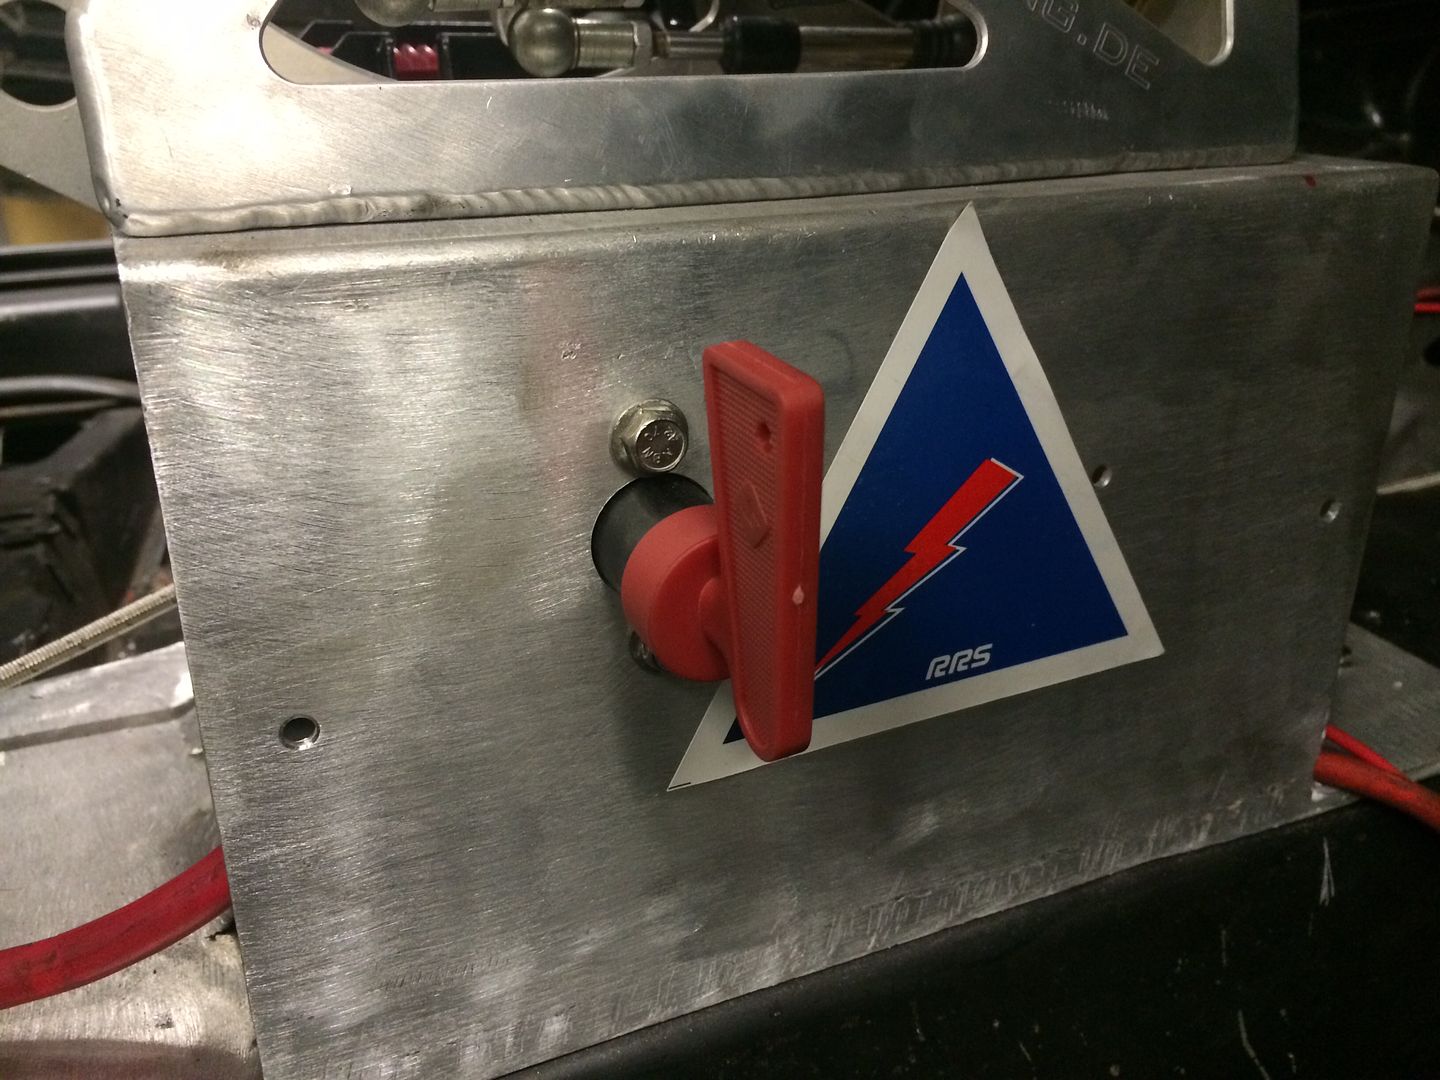
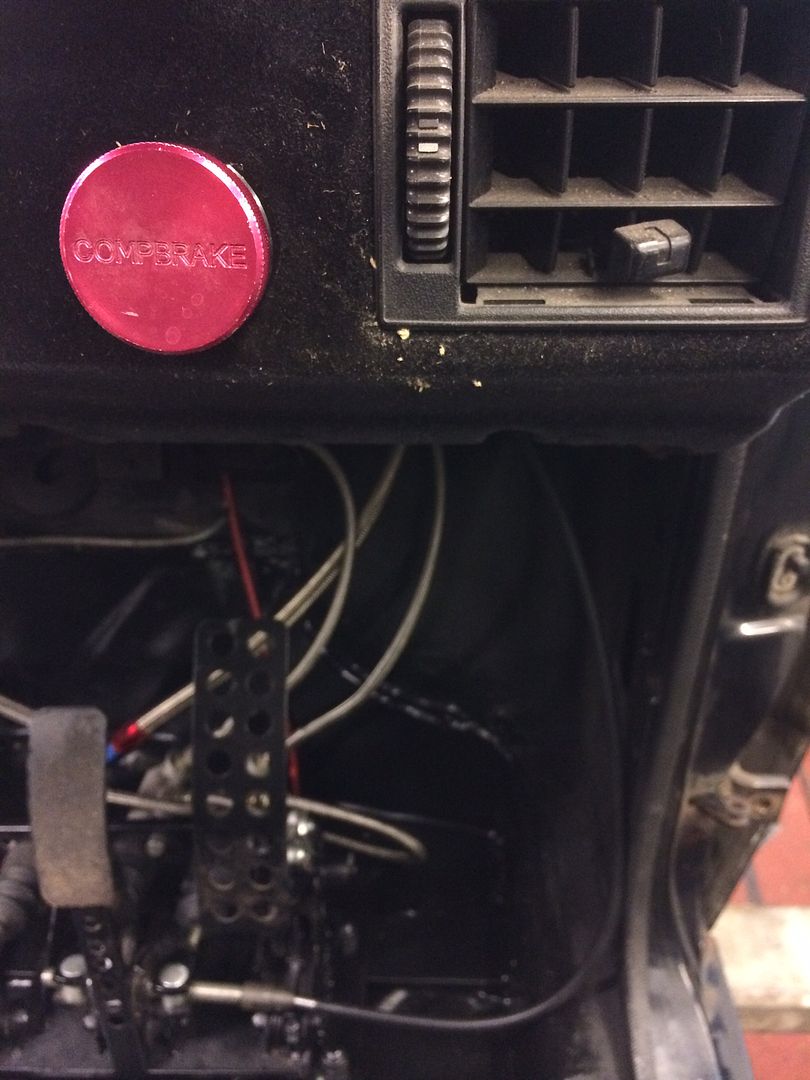
When fitting the CAE shifter, we broke the battery isolator switch, so a prime excuse for a mini upgrade.
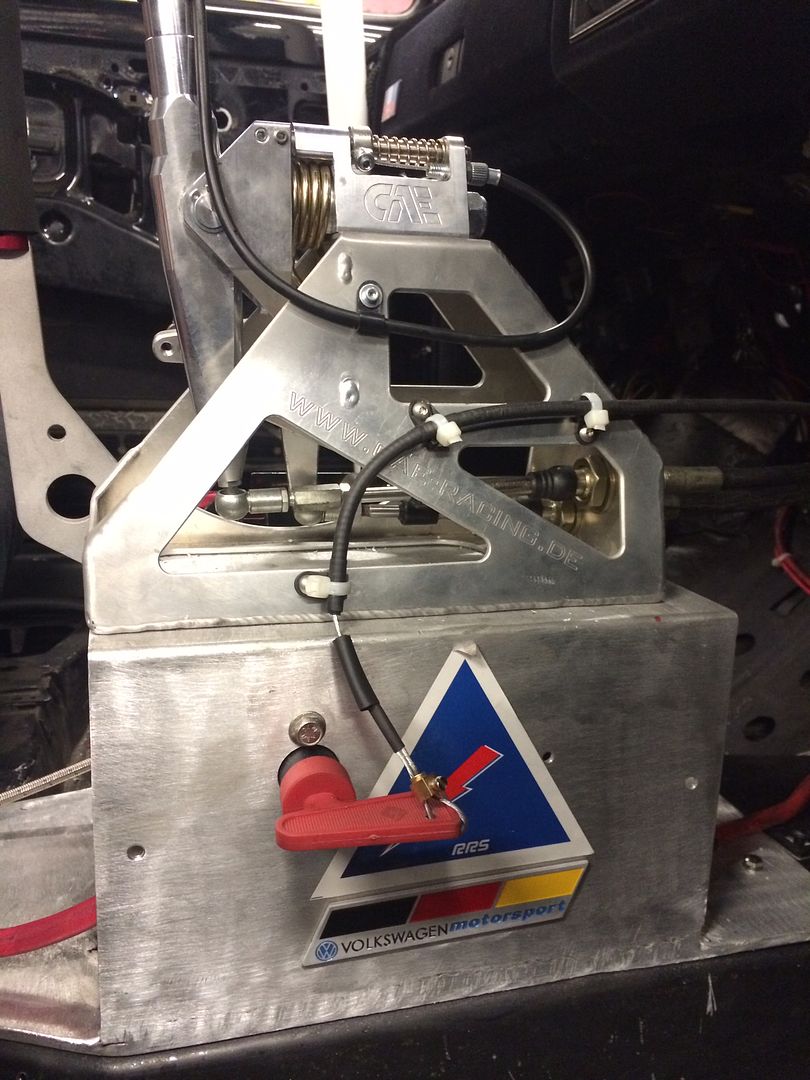
New FIA approved switch fitted in the side of the tower for easy reach
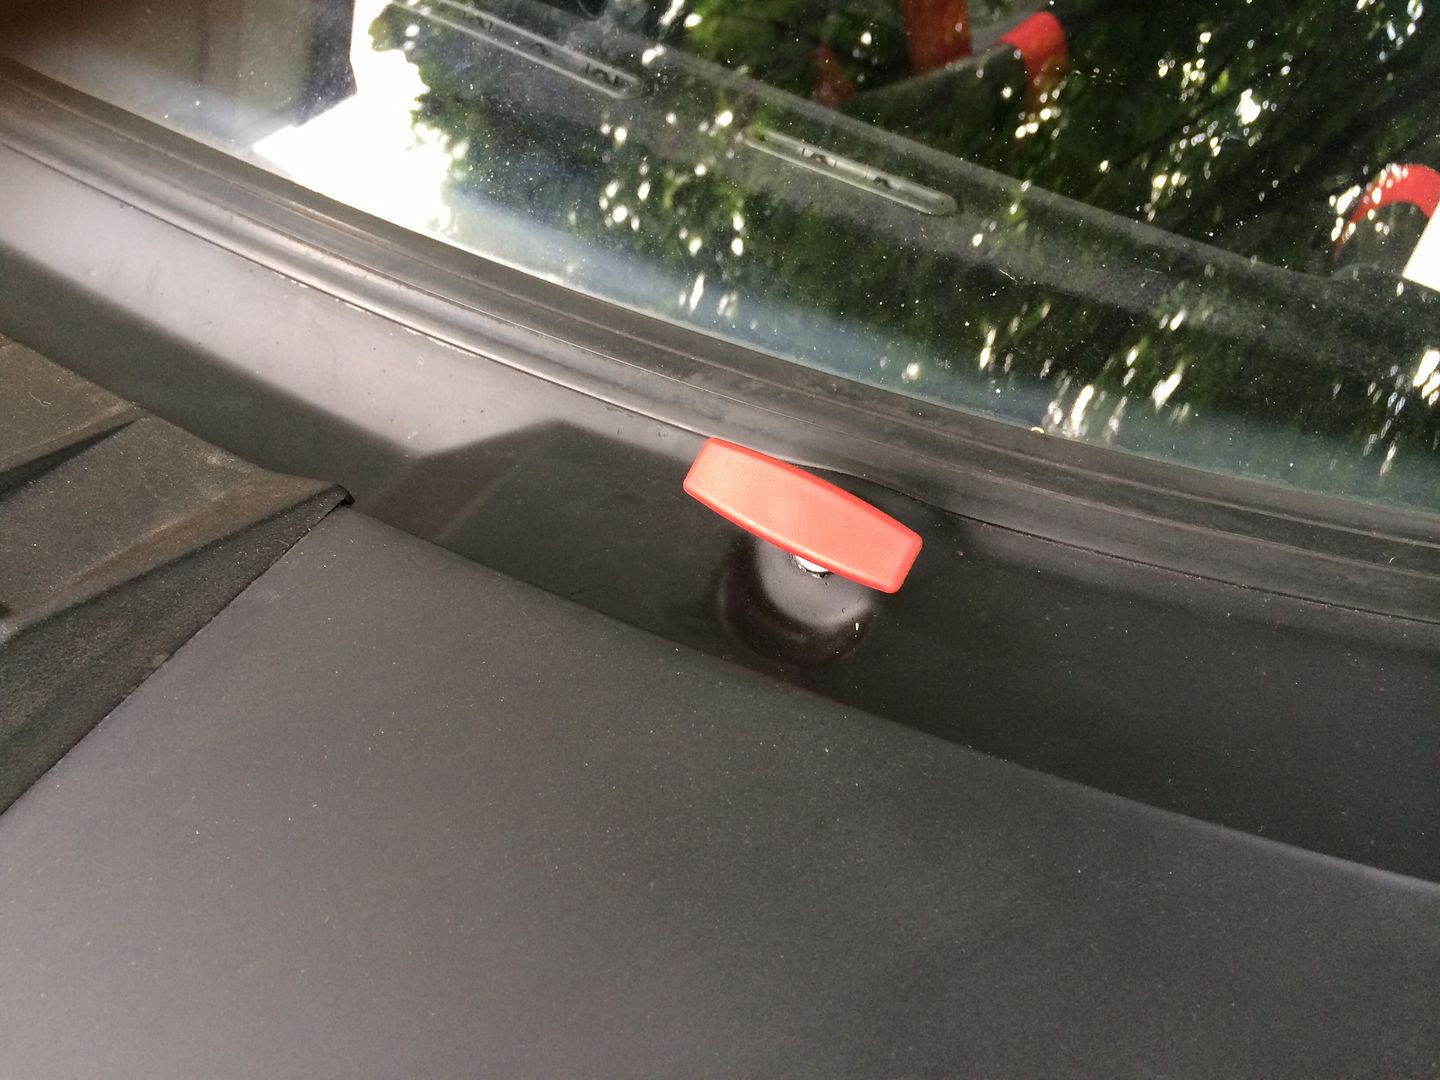
Remote release cable fitted
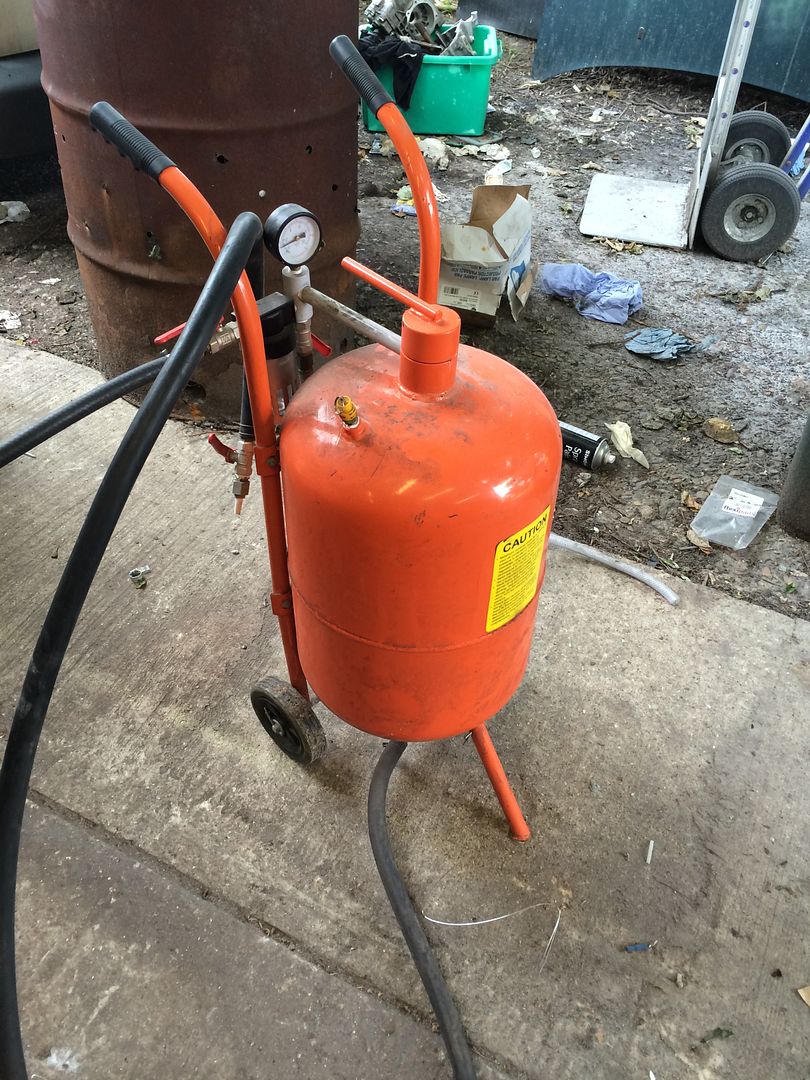
Then it was time to get her looking pretty for stoner park. The front air dam was all stoned chipped so we decided to repaint that. We pulled out the soda blaster and blasted it clean to get a good clean surface to paint.
http://www.youtube.com/watch?v=76KRFuOpQlc&fea...
All freshly painted
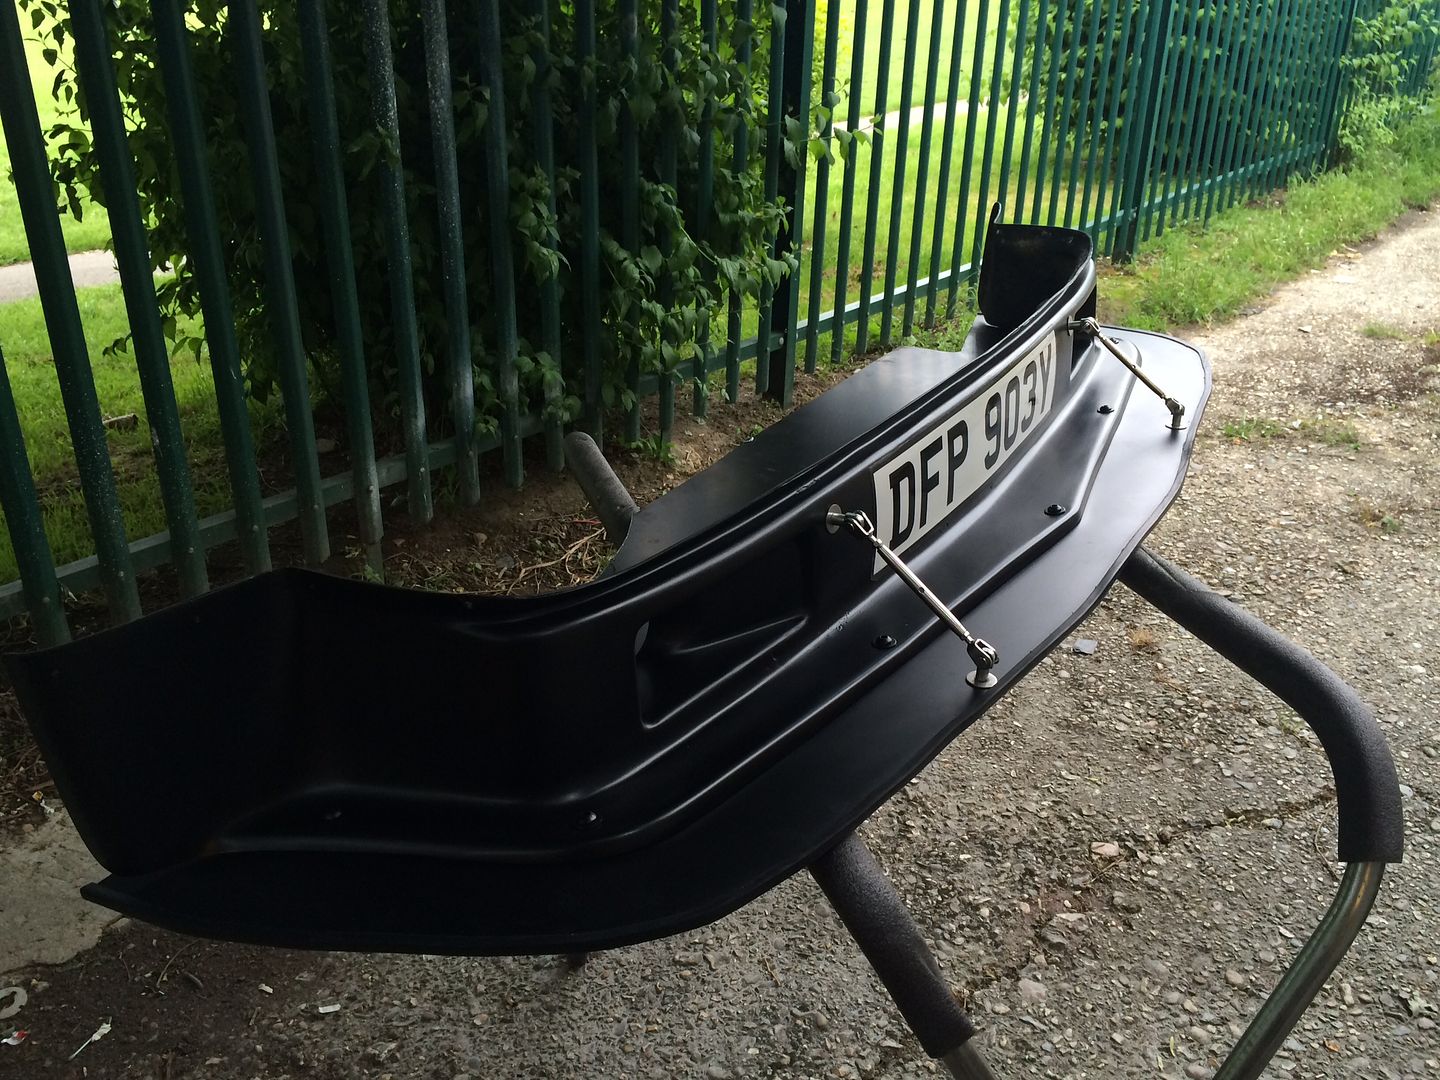
and installed back on the car.
Then it was time for a quick wash before jetting off to stoner park.
Unfortuneatley, on the way to stoner park, we discovered a couple more jobs that need doing. There appears to be a problem with the clutch cylinders. When in traffic, with the clutch pressed for a long time, the slave cylinder seams to drain back into the resivior releasing the clutch! So looks like a good time to upgrade the clutch release system. New cylinders and lines all round.
Also it gets very HOT in the cabin so need to look at some ventilation.
New FIA approved switch fitted in the side of the tower for easy reach

Remote release cable fitted


Then it was time to get her looking pretty for stoner park. The front air dam was all stoned chipped so we decided to repaint that. We pulled out the soda blaster and blasted it clean to get a good clean surface to paint.

http://www.youtube.com/watch?v=76KRFuOpQlc&fea...
All freshly painted

and installed back on the car.

Then it was time for a quick wash before jetting off to stoner park.
Unfortuneatley, on the way to stoner park, we discovered a couple more jobs that need doing. There appears to be a problem with the clutch cylinders. When in traffic, with the clutch pressed for a long time, the slave cylinder seams to drain back into the resivior releasing the clutch! So looks like a good time to upgrade the clutch release system. New cylinders and lines all round.
Also it gets very HOT in the cabin so need to look at some ventilation.
Escort3500 said:
Really enjoying this thread. Didn't realise a soda blasting machine was so effective
Keep the updates coming
This vid makes it look a little more effortless than it normally is. I suspect the air damn wasnt properly prepped the first time it was painted.Keep the updates coming
Either way its a very effective tool
Time for another update.
So last time we went out in the car, we found a problem with the clutch where if we kept our foot on the pedal, the clutch would slowly engage, even with the pedal pressed.
We started to dig and think we found the issue.

Exactly what you want to find the day before heading to Players show!
A quick scramble round london to find a new slave cylinder and we were back in the game
Next day, we set off nice an early for players. Weathers not looking great, but we think we will be fine.
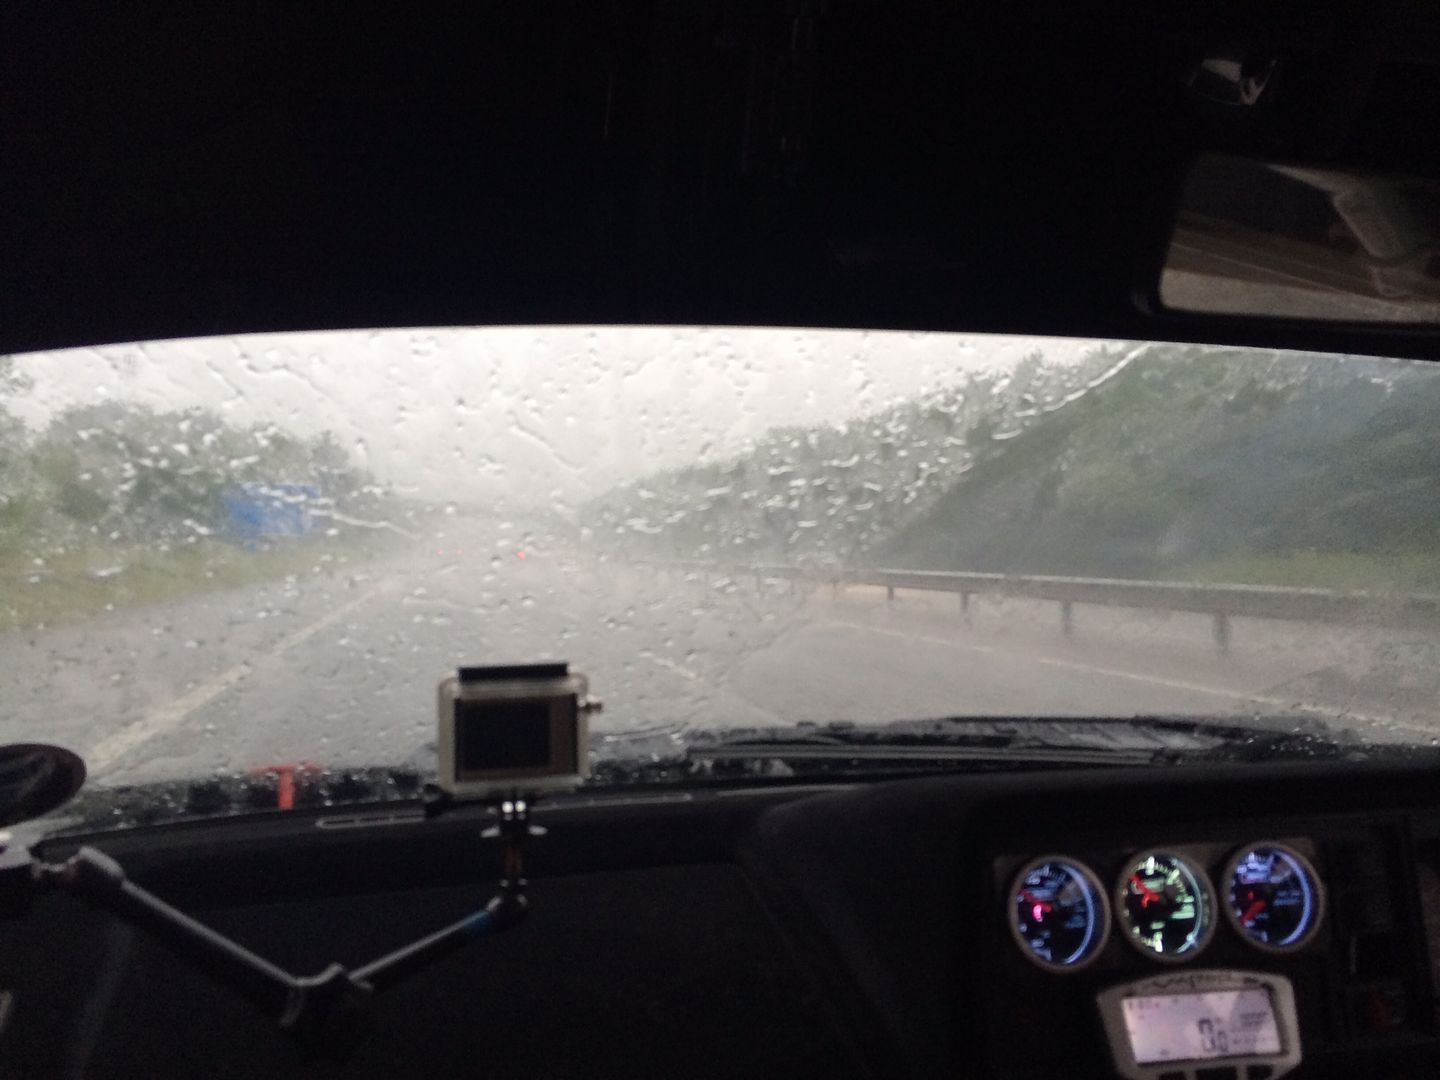
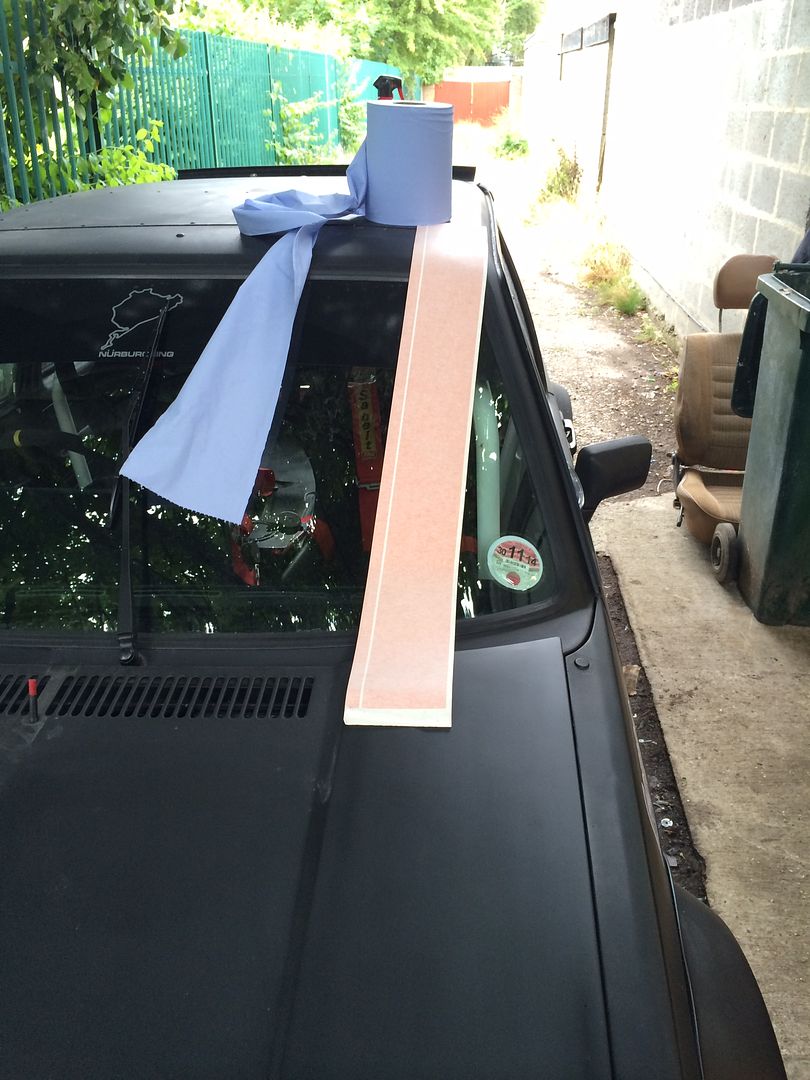
Boy were we wrong. About 30 mins out, we are hit by an Epic thunder storm. In a car with only 1 wiper and no demister, this is a problem!
Visibility is down to about 2m. I am now following the tail lights of the car in front at 20mph! I am sure I was over taken by noahs ark at one point.
First thing on the agenda when we get back lol!
The other issue is the car if full of holes. In the floors, in the doors, in the perspex windows. The car is filling up with water fast!
Well we eventually make it to the players show, carrying about a ton of water. Paul looks happy because all his rollies are soaked.
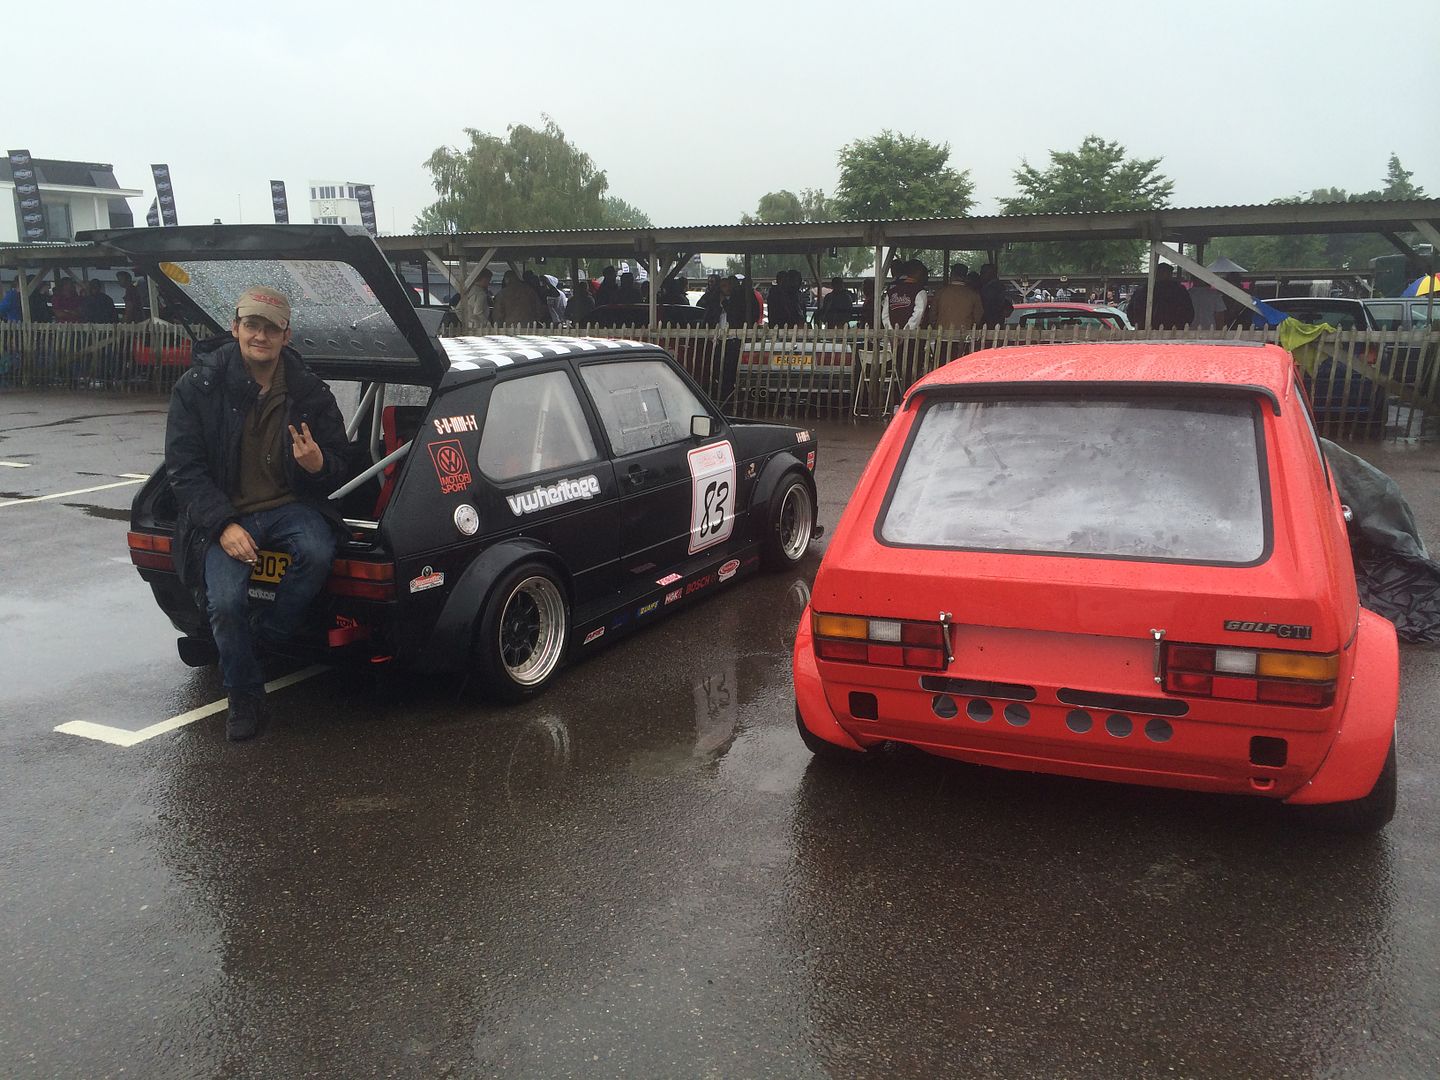
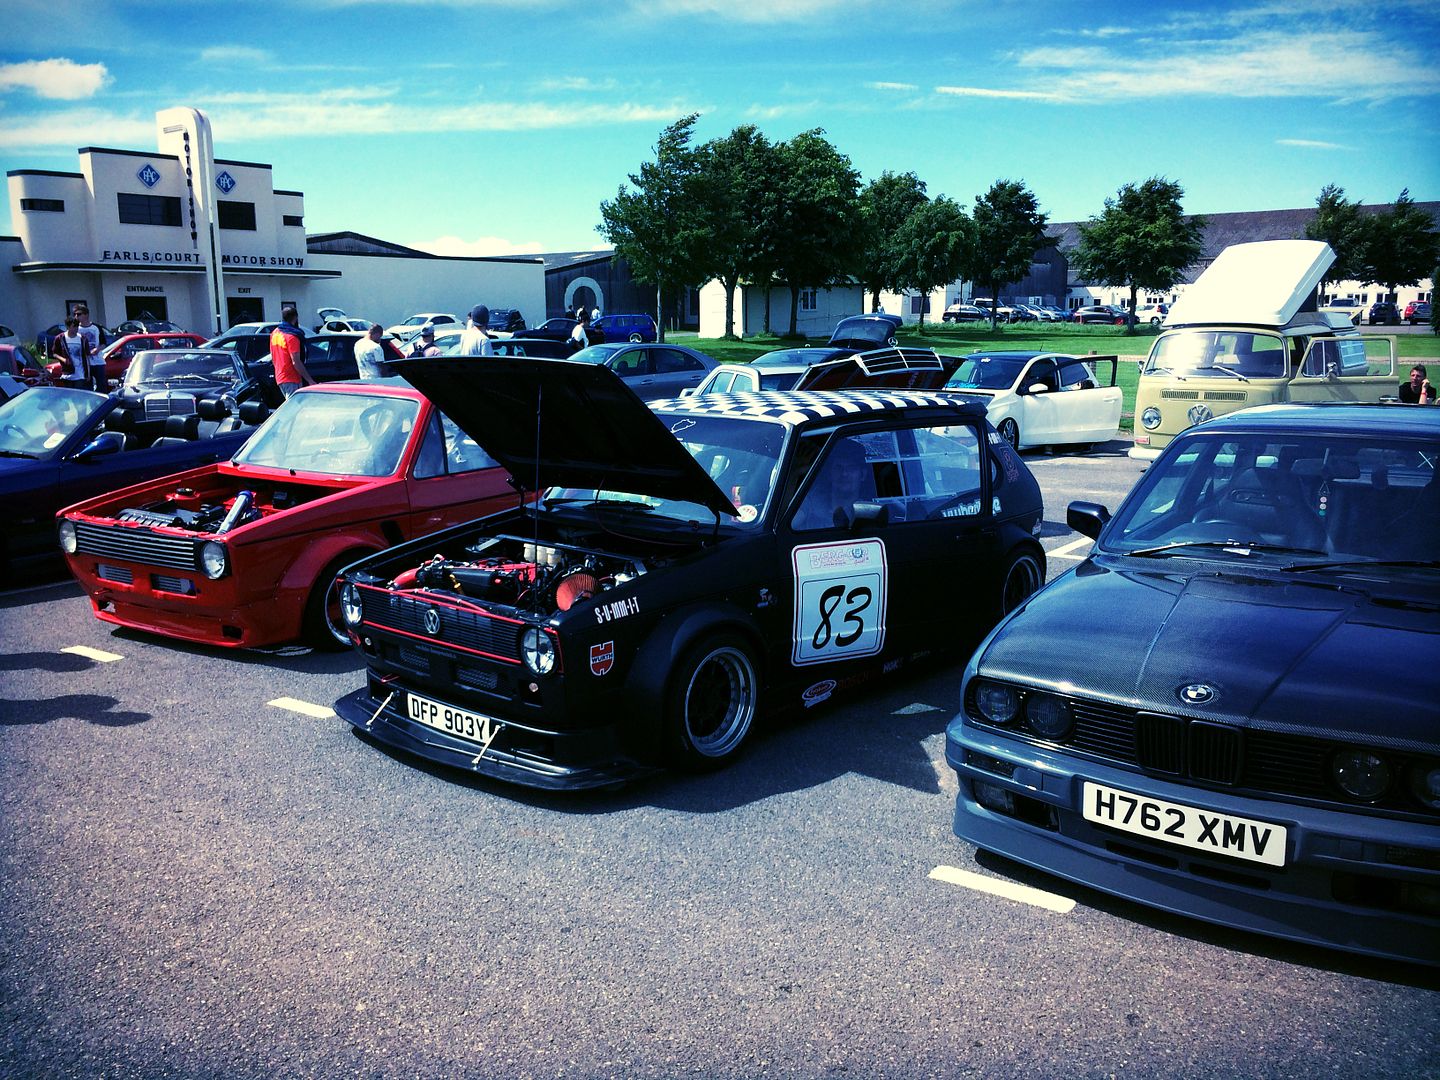
luckily, the sun eventually comes out and it turns out to be a great show. We meet some great people, and the car seems to go down well.
Mean while back home, some more exciting parts turn up for car two, and we sign up some exciting sponsors. Watch this space
Who can guess what this is
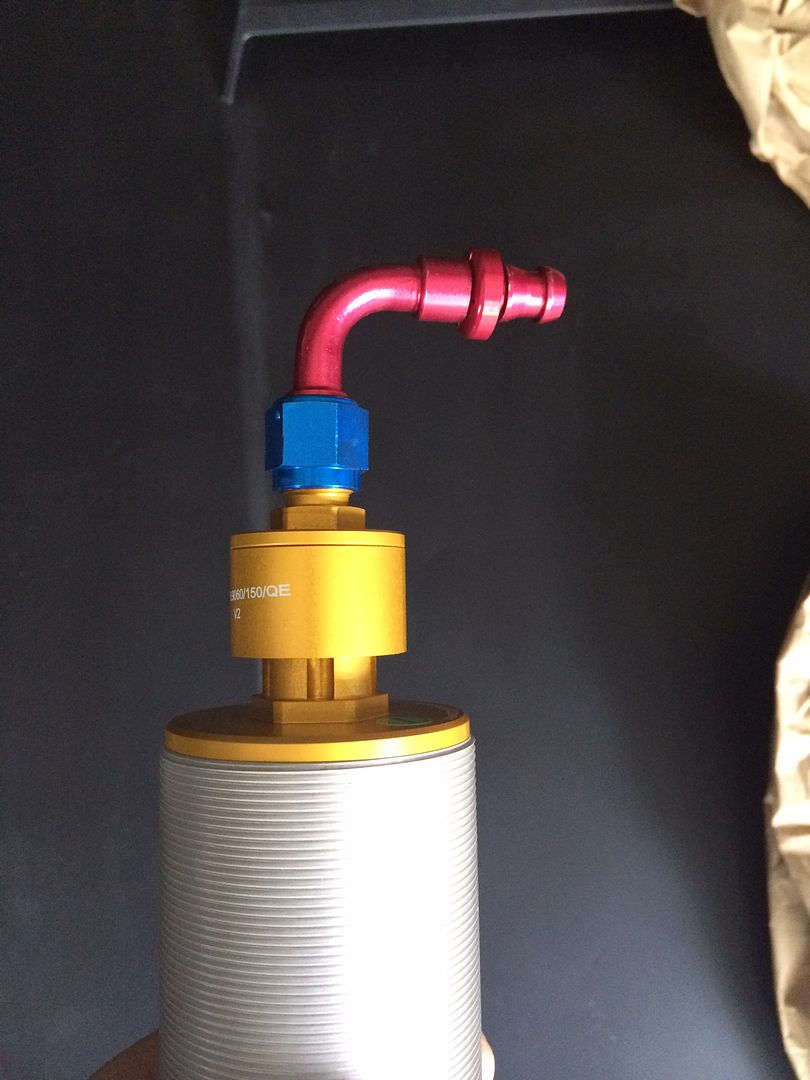
Amit
So last time we went out in the car, we found a problem with the clutch where if we kept our foot on the pedal, the clutch would slowly engage, even with the pedal pressed.
We started to dig and think we found the issue.

Exactly what you want to find the day before heading to Players show!
A quick scramble round london to find a new slave cylinder and we were back in the game

Next day, we set off nice an early for players. Weathers not looking great, but we think we will be fine.
Boy were we wrong. About 30 mins out, we are hit by an Epic thunder storm. In a car with only 1 wiper and no demister, this is a problem!
Visibility is down to about 2m. I am now following the tail lights of the car in front at 20mph! I am sure I was over taken by noahs ark at one point.

First thing on the agenda when we get back lol!
The other issue is the car if full of holes. In the floors, in the doors, in the perspex windows. The car is filling up with water fast!
Well we eventually make it to the players show, carrying about a ton of water. Paul looks happy because all his rollies are soaked.

luckily, the sun eventually comes out and it turns out to be a great show. We meet some great people, and the car seems to go down well.

Mean while back home, some more exciting parts turn up for car two, and we sign up some exciting sponsors. Watch this space
Who can guess what this is

Amit

With inters approaching this weekend we have been scrambling to get the car ready.
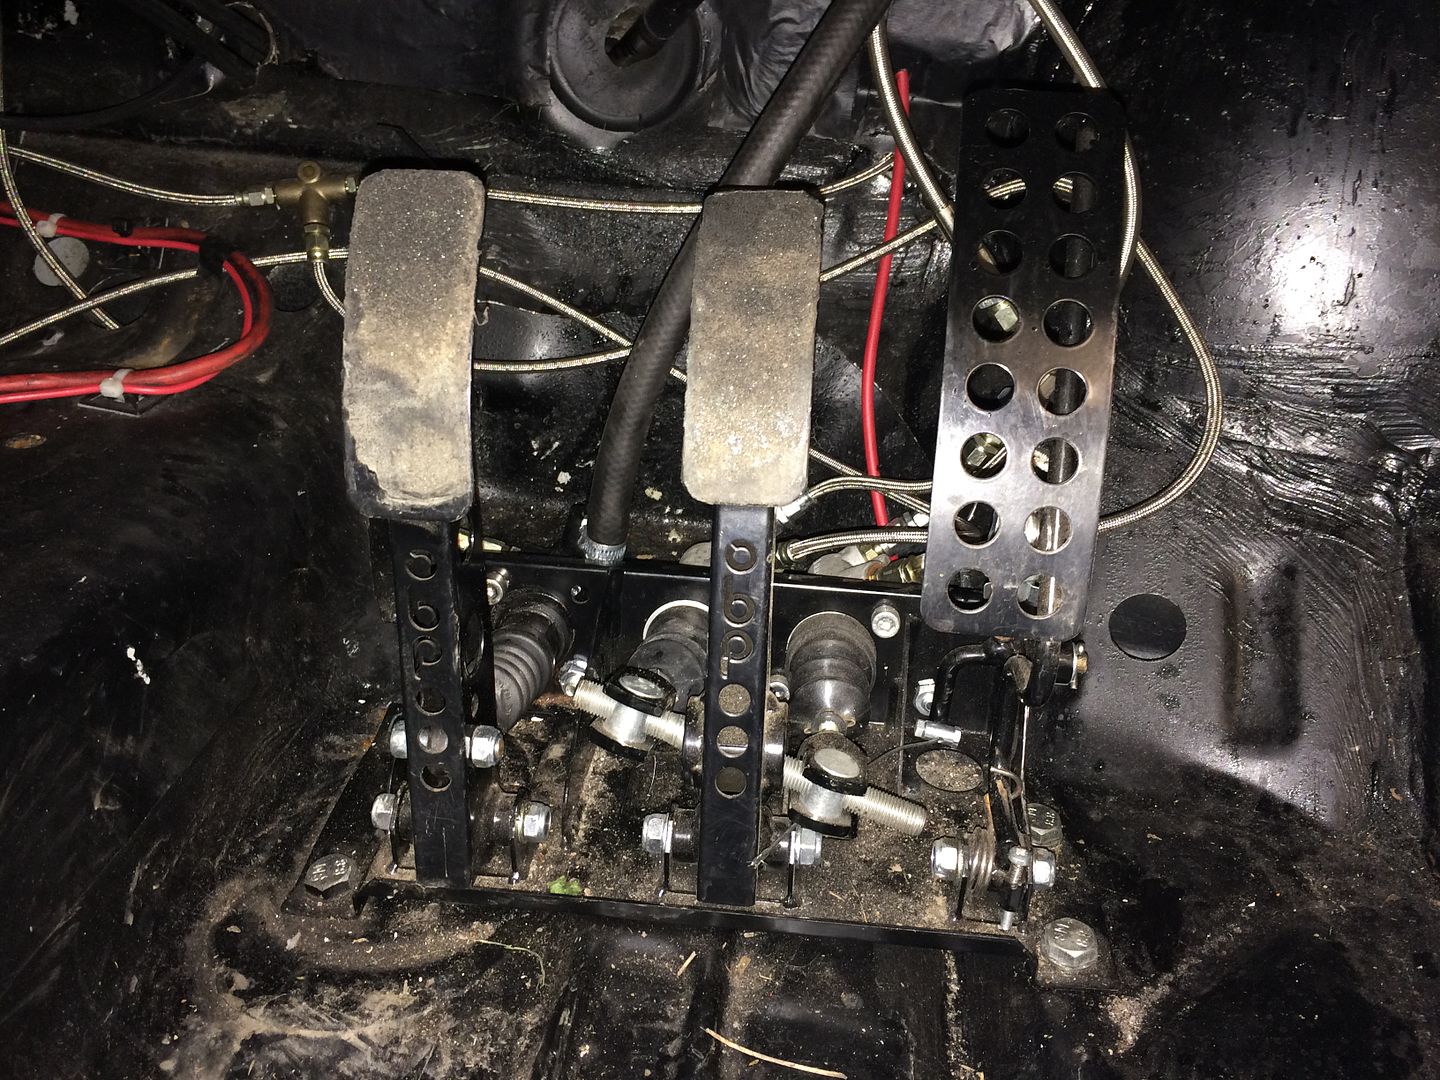
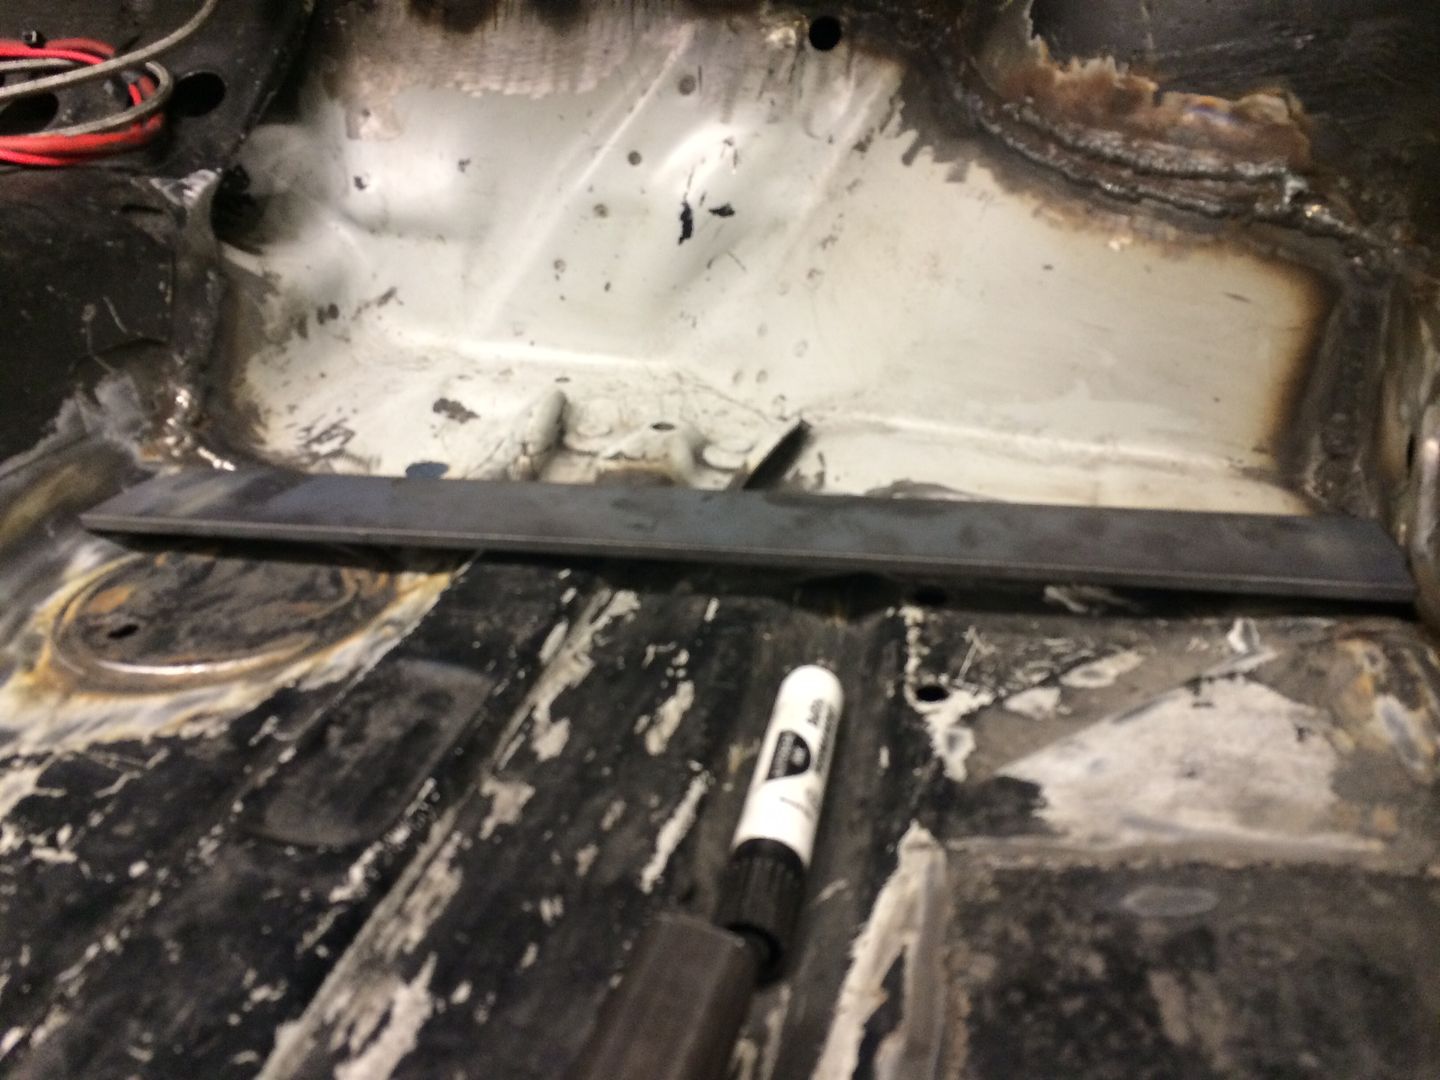
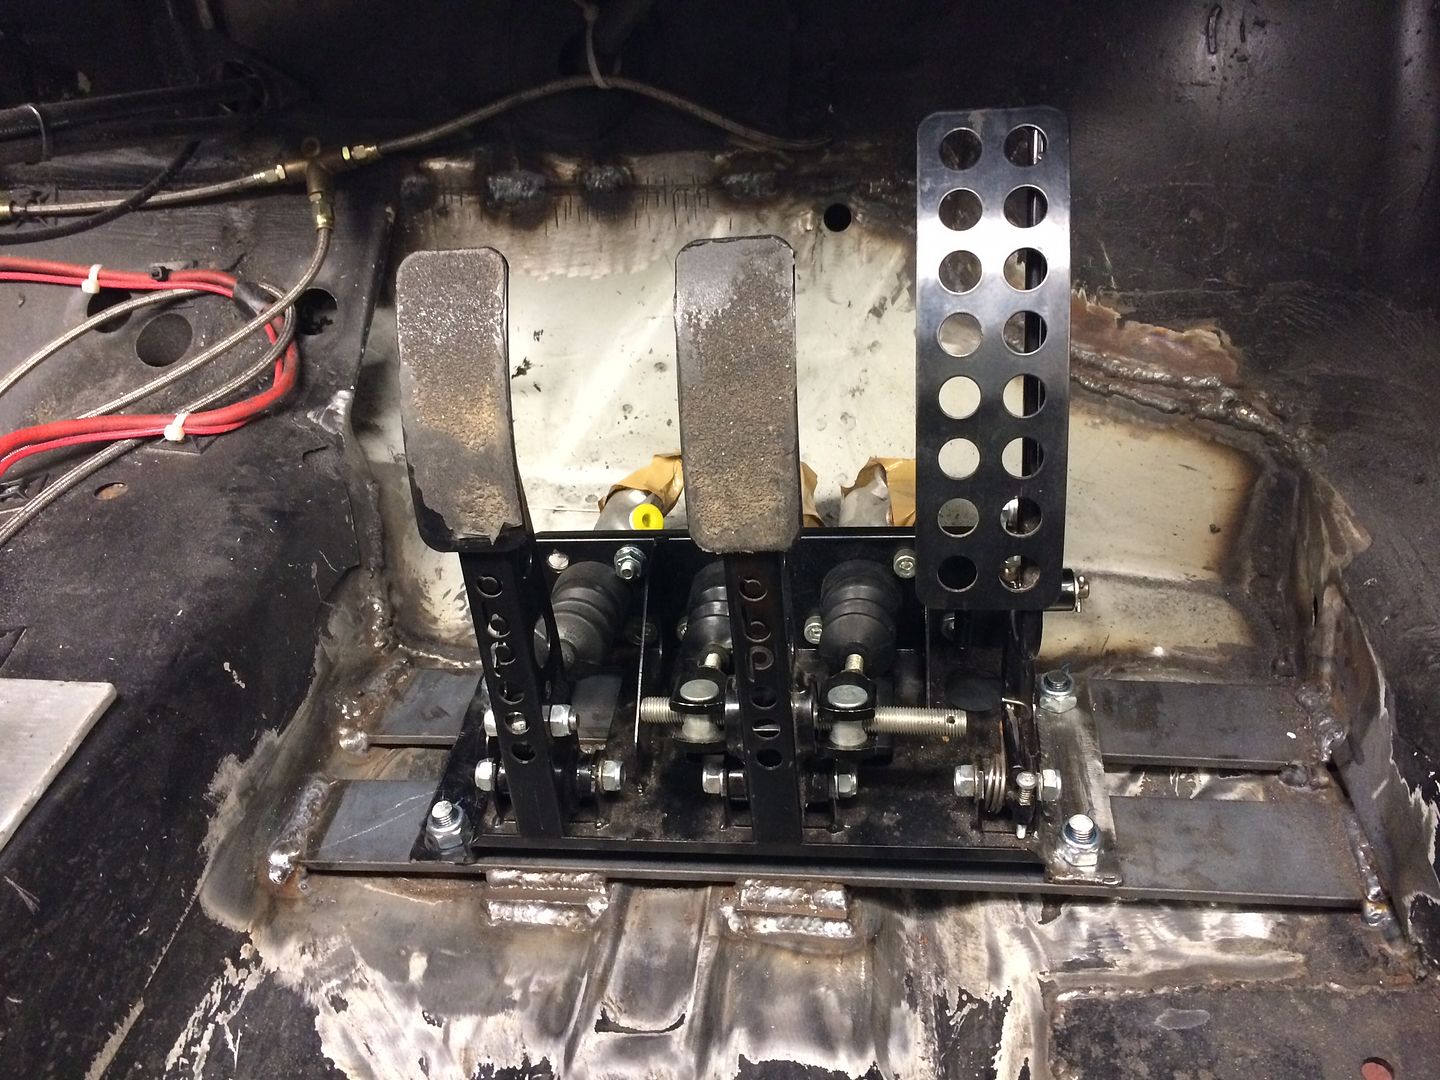
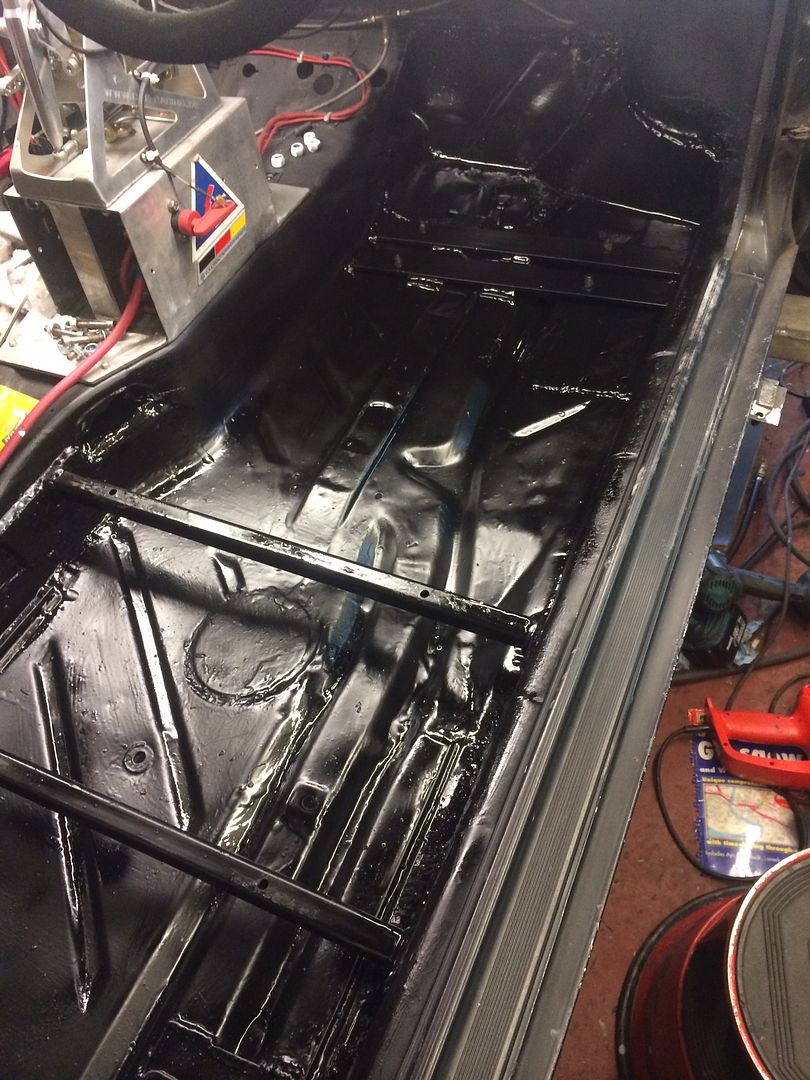
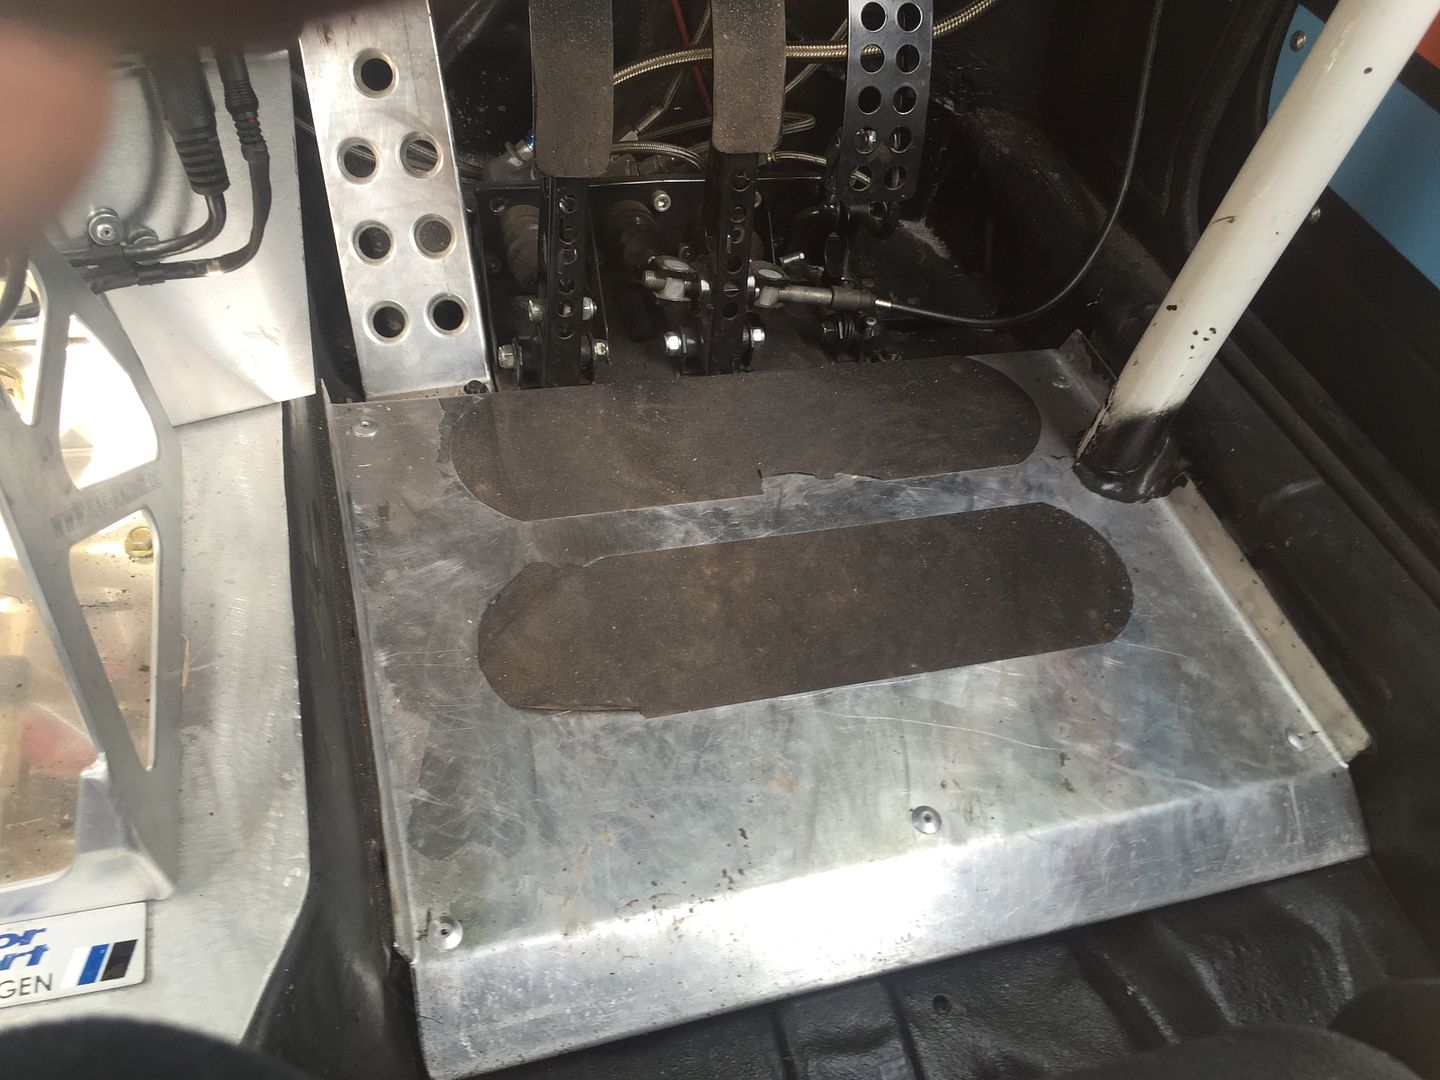
One thing we decided after the clutch incident was that we wanted to tidy up was that we needed to tidy up the pedal box area. It was functional, but not pretty. As you can see in the pic below, the hole cut in the foot plate was all ragged and the pedal box wasnt quite straight. Also, there was a lot of flex when stamping on the brakes.
So out it came.

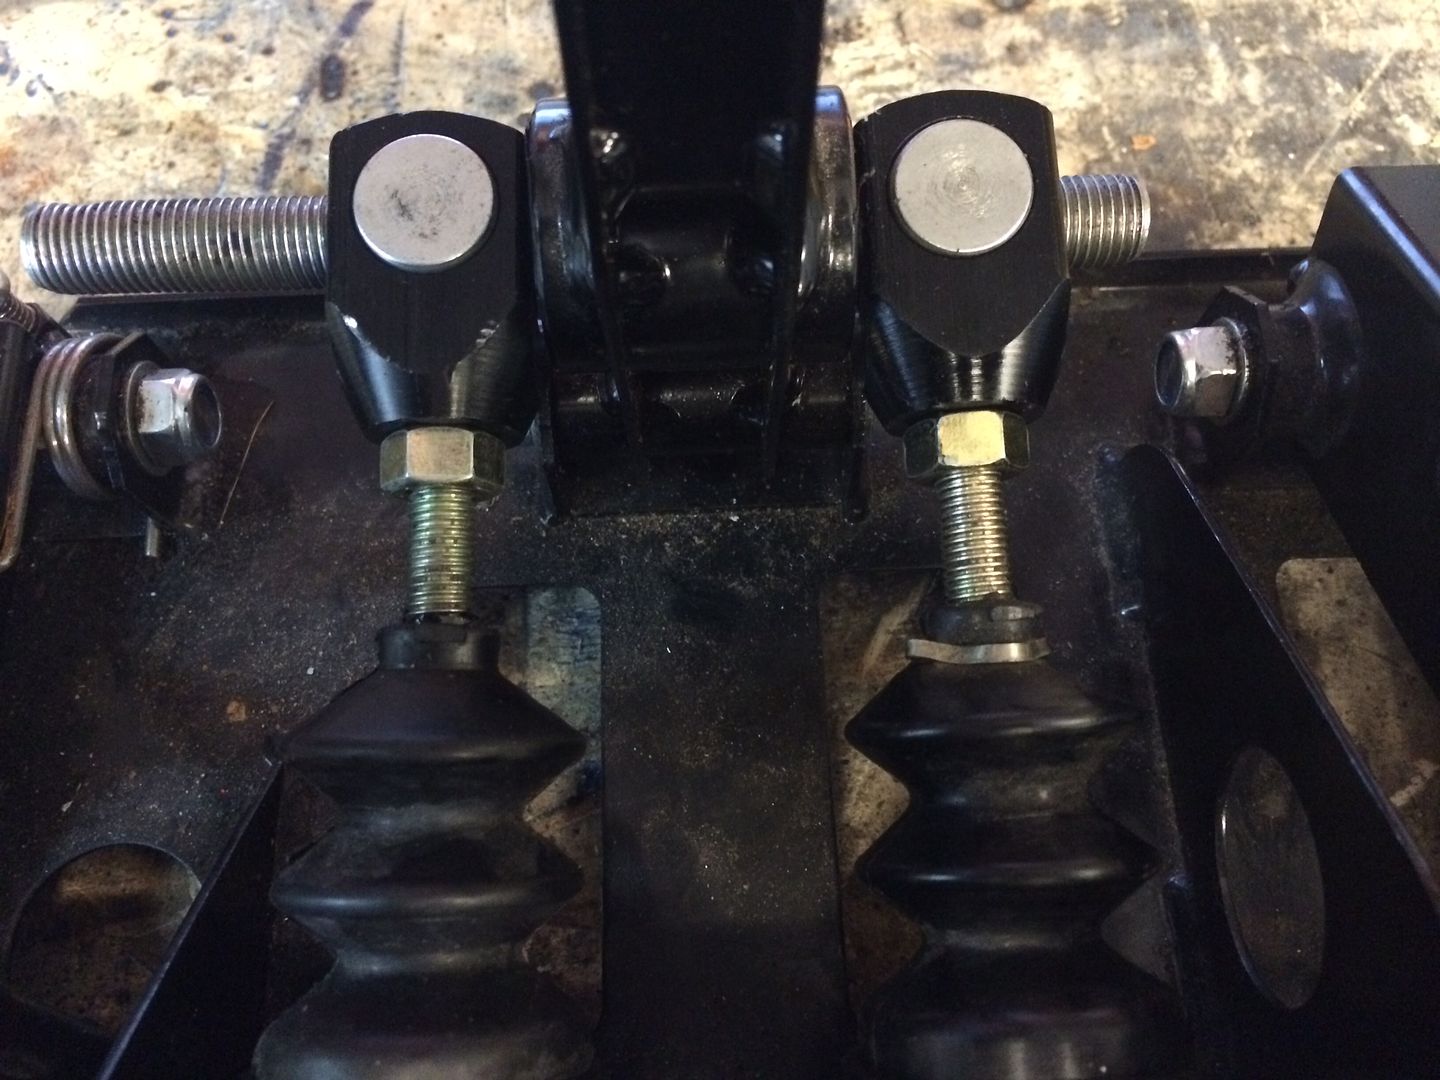
While it was on the bench, we properly adjusted the bias bar.
According to OBP, the clevis pins either side of the pedal, should be a max of 5mm from the pedal body for proper bias adjustment. Ours were around 15mm
Then the clean up started. We started cutting and cleaning
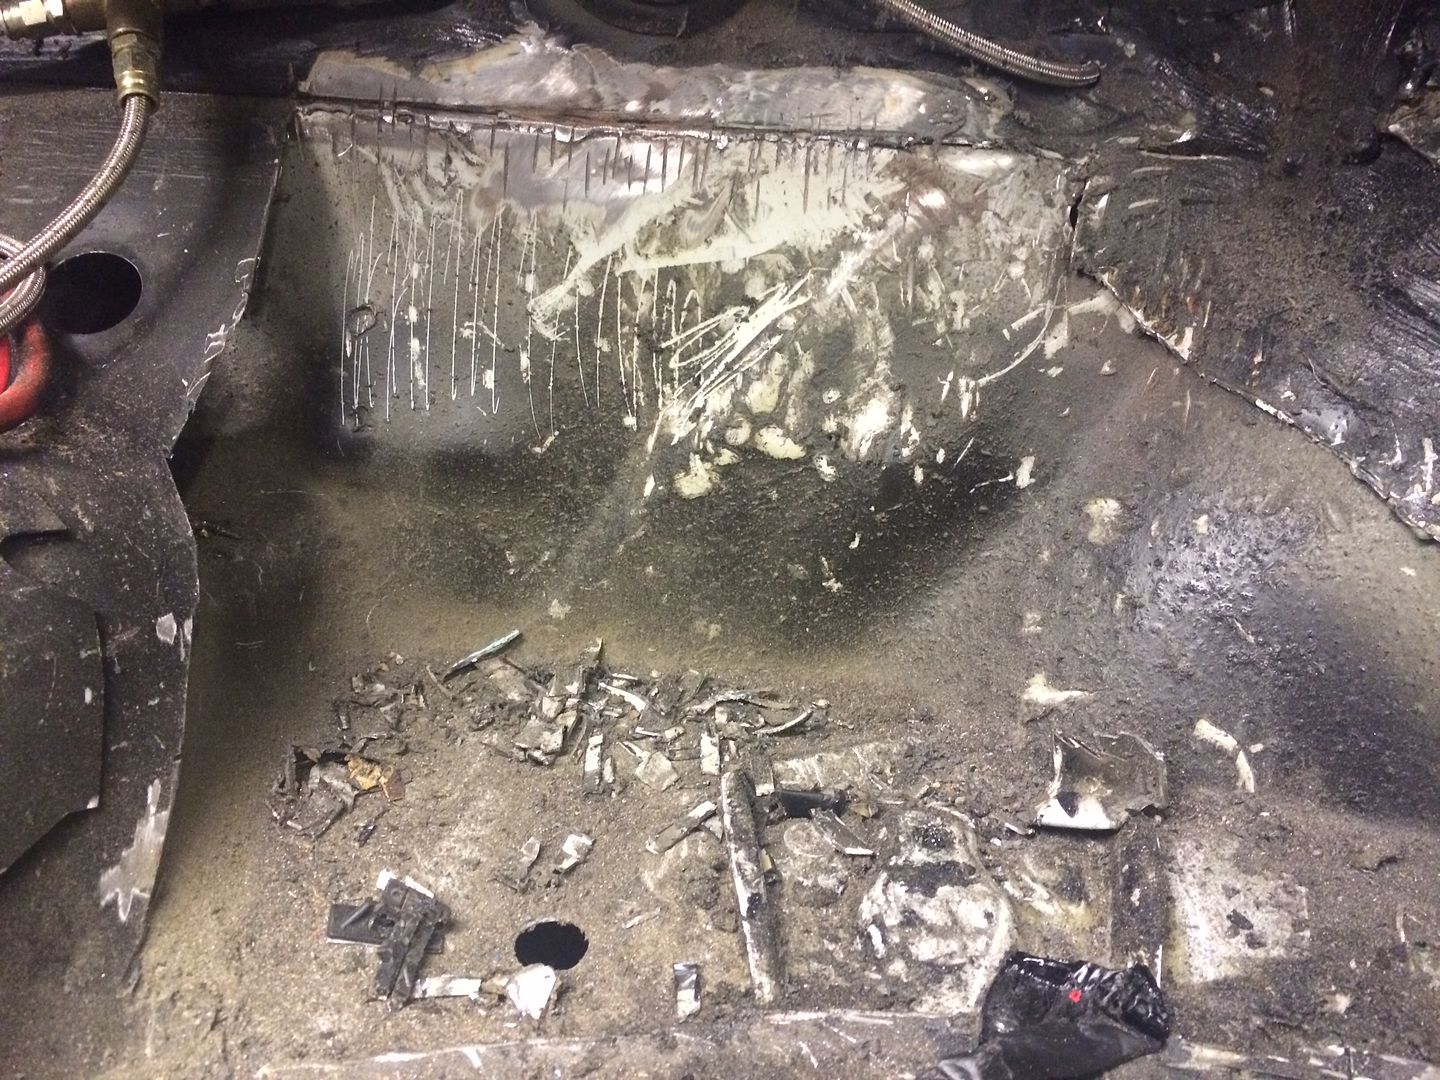
While we were in the foot well area, we decided to remove the old seat cross member and weld in some stronger seat mounts
All cleaned up and seem welded. Later one, I rounded the left hand edge of the cut out with a hammer and dolly to make it nice, but forgot to take a pic
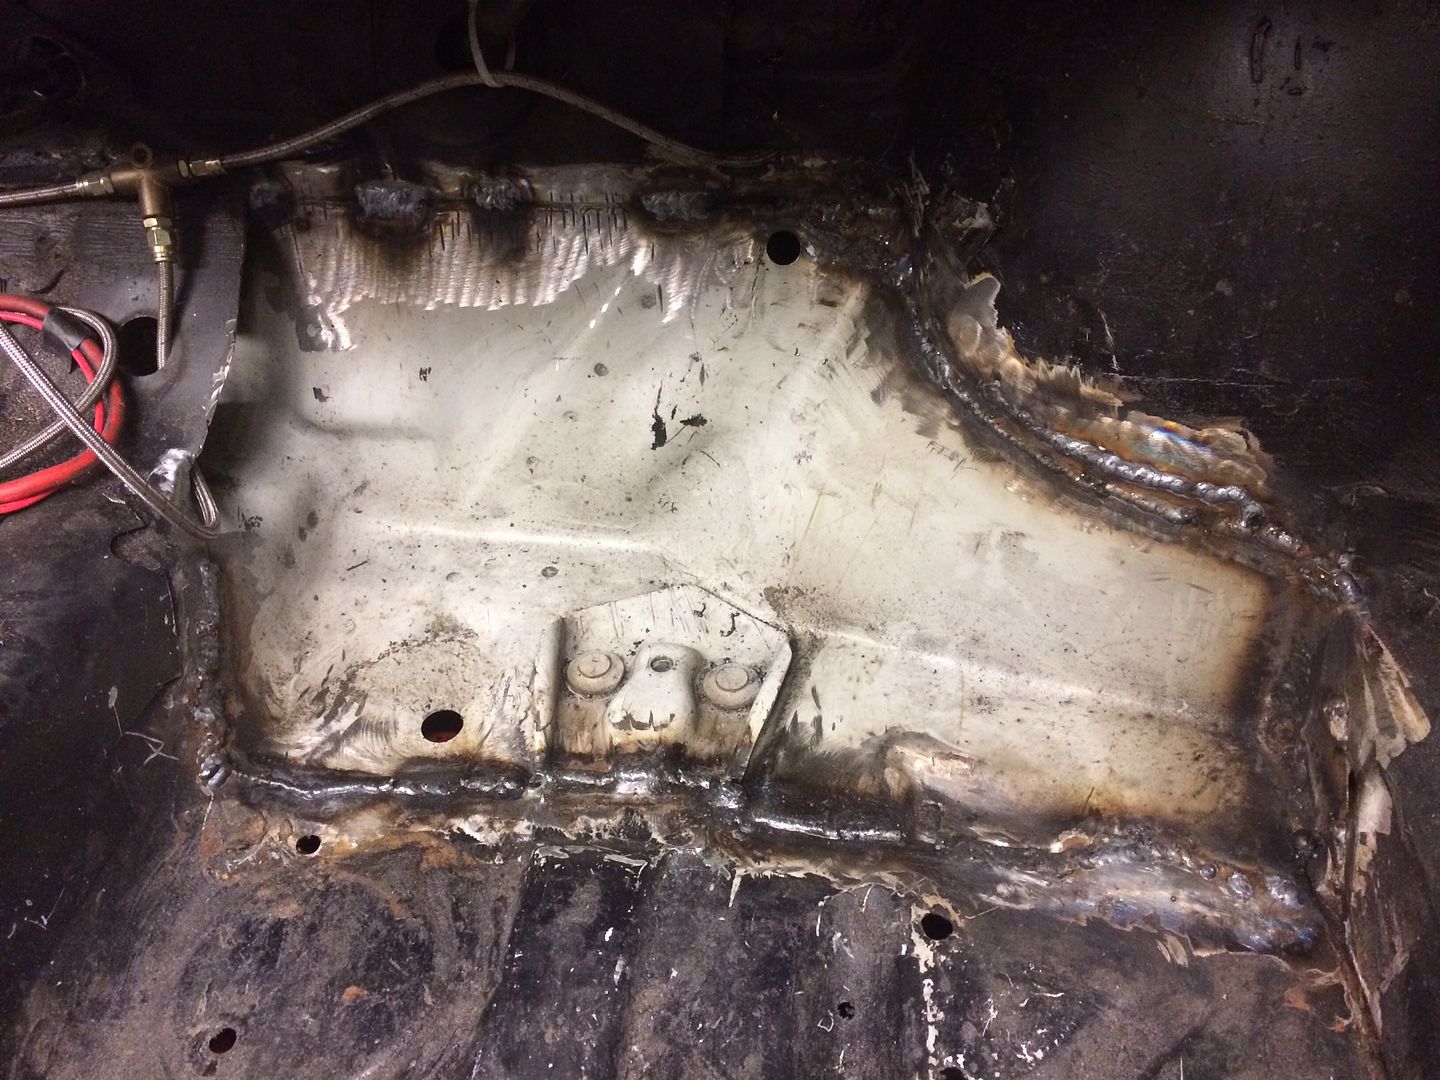
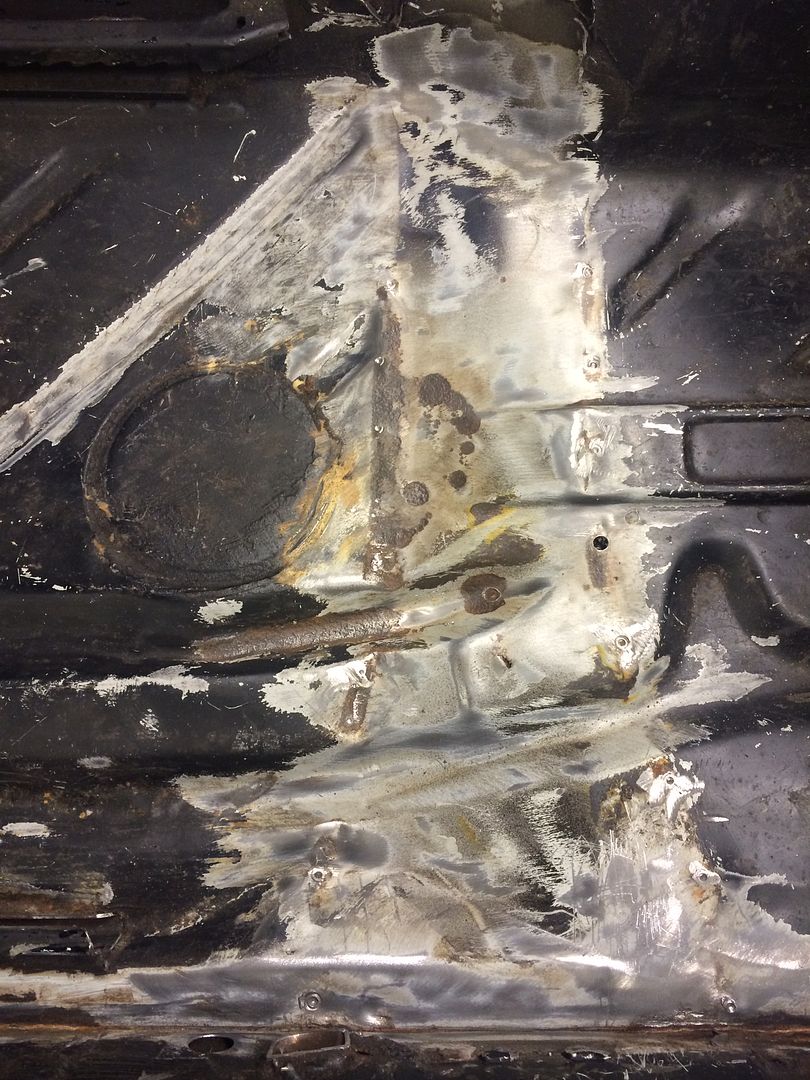
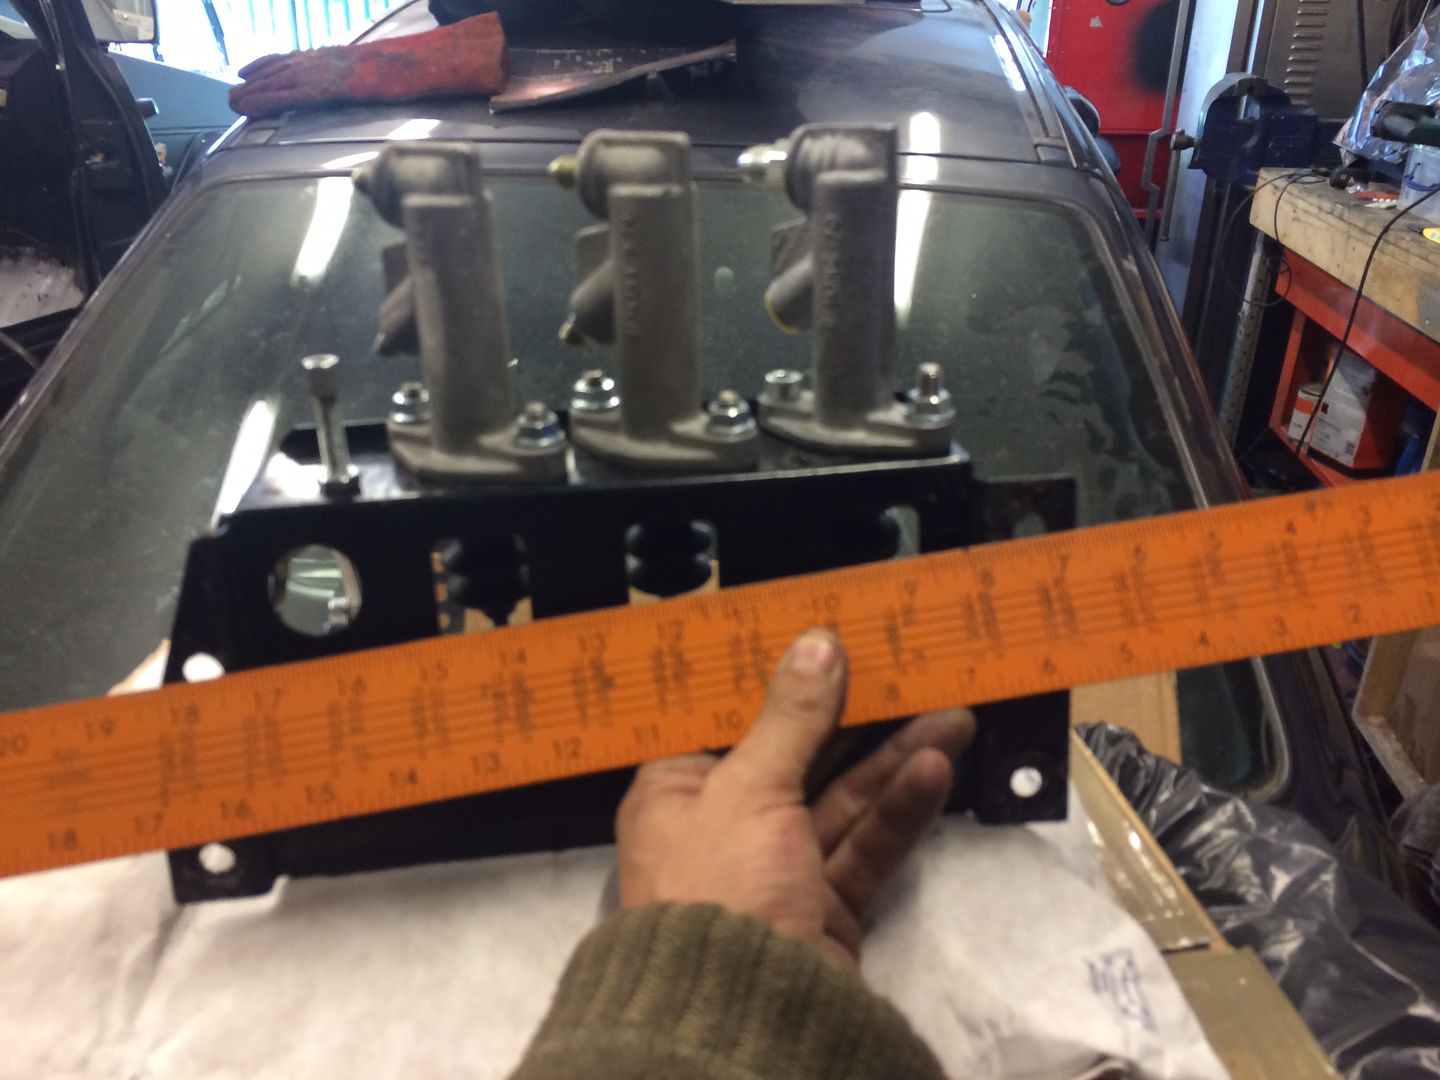
We decided rather bolt the pedal box to the flimsy floor, we should beef up the mount area with some flat bar
but problem. The OBP pedal box is designed to bolt into a mk1 with minimal fab, so the holes are skewed, and we wanted to put the bracing down straight
So we welded a corner on, and a bit of plate above and re positioned the mounting hole
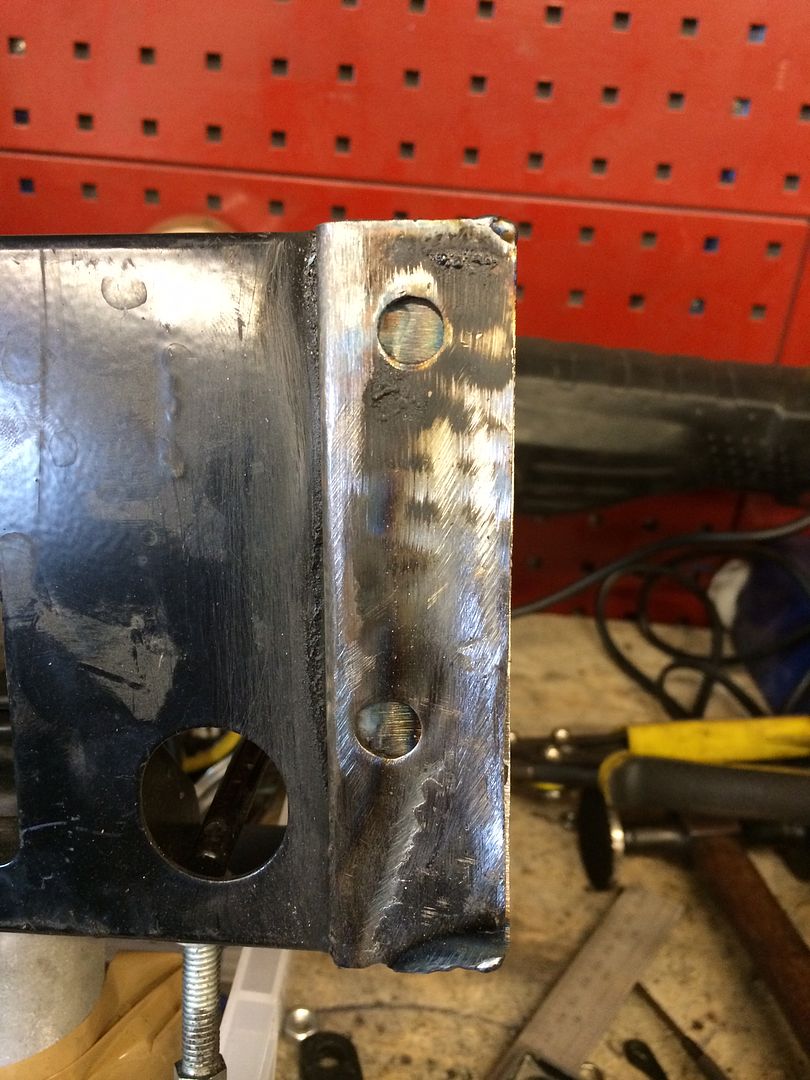
This should be a lot more solid
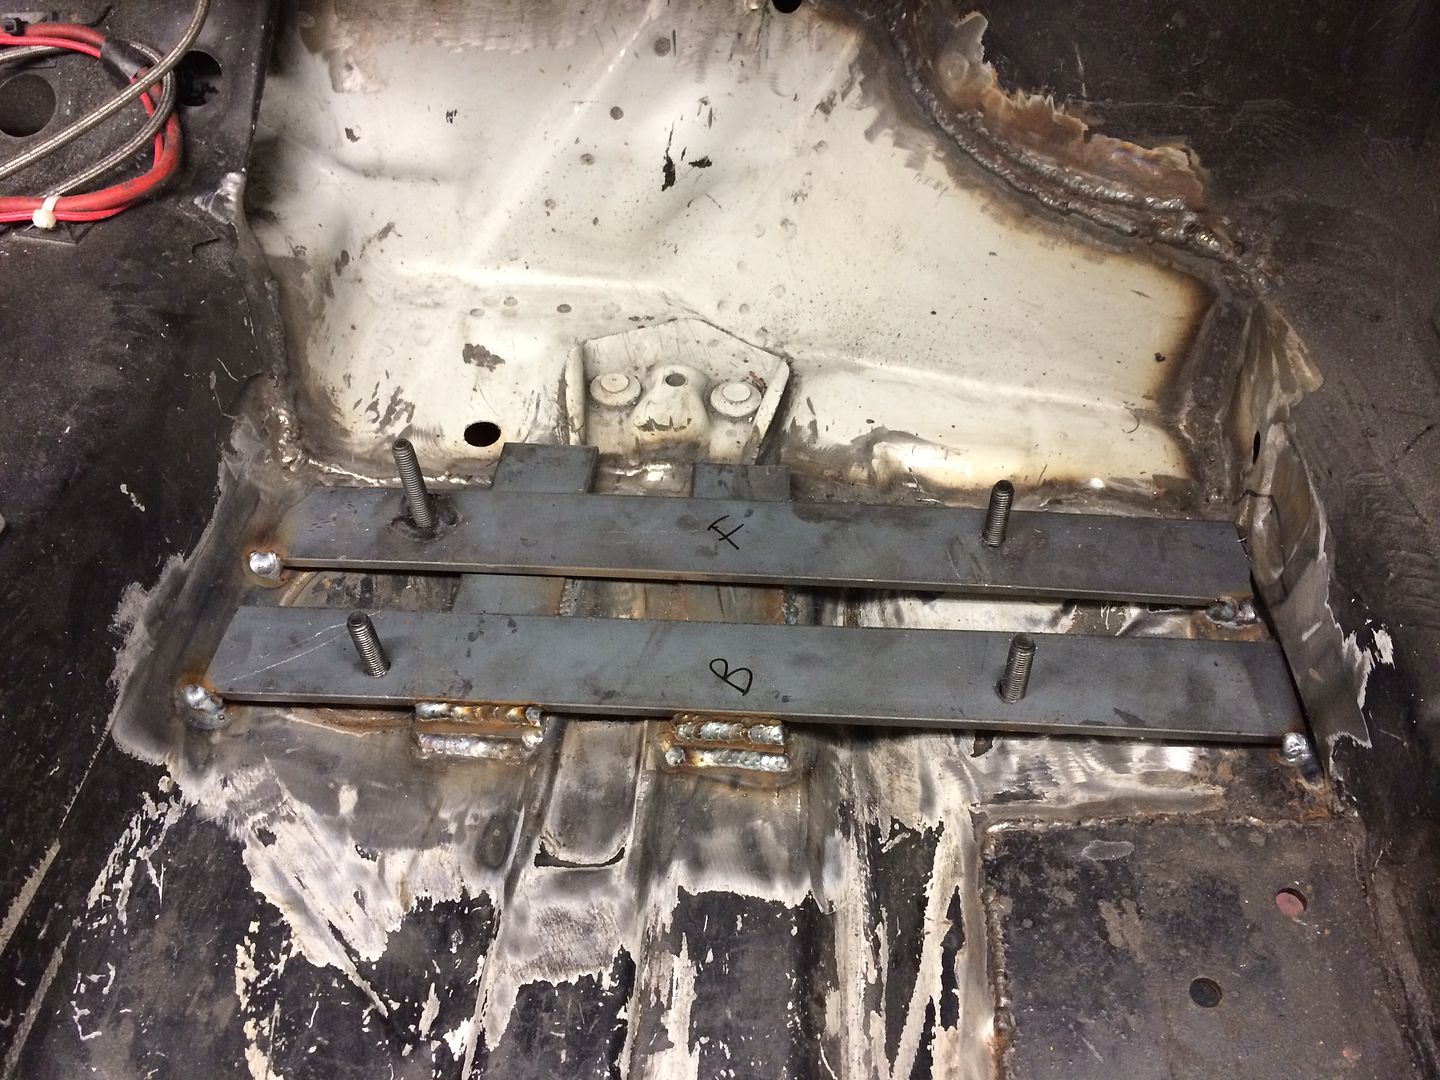
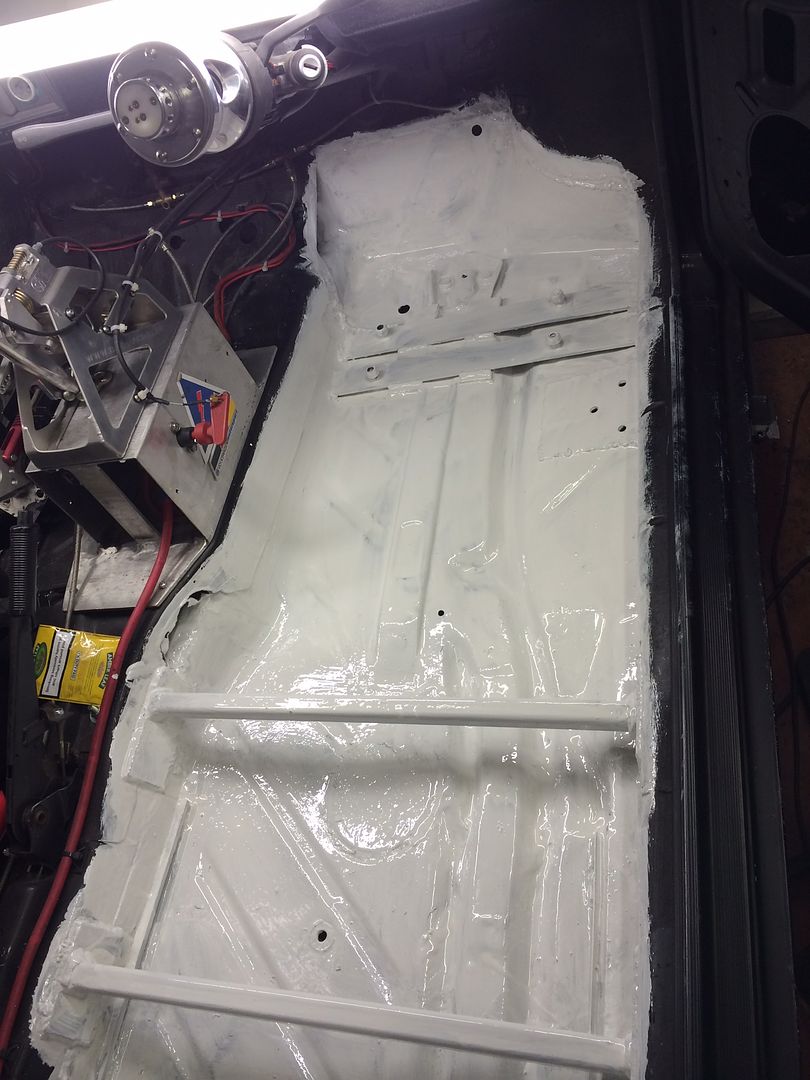
Next it was time to sort out the seat rails. We welded some pate to the sills to strengthen them and then added some nice thick walled box
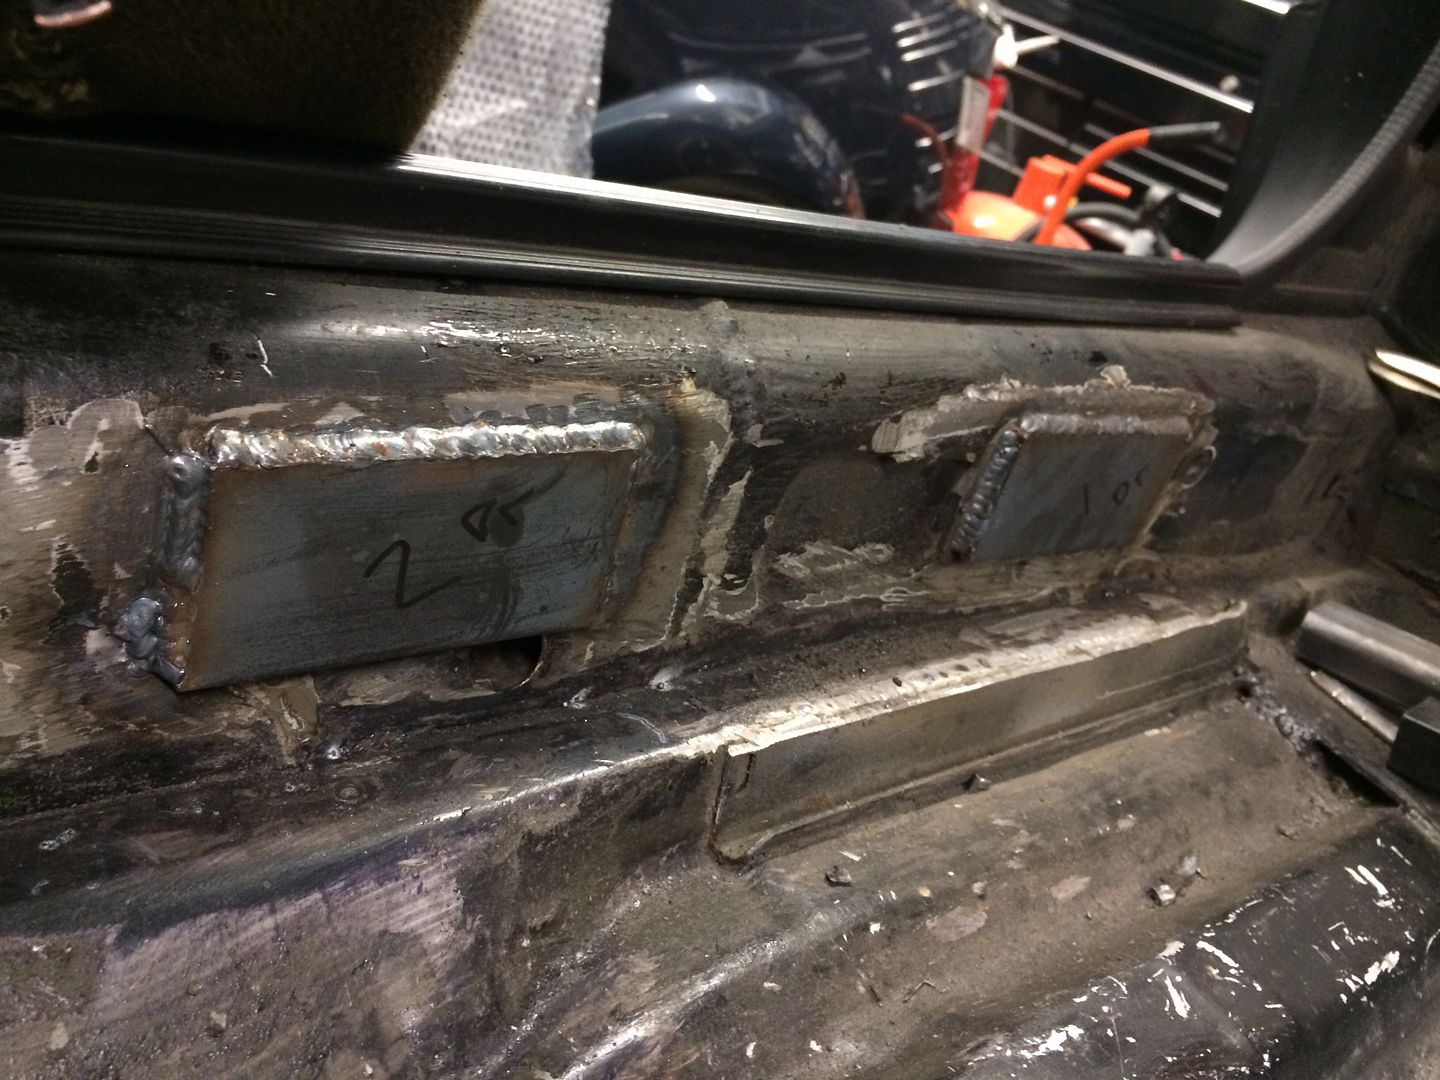

followed by a quick coat of epoxy and then some matt black
The pedals were then plumbed back in with nice looped pig tails. mmm much neater
We also fitted the bias adjuster onto the dash which wasnt previously fitted
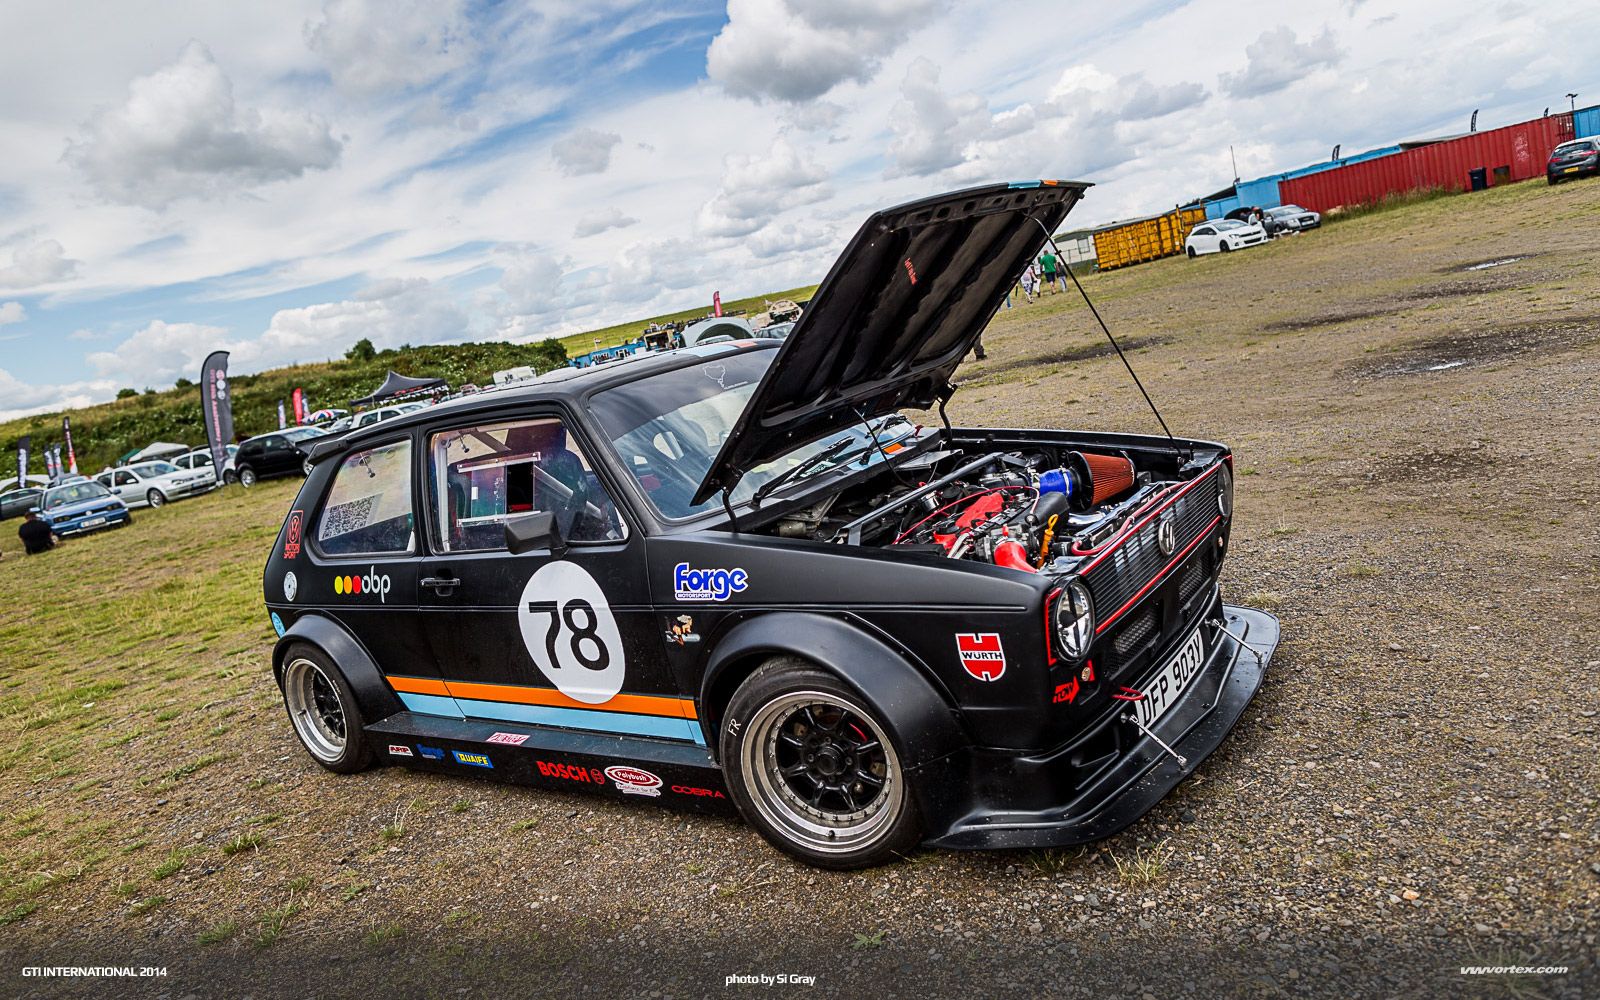
With the functional side sorted, it was time to turn our attention to the cosmetics. We decided it was time to change the livery and repair some of the damage on around the body.
more on that post inters
Will be interesting to see if anyone spots the car with the new livery
One thing we decided after the clutch incident was that we wanted to tidy up was that we needed to tidy up the pedal box area. It was functional, but not pretty. As you can see in the pic below, the hole cut in the foot plate was all ragged and the pedal box wasnt quite straight. Also, there was a lot of flex when stamping on the brakes.

So out it came.

While it was on the bench, we properly adjusted the bias bar.
According to OBP, the clevis pins either side of the pedal, should be a max of 5mm from the pedal body for proper bias adjustment. Ours were around 15mm
Then the clean up started. We started cutting and cleaning

While we were in the foot well area, we decided to remove the old seat cross member and weld in some stronger seat mounts

All cleaned up and seem welded. Later one, I rounded the left hand edge of the cut out with a hammer and dolly to make it nice, but forgot to take a pic

We decided rather bolt the pedal box to the flimsy floor, we should beef up the mount area with some flat bar

but problem. The OBP pedal box is designed to bolt into a mk1 with minimal fab, so the holes are skewed, and we wanted to put the bracing down straight

So we welded a corner on, and a bit of plate above and re positioned the mounting hole

This should be a lot more solid


Next it was time to sort out the seat rails. We welded some pate to the sills to strengthen them and then added some nice thick walled box


followed by a quick coat of epoxy and then some matt black


The pedals were then plumbed back in with nice looped pig tails. mmm much neater


We also fitted the bias adjuster onto the dash which wasnt previously fitted

With the functional side sorted, it was time to turn our attention to the cosmetics. We decided it was time to change the livery and repair some of the damage on around the body.
more on that post inters
Will be interesting to see if anyone spots the car with the new livery
So the story continues.
With GTi International fast approaching it was time to focus on the cosmetics.
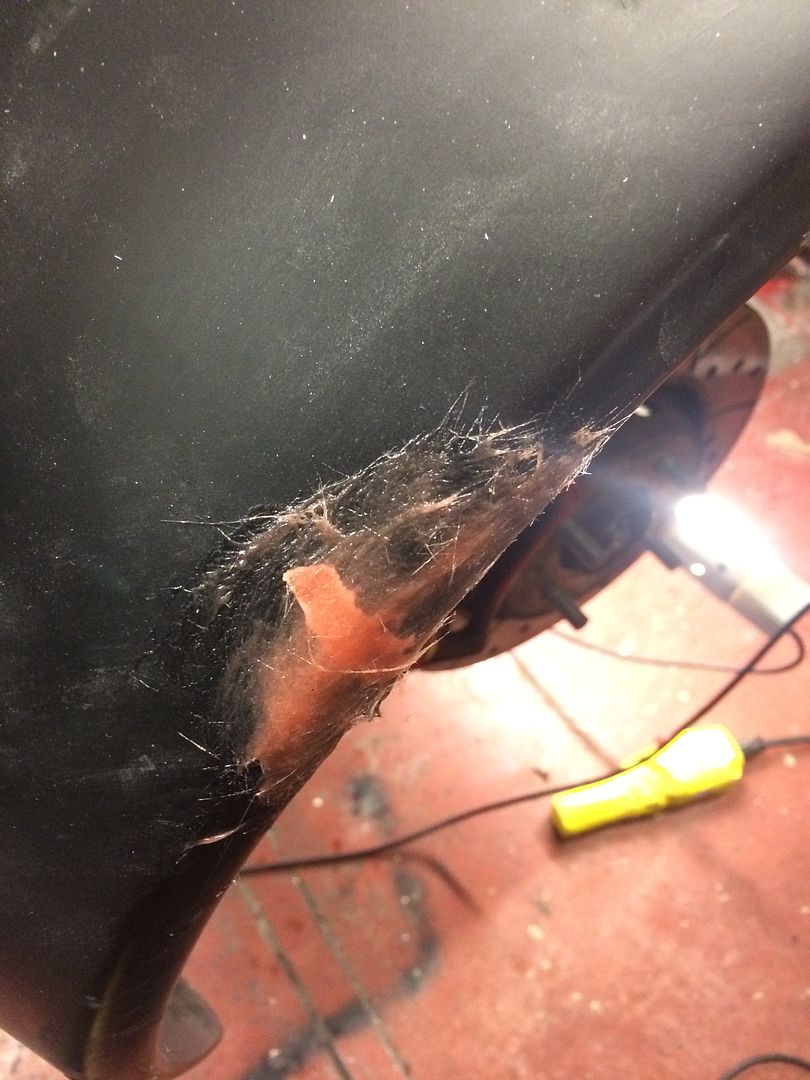
First up was body repair. Being a track car, there were lots of small areas of localised damage.
There was a small crack on one of the wheel arches
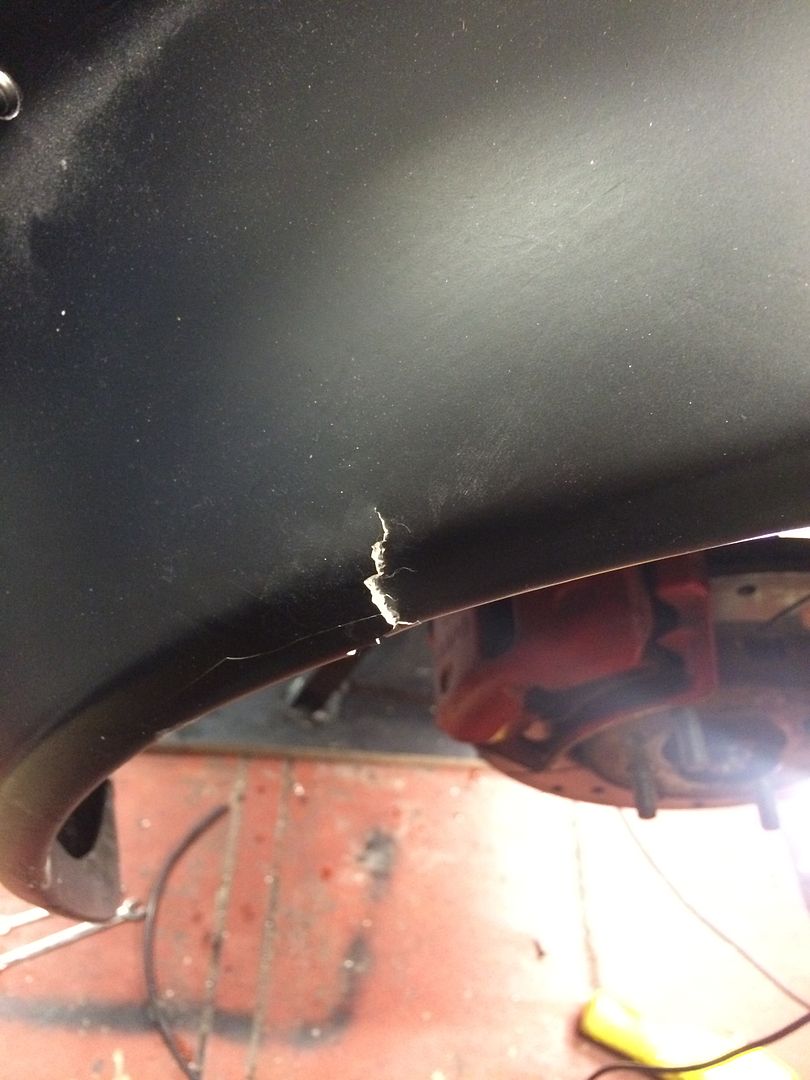
to repair, I drilled a small 3mm hole at the very tip of the crack. This stops the crack growing under stress, I also V'd out the crack from both sides using a dremel, then used some mole grips to re align the fiber glass and hold it in place.
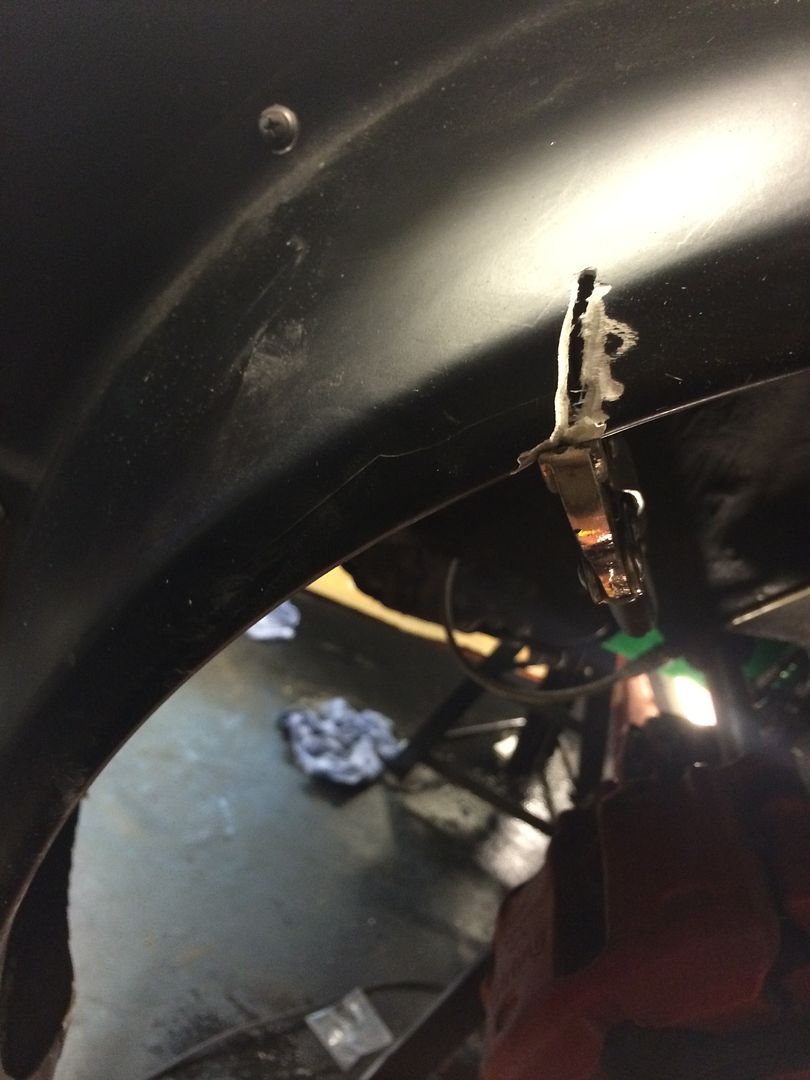
I then mixed up some P40 filler and applied it to both sides of the crack. Once set, I removed the mole grips and did the same to the area previously covered. At this point, I am about 20 mins into the repair. Nice and quick
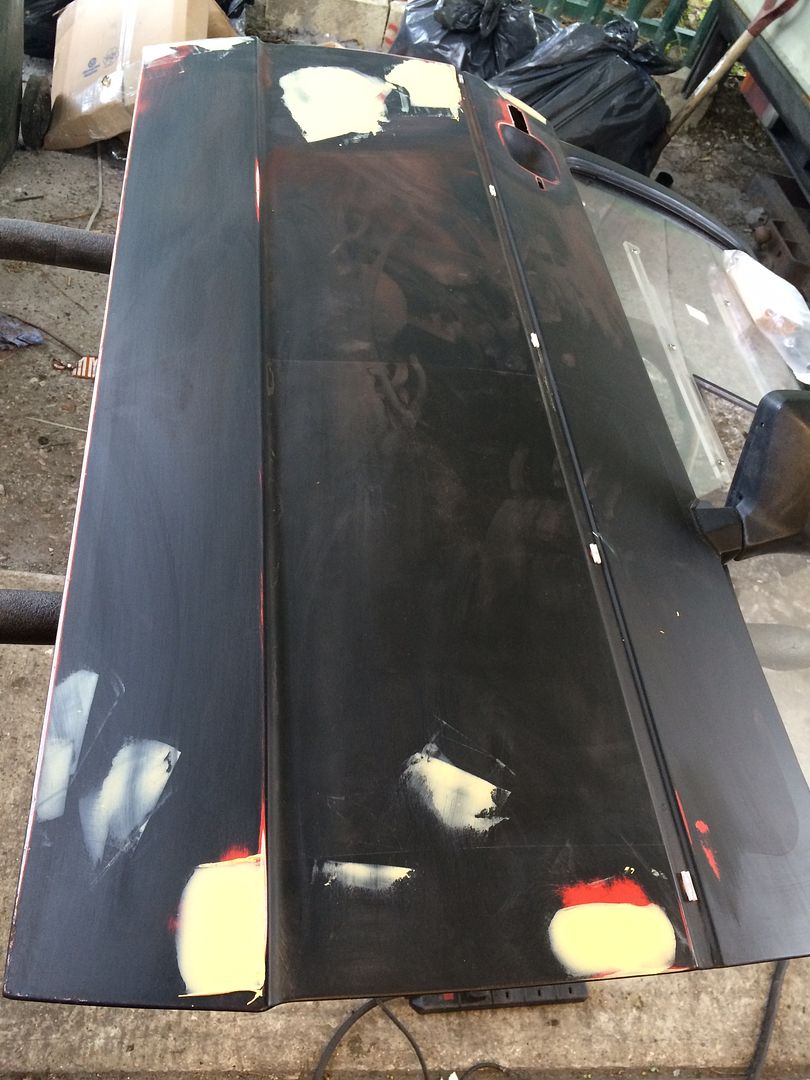
After its dry, its your basic prep for paint, sand, skim of filler, a squirt of primer, then paint and you are left with this
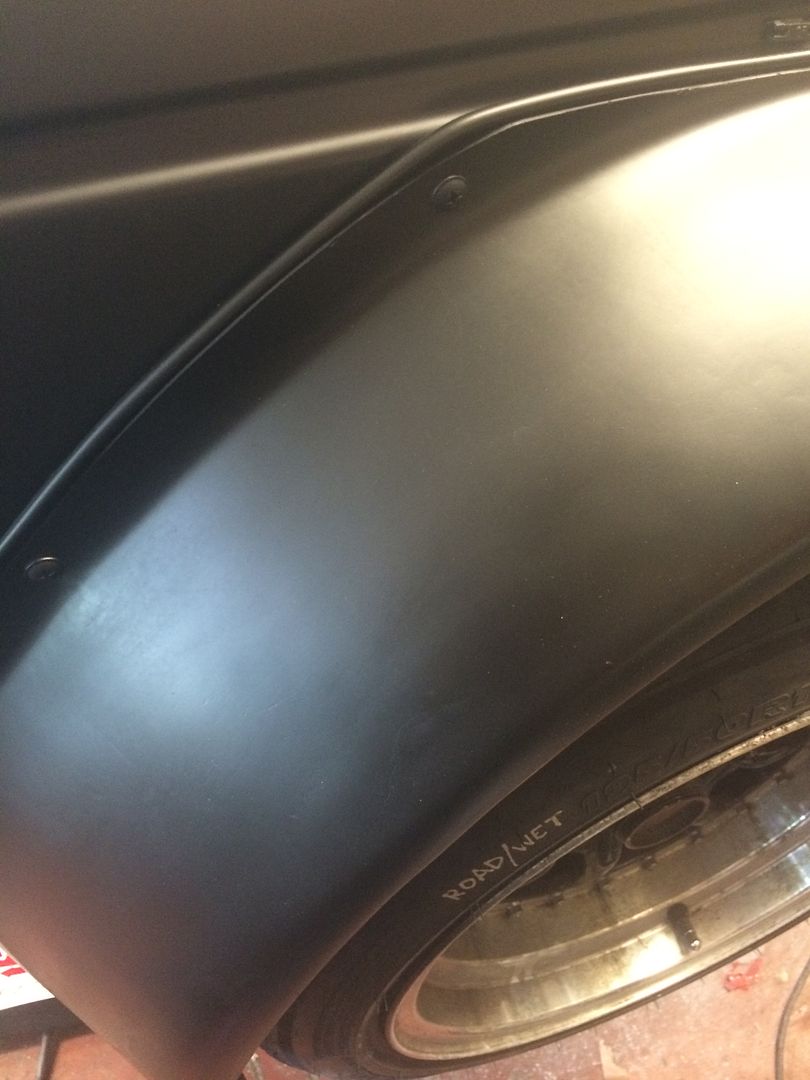
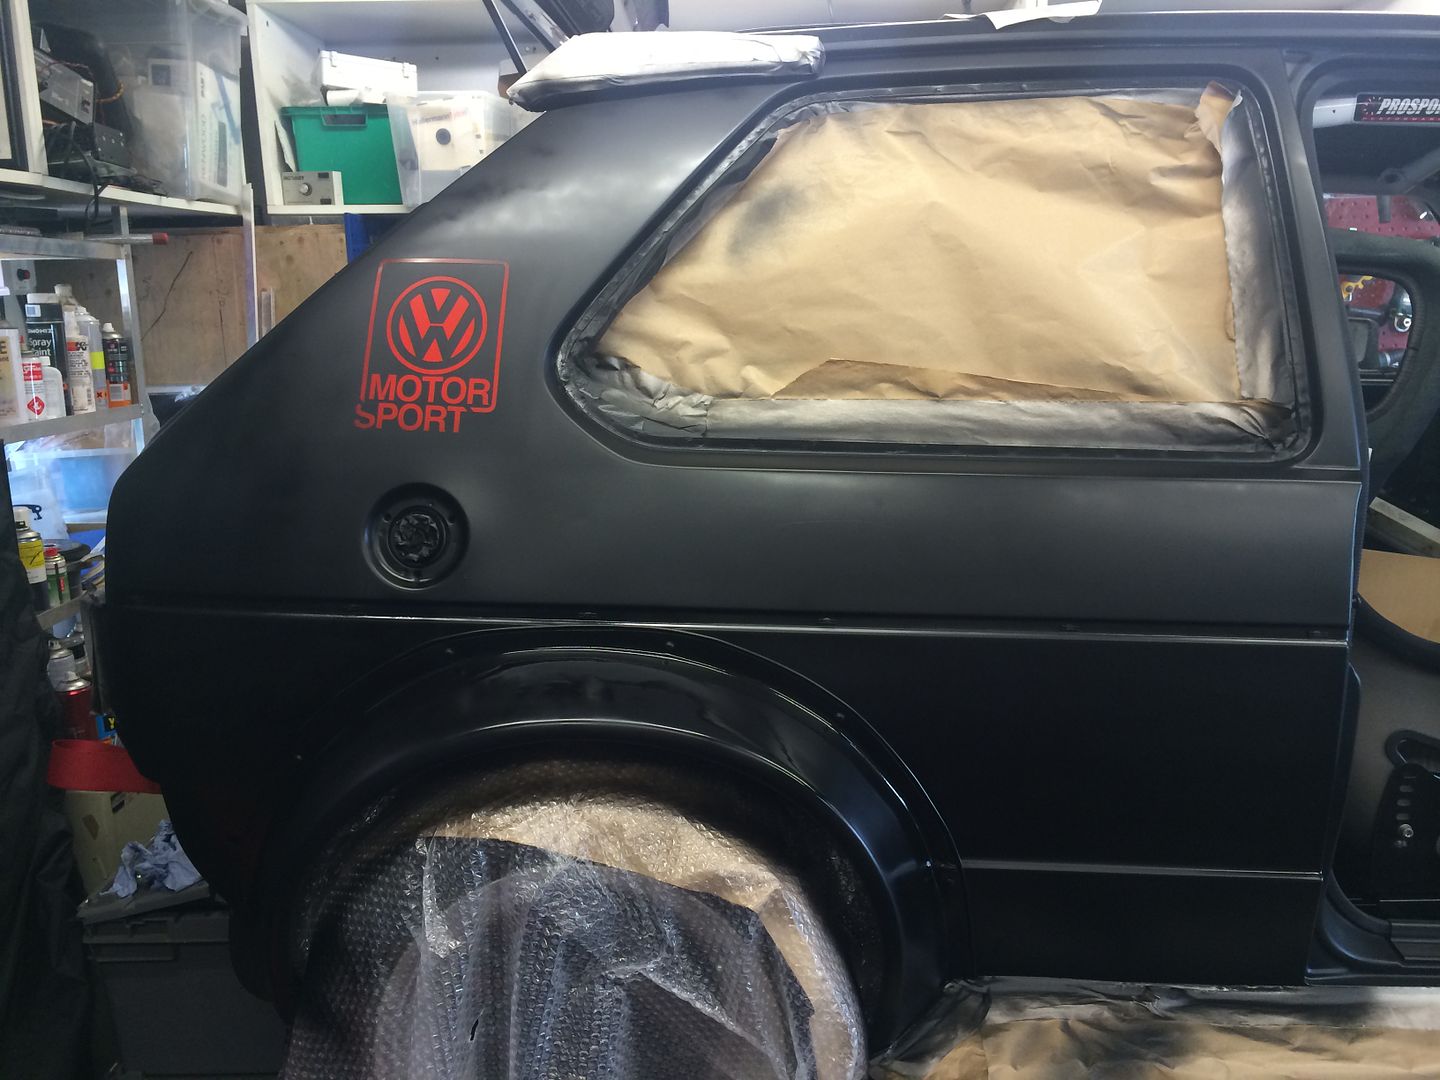
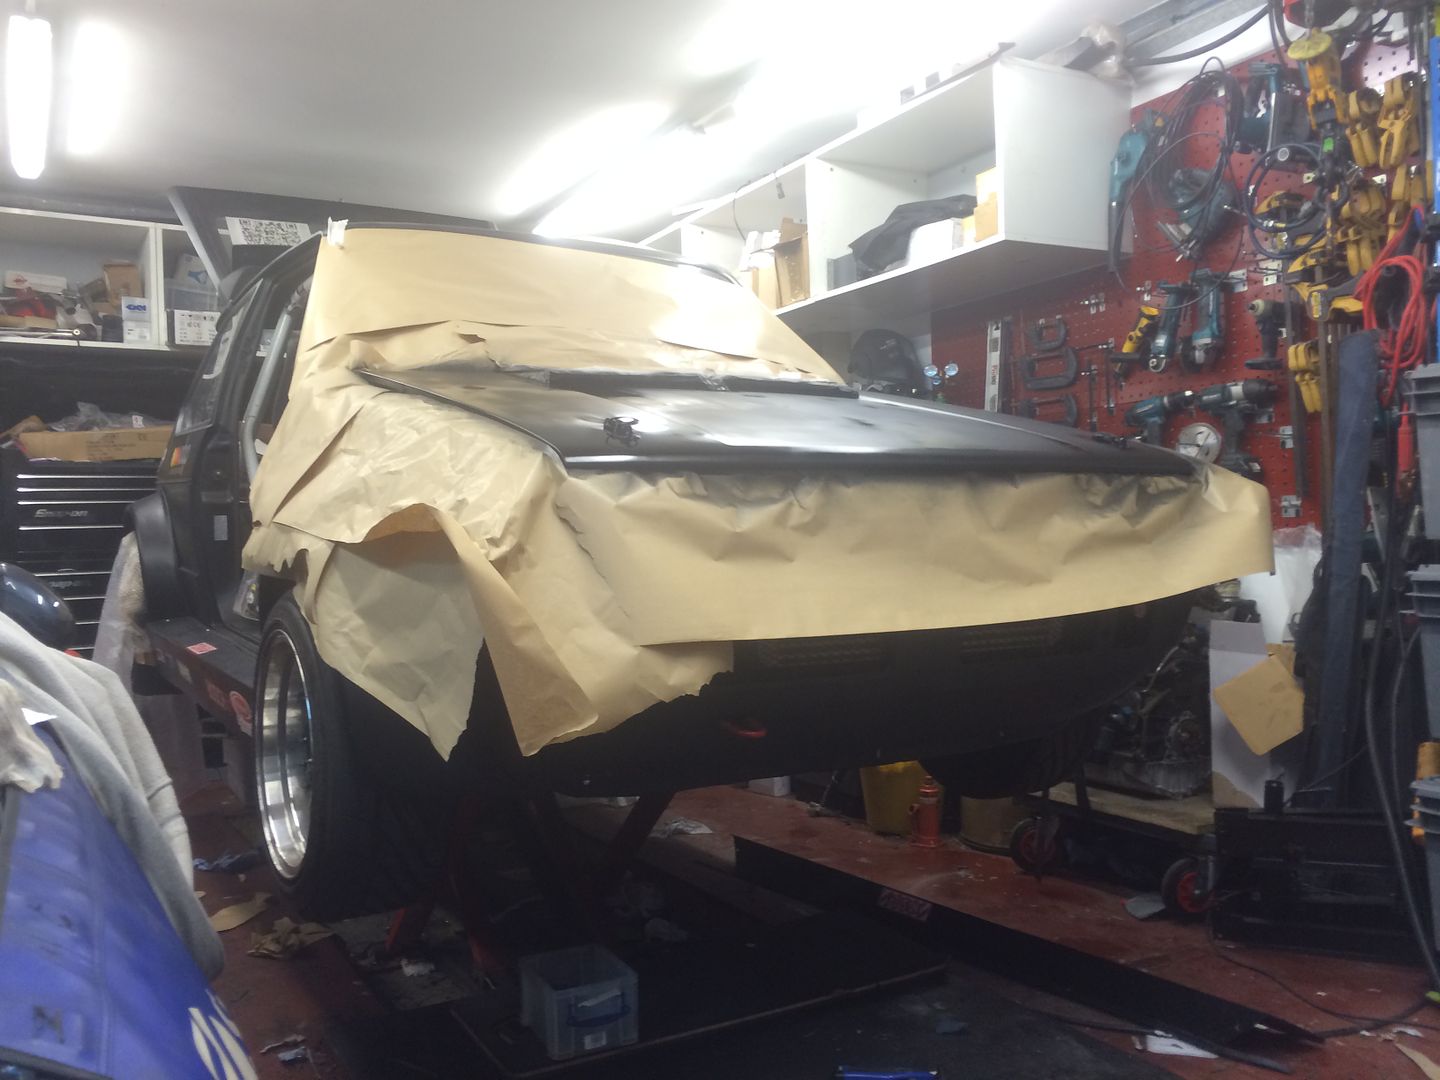
While the paint was out, we decided to give the car a gorilla paint job. We gave the rear quarter a going over to covers some scratches, and also the drivers door and bonnet.
The beauty of matt black paint is, you dont need to struggle with blending and lacquering. Just feather into the old paint and let it dry for an invisible finish
Next up, we needed to tackle air con as it gets damn hot in the car on sunny days.
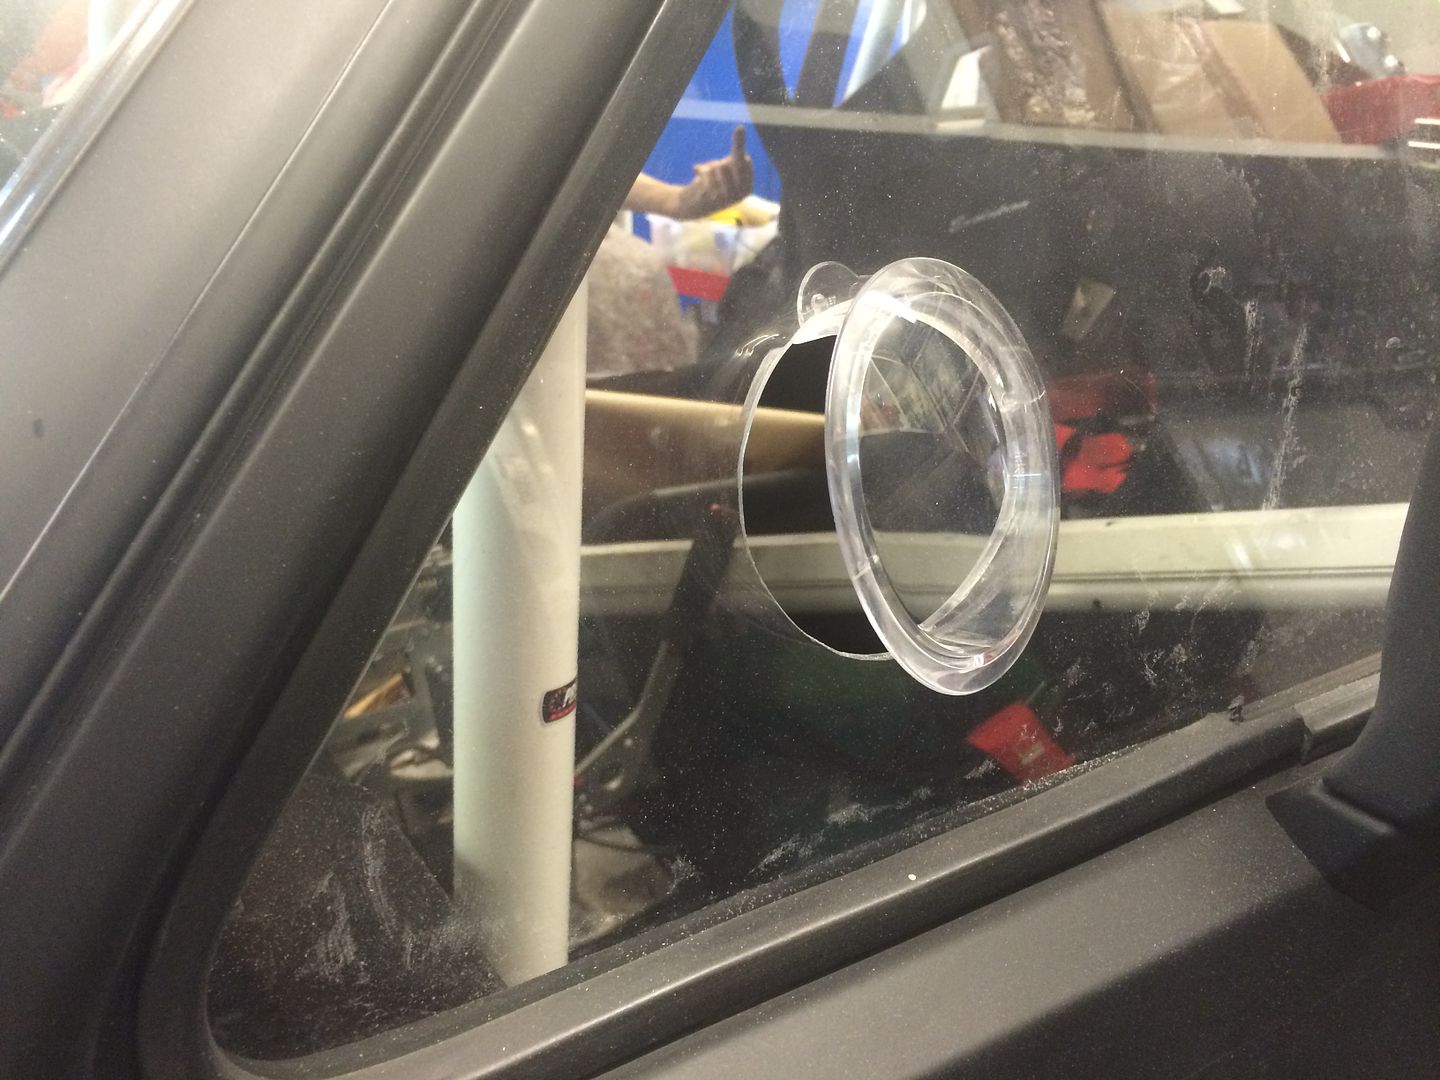
we drilled out the perspex windows
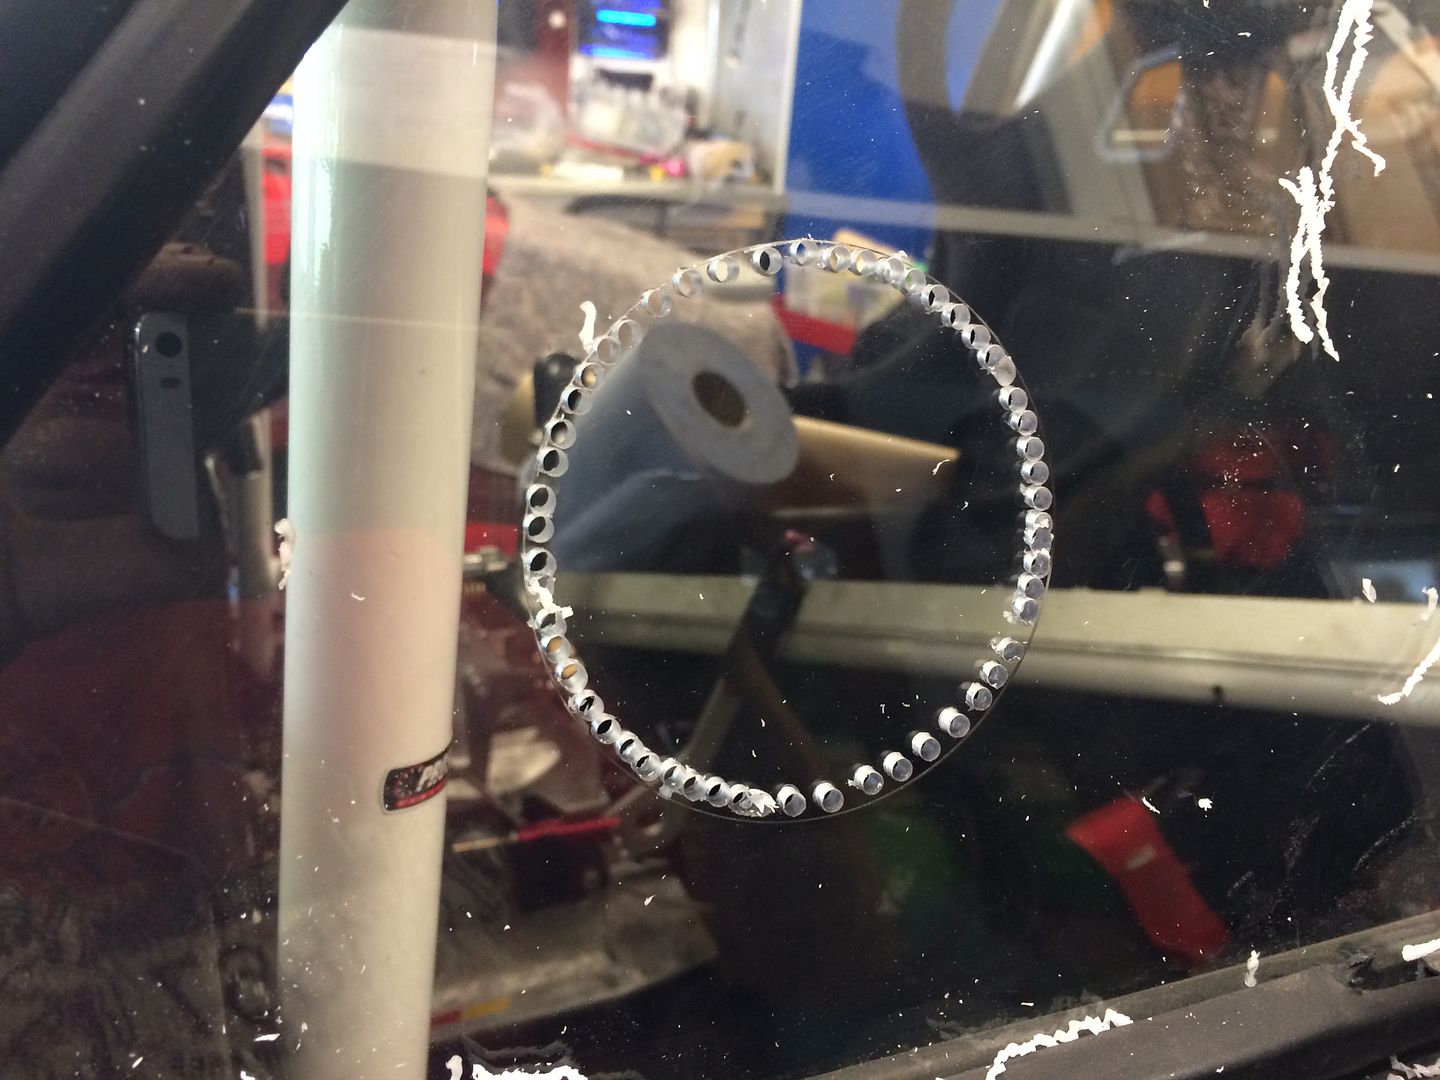
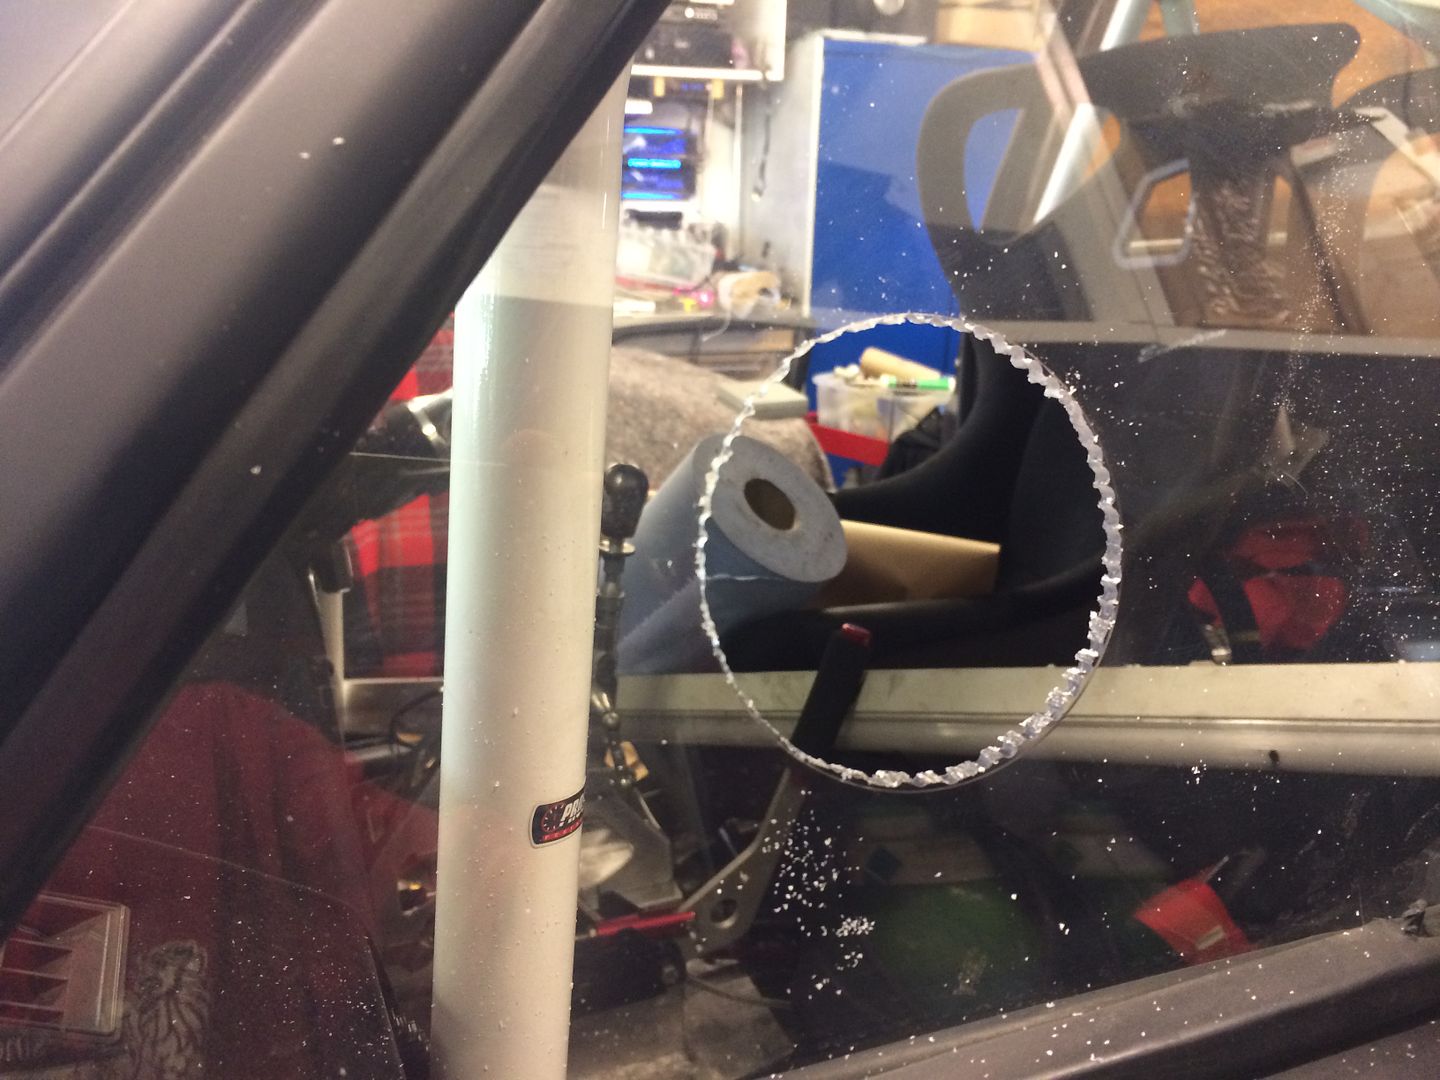
and installed some popout helicopter vents
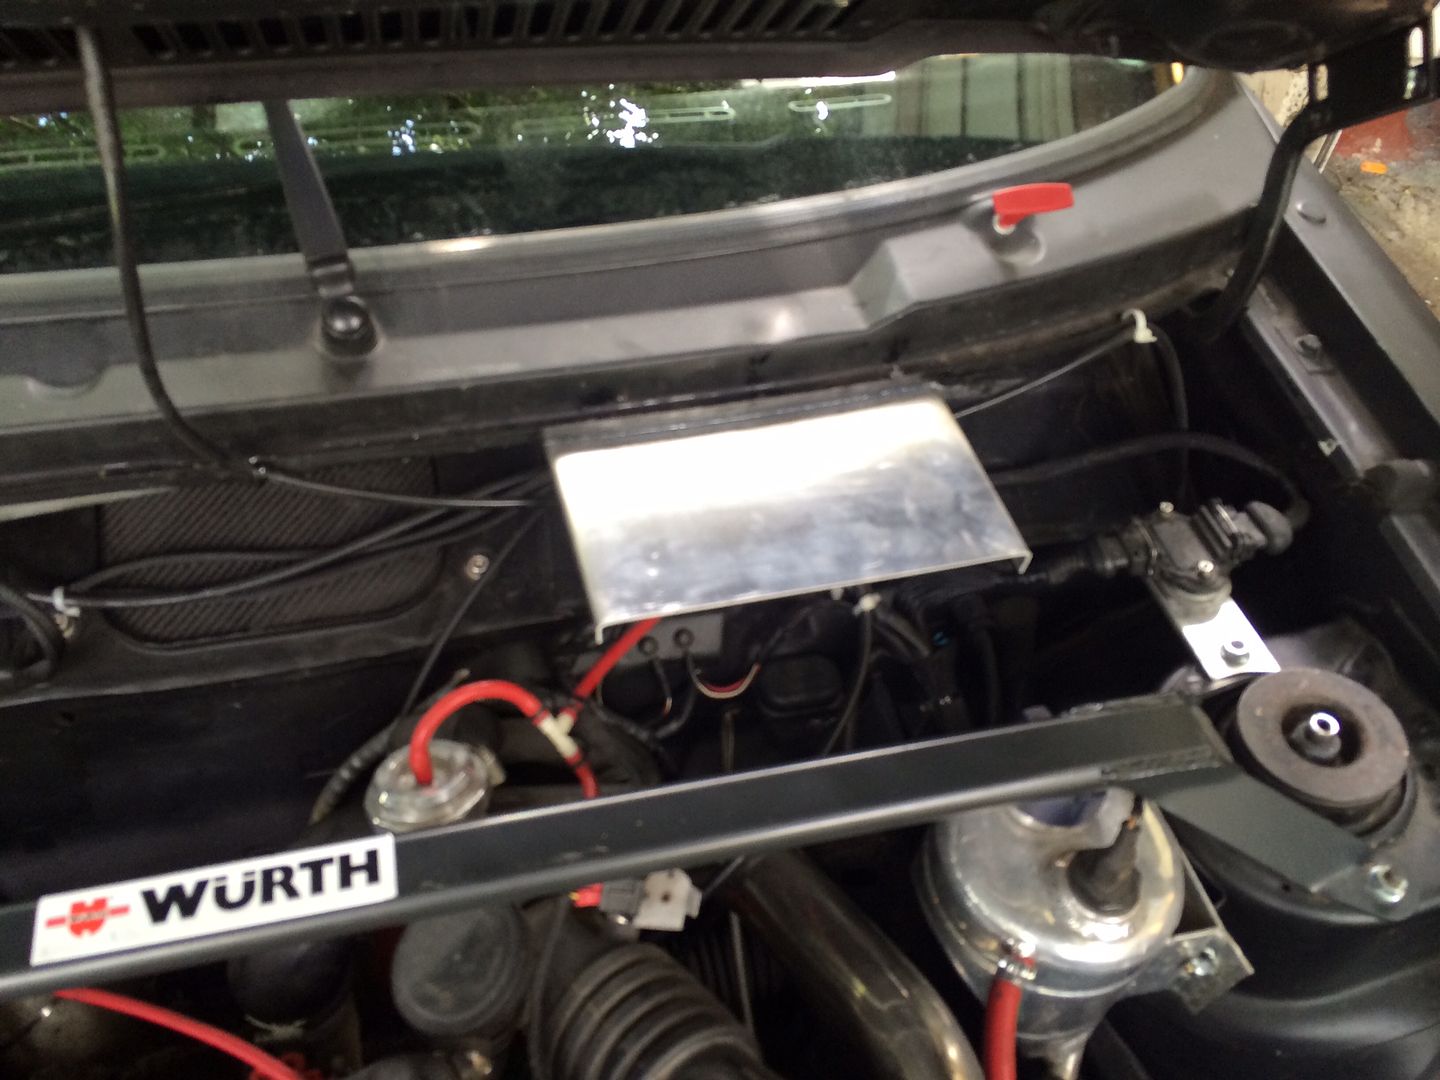
after our experience at the players show, we decided it was worth taking some wet weather precautions too so we made a litte rain shield for the ecu
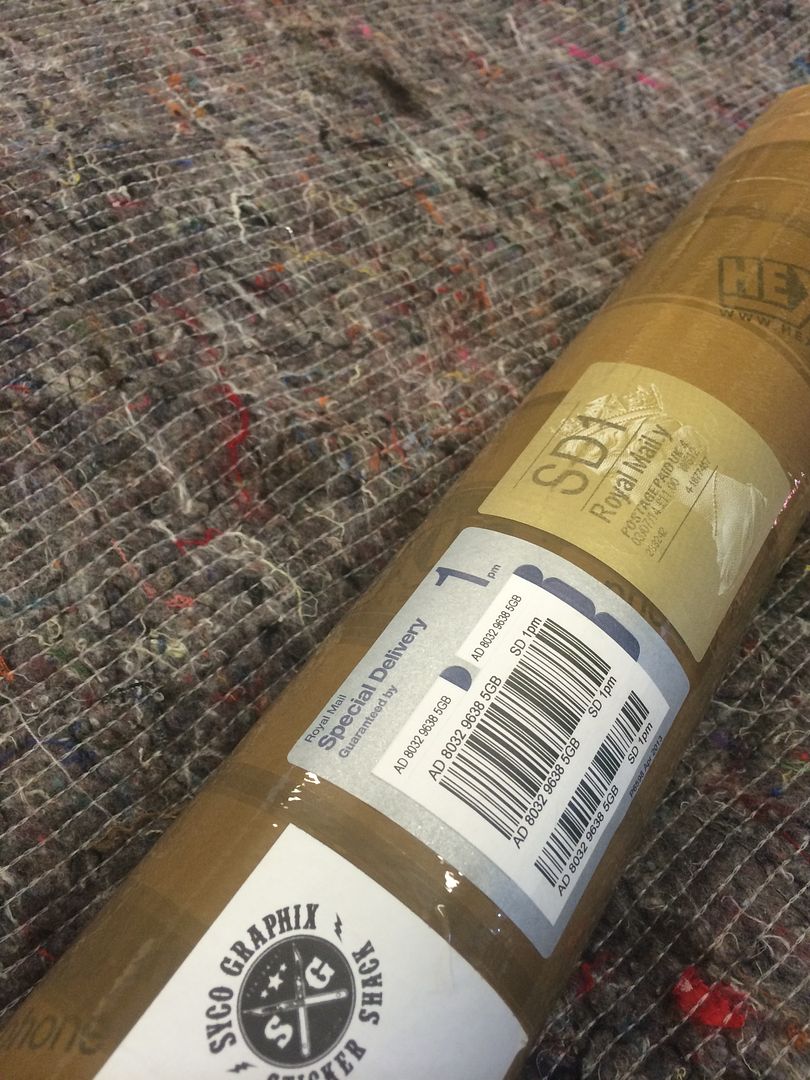
Then finally came the moment I had been waiting patiently for all week!!
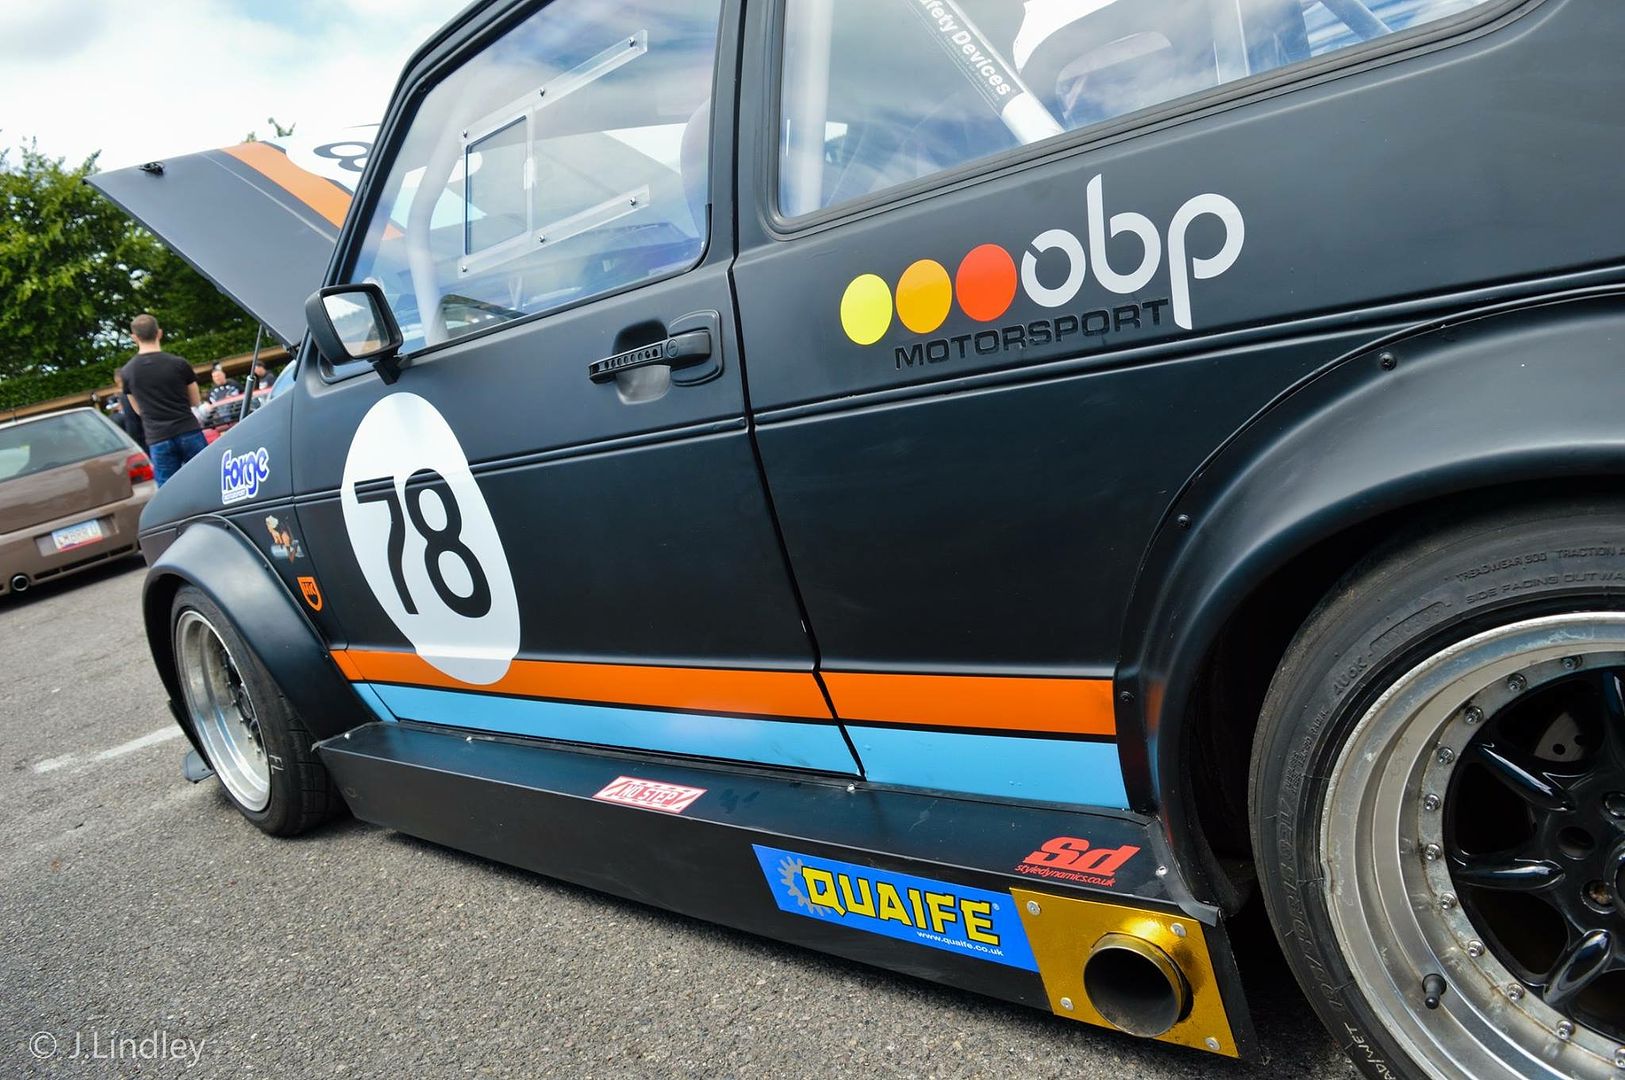
a parcel arrived from Syco Graphix with the all new livery.
The night before Inters, we started applying the stickers. We were up till 1am but I hope you will agree, it was worth it.
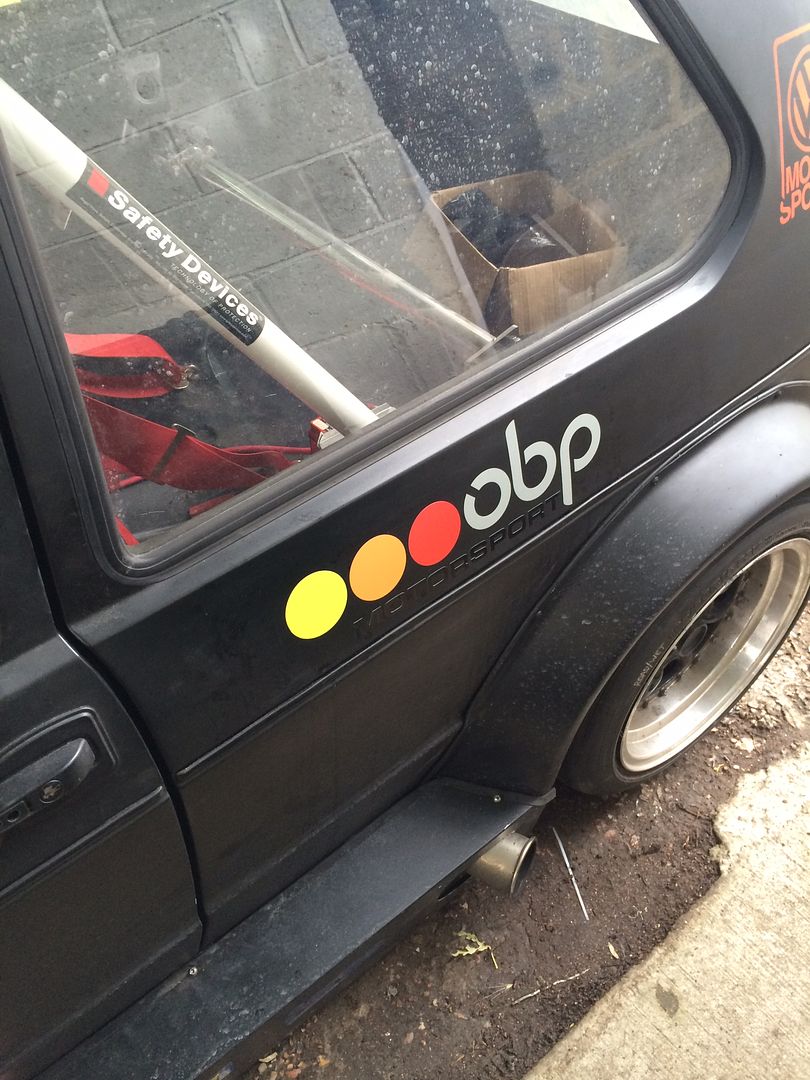
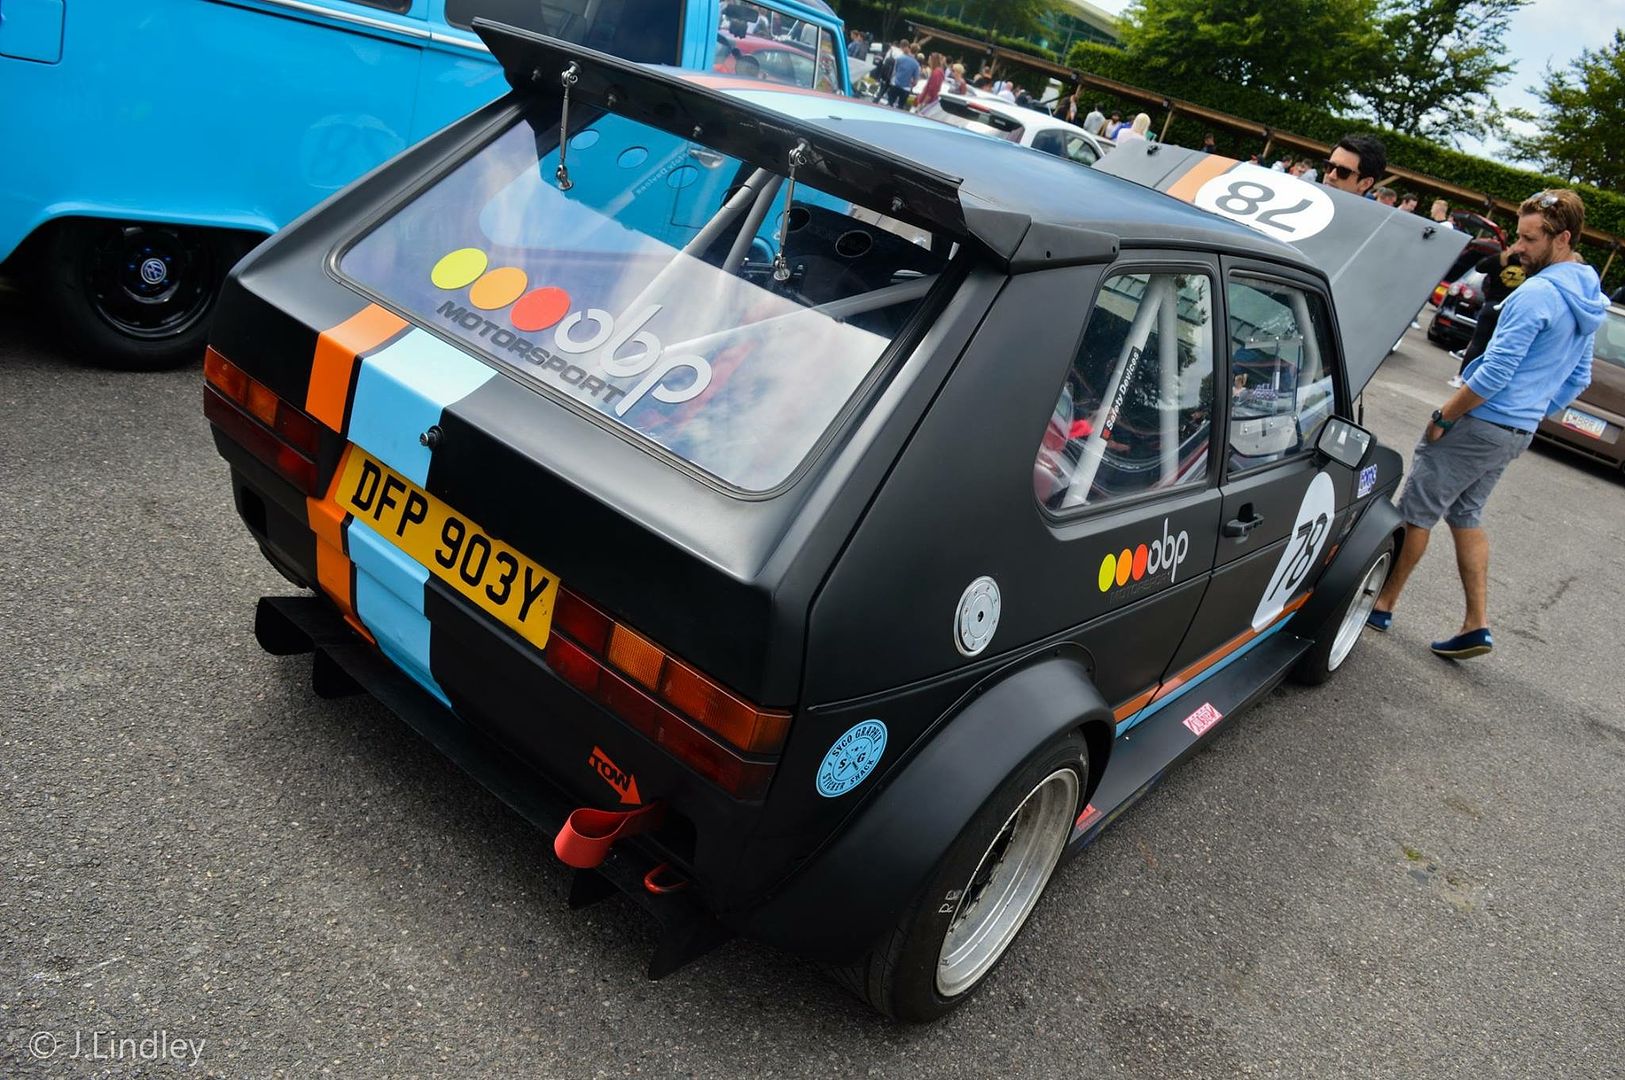
and here is the finished result
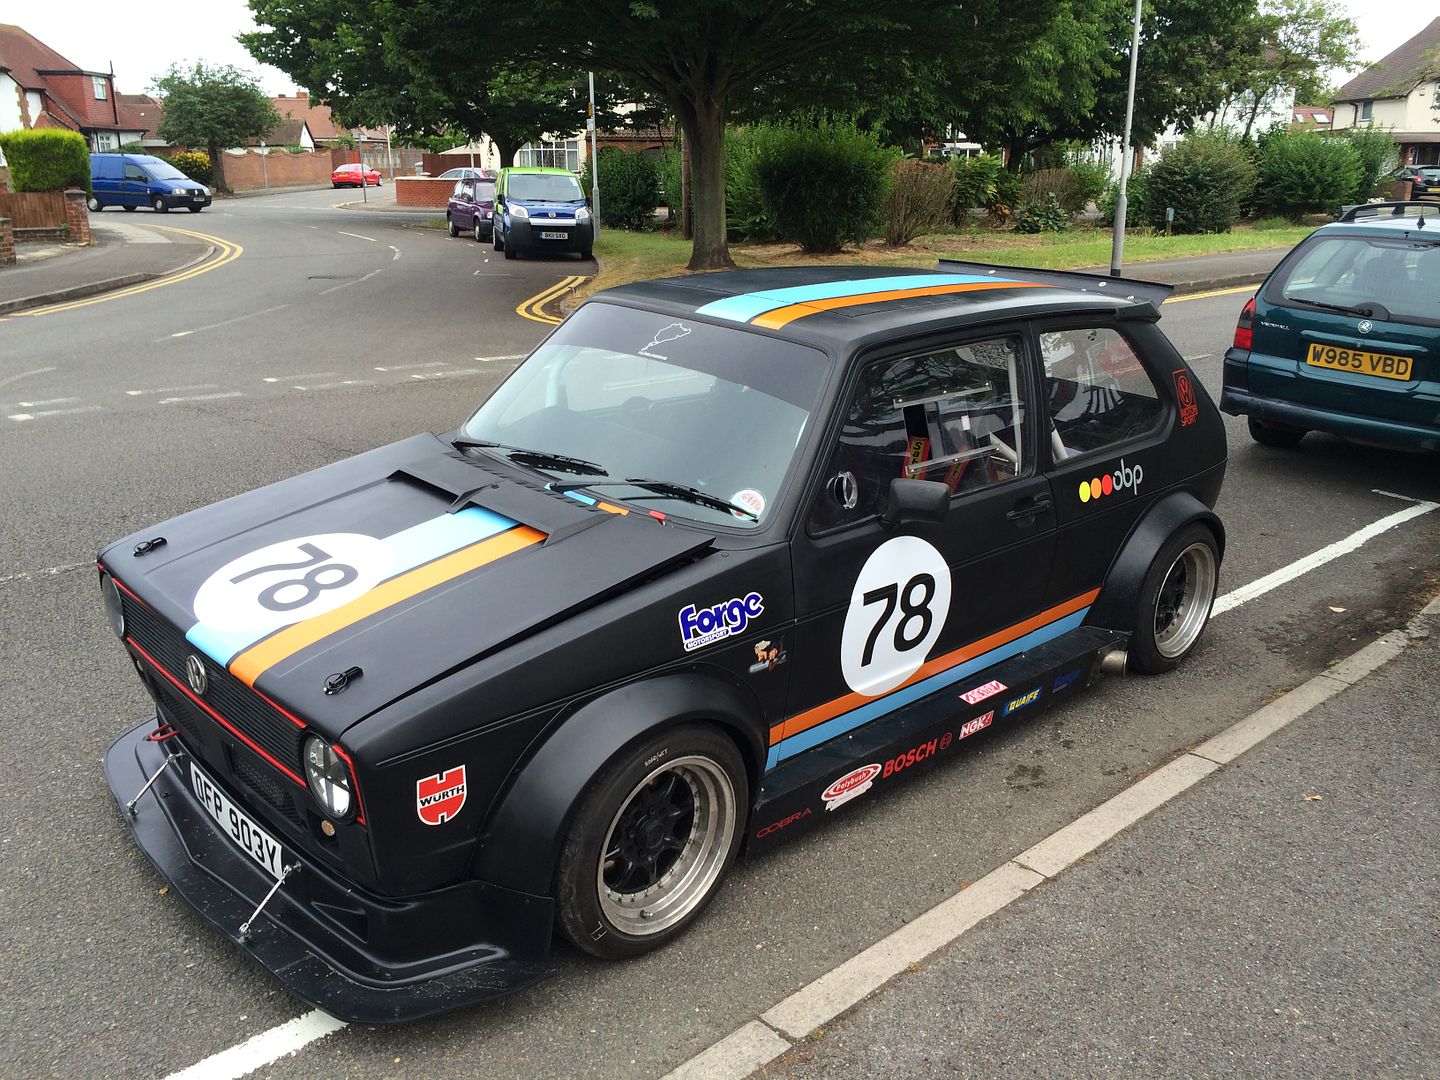
And seemed to go down well at inters. Lots of positive comments
Also thanks to Si Gray for taking some awesome pics of my car

Hope you all like the progress to date. I would love to hear your thoughts on the graphics too. They are probably a bit marmite.
Cheers
Amit
With GTi International fast approaching it was time to focus on the cosmetics.
First up was body repair. Being a track car, there were lots of small areas of localised damage.
There was a small crack on one of the wheel arches

to repair, I drilled a small 3mm hole at the very tip of the crack. This stops the crack growing under stress, I also V'd out the crack from both sides using a dremel, then used some mole grips to re align the fiber glass and hold it in place.

I then mixed up some P40 filler and applied it to both sides of the crack. Once set, I removed the mole grips and did the same to the area previously covered. At this point, I am about 20 mins into the repair. Nice and quick

After its dry, its your basic prep for paint, sand, skim of filler, a squirt of primer, then paint and you are left with this

While the paint was out, we decided to give the car a gorilla paint job. We gave the rear quarter a going over to covers some scratches, and also the drivers door and bonnet.
The beauty of matt black paint is, you dont need to struggle with blending and lacquering. Just feather into the old paint and let it dry for an invisible finish


Next up, we needed to tackle air con as it gets damn hot in the car on sunny days.
we drilled out the perspex windows


and installed some popout helicopter vents

after our experience at the players show, we decided it was worth taking some wet weather precautions too so we made a litte rain shield for the ecu

Then finally came the moment I had been waiting patiently for all week!!
a parcel arrived from Syco Graphix
with the all new livery.
The night before Inters, we started applying the stickers. We were up till 1am but I hope you will agree, it was worth it.


and here is the finished result


And seemed to go down well at inters. Lots of positive comments

Also thanks to Si Gray for taking some awesome pics of my car


Hope you all like the progress to date. I would love to hear your thoughts on the graphics too. They are probably a bit marmite.
Cheers
Amit
So guys.. time for an update
The First big show of the season for me was the APEX Festival where I was going to be a track demo car, and I wanted to make some major improvements to the interior.
Most of the dash didnt work after the 20v conversion. No speedo, no tacho. I didnt like how the CAE shifter was mounted, the floors looked shabby, the doors looked shabby so decided the focus for this year would be interior.. but we didnt stop there.. it would only be fair to make some performance improvements too.
So on with the story.
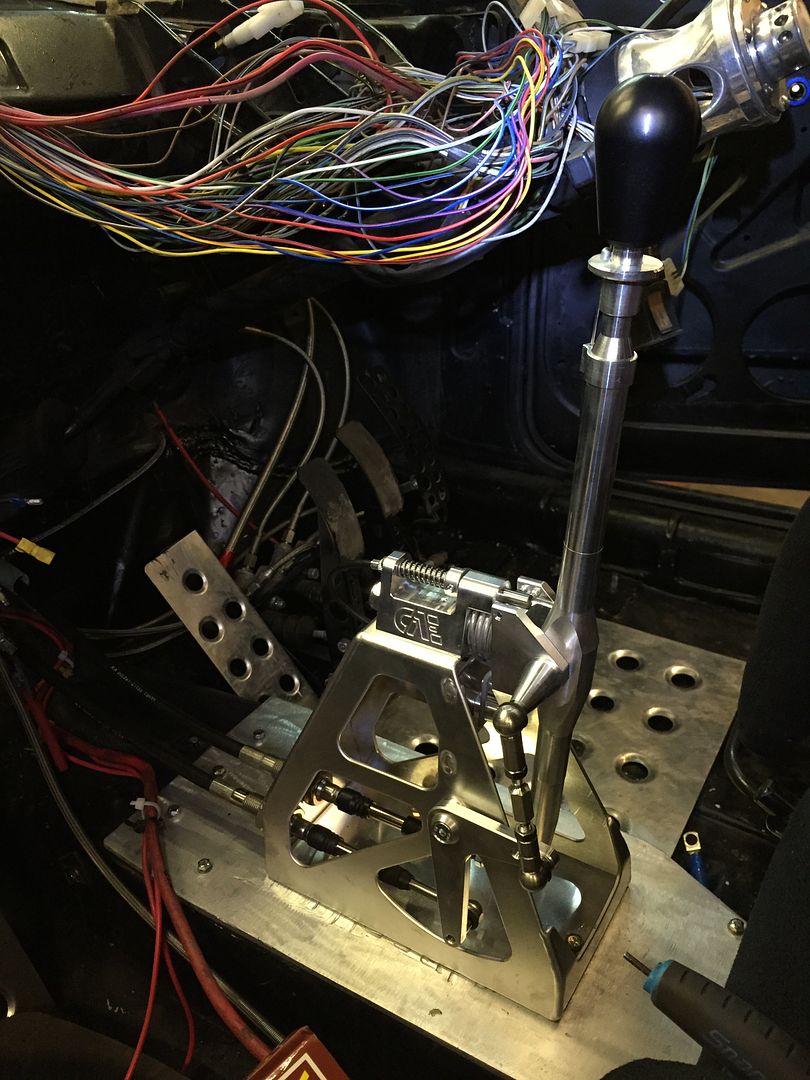
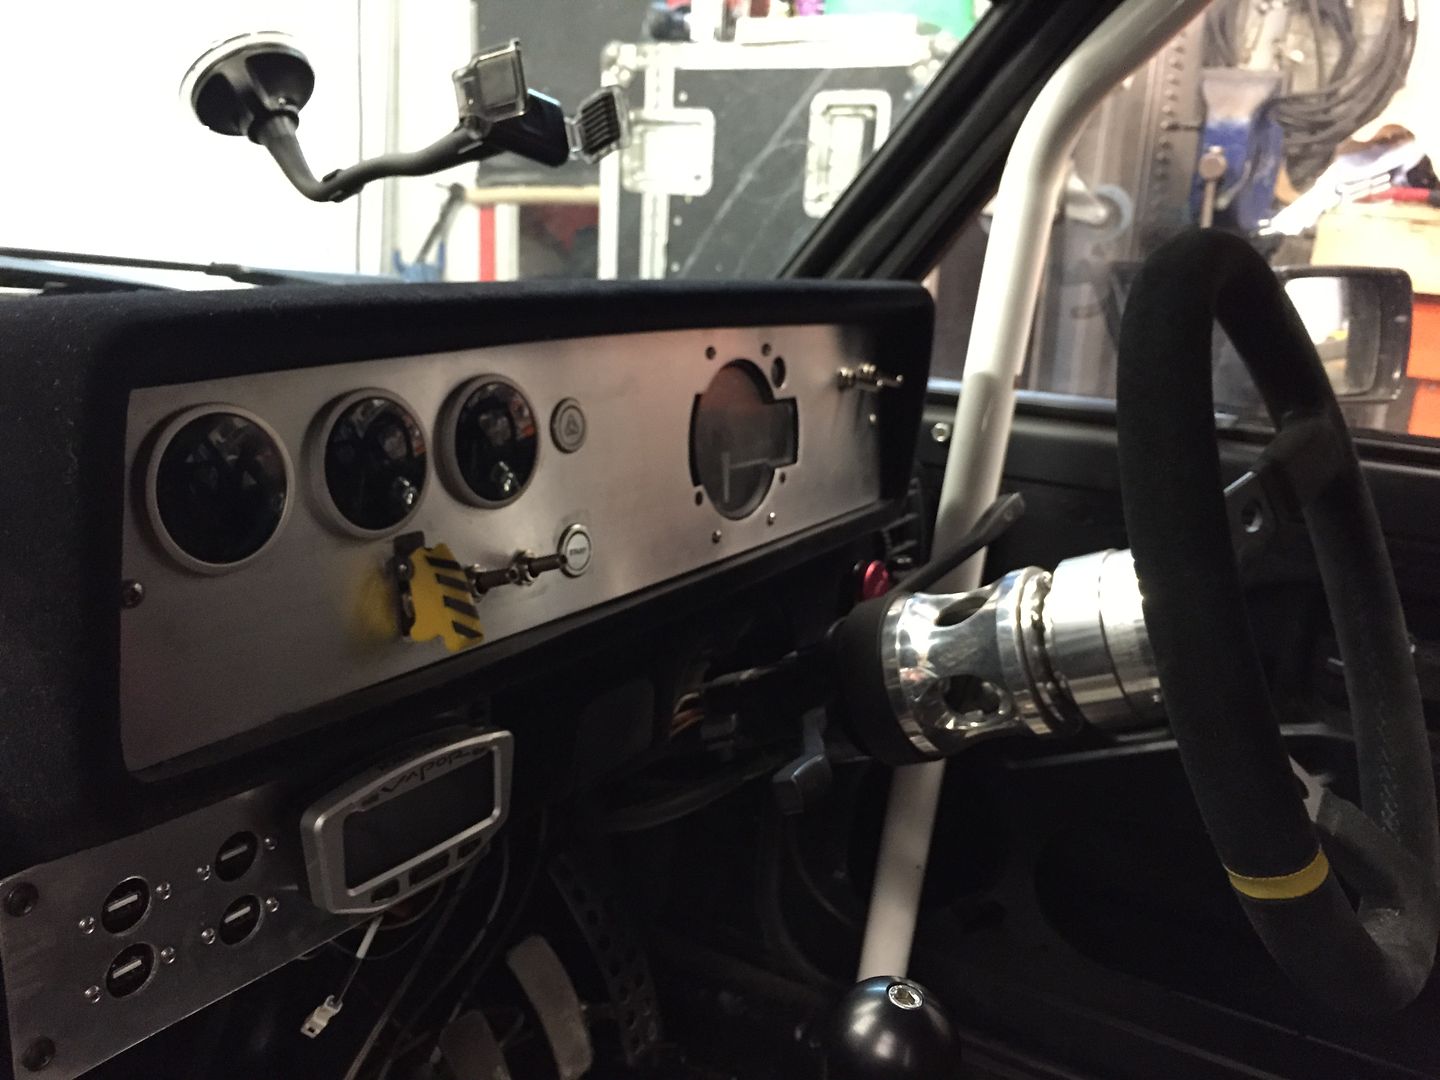
A reminder of how the dash and shifter looked. The CAE shifter I had was designed for a corrado so had to mount it on an ugly plinth to get the right height, and the dash was just the standard mk1 dash. not very race car.. so I stripped out the lot.
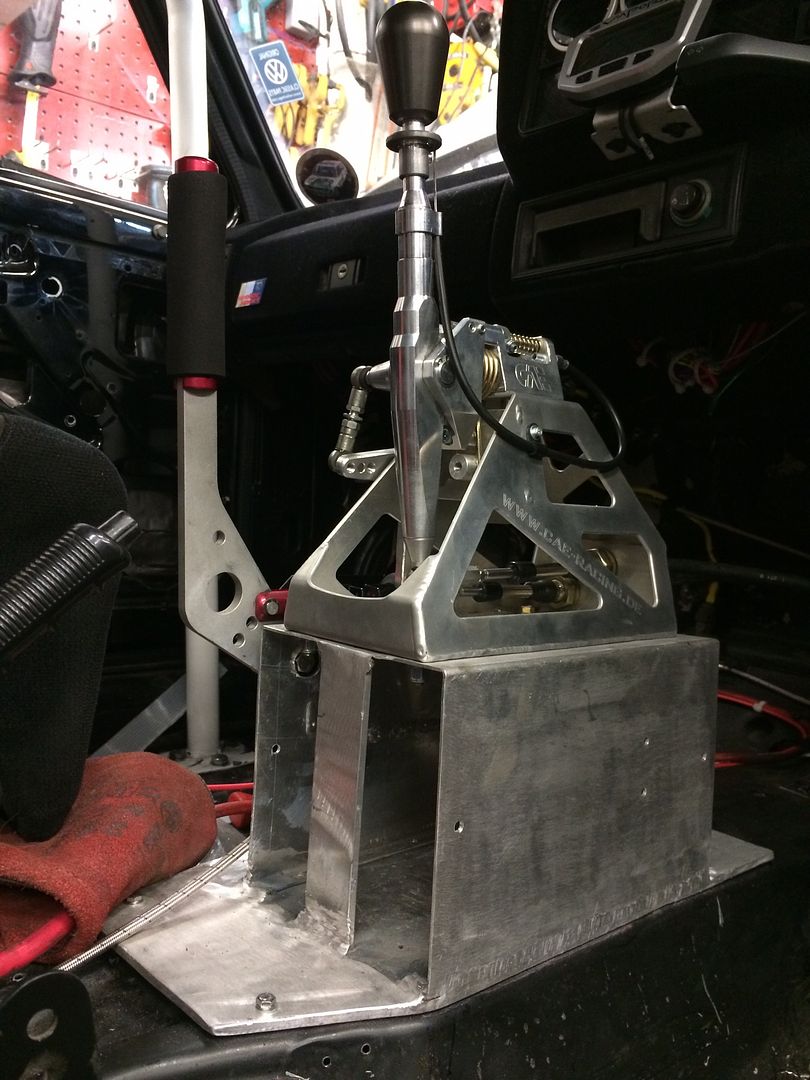
I purchased the proper mk1 CAE shifter and installed it which looks a thousand times better. I also got rid of the hydraulic hand brake as we never used it.
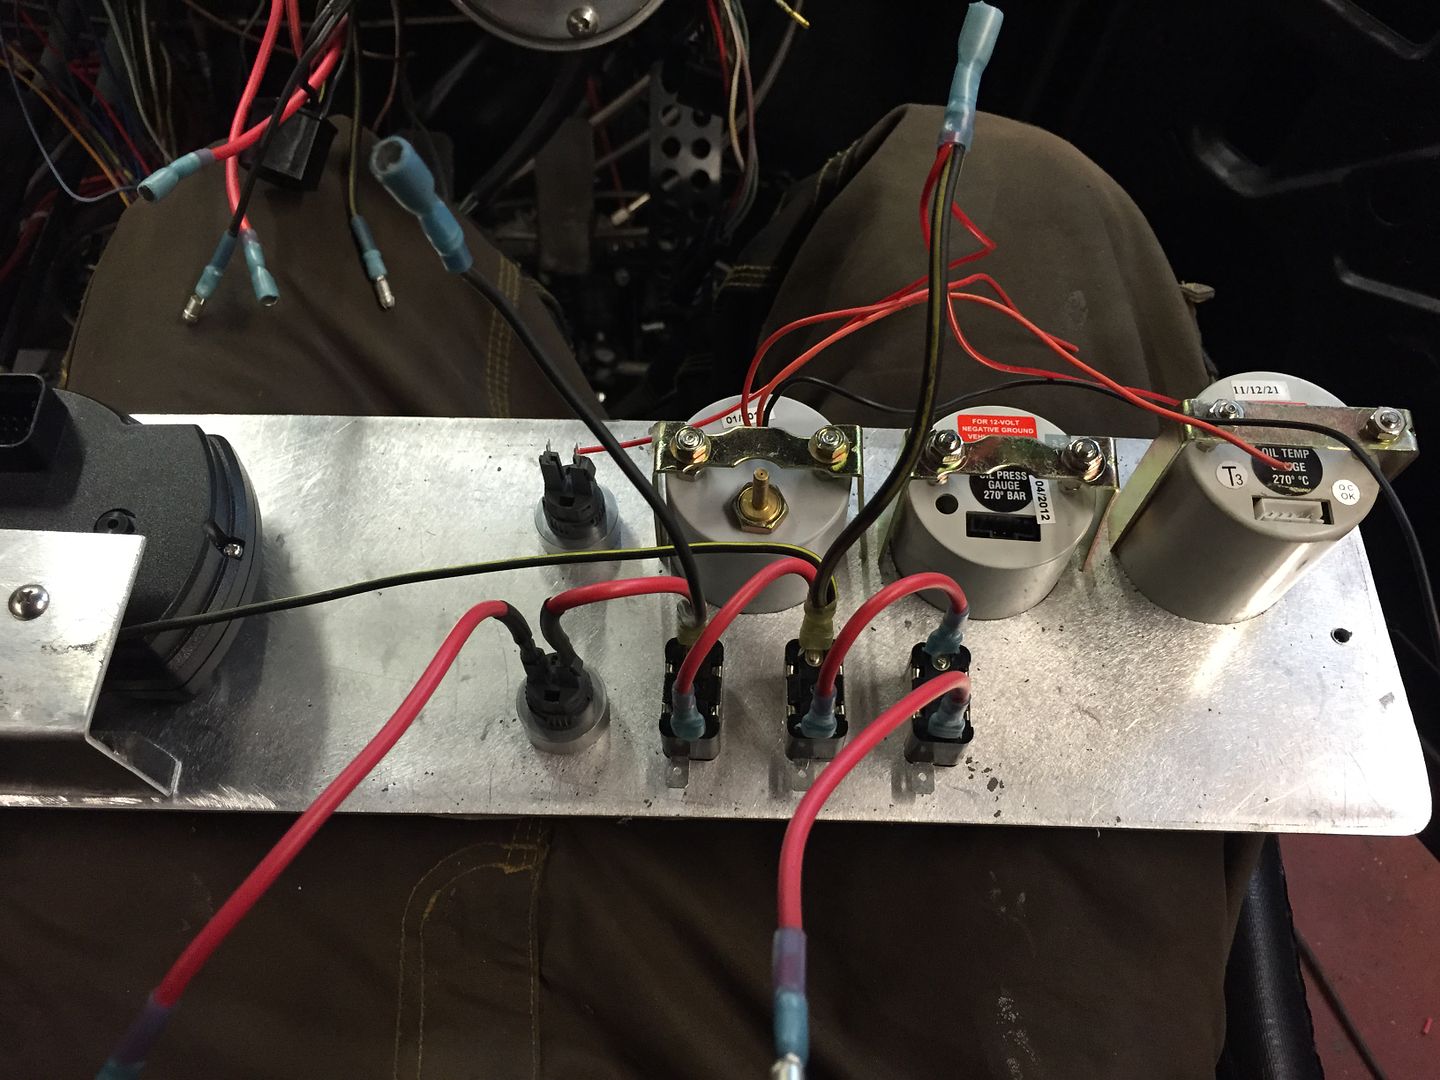
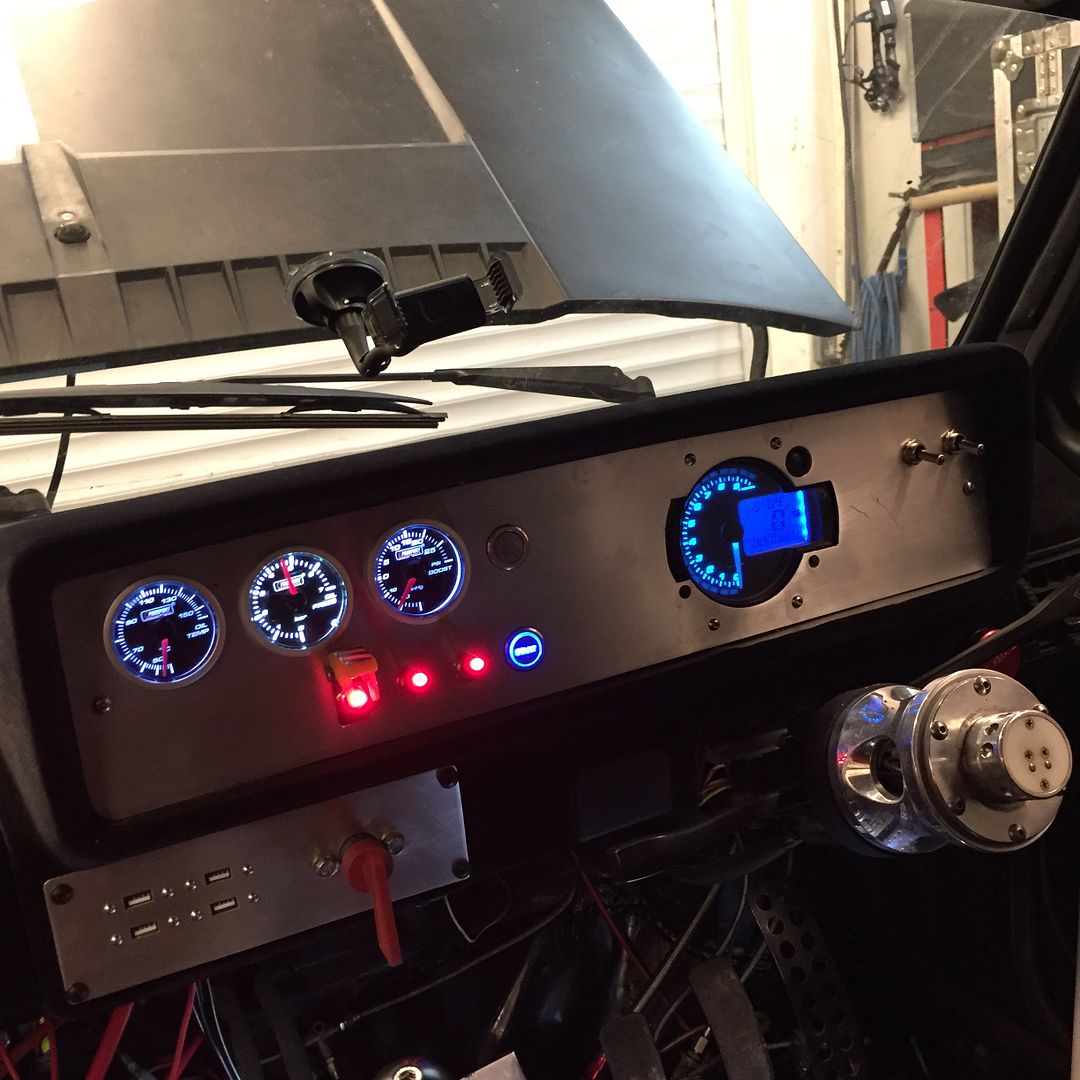
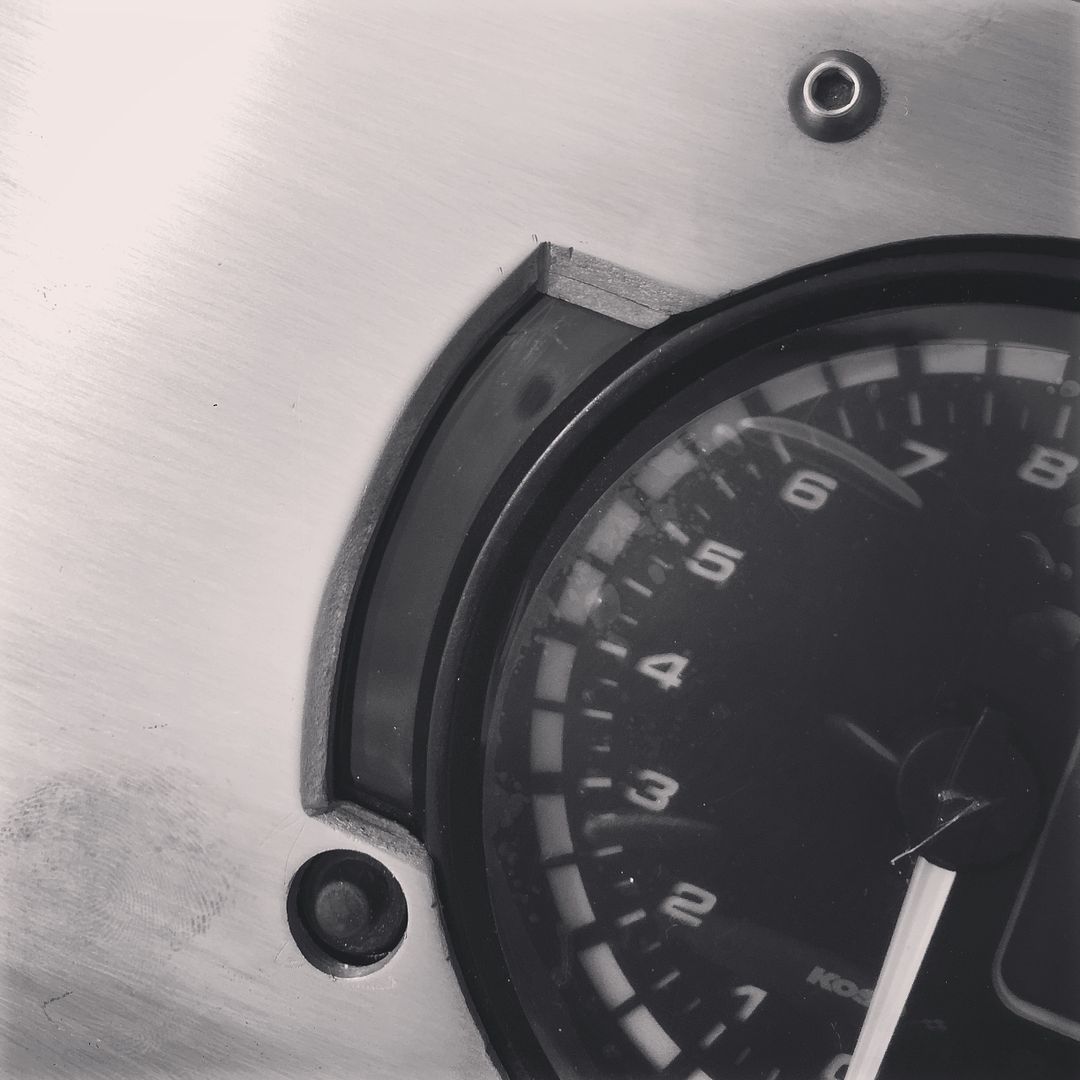
Then got to start making a new dash panel. I decided to use a Koso RX1n motor cylcle gauge as the main instrument. It has every thing I need. RPM up to 10k with shift light, speed, oil temp, water temp, indicator leds etc pretty much everything you would find in the mk1 dash
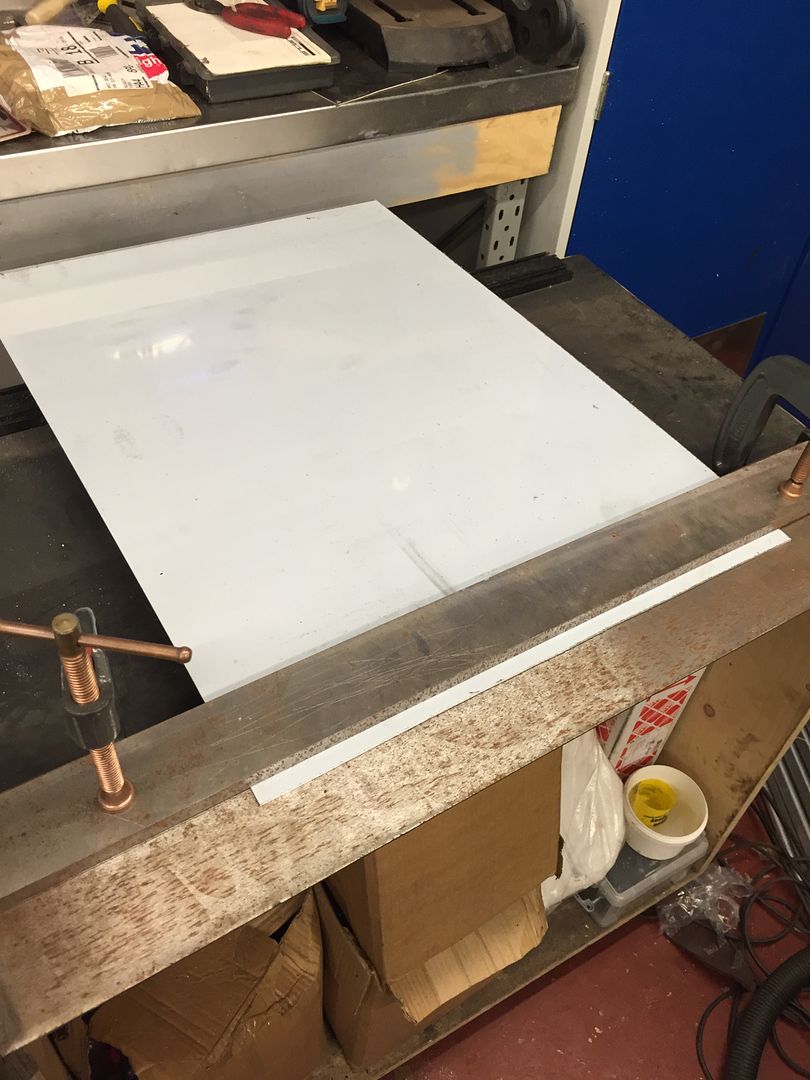
I bought a sheet of 2mm ally and made a panel that would fit perfectly into the mk1 binnacle
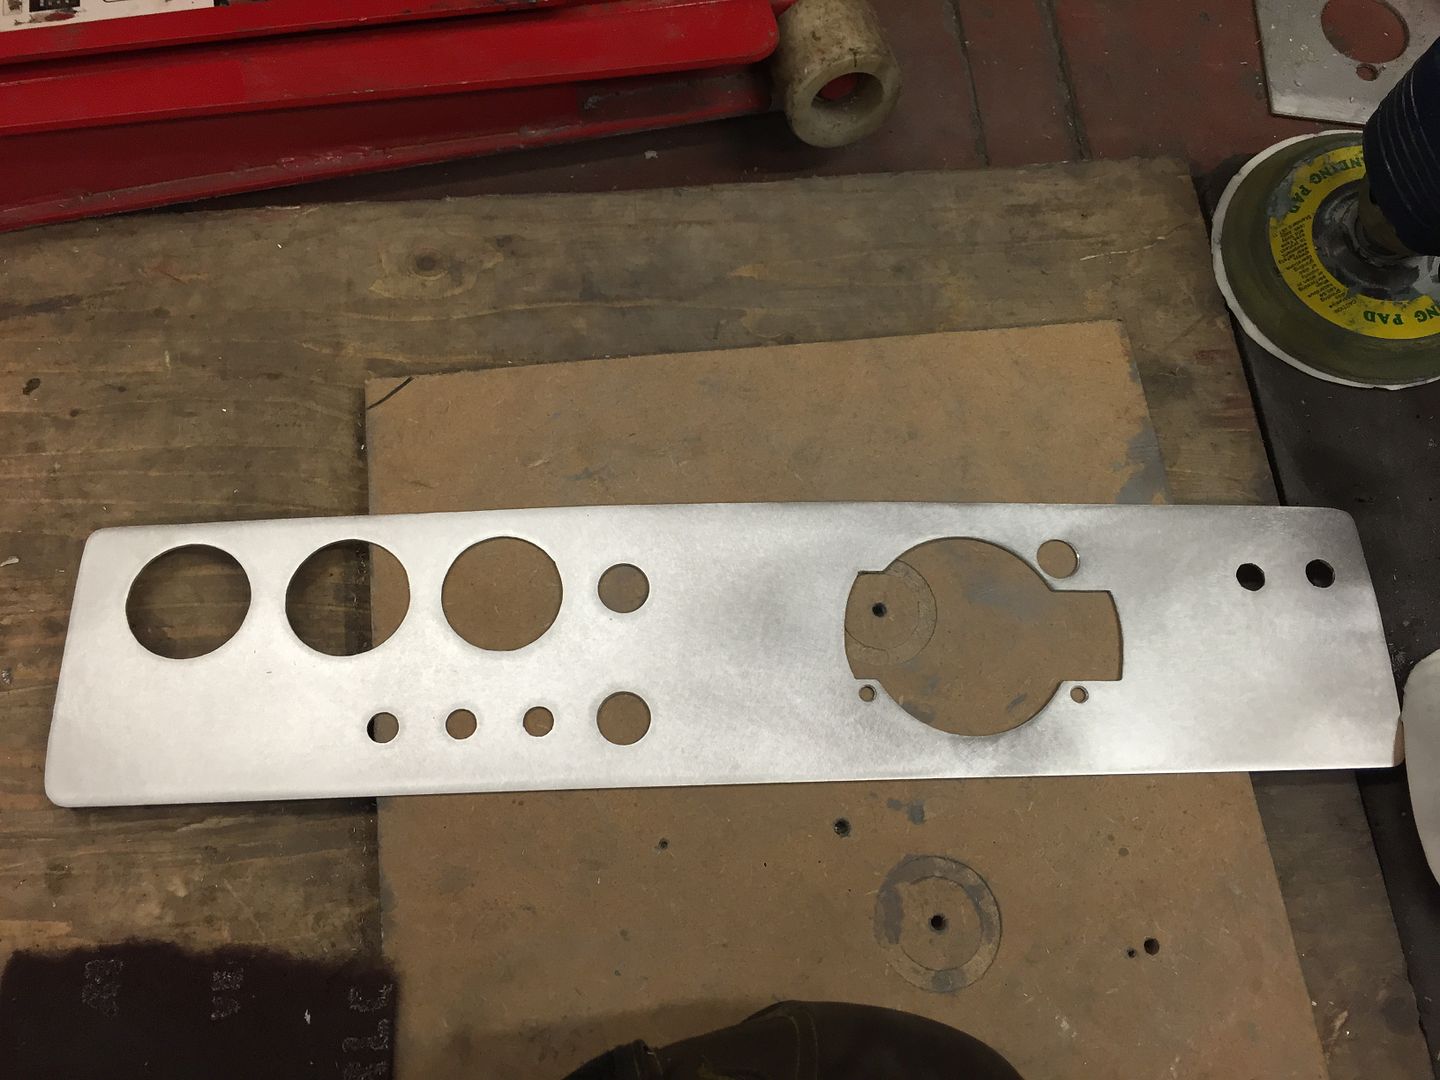
and gave it a nice brushed finish using a scotch bright pad.

I then test fitted the gauge, and wired it up to see how it looked.

Lovely
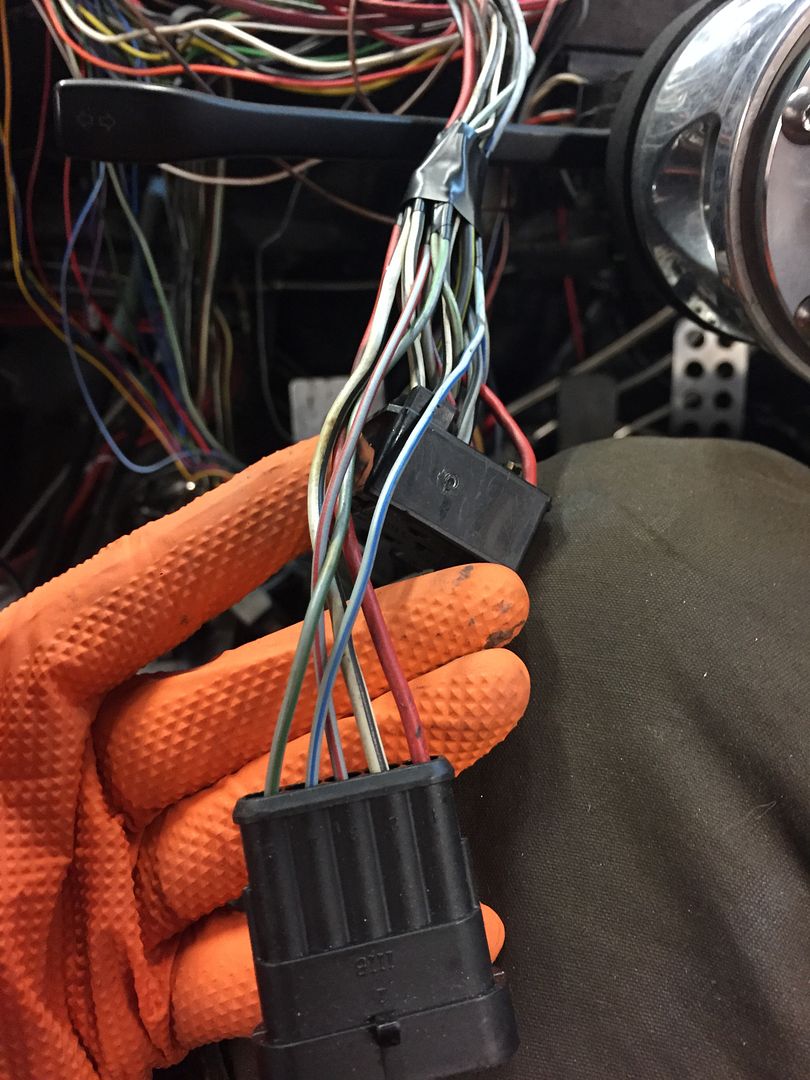
Next job was to hit up the wiring.. now this was a LONG process mapping all the wiring, figuring out the mk1 bits, the 20v bits etc. but got there in the end.
I spliced in new connectors to the existing wiring in case the original dash needs to go back in for what ever reason
and got a bit OCD with the soldering iron and heatshrink
end result
and a couple of vids
showing new starting procedure

and the wired partially working gauge

Chuffed to bits.. of I set to apex festival.
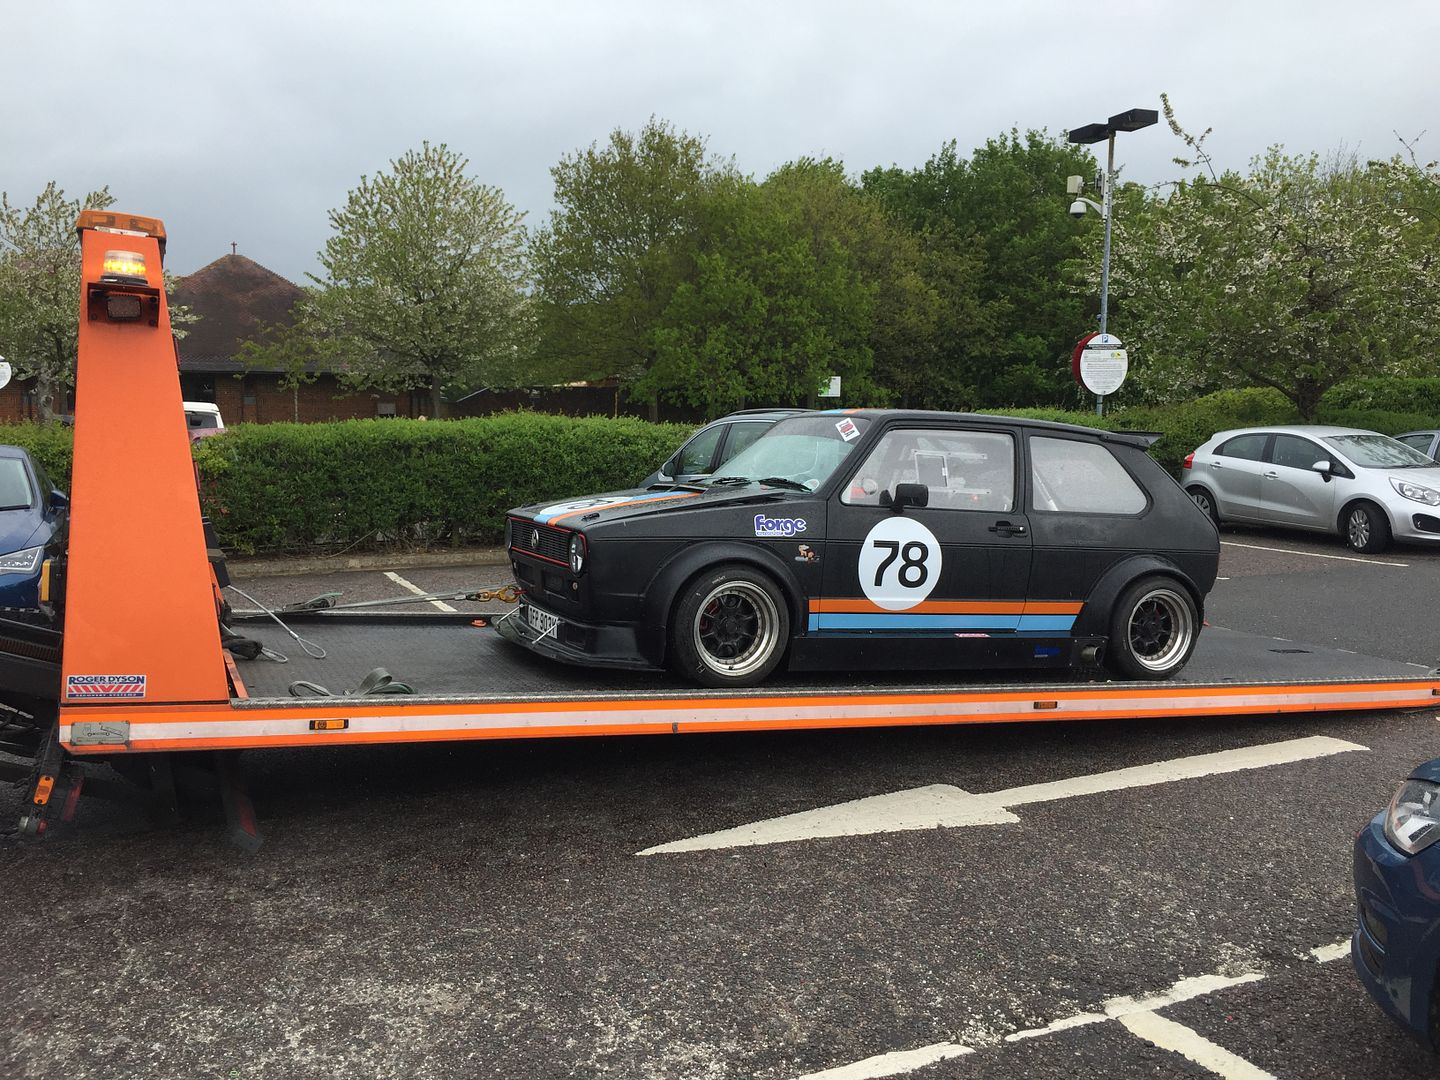
20mins from arrival, this happened.

If you can figure out what going on, thats me broken down on the M25.. As I was driving, I lost all power and couldnt restart the car. Oh well got some great pics out of it

Lovely MR RAC gave me a lift home
It transpired that my grasp of autoelectronics wasnt as good as I first thought. When I swapped the dash panel out, I didnt connect the alt warning light wire because the new gauge didnt have an alt warning light. Not connecting this wire meant the alternator wasnt energised and my piddly race battery went flat after about an hour of driving.
The First big show of the season for me was the APEX Festival where I was going to be a track demo car, and I wanted to make some major improvements to the interior.
Most of the dash didnt work after the 20v conversion. No speedo, no tacho. I didnt like how the CAE shifter was mounted, the floors looked shabby, the doors looked shabby so decided the focus for this year would be interior.. but we didnt stop there.. it would only be fair to make some performance improvements too.
So on with the story.
A reminder of how the dash and shifter looked. The CAE shifter I had was designed for a corrado so had to mount it on an ugly plinth to get the right height, and the dash was just the standard mk1 dash. not very race car.. so I stripped out the lot.
I purchased the proper mk1 CAE shifter and installed it which looks a thousand times better. I also got rid of the hydraulic hand brake as we never used it.

Then got to start making a new dash panel. I decided to use a Koso RX1n motor cylcle gauge as the main instrument. It has every thing I need. RPM up to 10k with shift light, speed, oil temp, water temp, indicator leds etc pretty much everything you would find in the mk1 dash
I bought a sheet of 2mm ally and made a panel that would fit perfectly into the mk1 binnacle

and gave it a nice brushed finish using a scotch bright pad.

I then test fitted the gauge, and wired it up to see how it looked.

Lovely
Next job was to hit up the wiring.. now this was a LONG process mapping all the wiring, figuring out the mk1 bits, the 20v bits etc. but got there in the end.
I spliced in new connectors to the existing wiring in case the original dash needs to go back in for what ever reason

and got a bit OCD with the soldering iron and heatshrink

end result

and a couple of vids
showing new starting procedure
and the wired partially working gauge
Chuffed to bits.. of I set to apex festival.
20mins from arrival, this happened.

If you can figure out what going on, thats me broken down on the M25.. As I was driving, I lost all power and couldnt restart the car. Oh well got some great pics out of it

Lovely MR RAC gave me a lift home

It transpired that my grasp of autoelectronics wasnt as good as I first thought. When I swapped the dash panel out, I didnt connect the alt warning light wire because the new gauge didnt have an alt warning light. Not connecting this wire meant the alternator wasnt energised and my piddly race battery went flat after about an hour of driving.
Back to the story..
With Apex out of the way, it was time to get ready for players and continue on the interior improvements.
Now that I had a new dash panel, I no longer need the little atv gauge that showed me water temp. That gave me great space to relocate the kill switch that used to live in base of the shifter tower.
I remade the whole panel because I wasnt happy with the previous USB charging ports
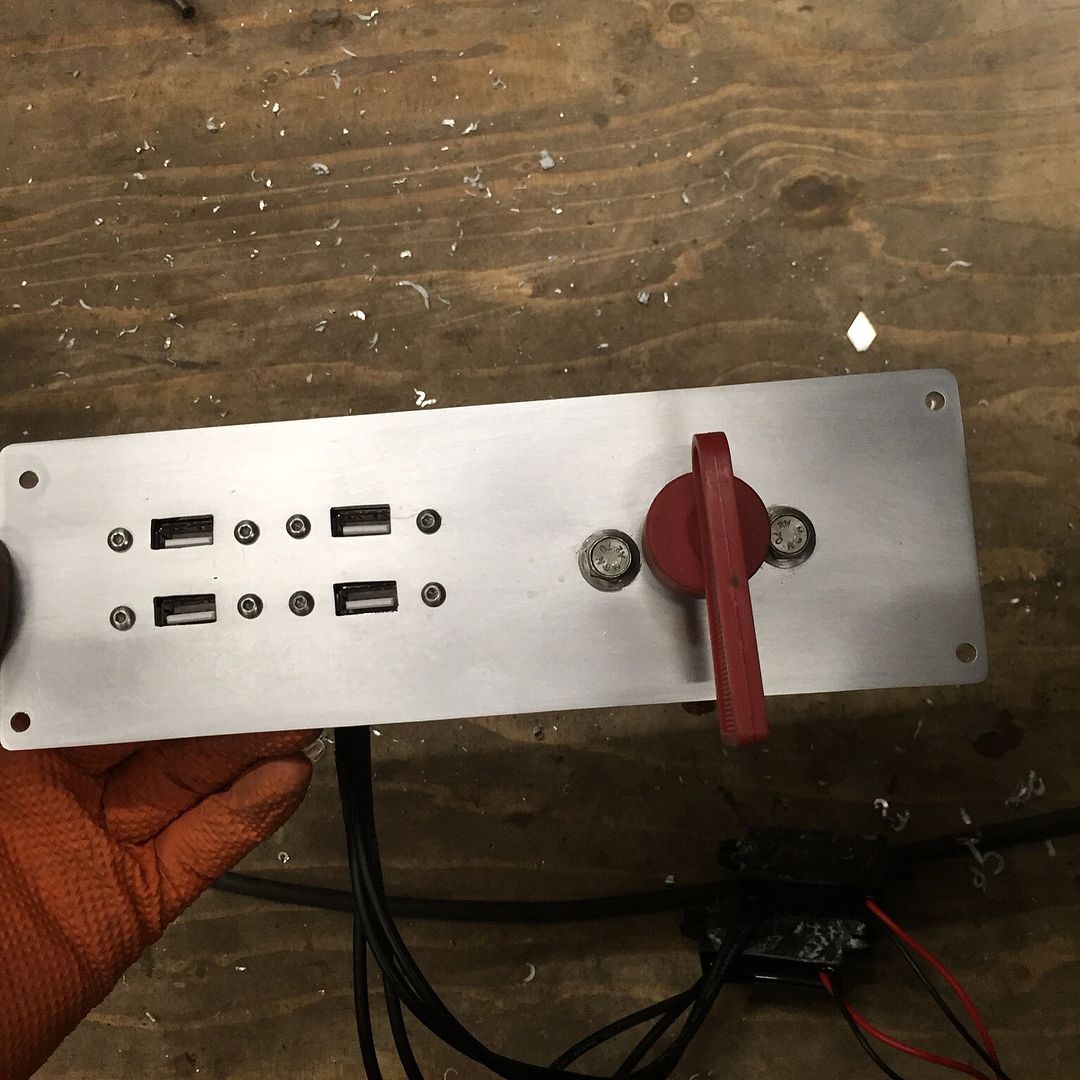
and fitted it in the ash try position
I also revisited the dash panel and cleaned up some of my hasty work from before
Adding some nice detail around the cut out
Up till now, I had never had a working speedo in the car. Always relying on GPS app on my phone.
My car has a 20v conversion so the first thing I tried was using the VSS signal straight out the gearbox sender into the new gauge, but it was the wrong voltage so didnt work.
Decided it would be best to use the hall sender that came with the gauge. I installed it to pick up the heads off the drive shaft bolts which worked a treat!
With the dash side of things complete, it was time to move onto the floors
I bought some 2mm ally sheet and decided to make a fitted navigator foot rest and rally floor plate.
I got to work with my crappy bench folder.

and all riveted together as I dont have a tig
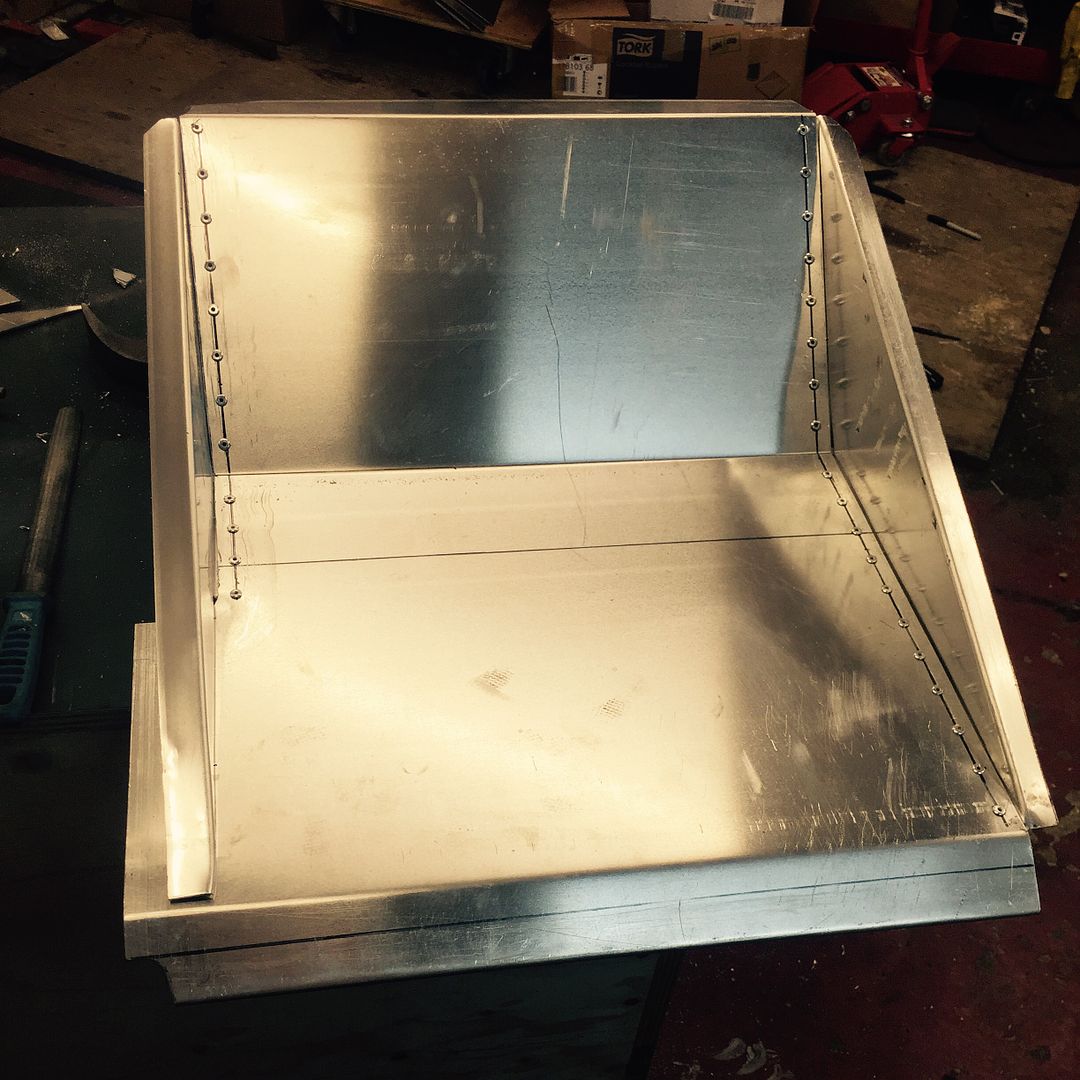
before finally fitting it to the car, I punched some holes and added some grip tape

and then made something similar for the drivers side
More tomorrow
With Apex out of the way, it was time to get ready for players and continue on the interior improvements.
Now that I had a new dash panel, I no longer need the little atv gauge that showed me water temp. That gave me great space to relocate the kill switch that used to live in base of the shifter tower.
I remade the whole panel because I wasnt happy with the previous USB charging ports

and fitted it in the ash try position

I also revisited the dash panel and cleaned up some of my hasty work from before
Adding some nice detail around the cut out

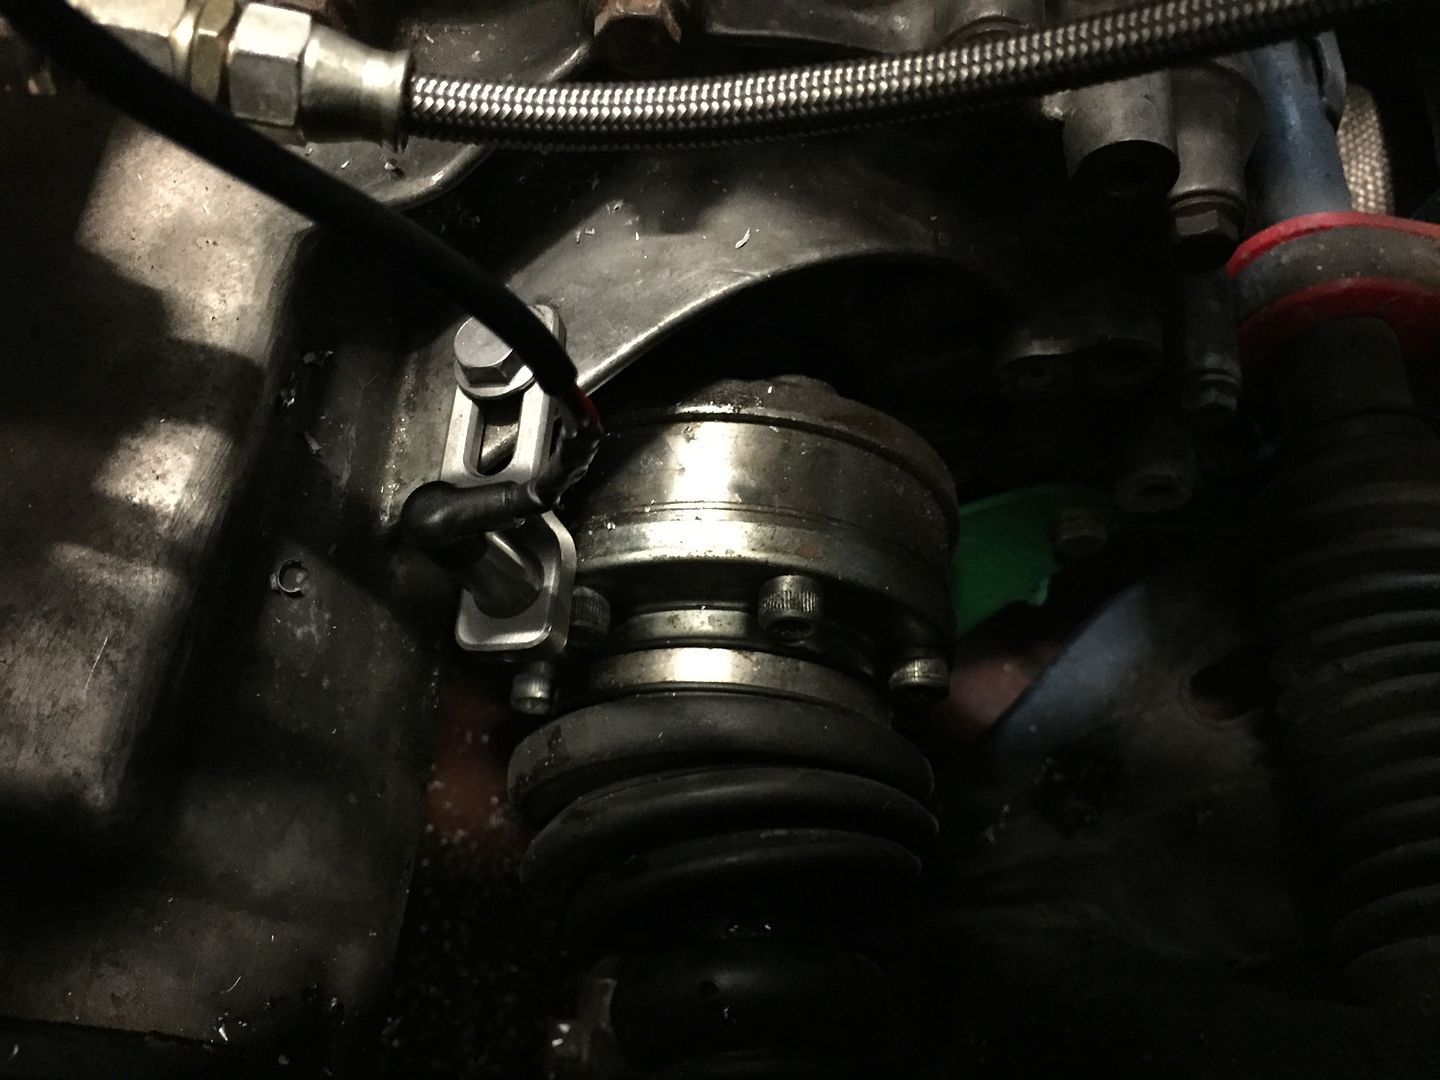
Up till now, I had never had a working speedo in the car. Always relying on GPS app on my phone.
My car has a 20v conversion so the first thing I tried was using the VSS signal straight out the gearbox sender into the new gauge, but it was the wrong voltage so didnt work.
Decided it would be best to use the hall sender that came with the gauge. I installed it to pick up the heads off the drive shaft bolts which worked a treat!

With the dash side of things complete, it was time to move onto the floors
I bought some 2mm ally sheet and decided to make a fitted navigator foot rest and rally floor plate.
I got to work with my crappy bench folder.


and all riveted together as I dont have a tig

before finally fitting it to the car, I punched some holes and added some grip tape

and then made something similar for the drivers side

More tomorrow
Update time.
The next area to tackle was the clutch. It had started to slip so we pulled to box and made a few other improvements while we were at it.
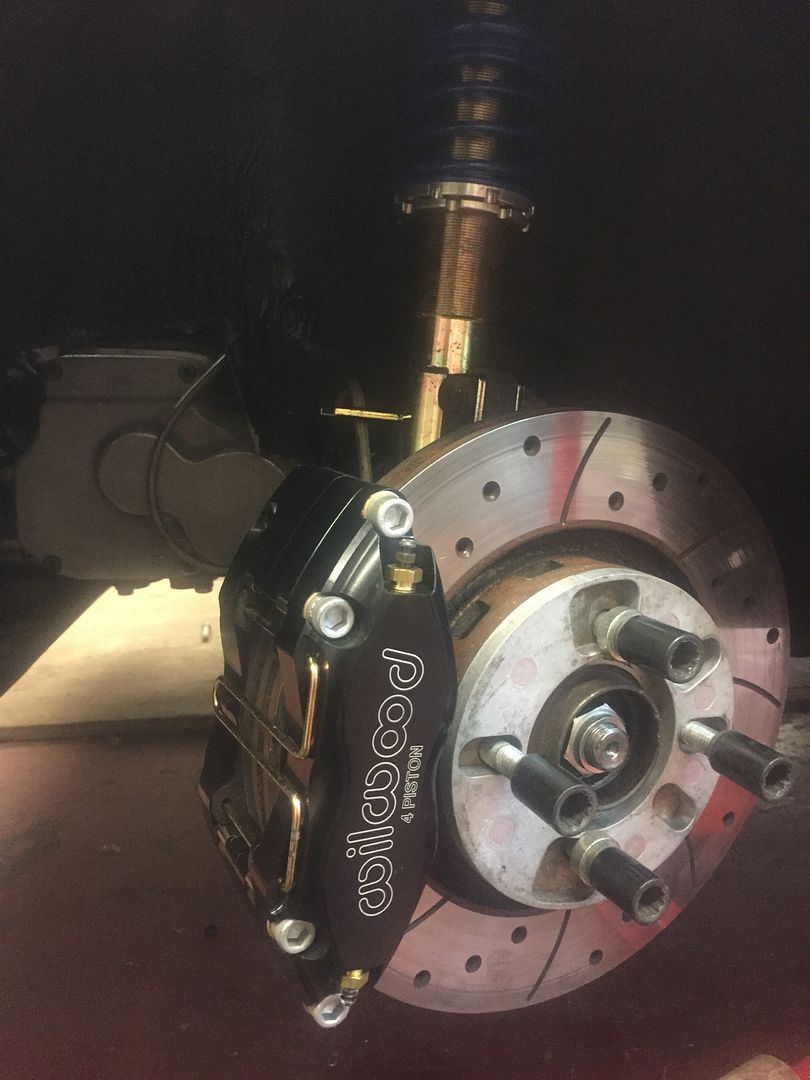
First up, a 6spd Quaife Dog box, new brakes, and new coilovers
Then it was time for a road test..
Boy was that epic! Check out the vid here. The sound of the dog box is incredible.

We also decided to give the engine bay a bit of love as it was looking a bit tired.
Powder coated the cam cover, new rad, powder coated top mounts, new fluid res, re did the boost plumbing, and the list goes on
Finished result
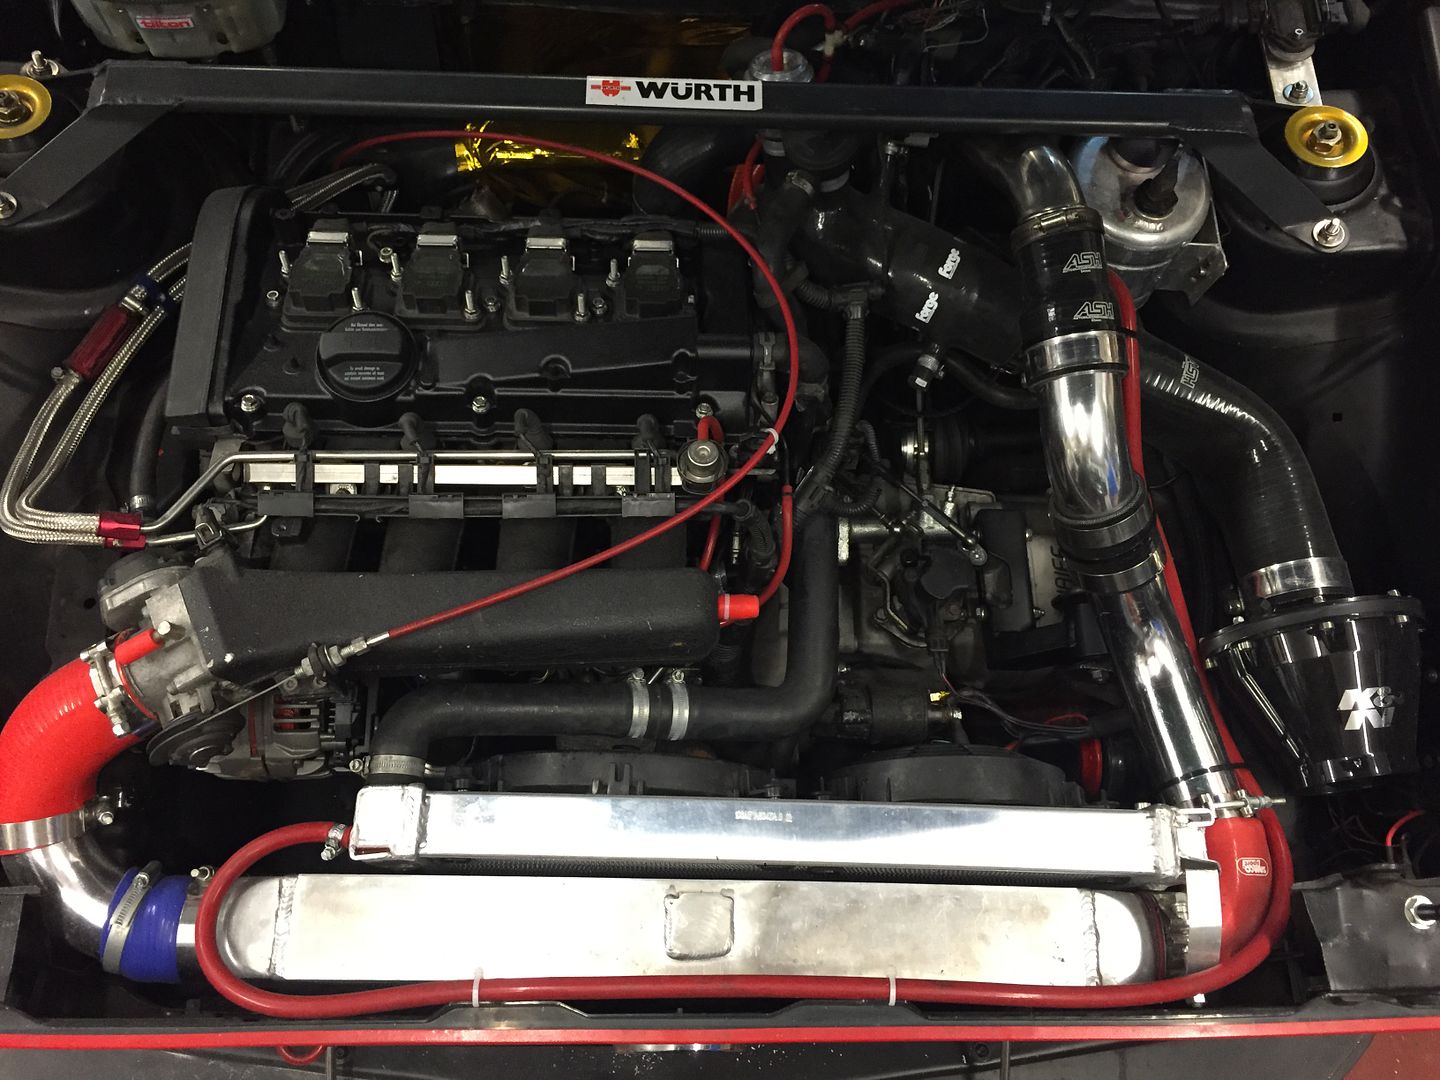
Powder coated the cam cover, new rad, powder coated top mounts, new fluid res, re did the boost plumbing, and the list goes on
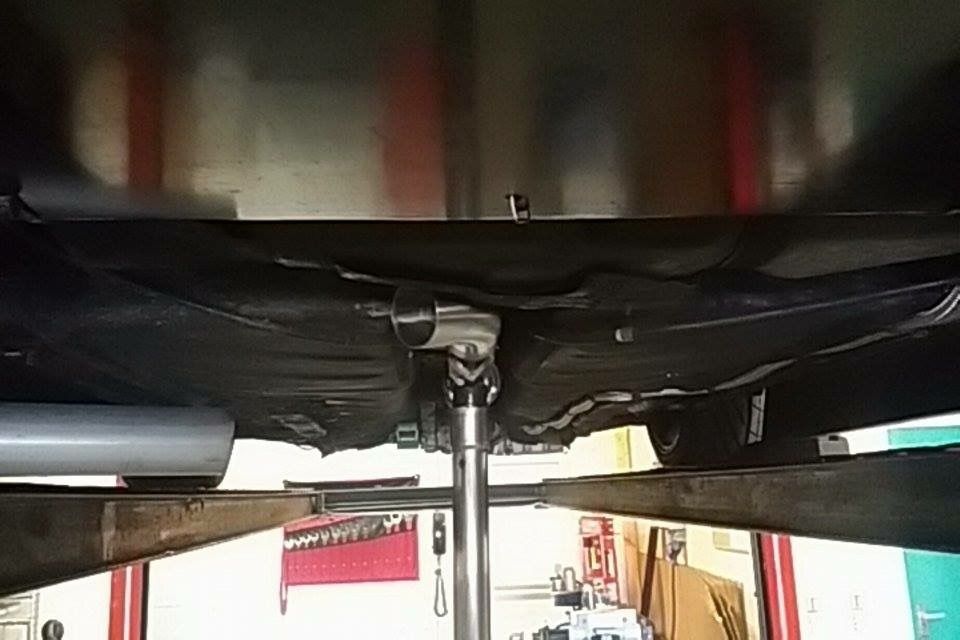
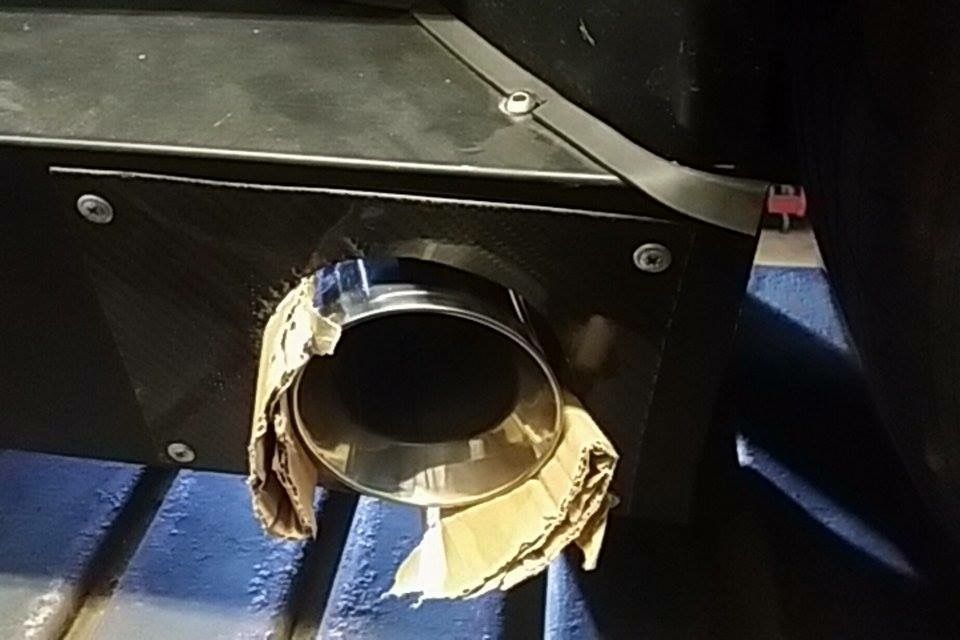
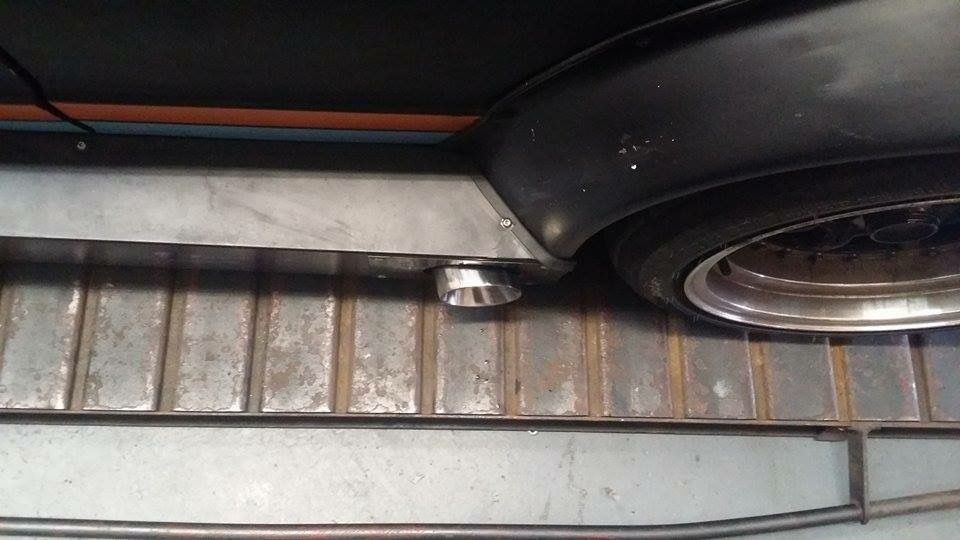
Next up was the exhaust
The current system was hashed together using off the shelf bends and clamped together. It hung down low and we were constantly catching it and ripping it off..
After smashing it one last time, enough was enough so I took the car down to Style Dynamix to have a custom tucked exhaust made.
The boys did a great job.
And that was us sorted for players.
And as far as I could tell, the car was a hit.
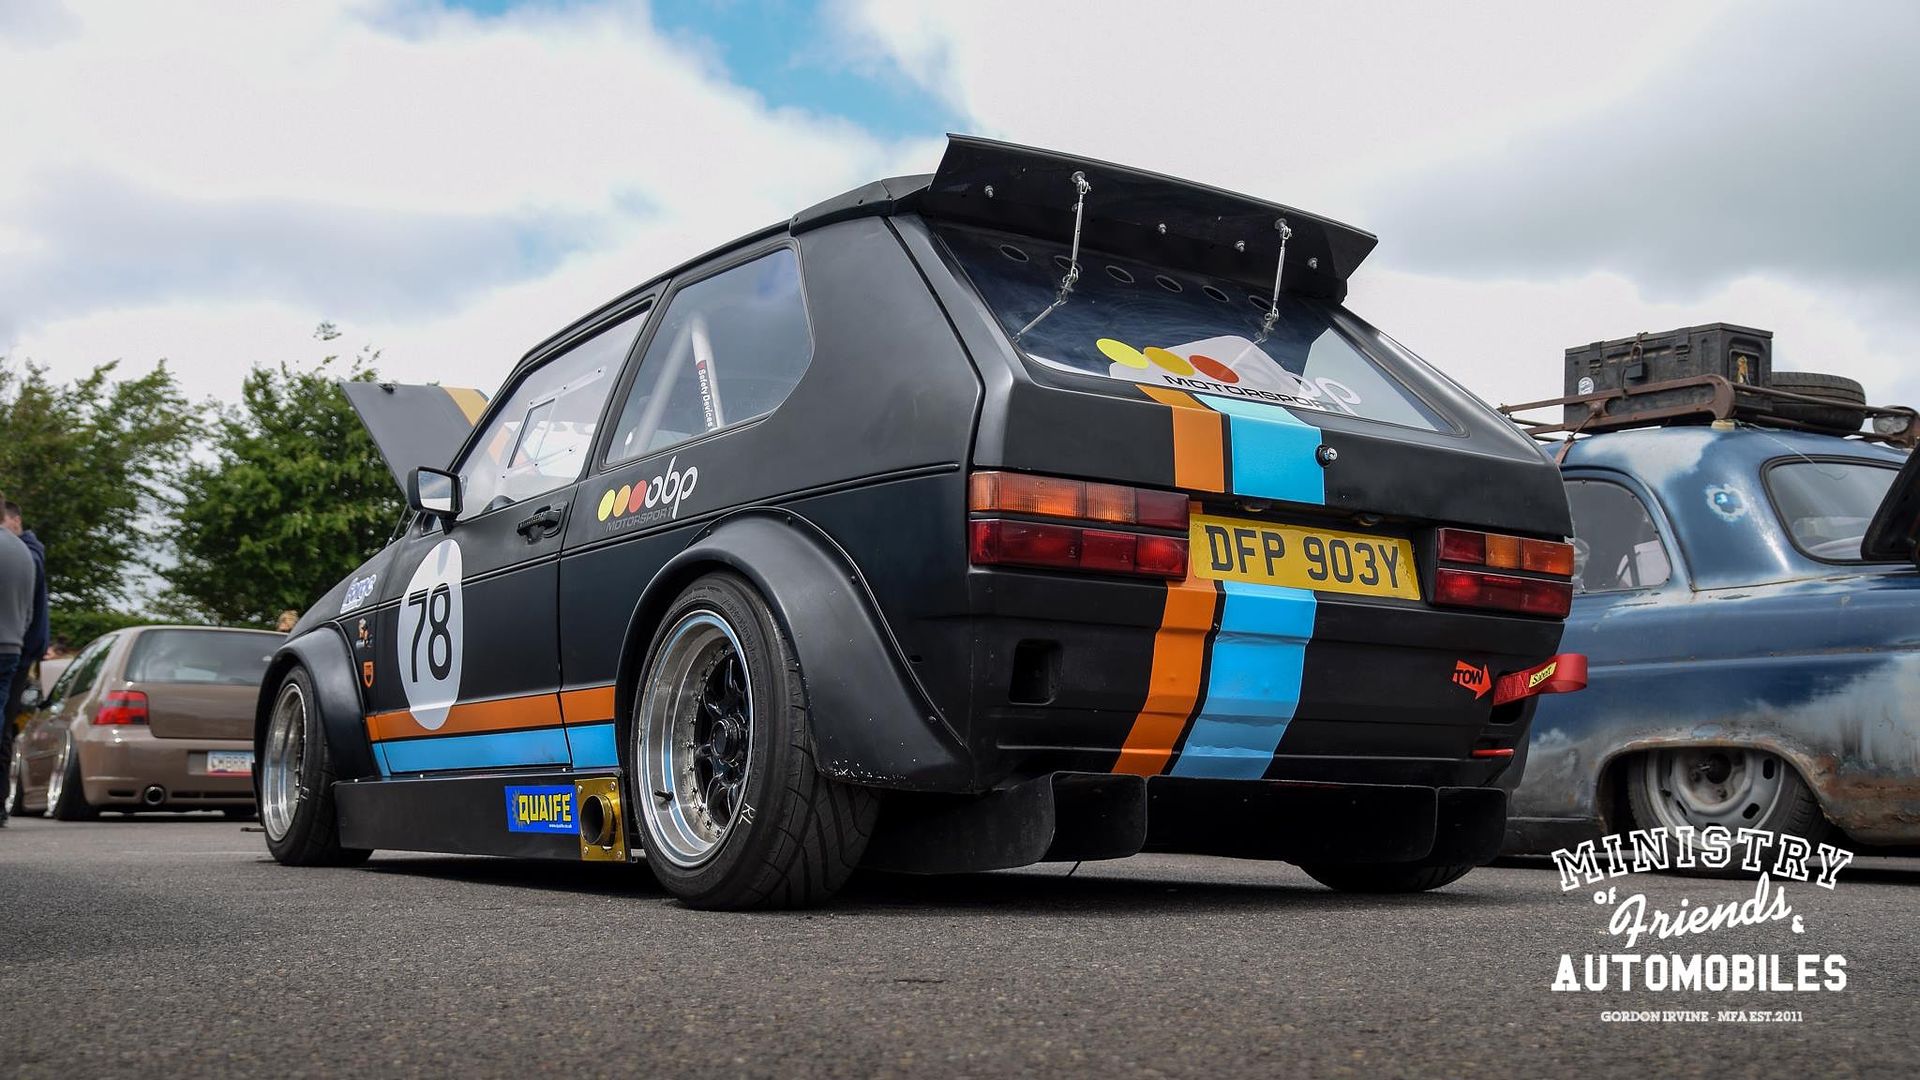
Thanks to Jack Lindley and MFA for some great pics.
The next area to tackle was the clutch. It had started to slip so we pulled to box and made a few other improvements while we were at it.
First up, a 6spd Quaife Dog box, new brakes, and new coilovers

Then it was time for a road test..
Boy was that epic! Check out the vid here. The sound of the dog box is incredible.
We also decided to give the engine bay a bit of love as it was looking a bit tired.
Powder coated the cam cover, new rad, powder coated top mounts, new fluid res, re did the boost plumbing, and the list goes on
Finished result

Powder coated the cam cover, new rad, powder coated top mounts, new fluid res, re did the boost plumbing, and the list goes on
Next up was the exhaust
The current system was hashed together using off the shelf bends and clamped together. It hung down low and we were constantly catching it and ripping it off..
After smashing it one last time, enough was enough so I took the car down to Style Dynamix to have a custom tucked exhaust made.
The boys did a great job.


And that was us sorted for players.
And as far as I could tell, the car was a hit.


Thanks to Jack Lindley and MFA for some great pics.
Gassing Station | Readers' Cars | Top of Page | What's New | My Stuff