Defender 90 - 6.0l LS V8 and 6l80 conversion.
Discussion


It was suggested in one of the offroad section threads that this may be of interest to some people.
I have tried to tidy this up from a couple of threads on LR forums so hopefully it makes sense…
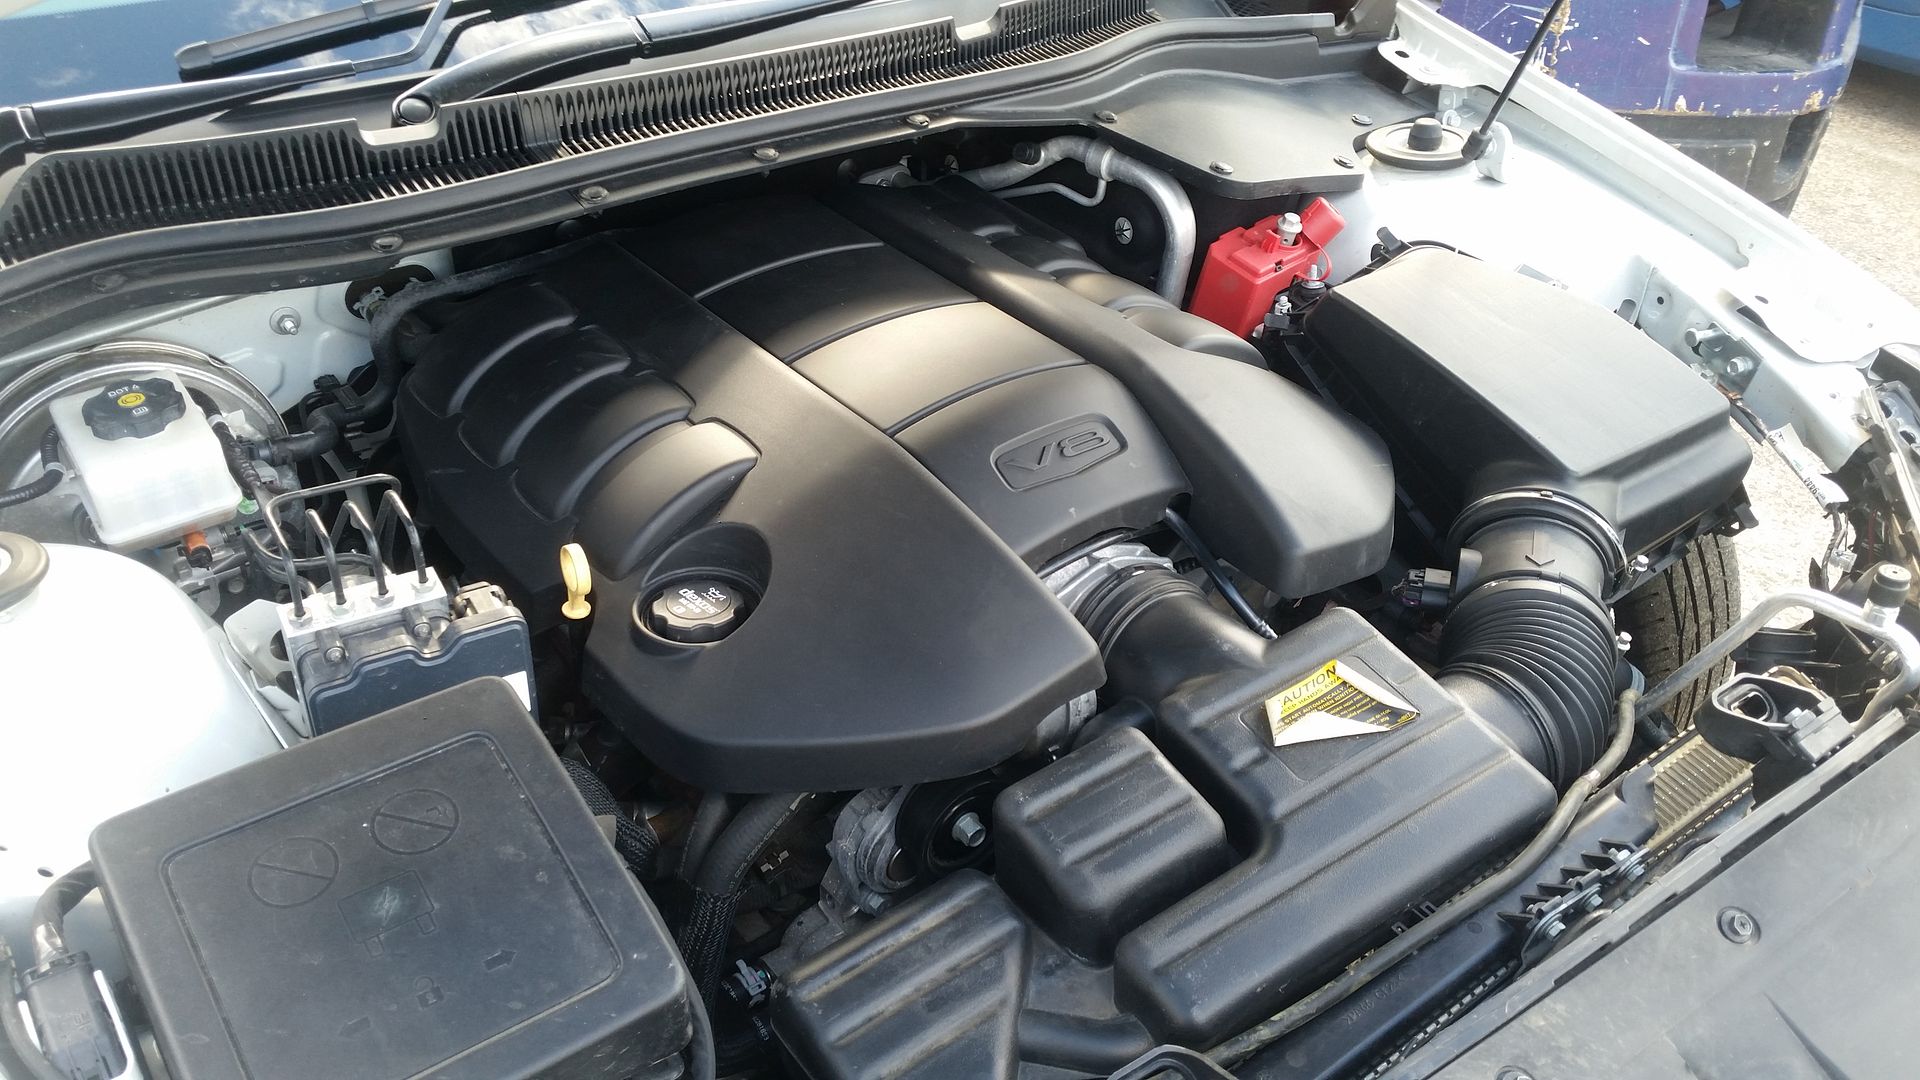
I am converting my 2001 TD5 Defender 90 to use the 6.0 l77 (Aussie version of the LS2/3 with cylinder deactivation) and 6l80e automatic from a 2015 VF holden Commodore SS.
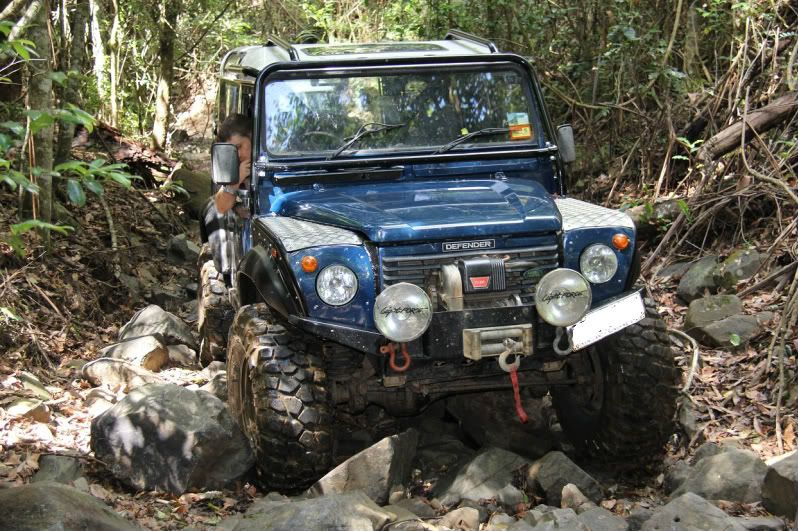
So this is the 90 in question. It is my off road toy. It is a late 2001 90, which I have owned for nearly 14 years, buying it with 11000miles on the clock. I bought it in the UK and put it in a container when we emigrated.

My wife thinks it would be more sensible to do the swap into our 2.2 90 and on the odd occasion I drive it I am inclined to agree with her.
Spec list is pretty long so I wont bore people with that, but the main points are Underdrive, cage, lockers, up-rated driveline, galvanized Chassis etc etc.
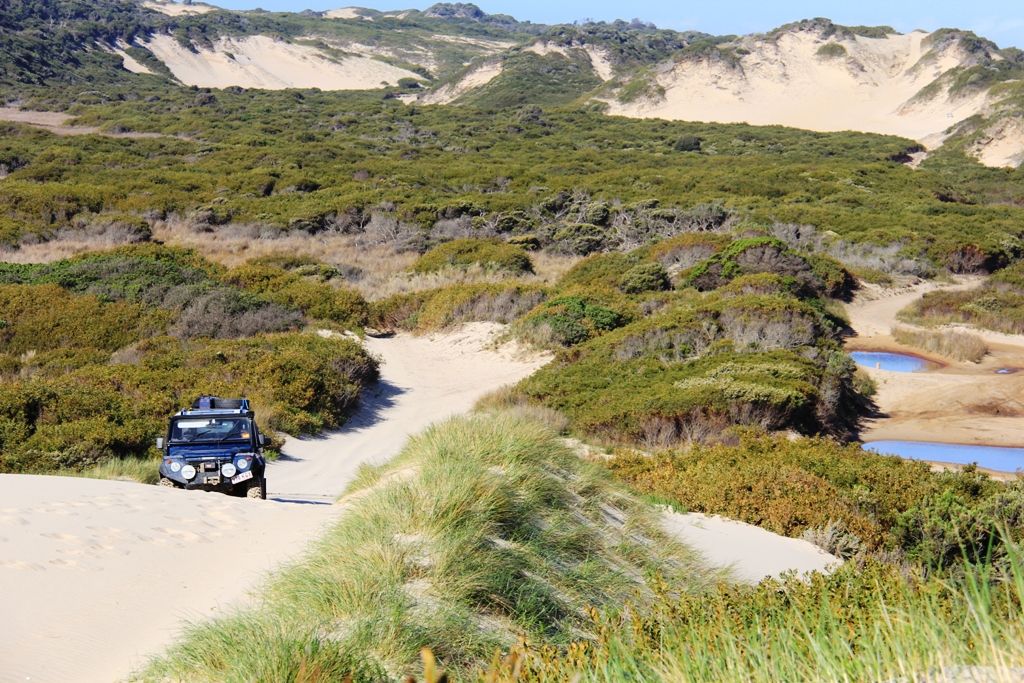
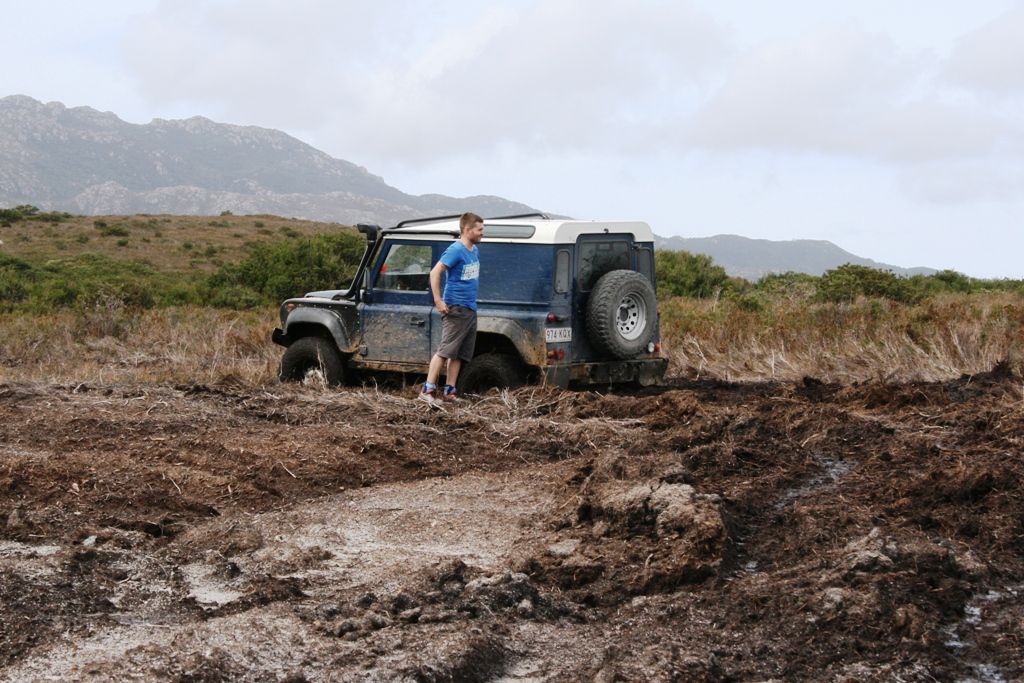
In no way is this a shiny, straight and polished Defender. It has been off road all over the place including Europe, a lot of Australia including Tasmania, the Simpson Desert, and Cape York. A fortune has been spent on maintenance over the years however due to the nature of its use.
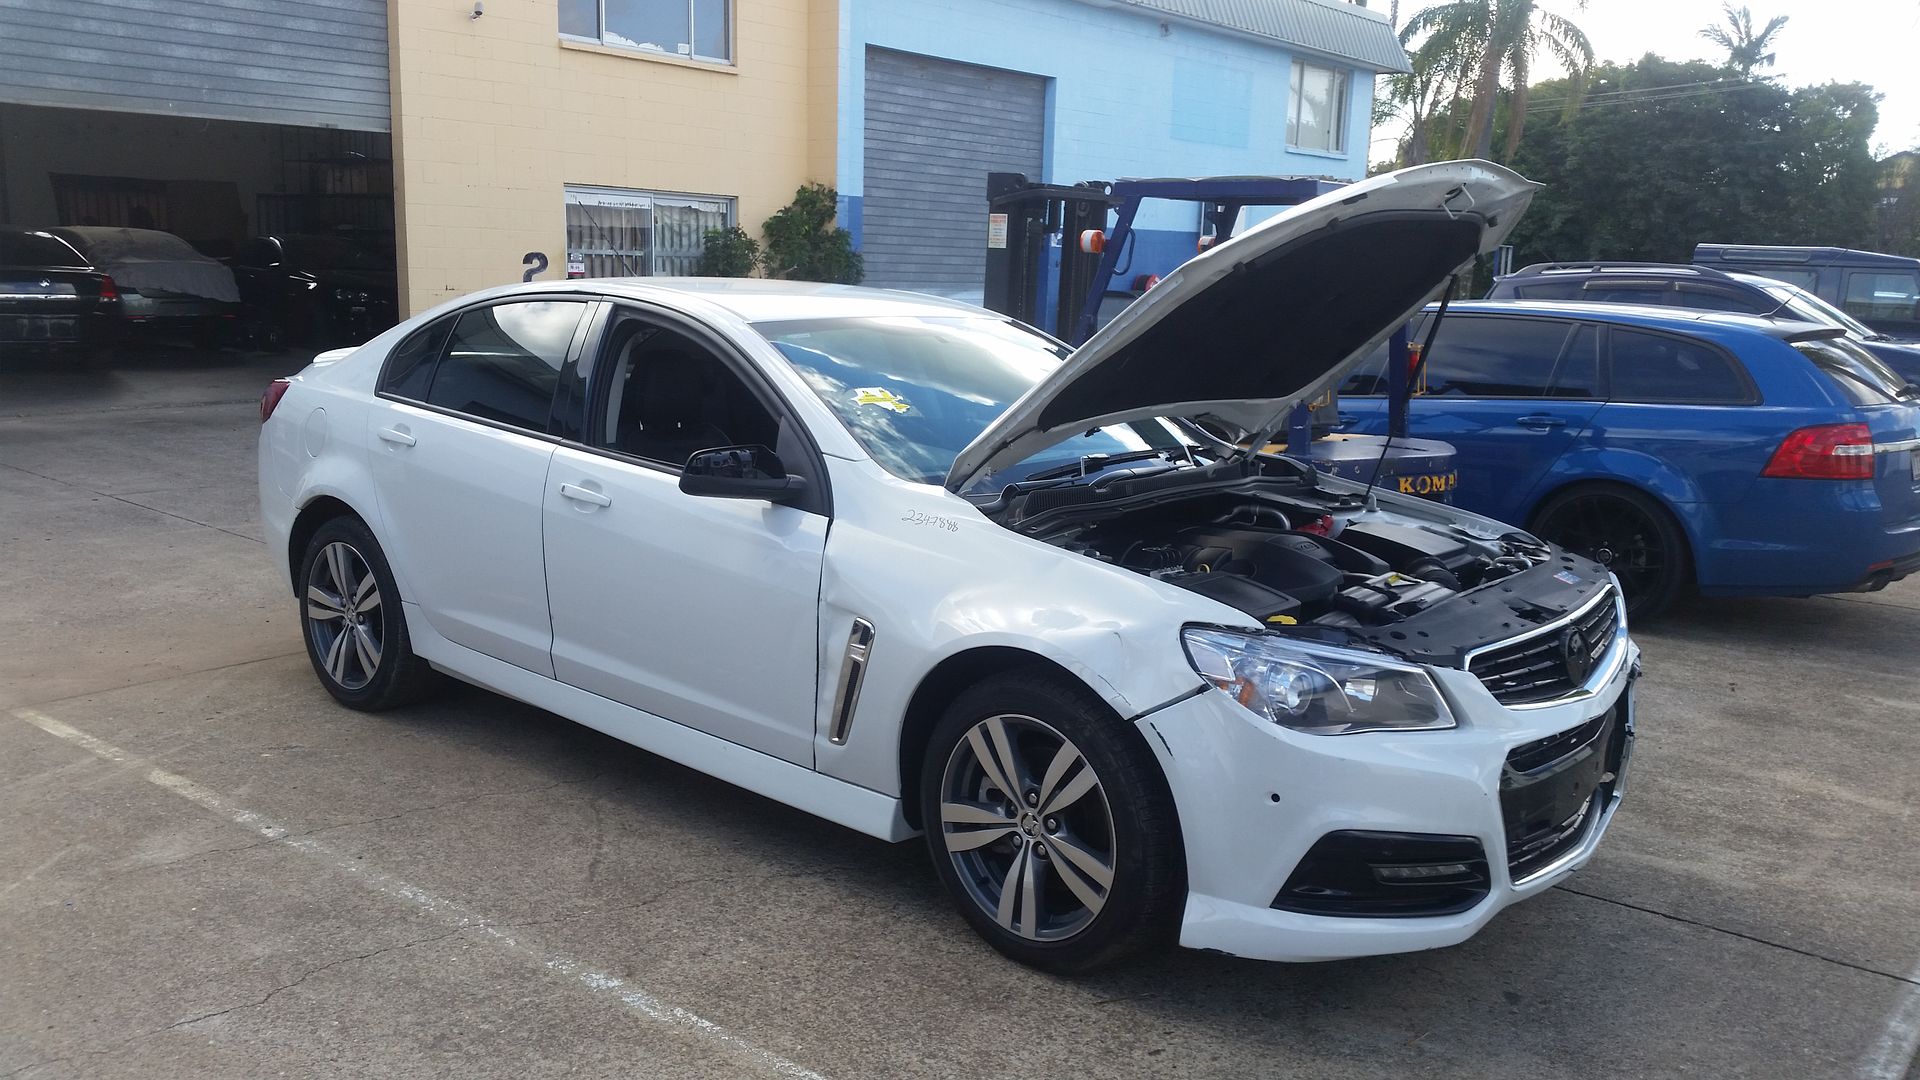
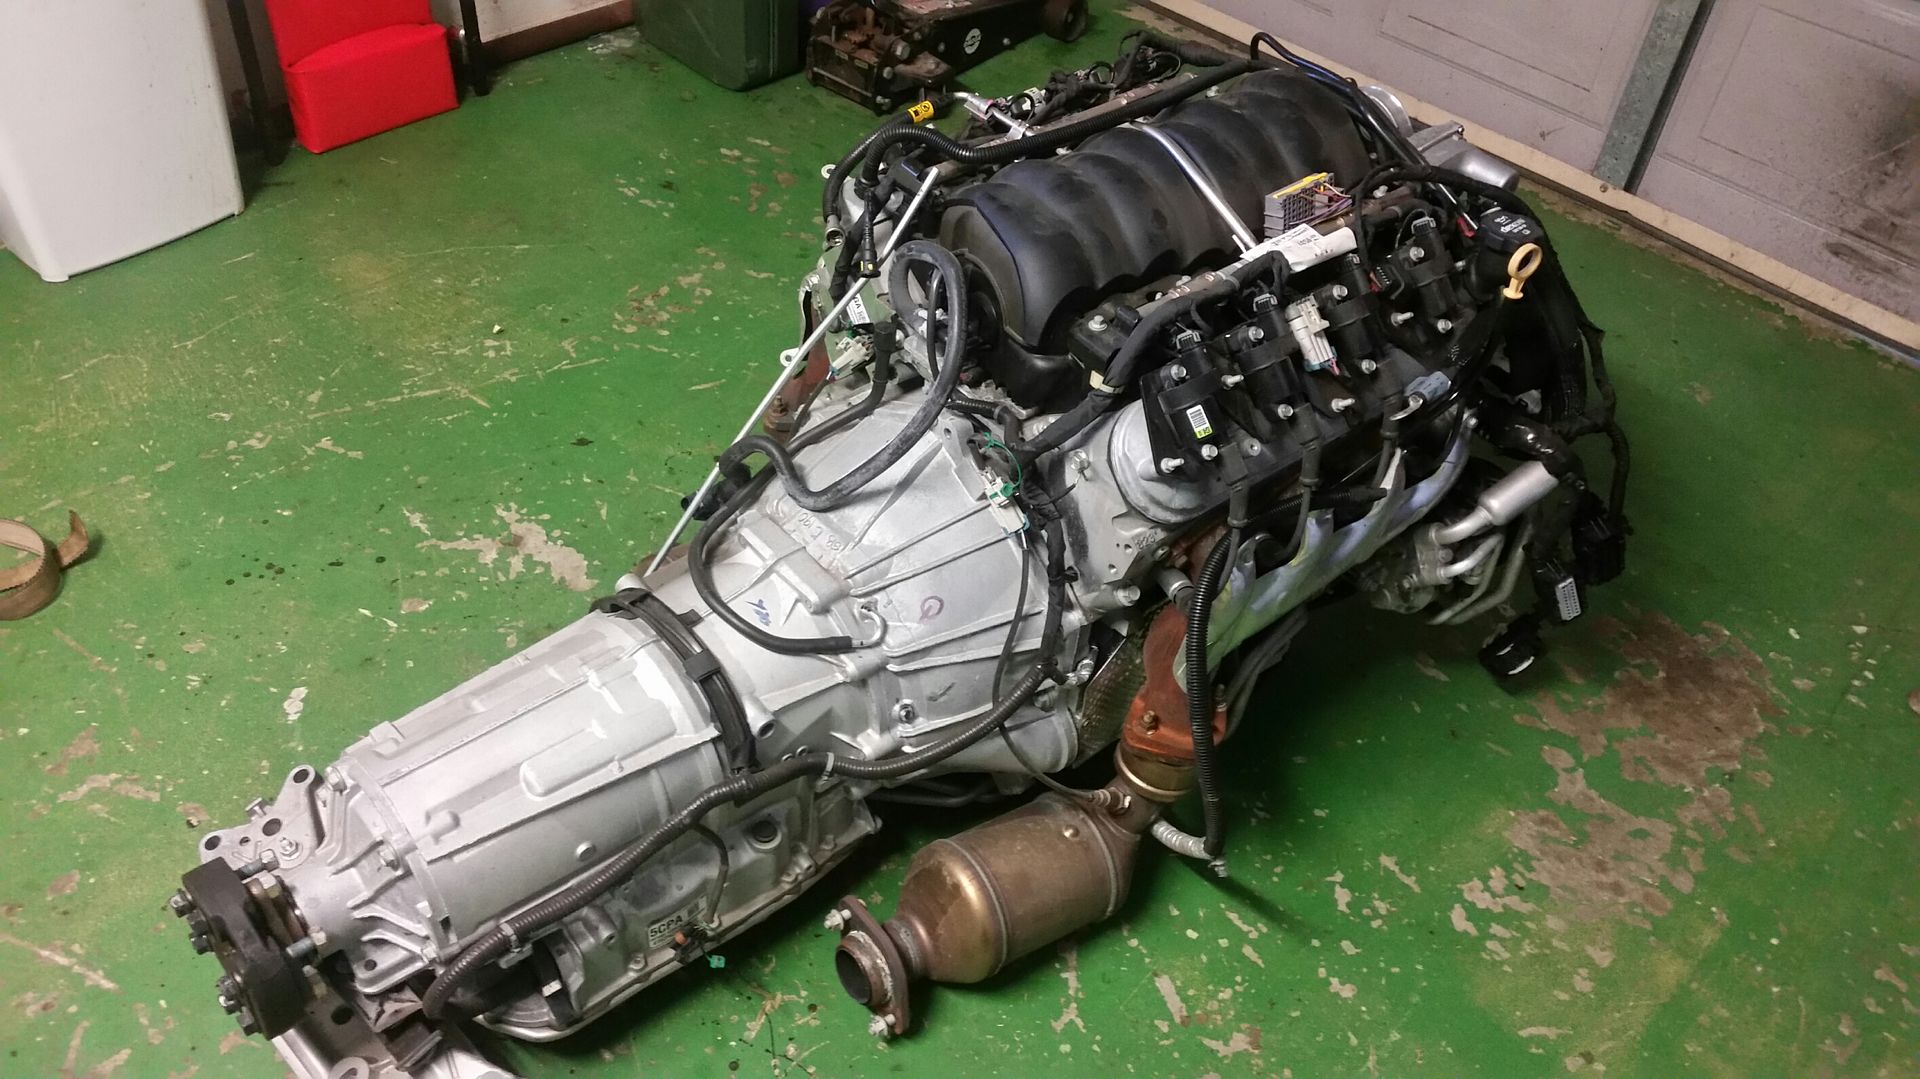
And this is where the powertrain has come from, Its a 2015 VF SS Holden commodore. which has only done 37k km. Believe it or not this is written off.
I have tried to tidy this up from a couple of threads on LR forums so hopefully it makes sense…
I am converting my 2001 TD5 Defender 90 to use the 6.0 l77 (Aussie version of the LS2/3 with cylinder deactivation) and 6l80e automatic from a 2015 VF holden Commodore SS.
So this is the 90 in question. It is my off road toy. It is a late 2001 90, which I have owned for nearly 14 years, buying it with 11000miles on the clock. I bought it in the UK and put it in a container when we emigrated.
My wife thinks it would be more sensible to do the swap into our 2.2 90 and on the odd occasion I drive it I am inclined to agree with her.
Spec list is pretty long so I wont bore people with that, but the main points are Underdrive, cage, lockers, up-rated driveline, galvanized Chassis etc etc.
In no way is this a shiny, straight and polished Defender. It has been off road all over the place including Europe, a lot of Australia including Tasmania, the Simpson Desert, and Cape York. A fortune has been spent on maintenance over the years however due to the nature of its use.
And this is where the powertrain has come from, Its a 2015 VF SS Holden commodore. which has only done 37k km. Believe it or not this is written off.
So next I got it home, complete with BCM, ECU, Throttle, cats, loom, gearshifter etc etc. I may/will not use it all but I wanted it to make sure I wasn't missing anything
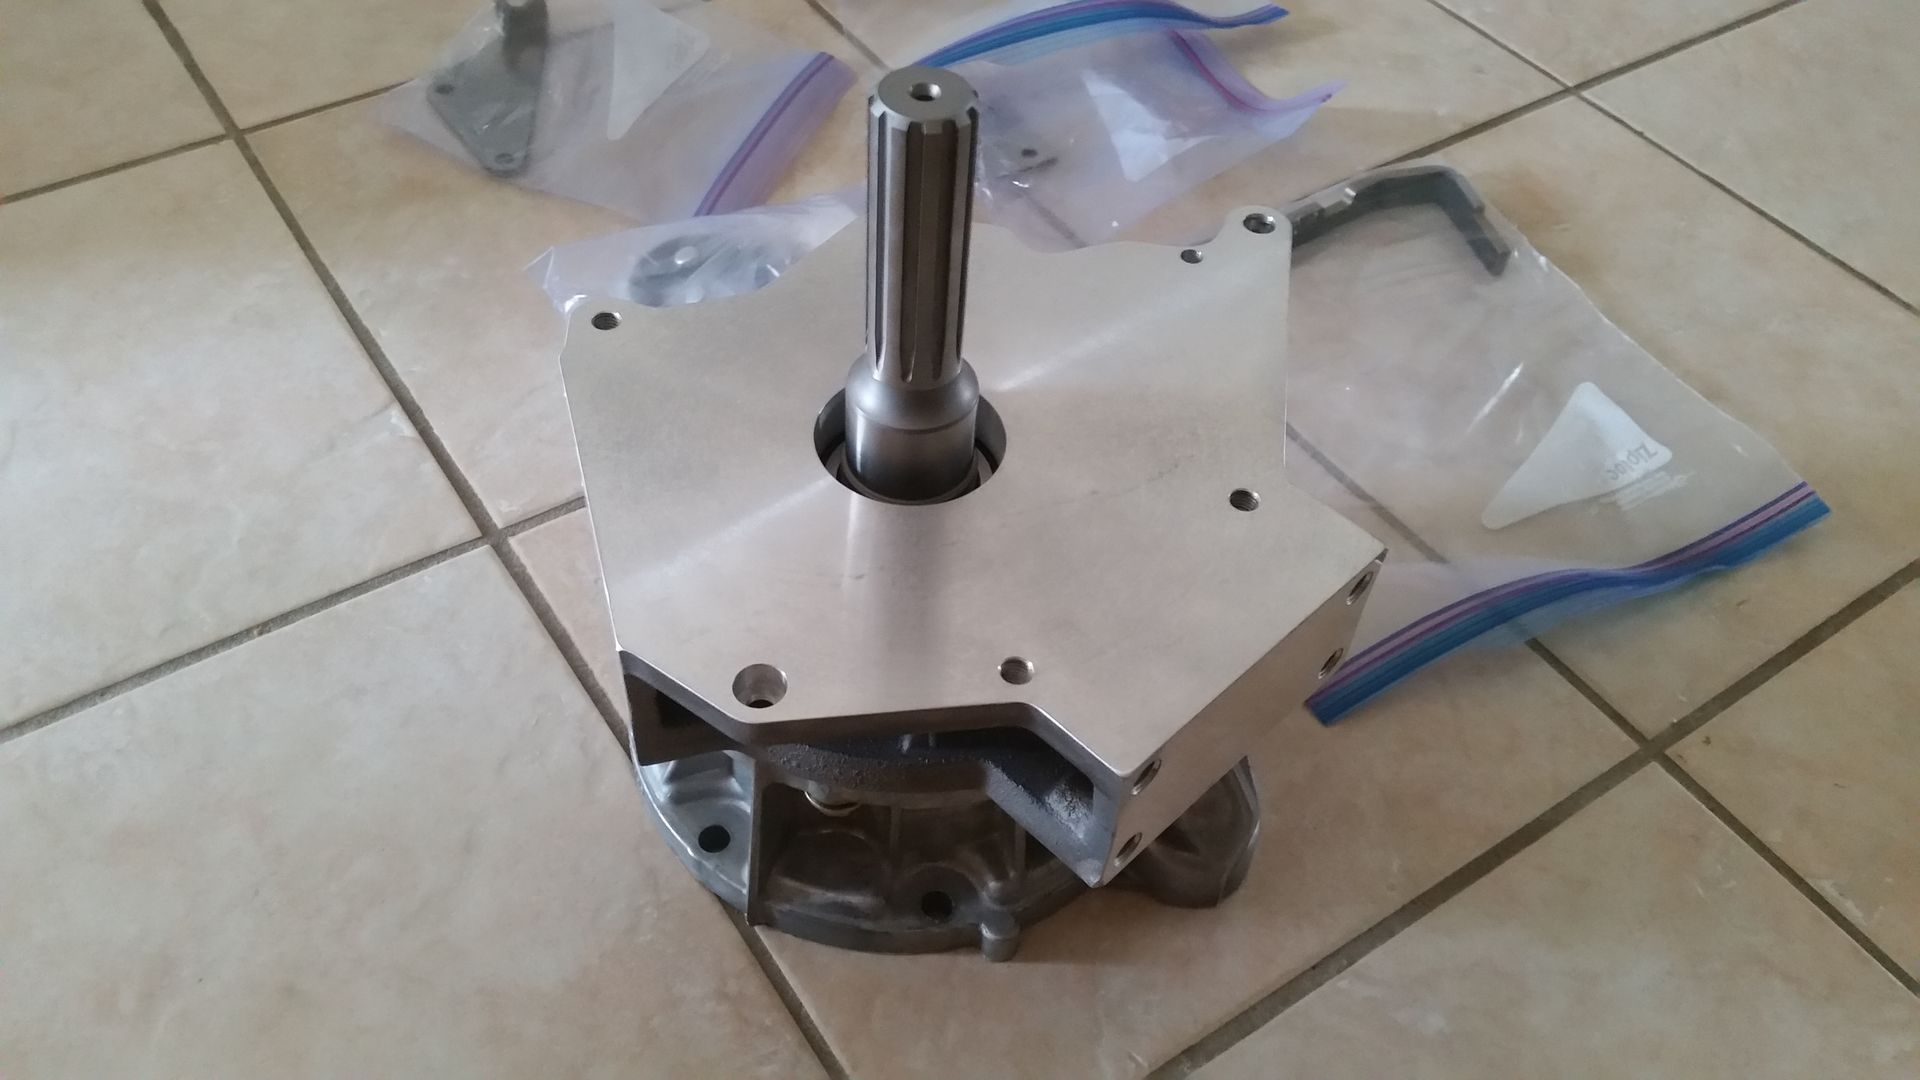
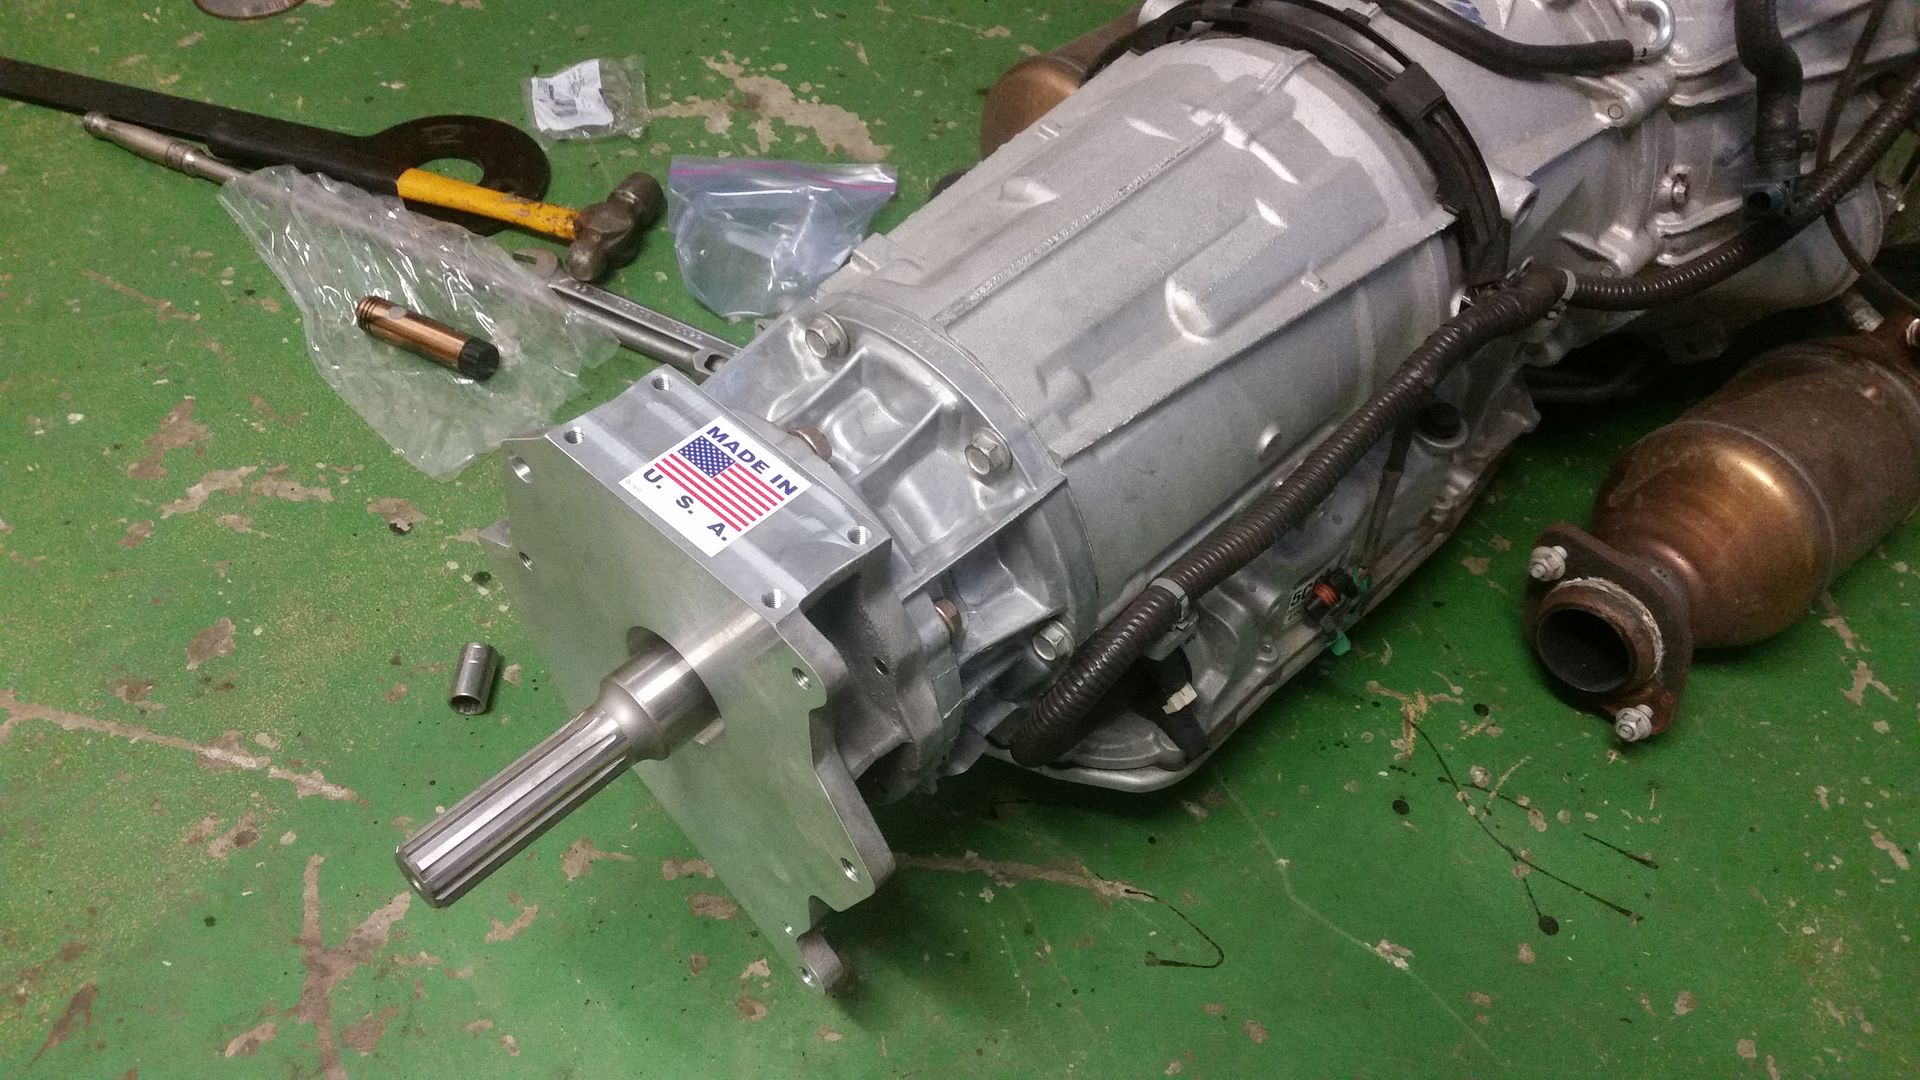
Luckily now there is an off the shelf adaptor available out of the states that allows the LT230 to be fitted onto the 6l80e without needing to push the drivetrain back. The ability to keep the LT is very important to me as I have an Ashcroft Underdrive
This is the adaptor. Also in the pic in the background you can see various parts for linkages and gearlever mounts.
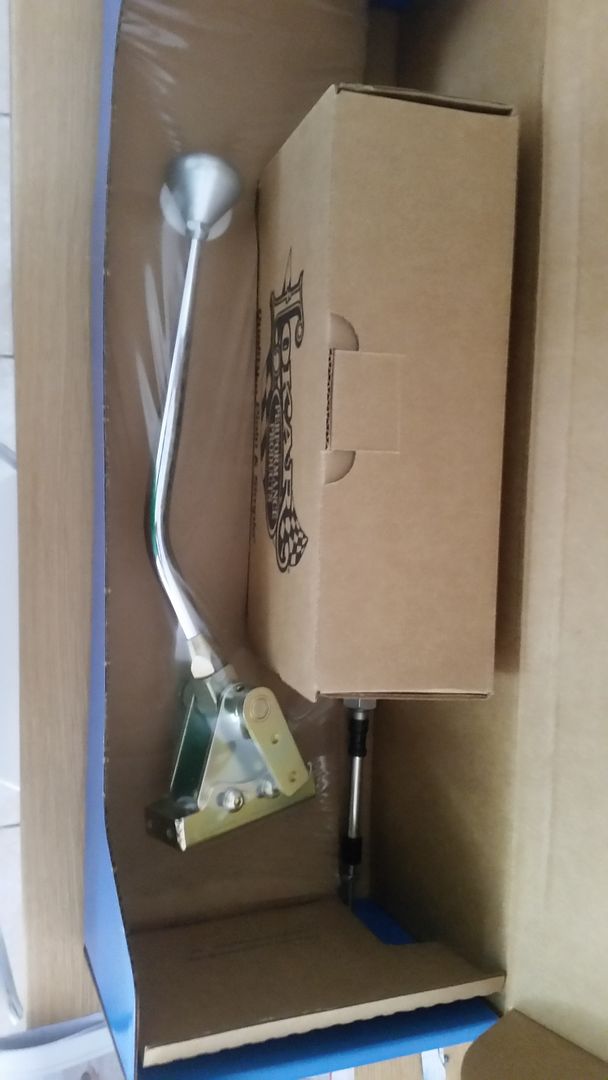
This is the Lokar shifter I am using:
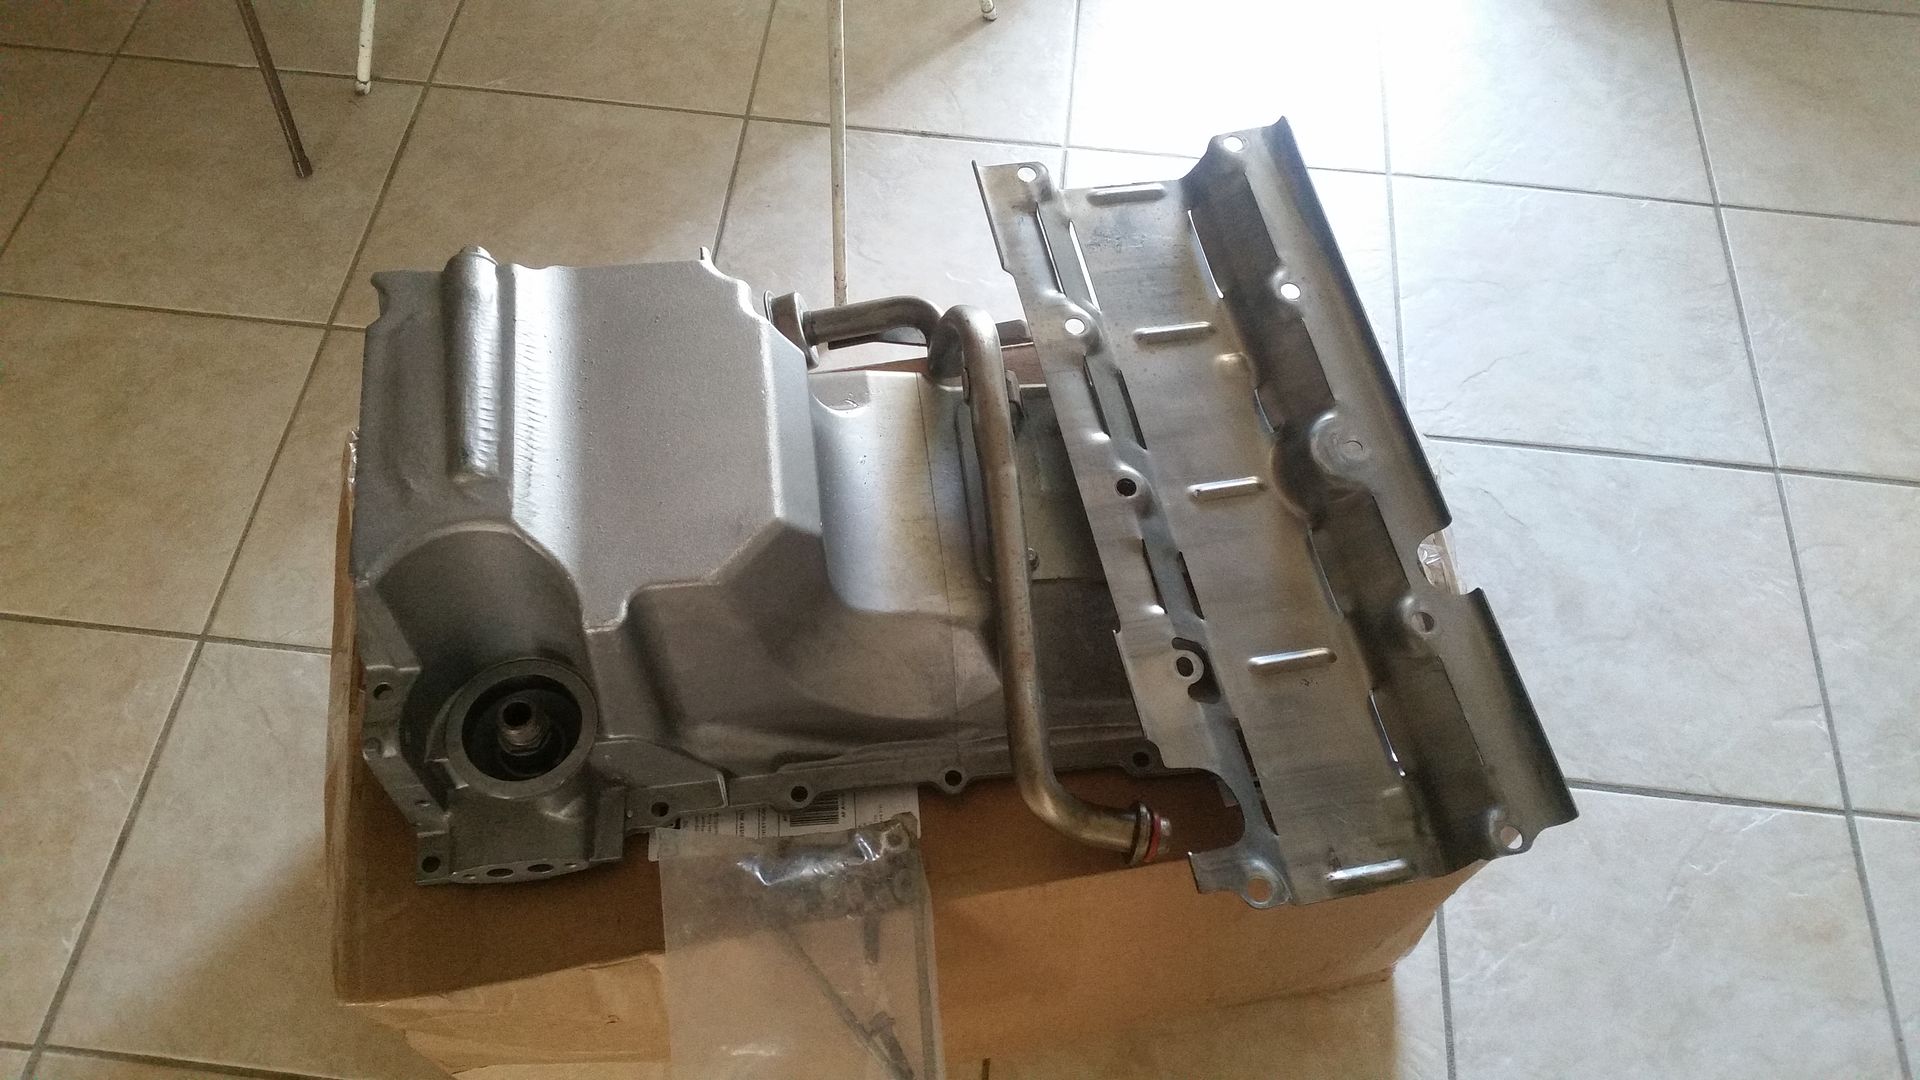
Truck (4WD) Sump as the car sump isnt suitable:
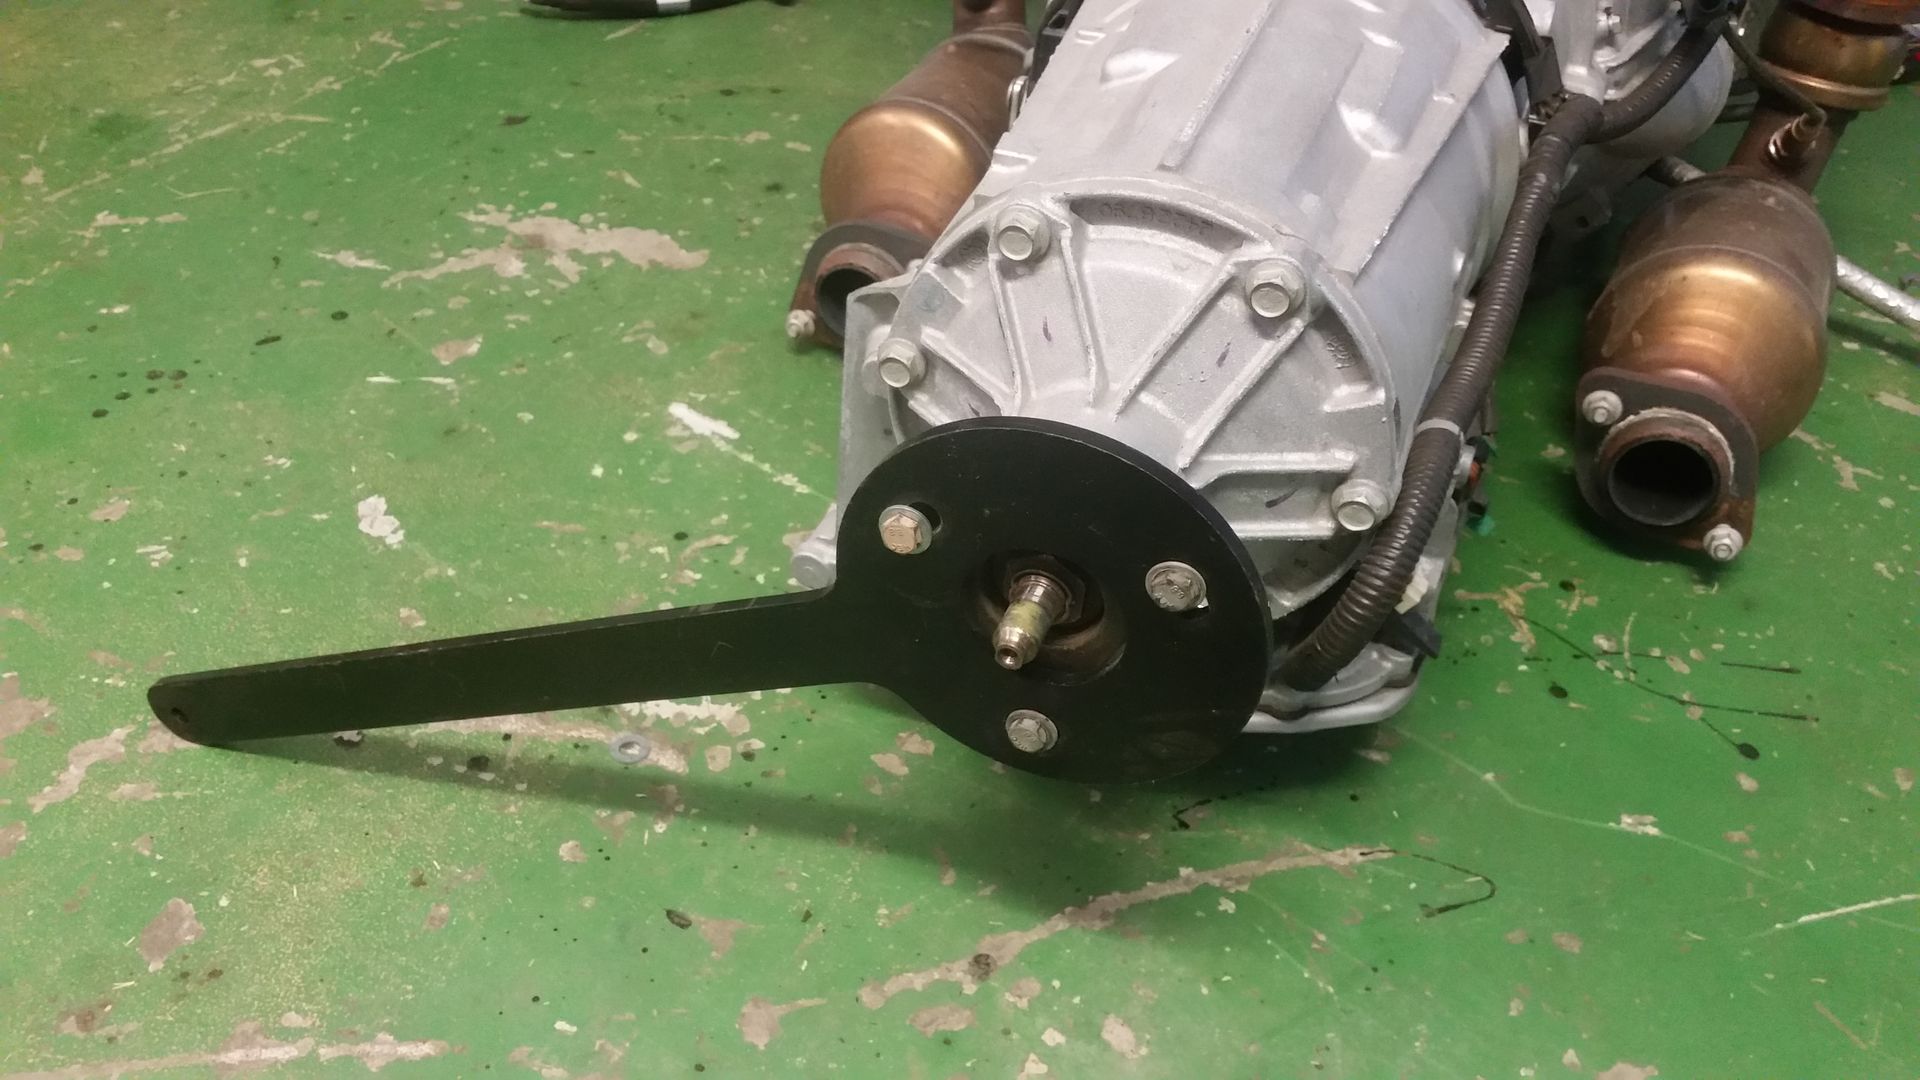
Most of these conversions are being done in the US. One issue over here is the fact that almost all the engine/box options are out of cars. That means that they have an output housing that isnt any use as it has a prop shaft flange bolted on the back.
So the next step is to convert it to a 4wd (and dry) tail housing

Seal is also fitted in this image (core plugs also fitted in the holes at the top and bottom):
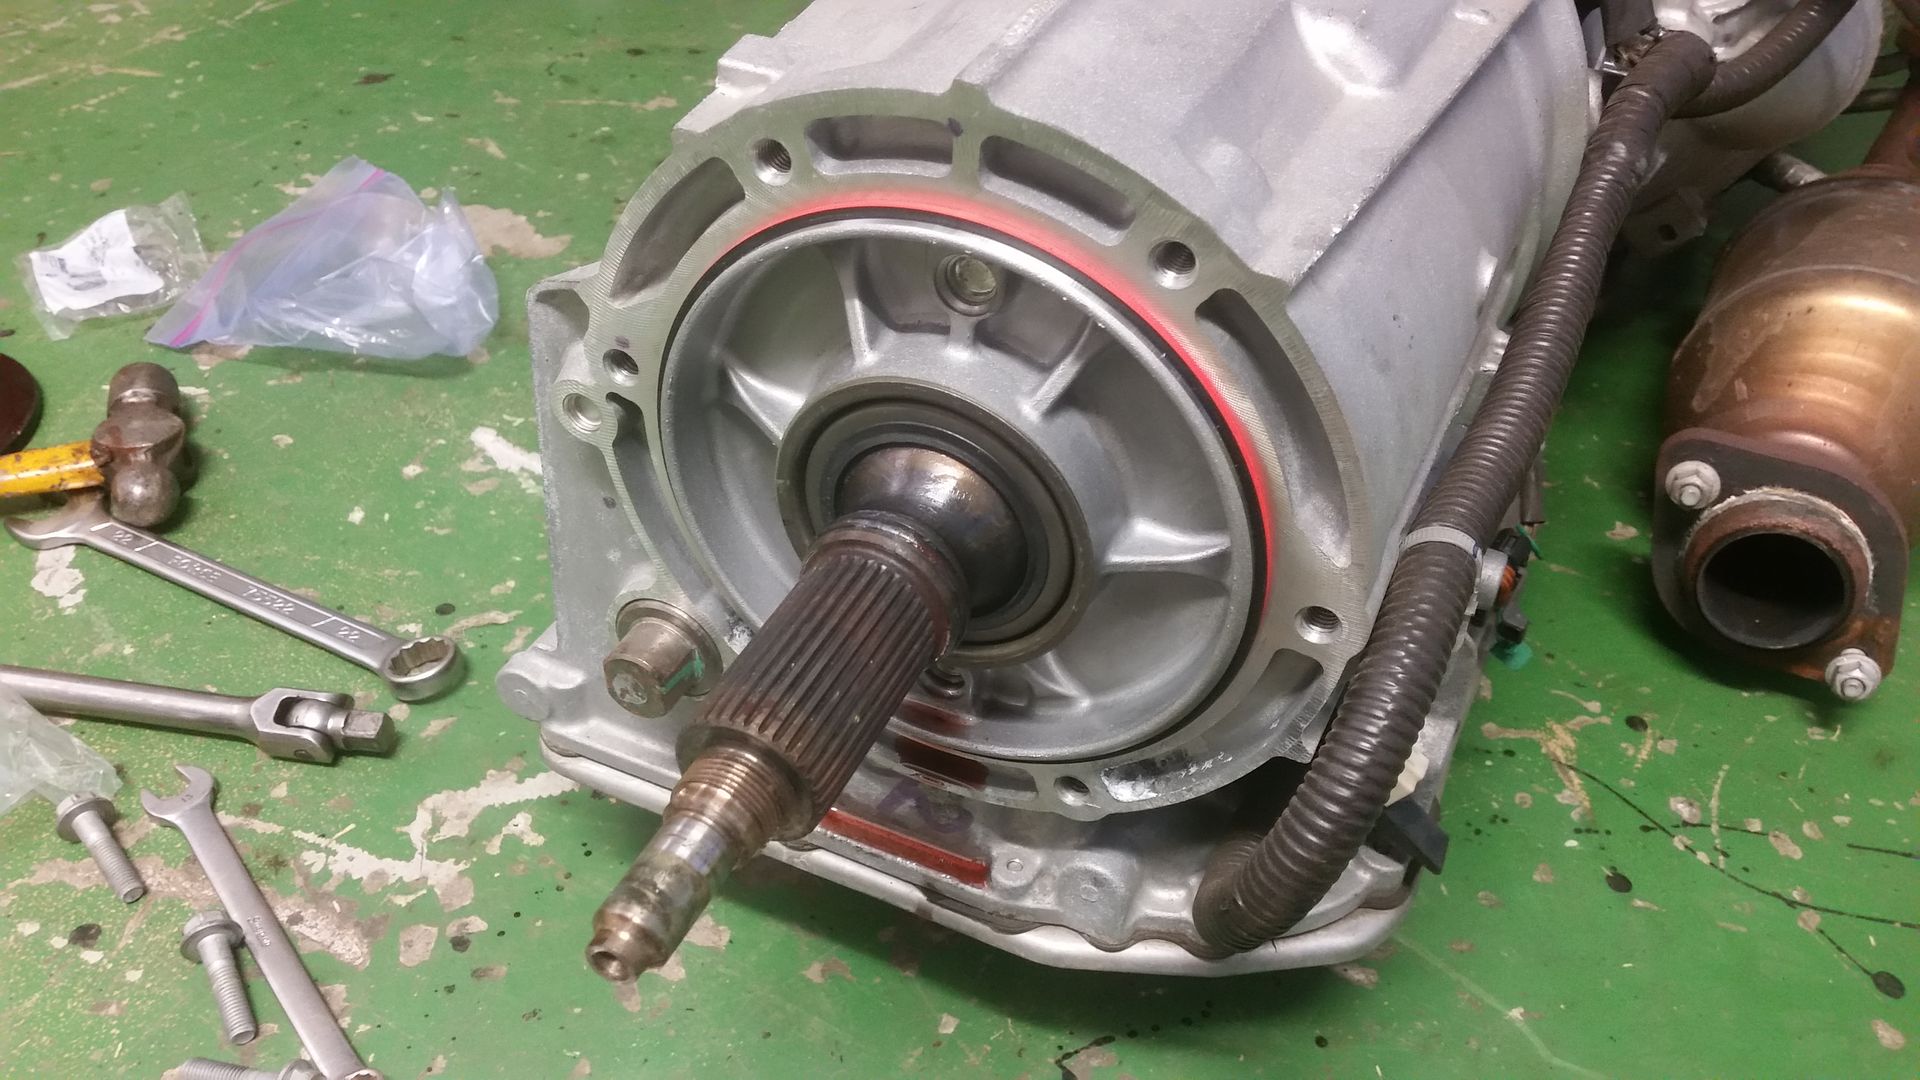
Threaded section cut off! and 4wd tail housing fitted
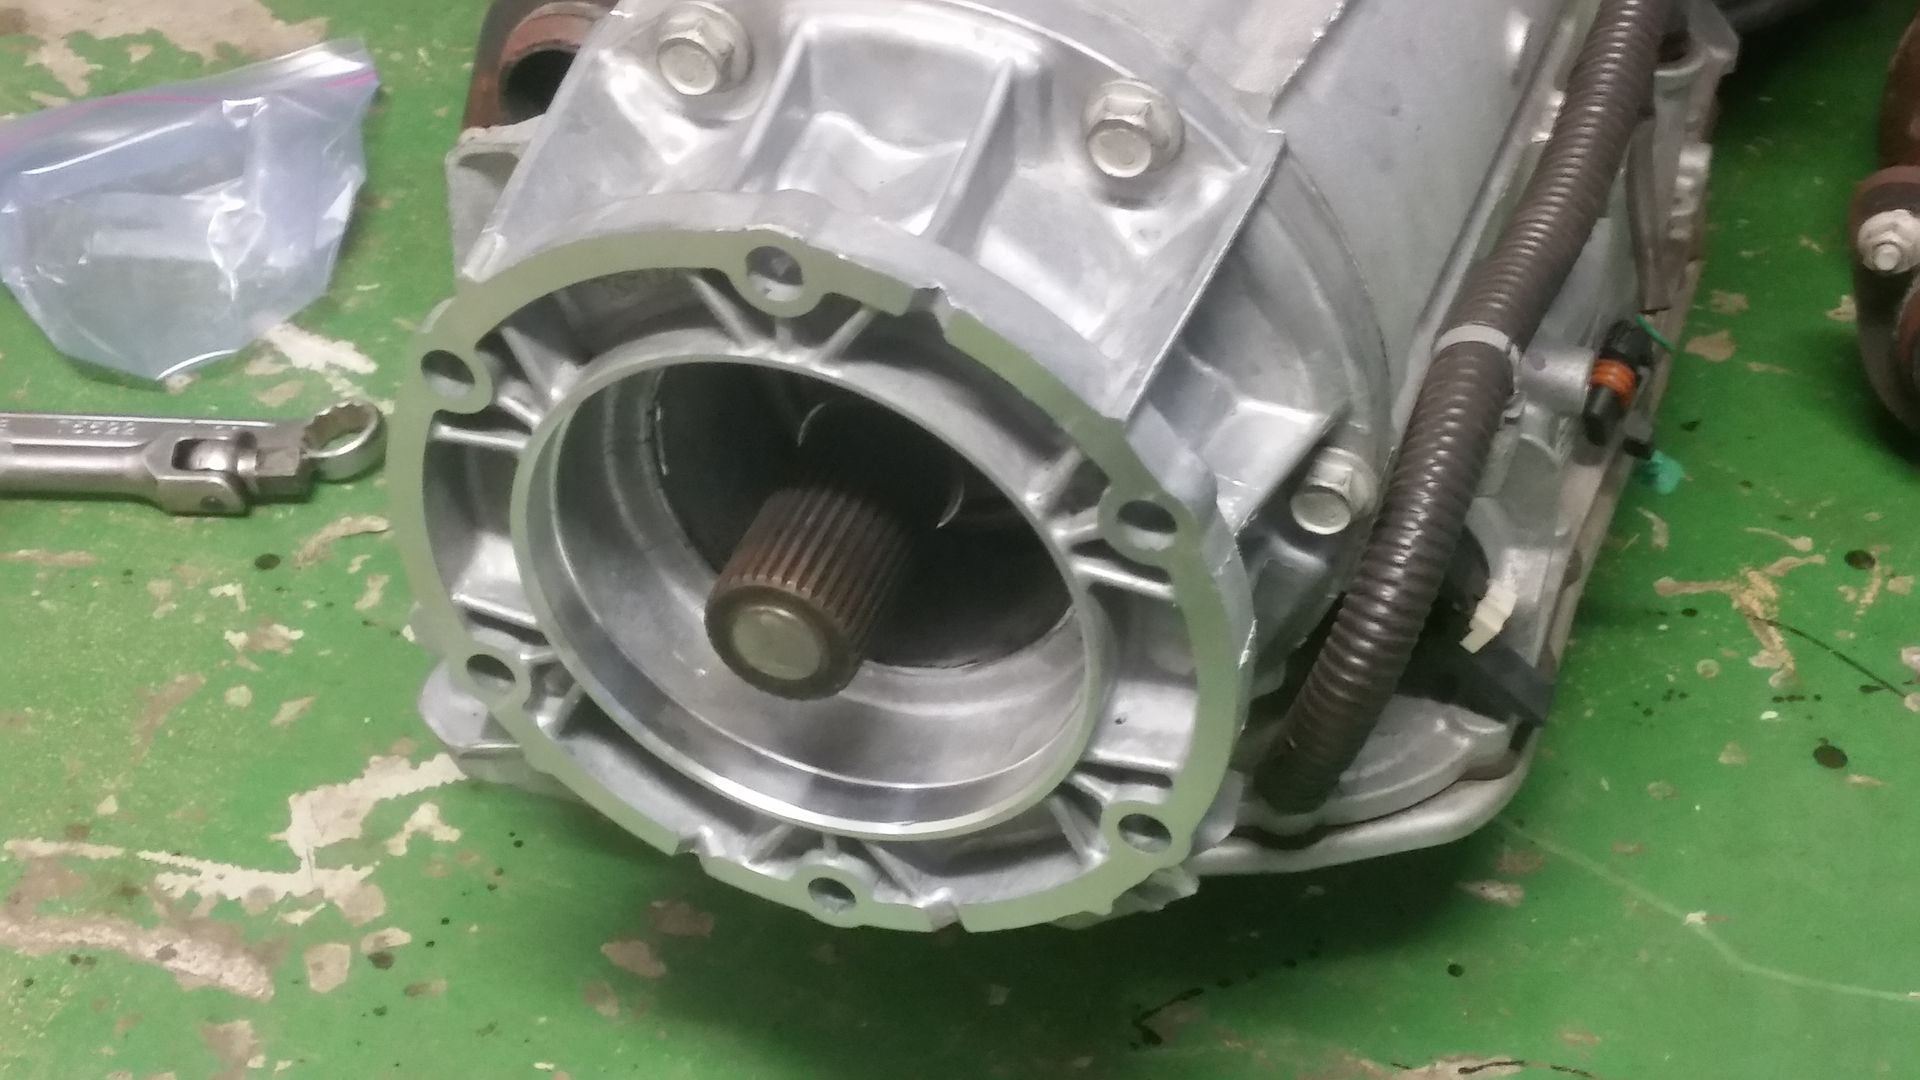
Trial fit of the adaptor:
Luckily now there is an off the shelf adaptor available out of the states that allows the LT230 to be fitted onto the 6l80e without needing to push the drivetrain back. The ability to keep the LT is very important to me as I have an Ashcroft Underdrive
This is the adaptor. Also in the pic in the background you can see various parts for linkages and gearlever mounts.
This is the Lokar shifter I am using:
Truck (4WD) Sump as the car sump isnt suitable:
Most of these conversions are being done in the US. One issue over here is the fact that almost all the engine/box options are out of cars. That means that they have an output housing that isnt any use as it has a prop shaft flange bolted on the back.
So the next step is to convert it to a 4wd (and dry) tail housing
Seal is also fitted in this image (core plugs also fitted in the holes at the top and bottom):
Threaded section cut off! and 4wd tail housing fitted
Trial fit of the adaptor:
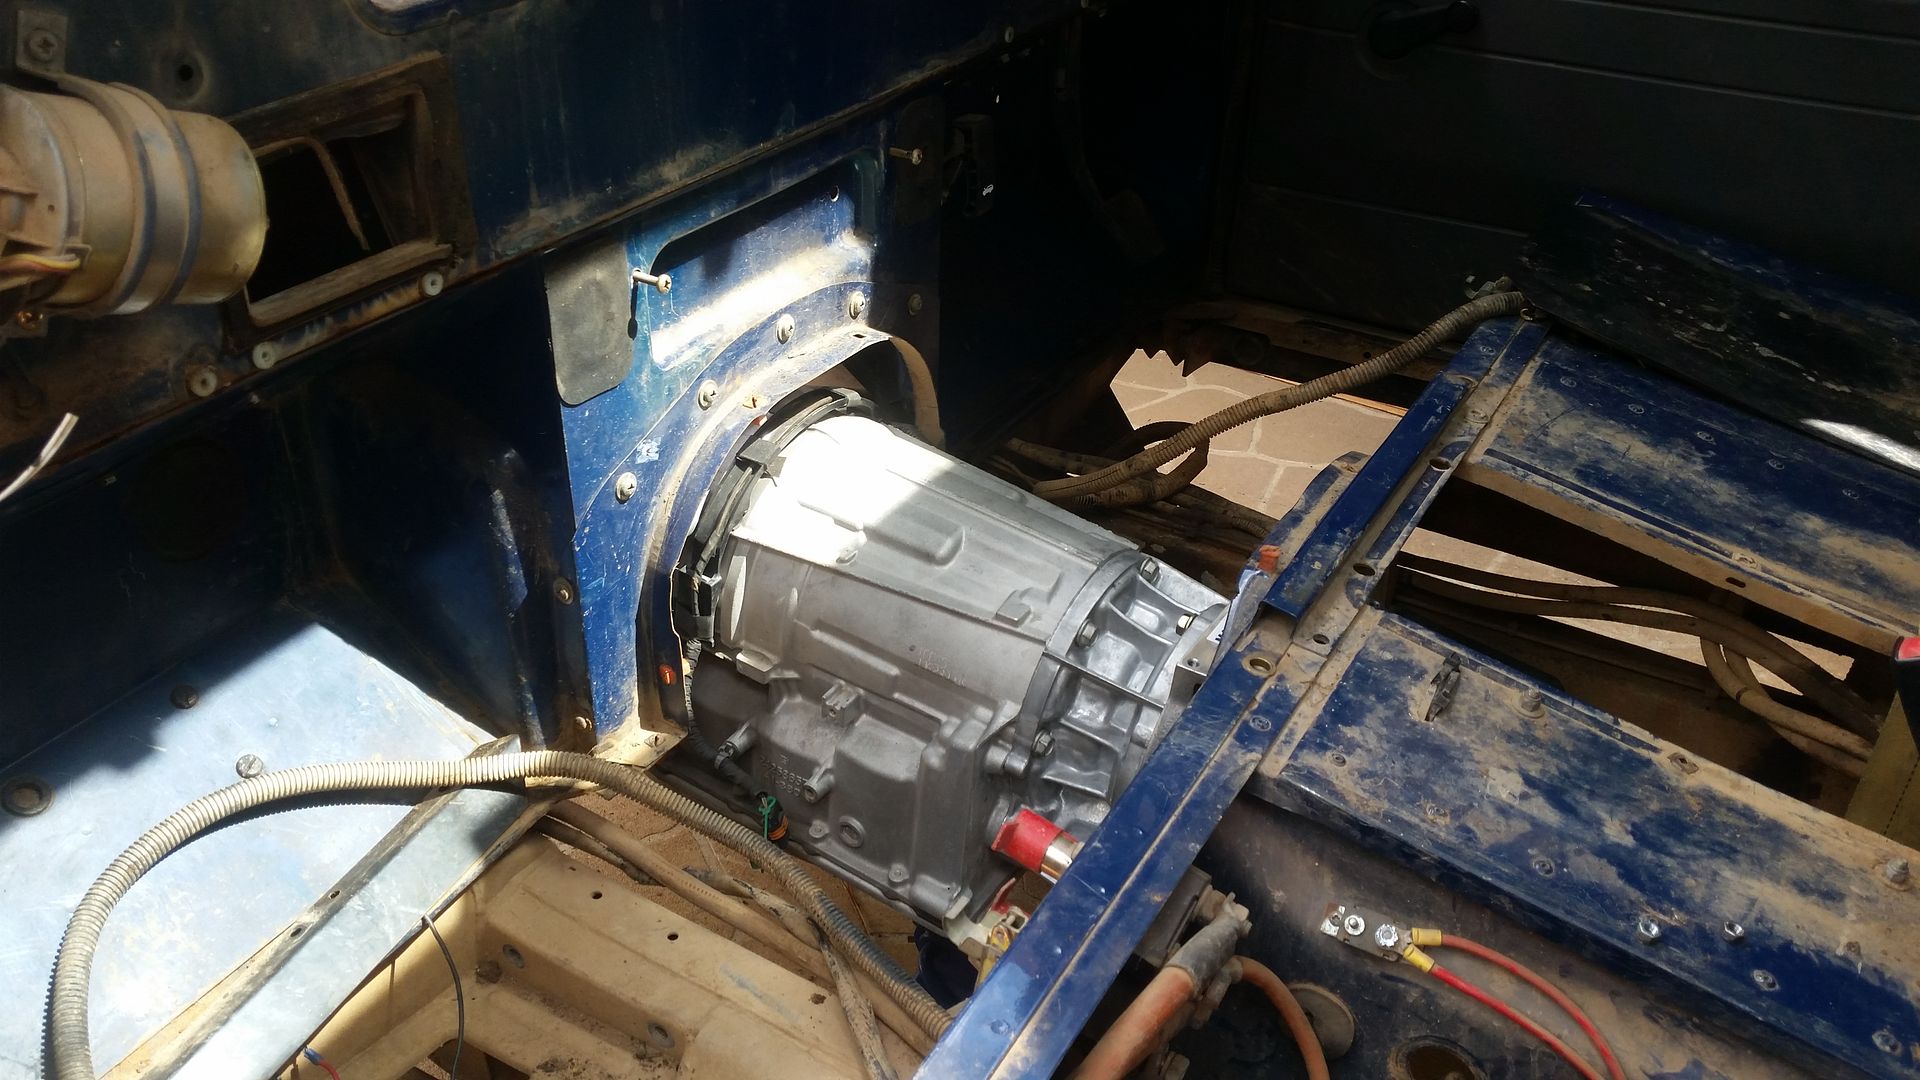
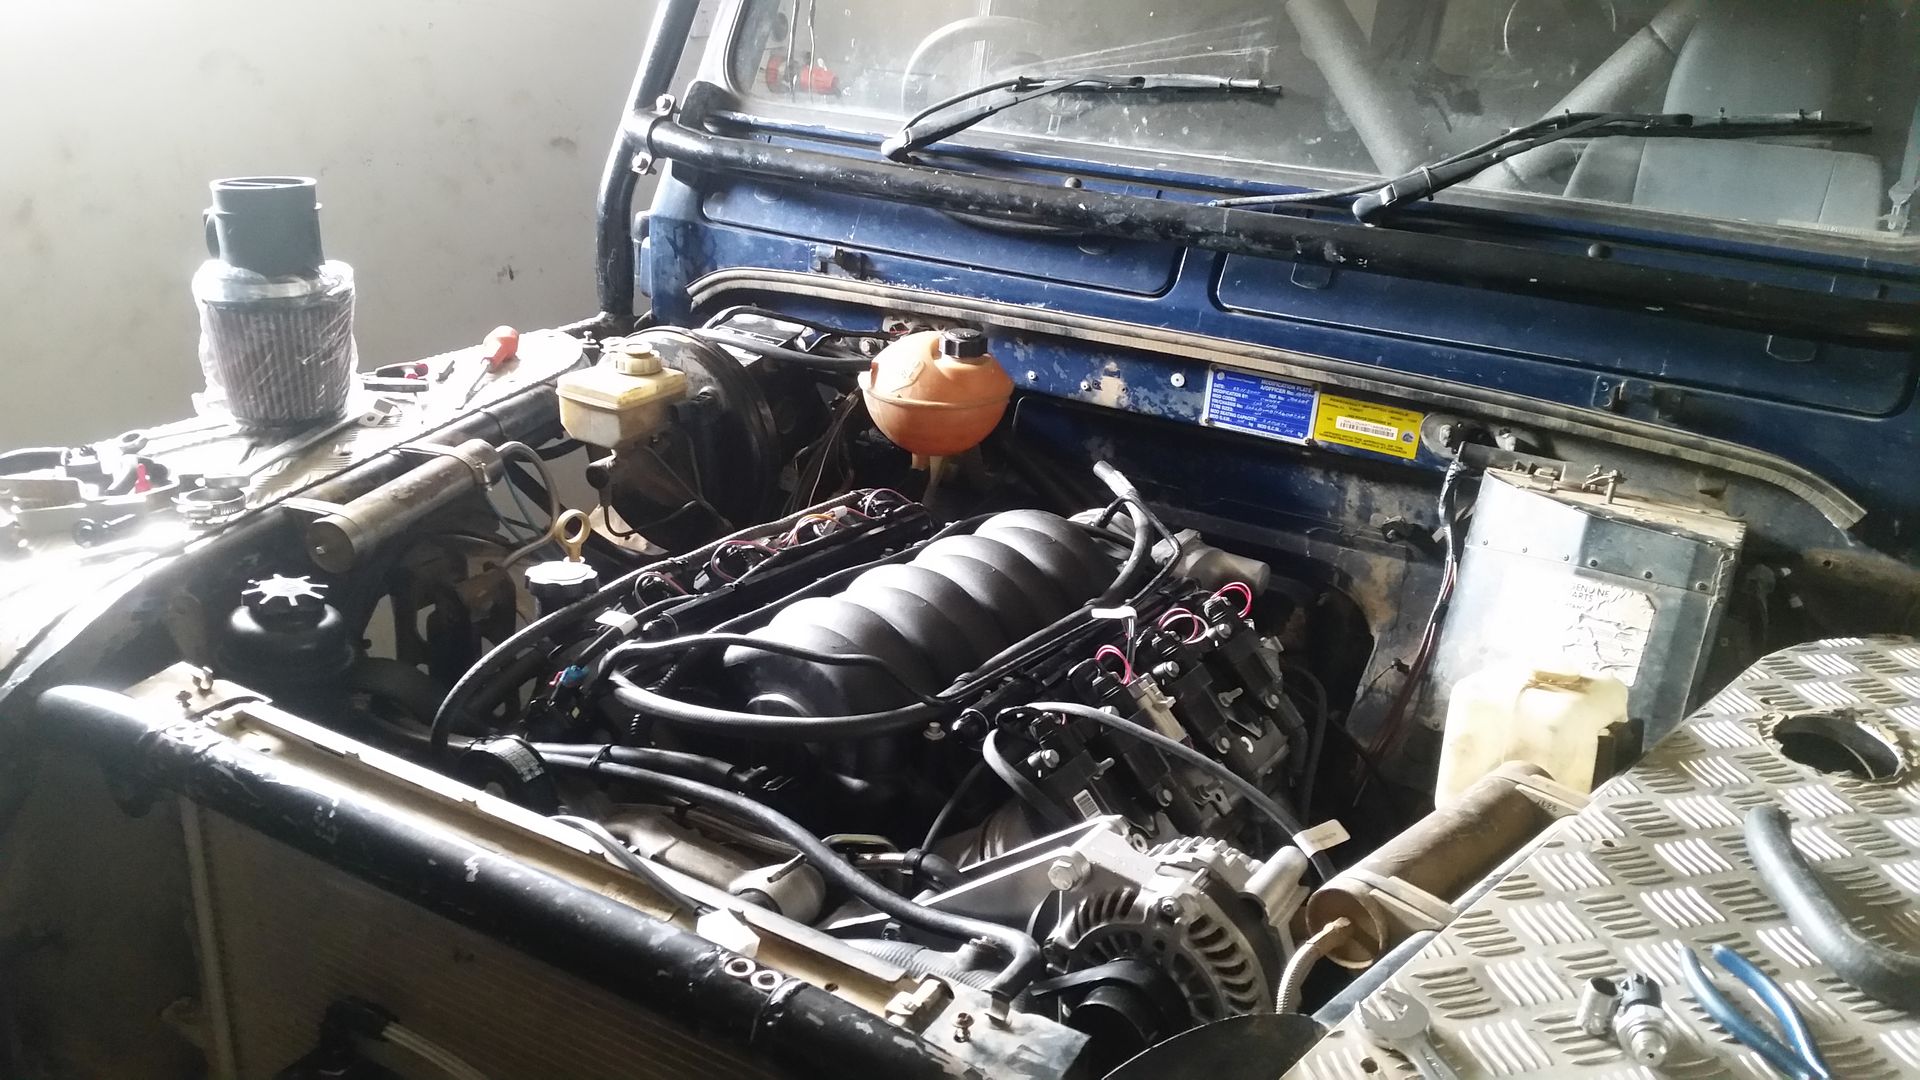
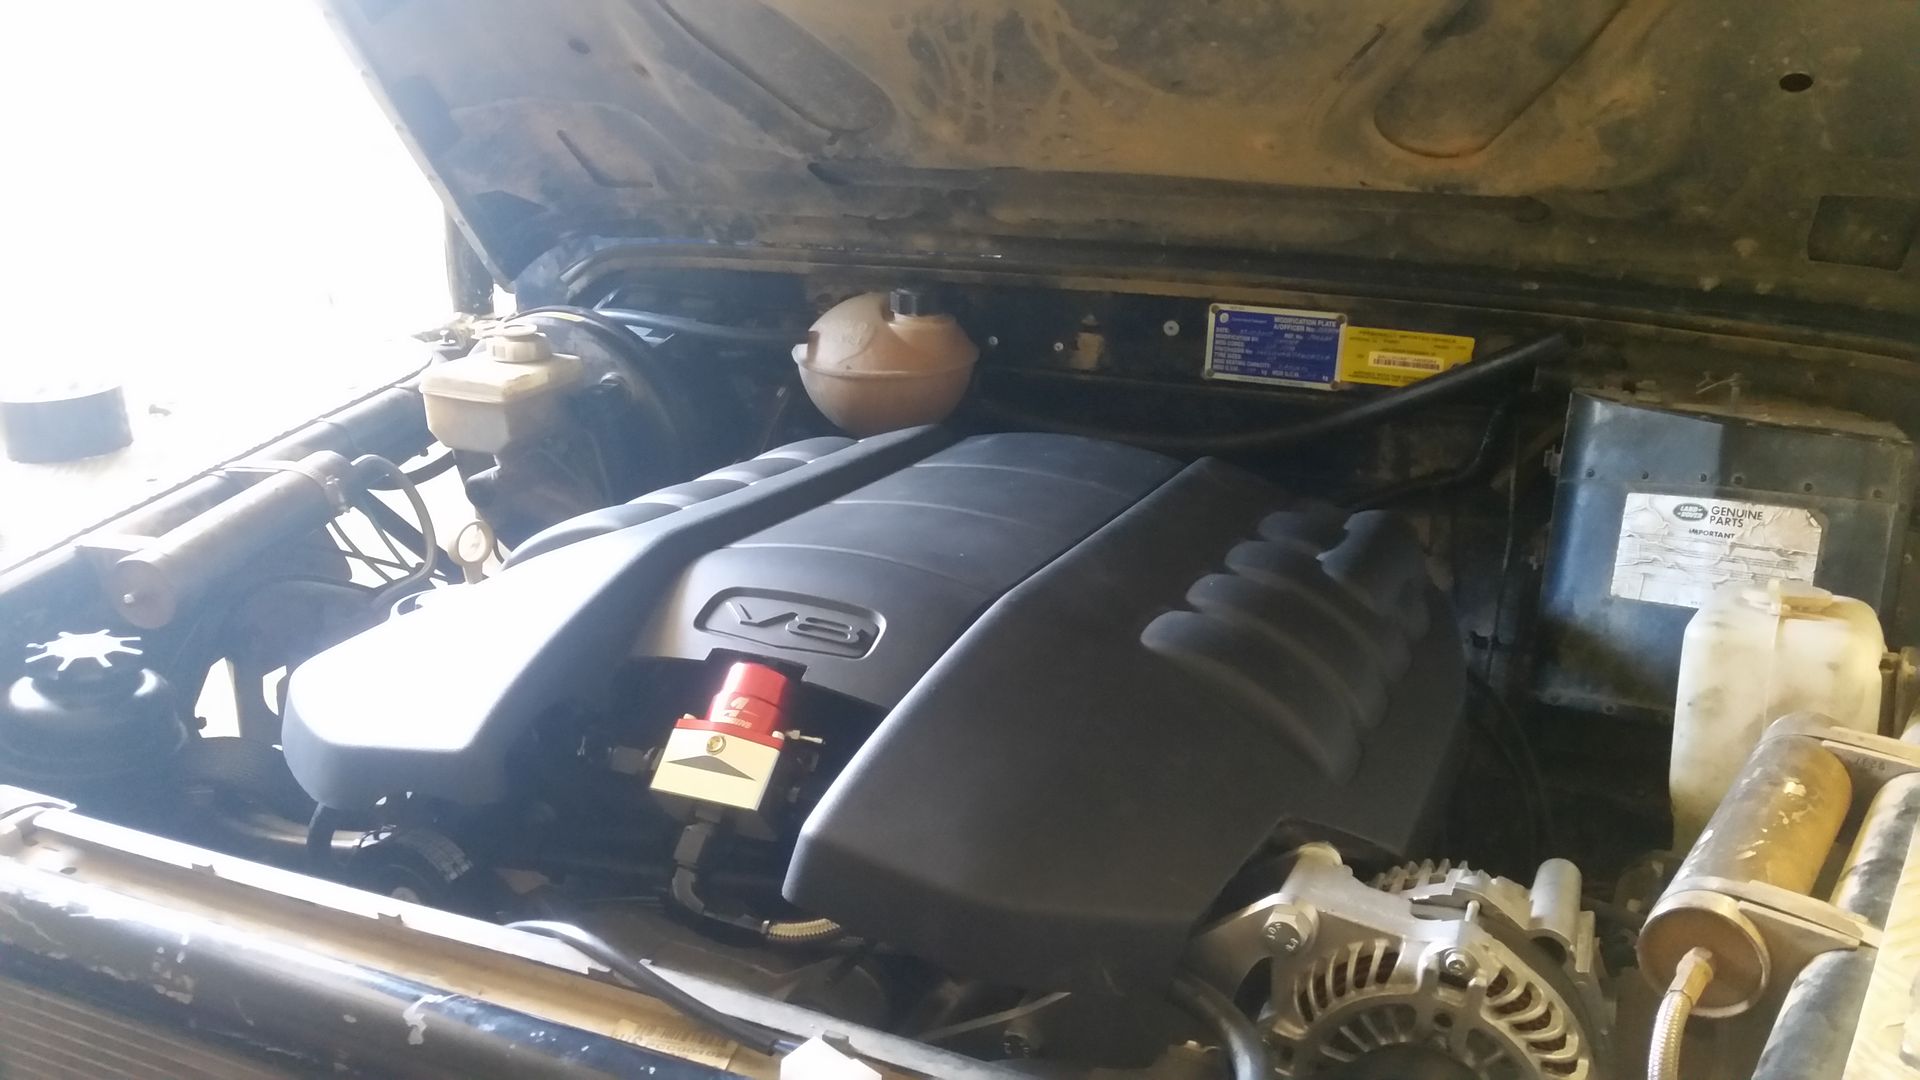
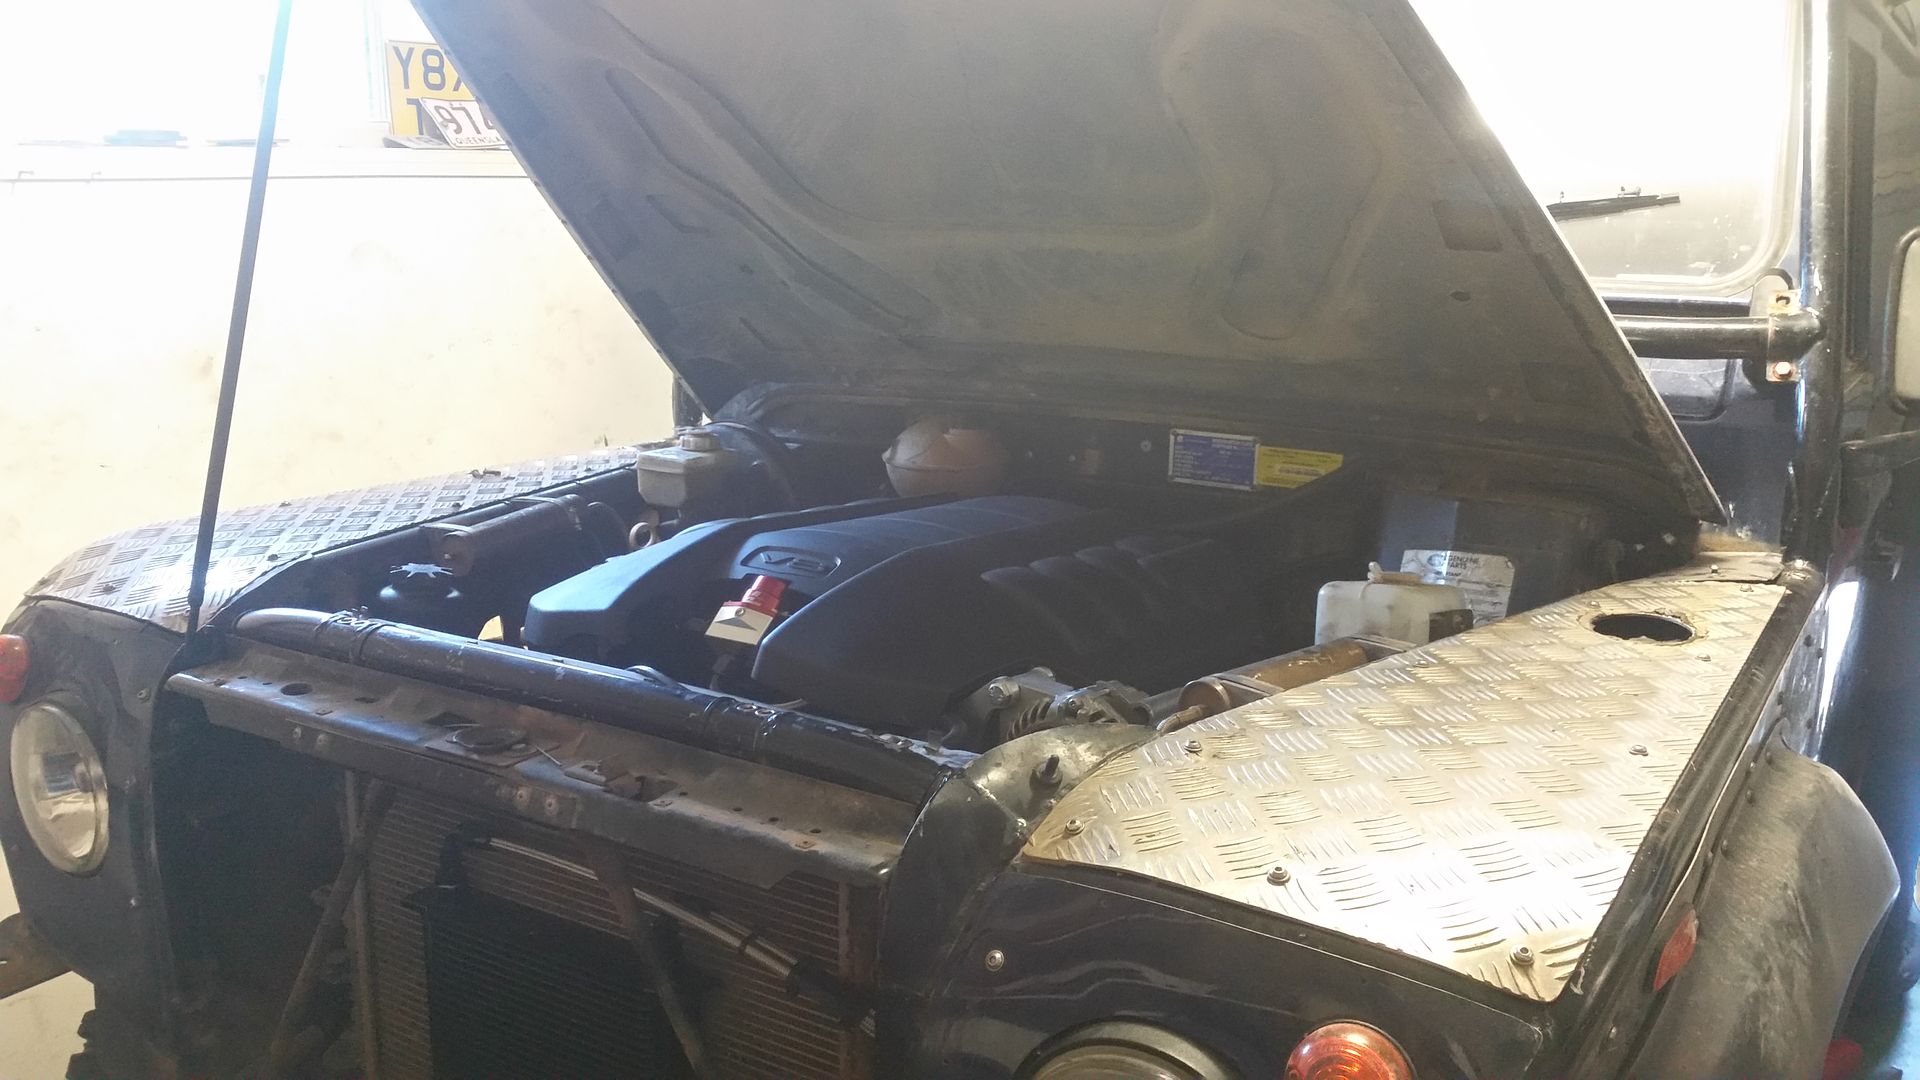
I then removed the aircon compressor and started a test fit in the 90 (no aircon on this):
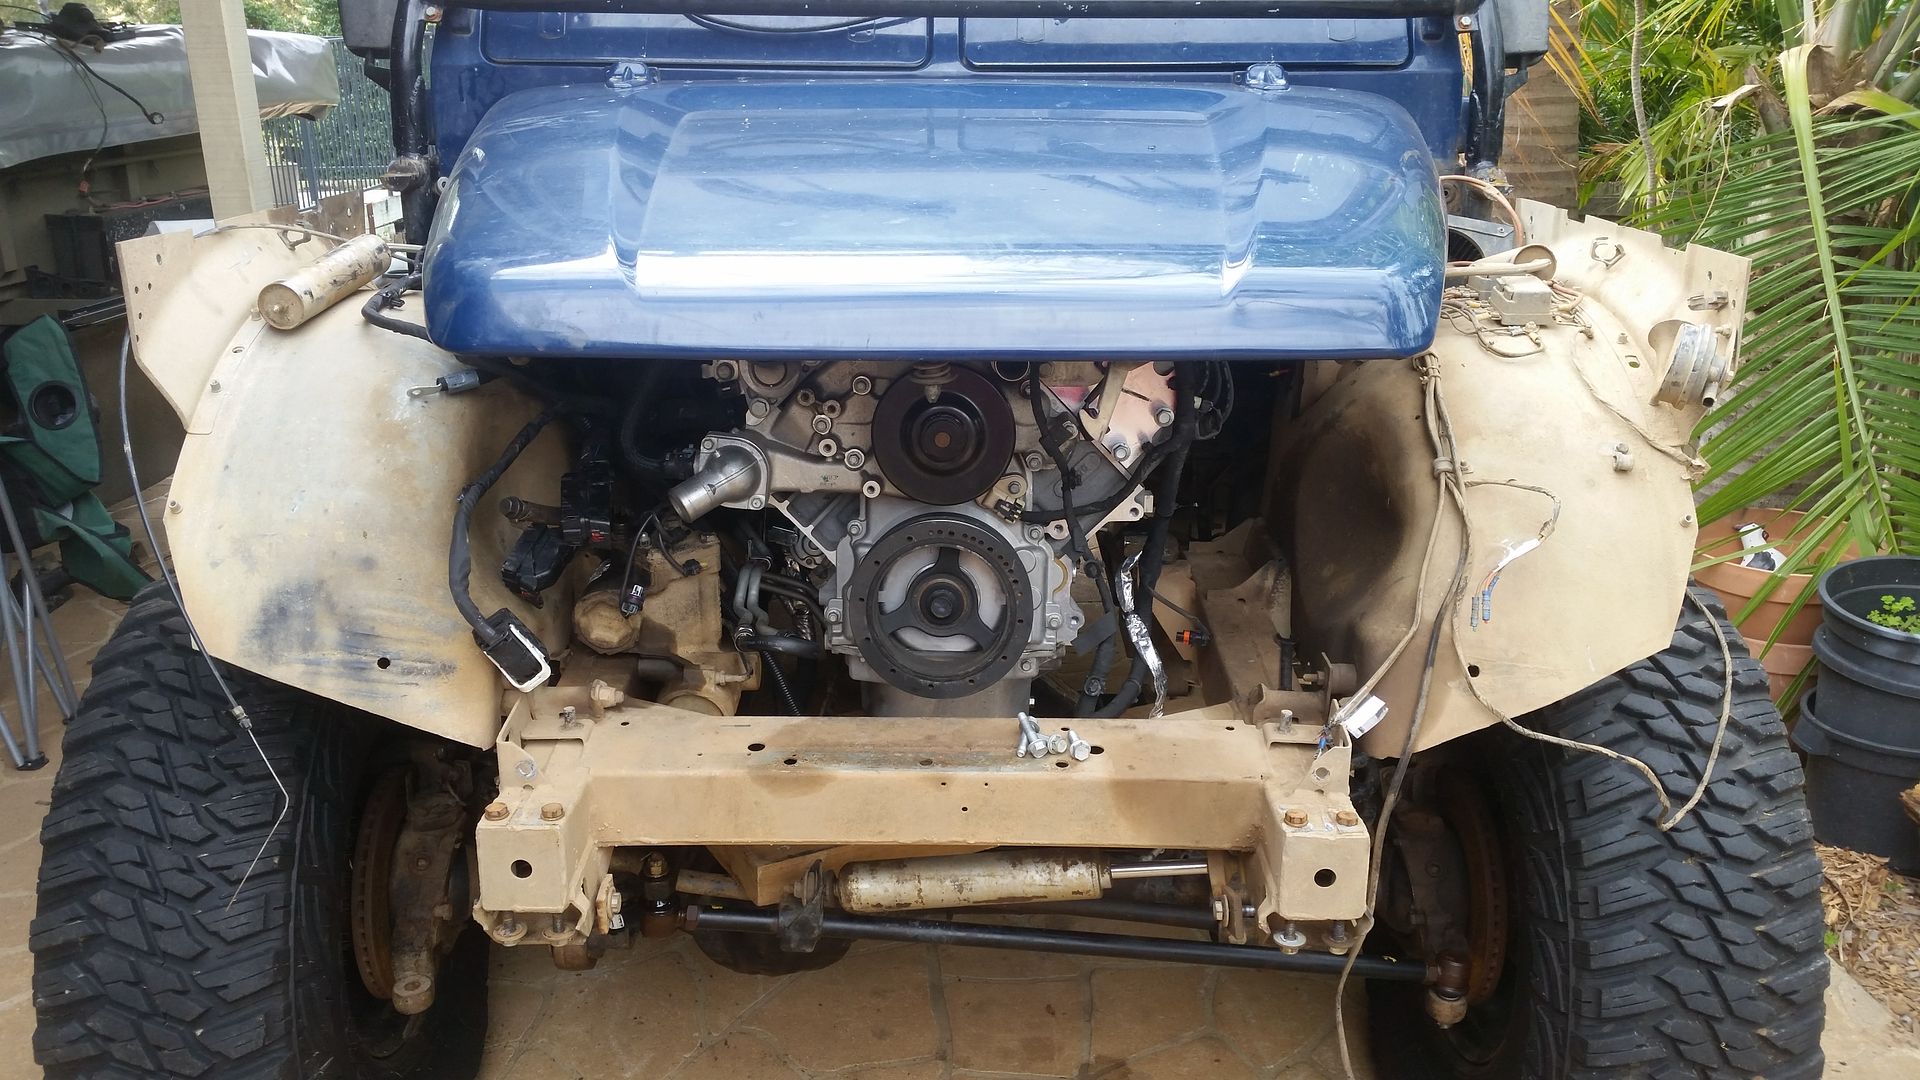
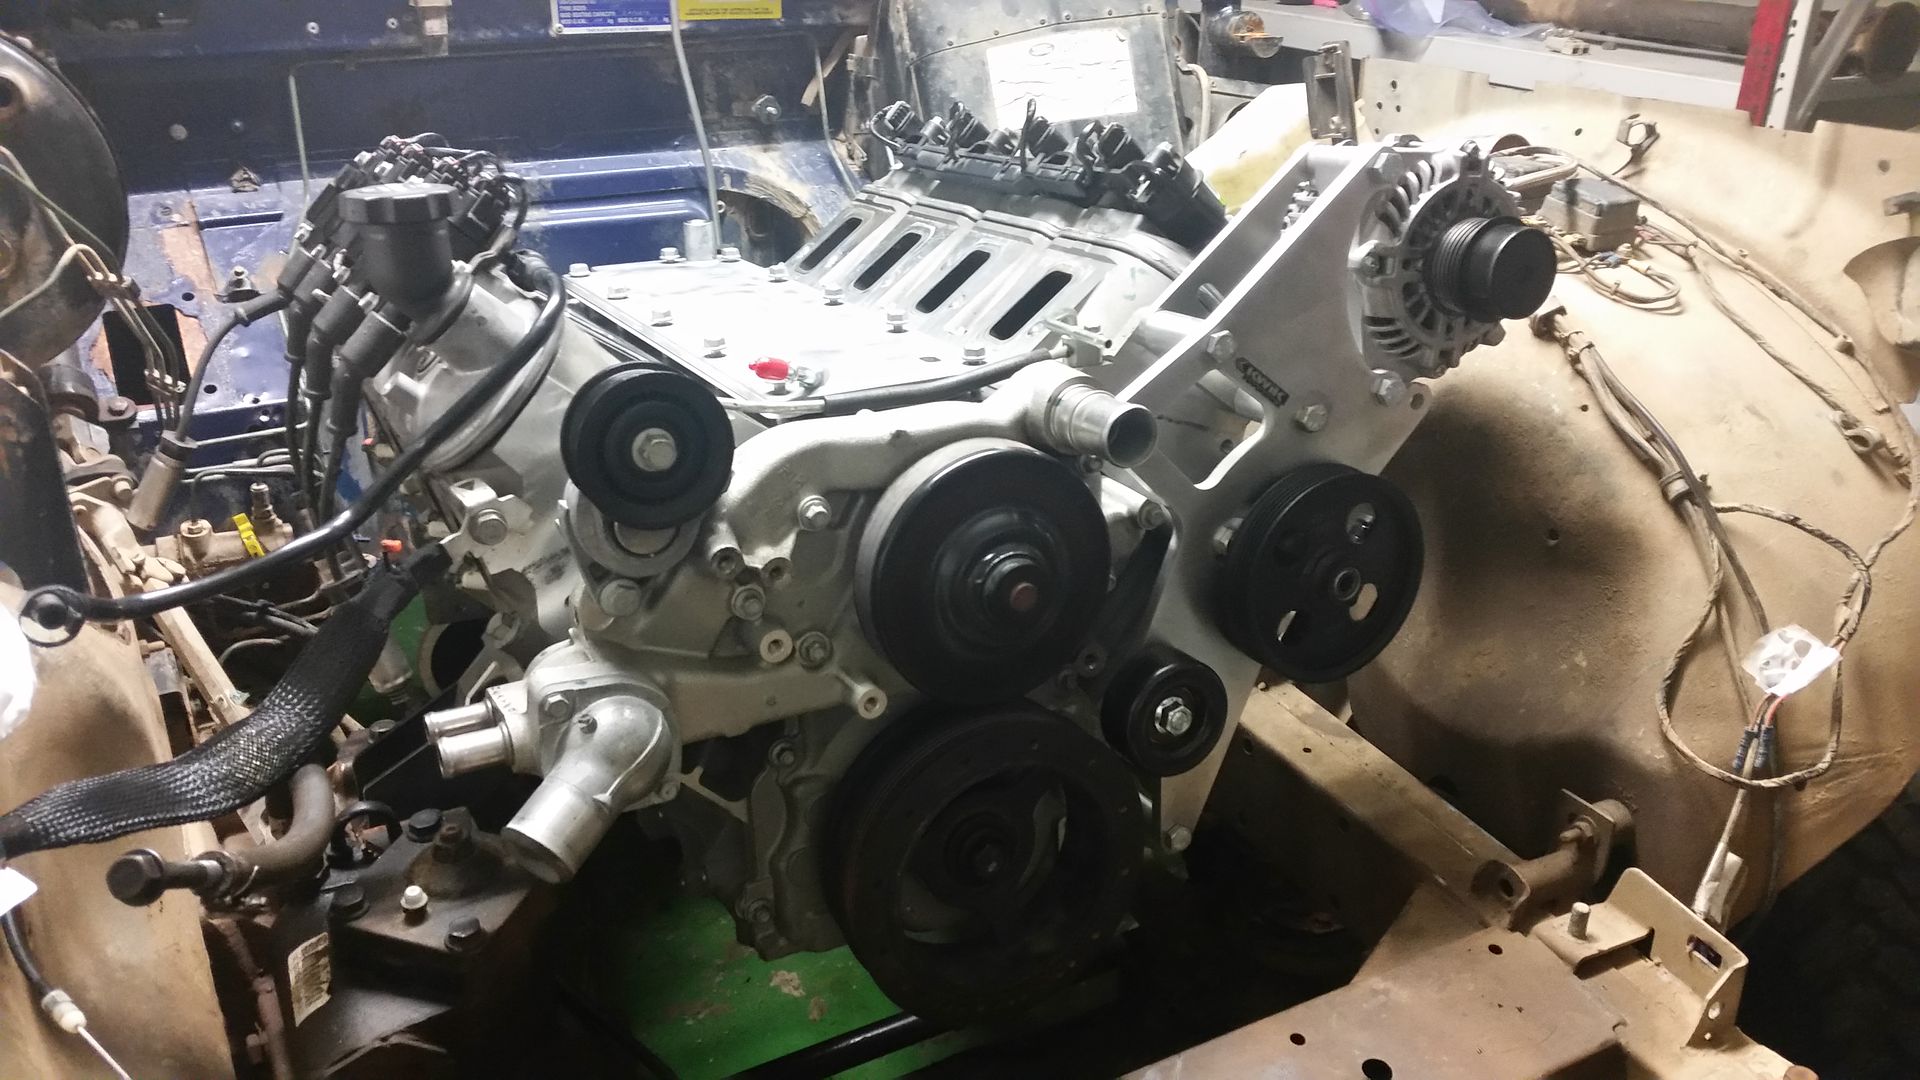
The alternator is low on the passenger side of the engine I needed to move this. Also with this been a very late l77 they dont actually have a power steering pump on the engine. Its electric. The holes are still there however to run a pump if requried.
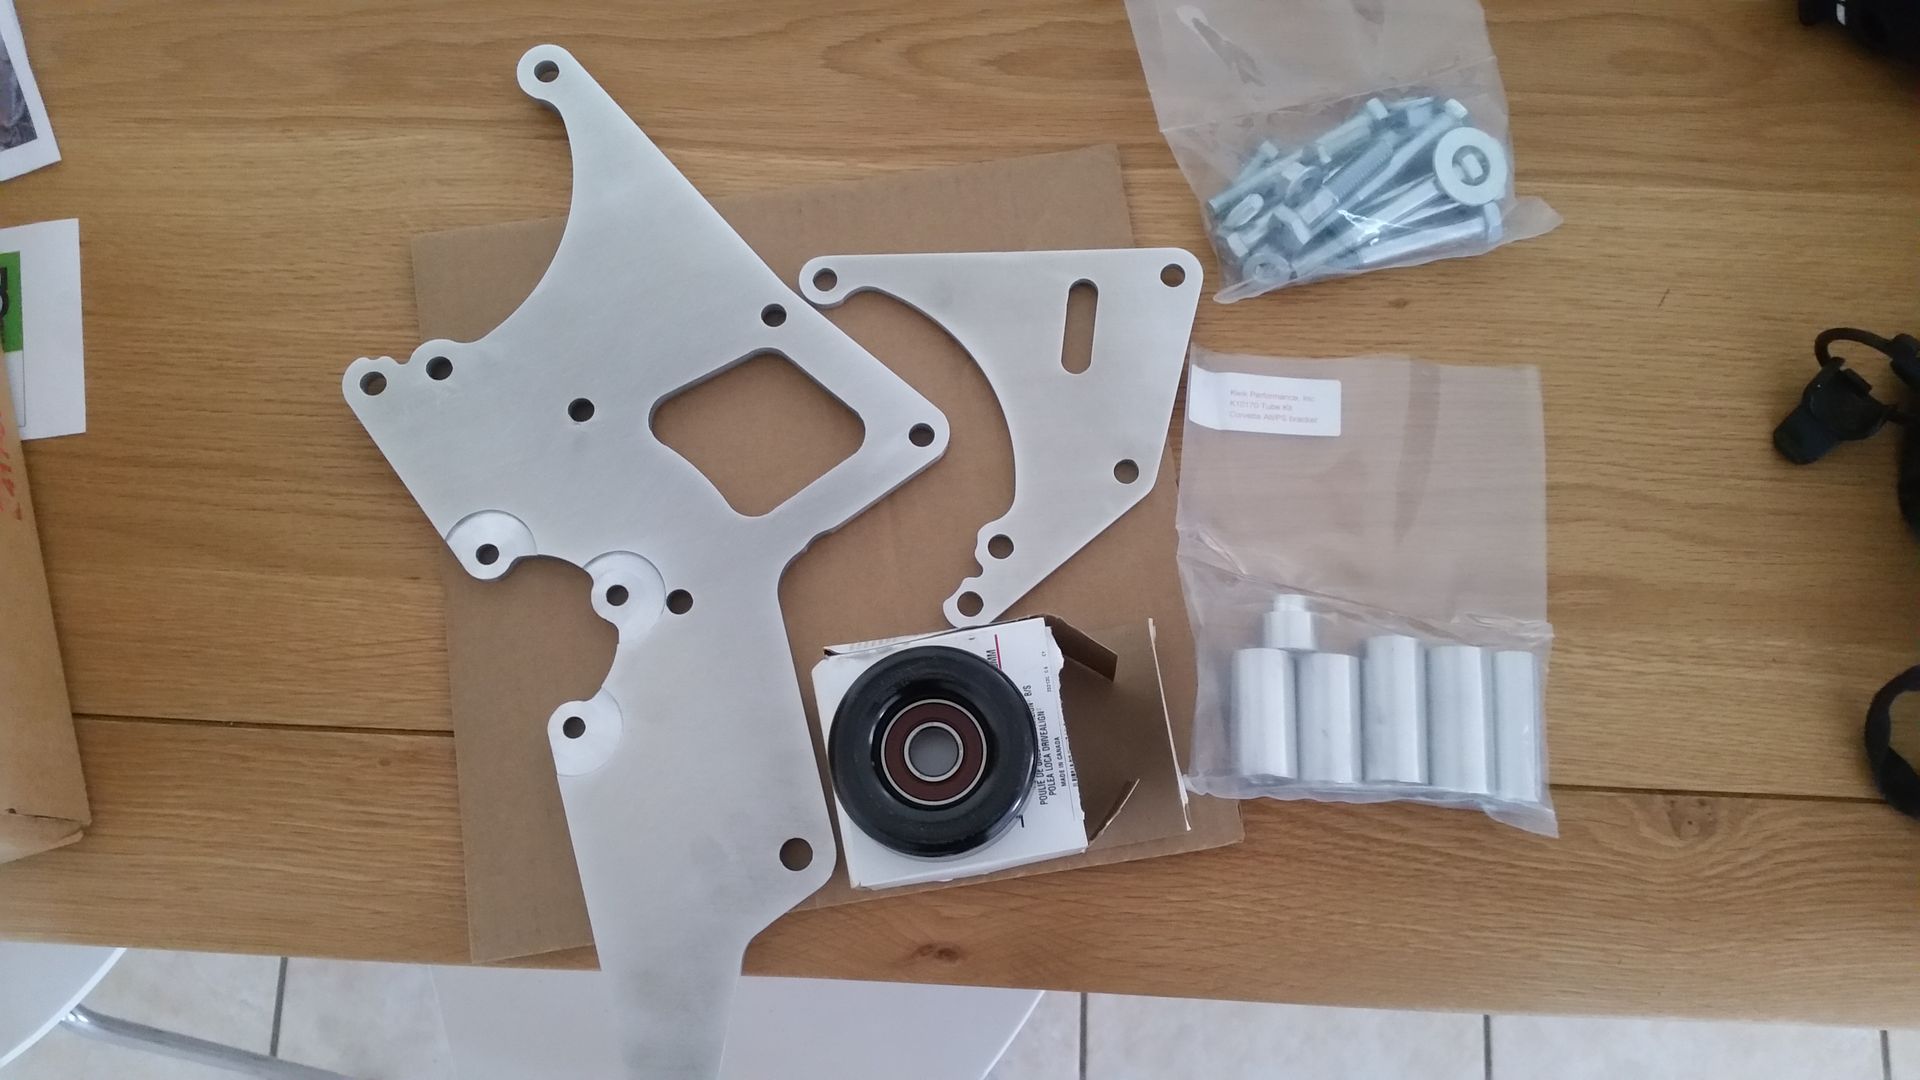
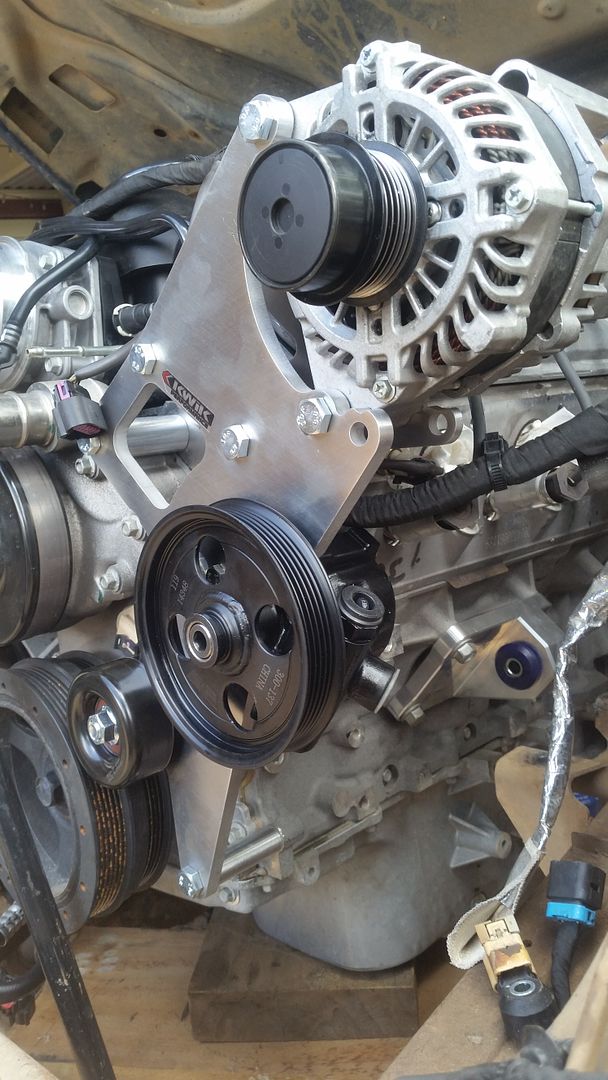
I ended up buying a kit from Kwik Performance which relocated the alternator to the top of the engine on the passenger side, and also allows the fitment of a GM type 2 PS pump
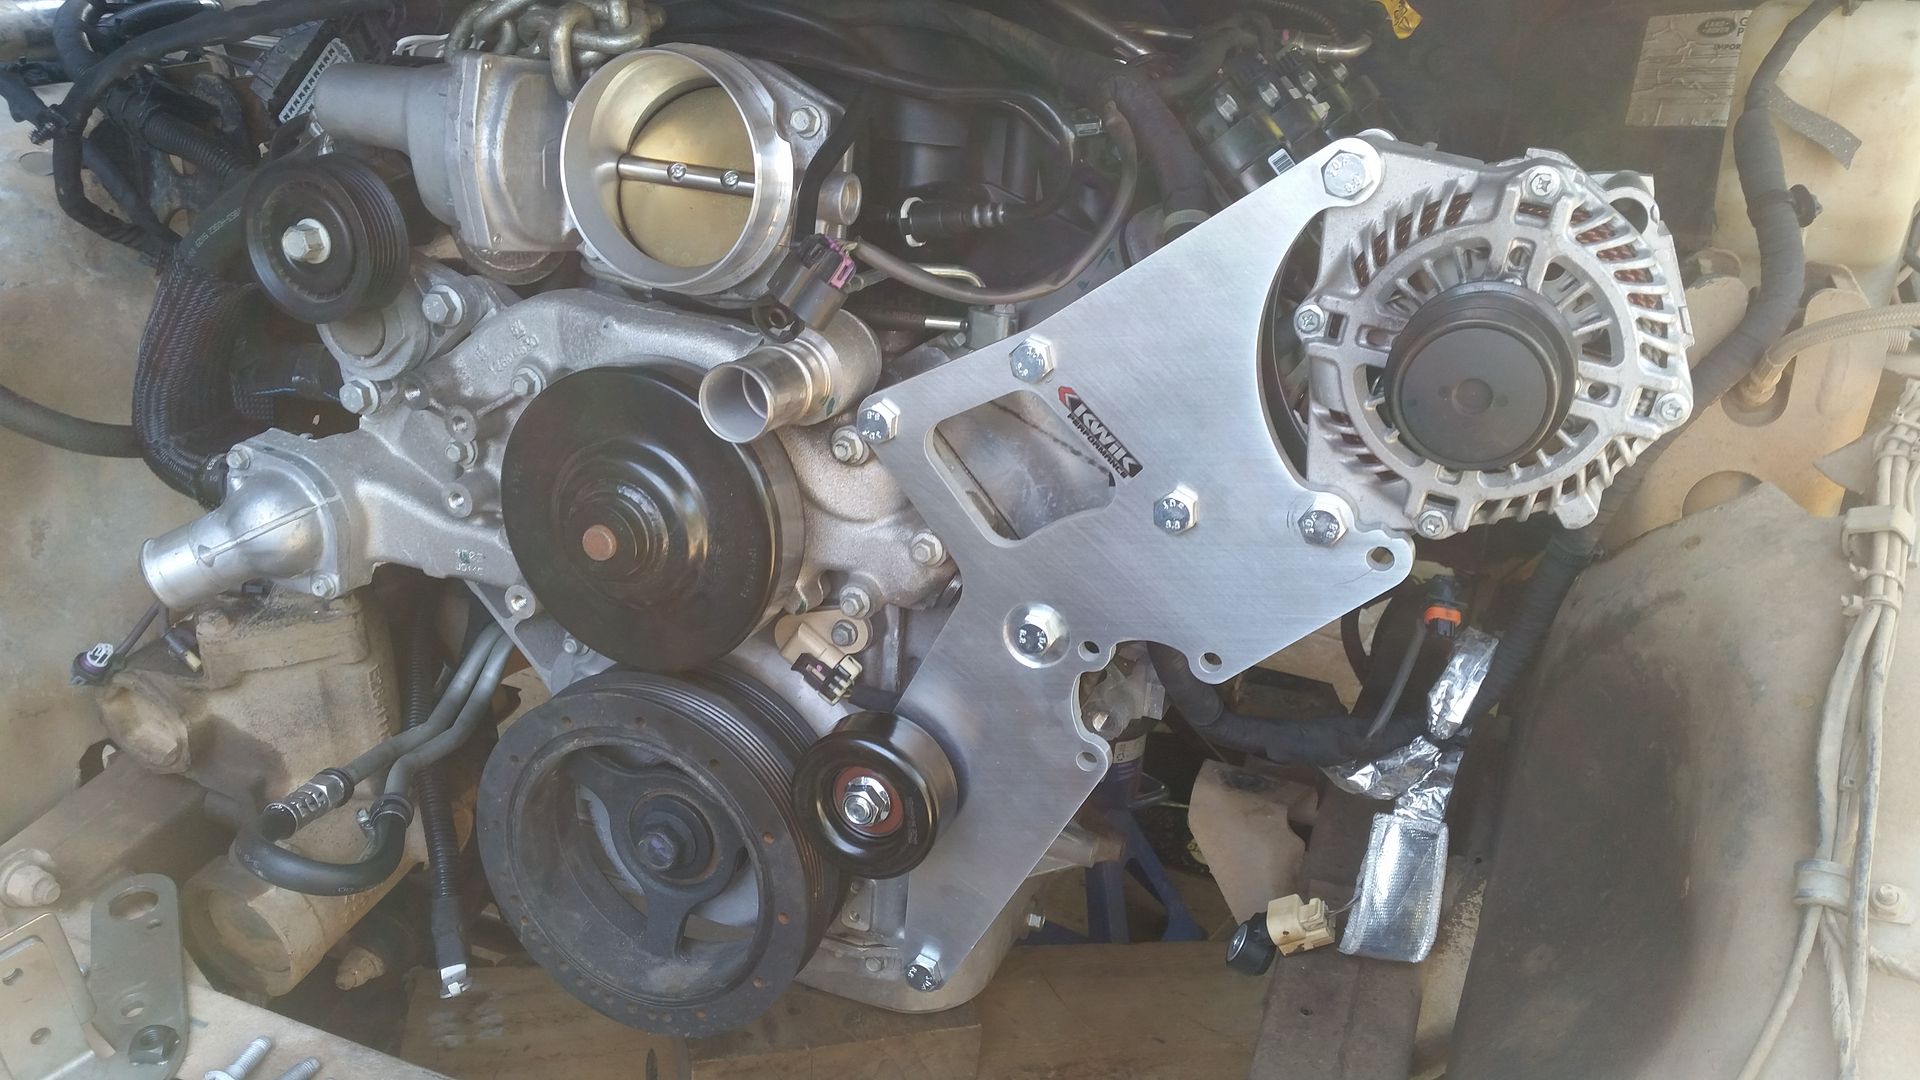
This is with the pump and pulley fitted
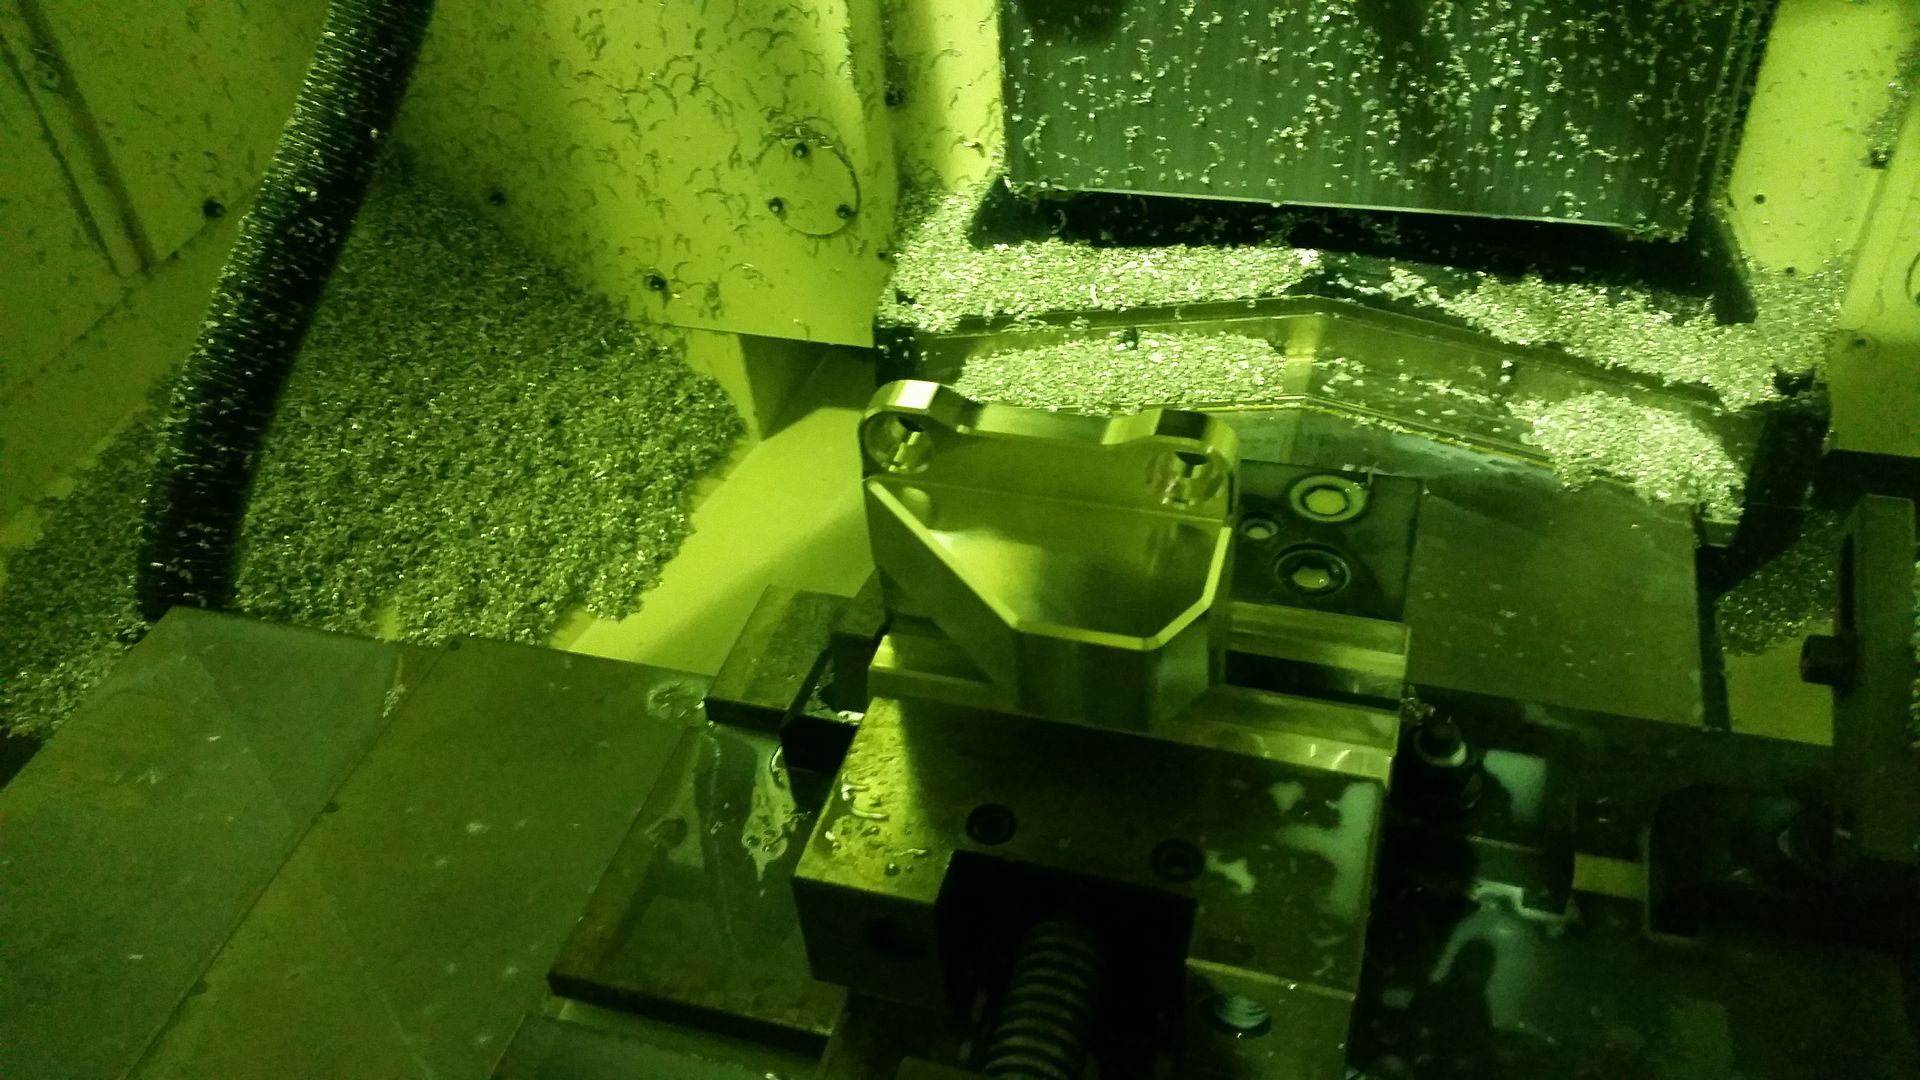
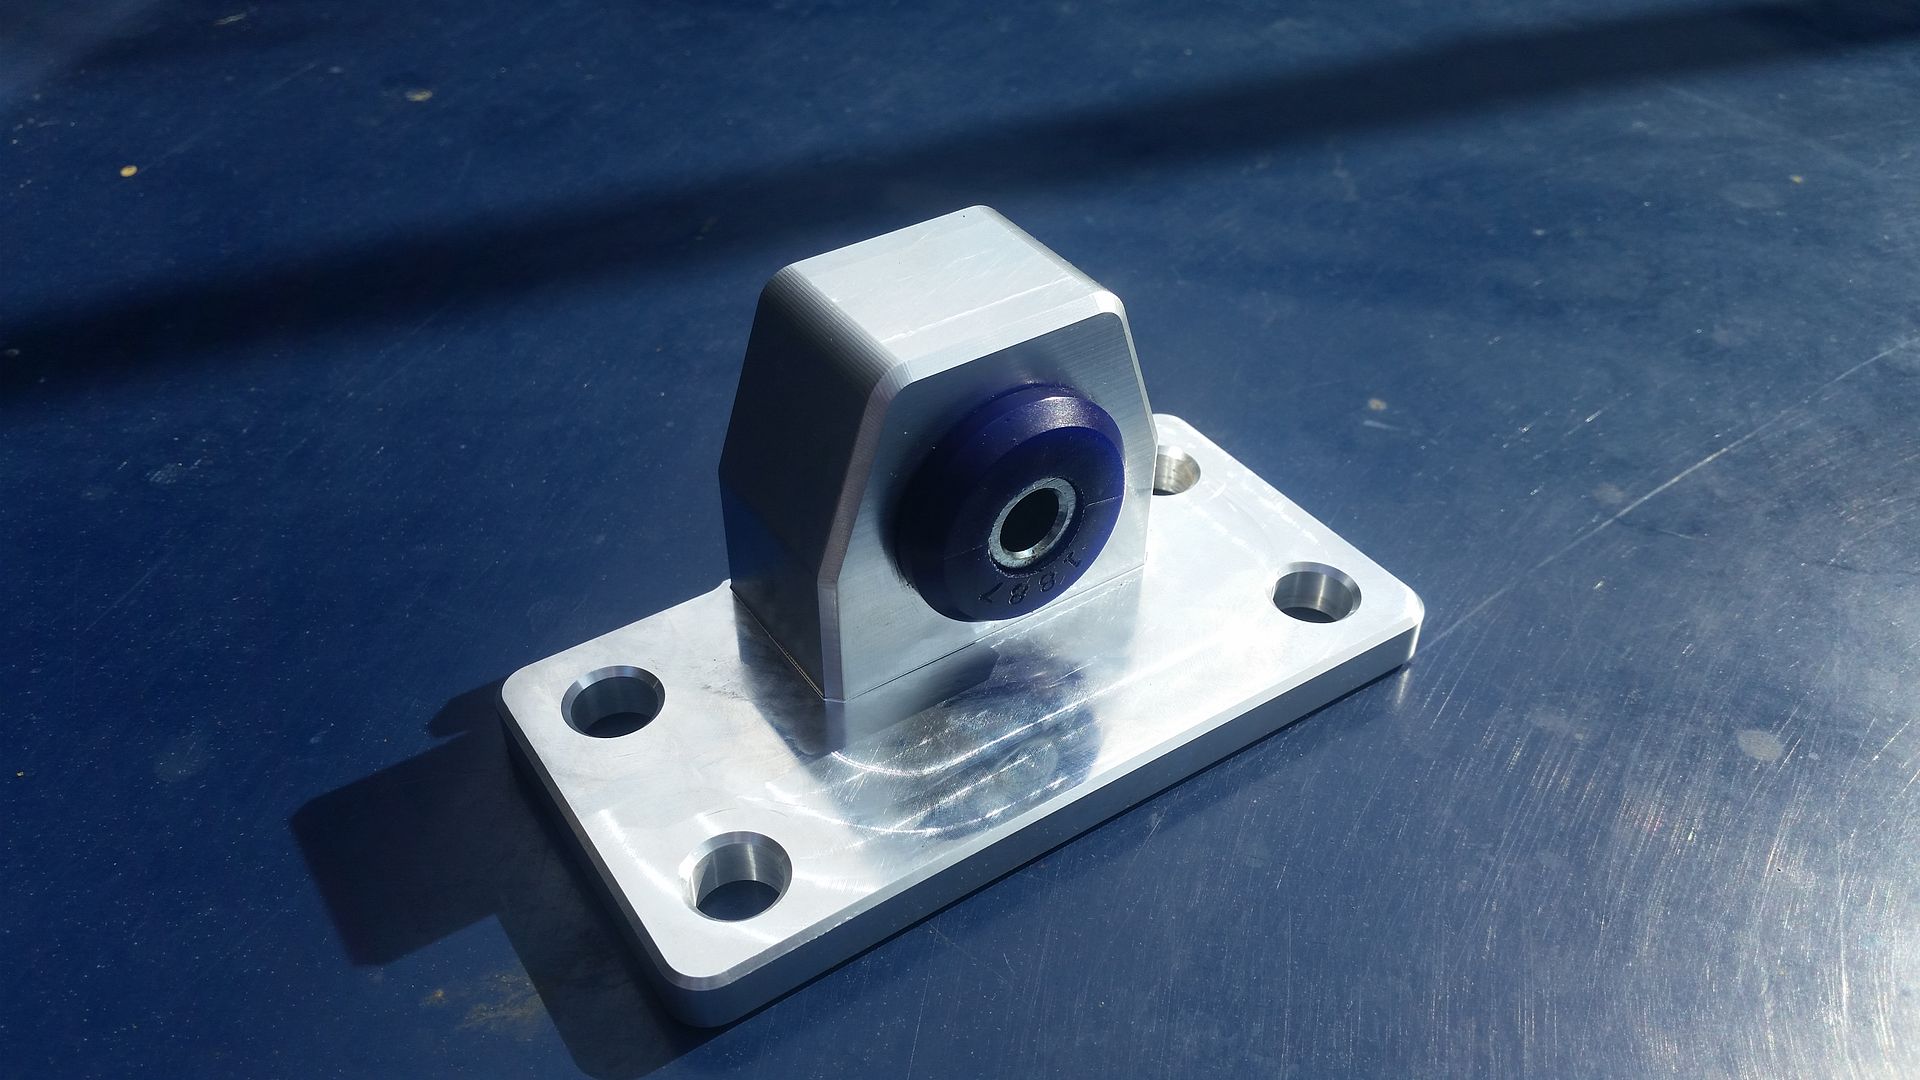
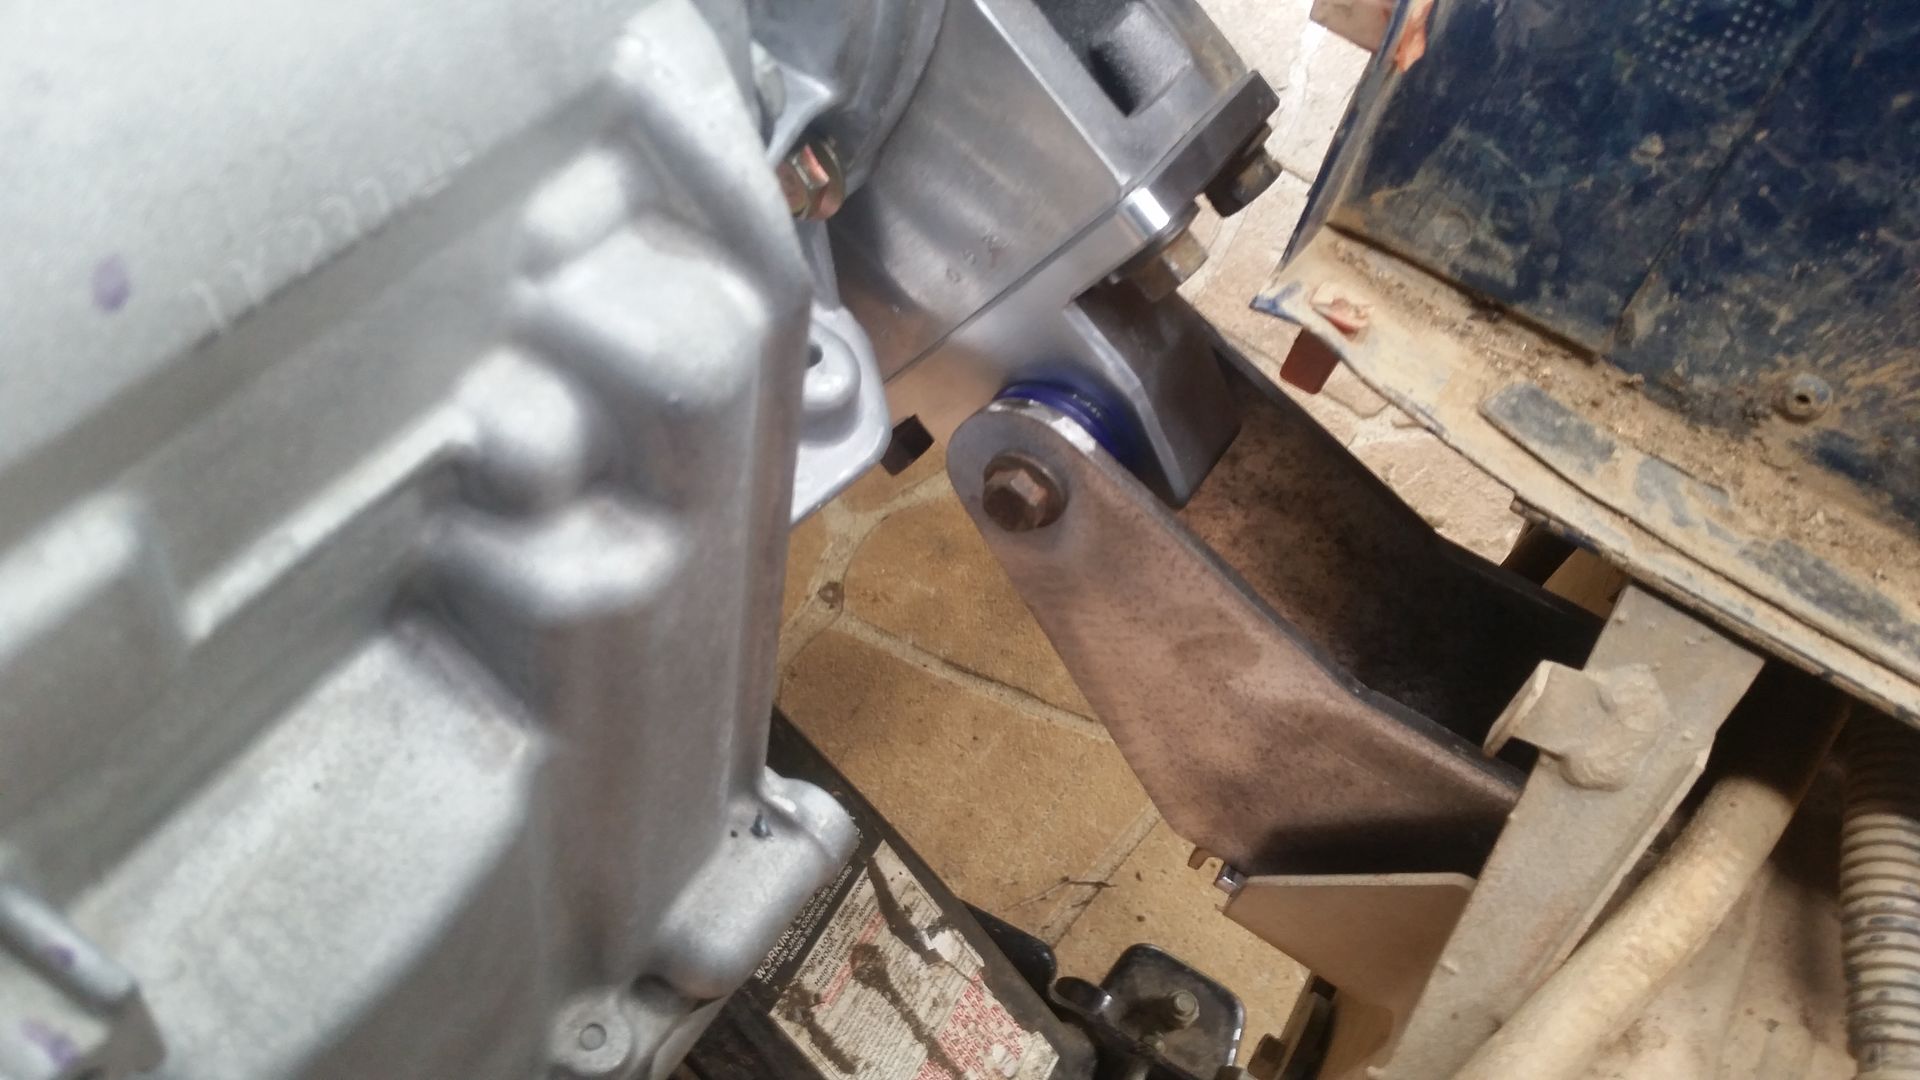
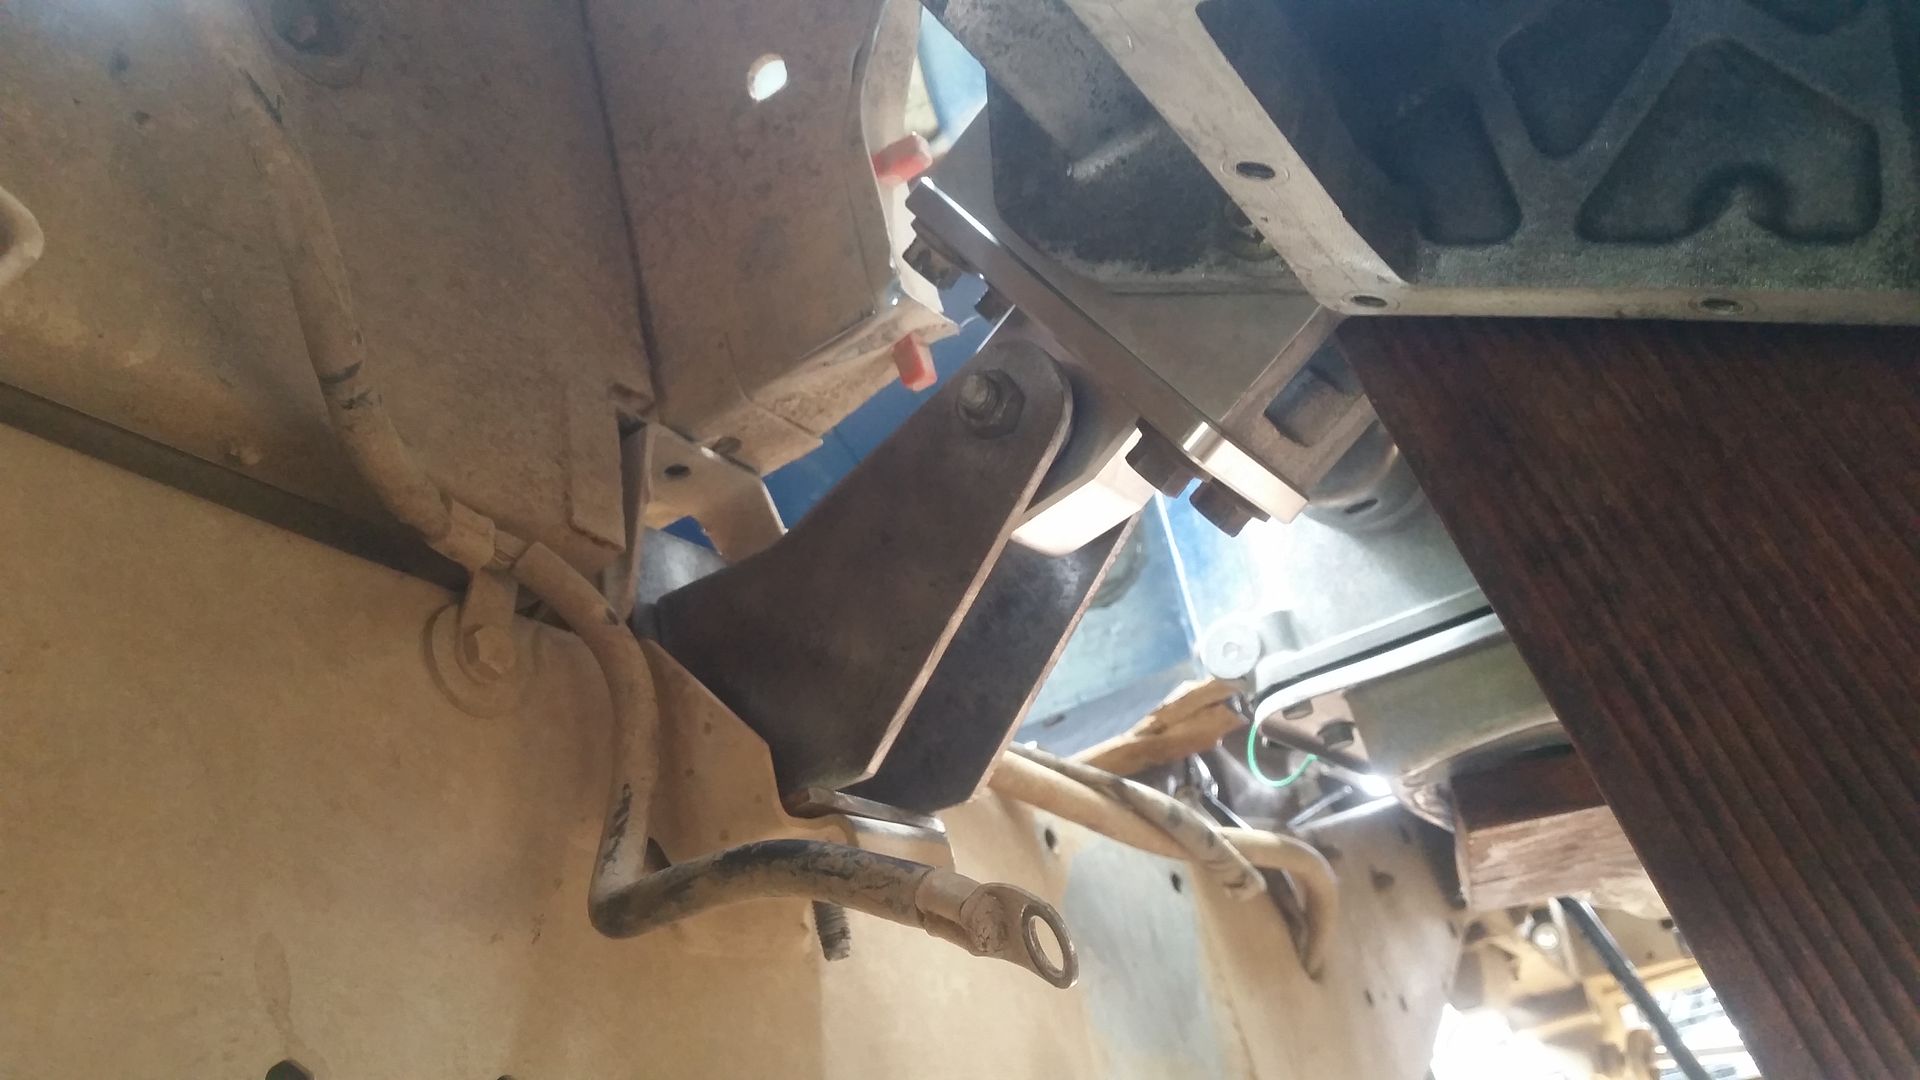
Mounts were next. The Transfer case mount on the drivers side bolts straight back on, and with an earlier Defender the std mount can be used on the adaptor for the LT aswell. On the TD5 this wont work easily. You could cut off the chassis mount and drill and then bolt on the earlier mount with the round rubbers but I didn't want to do that.
Luckily a mate has a CNC machine , and I have Solidworks so we made some custom mounts out of 6061 alloy billets
Adaptor side:
Engine ones. LH and RH versions of this (the steel work for the chassis part of the engine mounts is being cut at the lasers as I type this!)
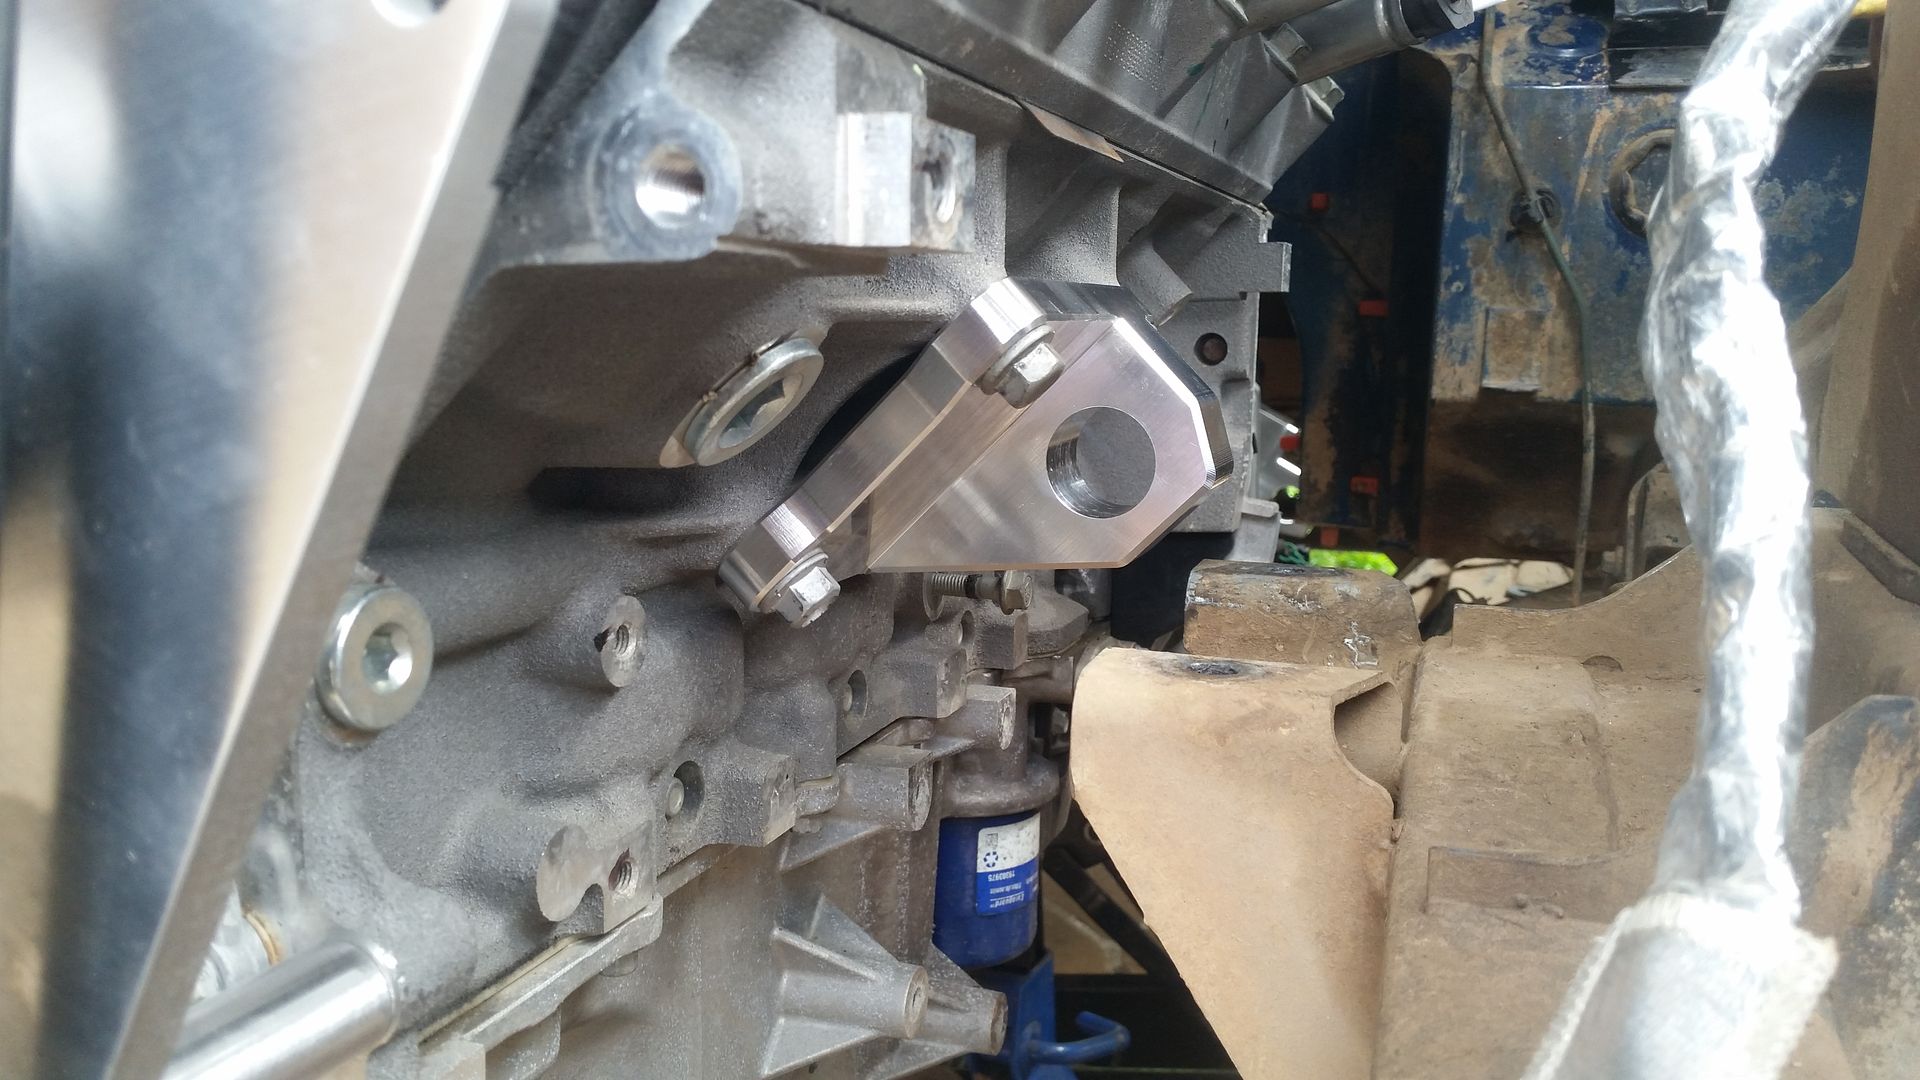
I however made up the one for the adaptor by hand:
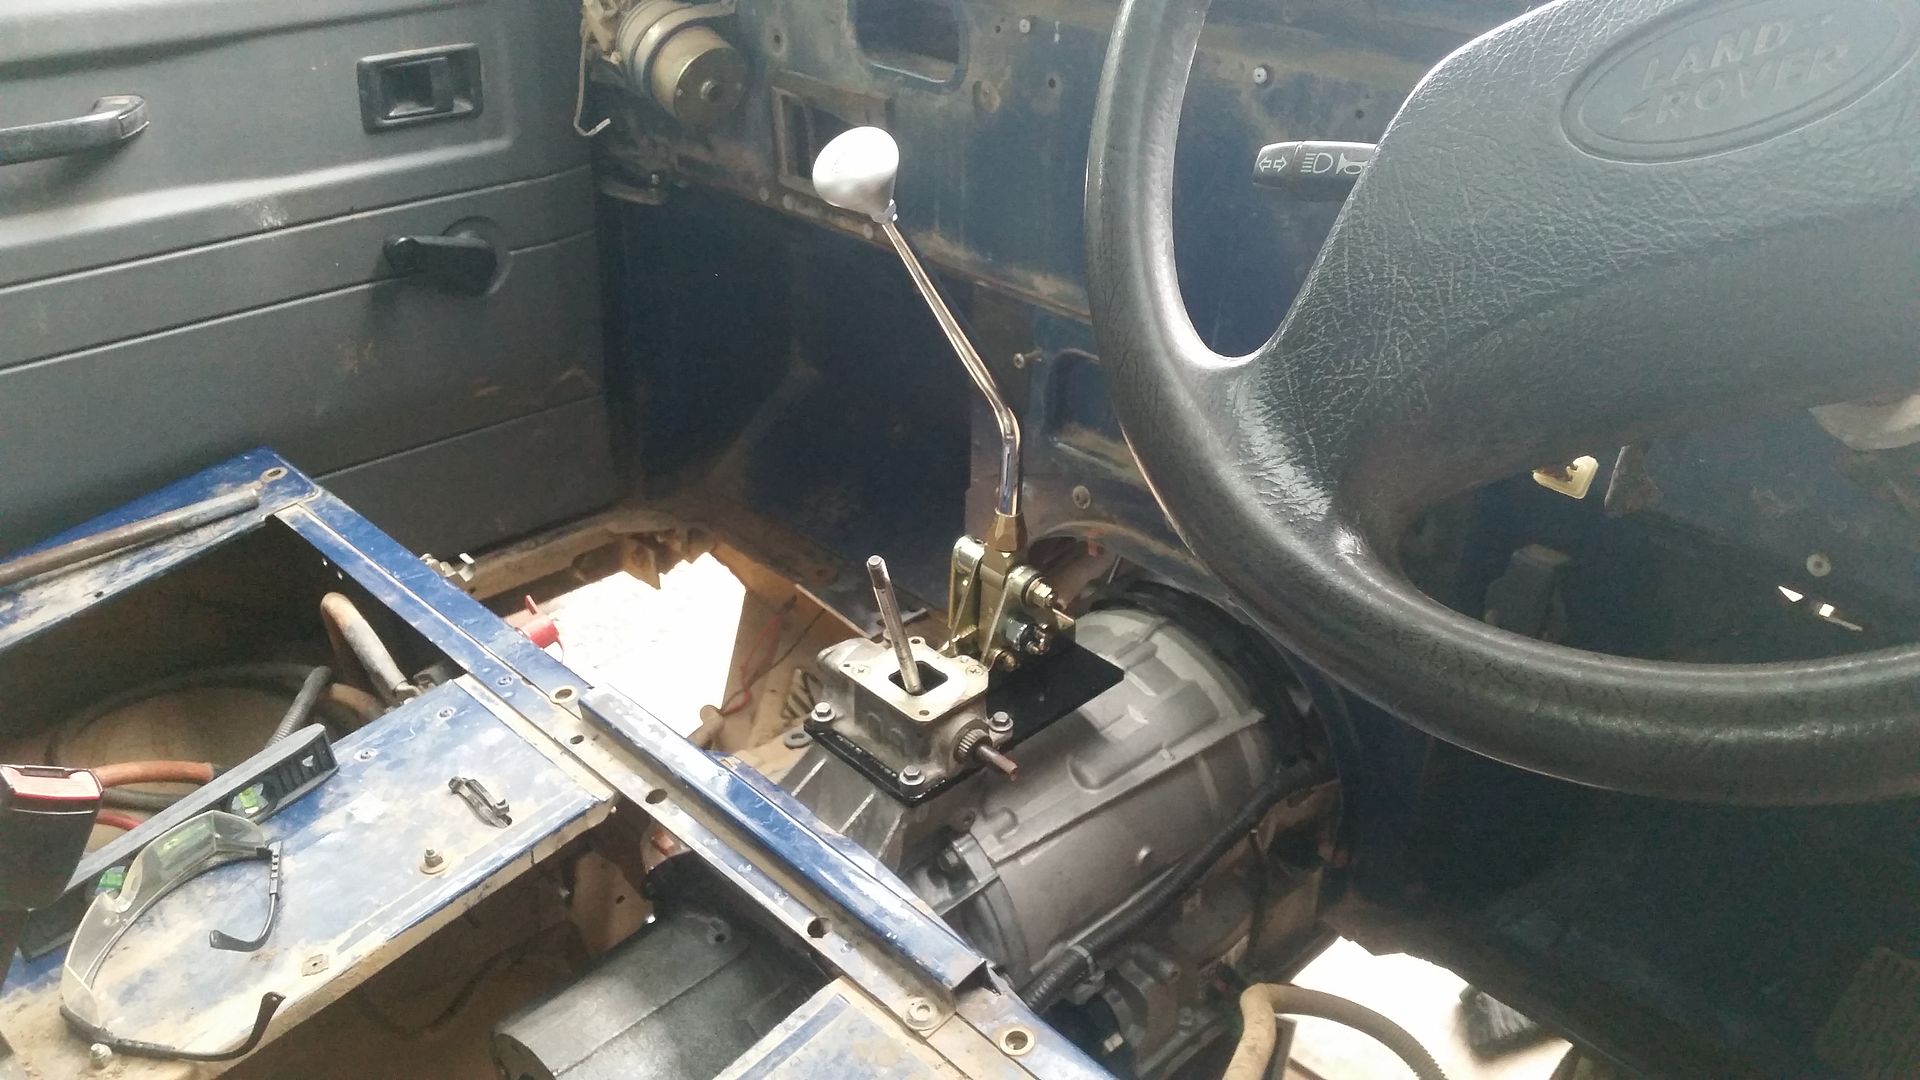
For reference this is what the shifter will look like when its fitted in the car. It will fit through exactly the same rubber boot that the r380 lever did
The alternator is low on the passenger side of the engine I needed to move this. Also with this been a very late l77 they dont actually have a power steering pump on the engine. Its electric. The holes are still there however to run a pump if requried.
I ended up buying a kit from Kwik Performance which relocated the alternator to the top of the engine on the passenger side, and also allows the fitment of a GM type 2 PS pump
This is with the pump and pulley fitted
Mounts were next. The Transfer case mount on the drivers side bolts straight back on, and with an earlier Defender the std mount can be used on the adaptor for the LT aswell. On the TD5 this wont work easily. You could cut off the chassis mount and drill and then bolt on the earlier mount with the round rubbers but I didn't want to do that.
Luckily a mate has a CNC machine , and I have Solidworks so we made some custom mounts out of 6061 alloy billets
Adaptor side:
Engine ones. LH and RH versions of this (the steel work for the chassis part of the engine mounts is being cut at the lasers as I type this!)
I however made up the one for the adaptor by hand:
For reference this is what the shifter will look like when its fitted in the car. It will fit through exactly the same rubber boot that the r380 lever did
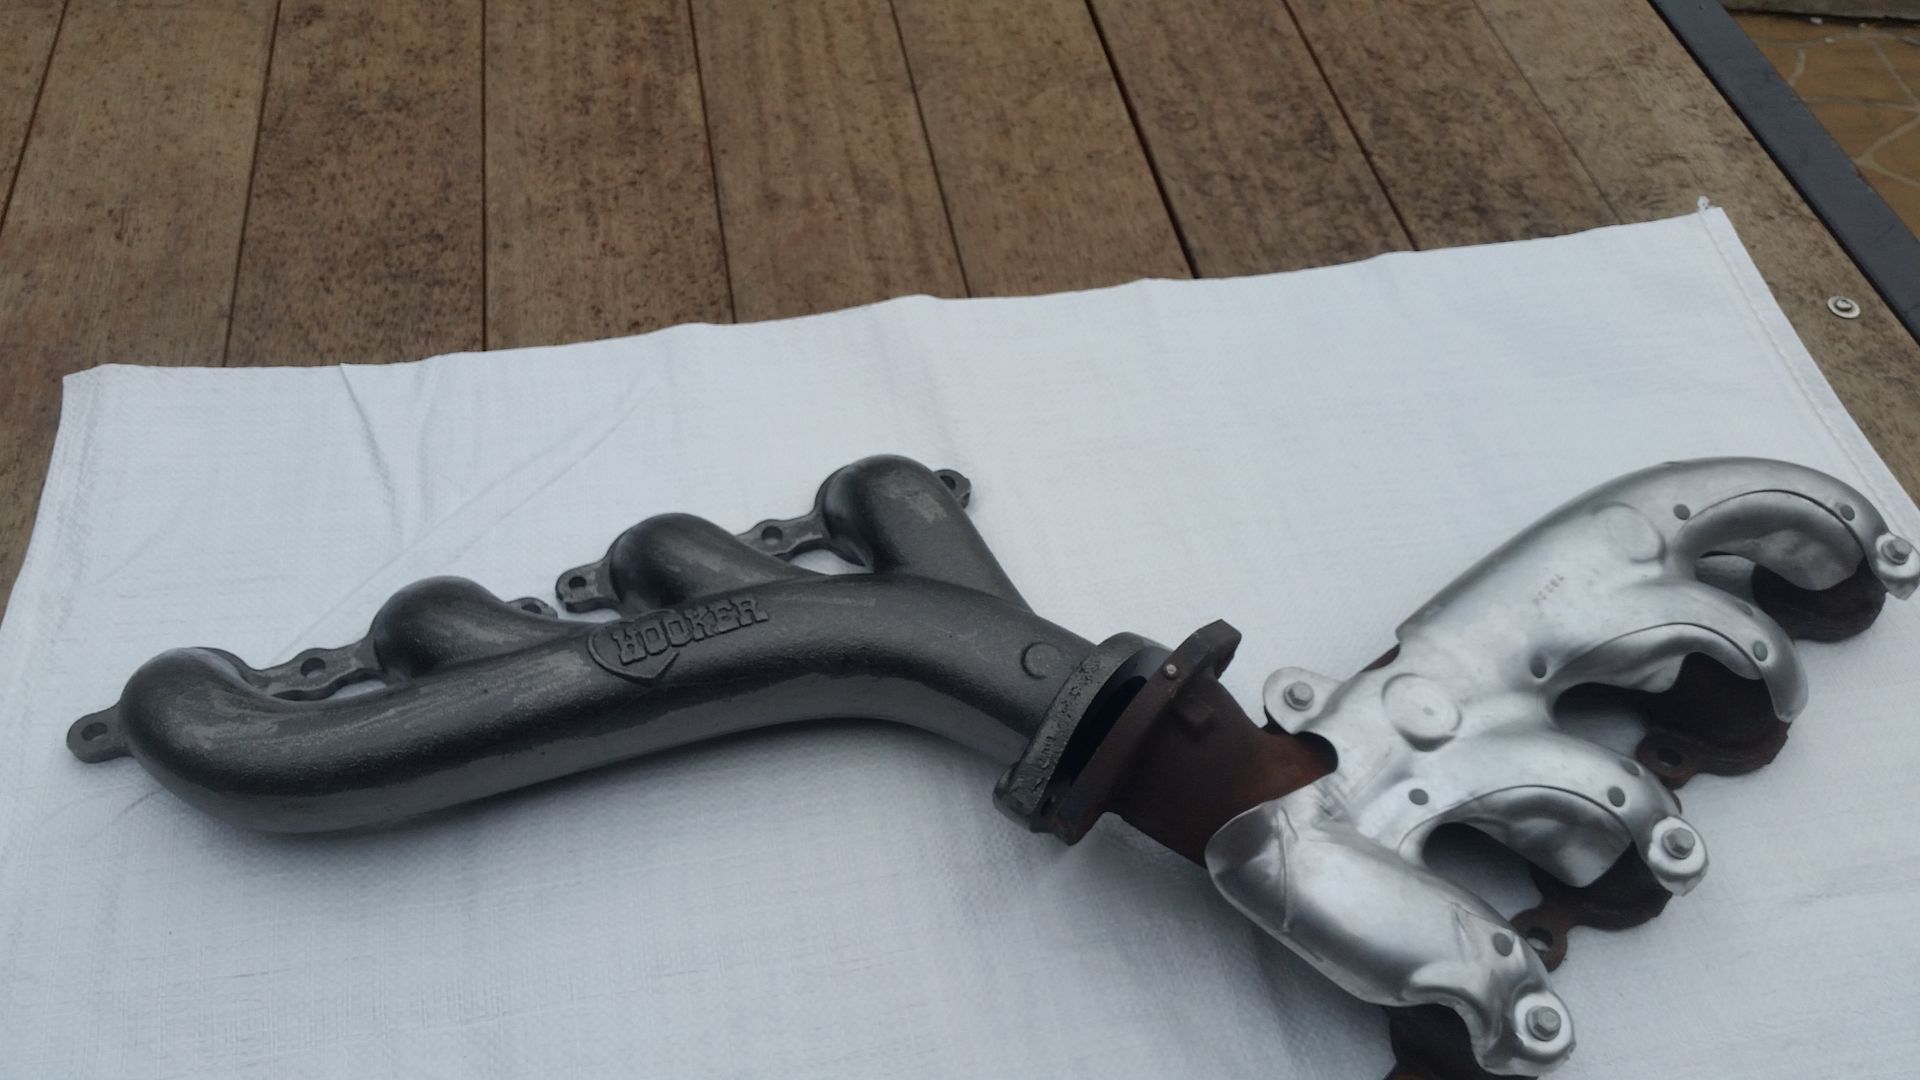
Exhaust manifolds.
The car manifolds are cast and quite compact. Unfortunately not quite compact enough. I tried to save some money here and tested 2 sets of car manifolds but they just wouldnt work so I had to bite the bullet and buy some Hooker ones.
Not very good comparison photo of the overall manifold size between the factory ones and the replacement ones
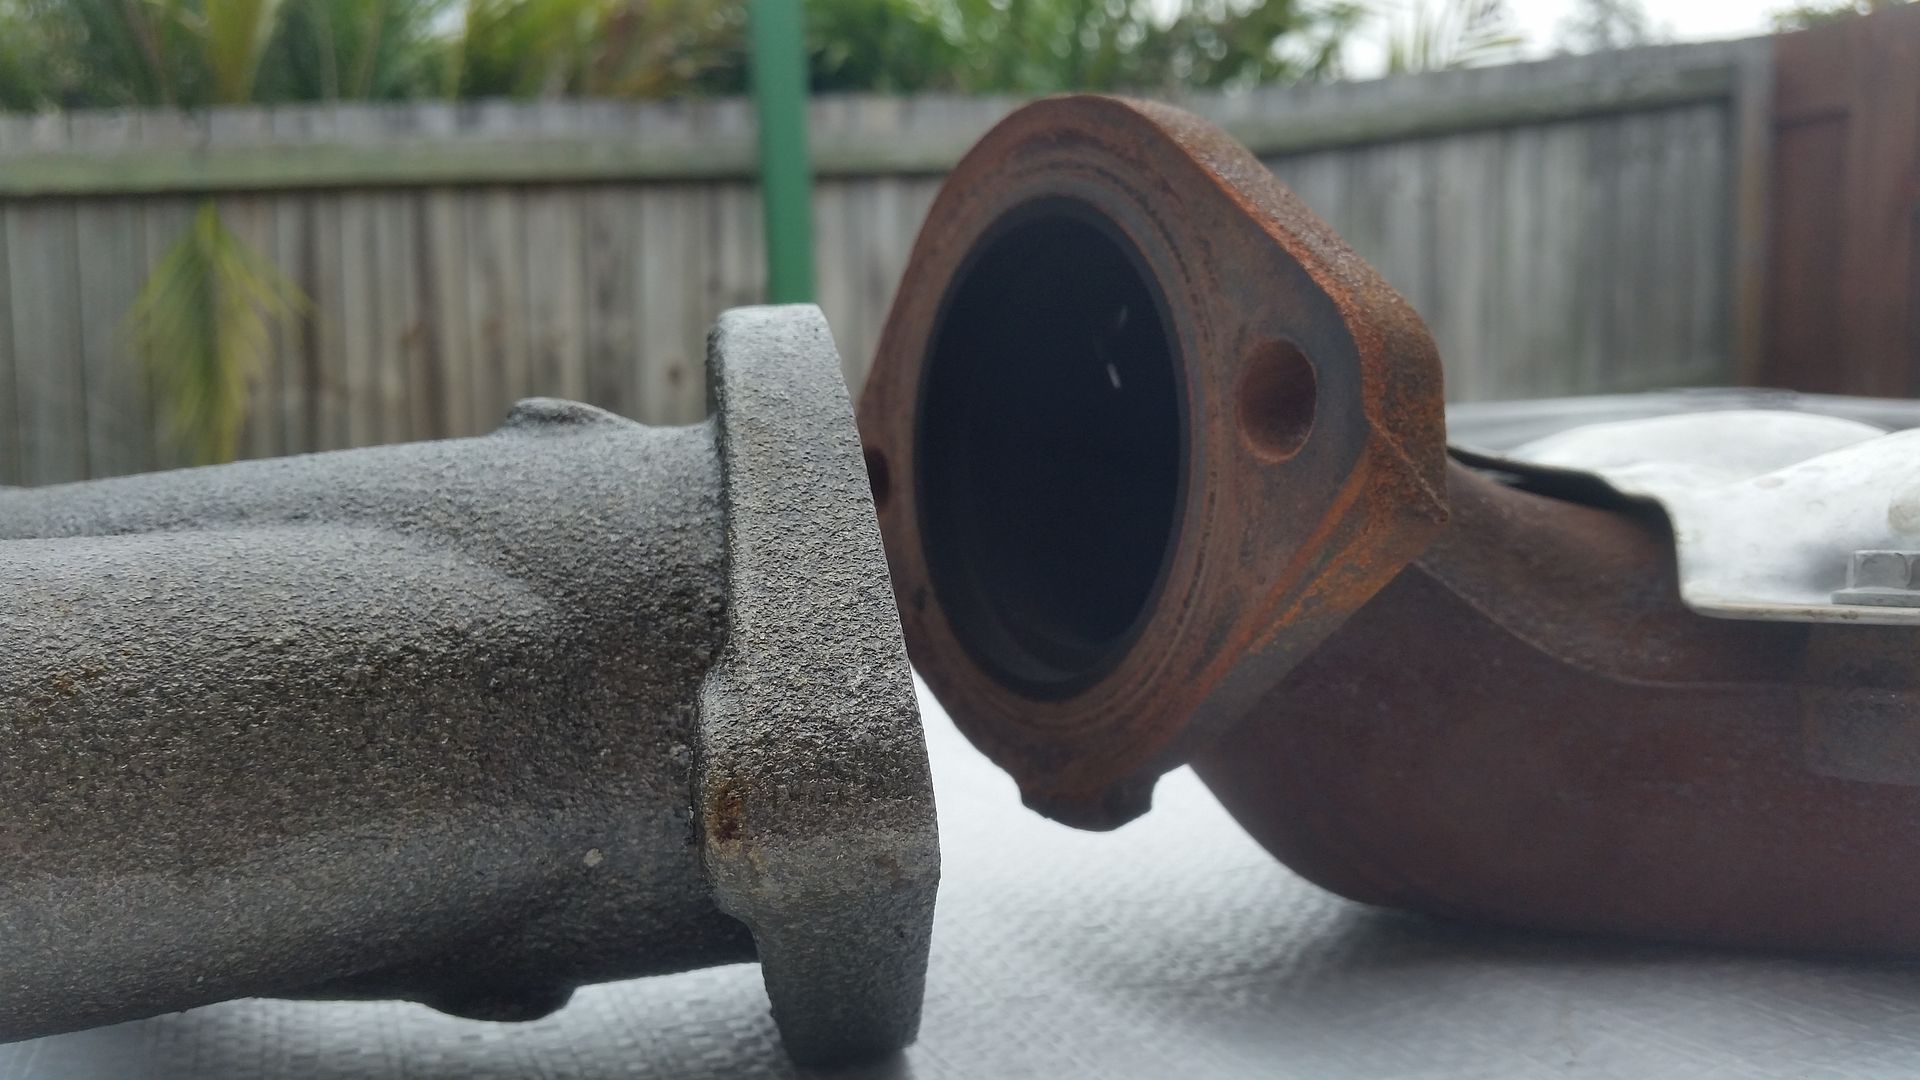
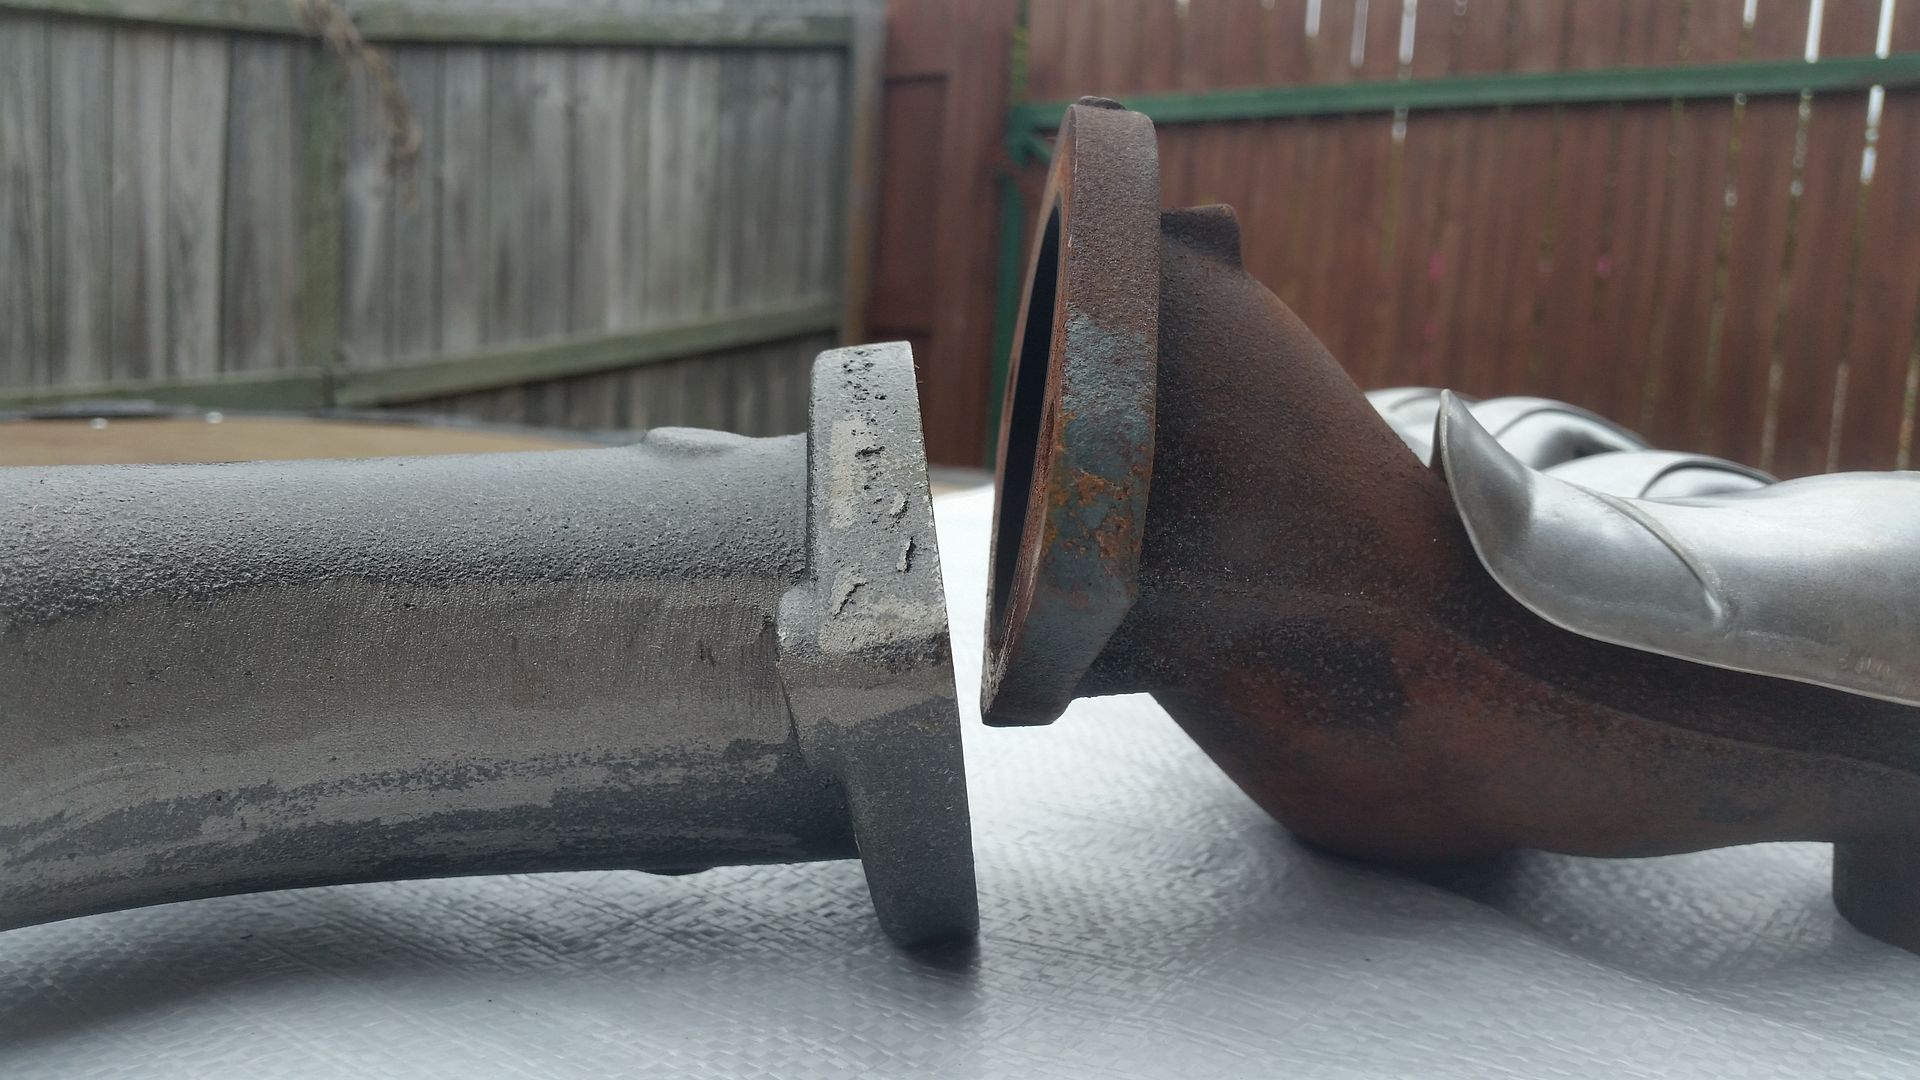
Reduction in flange offset:
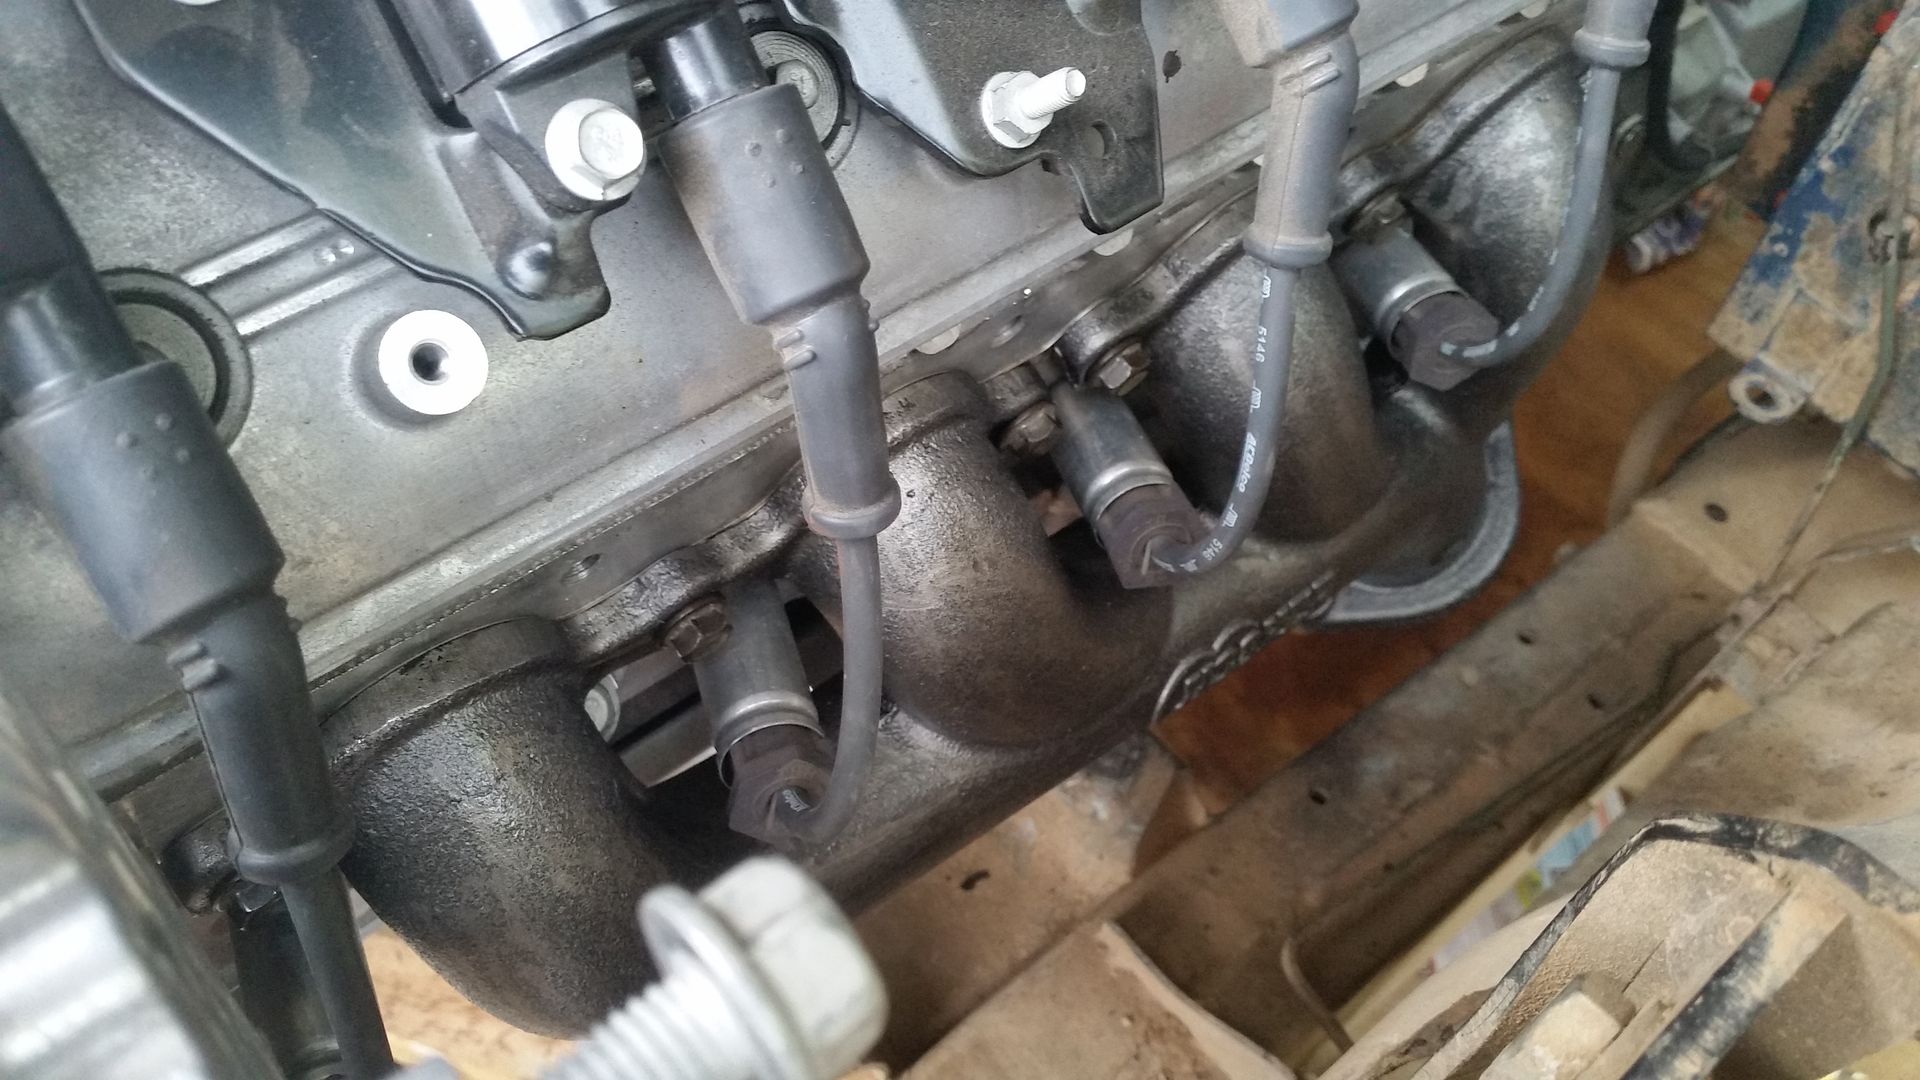
Passenger one fitted (hard to get a pic of the other one due to stuff in the way):
One downside to these is the fact that the flange is a different angle to the originals which makes it hard with the catalysts.
The car manifolds are cast and quite compact. Unfortunately not quite compact enough. I tried to save some money here and tested 2 sets of car manifolds but they just wouldnt work so I had to bite the bullet and buy some Hooker ones.
Not very good comparison photo of the overall manifold size between the factory ones and the replacement ones
Reduction in flange offset:
Passenger one fitted (hard to get a pic of the other one due to stuff in the way):
One downside to these is the fact that the flange is a different angle to the originals which makes it hard with the catalysts.
To be legal over here I need to run the full emissions setup for the engine with cats, pre and post cat 02's Evap, fuel tank pressure sensor etc etc.
Speartech in the US can provide me with a stand alone loom for the engine and 6l80 with the exact spec I need. I couldn't seem to find someone locally who would answer my questions and seemed willing to do it with all the emissions stuff.
They can also reprogram some stuff for me so I had to send them my ECU and TCM.... the ECU is easy, The TCM not quite as much! This was expensive.
So the issue with the Auto and the reprogramming is that it has the tap up/tap down on the gear shift is on the left gate. When people fit these engine and boxes in Patrols and the like they tend to run the factory commodore shifter which I didn't want. The Lokar shifter I have only has one plane (i.e no push across to the left for the tap up/down functions)
I need them on a separate switch as part of the new loom setup. I could possibly run paddles on the wheel but I think thats a bit extravagant for what it is really. Also the wheel is too large for the off the shelf options.
So, the TCM needs reprogramming...
And its inside the auto.
So, sump off
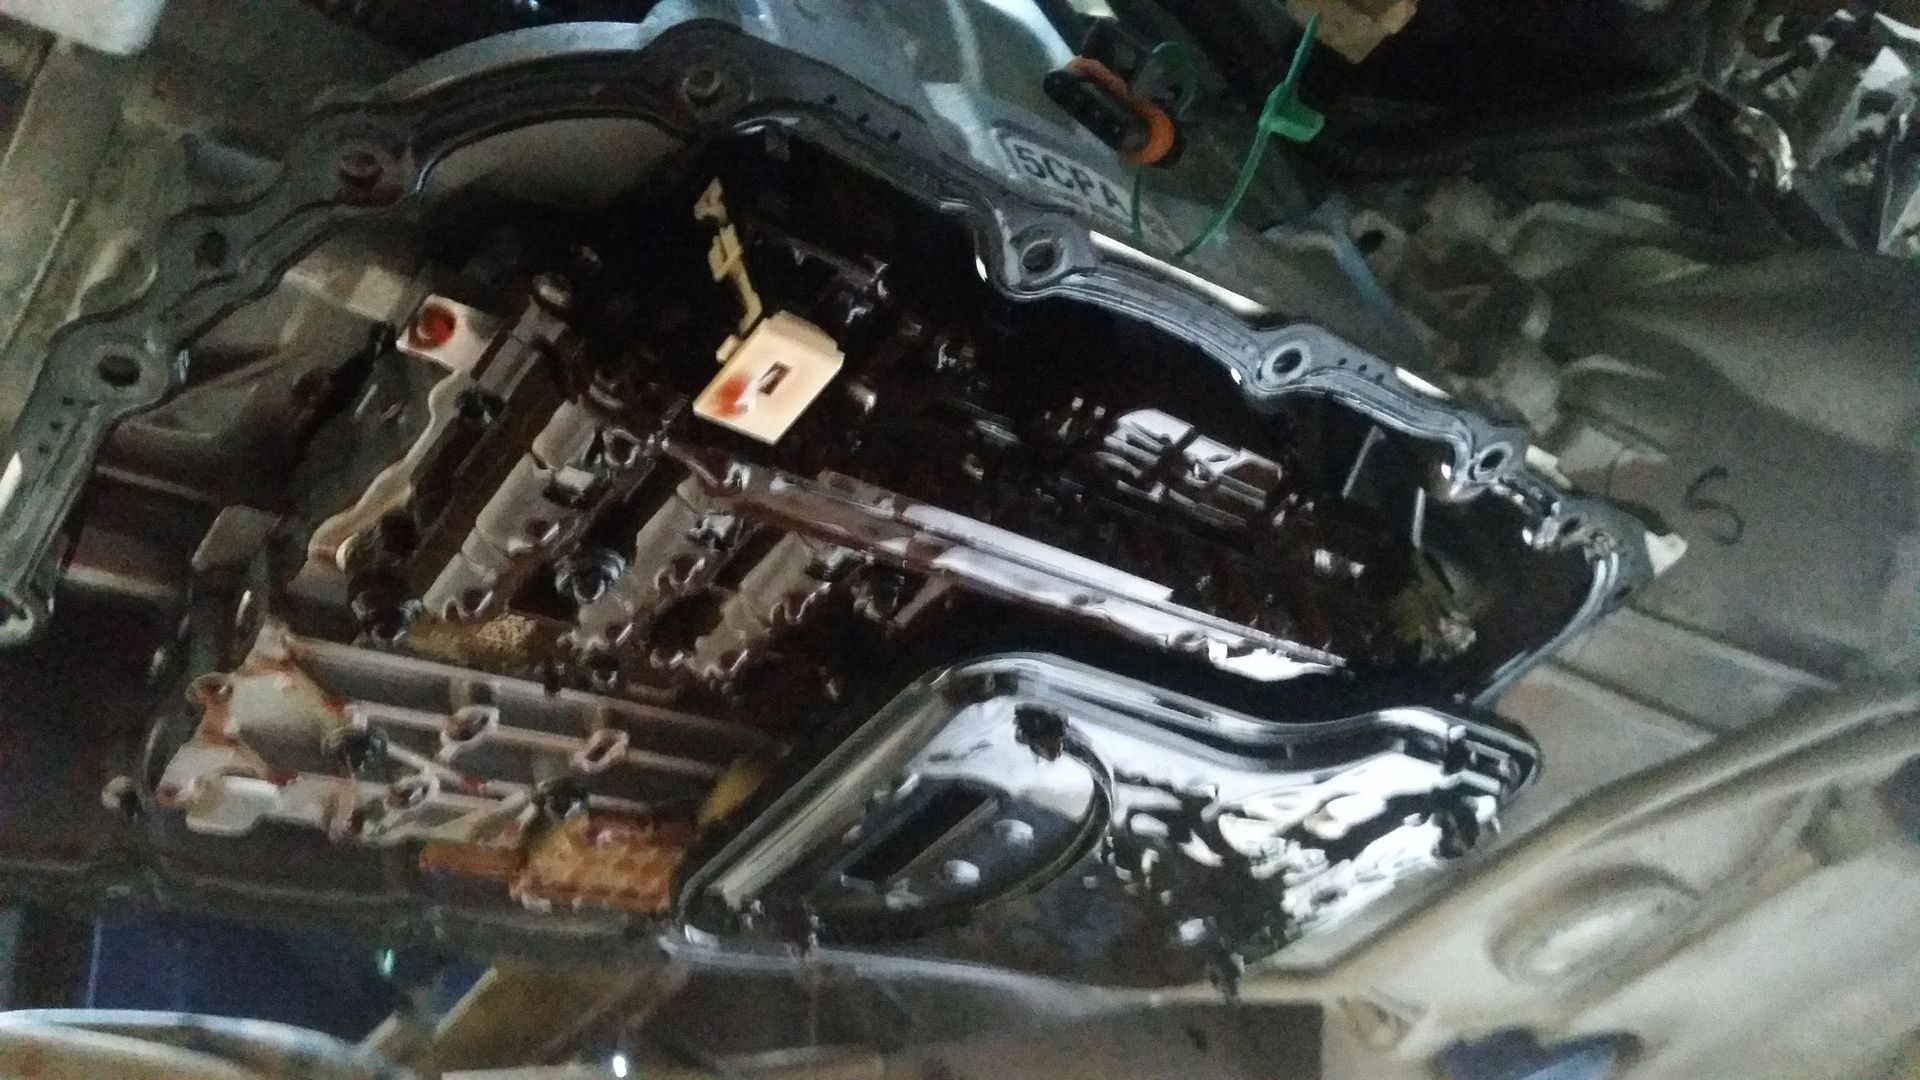
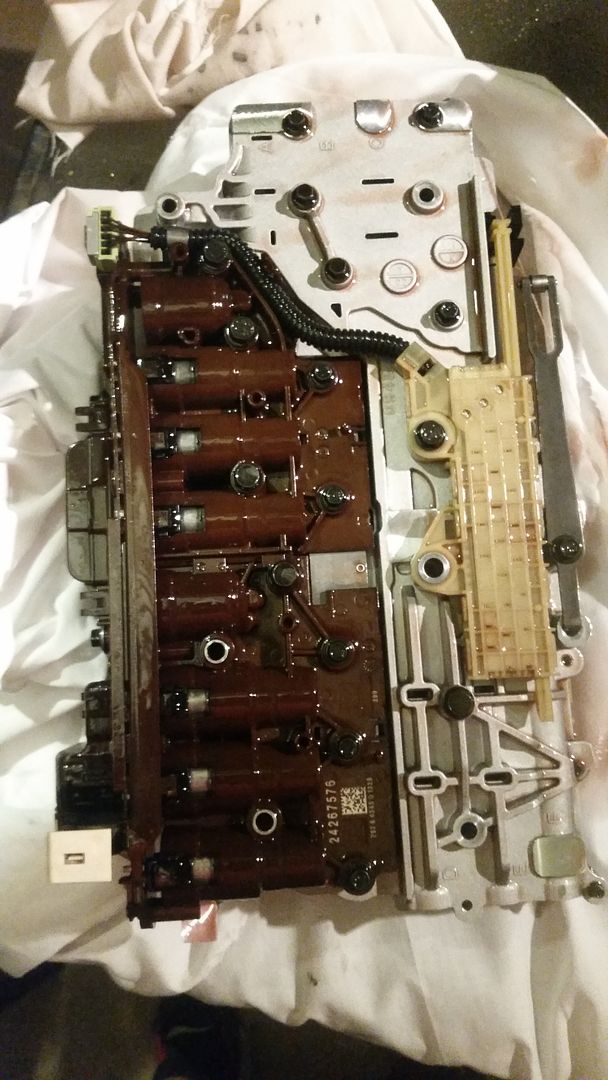
Remove valve body/TCM assembly and strip this down so only the brown bit will be sent:
Inside the auto with the stuff removed:

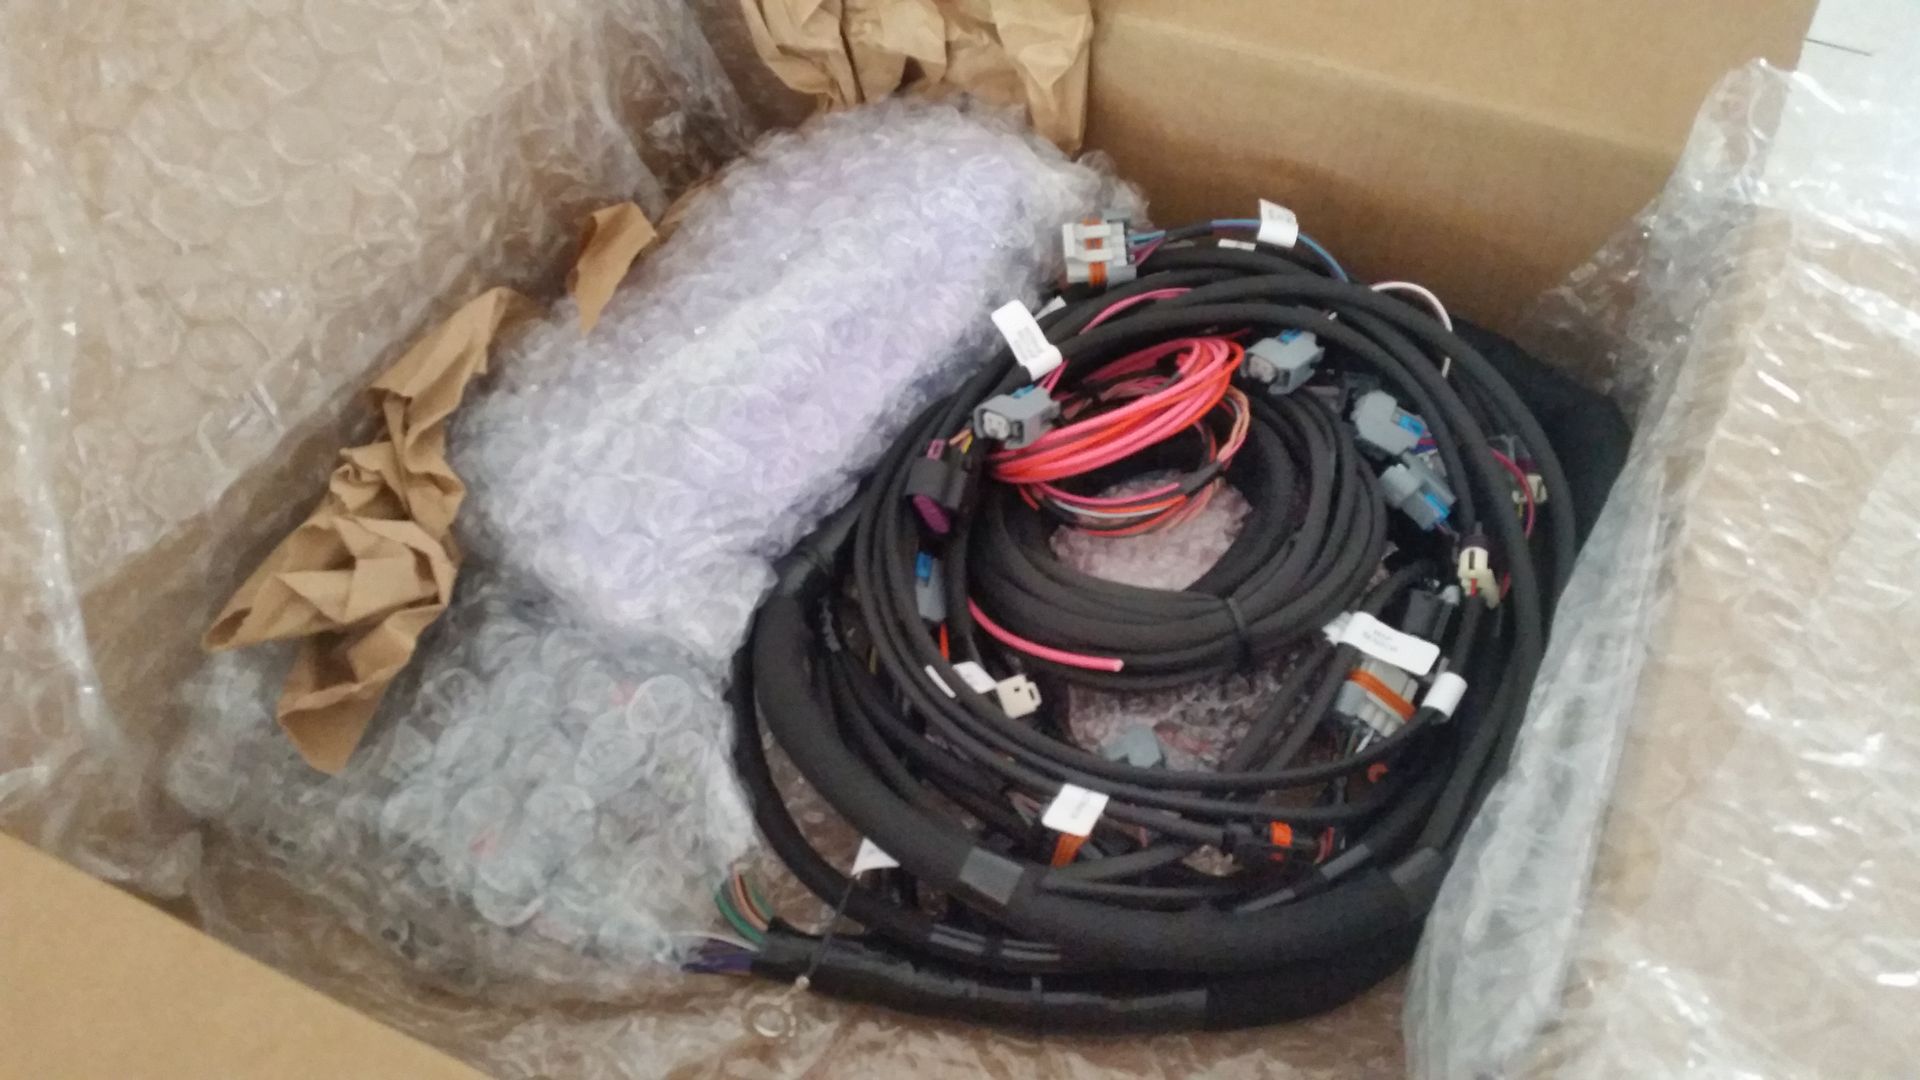
It tool a while to get the new loom and my reprogrammed e38/t43 ecms released from customs as they were shipped USPS with no customs paperwork. Luckily I managed to find the relevant codes for customs clearance and did the paperwork myself, and after paying the duty and GST they were released to me
Throttle Pedal:
I had to buy a Lokar throttle to suit the setup (the guys who are pioneering this stuff in the States aren't far off being able to use a std td5 pedal which will save a decent amount of money!) The factory commodore throttle was totally the wrong shape to work.
I then reassembled the valve body and t43 TCM and refitted that into the 6l80 after changing the seal for the oil filter in the pump body for a new one.
Along with the new sump:
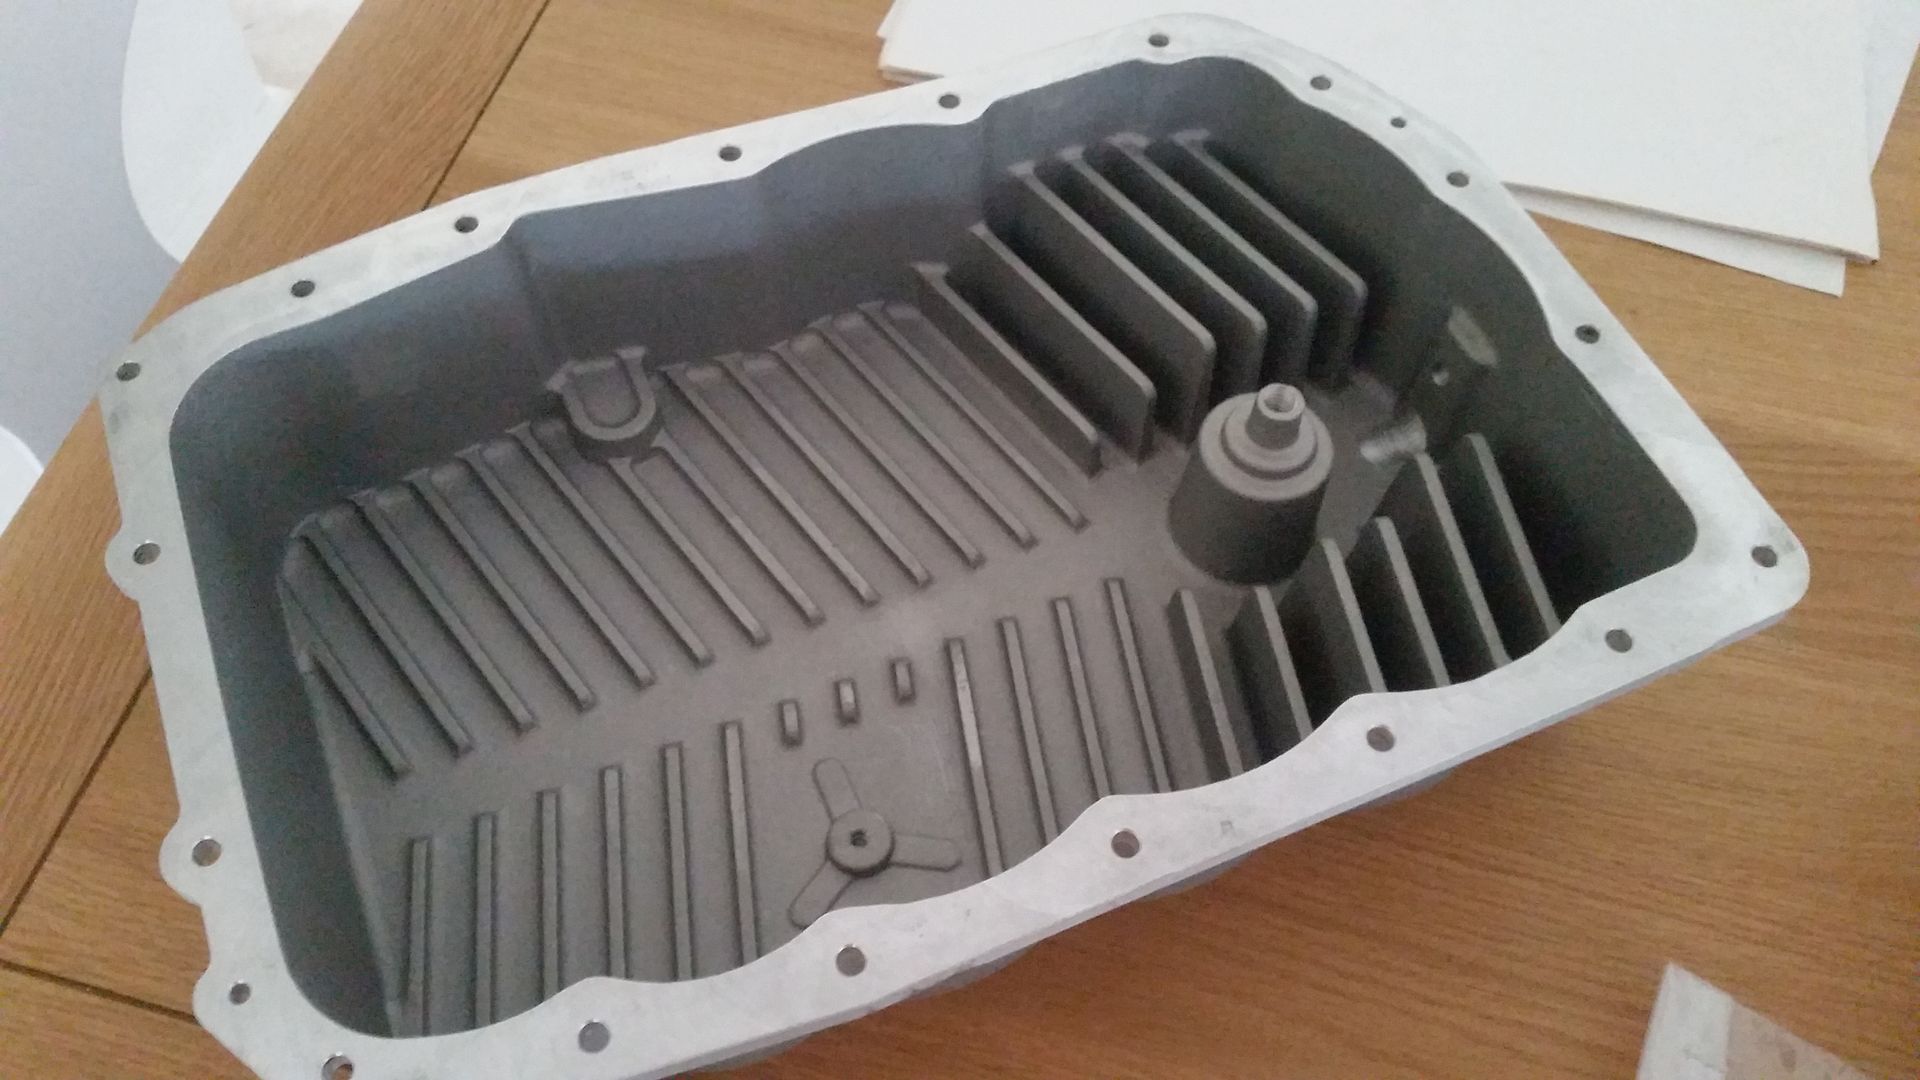
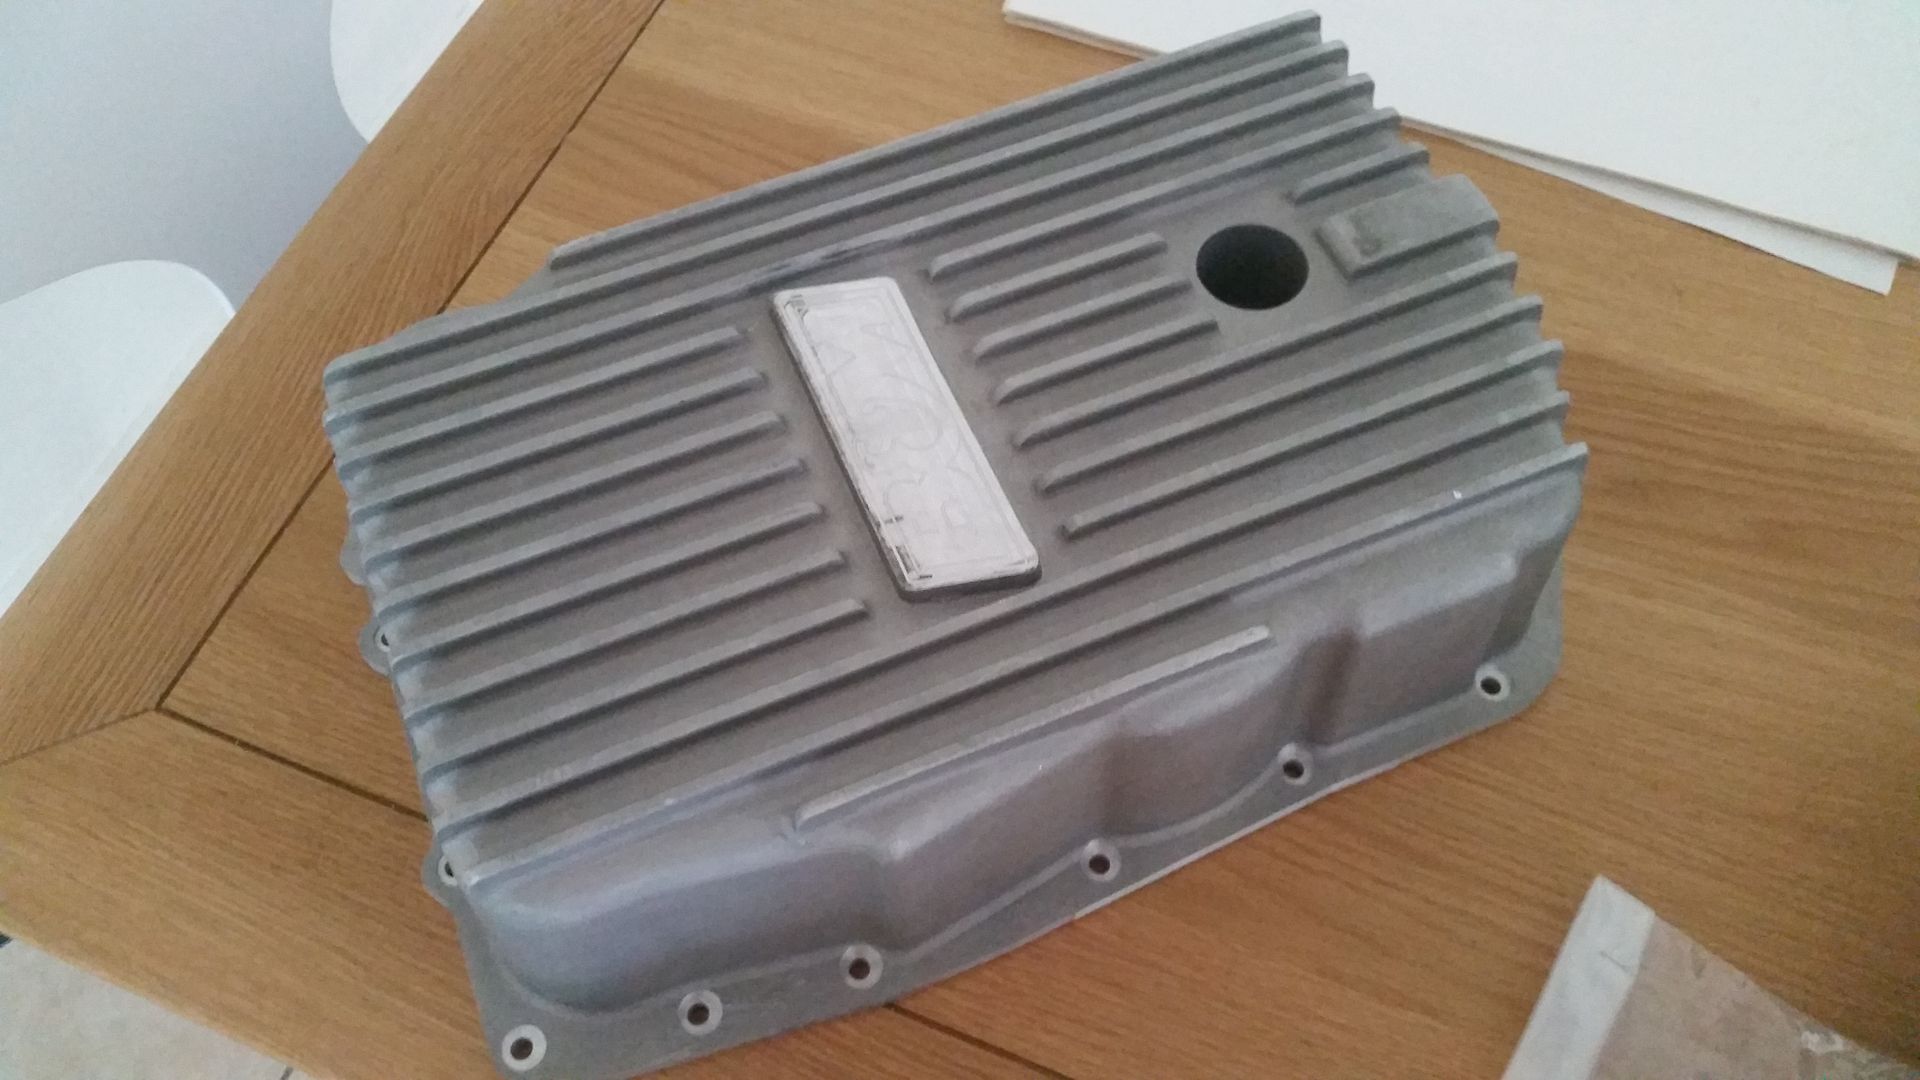
I also fitted a wide mouth filter from a Camaro / 6l90e box
Wide mouth filter:

I then fitted the new sump on the 6l80. sorry for the rubbish picture. This one holds about 1.5l more than the factory one
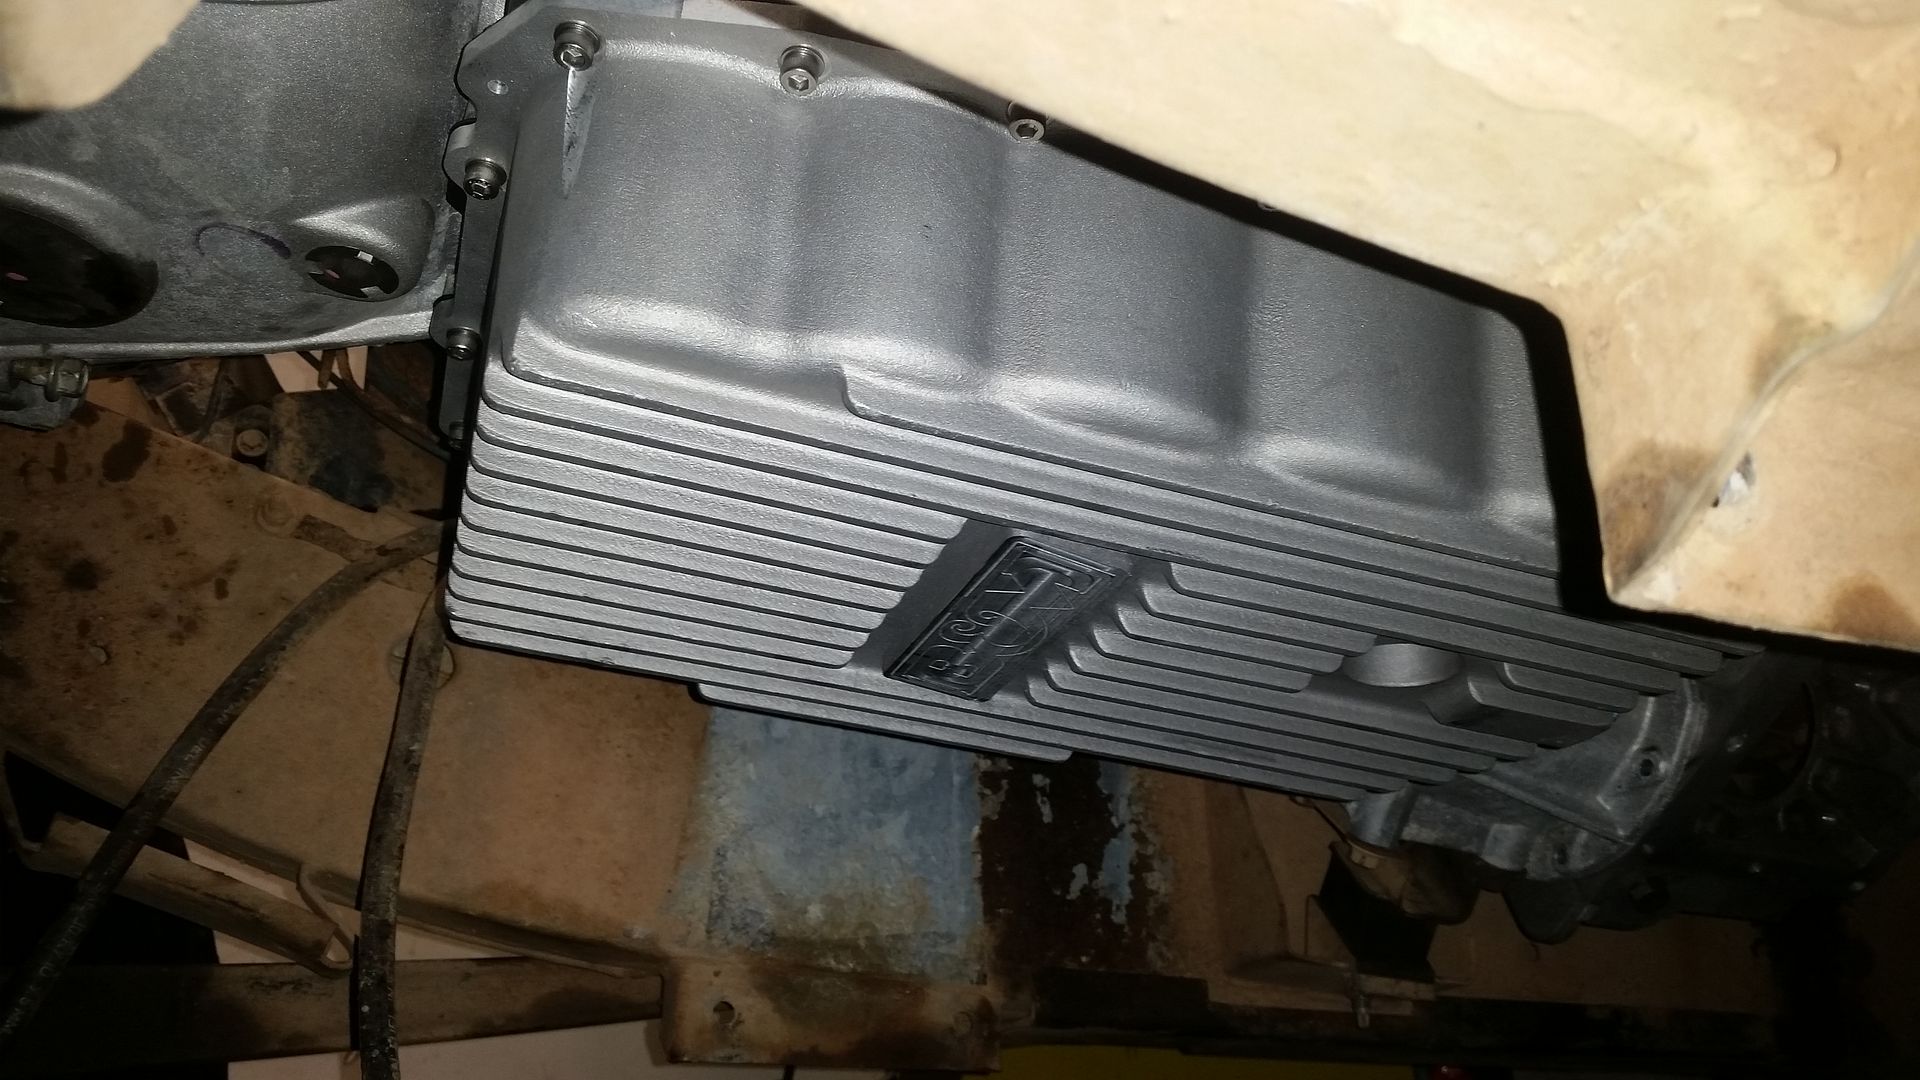
At the same time I also removed the engine sump, and oil pick up and test fitted the truck/4wd version. This is only on with a couple of bolts in this picture while I waited for the new sump gasket to arrive, and as you will see it all came apart again yet.
Speartech in the US can provide me with a stand alone loom for the engine and 6l80 with the exact spec I need. I couldn't seem to find someone locally who would answer my questions and seemed willing to do it with all the emissions stuff.
They can also reprogram some stuff for me so I had to send them my ECU and TCM.... the ECU is easy, The TCM not quite as much! This was expensive.
So the issue with the Auto and the reprogramming is that it has the tap up/tap down on the gear shift is on the left gate. When people fit these engine and boxes in Patrols and the like they tend to run the factory commodore shifter which I didn't want. The Lokar shifter I have only has one plane (i.e no push across to the left for the tap up/down functions)
I need them on a separate switch as part of the new loom setup. I could possibly run paddles on the wheel but I think thats a bit extravagant for what it is really. Also the wheel is too large for the off the shelf options.
So, the TCM needs reprogramming...
And its inside the auto.
So, sump off
Remove valve body/TCM assembly and strip this down so only the brown bit will be sent:
Inside the auto with the stuff removed:
It tool a while to get the new loom and my reprogrammed e38/t43 ecms released from customs as they were shipped USPS with no customs paperwork. Luckily I managed to find the relevant codes for customs clearance and did the paperwork myself, and after paying the duty and GST they were released to me
Throttle Pedal:
I had to buy a Lokar throttle to suit the setup (the guys who are pioneering this stuff in the States aren't far off being able to use a std td5 pedal which will save a decent amount of money!) The factory commodore throttle was totally the wrong shape to work.
I then reassembled the valve body and t43 TCM and refitted that into the 6l80 after changing the seal for the oil filter in the pump body for a new one.
Along with the new sump:
I also fitted a wide mouth filter from a Camaro / 6l90e box
Wide mouth filter:
I then fitted the new sump on the 6l80. sorry for the rubbish picture. This one holds about 1.5l more than the factory one
At the same time I also removed the engine sump, and oil pick up and test fitted the truck/4wd version. This is only on with a couple of bolts in this picture while I waited for the new sump gasket to arrive, and as you will see it all came apart again yet.
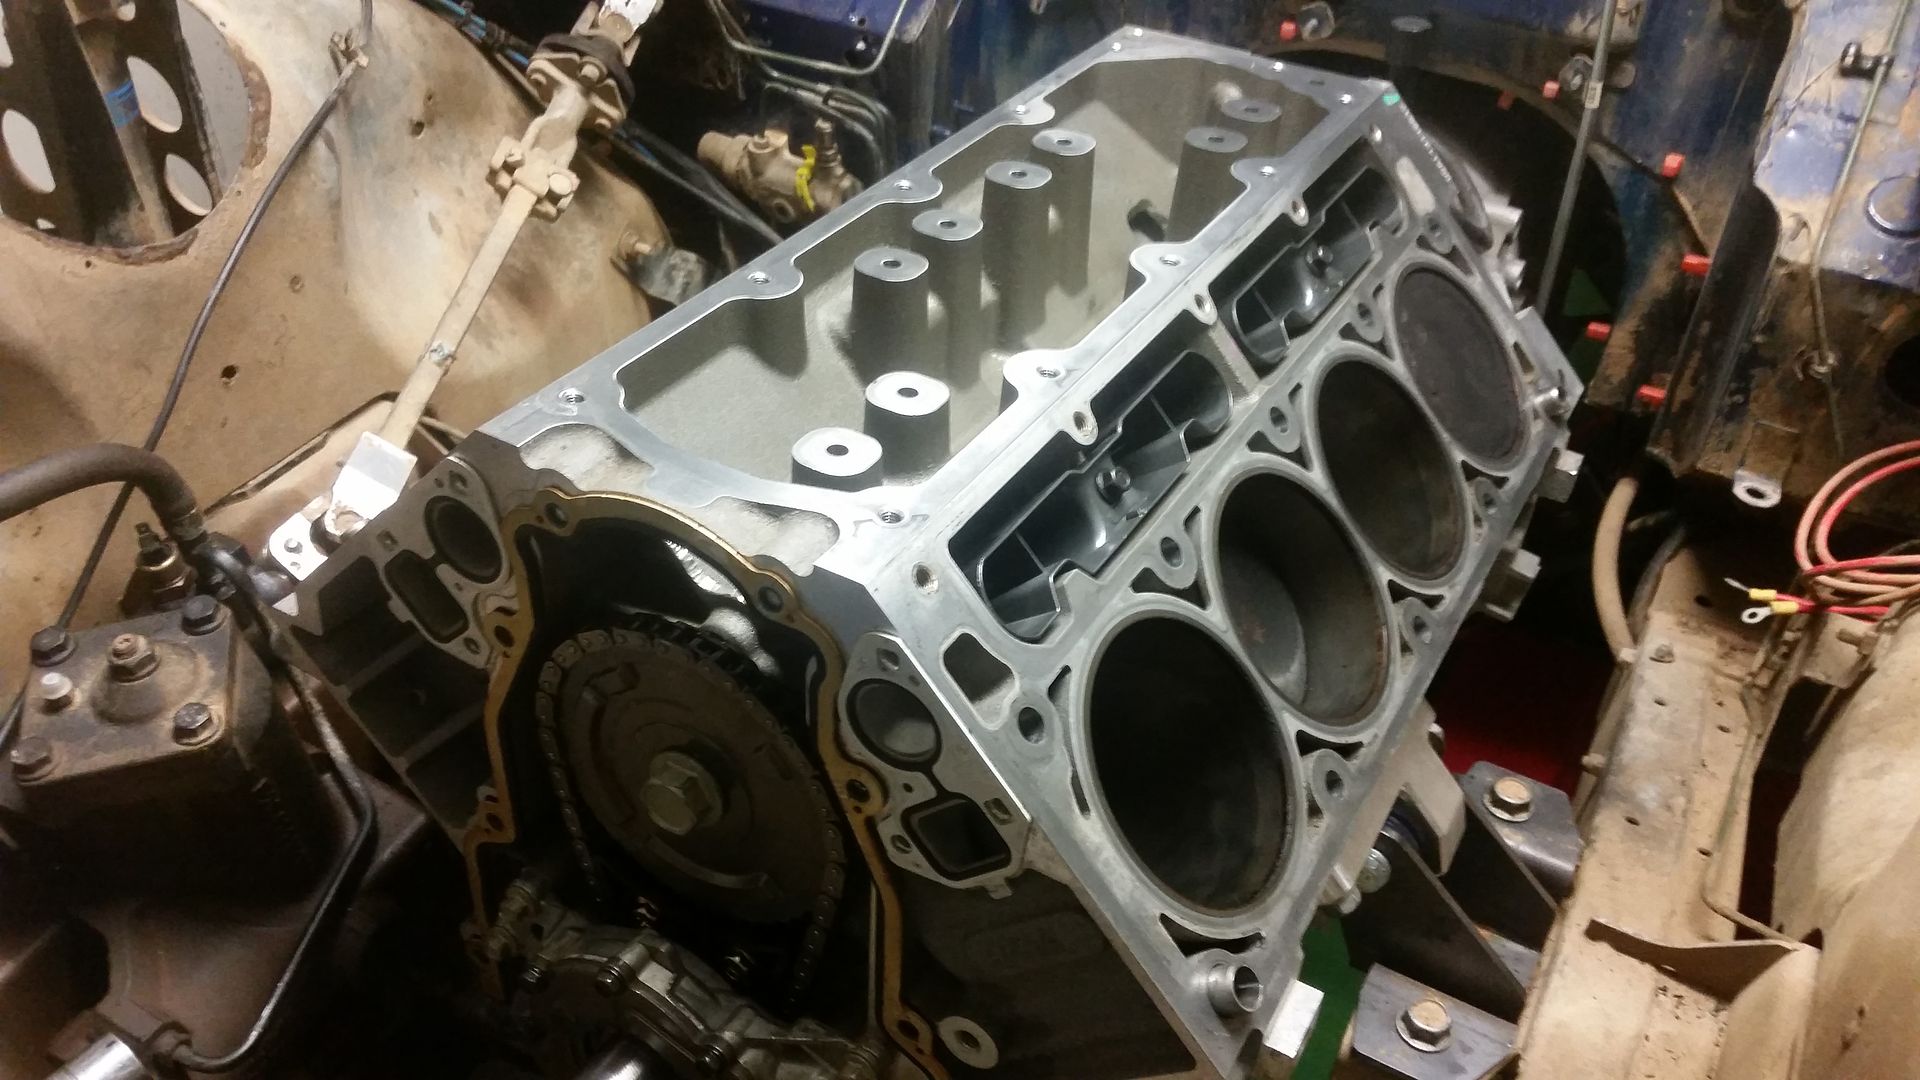
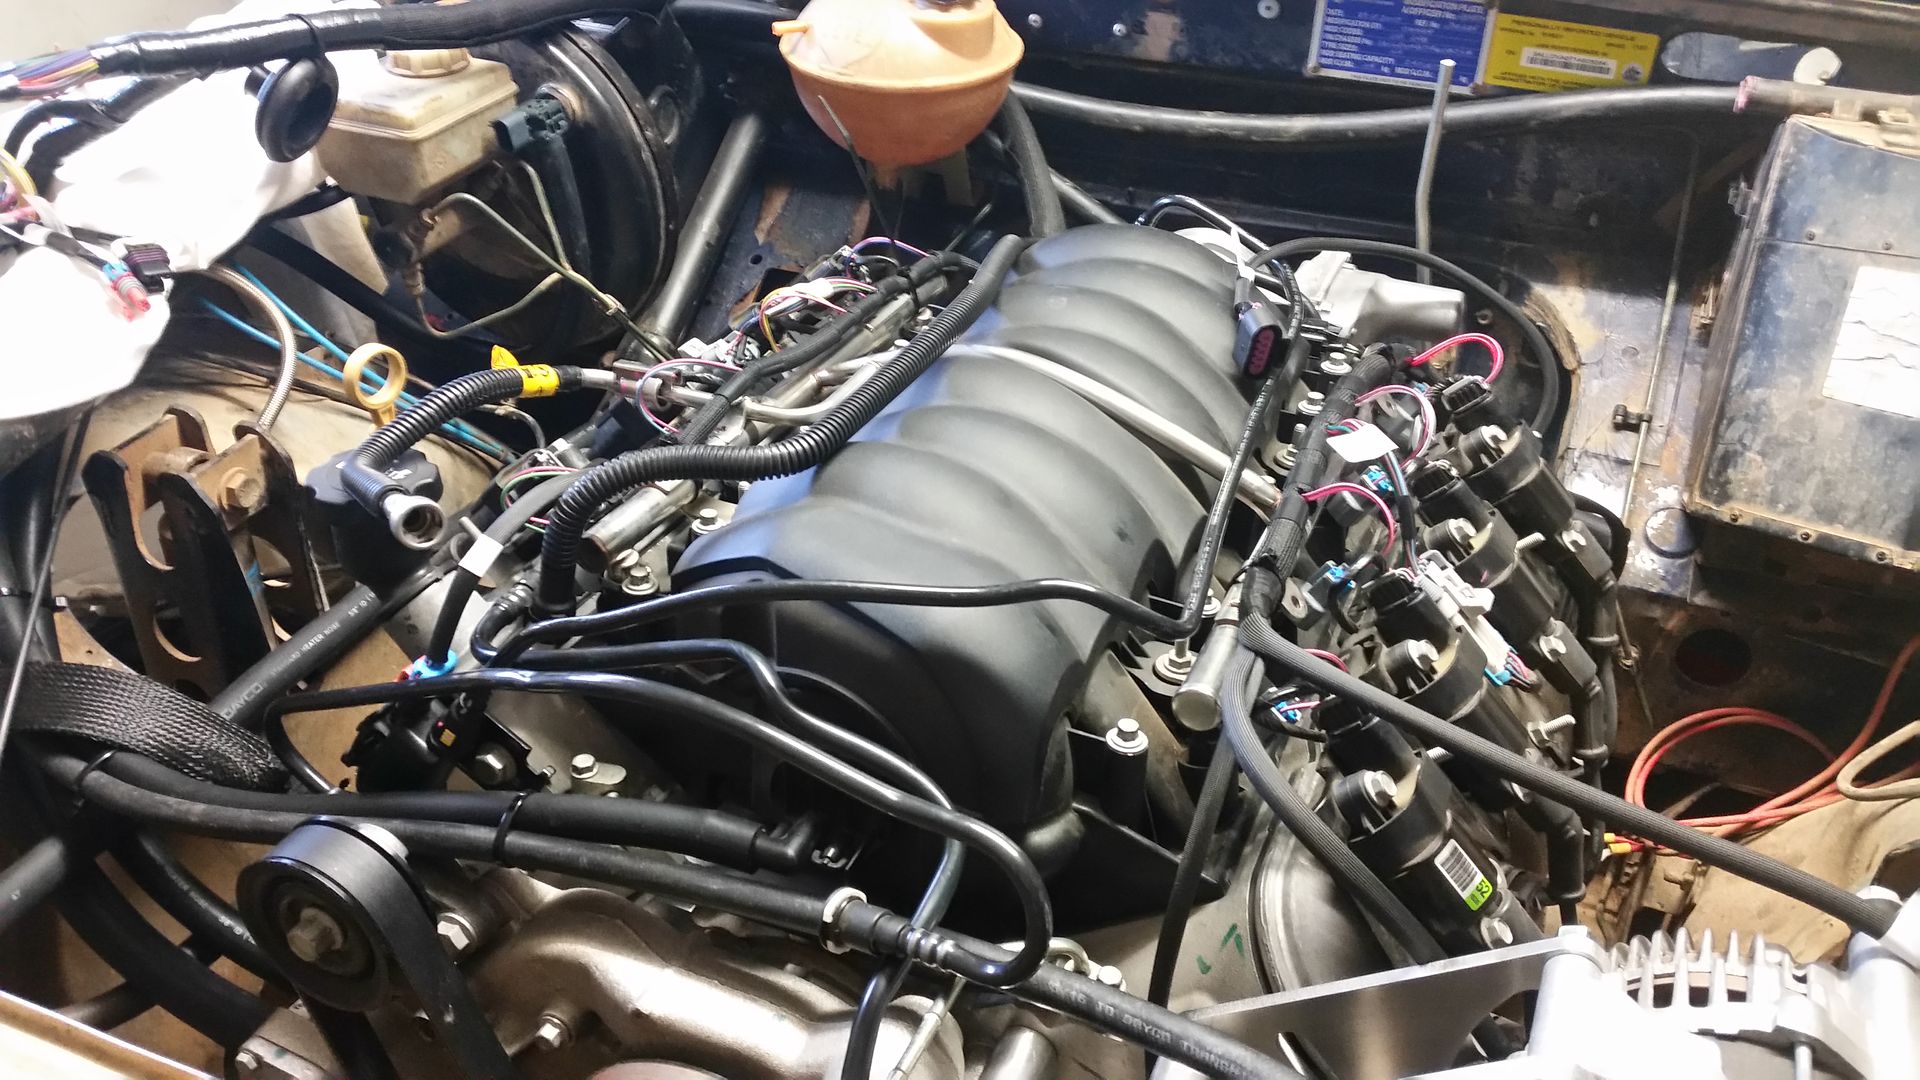
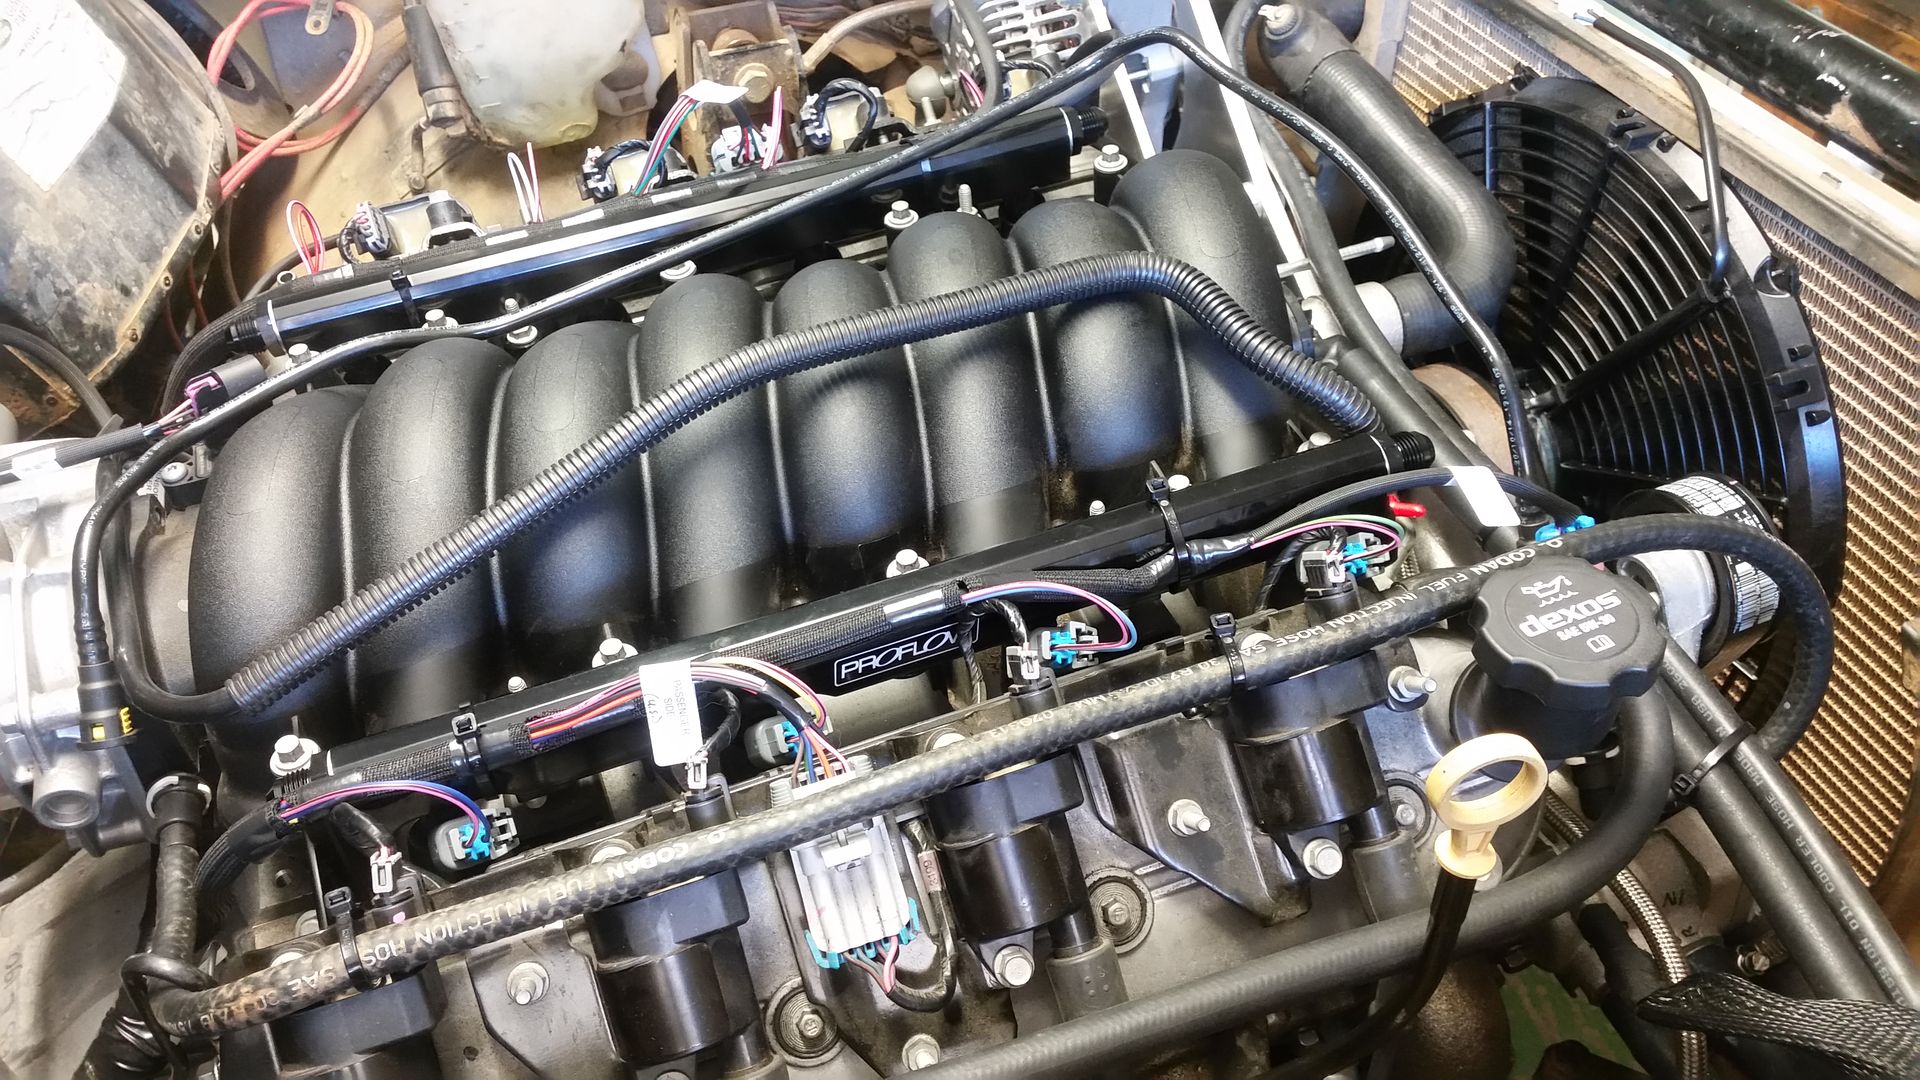
My engine is an L77 which has the Displacement on Demand. I was prepared for one problem when turning around the inlet manifold with the oil pressure switch being on a riser on the closing plate. This clashes with the manifold / throttle body when turned around.
However its possibly slightly more involved because of the DOD.
The oil that comes up to the pressure switch is then fed back down and along the top of the 4 De-ac lifters.
This is the cover plate with the oil pressure riser that gets in the way of the throttle body. next to it is the plug for the DOD De-ac lifters. You can see the raised section that goes along the middle in the casting which is the path the oil takes on its return from the pressure switch.
I wanted to shorten the riser and block it, but by doing this I would have blocked the oil return.
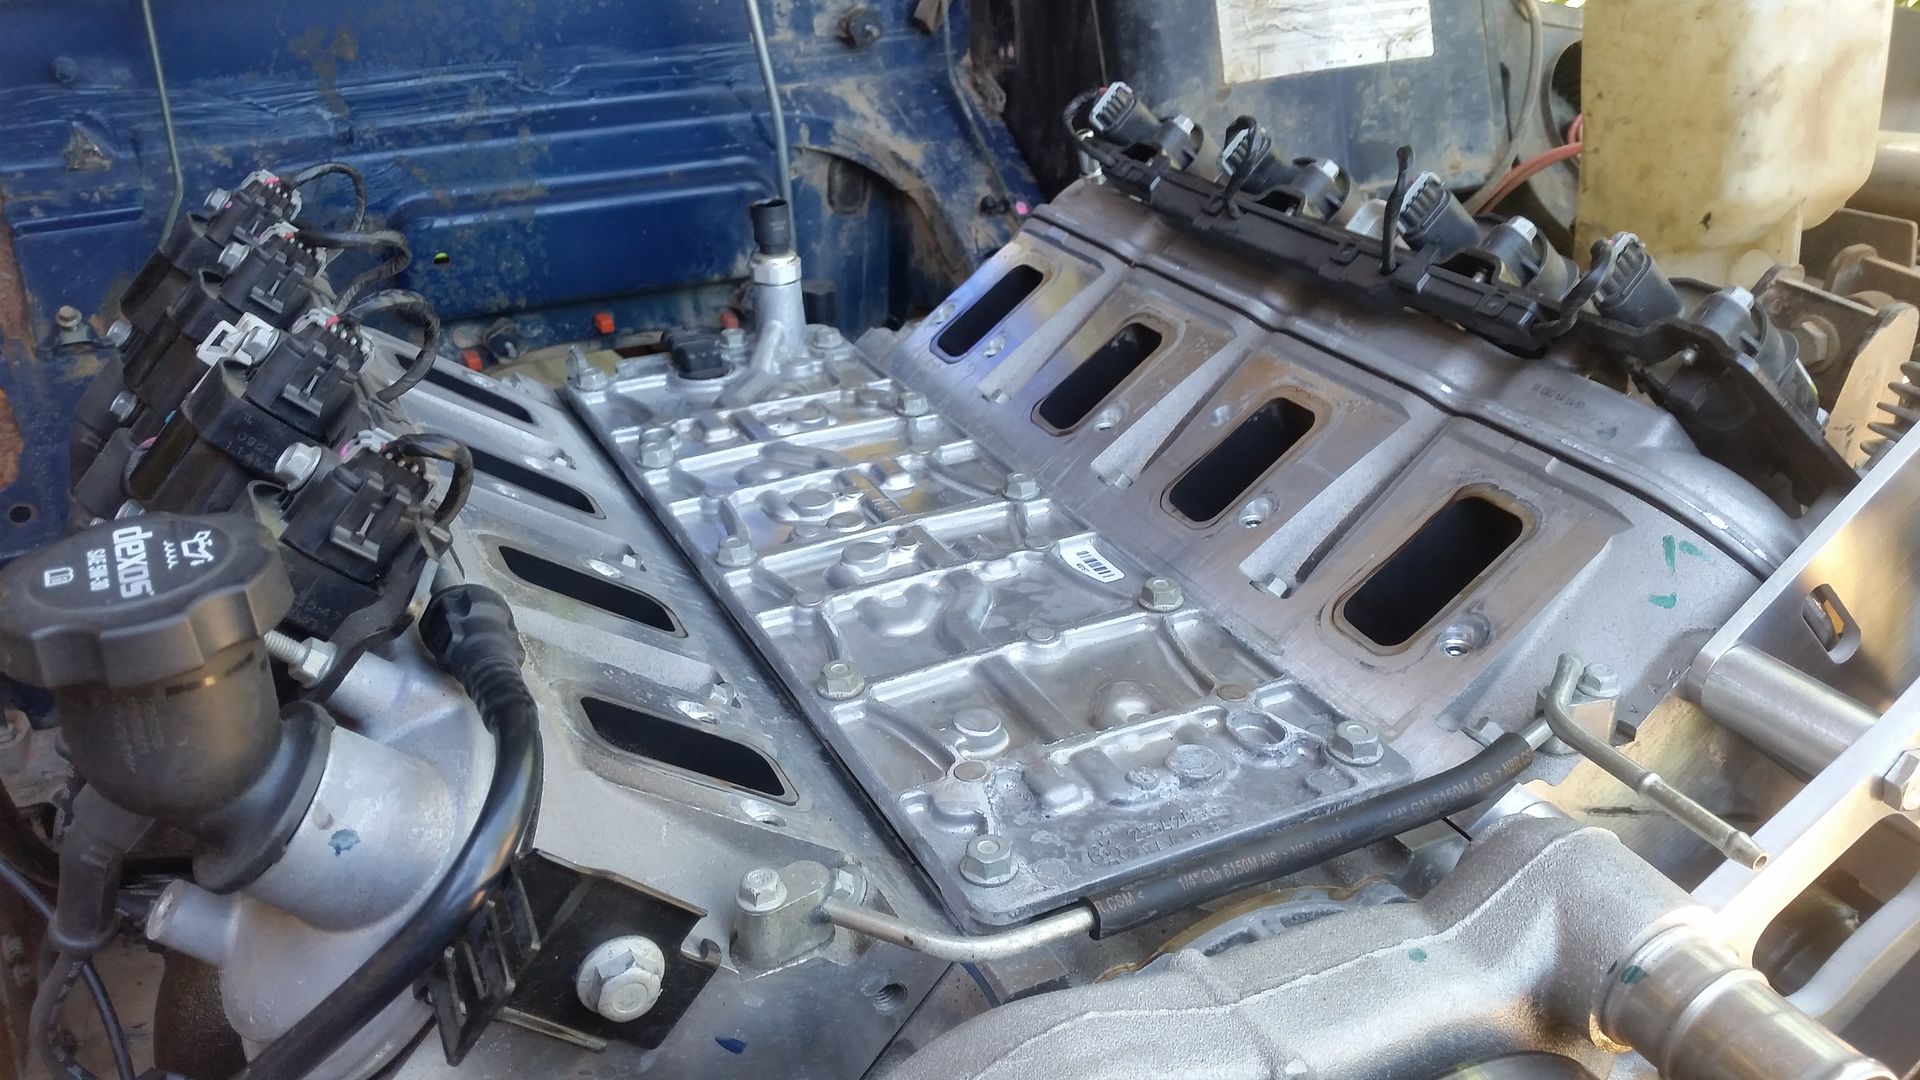
So this is with the inlet and cover plate off.
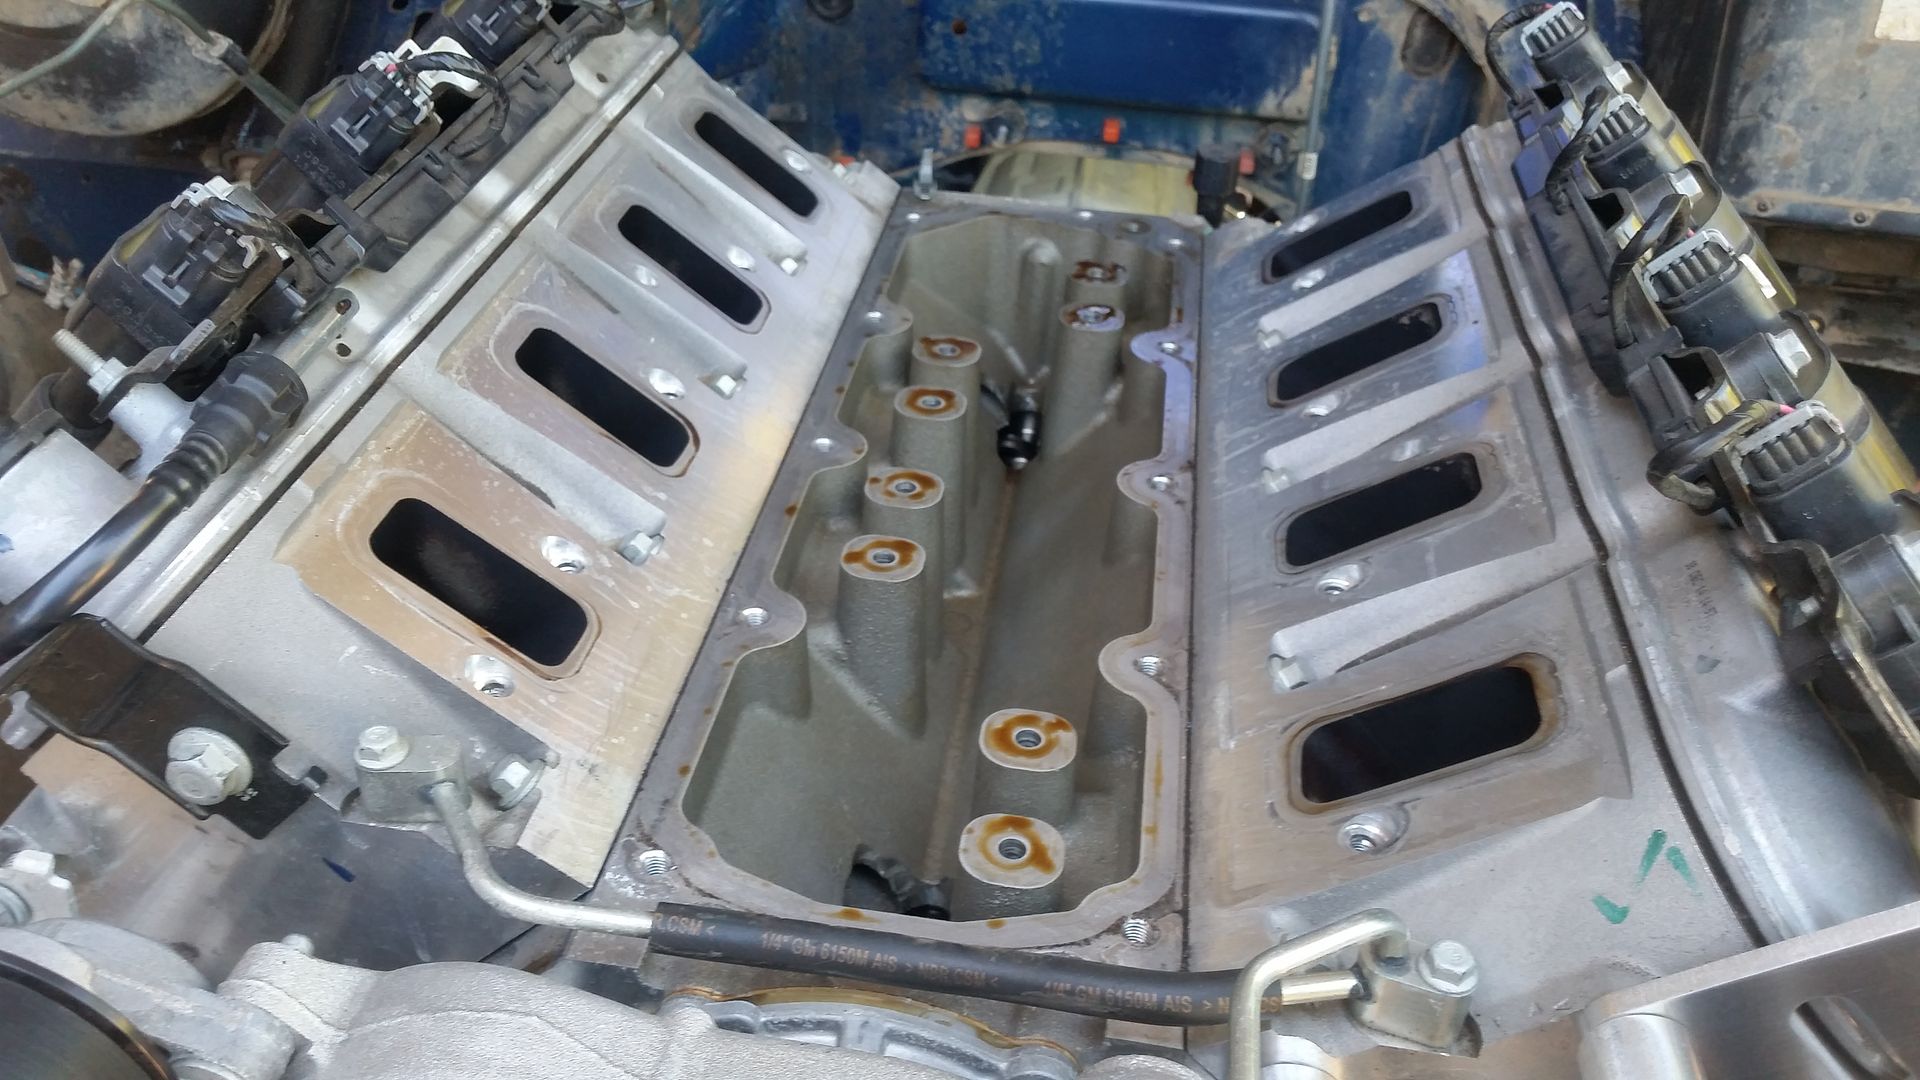
And this is the underside of the cover plate:

Here is the return from the pressure switch:
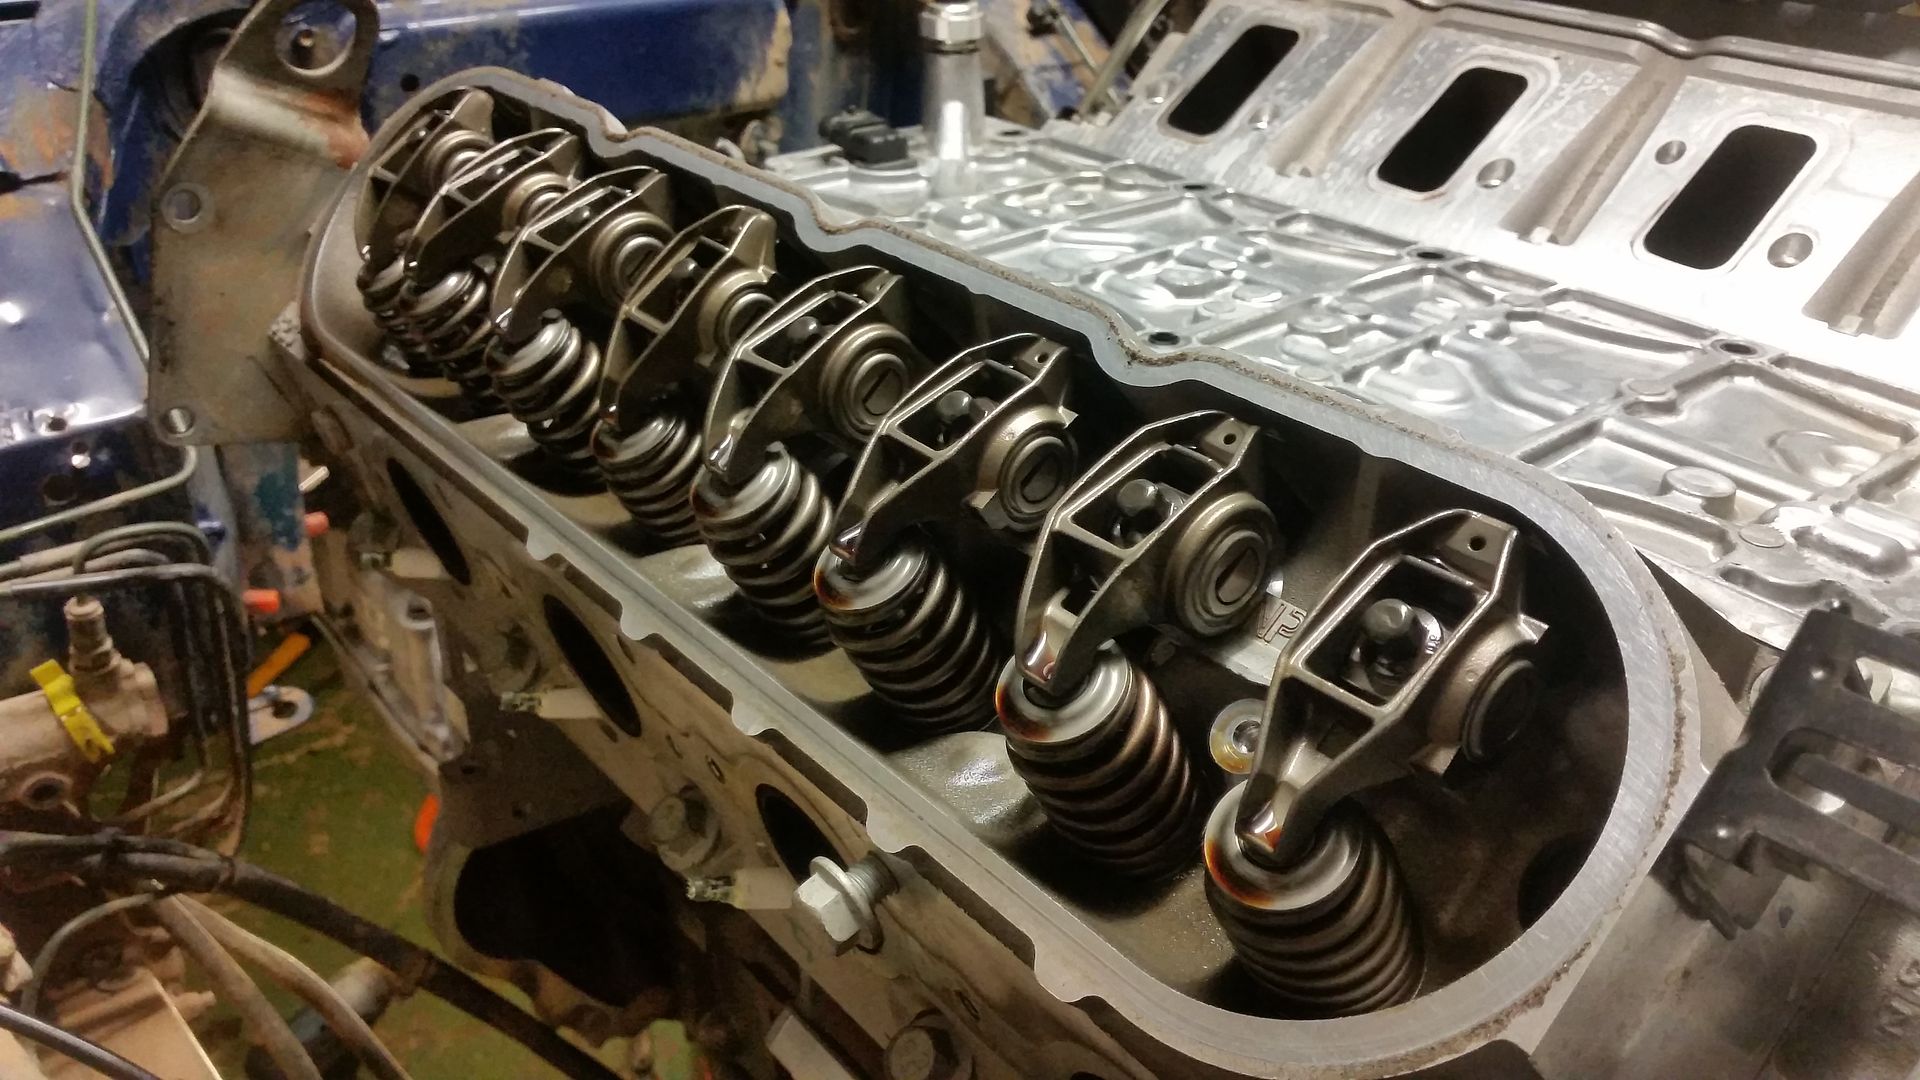
Removing the heads:
Waterpump also removed.
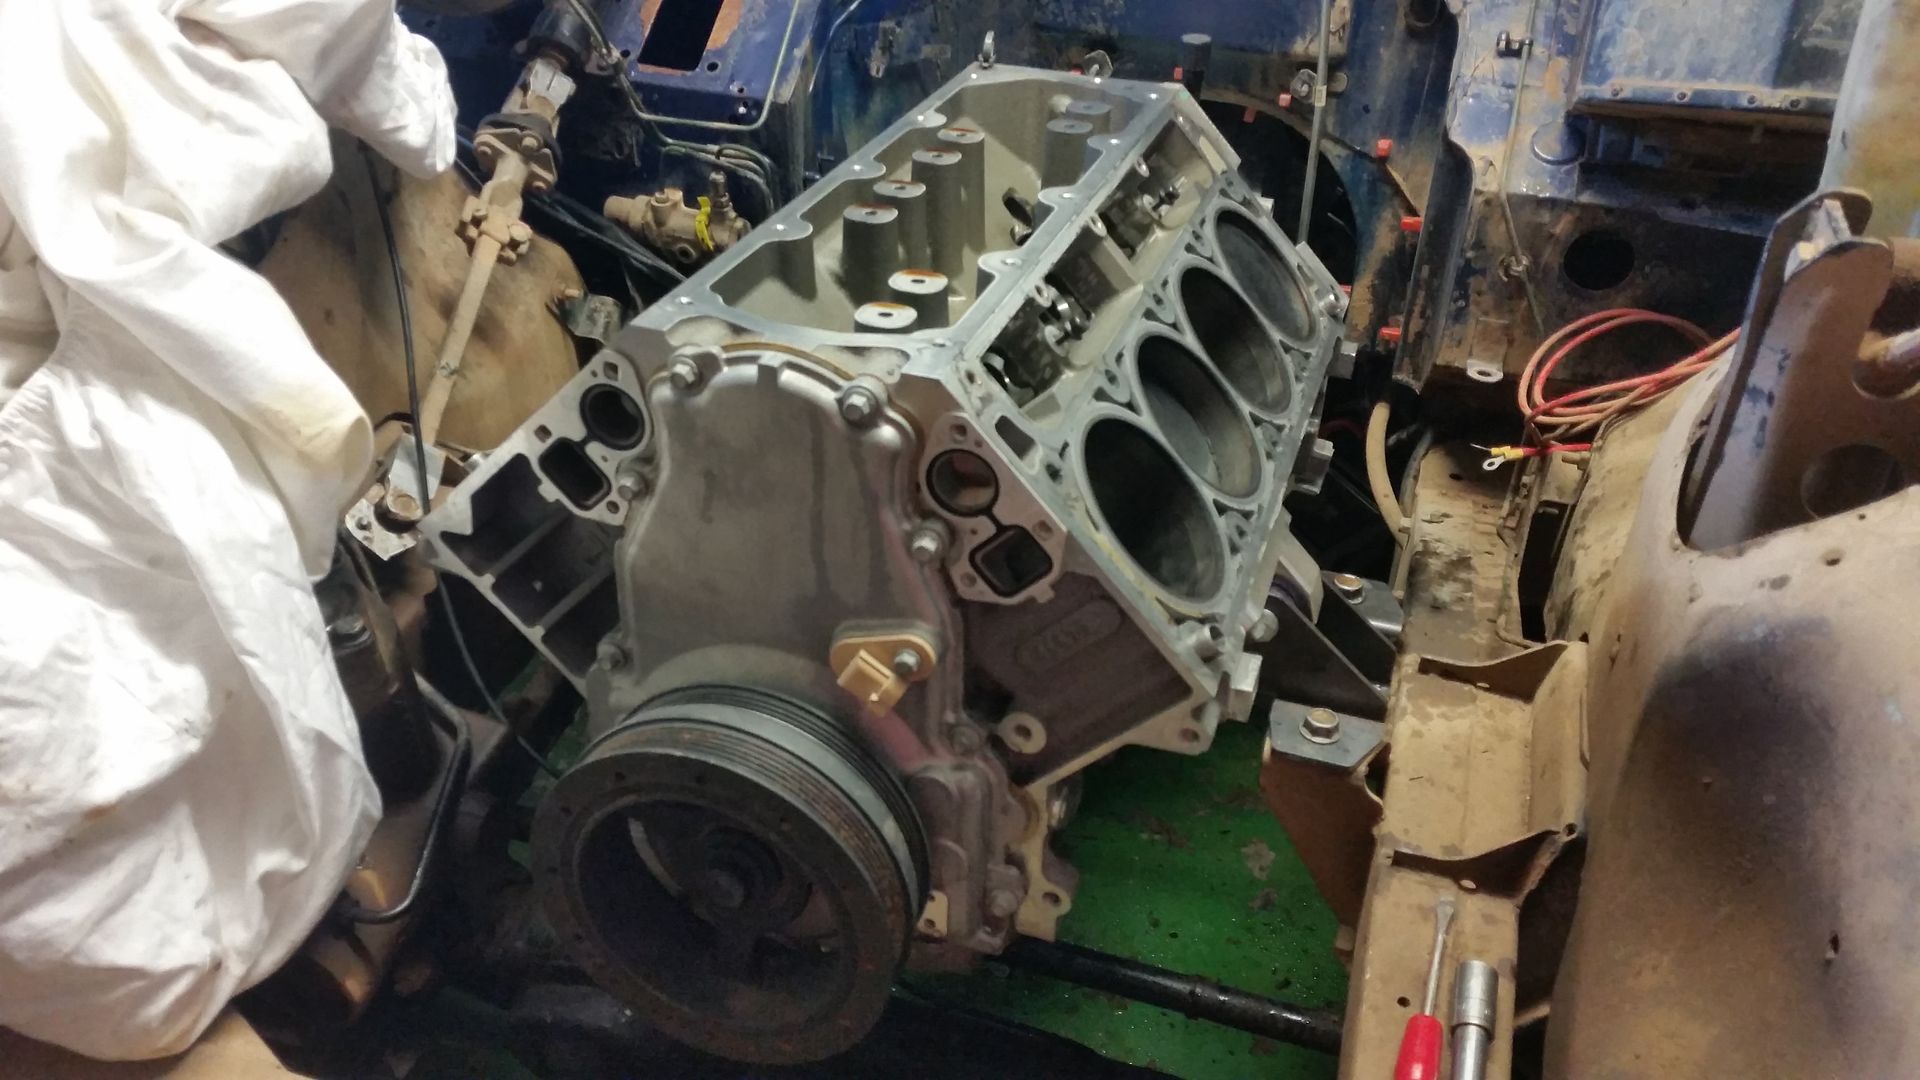
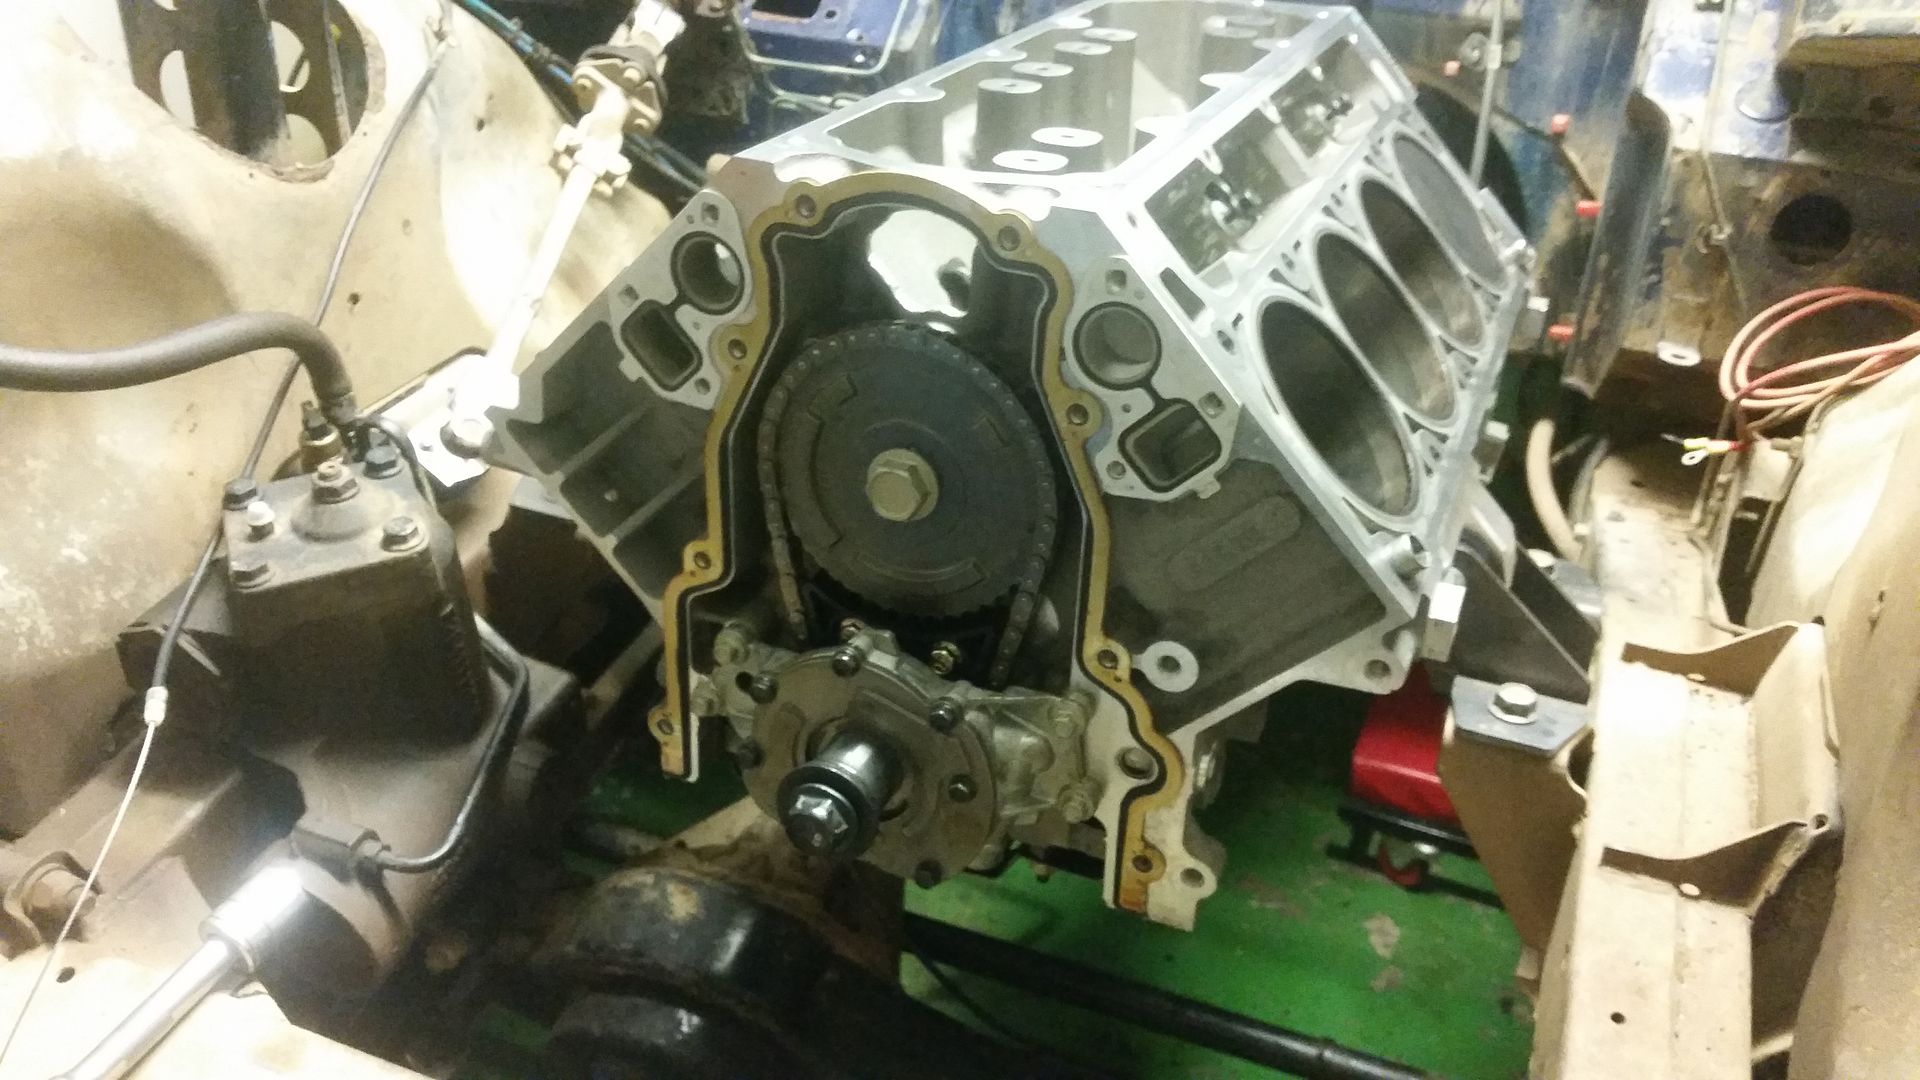
Timing cover removed after taking off the harmonic balancer:
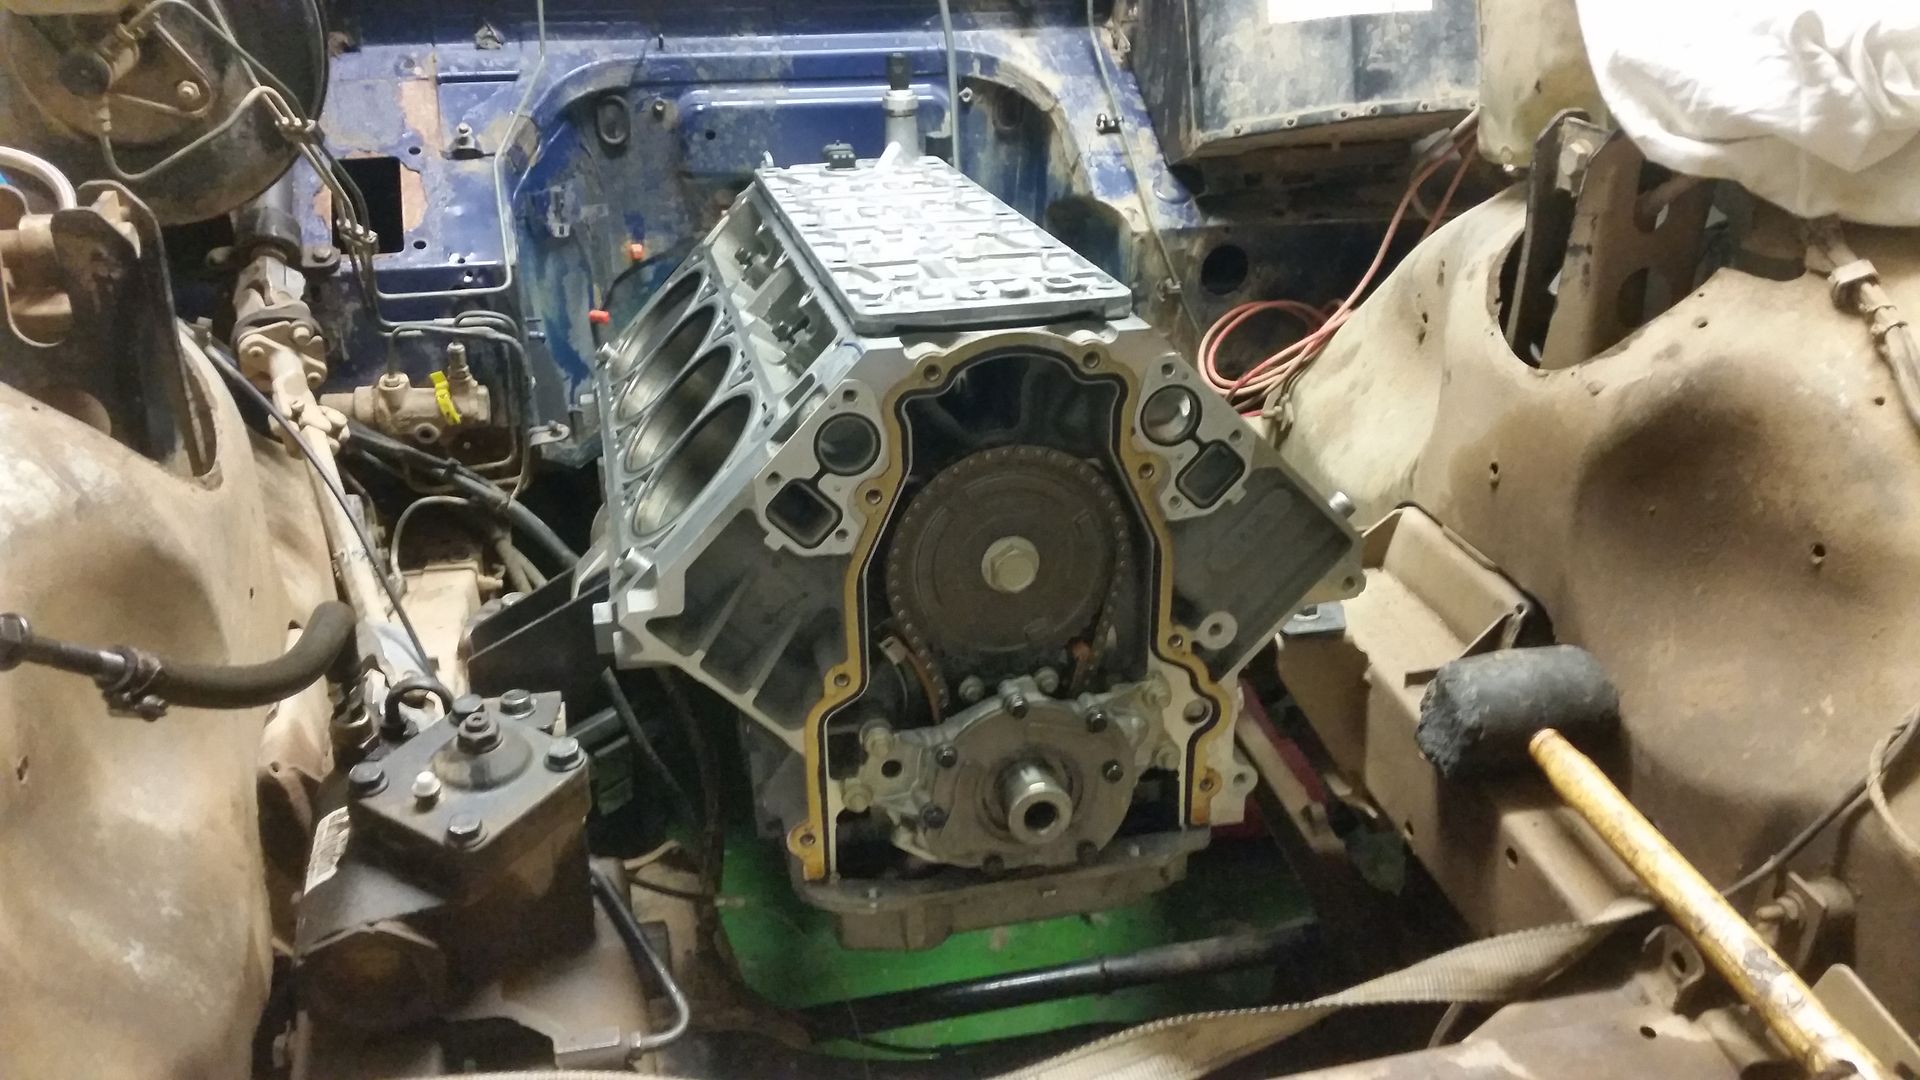
Oil pump:
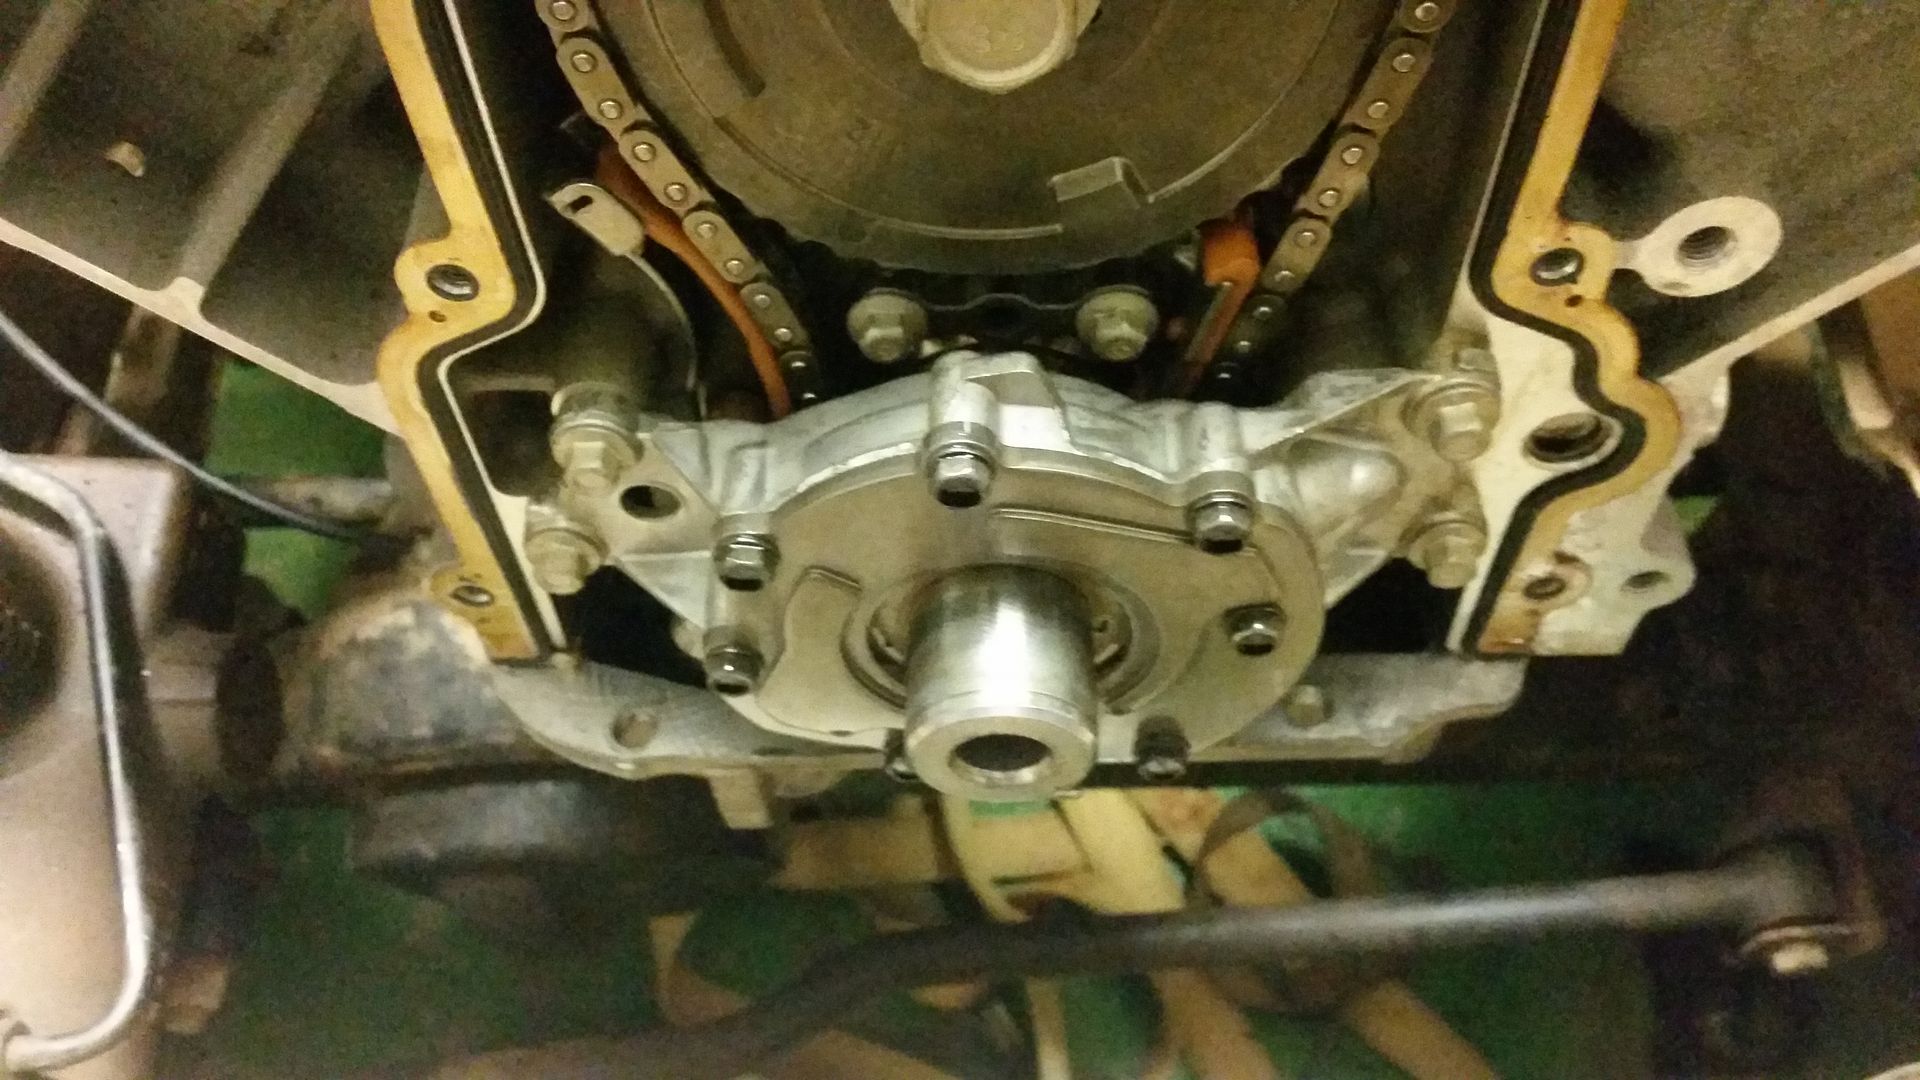
Oil pump removed:
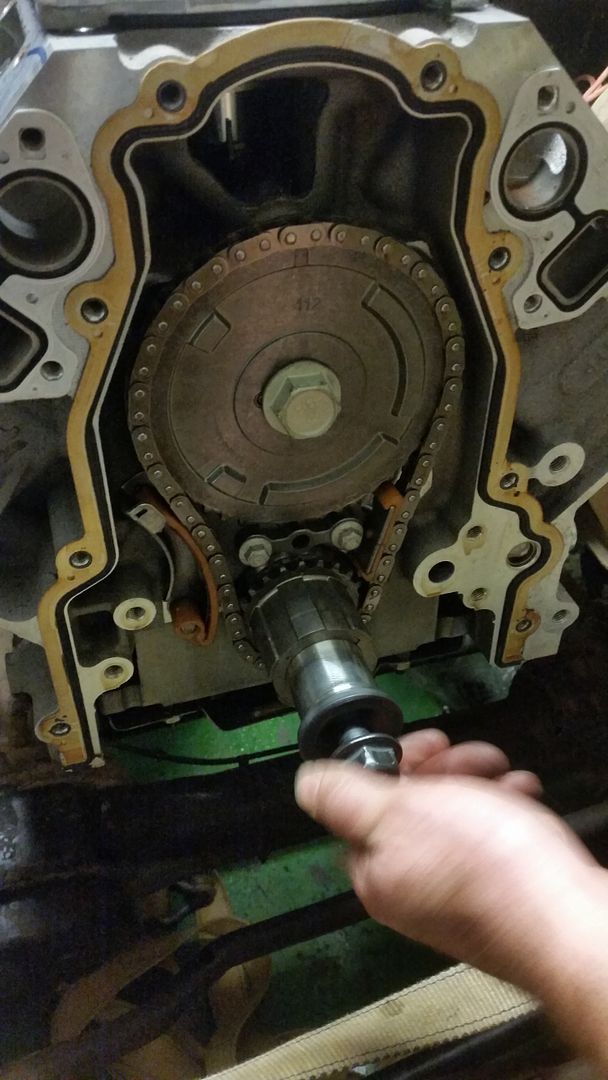
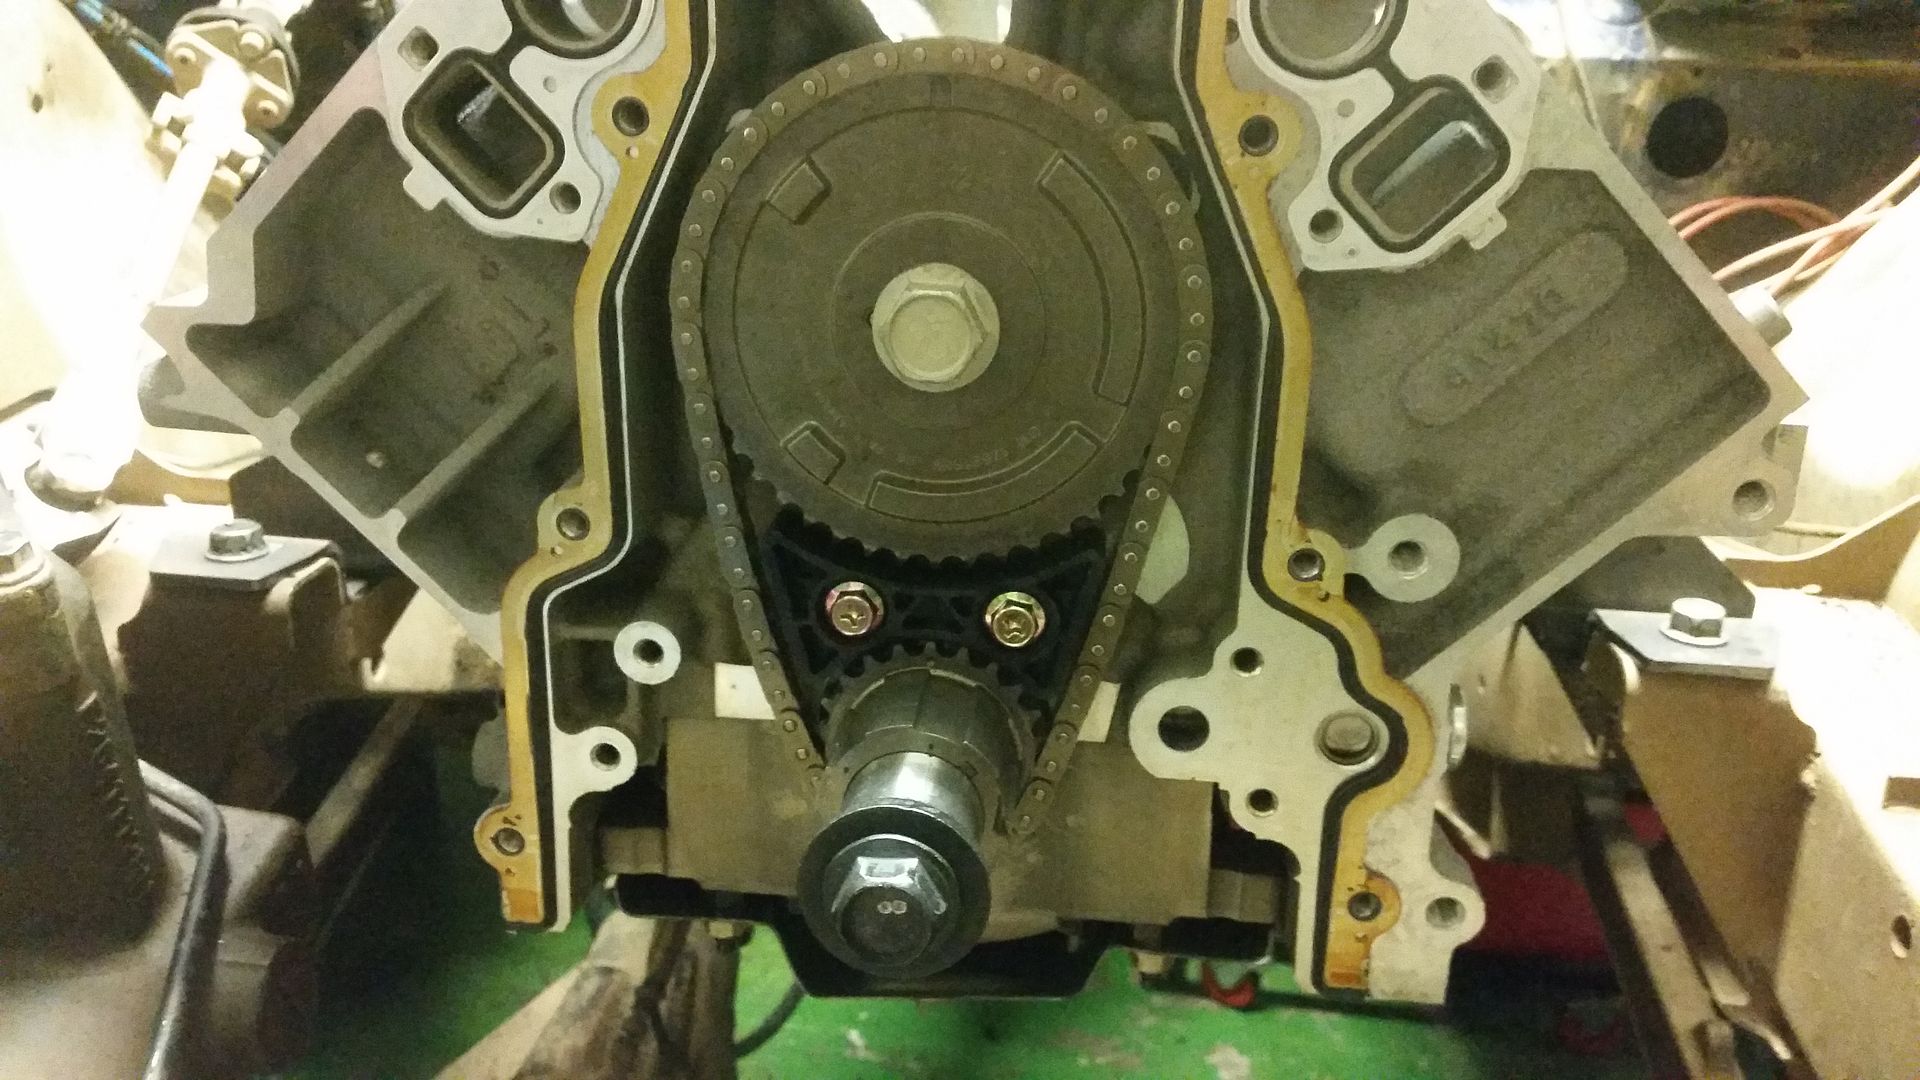
Timing gear and Camshaft removed:
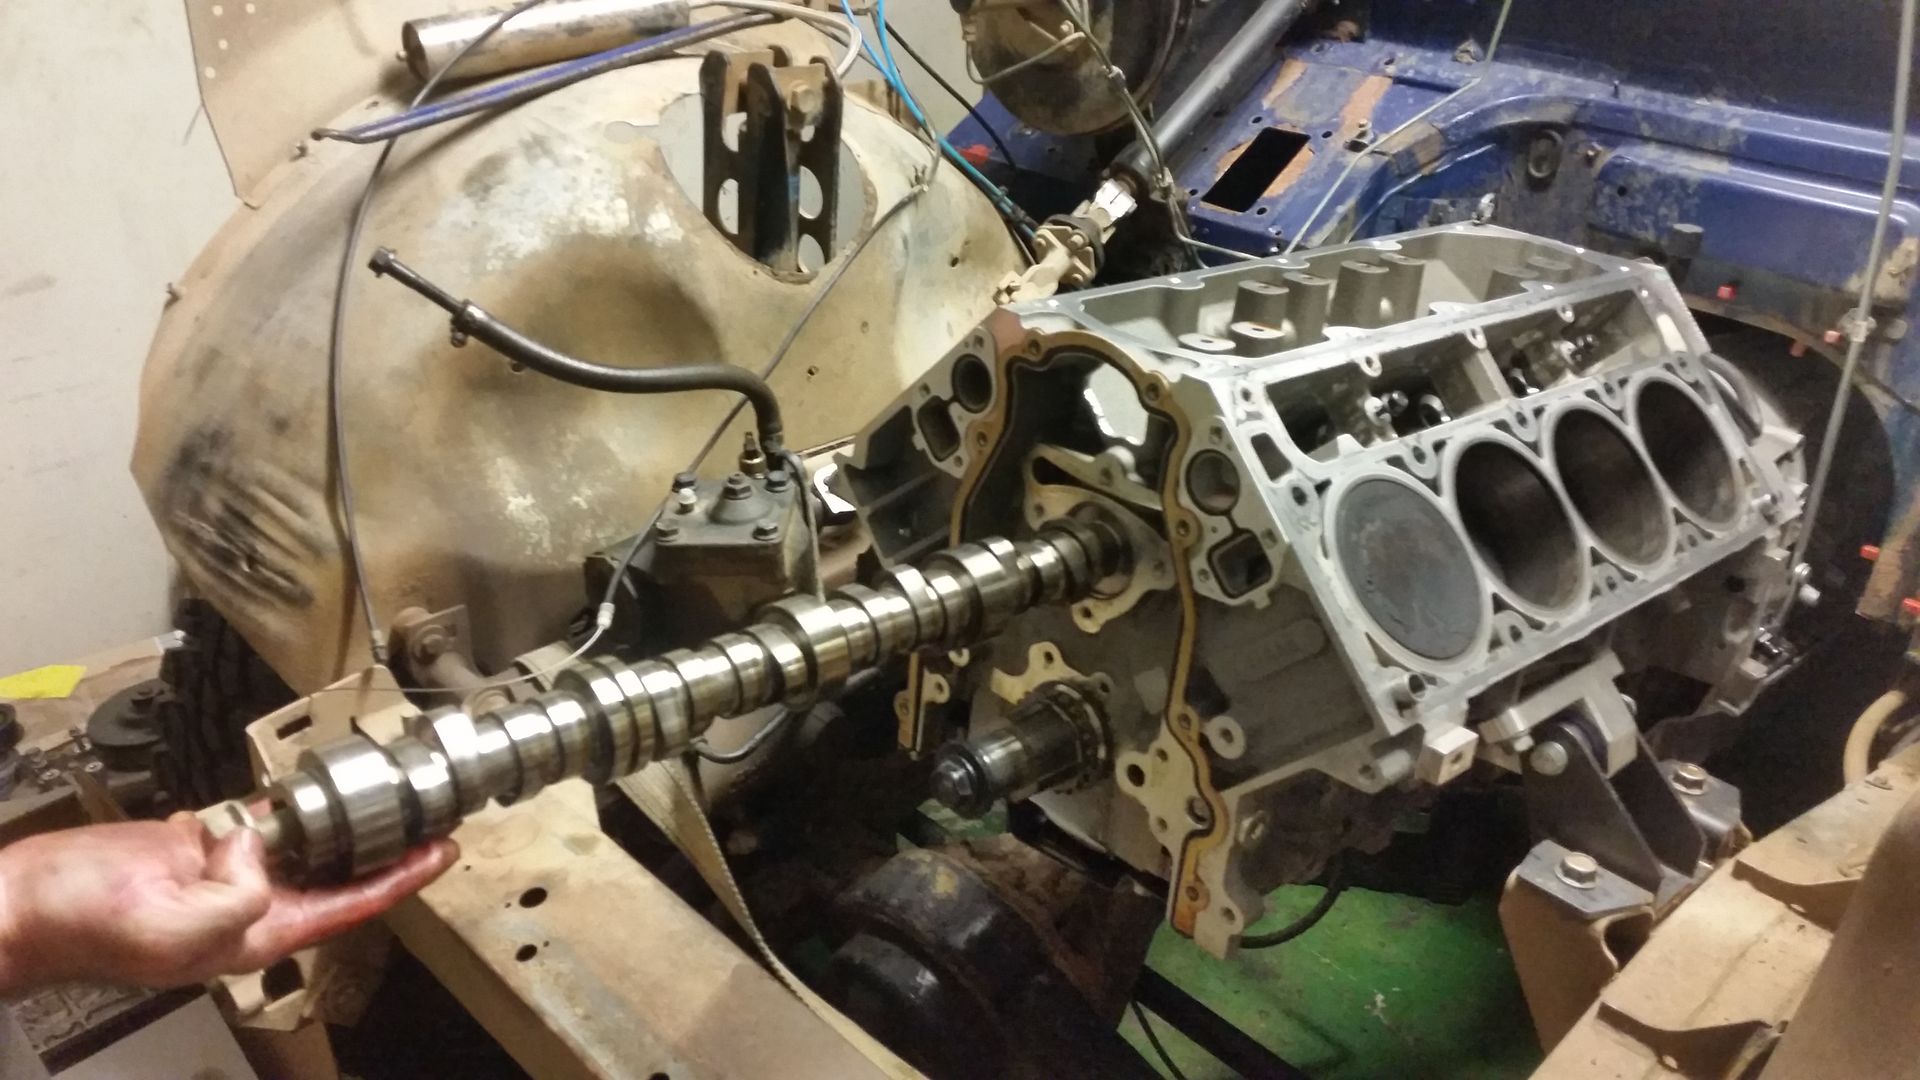
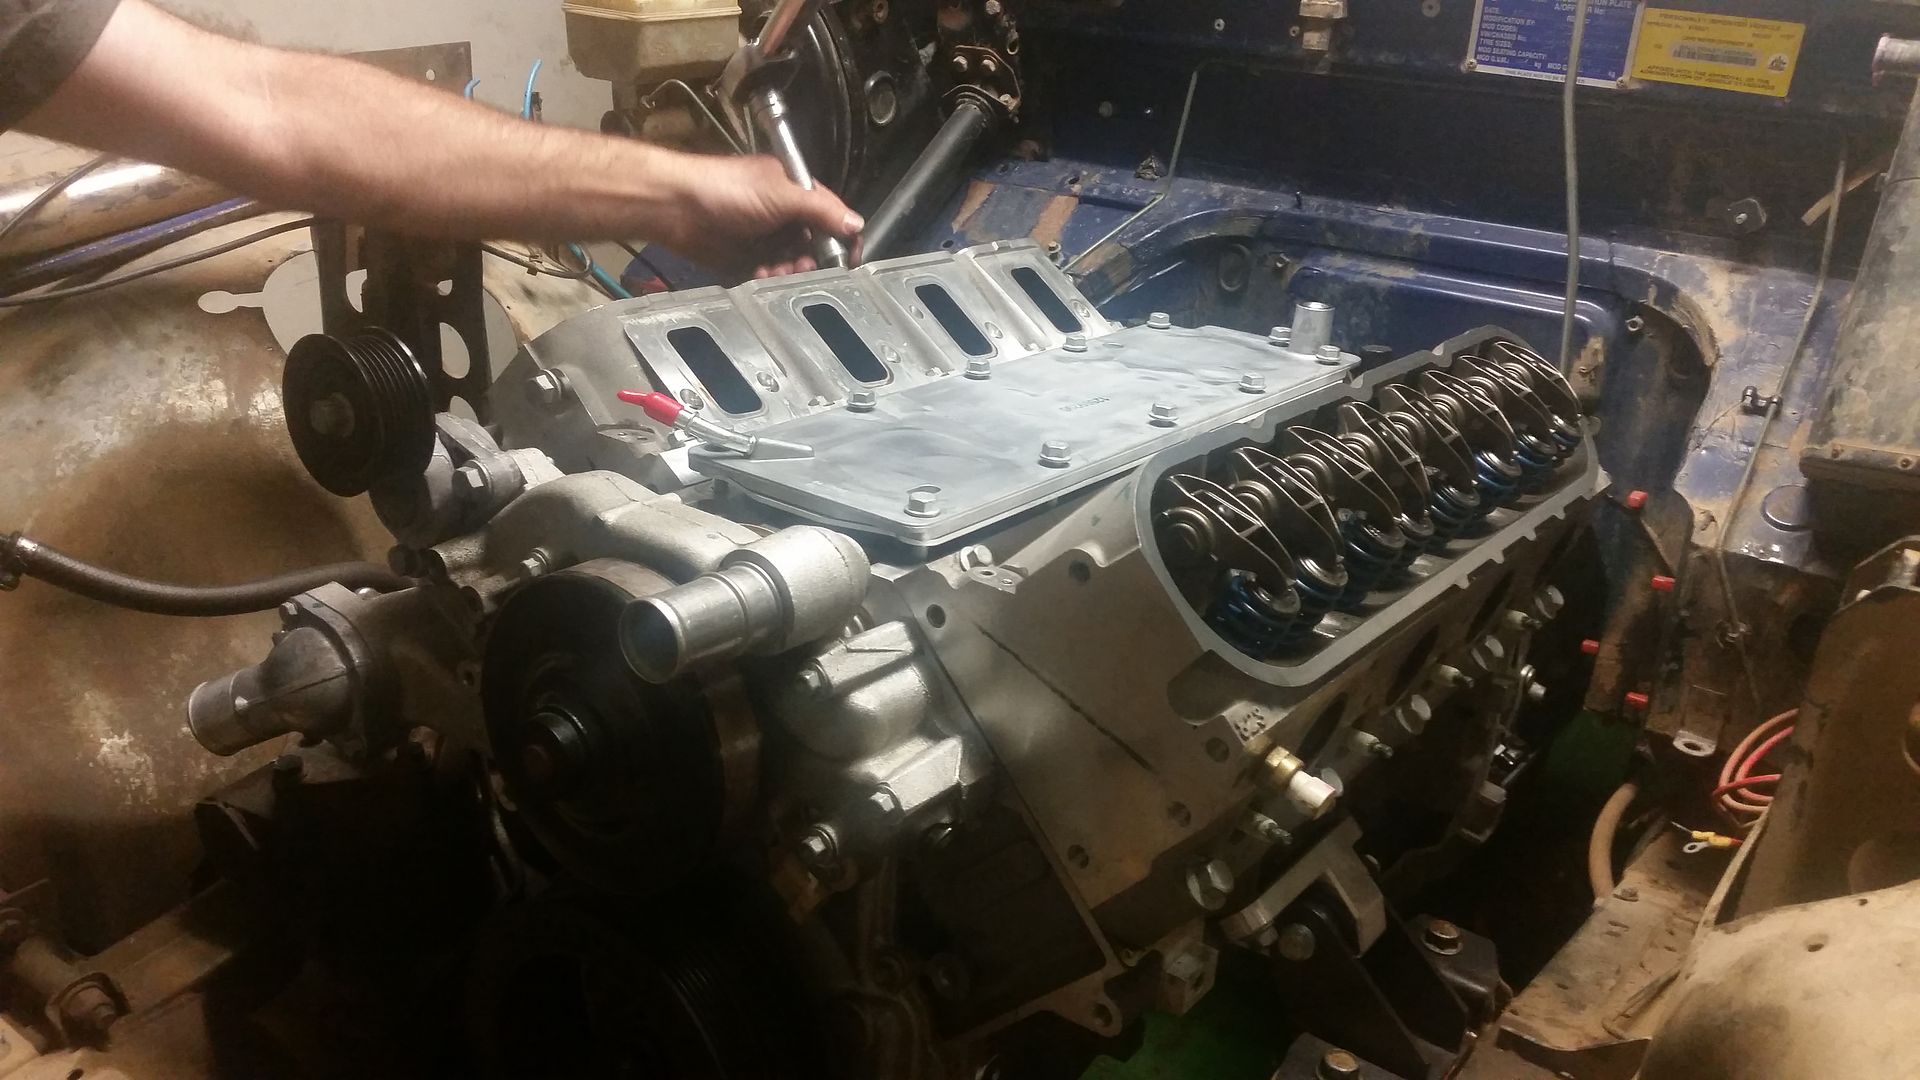
Valve springs/collets changed from the standard ones to LS3 ones which can cope with more lift as I am also fitting an LS3 Cam (I ended up having to buy two of these as the first one got lost)
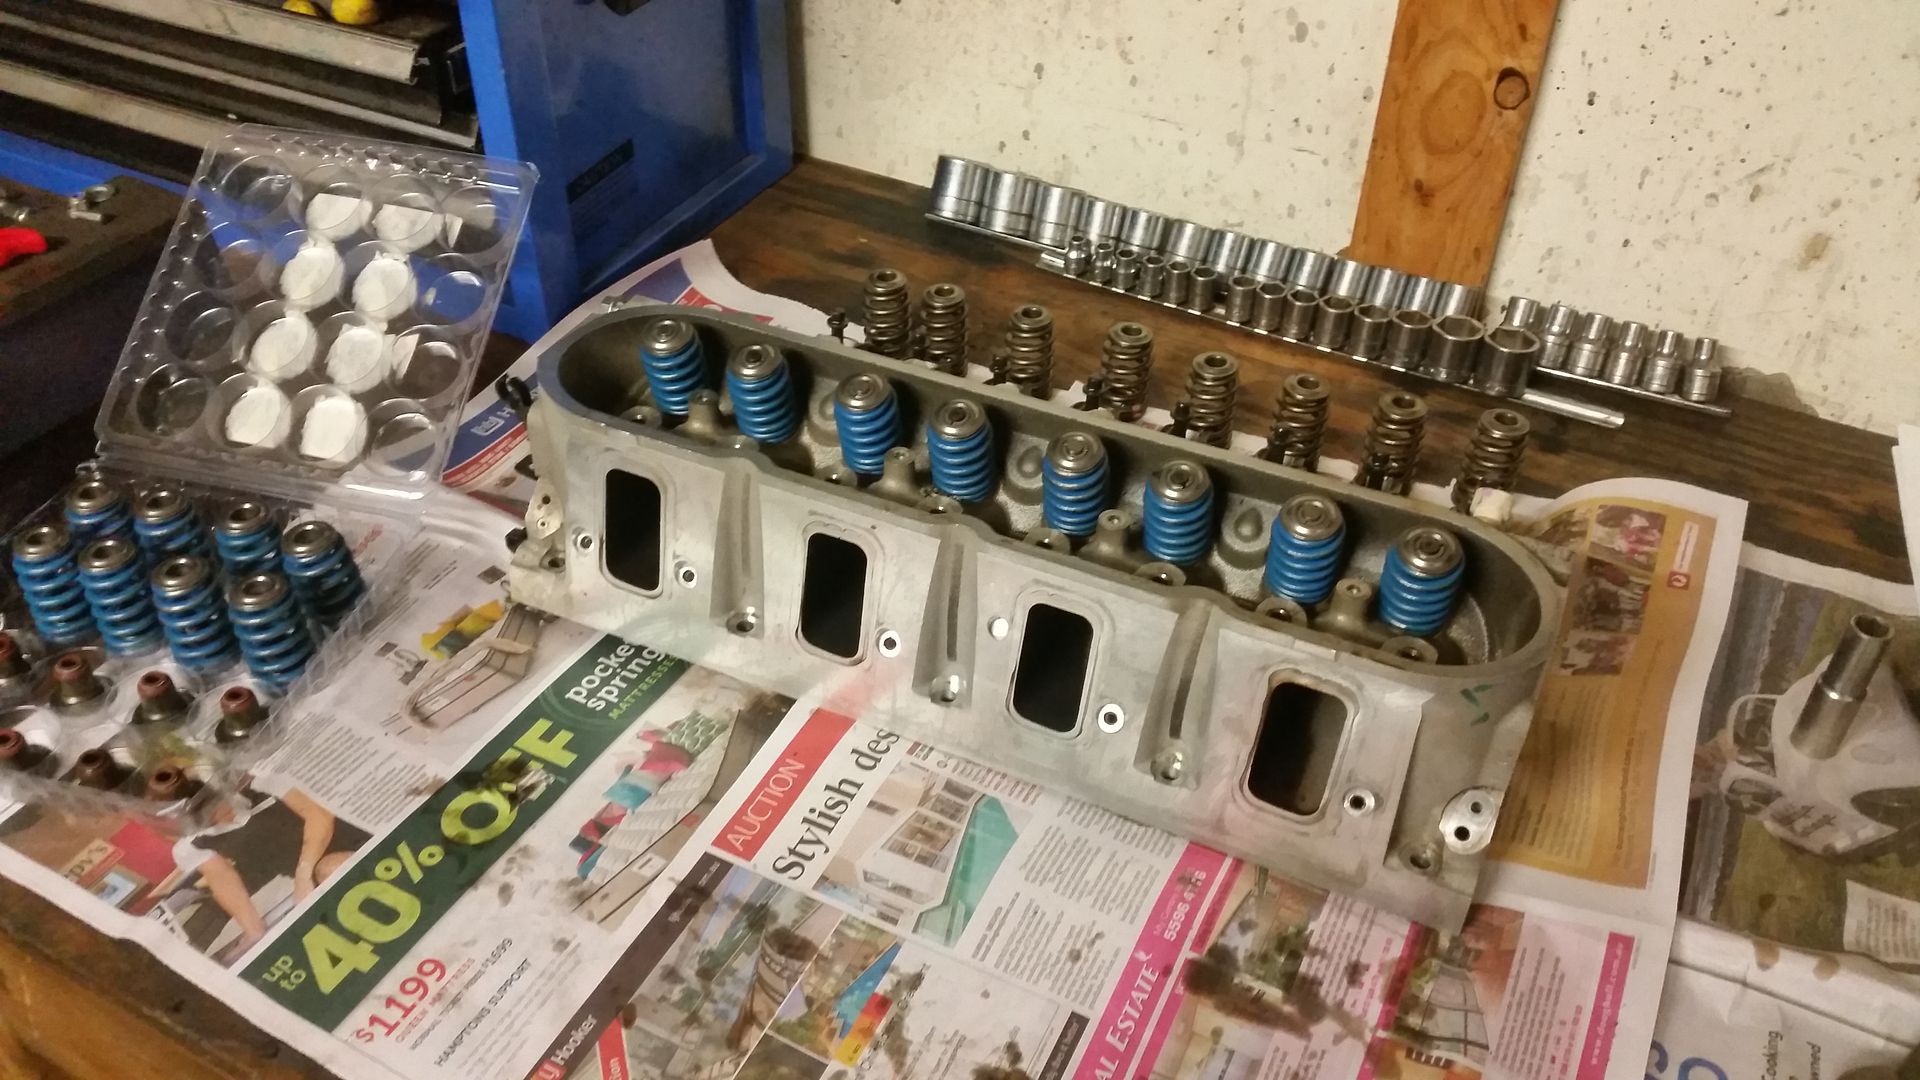
Note LS2 damper, as opposed to LS3 type tensioner. It really is as basic as it looks!
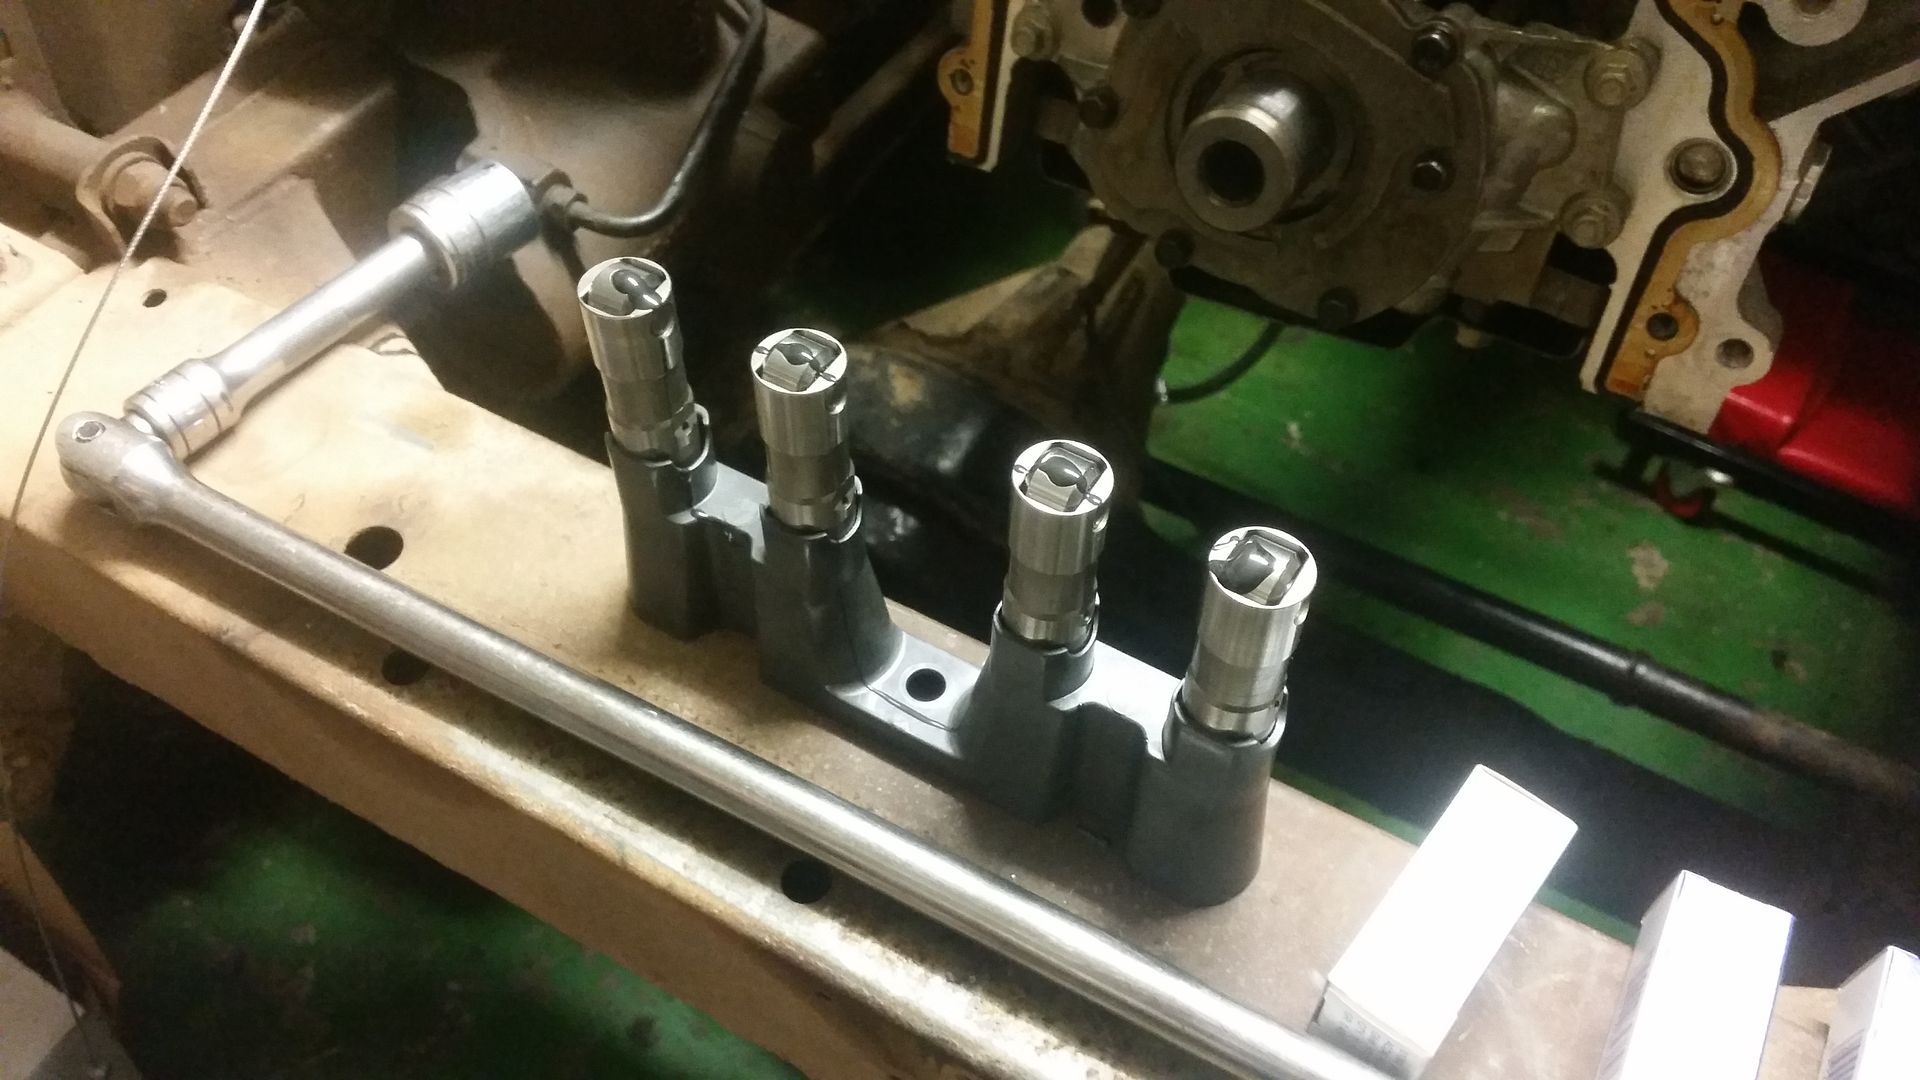
New lifters and buckets.
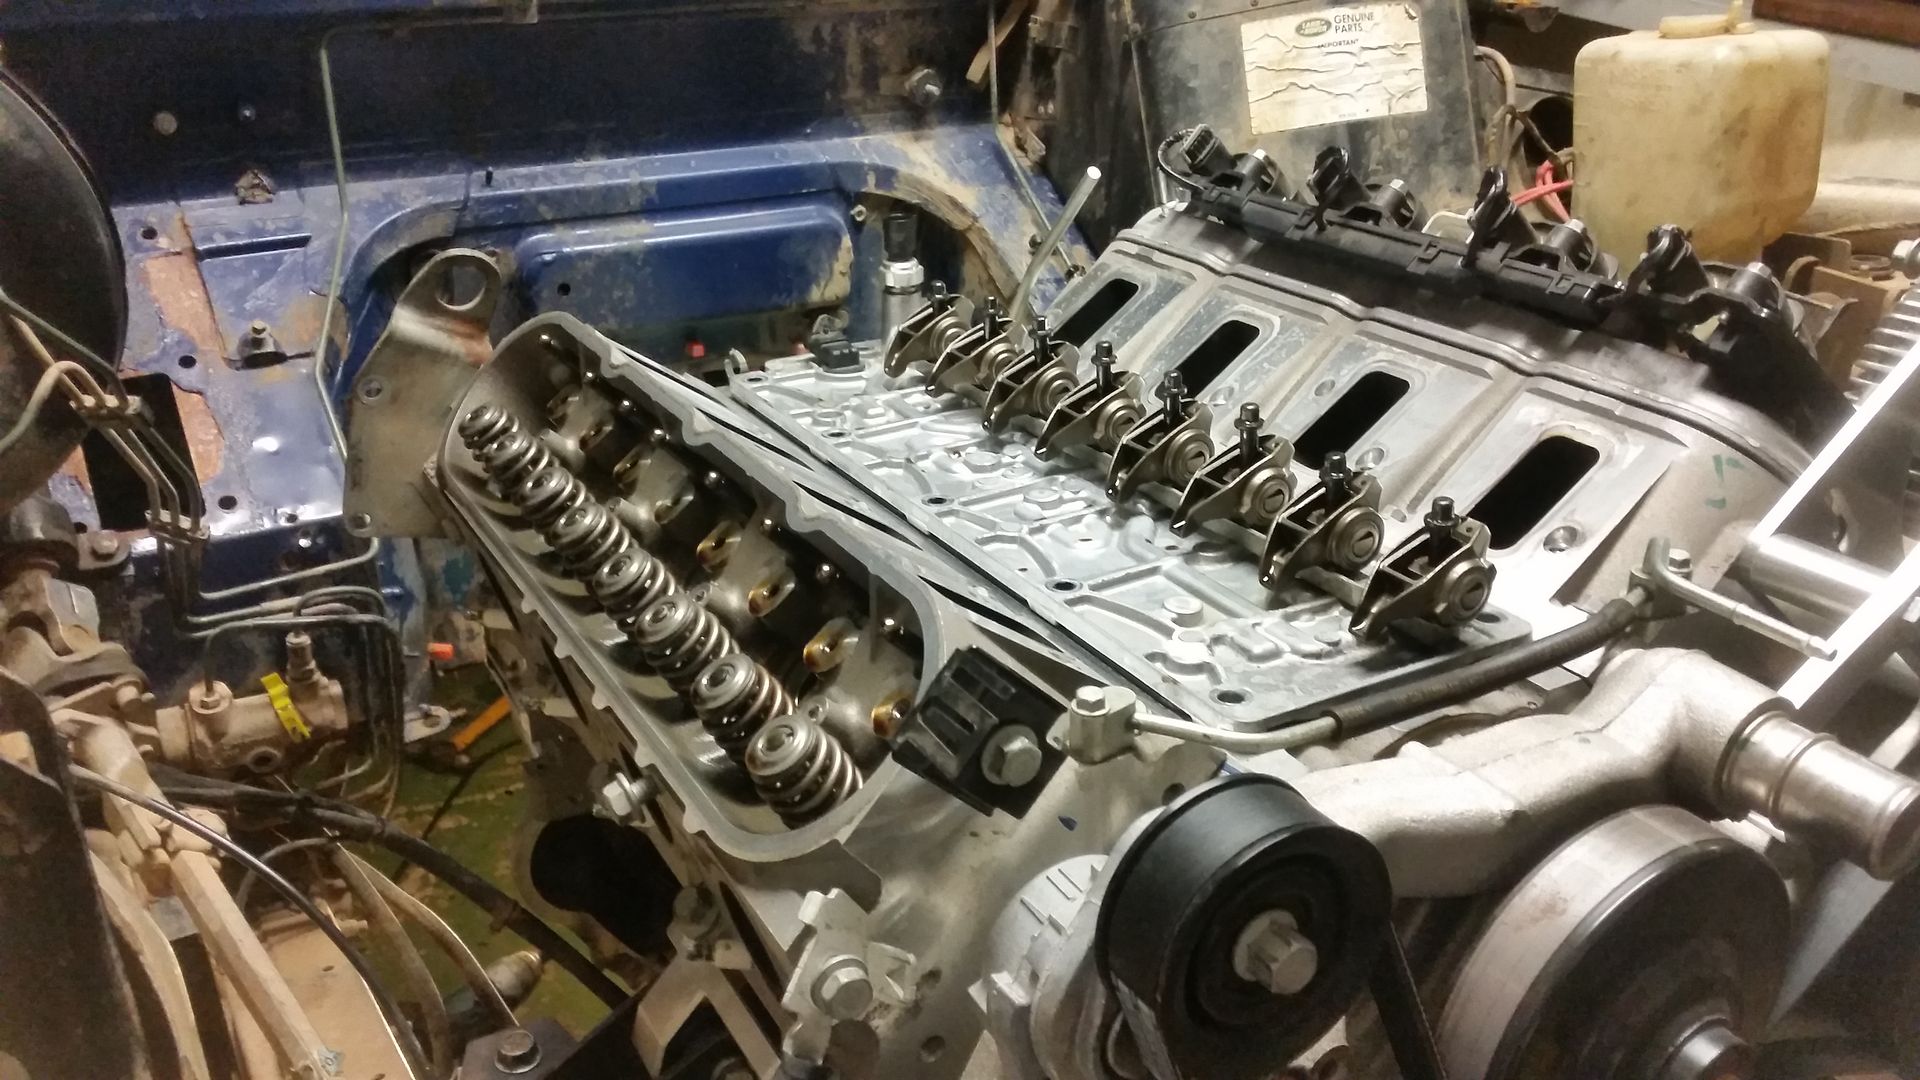
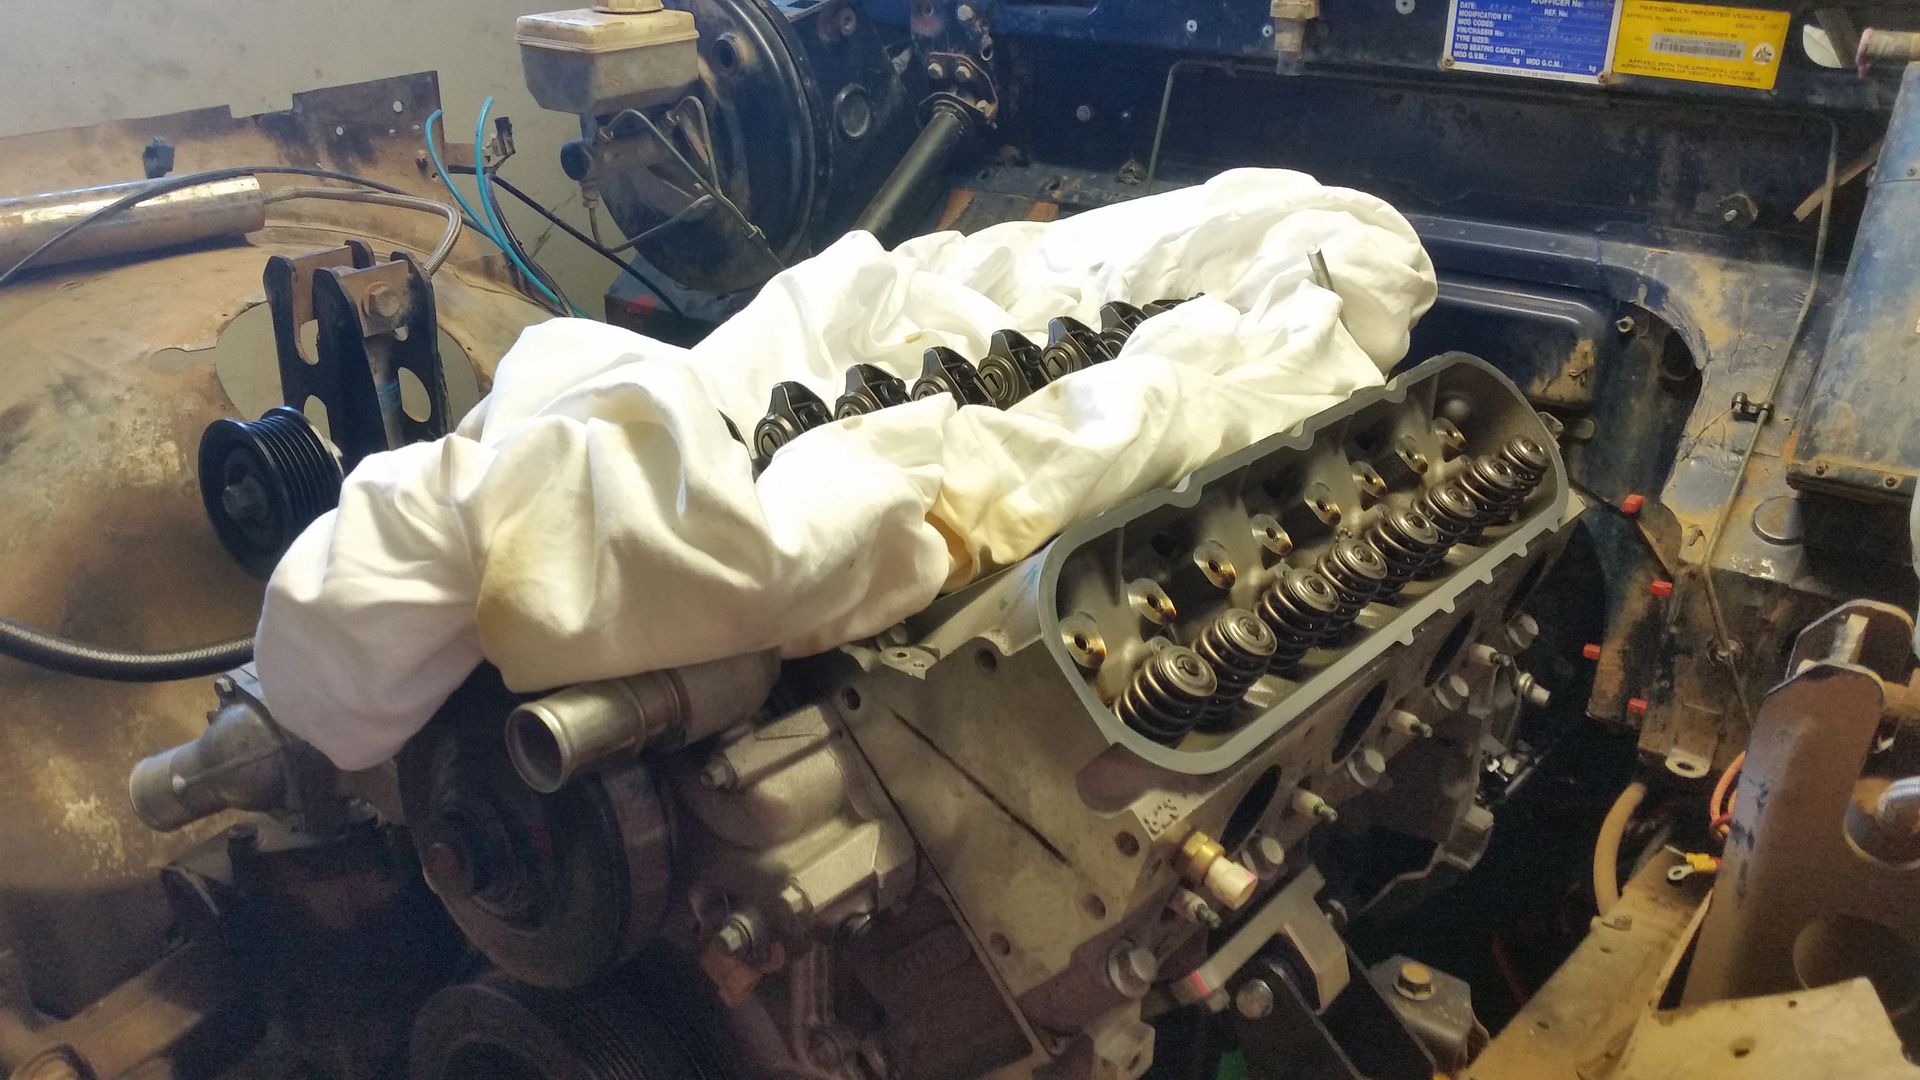
Refitting the heads:
However its possibly slightly more involved because of the DOD.
The oil that comes up to the pressure switch is then fed back down and along the top of the 4 De-ac lifters.
This is the cover plate with the oil pressure riser that gets in the way of the throttle body. next to it is the plug for the DOD De-ac lifters. You can see the raised section that goes along the middle in the casting which is the path the oil takes on its return from the pressure switch.
I wanted to shorten the riser and block it, but by doing this I would have blocked the oil return.
So this is with the inlet and cover plate off.
And this is the underside of the cover plate:
Here is the return from the pressure switch:
Removing the heads:
Waterpump also removed.
Timing cover removed after taking off the harmonic balancer:
Oil pump:
Oil pump removed:
Timing gear and Camshaft removed:
Valve springs/collets changed from the standard ones to LS3 ones which can cope with more lift as I am also fitting an LS3 Cam (I ended up having to buy two of these as the first one got lost)
Note LS2 damper, as opposed to LS3 type tensioner. It really is as basic as it looks!
New lifters and buckets.
Refitting the heads:
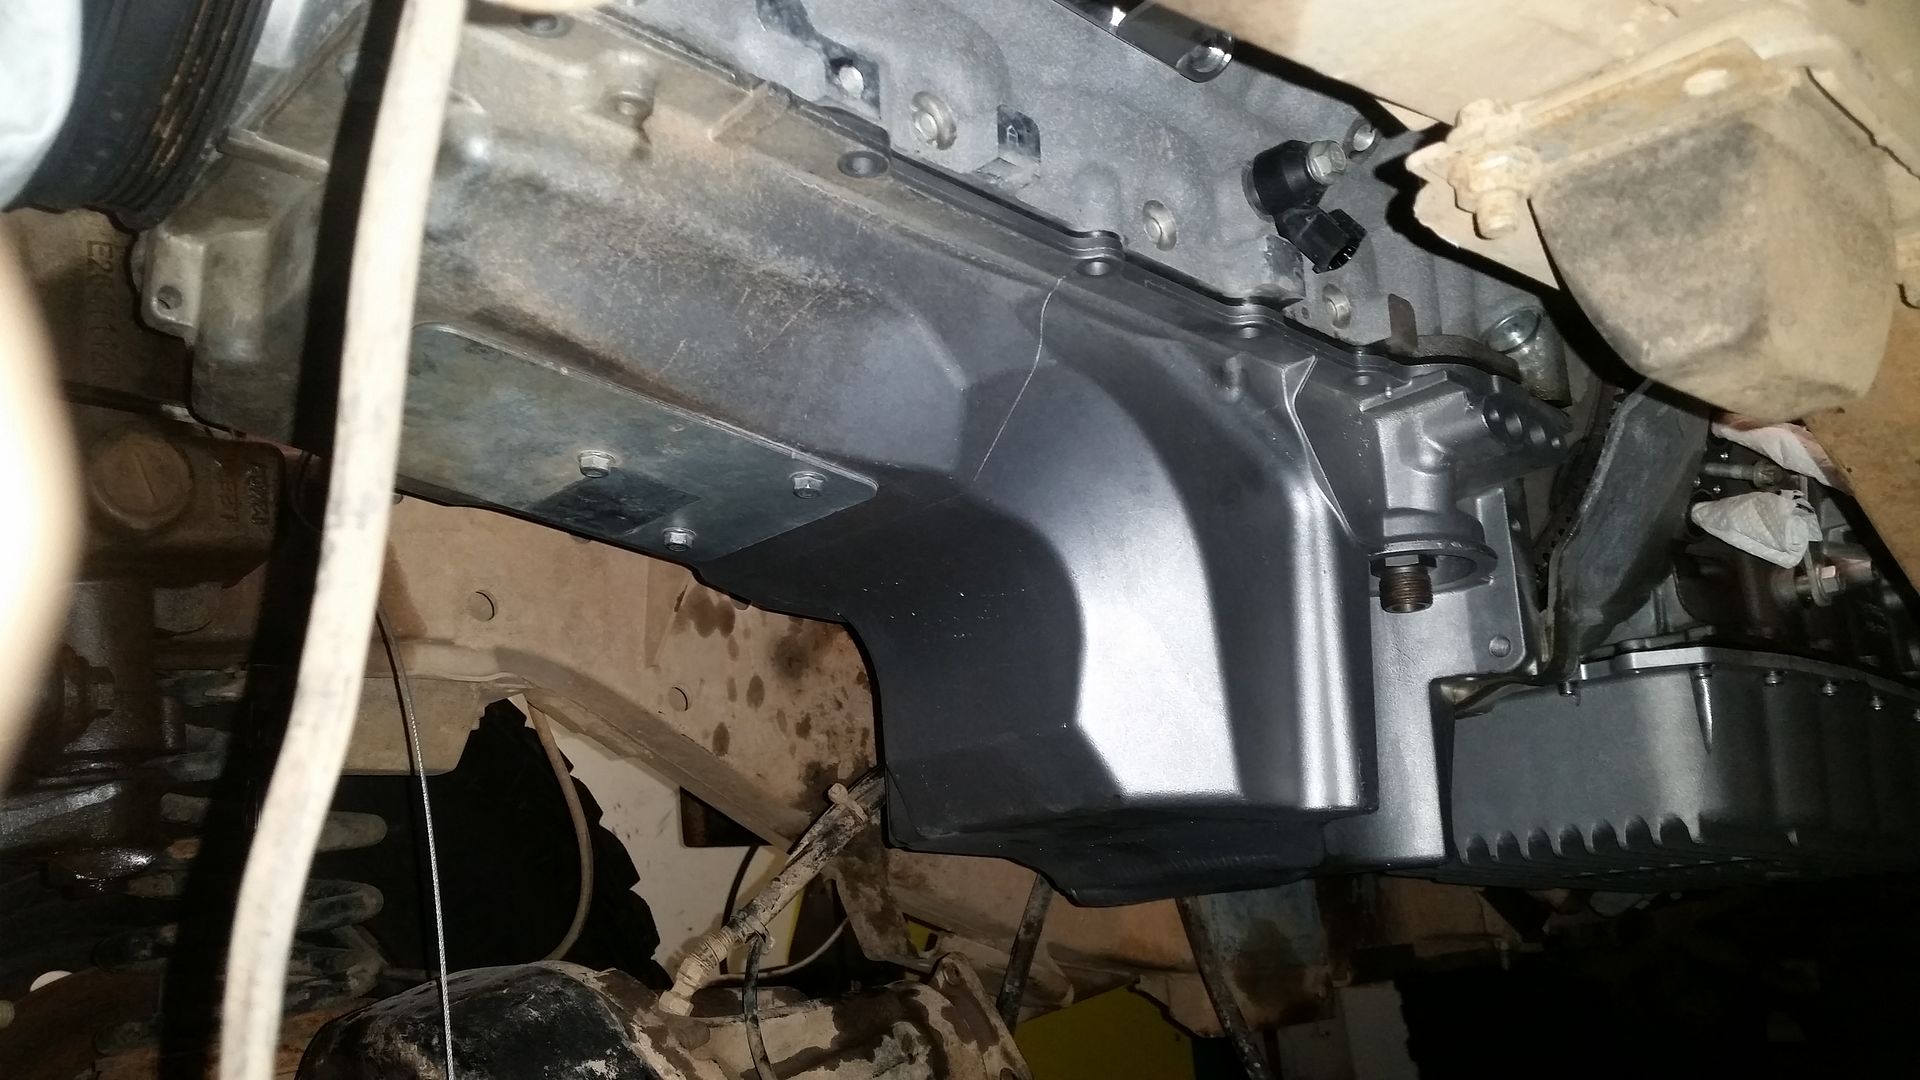
Started to put some of the front end back on. As much as anything else to get the pile of parts a bit smaller!
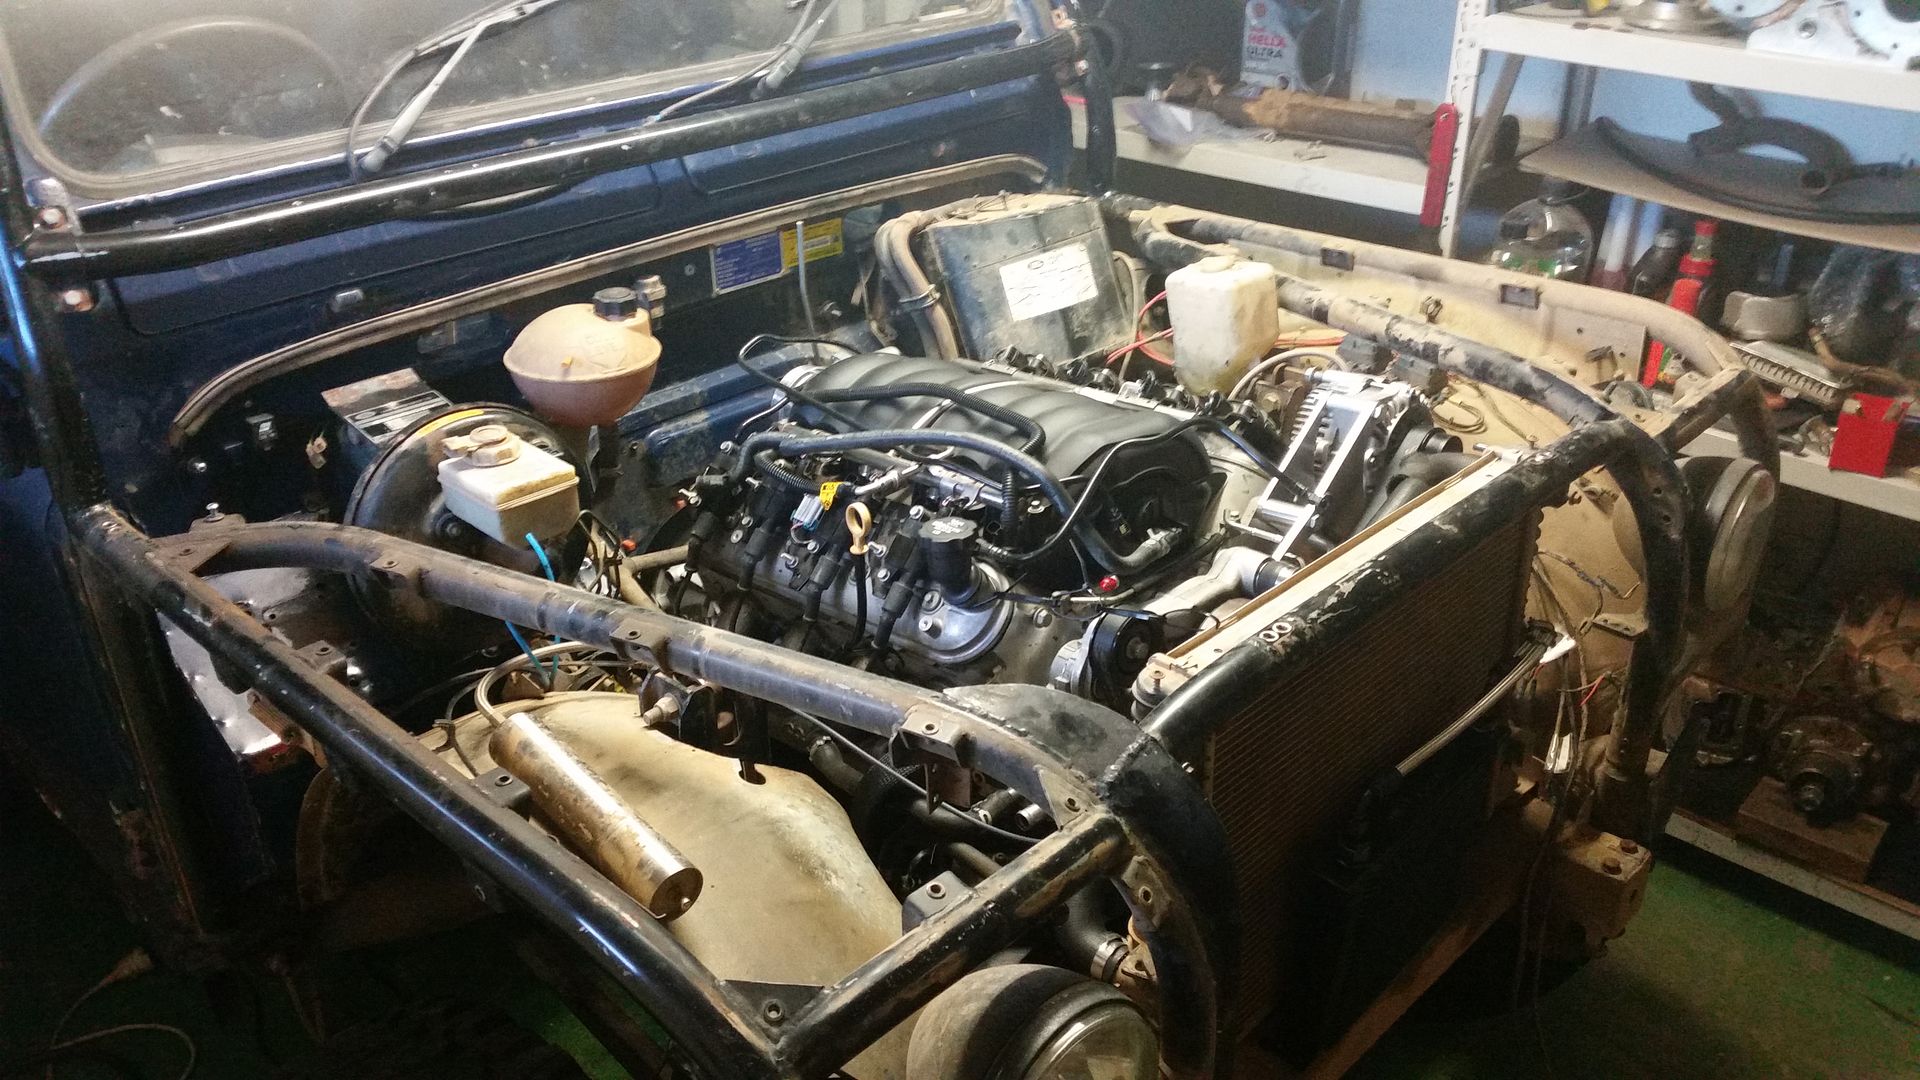
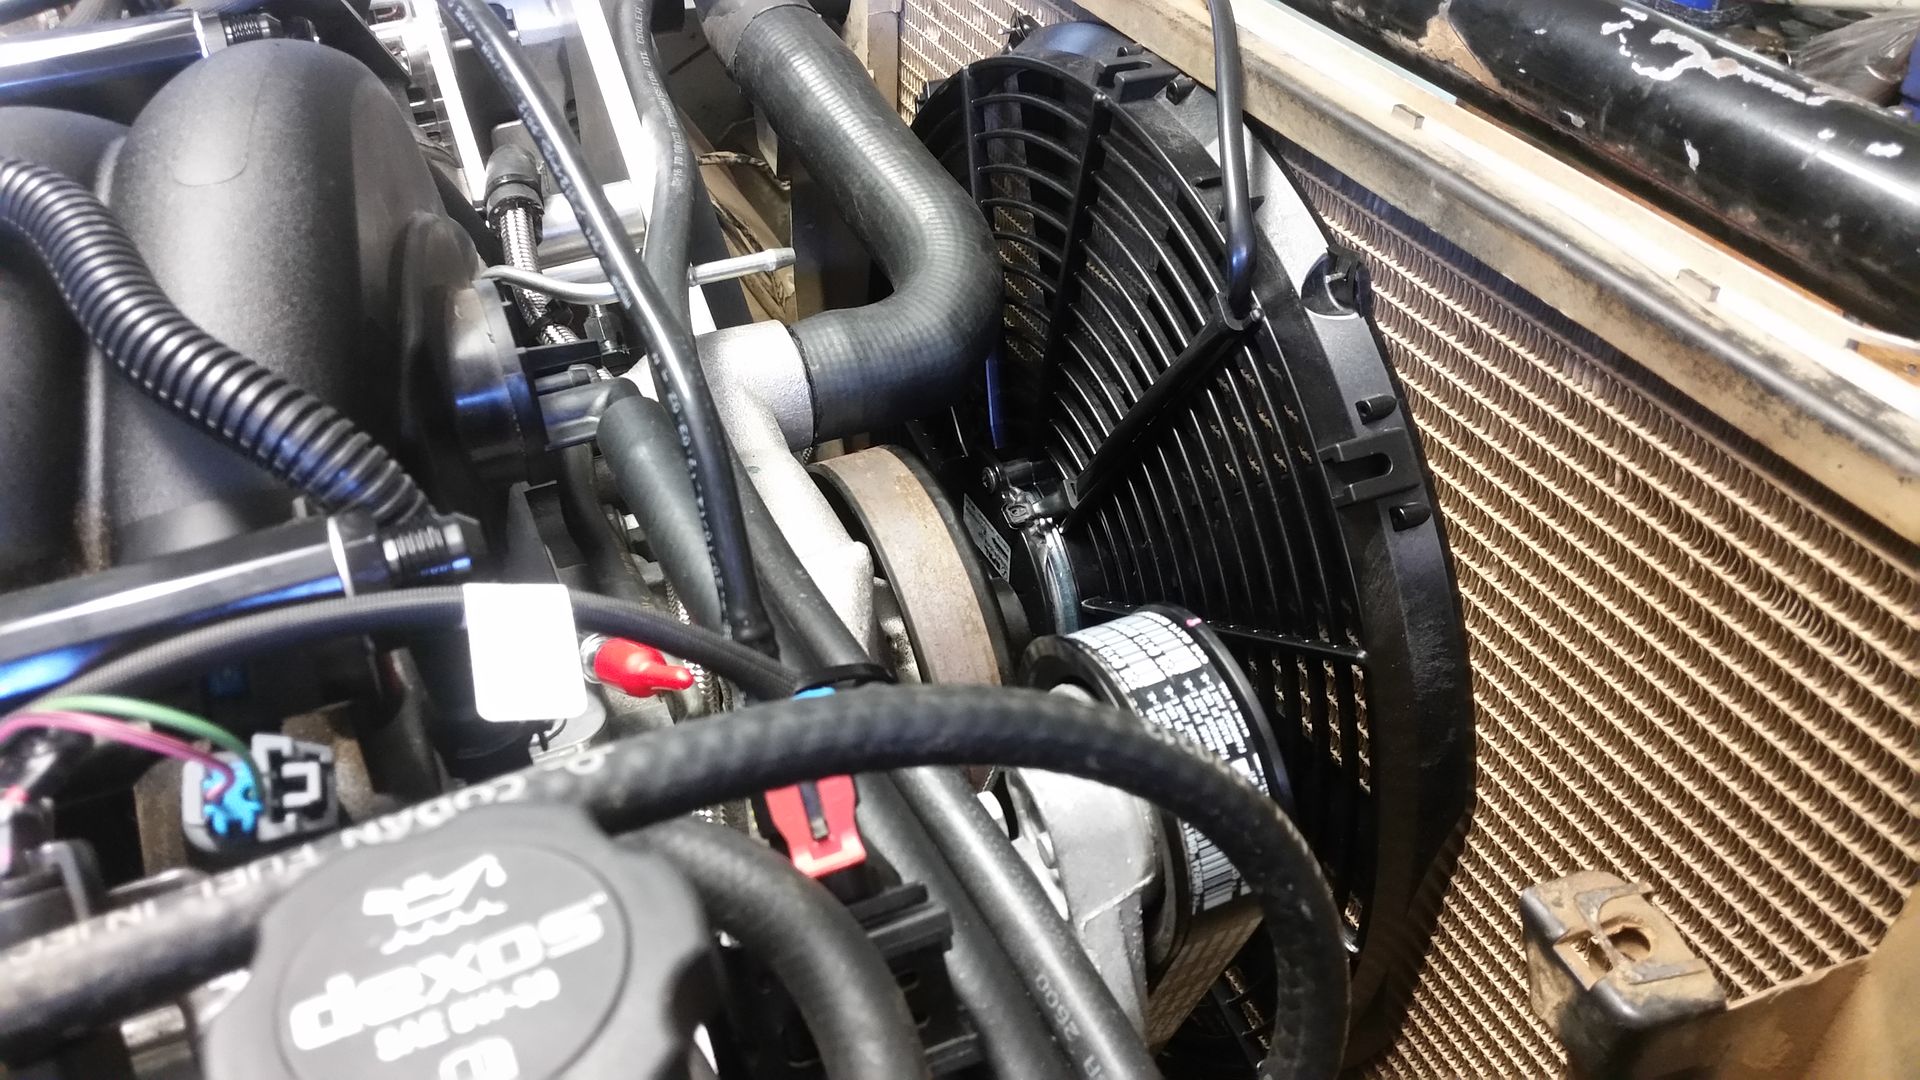
Oil cooler manifold for the Auto. Oil cooler sits in front of the Radiator.
For now I have the standard TD5 radiator in place. Will see how it copes. I have fitted a 16" spal fan (pic somewhere further on)
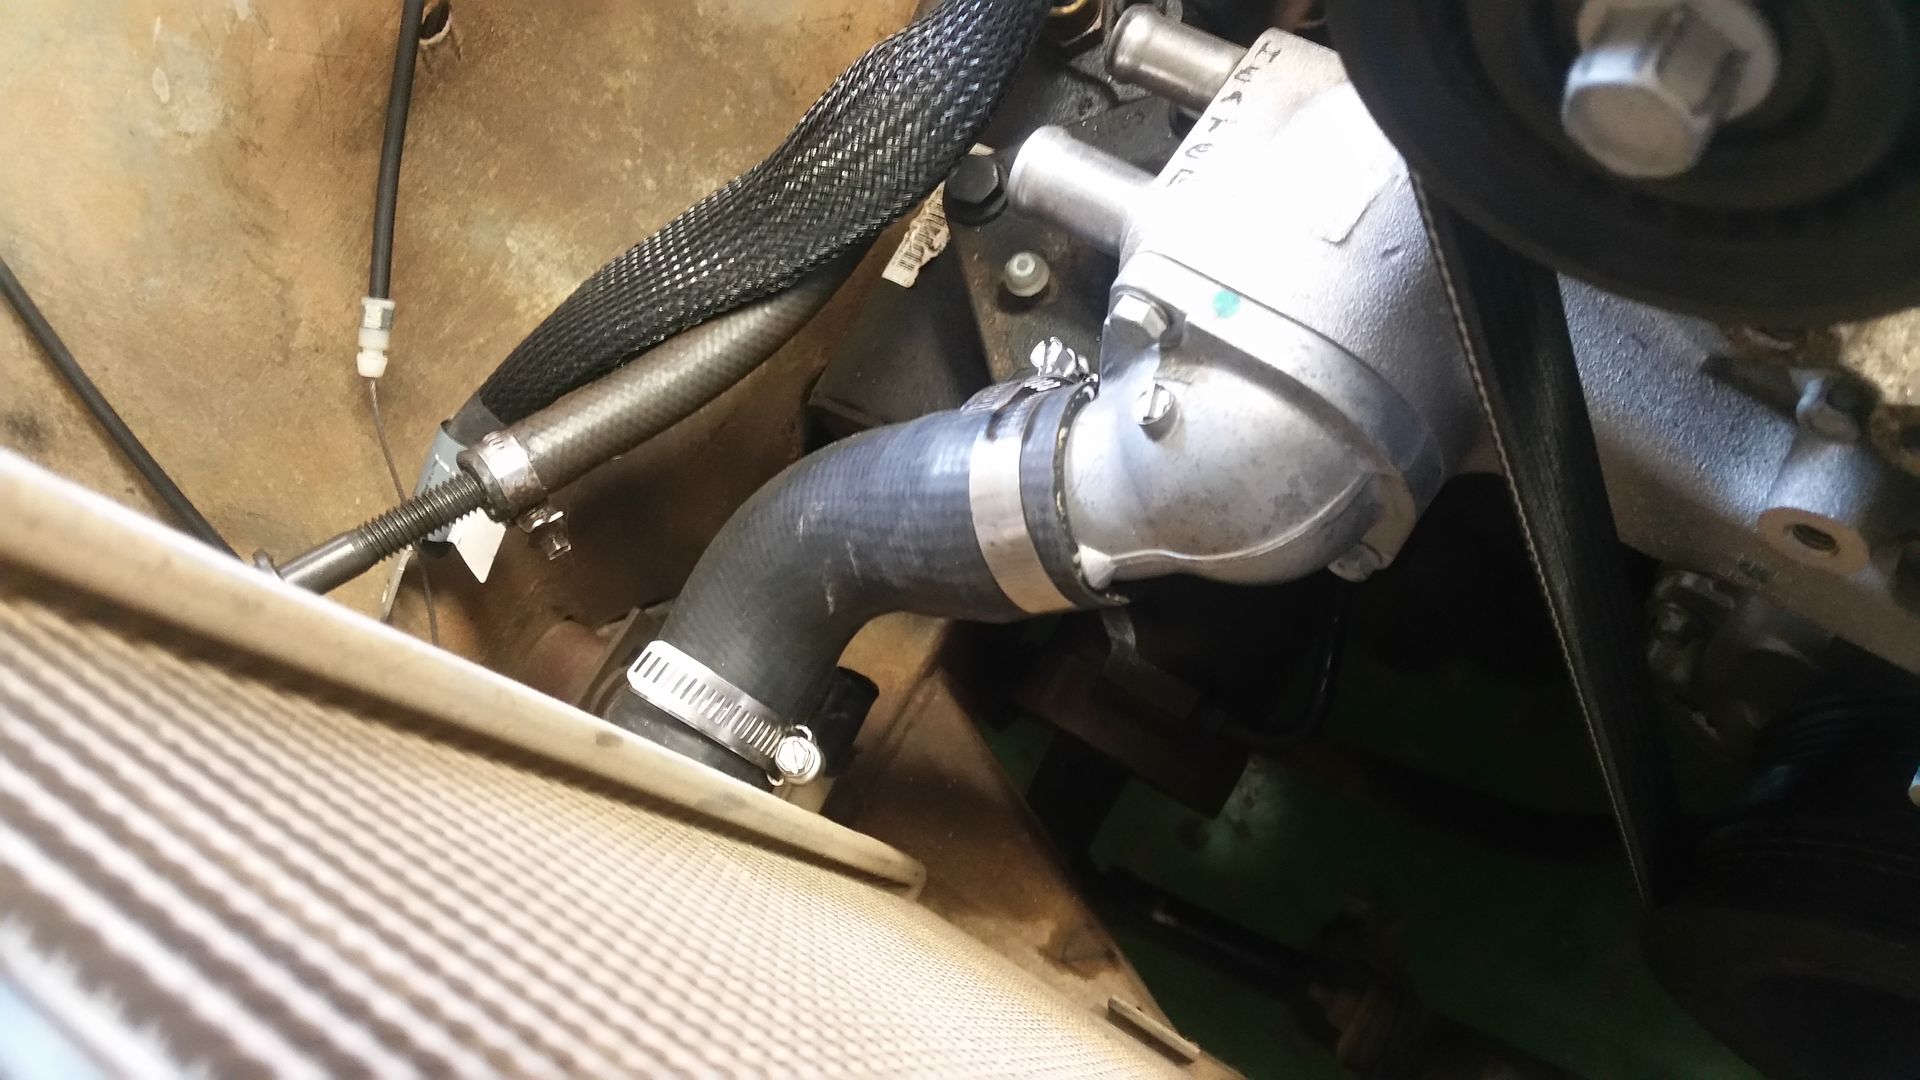
All the water hoses are now sorted including the heater hoses which aren't in this image:
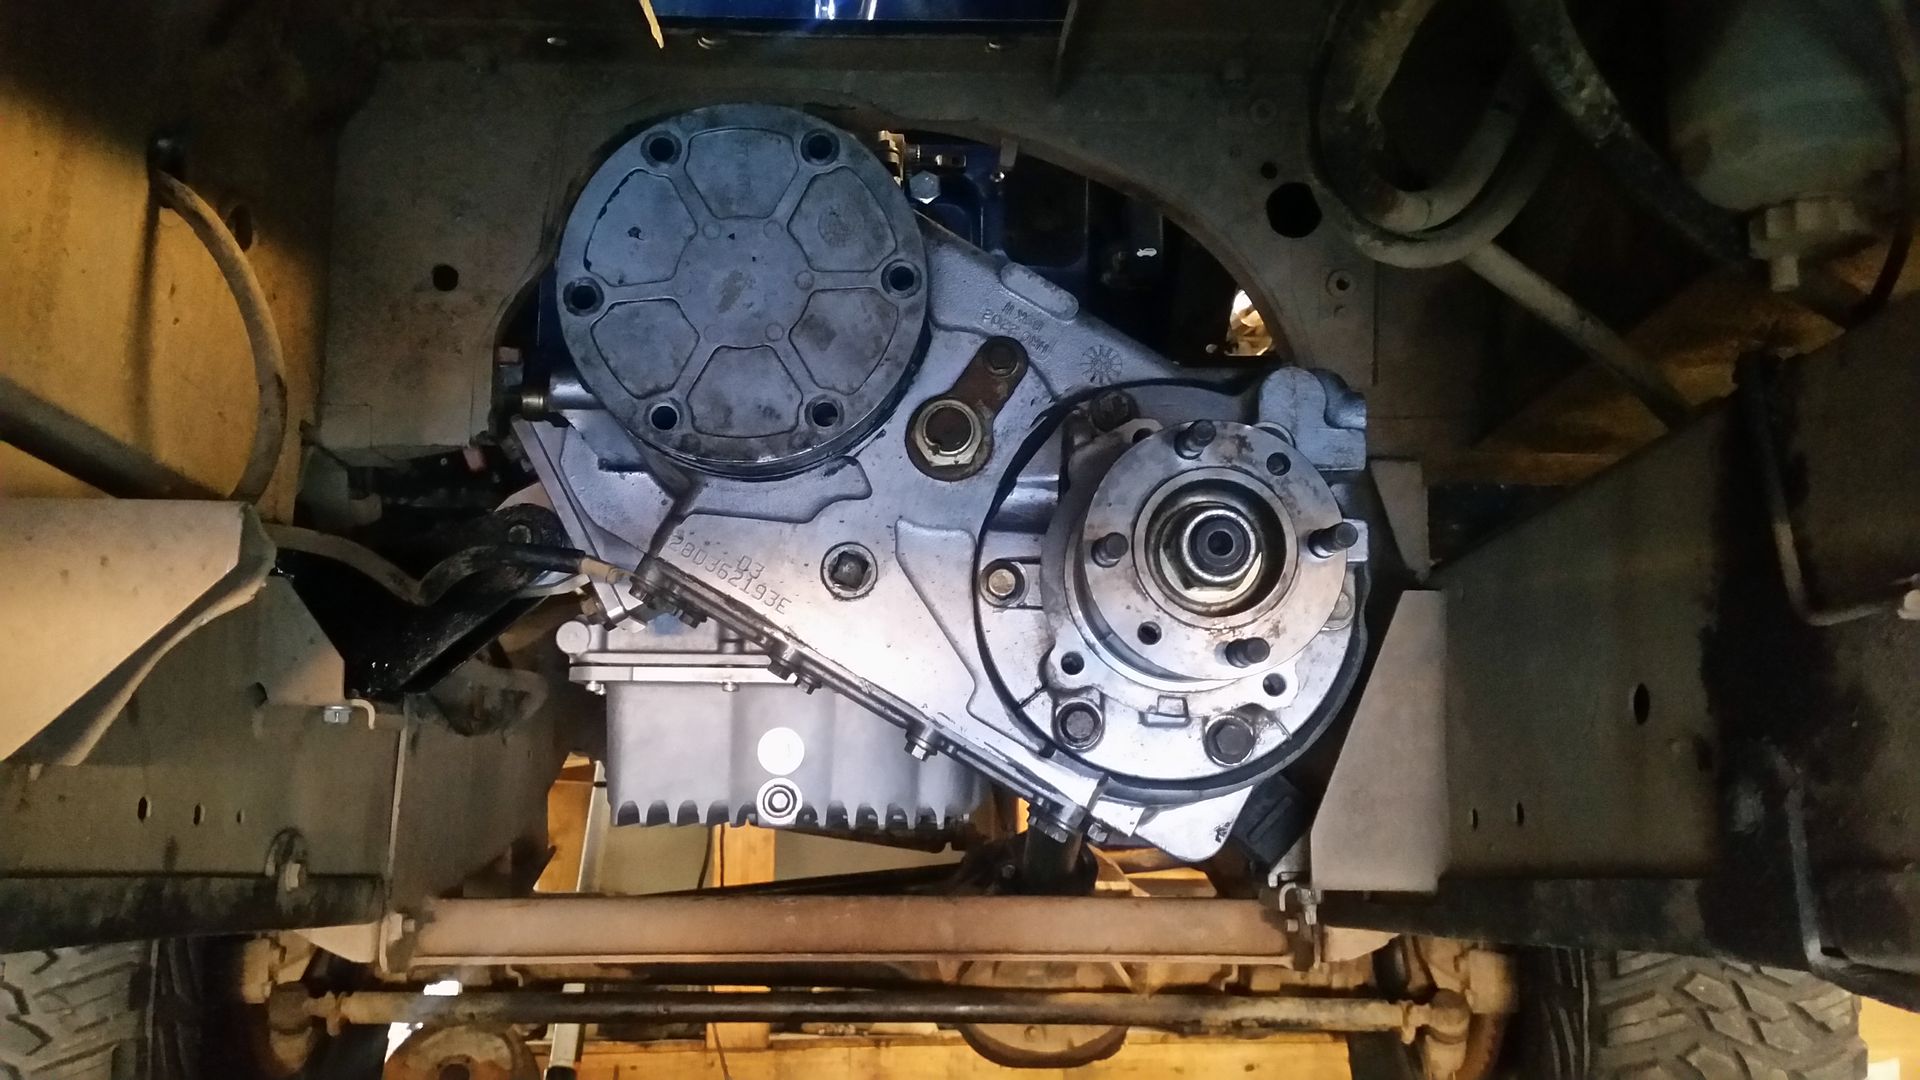
The bare LT230 I was using for setup has now been swapped out for a complete one which has been rebuilt with the heavyduty Ashcroft cross pin, and a sleeved intermediate shaft.
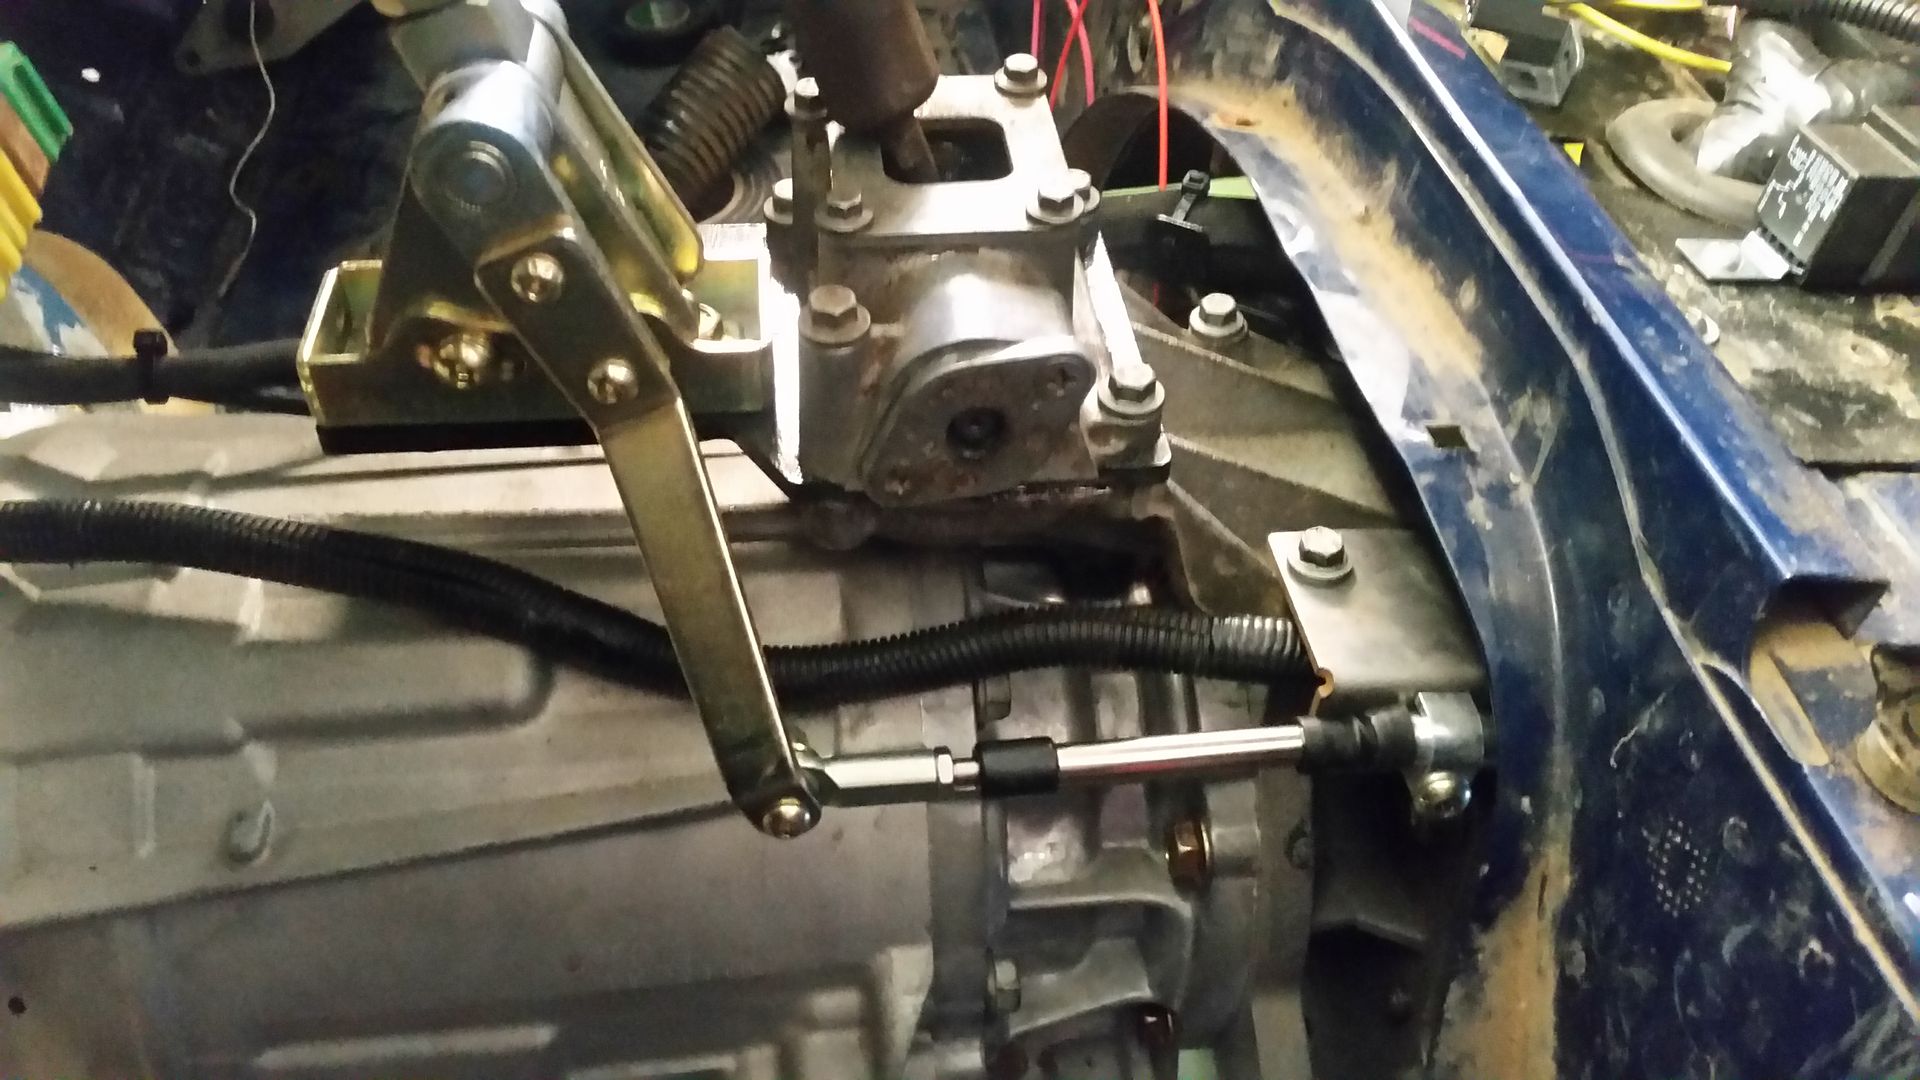
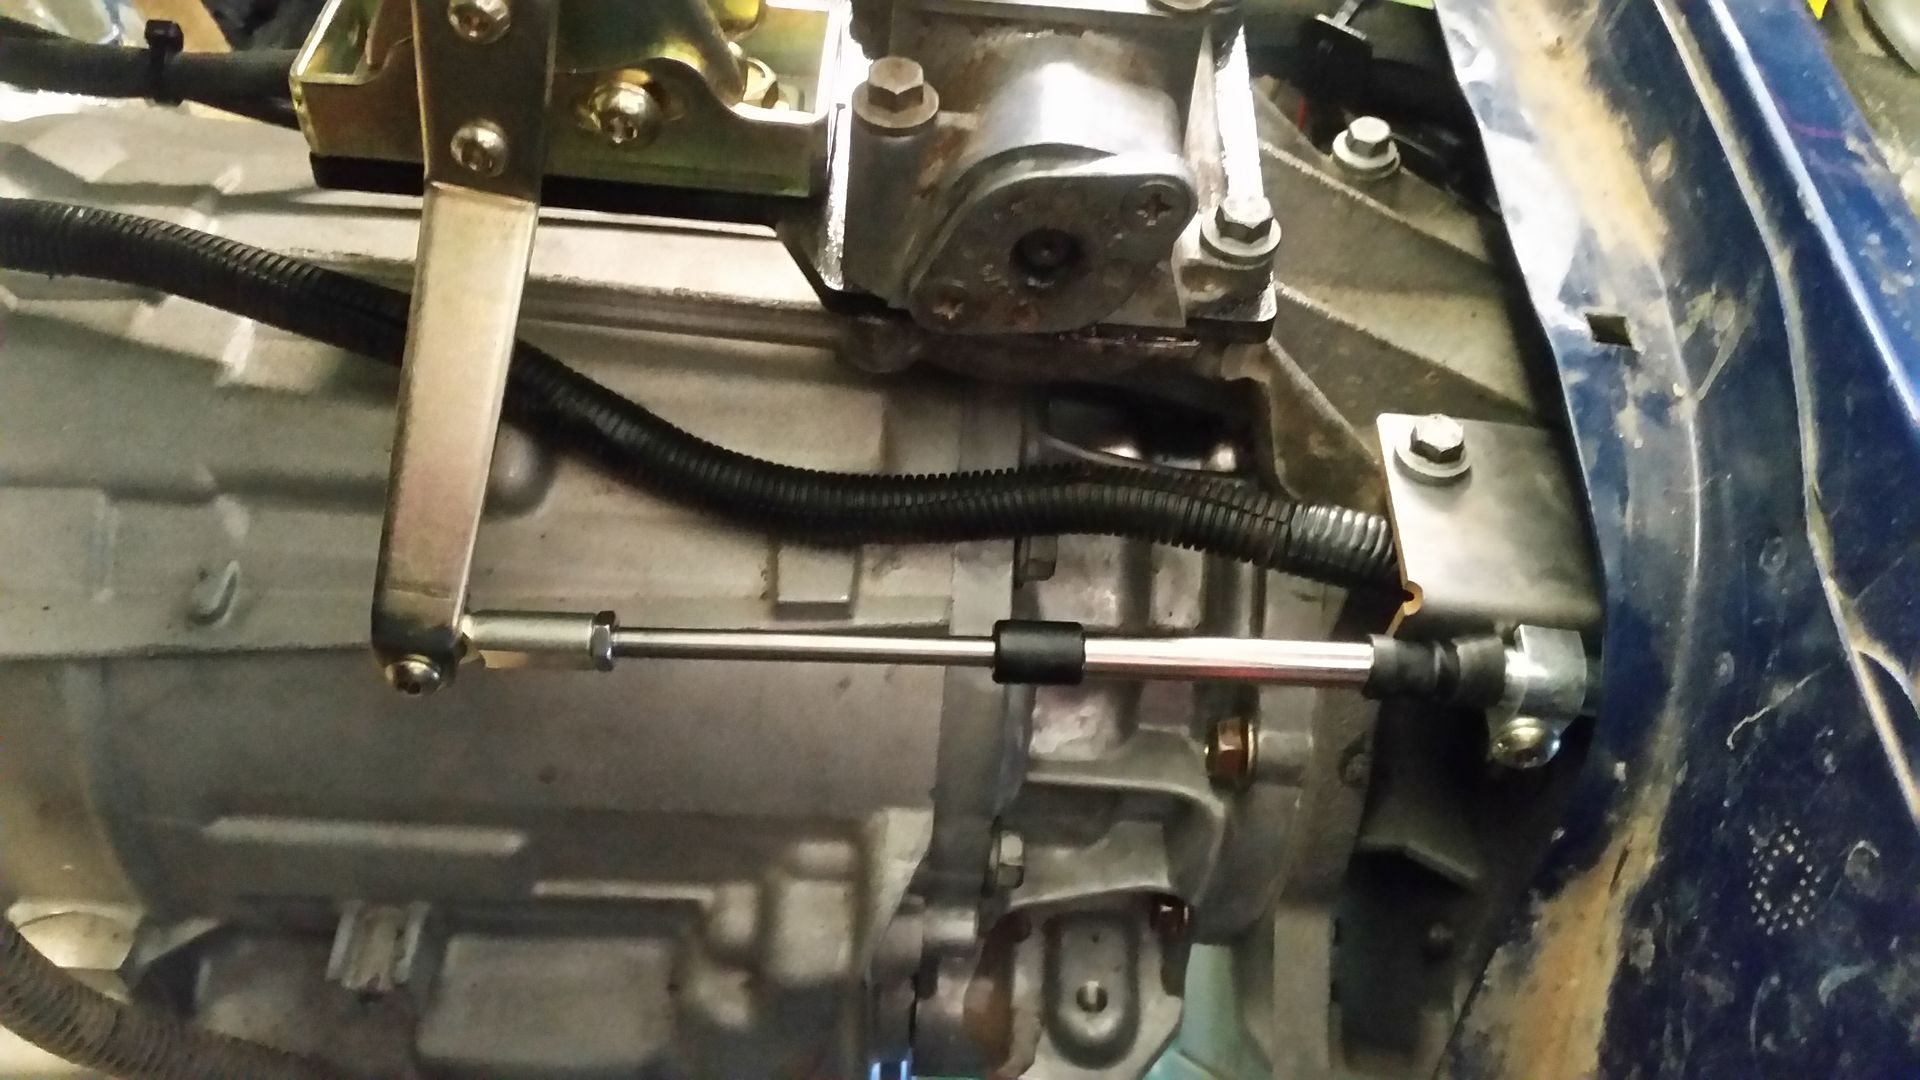
couple more pics:
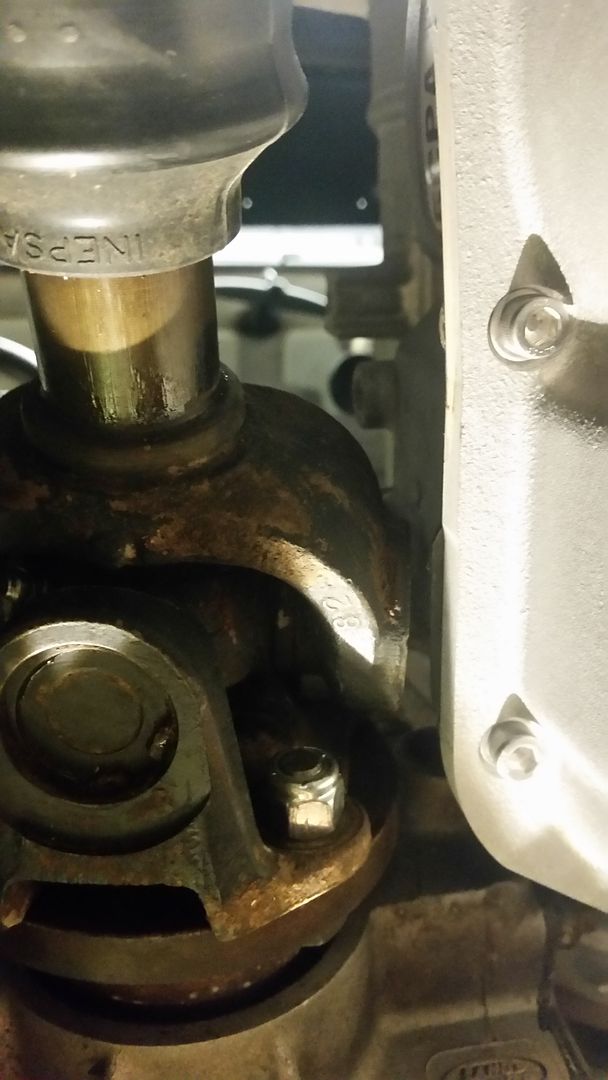
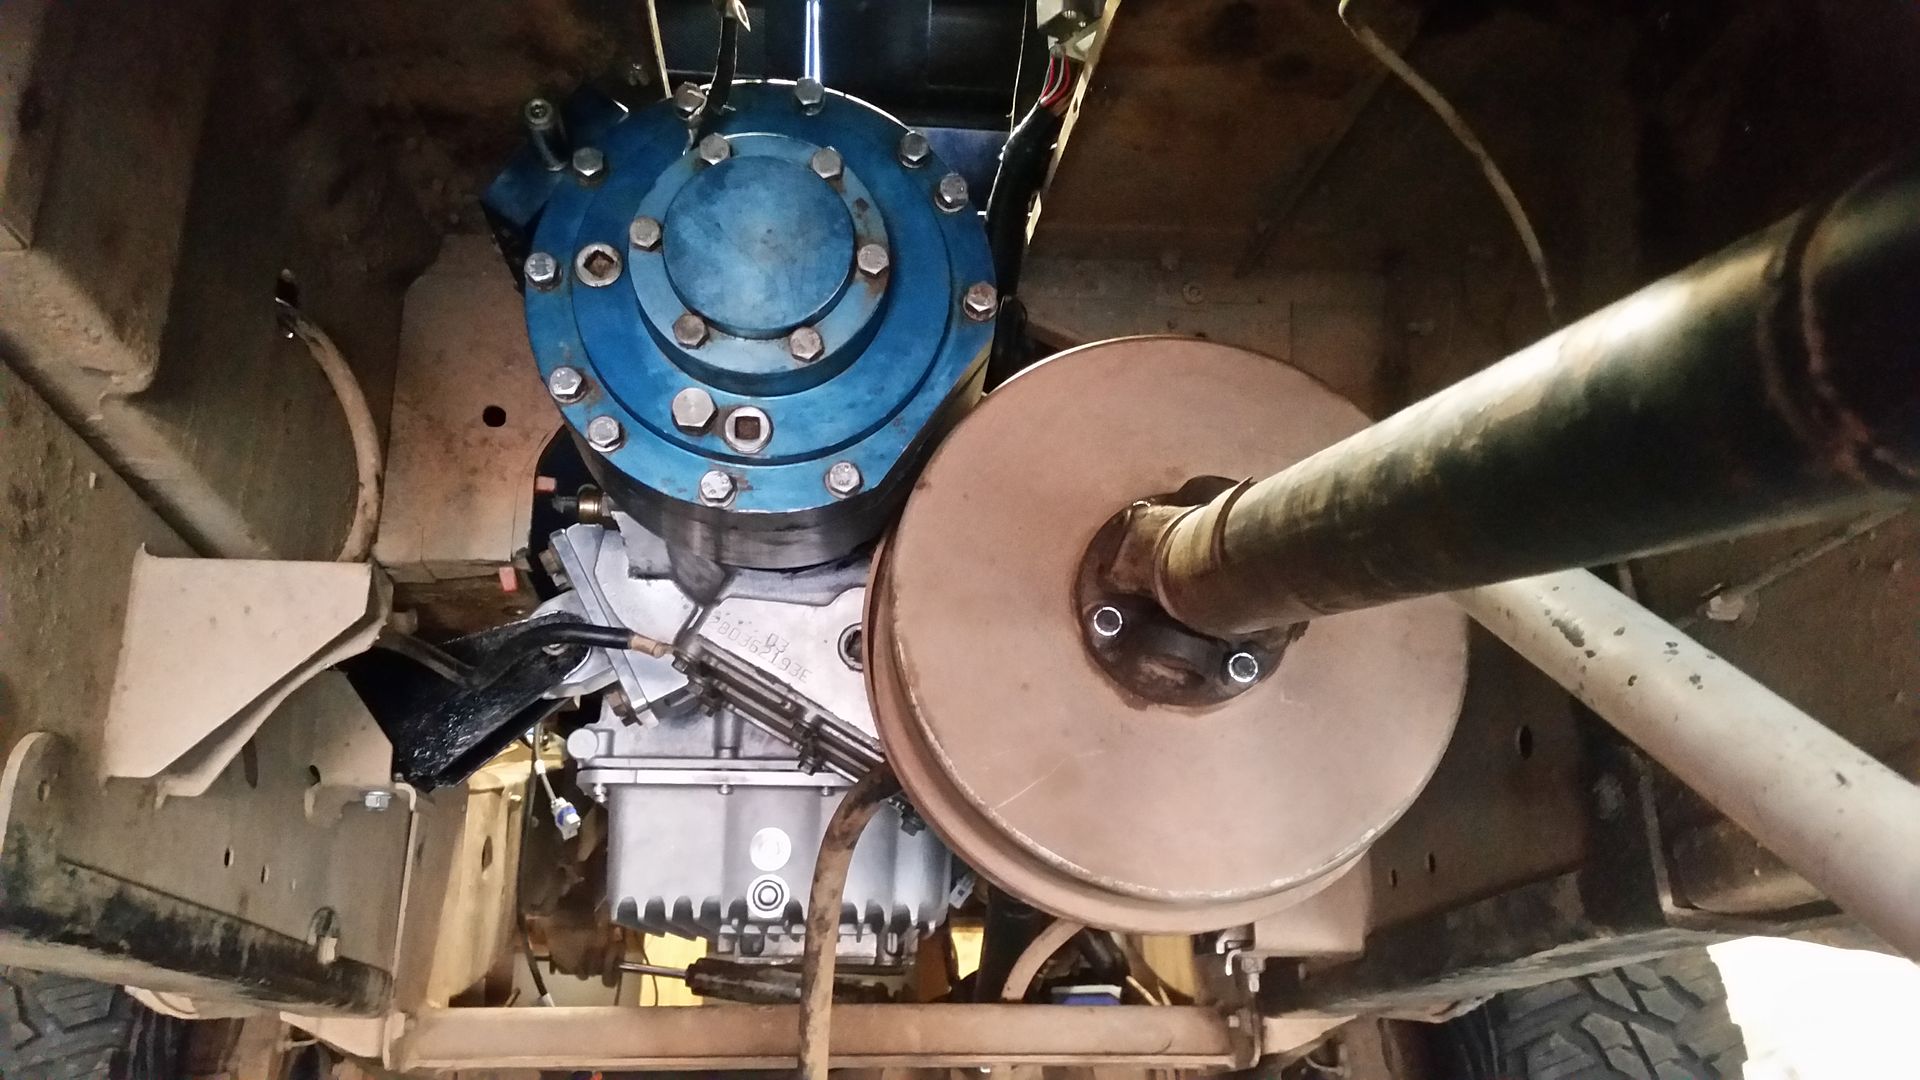
Front prop UJ clearance!
I fitted the propshaft the other day, then I was annoyed it was filthy so removed it, cleaned it and refitted in with new nuts and bolts again!
Had to unbolt the transfer and slide it back 10mm (on some longer bolts I fitted as guides) to allow me to get the connector into the 6l80e
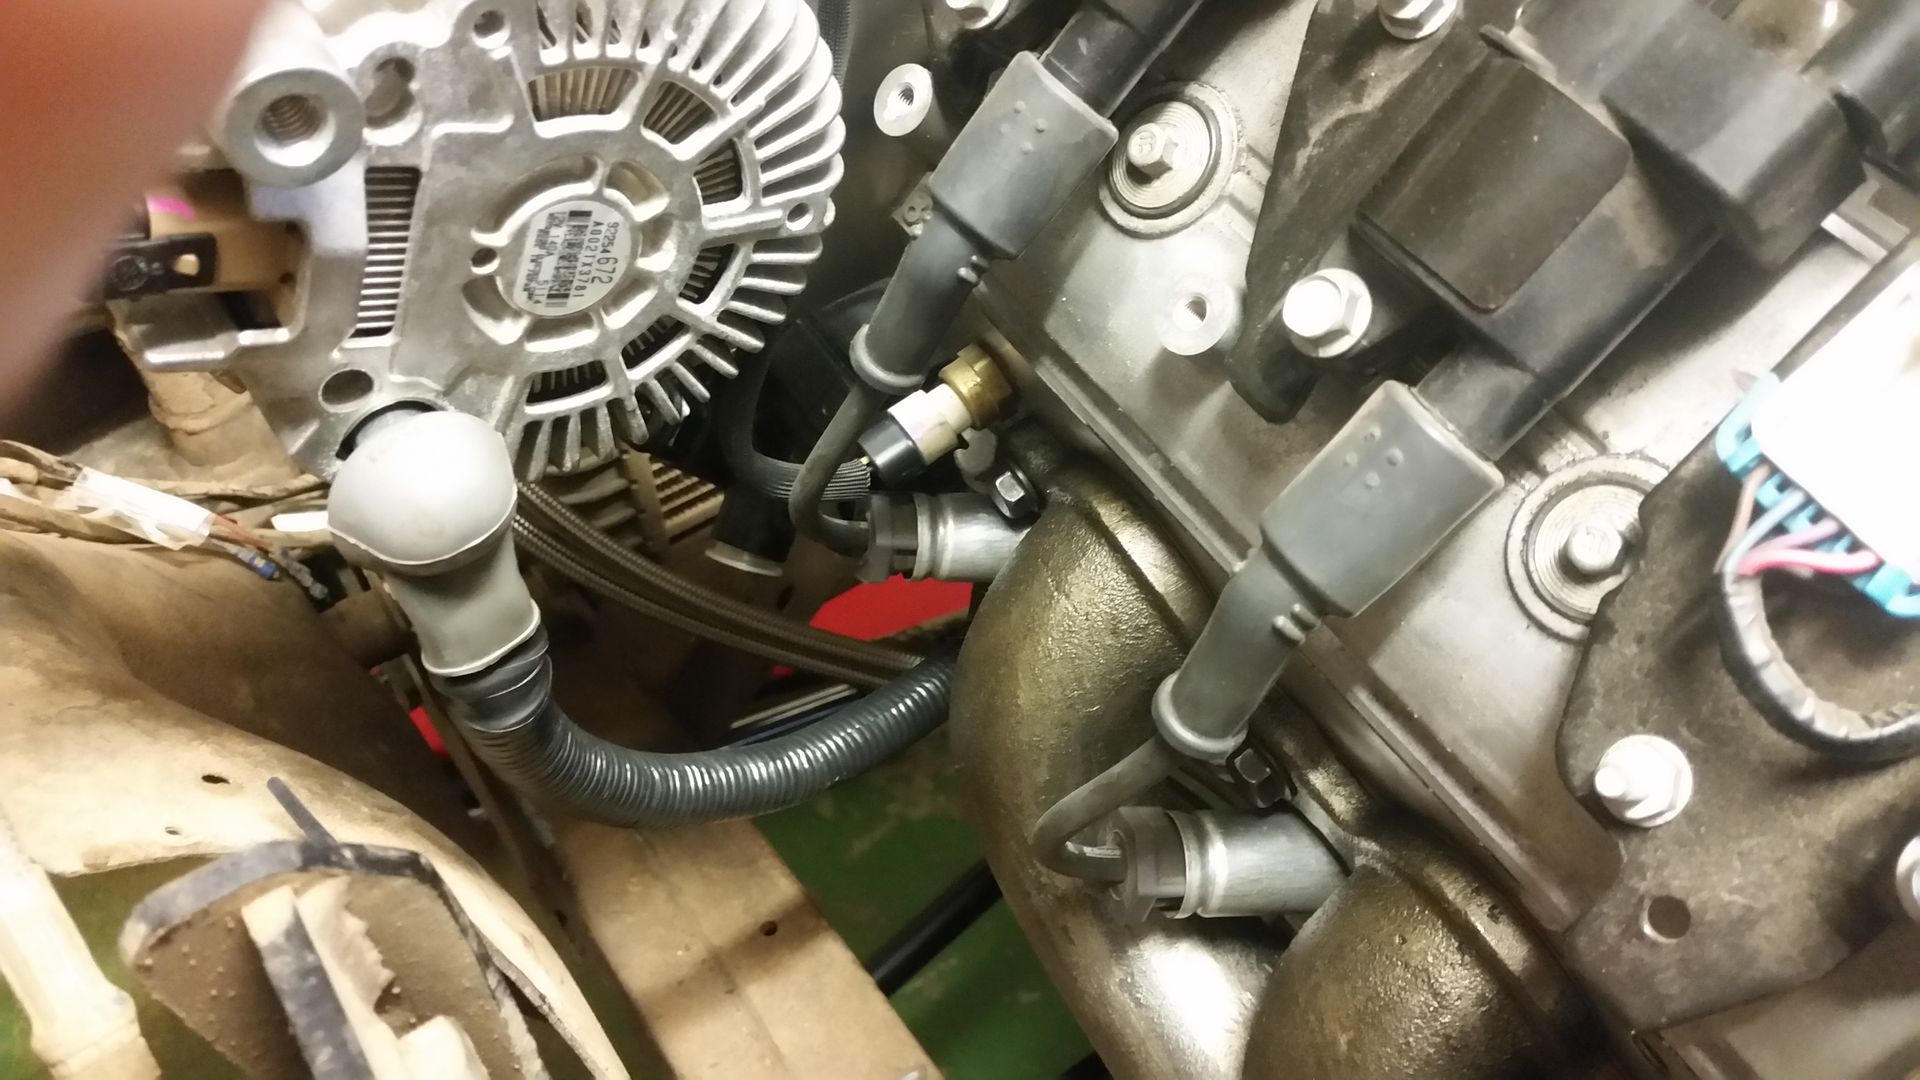
The hard plastic lines are for the Evap/Purge valve (connector just behind the serp belt tensioner)
I need to redo these as they dont fit atall anymore.

I also refitted the starter motor and put the underdrive back on.
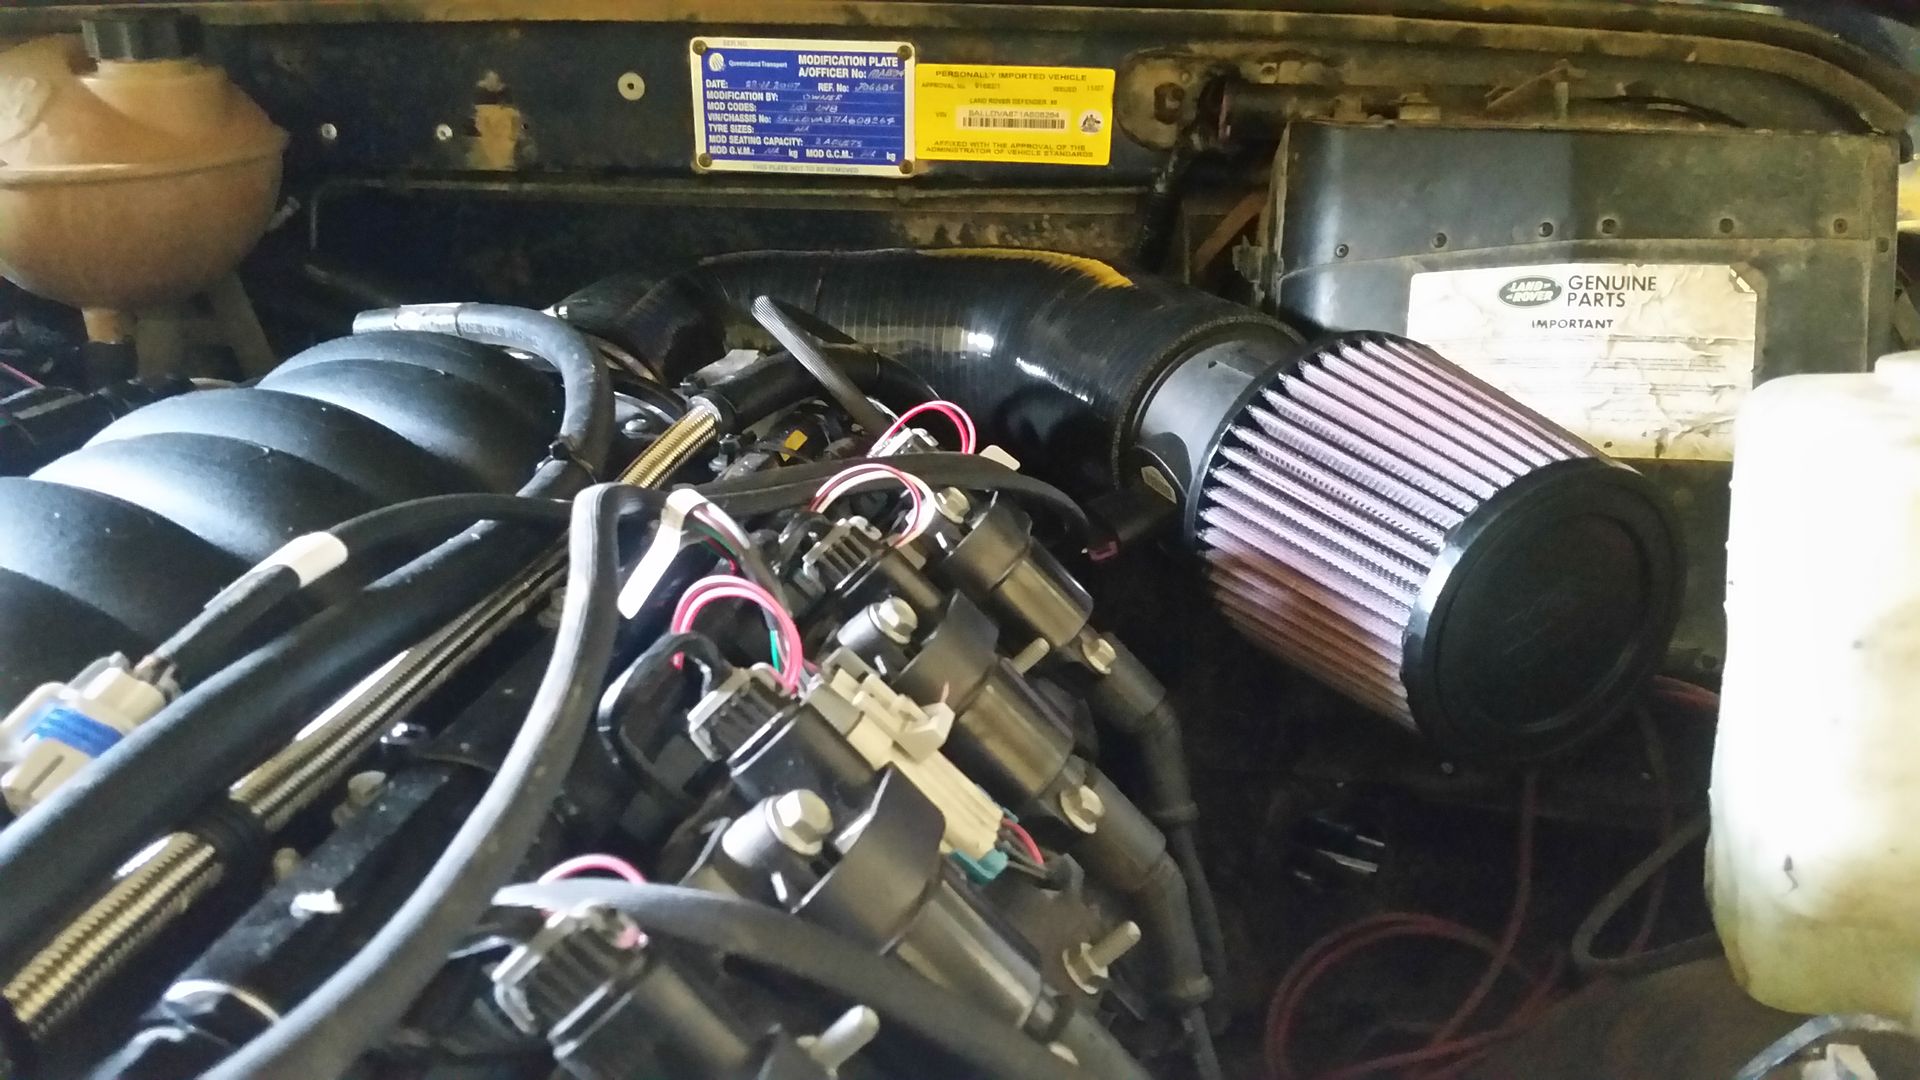
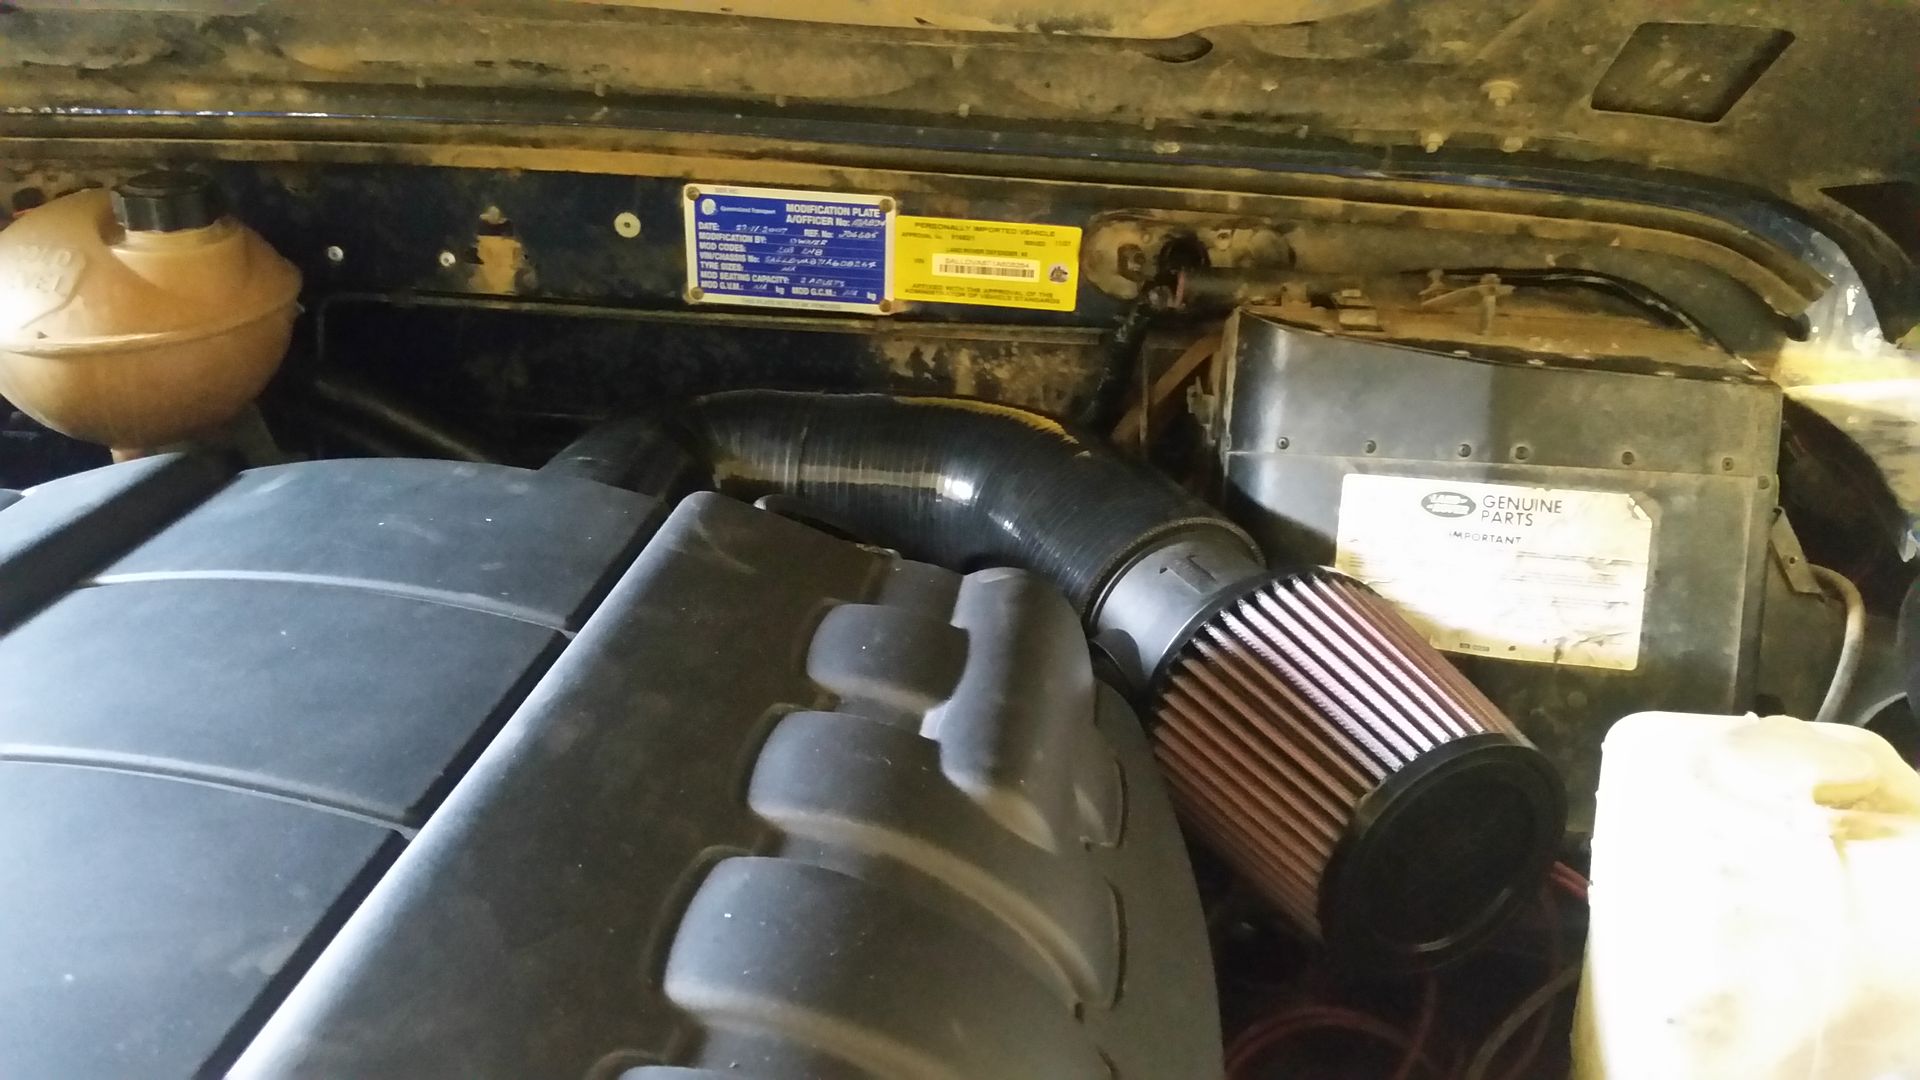
There is a fair gap between the loom and the manifold its just foreshortened by the picture. I picked up some wiring heat wrap earlier so will add some protection in a few places just in case.
Oil cooler manifold for the Auto. Oil cooler sits in front of the Radiator.
For now I have the standard TD5 radiator in place. Will see how it copes. I have fitted a 16" spal fan (pic somewhere further on)
All the water hoses are now sorted including the heater hoses which aren't in this image:
The bare LT230 I was using for setup has now been swapped out for a complete one which has been rebuilt with the heavyduty Ashcroft cross pin, and a sleeved intermediate shaft.
couple more pics:
Front prop UJ clearance!
I fitted the propshaft the other day, then I was annoyed it was filthy so removed it, cleaned it and refitted in with new nuts and bolts again!
Had to unbolt the transfer and slide it back 10mm (on some longer bolts I fitted as guides) to allow me to get the connector into the 6l80e
The hard plastic lines are for the Evap/Purge valve (connector just behind the serp belt tensioner)
I need to redo these as they dont fit atall anymore.
I also refitted the starter motor and put the underdrive back on.
There is a fair gap between the loom and the manifold its just foreshortened by the picture. I picked up some wiring heat wrap earlier so will add some protection in a few places just in case.
Fan fitted.
I have had the entire wiring loom out of the car to try and remove as much stuff as I possibly could. I removed all the TD5 ecu related stuff, the 10as unit, heaps of wiring and so on.
I also spent hours and hours detailing which wires in the instruments and warning lights did what.
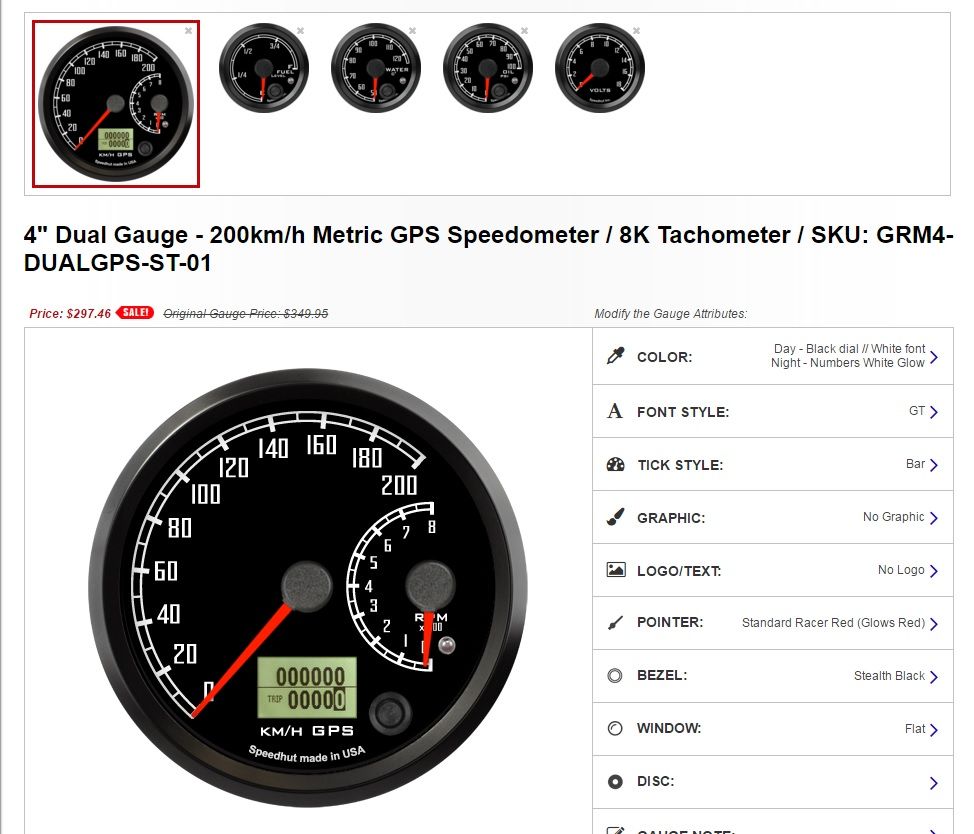
In terms of instruments I have ordered a set of gauges from Speedhut. Some of these are canbus from the obd2 port which makes wiring easier! The fuel gauge has its own capacitance sender unit and means I dont need a float in the tank
I went with the following:
GPS speedo with inbuilt revcounter, canbus water temp, oil pressure and voltmeter, and a fuel gauge with capacitance sender. I was hoping the combination speedo and rev counter would also be available with canbus as the trip meter screen can be used to read and clear fault codes!! It isnt unfortunately. only the single gauges for those.
I also found a problem with the Lokar gear cable. It isn't getting the range of movement it is supposed to be
The inner should push in about 20mm more at this end.
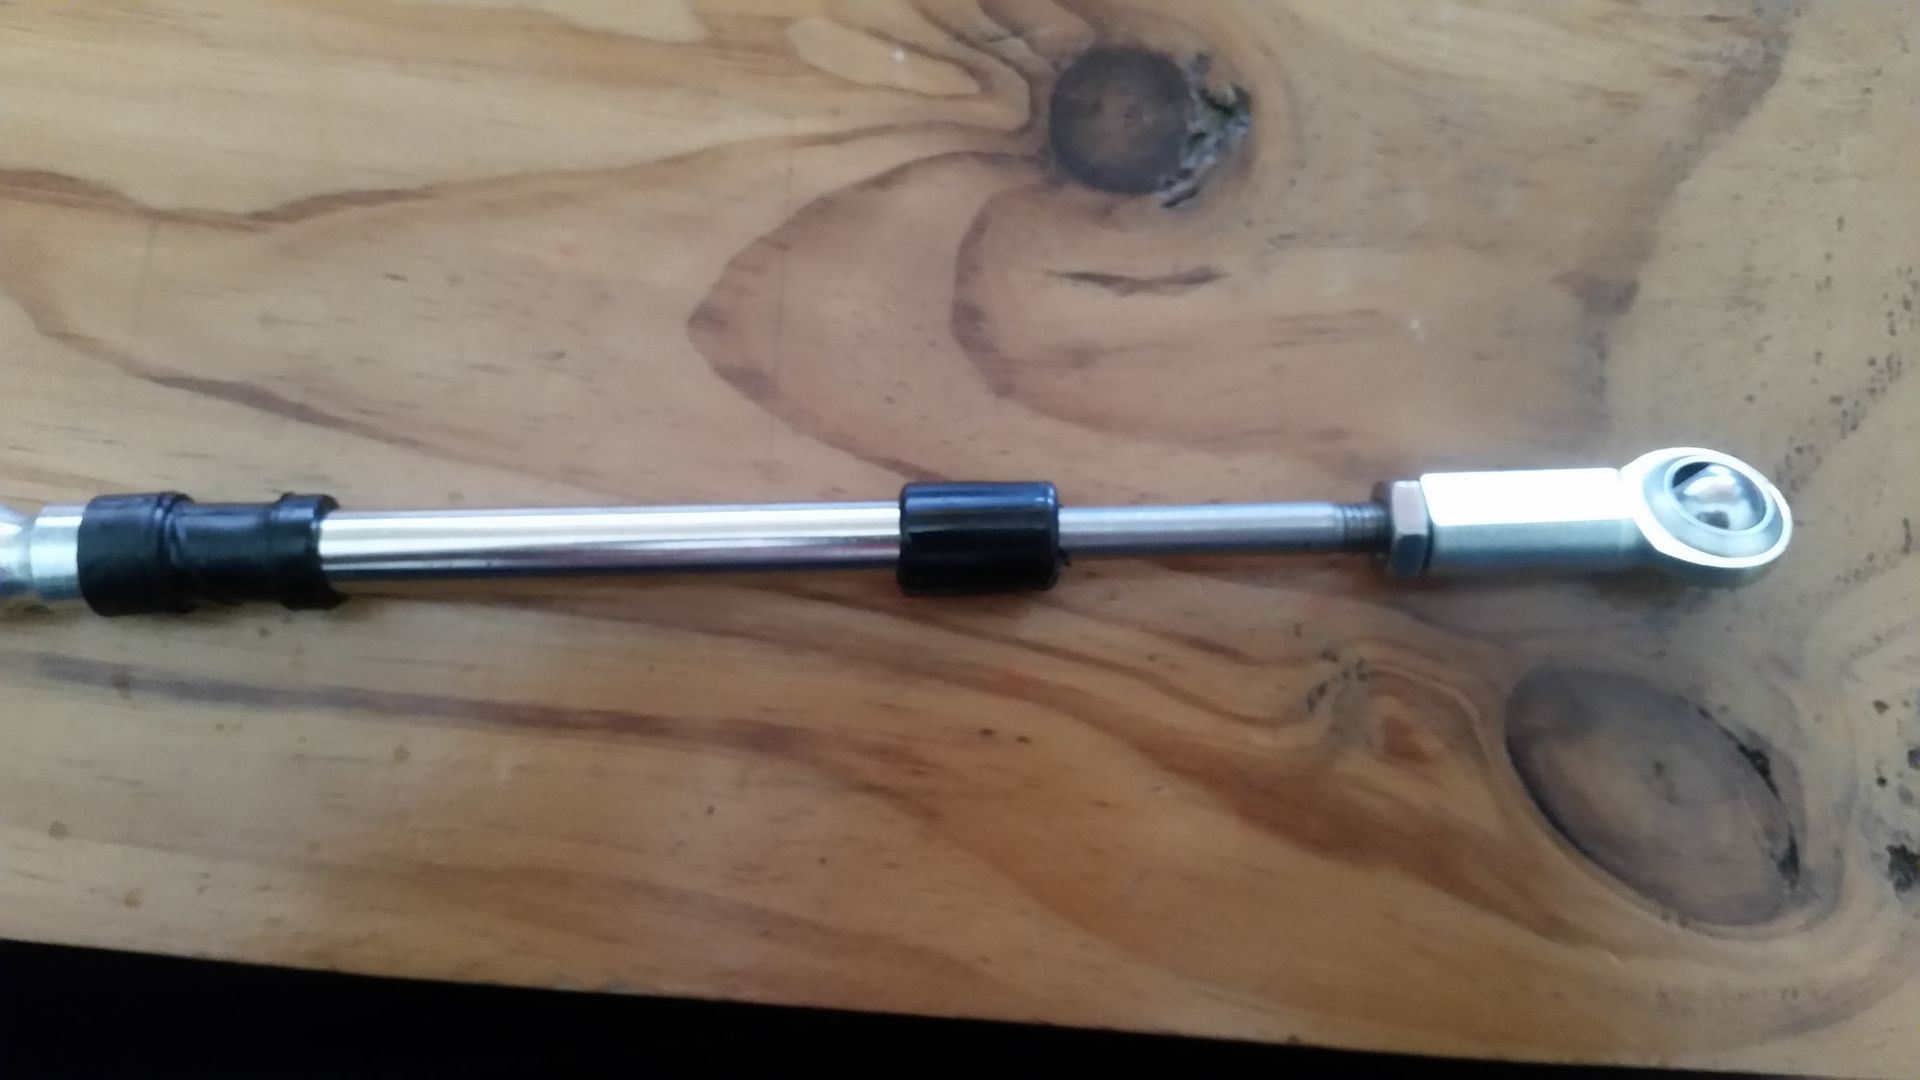
I emailed lokar and they are sending me a new cable. This has slowed progress a bit however
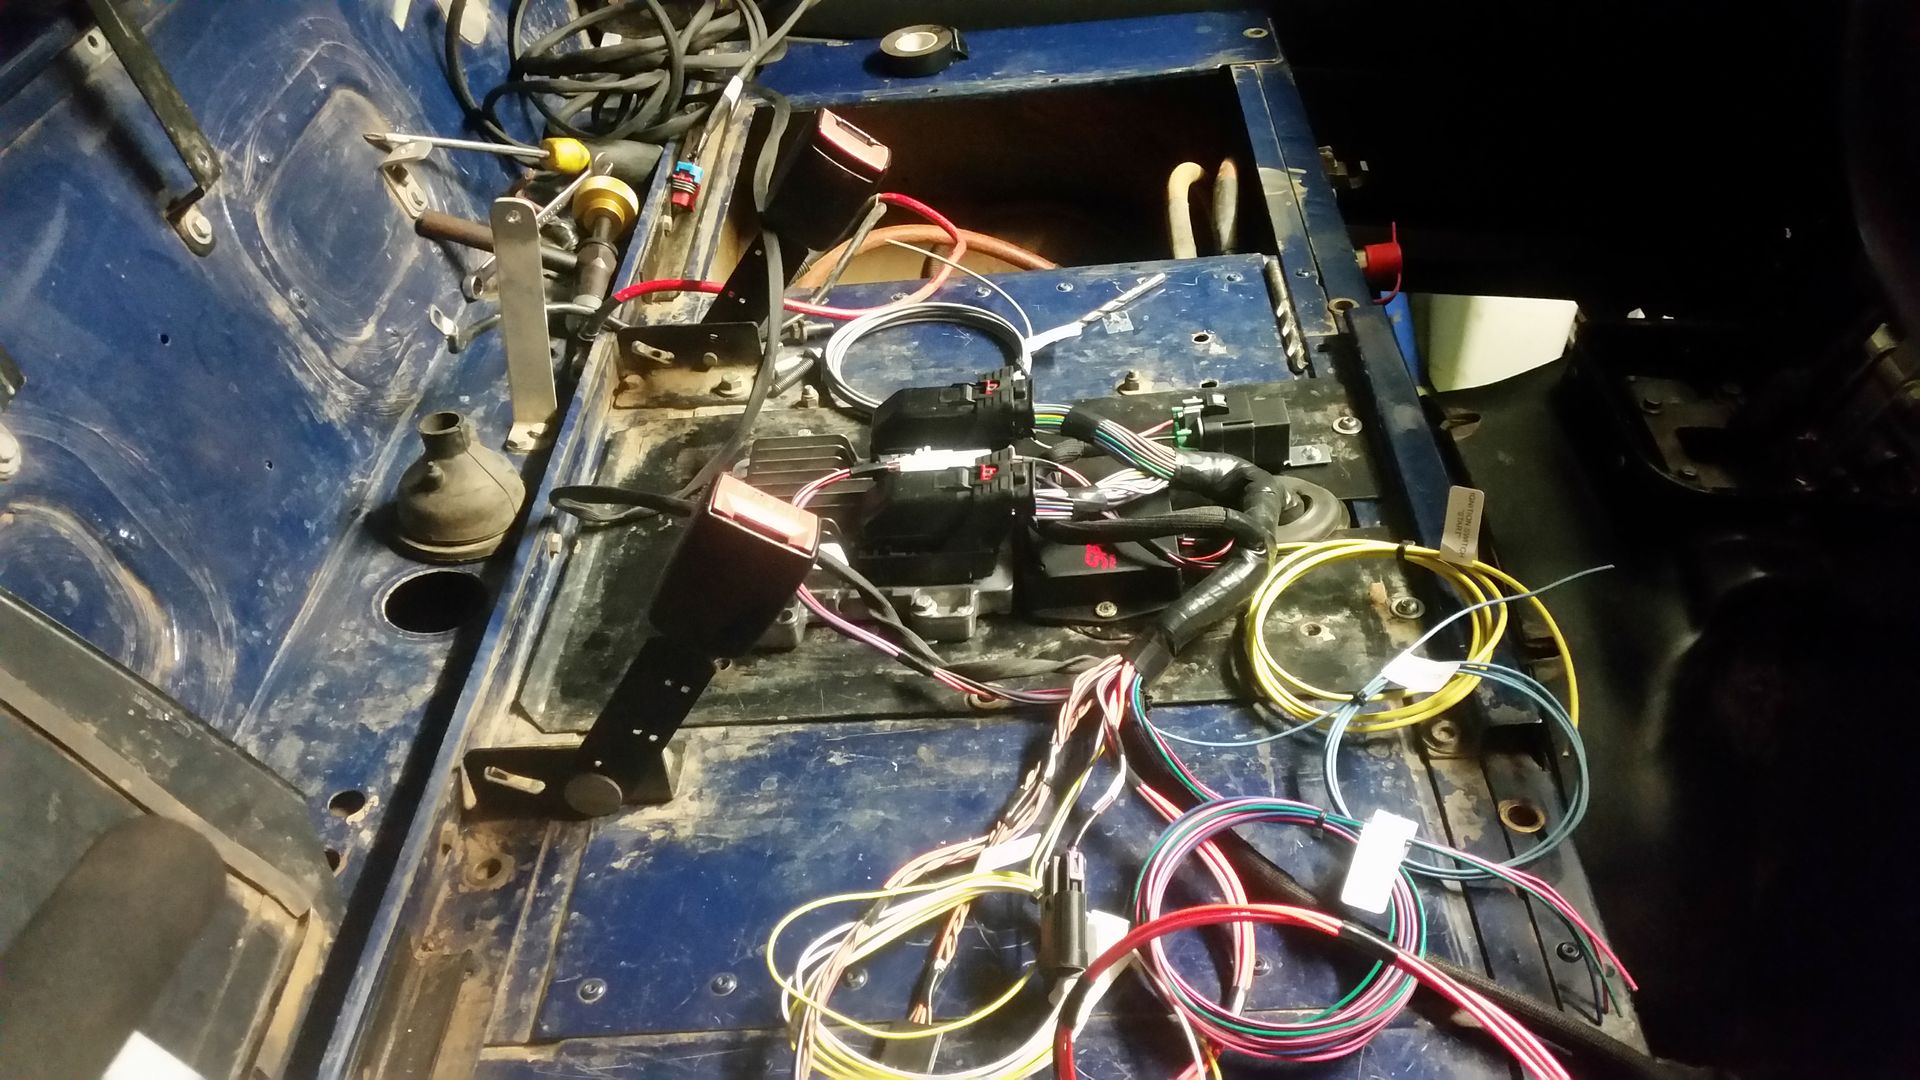
Some more wiring:
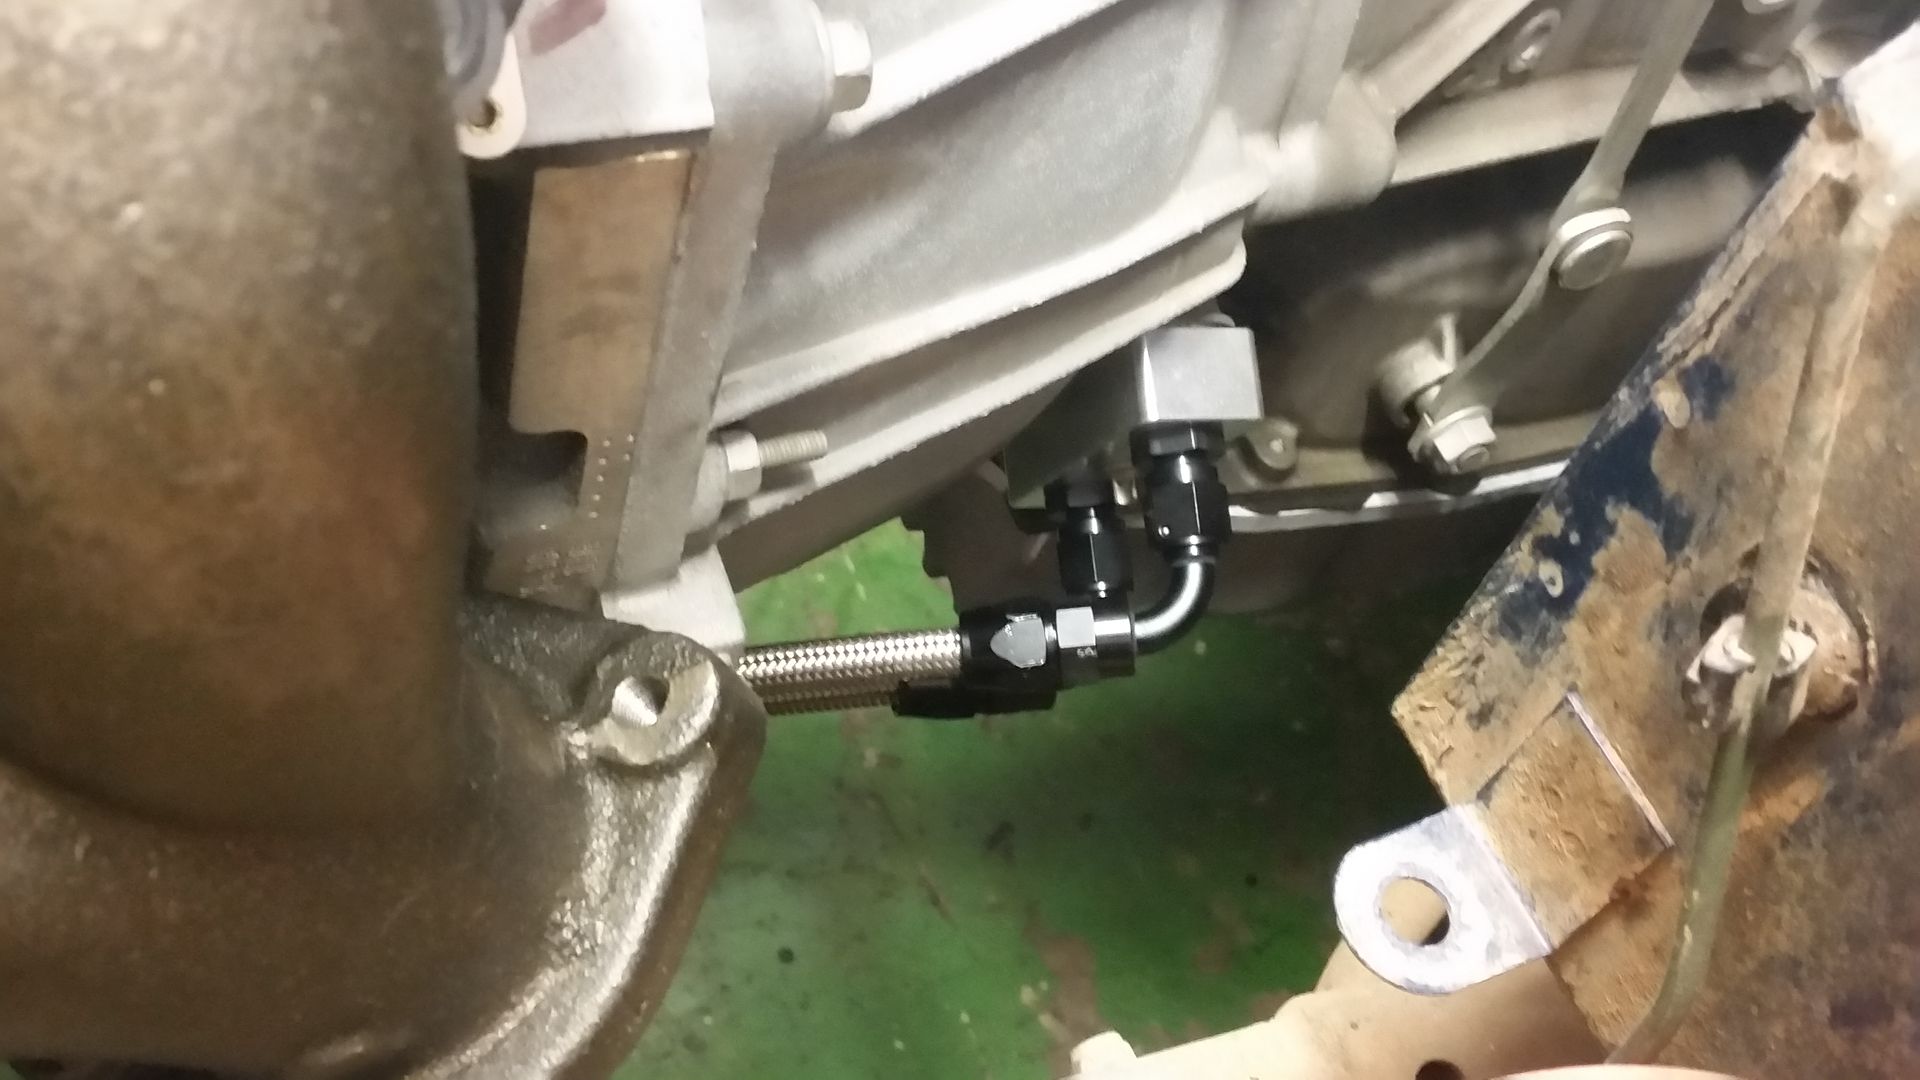
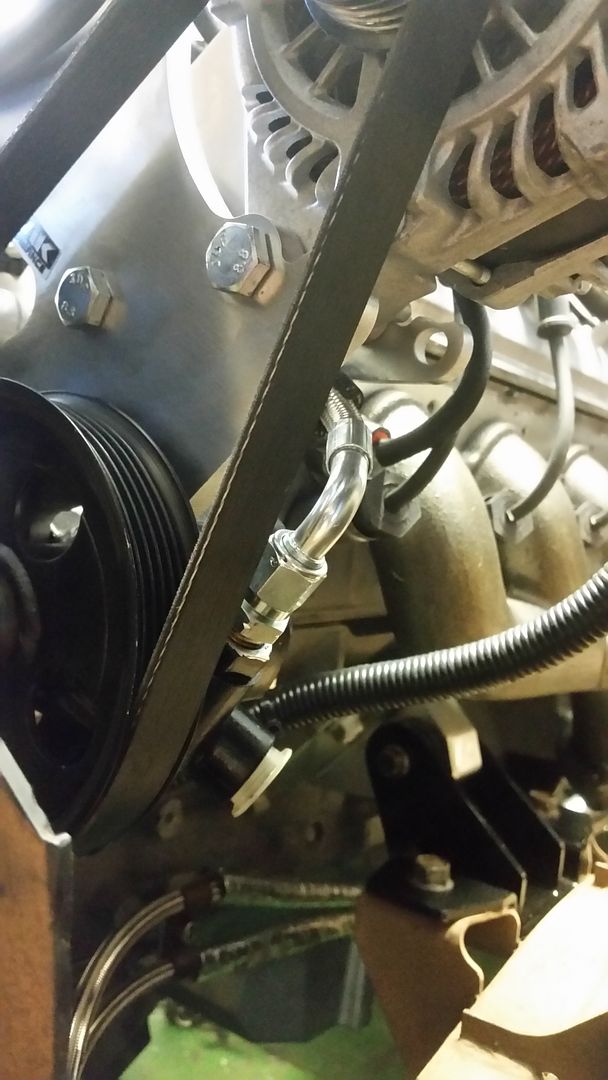
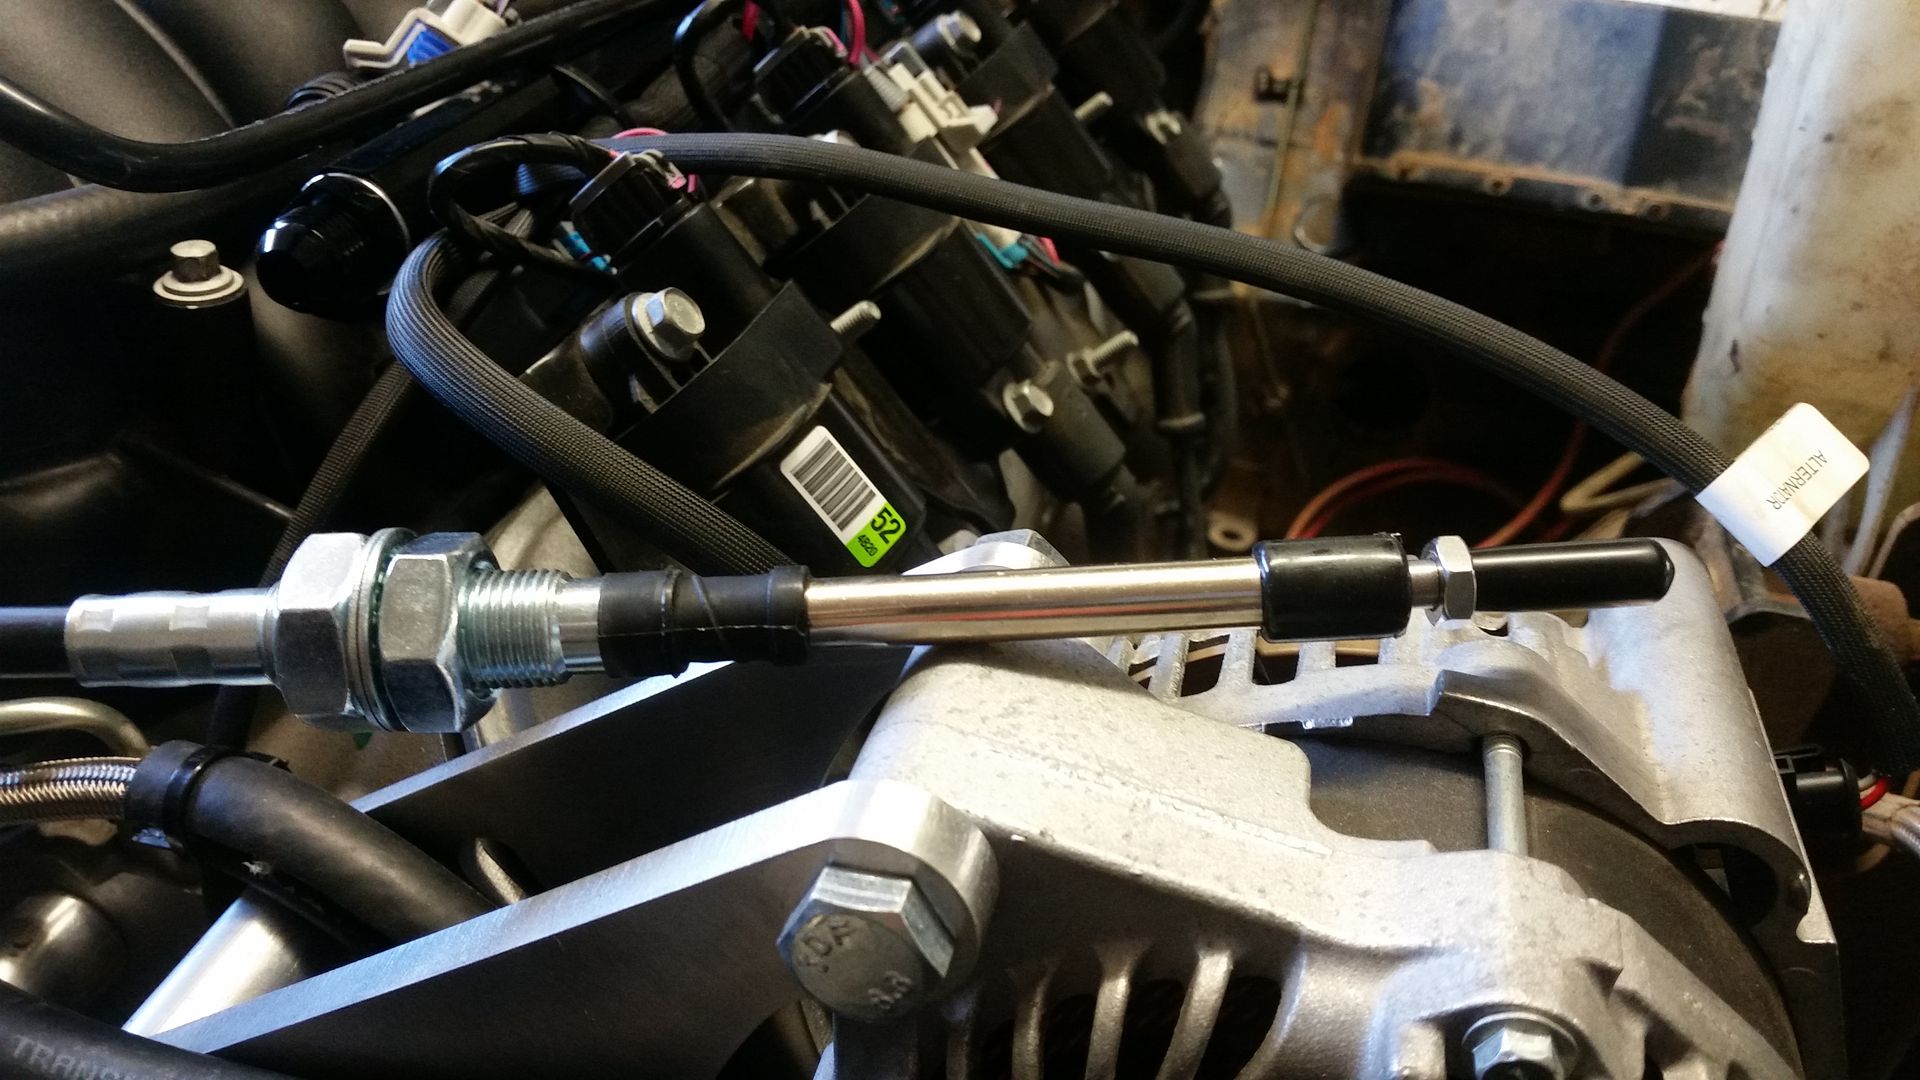
Power steering pump -> steering box pressure lines and fittings done.

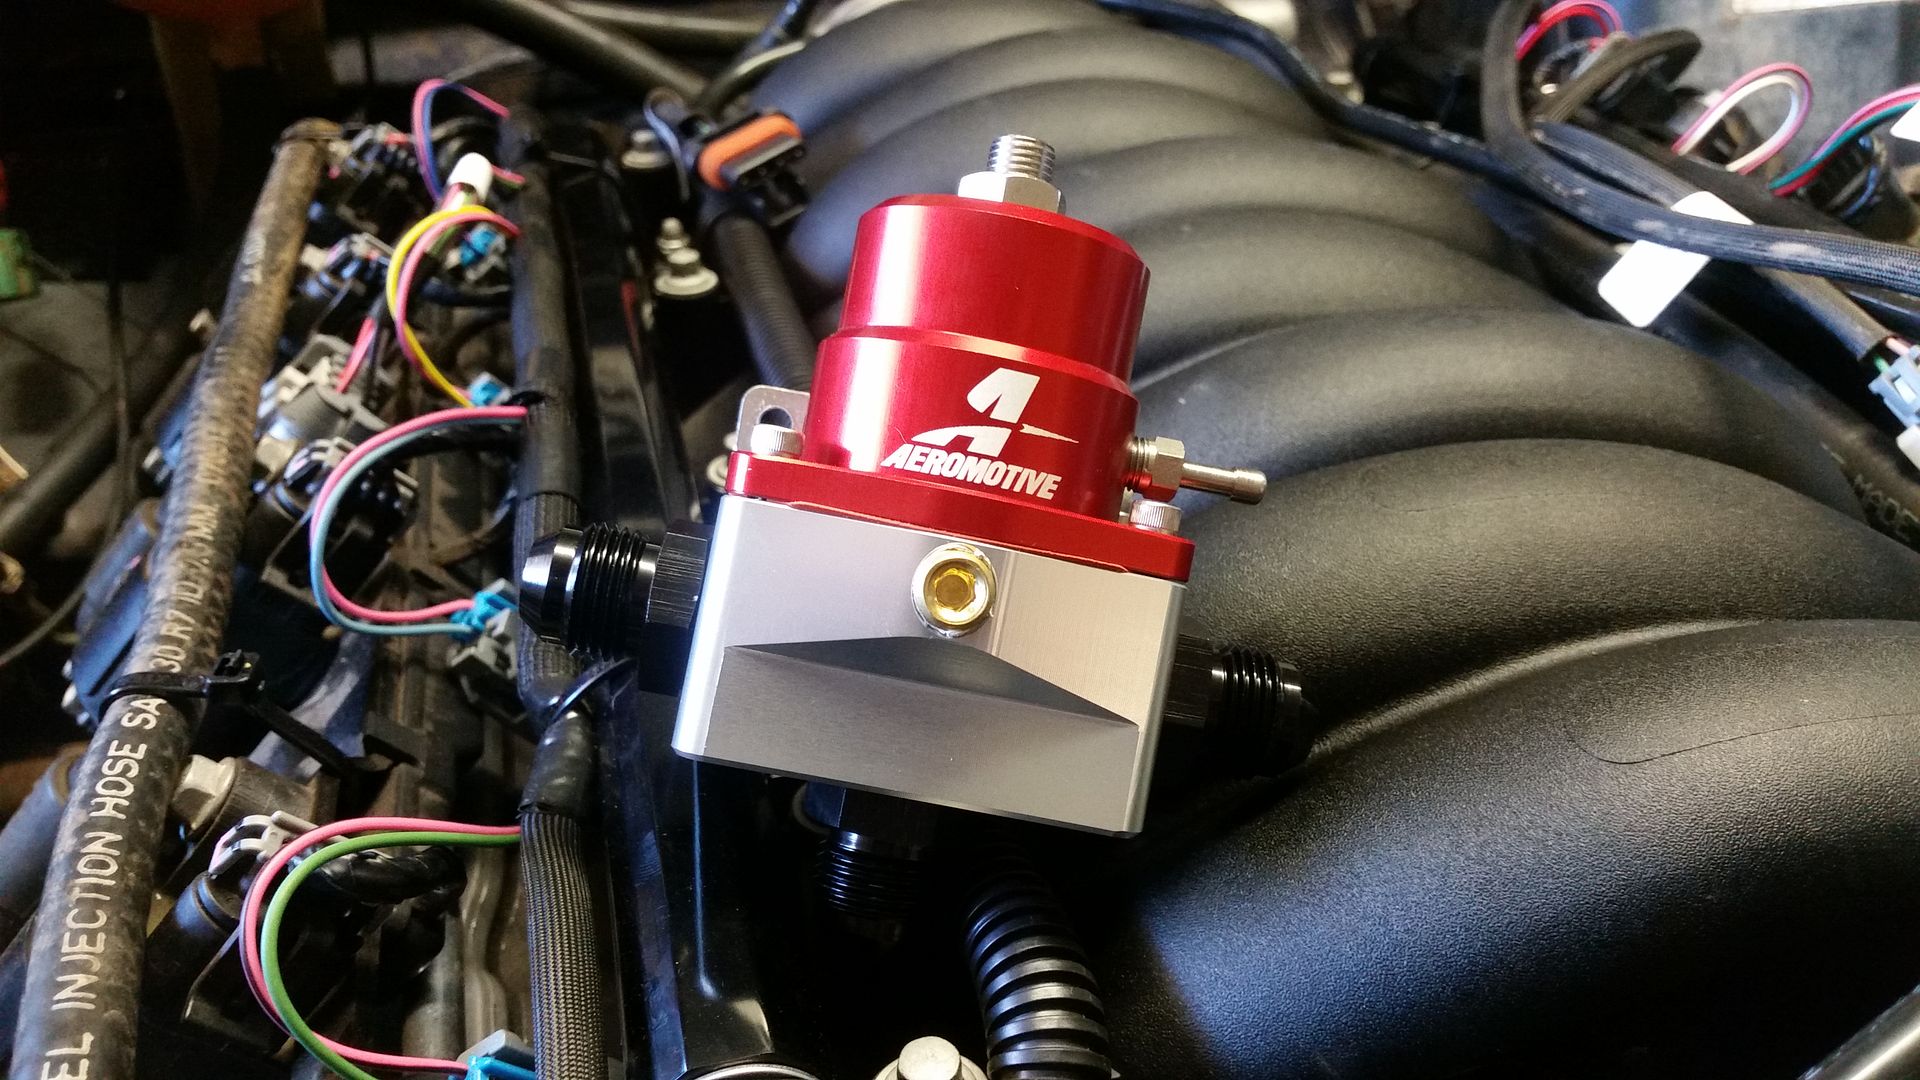
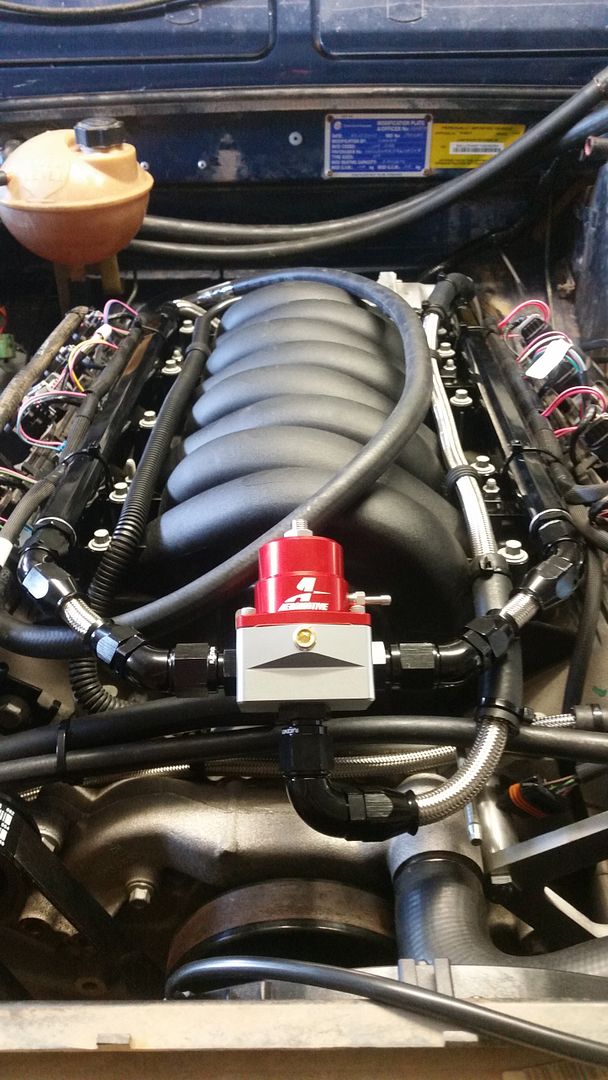
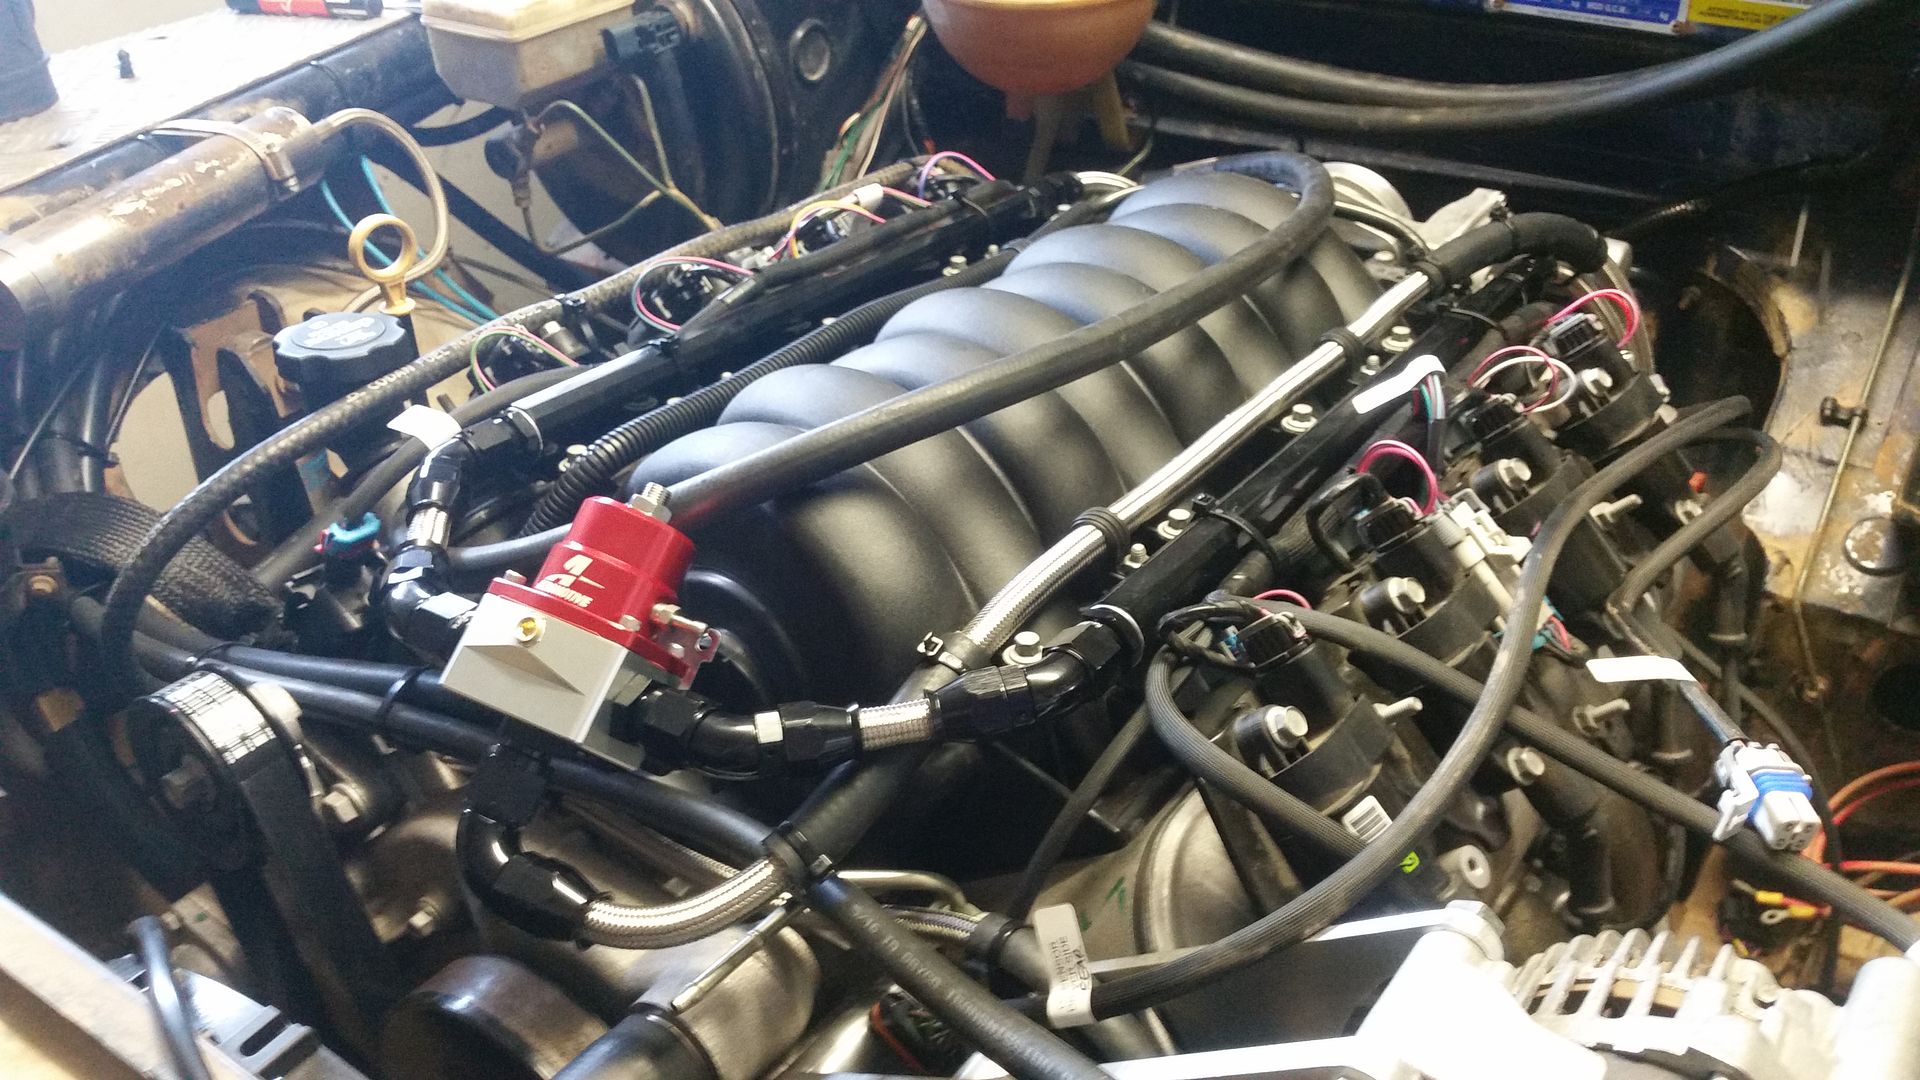
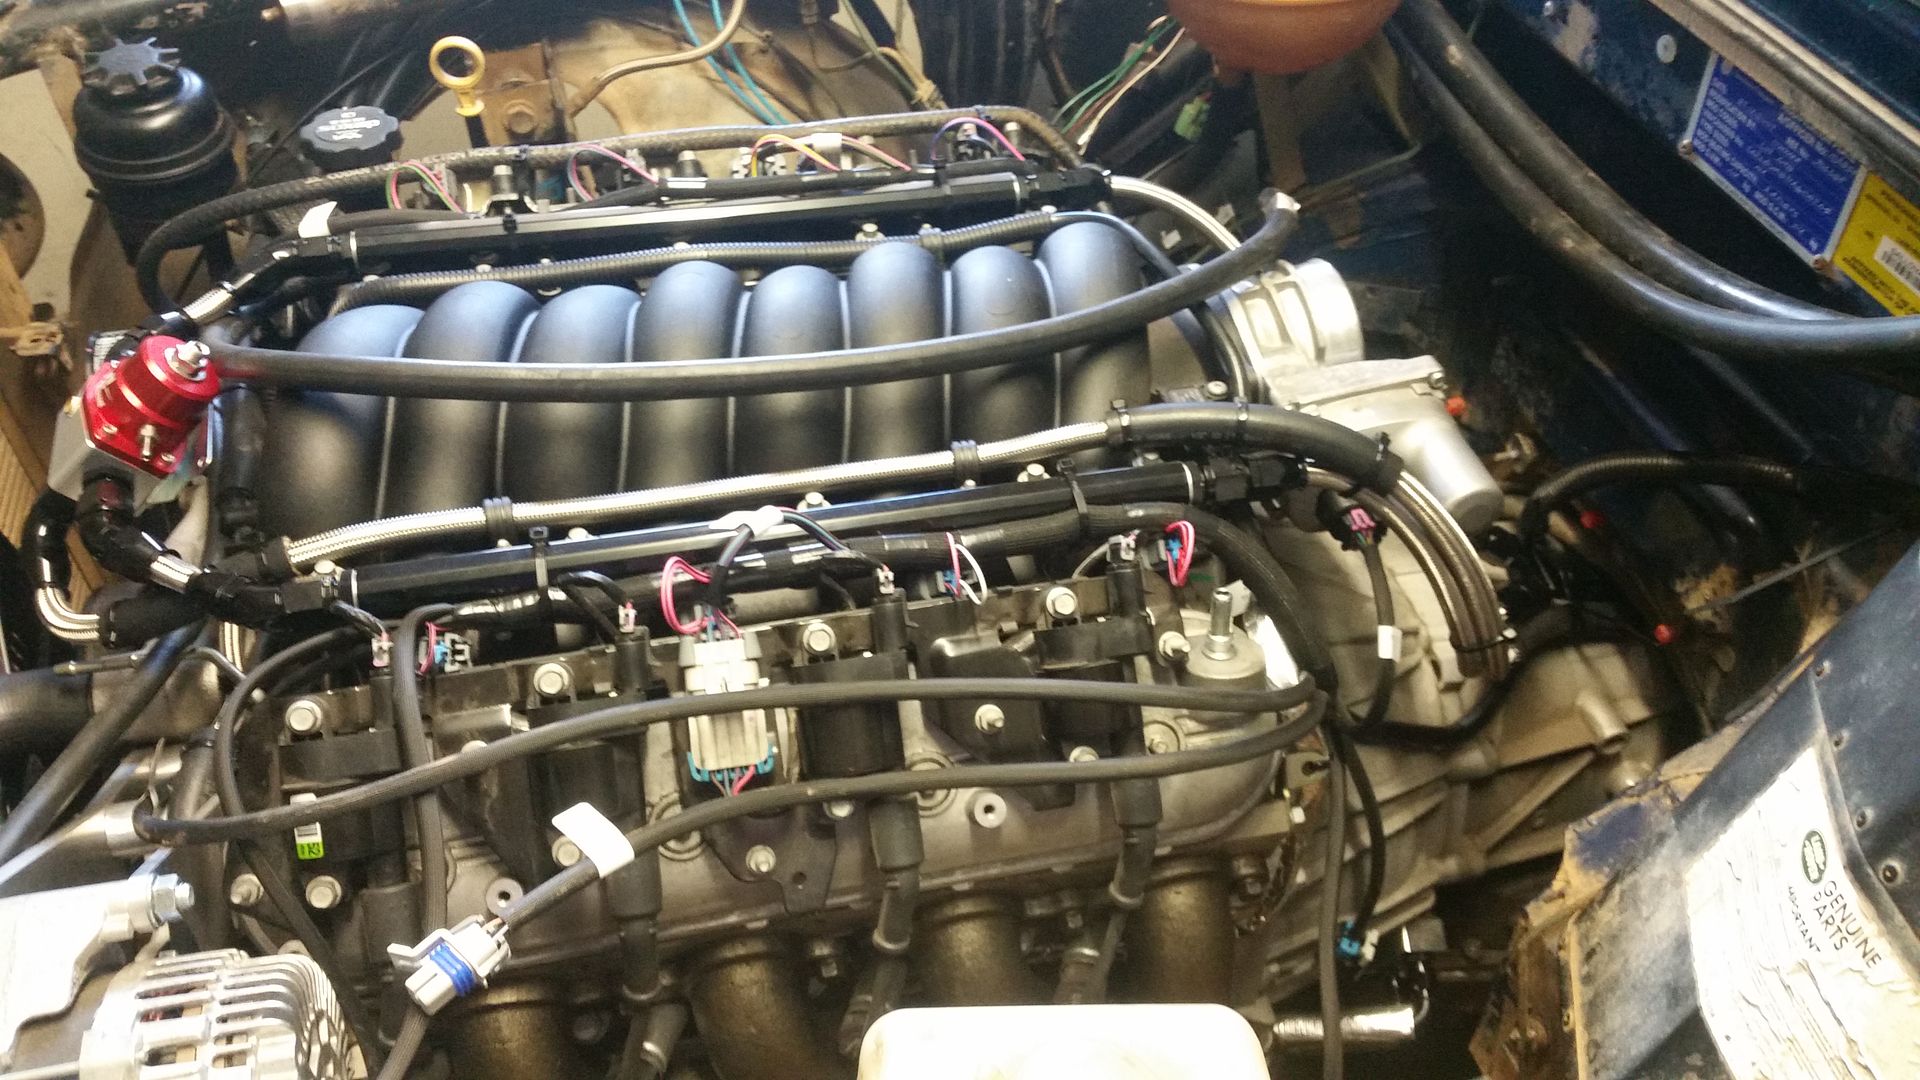
Billet fuel rails.
This is where I am at the moment. I have a heap of fuel system parts on order to do the rest of the fuel system. A mate is making me up a mount to hold the walbro pump in the td5 tank along with various fittings for the pick up, return, evap stuff, and he is also making me an oil pressure pickup to replace the bypass on the side of the sump.
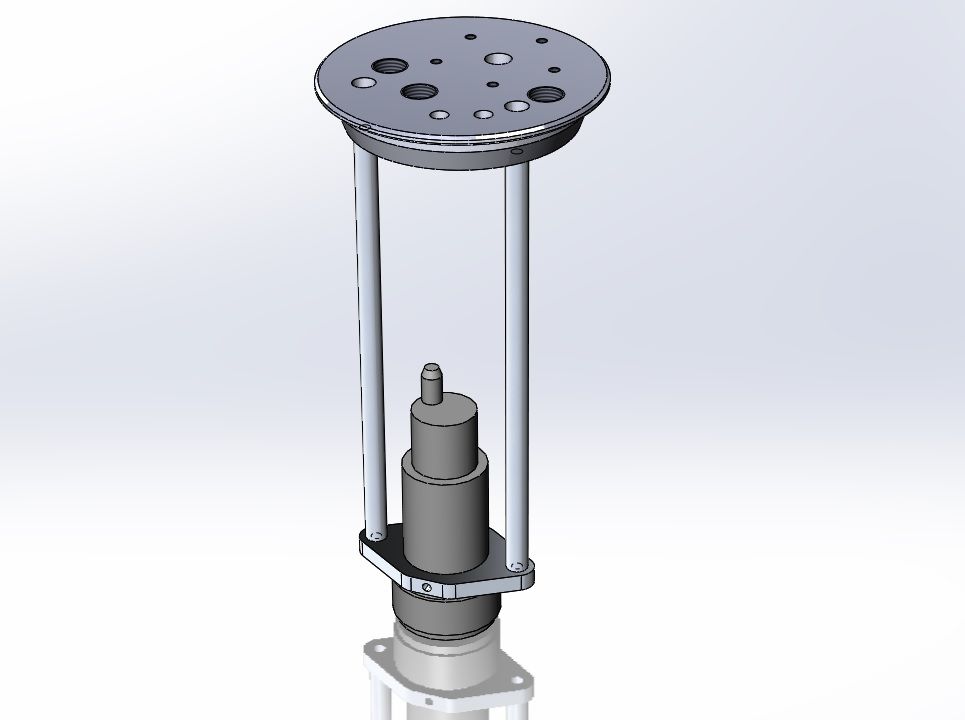
Updates will be a bit slower now
I have had the entire wiring loom out of the car to try and remove as much stuff as I possibly could. I removed all the TD5 ecu related stuff, the 10as unit, heaps of wiring and so on.
I also spent hours and hours detailing which wires in the instruments and warning lights did what.
In terms of instruments I have ordered a set of gauges from Speedhut. Some of these are canbus from the obd2 port which makes wiring easier! The fuel gauge has its own capacitance sender unit and means I dont need a float in the tank
I went with the following:
GPS speedo with inbuilt revcounter, canbus water temp, oil pressure and voltmeter, and a fuel gauge with capacitance sender. I was hoping the combination speedo and rev counter would also be available with canbus as the trip meter screen can be used to read and clear fault codes!! It isnt unfortunately. only the single gauges for those.
I also found a problem with the Lokar gear cable. It isn't getting the range of movement it is supposed to be
The inner should push in about 20mm more at this end.
I emailed lokar and they are sending me a new cable. This has slowed progress a bit however
Some more wiring:
Power steering pump -> steering box pressure lines and fittings done.
Billet fuel rails.
This is where I am at the moment. I have a heap of fuel system parts on order to do the rest of the fuel system. A mate is making me up a mount to hold the walbro pump in the td5 tank along with various fittings for the pick up, return, evap stuff, and he is also making me an oil pressure pickup to replace the bypass on the side of the sump.
Updates will be a bit slower now
Done a little bit more.
Replacememt gear cable turned up today from Lokar (Excellent service)
This one works perfectly:

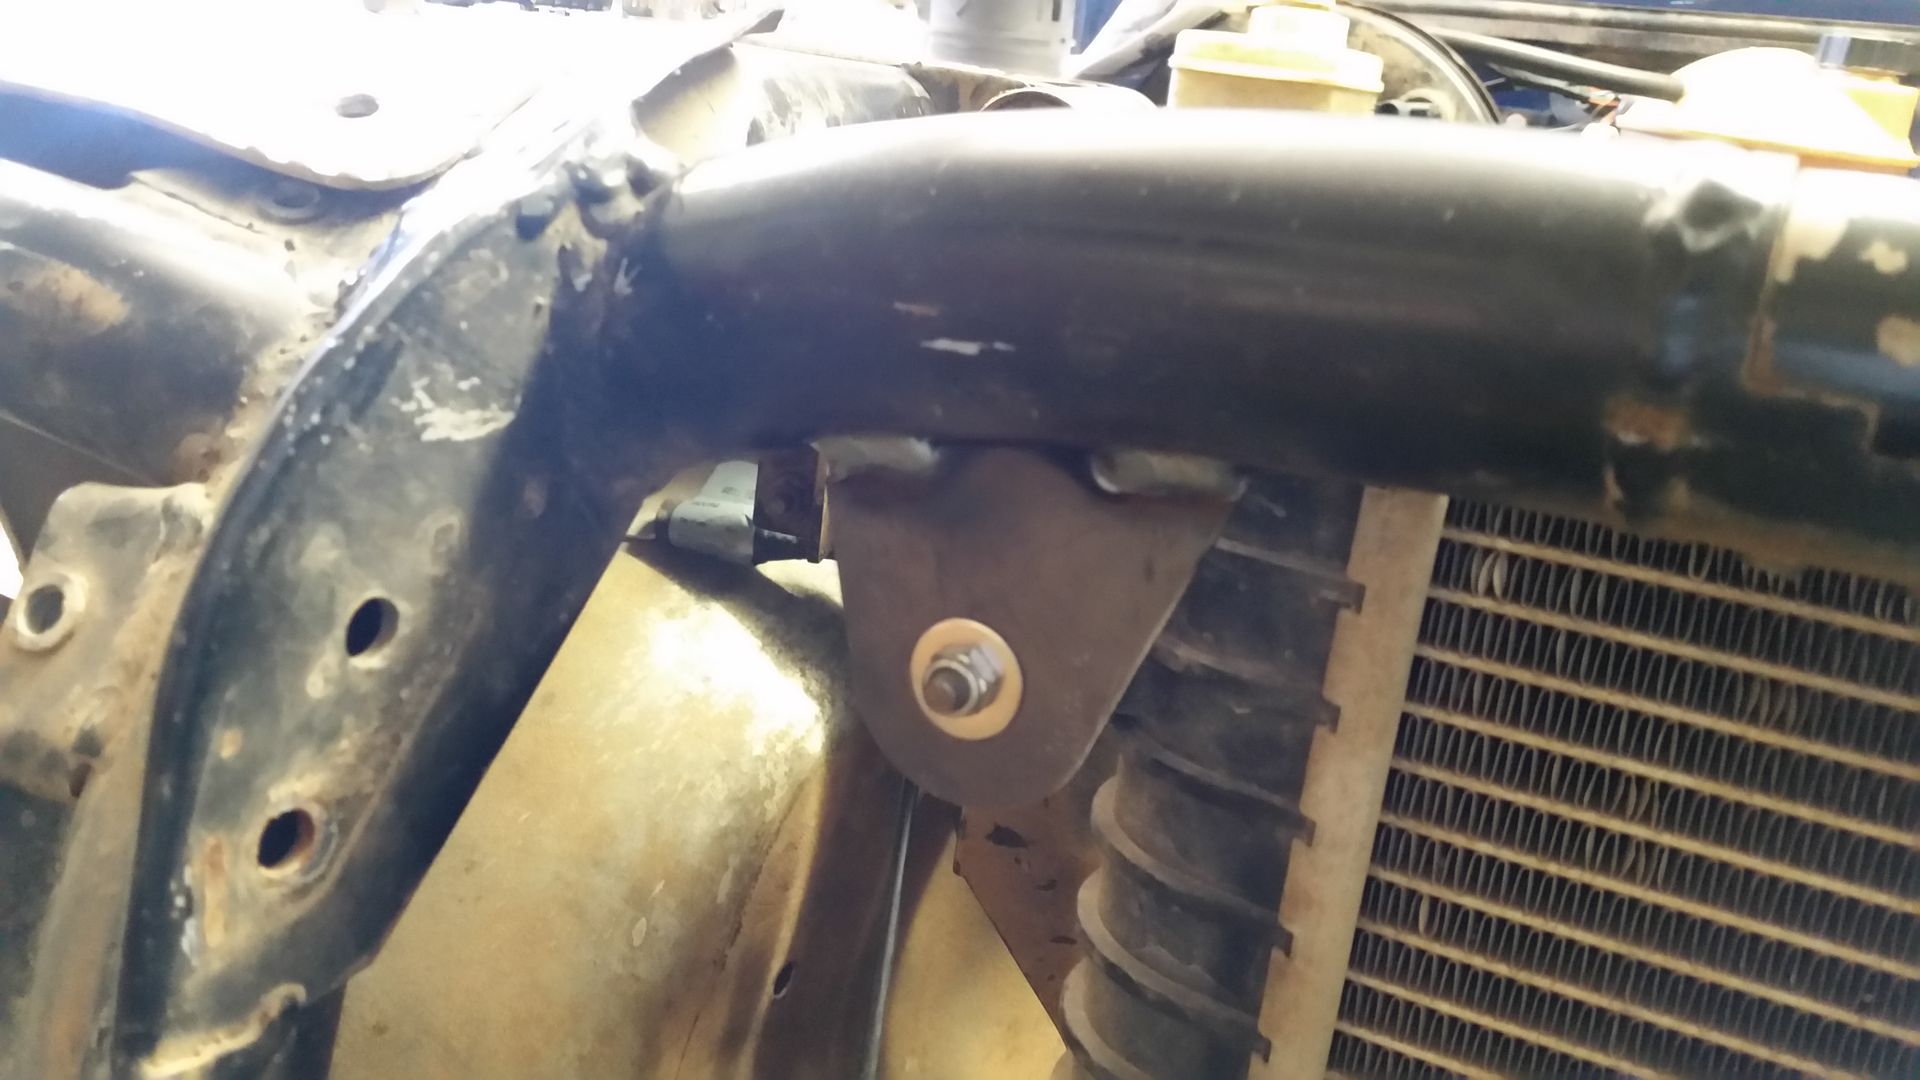
Also sorted out the upper radiator mounts.

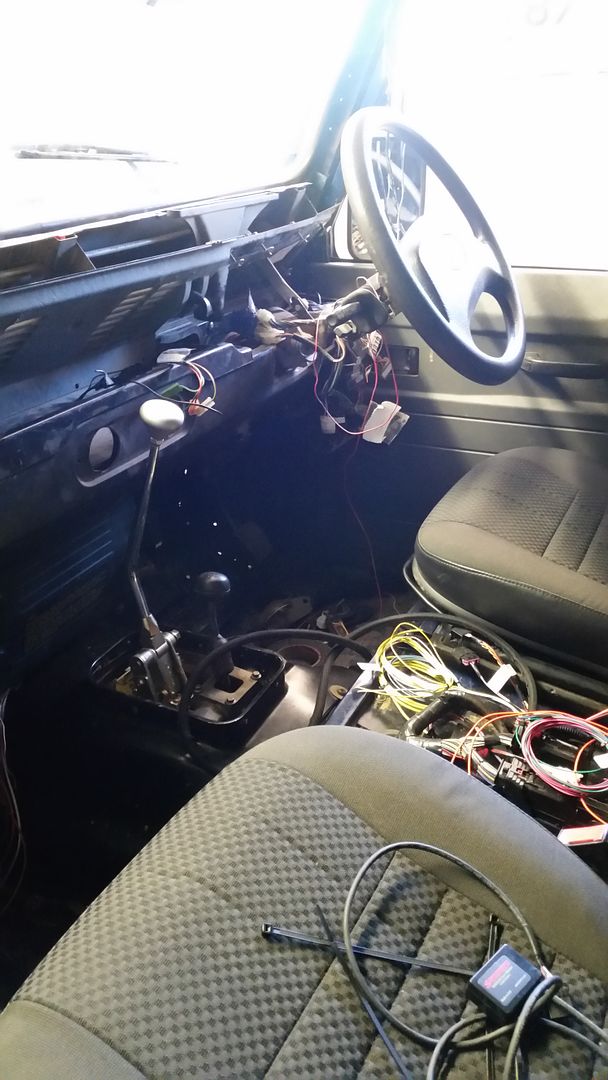
Interior progress:
Fuel pressure regulator also arrived along with a heap of fittings.
Will try and get some more done tomorrow.
Replacememt gear cable turned up today from Lokar (Excellent service)
This one works perfectly:
Also sorted out the upper radiator mounts.
Interior progress:
Fuel pressure regulator also arrived along with a heap of fittings.
Will try and get some more done tomorrow.
It had a hit dead on the end of the chassis rail on the left hand side. It basically collapsed the entire rail back to just in front of the suspension pick up. There was a few bits of other superficial damage. It is my understanding that it was actually a police car.
Most of the panel work refitted. Starting to look a lot more complete now. Sorry for the rubbish pictures.

Most of the panel work refitted. Starting to look a lot more complete now. Sorry for the rubbish pictures.
Edited by Psimpson7 on Monday 9th January 01:10
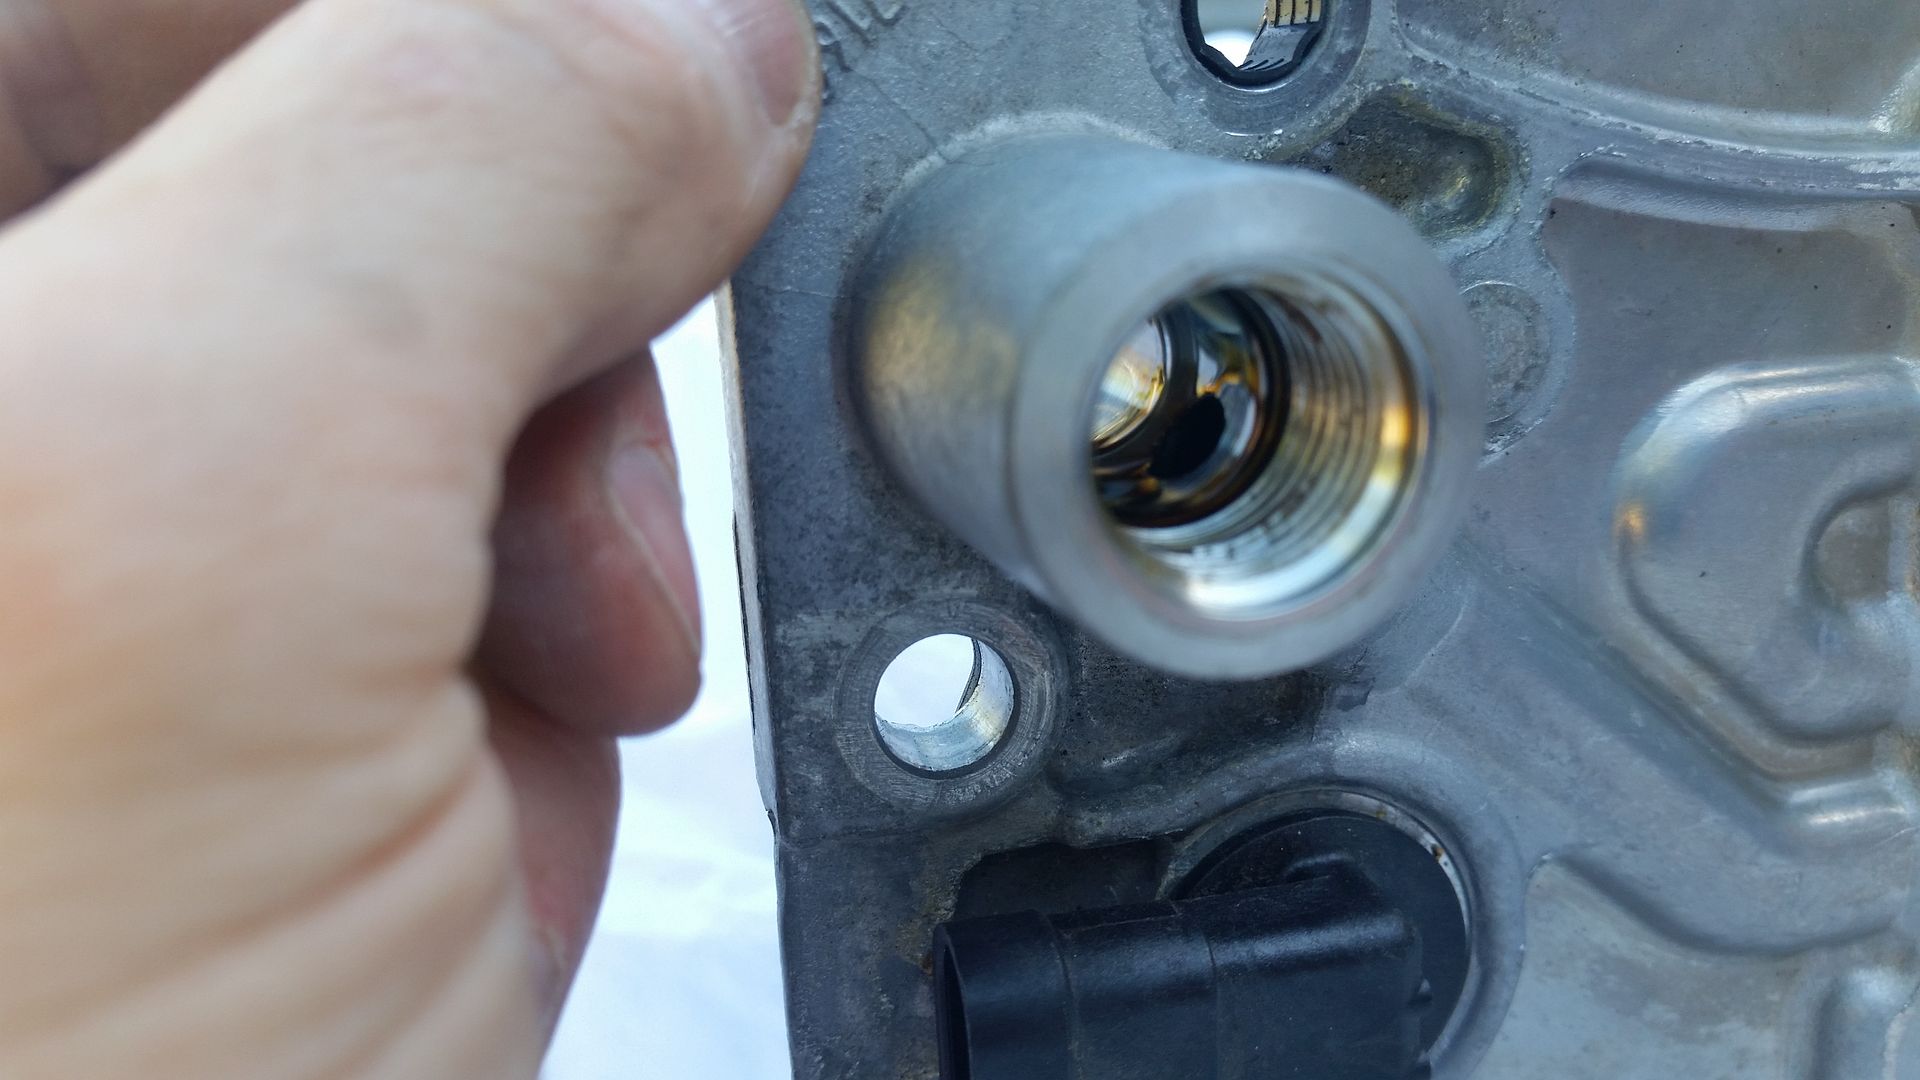
Hit an issue now. I have it turning over (Not trying to start it yet as no fuel) but I noticed that it would turn over irrespective of the gear lever position which as I have the loom set with a Neutral / Park start only inhibitor it shouldn't
I plugged in the gear indicator and irrespective of what position the lever was in it always displayed 'N'
I spoke to Speartech and after doing so, drained and removed the sump. When I got it off I noticed that when I refitted the TCM I missed lining up the selector shaft nub with the IMS (Internal Mode Switch) on the TCM.
I have corrected that and now I get the correct display for Park but all other positions still show 'N'
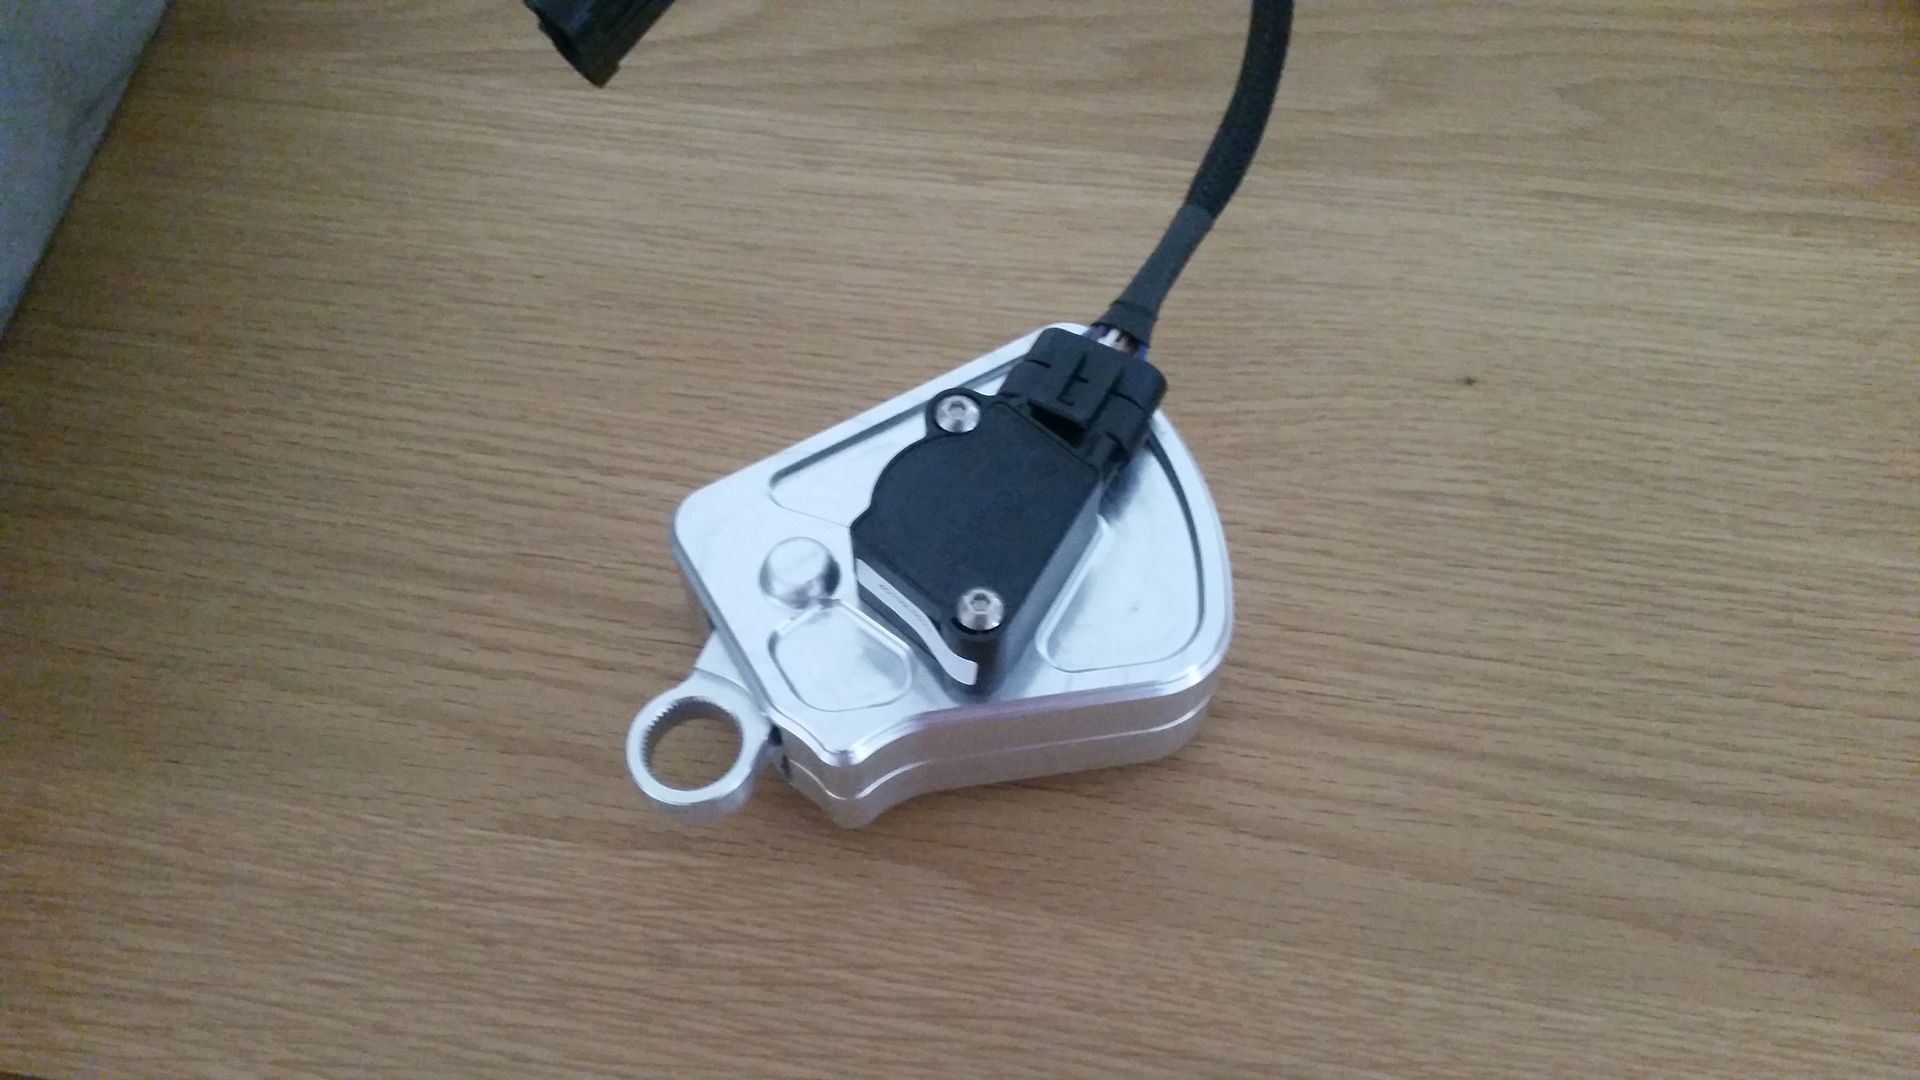
You can just about see the issue in my image below . The silver nub should be meshed with the black plastic fitting which them connects to the white plastic IMS:
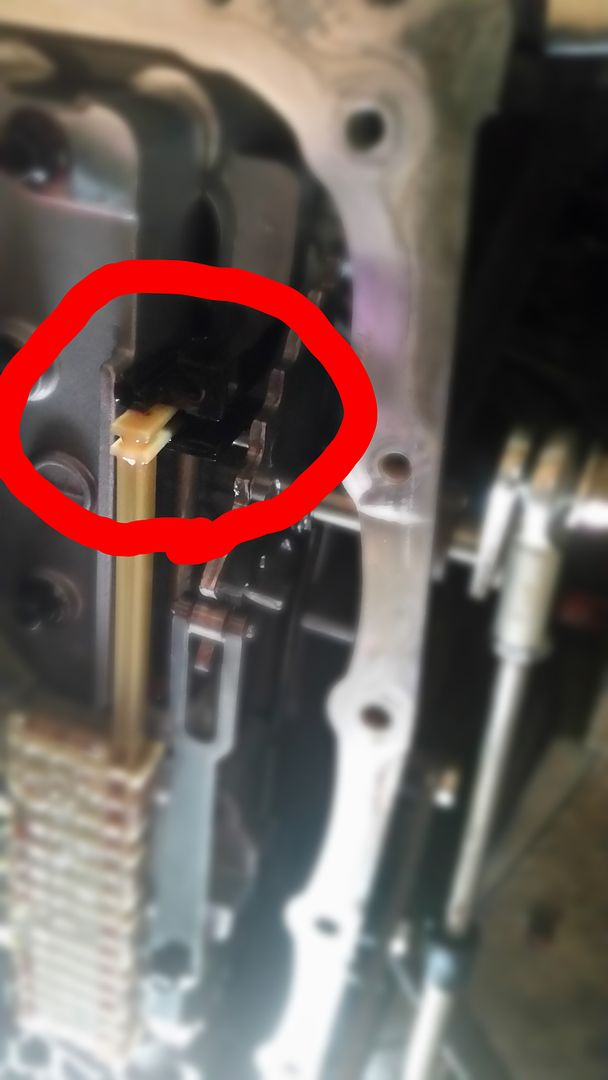
Hopefully this is something not too serious. Maybe I damaged the IMS? Just waiting on an update from Speartech to see if they have any more comments.
In the meantime I went back to working on things I am less likely to ruin....
Emissions stuff
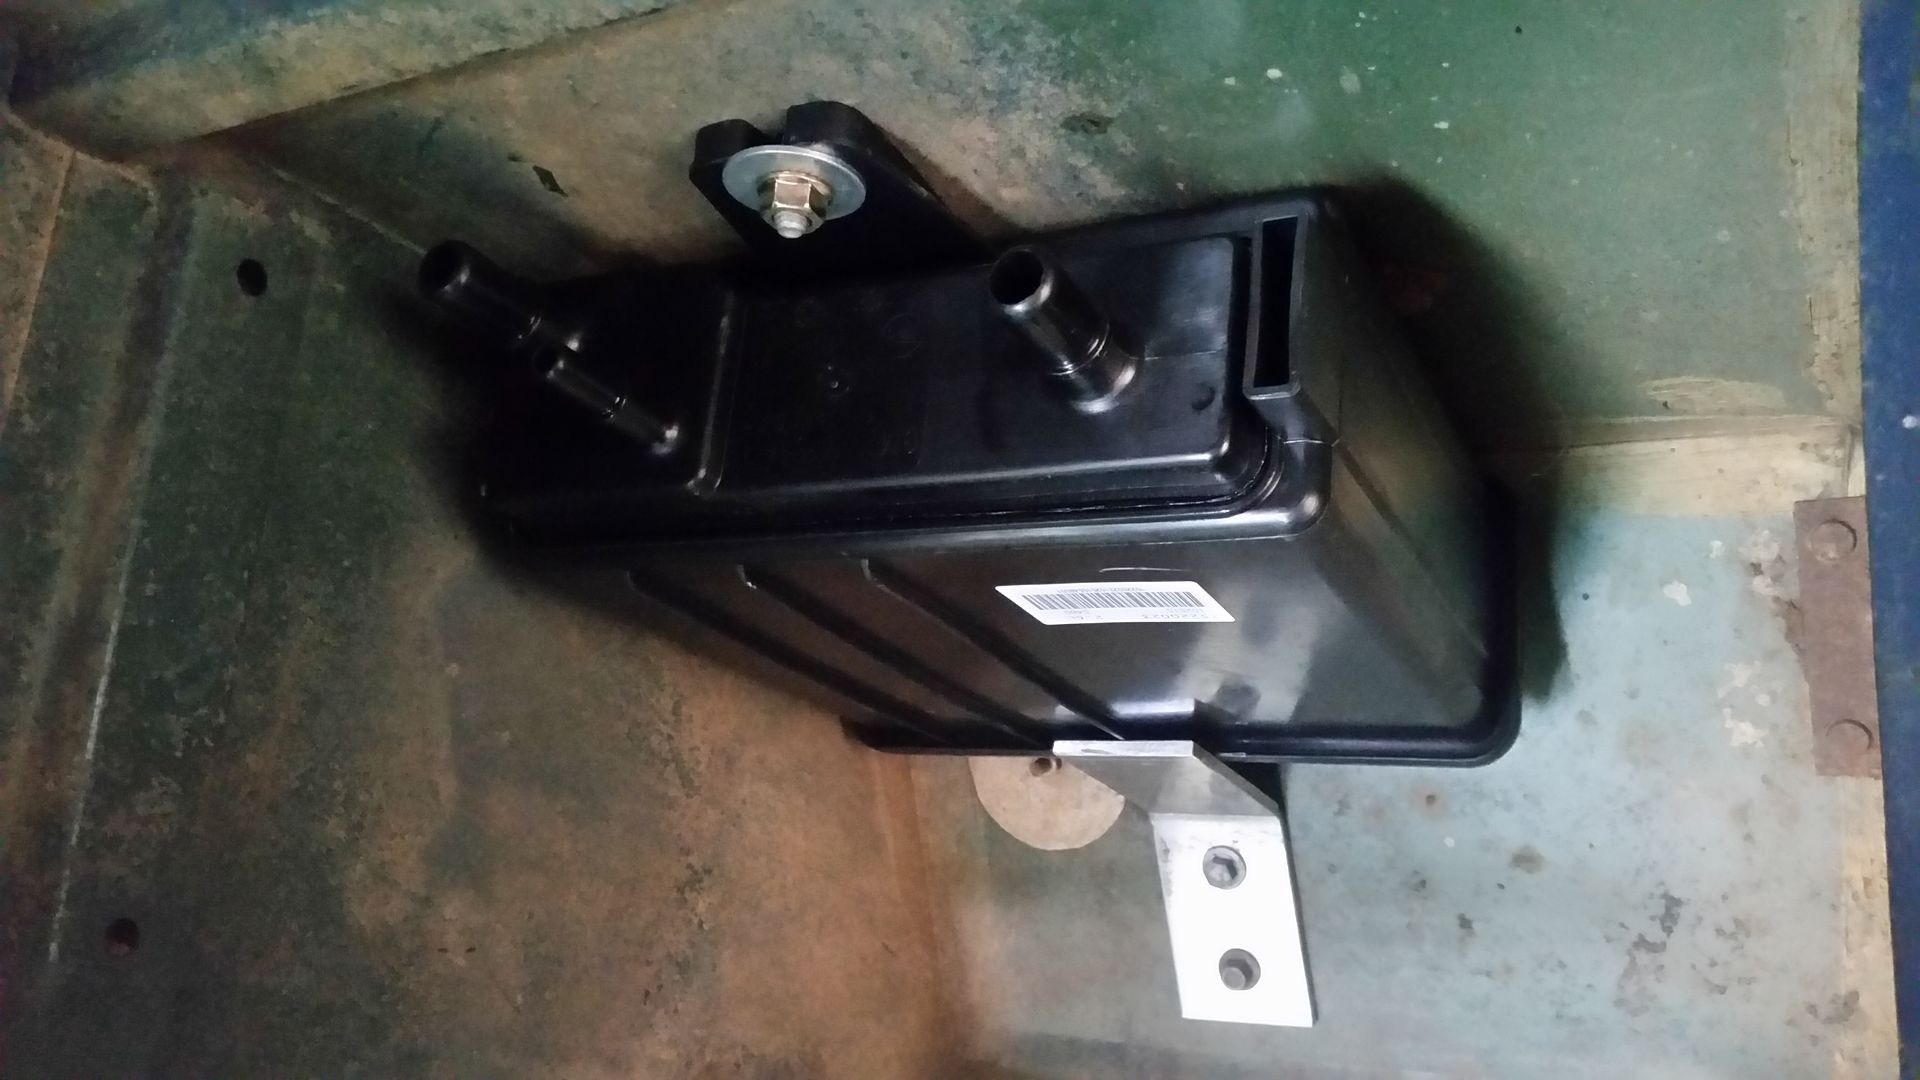
Canister fitted in rear wheel arch. This is in front of the wheel on the drivers side. I will make up a guard of some sort to limit the risk of stuff hitting the connections. Hopefully its not supposed to be fitted in a certain orientation.
I plugged in the gear indicator and irrespective of what position the lever was in it always displayed 'N'
I spoke to Speartech and after doing so, drained and removed the sump. When I got it off I noticed that when I refitted the TCM I missed lining up the selector shaft nub with the IMS (Internal Mode Switch) on the TCM.
I have corrected that and now I get the correct display for Park but all other positions still show 'N'
You can just about see the issue in my image below . The silver nub should be meshed with the black plastic fitting which them connects to the white plastic IMS:
Hopefully this is something not too serious. Maybe I damaged the IMS? Just waiting on an update from Speartech to see if they have any more comments.
In the meantime I went back to working on things I am less likely to ruin....
Emissions stuff
Canister fitted in rear wheel arch. This is in front of the wheel on the drivers side. I will make up a guard of some sort to limit the risk of stuff hitting the connections. Hopefully its not supposed to be fitted in a certain orientation.
Cheers, some days I wish I had more skills. Normally by then I have gone so far I have no choice but to carry on.
The auto is all back together again now so that's good, Hopefully it all works!
I had been doing some research on how to set up the emissions stuff. I wasn't really sure and confused myself a bit but I think I have it nailed now.
Basically
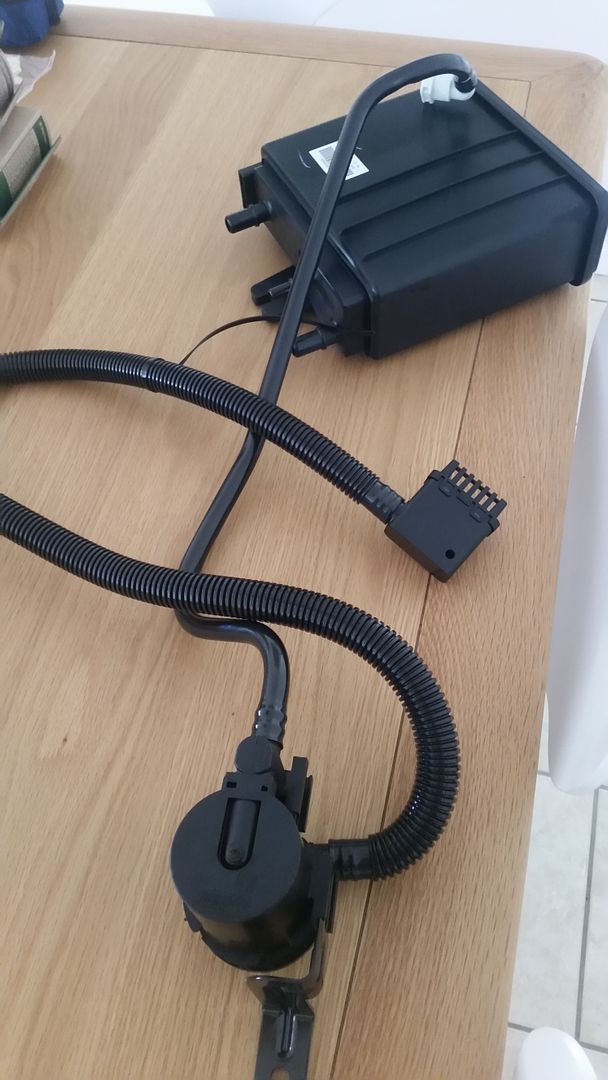
Tank breather ---> Larger connection of pair on EVAP canister
Smaller connection on EVAP canister ---> Purge valve on Engine
Fuel tank pressure sensor (to read pressure from fuel system - I will probably fit this in the EVAP canister)
Vent valve ---> larger connection on own on EVAP canister
Filter line on Vent valve ----> vents to atmosphere.
When the engine is off this allows the tank to release pressure out of the system via the filter line.
When the engine is running it feeds the tank emissions through the evap cannister, then to the purge valve which when it sees fit releases it into the throttle body.
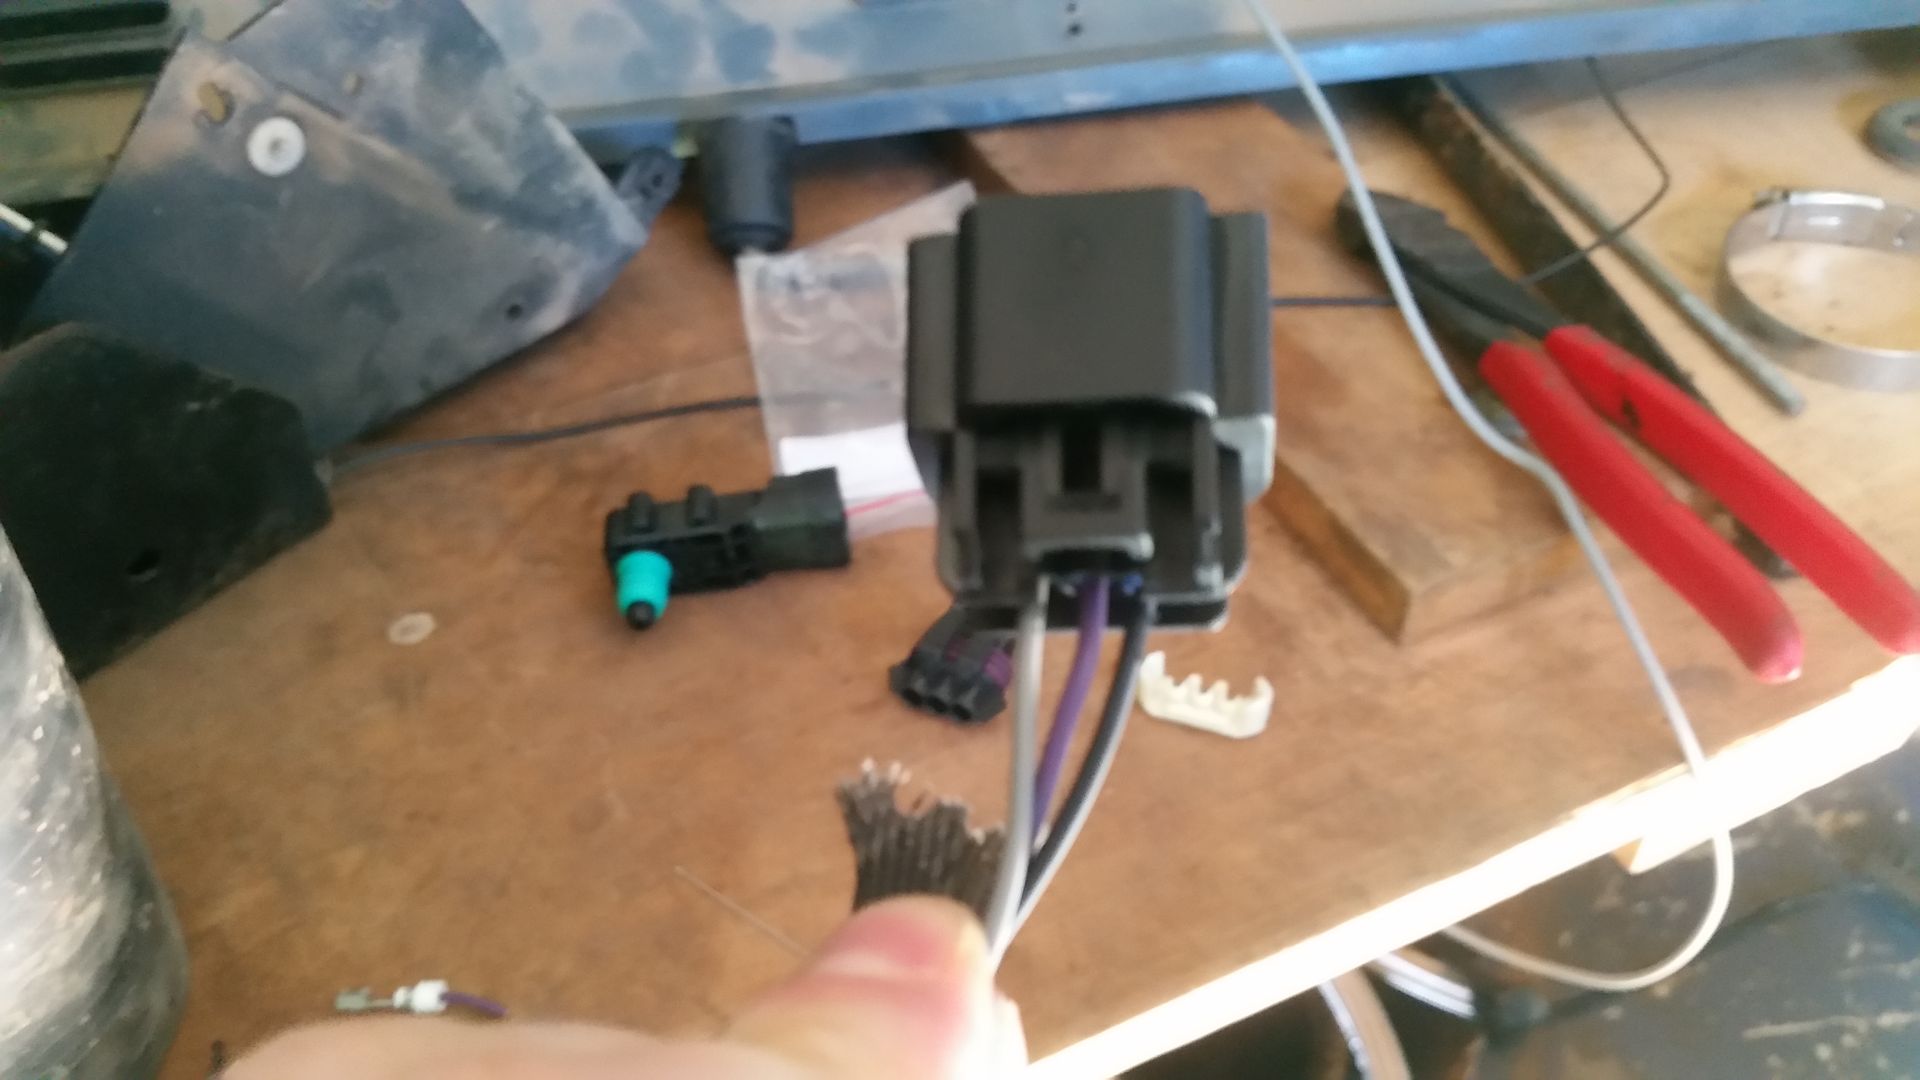
I also have to change a couple of electrical connectors. The fuel tank pressure sensor plug was wrong. It looked like it should use the identical looking e85 fuel flex sensor type plug so I ordered one of those (I could get this locally so figured it was worth a gamble).
Typically the shape of the plug was very slightly different so I tweaked it with a dremel and file. The pin spacing and height luckily was 100%
I then swapped the plug over.
This is the one that was on the loom.
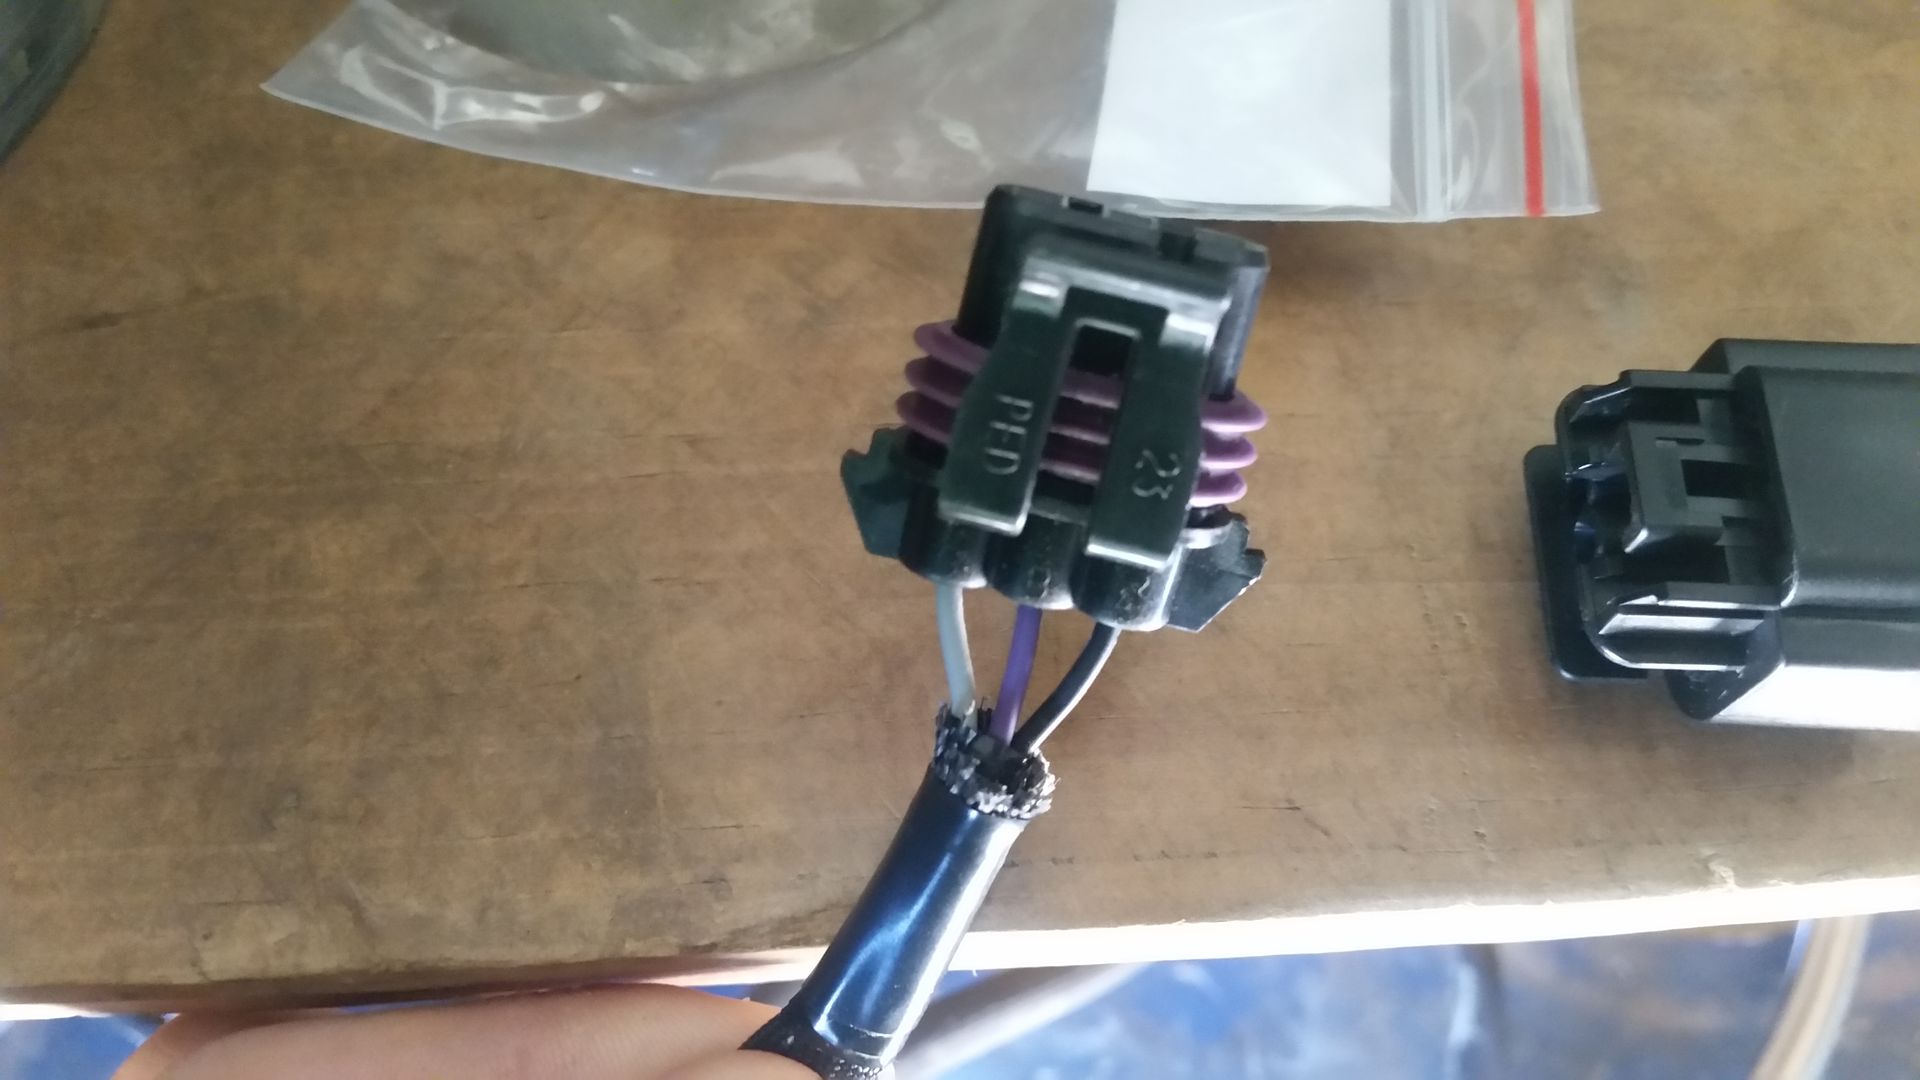
You can see the sensor in the background.
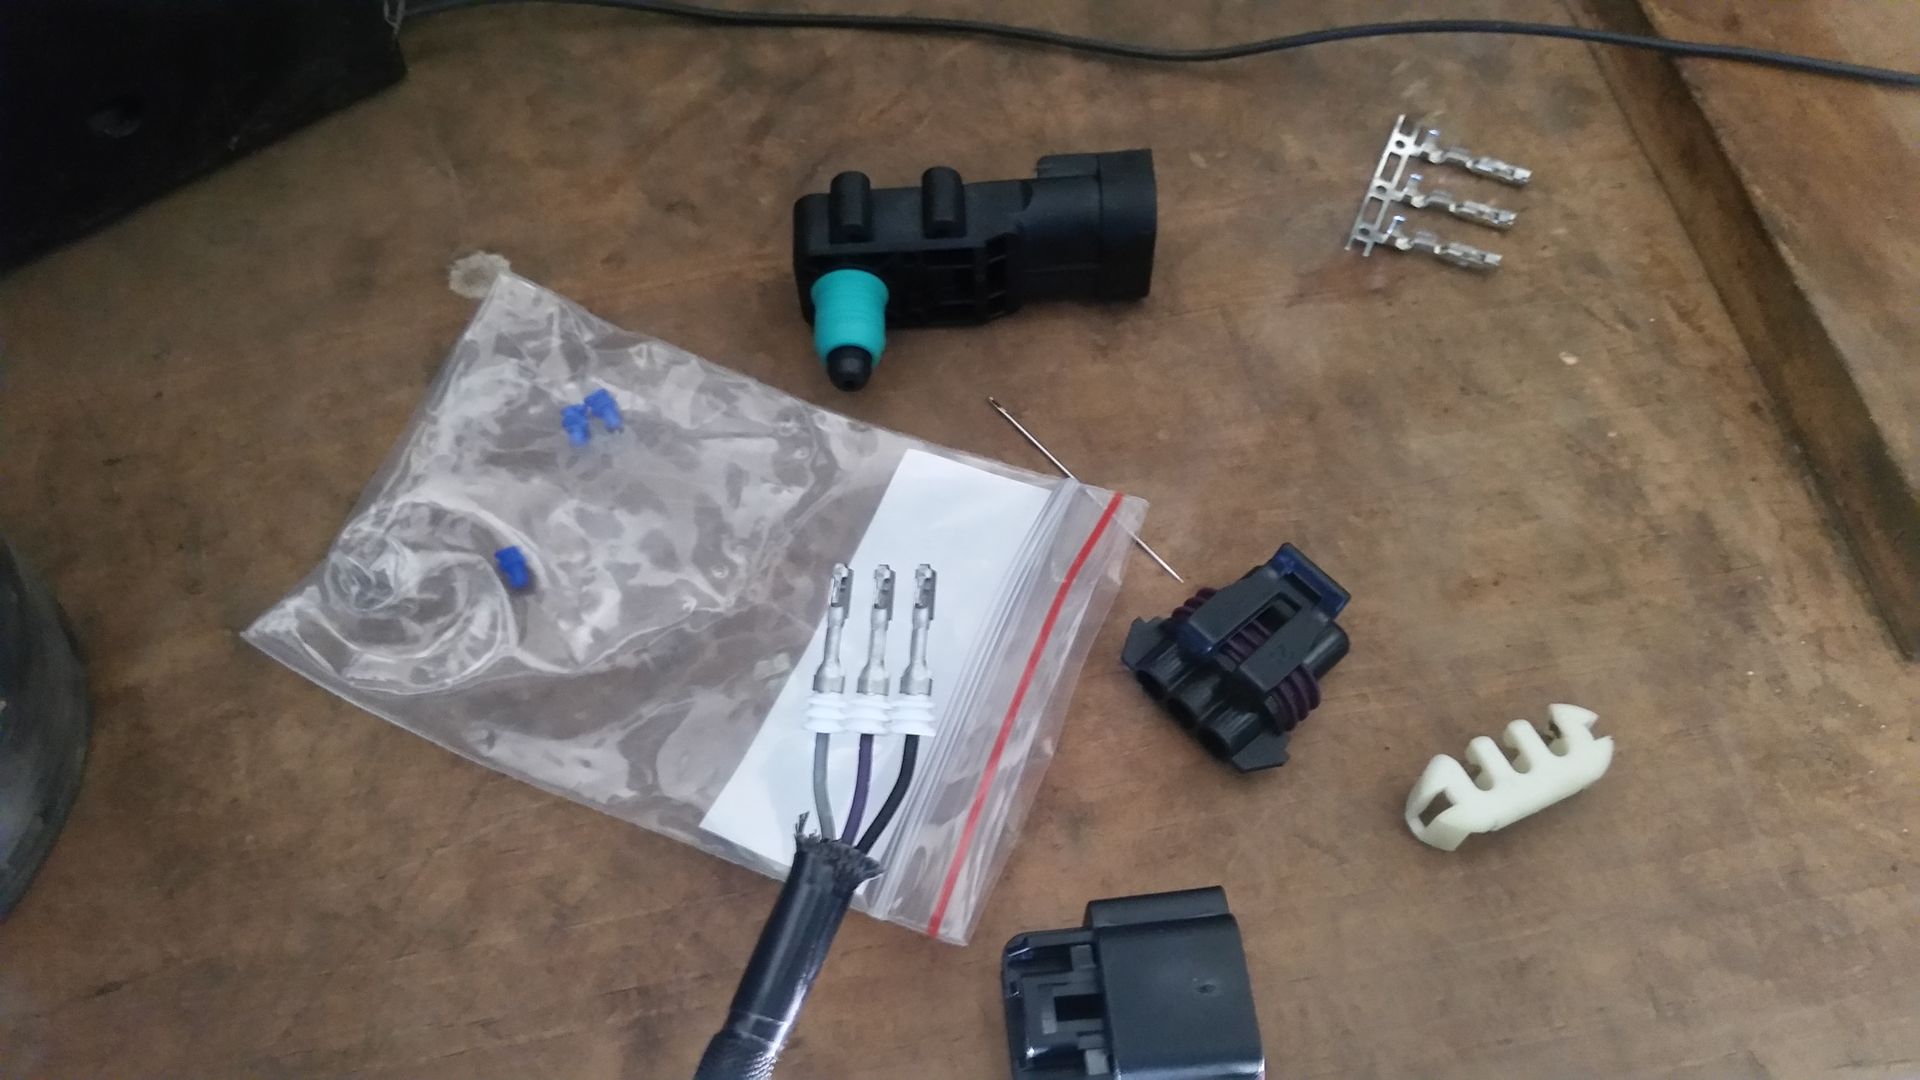
New connector pins:
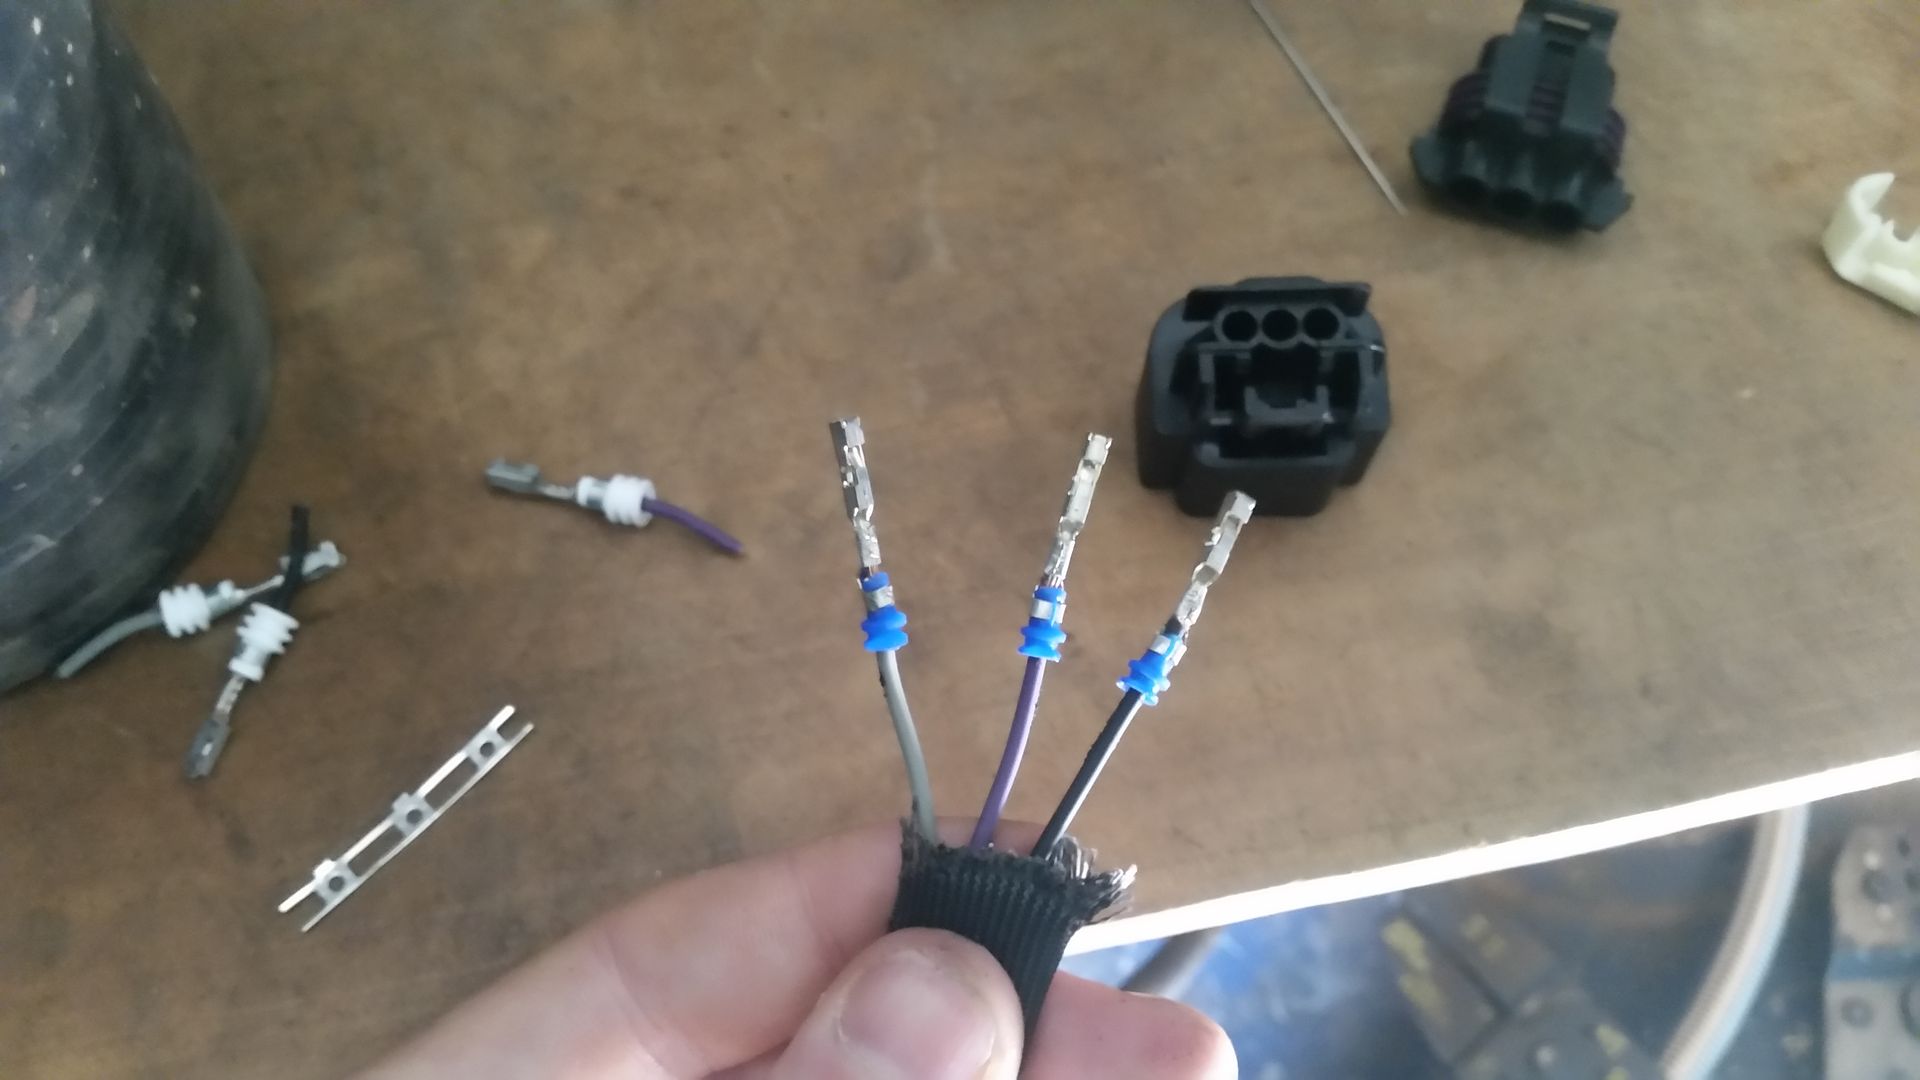

Need to change the one on the vent valve section of loom next.
The auto is all back together again now so that's good, Hopefully it all works!
I had been doing some research on how to set up the emissions stuff. I wasn't really sure and confused myself a bit but I think I have it nailed now.
Basically
Tank breather ---> Larger connection of pair on EVAP canister
Smaller connection on EVAP canister ---> Purge valve on Engine
Fuel tank pressure sensor (to read pressure from fuel system - I will probably fit this in the EVAP canister)
Vent valve ---> larger connection on own on EVAP canister
Filter line on Vent valve ----> vents to atmosphere.
When the engine is off this allows the tank to release pressure out of the system via the filter line.
When the engine is running it feeds the tank emissions through the evap cannister, then to the purge valve which when it sees fit releases it into the throttle body.
I also have to change a couple of electrical connectors. The fuel tank pressure sensor plug was wrong. It looked like it should use the identical looking e85 fuel flex sensor type plug so I ordered one of those (I could get this locally so figured it was worth a gamble).
Typically the shape of the plug was very slightly different so I tweaked it with a dremel and file. The pin spacing and height luckily was 100%
I then swapped the plug over.
This is the one that was on the loom.
You can see the sensor in the background.
New connector pins:
Need to change the one on the vent valve section of loom next.
Krikkit said:
Sounds like the emissions rules are pretty strict, how much more is there to include on the car? Does it have to pass to the same standard as the donor?
Basically the donor car has to be newer than the car into which it is being fitted and it has to keep all the same emissions stuff as the donor car.In short its not actually that difficult now I sort of know what I am doing.
Basically it needs 2 cats, Pre and Post cat o2 sensors, and this evap stuff.
I pretty much have all that done now bar a couple of bits of pipe and
Not too far off being able to see if it starts now. Couple of things left to do on the fuel system and probably a few other minor bits and pieces.
The last big hurdle will be the exhaust but I think I will get someone to make that for me.
Gassing Station | Readers' Cars | Top of Page | What's New | My Stuff