VW Transporter Day Van Conversion
Discussion


I'd been hankering for another car for months. I've got a V70 D5 that I've owned for 4 years, I usually get itchy feet to try something else after 6 months.
I looked all sorts from Nissan Silvia S15 and TVR Chimaera's to, well, a van with Audi A8's and Allroad's in between.
In the end I settled on a 2011 T5.1 T30 LWB Transporter with FSH and a not inconsiderable 232 thousand miles. It's got the 2.0 CR diesel in 140 bhp tune. Not the best engine VW has ever made but it came with the 6 speed box which I wanted.
I've covered 400 miles in it since purchase and there's no nasty surprises still feels tight and everything works as it should, mostly.
I intent to turn it into a day van, insulate and carpet the interior and tidy up the outside colour coding the bumpers and sticking some decent wheels on it.
This is how it looks at the moment.

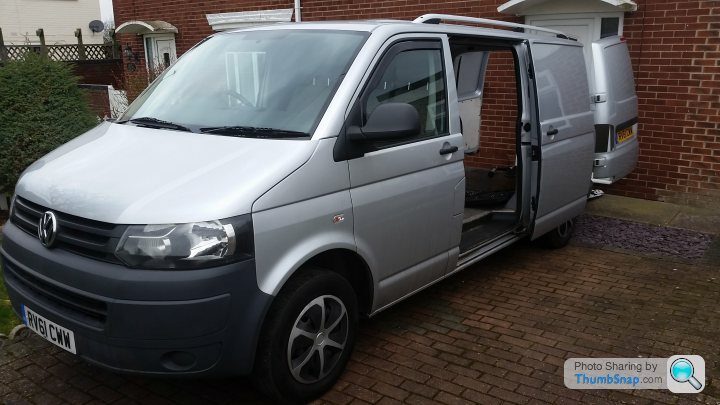
Very builders van, not sure what it was used for but the passenger seats look unused and the rear bumper barely has a mark on it.
First job was a full service I always service new to me cars to get a baseline and know it's got the right fluids in. Oil is an extra £30 just to keep the DPF happy. I'll get round to the gearbox oil too soon.

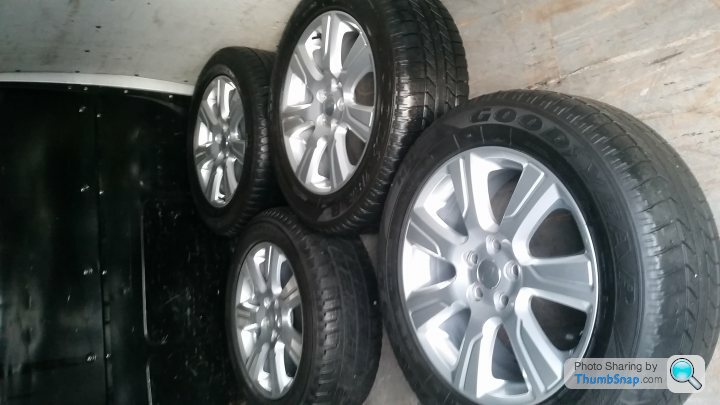
I also picked up a set of disco 4 alloys with the same PCD and offset as the T5 has. Just waiting for the correct wheel bolts and spigot rings to arrive before bolting them on. They're load rated to 950kg per corner with 111V tyres so more than sufficient for the van.
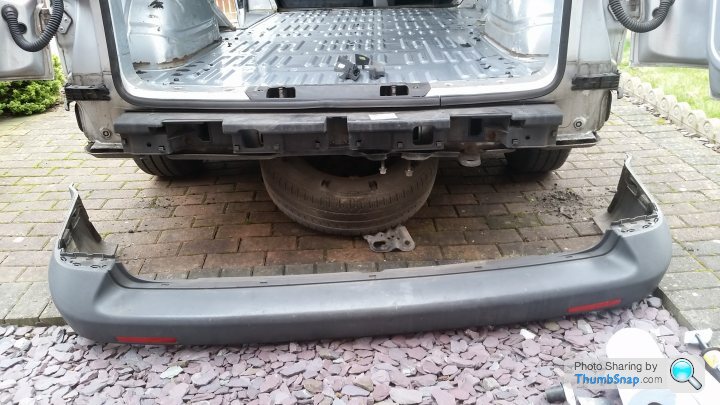
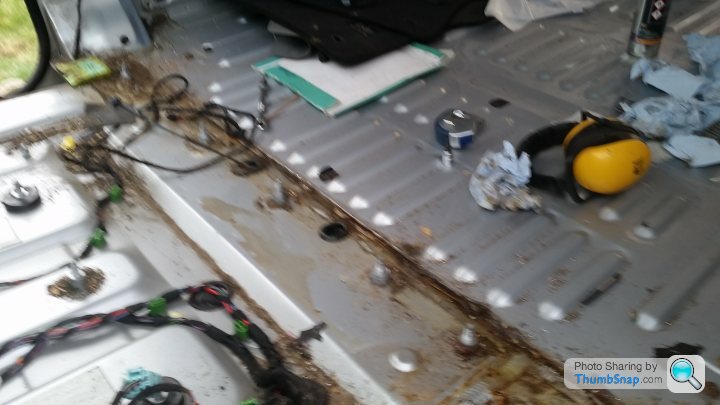
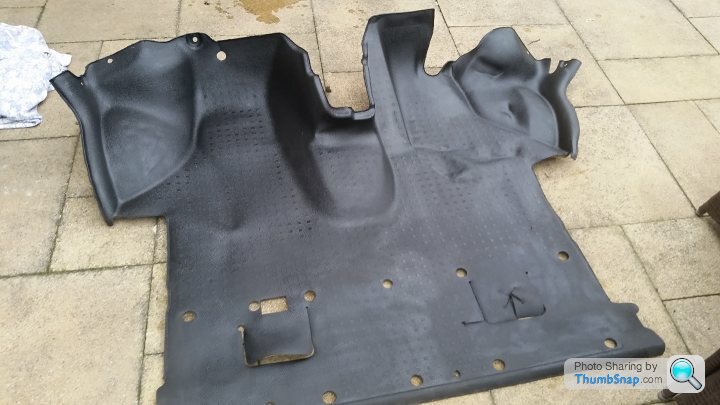
This is what the rear looked like before I started.
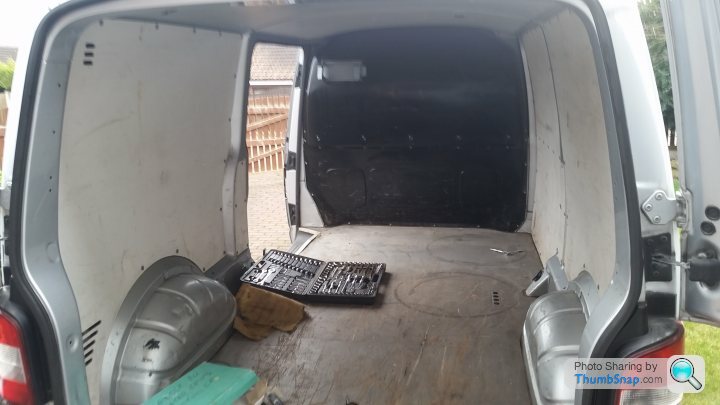
Generally in good nick. The wheel wells have a few dints, it looks like they've been uncovered it's whole life. I'll tidy those up before carpeting them. Under the watchful eye of this one I set about stripping the interior.

2 hours later and the pile of nuts, bolts and trim clips was getting bigger.

Quite impressed with the quality of every thing that's coming off so far and no nasty surprises. The floor was next and was a pain to get up. It had been riveted through the floor with around 20 rivets which needed drilling out and was sealed round the edge with silicone, but after an hour I had it looking like this.
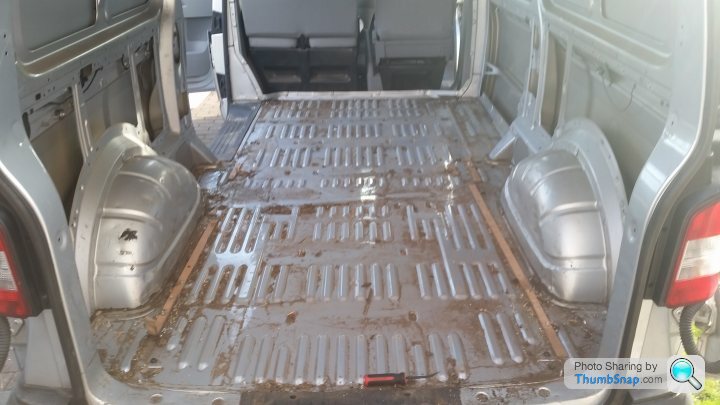
Filthy but nothing more. After a hoover out I ground down all the rivets and sanded back a couple a minor surface rust spots, where the floor had been fitted and water had got in past the rivets. I then painted the bare metal with POR chassis paint, this stuff is brilliant and I can highly recommend it, pricy but worth it.

Much better.
The bumpers and mirrors are off to the bodyshop on monday so I'll get them off tomorrow and hopefully have time to tidy up the wheel wells too. Now the van is stripped I need a dent guy to come round to tidy up a few blemishes so if anyone can recommend a good one in South Yorkshire let me know.
I looked all sorts from Nissan Silvia S15 and TVR Chimaera's to, well, a van with Audi A8's and Allroad's in between.
In the end I settled on a 2011 T5.1 T30 LWB Transporter with FSH and a not inconsiderable 232 thousand miles. It's got the 2.0 CR diesel in 140 bhp tune. Not the best engine VW has ever made but it came with the 6 speed box which I wanted.
I've covered 400 miles in it since purchase and there's no nasty surprises still feels tight and everything works as it should, mostly.
I intent to turn it into a day van, insulate and carpet the interior and tidy up the outside colour coding the bumpers and sticking some decent wheels on it.
This is how it looks at the moment.
Very builders van, not sure what it was used for but the passenger seats look unused and the rear bumper barely has a mark on it.
First job was a full service I always service new to me cars to get a baseline and know it's got the right fluids in. Oil is an extra £30 just to keep the DPF happy. I'll get round to the gearbox oil too soon.
I also picked up a set of disco 4 alloys with the same PCD and offset as the T5 has. Just waiting for the correct wheel bolts and spigot rings to arrive before bolting them on. They're load rated to 950kg per corner with 111V tyres so more than sufficient for the van.
This is what the rear looked like before I started.
Generally in good nick. The wheel wells have a few dints, it looks like they've been uncovered it's whole life. I'll tidy those up before carpeting them. Under the watchful eye of this one I set about stripping the interior.
2 hours later and the pile of nuts, bolts and trim clips was getting bigger.
Quite impressed with the quality of every thing that's coming off so far and no nasty surprises. The floor was next and was a pain to get up. It had been riveted through the floor with around 20 rivets which needed drilling out and was sealed round the edge with silicone, but after an hour I had it looking like this.
Filthy but nothing more. After a hoover out I ground down all the rivets and sanded back a couple a minor surface rust spots, where the floor had been fitted and water had got in past the rivets. I then painted the bare metal with POR chassis paint, this stuff is brilliant and I can highly recommend it, pricy but worth it.
Much better.
The bumpers and mirrors are off to the bodyshop on monday so I'll get them off tomorrow and hopefully have time to tidy up the wheel wells too. Now the van is stripped I need a dent guy to come round to tidy up a few blemishes so if anyone can recommend a good one in South Yorkshire let me know.
Edited by ChocolateFrog on Saturday 18th February 21:26
RumbleOfThunder said:
Nice. I'm a van casual so what's meant by "day van"?
My understand is rather than a full on camper it's everything involved in making a camper without actually fitting it out with units and beds etc so it will have windows, electrics, lighting, insulation, carpeting and so on.If I want to camp I'll through a stove, coolbox and airbed in and be good to go.
Bdevo3 said:
have the same year and colour as my work horse. great going van. economical enough. front wishbone bushes and rear springs seem to be a serviceable item on mine although mine has full shelving in the back. very interested to see what you do with yours
Got some HR lowering springs to go on, I'm assuming the originals are pretty tired. I'll check the bushes when I swap the wheels over.Bdevo3 said:
h and r are a great choice. have had them in most of my daily drivers they give a nice drop and still maintain a good level of comfort without scrubbing or bottoming out. the only thing I'd change is the drivers seat typical vw van seat, I find it hard to get comfortable in and very poor support certainly on long journeys or maybe I'm just getting old before my time
Coming from the Volvo which has possibly the most comfortable seats of any car highlights how uncomfortable they are. Wonder if the volvo seats will go in

Bit more progress today, the sun even came out, briefly.
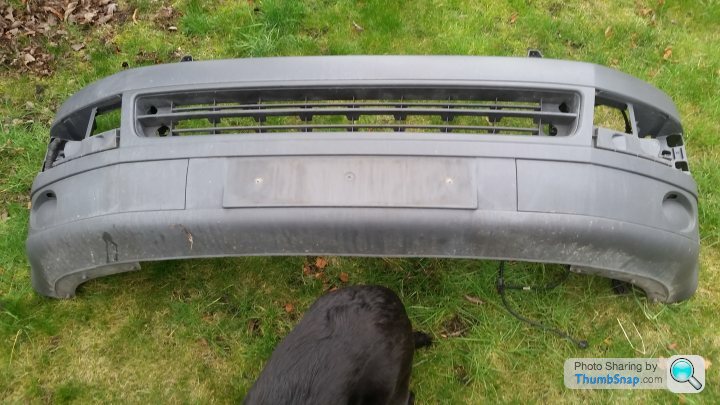
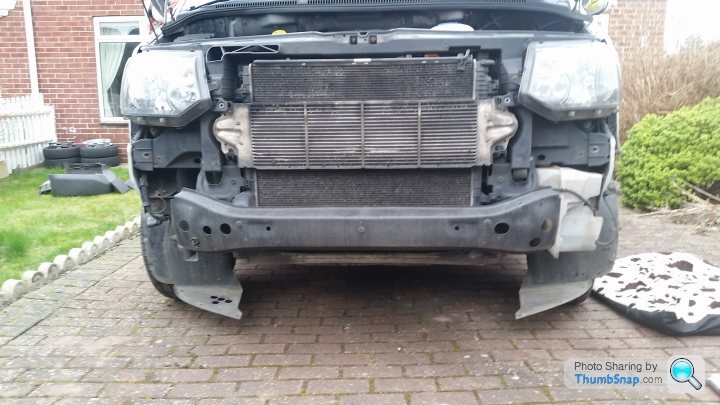
First job was to get the bumpers off ready for the bodyshop tomorrow. Started with the rear and apart from a bolt hidden behind the wheel arch at each side it was pretty straight forward.
Next up was the front bumper, a little tricker. Couple of hidden 10 mm nuts under each headlight, once I'd peeled the wheel arch back there was just enough room to get a ratchet in. There's a couple of bit of the loom that are rooted through the bumper for the external temp sensor that needed fishing out but after 45 mins or so it was free.
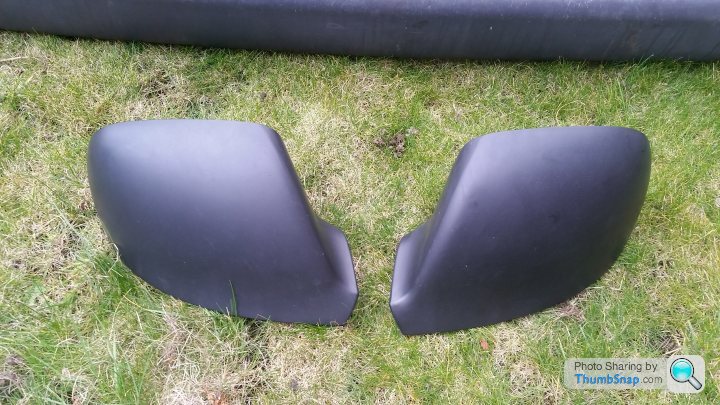
The mirror covers were next and it's safe to say they're not designed to be removed. I think the glass needs to come out to do it properly but many people have cracked them getting them back in. Added to that the plastic lugs are incredibly thin and brittle, a few were sacrificed so they'll need a bit of sealant when they go back in.
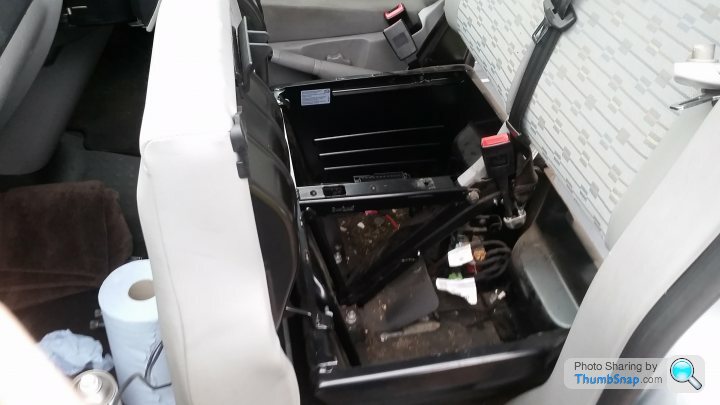
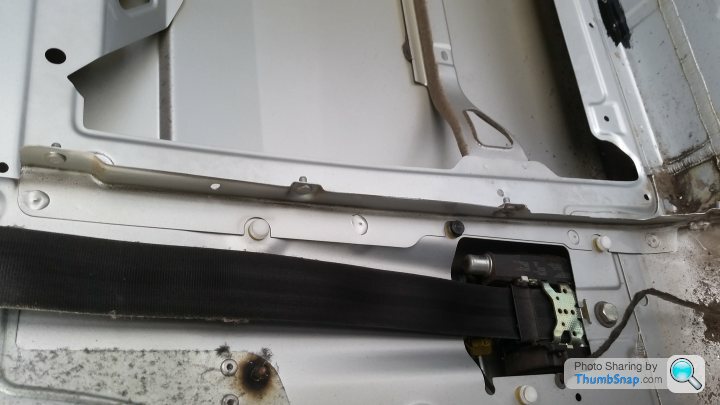
Also needed to remove the passenger seats to get to the b pillar trim, eventually the carpet will be trimmed behind it. Nice surprise to see a usualable storage space under the seat.
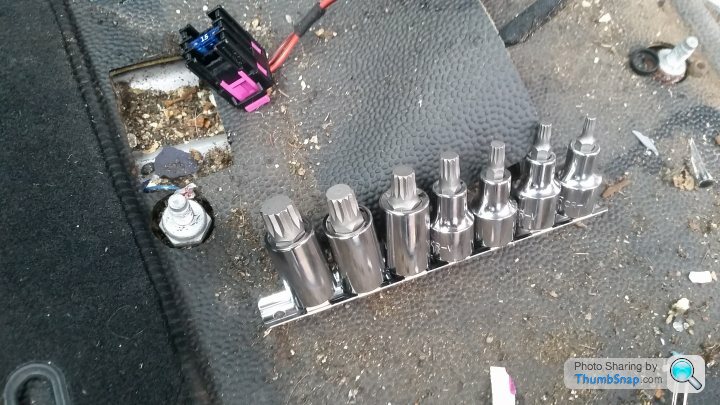
It was at this point I came across spline drive bolts and not needing an excuse to buy more tools popped off to Halfords for these
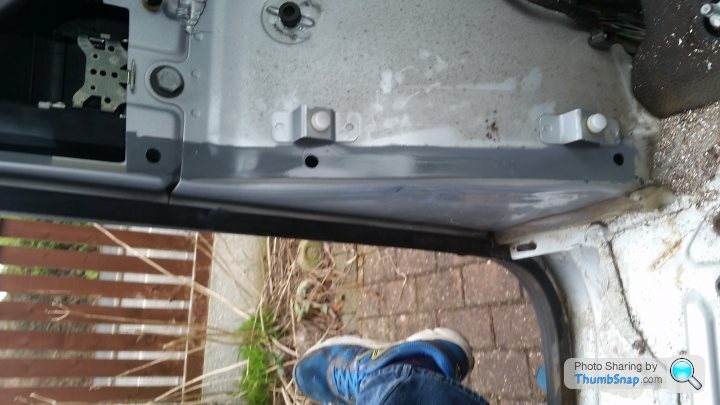
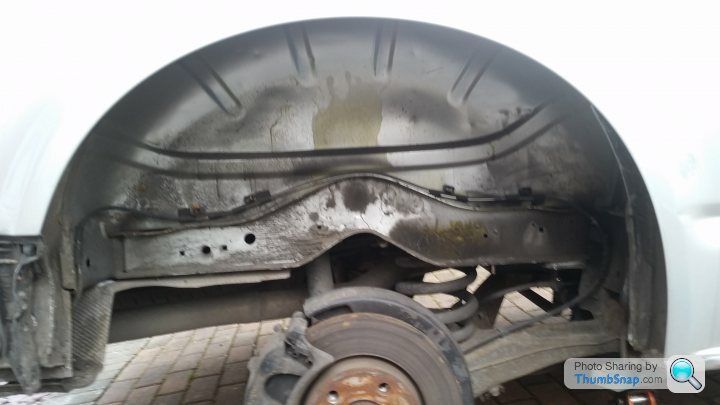
I also removed the sliding door step, a taller one from a caravelle is required with the deeper floor. This revealed a bit more of the red stuff. Luckily not too serious. These are the worst bits


Didn't have time to sort it but will get round to it. Part of the cause is where the bulkhead was brazed to the flor, it looks like it was ground back to bare metal but no protect added after it was installed.
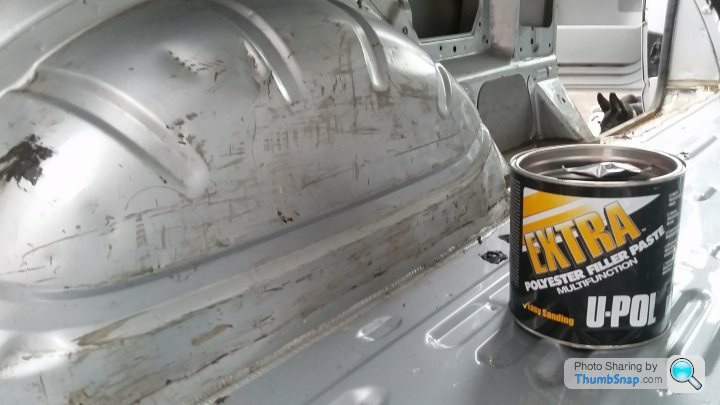
Just had time to stick a layer of filler on the wheel arches. They'll need sanded and touching up again but it doesn't need to be perfect as it will be under the carpet.
That's up to date. Need to get the carpet ordered tomorrow and pluck up the courage to fit the windows.
First job was to get the bumpers off ready for the bodyshop tomorrow. Started with the rear and apart from a bolt hidden behind the wheel arch at each side it was pretty straight forward.
Next up was the front bumper, a little tricker. Couple of hidden 10 mm nuts under each headlight, once I'd peeled the wheel arch back there was just enough room to get a ratchet in. There's a couple of bit of the loom that are rooted through the bumper for the external temp sensor that needed fishing out but after 45 mins or so it was free.
The mirror covers were next and it's safe to say they're not designed to be removed. I think the glass needs to come out to do it properly but many people have cracked them getting them back in. Added to that the plastic lugs are incredibly thin and brittle, a few were sacrificed so they'll need a bit of sealant when they go back in.
Also needed to remove the passenger seats to get to the b pillar trim, eventually the carpet will be trimmed behind it. Nice surprise to see a usualable storage space under the seat.
It was at this point I came across spline drive bolts and not needing an excuse to buy more tools popped off to Halfords for these
I also removed the sliding door step, a taller one from a caravelle is required with the deeper floor. This revealed a bit more of the red stuff. Luckily not too serious. These are the worst bits
Didn't have time to sort it but will get round to it. Part of the cause is where the bulkhead was brazed to the flor, it looks like it was ground back to bare metal but no protect added after it was installed.
Just had time to stick a layer of filler on the wheel arches. They'll need sanded and touching up again but it doesn't need to be perfect as it will be under the carpet.
That's up to date. Need to get the carpet ordered tomorrow and pluck up the courage to fit the windows.
A3gaz said:
Serious question as I really have no idea, but is this the most cost effective way of acquiring a day van??
Depends. Definitely not the cheapest. Vito's, transits etc can be had for half the price, however they also sell for half the price. I could have bought one ready made and possible saved a bit but wanted to do the work myself and this way I can have it exactly to my spec.
As far as Transporters go this was the cheapest facelift model (2010 onwards) I've seen so assuming it doesn't blow up on me it should prove pretty cost effective.
neilbauer said:
How well can you get the bumpers colour coded? Seen a few nightmares where tha plaint flakes off!
I've taken them to a guy who was recommended on the T5 forum. I'm not an expert but it's all in the prep and the use of proper materials. They'll be getting sanded smooth, plastic primed, high build primer then smoothed again before colour so I'm hoping for a good result.In either case I'll put them up here for judgement.
economicpygmy said:
Bookmarked as Im thinking of doing something similar. Whats involved in getting it classifed as a camper for the higher speed limits? I thought the most cost effective way would be buy a van given I dont want everything and the kitchen sink (  ). Dare I ask how much it was?
AFAIK you will need to fit a bed, hob, sink and portaloo before they will consider it a camper. I think it also has to look like a canper from the outside. Assuming the work has been done it's not too onerous to get it registered just a form along with photos of the interior and exterior. ). Dare I ask how much it was? I paid £6k hoping to get all the work done I want for less than 2k, probably unlikely.
Got a few more hours in today.
I removed the drivers seat in order to Strip down the A pillar ready for carpeting. Before that happens the last of the bracketry for the bulkhead needs to come out.
The brackets are plug welded on so I had to drill them out, probably about half an hour each side. Once out I dressed the panel and gave it a coat of etch primer.
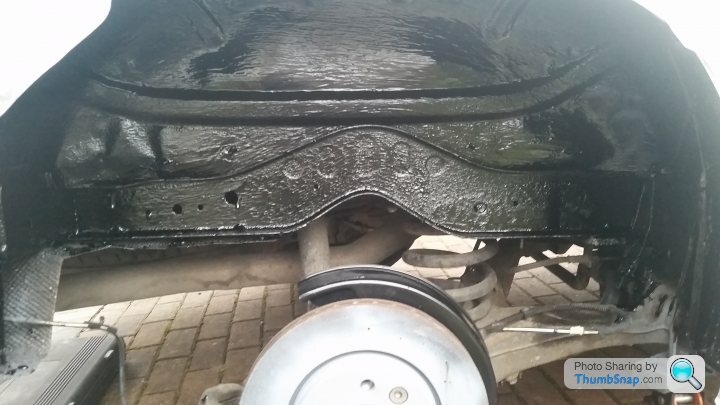
Then moved onto tackling the rust by the sliding door as it had been bugging me. It looked like this initially.
Combination of emery paper, wire brush and flap disc on my angle grinder had it looking like this

Much better.
As that area sits under a plastic step a colour match wasn't important so it was on with a coat of POR15, which is thick enough that the imperfect steel was hidden nicely.

Also managed to sand down the inner wheel arches and give them a second skim. I'll get some pictures up once they're finished.
Hopefully one more day will have the internal bodywork up to scratch and progress will be a little quicker.
Edit to add. Not sure why the first 2 pictures have decided to rotate anti-clockwise.
I removed the drivers seat in order to Strip down the A pillar ready for carpeting. Before that happens the last of the bracketry for the bulkhead needs to come out.
The brackets are plug welded on so I had to drill them out, probably about half an hour each side. Once out I dressed the panel and gave it a coat of etch primer.
Then moved onto tackling the rust by the sliding door as it had been bugging me. It looked like this initially.
Combination of emery paper, wire brush and flap disc on my angle grinder had it looking like this
Much better.
As that area sits under a plastic step a colour match wasn't important so it was on with a coat of POR15, which is thick enough that the imperfect steel was hidden nicely.
Also managed to sand down the inner wheel arches and give them a second skim. I'll get some pictures up once they're finished.
Hopefully one more day will have the internal bodywork up to scratch and progress will be a little quicker.
Edit to add. Not sure why the first 2 pictures have decided to rotate anti-clockwise.
Edited by ChocolateFrog on Tuesday 21st February 18:25
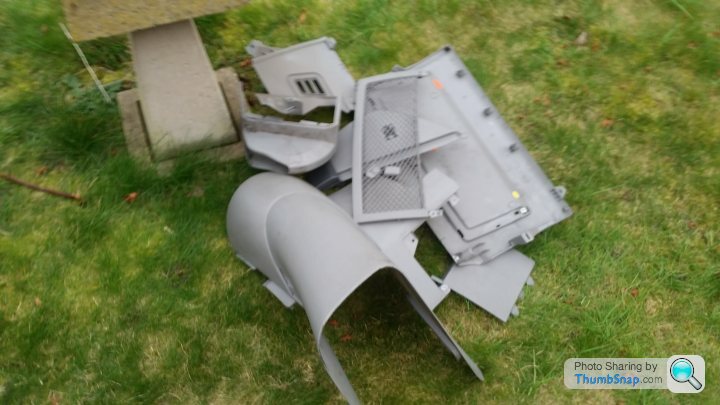
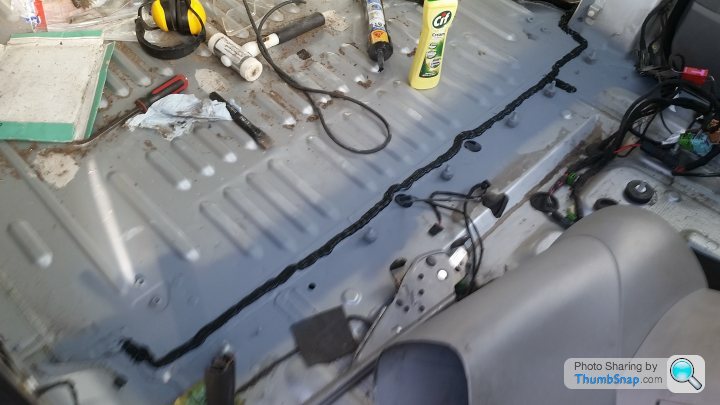
Not much done today. Wanted to remove the cab floor to check it's condition and sound proof where possible. It involved dismantling the lower half of the dash which resulted in a small pile of trim.
There's a couple of cheeky hidden screws but luckily didn't break anything. With the liner removed I could inspect the floor, which is in good condition.
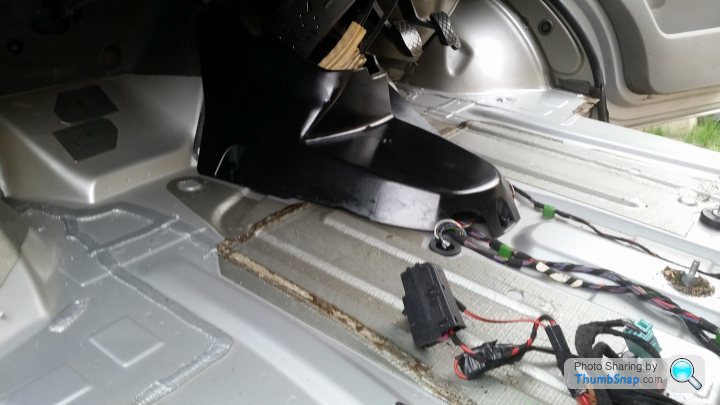
This gave me good access to dress that rusty seam in the picture below
It's now been ground back, etch primed and seam sealer reapplied.
In other news the carpets arrived today along with a caravelle rear threshold and side step. The pile of bits is rather alarming.
There's a couple of cheeky hidden screws but luckily didn't break anything. With the liner removed I could inspect the floor, which is in good condition.
This gave me good access to dress that rusty seam in the picture below
It's now been ground back, etch primed and seam sealer reapplied.
In other news the carpets arrived today along with a caravelle rear threshold and side step. The pile of bits is rather alarming.
Edited by ChocolateFrog on Wednesday 22 February 19:01
5ohmustang said:
How come it has so much rust for a relatively new van?
What kind of mpg will it get on cruise at 70mph?
How rare is the 4motion version?
It is only surface rust. The underneath looks very clean bar the front cross member which I'll clean up. The rust I think is from a damaged door seal by the sliding door and where the bulkhead was welded after it went through the galvanising process. I seen pictures and others look similar.What kind of mpg will it get on cruise at 70mph?
How rare is the 4motion version?
I bet most commercial converters just cover it up but I wanted to know it was all sound before laying the floor.
Rain and wind stopped any play today, realised lining the crankshaft sprocket up without any timing marks could prove troublesome, VW were useless for the special tool and nowhere stocked the Laser equivalent so gave up for the day.
One picture of the bit I finished yesterday
Excuse the mess!
One picture of the bit I finished yesterday
Excuse the mess!
A fairly productive day.
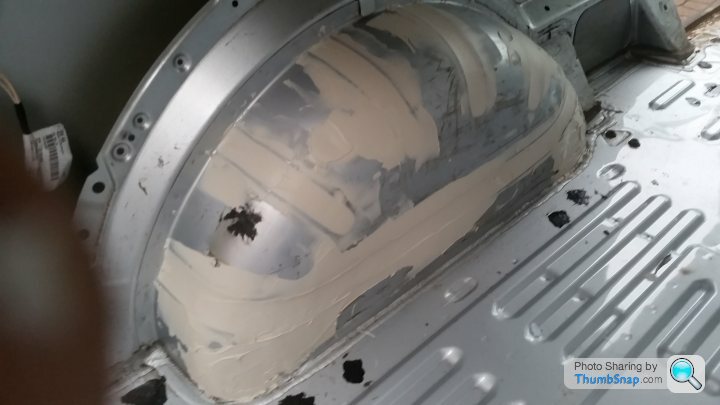
Finished off the wheel arches, gave them a sand and coat of etch primer. Not perfect but good enough that it should look fine under the carpet.
Then tackled the cambelt and associated pulleys along with the water pump and a coolant flush. Glad I did as it didn't look great.
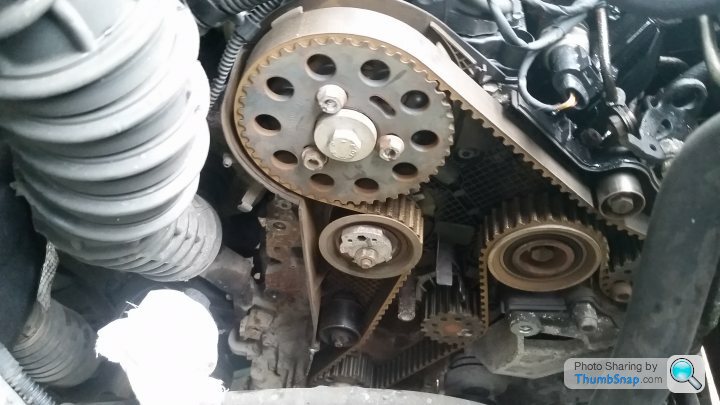
No pictures of it going back together but it felt good replacing worn out parts. The old belt had stretched to end of the tensioner. It actually sounds smoother now, probably just a placebo.
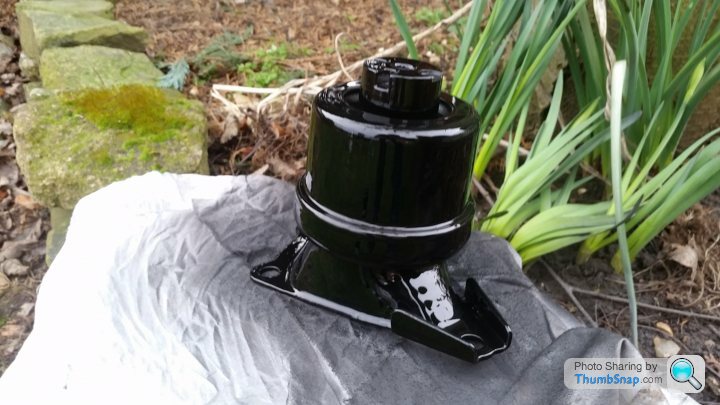
While doing the cambelt the engine mount had to come out and it had seen better days so tidied it up.
Before

Attacked with a wire brush. Note to self holding the piece in your left had while using an angle grinder in your right hurts when you get it wrong.

Etch primed

And a bit of Ed China's favourite satin black
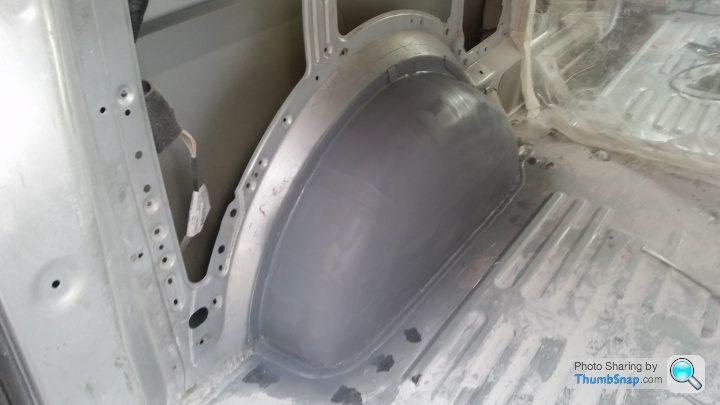
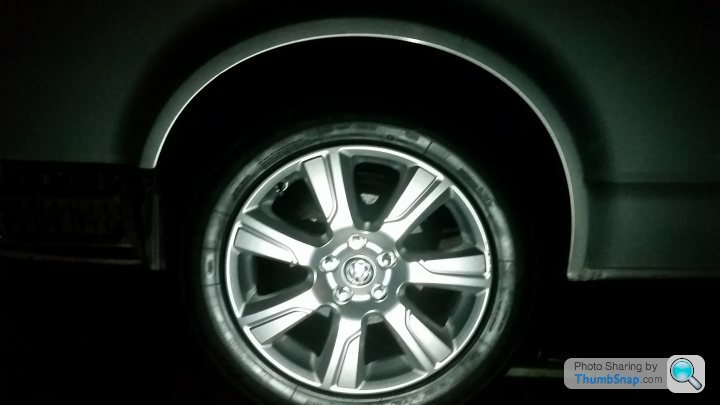
I then moved onto fitting the H an R springs and new wheels. Removed the arch liner and was pleasantly surprised in the condition, just a little bit of rust where the arch has been bashed from the inside.
Dressed back the affected areas, etch primed and undersealed.
Quick tidy up of the backing plate

No pictures of the spring going in. Tried to do it without dropping the axel, 2 hours later I gave in removed the shock and with a bit of leverage it came out. By this point it was dark but couldn't resist sticking the alloy on.
Picture in the dark. I assume the spring will settle down over time.
Finished off the wheel arches, gave them a sand and coat of etch primer. Not perfect but good enough that it should look fine under the carpet.
Then tackled the cambelt and associated pulleys along with the water pump and a coolant flush. Glad I did as it didn't look great.
No pictures of it going back together but it felt good replacing worn out parts. The old belt had stretched to end of the tensioner. It actually sounds smoother now, probably just a placebo.
While doing the cambelt the engine mount had to come out and it had seen better days so tidied it up.
Before
Attacked with a wire brush. Note to self holding the piece in your left had while using an angle grinder in your right hurts when you get it wrong.
Etch primed
And a bit of Ed China's favourite satin black
I then moved onto fitting the H an R springs and new wheels. Removed the arch liner and was pleasantly surprised in the condition, just a little bit of rust where the arch has been bashed from the inside.
Dressed back the affected areas, etch primed and undersealed.
Quick tidy up of the backing plate
No pictures of the spring going in. Tried to do it without dropping the axel, 2 hours later I gave in removed the shock and with a bit of leverage it came out. By this point it was dark but couldn't resist sticking the alloy on.
Picture in the dark. I assume the spring will settle down over time.
Edited by ChocolateFrog on Saturday 25th February 20:41


Escort3500 said:
Enjoying the build. What's the POR15 like to apply and, if you've used it before, does it last?
It's very thick so you get through a lot of it and it's a bit pricey. The tin I had was for another project and had extra pigment in so was a bit of an extravagance for something you won't see. It sets very hard and seems to chemically bond with the metal. I imagine even blasting it off would be a PITA. 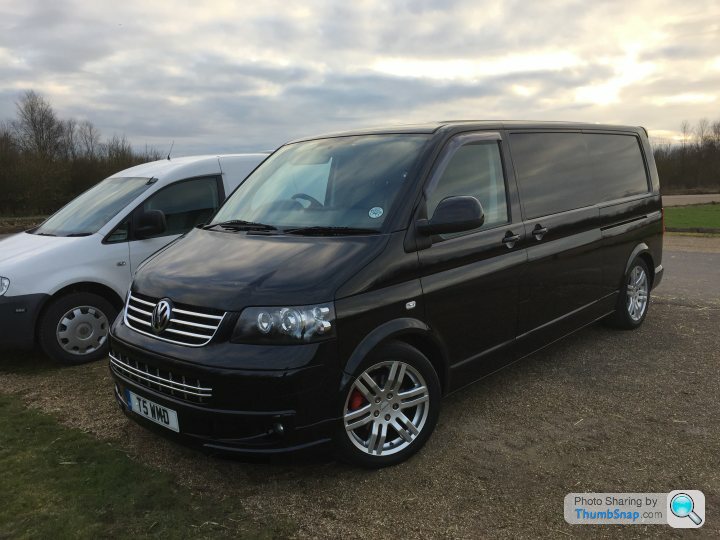
Gassing Station | Readers' Cars | Top of Page | What's New | My Stuff