BMW E46 M3 - Touring Build
Discussion


Hello All,
I decided to post a bit of a catch up thread on my project. Its something ive wanted to do for a while but space has always been a bit of an issue as you are essentially taking apart 2 cars and need to store all the bits somewhere. Going back a few months i managed to rent out a garage on a short term basis so the project was good to go.
The plan is to do a full E46 M3 Touring conversion. This includes drivetrain, cosmetics and interior where possible.
I will try my best to update the thread as it goes along. It wont be detailed as some as i focus on the task at hand.
I figured i would do it in stages as i will be working on it mostly on weekends.
Phase 1 - Transfer all running gear/electricals into the tourer.
Phase 2 - Work on interior and smaller details
Phase 3 - Bodywork
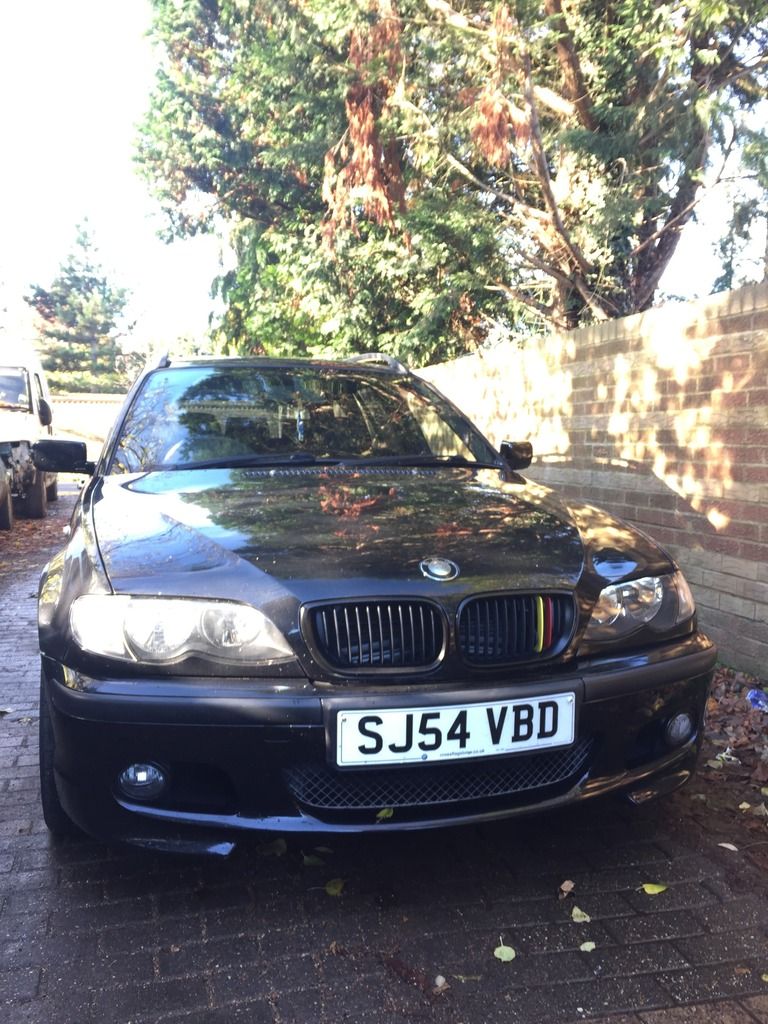
After Months of searching i was lucky enough to pick up a very clean E46 318i Tourer with just 57k on the clock. It belonged to an elderly gentleman who owned it since 2006.
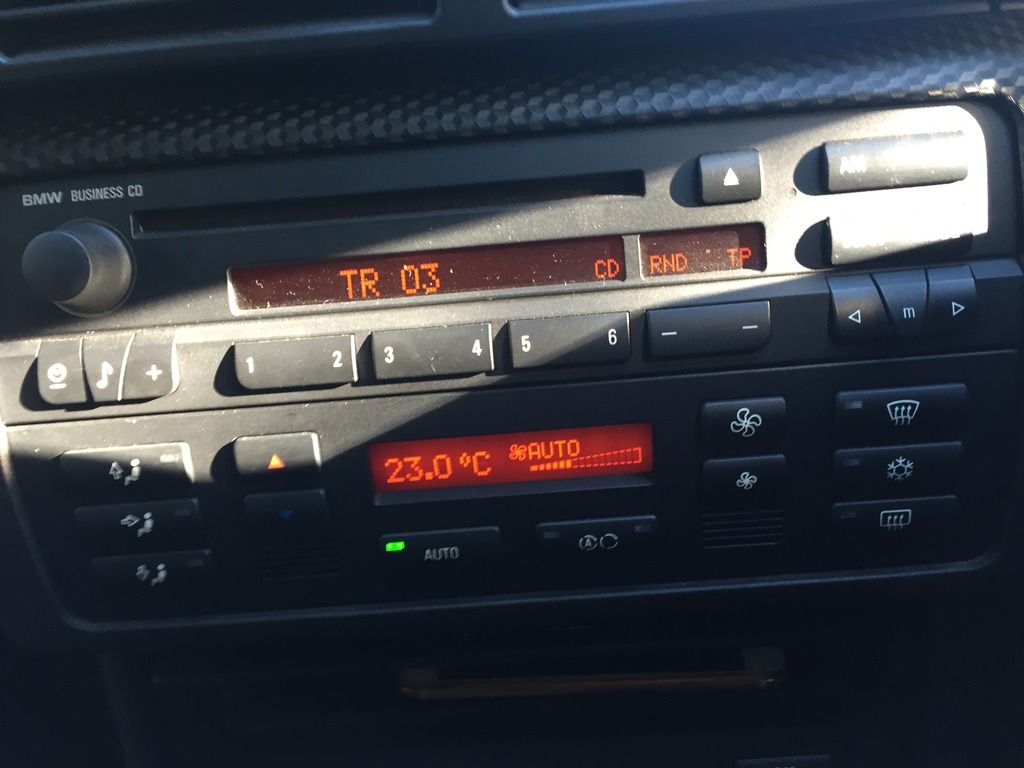
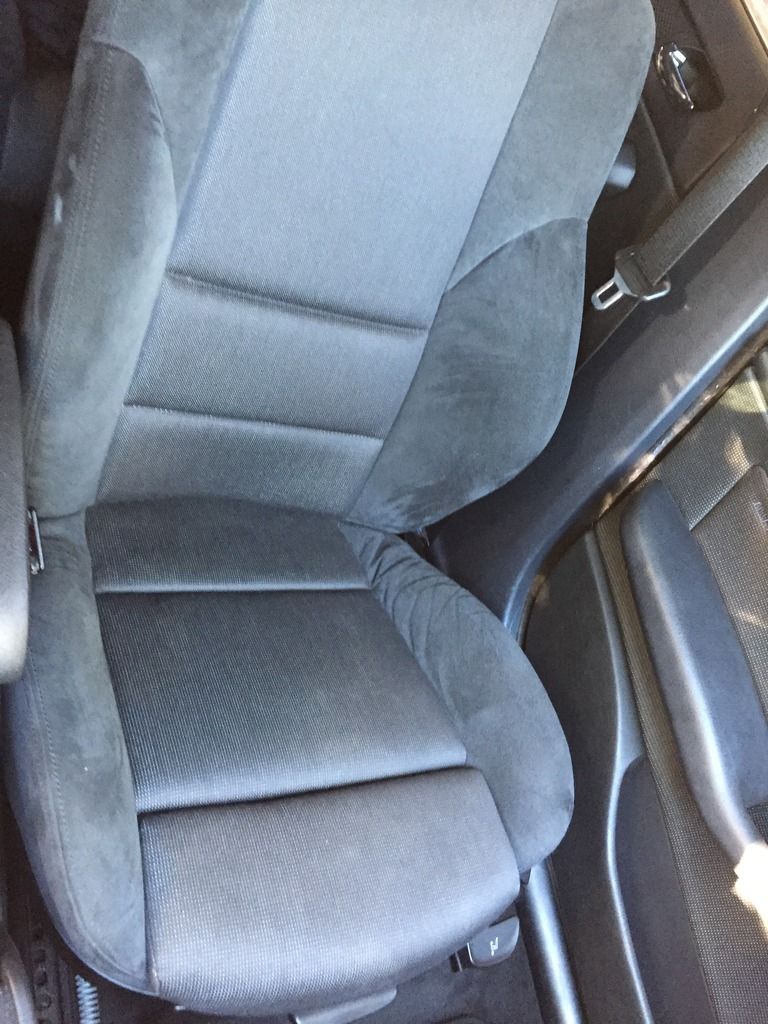
Its an M sport model and generally a very clean and straight car. The seats are in great condition (not that it matters as they will be replaced) The dashboard and plastics are still nice and matt, there is zero ink fade on the buttons and all the windows have the original BMW glass.
Some Pics:
As you can see the buttons and plastics and interior are in great condition:
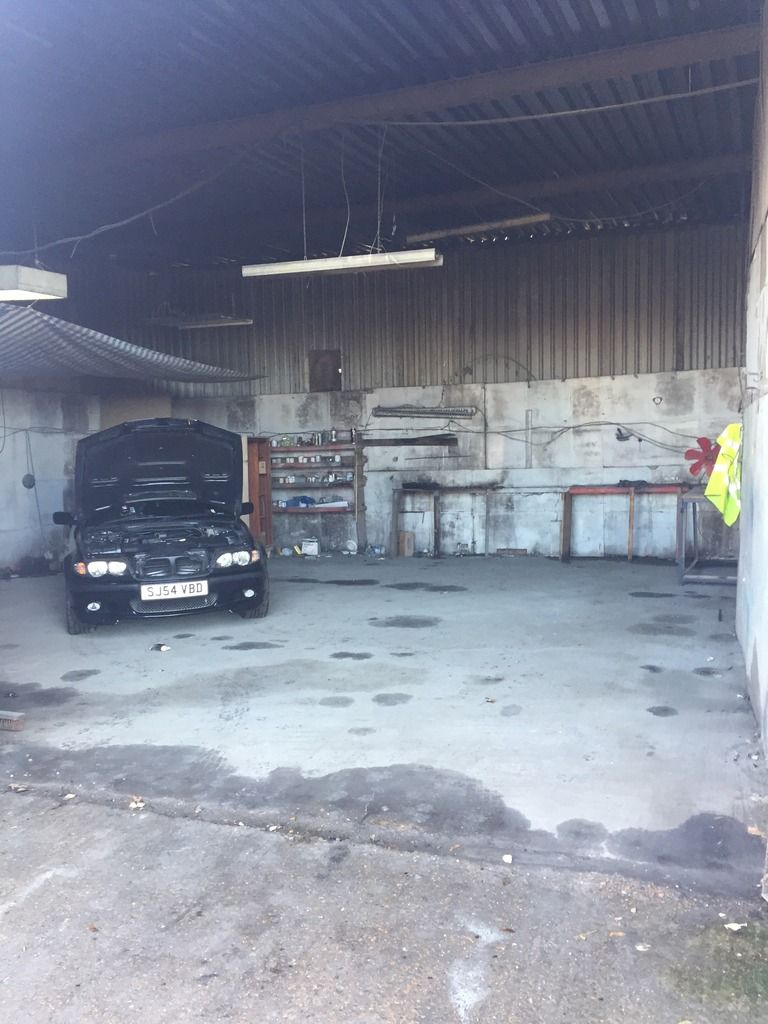
Here it is parked up in its home for the next month:
Work began last weekend. the aim of the weekend was to gut out the car:
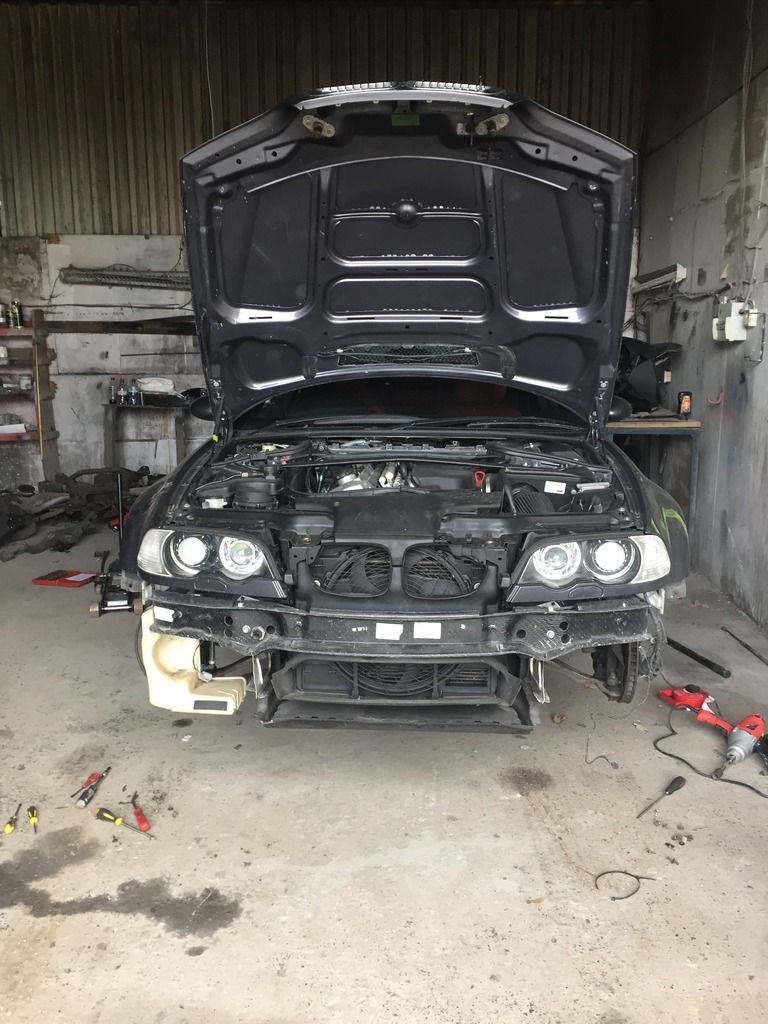
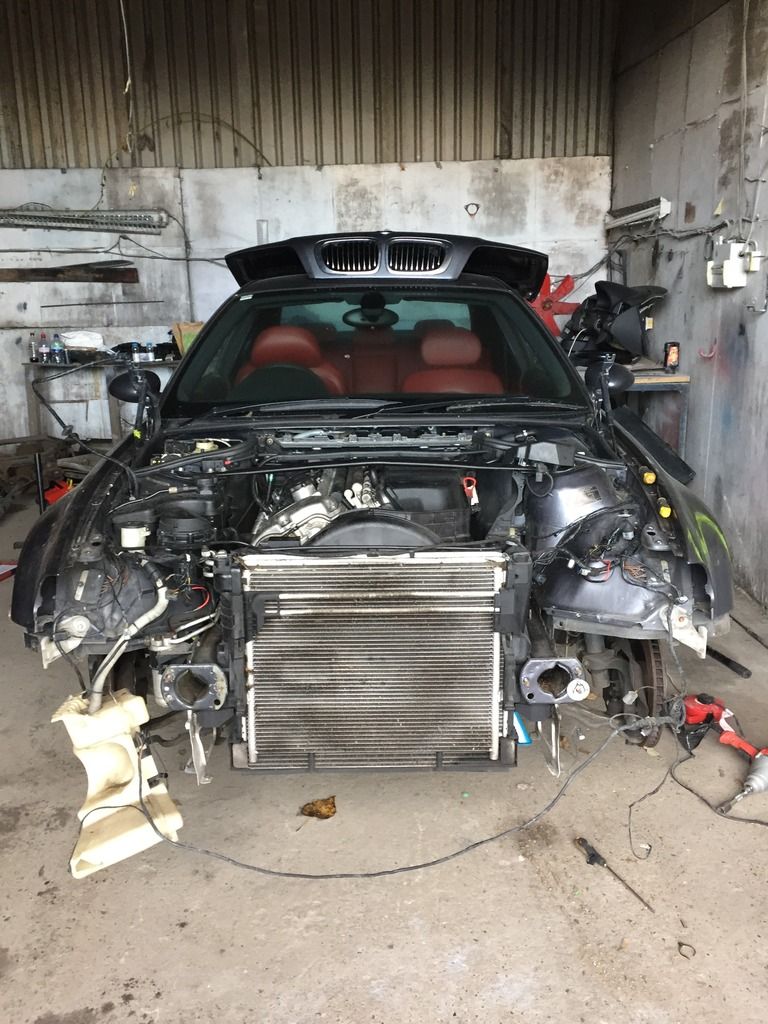
Front end was removed to give access to the engine:
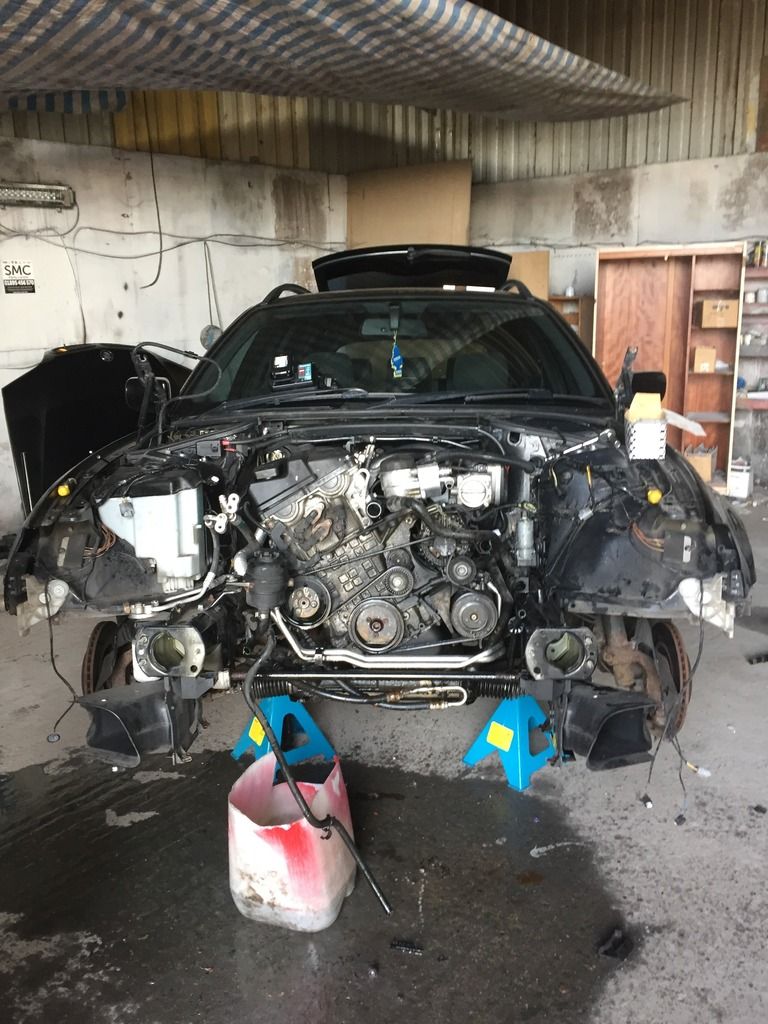
The entire front subframe assembly was dropped out with engine included:
Front End out:
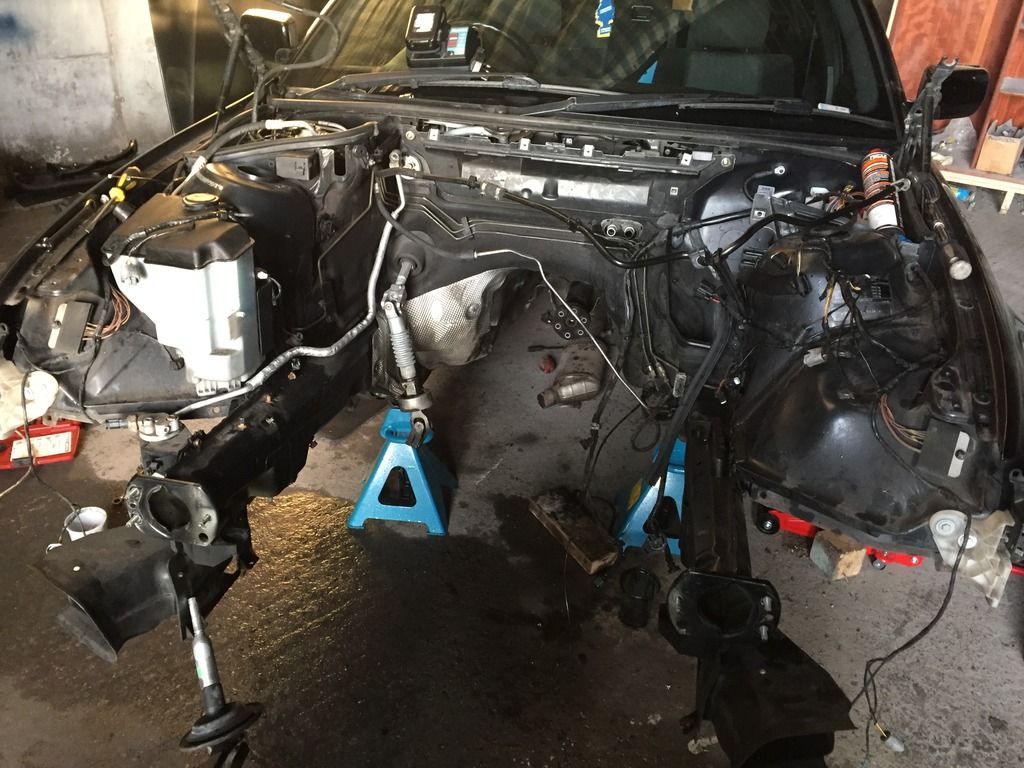
DSC and brake components removed.

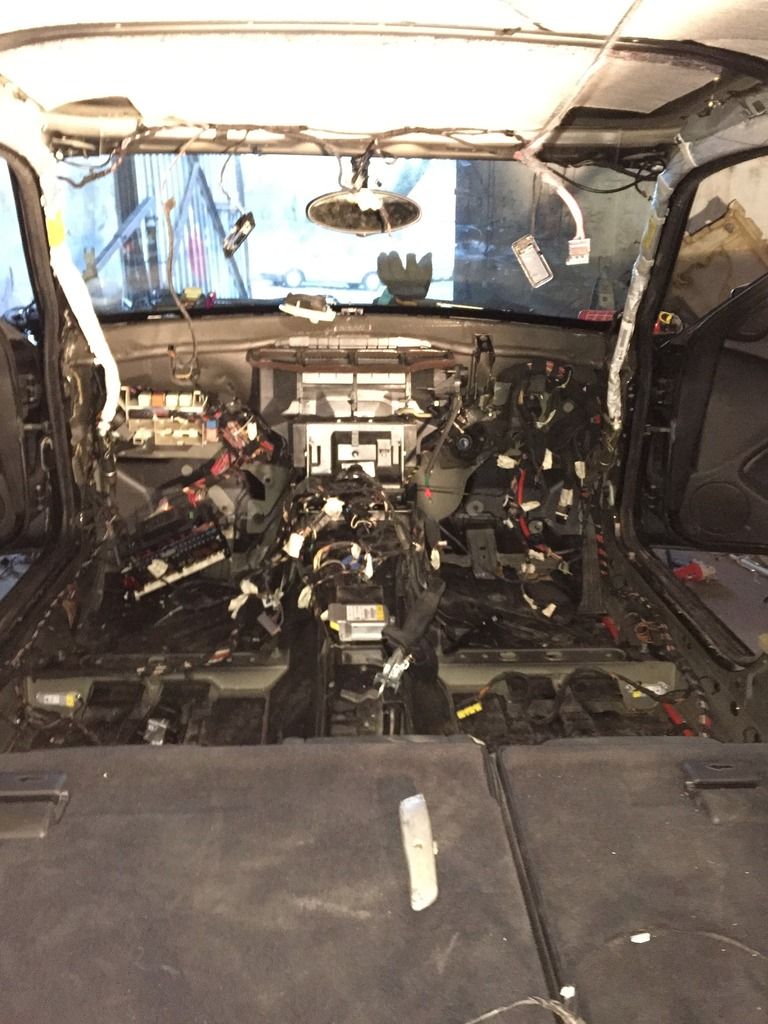
Dashboard and interior Removed:

Steering column, clutch and brake pedal removed, wires labelled up.
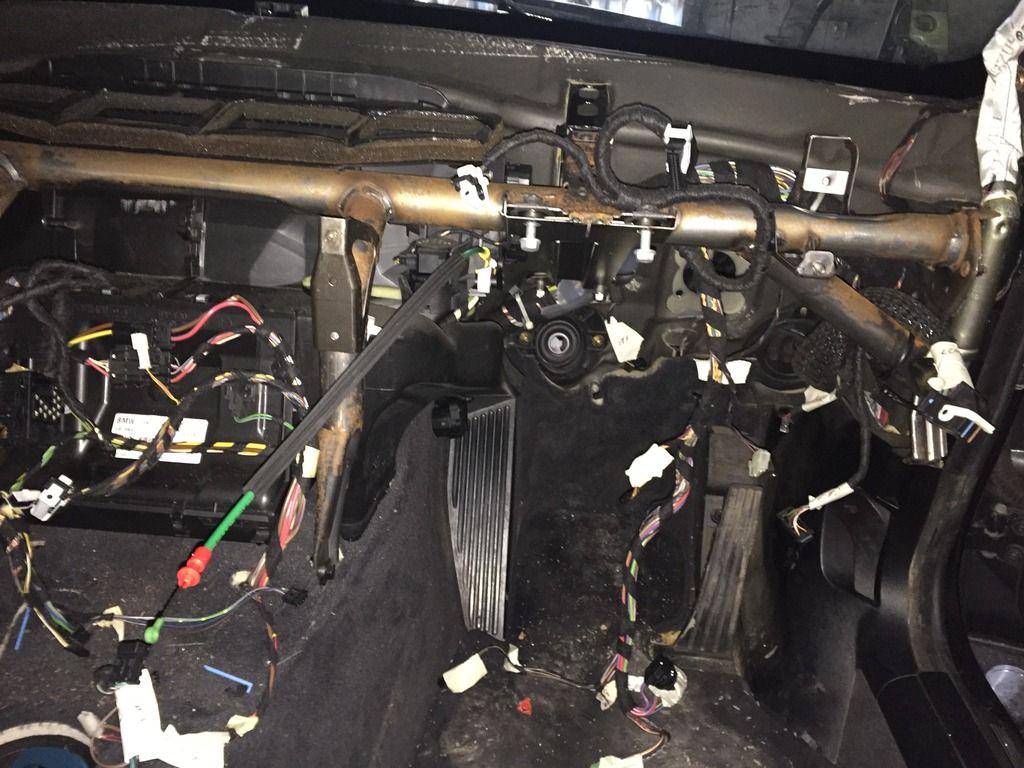
I will be leaving the clutch lines in for now. The Donar car is an SMG and i will be converting the SMG gearbox over. But its good to know that if i wanted to switch to manual then some of the groundwork is already in place making for an easy conversion.
That is all for now, thankfully the car has been really great to work on, no stubborn bolts or any set backs so far.
I decided to post a bit of a catch up thread on my project. Its something ive wanted to do for a while but space has always been a bit of an issue as you are essentially taking apart 2 cars and need to store all the bits somewhere. Going back a few months i managed to rent out a garage on a short term basis so the project was good to go.
The plan is to do a full E46 M3 Touring conversion. This includes drivetrain, cosmetics and interior where possible.
I will try my best to update the thread as it goes along. It wont be detailed as some as i focus on the task at hand.
I figured i would do it in stages as i will be working on it mostly on weekends.
Phase 1 - Transfer all running gear/electricals into the tourer.
Phase 2 - Work on interior and smaller details
Phase 3 - Bodywork
After Months of searching i was lucky enough to pick up a very clean E46 318i Tourer with just 57k on the clock. It belonged to an elderly gentleman who owned it since 2006.
Its an M sport model and generally a very clean and straight car. The seats are in great condition (not that it matters as they will be replaced) The dashboard and plastics are still nice and matt, there is zero ink fade on the buttons and all the windows have the original BMW glass.
Some Pics:
As you can see the buttons and plastics and interior are in great condition:
Here it is parked up in its home for the next month:
Work began last weekend. the aim of the weekend was to gut out the car:
Front end was removed to give access to the engine:
The entire front subframe assembly was dropped out with engine included:
Front End out:
DSC and brake components removed.
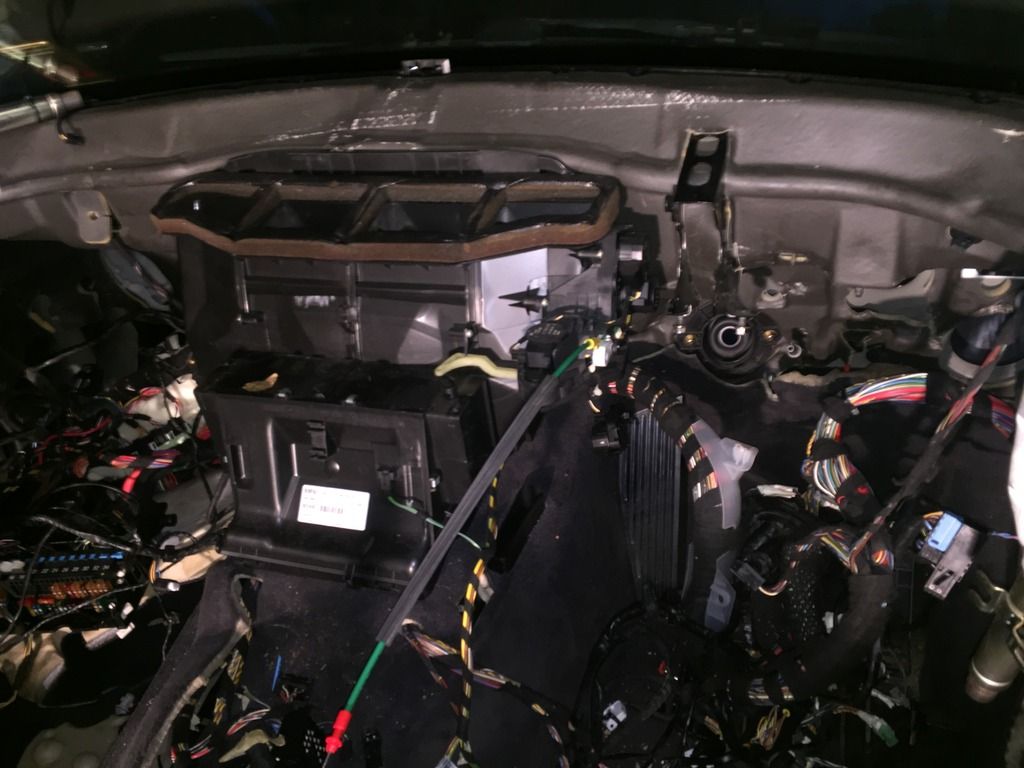
Dashboard and interior Removed:
Steering column, clutch and brake pedal removed, wires labelled up.
I will be leaving the clutch lines in for now. The Donar car is an SMG and i will be converting the SMG gearbox over. But its good to know that if i wanted to switch to manual then some of the groundwork is already in place making for an easy conversion.
That is all for now, thankfully the car has been really great to work on, no stubborn bolts or any set backs so far.
Next Installment:
Had the day off from work today so decided to crack on.
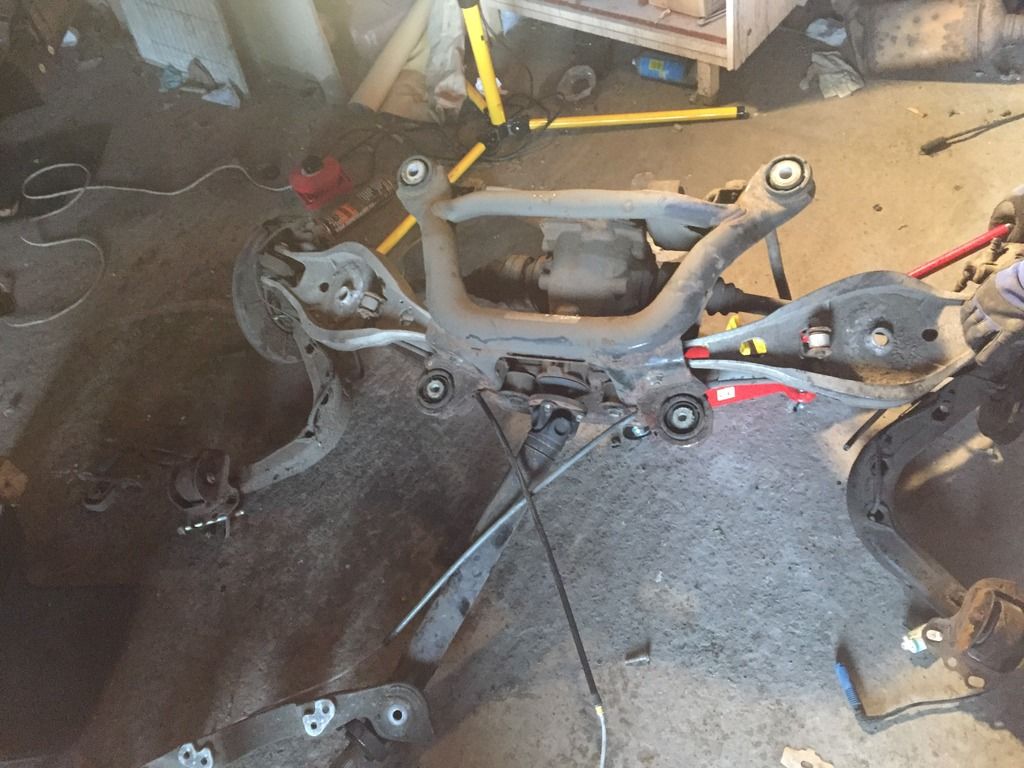
Rear subframe dropped from the estate
I
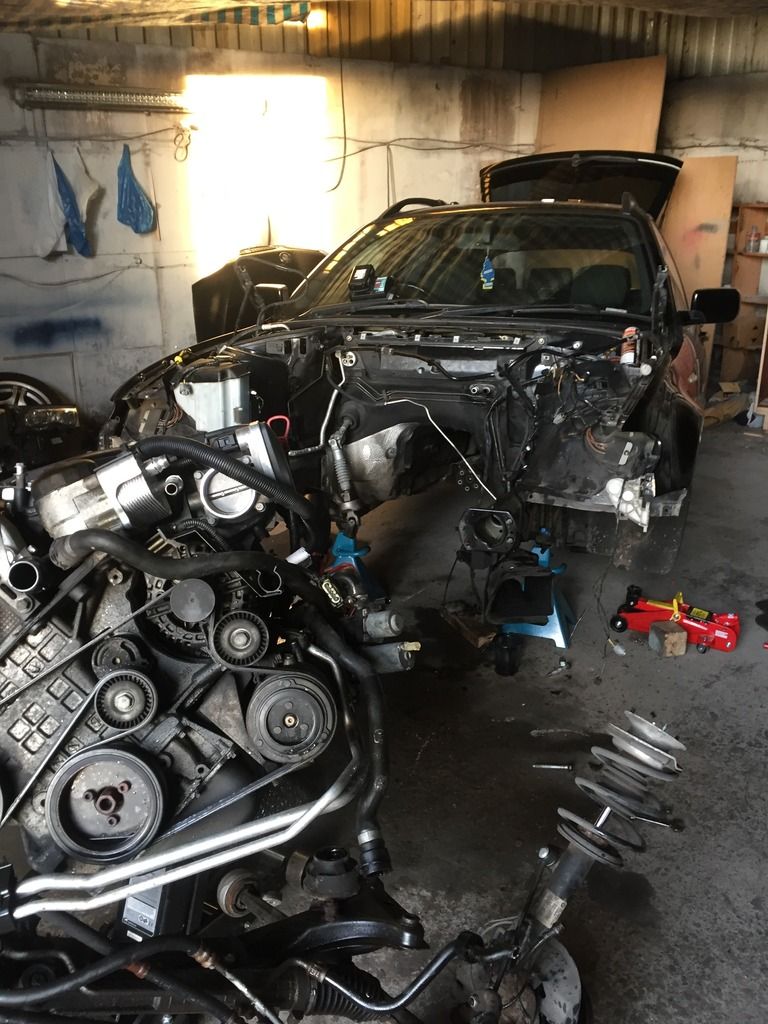
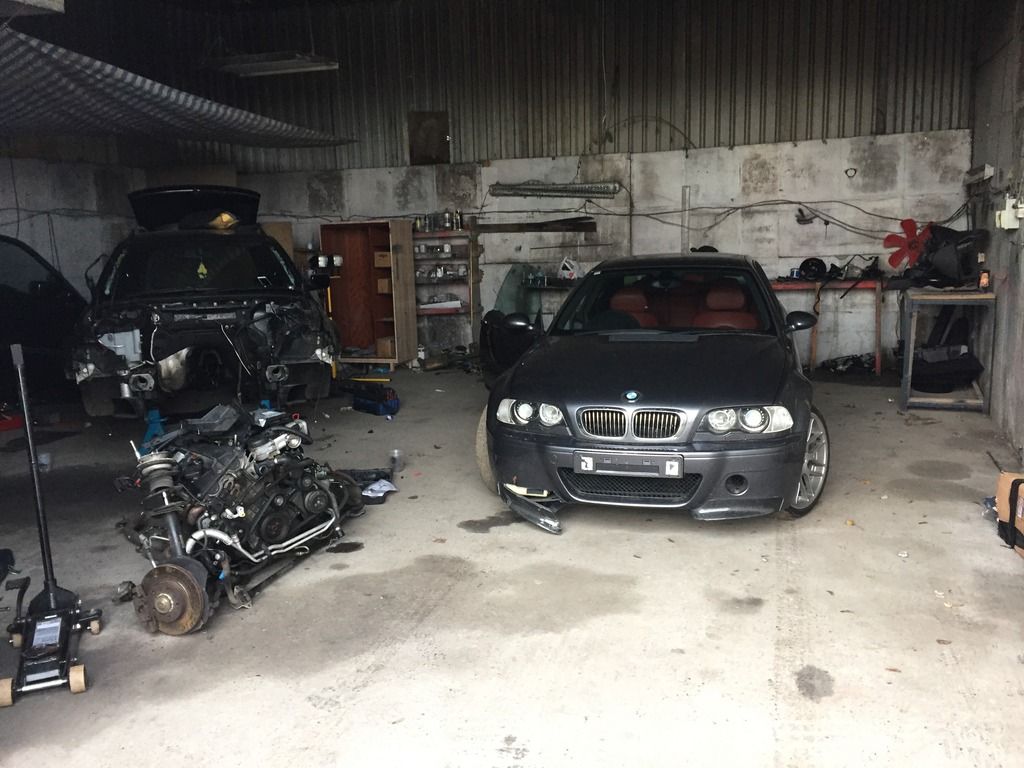
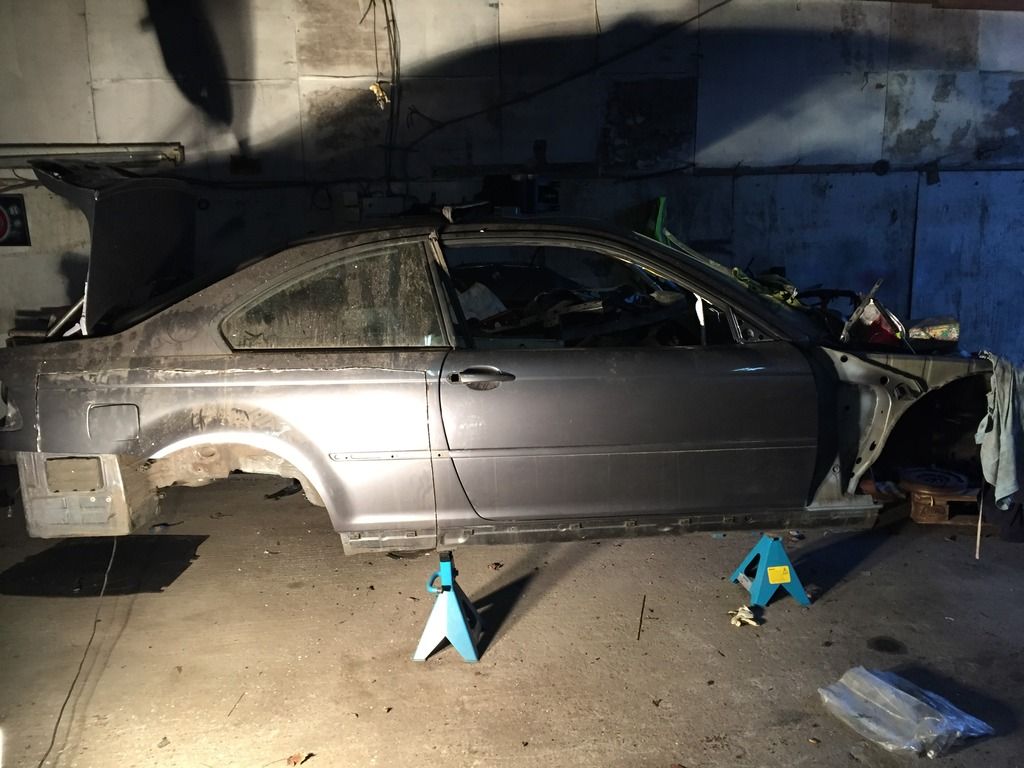
M3 parked up in the garage too. This is my m3 which I have owned for a few years now.
I wanted to use a car which I knew had zero issues, not some heap of crap which was going for cheap but hadn't been looked after. The head gasket was done not too long ago along with an inspection 2 service, it's runs perfect.
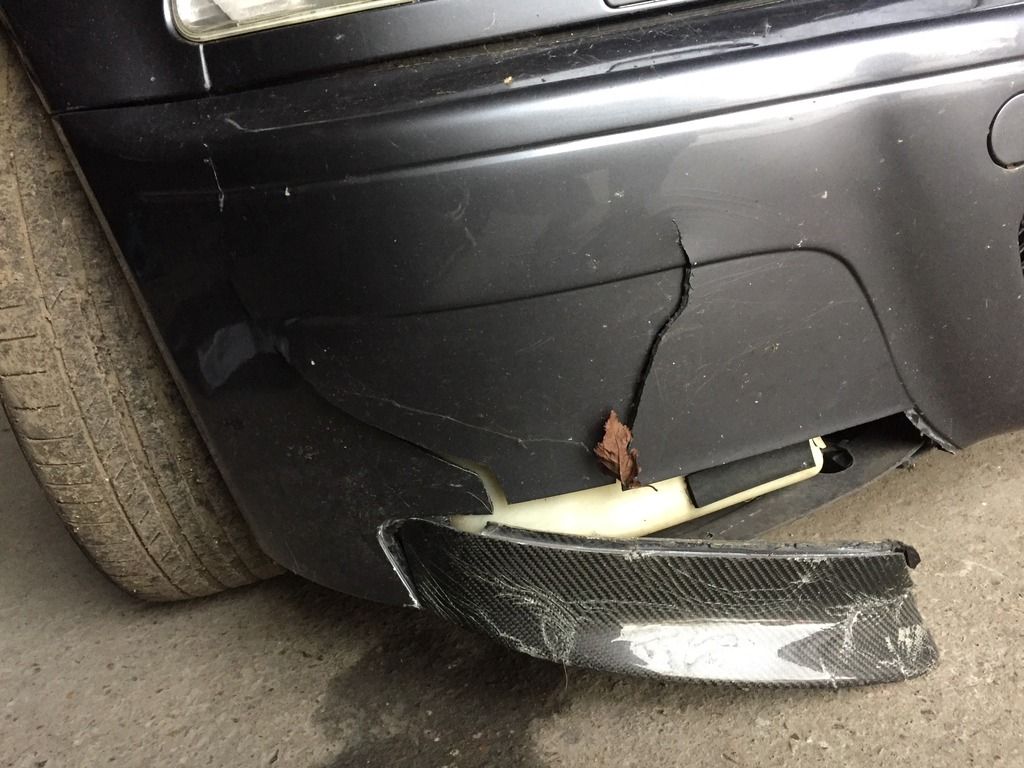
It has been parked up for a month or so as a fox decided to run out on me, the m3 came out on top but had a little damage to the front bumper.
Damage to the bumper from the fox incident
I repeated the whole process on the m3 to get the engine out.
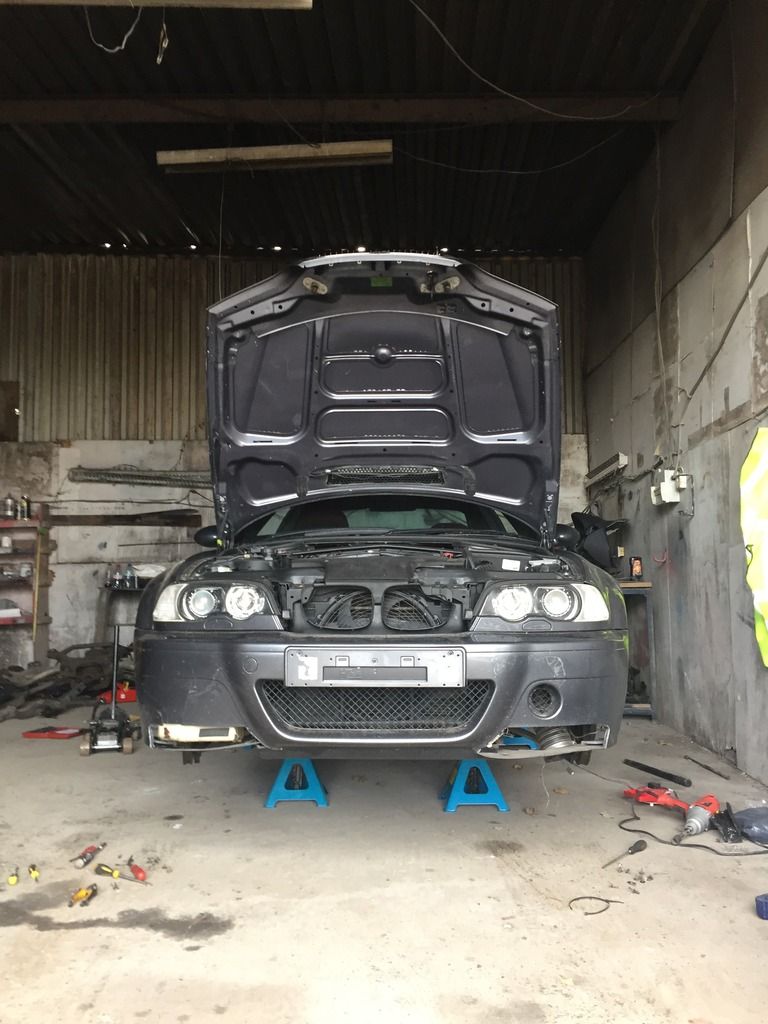
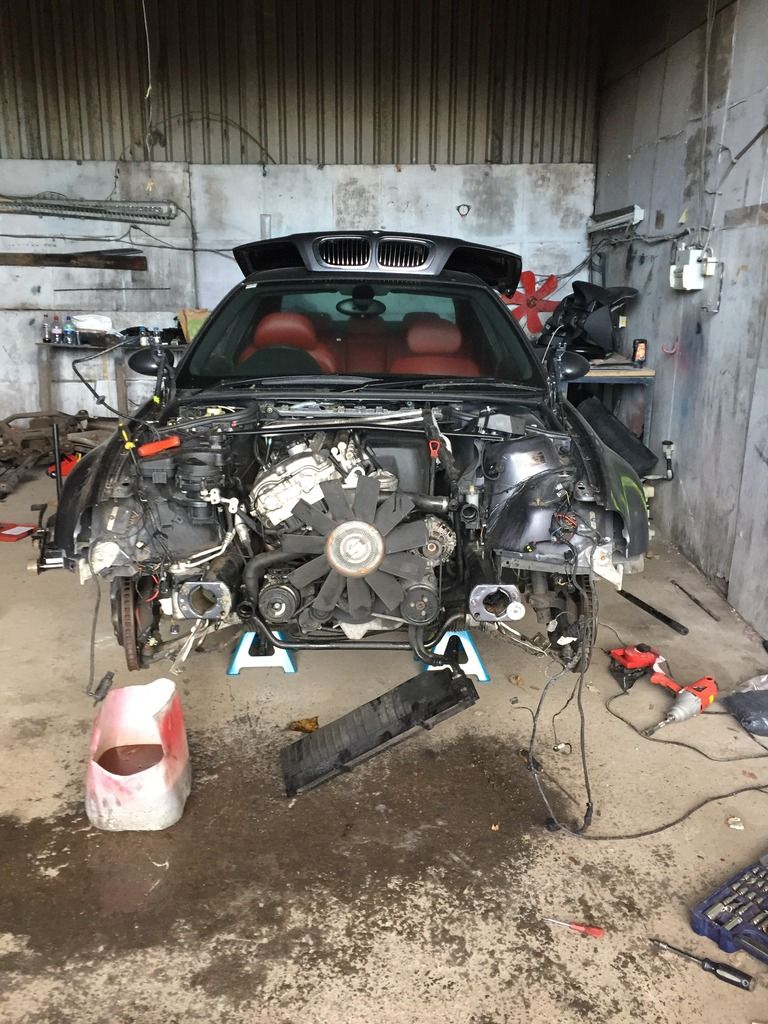
Engine out
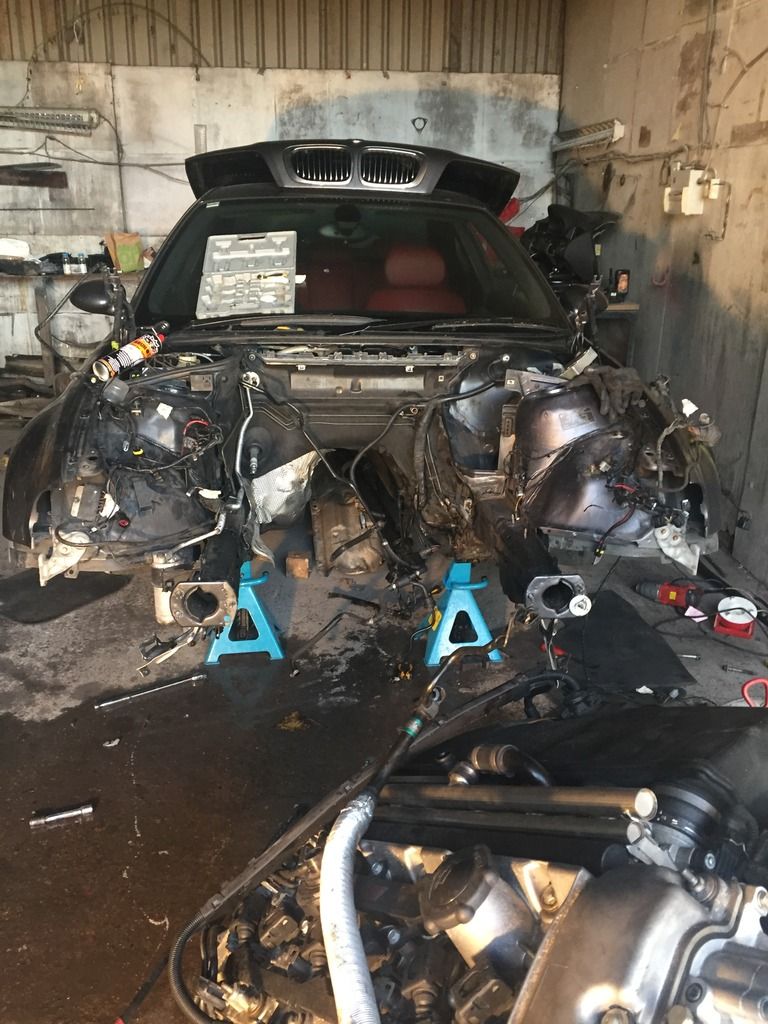
I now need to work on the looms. I've started on the estate loom. So many wires. It's very time consuming and the size of the task dawned on me at this point. Also realised I have crossed the point of no return for me. Let hope it ends well or I may end up with 2 cars that don't work.
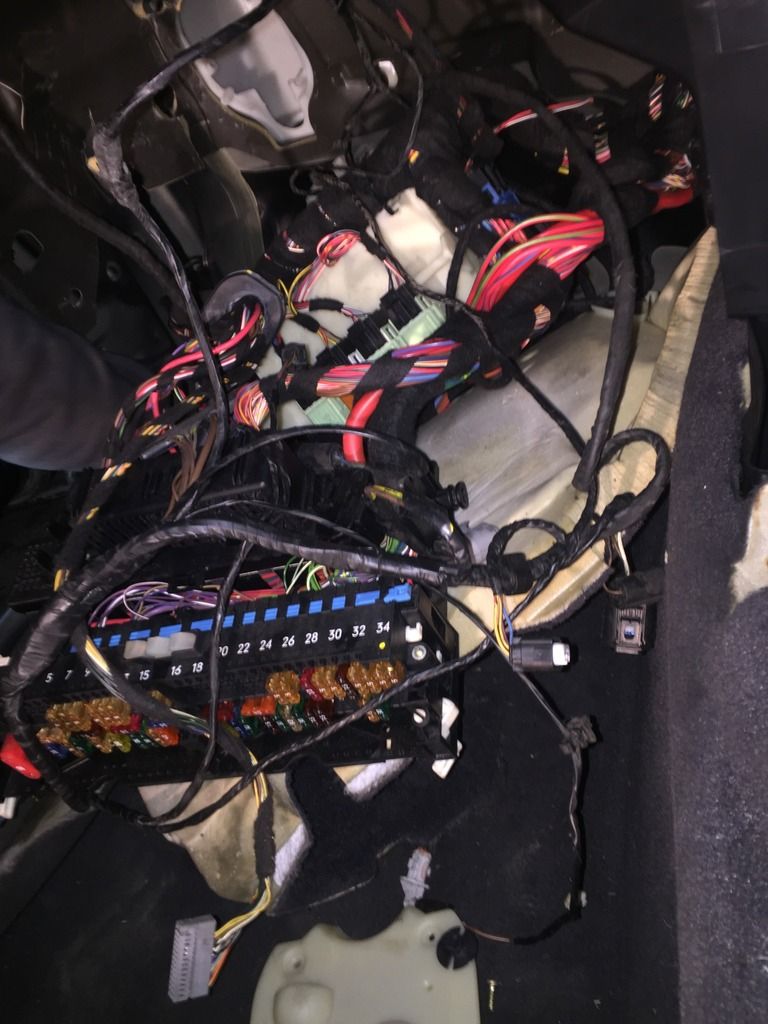
I got as far as removing all the wire from the engine bay and wrestled with the fuse box side of things. That's all for now. Il pick up where I left off on Saturday.
Had the day off from work today so decided to crack on.
Rear subframe dropped from the estate
I
M3 parked up in the garage too. This is my m3 which I have owned for a few years now.
I wanted to use a car which I knew had zero issues, not some heap of crap which was going for cheap but hadn't been looked after. The head gasket was done not too long ago along with an inspection 2 service, it's runs perfect.
It has been parked up for a month or so as a fox decided to run out on me, the m3 came out on top but had a little damage to the front bumper.
Damage to the bumper from the fox incident
I repeated the whole process on the m3 to get the engine out.
Engine out
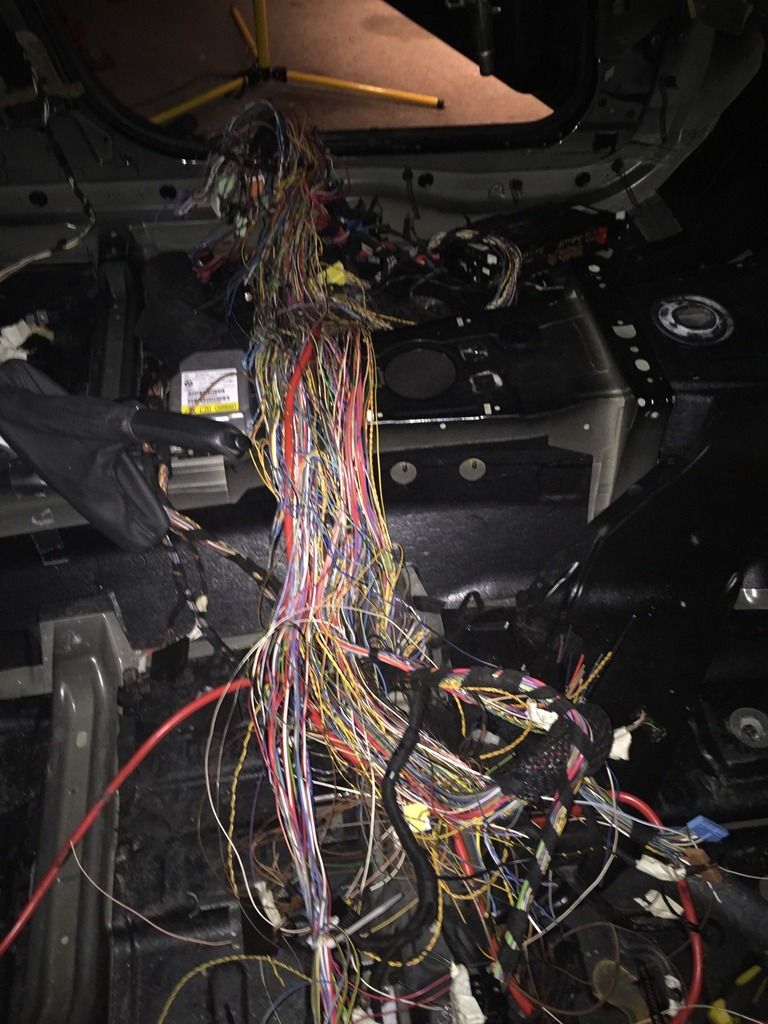
I now need to work on the looms. I've started on the estate loom. So many wires. It's very time consuming and the size of the task dawned on me at this point. Also realised I have crossed the point of no return for me. Let hope it ends well or I may end up with 2 cars that don't work.
I got as far as removing all the wire from the engine bay and wrestled with the fuse box side of things. That's all for now. Il pick up where I left off on Saturday.
A bit more:
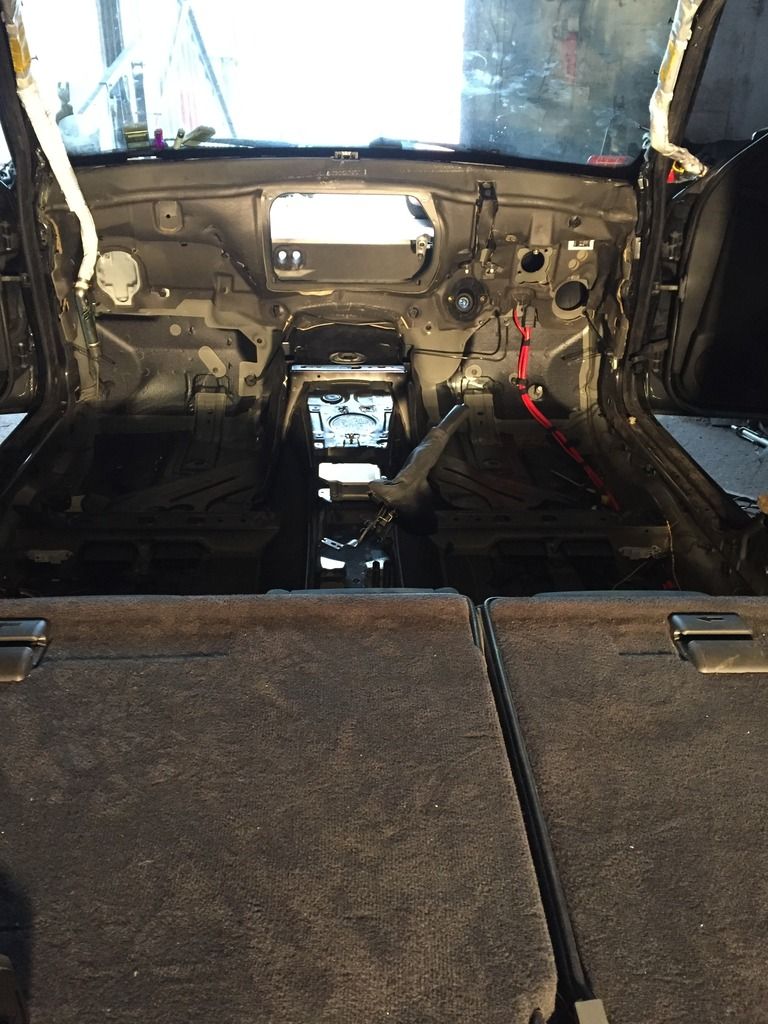
Stripped out the m3 interior so the body loom is ready to be plucked out.
Started the horrible job of wiring. The tourer has various extras wires compared to the coupe.
Namely the rear door electrics, rear window opening switch, rear wiper and the rear wiper washer bottle with pump.
I took the tourers loom apart and traced the extra wires back to the original plug. The plan is to plug the pins back into the m3 loom as they are currently empty for those pins, then use felt tape to make it look all oem again.
It's at times like these you realise why garages quote several thousands of pounds for the touring conversion. Seemed so simple in theory.
THis is all ive managed to write up at the moment, i have completed the follwing:
1) Full M3 loom has been plummed in and all connections made
2) Dashboard, carpets and front seats have been put back in place
3) Estate subframe has been strengthened by welding plates
4) M3 boot floor has been added to allow for exhaust to be run across the body and correct tyre inflator kit to be stored
5) Zinc Primer and future rust protection has been added to the rear underside
6) Car has been cranked and started (woohoooooo)
Il get pictures of the progress up soon.
Cheers,


Few more pics i found for now:
This pic shows the original M3 loom being put back in, fortunately all of the earthing points lined up perfectly so i didnt have to modify the loom, it ran neatly where the original loom did, after this picture i used the original cable management systems to tidy it up.
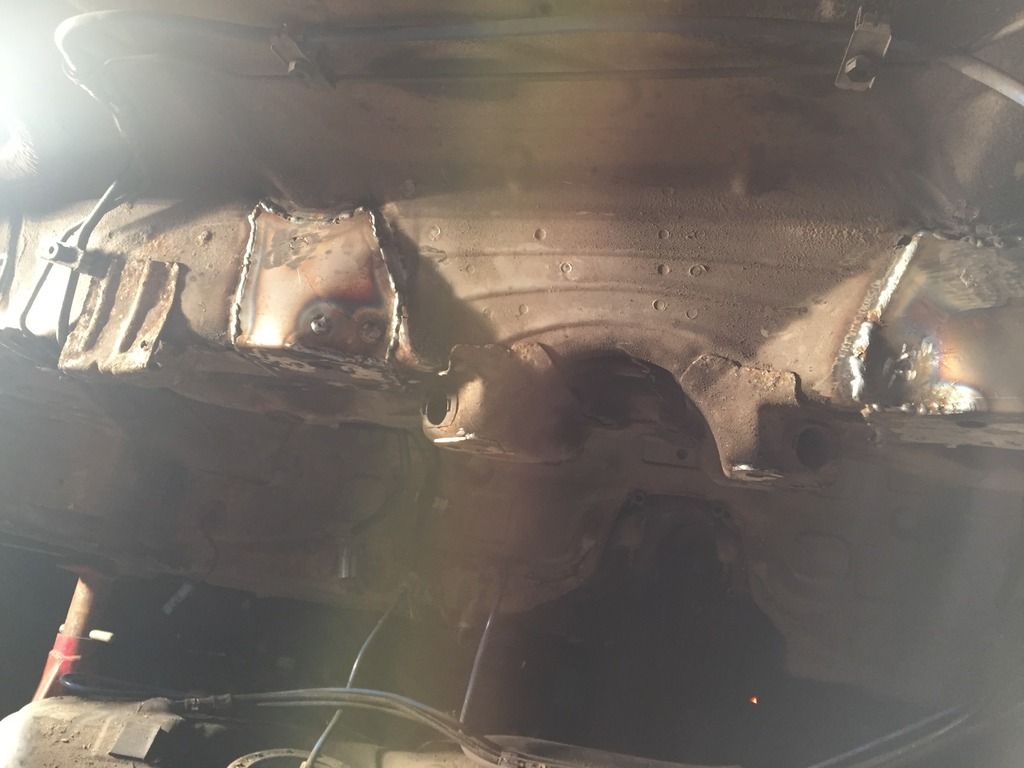
The E46 M3 subframe is a known weakspot, the mounting point on the subframe tend to crack and in extreme cases separate from the body. A well known fix for this is to weld in some purpose designed re-inforcement plates. Even though the tourers subframe mounting points were perfect, it was worth doing for peace of mind.
The below is a very quick snap of one of the welding plated before the welds were tieded and the entire boot floor area was coated with anti rust protection:
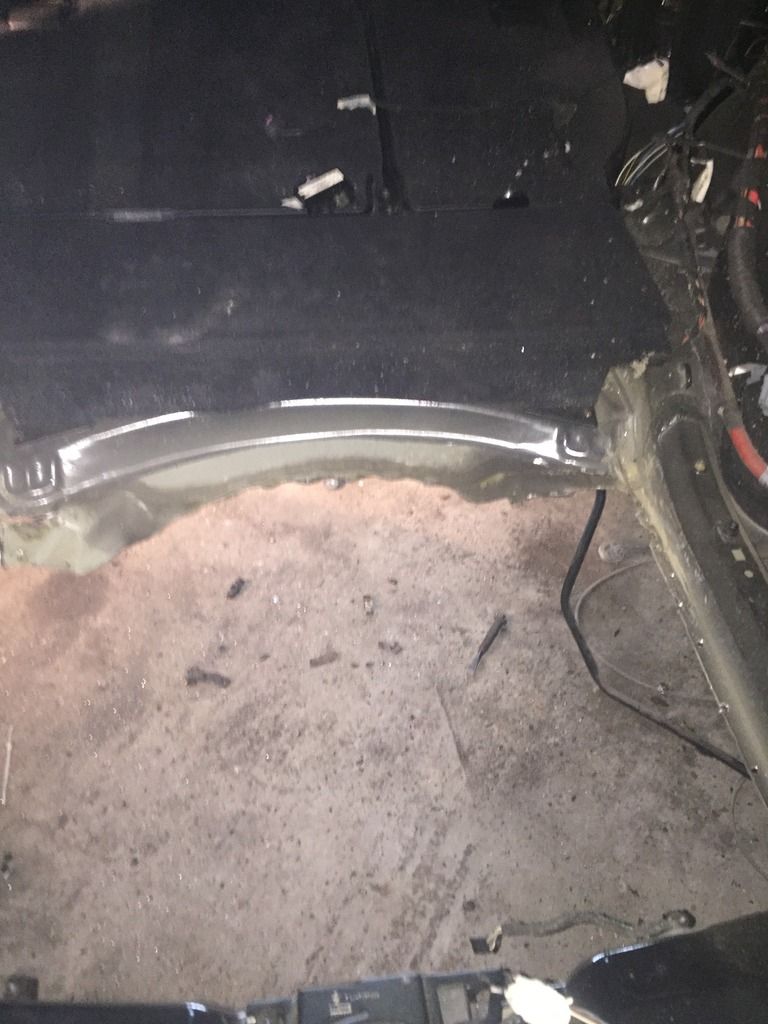
The original boot floor has space for a tyre spare tyre, the M3 does not have this as the exhaust runs the width of the body, instead it has a tyre inflator in its place.
I drilled the spot welds out of the original boot floor and then had the new boot floor welded in place.
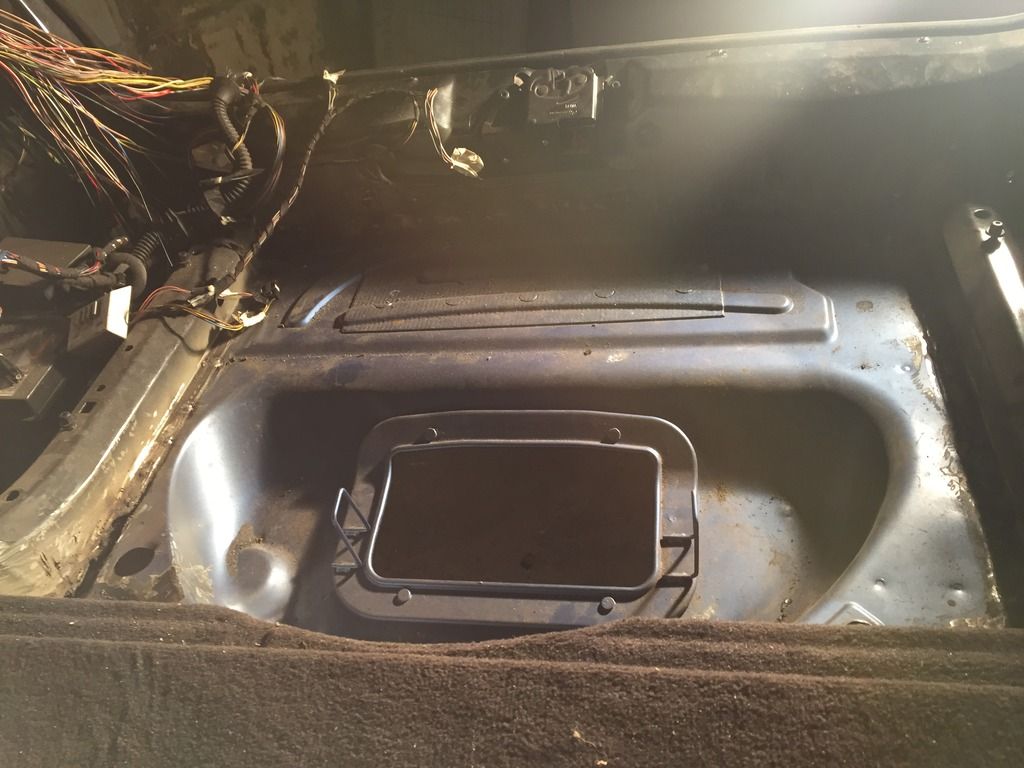
M3 boot floor in place:
This pic shows the original M3 loom being put back in, fortunately all of the earthing points lined up perfectly so i didnt have to modify the loom, it ran neatly where the original loom did, after this picture i used the original cable management systems to tidy it up.
The E46 M3 subframe is a known weakspot, the mounting point on the subframe tend to crack and in extreme cases separate from the body. A well known fix for this is to weld in some purpose designed re-inforcement plates. Even though the tourers subframe mounting points were perfect, it was worth doing for peace of mind.
The below is a very quick snap of one of the welding plated before the welds were tieded and the entire boot floor area was coated with anti rust protection:
The original boot floor has space for a tyre spare tyre, the M3 does not have this as the exhaust runs the width of the body, instead it has a tyre inflator in its place.
I drilled the spot welds out of the original boot floor and then had the new boot floor welded in place.
M3 boot floor in place:
pidsy said:
ARe you doing it to keep?
Or is it just the technical challenge?
I've always loved the e46 m3, I've had a few of them. Even after purchasing newer cars I find myself getting bored of the new car but not the e46 m3.Or is it just the technical challenge?
Cars have always been a hobby for me and a big project has always been on my bucket list. I'm now married and own 3 vehicles and the only way I could justify this was to do some man maths and logic. I had to create a car that would be 'sensible' and still keep me interested. This seems to tick all the above boxes
The plan is to keep it, but my problem is I get bored when the tinkering stops and I get cars just the way I want them, I then read a silly thread which then gives me my next idea. I hope this is not the case here as it's a lot of work.

It's been a lot of fun working on this as I think I've got to know the every bit of the car and it's just added confidence to my spanner skills.
So the next task was to get the underside finished up so the car was ready to be put on the ground. This meant adding the rear axle and exhaust system.
I swapped over the m3 fuel tank as the pumps are different from normal e46's.
The rear axle including the differential was just a bolt on jobbie.
Next was the exhaust. I wanted to keep everything oem but gave into the urge for aftermarket exhaust system. The OEM system weighs a ton.
I settled for a supersprint resonated centre section and an eisenmann back box. This combination does not drone like many others and maintains the characteristics of the oem sound, just a tad bit louder. Plus the weight saving benifits sweeten the deal
The m3 has an additional exhaust bracket mounted on the drivers side to carry the exhaust. This was cut of the m3 and welded on. The underside heatshield and tray were all added and the exhaust offered up.
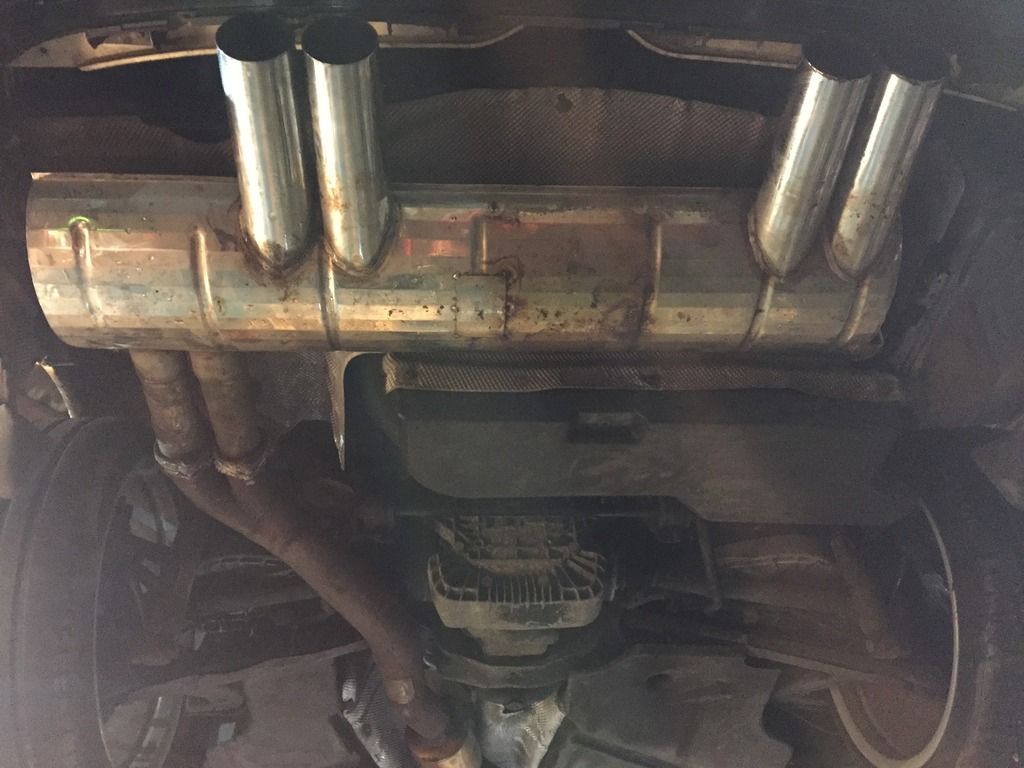
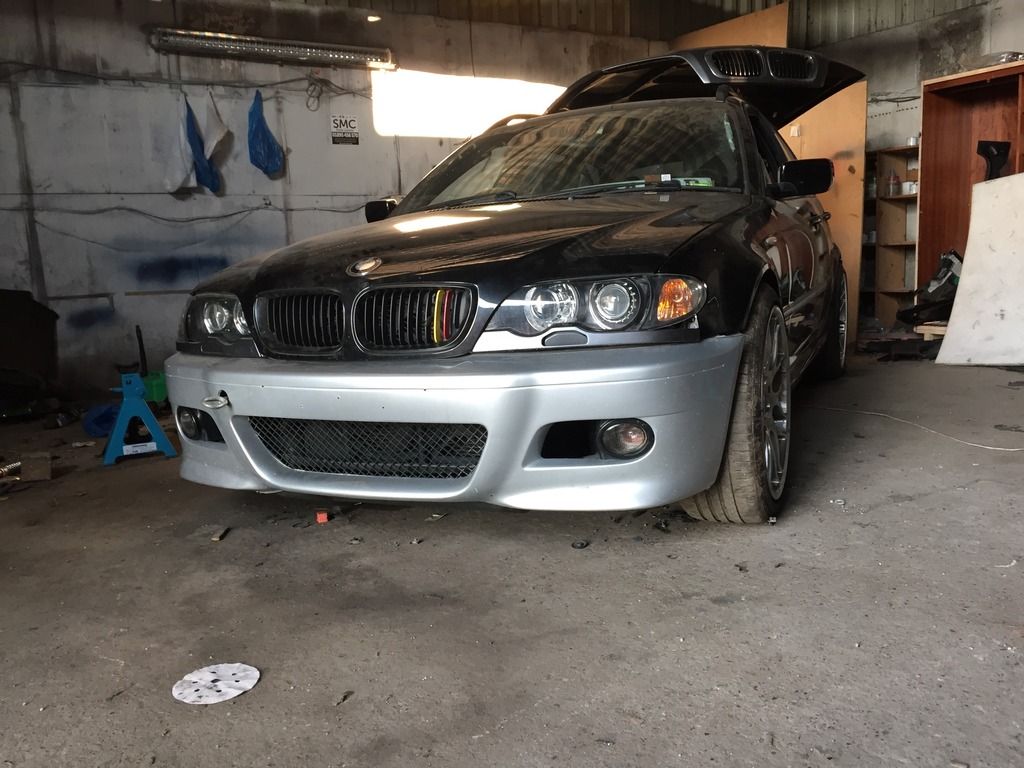
The car was then ready to be put on the ground. Here are a few shots of how it stands. I picked up an original front bumper to replace the csl replica. I hacked the m sport diffuser to allow the quad pipes to protrude.
Even without the m3 arches yet in place, the car looks good IMO.
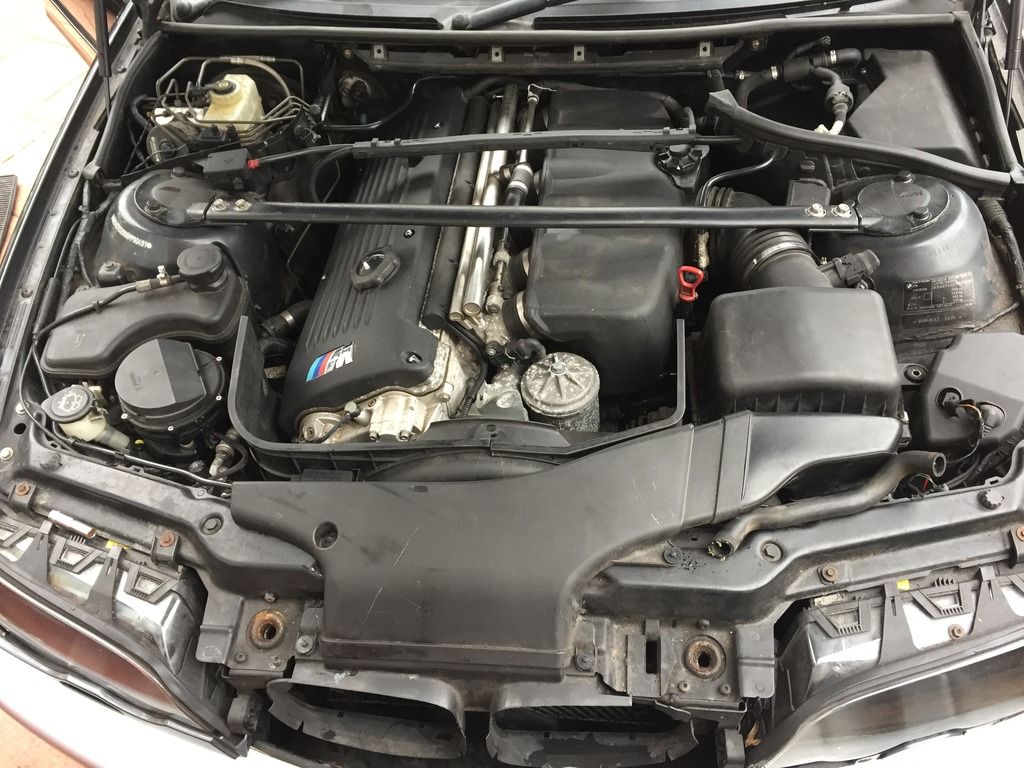
Here is a pic of the engine bay. I hadn't put a few bit on at this point such as the pollen filter housing and crank pipes. But it looks like it belongs in there
And finally a picture of the fallen soldier. This pic was before I cut the rear arches out fully but there is nothing left of the m3 that once was.
That is pretty much where I am up to at the moment. The car is on the driveway and is in need of electrical work now.
Most of the additional wiring for the estate (rear doors etc) all feed into the GM5 module. I have ordered a load of OEM electrical pins so the theory is just to solder the cut wire from the estate onto a pin, the pin can then be push into the OEM plug and connected to GM5 module the same way it would have been done from the factory.
No doubt it would be a fiddly job just will be a great moment when every button is functioning correctly and all errors are cleared from the computers log system.
I swapped over the m3 fuel tank as the pumps are different from normal e46's.
The rear axle including the differential was just a bolt on jobbie.
Next was the exhaust. I wanted to keep everything oem but gave into the urge for aftermarket exhaust system. The OEM system weighs a ton.
I settled for a supersprint resonated centre section and an eisenmann back box. This combination does not drone like many others and maintains the characteristics of the oem sound, just a tad bit louder. Plus the weight saving benifits sweeten the deal
The m3 has an additional exhaust bracket mounted on the drivers side to carry the exhaust. This was cut of the m3 and welded on. The underside heatshield and tray were all added and the exhaust offered up.
The car was then ready to be put on the ground. Here are a few shots of how it stands. I picked up an original front bumper to replace the csl replica. I hacked the m sport diffuser to allow the quad pipes to protrude.
Even without the m3 arches yet in place, the car looks good IMO.
Here is a pic of the engine bay. I hadn't put a few bit on at this point such as the pollen filter housing and crank pipes. But it looks like it belongs in there
And finally a picture of the fallen soldier. This pic was before I cut the rear arches out fully but there is nothing left of the m3 that once was.
That is pretty much where I am up to at the moment. The car is on the driveway and is in need of electrical work now.
Most of the additional wiring for the estate (rear doors etc) all feed into the GM5 module. I have ordered a load of OEM electrical pins so the theory is just to solder the cut wire from the estate onto a pin, the pin can then be push into the OEM plug and connected to GM5 module the same way it would have been done from the factory.
No doubt it would be a fiddly job just will be a great moment when every button is functioning correctly and all errors are cleared from the computers log system.
Edited by yavz on Sunday 26th February 16:54
Thanks for all the comments guys, im hoping the end product delivers.
Ive got wiring work to do over the weekend, something i normally dread but i've done all my research and im actually looking forward to it.
TheLordJohn said:
Looks a great project. And will be, without doubt, epic when completed.
Good effort in starting it and hope you see it through!
I know what you mean about seeing it though, ive wanted to do this for a while now so hopefully the motivation will stay through till the end.Good effort in starting it and hope you see it through!
Ive got wiring work to do over the weekend, something i normally dread but i've done all my research and im actually looking forward to it.
Bit of an update, slightly delayed by a mishap involving a Stanley knife and a 3 hour trip to a&e. What annoyed me most was That I couldn't work on the car that weekend. . Anyways, it wasn't anything too serious and lessons were learnt for sure.
I've been tackling the wiring, so nothing too exciting. This involved either soldering terminal connectors onto the ends of wires I had previously cut OR removing the complete wiring for a particular module from the old loom and plumbing it in to the now m3 estate.
I had to look at lots of schematics to figure out where everything went, thankfully most of the additional bits are now fully functioning. I have a few but left which I will tackle this coming weekend bits the main bits such as rear door locks, windows, rear tailgate window, rear wiper etc are already sorted.
the next few pics pretty much sum up my approach to wiring:
This is just 1 set of wires needed for the passenger side rear door.
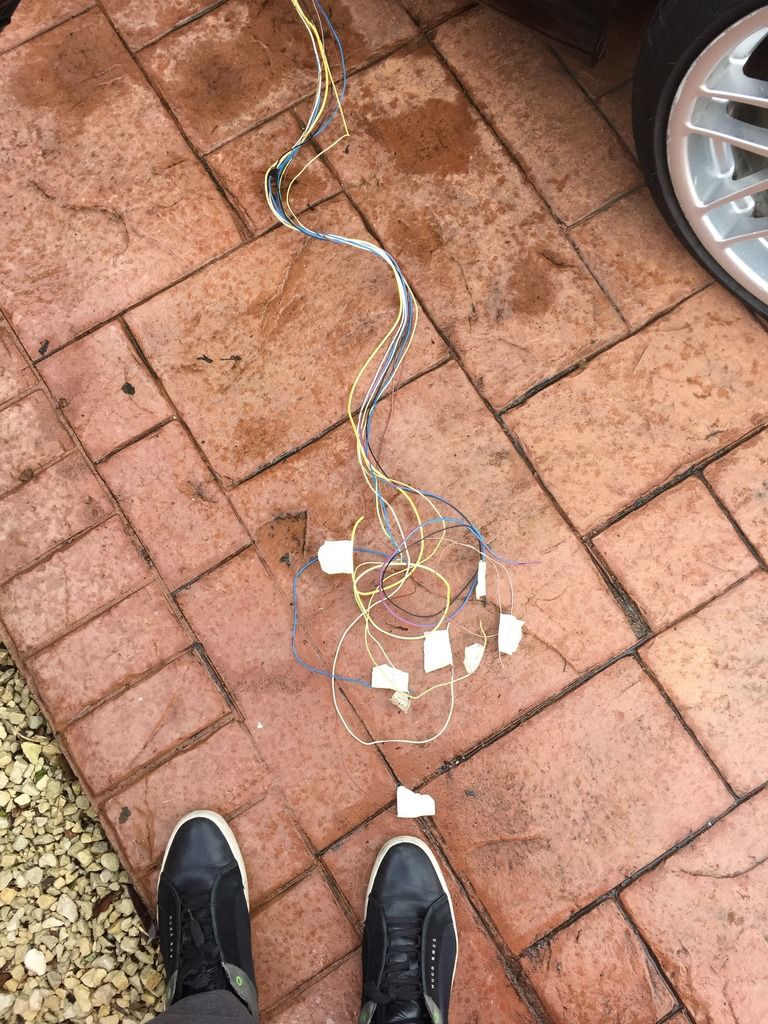
Each wire was paired with the relevant connector and place in the hands of my trusted soldier assistant.
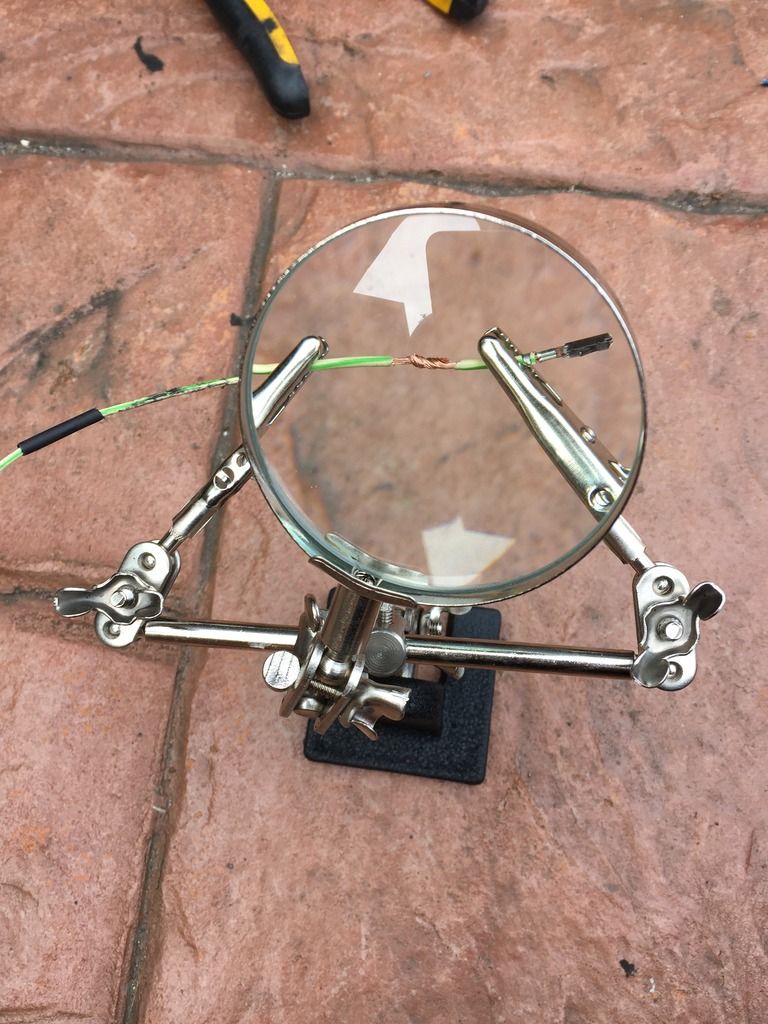
The wires were then soldered together
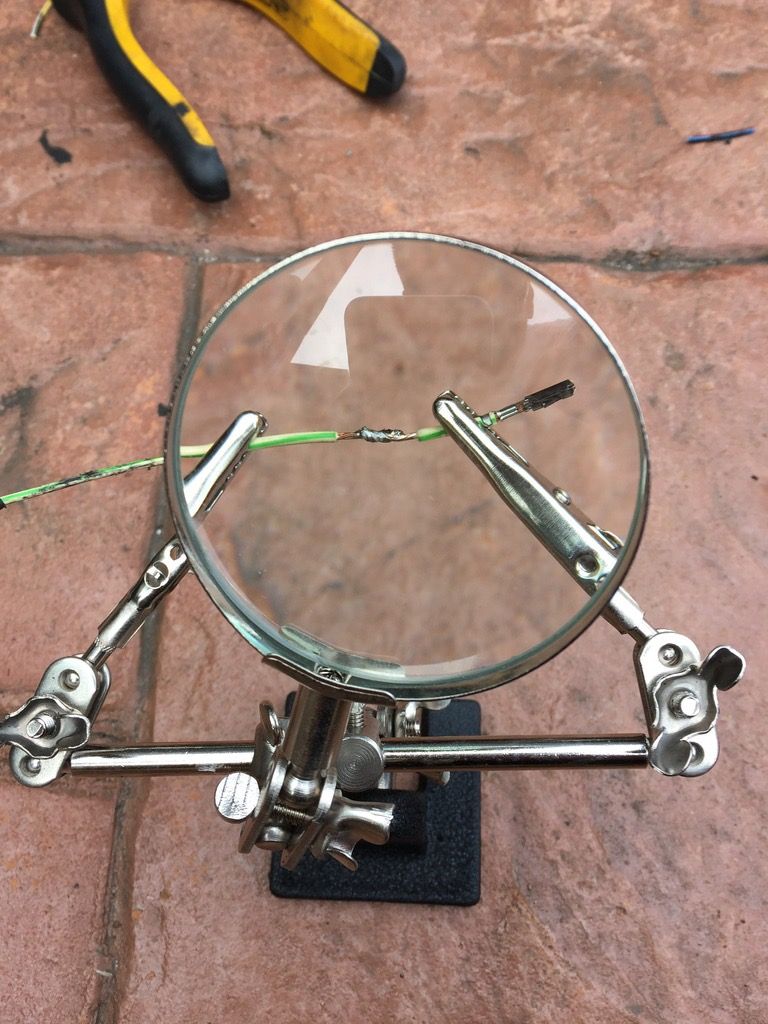
And heat shrink was used to cover the exposed join.
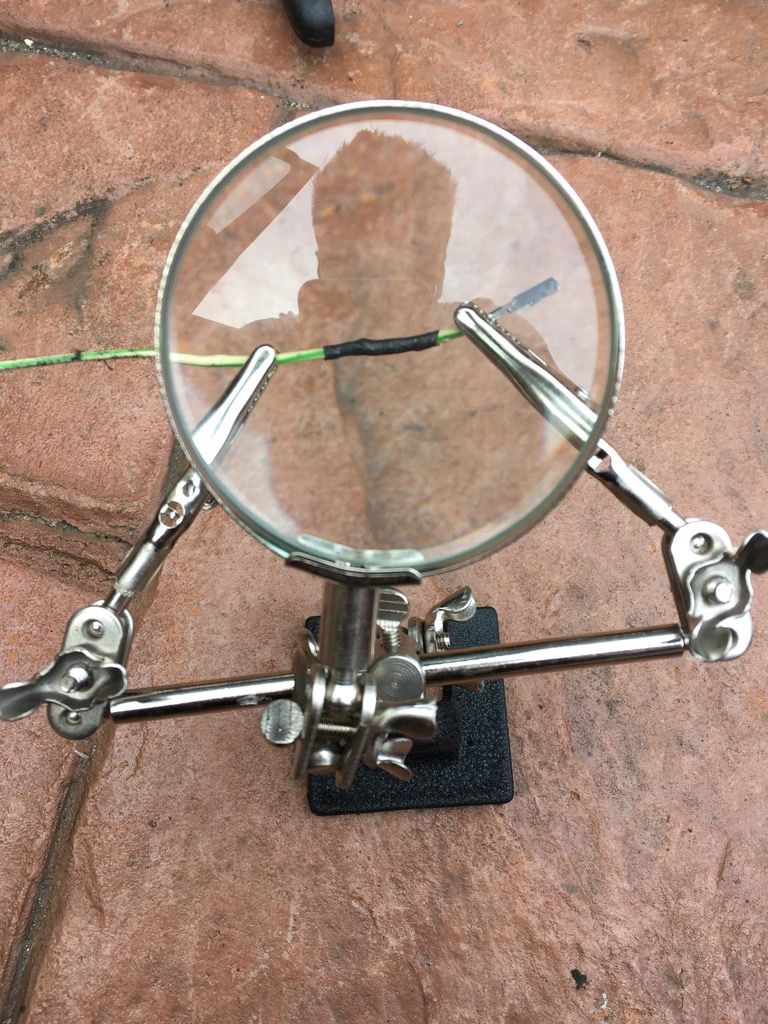
This process was repeated MANY times.
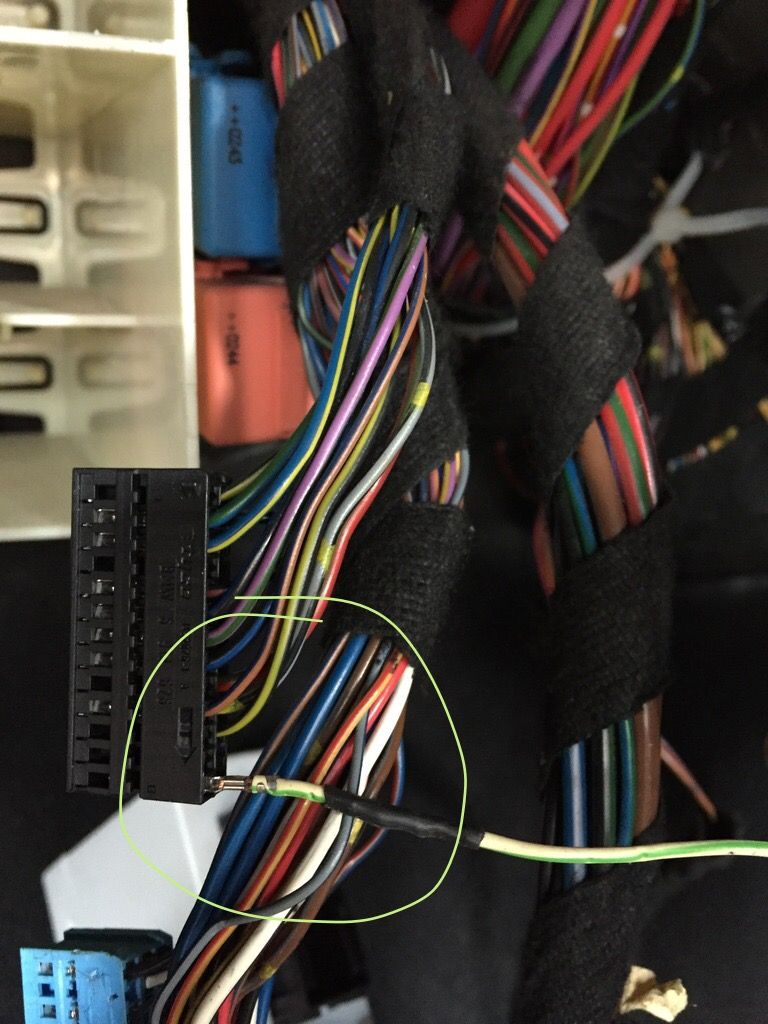
I then used felt tape to tape up the wires into a tidy bundle,this not only looks a lot tidier but also prevents the wires from making any noises when sitting against the metal body.
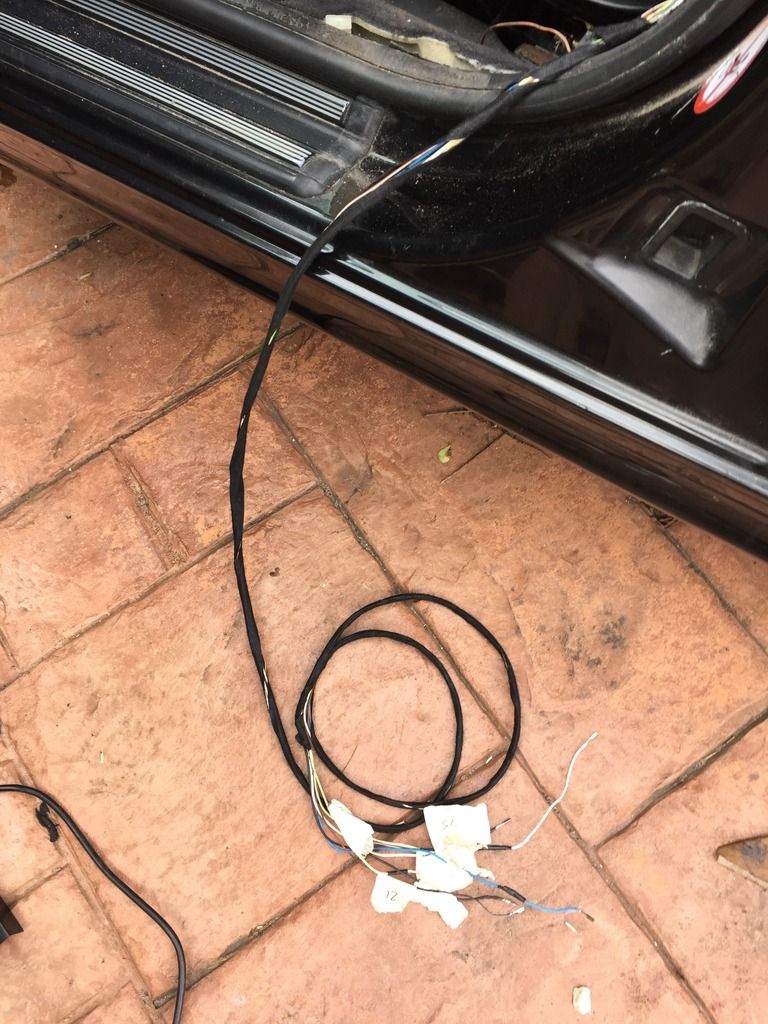
Finally I plugged the pin terminals into their relevant holes in the blocks. The block is then directly plugged into the module to make the connection.
Next up is a small update in my plans.
I've had the car out on road several times now, driving it hard to ensure everything is in top mechanical condition. One thing I noticed is some clutch slur from the smg gearbox. I reset the adaptations in the gearbox and it still slurs, this means the clutch has just started to show signs of wear.
Given that I have to drop the gearbox for a clutch replacement I have decided to convert the car to a manual gearbox, I've lots of reading on the matter and it seems straight forward enough, thankfully the estate was manual previously so the clutch line and gear linkage mounting are already in place, this is normally the most difficult part. Doing the conversion will make the car far more reliable from a transmission perspective.
I'm just sourcing the bits i need for the conversion before a busy weekend actually changing it.
Ive got a brand new clutch ready to go in, I also have the manual clutch pedal, I'm going to be using an smg converted bell housing and use the actual gears from the smg box. This is a popular route as the gears from an Smg gearbox are usually better than manual ones as the computer performs perfect/crunch free shifts.
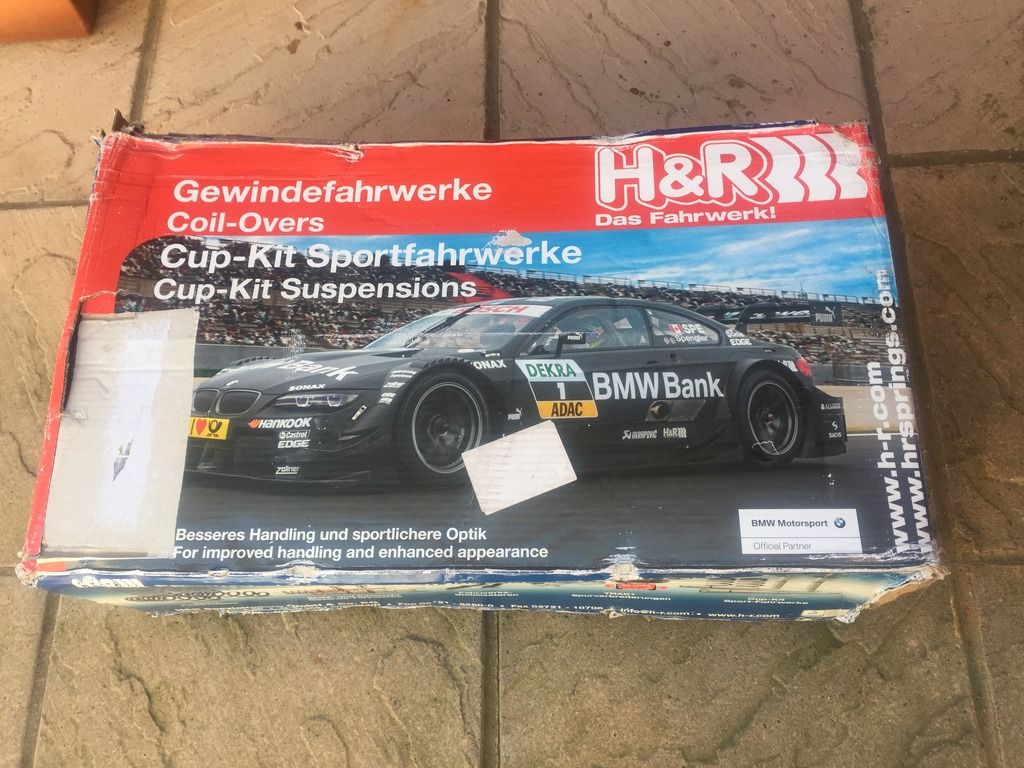
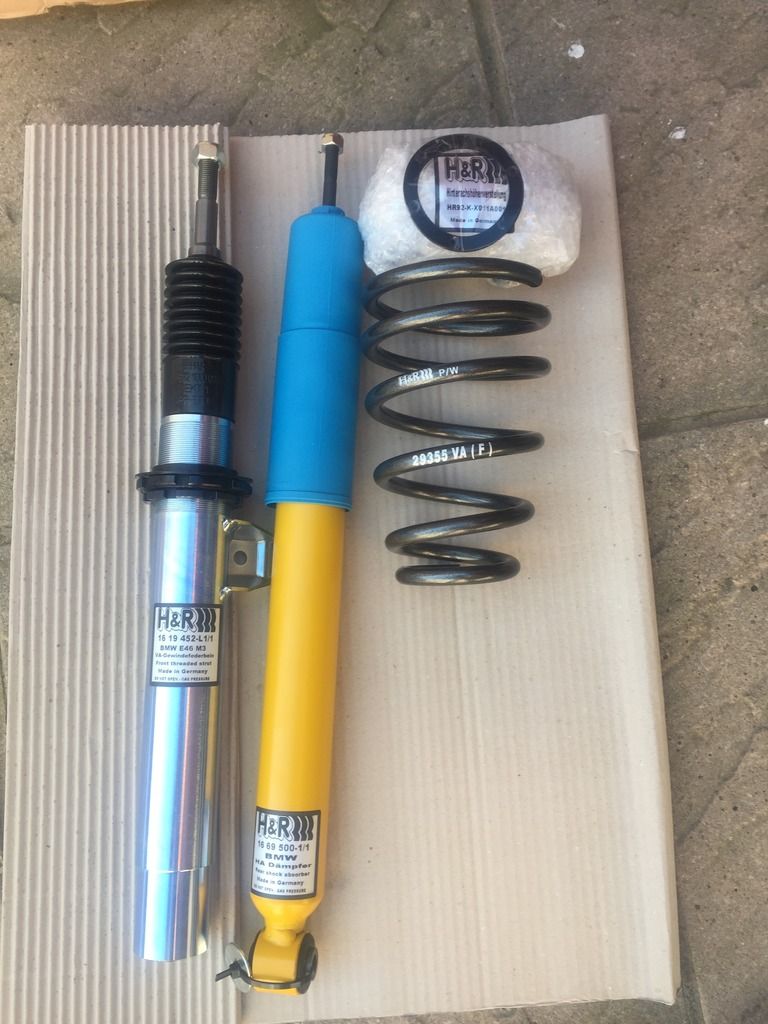
Whilst out shopping I also picked up a set of brand new H&R coilovers. This is a conscious effort to reduce any extra body roll that may have resulted from the slightly increased body height, I can honestly say I've not noticed it, but if nothing else the original dampers were on the car for over 5 years so could do with a refresh. I won't be lowering the car to the floor. I'm just hoping to enhance the handling a little.
That's all for now. Thanks to all those still reading
. Anyways, it wasn't anything too serious and lessons were learnt for sure.I've been tackling the wiring, so nothing too exciting. This involved either soldering terminal connectors onto the ends of wires I had previously cut OR removing the complete wiring for a particular module from the old loom and plumbing it in to the now m3 estate.
I had to look at lots of schematics to figure out where everything went, thankfully most of the additional bits are now fully functioning. I have a few but left which I will tackle this coming weekend bits the main bits such as rear door locks, windows, rear tailgate window, rear wiper etc are already sorted.
the next few pics pretty much sum up my approach to wiring:
This is just 1 set of wires needed for the passenger side rear door.
Each wire was paired with the relevant connector and place in the hands of my trusted soldier assistant.
The wires were then soldered together
And heat shrink was used to cover the exposed join.
This process was repeated MANY times.
I then used felt tape to tape up the wires into a tidy bundle,this not only looks a lot tidier but also prevents the wires from making any noises when sitting against the metal body.
Finally I plugged the pin terminals into their relevant holes in the blocks. The block is then directly plugged into the module to make the connection.
Next up is a small update in my plans.
I've had the car out on road several times now, driving it hard to ensure everything is in top mechanical condition. One thing I noticed is some clutch slur from the smg gearbox. I reset the adaptations in the gearbox and it still slurs, this means the clutch has just started to show signs of wear.
Given that I have to drop the gearbox for a clutch replacement I have decided to convert the car to a manual gearbox, I've lots of reading on the matter and it seems straight forward enough, thankfully the estate was manual previously so the clutch line and gear linkage mounting are already in place, this is normally the most difficult part. Doing the conversion will make the car far more reliable from a transmission perspective.
I'm just sourcing the bits i need for the conversion before a busy weekend actually changing it.
Ive got a brand new clutch ready to go in, I also have the manual clutch pedal, I'm going to be using an smg converted bell housing and use the actual gears from the smg box. This is a popular route as the gears from an Smg gearbox are usually better than manual ones as the computer performs perfect/crunch free shifts.
Whilst out shopping I also picked up a set of brand new H&R coilovers. This is a conscious effort to reduce any extra body roll that may have resulted from the slightly increased body height, I can honestly say I've not noticed it, but if nothing else the original dampers were on the car for over 5 years so could do with a refresh. I won't be lowering the car to the floor. I'm just hoping to enhance the handling a little.
That's all for now. Thanks to all those still reading
The ECU side wiring has remained untouched, i moved everything over and it started first time, it the body side loom which im modifying.
Ultimately you have 2 options with pro's and cons;
1) Change Engine side loom and keep body side loom
pros: Dont need to take the whole interior apart saves time
Cons: Still need to wire additional items in from the m3 depending on the base vihicle spec, e.g. sport button, xenons vs halogens, electric memory seats and mirrors etc
May not be a turn key solution as you have to fiddle some of the ECU connection to get it to work. Im sure someone could figure this bit out, but i didnt want to faff about with that.
2) Change Engine side loom and also body side loom
Pro; plug and play solution on the engine
No fault codes as evrything is connected as it was in the donor car
Cons: have to take apart interior to wire in rear doors, hatch, wiper etc
The reason i chose the latter was because i knew my base car had far less spec than my M3, so i would have had to take the interiors and looms apart anyway. I guess i would rather have everything that was working previously still working and worry about what i know is extra on the estate.
Both ways will work, just what level of fettling your interested in.
If you were to build it, would you be looking at doing the body conversion as well or just the engine?
A bit of a thread bump as this project is finally nearing completion. What's taken so long and what's been going on?
The short version of it is that work was pretty intense, I also had 2 kids in that time and after the arrival of the first one it became very apparent that the project was going to remain parked up for a bit. It actually got to the point where I had given up on it as it sat there with its gearbox removed. I sold off the coilovers, the exhaust, the csl wheels and a few other bits. I even had a sale agreed on the engine but when I come down to it just knew I would regret it if I didn't see it through to completion. So I put a cover over it and forgot about it for a while.
With things settling down a bit I gave the car some attention again. So since the last update here is what's been going on in the background:
1) Performed and SMG to manual conversion. Installing the following:
New clutch kit
New flywheel
New oem gear linkages
Manual clutch pedal
Gearbox oil refresh and clean up
New clutch lines etc
2) Rebuild stock braking system: Shotblasted and powdercoated,
new pistons and seals,
braided hose lines,
new brake pads (discs had no lips)
3) Differential service:
New Input shafted bearing seal
Genuine bmw fluids
New casing seal
New oem bushings with updated diff bolts.
4) Underside refresh:
Remove the rear axle.
Clean underside and apply epoxy mastic.
5) Rear axle refresh:
Remove, shot blast and powdercoat the subframe carrier, rear trailing arms, rear ARB and spring perches.
Fit new wheel bearings
New oem rear disc shields,
New powerflex subframe and rear trailing arm bushes,
New lemfjorder rose bushes near the hubs, New ARB bushes,
New handbrake shoes.
Repaint driveshafts.
6) Fit new OEM sachs dampers all round and oem springs.
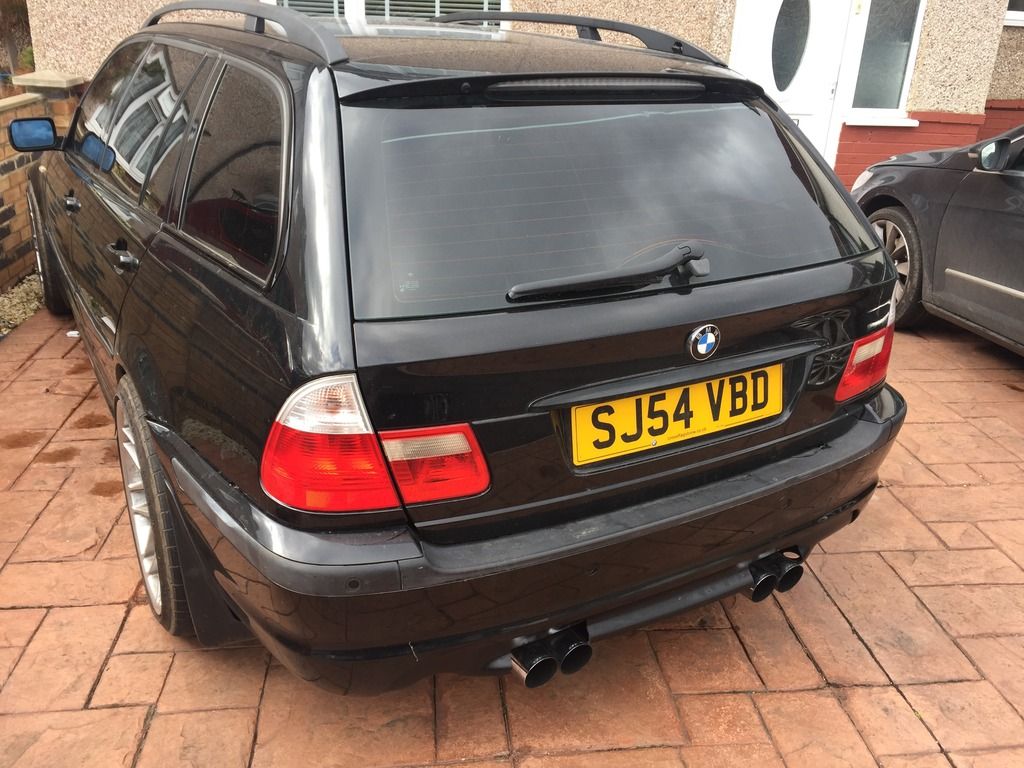
7) Sourced and fitted OEM roof rail delete kit, Would you believe these cost around £550 from bmw for the 2 strips.
8) General servicing to the engine. New plugs, oil, filters etc etc.
With all that done it was time for the bodywork. Finding someone to actually do this part was nervewracking as there is a lot involved. Thankfully the youtuber Calvin was also building an M3 touring and was using a man by the name of Tony. After I saw his work on Calvin's car u knew I could trust him with the conversion. So off the car went for the following:
1) Custom front wings built of OEM wings- it was important to retain as much or the M3 wings as possible
2) Custom rear quarters using oem m3 rear quarters - again you have to use the genuine panels for the correct proportions
3) Custom rear doors - I wanted these to be actually bent into shape so that there wasn't a thick edge when you open the door.
4) Custom rear bumper: the dip in the touring bumper was plastic welded into the OEM m3 bumper to allow the tailgate to close.
This pretty much brings me up to date with where I am.
The car is currently sitting in the bodyshop having a full spray job and I should have it back in a couple of weeks, at which point I will pack this thread with the latest pictures.
With photobucket taking the mick I didn't host the images anywhere. I did however create an Instagram account and uploaded most of the above work in a few succinct multiple picture type updates.
Please feel free to check it out on Instagram account @touringm3e46
That's all for now.
A few random pics to keep it interesting


The short version of it is that work was pretty intense, I also had 2 kids in that time and after the arrival of the first one it became very apparent that the project was going to remain parked up for a bit. It actually got to the point where I had given up on it as it sat there with its gearbox removed. I sold off the coilovers, the exhaust, the csl wheels and a few other bits. I even had a sale agreed on the engine but when I come down to it just knew I would regret it if I didn't see it through to completion. So I put a cover over it and forgot about it for a while.
With things settling down a bit I gave the car some attention again. So since the last update here is what's been going on in the background:
1) Performed and SMG to manual conversion. Installing the following:
New clutch kit
New flywheel
New oem gear linkages
Manual clutch pedal
Gearbox oil refresh and clean up
New clutch lines etc
2) Rebuild stock braking system: Shotblasted and powdercoated,
new pistons and seals,
braided hose lines,
new brake pads (discs had no lips)
3) Differential service:
New Input shafted bearing seal
Genuine bmw fluids
New casing seal
New oem bushings with updated diff bolts.
4) Underside refresh:
Remove the rear axle.
Clean underside and apply epoxy mastic.
5) Rear axle refresh:
Remove, shot blast and powdercoat the subframe carrier, rear trailing arms, rear ARB and spring perches.
Fit new wheel bearings
New oem rear disc shields,
New powerflex subframe and rear trailing arm bushes,
New lemfjorder rose bushes near the hubs, New ARB bushes,
New handbrake shoes.
Repaint driveshafts.
6) Fit new OEM sachs dampers all round and oem springs.
7) Sourced and fitted OEM roof rail delete kit, Would you believe these cost around £550 from bmw for the 2 strips.
8) General servicing to the engine. New plugs, oil, filters etc etc.
With all that done it was time for the bodywork. Finding someone to actually do this part was nervewracking as there is a lot involved. Thankfully the youtuber Calvin was also building an M3 touring and was using a man by the name of Tony. After I saw his work on Calvin's car u knew I could trust him with the conversion. So off the car went for the following:
1) Custom front wings built of OEM wings- it was important to retain as much or the M3 wings as possible
2) Custom rear quarters using oem m3 rear quarters - again you have to use the genuine panels for the correct proportions
3) Custom rear doors - I wanted these to be actually bent into shape so that there wasn't a thick edge when you open the door.
4) Custom rear bumper: the dip in the touring bumper was plastic welded into the OEM m3 bumper to allow the tailgate to close.
This pretty much brings me up to date with where I am.
The car is currently sitting in the bodyshop having a full spray job and I should have it back in a couple of weeks, at which point I will pack this thread with the latest pictures.
With photobucket taking the mick I didn't host the images anywhere. I did however create an Instagram account and uploaded most of the above work in a few succinct multiple picture type updates.
Please feel free to check it out on Instagram account @touringm3e46
That's all for now.
A few random pics to keep it interesting
DanG355 said:
Great progress.
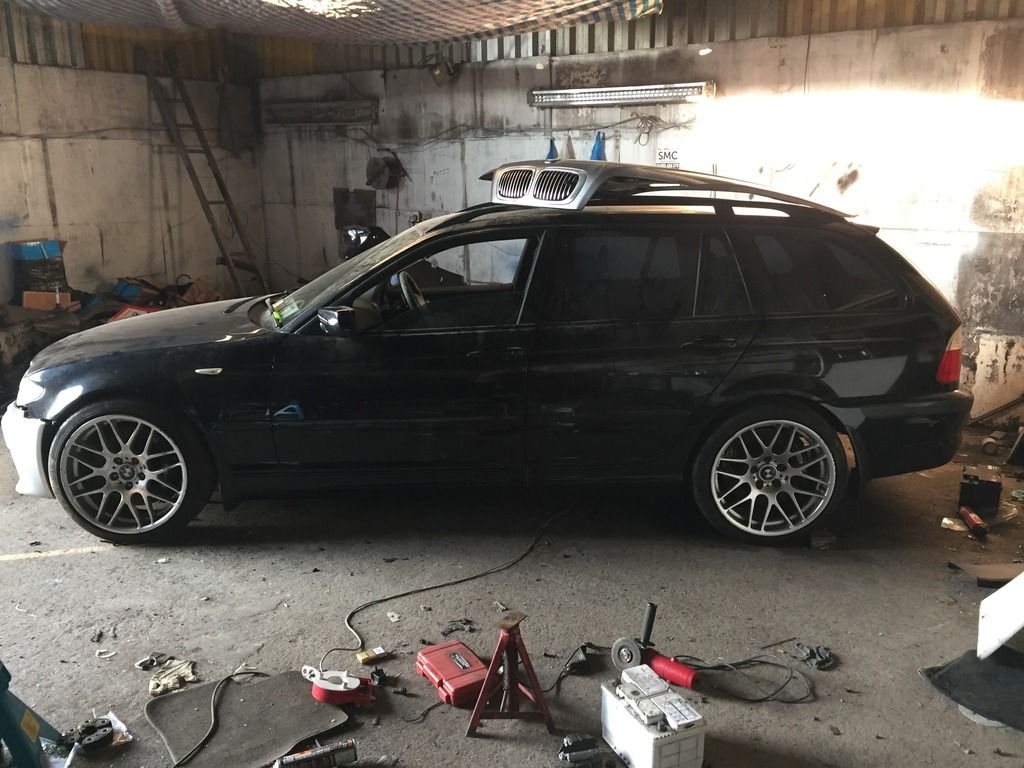
Really hope it is staying on the 18's as well as to me they look far more purposeful and less "bling" that the 19's on most E46 M3's.
It will be staying on the 18's for now. I'm toying with the idea of a square setup to negate some of the understeer that these cars have but that's still undecided. Really hope it is staying on the 18's as well as to me they look far more purposeful and less "bling" that the 19's on most E46 M3's.
I am potentially looking to run a 380mm big brake kit which may force me to switch to 19's. But it will be another set of CSL wheels If I go that route.
Gassing Station | Readers' Cars | Top of Page | What's New | My Stuff