My Indigo Blue Throttle Bodied 106 Rallye
Discussion


Right, well I haven't QUITE got my greasy paws on the car itself yet!!
BUT, I thought i'd start a blog so things are up and running, as i started to do a few bits to the engine tonight and managed to get some good pics of the ports/angle of the pug sport bodies etc etc.
As most of you know I was building up a nice Citroen, but unfortunately I had to abandon this project and sell it on to a friend to finish as I just haven't had the time to commit to as of late - you can read the full thread here if you are interested:
My Little Citroen Machine
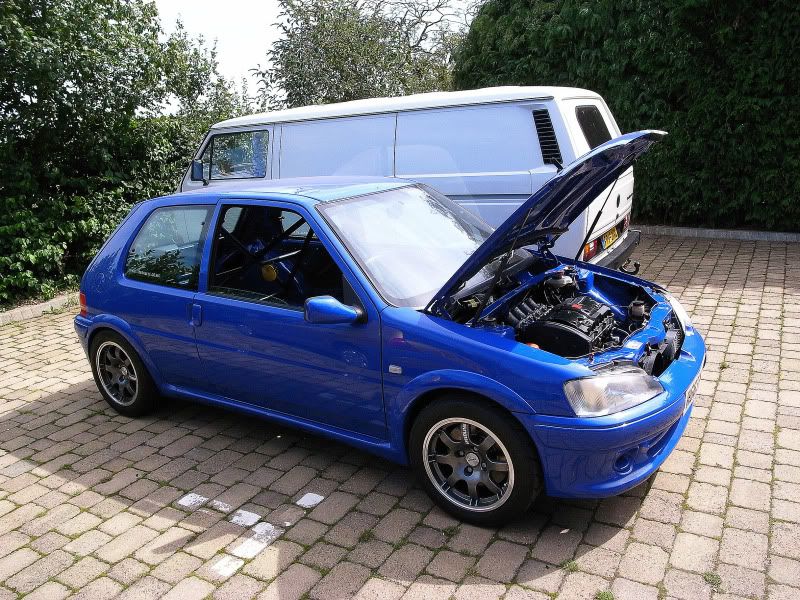
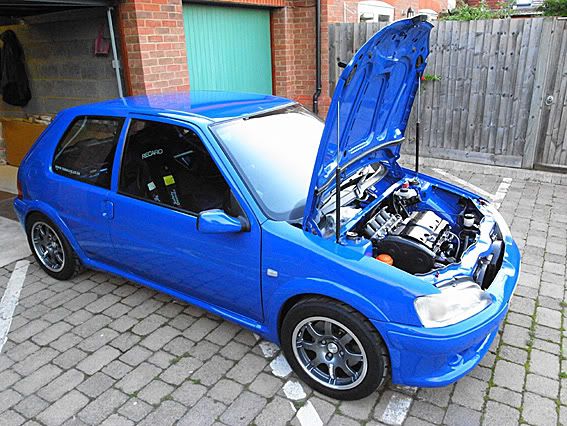
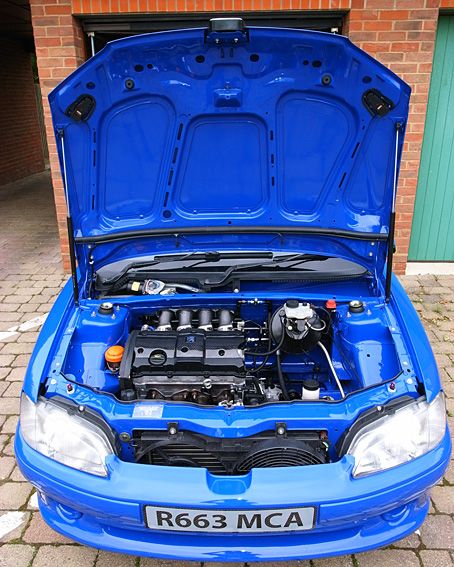
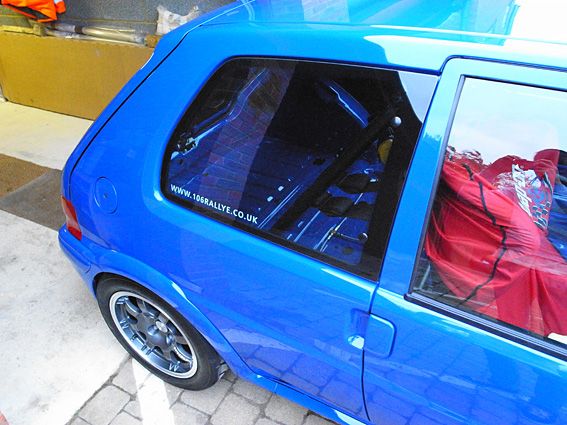
Anyway, that aside, here is my next project! A fully restored 106 Rallye with cage, coilovers, fully stripped to a shell and resprayed - basically a similar concept to the Saxo just less work to do! Pics of the car to follow at a later date (once I pick it up).
PART 1:
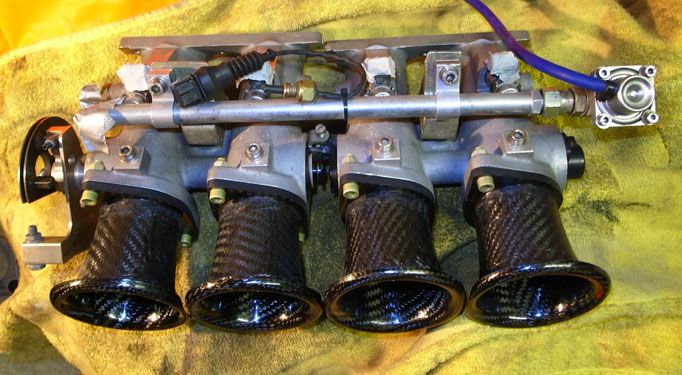
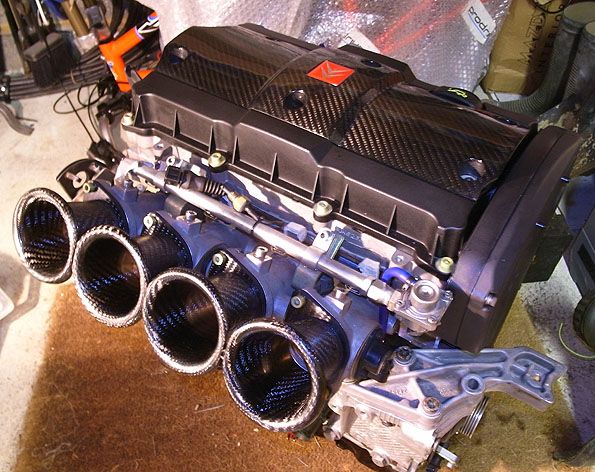
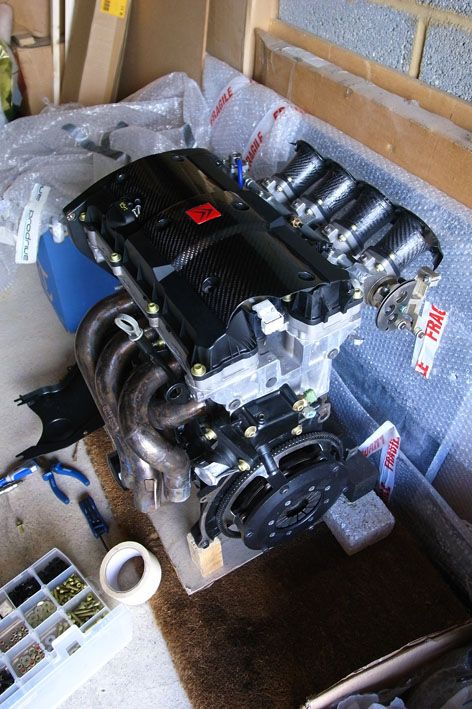
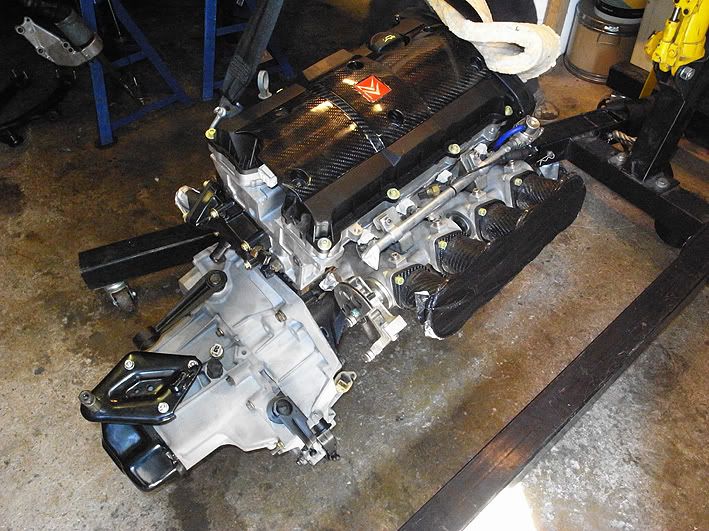
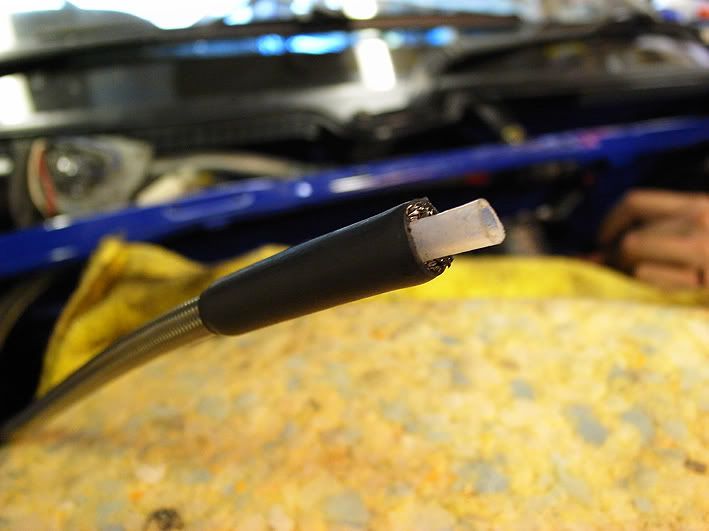
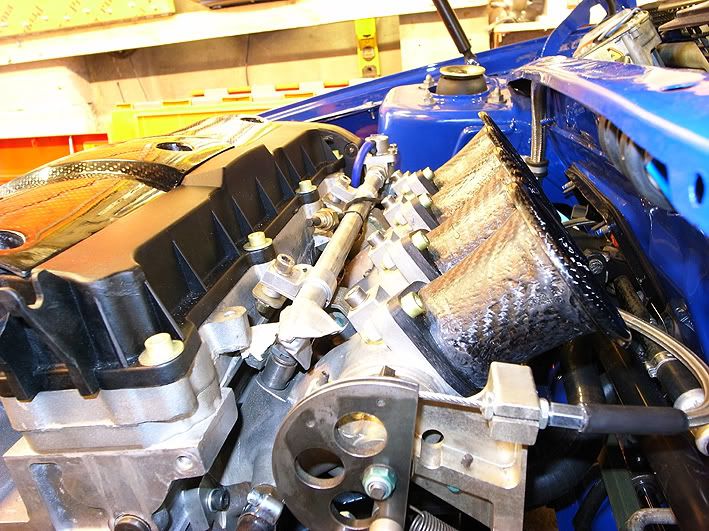
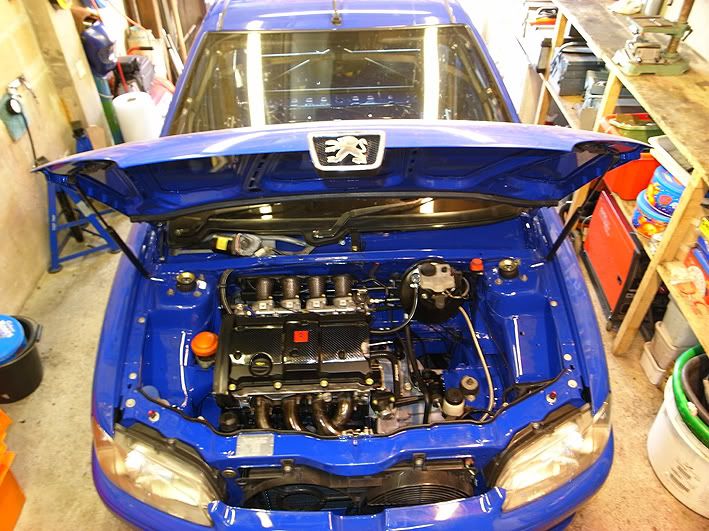
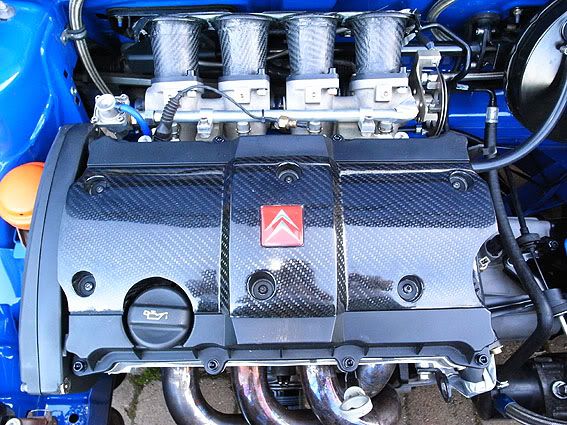
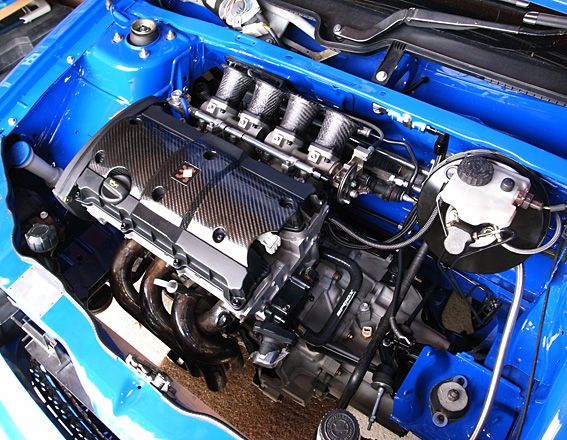
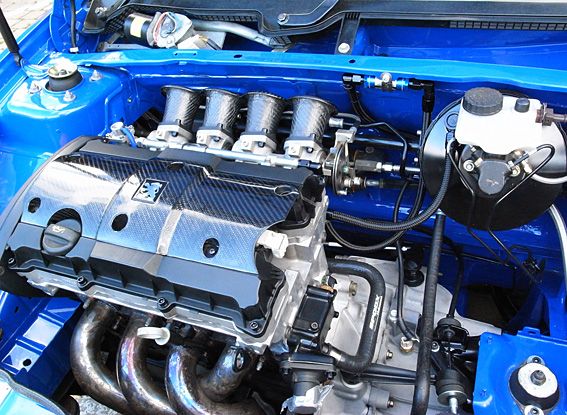
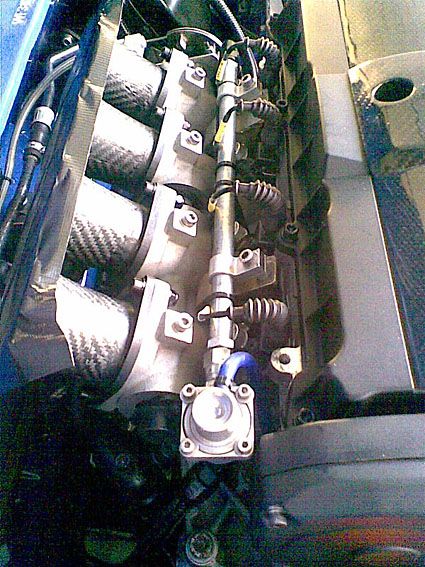
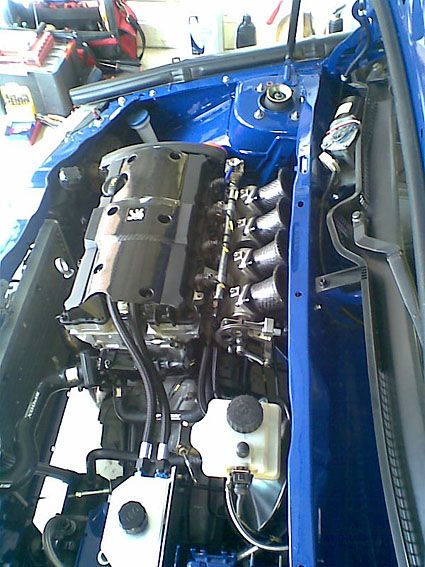
As i'd removed the inlet recently to get the Carbon Trumpets made by Streamline Carbon, I had to re-bond the bodies back onto the engine to seal them properly again. Below are a few pics of the engine with the intakes loosley bolted on, prior to the re-seal process, then pics of the bonding itself, then a pic of it all sorted.
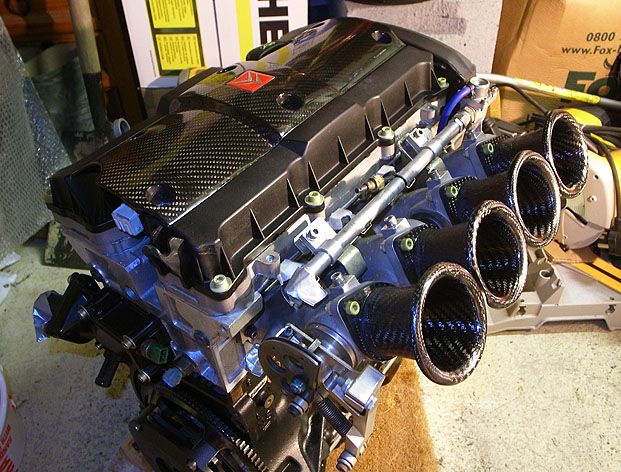
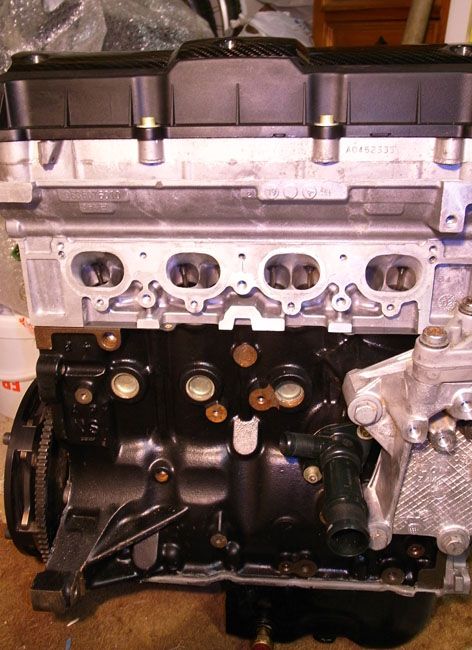
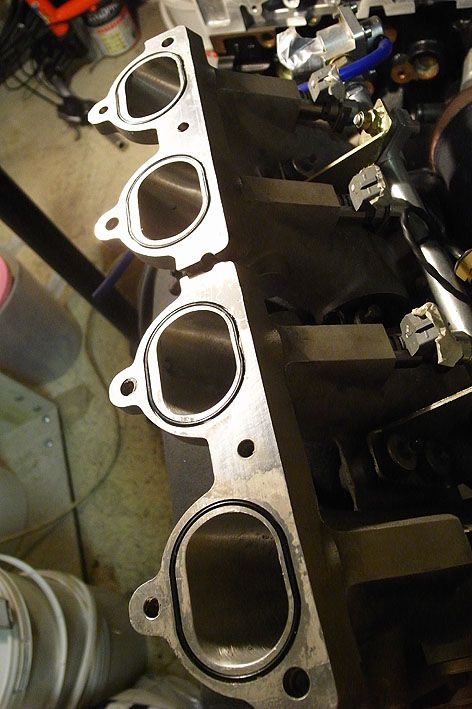
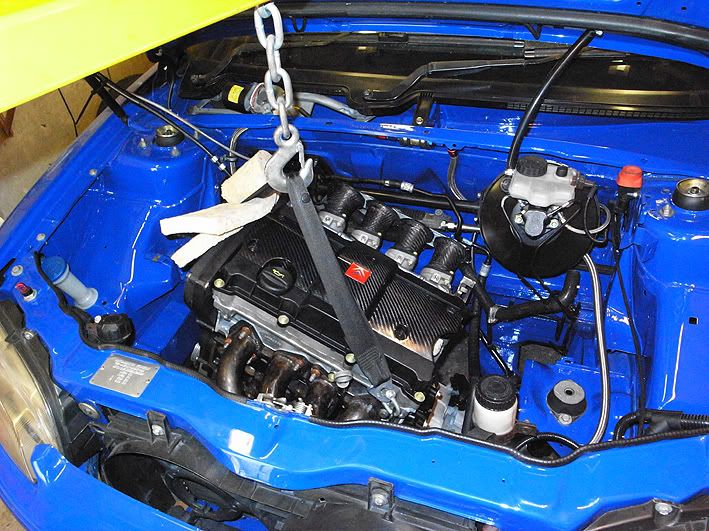
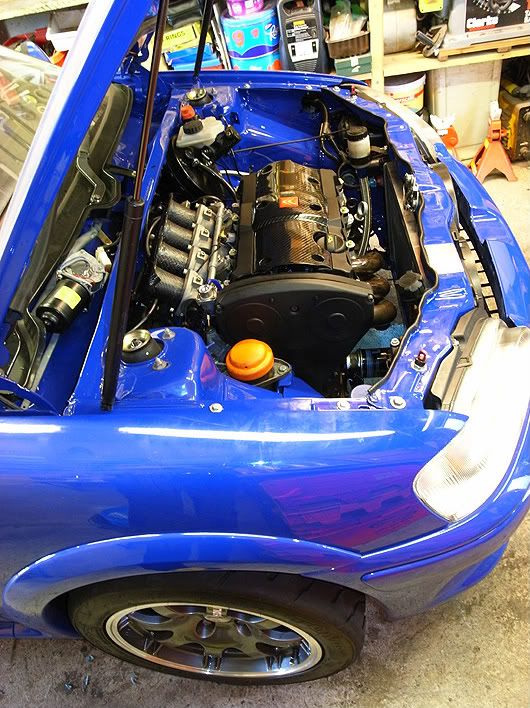
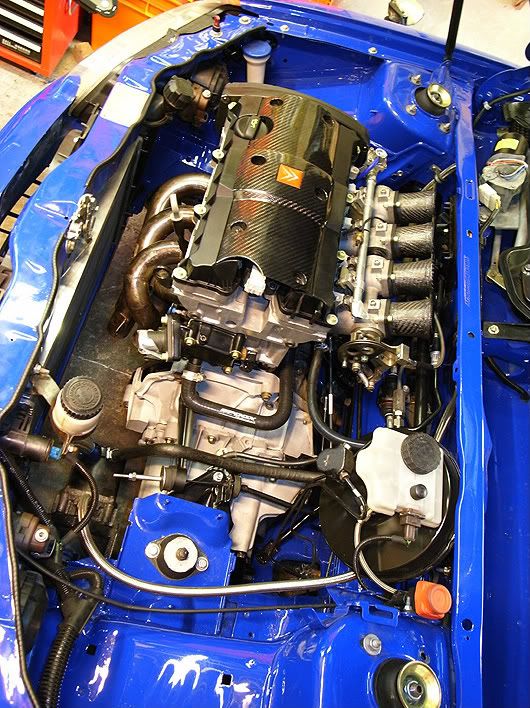
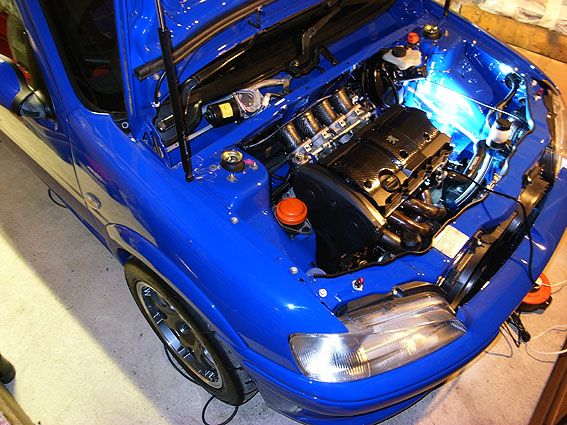
Here she is unveiled again (it's almost like a statue than a race engine!):
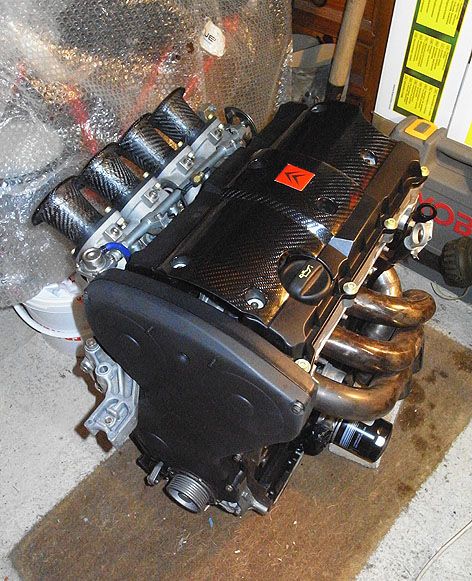
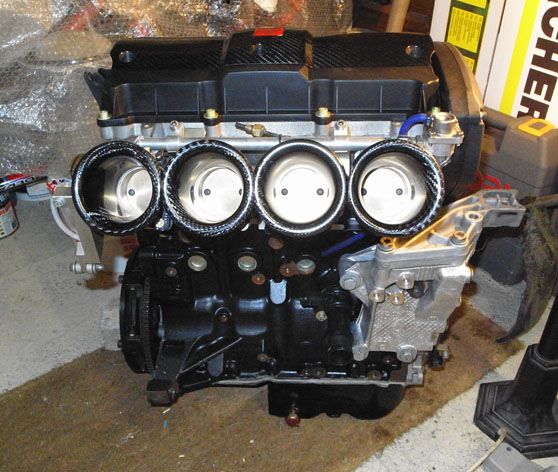
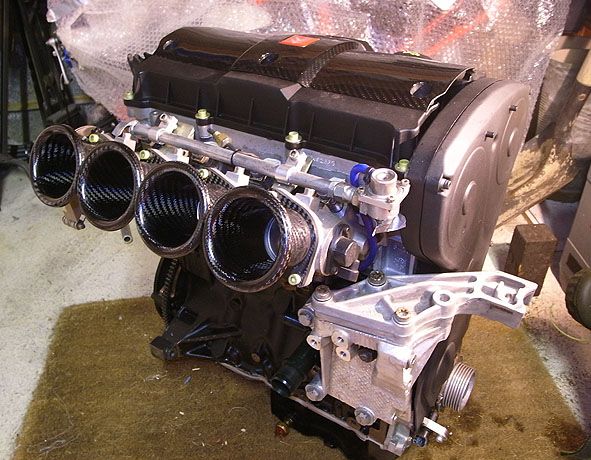
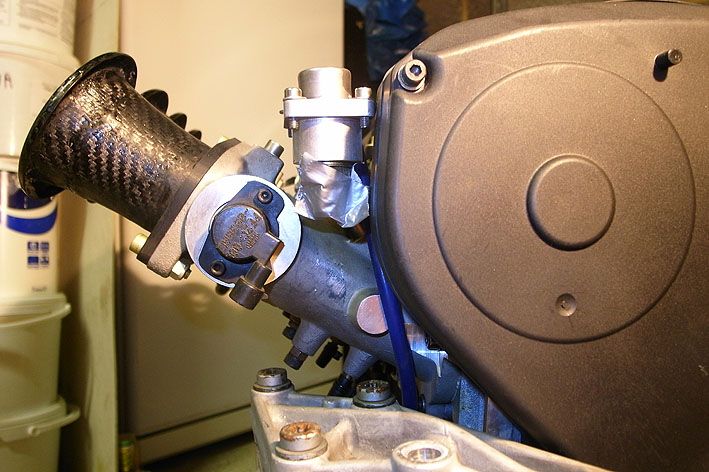
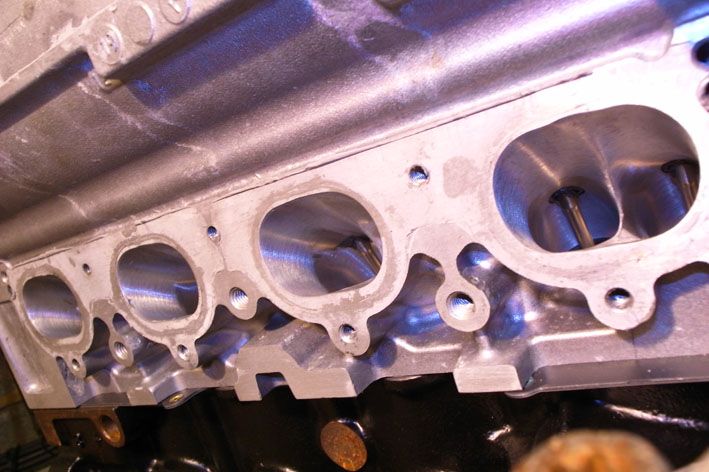
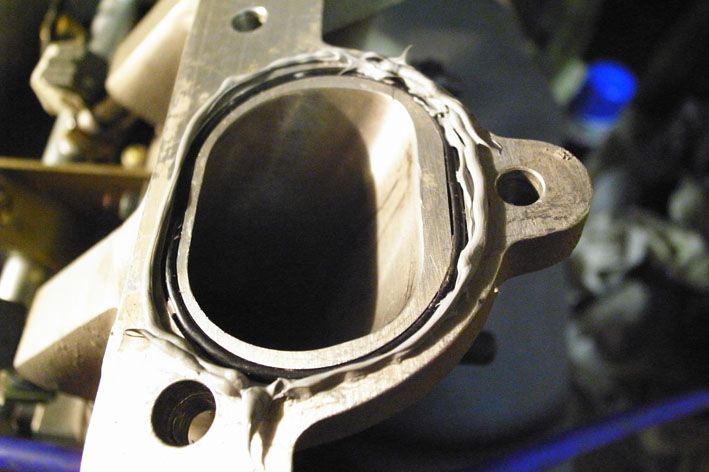
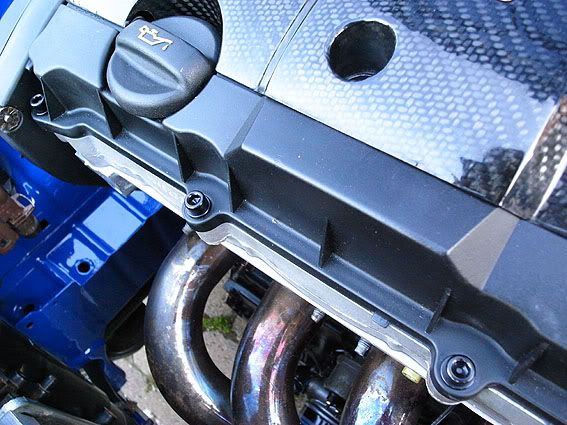
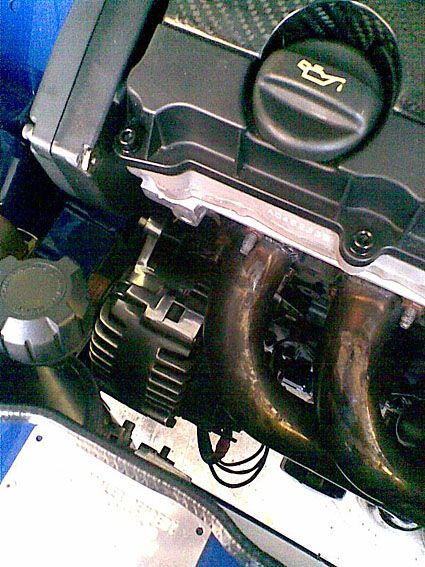
Angle of the Direct to head Pug Sport Throttle Bodies:
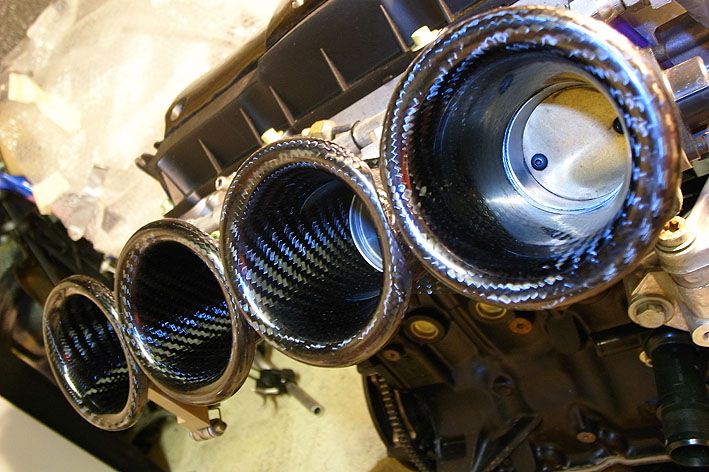
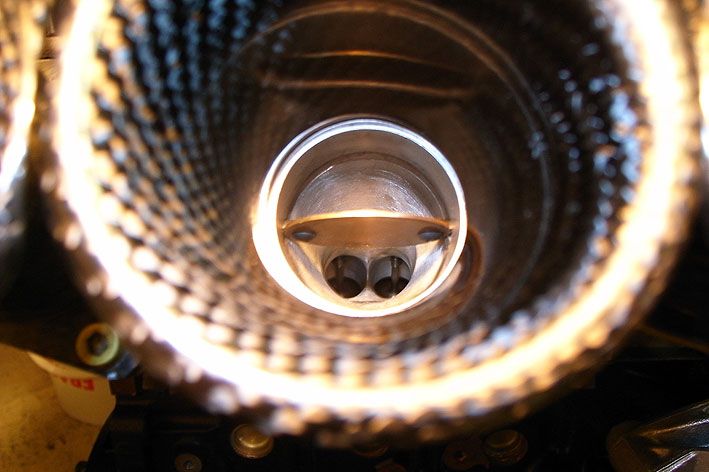
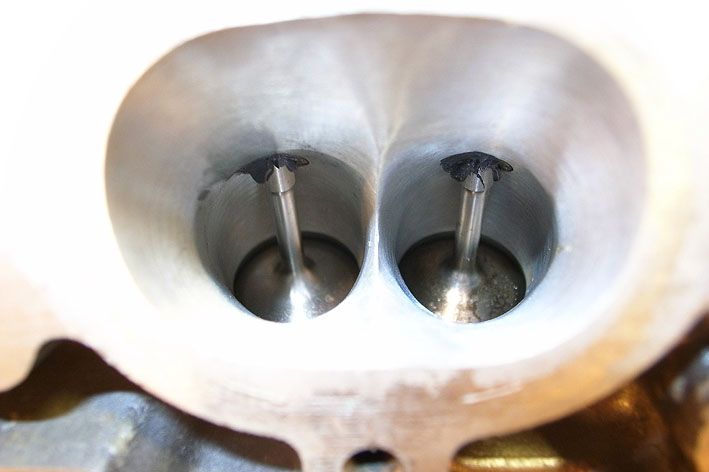
Close of up of port down intake:
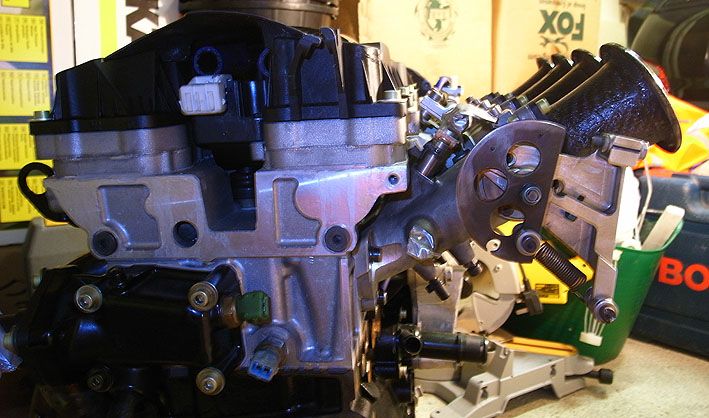
Intakes off:
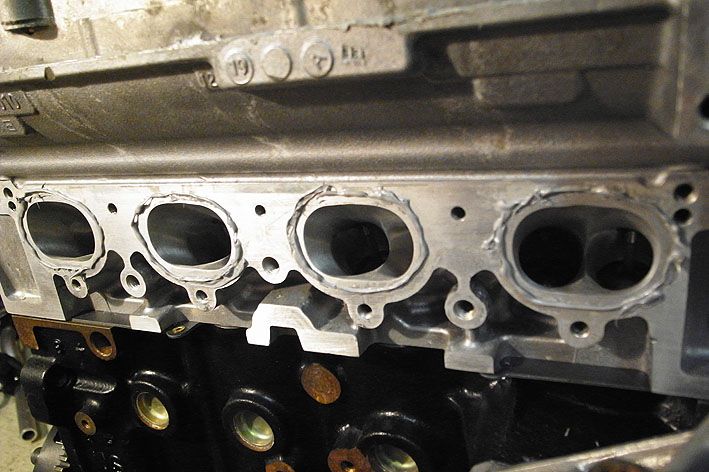
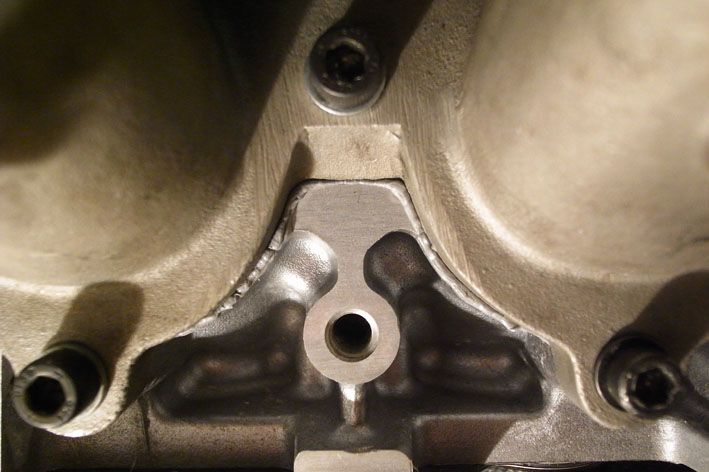
Close up of Porting:
Work in progress:
Cleaned Face:
Cleaned face of intakes (Old sealant removed etc):
The Sealant:
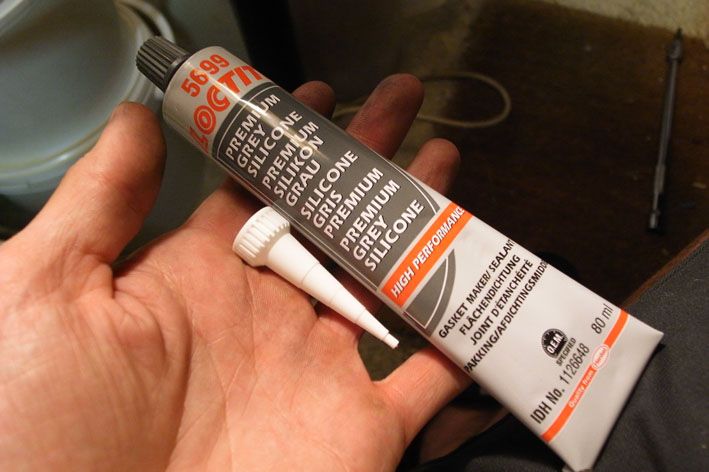
Apply to both surfaces carefully:
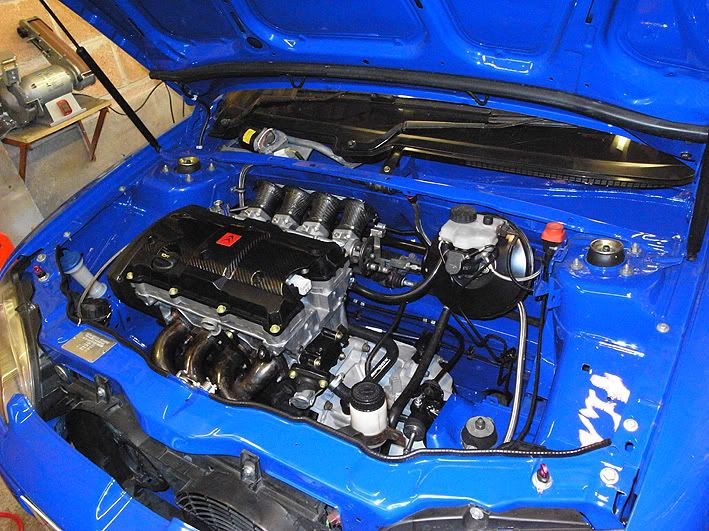
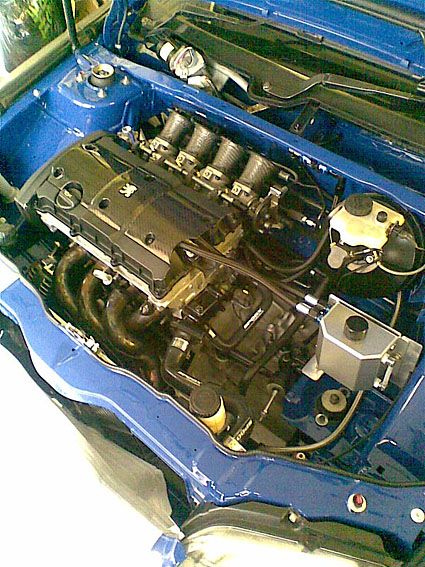
All bolted back on, and none seeped into the ports either!:
And all done:
Next thing is to collect the car, fit the engine and box (with the help of Hank), get Bobby (wire wizard) to get it running, then fit my seat, brakes and steering wheel to it and we should be good to go **Fingers crossed**
BUT, I thought i'd start a blog so things are up and running, as i started to do a few bits to the engine tonight and managed to get some good pics of the ports/angle of the pug sport bodies etc etc.
As most of you know I was building up a nice Citroen, but unfortunately I had to abandon this project and sell it on to a friend to finish as I just haven't had the time to commit to as of late - you can read the full thread here if you are interested:
My Little Citroen Machine
Anyway, that aside, here is my next project! A fully restored 106 Rallye with cage, coilovers, fully stripped to a shell and resprayed - basically a similar concept to the Saxo just less work to do! Pics of the car to follow at a later date (once I pick it up).
PART 1:
As i'd removed the inlet recently to get the Carbon Trumpets made by Streamline Carbon, I had to re-bond the bodies back onto the engine to seal them properly again. Below are a few pics of the engine with the intakes loosley bolted on, prior to the re-seal process, then pics of the bonding itself, then a pic of it all sorted.
Here she is unveiled again (it's almost like a statue than a race engine!):
Angle of the Direct to head Pug Sport Throttle Bodies:
Close of up of port down intake:
Intakes off:
Close up of Porting:
Work in progress:
Cleaned Face:
Cleaned face of intakes (Old sealant removed etc):
The Sealant:
Apply to both surfaces carefully:
All bolted back on, and none seeped into the ports either!:
And all done:
Next thing is to collect the car, fit the engine and box (with the help of Hank), get Bobby (wire wizard) to get it running, then fit my seat, brakes and steering wheel to it and we should be good to go **Fingers crossed**
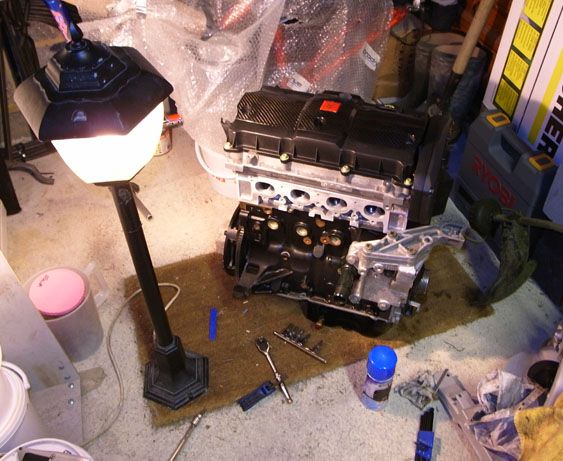
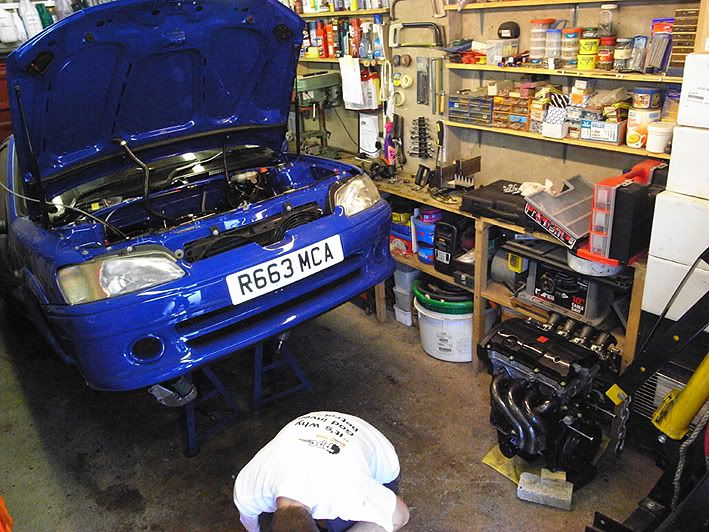
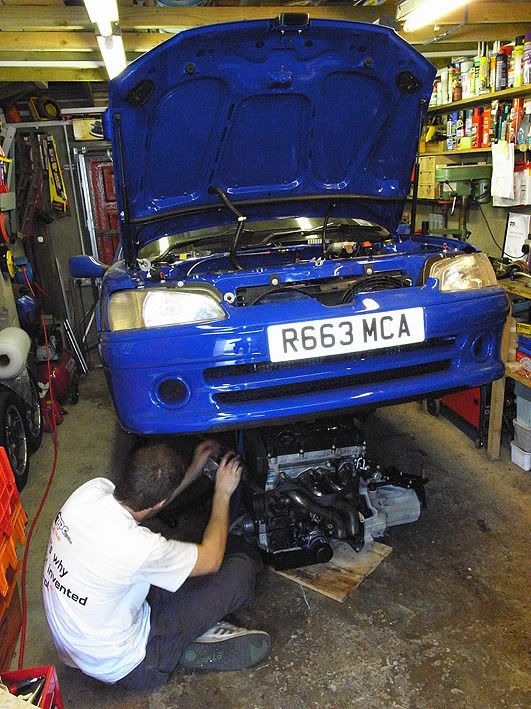
A few more pics from the weekend too - the Saxo is now out of the garage and i've moved the engine to the front so I can now see hat i'm doing when working on it!
Cam Pulleys:
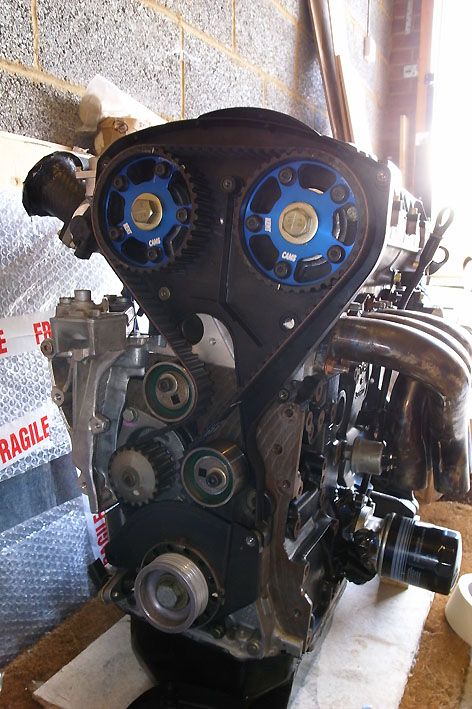
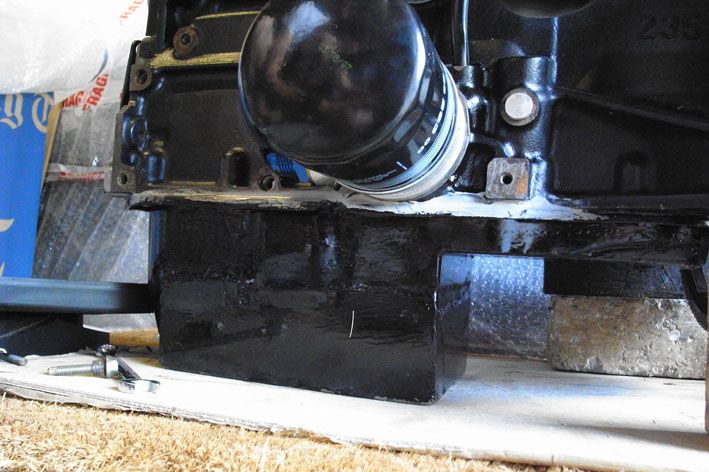
Modified & baffled Sump:
All ready to be fitted now:
I am on holiday now for two weeks but once i'm back i'll get this updated again asap - looking forward to getting the Rallye now!
Lewis
Cam Pulleys:
Modified & baffled Sump:
All ready to be fitted now:
I am on holiday now for two weeks but once i'm back i'll get this updated again asap - looking forward to getting the Rallye now!
Lewis
Right i've had a chance to do a bit more of a proper write up regarding the engine installation so here it is:
I loaded up the van on saturday with all the parts - engine, gearbox, Grp N wishbones, Steering, and other various nuts and bolts etc and then got up pretty early on the Sunday to head to Hanks gaff in Newport Wales. Bit of a debacle en route as I didn't have enough dosh for the severn bridge (assumed it would be about £3 and it turned out to £15!) So anyway they let me through and I just had to pay by post instead...and if you don't pay within the week it goes up to £90!!! Robbin' b
 ds!
ds!
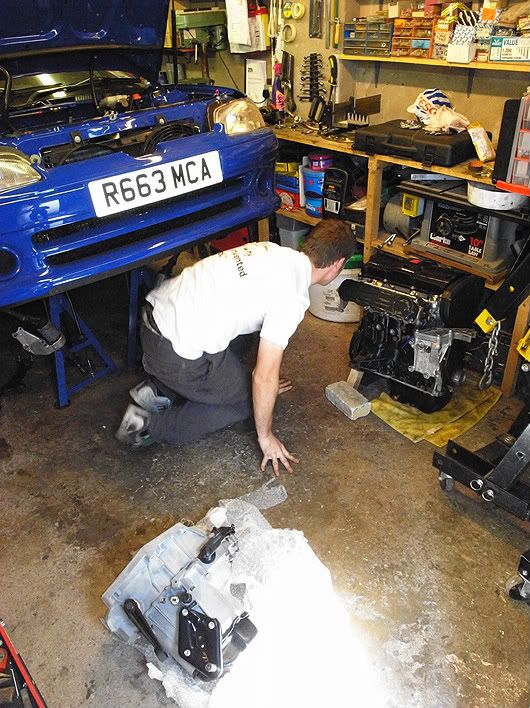
That aside, I got to Hanks about elevenish and we made a start straight away.
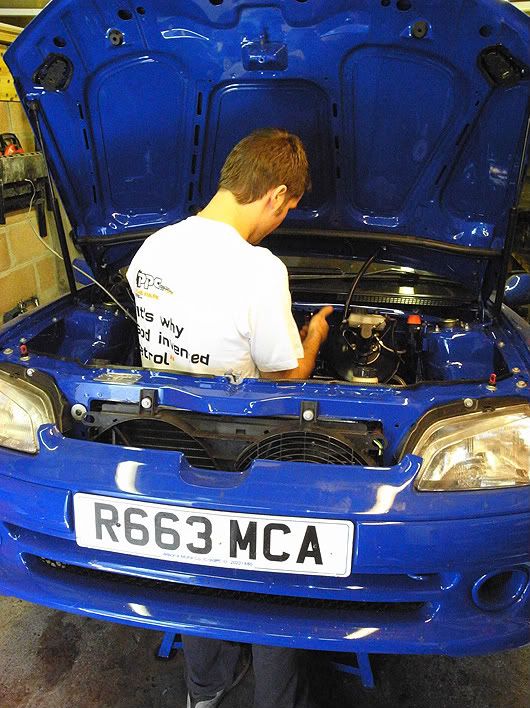
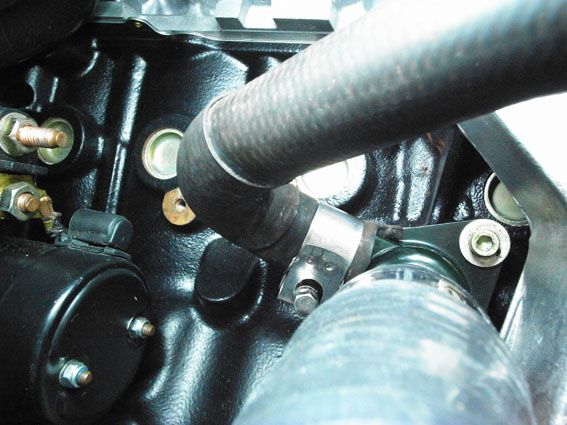
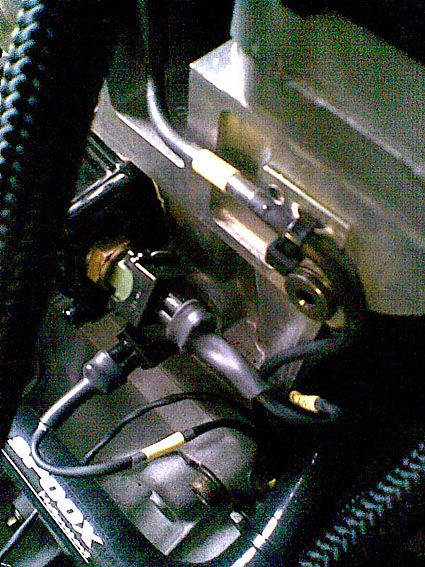
First Job was to check all the hoses in the bay were ready, and to remove the old Fuel pressure regulator that Hank had installed for his engine - mine already has one so we did away with that. 2nd pic shows Hank modeling the latest fashion in Wales, otherwise known as the '106 Rallye Frock'!
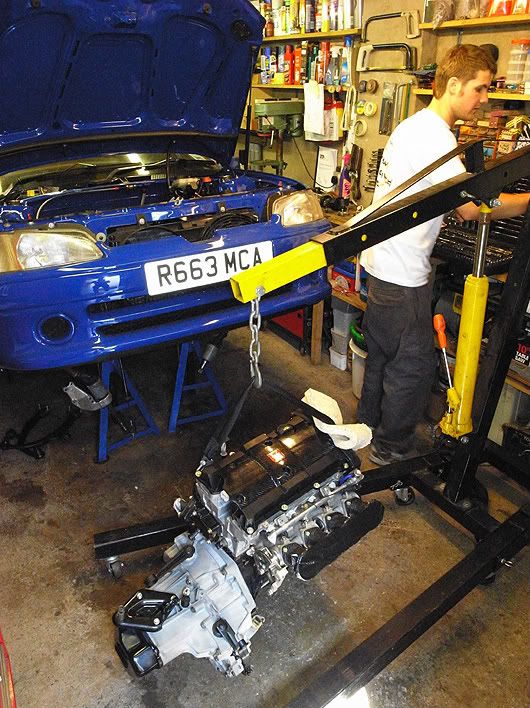
2nd job was to mate the engine to the Gearbox - this was done without too much trouble once we had lifted the engine up a little using the crane, and then located the input shaft into the clutch. We then bolted everything up and checked it was all tight etc:
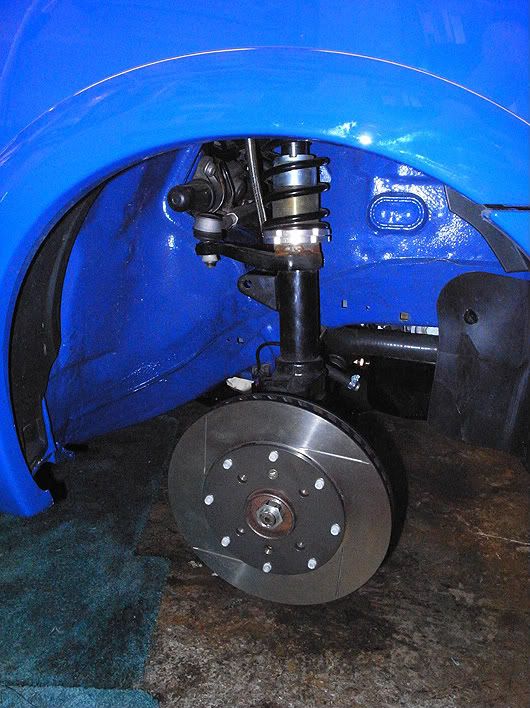
Next job was to try the brakes on the car to see if they fitted...needless to say they didn't, but the discs sure looked sexual regardless:
Next up was the actual engine fitment. ALthough the pics give the impresion that this was an easy task, while it was relatively straight forward there was a lot of heaving and fecking about to move it into postion while we lowered the car down onto it using the crane, all the while trying not to scratch or break anything (which we managed fine!)
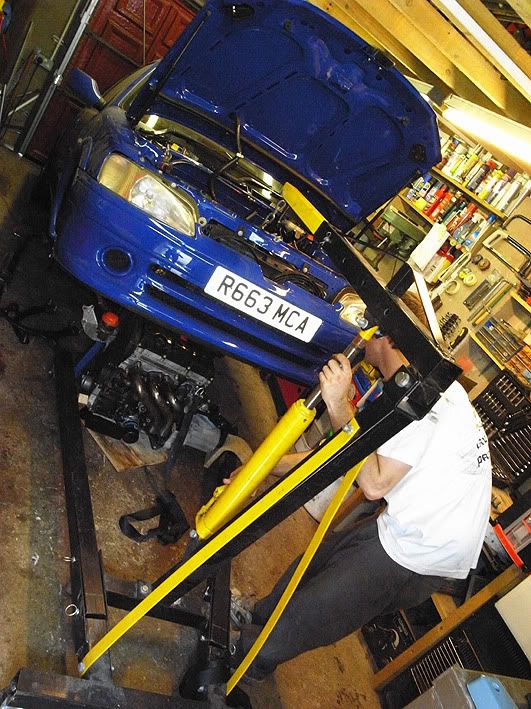
We then 'simply' lowered the car to the ground, and pulled the engine up into place using the crane, then onto then bolted it all in:
We then had to modify the throttle cable to fit, which we did. Meanwhile Hank discovered he had somehow implaed himself with some braided hose in his leg - stings like a bh!

After that we connected pretty much everything else, fitted the wishbones, checked it all and we were done! All that was left to do was admire our handiwork.
The car get's delivered to my house this weekend so more updates to come.
Watch this space!
I loaded up the van on saturday with all the parts - engine, gearbox, Grp N wishbones, Steering, and other various nuts and bolts etc and then got up pretty early on the Sunday to head to Hanks gaff in Newport Wales. Bit of a debacle en route as I didn't have enough dosh for the severn bridge (assumed it would be about £3 and it turned out to £15!)
So anyway they let me through and I just had to pay by post instead...and if you don't pay within the week it goes up to £90!!! Robbin' bds! That aside, I got to Hanks about elevenish and we made a start straight away.
First Job was to check all the hoses in the bay were ready, and to remove the old Fuel pressure regulator that Hank had installed for his engine - mine already has one so we did away with that. 2nd pic shows Hank modeling the latest fashion in Wales, otherwise known as the '106 Rallye Frock'!
2nd job was to mate the engine to the Gearbox - this was done without too much trouble once we had lifted the engine up a little using the crane, and then located the input shaft into the clutch. We then bolted everything up and checked it was all tight etc:
Next job was to try the brakes on the car to see if they fitted...needless to say they didn't, but the discs sure looked sexual regardless:
Next up was the actual engine fitment. ALthough the pics give the impresion that this was an easy task, while it was relatively straight forward there was a lot of heaving and fecking about to move it into postion while we lowered the car down onto it using the crane, all the while trying not to scratch or break anything (which we managed fine!)
We then 'simply' lowered the car to the ground, and pulled the engine up into place using the crane, then onto then bolted it all in:
We then had to modify the throttle cable to fit, which we did. Meanwhile Hank discovered he had somehow implaed himself with some braided hose in his leg - stings like a b
h! After that we connected pretty much everything else, fitted the wishbones, checked it all and we were done! All that was left to do was admire our handiwork.
The car get's delivered to my house this weekend so more updates to come.
Watch this space!
Edited by Track_Cit on Thursday 13th August 01:08
Right, a few updates tonight:
I have done a more comprehensive list of work but i haven't had time to do a proper write up, and my laptop is dead so currently using my g/f's cumbersome pc...anyways, that aside, here are some snaps and a list of work done so far:
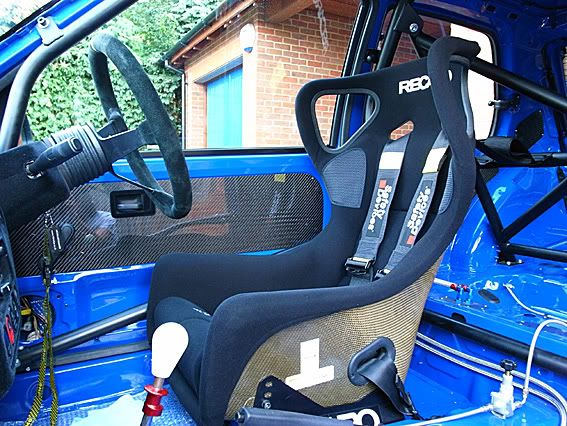
All bolts changed for lightweight aluminum one's where safe to do so, otherwise stainless steel or black high tensile socket head bolts were used. I fitted the seat, steering wheel, harnesses, and quick shift, and roof ariel blank too, and swapped all the stainless bolts in the cabin for back one's to tone it down a little. Also removed the map pockets as I don't really like them, plus the flock was peeling too! I also washed it so it's like new again now. I cannot emphasise how pleased i am with the car - pics do not do it justice, it's absolutely stunning in the flesh! Also swapped the jubilee clips for proper strong motorsport items - pics to follow. Spent two days working on it so far and got most of the small jobs done that I had in mind.
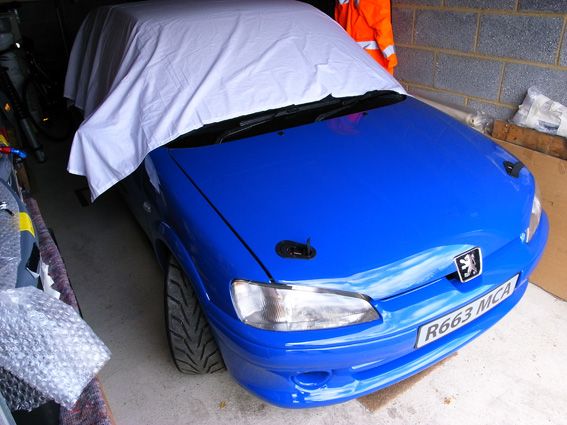
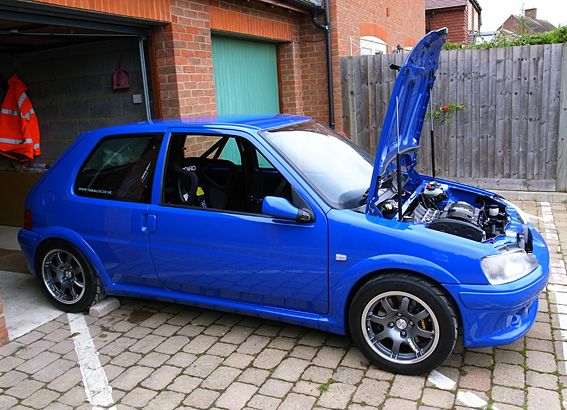
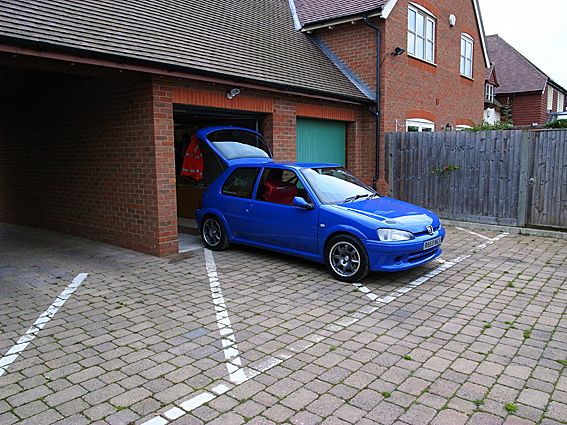
Here it is on it's arrival:
I washed it and did some work that night, now onto the next day:
Coming out of 'bed' for the evenings work:
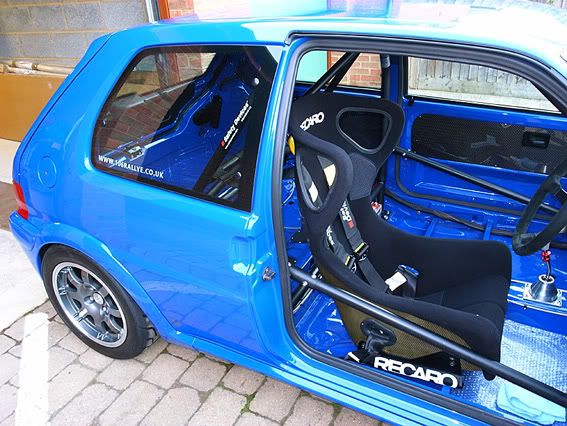
Seat Fitted:
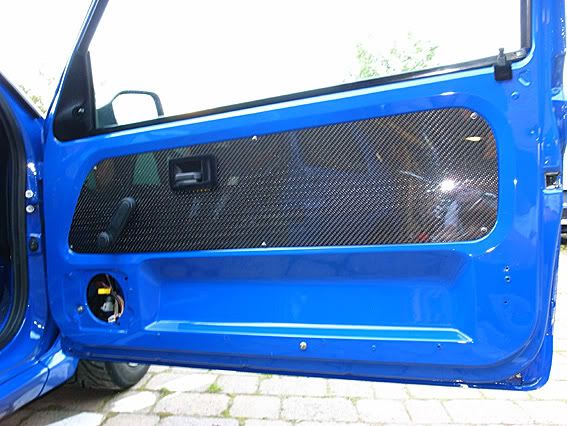
Doorcards with black bolts & removed map pockets:
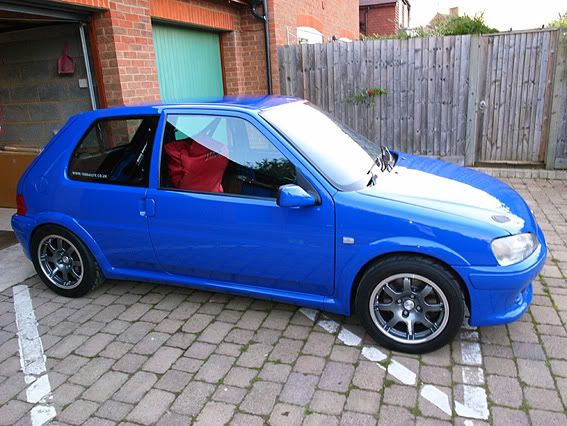
Overall quick snap:
Like I said i will do a proper write up when i get a chance!!
Things to do still:
Lewis
I have done a more comprehensive list of work but i haven't had time to do a proper write up, and my laptop is dead so currently using my g/f's cumbersome pc...anyways, that aside, here are some snaps and a list of work done so far:
All bolts changed for lightweight aluminum one's where safe to do so, otherwise stainless steel or black high tensile socket head bolts were used. I fitted the seat, steering wheel, harnesses, and quick shift, and roof ariel blank too, and swapped all the stainless bolts in the cabin for back one's to tone it down a little. Also removed the map pockets as I don't really like them, plus the flock was peeling too! I also washed it so it's like new again now. I cannot emphasise how pleased i am with the car - pics do not do it justice, it's absolutely stunning in the flesh! Also swapped the jubilee clips for proper strong motorsport items - pics to follow. Spent two days working on it so far and got most of the small jobs done that I had in mind.
Here it is on it's arrival:
I washed it and did some work that night, now onto the next day:
Coming out of 'bed' for the evenings work:
Seat Fitted:
Doorcards with black bolts & removed map pockets:
Overall quick snap:
Like I said i will do a proper write up when i get a chance!!
Things to do still:
- Buy new alternator
- Get exhaust system made
- Fit brakes/sort brakes out
- Get wiring loom done
Lewis
Edited by Track_Cit on Tuesday 18th August 00:27
Edited by Track_Cit on Tuesday 18th August 18:13
thanks guys!
Right a few more updates tonight... I finally had time to upload my other pics onto photobucket, with the initial progress, so i'll get those up and then put the latest updated after that....
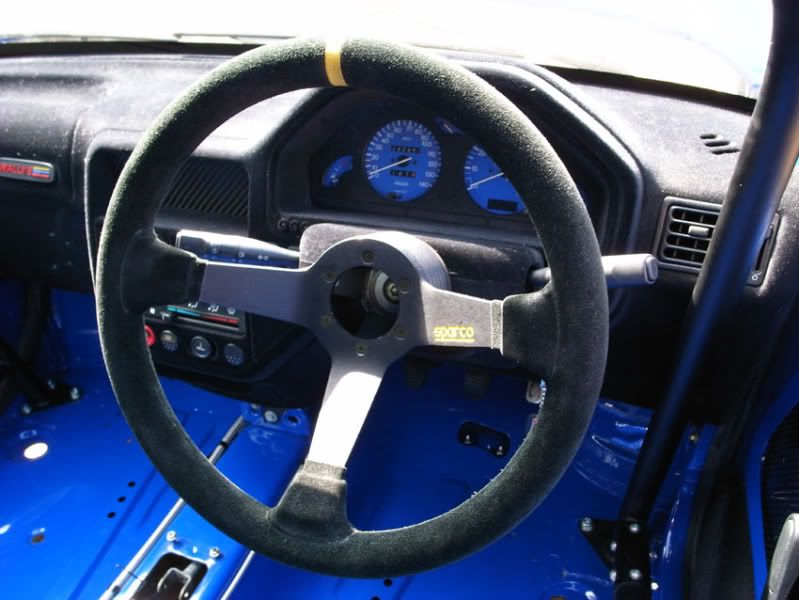
Steering wheel fitted:

Quick Shift fitted:
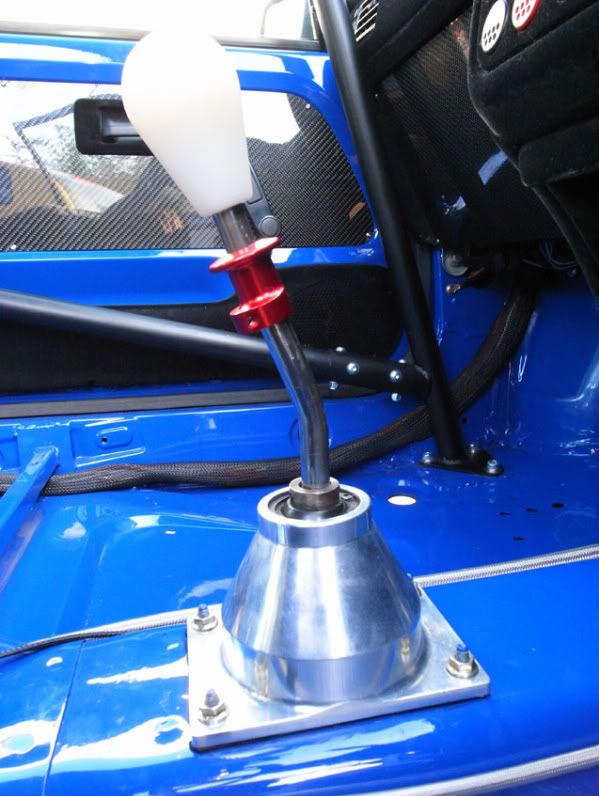
All bolts replaced with aluminum one's (where safe to do so of course):
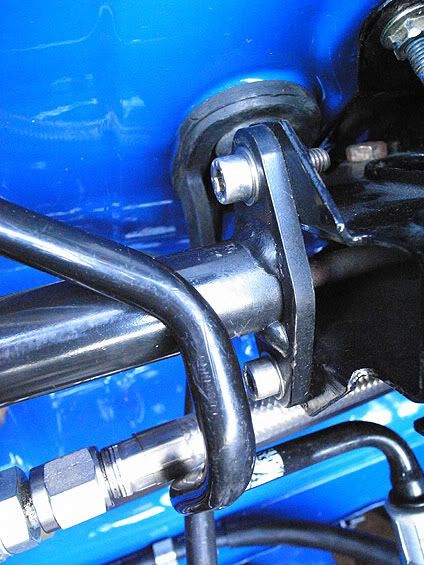
Jubilee clips banished and replaced with proper fasteners:
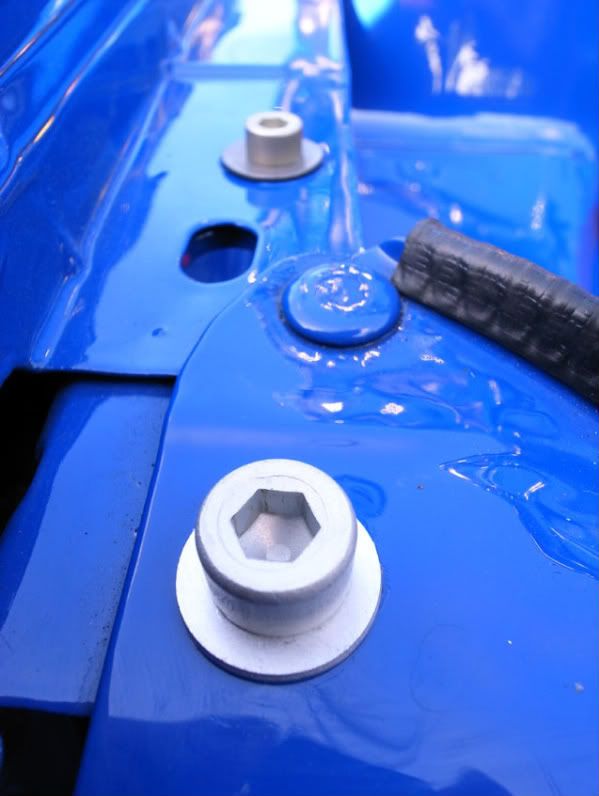
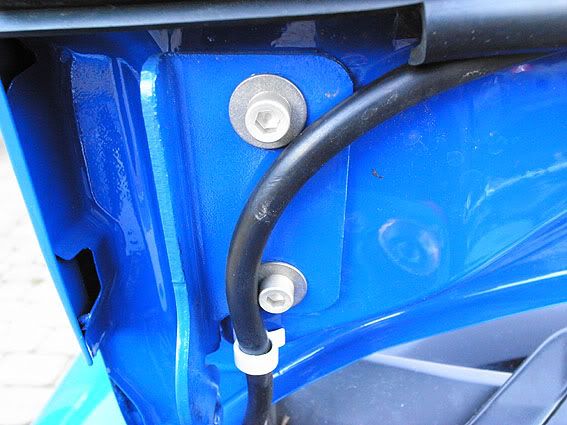
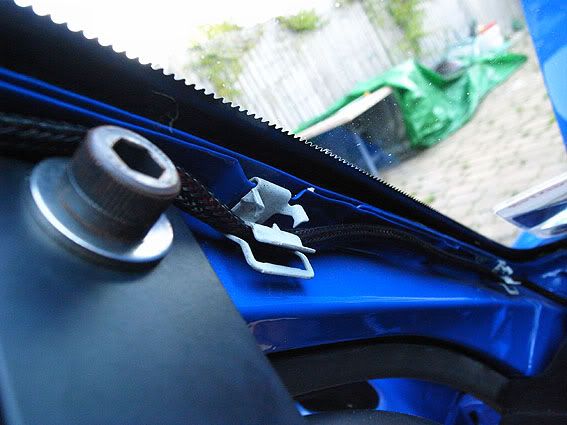
OE cable retainers on pillar banished and replaced with tidy ones (you can also see i'm in the process of fitting black roll cage bolts instead of the stainless ones):
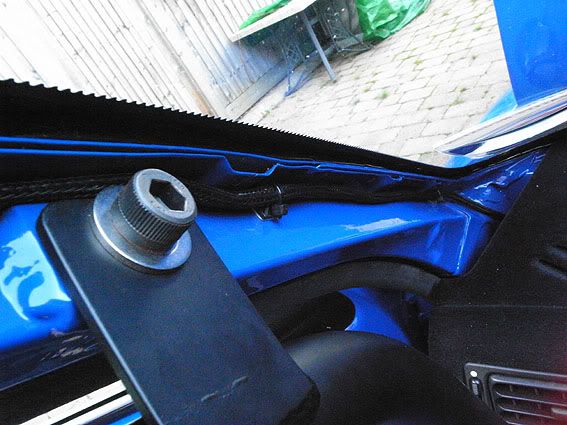
Stainless Steel Engine Mount bolts fitted:
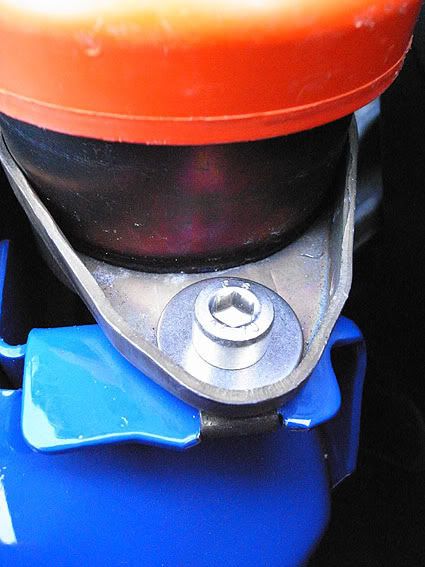
Stainless bolts fitted on brake balance bar:
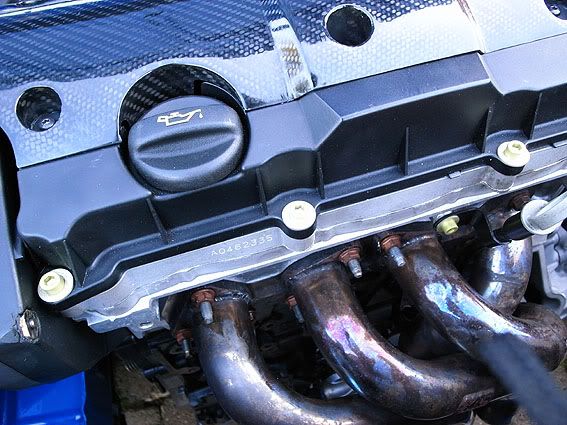
Gold bolts on engine all swapped for black aluminum ones (decided it's a cleaner more subtle look than the gold type!)
Before:
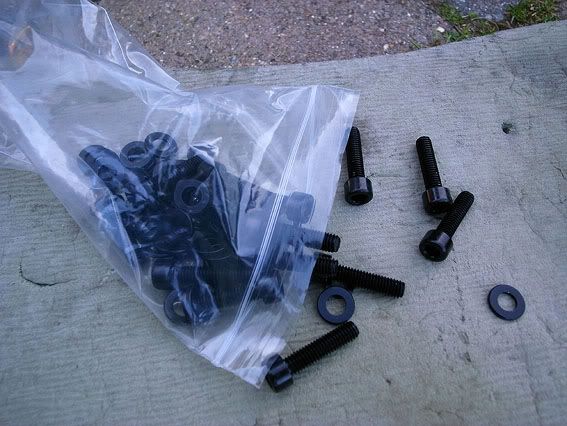
Take these:
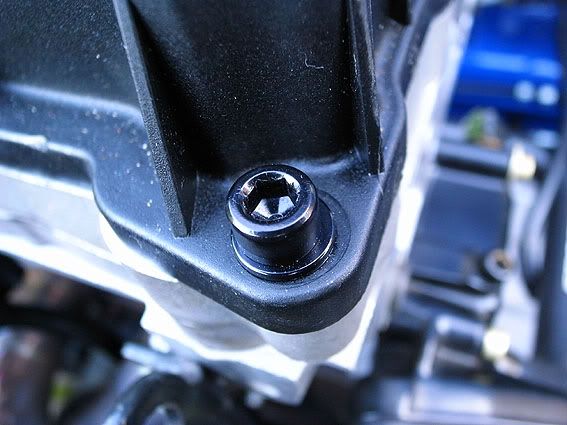
And you get this:
Still a few to swap in this pic - not quite done yet as I ran out!
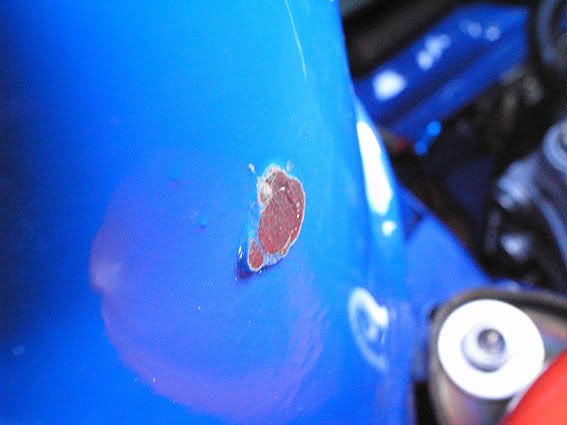
Also ground off this random stud in the bay using my good mothers dremmel (amazing tool this!) and touched it up with paint - looks better than a stud sitting there doing nothing but may get it smoothed over professionally eventually but it will do for now - no pic of it painted but it does look nice, I did a tidy job of it!
And that's about it for now - doing all the small detailing type jobs for now until I have enough dough to crack on with the exhaust and wiring!
Lewis
Right a few more updates tonight... I finally had time to upload my other pics onto photobucket, with the initial progress, so i'll get those up and then put the latest updated after that....
Steering wheel fitted:
Quick Shift fitted:
All bolts replaced with aluminum one's (where safe to do so of course):
Jubilee clips banished and replaced with proper fasteners:
OE cable retainers on pillar banished and replaced with tidy ones (you can also see i'm in the process of fitting black roll cage bolts instead of the stainless ones):
Stainless Steel Engine Mount bolts fitted:
Stainless bolts fitted on brake balance bar:
Gold bolts on engine all swapped for black aluminum ones (decided it's a cleaner more subtle look than the gold type!)
Before:
Take these:
And you get this:
Still a few to swap in this pic - not quite done yet as I ran out!
Also ground off this random stud in the bay using my good mothers dremmel (amazing tool this!) and touched it up with paint - looks better than a stud sitting there doing nothing but may get it smoothed over professionally eventually but it will do for now - no pic of it painted but it does look nice, I did a tidy job of it!
And that's about it for now - doing all the small detailing type jobs for now until I have enough dough to crack on with the exhaust and wiring!
Lewis
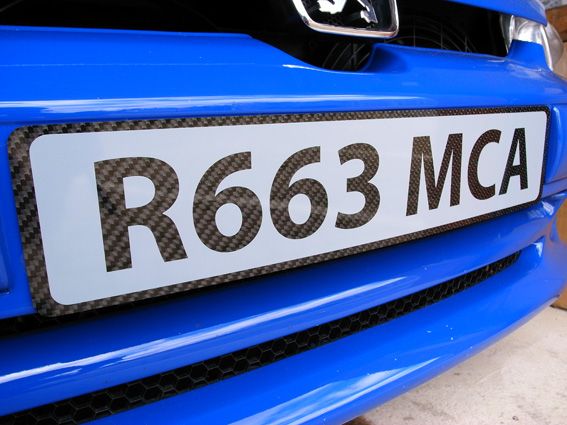
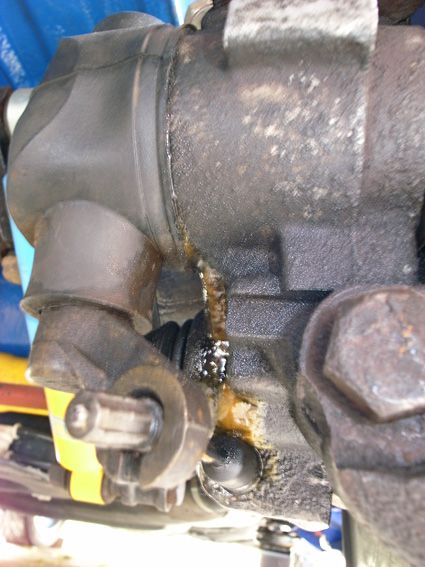
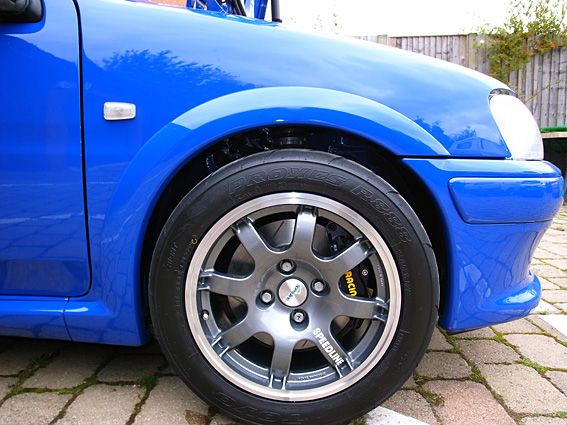
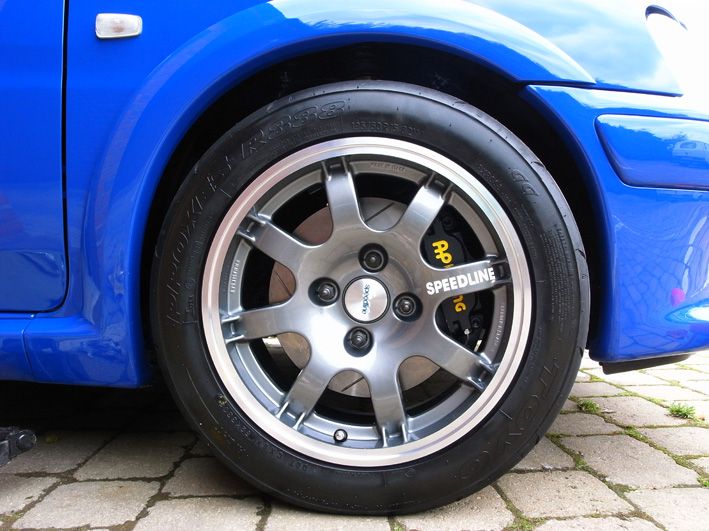
Right lots of updates today. I fitted my AP's (total arse of a job) achieved with the help of 5mm spacers and a little grinding. Also installed my fuel lines in the bay, replaced my bonnet lifters as they were creaking, and removed my rear caliper as it was leaking like fk (only realised when I pushed the car out of the garage and saw the stain on the floor from brake fluid, so that will need to be replaced at some point. Also perfected my throttle cable as it was a bit gammy before, and took a pic of my group N wishbones fitted too. Also fitted my carbon number plates, as the old one's were a little haggard! I will let the pics do the talking anyways.
Good morning little Rallye:
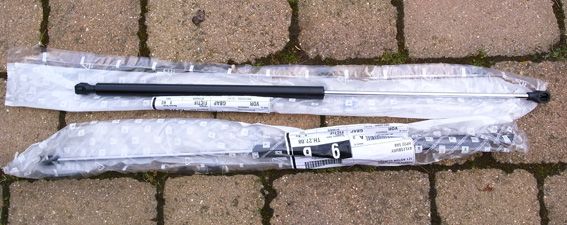
Old Bonnet Lifters removed:
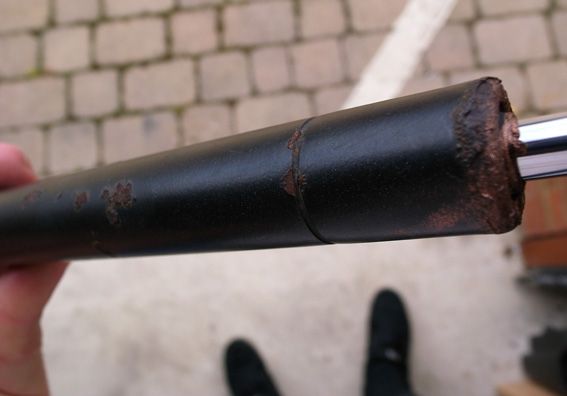
New OE ones from Peugeot:
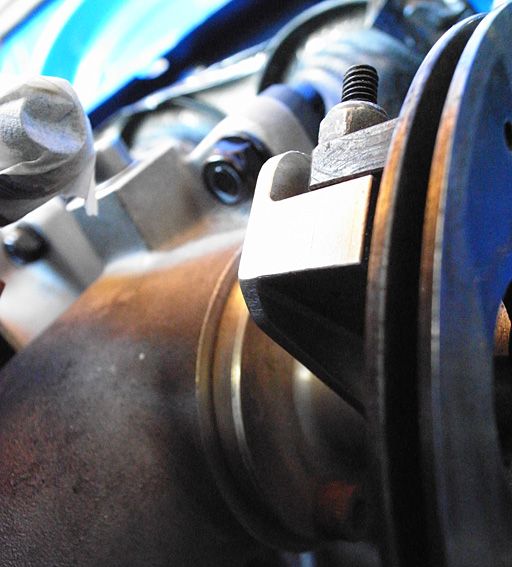
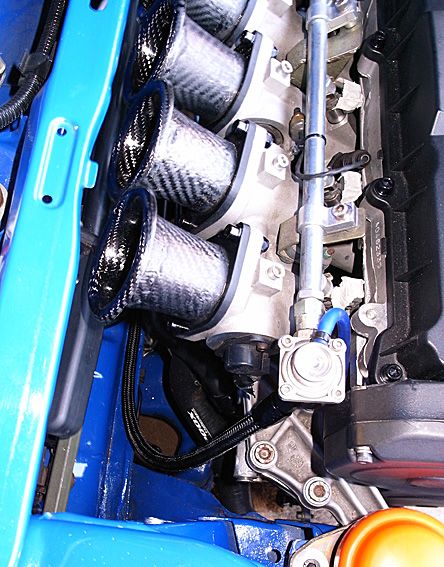
Linkage was fouling my fuel line fitting so i ground it down a little bit with a dremmel (such a handy tool!)
Before:
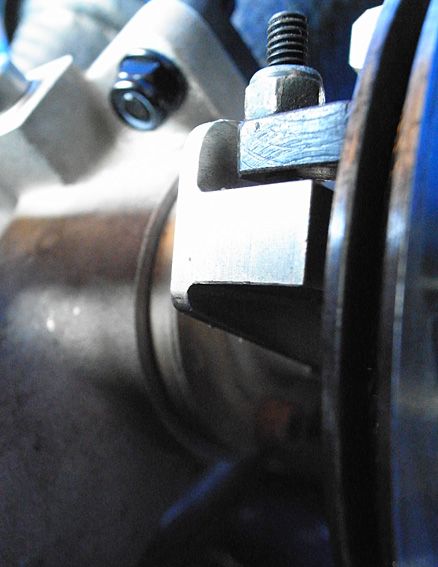
After (tiny corner ground off for clearance):
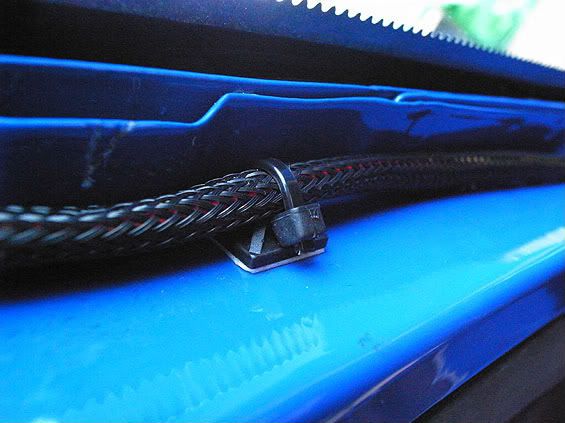
Throttle cable sorted:
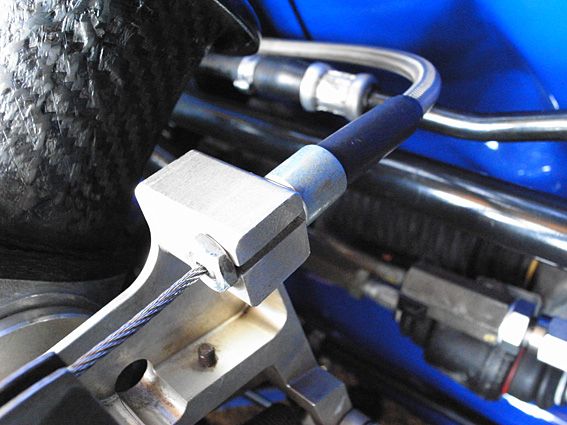
Throttle cable secured to bulkhead:
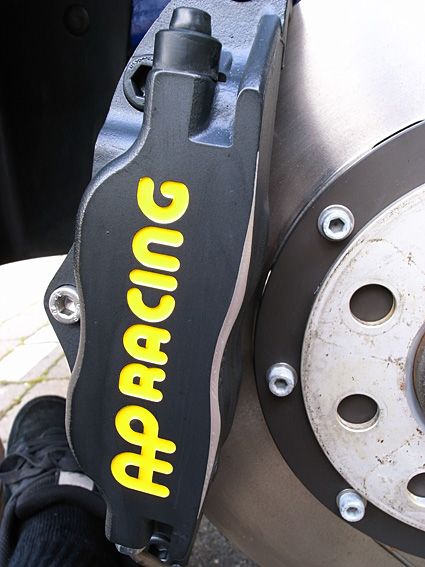
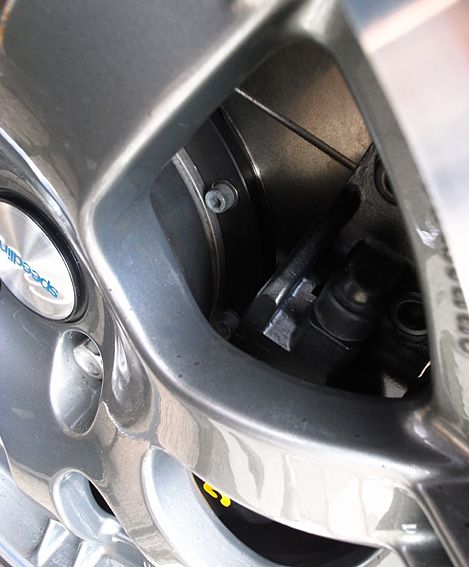
AP's brakes ground down a little (still need to touch them up):
Pads in (very easy) At this point the caliper was upside down so I swapped it after - doh!):
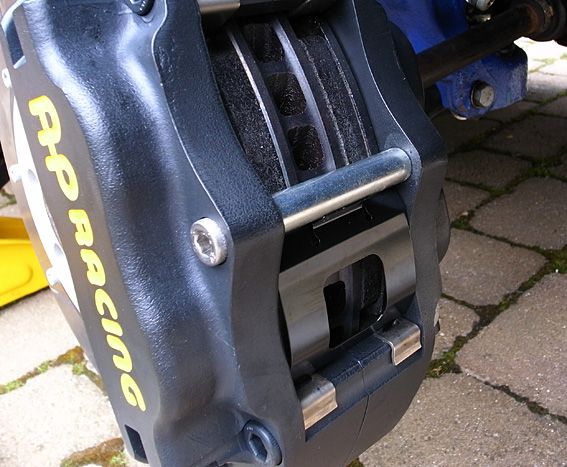
Tight like a tiger!!:

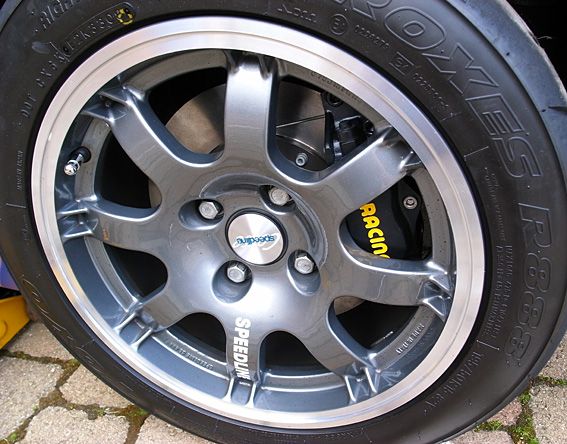
All fitted:
k (only realised when I pushed the car out of the garage and saw the stain on the floor from brake fluid, so that will need to be replaced at some point. Also perfected my throttle cable as it was a bit gammy before, and took a pic of my group N wishbones fitted too. Also fitted my carbon number plates, as the old one's were a little haggard! I will let the pics do the talking anyways.Good morning little Rallye:
Old Bonnet Lifters removed:
New OE ones from Peugeot:
Linkage was fouling my fuel line fitting so i ground it down a little bit with a dremmel (such a handy tool!)
Before:
After (tiny corner ground off for clearance):
Throttle cable sorted:
Throttle cable secured to bulkhead:
AP's brakes ground down a little (still need to touch them up):
Pads in (very easy) At this point the caliper was upside down so I swapped it after - doh!):
Tight like a tiger!!:
All fitted:
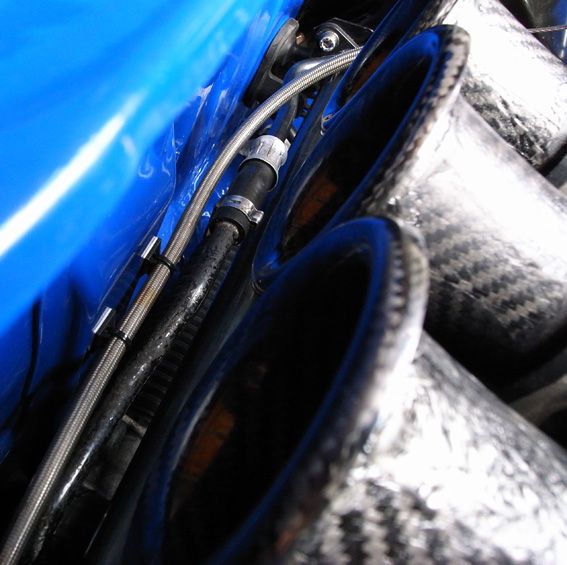
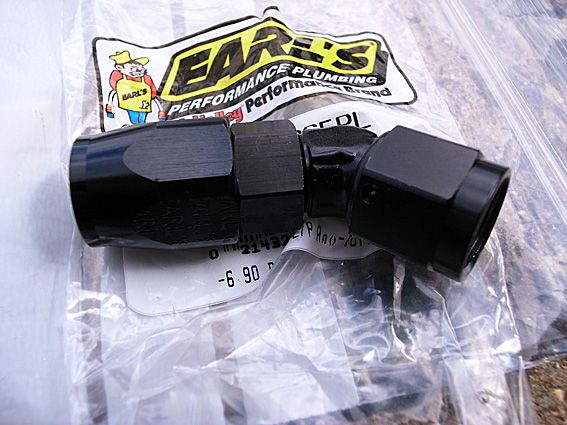
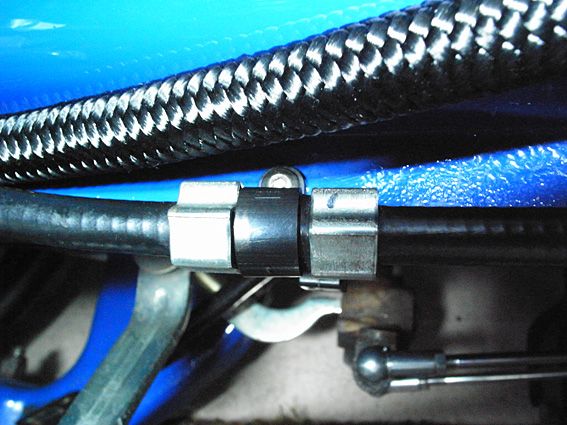
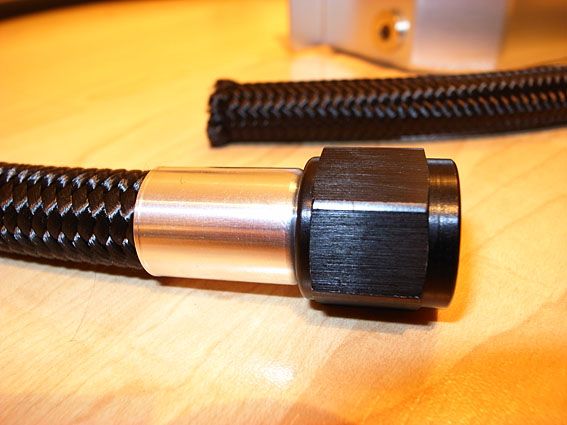
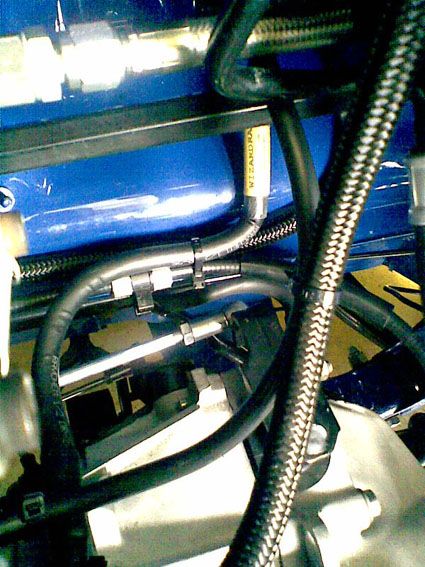
Mint new Earls Black fittings:
Fuel lines and filter installed (using hole already present in the bay, didn't have to drill anything!):
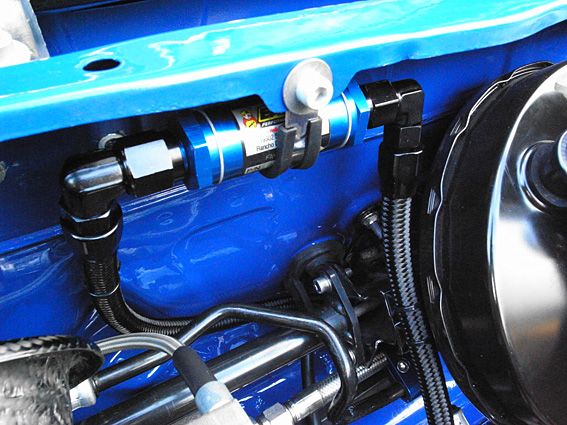
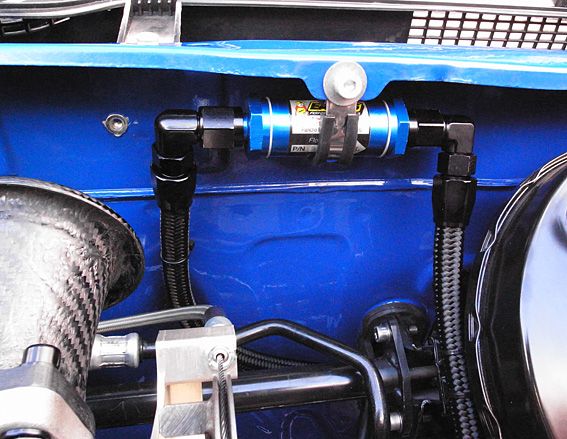
Return Line:
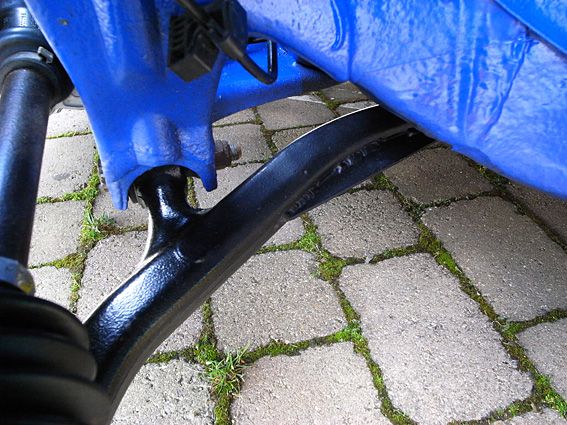
Group N wishbone:
New Carbon plates off Bic @ Streamline Carbon (thanks again!):
Leaking Caliper (Now removed):
New coilpack badge (there is a piece of paper on it here but you get the idea!)
Bay as it stands now:
Lol we all make mistakes!
Hmm I hadn't considered a little space for expansion when hot...I may zim them down a little more with the file. I don't fancy spacing the wheels any wider, they'd look odd more than anything too! We'll see how she goes as they are (maybe ground down a mm more or so) then go from there. Makes you sweat taking a grinder to £1500 brakes I tell you!
More updates today anyway. I have done a hard days graft today again on the Rallye. Hank must have driven on a road that was recently resurfaced (in fact he told me he did) as the front wheels were literally COVERED in black tar spots and they wouldn't come off for st, so i had to buy some 'muc off' tar remover from halfords to clean them up. It wasn't much good, and I had to spend an hour (per wheel) painstakingly cleaning each wheel and scraping the spots off with my finger nail...my hands are now killing me, but the wheels are like new again! I also P clipped in my clutch cable so as to allow room for my return fuel line to run along side without the risk of chaffing it etc. I also put a threaded insert in the back of the P clip fixing the fuel filter for ease of removal if i ever need to, as it was fiddly as hell with a nut a bolt. I also fitted a black bolt to it too, looks better now!
Some pics of the updates, and random shots too. The wheels look like they protrude loads in the pics but it's just the camera!
Engine bay:
Brakes (prior to wheel clean I might add!):
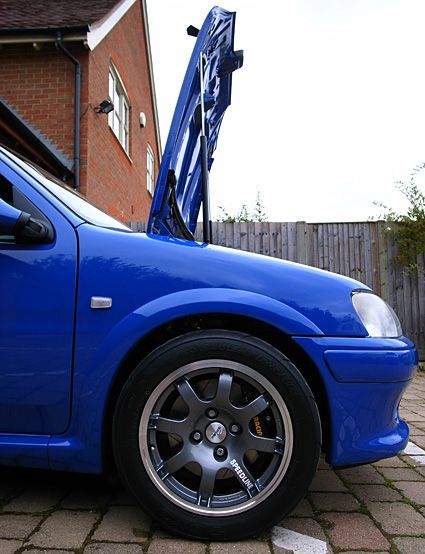
Overall snap:
Clutch cable P clipped in (bh to do with engine in place - enter the dremmel again!)
Filter:
Hmm I hadn't considered a little space for expansion when hot...I may zim them down a little more with the file. I don't fancy spacing the wheels any wider, they'd look odd more than anything too! We'll see how she goes as they are (maybe ground down a mm more or so) then go from there. Makes you sweat taking a grinder to £1500 brakes I tell you!
More updates today anyway. I have done a hard days graft today again on the Rallye. Hank must have driven on a road that was recently resurfaced (in fact he told me he did) as the front wheels were literally COVERED in black tar spots and they wouldn't come off for s
t, so i had to buy some 'muc off' tar remover from halfords to clean them up. It wasn't much good, and I had to spend an hour (per wheel) painstakingly cleaning each wheel and scraping the spots off with my finger nail...my hands are now killing me, but the wheels are like new again! I also P clipped in my clutch cable so as to allow room for my return fuel line to run along side without the risk of chaffing it etc. I also put a threaded insert in the back of the P clip fixing the fuel filter for ease of removal if i ever need to, as it was fiddly as hell with a nut a bolt. I also fitted a black bolt to it too, looks better now! Some pics of the updates, and random shots too. The wheels look like they protrude loads in the pics but it's just the camera!
Engine bay:
Brakes (prior to wheel clean I might add!):
Overall snap:
Clutch cable P clipped in (b
h to do with engine in place - enter the dremmel again!)Filter:
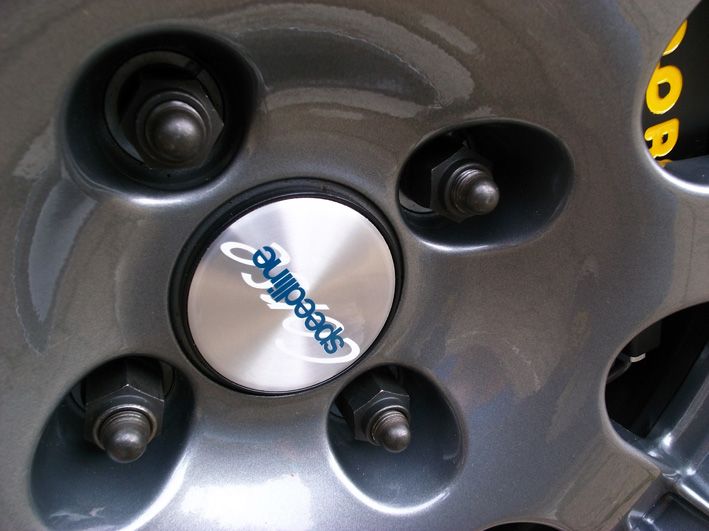
Yesterday I did some more work on the Rallye. I fitted my pug sport High tensile stud and nut conversion, touched up the calipers that I ground down (probably will redo them as they're still not 100% perfect). I fitted my new wish bone bolts too, so they're all hunky dory now.
I also finished P clipping the brake liness in with Stainless P clips. Added one more on the rear bulkhead to secure it more tidily - no pics of that as yet but will sort some soon.
Here's the pics anyway.
Wheel stud kit (front only until I can afford the rears!):
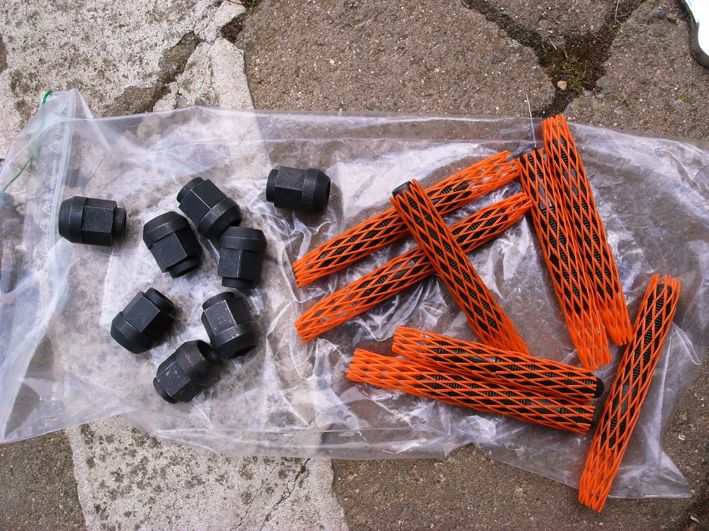

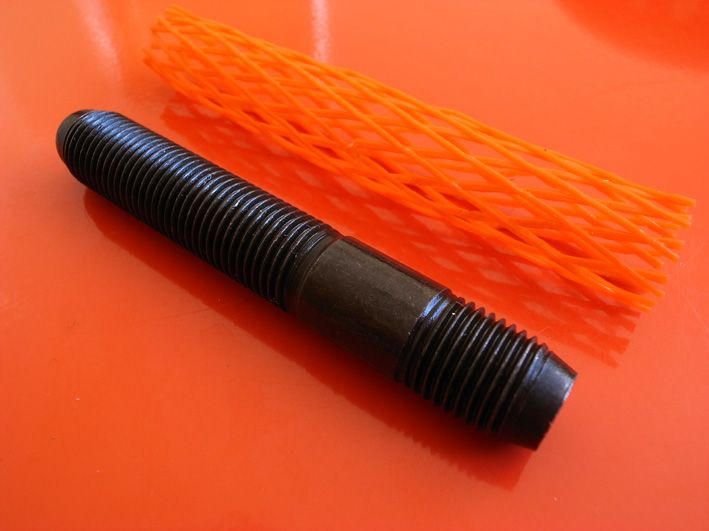
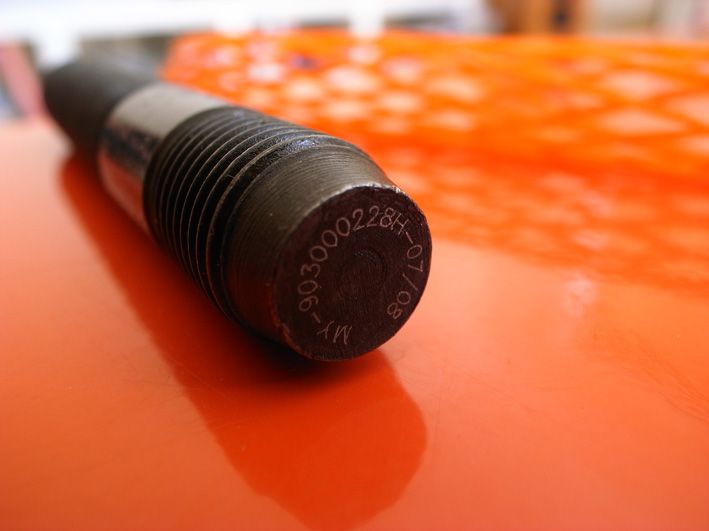
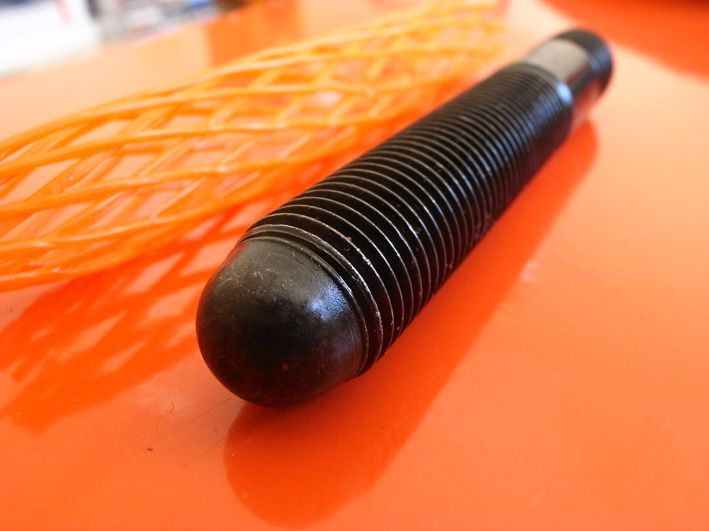
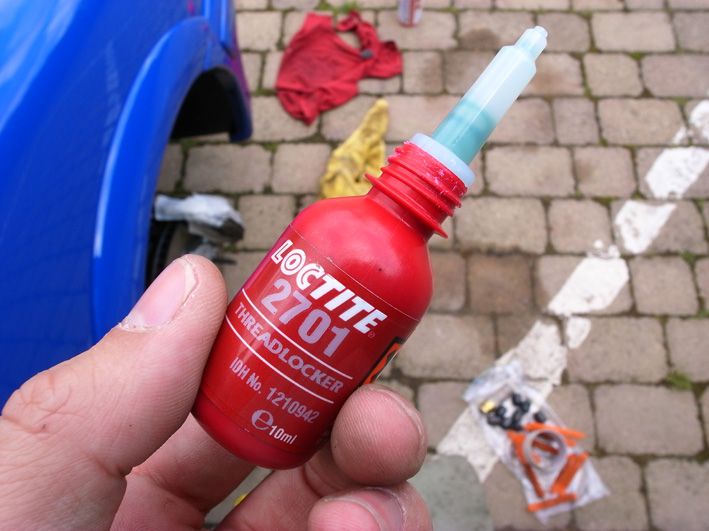
Bit of thread lock on them to ensure they don't work loose (they are screwed in very tightly but this is how you're meant to fit them):
All done:
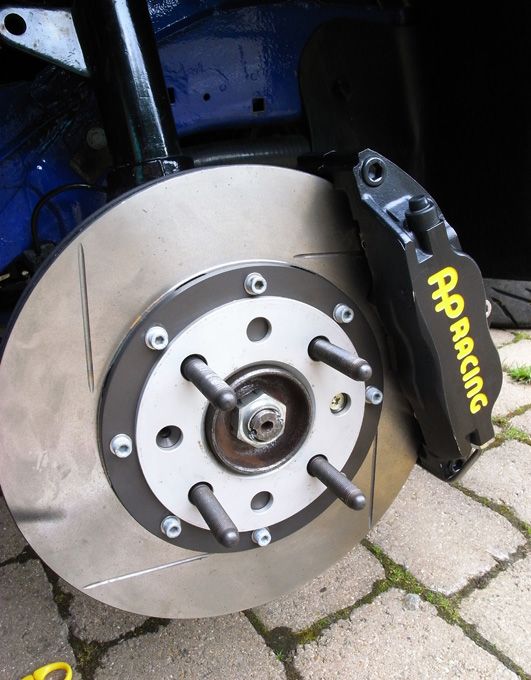
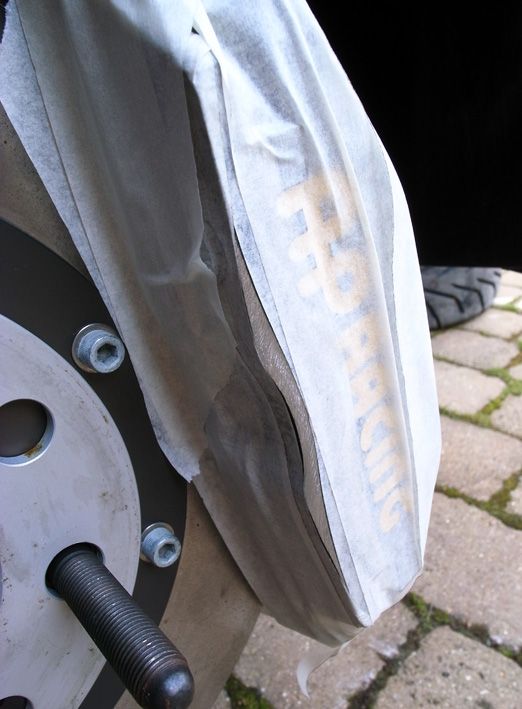
Masked off the caliper to paint it (you can see the finished result in the pic above):
New wishbone bolts:
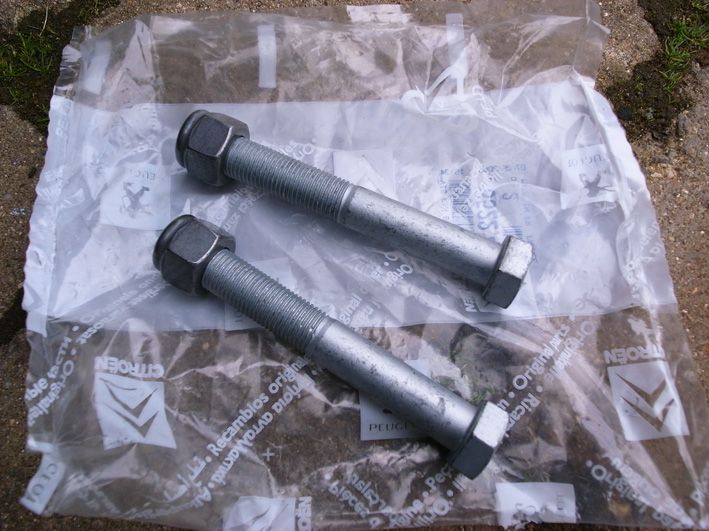
All fitted:
Will get some snaps of the brakes lines soon!
I also finished P clipping the brake liness in with Stainless P clips. Added one more on the rear bulkhead to secure it more tidily - no pics of that as yet but will sort some soon.
Here's the pics anyway.
Wheel stud kit (front only until I can afford the rears!):
Bit of thread lock on them to ensure they don't work loose (they are screwed in very tightly but this is how you're meant to fit them):
All done:
Masked off the caliper to paint it (you can see the finished result in the pic above):
New wishbone bolts:
All fitted:
Will get some snaps of the brakes lines soon!
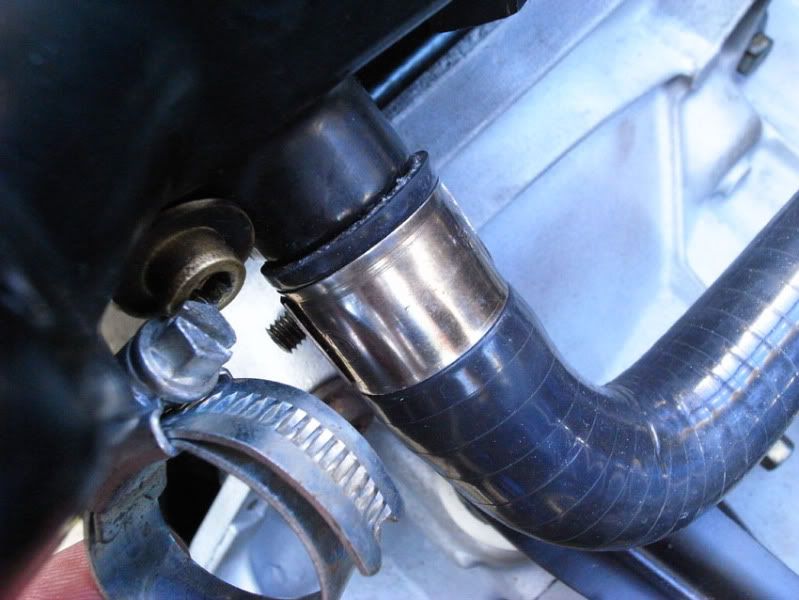
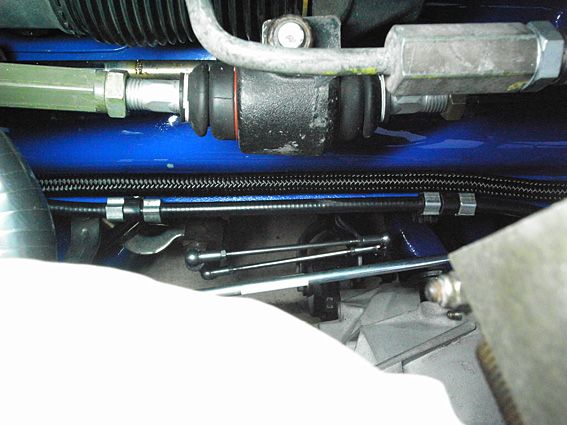
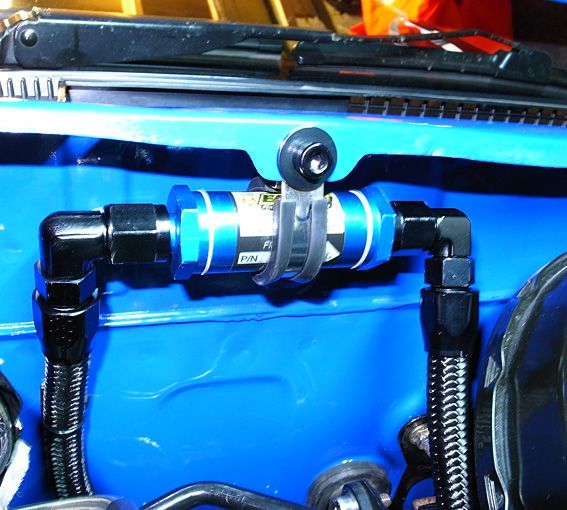
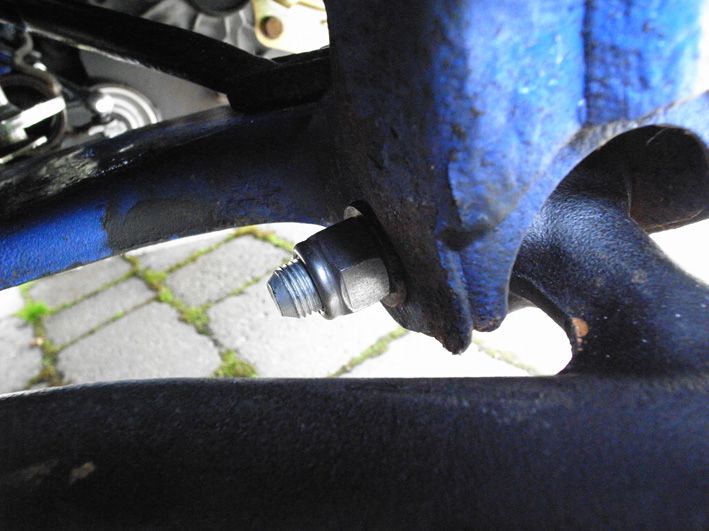
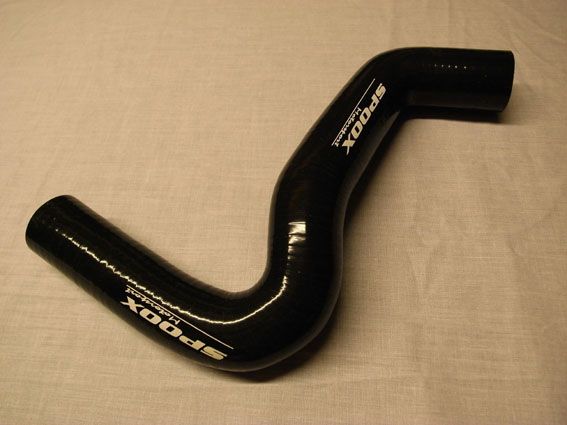
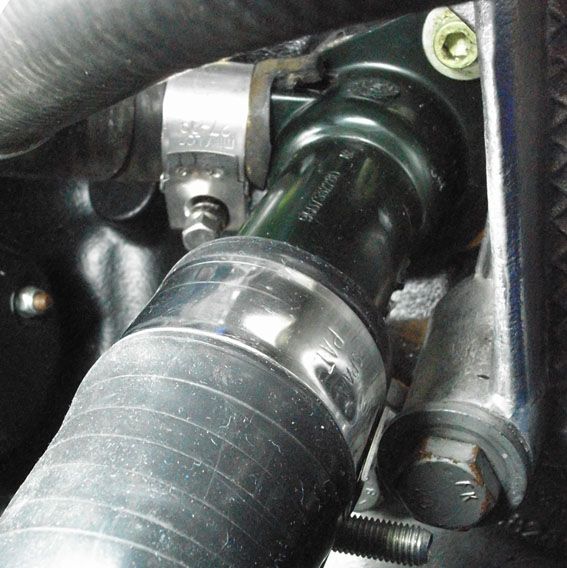
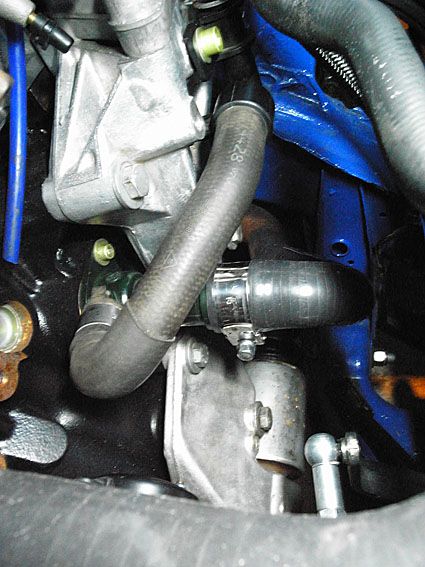
Some more updates last night. I finally took delivery of my top hose from Spoox (4 week lead time as it was made to order). Had to cut it down as it was too long but it's all fitted now and looks great - just need some decent hose clips to secure it each end. Also received my 120 degree fitting from earls to secure the return fuel line to the bulkhead connector so fitted that too - fits perfect! Pics below:
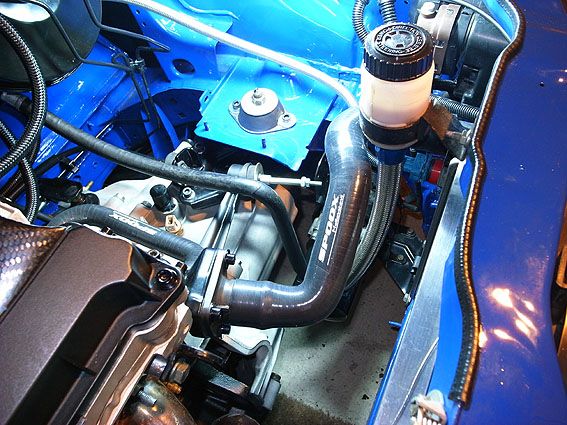
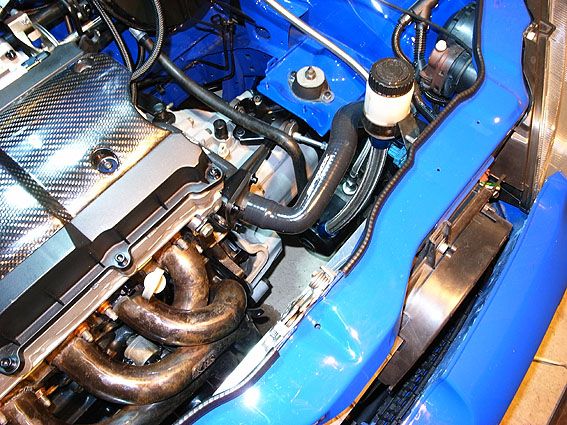
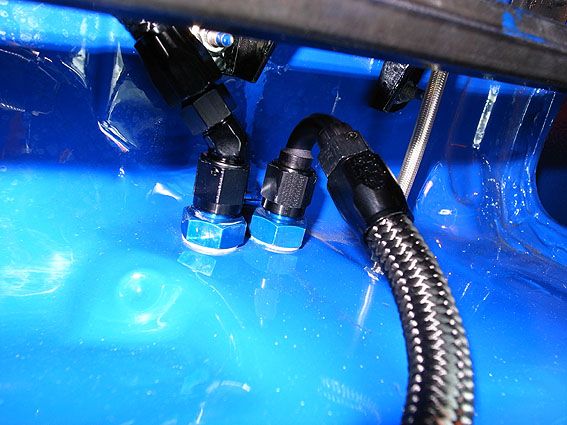
And an overall snap of the bay, getting there!
And an overall snap of the bay, getting there!
they do, but they only do 2 heater matrix hoses whereas Spoox do all three, hence why I went for their one. They were already on the car when I bought it anyway so I thought it simpler just to keep the same type!
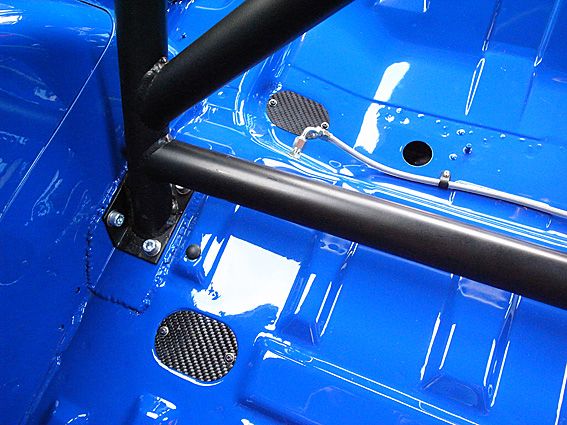
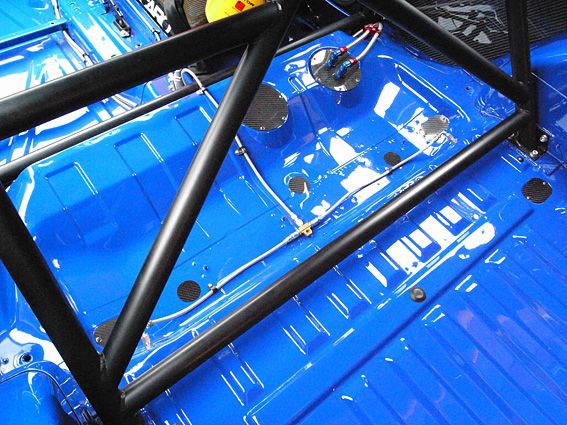
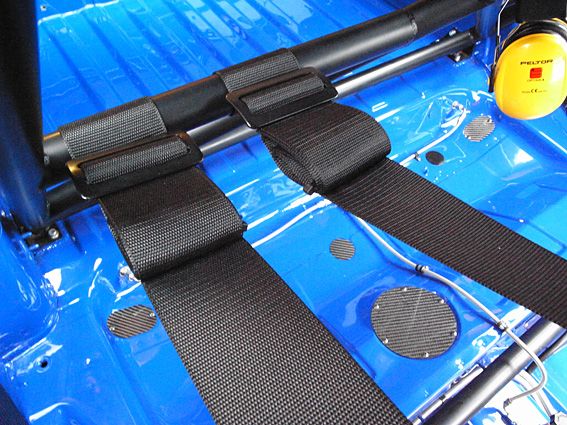
A few more updates today...I started to fit all my little carbon covers to go over the OE 'holes' in the shell. I have gone about this in a practical way this time in contrast to the Citroen where I just siliconed everything into place. This time I have kept the covers that go over bolts etc (for the rear beam for example) removable so fitted threaded inserts and bolted the covers down. However the other ones that just merely cover holes have been secured using a few dobs of silicon as before. I also tidied up my harnesses, and also swapped the plastic P clips securing the brake lines for stainless one's to keep them in place a bit more firmly. It has also straightened them all up so they look a lot neater now! I fitted one more to the rear bulkhead too to pull the hose down a little more - I reckon it looks a lot tidier now.
One more think i did is remove the Safety Devices stickers from the cage back stays as i thought it looks a bit fussy before. Goes better with the blue and black theme too! I've obviously kept the one in the inside of the cage which states it's FIA approval etc etc.
Anyway here are some pics:
Carbon Covers (all hand made by me I may add!):
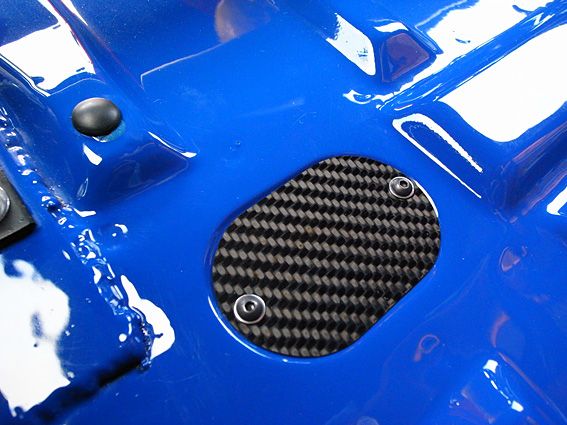
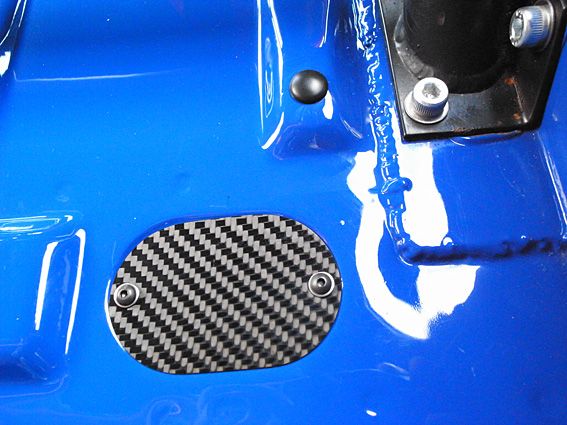
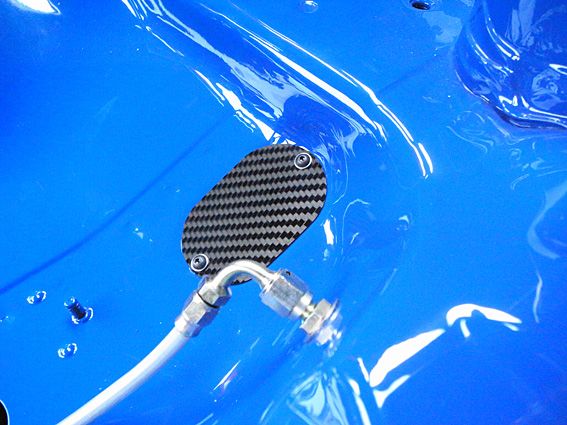
Here's all the Carbon fitted, and you can just see how the brake lines are now also:

Harnesses tidied up:
Stickers off:
A little snap:
thats all for today!
A few more updates today...I started to fit all my little carbon covers to go over the OE 'holes' in the shell. I have gone about this in a practical way this time in contrast to the Citroen where I just siliconed everything into place. This time I have kept the covers that go over bolts etc (for the rear beam for example) removable so fitted threaded inserts and bolted the covers down. However the other ones that just merely cover holes have been secured using a few dobs of silicon as before. I also tidied up my harnesses, and also swapped the plastic P clips securing the brake lines for stainless one's to keep them in place a bit more firmly. It has also straightened them all up so they look a lot neater now! I fitted one more to the rear bulkhead too to pull the hose down a little more - I reckon it looks a lot tidier now.
One more think i did is remove the Safety Devices stickers from the cage back stays as i thought it looks a bit fussy before. Goes better with the blue and black theme too! I've obviously kept the one in the inside of the cage which states it's FIA approval etc etc.
Anyway here are some pics:
Carbon Covers (all hand made by me I may add!):
Here's all the Carbon fitted, and you can just see how the brake lines are now also:
Harnesses tidied up:
Stickers off:
A little snap:
thats all for today!
Lots of questions.....
Yes it was in a recent issue of french cars, I bought it off SImon and have been transforming it slowly. My engine has already been dyno'd at over 200Bhp, it's a super 1600 competition spec engine built by Richard Longman and Co (since shut down!)
Oh and yes I know Tommy, his car is immaculate too, and he's a good lad!
Few more updates anyway. As you know I had that heater matrix hose debacle a while back which Mankee eventually sorted out for me - here are some pics of the wrong type which I kept getting from Citroen (it's due to the plastic housing being different I eventually discovered) and some pics of the right one fitted courtesy of Mr Chang, the Chinese arms, I mean parts dealer!
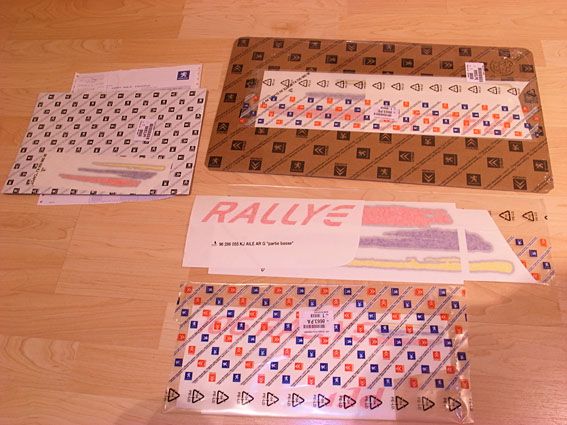
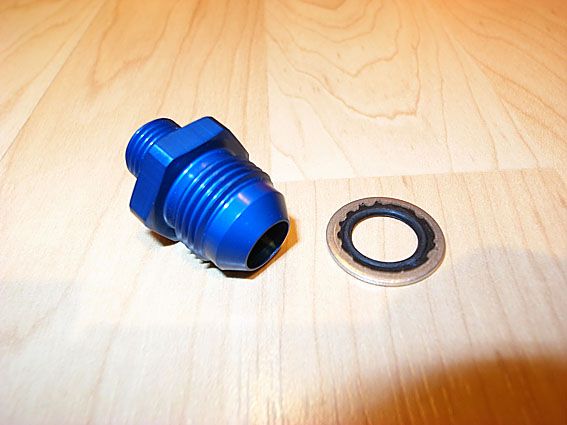
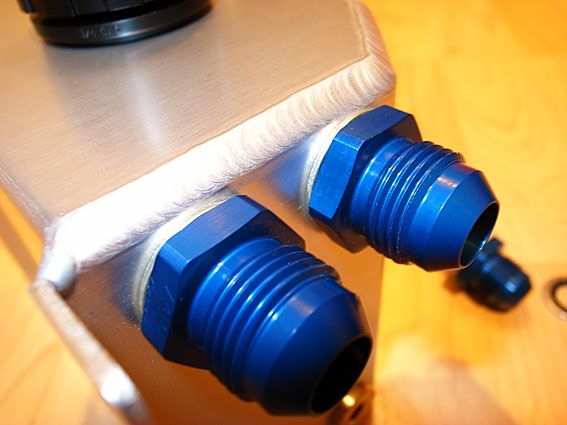
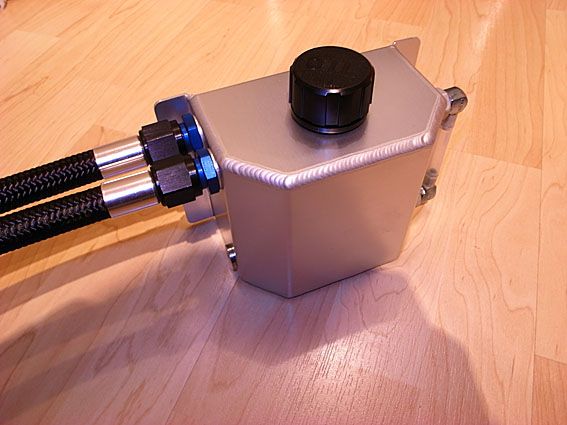
Also nipped to Earls today to get my catch tank (thanks to Bruce @ COmpetition Supplies for coming up with the goods uber quick) and cheers to Ashley @ Earls for sorting out all the little adaptors I needed to run the pro lite hose. Also got decals too! So no more questions about that please! Here we go anyway:
Hose from Citroen:


Correct Hose from Mankee now fitted:
New Decals:
New Catch Tank:

Earls Adaptors and hose ends:
Fitted Up:
Thats all for now...just waiting on Bob to finish my wiring now!
Yes it was in a recent issue of french cars, I bought it off SImon and have been transforming it slowly. My engine has already been dyno'd at over 200Bhp, it's a super 1600 competition spec engine built by Richard Longman and Co (since shut down!)
Oh and yes I know Tommy, his car is immaculate too, and he's a good lad!
Few more updates anyway. As you know I had that heater matrix hose debacle a while back which Mankee eventually sorted out for me - here are some pics of the wrong type which I kept getting from Citroen (it's due to the plastic housing being different I eventually discovered) and some pics of the right one fitted courtesy of Mr Chang, the Chinese arms, I mean parts dealer!
Also nipped to Earls today to get my catch tank (thanks to Bruce @ COmpetition Supplies for coming up with the goods uber quick) and cheers to Ashley @ Earls for sorting out all the little adaptors I needed to run the pro lite hose. Also got decals too! So no more questions about that please!
Here we go anyway:Hose from Citroen:
Correct Hose from Mankee now fitted:
New Decals:
New Catch Tank:
Earls Adaptors and hose ends:
Fitted Up:
Thats all for now...just waiting on Bob to finish my wiring now!
Edited by Track_Cit on Friday 16th October 19:47
Few more updates today - went over to Bob's workshop to fit my catch tank and breather pipes etc (with Bob's help) so I took a few pics. The loom is all fitted, alternator fitted, oil has been filled up in the gearbox, just need some engine oil (they ran out at Silverstone) and it should be ready to start on Tues - so fingers crossed!
Massive thanks to Bob - the wiring is absolutely SEXUAL and it's so minimal you can hardly notice it. Really sets off the engine bay well. You'll have to excuse the turd pics as they're off my phone as I forgot to bring my camera over!Loom and details:

Alternator in:
Catch tank done (thanks to Bic for his old mounting bracket) top man!

Gassing Station | Readers' Cars | Top of Page | What's New | My Stuff