Discussion


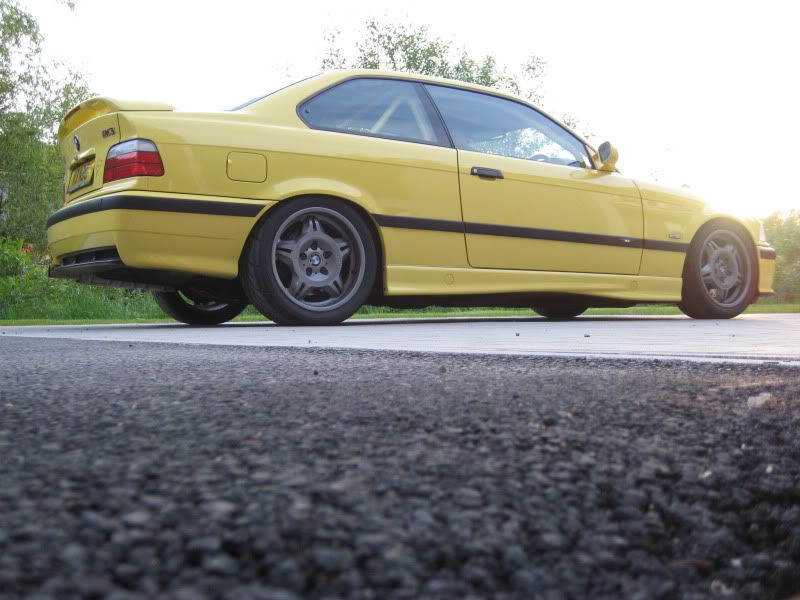
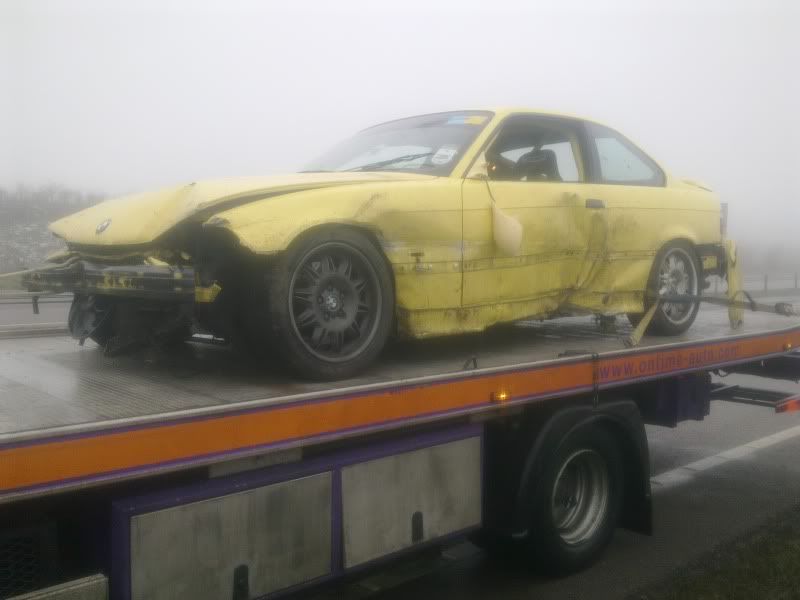
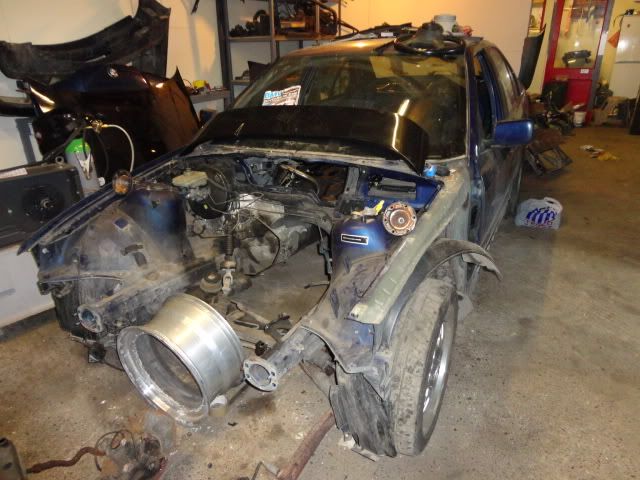
After an unfortunate coming together with some black ice on a dual carriageway, iam sad to say that my M3 is now dead... Did me well though over 50 laps of the ring without missing a beat and a best time of 8.07 BTG.
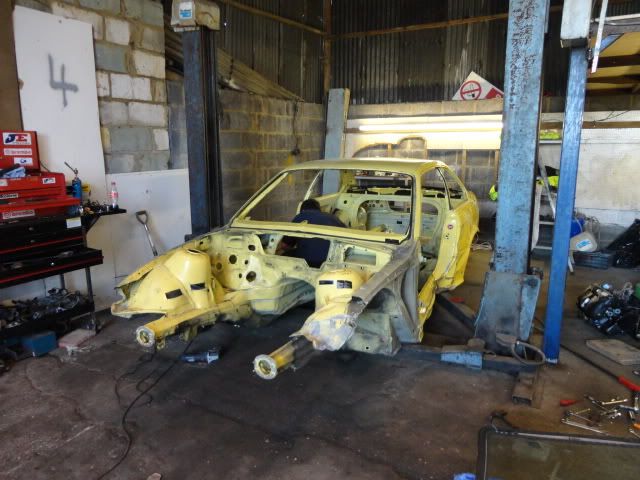
Before
After
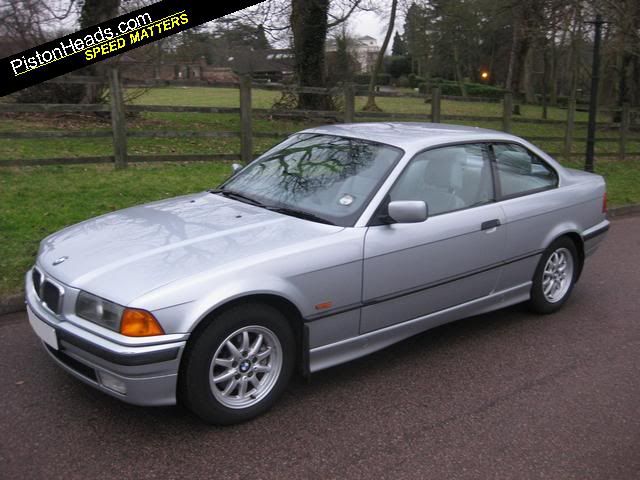
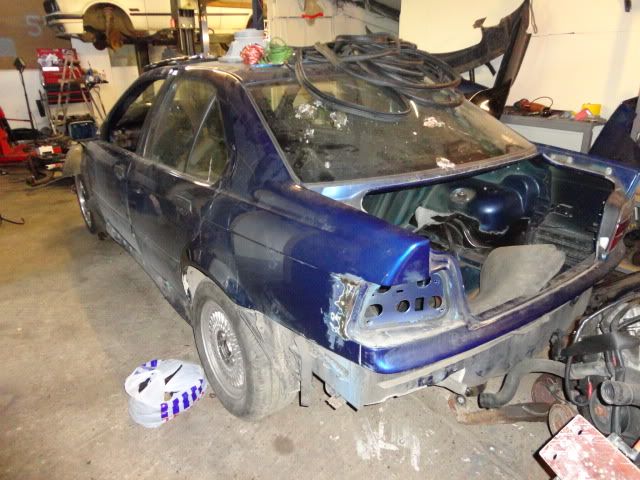
Anyway as all of the running gear survived i have decided to reshell her, so i have just picked up this 323 with one lady owner from new, full service history and only 49k on the clock
Plans are to build a full race spec car this time around with full multi point weld in cage, full respray in bmw alpine white II and some other nice bits and pieces like a flocked dash.
Will keep you updated as i progress.
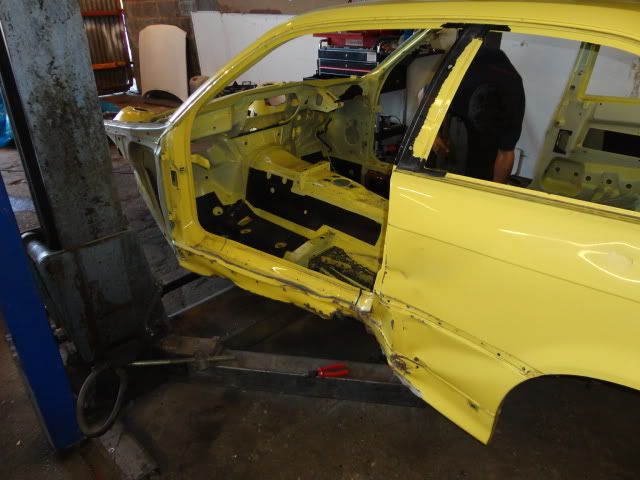
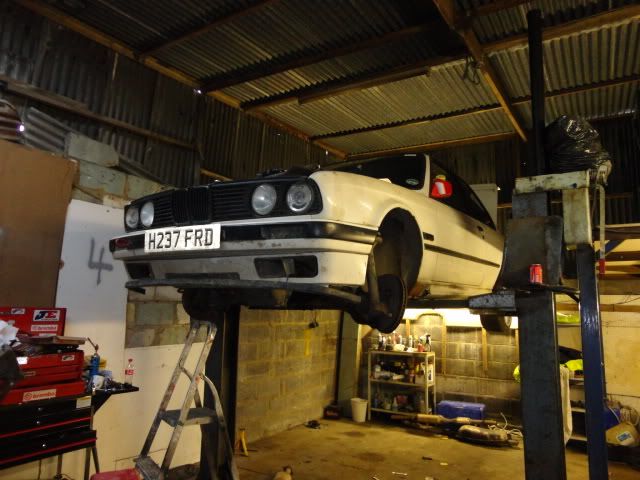
Before
After
Anyway as all of the running gear survived i have decided to reshell her, so i have just picked up this 323 with one lady owner from new, full service history and only 49k on the clock
Plans are to build a full race spec car this time around with full multi point weld in cage, full respray in bmw alpine white II and some other nice bits and pieces like a flocked dash.
Will keep you updated as i progress.


Bit of an update as i havent posted for a while.
Received a parcel from the states
BMW Rear Diff Strengthening kit (standard feature on M3 shell)
Turner Motorsport front subframe strengthening kit

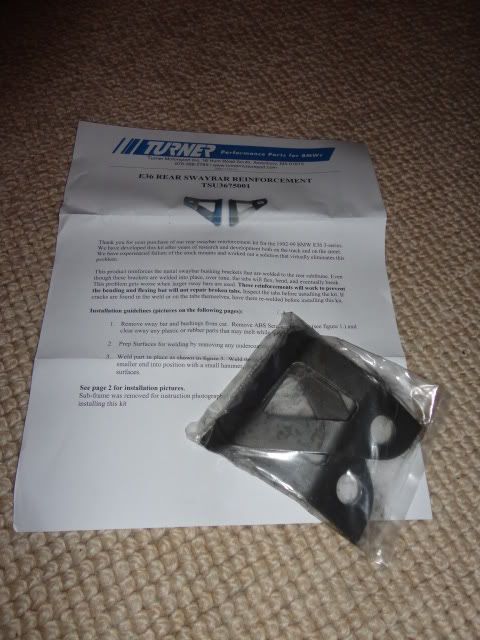
Turner motorsport rear sway bar strengthening kit
Also managed to pick up these aluminium doors, came only on early evos for around 12 months, and noticably lighter then the steel equivalents

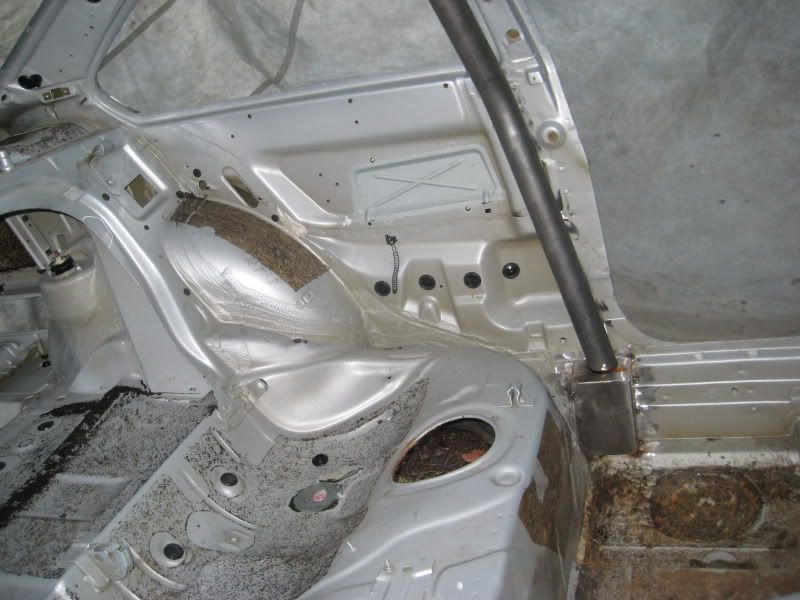
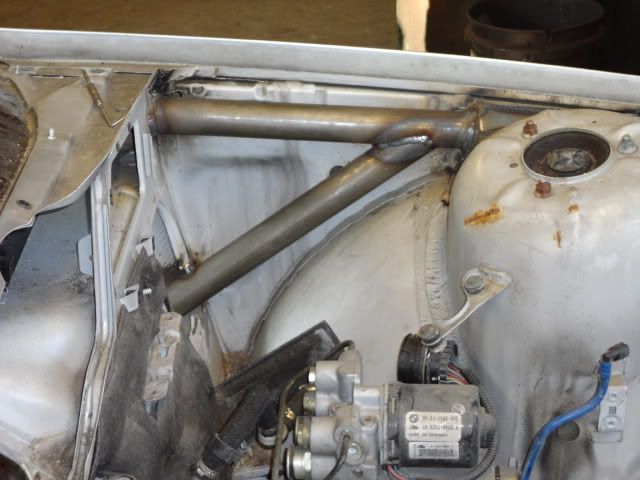
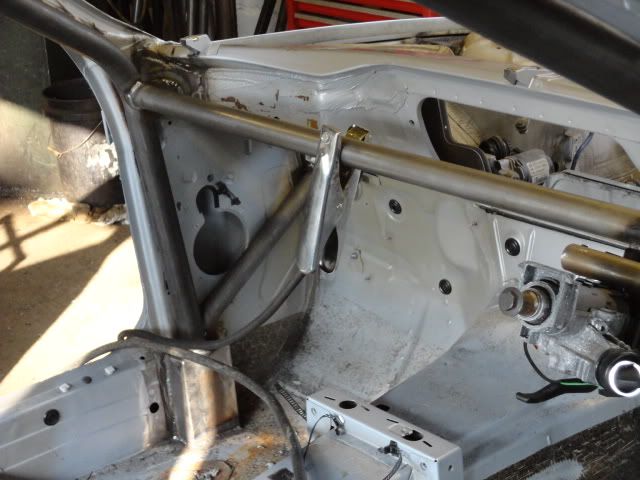
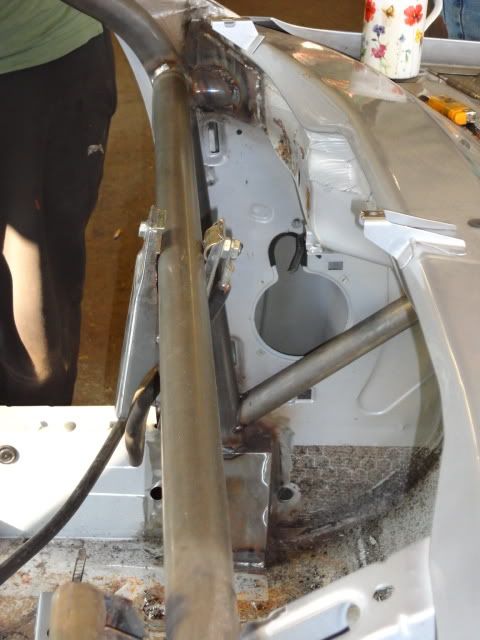
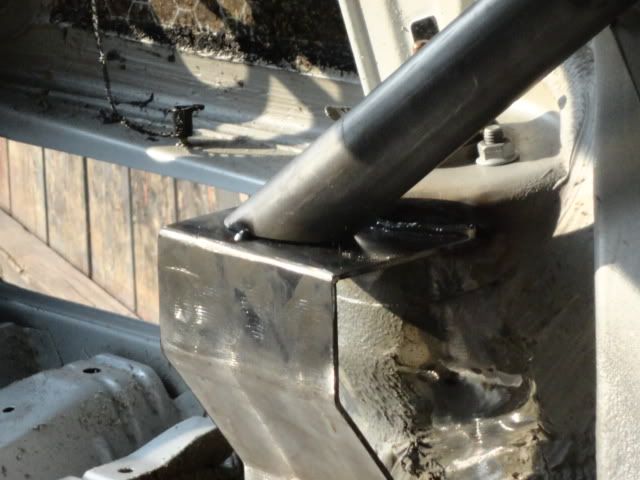
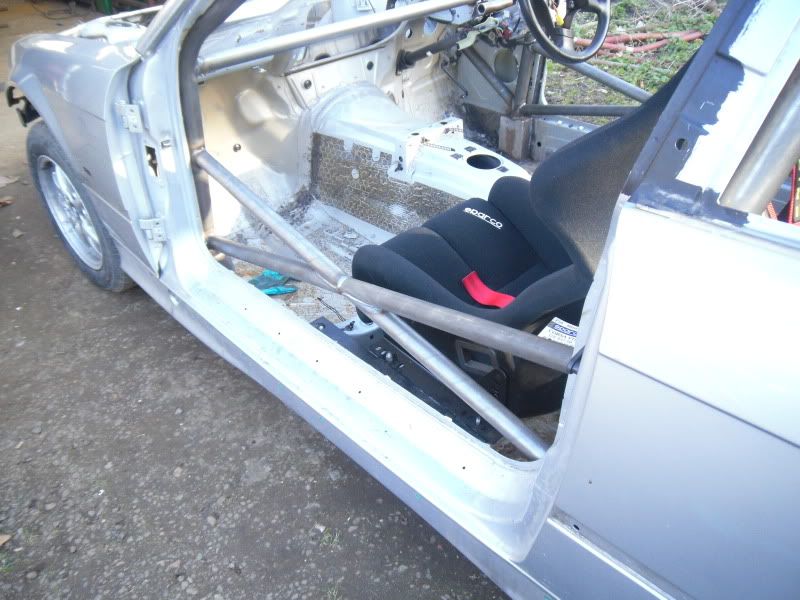
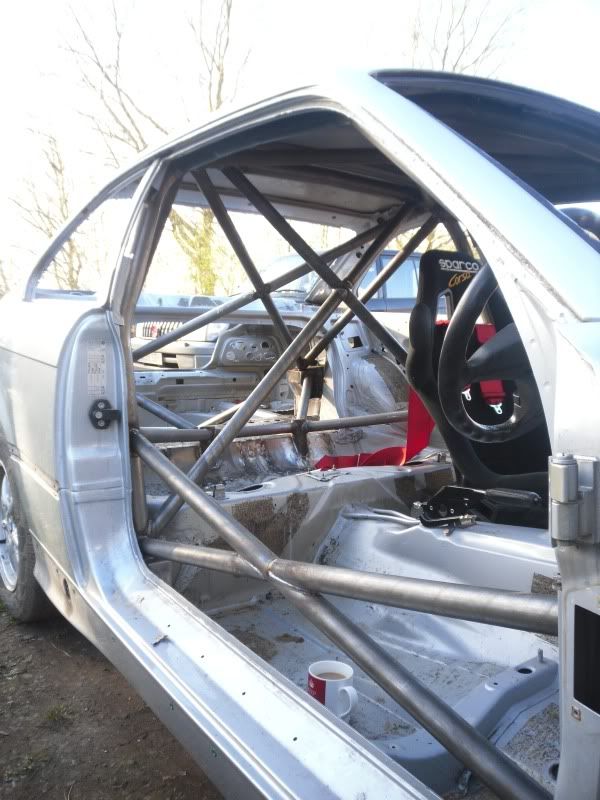
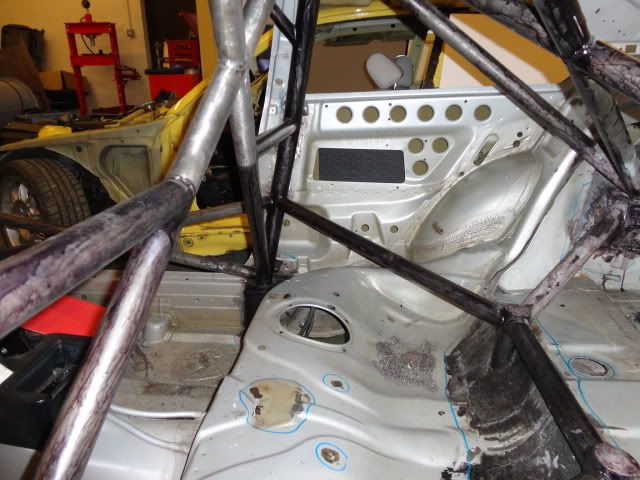
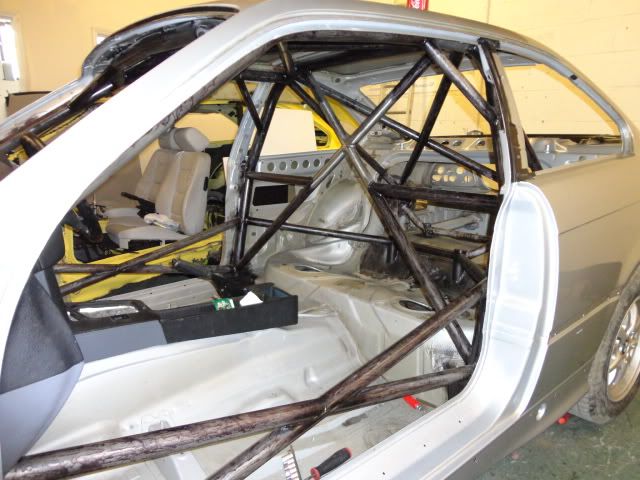
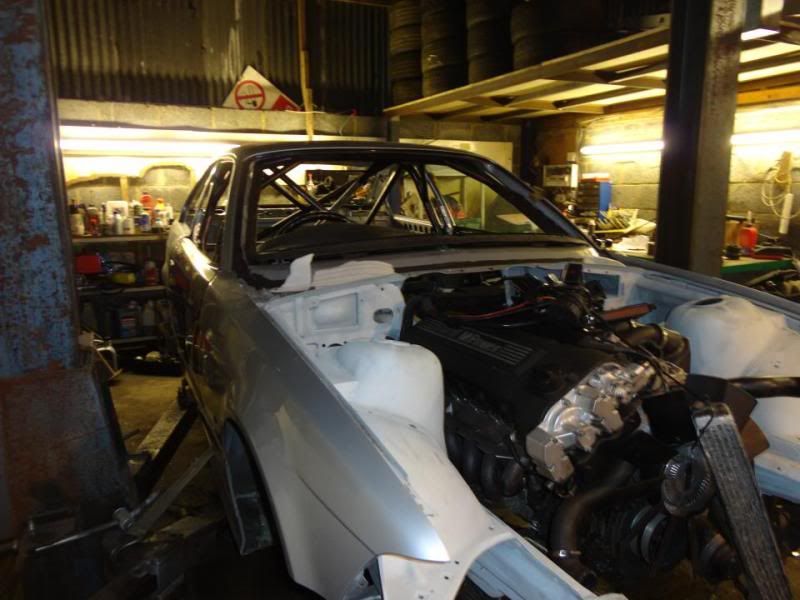
Car is back with the cage complete, tried to prep and primer but it is so complex i have given up and sending it so be sand blasted and zinc primered on monday... pics to follow
Received a parcel from the states
BMW Rear Diff Strengthening kit (standard feature on M3 shell)
Turner Motorsport front subframe strengthening kit
Turner motorsport rear sway bar strengthening kit
Also managed to pick up these aluminium doors, came only on early evos for around 12 months, and noticably lighter then the steel equivalents
Car is back with the cage complete, tried to prep and primer but it is so complex i have given up and sending it so be sand blasted and zinc primered on monday... pics to follow
Had a busy weekend working on the car
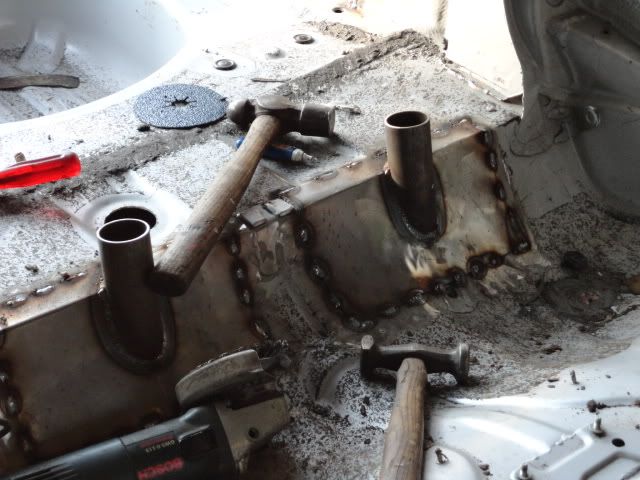
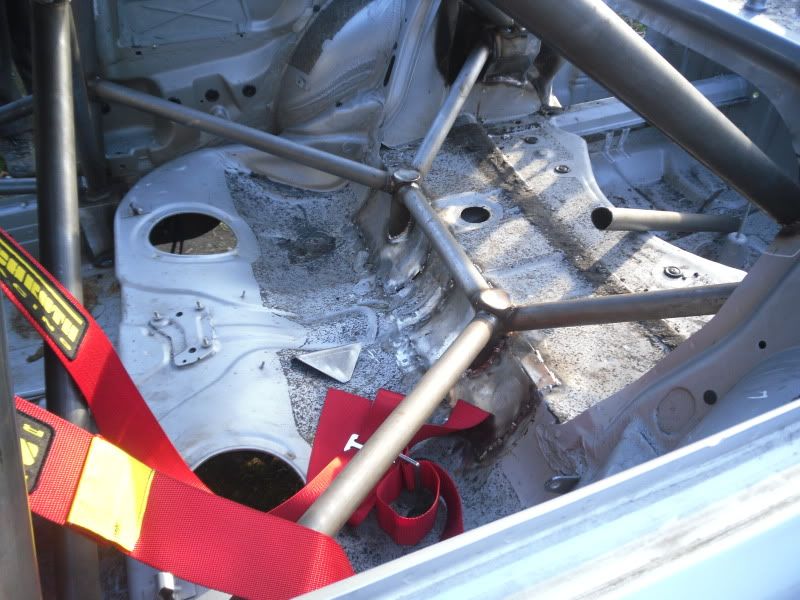
Swaged holes placed in various panels to take out some weight and strengthen up the panels

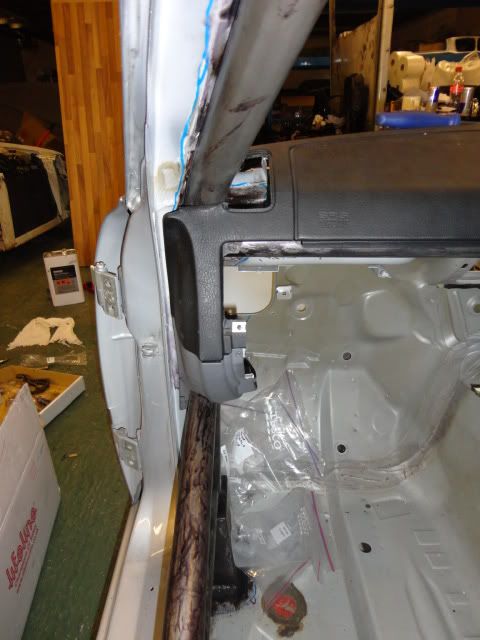
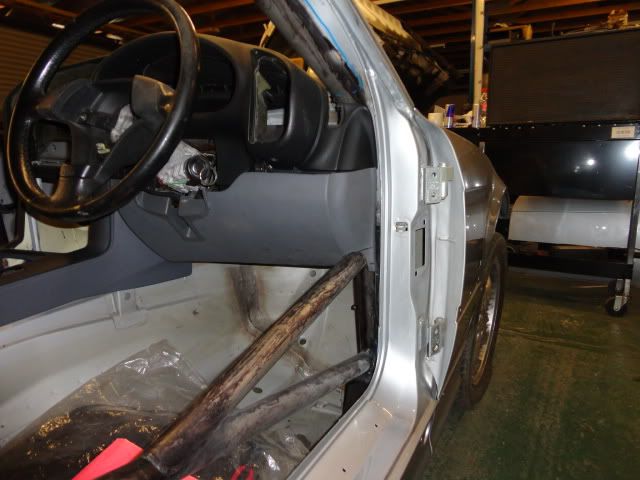
Dash trimmed and fitted
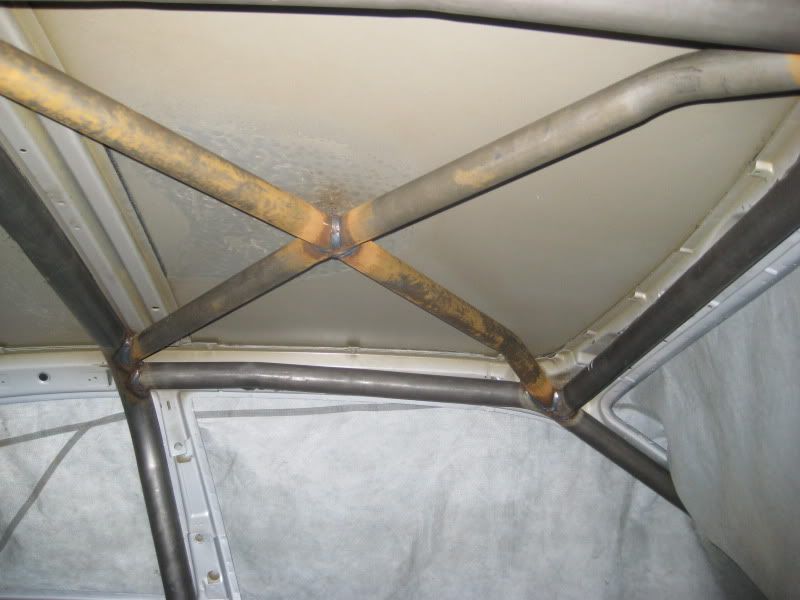
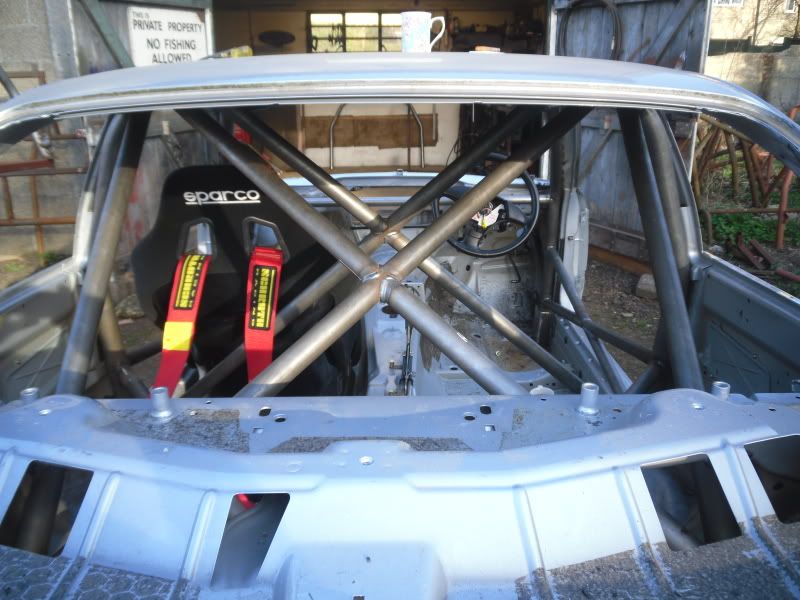
Also some updated pictures of the finished cage, the zinc coaters couldnt do the cage so we have painted it in Kurust until it goes for paint
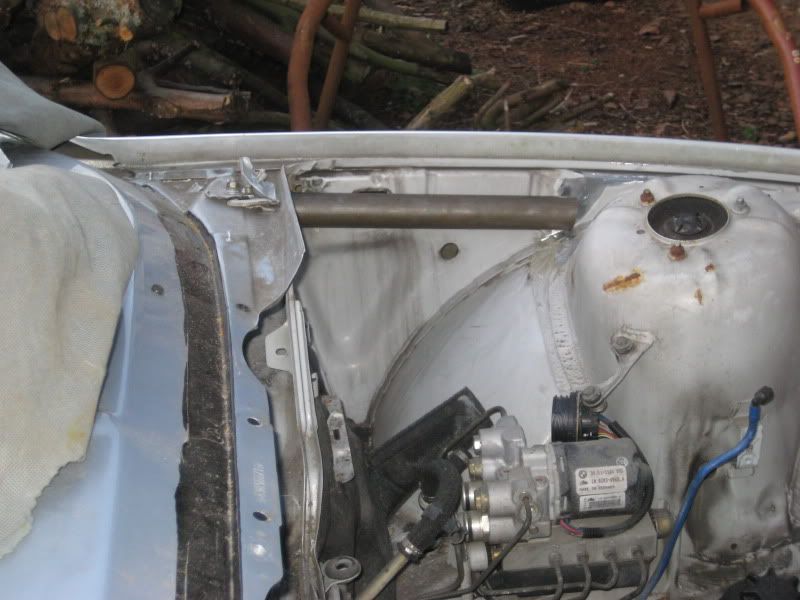
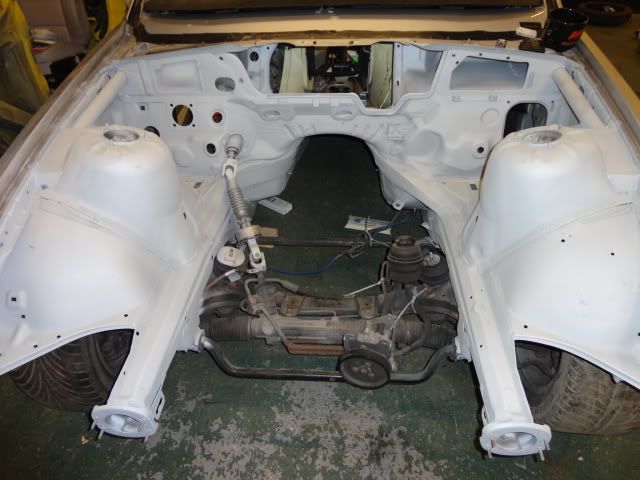
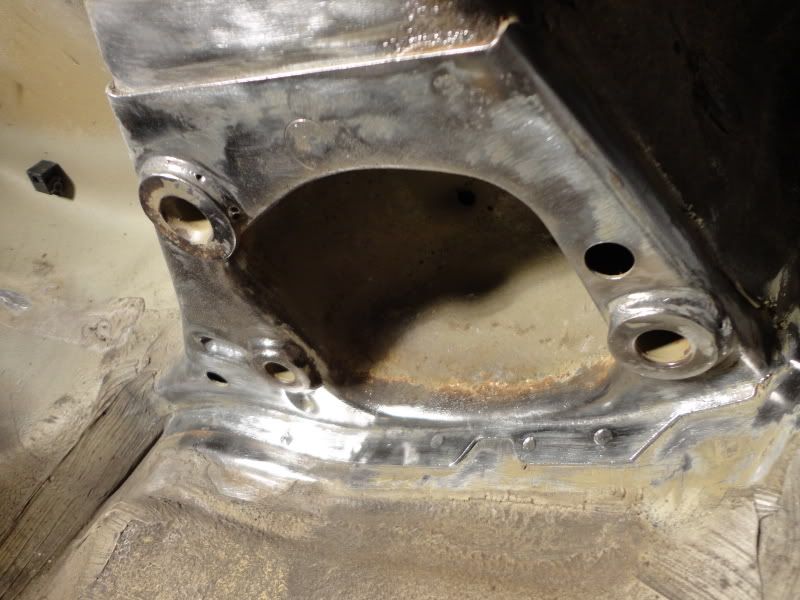
Engine bay had some minor rust spots, so we decided to get it sand blasted and zinc coated.
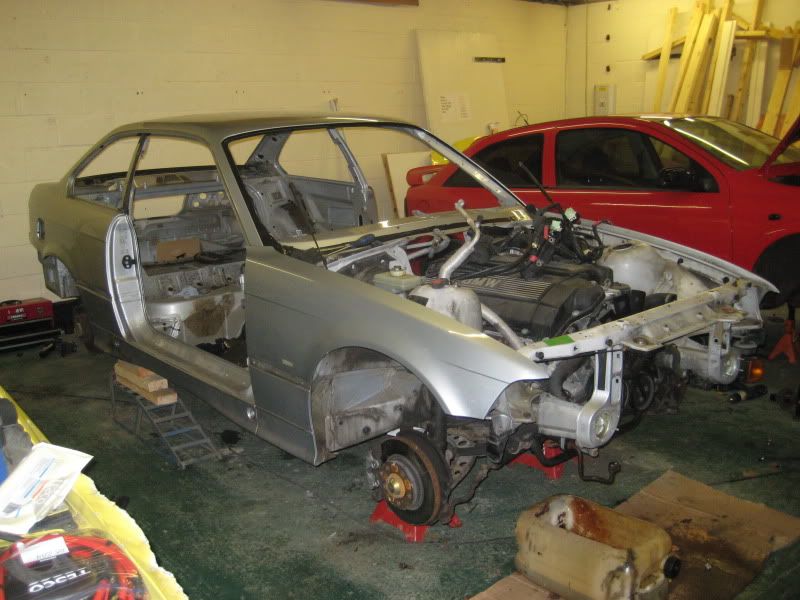
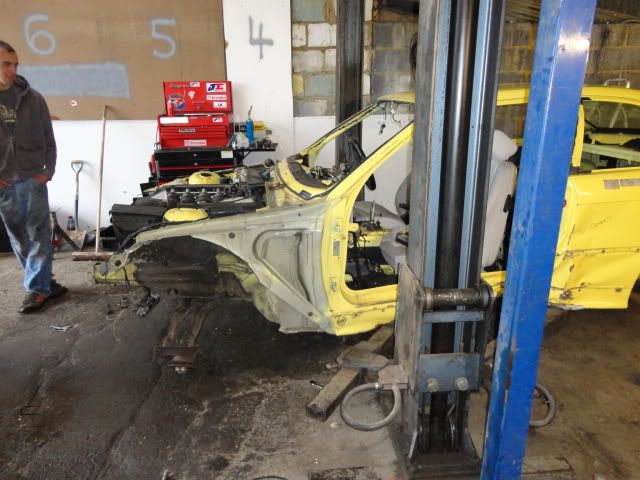
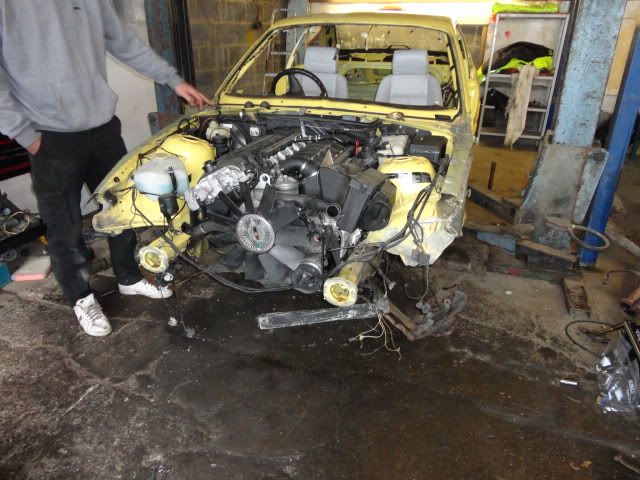
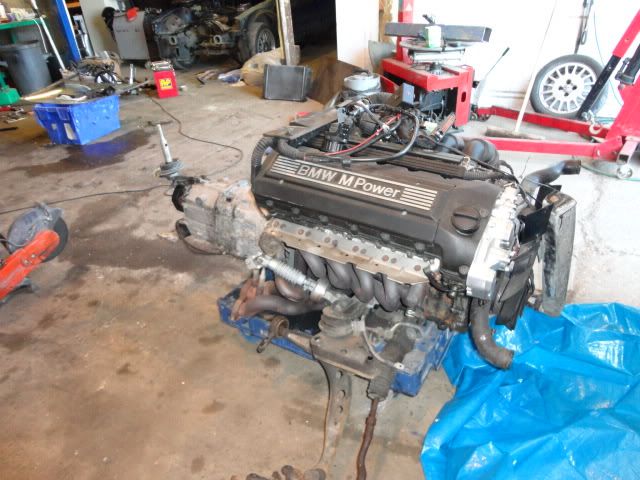
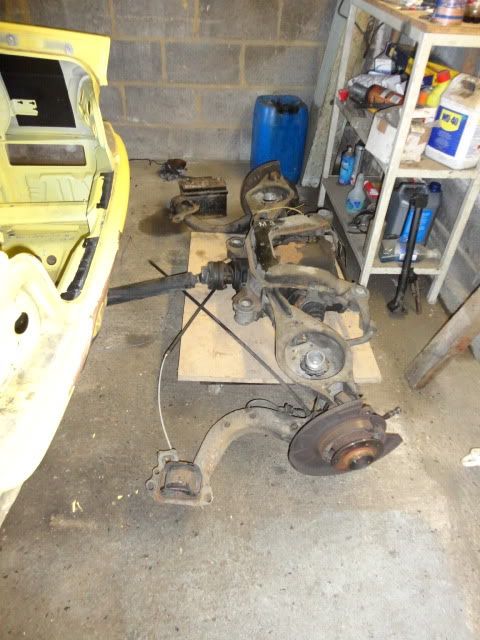
And finally started to get the engine and running gear out of the M3.
Swaged holes placed in various panels to take out some weight and strengthen up the panels
Dash trimmed and fitted
Also some updated pictures of the finished cage, the zinc coaters couldnt do the cage so we have painted it in Kurust until it goes for paint
Engine bay had some minor rust spots, so we decided to get it sand blasted and zinc coated.
And finally started to get the engine and running gear out of the M3.
Edited by Bmdub on Monday 30th May 20:51
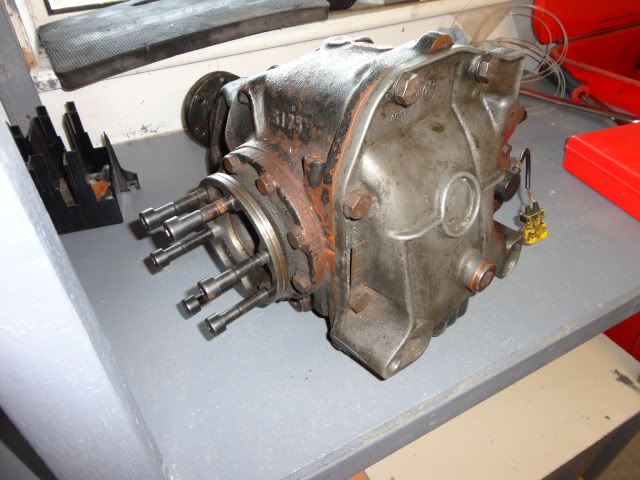
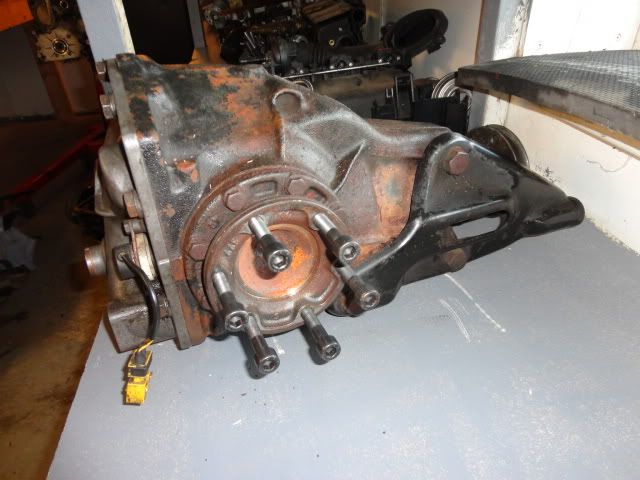
Picked up an E34 M5 3.91 diff, going to get my EVO diff rebuilt using the 3.91 internals
Also some pics of other cars being built at the yard.
E36 4 door which will be built to a similar spec to mine but with a 2.8 litre engine.
The E30 drift shed, currently having a 2.5 litre engine installed.
Also some pics of other cars being built at the yard.
E36 4 door which will be built to a similar spec to mine but with a 2.8 litre engine.
The E30 drift shed, currently having a 2.5 litre engine installed.

Well this has been dragging on for god knows how long due to my mechanic being ill and various other hold ups. Plan is not to get the dry build done by the end of Feb, Painted in March and back together for April...
Progress has been coming along slowloy but surly over the last few weeks.
Engine and box now in.
The wiring loom has also been simplyfied, and the fuse box moved into the modified glove box, wiring loom is now back in the car.
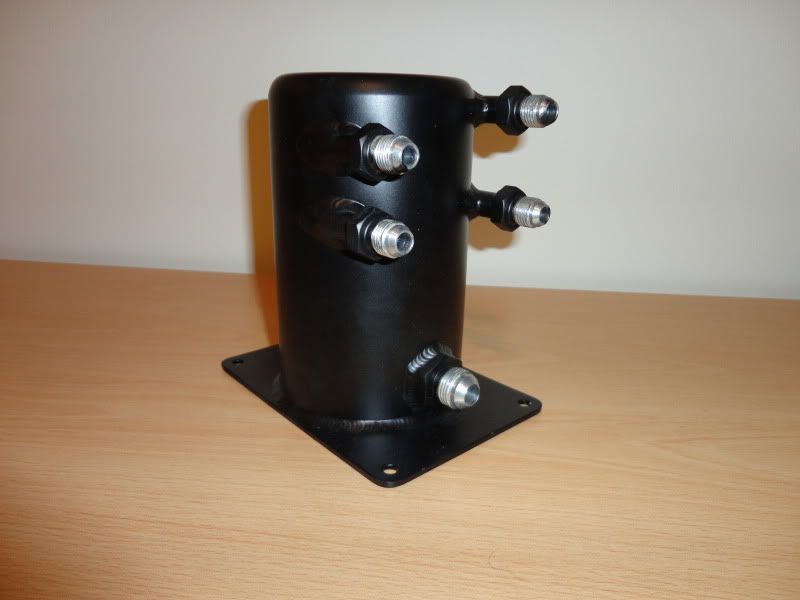
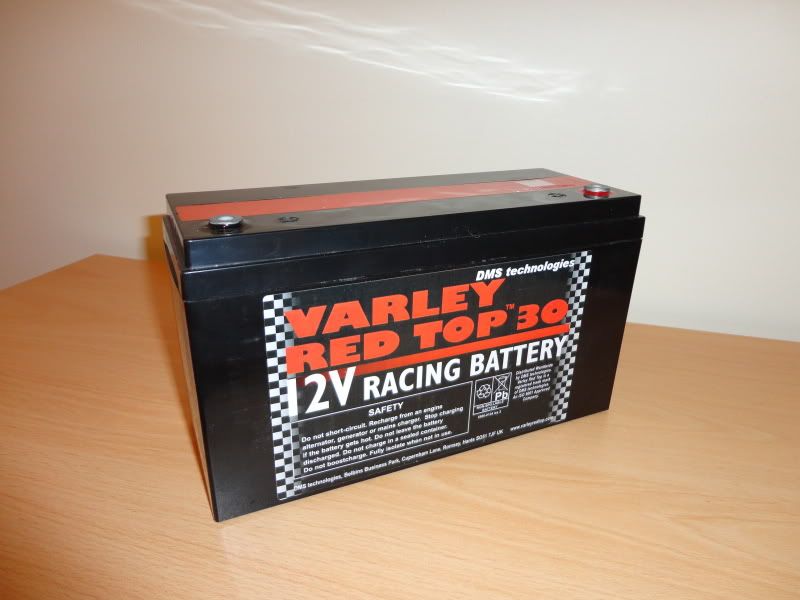
Next up is the installation of the Varley Red Top battery, Earls Fuel and Brake lines installed as well as the custom fuel system.
Pics to follow
Progress has been coming along slowloy but surly over the last few weeks.
Engine and box now in.
The wiring loom has also been simplyfied, and the fuse box moved into the modified glove box, wiring loom is now back in the car.
Next up is the installation of the Varley Red Top battery, Earls Fuel and Brake lines installed as well as the custom fuel system.
Pics to follow
Change of plan... after my patience finally running out with the current mechanic my car is booked in with Redish Motorsport on the 5th April.
In readiness for this and as iam off to the states next week, ive ordered a load of parts to meet me when i arrive. These are
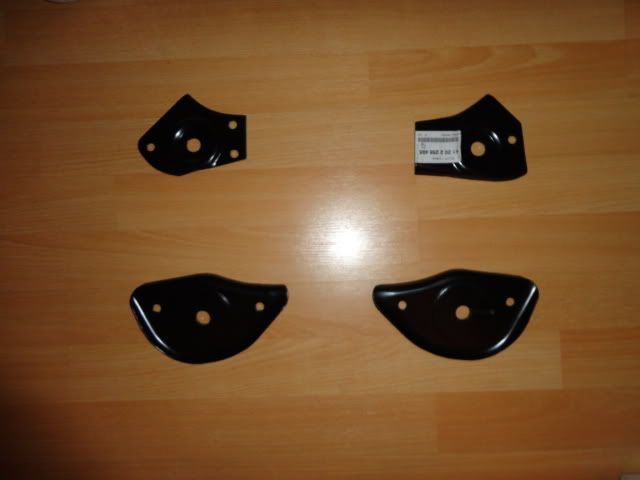
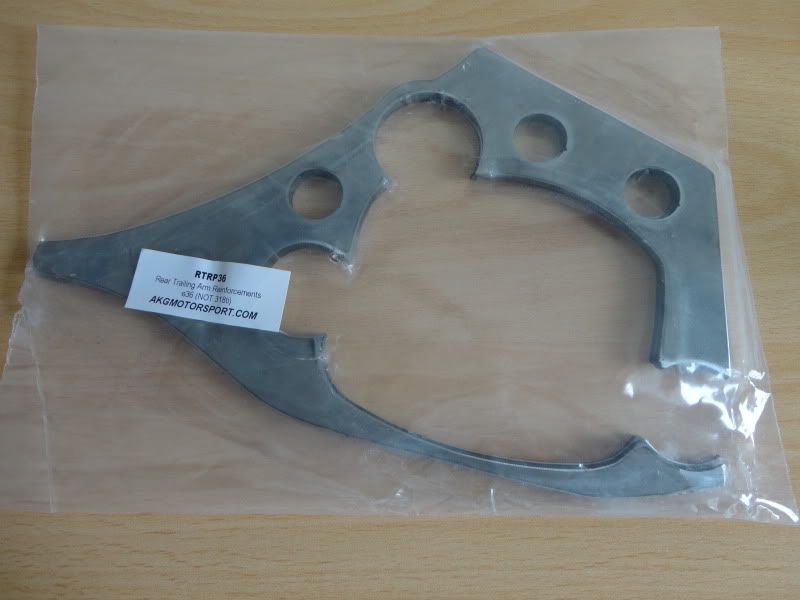
Rear trailing arm pocket reinforcement plates
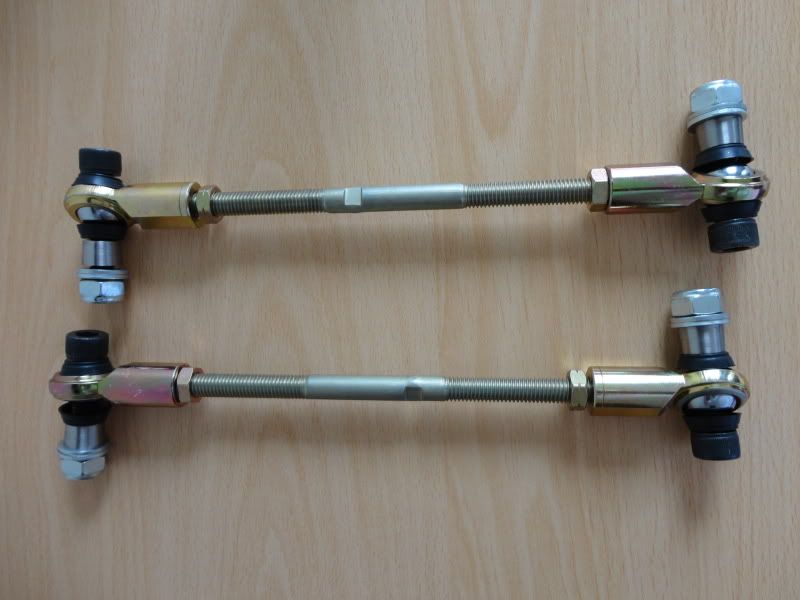
Adjustable swaybar stabilser link set
Delrin brake pedal bushing set
Delrin cluth pedal bushing set
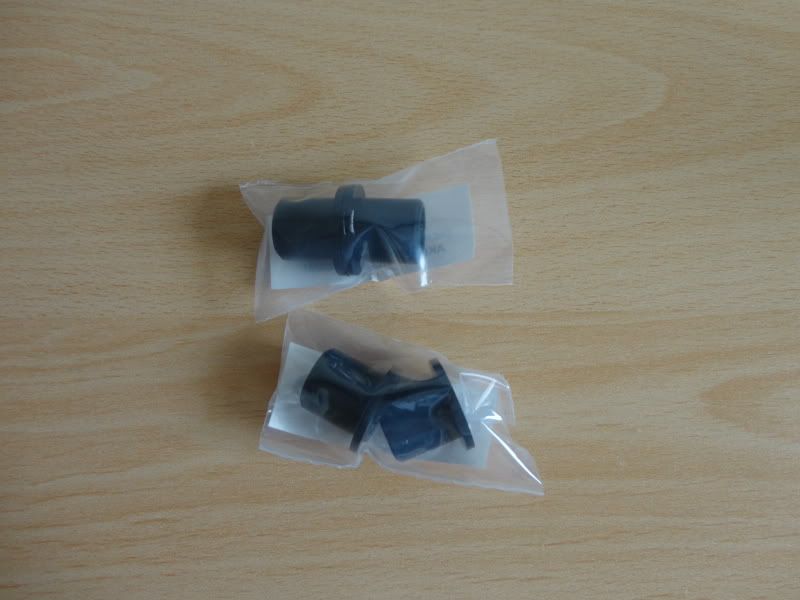
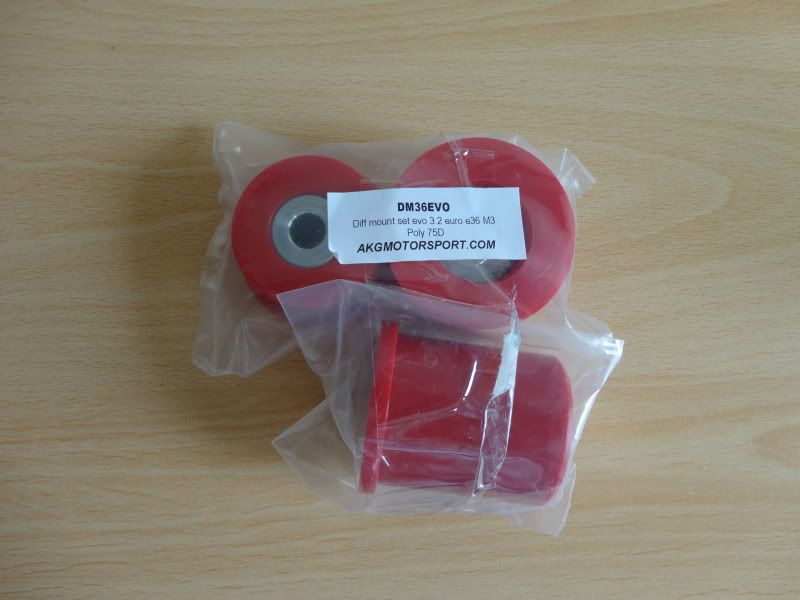
75d Polyurethane rear diff mount bushings
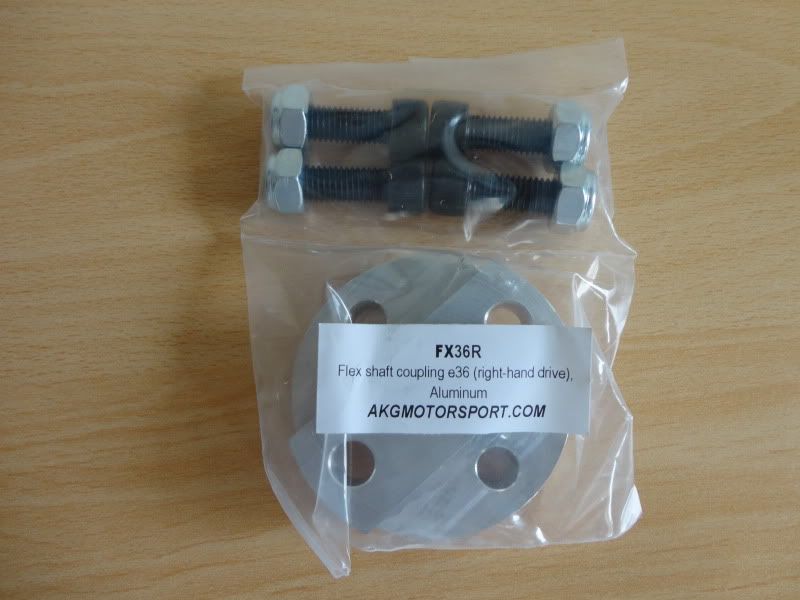
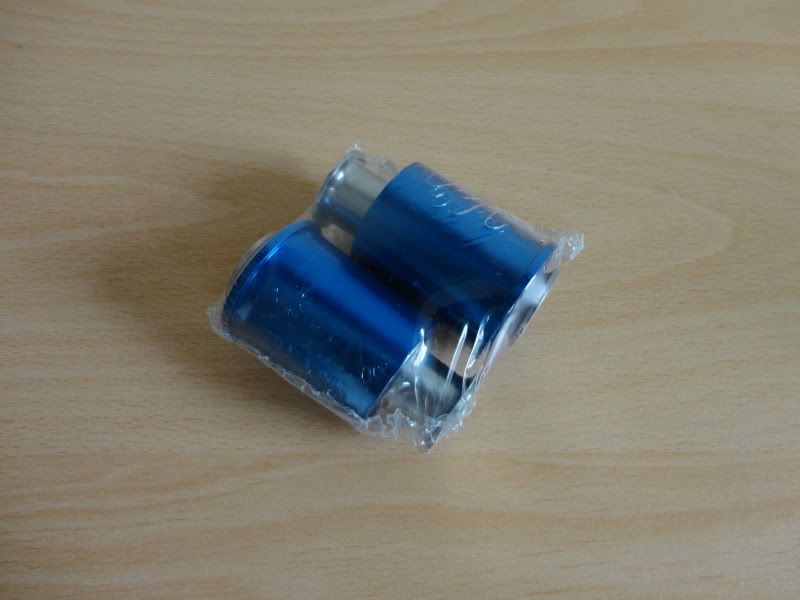
Aluminium steering flex shaft coupling
Vorshlag camber/caster plates & perches
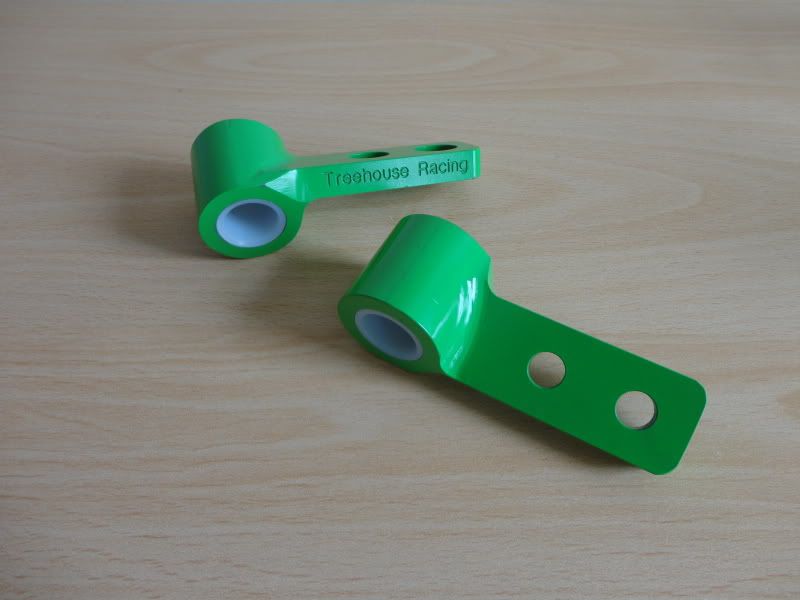
Treehouse racing eyeball arms
Monoball rear control arm upper inner bushing
Solid rear subframe busihings
Monoball rear trailing arm bushings
Once i have these home all the suspension will be powdercoated and built up ready to go onto the car, the 323 items will be used for dry build purposes.
Once the dry build has been completed the car will be striped and painted at the end of April then put back together in full.
With any luck the car should be ready for a shake down mid June.
I will update pics in due course
In readiness for this and as iam off to the states next week, ive ordered a load of parts to meet me when i arrive. These are
Rear trailing arm pocket reinforcement plates
Adjustable swaybar stabilser link set
Delrin brake pedal bushing set
Delrin cluth pedal bushing set
75d Polyurethane rear diff mount bushings
Aluminium steering flex shaft coupling
Vorshlag camber/caster plates & perches
Treehouse racing eyeball arms
Monoball rear control arm upper inner bushing
Solid rear subframe busihings
Monoball rear trailing arm bushings
Once i have these home all the suspension will be powdercoated and built up ready to go onto the car, the 323 items will be used for dry build purposes.
Once the dry build has been completed the car will be striped and painted at the end of April then put back together in full.
With any luck the car should be ready for a shake down mid June.
I will update pics in due course
Right, got back from Florida this morning with all my new bits
Treehouse Racing Eyeball control arms
AKG Motorsport Delrin cluth and brake pedal bushings
AKG Motorsport flex shaft coupling
AKG Motorsport adjustable stabilizer link set(Heavy Duty)
AKG Motorsport 75D Poly diff mount set
AKG Motorsport Rear Trailing Arm Reinforcement Plates
Turner Motorsport control arm subframe monoball set
Turner Motorsport solid rear subframe race mount kit

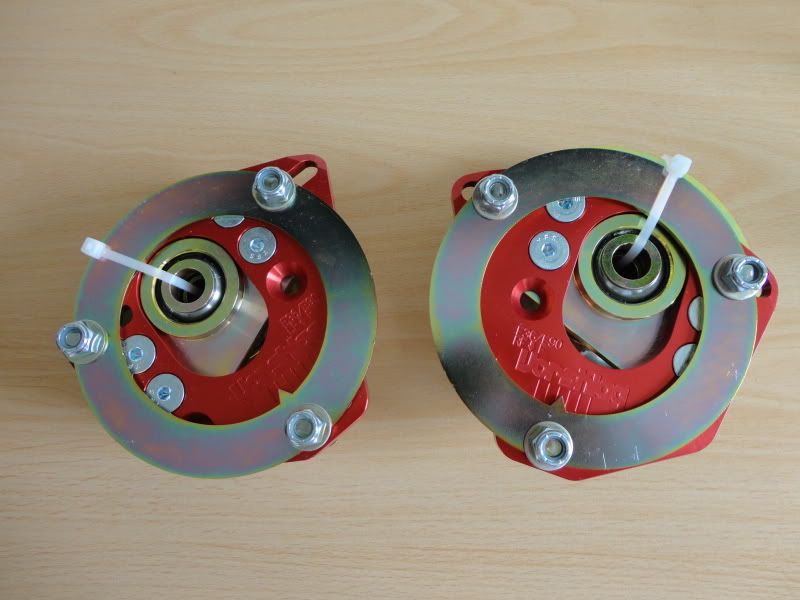
Vorshlag Racing aluminium camber/caster plates
Only thing iam waiting on now is the Turner Motorsport monoball rear trailing arm bushes as these were out of stock.
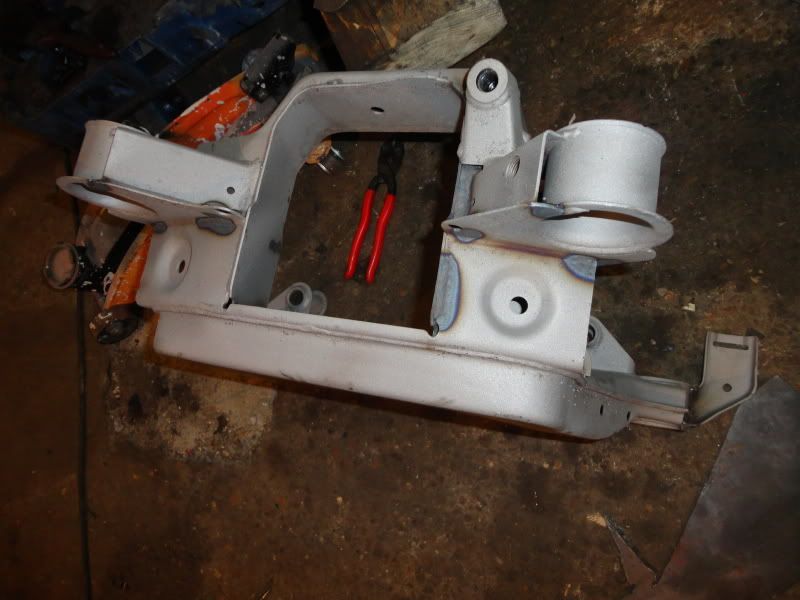
Tomorrow the reinforcement plates are going to be welded to the car, and the underside fully etch primered and seal sealered around welded plates.
The front and rear subframes are also going to be stripped, strengethening plates welded and then all set off for powder coating before new bushes are fitted.
Treehouse Racing Eyeball control arms
AKG Motorsport Delrin cluth and brake pedal bushings
AKG Motorsport flex shaft coupling
AKG Motorsport adjustable stabilizer link set(Heavy Duty)
AKG Motorsport 75D Poly diff mount set
AKG Motorsport Rear Trailing Arm Reinforcement Plates
Turner Motorsport control arm subframe monoball set
Turner Motorsport solid rear subframe race mount kit
Vorshlag Racing aluminium camber/caster plates
Only thing iam waiting on now is the Turner Motorsport monoball rear trailing arm bushes as these were out of stock.
Tomorrow the reinforcement plates are going to be welded to the car, and the underside fully etch primered and seal sealered around welded plates.
The front and rear subframes are also going to be stripped, strengethening plates welded and then all set off for powder coating before new bushes are fitted.
Edited by Bmdub on Wednesday 14th March 16:48
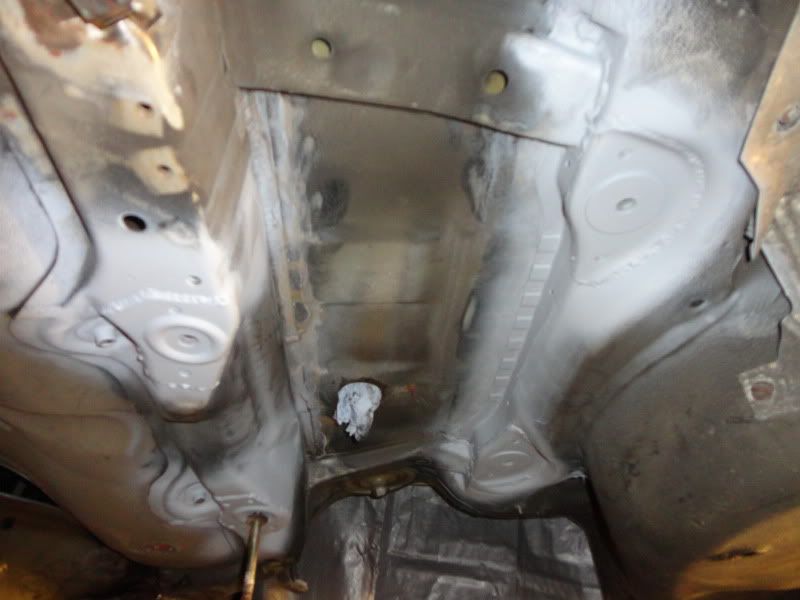
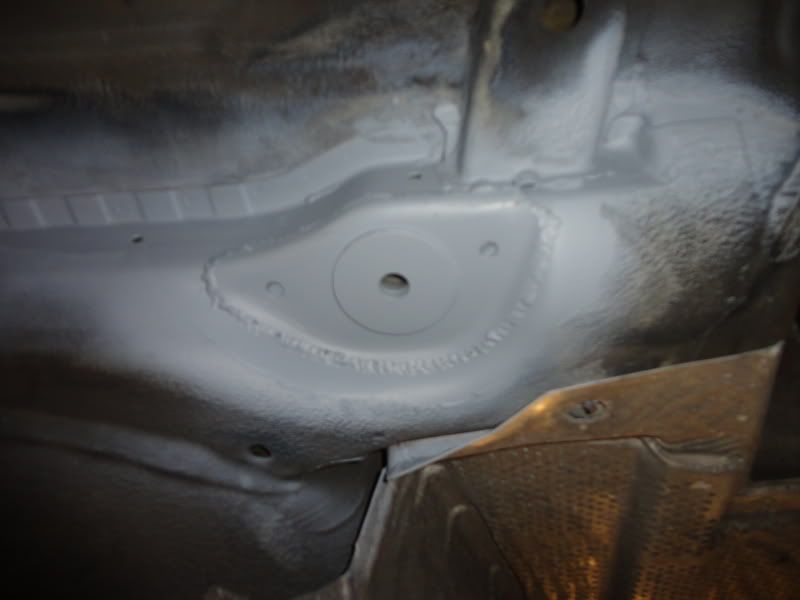
Bit of an update, been a busy couple of weeks.
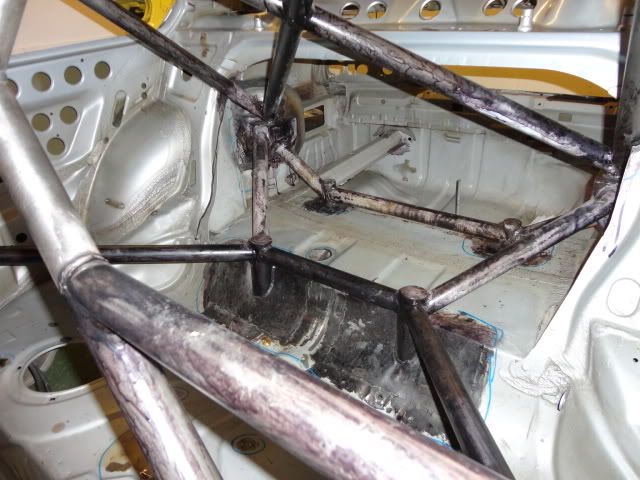
Rear subframe dismantled and sand blasted
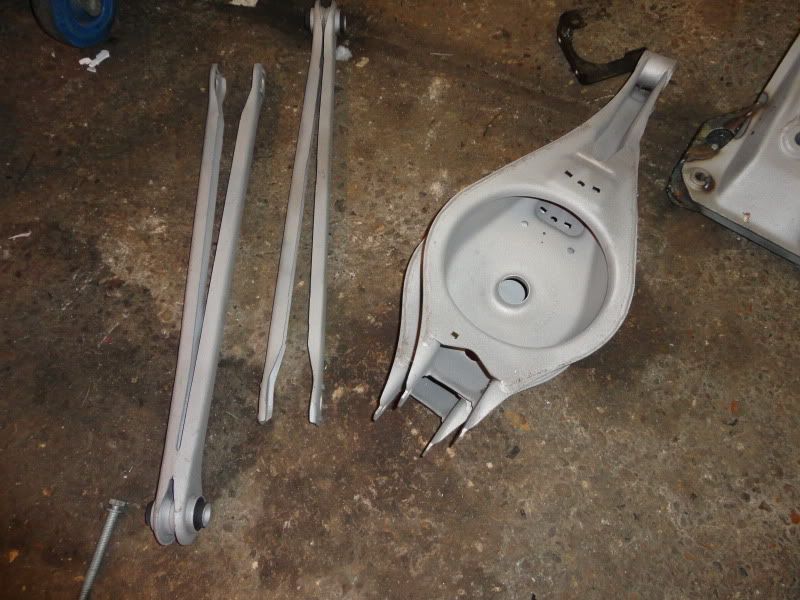
Diff cradle seam welded and strengthening plates added
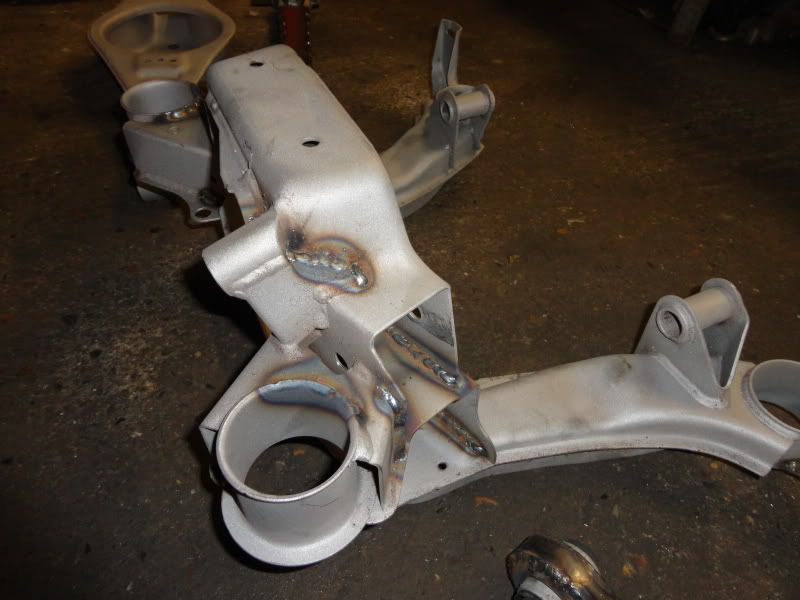
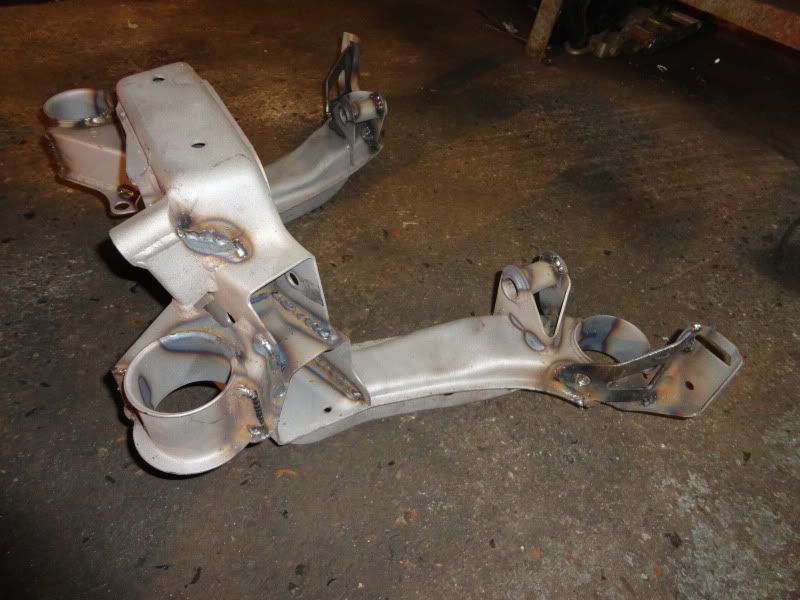
Rear control arms strengthened
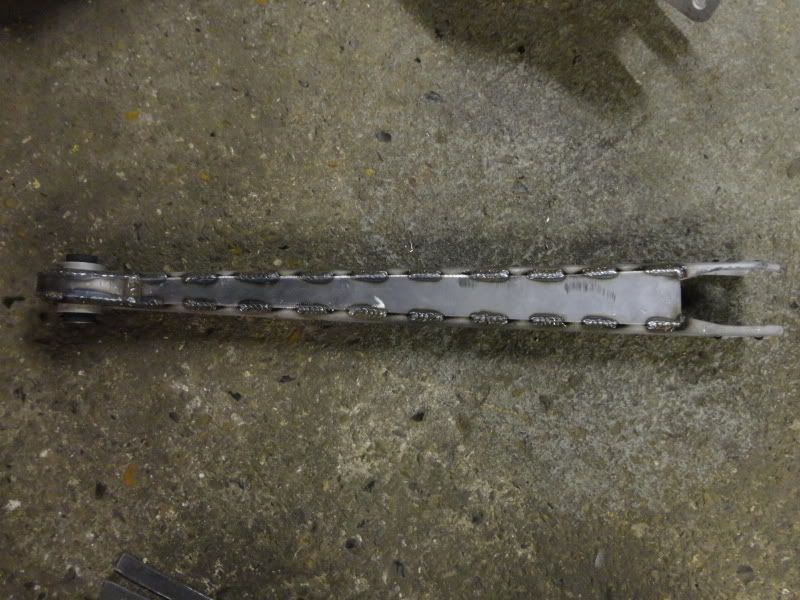
Rear trailing arm mounting point reinforcement plates welded on
Harness mounts welded and drilled
All welded areas rust treated and primered.
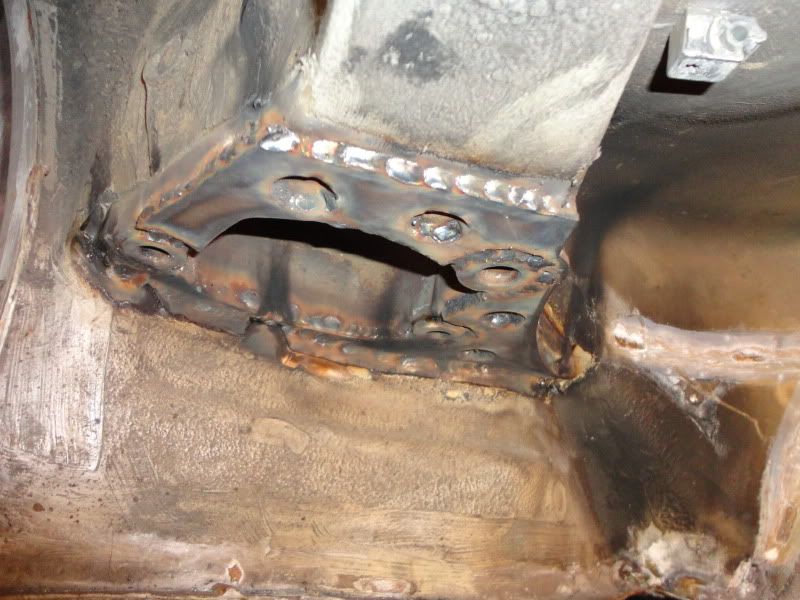
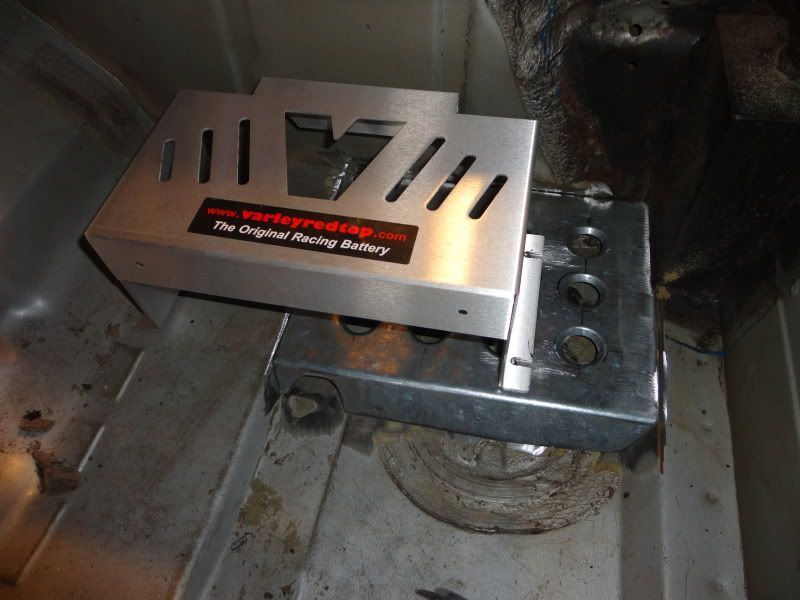
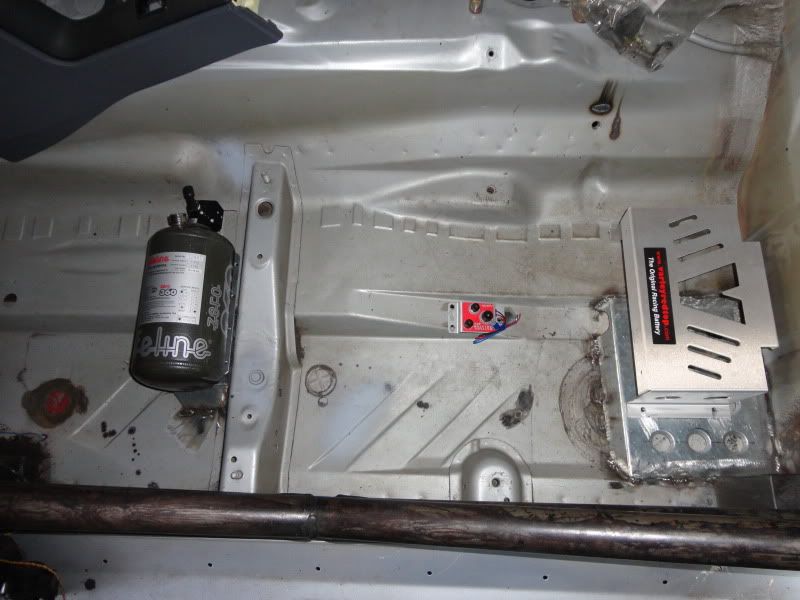
Battery mount made and welded into car behind passenger seat
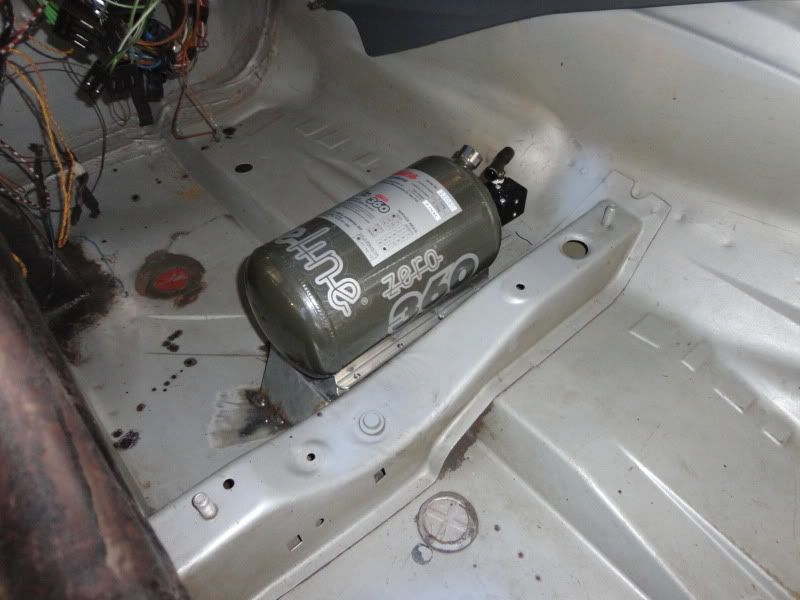
Fire extinguisher mount welded to car
Kill switch mounted to floor, this will be under the passenger seat
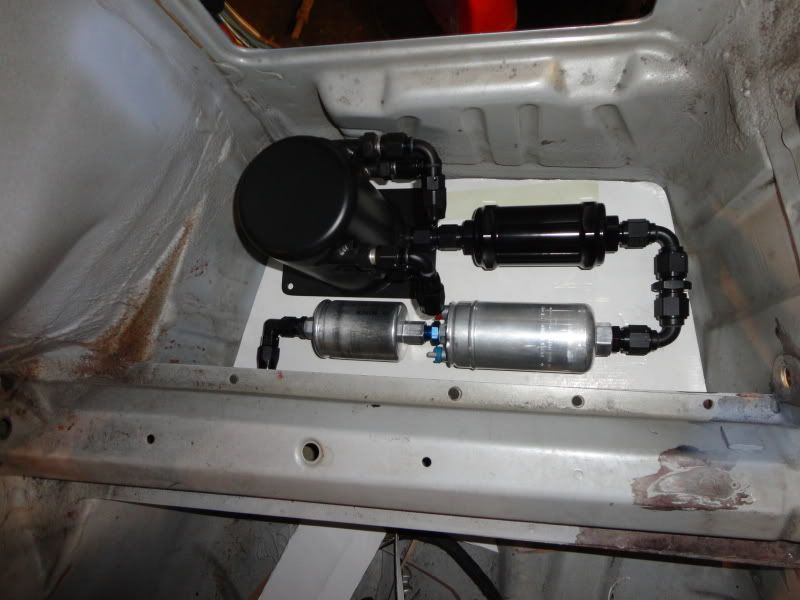
Fuel system mocked up in old battery location, this all sits on a carbon plate with we have covered in masking tape until the final fitment
Fuel hoses fitted and run through boot floor
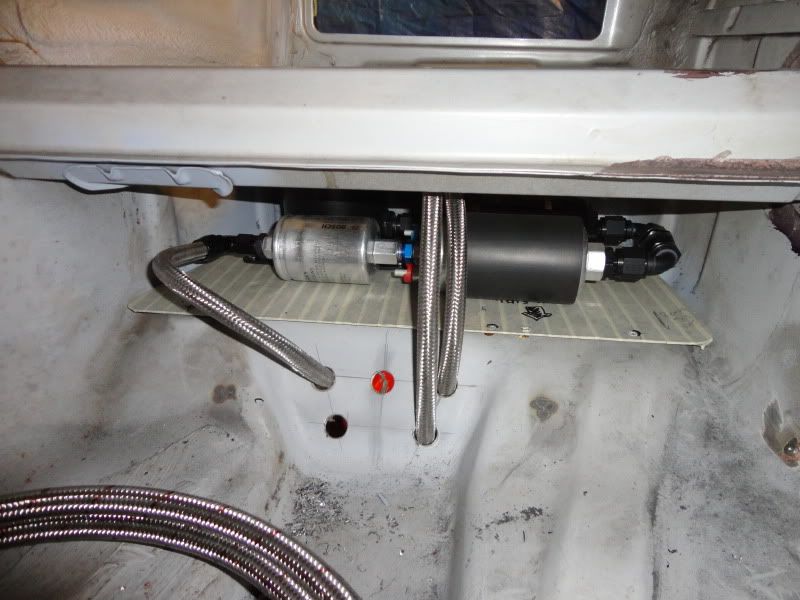
Fuel hard lines run under the car as well as wiring loom which will run alongside
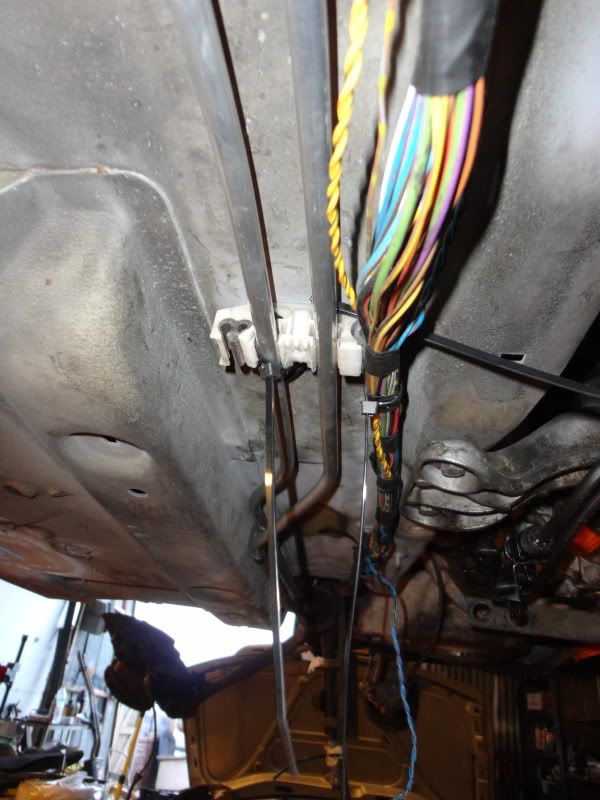
Next job is to lengthen the front wiring loom so that it can run under the front wheel arch, fit dash and run fire extinguisher pipes
Rear subframe dismantled and sand blasted
Diff cradle seam welded and strengthening plates added
Rear control arms strengthened
Rear trailing arm mounting point reinforcement plates welded on
Harness mounts welded and drilled
All welded areas rust treated and primered.
Battery mount made and welded into car behind passenger seat
Fire extinguisher mount welded to car
Kill switch mounted to floor, this will be under the passenger seat
Fuel system mocked up in old battery location, this all sits on a carbon plate with we have covered in masking tape until the final fitment
Fuel hoses fitted and run through boot floor
Fuel hard lines run under the car as well as wiring loom which will run alongside
Next job is to lengthen the front wiring loom so that it can run under the front wheel arch, fit dash and run fire extinguisher pipes
Edited by Bmdub on Monday 9th April 20:00
Edited by Bmdub on Monday 9th April 20:02
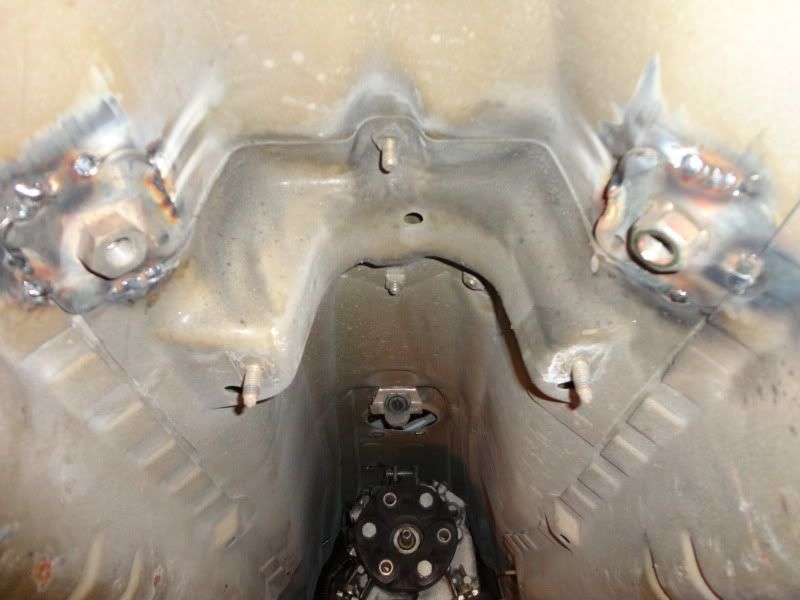
Update from the weekend.
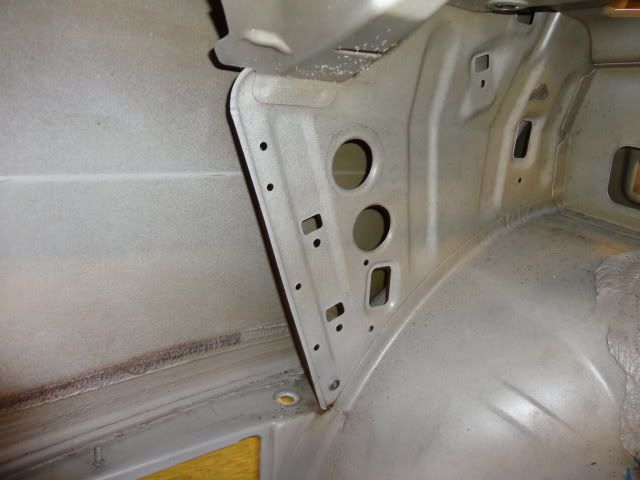
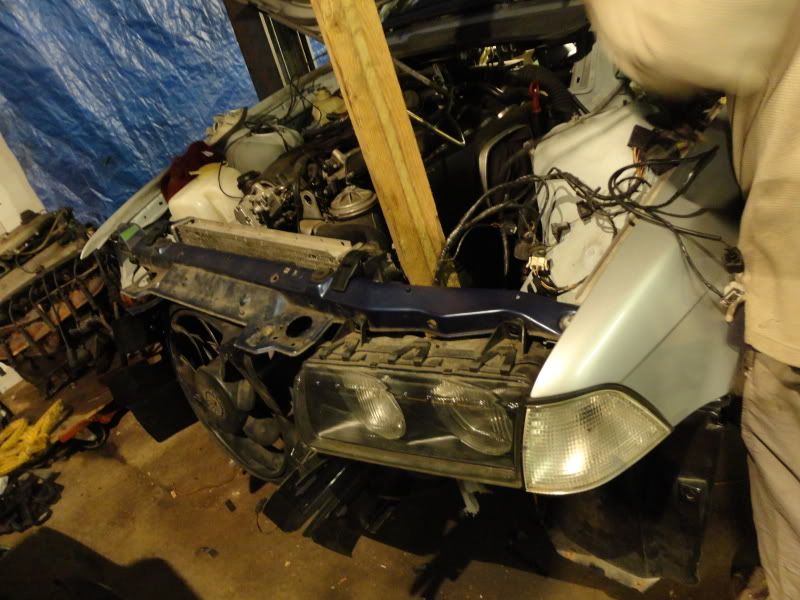
First job was to extend the front loom so that it could be run through the passenger wheel arch, this meant mocking up the front of the car.
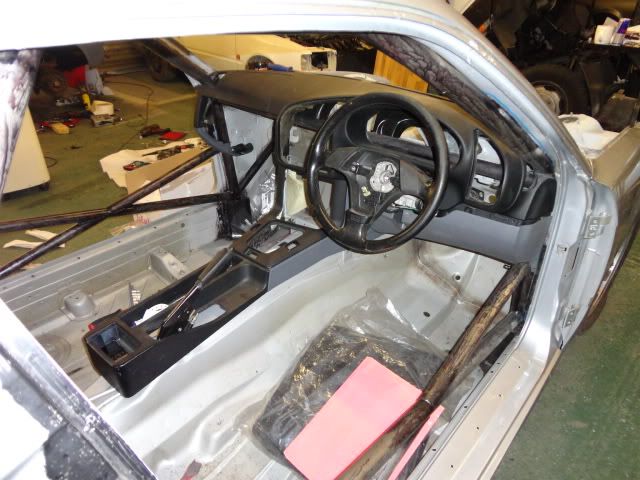
With this done, we set about fitting up the dash, first job was to weld the side mounts to the cage, these can no longer be attached to the shell in the usual places as the cage is now in the way.
Next we dropped the dash into the car and sat it on the mounts, its already been cut to fit around the cage although it will need tidying up still.
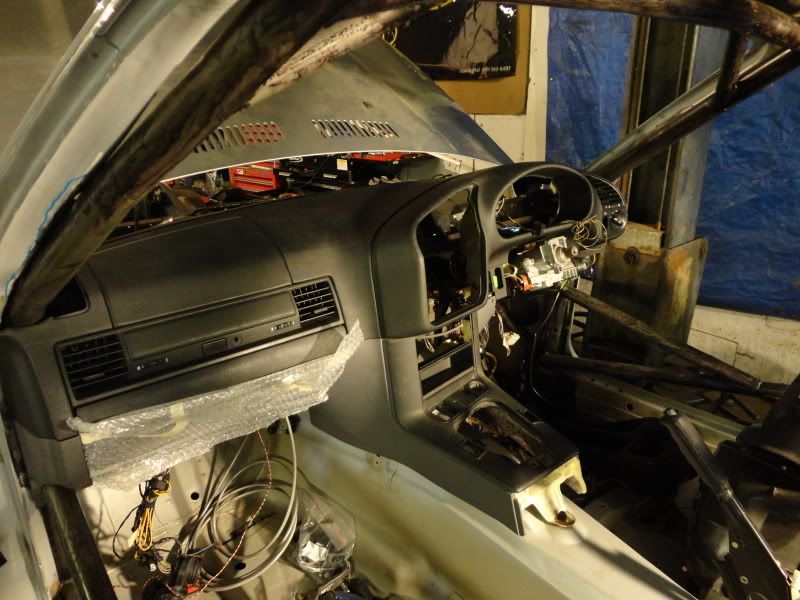
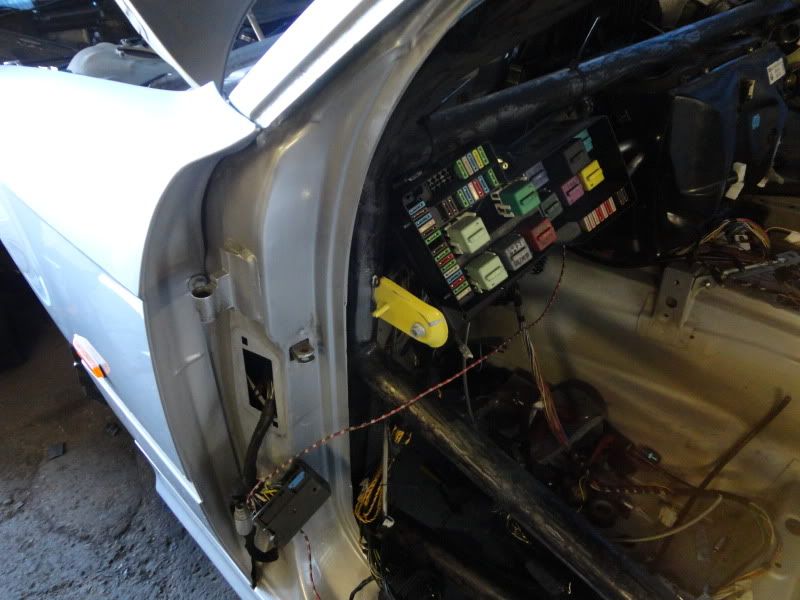
Fuse box then fitted into the glove box
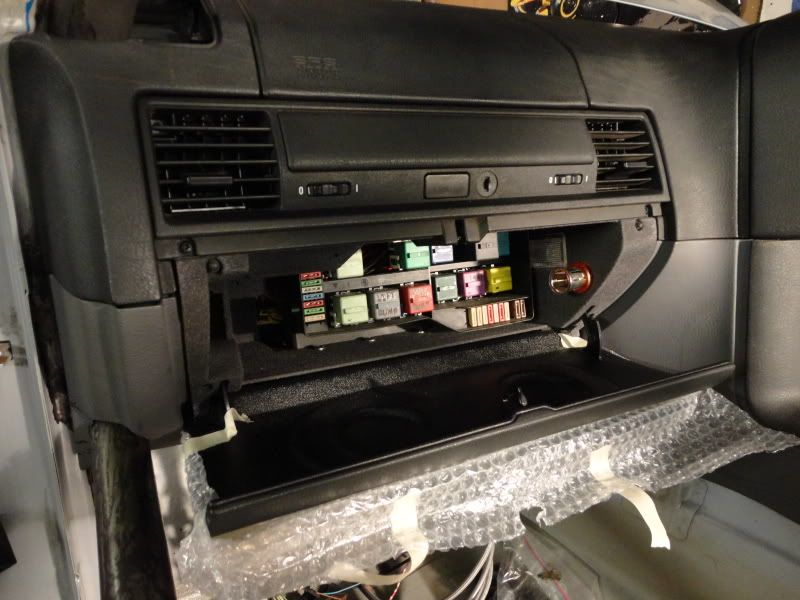
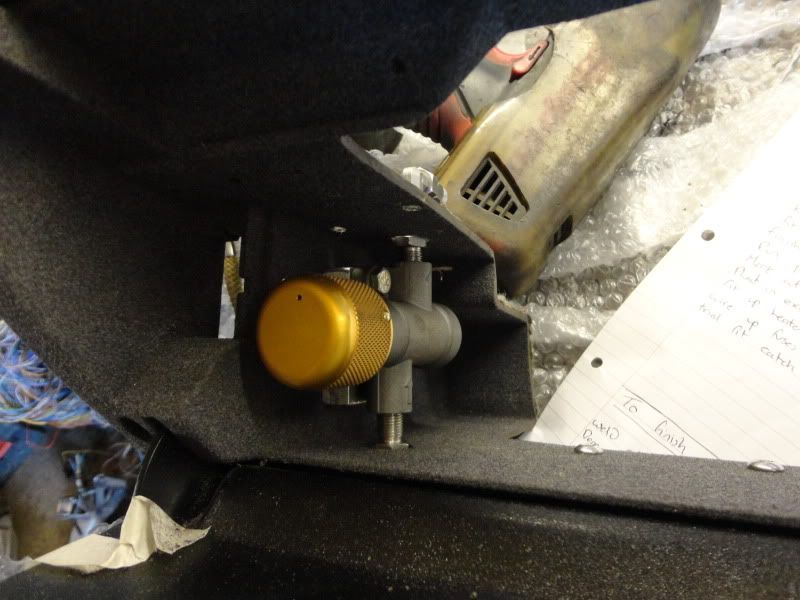
Once the fuse box was in position we knew what space we had to fit the brake bias valve, so the glove box was removed and said valve fitted.
with the dash more or less now mocked up we moved onto the fire extinguisher, air box, header tank and ecu cover plate put back in, so that we know where to run the extinguisher lines.

And the two bulkhead pray nozzles fitted up
O/S

N/S
Both together
We then hit a slight snag, in that the wiper mechanism is hitting the cage where is passes through the bulkhead... Solution; Shorten the arms on the mechanism so it moves everything around by 45 degrees but still giving the same amount of movement.
Hopefully collecting my catchtank and external switch mounting box tomorrow so that they can be mocked up
First job was to extend the front loom so that it could be run through the passenger wheel arch, this meant mocking up the front of the car.
With this done, we set about fitting up the dash, first job was to weld the side mounts to the cage, these can no longer be attached to the shell in the usual places as the cage is now in the way.
Next we dropped the dash into the car and sat it on the mounts, its already been cut to fit around the cage although it will need tidying up still.
Fuse box then fitted into the glove box
Once the fuse box was in position we knew what space we had to fit the brake bias valve, so the glove box was removed and said valve fitted.
with the dash more or less now mocked up we moved onto the fire extinguisher, air box, header tank and ecu cover plate put back in, so that we know where to run the extinguisher lines.
And the two bulkhead pray nozzles fitted up
O/S
N/S
Both together
We then hit a slight snag, in that the wiper mechanism is hitting the cage where is passes through the bulkhead... Solution; Shorten the arms on the mechanism so it moves everything around by 45 degrees but still giving the same amount of movement.
Hopefully collecting my catchtank and external switch mounting box tomorrow so that they can be mocked up
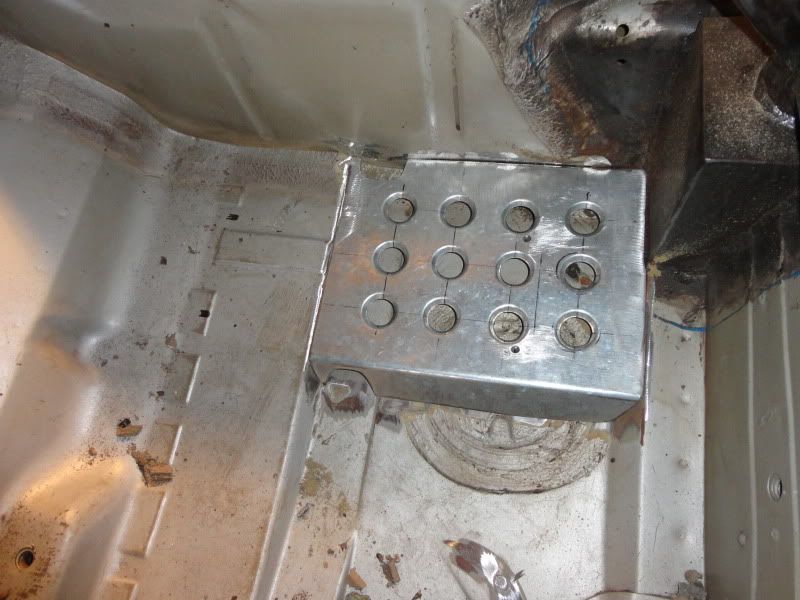
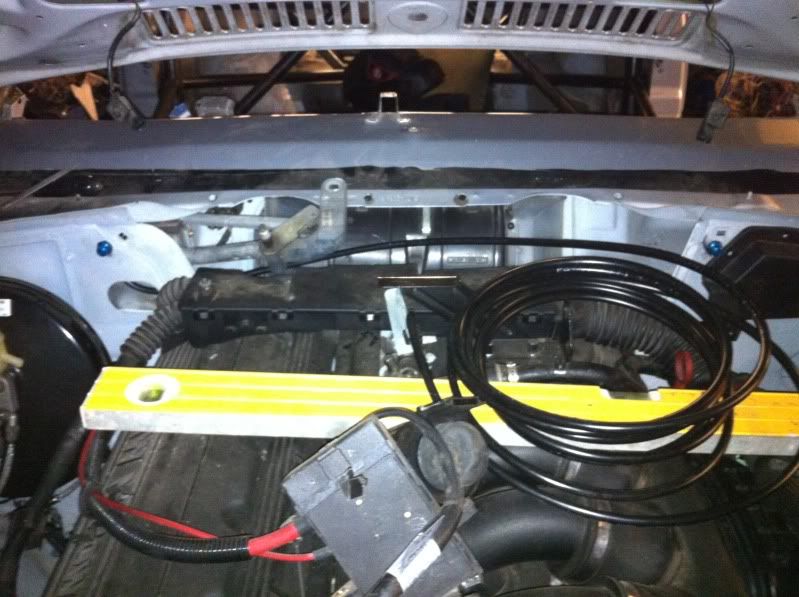
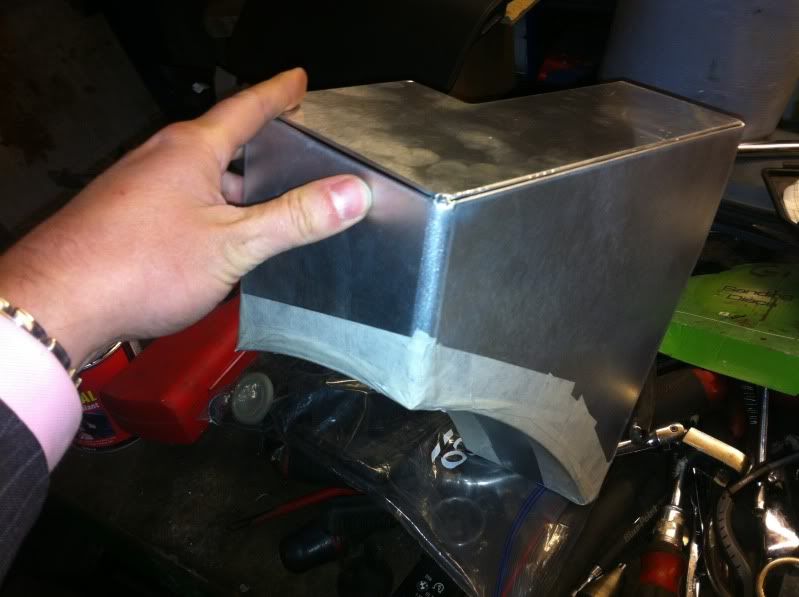
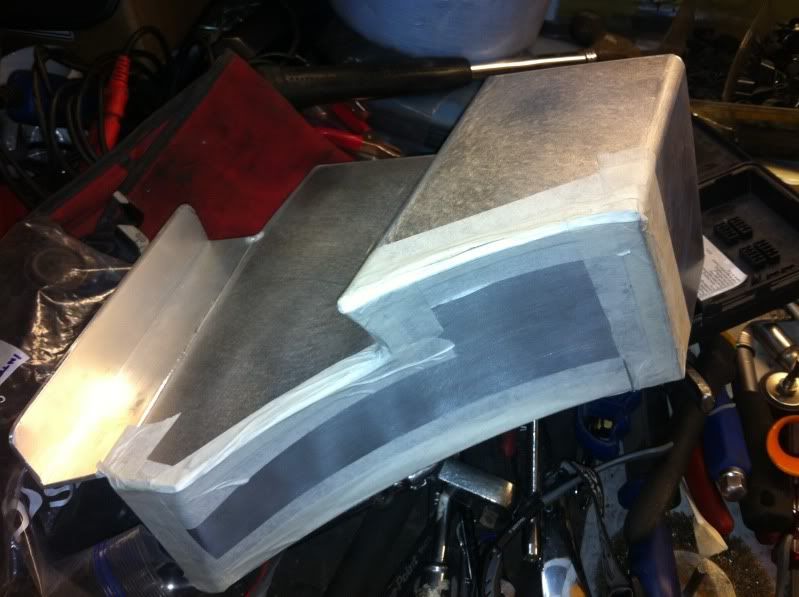
Quick update.
As previously mentioned the original fuse box has now been moved inside the glove box... so what to do with the void where the original fuse box sat?
The solution get a catch tank made in the shape of the original fuse box, just made a bit slimmer on the n/s to miss the rollcage.
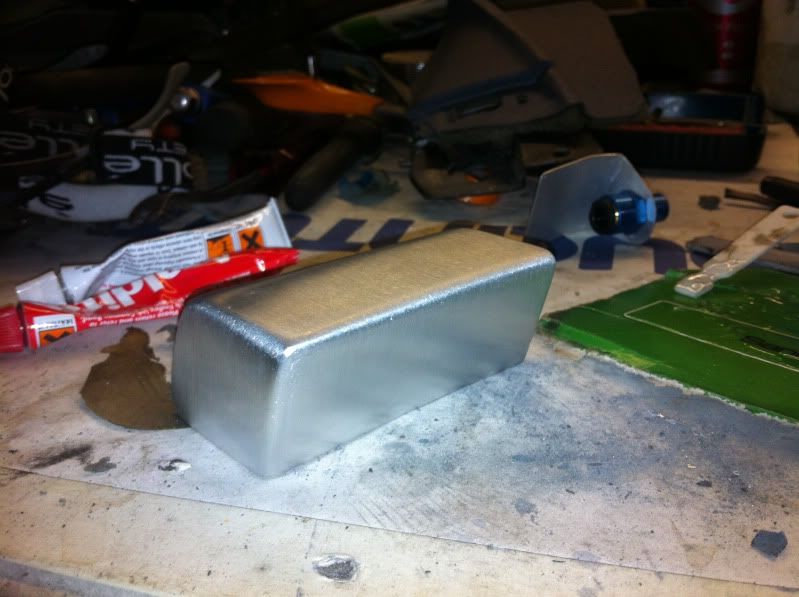
So today i collected the first mock up of the catch tanks from Pro Alloy
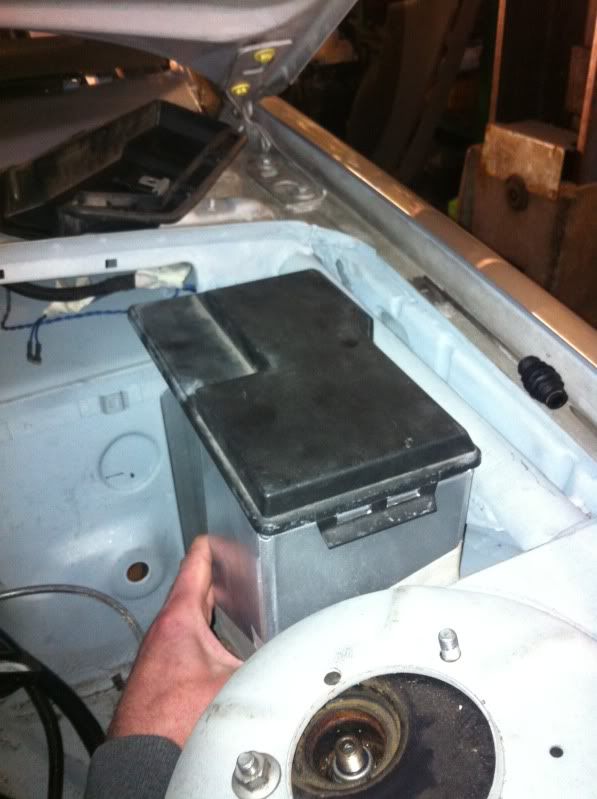
How it looks inside the car
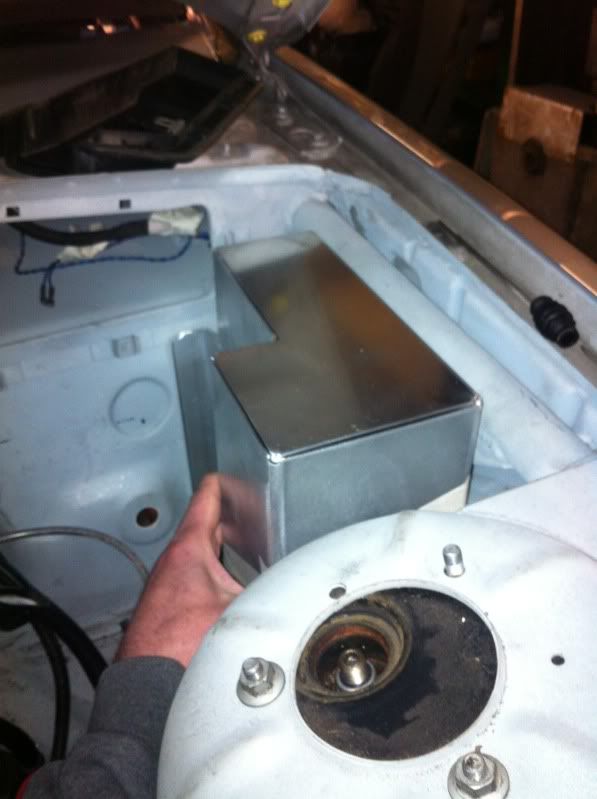
And the best bit, the original fuse box cover fits on top
Once we are happy with ther fitment, it will go back to pro alloy to be finished off and powder coated satin black to add to the OE fuse box look.
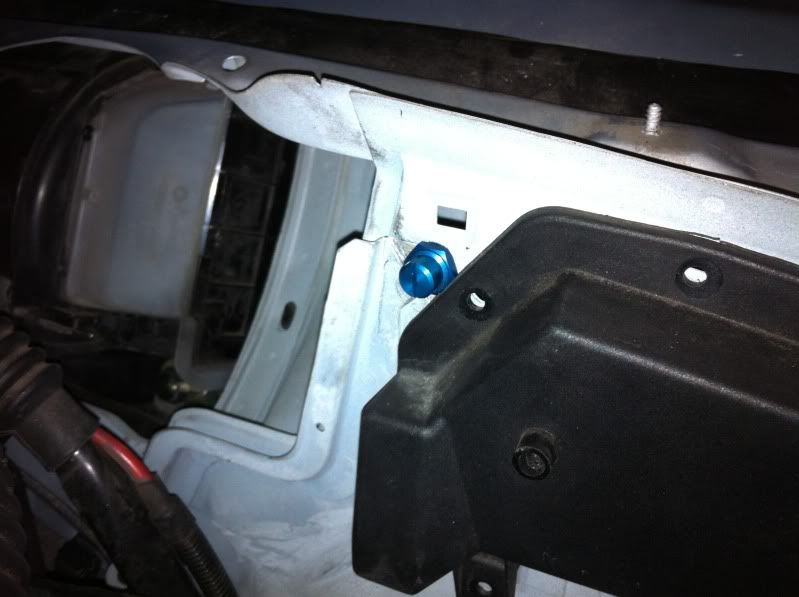
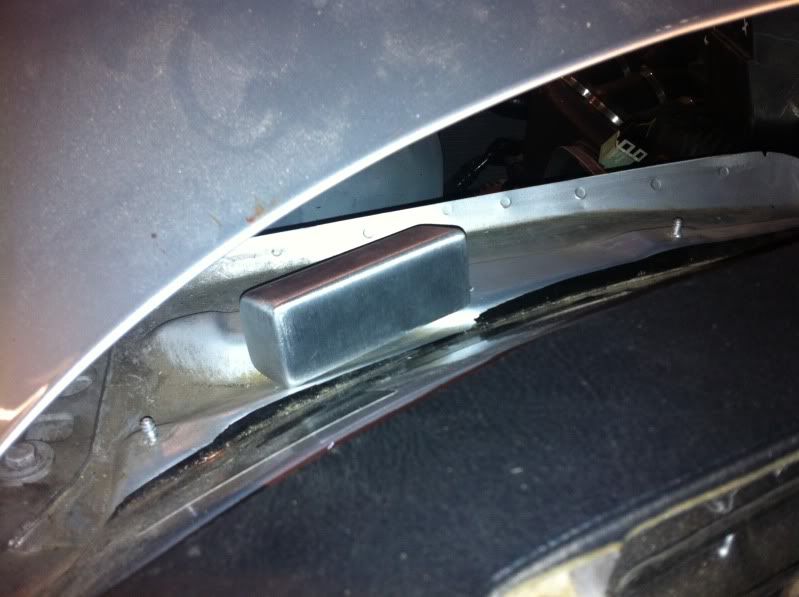
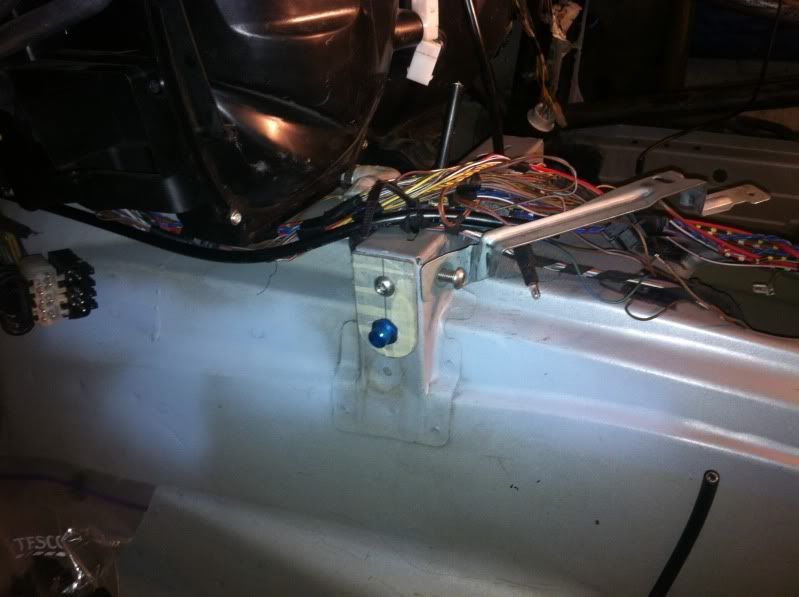
Also picked the external switch box, for the kill switch and fire extinguisher switch. This sits on the scuttle panel through a hole made in the plastic trim so that it sits neatly under the bonnet. The front is even curved to follow the line of the bonnet.
How it looks on the car, once finished it will be fixed to the shell and pained with the car.
Other than this the wiper motor has been modified to fit with the roll cage and has been tested... all good
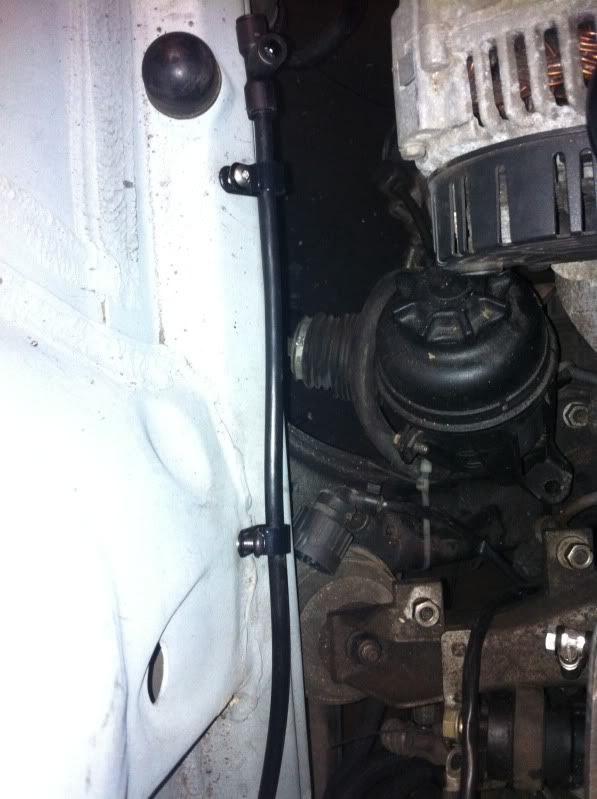
Fire extinguisher lines run down the chassis legs to the front of the car, held in with p-clips riv nutted to the shell.
internal sfire extinguisher spray nozzles fitted, into exisiting holes and mounted onto carbon fibre back plates (taped up at the moment)
Also been experimenting with what to use on the dash to build it back up and reshape around the cage... bumper repair didnt take at all.. however araldite epxoy resin worked a treat, so this will be used to build up the area and then sanded down to recreate the standard dash lines around the cage before being flocked.
More progress to follow.. 12 days until it goes off to be painted
As previously mentioned the original fuse box has now been moved inside the glove box... so what to do with the void where the original fuse box sat?
The solution get a catch tank made in the shape of the original fuse box, just made a bit slimmer on the n/s to miss the rollcage.
So today i collected the first mock up of the catch tanks from Pro Alloy
How it looks inside the car
And the best bit, the original fuse box cover fits on top
Once we are happy with ther fitment, it will go back to pro alloy to be finished off and powder coated satin black to add to the OE fuse box look.
Also picked the external switch box, for the kill switch and fire extinguisher switch. This sits on the scuttle panel through a hole made in the plastic trim so that it sits neatly under the bonnet. The front is even curved to follow the line of the bonnet.
How it looks on the car, once finished it will be fixed to the shell and pained with the car.
Other than this the wiper motor has been modified to fit with the roll cage and has been tested... all good
Fire extinguisher lines run down the chassis legs to the front of the car, held in with p-clips riv nutted to the shell.
internal sfire extinguisher spray nozzles fitted, into exisiting holes and mounted onto carbon fibre back plates (taped up at the moment)
Also been experimenting with what to use on the dash to build it back up and reshape around the cage... bumper repair didnt take at all.. however araldite epxoy resin worked a treat, so this will be used to build up the area and then sanded down to recreate the standard dash lines around the cage before being flocked.
More progress to follow.. 12 days until it goes off to be painted
Gassing Station | Readers' Cars | Top of Page | What's New | My Stuff