Taking the leather off the interior to redye, Please advise!
Discussion


Hi guys - in the process of taking all the leather off the car to redye in black and dark red. Then redoing the flocking in alacantara - same colour scheme (except light grey roof as I think a dark roof lining feels opressive (hence why I like open topped cars!).
Any links to useful guides, your experience of disassembling interior parts etc. very gratefully received! So far I've managed to take the leather off from around the steering wheel/rev lights and the leather seats but that's it.
I'm really enjoying getting to know the car and it's wonderful to be able to have the confidence to have a go even though I don't have much experience with cars because of helpful fellow tvr owners such as yourselves.
Thank you!
Darren
I have the radio and centre console off + handbrake gaiter - however the gear knob will not budge =/ Ordering this to try to do the job: http://www.amazon.co.uk/gp/product/B00096JDK8/ref=...
Edited by Dischordant on Sunday 4th May 19:16
Mostly just a boring black I'm afraid - but it contrasts so nicely with the silver in the dash/head unit etc. and matches the colour scheme of the car overall.
The odd parts I'm doing dark red - was planning seat square, gaiters, bottom leather part of the dash, door leather.
Then going to get some alcantara to go over areas with flocking - again sticking with the black or red theme, apart from the roof which I'm doing a light grey to mimic the silver - I just find any dark colour above makes the car feel less spacious.
New carpets waiting to be fitted are black with dark red.
I'm also redoing the audio system but haven't decided on speaker positions yet.
I'm struggling to get to the two bolts to remove the top section of the dash - are they the ones positioned pointing outwards on either side of the car? They are tucked right up above the shelf and seem to be allen bolts from the impression on my finger! Unfortunately the only allen key large enough to fit them is to chunky to then rotate in that area.
Am I doing it in the wrong order or is there something I'm missing?!
Cheers!
Am I doing it in the wrong order or is there something I'm missing?!
Cheers!
nm - figured out removing of the top dash thanks to this guide here (before I was trying to remove the bottom bolts - I think two on either side - I'm hoping this will enable me to remove the bottom section http://www.pistonheads.com/gassing/topic.asp?f=5&a...
Now to try to take the bottom part off!
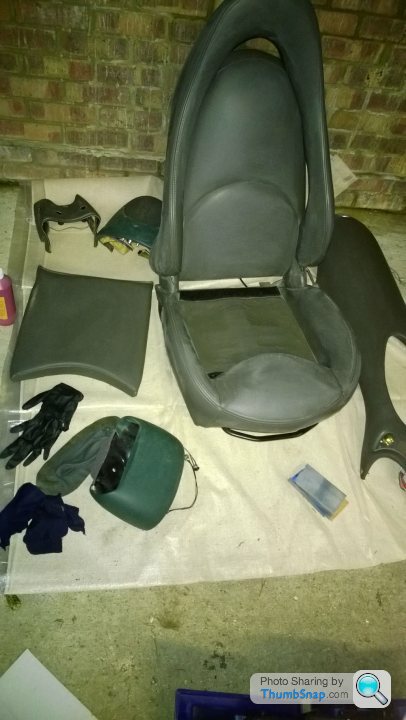
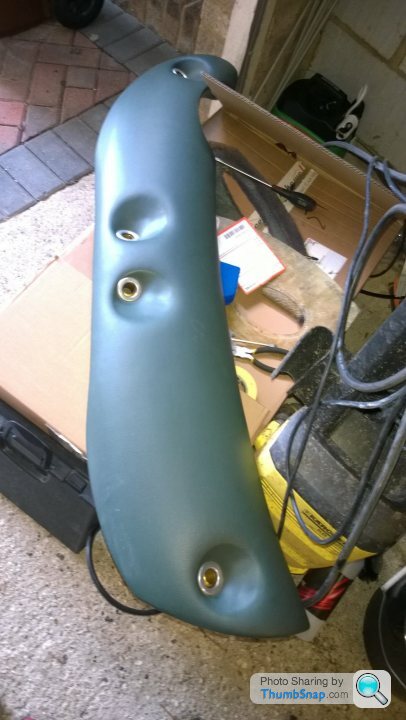
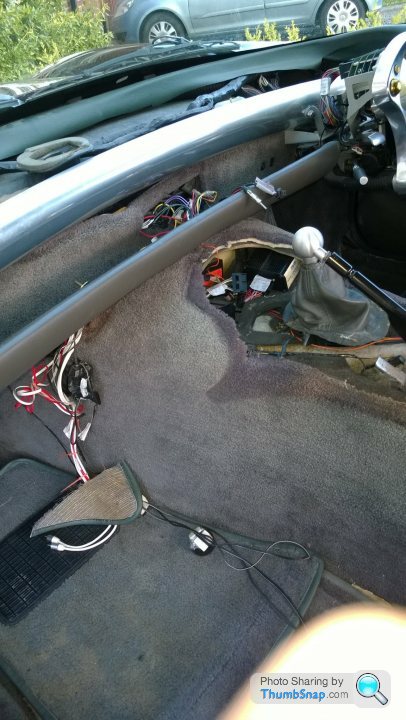
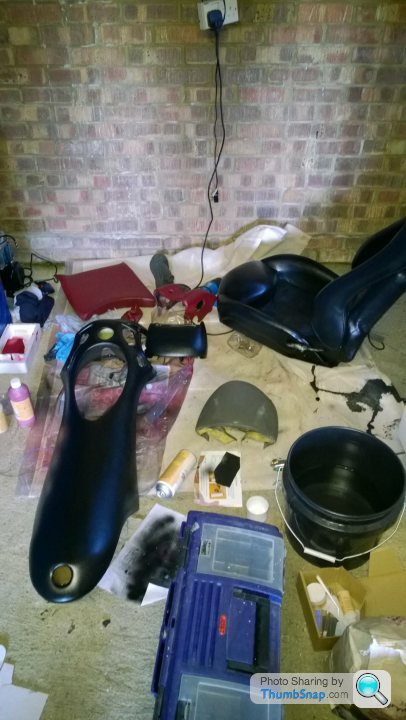
Some photos so far:
Now to try to take the bottom part off!
Some photos so far:
Edited by Dischordant on Tuesday 6th May 19:52
Edited by Dischordant on Tuesday 6th May 19:52
Wow - ok this part seems particularly difficult - again I may be going about this wrong! I've started removing the bolts that attach the horizontal shiney metal section just above the bottom dashboard - there seems to be like 20 nuts! Is this correct before I continue to remove them all? I still can't manage to undo the 2 large allen bolts at the ends pointing outwards - I just don't have room to put pressure on an allen key of sufficient size in such a small space. =/
Advice welcomed! =)
Advice welcomed! =)
Thanks Rich, hope I can do a decent job of it! I'm picking up some crappy sheets tomorrow from Primark to then tape up all the interior so I can dye the parts that can't be removed.
Just noticed that 4 of my rear indicator bulbs have gone on the back left indicator - anyone know where I can buy replacements from?
There was a bit of plastic in the air vent that I think was meant to be attached to the interior bit of hose - upon trying to get it out it's fallen inside instead into the front of the car. Is it a simple enough job to retrieve the once the main bonnet is off?
Yep threads like yours were ones that inspired me to give it a go myself - save some money and get to know the car better. As I needed to do the leather too it was a no brainer to have a go - worse case scenario I cock it up and pay someone else to do it. Carpet was bought through Lakewell.com - They've seemed good so far!
Any ideas on the air vent plastic piece retrieval? Possibility of any damage caused by it rattling around inside? I'd have had a look already but it's not that easy taking the bonnet off solo!
Any ideas on the air vent plastic piece retrieval? Possibility of any damage caused by it rattling around inside? I'd have had a look already but it's not that easy taking the bonnet off solo!
Cheers guys - just to clarify I was in the passenger footwell where the 2 ducts exit and the pipe normally joins one of them to then feed to the appropriate place in the car but in mine the pipe was hanging loose and I could see a white ring of plastic sitting inside one of the rubber tubes - I assume it was meant to be positioned between the rubber tube exit and the plastic tube - but upon trying to pull it down I foolishly knocked it further in and it fell inside the front of the car (not the footwell area).
Once the weather dries up will take the main bonnet off and see if I can find the airboxes you've mentioned =) In the mean time... time to polish up the metal and prep the next leather section!
Once the weather dries up will take the main bonnet off and see if I can find the airboxes you've mentioned =) In the mean time... time to polish up the metal and prep the next leather section!
Hiya - as far as I can tell the leather trim doesn't come off the a pillar, or at least not without cocking everything up. I'm planning to dye the leather on the pillars in situ as a result. However where the bottom of the A pillar comes out you could attach it there - I don't see why the aerial would care if it is earthed at the top or the bottom of the pillar but I'm no expert in such matters.
I'll take a photo to show you tomorrow but unfortunately my phone is dead at the moment and night is falling
I'll take a photo to show you tomorrow but unfortunately my phone is dead at the moment and night is falling
Hi guys - I've recorded some video of the inside now with everything taken off - sorry it's not very knowledgeable, but I'm a computing teacher not a mechanic..I'm just having a go and seeing what I can learn! =)
Anyhow hopefully it's helpful to someone out there as I'd like to try to give back to the community even if I can only manage it in a limited way.
Remember I've forewarned you I don't have a clue! Would be awesome if someone in the know could post a walk through of all the parts of the car! =)
http://youtu.be/3F23RwEvOZY
http://youtu.be/BHe4xBl_zy4
Edited by Dischordant on Friday 9th May 18:37
Edited by Dischordant on Friday 9th May 18:37
Looks nice and I wasn't aware of new door cards so cheers for that but I'm happy with the standard one so will leave it that style - plus as I'm adding speakers I'm already worried about the door looking too "busy" so don't want to add more to it.
I'm using the furniture clinic kit to dye it
I'm using the furniture clinic kit to dye it
Edited by Dischordant on Saturday 10th May 13:33
Gassing Station | Tuscan | Top of Page | What's New | My Stuff