Chassis Refurb
Discussion


OK... So the body is coming off at the moment to get the outriggers done. Initially, I was just thinking of rubbing the chassis down and waxoyling (I know there are a fair few here that hate the stuff... We’ll not talk about that now) but the more I look at it, the more I thinking about stripping the chassis right back.
So, I’ve got a number of questions:
Firstly, what sort of pitfalls am I likely to come up against? I’ve got the ability to leave the body, engine & gearbox in storage while I get the chassis home & work on my drive. I’m guessing that once up on axle stands, it is just a case of unbolting everything??? Does it all come off in nice, easy chunks or are there going to be bits that are a PITA??
POR15 v Powdercoat
Whatever I do, I’ll probably get things shot-blasted. What are the relative merits of each finish? I know powder can chip but how much can be mitigated by the type of finish, base, etc... Going powder could be the easy option, assuming they can get the chassis in or would I be better using POR15 on the chassis and powder everything else???
I think you see where I’m going with these questions, so what else do I need to consider?? E.g. I’ll be fitting new bushes...
/DISCUSS ON
M
Tanguero said:
I have just got my chassis back from the powder coaters. They grit blasted it then hot zinc metal sprayed it and finally powder coated it with a polyester powder.
The zinc plasma spraying leaves an 80 micron bonded coat of zinc effectively galvanising the chassis without the heat distortion and weight problems of dipping it in molten zinc.
The company that did the work demonstrated the toughness of the powder coating by enthusiastically braying a piece of coated steel with a lump hammer for a minute or so. It didn't chip. I have used POR15 in the past and there is absolutely no contest whatsoever.
I've gone the zinc route before with other stuff so will probably stick to that. I've e-mailed a couple of local powdercoaters to see what they come back with and I've specifically asked about chip resistance.The zinc plasma spraying leaves an 80 micron bonded coat of zinc effectively galvanising the chassis without the heat distortion and weight problems of dipping it in molten zinc.
The company that did the work demonstrated the toughness of the powder coating by enthusiastically braying a piece of coated steel with a lump hammer for a minute or so. It didn't chip. I have used POR15 in the past and there is absolutely no contest whatsoever.
Tanguero said:
In terms of stripping the chassis, it all comes off fairly easily once you have all round access. The only even slightly tricky point I found was the steering rack, which I needed to remove the hard pipes to get out. If you have polybushes already, don't rely on being able to remove them from suspension arms easily though. I have ended up replacing them all.
Thanks, that's good to know.Tanguero said:
The other big drawback of stripping the chassis is that you will end up wanting to replace everything in sight, thereby comprehensively blowing your budget!
Yeah... I'm worried that the 4wk "Replace Outriggers" is going to turn into a 2yr full body off restoration!!! 
Tanguero said:
ETA - My other top tip is make a trolley to put the chassis on so you can strip it at a comfortable height and move it around easily. I made a wooden frame out of 3x2 timber on castors and it has made like a whole lot easier.
Top tip.  It's a pity I've got a gravel drive though. Hey ho!
A few more questions:
- Heat protection: What have others done around the manifolds? Have you put anything on the chassis, wrapped the manifolds, both, etc... ???
- Colour: I know it would have originally had a white chassis but I think I'd prefer a darker colour. Has anyone got any examples that I can have a look at Grey/Black (I'll have a flick through 'Sprint' later too)?
- Bushes: Does anyone do a complete 'boxed' set of Cerbera bushes???
M
...and so the body is off!
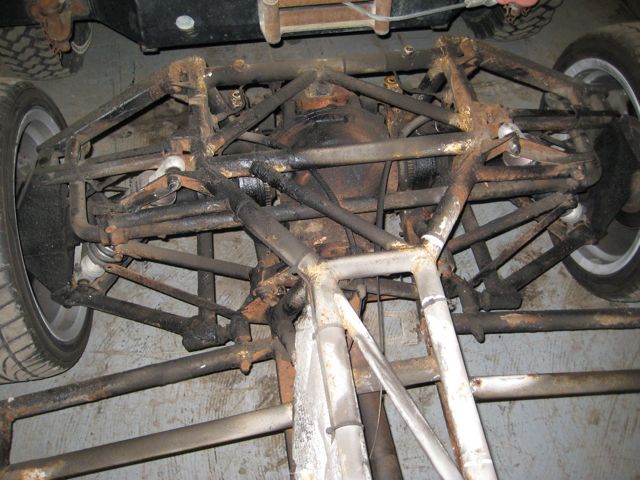
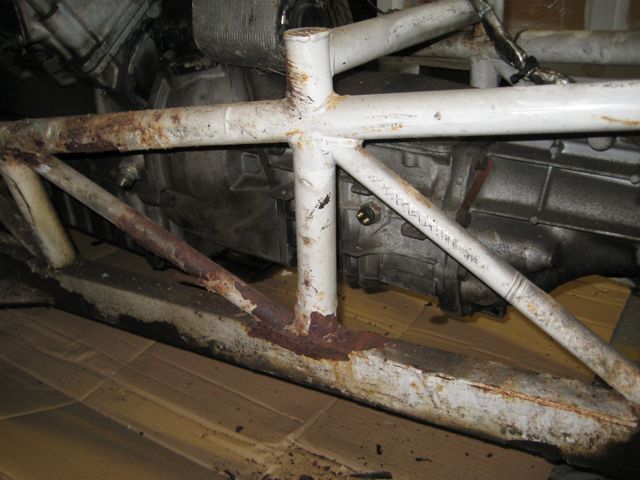
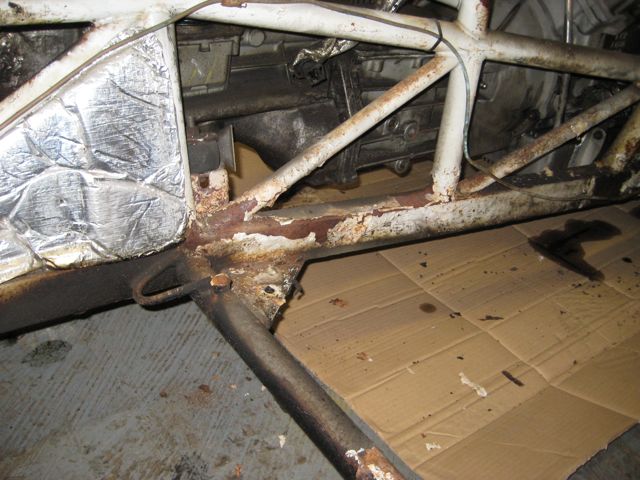
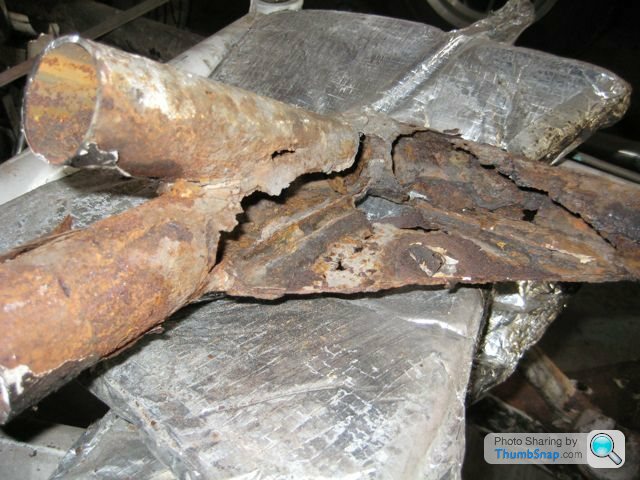
The rust is mainly surface but as mentioned, the outriggers are the main driver for this work:
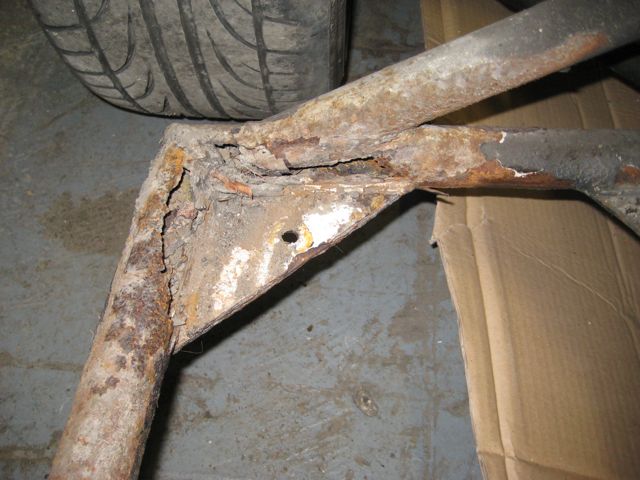
The rest of the outriggers are poor but still solid.
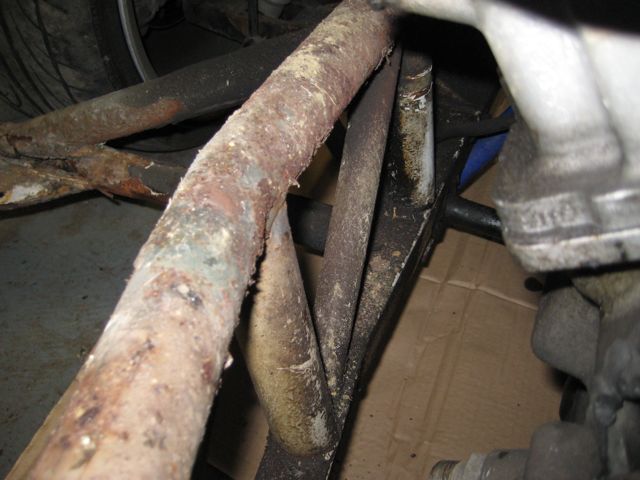
I was also pleasantly surprised that the areas around the manifolds weren't too bad:
I'm hoping to be able to get the chassis back to my place for the long bank holiday weekend to strip, ready for blasting & powdercoating.
M
The rust is mainly surface but as mentioned, the outriggers are the main driver for this work:
The rest of the outriggers are poor but still solid.
I was also pleasantly surprised that the areas around the manifolds weren't too bad:
I'm hoping to be able to get the chassis back to my place for the long bank holiday weekend to strip, ready for blasting & powdercoating.
M
spongy said:
good work sir....and very fast 
I can't take credit for all of it.I've used a local restoration chap to do the outriggers and as he was going to take the body off anyway, we came to an arrangement whereby I can store the body while I take the chassis away for the other stuff.
Once I've done my bit, I'll deliver him back a spanking clean rolling chassis, for him to nail it all back together. We're also going to tidy up a couple of other things while it is all in bits.
M
Spathodus77 said:
Mark - I notice your from wilts, I'm from Swindon and recently used Sunbase (Unit 14 Isis Trading Estate, Stratton Road, Swindon, SN1 2PG; phone 01793 511203) to blast and powder coat approx 12 bits (wishbones, radiator mounts etc from my S). They powder coated in two different colours - lots available to choose from. I was very pleased with the results. The damage was in the region of £75 inc VAT - I'm told by people in the know that this is reasonable.
You may wish to give them a try.
On a different note - if your cerb is blue I think we met at a Wilts TVRcc run ac ouple of months ago?
Ralph
Cheers Ralph, I'll check them out...You may wish to give them a try.
On a different note - if your cerb is blue I think we met at a Wilts TVRcc run ac ouple of months ago?
Ralph
Yes it probably was me at the Wilts TVRcc outing.
M
Wot he said...
Once the repairs have been completed to the rolling chassis, someone has to strip it right back to its component parts before sending off to the powder coaters. Although the sandblasting & powdercoating of the chassis is probably around £600-£700, don't forget to factor in the costs of stripping the chassis down to its component parts as well as the costs of re-assembly, new bushes, brake lines, etc...
On my chassis, I'm taking the rolling chassis & stripping before sending off to be powdercoated.
Once coated, I'll be re-assembling and delivering the rolling chassis back for dropping the engine in & body back on.
M
Edited by camel_landy on Monday 14th May 10:49
Tanguero said:
The cost of "might as well replace that while it's apart" and "I am not putting that back on my nice clean chassis if its in that state", far far outweighs the cost of the powder coating - by at least a factor of 10 in my experience.
Yeeeesssss.....For the time being, I'm trying to limit it to those things which can't be accessed easily with the body on and anthing badly corroded. So far I have:
- Bushes
- Brake lines
- Steering rack refurb
- One of the power steering fluid pipes
- Coolant pipe to expansion tank
- Aircon condenser
- Exhaust wrap on manifolds
- Heat shielding
- Couple of minor engine oil leaks
- Throttle cable
M
ukkid35 said:
Any news on your chassis refurb?
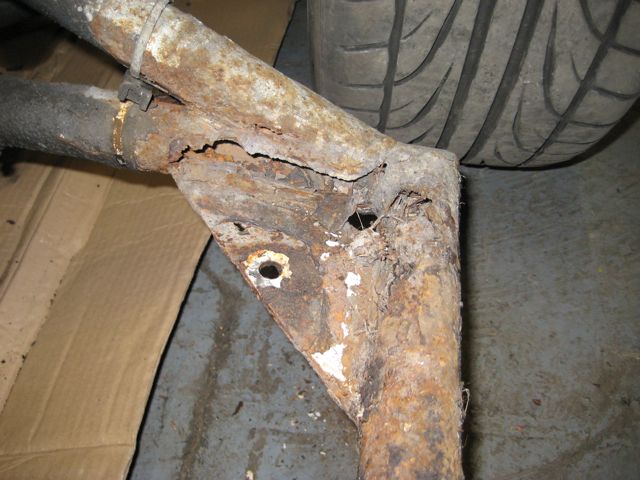
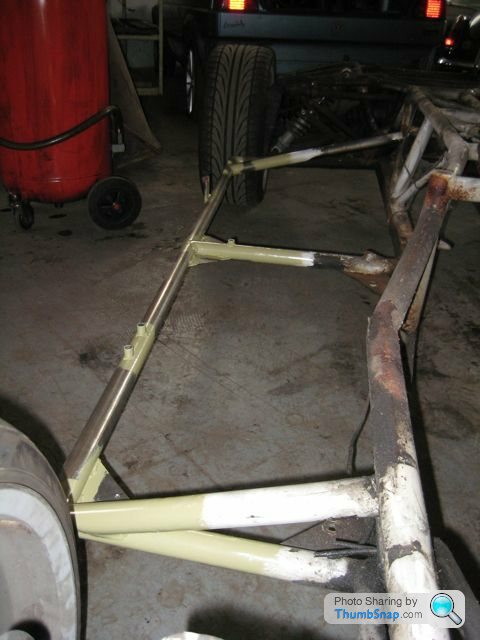
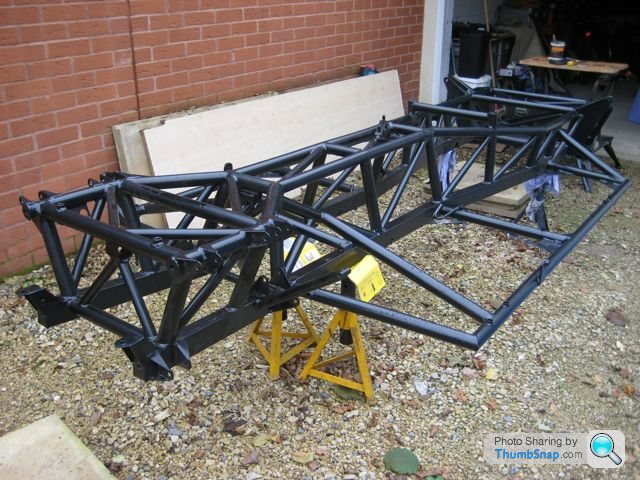
Well funny you should ask that as there have been various delays but on Friday I wandered down to the workshop to have a look... Here is one of the rotted out corners:
...and this is what it all looks like now:
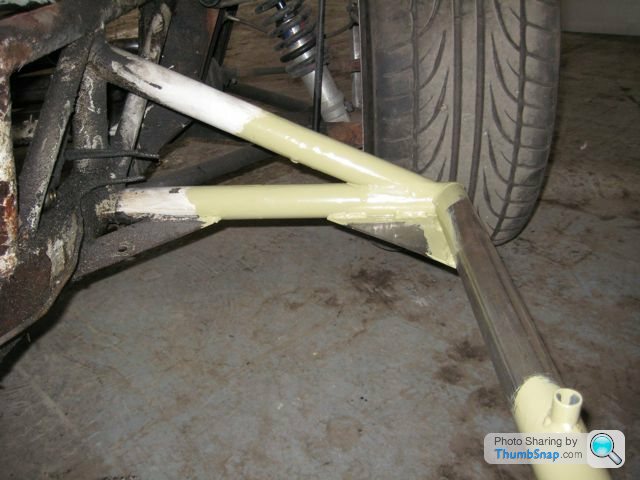
...and the other side:
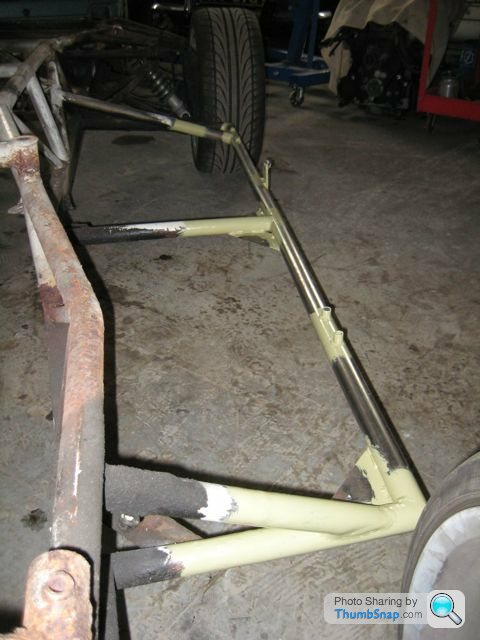
Before you ask; No, it isn't stainless... It's just high carbon steel, with a temporary primer on the joints. Also, before all the final welds were done, we took the opportunity to treat the insides with a splash of waxoyl.
There is a good chance that I'll get the chassis on my drive this week and I can start stripping it for powdercoating. If that's the case, then it'll be perfect timing as we're forecast some decent weather and I've got some time off work.
M


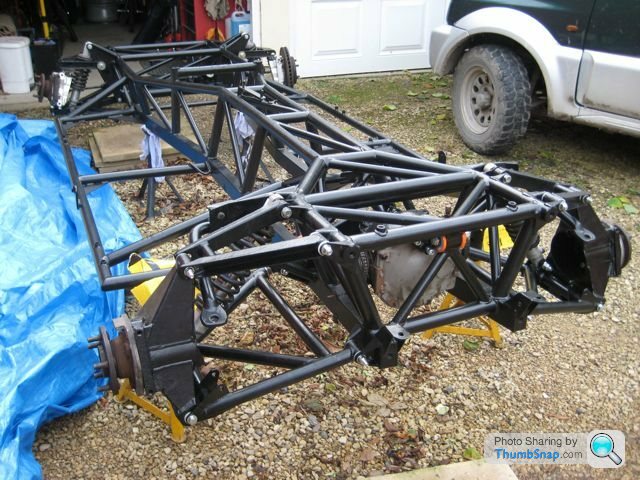
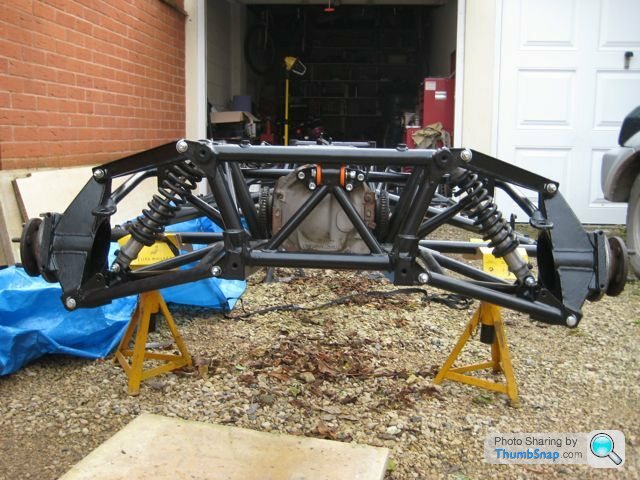
...and now a couple more 'Before & After' shots.
Before...
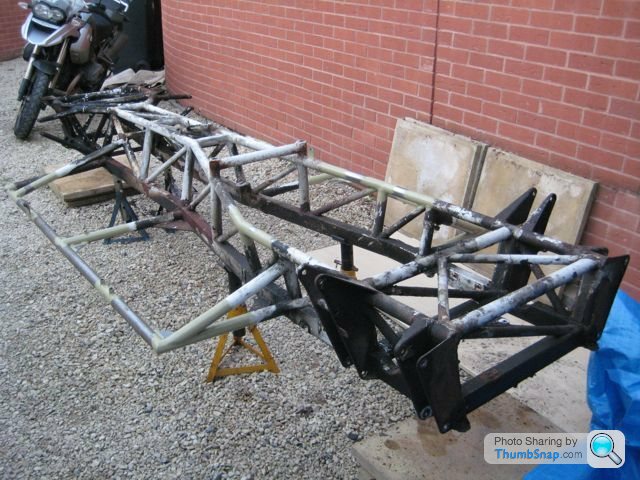
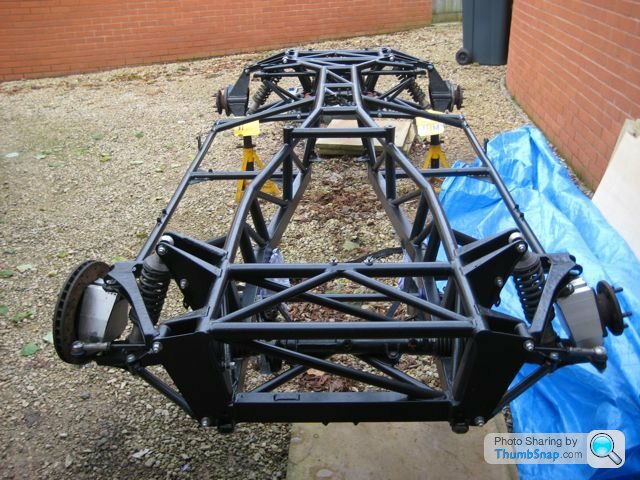
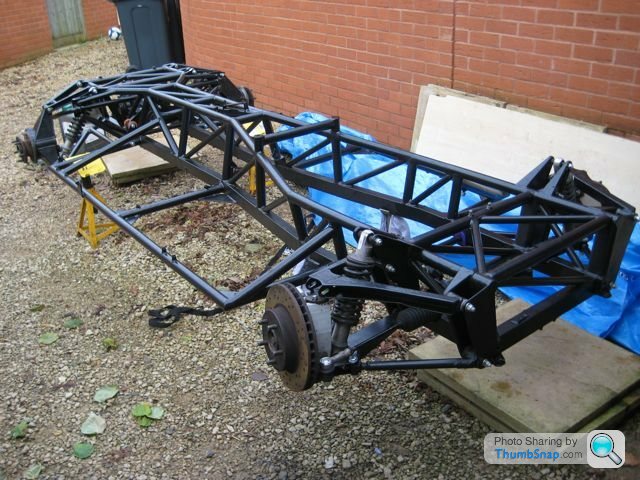
...and after.
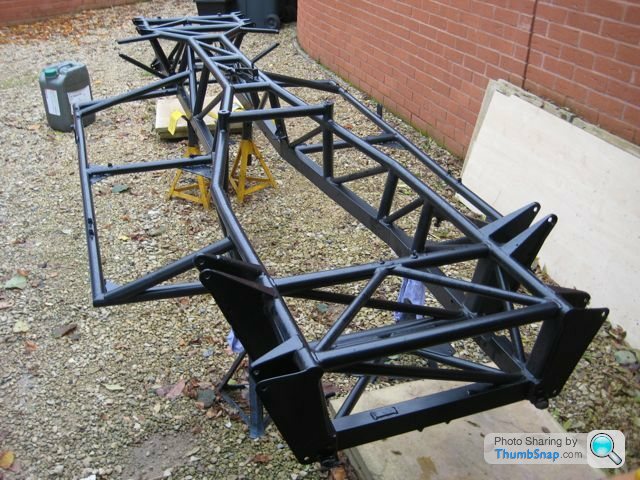
I ended up going for a complete PowerFlex kit for the bushes, on the basis that it was just a lot easier ordering it in that way (cheaper too). My preference would have been to have rubber bushes on the hubs & wishbones with poly on the diff & ARBs but that was just going to be faff which I couldn't be bothered with at the time. The bushes are now mostly in and the first few bits have been nailed to the chassis.
Top Tip: When your hands are greasy, be careful when moving the rear hub assy as it hurts when it slips out of your hands and lands on your ankles!!!
For future reference, here are a couple of other threads started, talking about bushes and the arrangement of the front upper wishbone.
http://www.pistonheads.com/gassing/topic.asp?h=0&a...
http://www.pistonheads.com/gassing/topic.asp?h=0&a...
More updates later...
M
Before...
...and after.
I ended up going for a complete PowerFlex kit for the bushes, on the basis that it was just a lot easier ordering it in that way (cheaper too). My preference would have been to have rubber bushes on the hubs & wishbones with poly on the diff & ARBs but that was just going to be faff which I couldn't be bothered with at the time. The bushes are now mostly in and the first few bits have been nailed to the chassis.
Top Tip: When your hands are greasy, be careful when moving the rear hub assy as it
hurts when it slips out of your hands and lands on your ankles!!! For future reference, here are a couple of other threads started, talking about bushes and the arrangement of the front upper wishbone.
http://www.pistonheads.com/gassing/topic.asp?h=0&a...
http://www.pistonheads.com/gassing/topic.asp?h=0&a...
More updates later...
M
I'm trying to do a couple of hours a day, just taking it slow & steady and trying to keep my fingers warm!!!
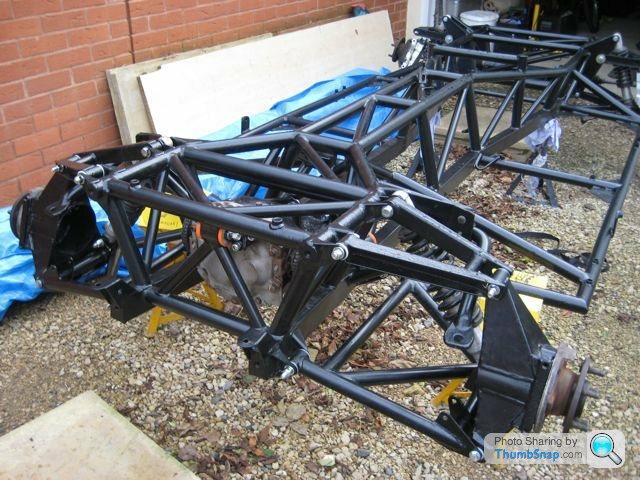
Most of the front end is back together but found that one of my upper ball joints was damaged, so am replacing them. All I'll say is "Jeez..." they were a sod to shift and I'm glad I've got a press in the garage to push it out from the ring!!
I'm hoping that most of the rear should be back together by the weekend as I've spent a while prepping, cleaning threads, etc...
M

Gassing Station | Cerbera | Top of Page | What's New | My Stuff