DB7 Rear Lights - modifications
Discussion


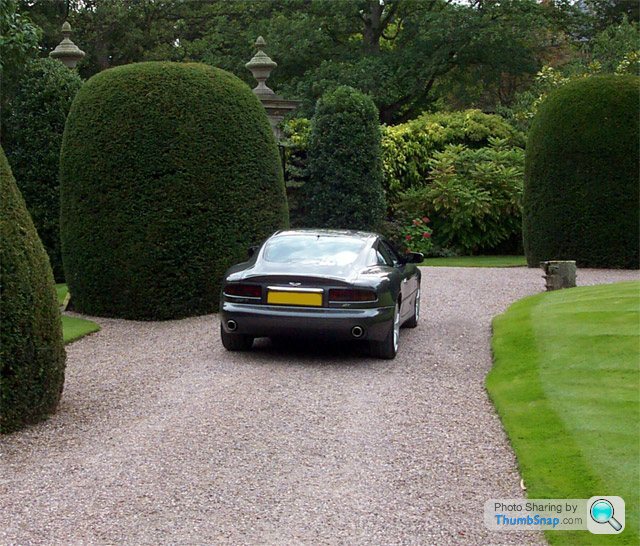
The only bug bear I ever had with a DB7, especially the later models were the rear lights.
Throw backs from the late 80's Mazda's and never changed or updated for such a high end car such as the DB7.
We had the round conversions available but the JAFFA style looked as though the lenses were from the 70's, there are some nicer ones available but at almost £3k are a bit extreme for something that should have been done on the production line.
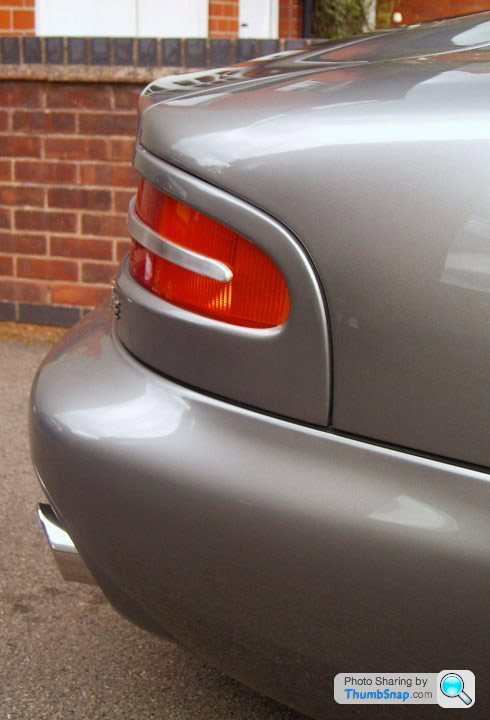
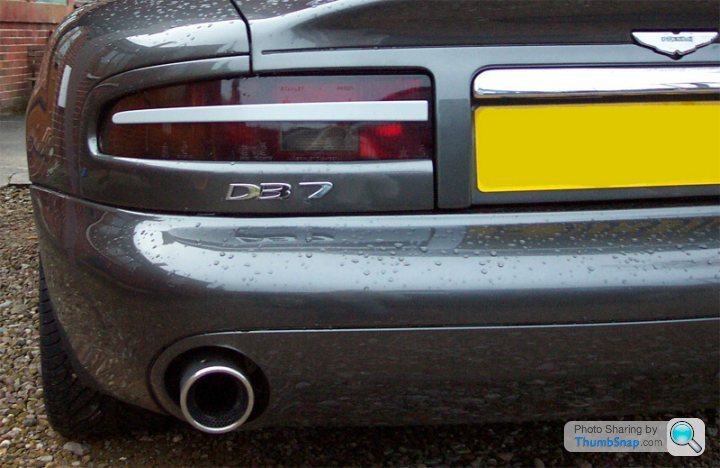
So I chose to tint my lenses yesterday, I didn't want a Black look, just something to tone them down as having a dark colour body the light were just "TOO" in your face.
I'll post a few photo's showing Before, After and and an extra image that I did in photoshop to test out a surround modification to split the lens.
I think the split mod would look ok especially if LED lamps were used to replace the filament bulbs.
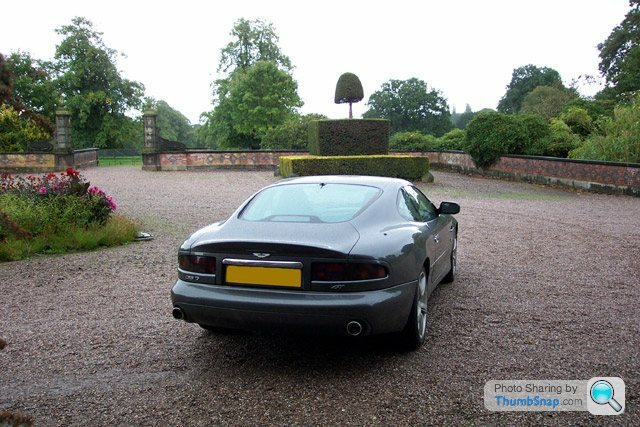
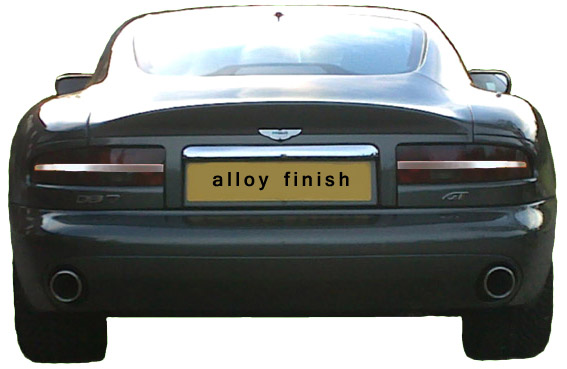
BEFORE

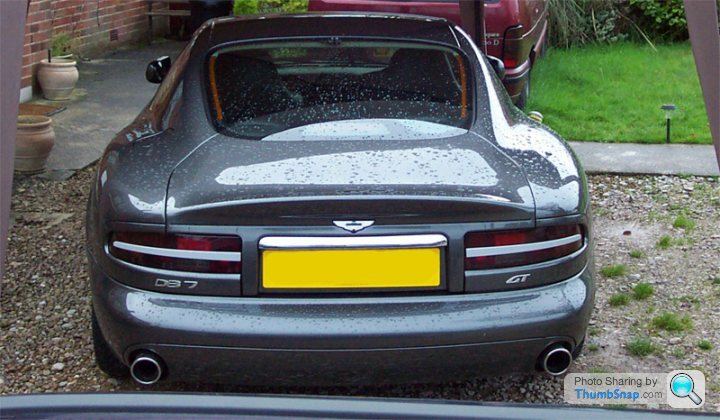
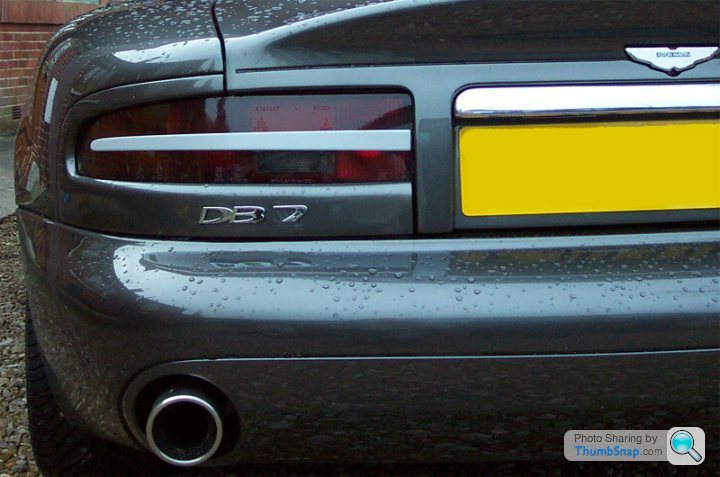
AFTER

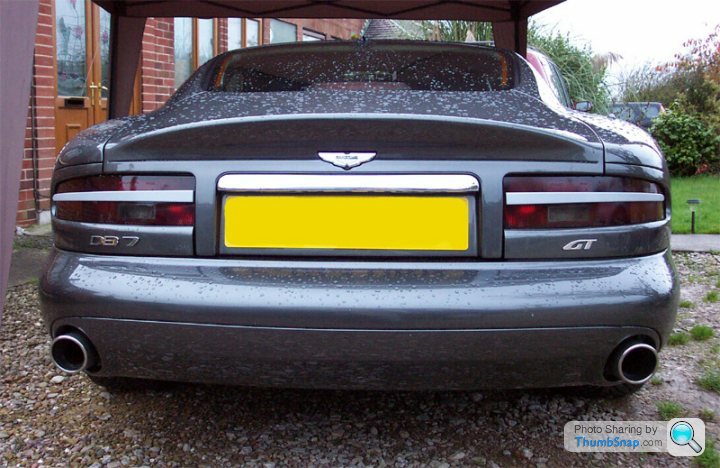
SPLIT MOD IDEA

The split can be any shape, straight or curved as the whole surround could be reworked if needed.
Thoughts and ideas??
Throw backs from the late 80's Mazda's and never changed or updated for such a high end car such as the DB7.
We had the round conversions available but the JAFFA style looked as though the lenses were from the 70's, there are some nicer ones available but at almost £3k are a bit extreme for something that should have been done on the production line.
So I chose to tint my lenses yesterday, I didn't want a Black look, just something to tone them down as having a dark colour body the light were just "TOO" in your face.
I'll post a few photo's showing Before, After and and an extra image that I did in photoshop to test out a surround modification to split the lens.
I think the split mod would look ok especially if LED lamps were used to replace the filament bulbs.
BEFORE
AFTER
SPLIT MOD IDEA
The split can be any shape, straight or curved as the whole surround could be reworked if needed.
Thoughts and ideas??
Firstly, just to be totally clear I did the tint to blend the lights in, rather than to make it look cool.
The first photo at the top doesn't quite show how bright the lenses were as that was taken on an overcast day, but the lights did look almost out of place on a dark coloured car, I'll try to find a photo showing them on a brighter day.
Right with that said... how I did it.
Quite simply really, though you do have to remove the light units completely.
Open boot
Remove the 4 cover thumb screws from the rear of the lights which holds the sound proof covering on.
Peel back the boot lining to expose two 10mm bolts below the light pod (this holds the bottom of the exterior surround)
Carefully lift the black plastic trim on top of the lights in the boot recess to expose a screw (this holds the top corner of the exterior surround)
With both Bolts and one screw removed carefully jiggle the surround free, it might be stuck in places to the foam seals.
My foam seals were looking tired and some had fallen off so I re-glued them back on and coloured the edges with a marker pen (worked well)
Now remove 6 small nuts from the rear of the light units.
Remove 6 plastic washers and 6 rubber washers (be careful with the rubber ones as they can split if stuck in place)
Disconnect the wiring plug from the socket.
Gently ease the light unit rear ward and off the car, be careful of the foam surround behind the light unit as it can grab on the studs.
With the light unit removed I washed the lens off with Isopropanol.
Then using a spray can of tint (charcoal colour) I sprayed them one at a time using the second as a guide as to how dark the first was going.
Once satisfied I then used the first one as a guide for the second to match up the shades as best as possible.
One thing to note I think as it dried it went a little darker, this is NOT mentioned on the can!!
So best to stop a few shades lighter than your needs and then allow to dry fully before adding more.
It takes a good few hours to air dry fully though after 30 minutes I refitted them to the car and left the surrounds off for a further hour or so before refitting everything else.
Just to be clear the bottom photo above is a fake, the light split was done on the computer to see what it would look like.
Personally I like it but the end where it dips down towards the front could do with some tweaking, maybe a rework on the actual end shape so the split ends in the centre rather than at the bottom corner...... shame I don't have the skill to knock a few up and practice :-)
Although there is a DB7 Vantage in a breakers yard 3 miles from here ;-) hmmmmm
Edited by GTDB7 on Thursday 2nd September 10:54
To me it looks as though the strip bends down along the horizontal, to me it would look better if it were more horizontal at the boot lid end before bending downwards... or as you say a wider strip that narrows towards the end.
Maybe try some plastic too and paint to match the bodywork.
At the end of the day it's down to personal taste so what ever you like best will work best for you.
I like the split idea and have wondered about it for many months now, some cars will look better with it, some without it.
I was also thinking about removing the actual lens from the lighting unit and masking off the edges (corners) to give them a more simulated round lens effect.
This would be an internal mod and would only be noticeable when the lights were on. I would then be looking at fitting after market LED lamps to replace the filament bulbs.
Hi Mark,
I have just replied to the thread over on AMOC.
My own rear light work has been halted due to my water problems thanks to Autoglass. :-(
Once I have rectified the problem there I will return to my own rear lights.
They look 100% better now they are tinted slightly, makes the rest of the rear stand out rather than just the lights.
I have a few photo's which I will post showing the car in different settings and it just looks better!
When I have time I have a few internal mods I want to try also which requires me removing the actual lens from the light unit body itself, it's only clipped on and held with some silicone so should be easy to pop off, mod and re-apply.
It's a shame I have to arrange a super car meet on the 26th otherwise I would have been at Rick's myself.
I've also just fitted a DV camera mount to the front of my car, 99% invisible unless you know where to look ;-)

I like the last set #6
The first 3 photo's of attempt #6 seem to be perfect however, the last shot they appear to be approx 10mm short. I imagine the ideal end point to be where the indicator lens meets the orange reflector lens.
I'll photoshop an image up form your last photo to highlight my point.
I'll post the PS image shortly.

Well one thing is for sure...
I have more respect for car designers now.. ;-) where they spend months perfecting one little thing.. hehe
I also understand what you mean about the lens for #6
As for adhesives.. what about the double sided stuff they use for number plates.
Obviously stays stuck on and doesn't damage anything and is ultimately removable.
I bought some this week to re-attach my scuttle panel back on below the windscreen, worked a treat.
I want to try some LED lamps in the rear lights, as I think they would suit the strips better over standard filament bulbs.
Also it could be possible to open up the actual lenses themselves and position a horizontal divider in there to further split the top from the bottom.
Of course LED's would better suit the split Lenses internally.
The good things with LED's is that you are no longer dependent on the reflector to magnify the light as the LED's are much more directional.
It could be theoretically possible to obtain some spare Mazda Light clusters, and drill / mount LED's directly onto the rear of the light clusters, this would give a more modern look along with the alloy strip would be a good improvement over the 80's style lights.
These are all ideas which I am sharing in case others might wish to give anything a go.
Sorry I should have been clearer in my previous description.
I was meaning for the strips to remain on the outside as you have them now, however using plastic or card etc.. make some internal dividers to fit snug without the need for any machining of the internals.
Then with a little more effort and no doubt patience fit or mount LED's in place of the bulbs in the upper and lower compartments, so you would effectively have a split rear lens using LEDs and the Alloy outer strip would nicely cover the edge of the internal divider.
This would retain the weather proofing of the original lens.
It might be very possible to fabricate some PCB's to fit perfectly within the lenses using the existing bulb socket as a mounting... I have the means to make PCB's here I just don't have a spare rear light to work with (yet).
Thanks for that I see what you mean.
Mine are already tinted although the photo's I took show them as being darker than they really are.
The colours can still be seen through the tint, I'll try to get better photo's, just need some decent light onto the lens.
As a footnote I noted in the Factory Video's for the GT model the lenses appear to be tinted ;-)
Excellent!
I knew Rick was interested in working with these. Any chance we could see a photo of the stand in situ?
Be interesting to see how they are presented etc..
What I intend to do with my set is temporarily attach them for some photo's as they come in the alloy finish, then I will shrink wrap them in a suitable covering, paint them to match the car and re-attach for a direct comparison with photo's.
Hopefully this will allow me to judge which look is best with minimal fuss and allow me to retain the original finish if required.
A Package arrived today :-)
I thought what could this be,, funny shape for the glue I had on order. and to my surprise it contained two rear blades for the Aston.
I was like a little boy at Christmas ;-)
I'll be offering them up later, however my car lives outside and it's raining today.
I'll do a test fit ASAP and post pics and then probably will have them painted to match as I think the finish on them at the moment might not go fully with the car.
A very pleasurable experience opening the tube and finding all the little goodies inside.
Well done Mark!
I'll send you a private email later.
Rick,
Without wanting to jump off thread, but as you're active on this one I'll draw your attention to another idea currently being discussed either here or over on AMOC. ( I can never keep up with which forum which thread is on)
I am going to design a new warning lamp strip for the DB7's as many people think the original is too dim.
By using modern materials and printing options I am very confident a new strip can be produced that will be far more visible to the driver without the need to change the lamp types, however installing LED's will also be of benefit due to their long life and more focussed beam.
Would this be something that might interest you alongside the Rear Blades?
On my own car I might go as far as changing the position of some warnings, so things like traction control and indicators are more prominent, something I can easily do by re-wiring the actual rear of the clocks themselves. ( I could do this for others if they wanted and on that note I wonder if there might be a specific sequence of warning icons, left to right that meets with most people's needs?)
Anyway back to the original programming... I'll start a new thread on this and link form this posting to it when done.
Nice result there !
I've been waiting to get out and start mine but the weather has been dreadful this week.
Also Mark..
Check out this product: "PRITT GLUE DOTS - REPOSITIONABLE"
http://cgi.ebay.co.uk/-2-packs-Pritt-Glue-Dots-Rep...
I use these now and then and I have yet to test them in the Blades (awaiting a dry day) but they might make for a quick and easy method to attach the blades closely to the lights without any worry of them not coming off.
I've not tried the velcro tabs yet, but thought they might be more sticky and introduce a gap when testing.
Anyway.. just a suggestion that might be worth checking out for you.
Ok, these were fitted quickly between showers using the glue dots as posted above.. these allow for easy positioning and removal etc..
I tried two placements and thought I'd post the preliminary pics here first.
I was somewhat rushing to avoid rain and also I was bloody freezing.. so excuse any slight alignment issues.
Also the car was penned in so couldn't get decent angles.. this will be re-addressed as soon as possible :-)
Blades were finished as they arrived so do not match any colours at this time.
Blades fitted along the centre line of the lights.
Blade along centre line.
Blades fitted above centre line of lights.
Blade above centre line.
Edited by GTDB7 on Thursday 28th October 17:49
Gassing Station | Aston Martin | Top of Page | What's New | My Stuff