Discussion


Hi folks, I'm not sure whether to post here or not. Its a bit of an alien this project and I think it might "fall on stoney ground"
Let me explain this strange idea. This summer I have been building a biodiesel plant and am now making fuel at somewhere between 25-28p per liter. I've also taken a new job which is miles away. Joining the dots you can see that I have no choice but to drive a diesel of some kind. After looking at the option, I've found there are some interesting (fast) diesels about. But I could do with an older distributor pump type (90s) to run on "rough" (not 100%) biodiesel.
So this a diesel engine wrapped in a nice car. That's how I'm thinking of it anyway. eventually, I'll tune to near 180hp and it will have plenty of low grunt for boring (or not so boring) commuter type driving.
So here is it:
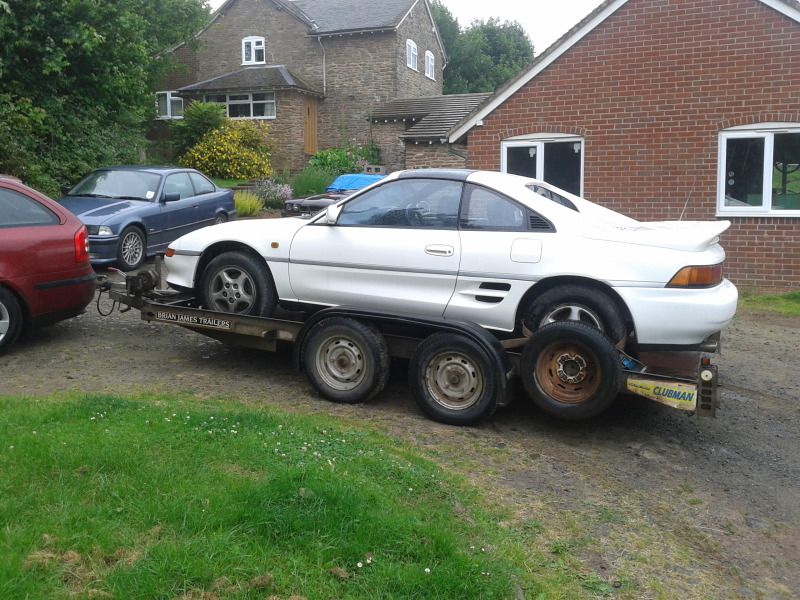
The first thing I did was have all the rust and dents sorted (I'm not good with rust repairs). This is it after picking up from the bodyshop. (it still needs a polish)).
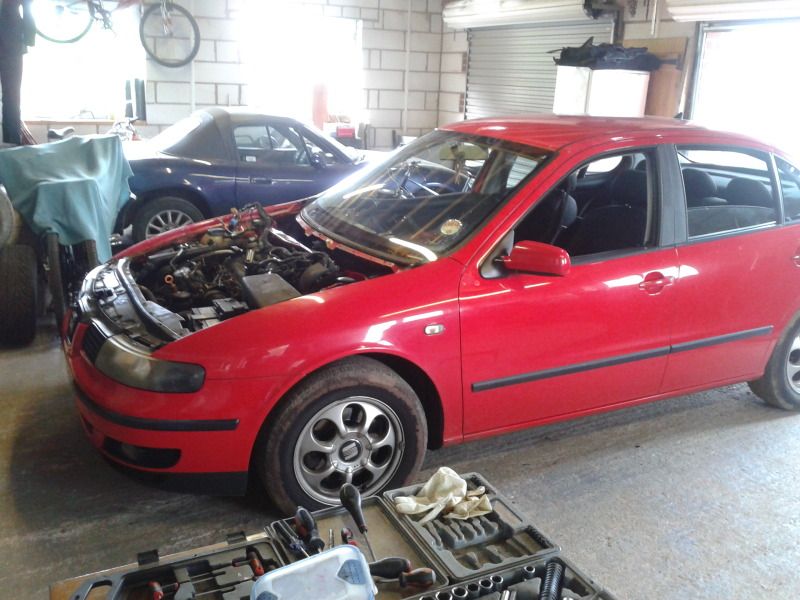
I've been looking for an engine for months (cheap and lowish miles) and finally found this last week.
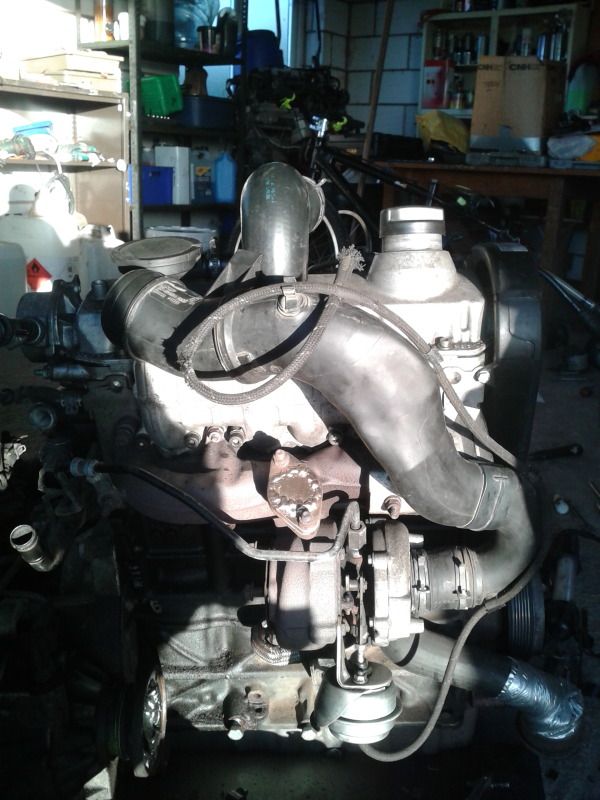
I'm really happy with my purchase and think I've got it a at a reasonable price. It's a 1999 seat toledo with a 110hp AHF engine. soon to run out of MOT and Tax but still legal long enough to get it home. It has 89k on the clock and cost £450.
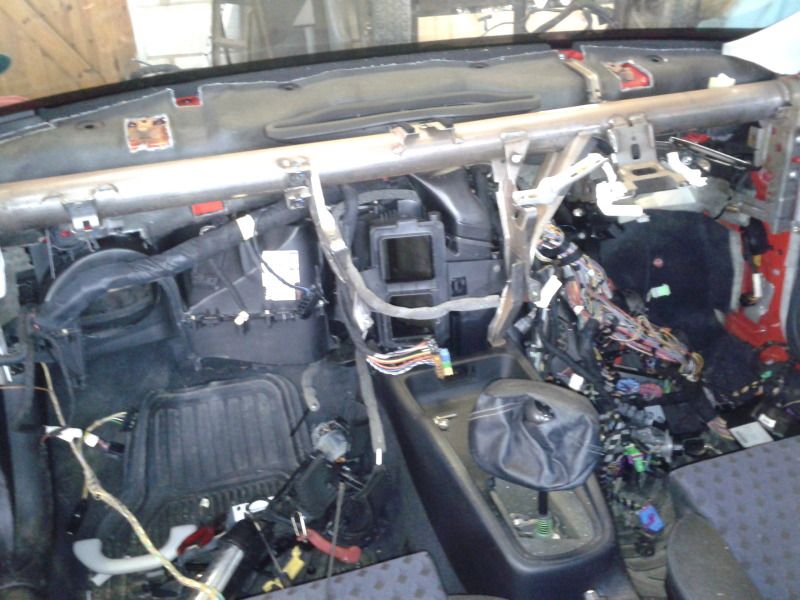
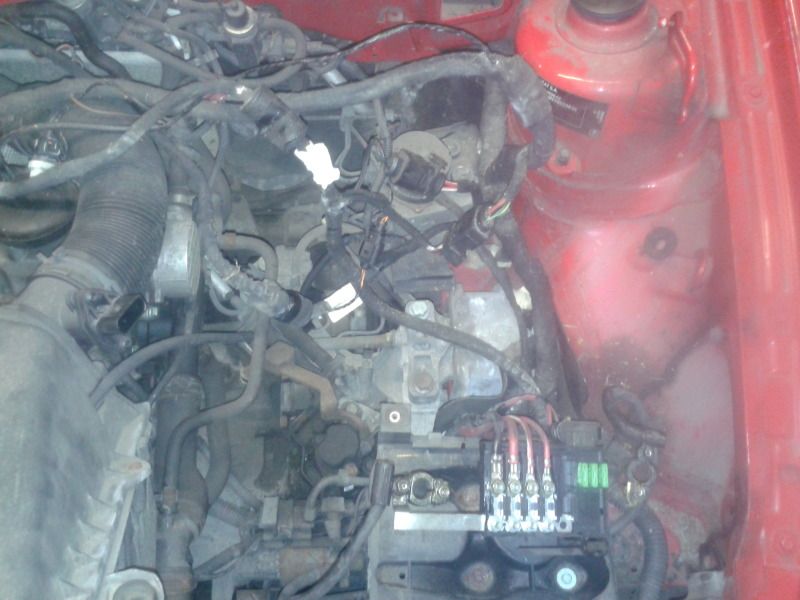
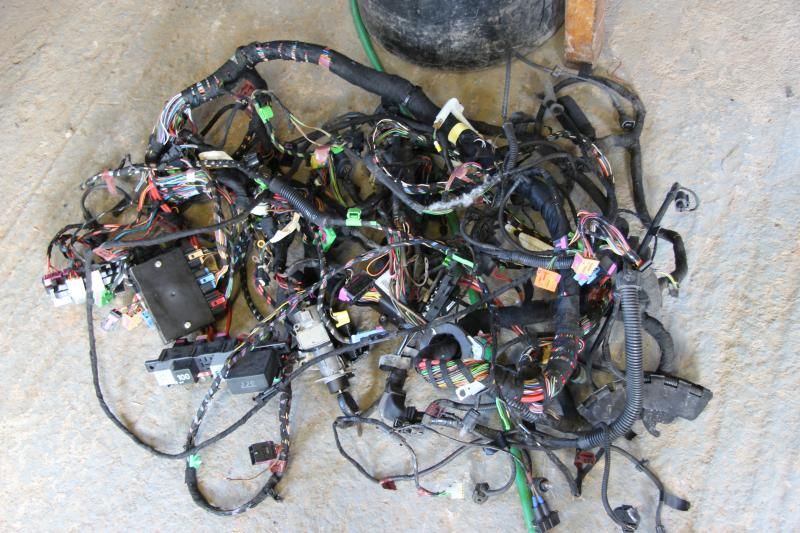
I've not had long on it due to starting a new job that entails rather a lot of commuting, but here is the progress so far. I've just been stripping the loom, and labelling.
Its one fo the very last distributor pump type TDI engine from VAG and can be tuned plenty
I want to get it running on the garage floor, then carefully strip away all the parts I don't new leaving the engine loom and instrument cluster, and hopefully adding a cruise control stalk for good measure.
I plan to:
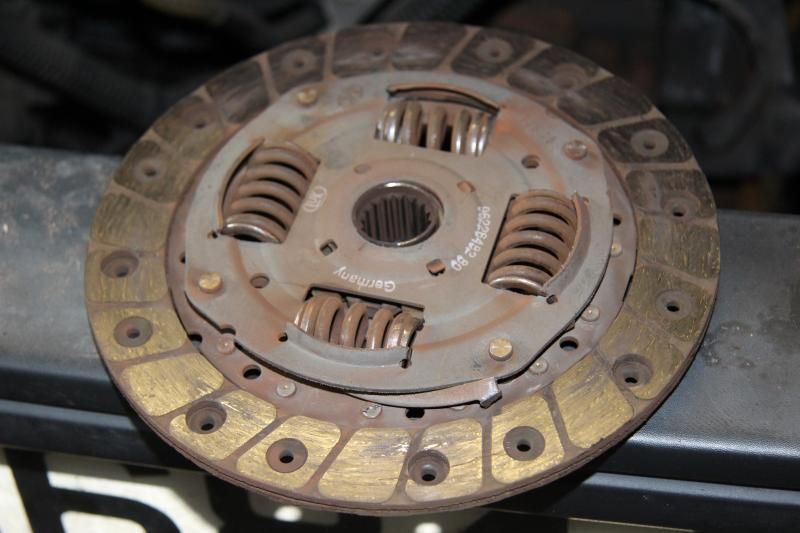
Bin the dual mass flywheel in favour of the G60 solid flywheel and VR6 clutch (can take 300ft.lb)
port the head and regrind the valves for good measure
fit a new water pump and cambelt kit
fit a "tuning box" for 140 + hp
then later when all the problems are ironed out
Fit a PD130 turbo and manifold and larger injectors and a larger intercooler to get it closer to 180hp
I can't wait, its great to get started on a new project.
More to come if you want it?????
Let me explain this strange idea. This summer I have been building a biodiesel plant and am now making fuel at somewhere between 25-28p per liter. I've also taken a new job which is miles away. Joining the dots you can see that I have no choice but to drive a diesel of some kind. After looking at the option, I've found there are some interesting (fast) diesels about. But I could do with an older distributor pump type (90s) to run on "rough" (not 100%) biodiesel.
So this a diesel engine wrapped in a nice car. That's how I'm thinking of it anyway. eventually, I'll tune to near 180hp and it will have plenty of low grunt for boring (or not so boring) commuter type driving.
So here is it:

The first thing I did was have all the rust and dents sorted (I'm not good with rust repairs). This is it after picking up from the bodyshop. (it still needs a polish)).
I've been looking for an engine for months (cheap and lowish miles) and finally found this last week.
I'm really happy with my purchase and think I've got it a at a reasonable price. It's a 1999 seat toledo with a 110hp AHF engine. soon to run out of MOT and Tax but still legal long enough to get it home. It has 89k on the clock and cost £450.
I've not had long on it due to starting a new job that entails rather a lot of commuting, but here is the progress so far. I've just been stripping the loom, and labelling.


Its one fo the very last distributor pump type TDI engine from VAG and can be tuned plenty
I want to get it running on the garage floor, then carefully strip away all the parts I don't new leaving the engine loom and instrument cluster, and hopefully adding a cruise control stalk for good measure.
I plan to:
Bin the dual mass flywheel in favour of the G60 solid flywheel and VR6 clutch (can take 300ft.lb)
port the head and regrind the valves for good measure
fit a new water pump and cambelt kit
fit a "tuning box" for 140 + hp
then later when all the problems are ironed out
Fit a PD130 turbo and manifold and larger injectors and a larger intercooler to get it closer to 180hp
I can't wait, its great to get started on a new project.
More to come if you want it?????
Crikey that engine bay is smart! Really nice looking car that. Did he/she make any modifications to the engine while at it?
Got some more done last night, nothing major to report other than I set the small target that I set myself and removed the last of the loom from the interior (not yet the engine bay though).
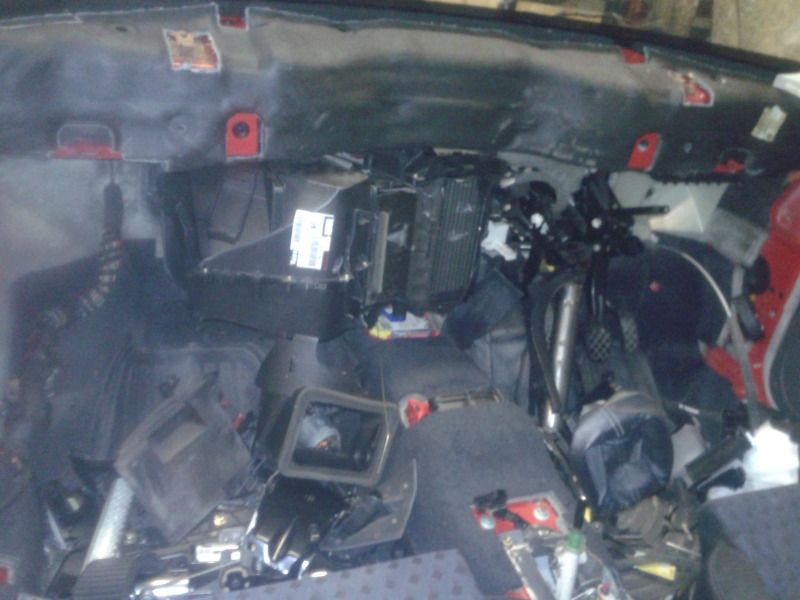
It just needs feeding through the bulkhead when the engine side is disconnected.
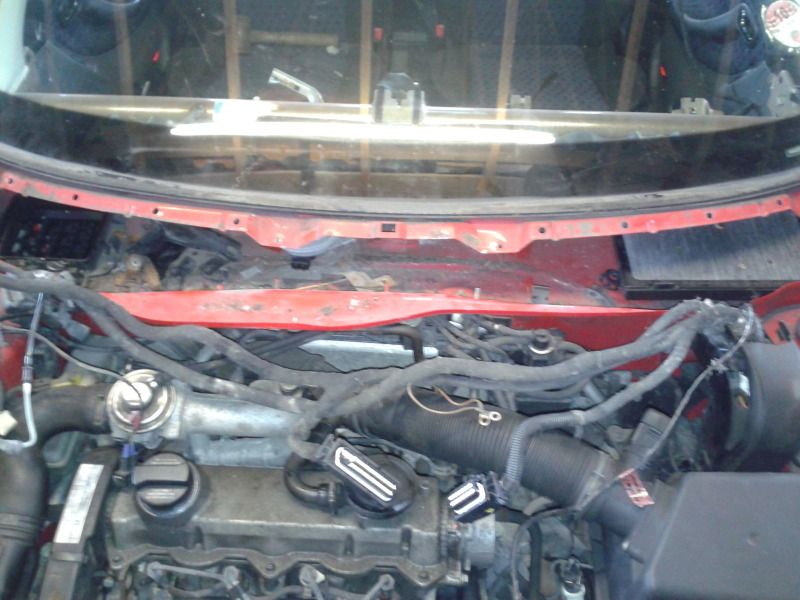
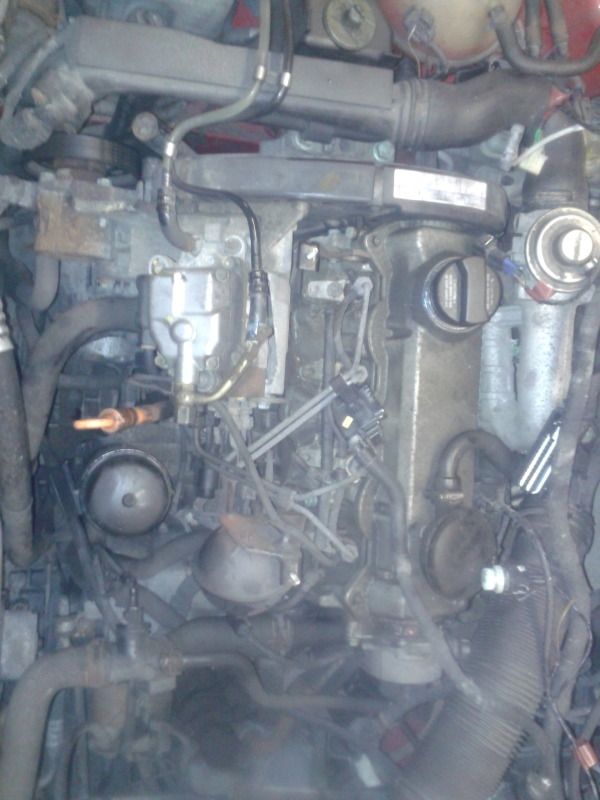
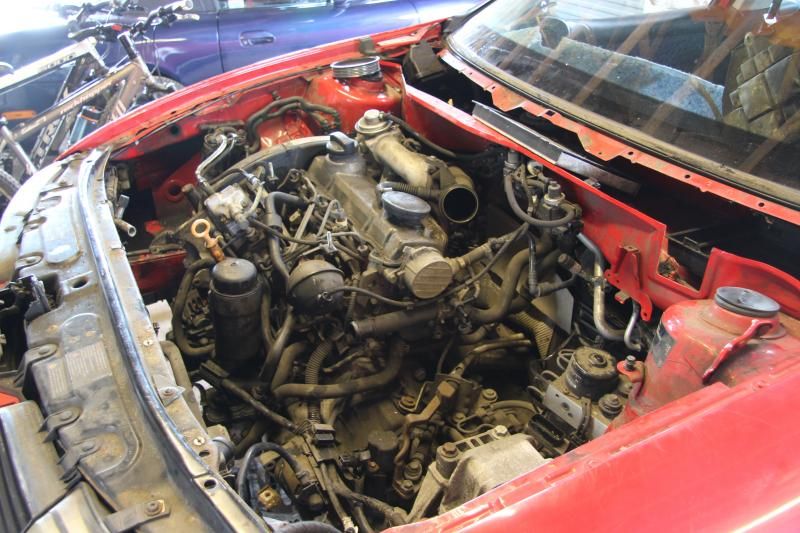
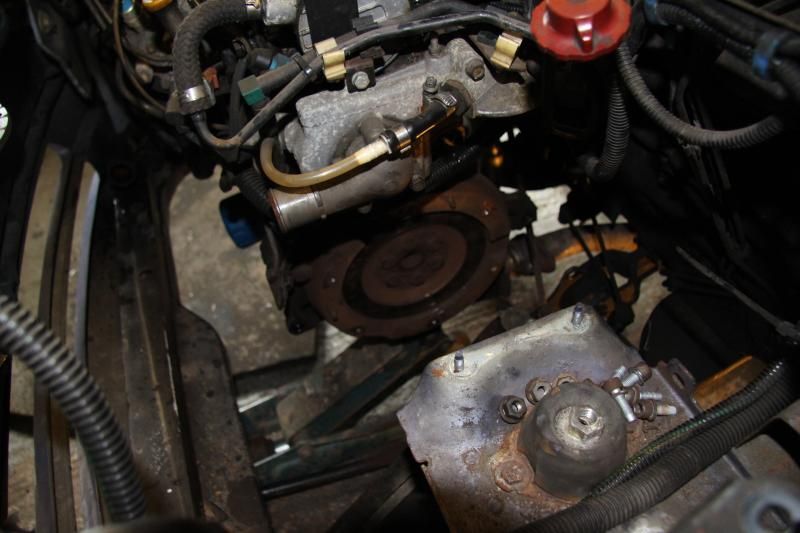
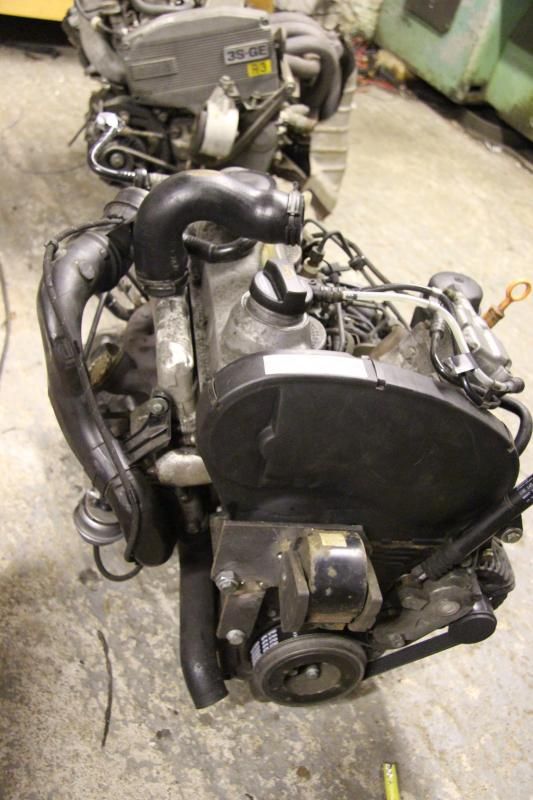
I didn't really show a very good pic of the engine before so here it is:
Work starts on the engine loom at the weekend.
More to come
Got some more done last night, nothing major to report other than I set the small target that I set myself and removed the last of the loom from the interior (not yet the engine bay though).


It just needs feeding through the bulkhead when the engine side is disconnected.

I didn't really show a very good pic of the engine before so here it is:

Work starts on the engine loom at the weekend.
More to come
I got some more done this weekend, between jobs on the 106 
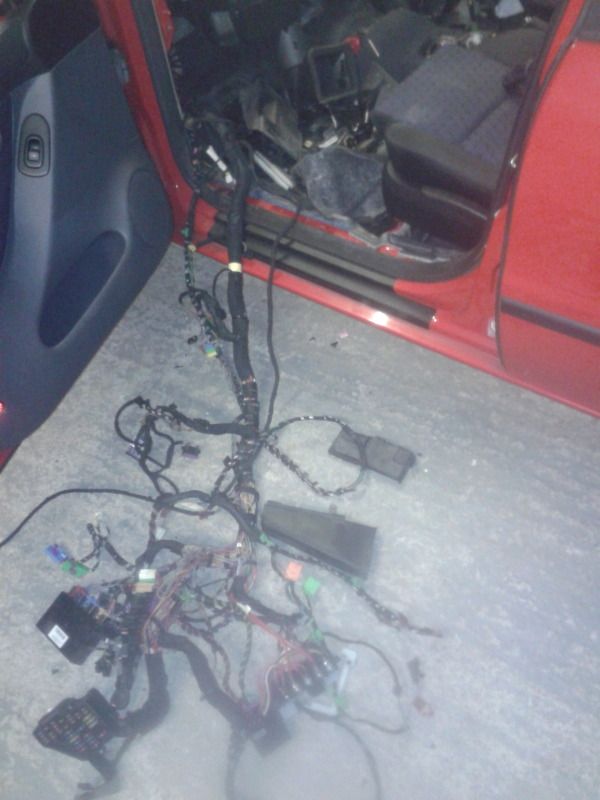
I've finally got all the loom out and labelled everything up. I've got a nasty feeling there is no speed sensor on the gearbox at all, I imagine it must use one of more of the ABS sensors thats a bummer as I've cut them all off.
Anyway, progress so far.
The loom is now completely free from the car and all the bits I need (minus the ABS sensors) are in tact.
The engine is nearly free and ready to come out:

More to come
I've finally got all the loom out and labelled everything up. I've got a nasty feeling there is no speed sensor on the gearbox at all, I imagine it must use one of more of the ABS sensors
thats a bummer as I've cut them all off. Anyway, progress so far.
The loom is now completely free from the car and all the bits I need (minus the ABS sensors) are in tact.

The engine is nearly free and ready to come out:


More to come
Thanks folks
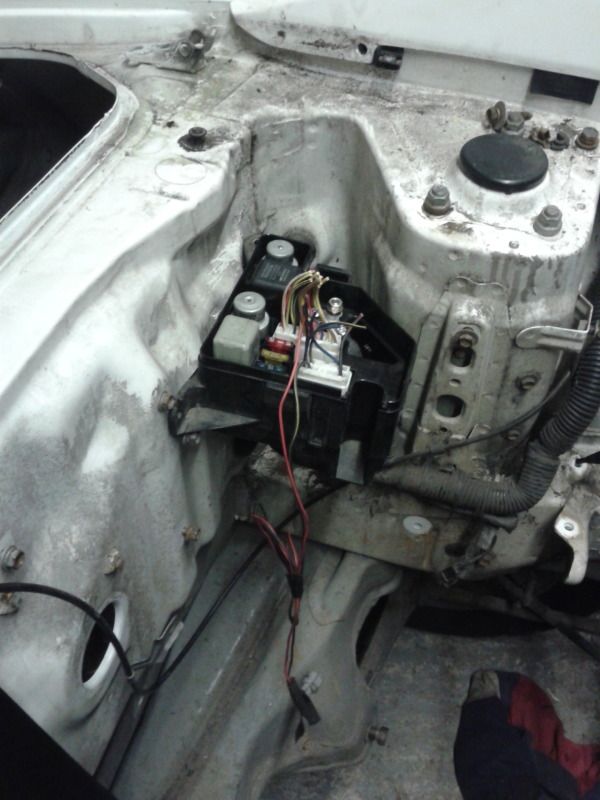
That's good news Ug Lee, I'm not too sure what I'm doing with the wiring yet. I think I'll take a look at the MR2 shortly (as soon as the engine is out of the Toledo). I'm hoping to graft the Toledo dials in some how, so I've got working Tacho, speed engine temp and associated engine lights. I'll have to find which wired supply the MR2 dials with things like the handbrake light, indicators and main beam, and connect them up to the toledo dials.
Forgive my ignorance, is that the Camry V6?
Thanks all
That's a fantastic conversion Ug Lee, that'll be a right beasty
I'll look into using the wires in there, but there are an aweful lot going into the Toledo dials, for more than you'd imagine to be necessary for some dials and warning lights. The other scary thing is that it'll start without the dials but stop again straight away, so there are some important things going on in those connections. Its not just a display unit, there must be two way communication.
I'm really wrestling with time at the moment, the new job requires 7 more hours a week than my last job and its an hour away where the last job was 11mins. That and making bio has meant a huge reduction in car time
I'm working on it though (getting more time and the car)
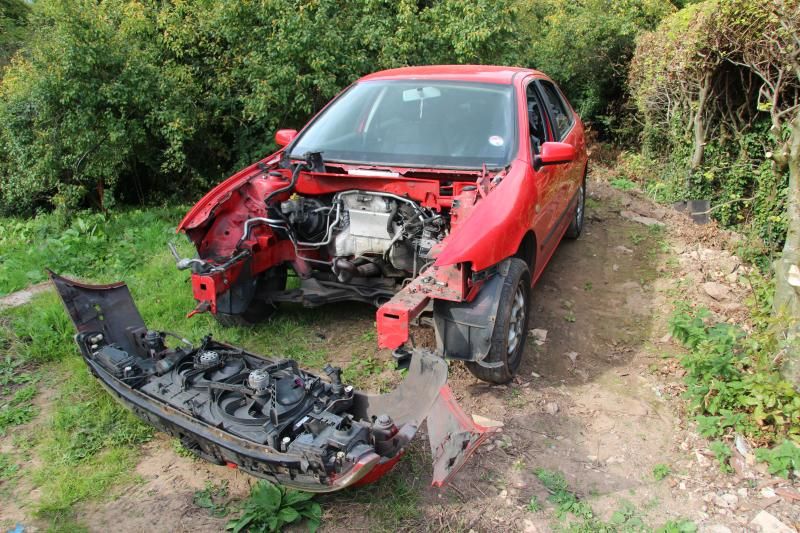
The engine is finally out

There are a few more bits to harvest from the toledo then its off to the scrap yard in the sky:
There is a nice DOC to sell under there somewhere. There diesel in the tank to extract and some sections of exhaust might come in useful too.
I'm still undecided on which direction to go now. Strip the loom, learn more about the MR2 loom, or just get stuck in stripping and tuning the TDI motor first???
Well I've got to stop the scimitar exhaust tapping on the floor of the car first and fit new track rod ends to the pug. But hopefully in the not too distant future I can get a solid 8 hours on this.
More to come
That's a fantastic conversion Ug Lee, that'll be a right beasty
I'll look into using the wires in there, but there are an aweful lot going into the Toledo dials, for more than you'd imagine to be necessary for some dials and warning lights. The other scary thing is that it'll start without the dials but stop again straight away, so there are some important things going on in those connections. Its not just a display unit, there must be two way communication.
I'm really wrestling with time at the moment, the new job requires 7 more hours a week than my last job and its an hour away where the last job was 11mins. That and making bio has meant a huge reduction in car time
I'm working on it though (getting more time and the car)
The engine is finally out

There are a few more bits to harvest from the toledo then its off to the scrap yard in the sky:

There is a nice DOC to sell under there somewhere. There diesel in the tank to extract and some sections of exhaust might come in useful too.
I'm still undecided on which direction to go now. Strip the loom, learn more about the MR2 loom, or just get stuck in stripping and tuning the TDI motor first???
Well I've got to stop the scimitar exhaust tapping on the floor of the car first and fit new track rod ends to the pug. But hopefully in the not too distant future I can get a solid 8 hours on this.
More to come
Thanks Yonex, I'm afraid its nowhere near the progress of my last project, but if you don't mind slow and steady then I should get there in the end.
I spent most of this morning pulling the last few bits off the toledo, the first length of exhaust pipe, the gear linkage and a few nuts and bolts. I put the bumper back on, and the bonnet. Drained the tank and put it in the daily driver.
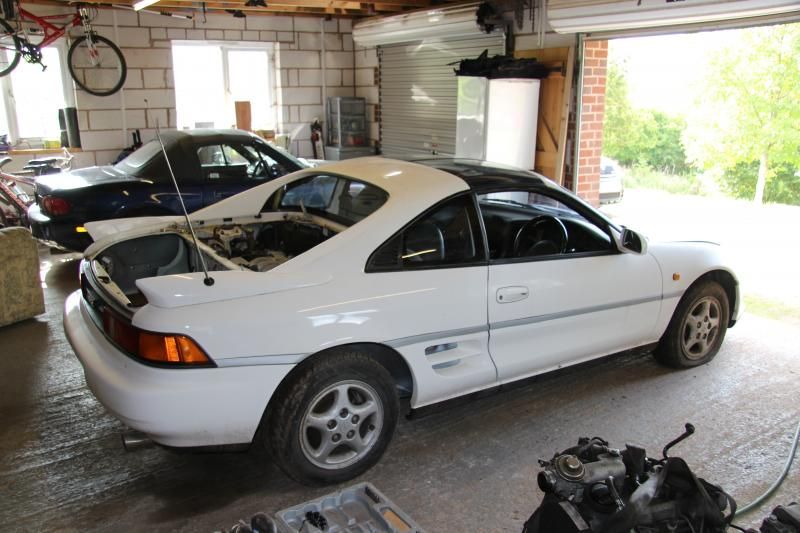
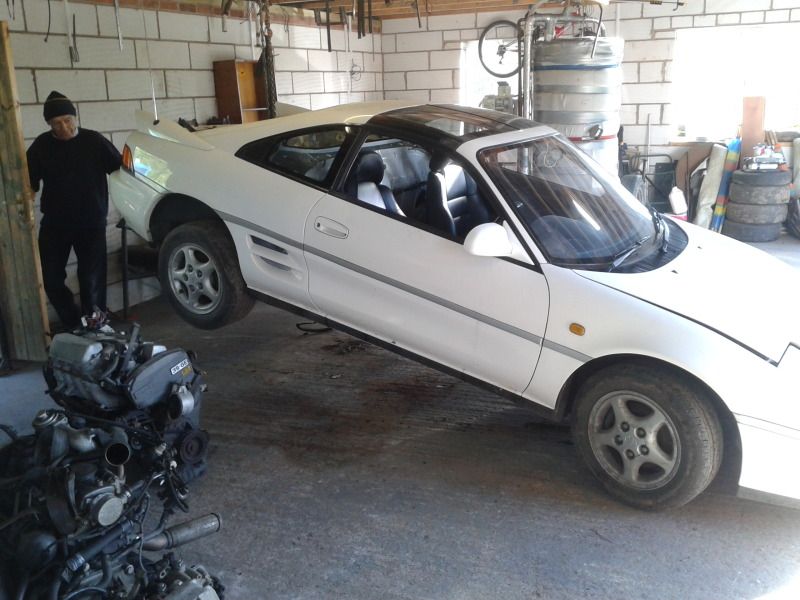
Then out came the Scimitar and in went the MR2. I've taken a few bits off it and had a good look over it. I think I'm going to do something like what I did with the Toledo. Label everything up as I disconnect it, take the engine and box out, then open up the loom and check there is nothing in that stretch of loom that I need.
So this is where I'm at at the moment. It still doesn't look like much progress, but I really have run out of other things to do now
This might sound strange, but I really like working on Toyotas, this is the fourth Toyota I've worked on and they just seem to be well put together. Everything is in a sensible place, well made, dimple topped captive washer bolts, and well thought out.
More to come.
I spent most of this morning pulling the last few bits off the toledo, the first length of exhaust pipe, the gear linkage and a few nuts and bolts. I put the bumper back on, and the bonnet. Drained the tank and put it in the daily driver.
Then out came the Scimitar and in went the MR2. I've taken a few bits off it and had a good look over it. I think I'm going to do something like what I did with the Toledo. Label everything up as I disconnect it, take the engine and box out, then open up the loom and check there is nothing in that stretch of loom that I need.
So this is where I'm at at the moment. It still doesn't look like much progress, but I really have run out of other things to do now
This might sound strange, but I really like working on Toyotas, this is the fourth Toyota I've worked on and they just seem to be well put together. Everything is in a sensible place, well made, dimple topped captive washer bolts, and well thought out.

More to come.
Good question.
I've always had a soft spot for these, I had a mk1 before, and a mk3 supra and loved them both.
It had to be rear drive as I don't really like torque steer or the way that front heavy FWD TDI cars handle. But with RWD comes extra cost with a project like this. The MR2 solves both of these being a transverse rear engined car. Antoher car I have a soft spot for is the 3 series TDS E36. It was a toss up between the two really. I think I ended up going withe MR2 as it was the most unusual project.
Yey! I got more done today
Got the MR2 motor out. I've said it before and will no doubt say it many more times... I love working on Toyotas.
Another bit of good news is that I found the TDI engine is 3 inches shorter than the MR2 engine so there's plenty of room
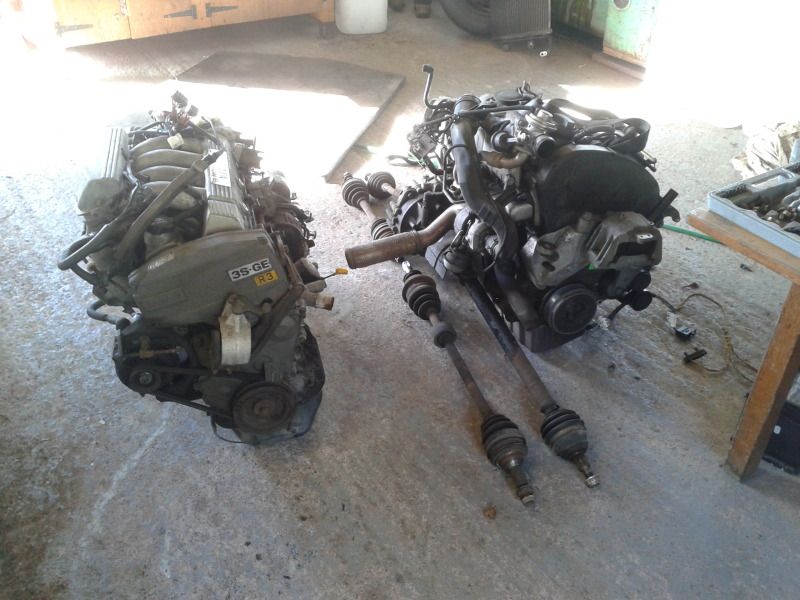

Having had a good look at the two, I think I've now got a design in my head for how to make the toyota engine mounts fit the TDI engine.
More to come.
I took a day off today and was in the garage all day It was like old times, a pig in s***
I made another 150L of bio diesel. I stripped the Toyota engine loom in an attempt to understanding it and see if I could get the engine bay fan to work in the absence of the engine (I couldn't). So the engine loom now consists of just the reverse light wiring
Then stripped the loom to the dials and have identified what I need to make the following warning lights work: main beam, fog lights, handbrake, doors open, and indicators. Then took it to pieces and was delighted to find that the VAG dials will fit in the gap where the Toyota dials used to reside. Result!
As well as that, I've done my usual looking at it for ages and figuring things out, got lots of ideas in my head now. What a great day!
More to come
It was like old times, a pig in s*** I made another 150L of bio diesel. I stripped the Toyota engine loom in an attempt to understanding it and see if I could get the engine bay fan to work in the absence of the engine (I couldn't). So the engine loom now consists of just the reverse light wiring
Then stripped the loom to the dials and have identified what I need to make the following warning lights work: main beam, fog lights, handbrake, doors open, and indicators. Then took it to pieces and was delighted to find that the VAG dials will fit in the gap where the Toyota dials used to reside. Result!
As well as that, I've done my usual looking at it for ages and figuring things out, got lots of ideas in my head now. What a great day!


More to come
A little update on my (lack of) progress
I've not done a huge amount as the clutch on my cr**y 106 diesel failed in a way that meant it wouldn't disengage. So I've taken the gearbox off that and am waiting for a new clutch plate to arrive.
Spot the piece of metal where it shouldn't be......
On the plus (but rather expensive side) I'm driving the scimitar 90 miles a day, getting plenty of admiring looks and really enjoying the car (at 5 times the cost!!!).
Back to the MR2, I've been doing a bit of loom thinning, this time its the TDI loom, its about halved so far, I need to go get some of the controls to keep going with the job now.

More to come.
I've not done a huge amount as the clutch on my cr**y 106 diesel failed in a way that meant it wouldn't disengage. So I've taken the gearbox off that and am waiting for a new clutch plate to arrive.
Spot the piece of metal where it shouldn't be......


On the plus (but rather expensive side) I'm driving the scimitar 90 miles a day, getting plenty of admiring looks and really enjoying the car (at 5 times the cost!!!).
Back to the MR2, I've been doing a bit of loom thinning, this time its the TDI loom, its about halved so far, I need to go get some of the controls to keep going with the job now.

More to come.
It Runs!!!!!!
After several weeks of head scratching, a friend at work gave me a circuit diagram from autodata (thanks Mark), and it seems I had an earth connected up to 12v. I changed that and it ran straight away. See the video here:
https://www.youtube.com/watch?v=O6V9oazx_HI&fe...
Its very nearly in a position to be electrically connected to Mr Two now, I hope to have that done soon, then I'll get started on the mechanical side and physically putting all the wires in the car.
Very happy with that.
More to come.
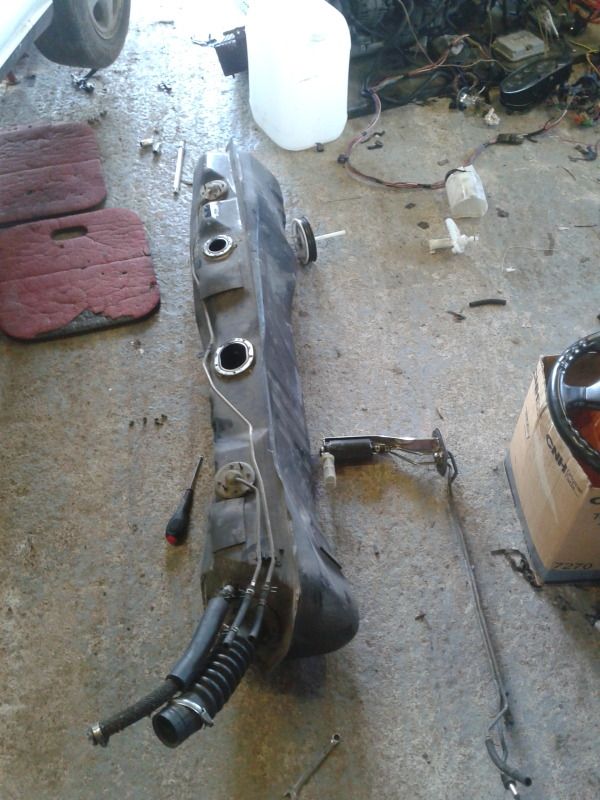
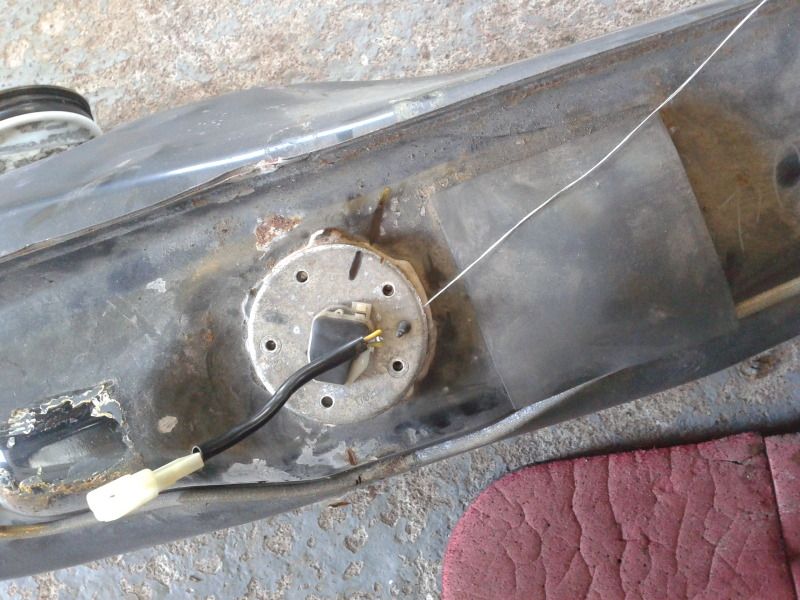
Another small update. The rough running is sorted, and I've been working on the tank.
Got it off the car:
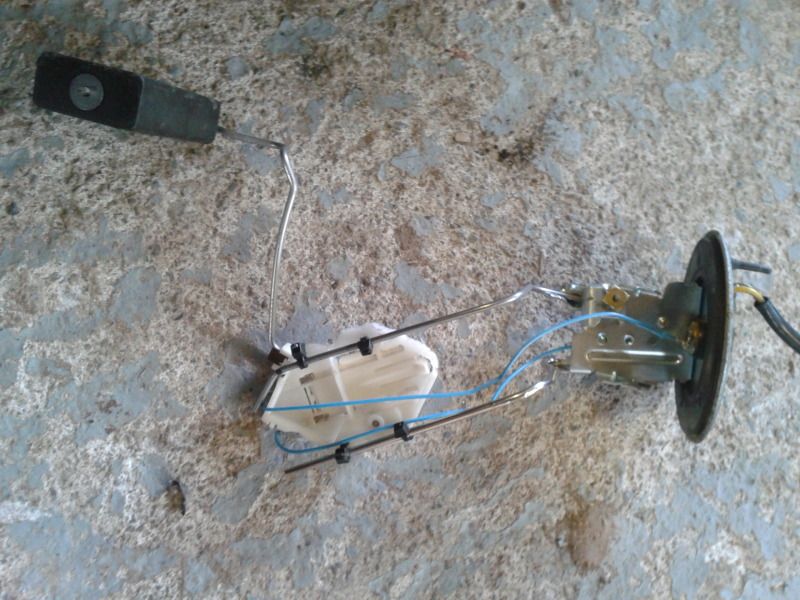
Cut off the toyota float, and fixed the swing arm in place, then attached the TDI tank sender to get the right signal to the dials.
Then had to put it back in in a different orientation so it could still move up and down freely:
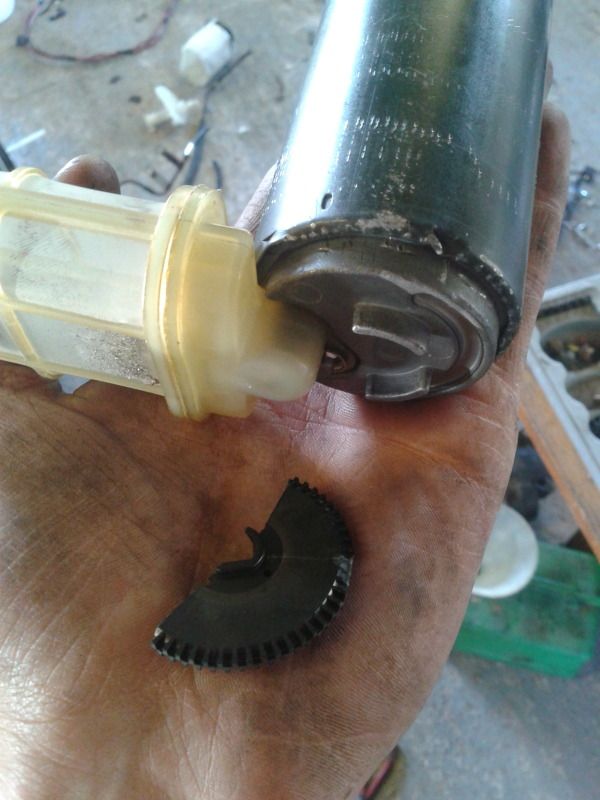
Then pulled the impella out of the fuel pump so its now effectively a pipe:
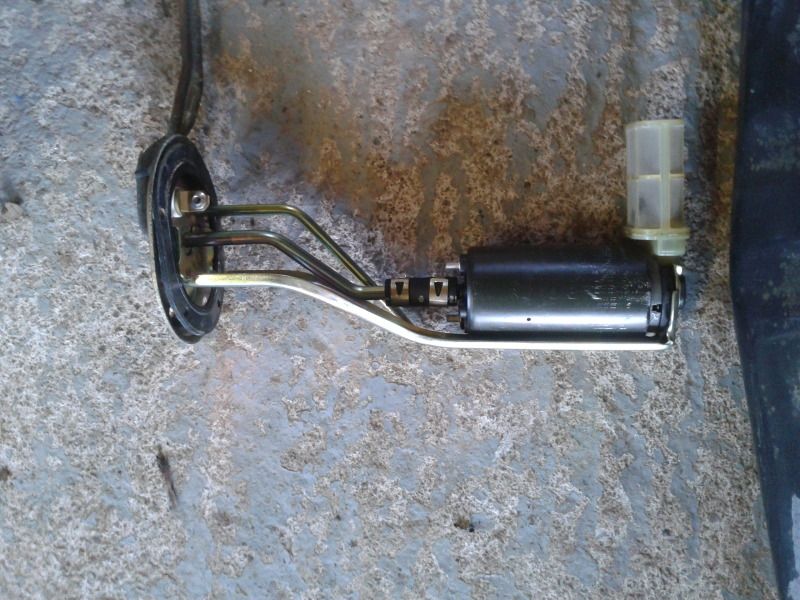
And re-assembled it:
I've got a new cam belt, water pump, oil filter, fuel filter and oil to change, then the MFA/cruise switches to wire in then the loom can finally start going into the car.
In a break from MR2 stuff….
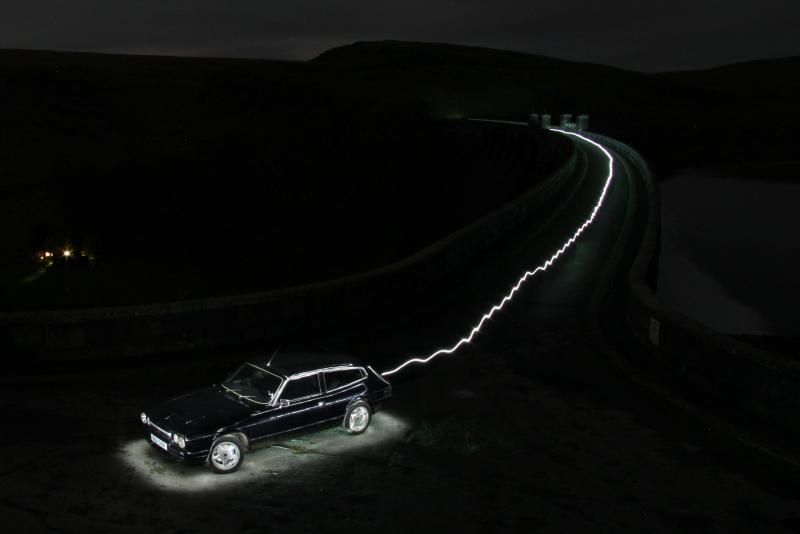
The Scimitar ran out of tax yesterday. As a little treat, I took it up to Rhayada for a late night blast. It was a lot of fun, not another car for miles
Hope you like the photos. (fireworks was taken on bonfire night)


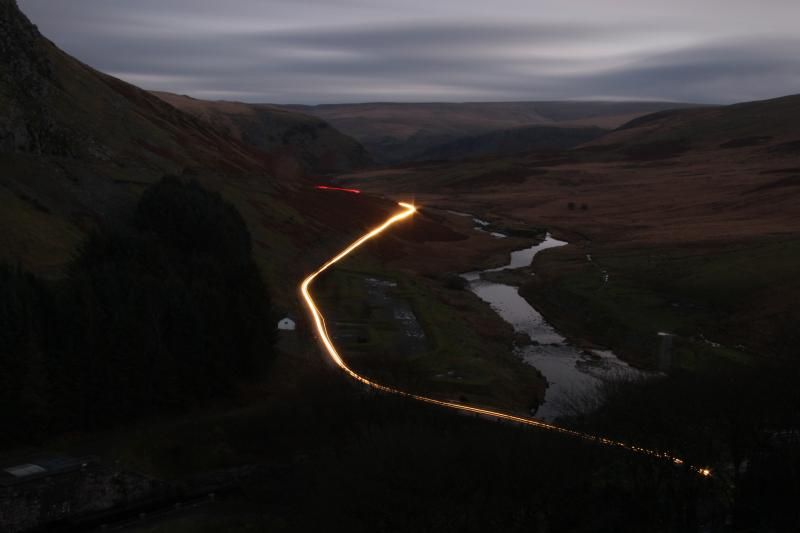
And for the grand finale (this shot took a long time and included an 11 min exposure):
Got it off the car:

Cut off the toyota float, and fixed the swing arm in place, then attached the TDI tank sender to get the right signal to the dials.

Then had to put it back in in a different orientation so it could still move up and down freely:

Then pulled the impella out of the fuel pump so its now effectively a pipe:

And re-assembled it:

I've got a new cam belt, water pump, oil filter, fuel filter and oil to change, then the MFA/cruise switches to wire in then the loom can finally start going into the car.
In a break from MR2 stuff….
The Scimitar ran out of tax yesterday. As a little treat, I took it up to Rhayada for a late night blast. It was a lot of fun, not another car for miles
Hope you like the photos. (fireworks was taken on bonfire night)


And for the grand finale (this shot took a long time and included an 11 min exposure):

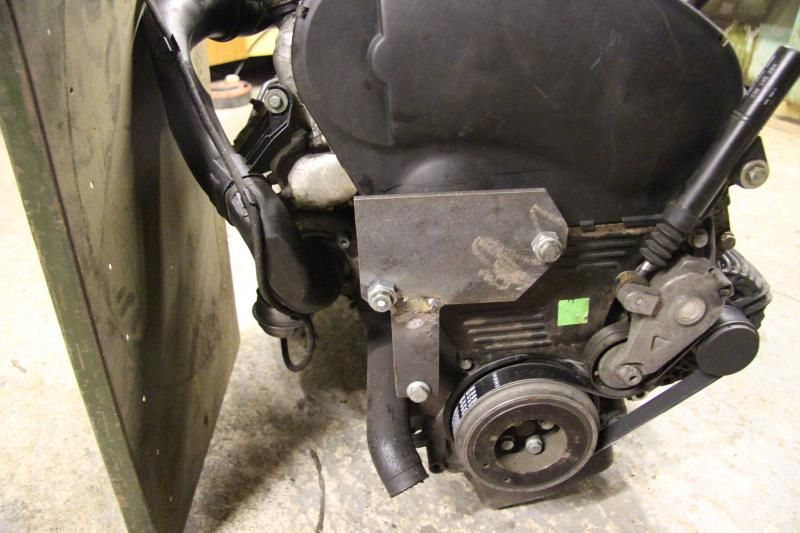
Hello again. I've made quite a bit of progress recently but haven't really had time to post about it. Well here is a bit of an update.
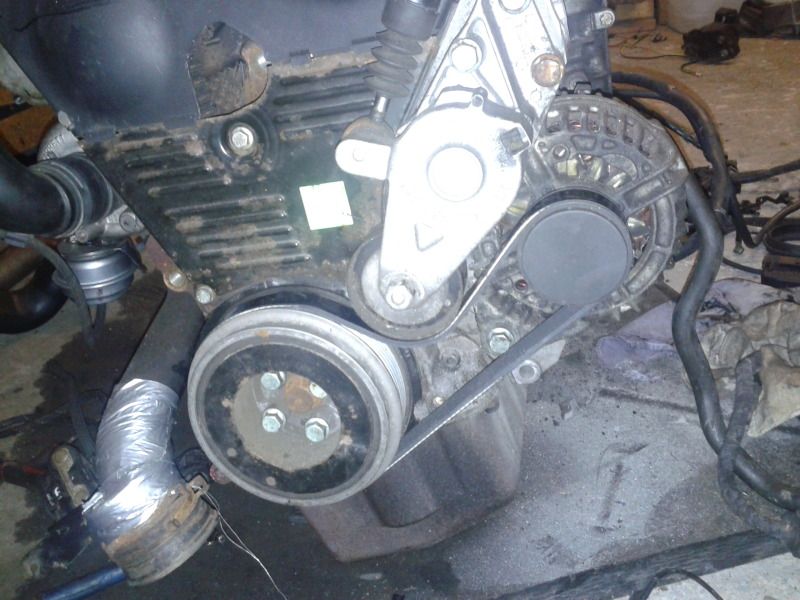
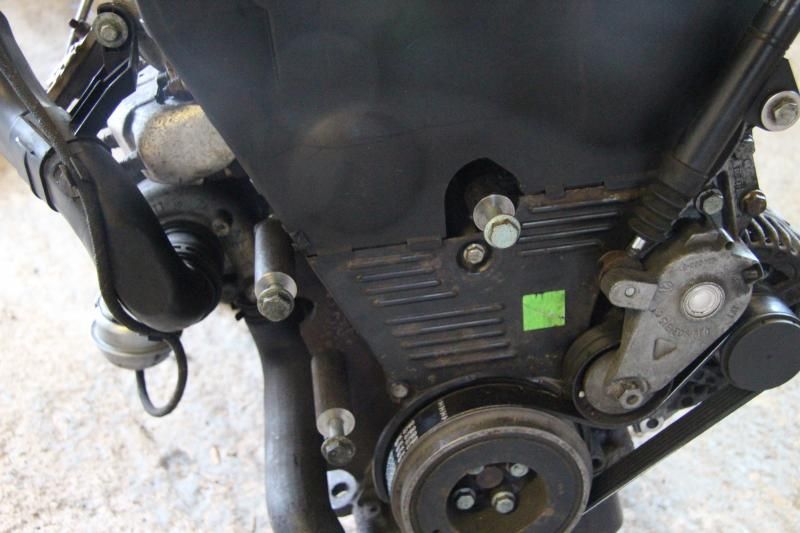
I've changed the cambelt, idlers and water pump (but was disappointed to find they were in really good condition so could have saved a load of money)
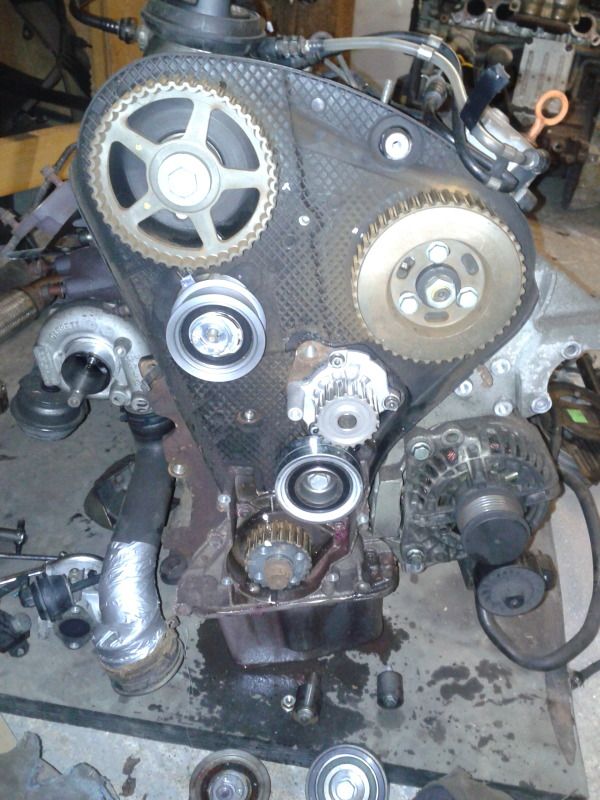
I've cut of the bits I don't need leaving just the tensioned and alternator:

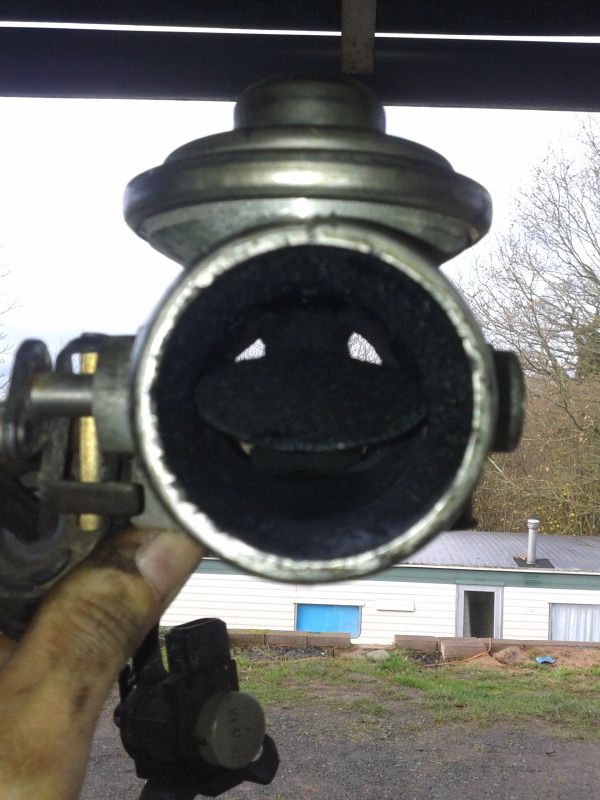
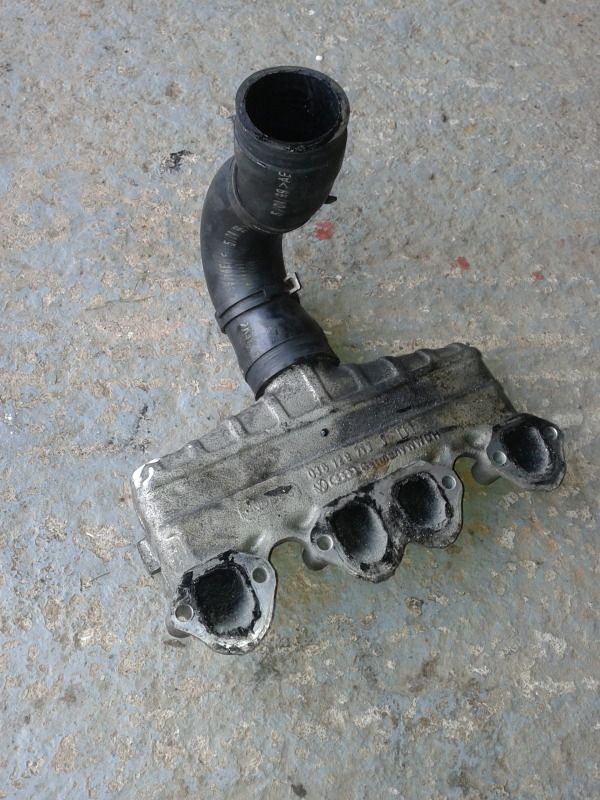
Next was to sort out the horrendous throttle and EGR situation. The crank case gas recirculation means that oil makes it into the inlet and the EGR means that soot gets in there too, the combination means an epic building up of black crud (you can see it in the photo below). The already small inlet pipe had 8mm of caked on crap so that was cleaned out. The EGR was welded up (using bird poo, check out that weld) and the throttle and EGR valve was binned. In fact I went further than that and cut the elbow of the manifold completely. (The throttle is only used when the engine is switched off, it creates an inlet manifold vacuum, just like in a petrol car. Less gas in the cylinders means less compression and the engine spins gently to a stop, rather than the abrupt shaking you can get with older diesels. I can live with that for more power.)
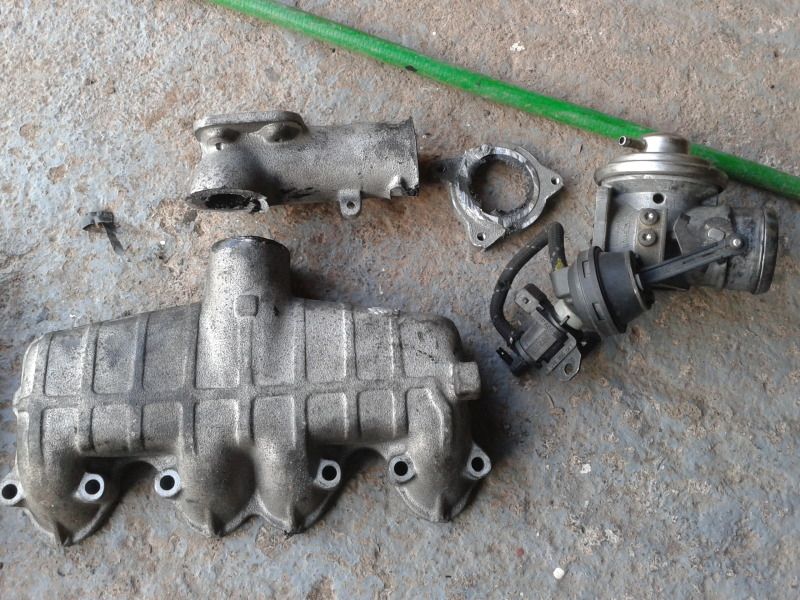
Imagine the restriction this was giving:
This is after cutting:
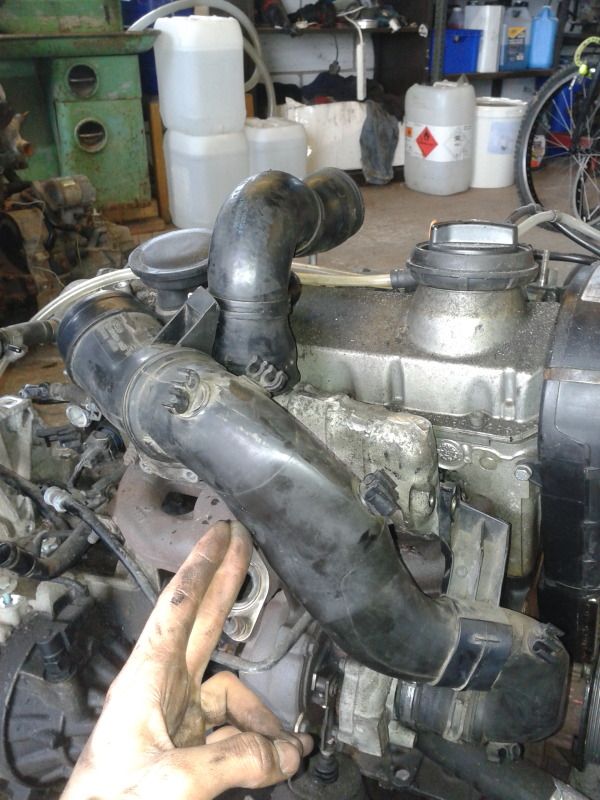
I then cleaned and ported the manifold a little and used the rubber hose straight onto the manifold:
All done:
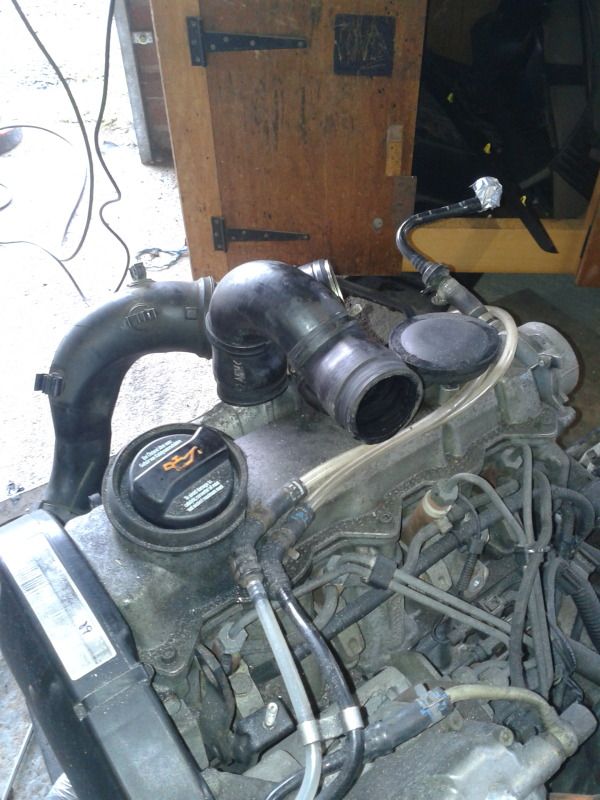
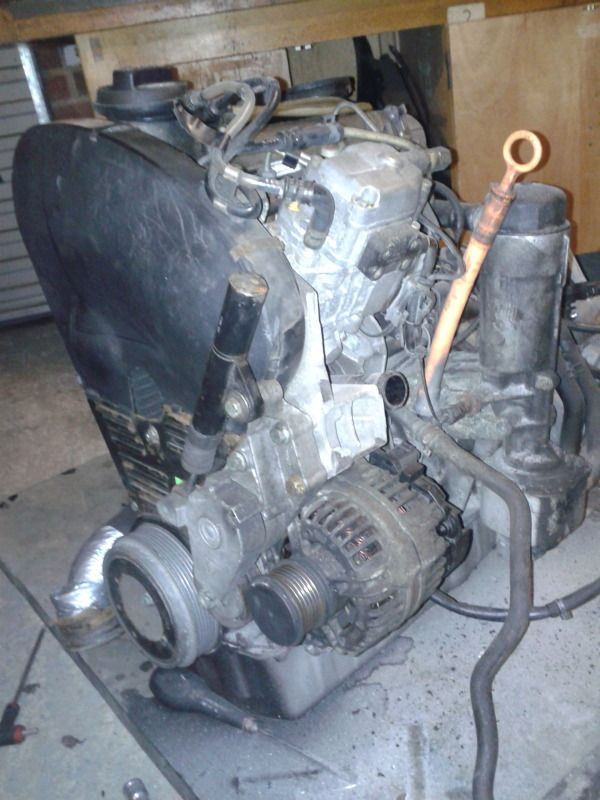
I've found a 760mm belt to drive just the alternator:
Yesterday I started messing about with the intercooler to see if I could get it to fit against the MR2s side duct. The plan being to use a micro switch under the throttle to switch on the fan and pull air through the intercooler on full throttle.
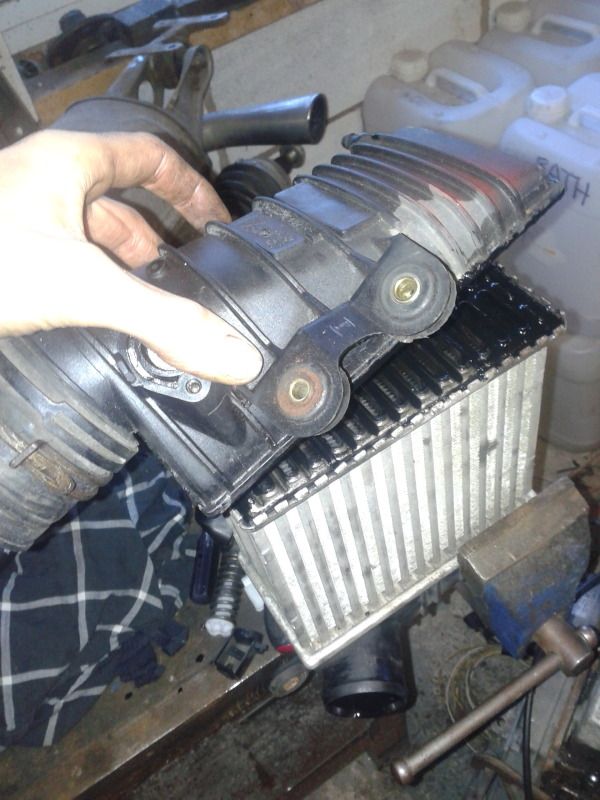
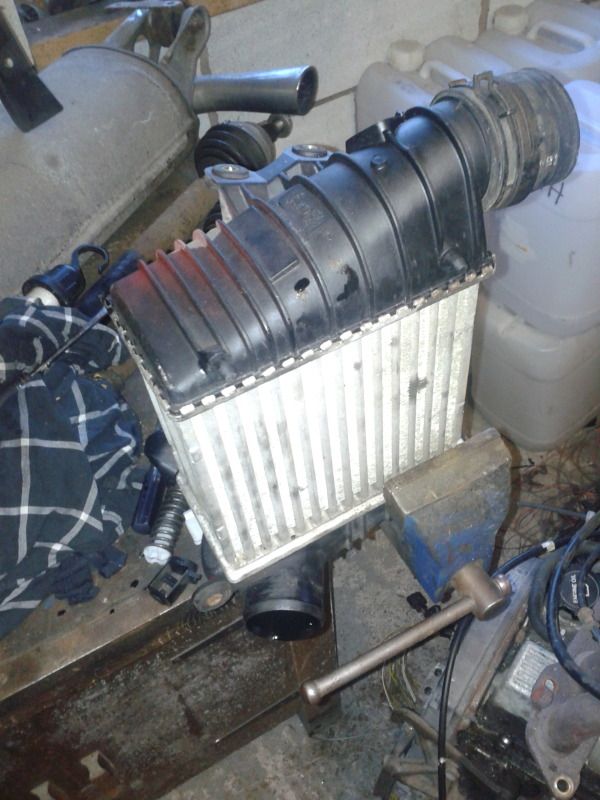
Its still not perfect really, I'll keep pondering this one.
I tested to see if the throttle pedal feel was ok if I just connected up the MR2 pedal to the TDI variable resistor.
It was great, good pressure needed to push it (it just supports the weight of your foot) and a decent amount of travel (a little less than previously but still plenty for accurate control). So I welded a more permanent version into the under bonnet space.
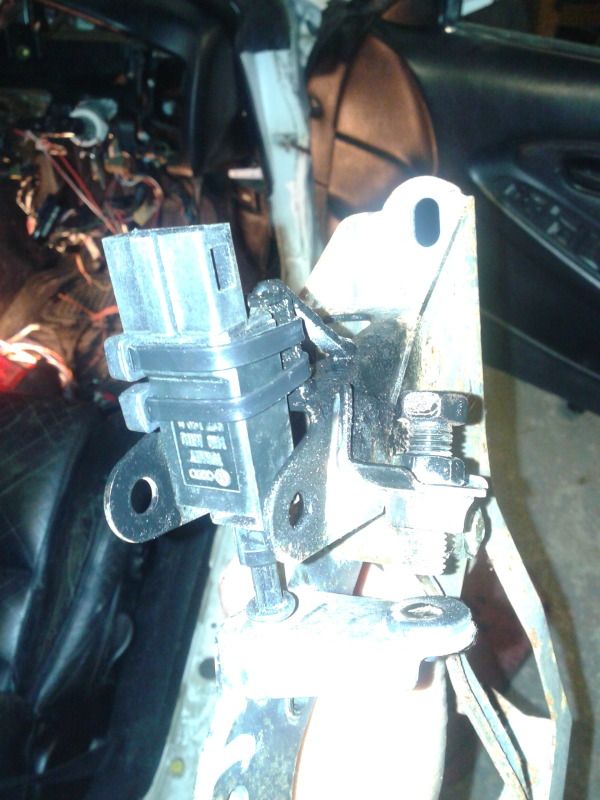
And the last thing I got done yesterday was to attach the clutch pedal switch on to the MR2 clutch pedal (as I plan to have cruise control).
Sorry for the crap images, I was using my phone again. I'll take a better camera next time.
More to come
I've changed the cambelt, idlers and water pump (but was disappointed to find they were in really good condition so could have saved a load of money)

I've cut of the bits I don't need leaving just the tensioned and alternator:


Next was to sort out the horrendous throttle and EGR situation. The crank case gas recirculation means that oil makes it into the inlet and the EGR means that soot gets in there too, the combination means an epic building up of black crud (you can see it in the photo below). The already small inlet pipe had 8mm of caked on crap so that was cleaned out. The EGR was welded up (using bird poo, check out that weld) and the throttle and EGR valve was binned. In fact I went further than that and cut the elbow of the manifold completely. (The throttle is only used when the engine is switched off, it creates an inlet manifold vacuum, just like in a petrol car. Less gas in the cylinders means less compression and the engine spins gently to a stop, rather than the abrupt shaking you can get with older diesels. I can live with that for more power.)

Imagine the restriction this was giving:

This is after cutting:
I then cleaned and ported the manifold a little and used the rubber hose straight onto the manifold:

All done:


I've found a 760mm belt to drive just the alternator:

Yesterday I started messing about with the intercooler to see if I could get it to fit against the MR2s side duct. The plan being to use a micro switch under the throttle to switch on the fan and pull air through the intercooler on full throttle.


Its still not perfect really, I'll keep pondering this one.
I tested to see if the throttle pedal feel was ok if I just connected up the MR2 pedal to the TDI variable resistor.

It was great, good pressure needed to push it (it just supports the weight of your foot) and a decent amount of travel (a little less than previously but still plenty for accurate control). So I welded a more permanent version into the under bonnet space.

And the last thing I got done yesterday was to attach the clutch pedal switch on to the MR2 clutch pedal (as I plan to have cruise control).

Sorry for the crap images, I was using my phone again. I'll take a better camera next time.
More to come
I made a bit more progress last night.
Lots of grinding away at the old MR2 dials, trying to get the TDI dials to fit inside. On paper that sounds like very little progress, but.. I did spend a while looking at it and figuring out how it was all going to come together. I'm pretty sure I know how to finish the interior side of things now. The dials are officially in (although the dead space either side of the TDI dials still needs painting black). I'm going to have a number of switches on a panel in the spare space above the radio (its double height), including the MFA, cruise control and perhaps a switch for the little power booster thingy (resistor).
Very pleased with progress I was too.
Forgive the dust all over the clear plastic, I haven't cleaned anything after grinding yet:
More to come
Lots of grinding away at the old MR2 dials, trying to get the TDI dials to fit inside. On paper that sounds like very little progress, but.. I did spend a while looking at it and figuring out how it was all going to come together. I'm pretty sure I know how to finish the interior side of things now. The dials are officially in (although the dead space either side of the TDI dials still needs painting black). I'm going to have a number of switches on a panel in the spare space above the radio (its double height), including the MFA, cruise control and perhaps a switch for the little power booster thingy (resistor).
Very pleased with progress I was too.
Forgive the dust all over the clear plastic, I haven't cleaned anything after grinding yet:

More to come
Right then! A much needed update.
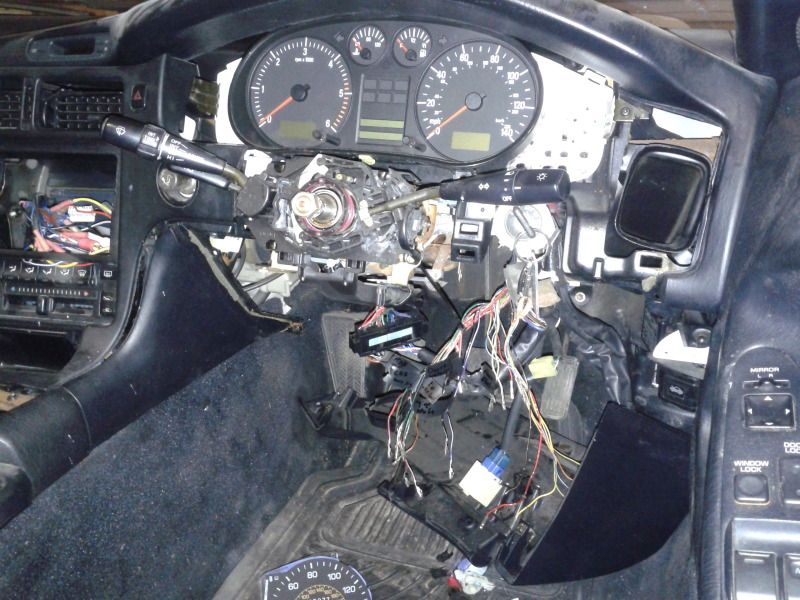
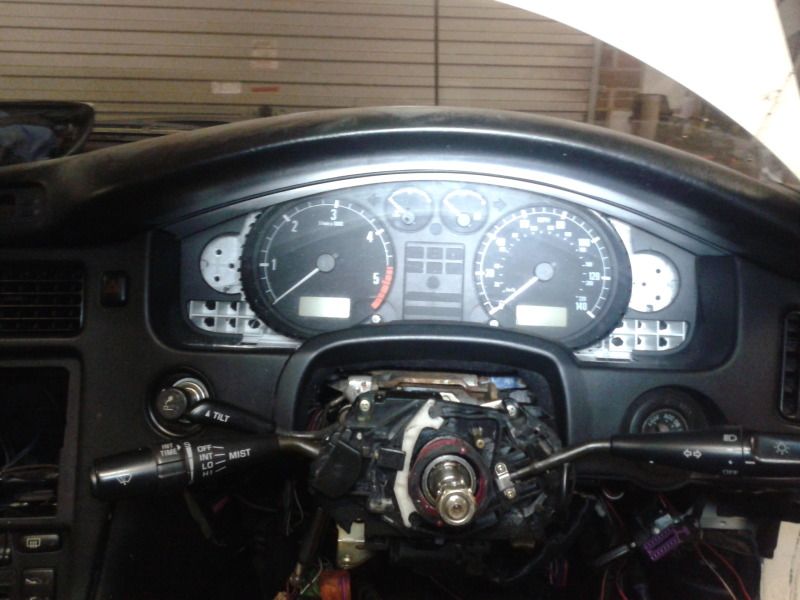
I've got the dials looking how I want them to now, and they're fully wired in, and fully working But as I was putting them in for the last time I cracked the Clear plastic (the toyota bit). I'm a little gutted but this can be easily replaced at some point when I have more money to spend. (you can't see it very well in the photo but the crack goes from the top down through the speedo)
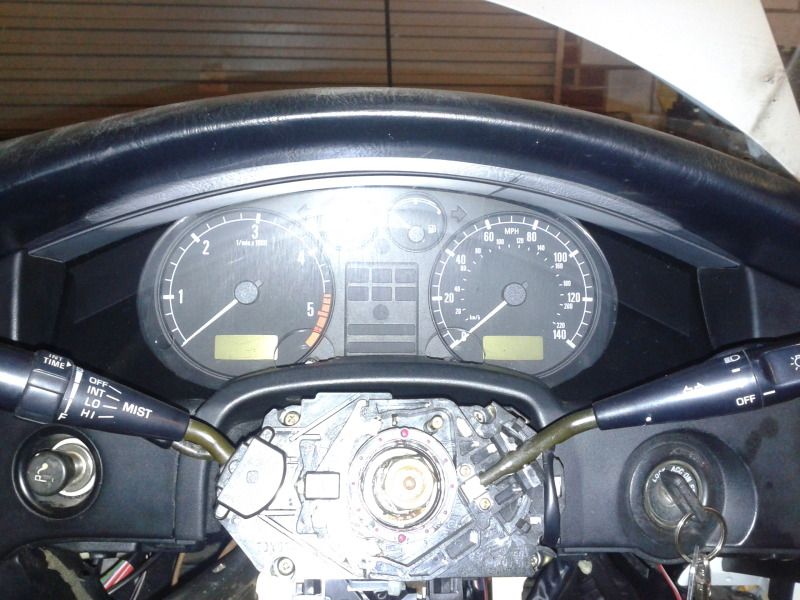
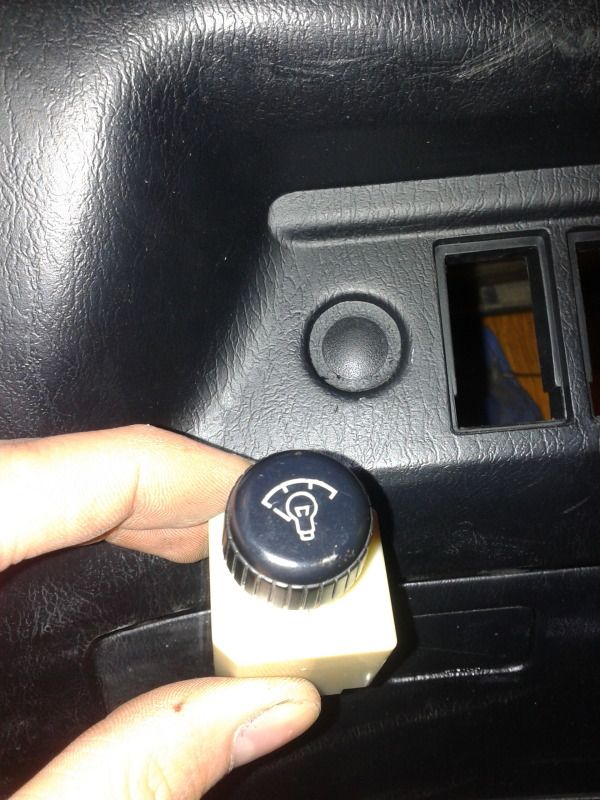
The illumination adjuster now serves no purpose so I've blanked it off.
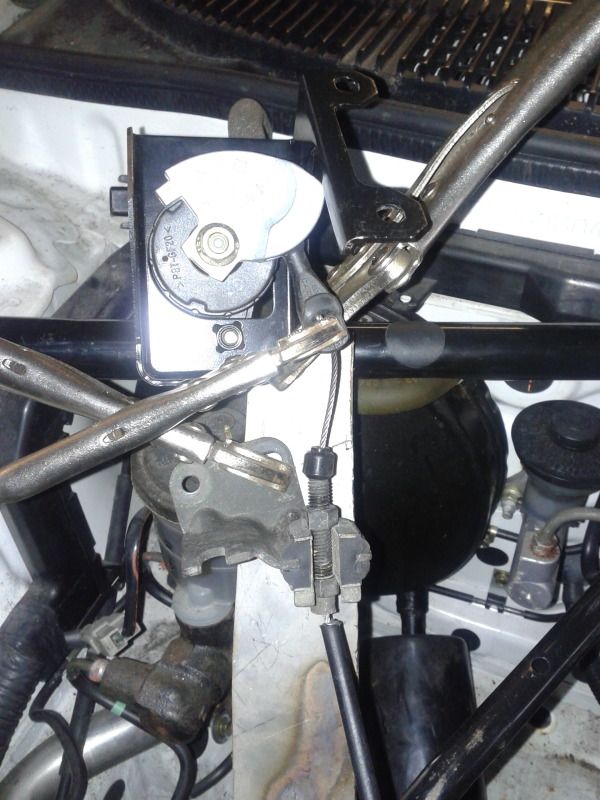
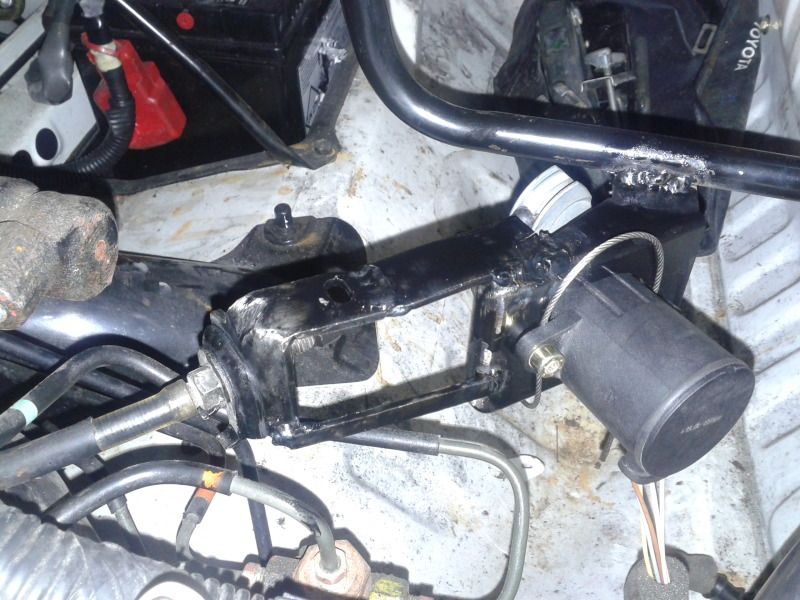
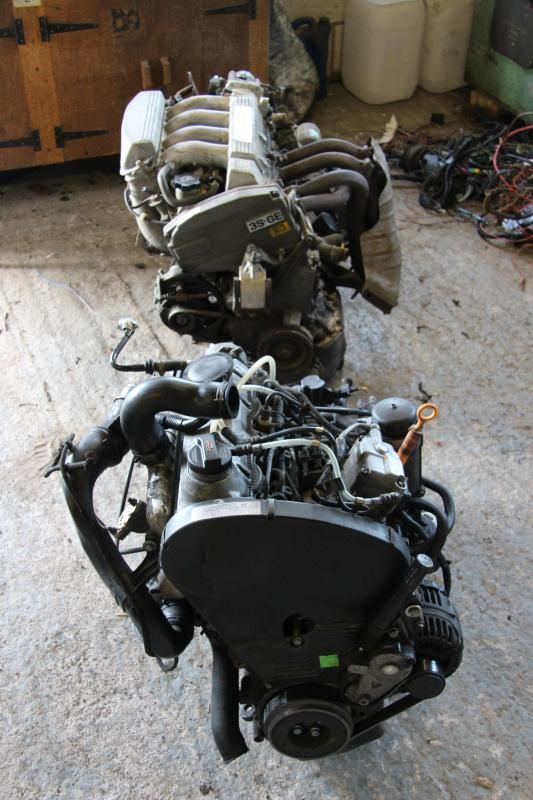
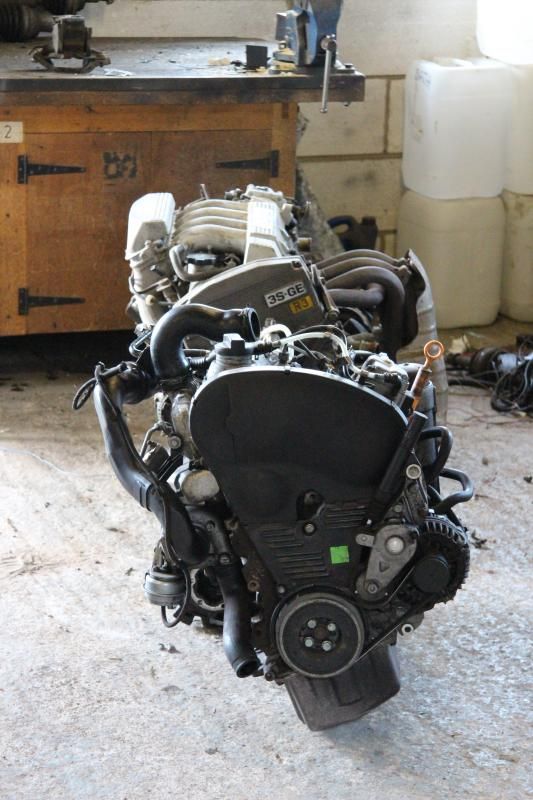
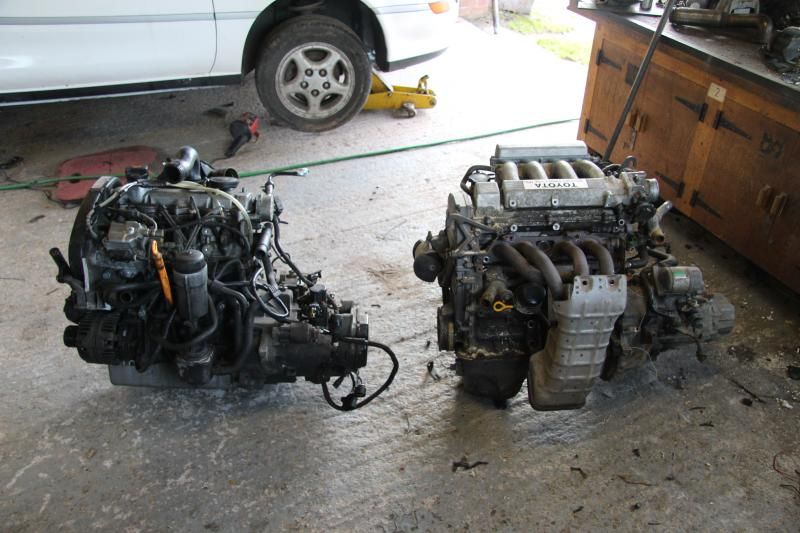
I've reached a point where I really need to get the engine in before any other work can progress. So I cleaned up the garage and lined the engines up to get an idea where the TDI will need to sit in the engine bay.
Then set about making the first engine mount.
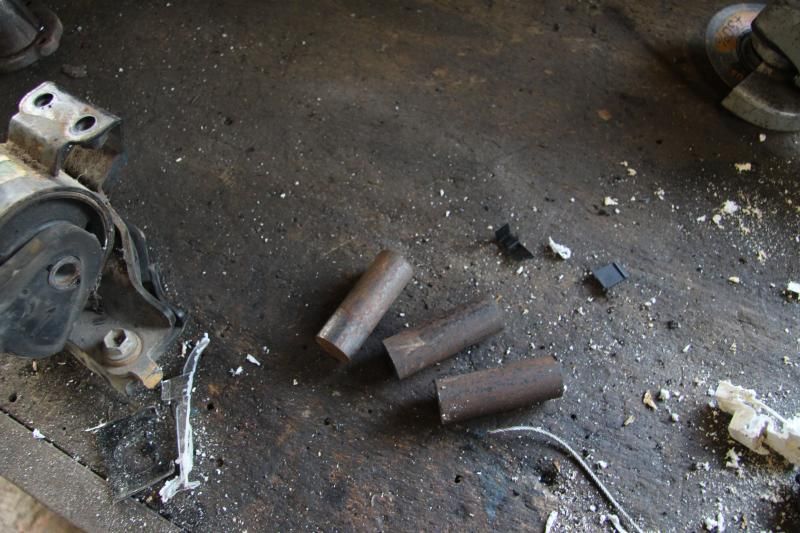
I got these bars to the same length and flattened the ends on the lathe:
Drilled them out on the lathe:

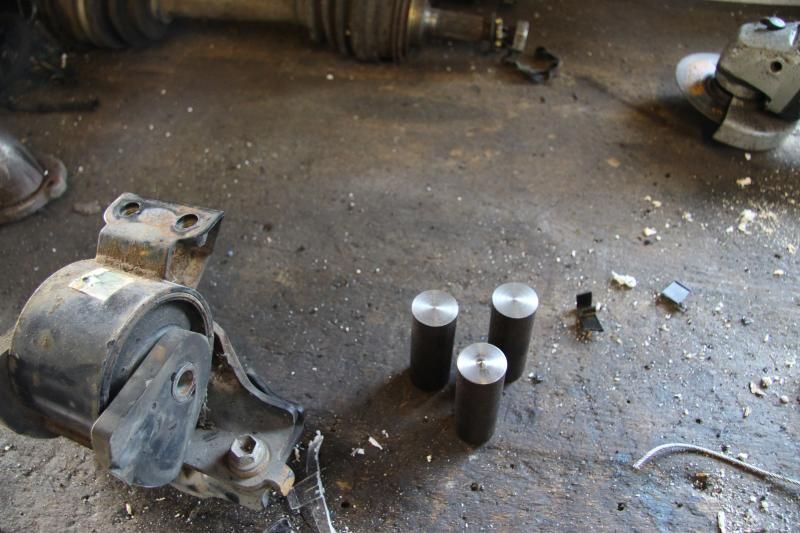
These will mean I can use the same three bolt holes that VW intended:
Cut a plate to shape:
And welded on the engine mount:
This is ready for a trial fit on Sunday (I'm very excited), if all goes well I'll start looking at the gearbox mount and add some bracing to this mount.
It is with regret that I'm altering the budget of this project, I'm now having to reduce costs as much as possible. This mainly means it'll be on the rather nasty 14" wheels for a bit (the gearing will be 5% down, i.e. more revs for the same speed) and the engine tuning will be in the form of decat, decoke and fit the +35hp "chip" (resistor). it should still match the brothers fabia VRS though
More to come
I've got the dials looking how I want them to now, and they're fully wired in, and fully working
But as I was putting them in for the last time I cracked the Clear plastic (the toyota bit). I'm a little gutted but this can be easily replaced at some point when I have more money to spend. (you can't see it very well in the photo but the crack goes from the top down through the speedo)
The illumination adjuster now serves no purpose so I've blanked it off.

I've reached a point where I really need to get the engine in before any other work can progress. So I cleaned up the garage and lined the engines up to get an idea where the TDI will need to sit in the engine bay.


Then set about making the first engine mount.

I got these bars to the same length and flattened the ends on the lathe:

Drilled them out on the lathe:

These will mean I can use the same three bolt holes that VW intended:

Cut a plate to shape:

And welded on the engine mount:

This is ready for a trial fit on Sunday (I'm very excited), if all goes well I'll start looking at the gearbox mount and add some bracing to this mount.
It is with regret that I'm altering the budget of this project, I'm now having to reduce costs as much as possible. This mainly means it'll be on the rather nasty 14" wheels for a bit (the gearing will be 5% down, i.e. more revs for the same speed) and the engine tuning will be in the form of decat, decoke and fit the +35hp "chip" (resistor). it should still match the brothers fabia VRS though
More to come
Gassing Station | Japanese Chat | Top of Page | What's New | My Stuff