More chassis refurbishment porn at Willow sports cars
Discussion


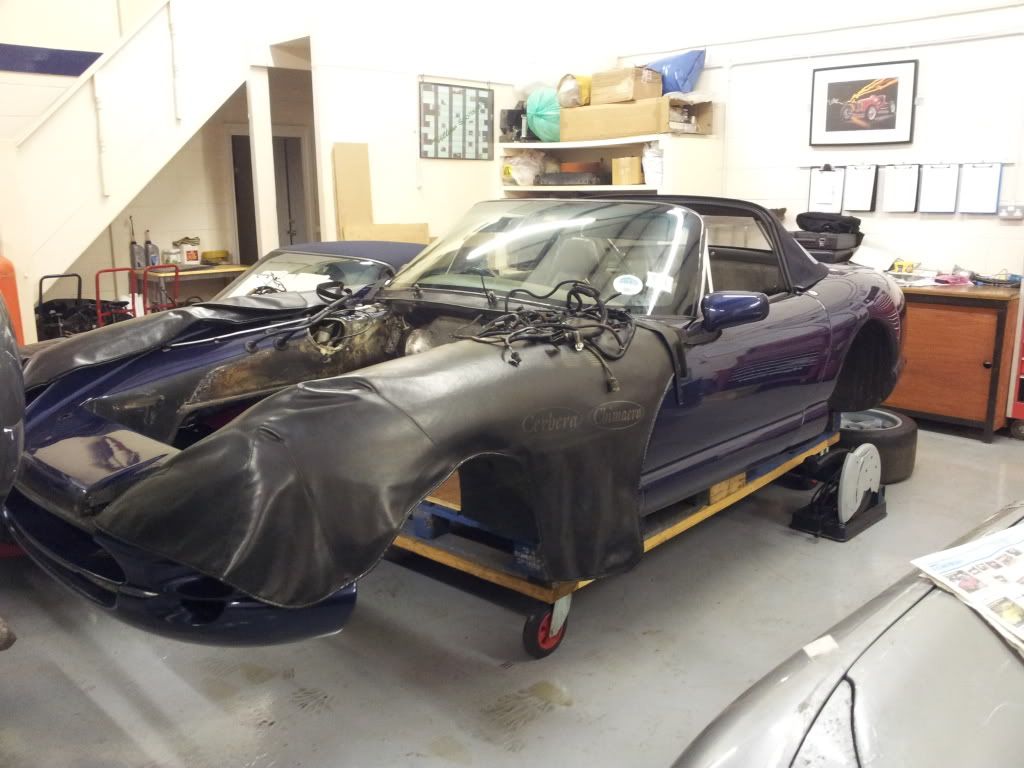
Well after much deliberation of doing some work on my beloved Chimaera, I have decided to take the plunge and do the fully body of chassis repair. I would have loved to do it all on my own, but thought it wise to take her to willow sports Cars in Newark for the job. There has been quite afew body off topics with some fantastic results, so I thought I will document mine on PH’s, as all good work should be shown and praised. Nick Day at willow takes great pride in his work and to say he is a perfectionist does not do his work justice. I will keep the pictures coming on the topic as we all like looking at chassis pictures and seeing the different solutions to solving the same chimaera problems. I acquired my Chimaera from Paul Forest at X works service, who is a friend of my family back home in sunny Blackpool 3 years ago. Since then apart from a new clutch and battery, I have had trouble free motoring so thanks to Paul forest for looking after me. Living in the Lincolnshire area, travelling back to X-works at Kirkham was no practical and i was lucky enough to be put into contact with Willow sports cars, through a contact within East mids TVR car club. Nick is extremely busy, as Jason at Str8six sends chassis repairs to Willow for refurbishment, obviously he must think his is good also. As I am in no rush to get the car back over the winter months I have told nick to fit the work in on my car when he can.
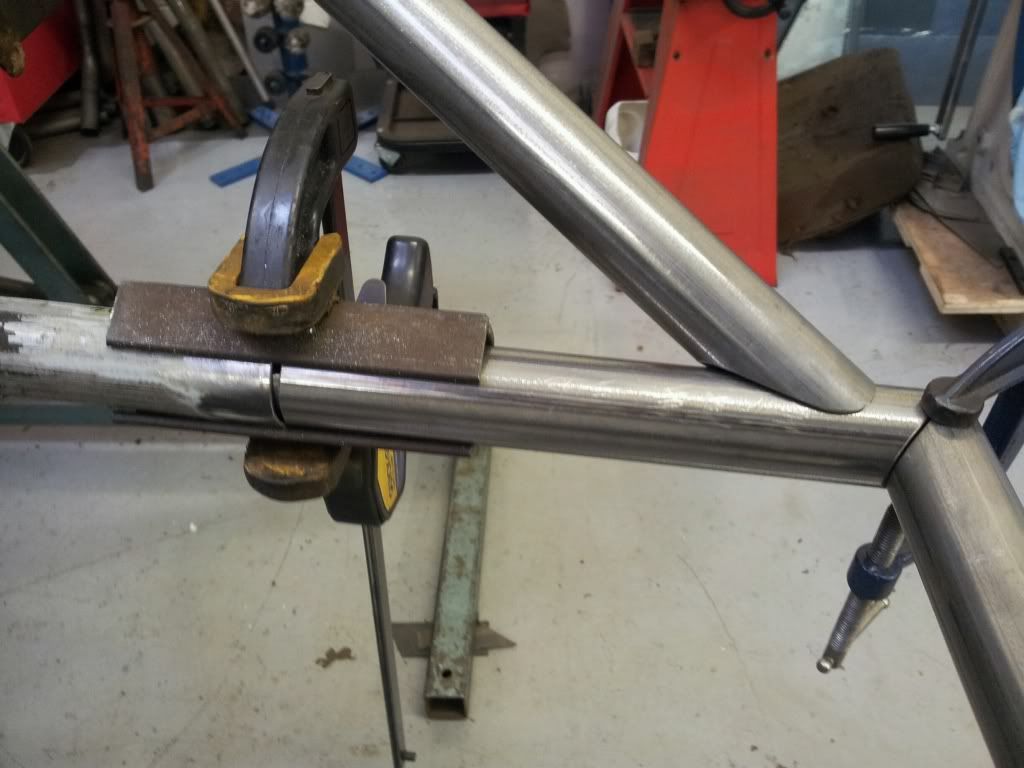
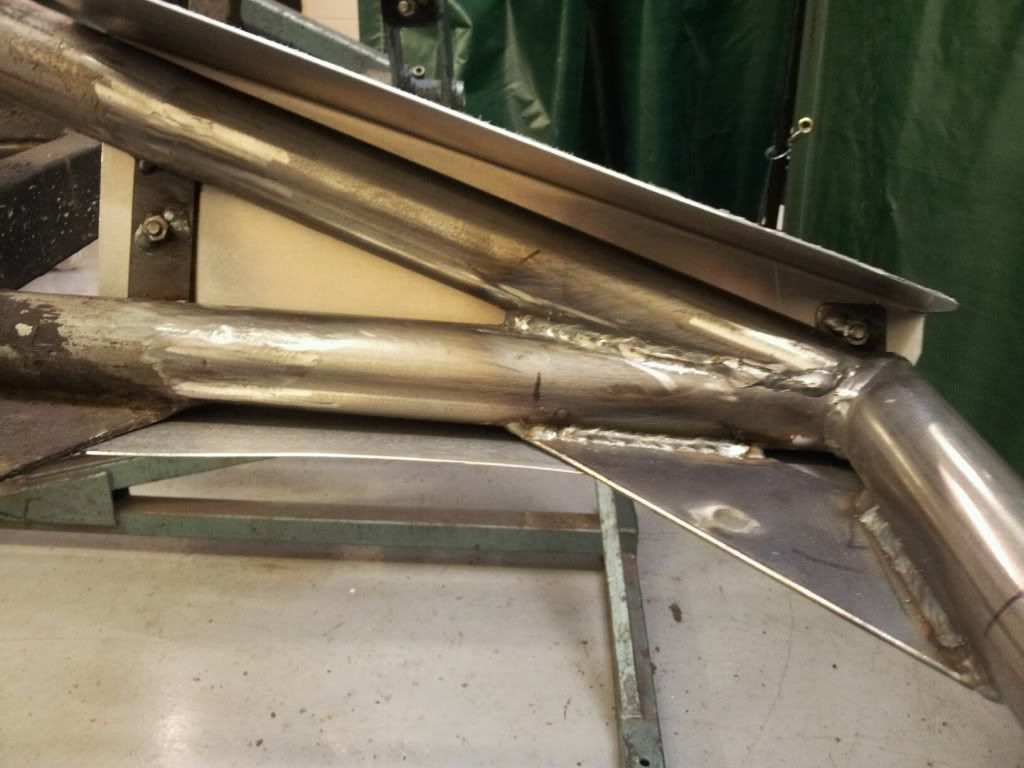
With the body off I was able to take so detailed photos of my chassis and how the repairs are carried out. Nick inserts a metal sleeve inside the tube and leaves a intensional gap between mating surfaces to ensure weld penetration and a strong joint. With everything jigged and clamped up, distortion from the heat effected zone is minimised
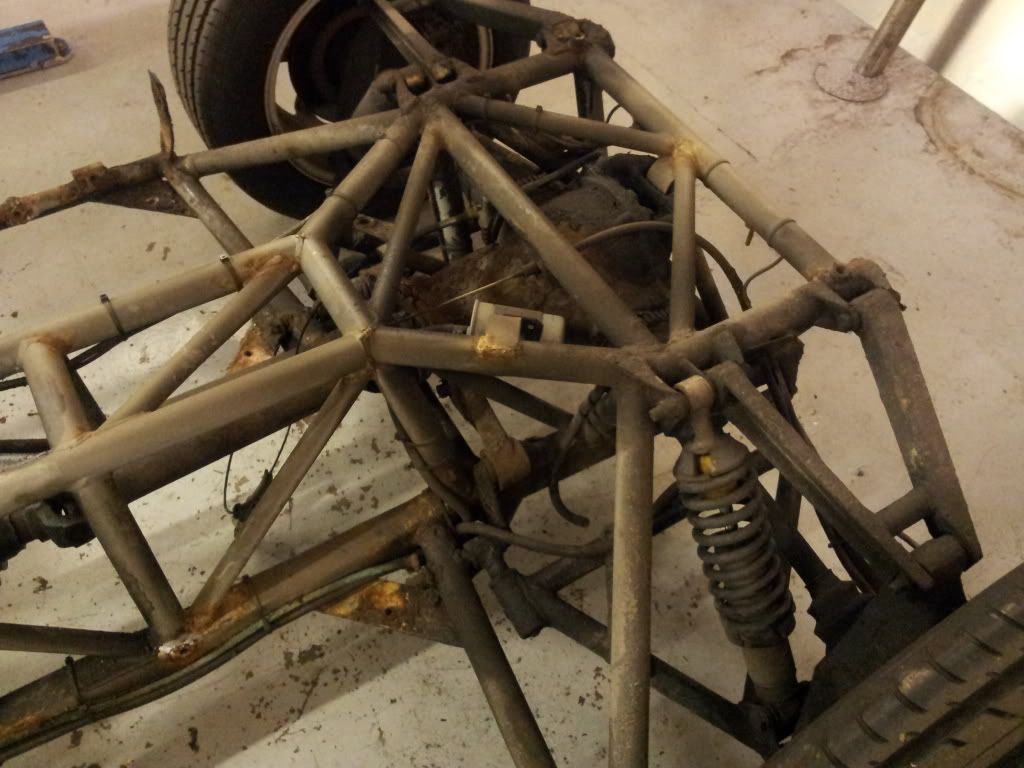
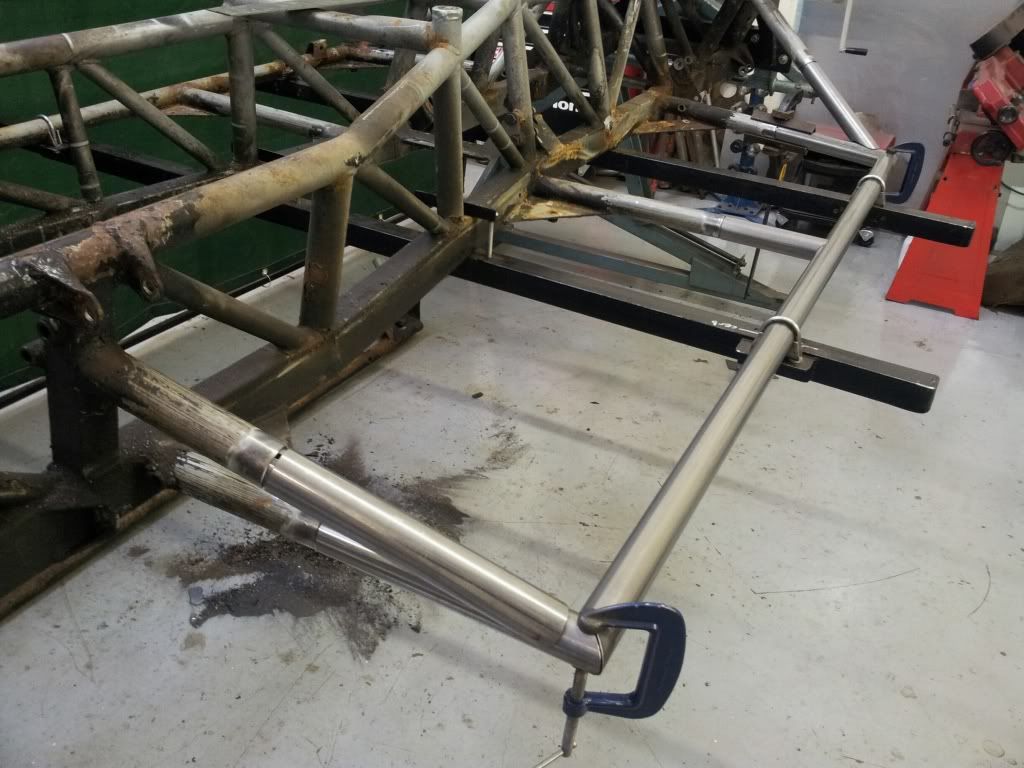
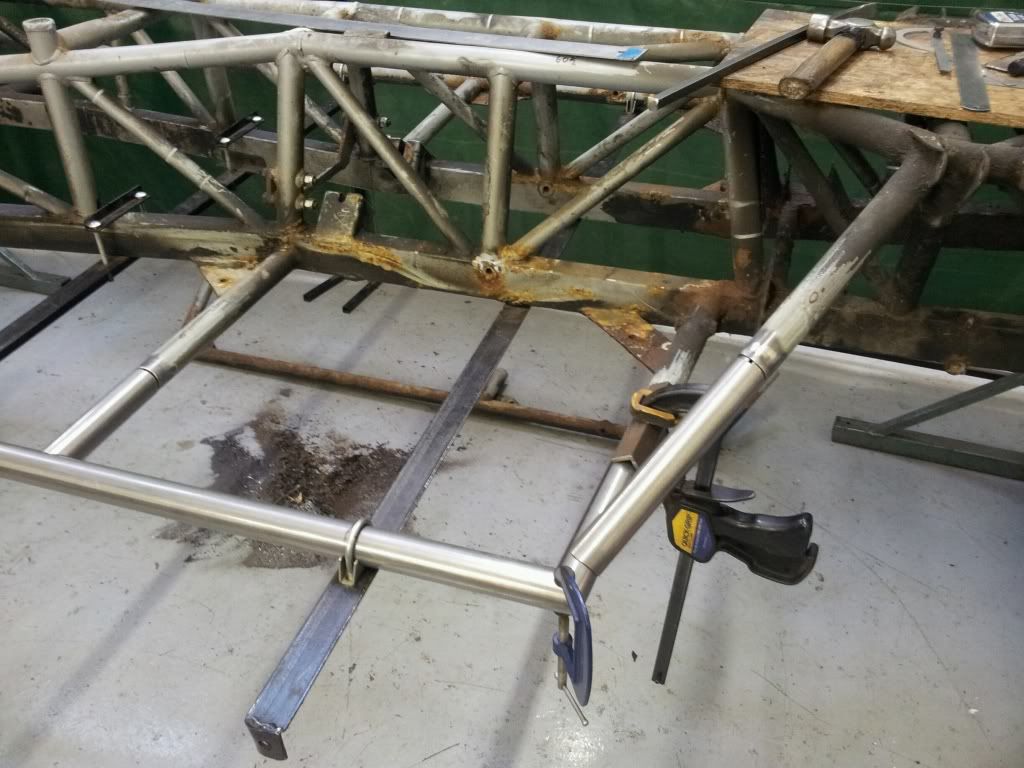
When I saw the outriggers I was very pleased as there was only surface rust on the tubing and Nick explained that they were in reasonable condition and this pays testament to the former keepers and talked my through the whole chassis the good points and the bad points which are coming up.
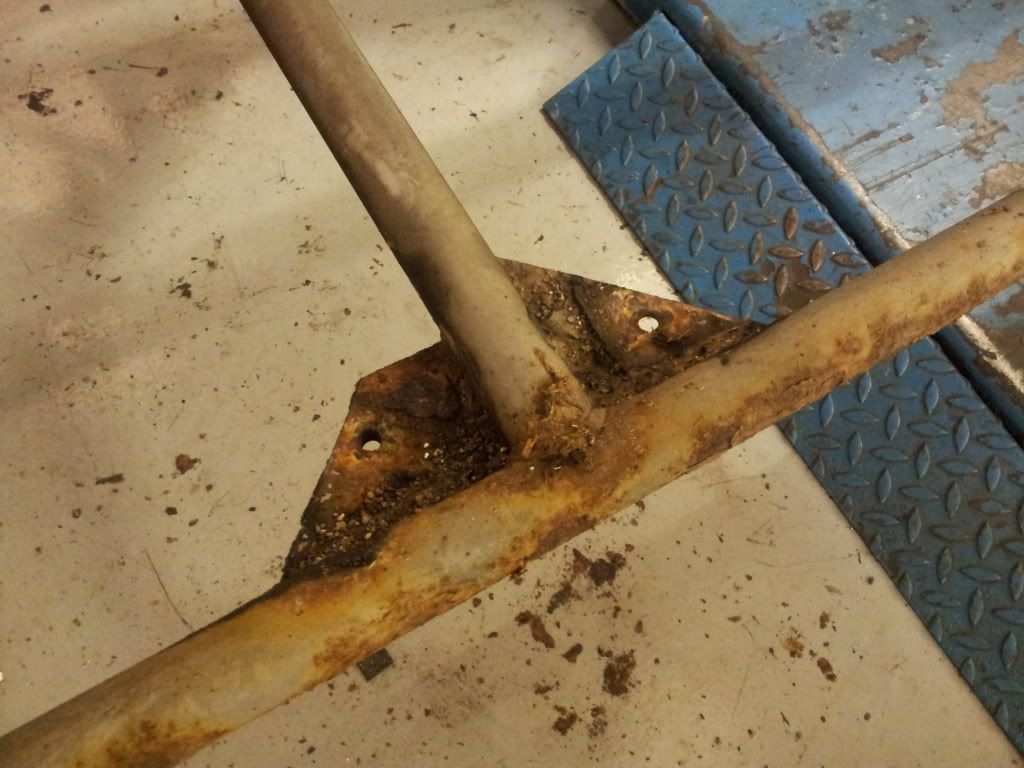
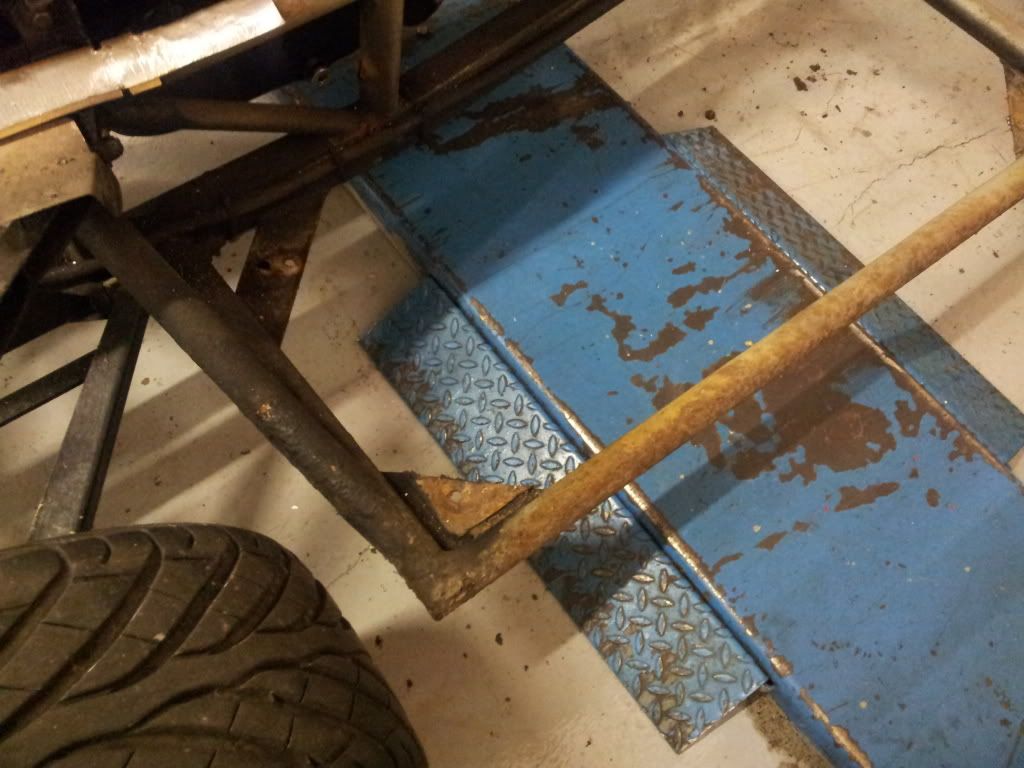
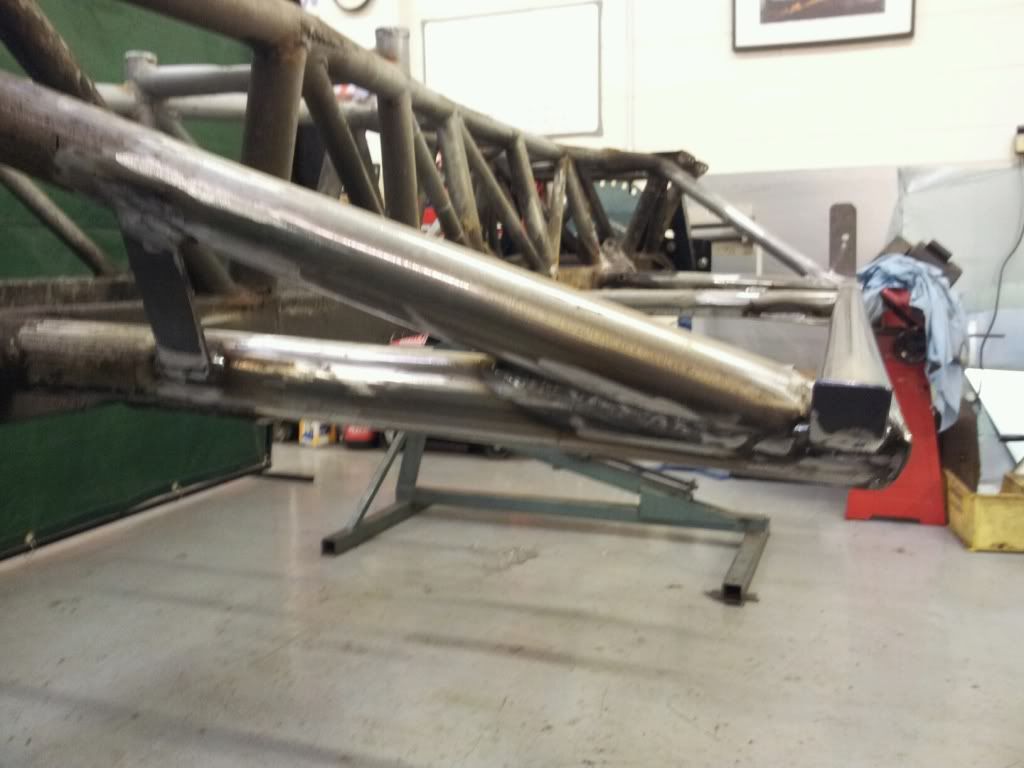
The bad bits that could not be seen clearly without a body lift.
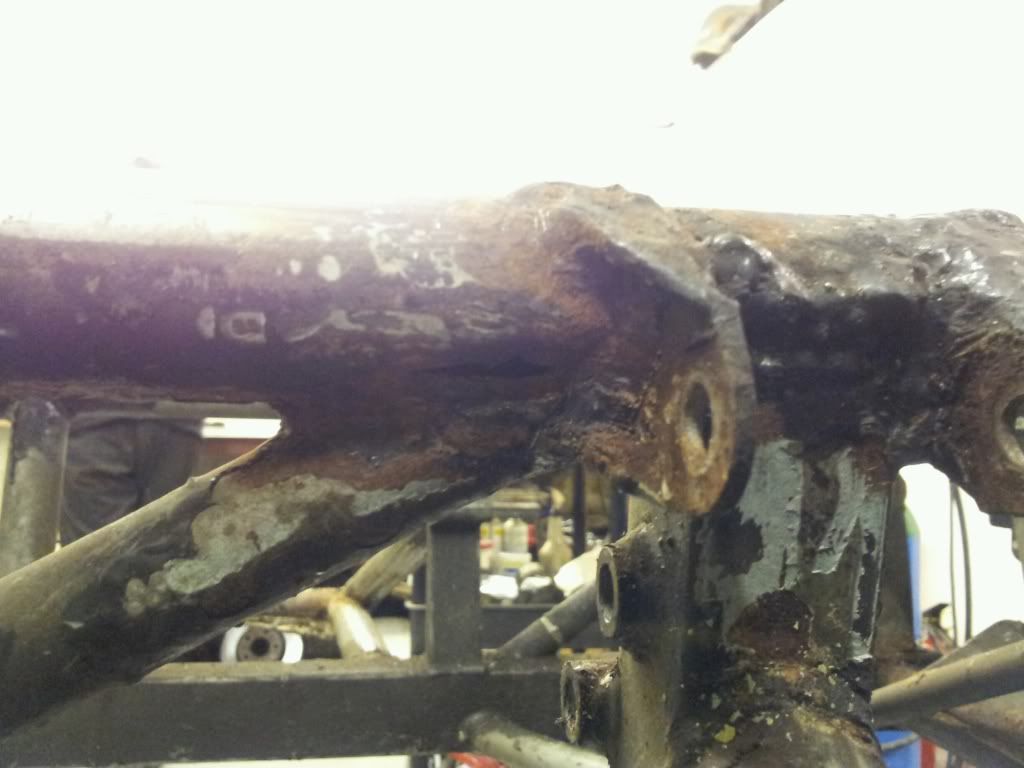
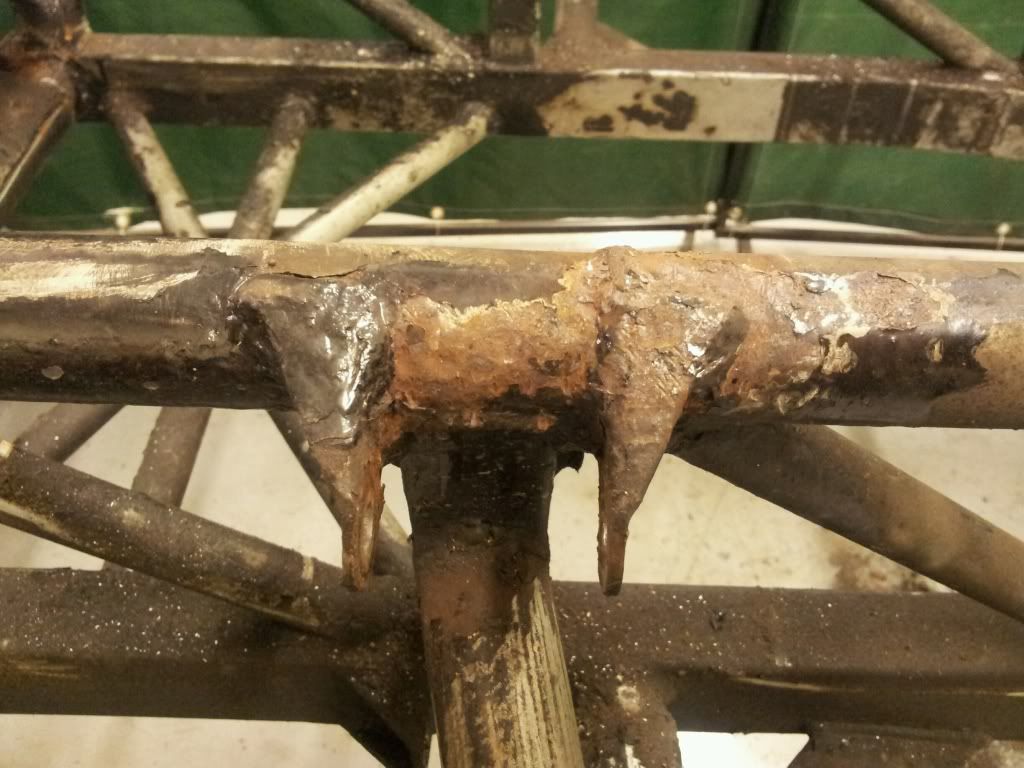
some of these areas of rust were very thin and holes had appeared compromising the strength and letting in water in my chassis. I will update the topic as I progress, and finally have a new coat of paint on the car to boot.
With the body off I was able to take so detailed photos of my chassis and how the repairs are carried out. Nick inserts a metal sleeve inside the tube and leaves a intensional gap between mating surfaces to ensure weld penetration and a strong joint. With everything jigged and clamped up, distortion from the heat effected zone is minimised
When I saw the outriggers I was very pleased as there was only surface rust on the tubing and Nick explained that they were in reasonable condition and this pays testament to the former keepers and talked my through the whole chassis the good points and the bad points which are coming up.
The bad bits that could not be seen clearly without a body lift.
some of these areas of rust were very thin and holes had appeared compromising the strength and letting in water in my chassis. I will update the topic as I progress, and finally have a new coat of paint on the car to boot.
Edited by portzi on Wednesday 21st December 19:27
Edited by portzi on Wednesday 21st December 22:02
M@H said:
Well on the list of things to have securely fitted down I'd have it top of my list  If nothing else you could add a strip of steel across the underneath of the GRP between the two bolts to spread the load even without it being a part of the chassis.
he has asked me about the battery move and has suggested putting it behind the passenger seat in the cubby hole there but it have to be an odessey type of battery as there is limited space. a good suggestion none the less thanks If nothing else you could add a strip of steel across the underneath of the GRP between the two bolts to spread the load even without it being a part of the chassis.
M@H said:
My friends MG V8 had two smallish betteries either side of the rear of the car under the back seat, both connected up in parallel - might be an option to use both cubby holes? Saying that, do you not fancy the boot, its quite popular for the battery.
Yes I did think about the boot, as it seems a very popular choice for the Chimaera. After seeing the size of the oddesey battery I will hope it could fit in snuggly with abit of fettling of the cubby hole behind the seat, as I believe the battery cabling will need very little lengthening to achieve this. If it works I will be very happy. 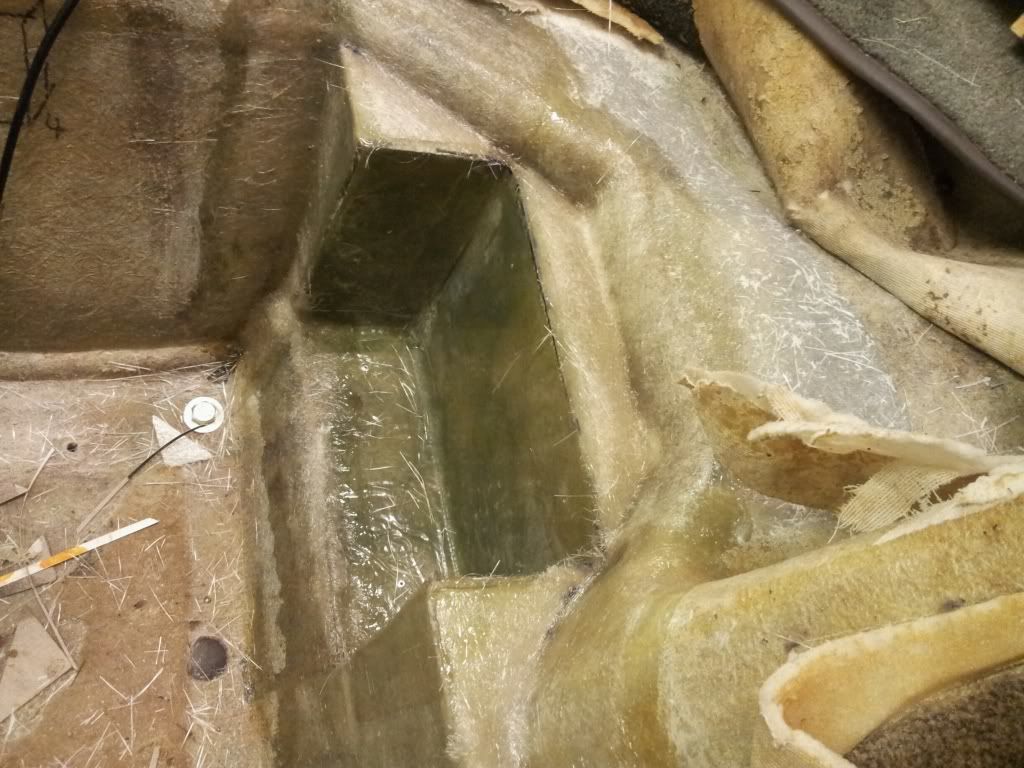
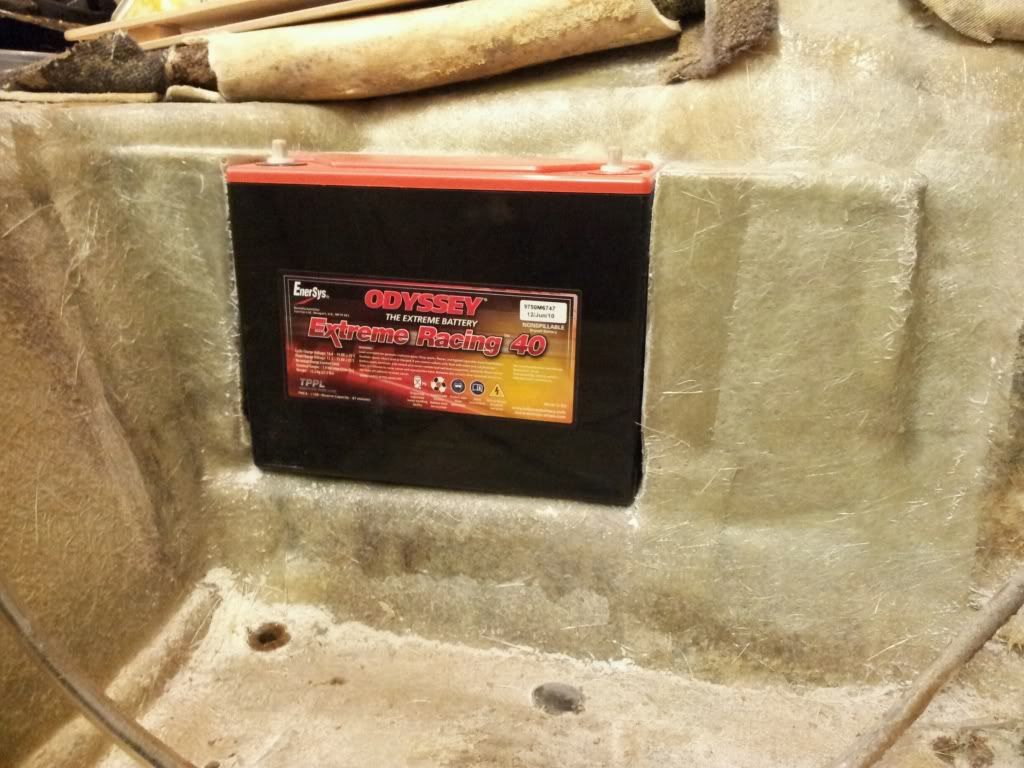
VOILA, the finished battery housing behind the passenger seat. The corners were originally rounded on my cubby hole. They have been squared out and fibre glassed smooth.
nicks idea for the battery mod is cool. leaving more space in the boot for tvr goodies and pies and beer
Edited by portzi on Wednesday 21st December 21:59
Edited by portzi on Friday 23 December 11:13
Edited by portzi on Tuesday 27th December 22:09
carsy said:
That is what i intend doing. What size Odyssey have you gone for.
hi carsy . i an popping into willow this evening on my way home i will ask. l thing a similar size one to the one i saw in jasons tuscan from straight six that nick is working on. very compact:the battery is a 40 oddessey
Edited by portzi on Friday 23 December 11:38
Twistygit said:
Hi, if you don't mind me asking approx. how much would it cost for a body off outrigger replace? Also what will they do with the thin and holed bits of chassis at the shocker mounts?
Hi Graeme.I think the going rate for outrigger replacement is about £1500 all in, and I have seen people doing 2-3 inch lifts just to do the outriggers. Ring around afew places for quotes, and its defo giving them a good inspection before getting them done. But once you have the body off you may aswell get all the other jobs done for piece of mind, if you have the cash of course.
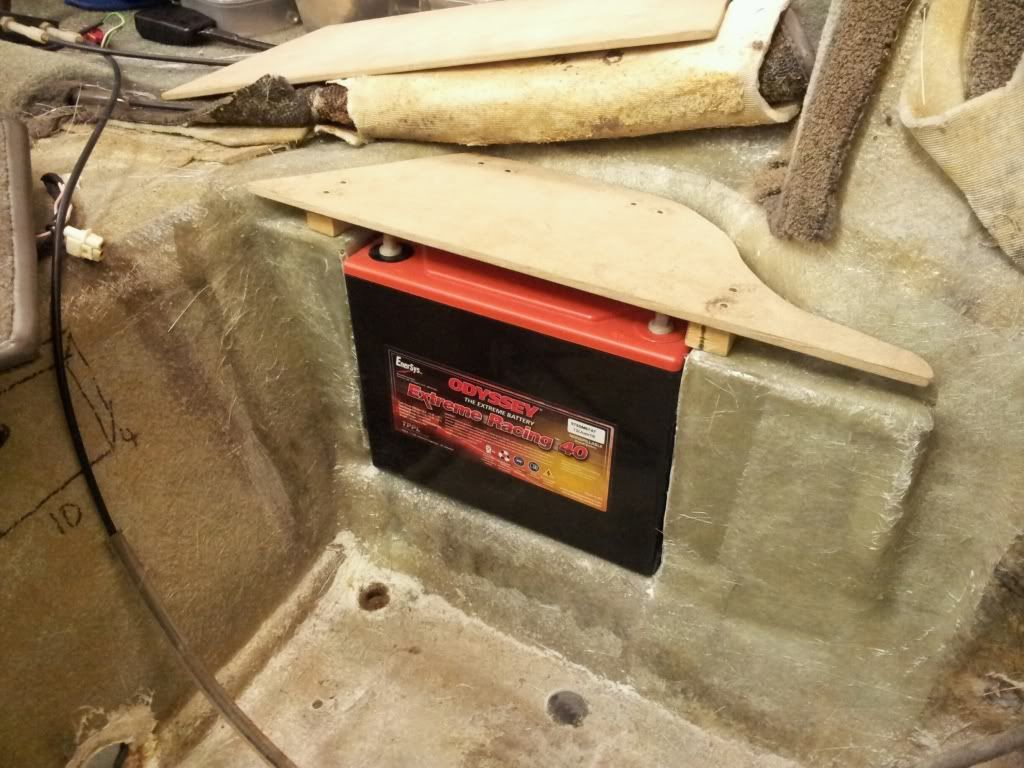
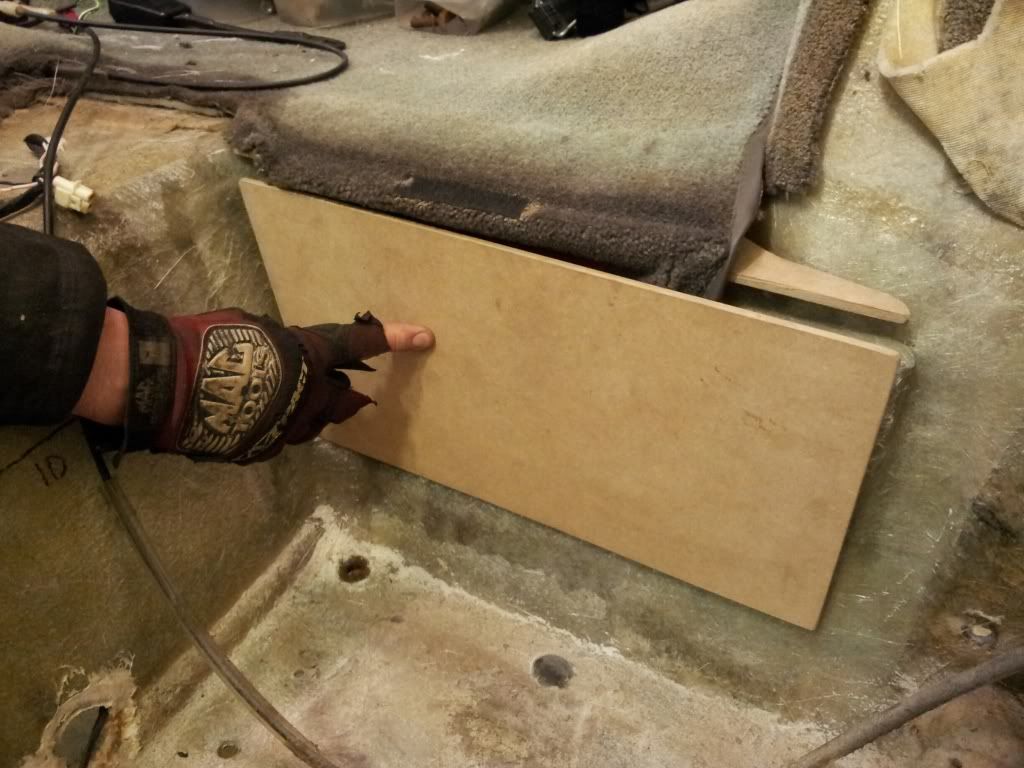
With the battery in place, Nick will fit a strap around the battery, specially made by his friend Tim an up-holstery by trade. My garage at work does not have power, so I will simply lift out the battery and put on charge. The wood that covers the battery will of course be carpeted, and either attached by good old velcro or a hinge of some sort?
Nick has put some more upgrades to the chassis. He has put some outrigger protectors which simply bolt onto the chassis outriggers, with some clever brackets he has manufactured. These too will get powder coated.
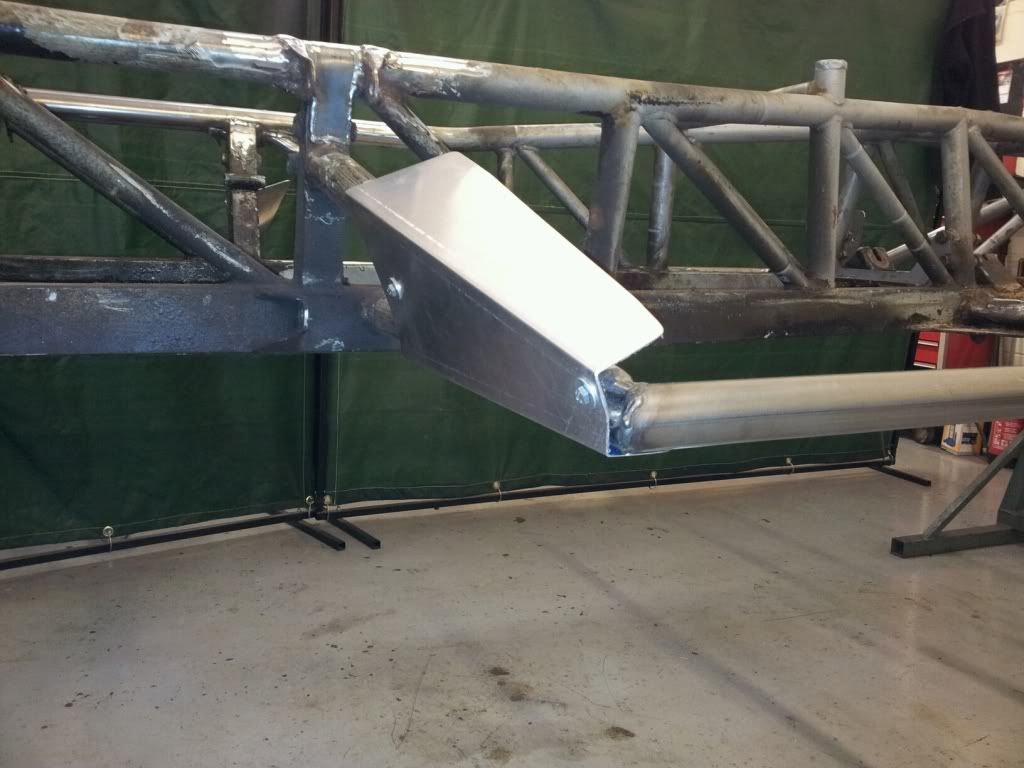
Nick has put some more upgrades to the chassis. He has put some outrigger protectors which simply bolt onto the chassis outriggers, with some clever brackets he has manufactured.
These too will get powder coated.Edited by portzi on Tuesday 27th December 22:54
Edited by portzi on Tuesday 27th December 23:03
Twistygit said:
Hi, if you don't mind me asking approx. how much would it cost for a body off outrigger replace? Also what will they do with the thin and holed bits of chassis at the shocker mounts?
Nick has cut that area away completely and welded a new piece of steel in there. I will take a pic tomorrow and put it on.
Dr Mike Oxgreen said:
My reading of the link is that it's £3475 + VAT to supply a chassis. To fit it, you'd have to do a full body lift and strip everything: engine, gearbox, diff, etc etc. If you've got the time and skills to do all that yourself, then a new chassis looks like a good option, being only slightly more than the refurb.
But my rough figures were for getting someone like Nick at Willow to do everything for you, all disassembly and reassembly included. I think the refurb option is sensible if, like me, you're largely incompetent - I'm not sure I'd drive any car that I'd disassembled and reassembled myself!
Hi Mike, nick did a superb job on your chassis, with some unique upgrades, and that was the main reason for getting mine done. The labour is the biggest expense on this exercise so adding nearly 4000, for a new chassis was not an option for me, unless the chassis is so badly corroded that it is not useable. Also you have to added knowledge thats Nicks expertise is doing the work for you. But my rough figures were for getting someone like Nick at Willow to do everything for you, all disassembly and reassembly included. I think the refurb option is sensible if, like me, you're largely incompetent - I'm not sure I'd drive any car that I'd disassembled and reassembled myself!
I would have loved to do it myself and had the satisfaction of it, but I,m affraid my Trevor would have been off the road for far toooooo long for to bear with . My phone ran out of charge today, so was unable to update with more pics will post some more tomorrow.
Edited by portzi on Tuesday 3rd January 21:30
SILICONEKID340HP said:
Cheers Im about to put mine in the boot but in stumped with the two brown wires..
how to connect ,what size etc
Daz, Nick has told me that he is just simply extending the 2 leads to the battery, I told him about your brown wires. Are these the positive and negative connections to the battery terminals? As mine are red and black.how to connect ,what size etc
SILICONEKID340HP said:
There not mate ! the two brown wires are two live cables which disappear in to the abyss towards the fuse box .
After doing some research they need upsizing. if there being extended.
Daz, I will enquire about the brown ones again going towards the fuse box? I wonder if anyone on this forum has had the same question, as many have done the conversion.After doing some research they need upsizing. if there being extended.
Mark
Edited by portzi on Wednesday 4th January 21:14
andydw said:
Does anybody know if there are any improvements that could be carried out to the cerb chassis during a restoration eg improved suspension geometry that sort of thing?
In regards to suspension and wishbones etc. the cerbera wishbones are different to the chimaera's and griff's,a better design I was told. Mark
Pink_Floyd said:
I would extend the 2 brown wires to the battery and use larger cable. In the fuse box they go to 2 connectors that are joined together.
If you don't extend them, then during cranking the voltage drop in the red cable will mean that the electronics will see a lower voltage than the battery voltage.
Does this answer your question Daz?If you don't extend them, then during cranking the voltage drop in the red cable will mean that the electronics will see a lower voltage than the battery voltage.
[quote=Twistygit]how's it going any more photo's on the progress?[/quote
lupos in first hopefully here today as my lights are on the way out. Changing the upper front wishbone design will put some pics up on machining mod.
Just making my frame for transporting the body to the paintshop . will take some pics of the body on the frame when complete.
lupos in first hopefully here today as my lights are on the way out. Changing the upper front wishbone design will put some pics up on machining mod.
Just making my frame for transporting the body to the paintshop . will take some pics of the body on the frame when complete.
 .
. spikep said:
Hes using some local 'specialist' if you can us that term!!!
When you take it, can you drive by my Grif so they can look at the battery mounting to see if it can be done the same!!!!!!
PS
Get it finished soon for classic Le Mans.
hi spike i will check as there is a griff in at the moment . As for paint Daz Am using a local specialist. When you take it, can you drive by my Grif so they can look at the battery mounting to see if it can be done the same!!!!!!
PS
Get it finished soon for classic Le Mans.
Well its been afew weeks since my last update on restoration. my time has been taken up by making the trolley for the body to go to the painters. My main concern was the weak spot behind the soft top and rear wheel arch area. the body there is very fragile so supporting this area fully was my main concern and mounting the body such as it is supporting 2/3's of the body.
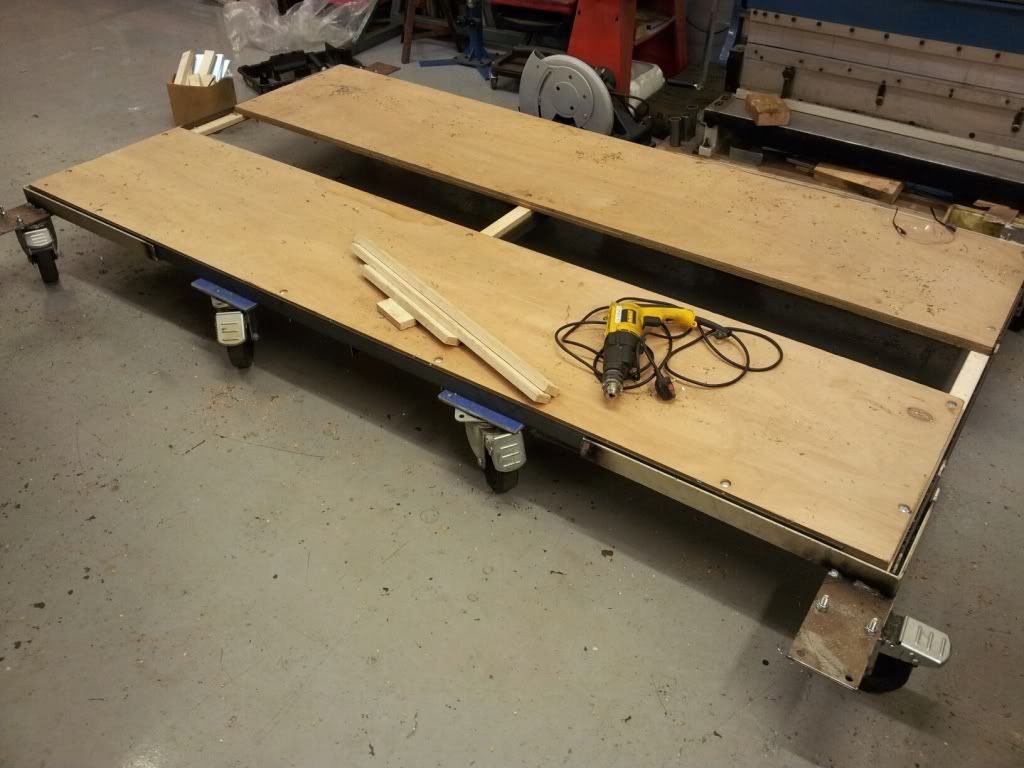
The trolley is taking shape nicely.
[IMG]http://i955.photobucket.com/albums/ae36/portzi/2012-01-24_192126_resized.jpg[/IMG
to support the body full I aquired some angle iron 8 caster wheels and some 1 inch ply form a friendly carpenter I know.
Using the bolt holes behind the fuel tank I was able to lock the end of the car to the ply with some steel brackets.
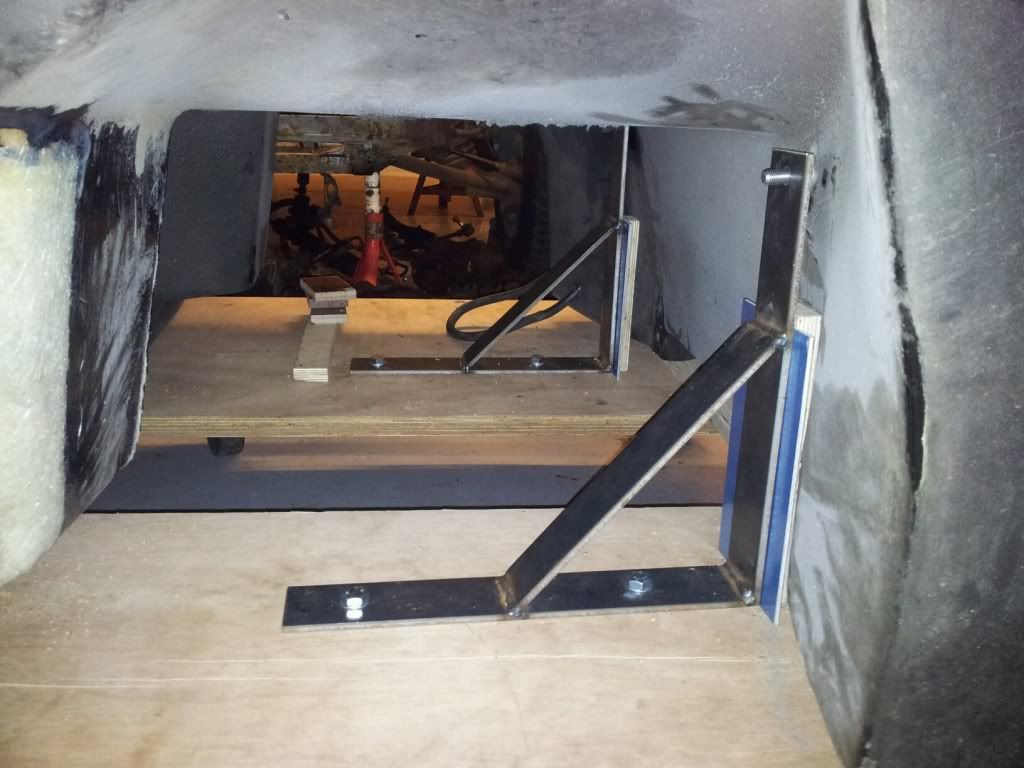
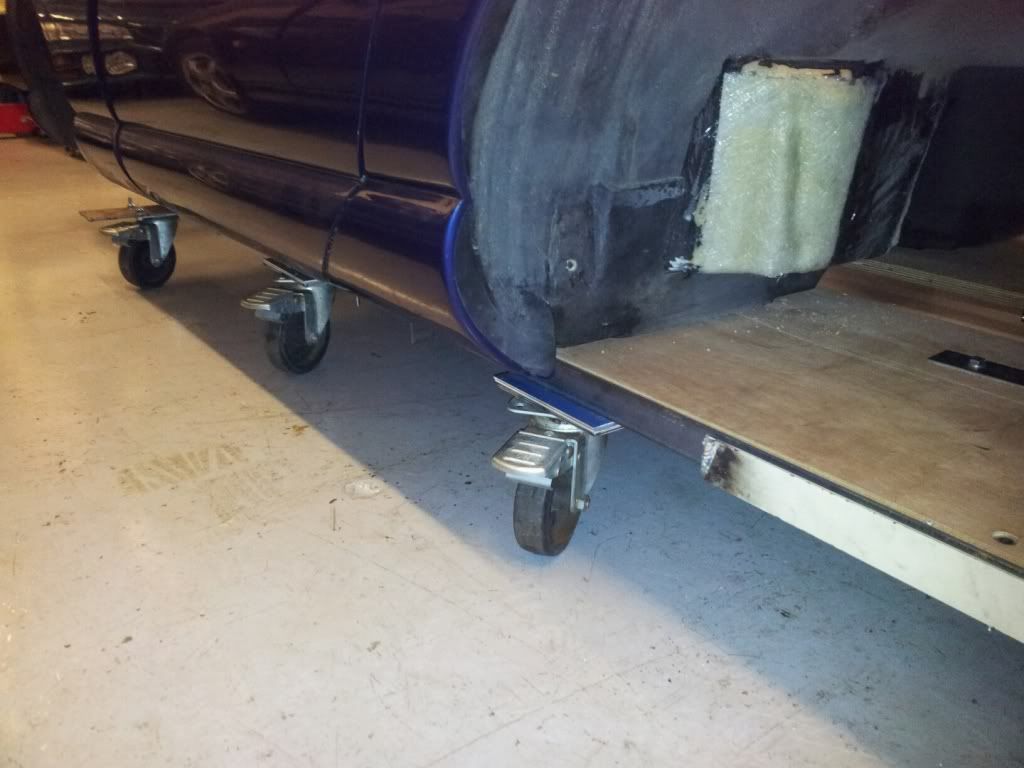
I have fitted 4 casters each side to stop and bowing and strenght to the trolley.
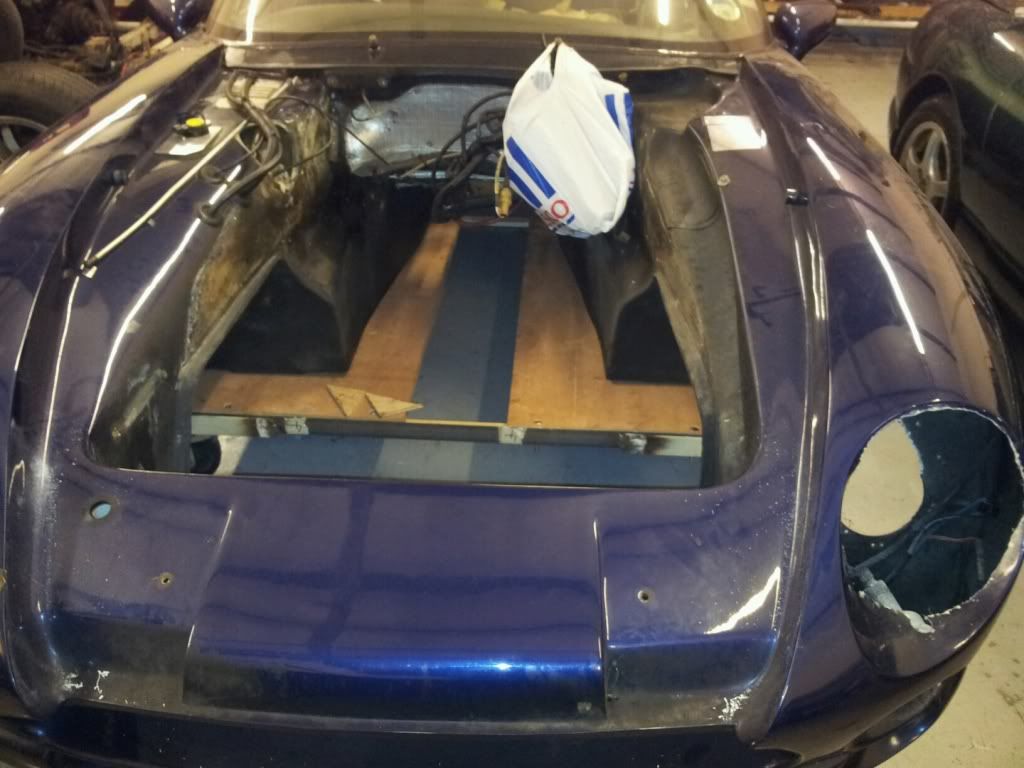
Using the seat mounting bolt holes and the outrigger holes the front of the car will be fixed to the ply, as you can see not taking any chances of body movement or cracking.
The trolley is taking shape nicely.
[IMG]http://i955.photobucket.com/albums/ae36/portzi/2012-01-24_192126_resized.jpg[/IMG
to support the body full I aquired some angle iron 8 caster wheels and some 1 inch ply form a friendly carpenter I know.
Using the bolt holes behind the fuel tank I was able to lock the end of the car to the ply with some steel brackets.
I have fitted 4 casters each side to stop and bowing and strenght to the trolley.
Using the seat mounting bolt holes and the outrigger holes the front of the car will be fixed to the ply, as you can see not taking any chances of body movement or cracking.
Dr Mike Oxgreen said:
I think it's a mistake to look only at the cost of the blasting and powder-coating - except if you're able to do all the disassembly and reassembly yourself, then it is indeed the only cost involved. But if, like me, all that work is beyond your time and skill, then you have no choice but to pay for the disassembly followed by the substantial reassembly, checking, adjusting and setting up. To get the chassis totally naked for blasting and coating requires substantial extra work beyond what you'd do just to replace the outriggers. The actual blasting and powder-coating is only a tiny proportion of the cost.
Yes Mike,the man hours involved in assembling a TVR back together, far outways the cost of blasting and powder coating.Edited by Dr Mike Oxgreen on Wednesday 25th January 07:53
Gassing Station | Chimaera | Top of Page | What's New | My Stuff