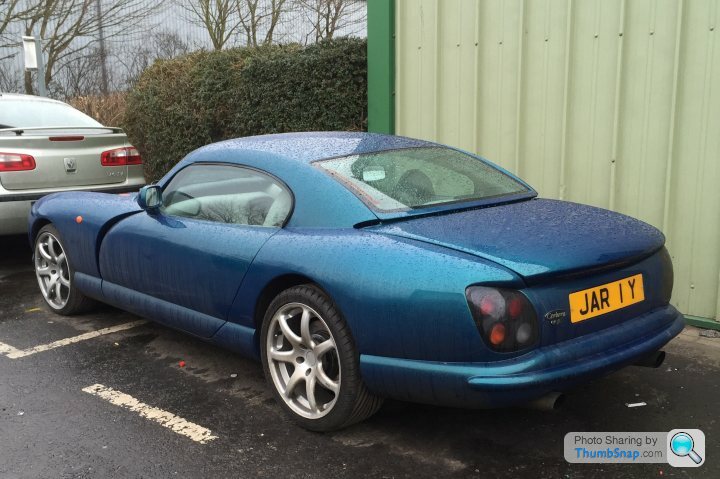
Undressing Kate, my Chim 430 resto.
Discussion


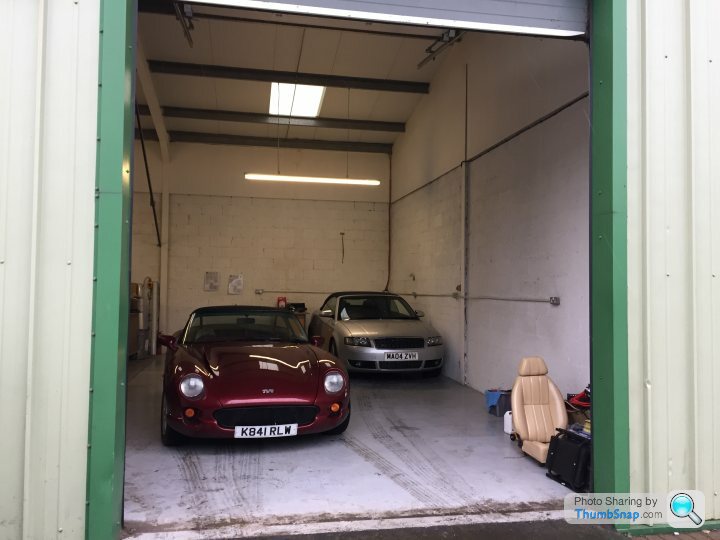
Well, I found a space and tucked her in for her transformation beside her V8 partner, Sophie the S4.
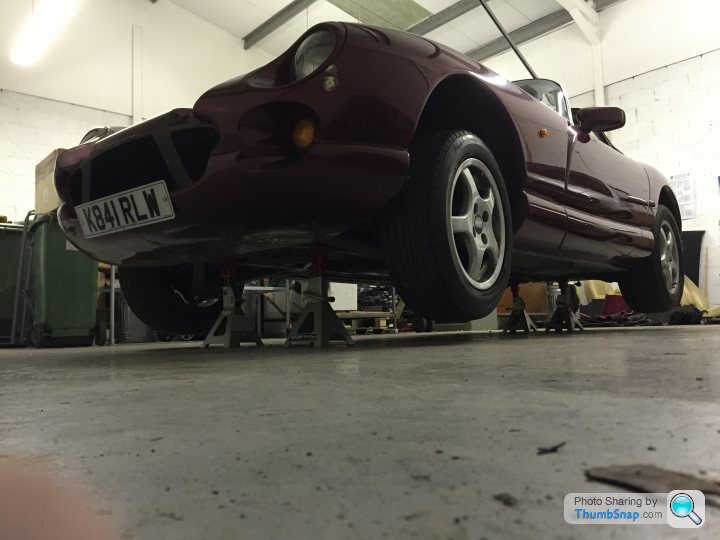
So it was time to start the full ground up, body off restoration.
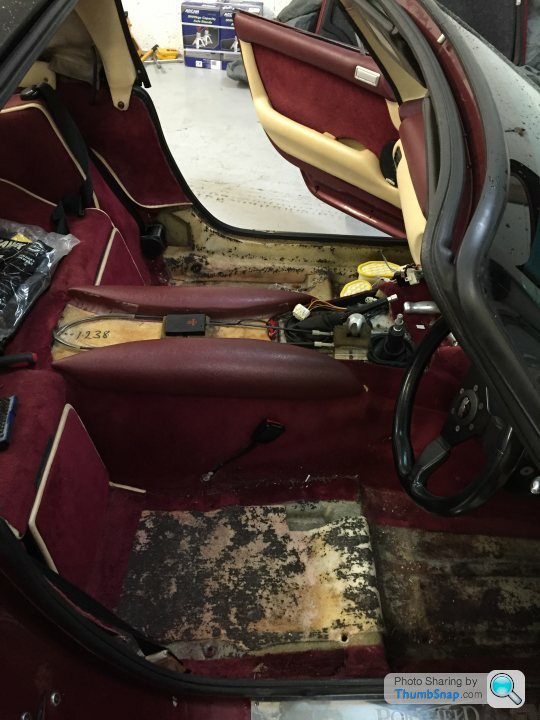
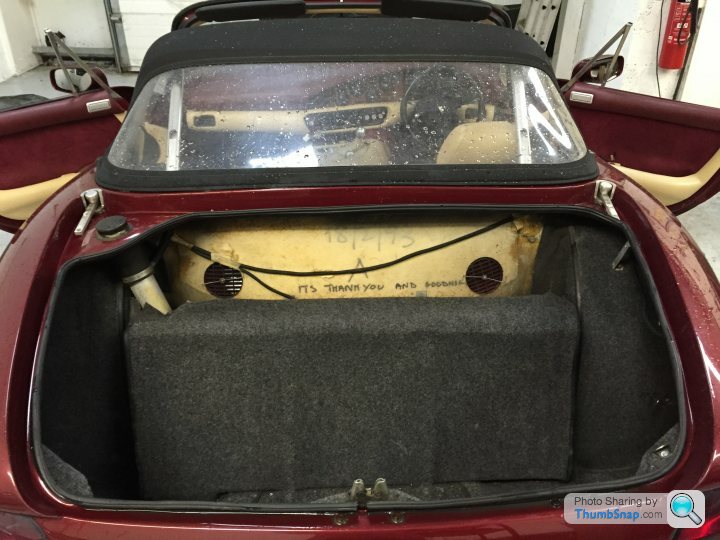
Interior strip first.
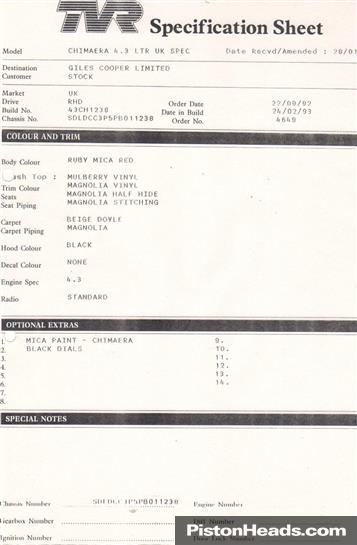
Where i found the build number,
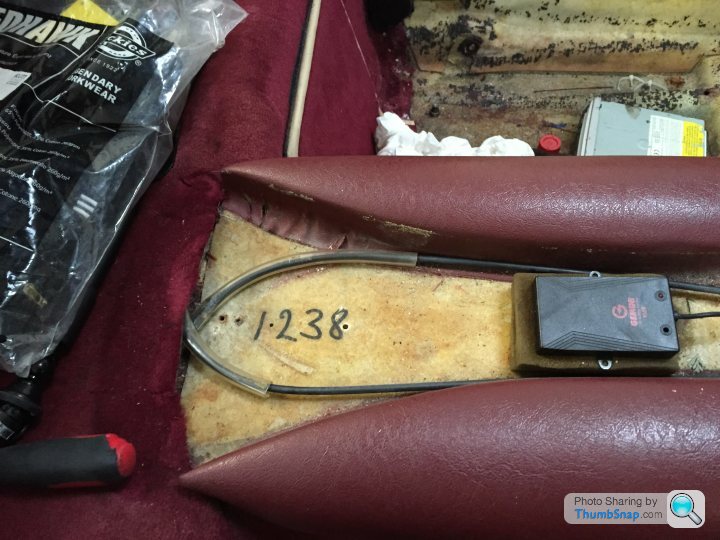
To match the build sheet i have,
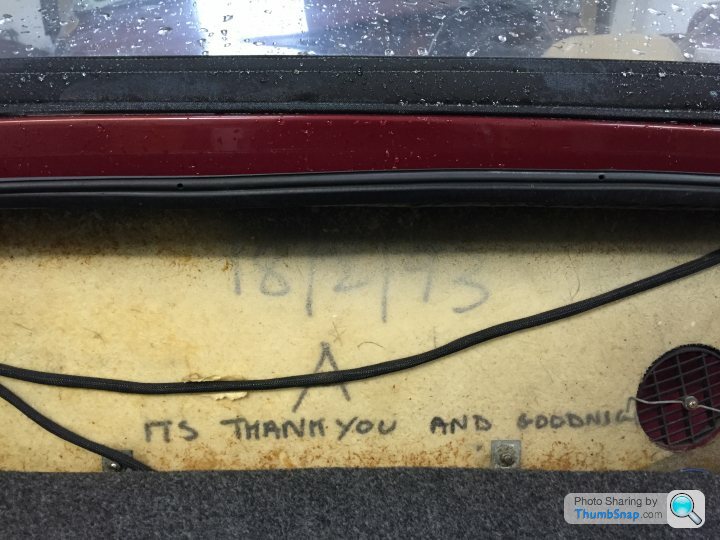
Boot lid came off to save weight when the lift begins and found a message from the guys in blackpool.
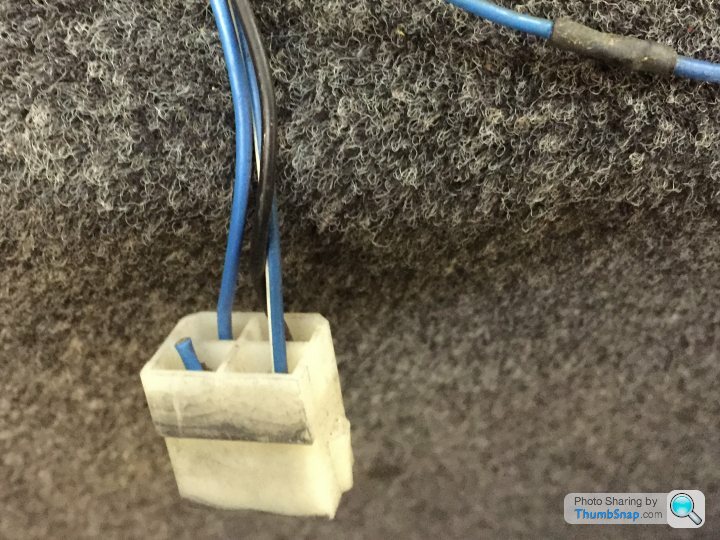
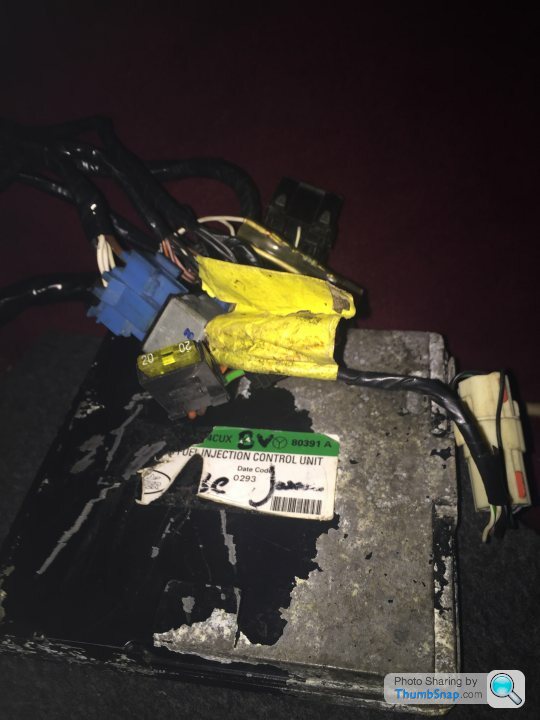
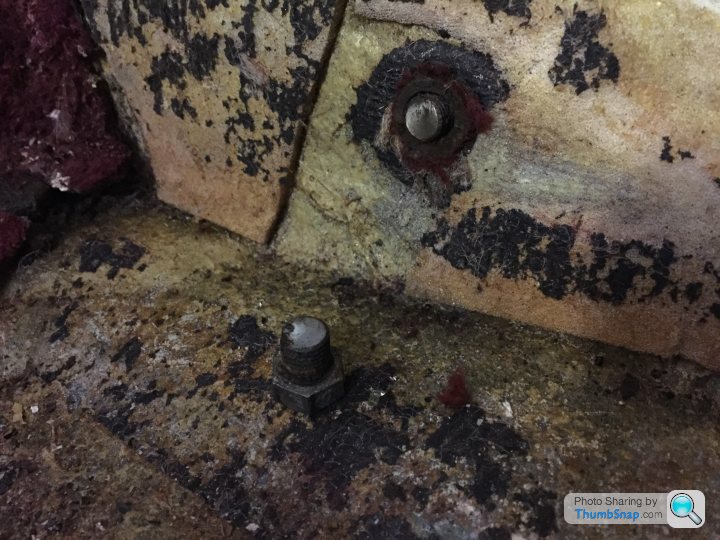
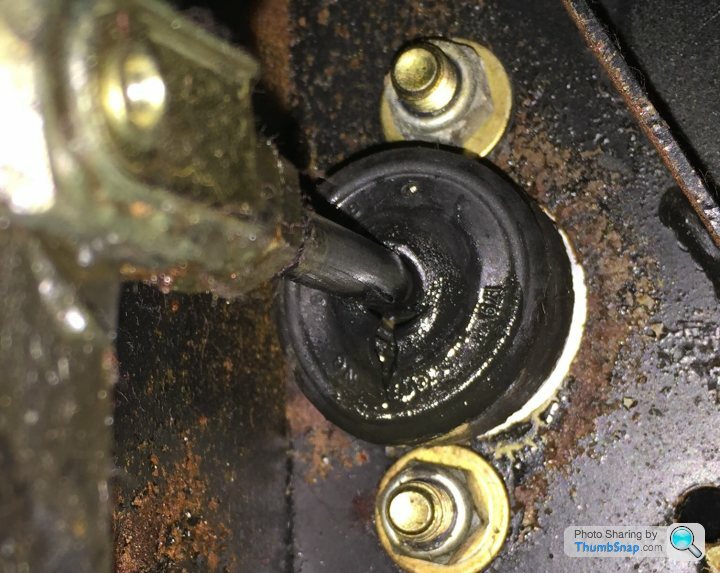
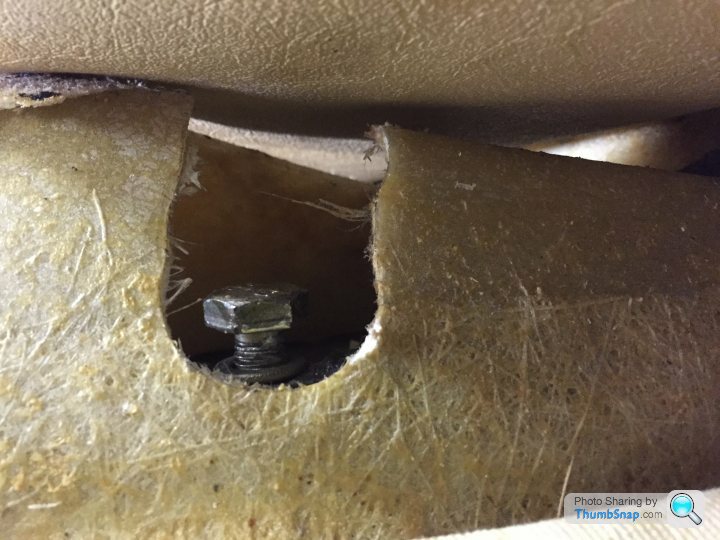
Also found this, is it normal ?
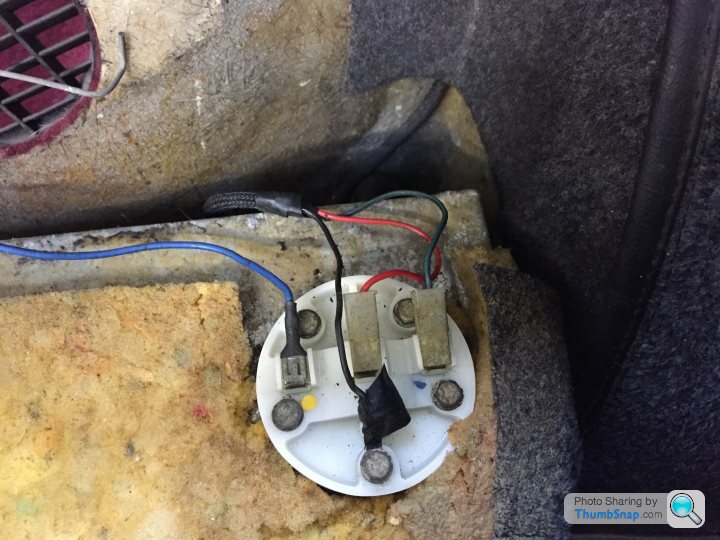
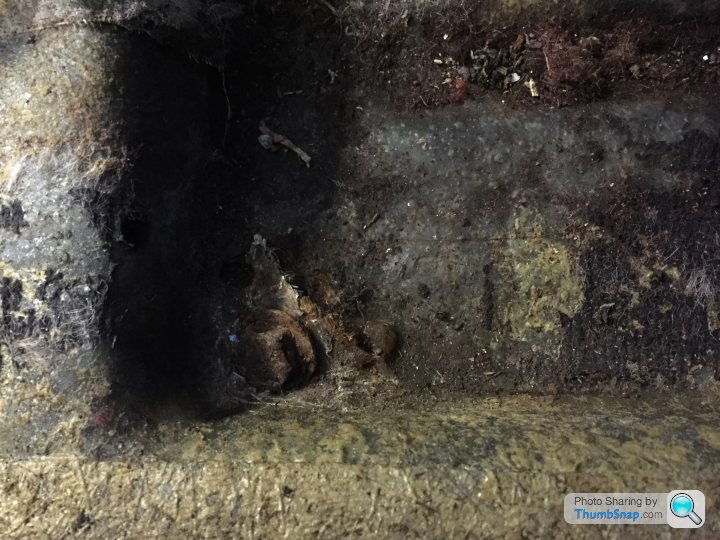
Spare plug, i've found them all over so far, but with one wire cut and jointed through to the fuel level sender.
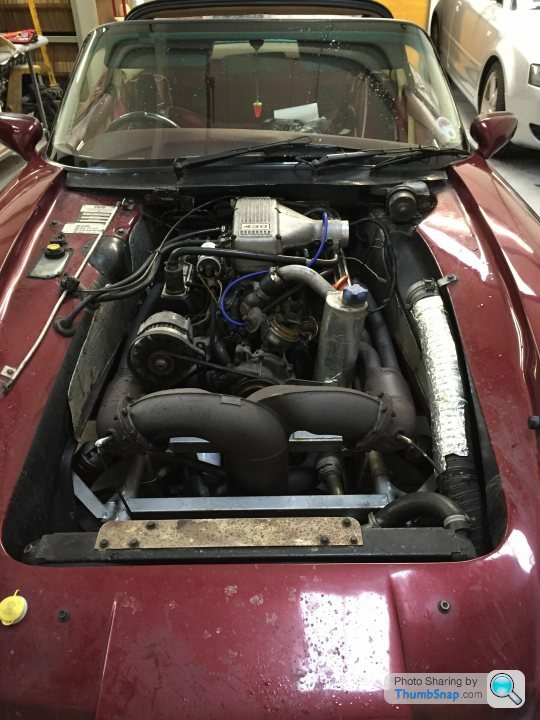
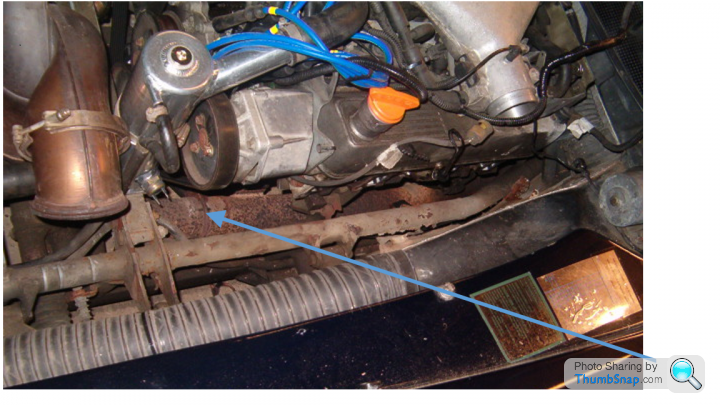
Anyway, on to the engine. Bonnet off to save weight and to ease access.
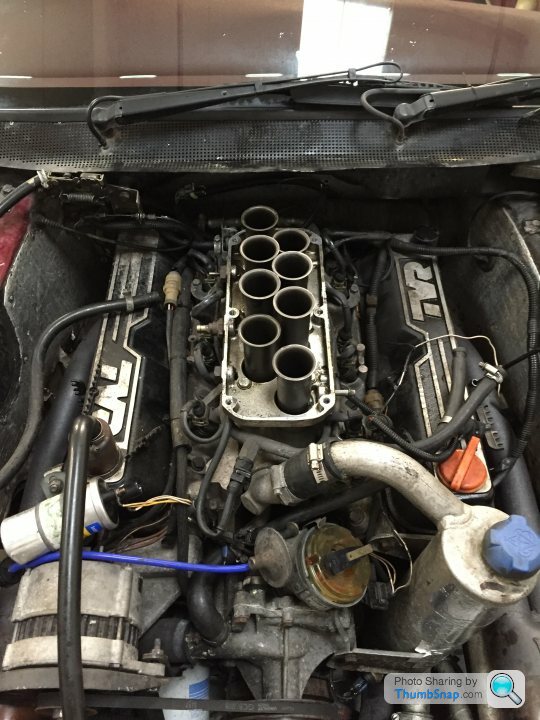
Plenum first.
Well thats all she wrote so far but i'm thinking i have to start somewhere.
Next it's jacked up, exhaust off and work my way back up the Y piece and then manifolds.
More pics coming to a thread near you soon.
A special thanks to Marcus1875 for the help so far, all hands welcome, i pay in fresh brewed coffee and cookies
So it was time to start the full ground up, body off restoration.
Interior strip first.
Where i found the build number,
To match the build sheet i have,
Boot lid came off to save weight when the lift begins and found a message from the guys in blackpool.
Also found this, is it normal ?
Spare plug, i've found them all over so far, but with one wire cut and jointed through to the fuel level sender.
Anyway, on to the engine. Bonnet off to save weight and to ease access.
Plenum first.
Well thats all she wrote so far but i'm thinking i have to start somewhere.
Next it's jacked up, exhaust off and work my way back up the Y piece and then manifolds.
More pics coming to a thread near you soon.
A special thanks to Marcus1875 for the help so far, all hands welcome, i pay in fresh brewed coffee and cookies
Edited by Cokes on Sunday 22 February 20:21
No, I don't think it's essential to remove it but I was going to do it to ease removal of the Y piece and then manifolds.
To be honest,this is the biggest car project I've ever taken on and I was following this guide http://autogasp.com/documents/TVRChimaeraBodyLiftC...
To be honest,this is the biggest car project I've ever taken on and I was following this guide http://autogasp.com/documents/TVRChimaeraBodyLiftC...
ZNSsupercars said:
Cokes said:
ZNSsupercars said:
What a nice car! Why choose the Chimaera not a cerbera?
In a word, convertible 
And before anyone corrects me, I know the Cerbera also came as a convertible. I should have added at my budget I was willing to spend on a car at this time.
Sounds like a plan Ged  and I was going to make a start tonight but after finding my trolley jack broken and not being able to access the main exhaust joint I went for cabin chassis bolts with mixed results.
Like how to hold a bolt still while lying under the car undoing the nut because my arms aren't long enough to do both.
Sheering the seat belt anchor bolt.
Or finding out that one of the bolts has taken a hit from underneath and pushed the outrigger plate up though the floor.
And to top it off, finding that my clutch master cylinder is leaking.
Tomorrows plan is firstly to go and buy a new trolly jack and then manifolds and Y piece are coming off.
and I was going to make a start tonight but after finding my trolley jack broken and not being able to access the main exhaust joint I went for cabin chassis bolts with mixed results.Like how to hold a bolt still while lying under the car undoing the nut because my arms aren't long enough to do both.
Sheering the seat belt anchor bolt.
Or finding out that one of the bolts has taken a hit from underneath and pushed the outrigger plate up though the floor.
And to top it off, finding that my clutch master cylinder is leaking.
Tomorrows plan is firstly to go and buy a new trolly jack and then manifolds and Y piece are coming off.
caduceus said:
Cokes said:
Like how to hold a bolt still while lying under the car undoing the nut because my arms aren't long enough to do both.
I used mole grips to hold the nut head steady in the car, whilst undoing from underneath.Twistygit said:
I don't think anyone answered your question about removing the exhaust, sorry if they did but I would say remove it as it makes it easier to get at the stuff up inside the tunnel, such as hand brake, speed sensor and a lot of cable ties.
As I not long ago took it all out to refurb my diff I should have thought of that 
Thanks Twisty

Edited by Cokes on Tuesday 24th February 05:51
Twistygit said:
I don't think anyone answered your question about removing the exhaust, sorry if they did but I would say remove it as it makes it easier to get at the stuff up inside the tunnel, such as hand brake, speed sensor and a lot of cable ties.
As I not long ago took it all out to refurb my diff I should have thought of that Thanks Twisty
Edited by Cokes on Tuesday 24th February 05:53
J400GED said:
Cokes said:
Sounds like a plan Ged and I was going to make a start tonight but after finding my trolley jack broken and not being able to access the main exhaust joint I went for cabin chassis bolts with mixed results.
I've got plenty of access and I was going to make a start tonight but after finding my trolley jack broken and not being able to access the main exhaust joint I went for cabin chassis bolts with mixed results.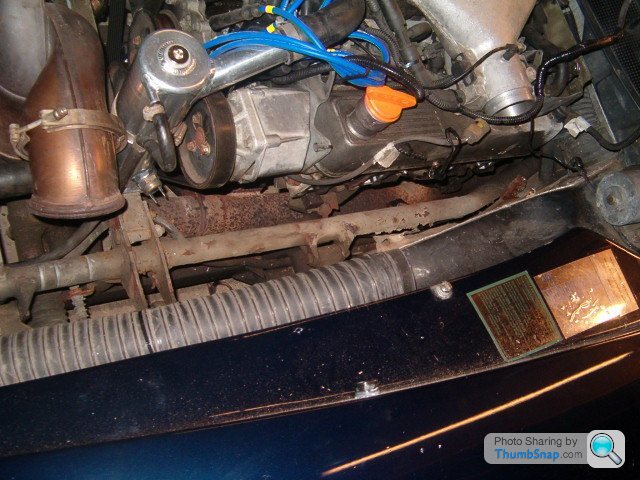
Best of luck mate. I'm just about to start my own thread.
 your manifold to Y are clamps, I've got about a dozen bolts on each.
Although I might be being thick here but I still don't see how you access the joint from Y to main exhaust ?
J400GED said:
Access is either down from the top or through the wheelarch. Another bonus is that the clamp is so rotten I can probably cut it with scissors!
I'm going to continue with cabin bolts tonight and time allowing I'll start the manifolds and I'll be able to see what you're seeing.

In tonights episode of what did he break this time
Nothing but there may be a possiblility i dislocated my middle finger 
Anyway, on with the show, no one whats to hear me moan.
Tonight was a productive and frustrating all at the same time. Managed a good 4 hours.
I started with the remaining chassis bolts in the cabin and then moved onto the manifolds and T piece.
First job was to get the car in the air.
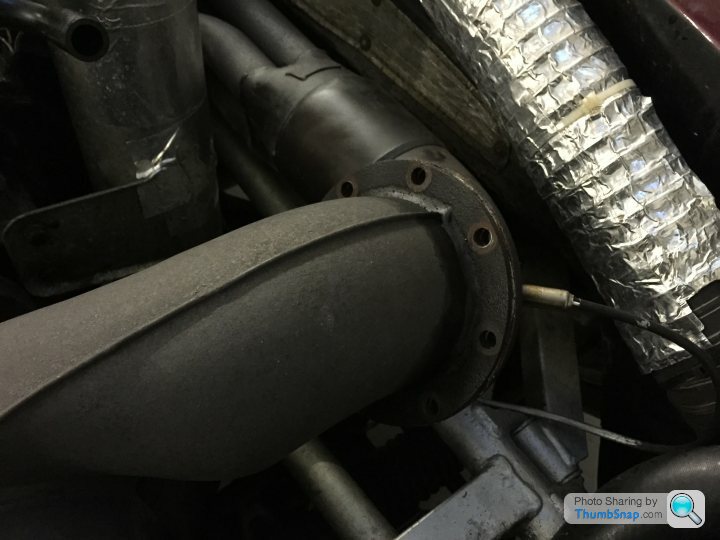
Next I undid the main exhaust joint and set about undoing all the manifold to Y bolts which to my great delight were easy to do.
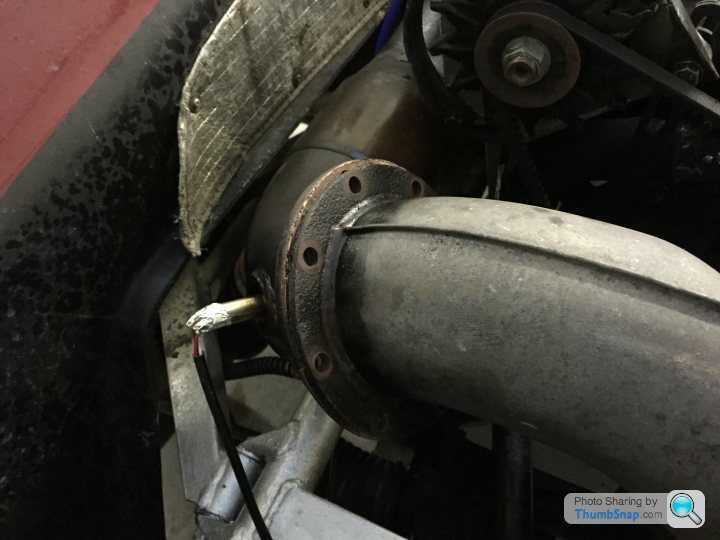
I then moved onto the manifolds which i also found were not siezed.
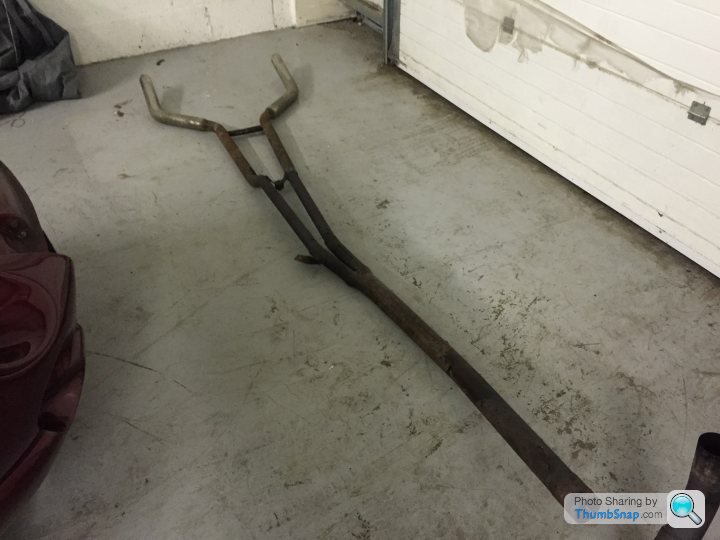
Although i tried Ged's method of leaving the main exhaust in place, i found my hands were too big to undo the bottom bolts. So i set about removing the main exhaust.
No silencer
It wasn't easy undoing the bottom bolts but i managed it in the end.
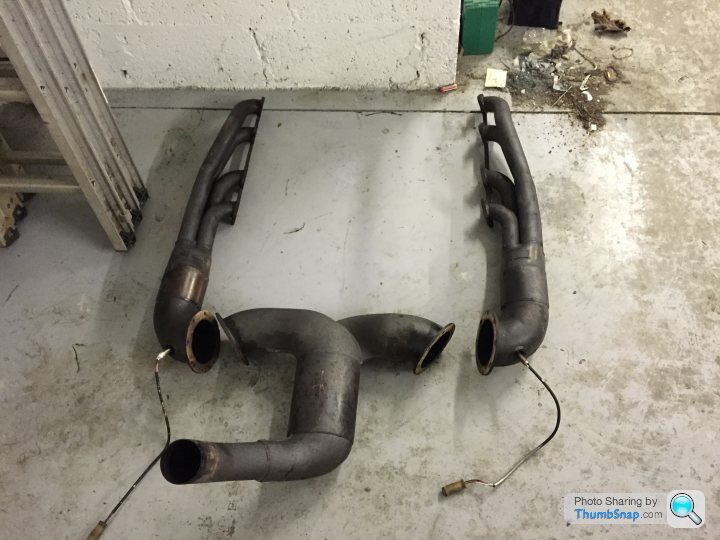
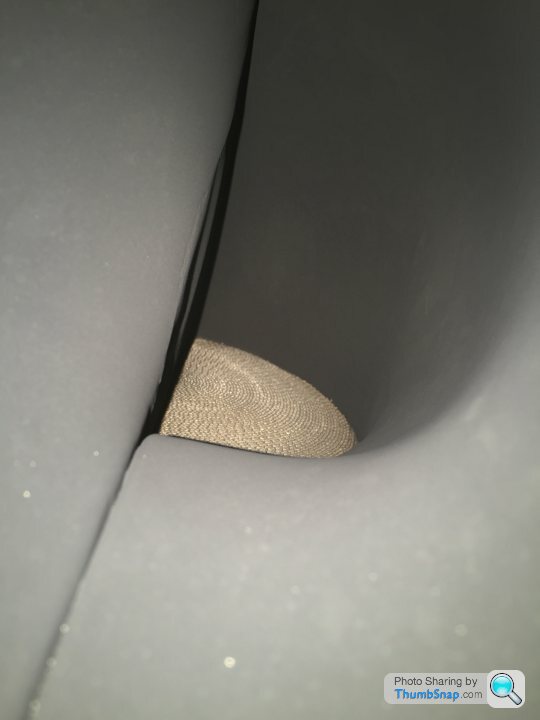
Once they were off i thought id have a wee peek to see if any of the cats were in place.
Left precat.
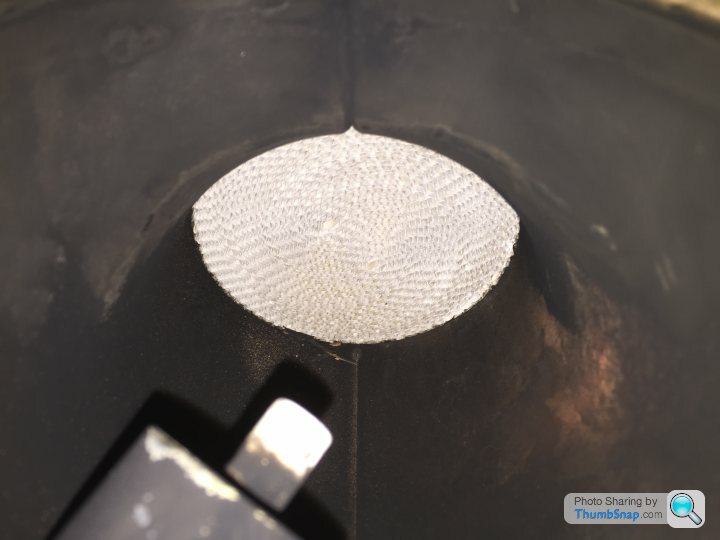
Right precat.
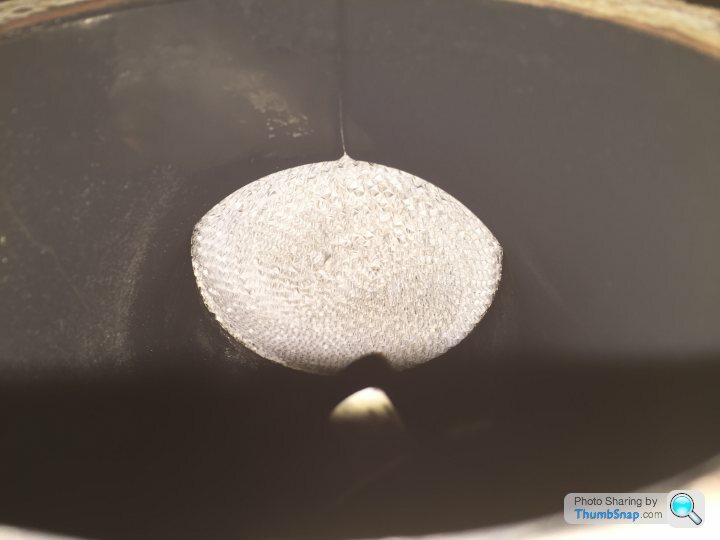
Main cat.
And finally my top tip for the day is, If you're going to be lying under your car working, buy a decent set of googles I'm not winking, its crap in my eye.
Nothing
but there may be a possiblility i dislocated my middle finger Anyway, on with the show, no one whats to hear me moan.
Tonight was a productive and frustrating all at the same time. Managed a good 4 hours.
I started with the remaining chassis bolts in the cabin and then moved onto the manifolds and T piece.
First job was to get the car in the air.
Next I undid the main exhaust joint and set about undoing all the manifold to Y bolts which to my great delight were easy to do.
I then moved onto the manifolds which i also found were not siezed.
Although i tried Ged's method of leaving the main exhaust in place, i found my hands were too big to undo the bottom bolts. So i set about removing the main exhaust.
No silencer
It wasn't easy undoing the bottom bolts but i managed it in the end.
Once they were off i thought id have a wee peek to see if any of the cats were in place.
Left precat.
Right precat.
Main cat.
And finally my top tip for the day is, If you're going to be lying under your car working, buy a decent set of googles
I'm not winking, its crap in my eye.I forgot to take pictures, I'll do it tonight.
Basically there is an access hole in the side of the fibreglass moulding that I used a ratchet spanner on. To start with I was only getting 1 maybe 2 clicks at a time but got better the further out the bolt came because of the shape of the hole.
Basically there is an access hole in the side of the fibreglass moulding that I used a ratchet spanner on. To start with I was only getting 1 maybe 2 clicks at a time but got better the further out the bolt came because of the shape of the hole.
Turned up to the garage tonight and thought I had a visitor.
Anyone know this Cerbera ?
Turns out there is a guy called Peter next door that is a "TVR guy" or that's what my other neighbour has told me.
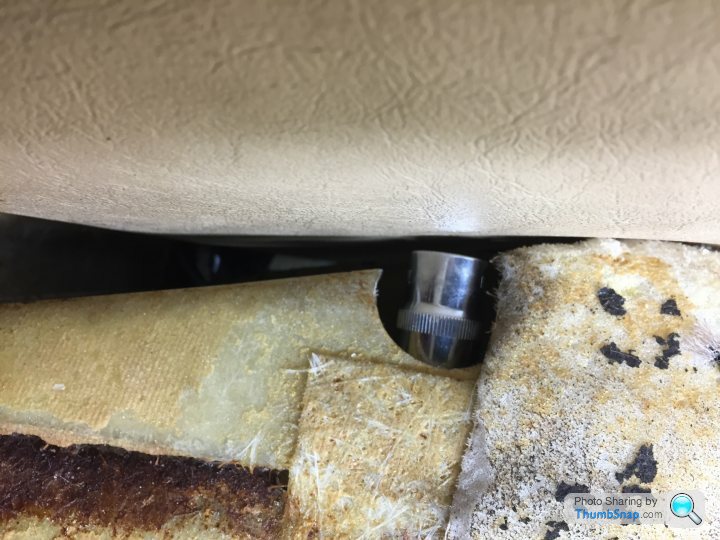
Anyway, the pictures I promised Ged. 17mm spanner/socket on both sides.
Drivers side done with a ratchet spanner. Slow going to start with but gets there.
And passenger side. Hole is smaller so no chance of getting a spanner on it.
Socket and a pair of pump pliers did the job.

Hope this helps
Oh I also drained the coolant system and removed the radiator. 2 bolts holding it in place looked good on the radiator side but rotten in the nose but got there in the end. Will send it away to be re-cored.
Well that's me until Sunday when I hope to get a few hours in but family might have other plans for me.
Anyone know this Cerbera ?
Turns out there is a guy called Peter next door that is a "TVR guy" or that's what my other neighbour has told me.
Anyway, the pictures I promised Ged. 17mm spanner/socket on both sides.
Drivers side done with a ratchet spanner. Slow going to start with but gets there.
And passenger side. Hole is smaller so no chance of getting a spanner on it.
Socket and a pair of pump pliers did the job.
Hope this helps
Oh I also drained the coolant system and removed the radiator. 2 bolts holding it in place looked good on the radiator side but rotten in the nose but got there in the end. Will send it away to be re-cored.
Well that's me until Sunday when I hope to get a few hours in but family might have other plans for me.
Gassing Station | Chimaera | Top of Page | What's New | My Stuff