J400 GED Chimaera Chassis refurb
Discussion


It's all my Wife's fault for buying me a borescope for Christmas!
I decided to use it to inspect the outriggers on the Chimaera and found some not so good bits!
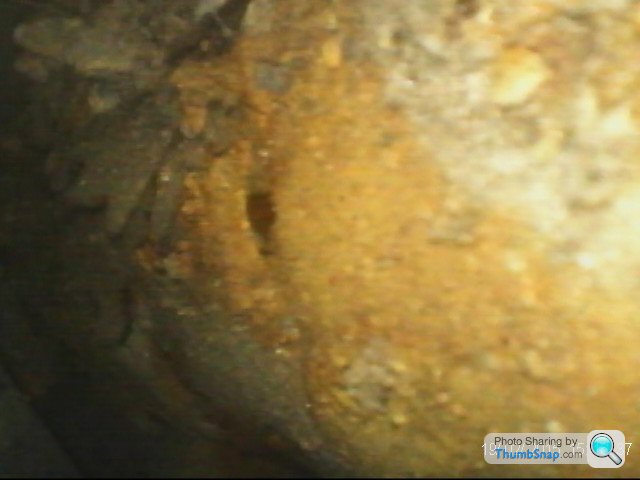
a hole in the offside outrigger between the seatbelt mount and rear corner
Left hand side rear quarter of the outrigger.
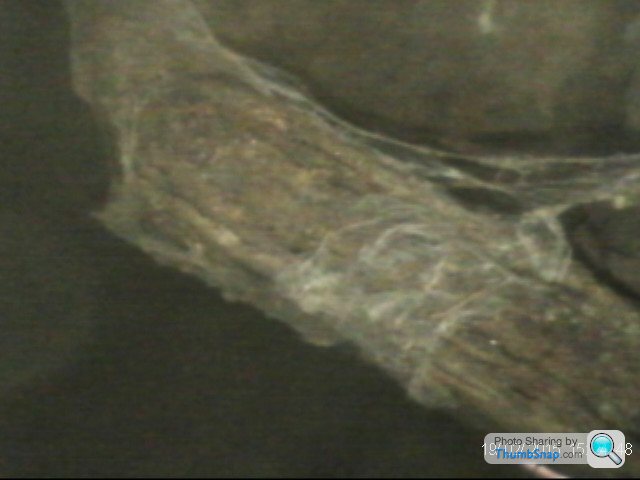
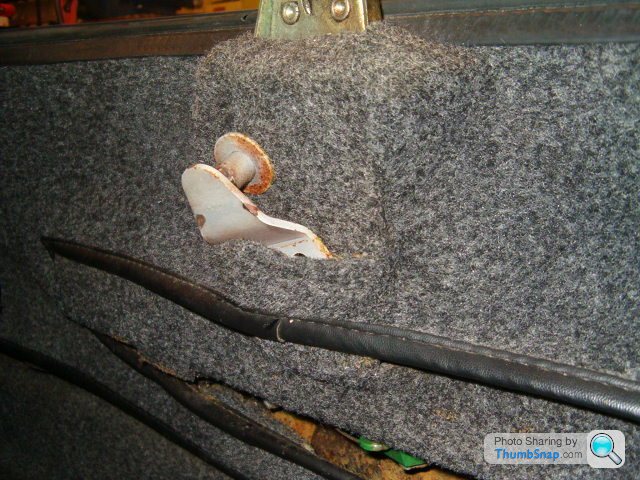
I also found that the off side seat belt bracket in the rear wheel arch is delaminating (falling apart)
Having seen these, I decided to take the body off and refurbish the chassis.
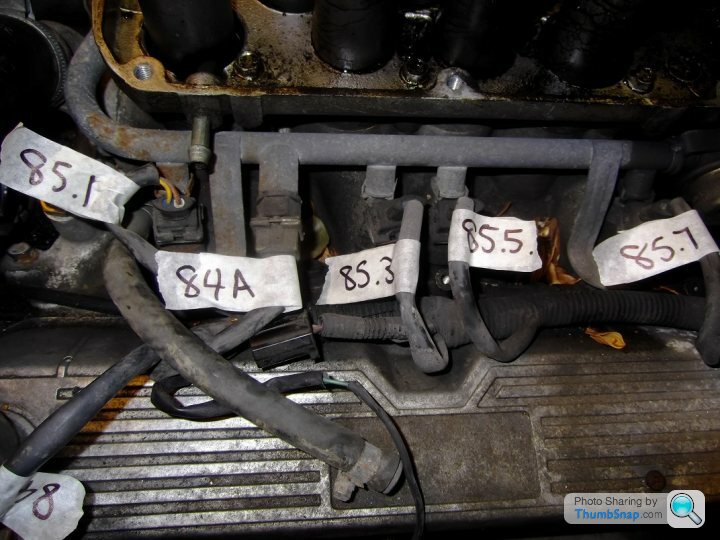
I am noting everything and labelling everything as I go, so that refitting should be the reverse of removal and I will know how everything goes back together
My target is to be finished in time for my annual RAF reunion in October
So, some pics:
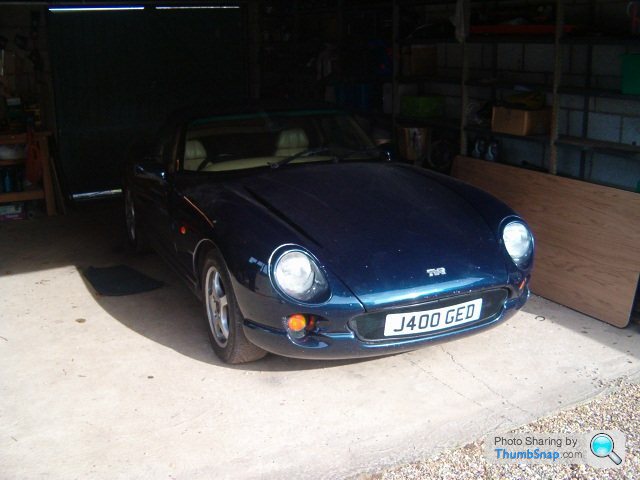
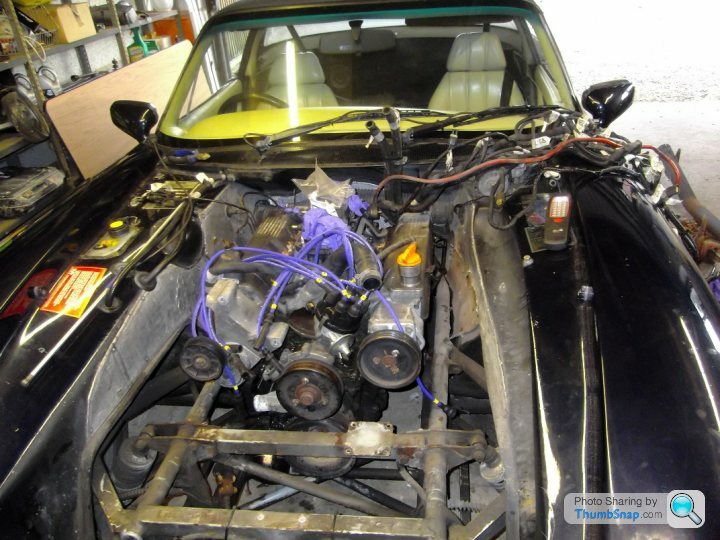
Last one before I start the strip.
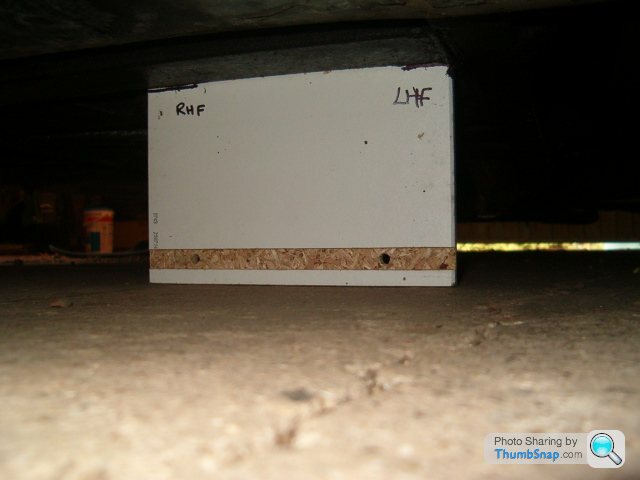
Ride heights from main rails to the floor were measured at each corner. This will allow me to set the ride height prior to body fit and torque the suspension bolts and set the toe.
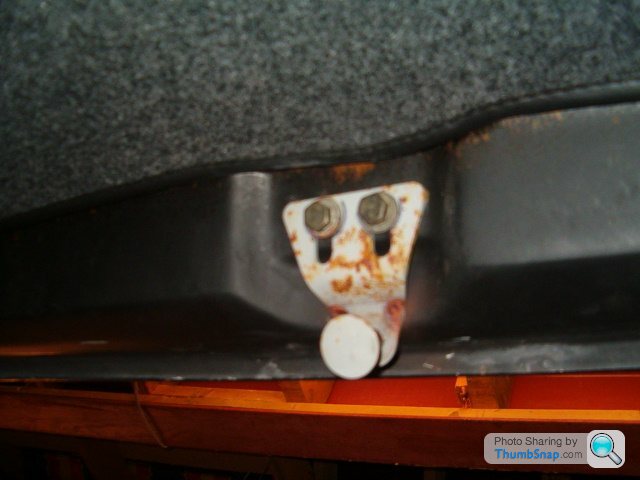
boot striker position was marked prior to removal - I am leaving the boot lid in place (don't want to be locked out of the boot with the battery disconnected)
Then tucked it away for safe keeping.
Windows were lowered and then, having disabled the alarm siren - I knew it was working because the first time I disconnected the battery it nearly deafened me! - I then disconnected the battery (-ve first off and last on) and ditched the Accumate wiring - I use the cigar lighter for the trickle charger.
Next was to mark the bonnet hinge positions and remove the bonnet for access.
LH hinge marked
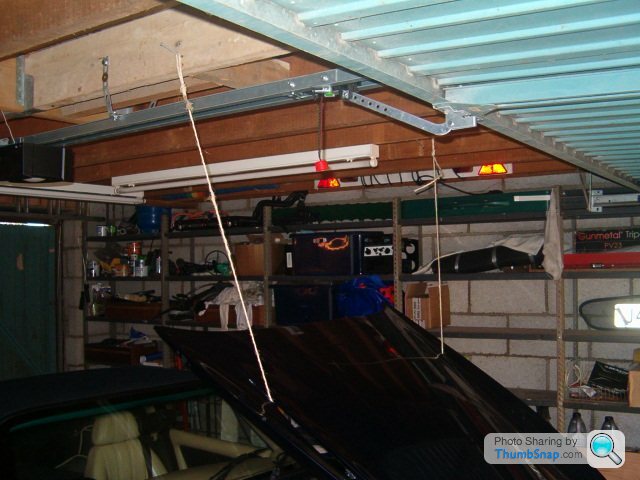
Bonnet held up with string.
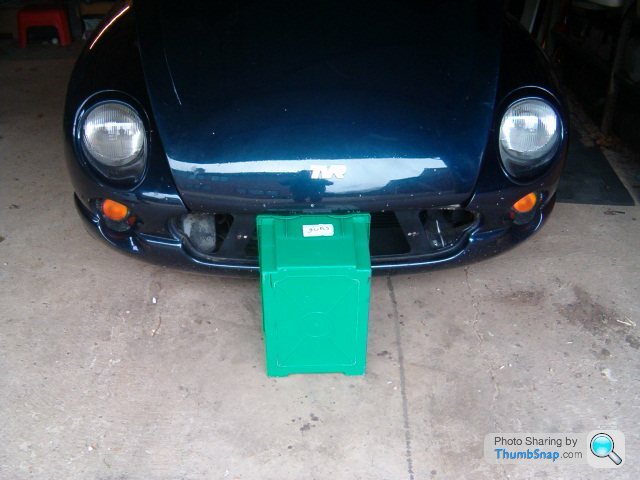
Tub under the front, just in case it slips.
I undid the lower hinge bolts first as these were the most difficult to access, then the upper bolts.
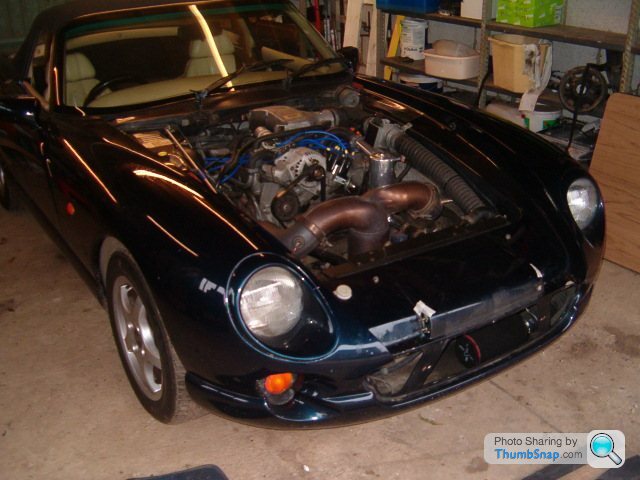
Bonnet removed and stored out of the way.
Next step was the induction system:
Unfortunately, it was at this point that my camera started playing up. I didn't realise this until I had finished for the day and tried to download my step by step photo record.
Fortunately, as I mentioned above, I am keeping a step by step strip and build log.
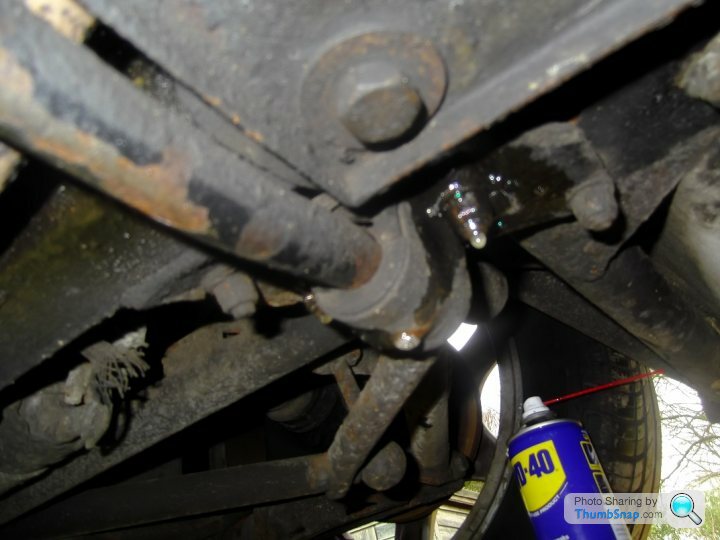
AFM and ducting out of the way, it was time to move on to the LH exhaust manifold. With the HT leads disconnected and the shrouds removed, the access was as good as it was going to get and fortunately the none of the bolts were seized in and, although a bit fiddly, got all the bolts out fairly easily.
Top tip: tie a piece of string round any spanner or socket that you use in a tight area as you are bound to drop it at some point!
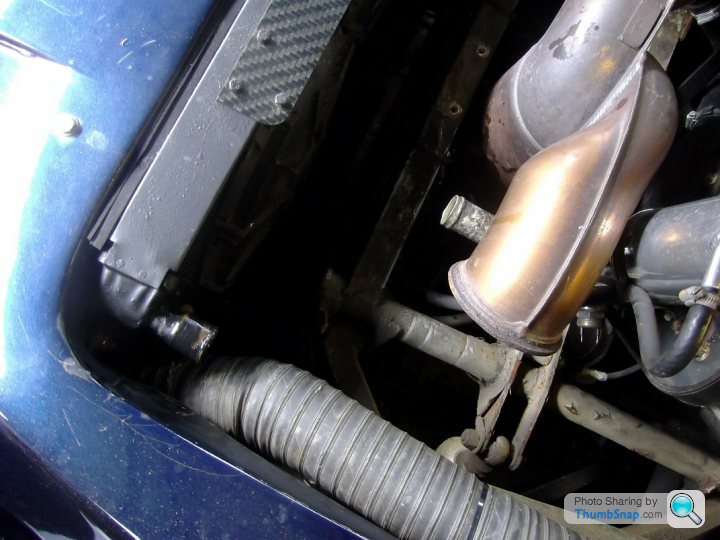
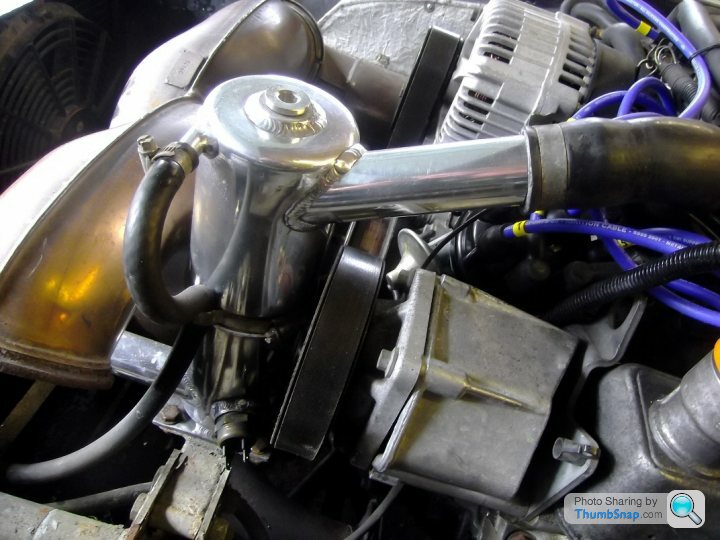
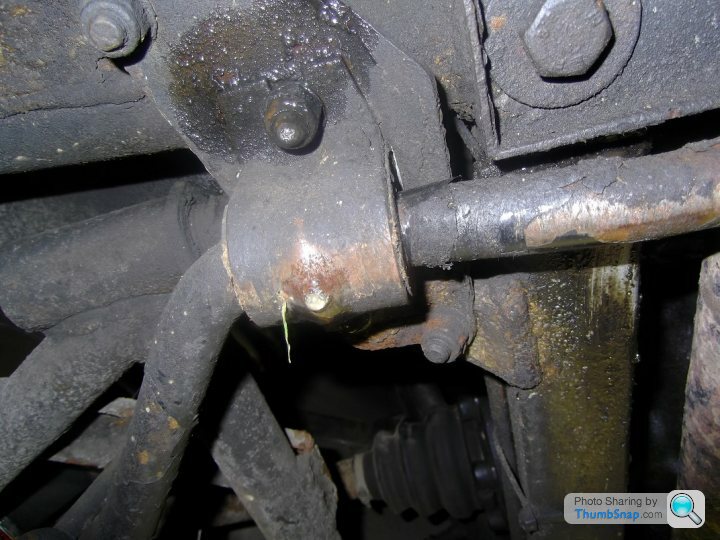
LH manifold removed, giving excellent access to the front exhaust joint to y-piece.
I am intending to remove the y-piece and RH manifold leaving the main part of the exhaust on the car until the body is off - unless it is absolutely necessary to remove it.
That's it until Friday as I am working away during the week. I have left my teenage daughter the task of soaking the exhaust joint every night with WD-40.
Like that's going to happen!
I decided to use it to inspect the outriggers on the Chimaera and found some not so good bits!
a hole in the offside outrigger between the seatbelt mount and rear corner
Left hand side rear quarter of the outrigger.
I also found that the off side seat belt bracket in the rear wheel arch is delaminating (falling apart)
Having seen these, I decided to take the body off and refurbish the chassis.
I am noting everything and labelling everything as I go, so that refitting should be the reverse of removal and I will know how everything goes back together
My target is to be finished in time for my annual RAF reunion in October
So, some pics:
Last one before I start the strip.
Ride heights from main rails to the floor were measured at each corner. This will allow me to set the ride height prior to body fit and torque the suspension bolts and set the toe.
boot striker position was marked prior to removal - I am leaving the boot lid in place (don't want to be locked out of the boot with the battery disconnected)
Then tucked it away for safe keeping.
Windows were lowered and then, having disabled the alarm siren - I knew it was working because the first time I disconnected the battery it nearly deafened me!
- I then disconnected the battery (-ve first off and last on) and ditched the Accumate wiring - I use the cigar lighter for the trickle charger.Next was to mark the bonnet hinge positions and remove the bonnet for access.
LH hinge marked
Bonnet held up with string.
Tub under the front, just in case it slips.
I undid the lower hinge bolts first as these were the most difficult to access, then the upper bolts.
Bonnet removed and stored out of the way.
Next step was the induction system:
Unfortunately, it was at this point that my camera started playing up. I didn't realise this until I had finished for the day and tried to download my step by step photo record.
Fortunately, as I mentioned above, I am keeping a step by step strip and build log.
AFM and ducting out of the way, it was time to move on to the LH exhaust manifold. With the HT leads disconnected and the shrouds removed, the access was as good as it was going to get and fortunately the none of the bolts were seized in and, although a bit fiddly, got all the bolts out fairly easily.
Top tip: tie a piece of string round any spanner or socket that you use in a tight area as you are bound to drop it at some point!
LH manifold removed, giving excellent access to the front exhaust joint to y-piece.
I am intending to remove the y-piece and RH manifold leaving the main part of the exhaust on the car until the body is off - unless it is absolutely necessary to remove it.
That's it until Friday as I am working away during the week. I have left my teenage daughter the task of soaking the exhaust joint every night with WD-40.
Like that's going to happen!


phazed said:
You need to set dedicated times if at all possible.
When I built a kit car I set aside every Saturday, (at least 12 hours) and 2 evenings a week. That worked well and with an understanding wife and 3 children at the time and the car was built from scratch in 6 months.
You will find that it takes forever if you snatch a few hours here and there.
Good informative thread, good luck with the job!
At present I work away from home Monday to Thursday, When I built a kit car I set aside every Saturday, (at least 12 hours) and 2 evenings a week. That worked well and with an understanding wife and 3 children at the time and the car was built from scratch in 6 months.
You will find that it takes forever if you snatch a few hours here and there.
Good informative thread, good luck with the job!
 the daughter is at school on a Friday out on a Saturday and the Wife works Friday and Saturday, so the intention is to get at least 16 hours a week each week over Friday to Sunday.
 Project wise, the bonus to working away Monday to Thursday is that I can assimilate what I have done, sort out shopping lists etc., work out any mods prior to rebuild - currently I have a mod for the Otter switch and Fan over-ride loom - and plan what to do on the next weekend, including whether to steam ahead with the strip and then do the mods later, or do the mods as I go along - basic Project Planning and Management.
Also, by being away I can't work on the car and as every one knows, absence makes the heart grow fonder.
Right, today's update:
After speaking with Engineer1949 for an hour or two this morning, that's the chassis painting/repairs sorted - only 25 mins from home as well - result!
Anyway, here's today's efforts:
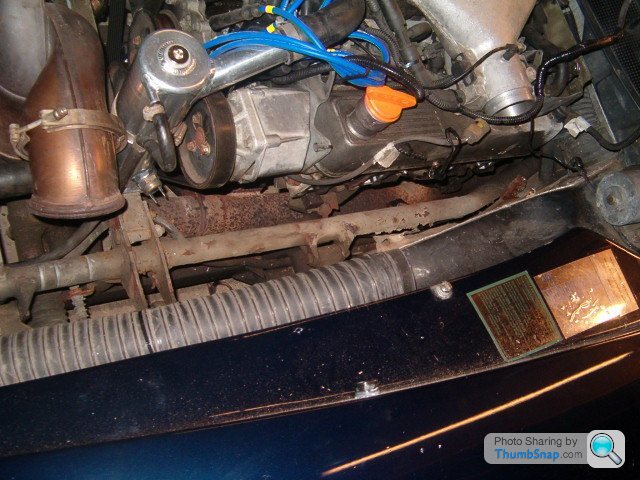
First up was drain the cooling system and strip out all the hoses from the top of the block through the rad back to the water pump.
took off the Header and expansion tanks and the rad - all M8 fixings
sorry, I removed the y-piece before the radiator, this aided rad removal by allowing it to tip a lot further backwards when lifting it out.
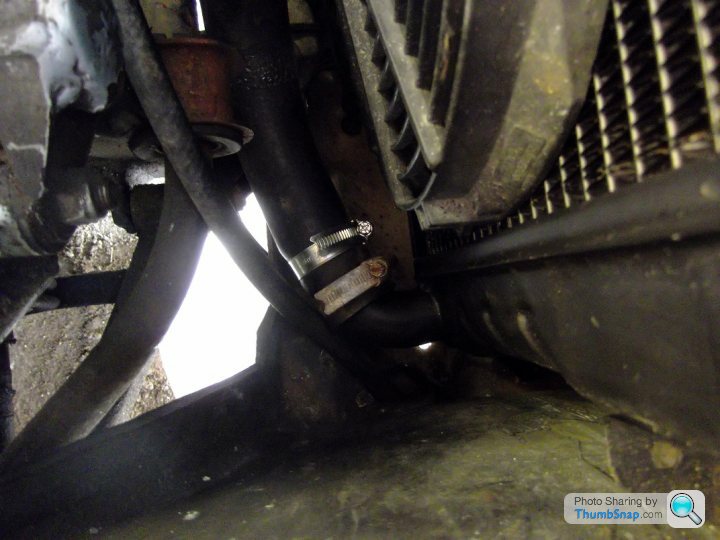
Once the rad was out I cut the carbon canister hose below the right hand y-piece clamp - this will be re-connected using a straight connector on rebuild.
Then came the RH O2 sensor, the carbon hose to manifold and the brake servo to manifold connections.
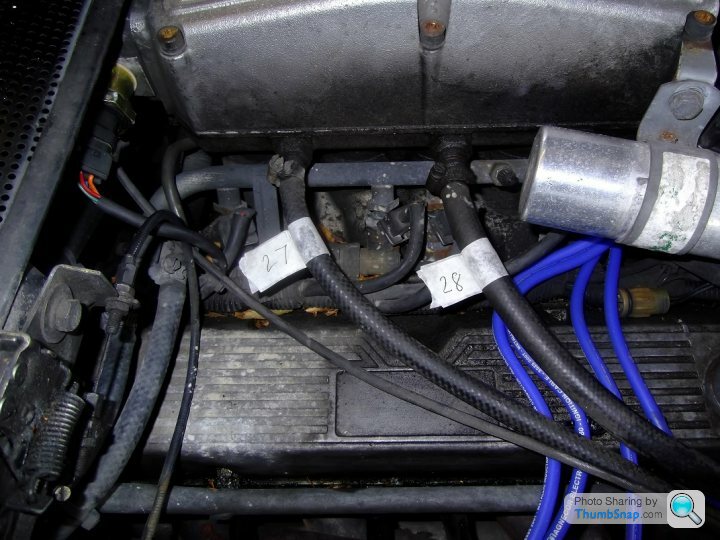
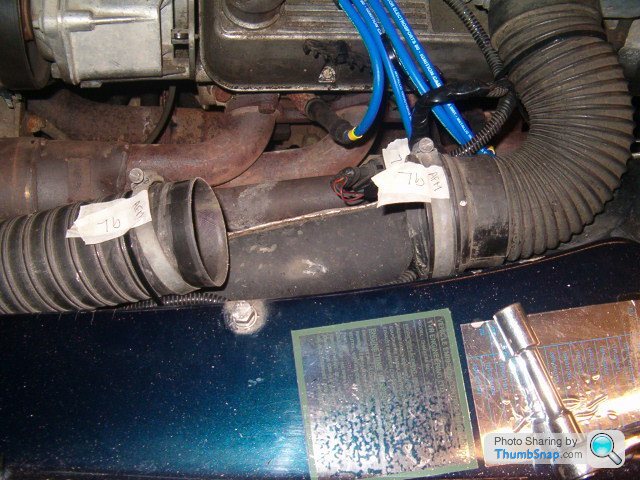
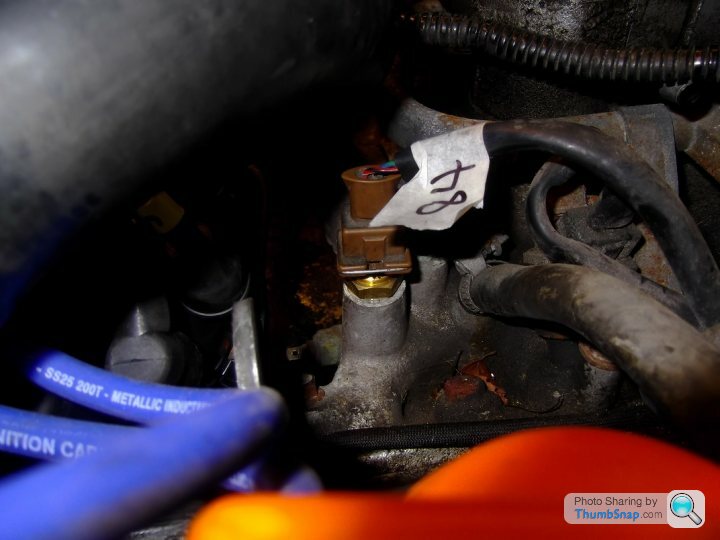
Next up were the right hand HT leads and shrouds, the bonnet catch and the heater pipes on the right hand side of the engine - this was to allow access to the manifold bolts. to gain access to the top heater hoses I had to disconnect the fuel feed and return hoses - sealed with fingers from latex gloves and plastic bungs.
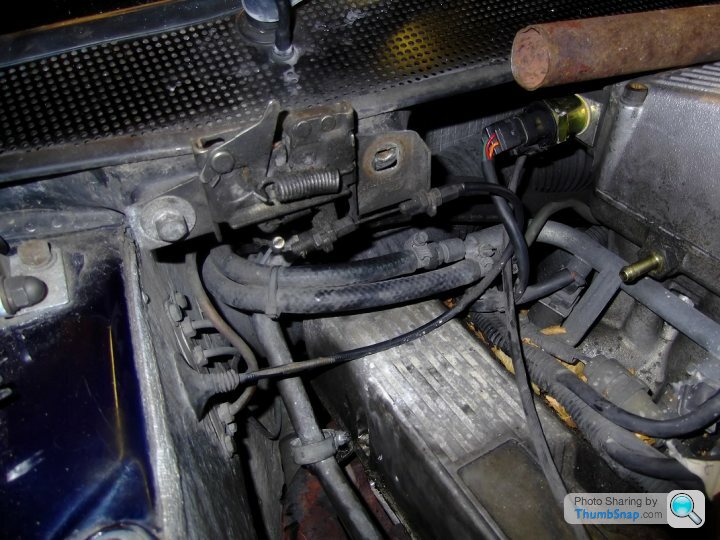
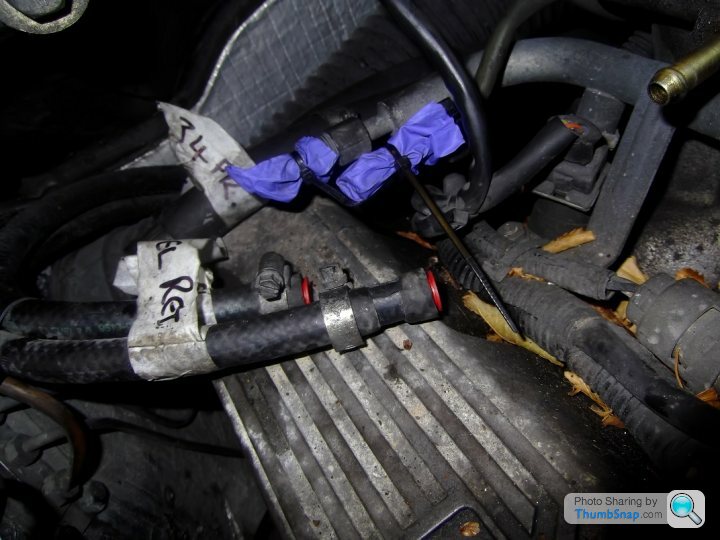
Number 34 in the above pic if the front one of the two heater hoses.
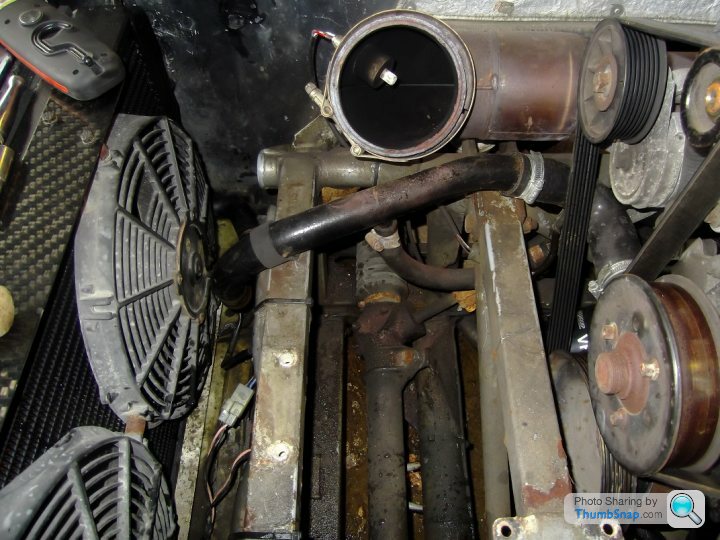
After all that was done, it was a simple case of removing the right hand manifold bolts and sliding out the manifold.
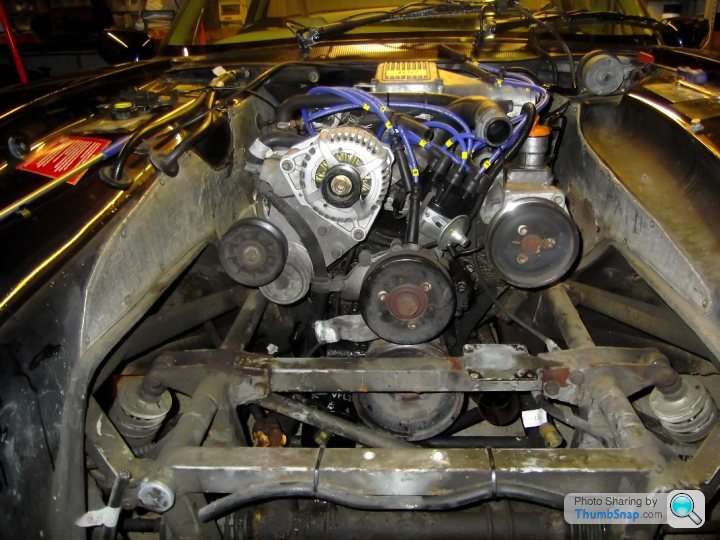
Today's top tip came from Engineer1949: #4 cylinder lower manifold bolt can be a right b ard to get out and John's suggestion was to remove all the other manifold bolts and then wiggle the manifold which could then basically destroy what's left of the gasket and allow the bolt to crack off. Before John gave me this tip I had already packed up for the night ready to have another crack at this bolt in the morning, but as you can see I now have both manifolds off.
Cheers John
So far I haven't been under the car or had to jack it up.
Jobs for tomorrow are:
Remove rear anti-roll bar
Remove Exhaust
Remove Speed sensor
Slacken off handbrake
Disconnect reverse light switch and hand brake switch
Disconnect the fuel hose from tank to pump - and obviously drain the fuel tank.
Disconnect the front end lower electrics and engine loom.
Not sure I'll get them all done but will report back tomorrow evening.
After speaking with Engineer1949 for an hour or two this morning, that's the chassis painting/repairs sorted - only 25 mins from home as well - result!
Anyway, here's today's efforts:
First up was drain the cooling system and strip out all the hoses from the top of the block through the rad back to the water pump.
took off the Header and expansion tanks and the rad - all M8 fixings
sorry, I removed the y-piece before the radiator, this aided rad removal by allowing it to tip a lot further backwards when lifting it out.
Once the rad was out I cut the carbon canister hose below the right hand y-piece clamp - this will be re-connected using a straight connector on rebuild.
Then came the RH O2 sensor, the carbon hose to manifold and the brake servo to manifold connections.
Next up were the right hand HT leads and shrouds, the bonnet catch and the heater pipes on the right hand side of the engine - this was to allow access to the manifold bolts. to gain access to the top heater hoses I had to disconnect the fuel feed and return hoses - sealed with fingers from latex gloves and plastic bungs.
Number 34 in the above pic if the front one of the two heater hoses.
After all that was done, it was a simple case of removing the right hand manifold bolts and sliding out the manifold.
Today's top tip came from Engineer1949: #4 cylinder lower manifold bolt can be a right b
ard to get out and John's suggestion was to remove all the other manifold bolts and then wiggle the manifold which could then basically destroy what's left of the gasket and allow the bolt to crack off. Before John gave me this tip I had already packed up for the night ready to have another crack at this bolt in the morning, but as you can see I now have both manifolds off. Cheers John
So far I haven't been under the car or had to jack it up.
Jobs for tomorrow are:
Remove rear anti-roll bar
Remove Exhaust
Remove Speed sensor
Slacken off handbrake
Disconnect reverse light switch and hand brake switch
Disconnect the fuel hose from tank to pump - and obviously drain the fuel tank.
Disconnect the front end lower electrics and engine loom.
Not sure I'll get them all done but will report back tomorrow evening.
Edited by J400GED on Friday 27th February 23:30
caduceus said:
Good progress so far Ged 
Re draining the fuel tank - I don't mean to teach you how to suck eggs, but make sure you have more than enough containers to catch and store the petrol! I thought I did, and there was a lot more in the tank than the gauge would have me believe Really put a spanner in the works that day...
Thanks Cad, I've got 50 litres storage capacity and about 1/4 of a tank of fuel to drain, so hopefully that will be adequate. Re draining the fuel tank - I don't mean to teach you how to suck eggs, but make sure you have more than enough containers to catch and store the petrol! I thought I did, and there was a lot more in the tank than the gauge would have me believe
Really put a spanner in the works that day...Today's work was underneath the car:
Top tip today is: Wear safety glasses or goggles!
First up was the anti roll bar. Special note was taken of the orientation and sequence of the nuts and washers on removal - especially the drop link upper fixings.
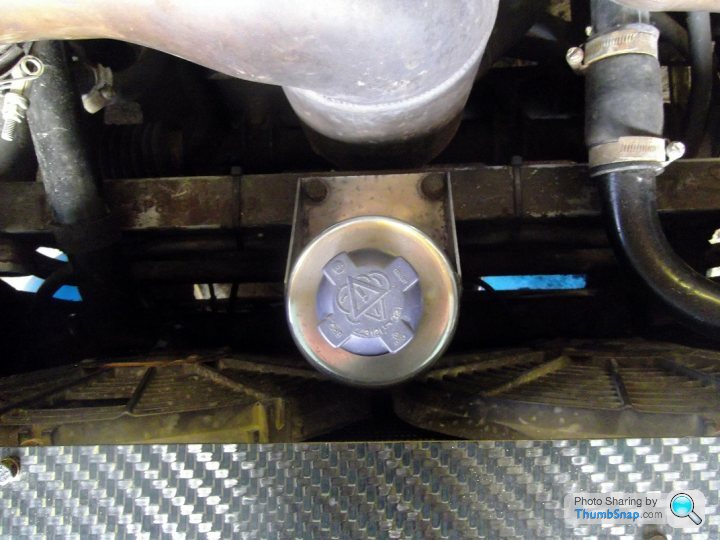
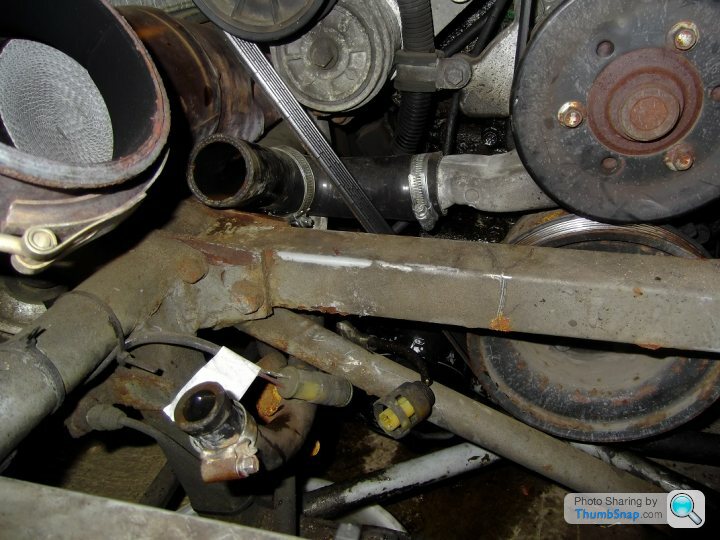
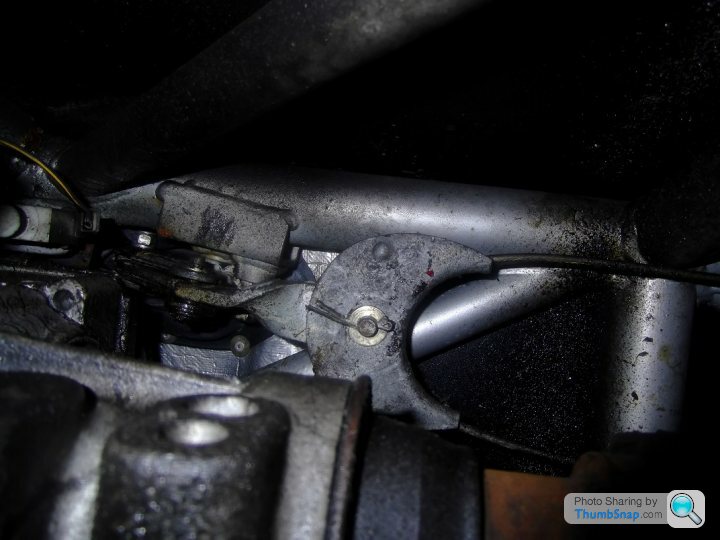
Next up, the exhaust. front Bracket to engine block, then the 6 17mm bolts for the main mounting plate, then slide it out rearwards off the rear hanger.
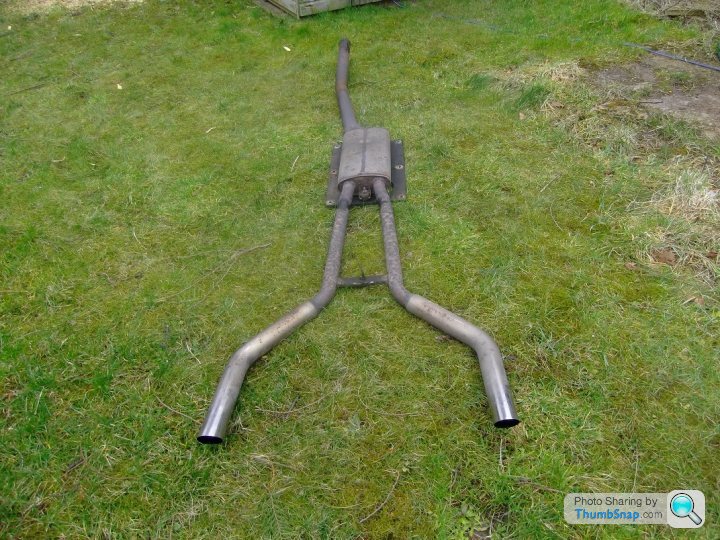
The 6 bolt holes can clearly be seen in the above pic.
On removal of the exhaust I found the source of an annoying rattle I had - The innards of the silencer sound like they are no longer fixed in position. A job to be done whilst the chassis is away.
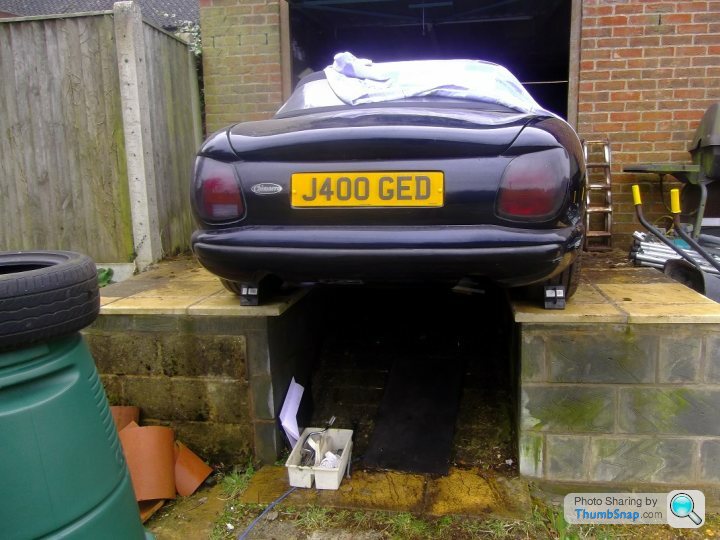
Here it is over my "Anti-pit" with the exhaust off.
With the exhaust out of the way, access to the handbrake and gearbox was much improved.
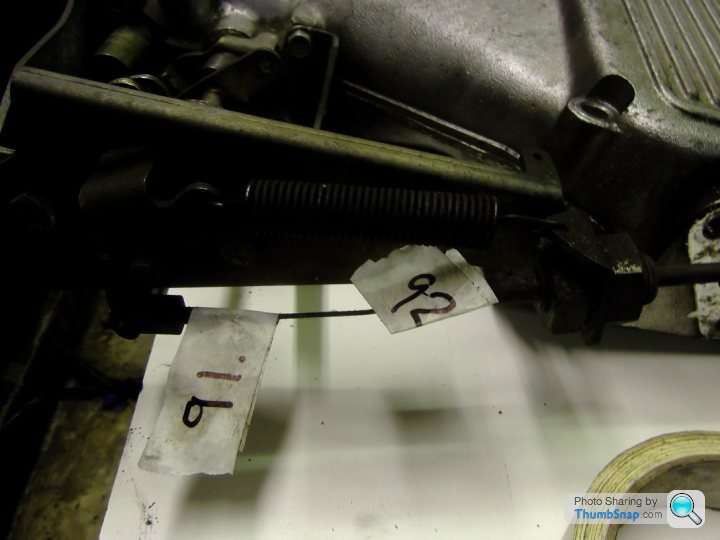
Following another top tip from Engineer 1949, I removed the handbrake compensator clevis pin - split pin out first then push out the clevis remembering that there is a washer above as well as below.
The main reason for this is that the hand brake adjustment should be undisturbed for when I come to rebuild the car. Re-assembly of the compensator may be a bit fiddly, I'll let you know in due course.
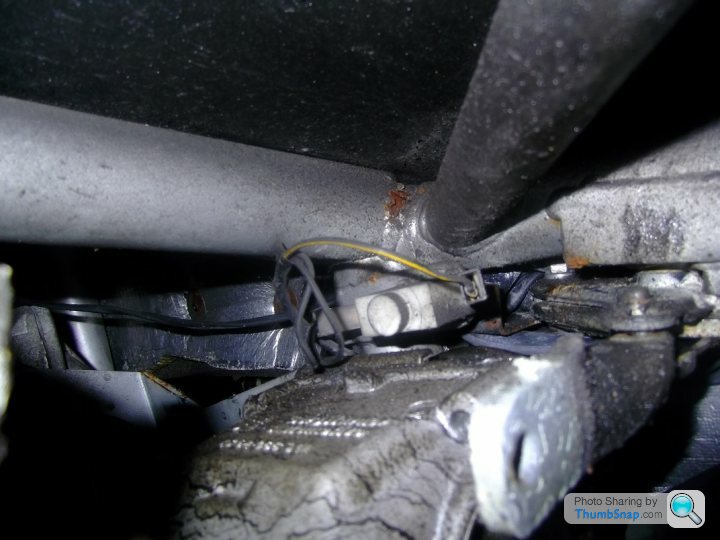
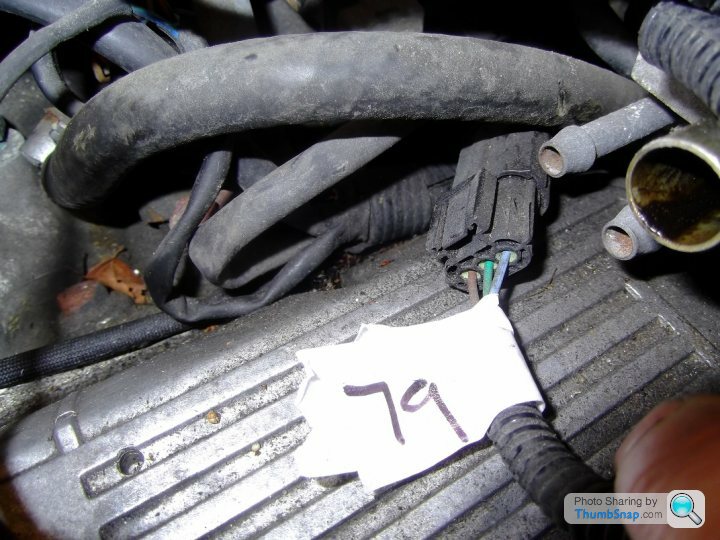
Next were the handbrake switch - 2 spade connectors, noting the orientation of the wiring - and the reverse light switch multiplug.
Now the potentially dangerous part - draining the fuel tank.
The process was to undo the pump bracket to allow me to remove the rear end of the hose between the pump and the pipe from the fuel tank.
Prior to starting this I gathered together a jerry can and some fuel hose of the same size as on the car, I put one end of the hose into the jerry can and had the other end to hand. With the pump bracket undone I removed both the jubilee clips on the rear hose - this allowed me to rotate the hose to unstick it. Then - with my latex gloves and safety glasses on (obviously, that wasn't all I was wearing! ) - I removed the rear end of the hose and pushed the hose from the jerry can on. There was some spillage as I pushed the hose on but the main thing was to not panic.
A word of caution here, the fuel did not drain all in one go even with the filler cap off and a vent in the top of the filling point!
The first dollop of fuel to come out of the tank amounted to approximately only one pint - I was starting to think my gauge was very optimistic.
This is where it is handy to note your Fuel Gauge reading before disconnecting the battery - mine was showing 1/4 of a tank and I got 3 gallons out.
my final test that the tank was empty was to pump some air back down the hose and listen for bubbling in the tank. No bubbling, no fuel left.
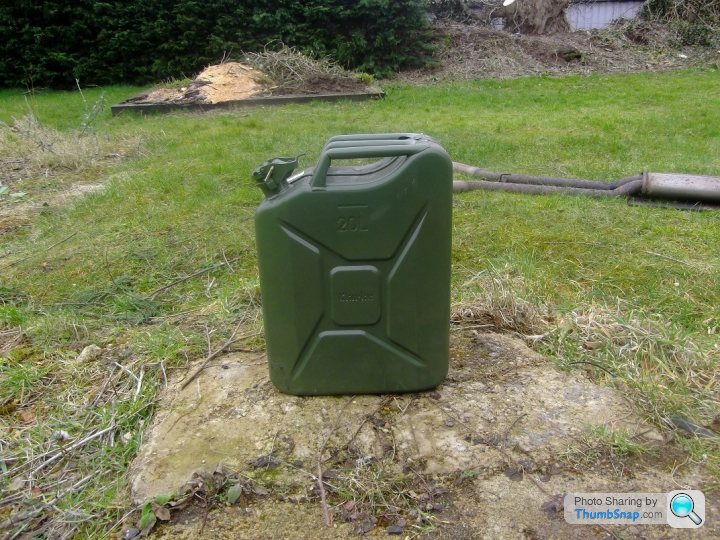
That'll keep the lawn mower going nicely through the summer.
The only other thing I did today was to undo the seat fixings under the car.
This was lunchtime and at this point Dad's Taxi was pressed into service for the rest of the afternoon/early evening, so I will have to leave the lower electrics until tomorrow at least.
Oh, I will disconnect the speed sensor from inside the car and leave it with the chassis.
Top tip today is: Wear safety glasses or goggles!
First up was the anti roll bar. Special note was taken of the orientation and sequence of the nuts and washers on removal - especially the drop link upper fixings.
Next up, the exhaust. front Bracket to engine block, then the 6 17mm bolts for the main mounting plate, then slide it out rearwards off the rear hanger.
The 6 bolt holes can clearly be seen in the above pic.
On removal of the exhaust I found the source of an annoying rattle I had - The innards of the silencer sound like they are no longer fixed in position. A job to be done whilst the chassis is away.
Here it is over my "Anti-pit" with the exhaust off.
With the exhaust out of the way, access to the handbrake and gearbox was much improved.
Following another top tip from Engineer 1949, I removed the handbrake compensator clevis pin - split pin out first then push out the clevis remembering that there is a washer above as well as below.
The main reason for this is that the hand brake adjustment should be undisturbed for when I come to rebuild the car. Re-assembly of the compensator may be a bit fiddly, I'll let you know in due course.
Next were the handbrake switch - 2 spade connectors, noting the orientation of the wiring - and the reverse light switch multiplug.
Now the potentially dangerous part - draining the fuel tank.
The process was to undo the pump bracket to allow me to remove the rear end of the hose between the pump and the pipe from the fuel tank.
Prior to starting this I gathered together a jerry can and some fuel hose of the same size as on the car, I put one end of the hose into the jerry can and had the other end to hand. With the pump bracket undone I removed both the jubilee clips on the rear hose - this allowed me to rotate the hose to unstick it. Then - with my latex gloves and safety glasses on (obviously, that wasn't all I was wearing!
) - I removed the rear end of the hose and pushed the hose from the jerry can on. There was some spillage as I pushed the hose on but the main thing was to not panic.A word of caution here, the fuel did not drain all in one go even with the filler cap off and a vent in the top of the filling point!
The first dollop of fuel to come out of the tank amounted to approximately only one pint - I was starting to think my gauge was very optimistic.
This is where it is handy to note your Fuel Gauge reading before disconnecting the battery - mine was showing 1/4 of a tank and I got 3 gallons out.
my final test that the tank was empty was to pump some air back down the hose and listen for bubbling in the tank. No bubbling, no fuel left.
That'll keep the lawn mower going nicely through the summer.
The only other thing I did today was to undo the seat fixings under the car.
This was lunchtime and at this point Dad's Taxi was pressed into service for the rest of the afternoon/early evening, so I will have to leave the lower electrics until tomorrow at least.
Oh, I will disconnect the speed sensor from inside the car and leave it with the chassis.
Today's update:
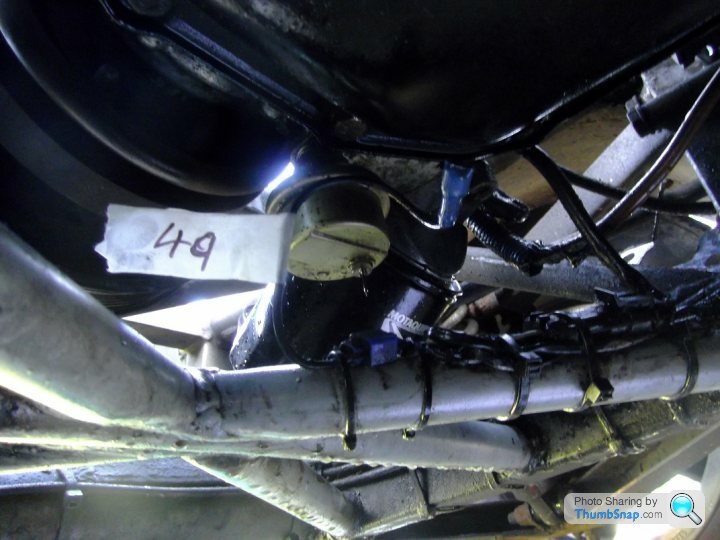
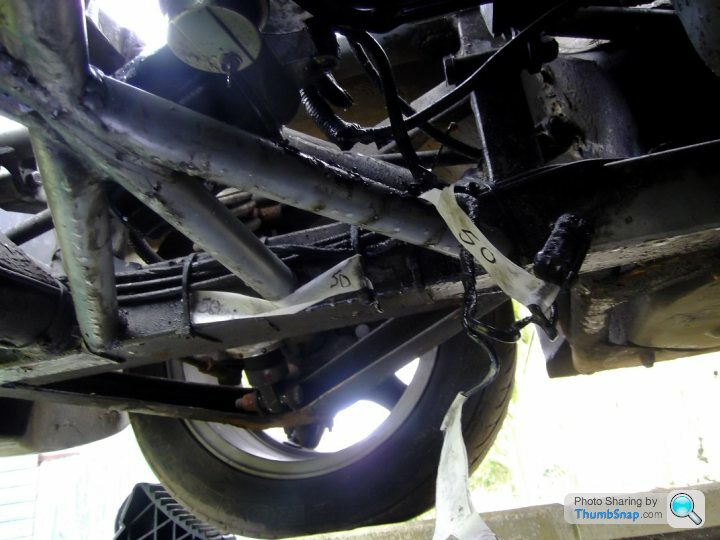
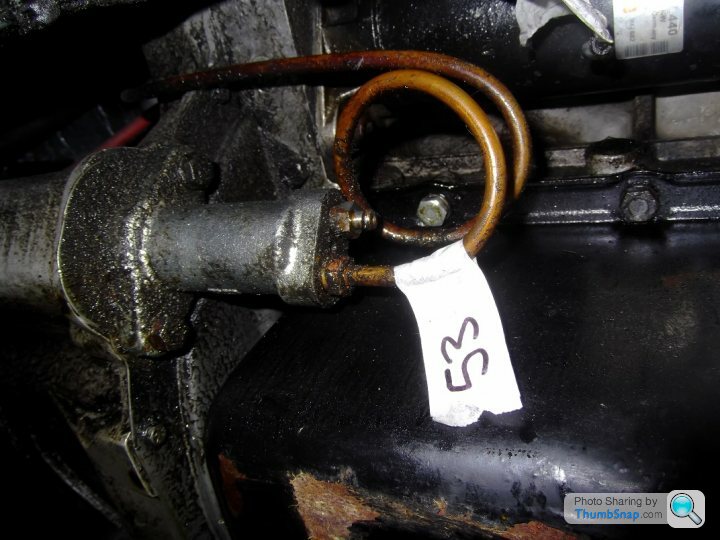
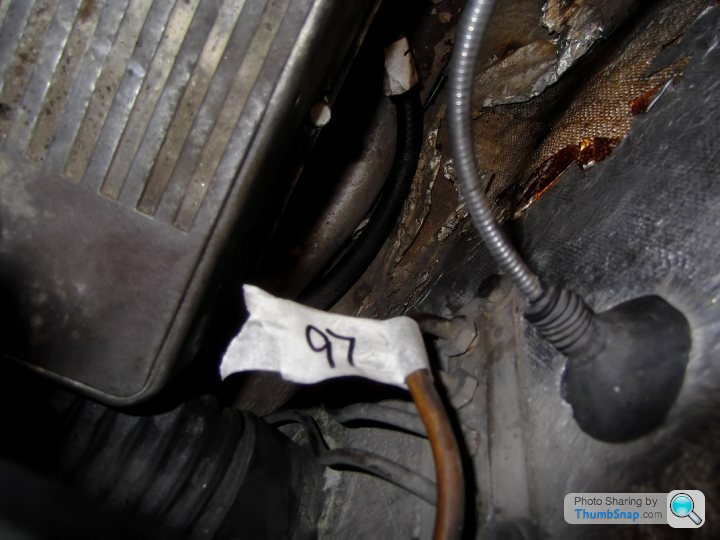
Started off under the car again. First up was the oil pressure sender and then the multi-plug to the front loom - noting the tie-wrap positions and the loom routing.
]
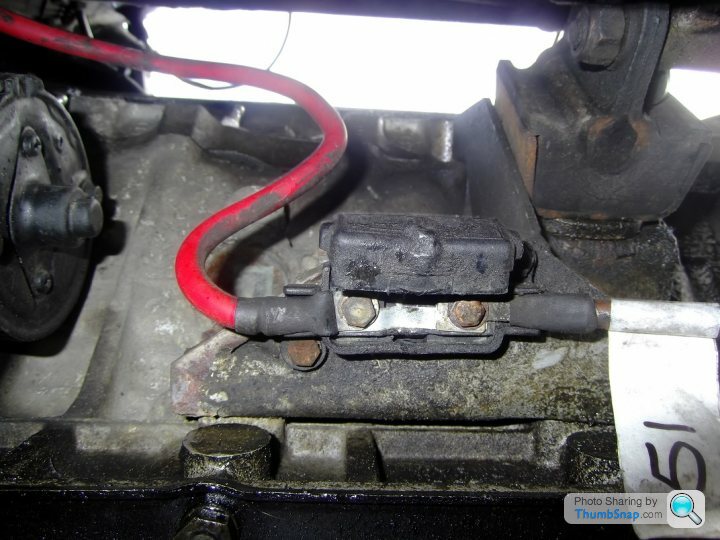
then came the fuse link front connection
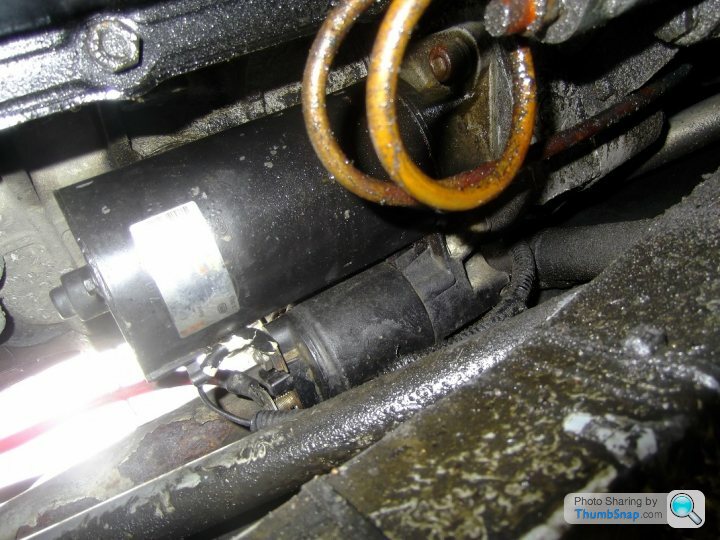
then disconnected the starter, and tie-wraps to chassis again noting the routing.
Drained the clutch pipe to slave cylinder
 |http://thumbsnap.com/IZFAEL2D[/url]
That was it underneath today.
Now to start on the engine loom from above.
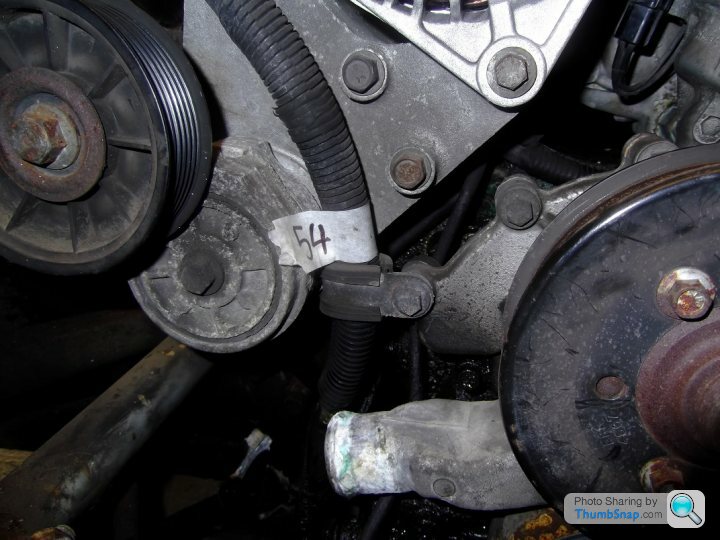
First was the P-clip on the water pump housing
followed by the oil low pressure warning switch
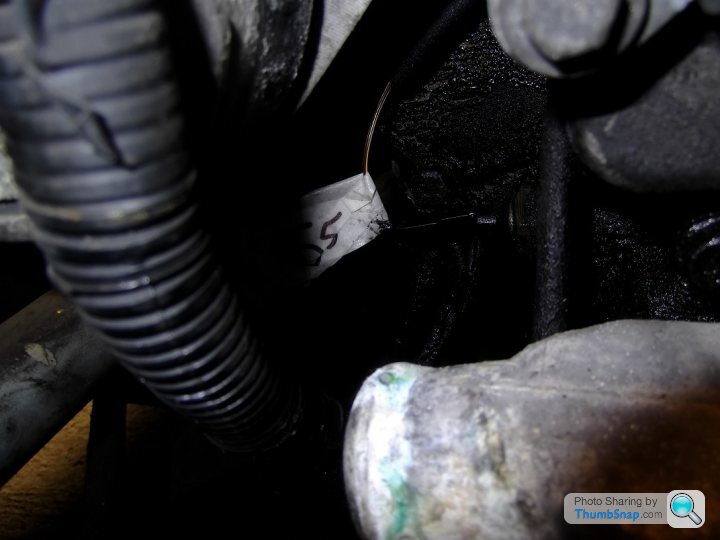
and then the engine front earth point
 |http://thumbsnap.com/eH0JsXbv[/url]
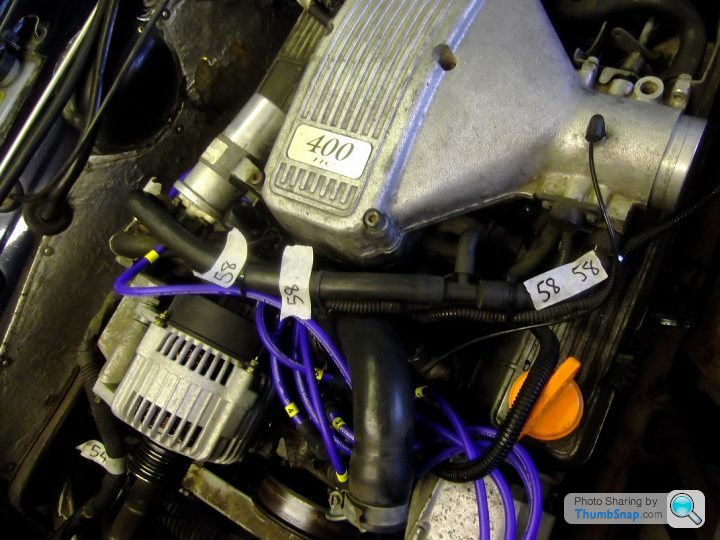
I then started from the left side of the engine, first up removing the tie-wraps along the crank breather hose.
then the Vacuum advance hose
[/url]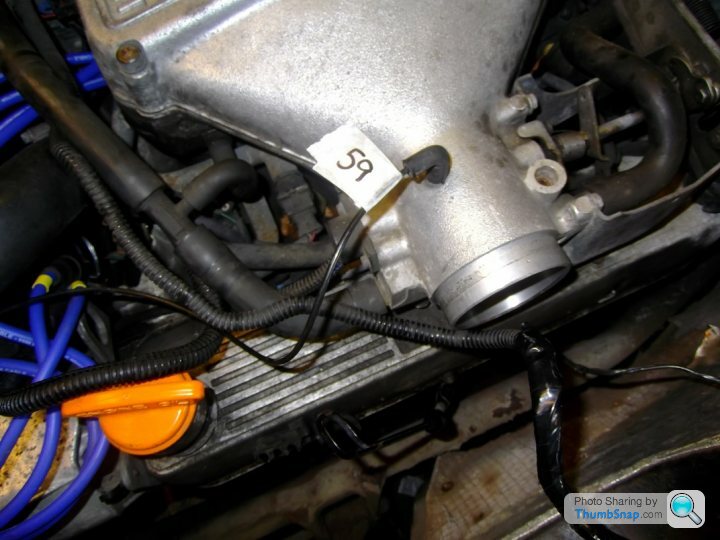 |http://thumbsnap.com/p4kr0krG[/url]
then the crank breather hose
Next was to disconnect and remove the coil, then noting the routing of the "coil loom" as I call it
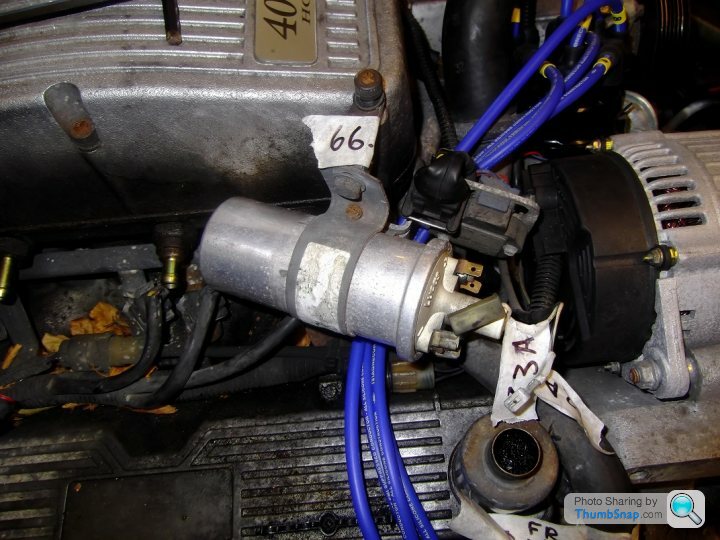
Then the alternator connections and remove the alternator
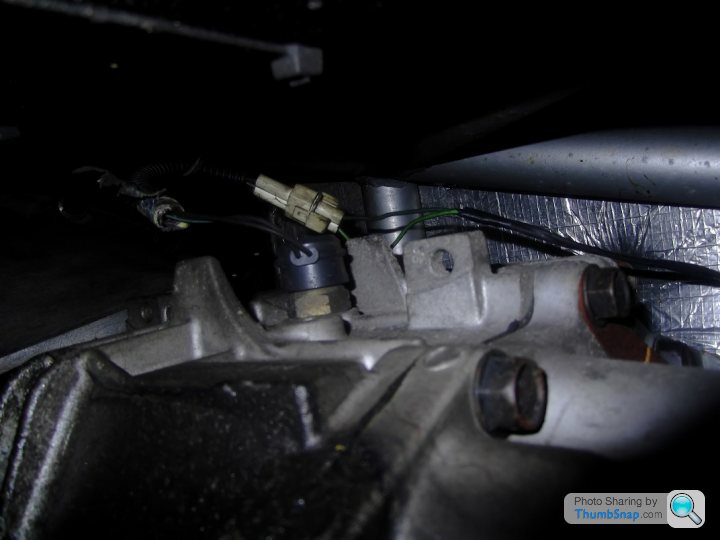
This was followed by the coolant temp sensor lead and the plug on the side of the dizzy, this then allowed the "coil loom" to be fed out across the front of the block.

Working on the Right of the engine, next came the RH O2 sensor, the injector plugs and the tie-wrap at the rear of the fuel rail.

This took me up to lunch. Suitably refreshed, next was the throttle pot connector in the LH loom
Next was the plenum, I had to remove the stepper motor from the rear of the plenum to allow it to be lifted off with the throttle cable still attached, which I disconnected later.
Then came the ECU coolant sensor plug, fuel rail plug, the LH injector plugs and the LH O2 sensor.
Then came the tie wrap holding the loom to the fuel pipe near the pressure regulator.
Followed by the earth at the LH rear of the engine.
The loom is basically disconnected and just needed feeding round to the LH rear of the engine bay, remembering to feed up the starter solenoid cable with the loom.
Once the loom was out the starter feed cable came out and the fuel feed and return hoses were fed down behind the air ducting at the rear of the engine bay.
To finish off for today, the clutch pipe was disconnected from the block, but as this was routed over the top of the air ducting and down to the slave cylinder, I had to bend it back out of the way.
So, at the front of the car, all that is left is:
Steering column shaft
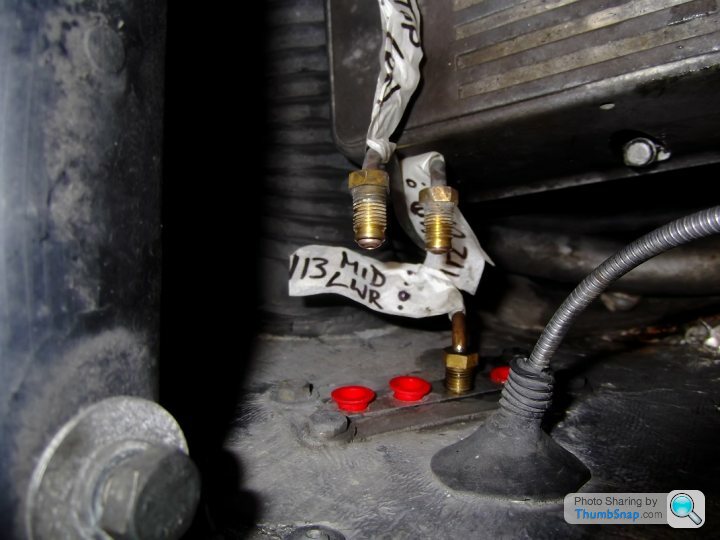
Brake lines
Two front mounting bolts
Jobs for next Friday are:
Brake lines
Two front mounting bolts
Fuel tank
Started off under the car again. First up was the oil pressure sender and then the multi-plug to the front loom - noting the tie-wrap positions and the loom routing.
]
then came the fuse link front connection
then disconnected the starter, and tie-wraps to chassis again noting the routing.
Drained the clutch pipe to slave cylinder
|http://thumbsnap.com/IZFAEL2D[/url]That was it underneath today.
Now to start on the engine loom from above.
First was the P-clip on the water pump housing
followed by the oil low pressure warning switch
and then the engine front earth point
|http://thumbsnap.com/eH0JsXbv[/url]I then started from the left side of the engine, first up removing the tie-wraps along the crank breather hose.
then the Vacuum advance hose
[/url]
|http://thumbsnap.com/p4kr0krG[/url]then the crank breather hose
Next was to disconnect and remove the coil, then noting the routing of the "coil loom" as I call it
Then the alternator connections and remove the alternator
This was followed by the coolant temp sensor lead and the plug on the side of the dizzy, this then allowed the "coil loom" to be fed out across the front of the block.
Working on the Right of the engine, next came the RH O2 sensor, the injector plugs and the tie-wrap at the rear of the fuel rail.
This took me up to lunch. Suitably refreshed, next was the throttle pot connector in the LH loom
Next was the plenum, I had to remove the stepper motor from the rear of the plenum to allow it to be lifted off with the throttle cable still attached, which I disconnected later.
Then came the ECU coolant sensor plug, fuel rail plug, the LH injector plugs and the LH O2 sensor.
Then came the tie wrap holding the loom to the fuel pipe near the pressure regulator.
Followed by the earth at the LH rear of the engine.
The loom is basically disconnected and just needed feeding round to the LH rear of the engine bay, remembering to feed up the starter solenoid cable with the loom.
Once the loom was out the starter feed cable came out and the fuel feed and return hoses were fed down behind the air ducting at the rear of the engine bay.
To finish off for today, the clutch pipe was disconnected from the block, but as this was routed over the top of the air ducting and down to the slave cylinder, I had to bend it back out of the way.
So, at the front of the car, all that is left is:
Steering column shaft
Brake lines
Two front mounting bolts
Jobs for next Friday are:
Brake lines
Two front mounting bolts
Fuel tank
Edited by J400GED on Sunday 1st March 21:50
JWzed said:
Nice work. I do like your methodical approach. Am currently doing a body off refurb on mine and will hopefully be getting the body back on in a few weeks. A big undertaking but you'll reap the benefit in knowing and being able to prove the provenance of your car. I'm sure you are already doing it, but make sure you take loads of pictures of everything, even the most obvious things. You will be surprised when doing your rebuild how many times you will need to go back and refer to them. Also good for boosting confidence in your work in times of doubt. Keep it up. It's definitely worth all the effort.
Thanks mate - definitely got more pictures - posted approx. 50% of themCokes said:
Nothing made yet but I've get the wheels/casters and I've started pricing up wood.
I'm going to use a/some heavy duty pallet(s)- if they can hold a ton of bricks, they can hold the body! I've blagged 3 of them and I am just going to bosh some castors on it/them. The reason for possibly more than one is for best fit supporting as much of the main tub as possible.
robsco said:
When a friend of mine "helped" me remove the Cerbera's engine last year, my designated role was "cable tie cutter". It was a much bigger job than one would ever imagine.
Sounds a bit anal/OCD, but I am saving any tie wraps that I cut off just to see how many I end up with! Evening All,
Today's update:
Seats out

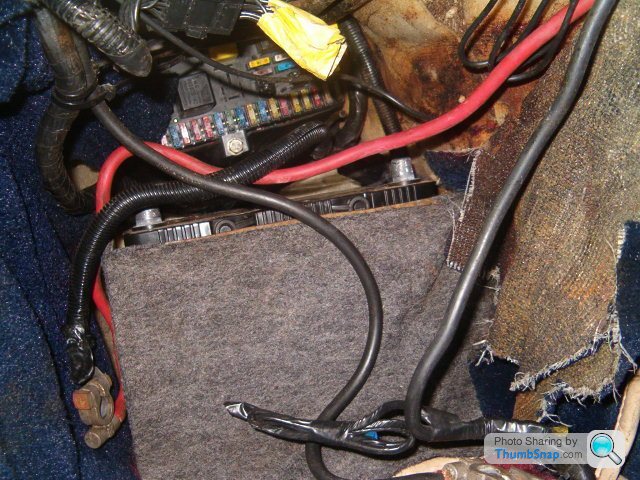
Battery and box removed, Centre Console removed
Speed sensor disconnected. to get it through the body I dismantled the multiplug
Removed the gear knob
And inspection hatch sorry, no pics
Handbrake switch loom tie wrap
Then I drained the brakes
and disconnected the brake pipes from the bulkhead
Next, I moved onto removing the fuel tank
Boot upper trim panel,
Tank lower fixing bolts - these are not captive nuts
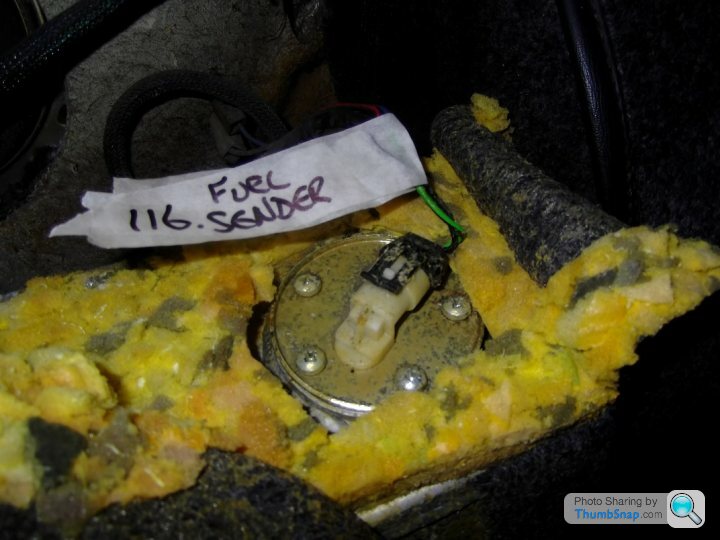
Unplugged the fuel sender - this wasn't actually necessary
Disconnected the fuel filler hose
Disconnected the carbon return hose at the filler neck

Removed the 2 upper tank fixings
The I cut the carbon return hose near the LH rear suspension ( will be re-connected with an in-line connector at a later date
And finally before the chassis bolts start flying, I disconnected the fuel pump loom
Next I started to remove the chassis bolts
2 front bolts first,
then the rear bolts - unfortunately, one bolt sheared
So, jobs for Saturday 7th March
Remove the remaining chassis bolts
Position the car for the lift
Disconnect the steering column
Prep for lift - potentially Sunday.
Today's update:
Seats out
Battery and box removed, Centre Console removed
Speed sensor disconnected. to get it through the body I dismantled the multiplug
Removed the gear knob
And inspection hatch sorry, no pics
Handbrake switch loom tie wrap
Then I drained the brakes
and disconnected the brake pipes from the bulkhead
Next, I moved onto removing the fuel tank
Boot upper trim panel,
Tank lower fixing bolts - these are not captive nuts
Unplugged the fuel sender - this wasn't actually necessary
Disconnected the fuel filler hose
Disconnected the carbon return hose at the filler neck
Removed the 2 upper tank fixings
The I cut the carbon return hose near the LH rear suspension ( will be re-connected with an in-line connector at a later date
And finally before the chassis bolts start flying, I disconnected the fuel pump loom
Next I started to remove the chassis bolts
2 front bolts first,
then the rear bolts - unfortunately, one bolt sheared
So, jobs for Saturday 7th March
Remove the remaining chassis bolts
Position the car for the lift
Disconnect the steering column
Prep for lift - potentially Sunday.

I spent today making a body dolly - same concept as Cokes - sorting out lifting equipment and removing the chassis bolts.
Well, it's ready for the body lift - almost.
Two bolts have sheared across the lifting plane - i.e. two horizontal bolts have sheared and the lift will be vertical - so I need to sort those first.
Two vertical ones sheared as well but that's not a concern.
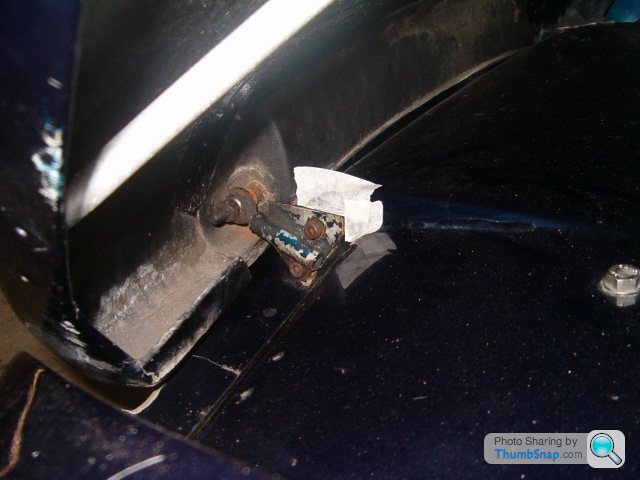
The horizontal sheared bolts are Left Hand Lower behind the fuel tank and LH Outboard Fwd seatbelt mount.
The difficulty depends on the thickness of the GRP in those areas.
The rear bolt that sheared went 3mm from the head and the seatbelt bolt flush with the head.
Well, it's ready for the body lift
- almost. Two bolts have sheared across the lifting plane - i.e. two horizontal bolts have sheared and the lift will be vertical - so I need to sort those first.
Two vertical ones sheared as well but that's not a concern.
The horizontal sheared bolts are Left Hand Lower behind the fuel tank and LH Outboard Fwd seatbelt mount.
The difficulty depends on the thickness of the GRP in those areas.
The rear bolt that sheared went 3mm from the head and the seatbelt bolt flush with the head.
Gassing Station | Chimaera | Top of Page | What's New | My Stuff