Internal frame for offside wing mirror
Discussion


Does anybody have any recommendations for good places to get the internal frame for an offside (right) wing mirror - just broken mine due to heavy handedness.
It's broken in a similar place to this one from the TVRCC website:

Thanks!
P.s. what's the rules on driving without a wing mirror? Is it that you have to have 2 of the three rearview mirrors???
It's broken in a similar place to this one from the TVRCC website:
Thanks!
P.s. what's the rules on driving without a wing mirror? Is it that you have to have 2 of the three rearview mirrors???

Chimpaholic,
That piccy came from here (found as a result of google image searching for Citroen CX wing mirror):
http://www.andywhittaker.com/Cars/LotusEspritGT3/D...
Here is another detailed thread on how to refix the door mirror:
http://www.pistonheads.com/gassing/topic.asp?h=0&a...
I had a loose mirror about three years ago and tightening that screw was the answer. I used Steve Heath's instructions in the bible to do it - it took about 2 hours and I had to resort to removing the mirror, tightening the grub screw and putting it all back on. I found the grub screw impossible to reach with the mirror on. Loosening the tripod with the mirror in place is extremely hard (I used lots of WD40).
5.0ltr said:
One of the better articles on this from a Griff owner of course  May be of use.
http://www.tvr-car-club.co.uk/forum/forum_posts.as...
That's what I need to do - thanks 5.0ltr. I knew those Griff drivers were useful for something..... May be of use.http://www.tvr-car-club.co.uk/forum/forum_posts.as...

Chimpaholic - it's a description on how to repair a broken frame (the exact issue I have) with a coupl eof aluminium plates. And you should join the TVRCC - the magazine alone is worth the subscription fee IMO!
I've repaired my wing mirror, and have finally got round to sitting down and writing it up. I used a similar, but slightly different method to the one 5.0ltr linked to above but I think it needs a bit of a clearer write up. So hear goes....
What I have done is create a backing plate out of aluminium (duralumin) then pop-riveted the broken bits of the frame onto it. It differs to the TVRCC link above in that it isn't a sandwich of two pieces of aluminium. I've also bored out the 'stalk' (broken bit) of the frame, tapped it through and replaced the annoying Torx bolt with a bolt and locking nut (to allow for easier removal and tightening.
First off, protect the door of the car with a rag or some such gaffer-taped into position.
To remove the wing mirror - twist off the tripod (lots of WD40 and a screwdriver gently inserted through to twist the tripod without bending it. Unscrew the mirror unit, remove the mirror glass (small black slidy thing underneath the mirror), then disconnect the heating plugs, remove the motor and disconnect the plug (and then leverl the three pins out so that the wire can be removed through the tripod), finally cut the wires to the door entry button (to be repaired with bullet connectors later). Unscrew the two halves of the casing.
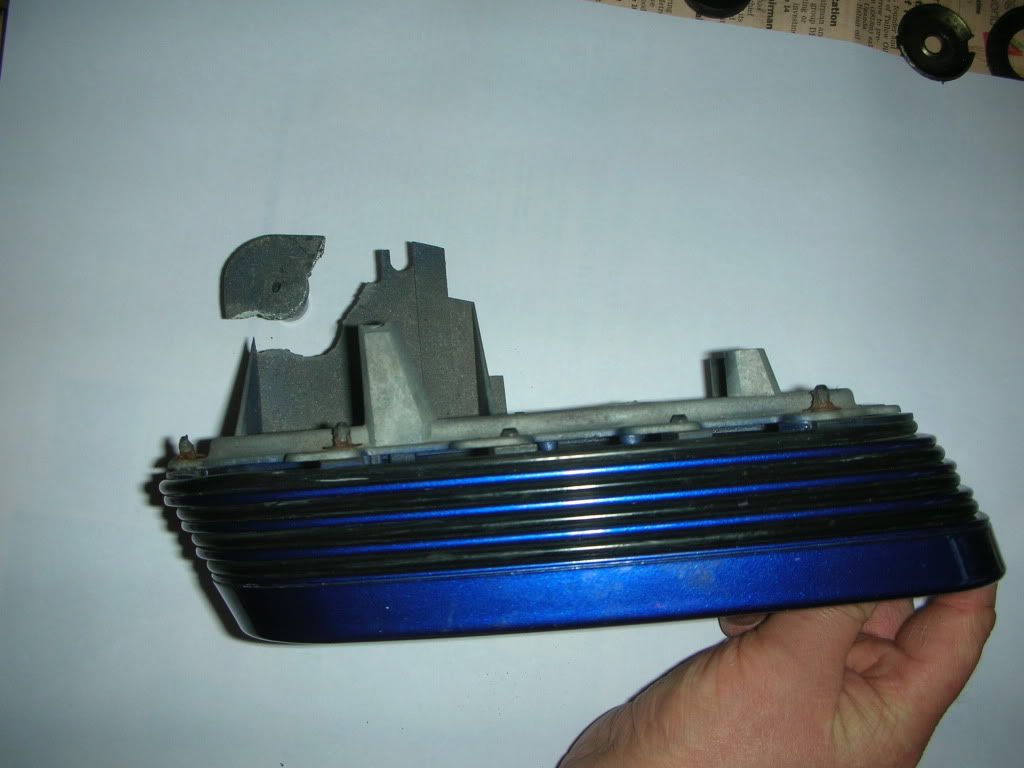
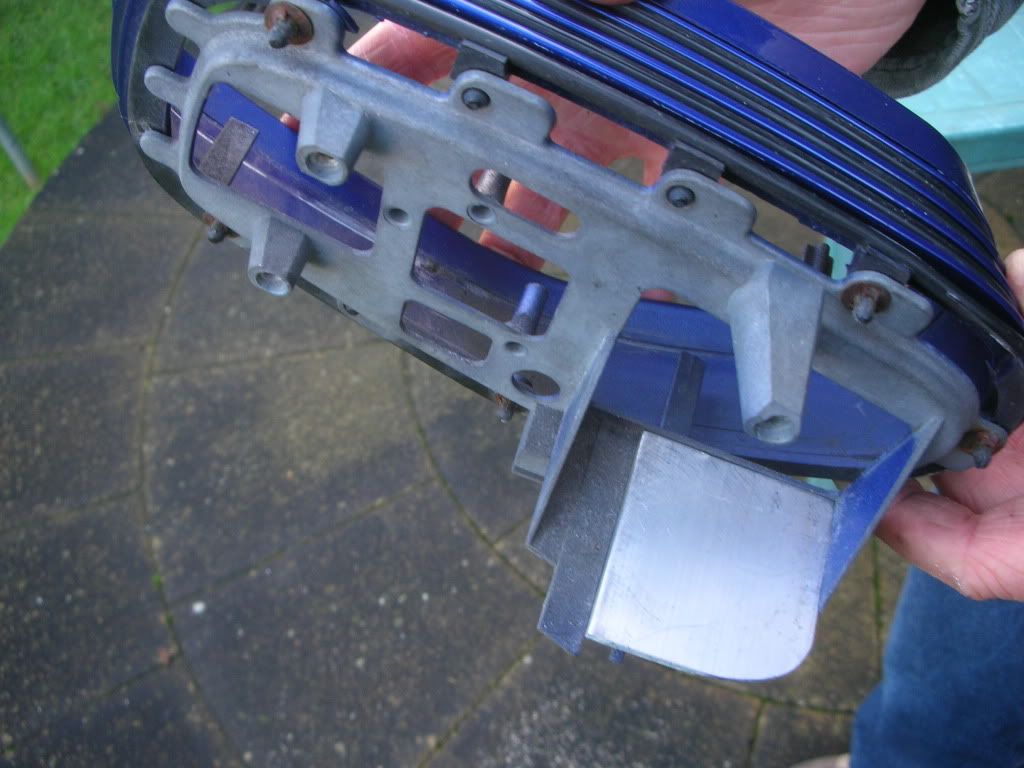
Then you should have removed the wing mirror - it looks like this:
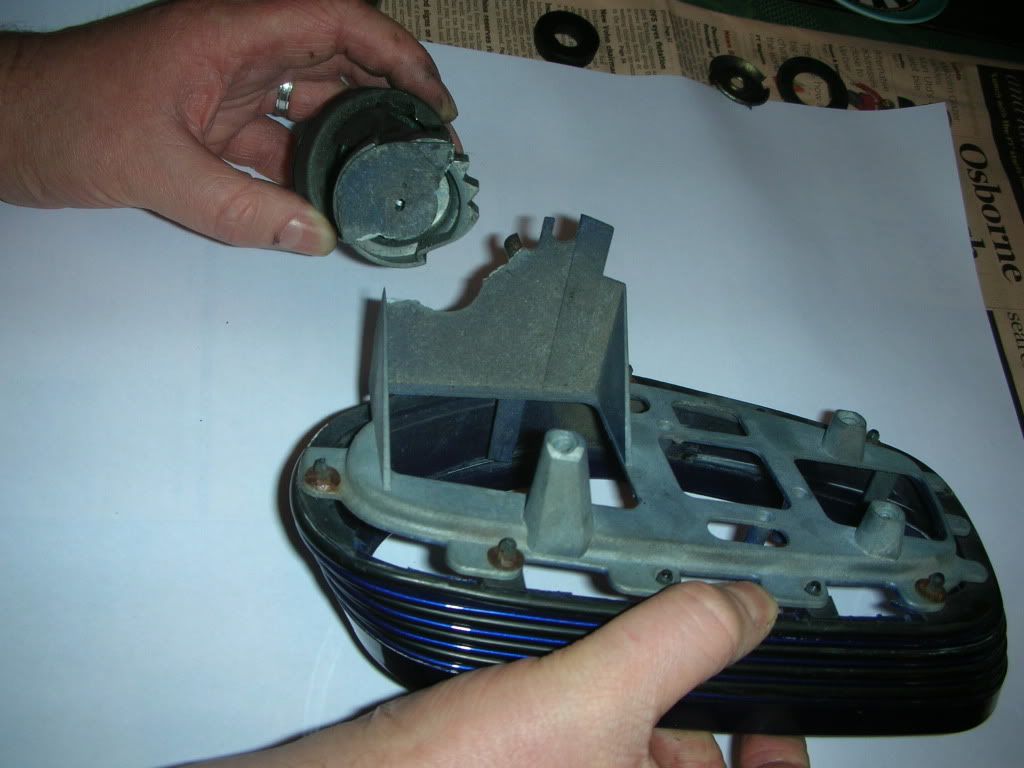
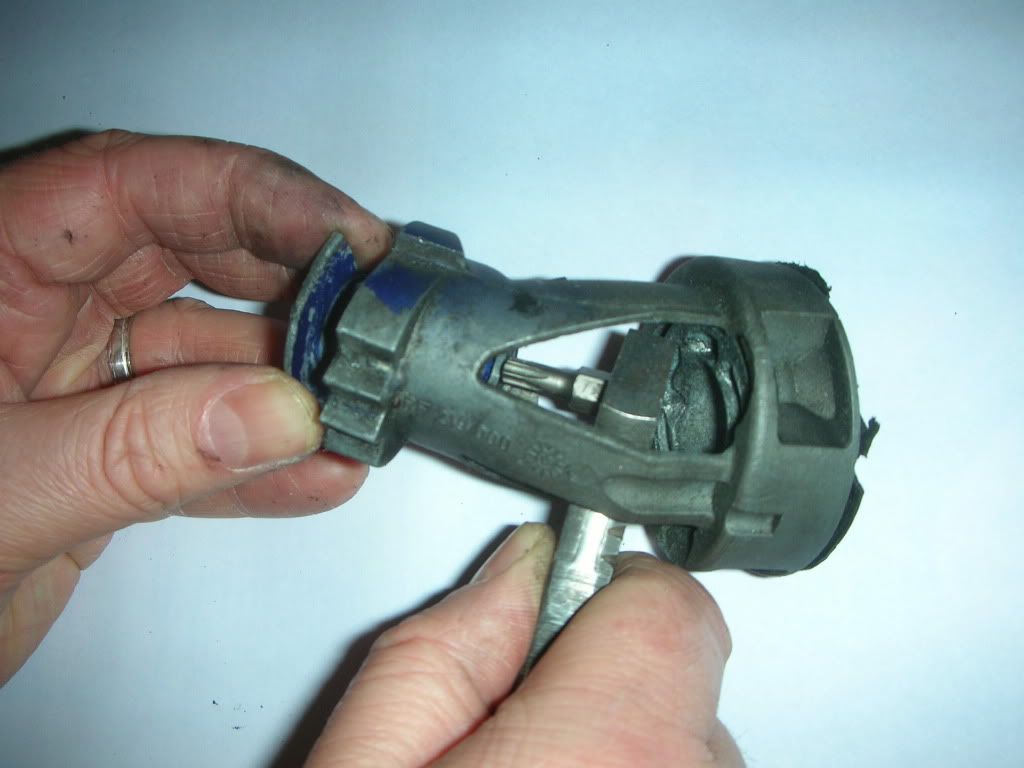
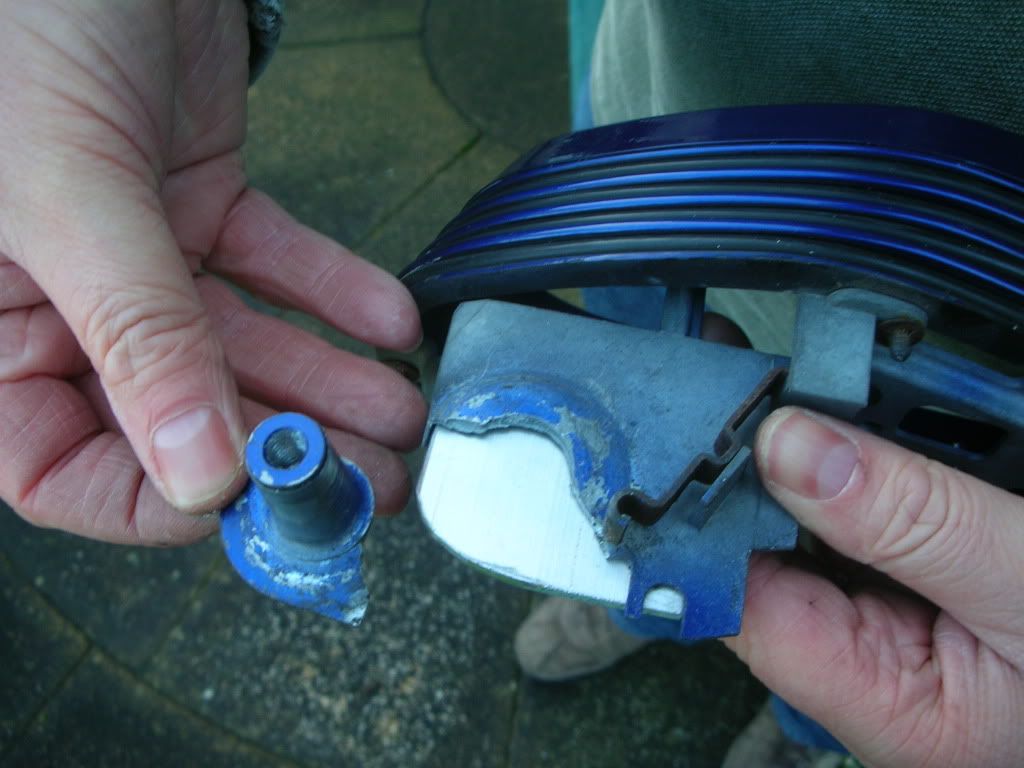
To get the broken bit from the turret, you will need a Torx screw, some dexterity, and plenty of skin to spare on your fingers:

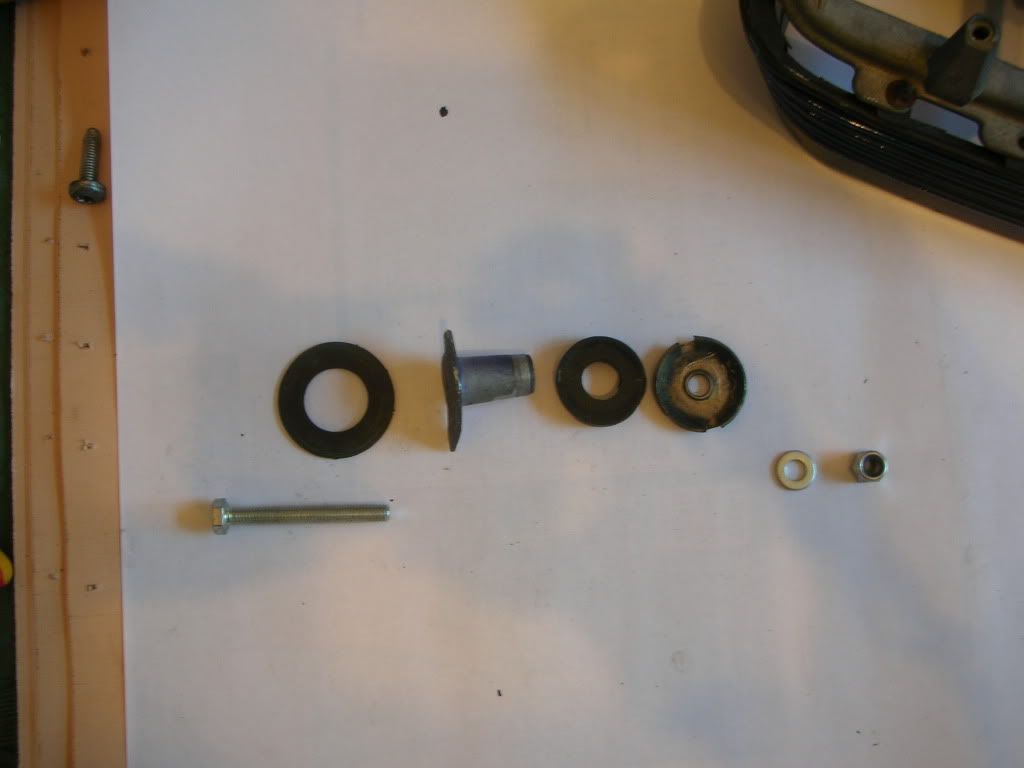
This is the bolt / washer order:

Then replace the Torx bolt with a normal bolt, washer and locking nut:
It will require drilling out the 'stalk' so that you can extend the thread to take the bolt all the way through:
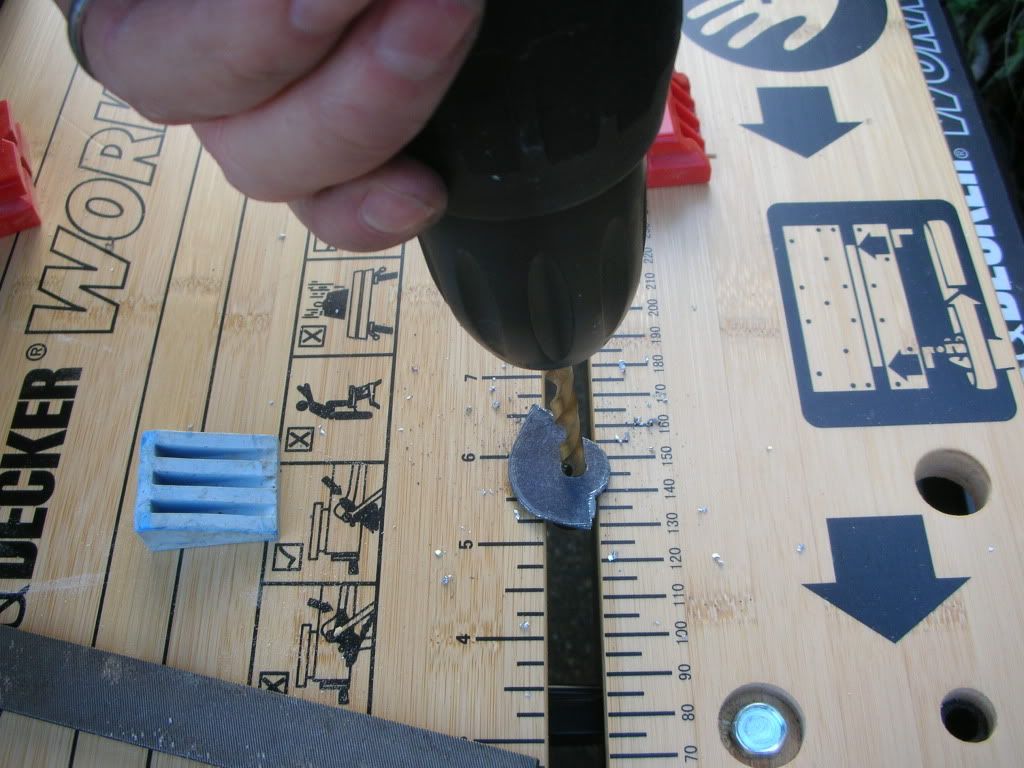
This bit is actually done from the other side of the 'stalk' but I put it down the wrong way when we set it up for the photo!:

Then cut up and file off a bit of aluminium to take the rivets (make sure it doesn't interfere with the wing mirror casing when reassembled:
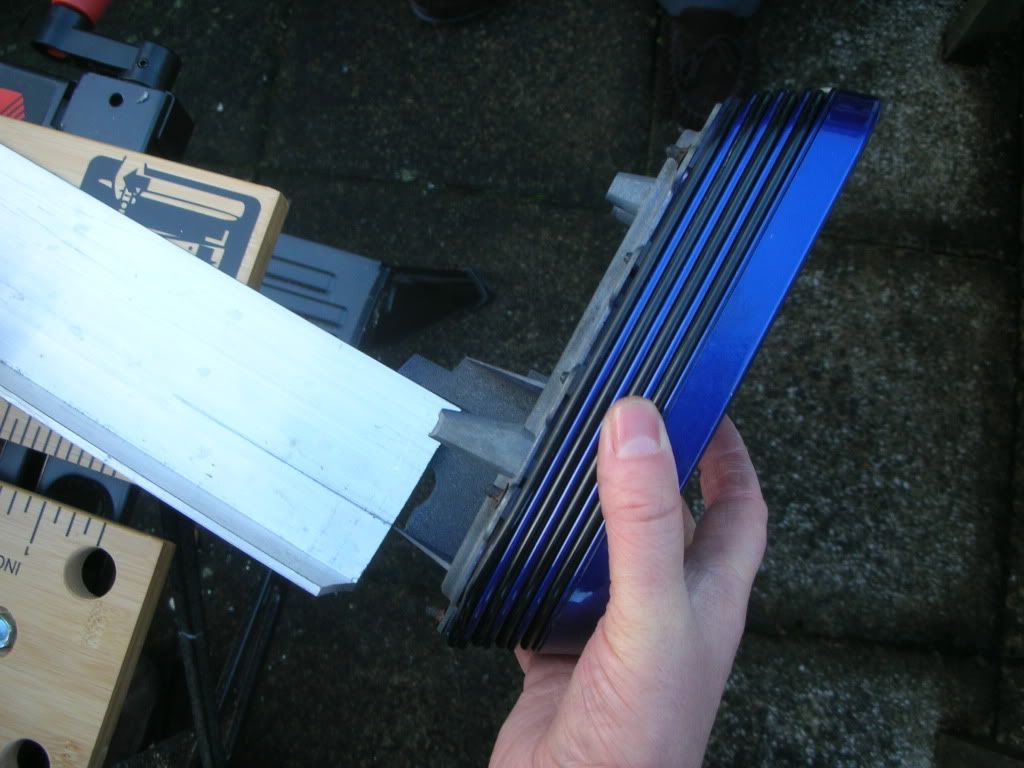

Pop rivet the aluminium to the frame:

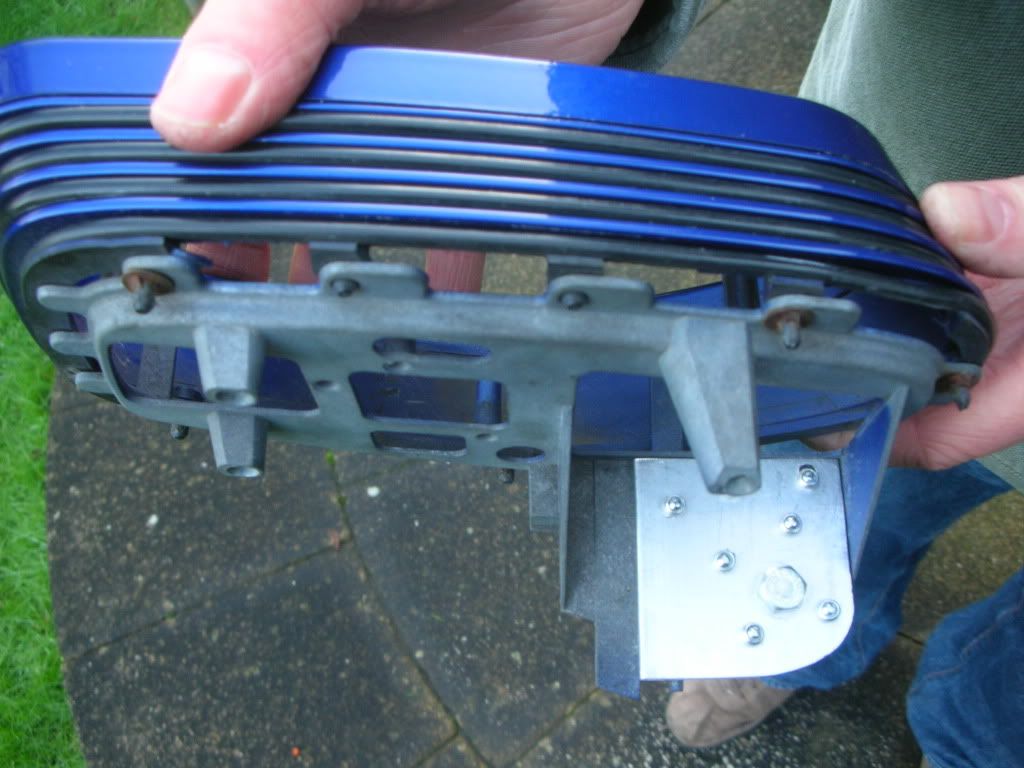
And pop-rivet on the broken bit (don't forget to drill out the hole in the aluminium for your new bolt:
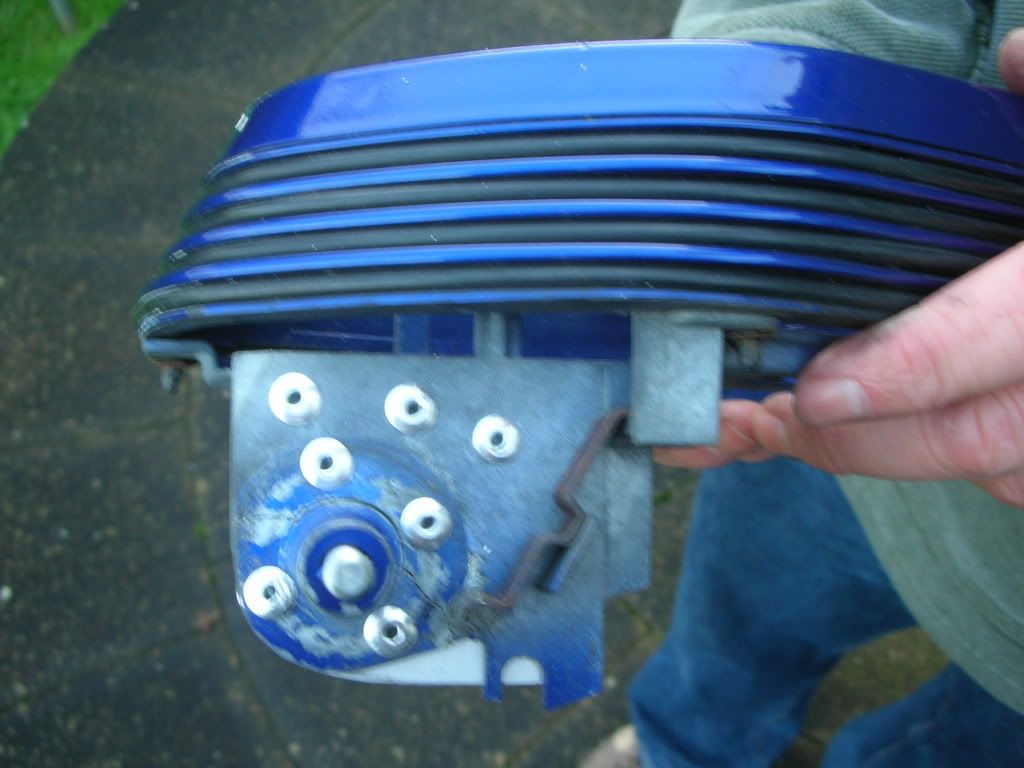
I went a bit overboard with the rivets!
Finally reassemble the bolt, washers, rubber, nuts etc, tighten well.
At the car, poke through all the wires, reconnect everything (I extended the door button wires and put on bullet connectors).
Then pre-twist the mirror before screwing it in (so that all the cables un-twist as it screws on.
Everything should now be very tight and the mirror should operate on the ratchet (I had to take it all off again and tighten up my bolt/locking nut a bit more).
The only major issue I had was the plastic sheeth that sits between the mirror casing and the car is impossible to put on and do up the bolt/nut at the same time so I ended up cutting it (one cut, to open it up into a 'C') then pulling it in to place. I should go and superglue it so it's sealed, but it's cold outside....
I can't say where I got the durlumin from (my old man had some lying around) - it was about 3mm thick.
And I'd never tapped a thread before, so make sure you know how to do it before having a go (again, my old man had the gear and know-how for doing it).
Hope this helps. At least I've written it up for when my passenger mirror falls off.
What I have done is create a backing plate out of aluminium (duralumin) then pop-riveted the broken bits of the frame onto it. It differs to the TVRCC link above in that it isn't a sandwich of two pieces of aluminium. I've also bored out the 'stalk' (broken bit) of the frame, tapped it through and replaced the annoying Torx bolt with a bolt and locking nut (to allow for easier removal and tightening.
First off, protect the door of the car with a rag or some such gaffer-taped into position.
To remove the wing mirror - twist off the tripod (lots of WD40 and a screwdriver gently inserted through to twist the tripod without bending it. Unscrew the mirror unit, remove the mirror glass (small black slidy thing underneath the mirror), then disconnect the heating plugs, remove the motor and disconnect the plug (and then leverl the three pins out so that the wire can be removed through the tripod), finally cut the wires to the door entry button (to be repaired with bullet connectors later). Unscrew the two halves of the casing.
Then you should have removed the wing mirror - it looks like this:
To get the broken bit from the turret, you will need a Torx screw, some dexterity, and plenty of skin to spare on your fingers:
This is the bolt / washer order:
Then replace the Torx bolt with a normal bolt, washer and locking nut:
It will require drilling out the 'stalk' so that you can extend the thread to take the bolt all the way through:
This bit is actually done from the other side of the 'stalk' but I put it down the wrong way when we set it up for the photo!:
Then cut up and file off a bit of aluminium to take the rivets (make sure it doesn't interfere with the wing mirror casing when reassembled:
Pop rivet the aluminium to the frame:
And pop-rivet on the broken bit (don't forget to drill out the hole in the aluminium for your new bolt:
I went a bit overboard with the rivets!
Finally reassemble the bolt, washers, rubber, nuts etc, tighten well.
At the car, poke through all the wires, reconnect everything (I extended the door button wires and put on bullet connectors).
Then pre-twist the mirror before screwing it in (so that all the cables un-twist as it screws on.
Everything should now be very tight and the mirror should operate on the ratchet (I had to take it all off again and tighten up my bolt/locking nut a bit more).
The only major issue I had was the plastic sheeth that sits between the mirror casing and the car is impossible to put on and do up the bolt/nut at the same time so I ended up cutting it (one cut, to open it up into a 'C') then pulling it in to place. I should go and superglue it so it's sealed, but it's cold outside....
I can't say where I got the durlumin from (my old man had some lying around) - it was about 3mm thick.
And I'd never tapped a thread before, so make sure you know how to do it before having a go (again, my old man had the gear and know-how for doing it).
Hope this helps. At least I've written it up for when my passenger mirror falls off.
Edited by mav 1 on Monday 25th January 17:26
Chimpaholic,
I had a similar issue with my mirror 2 years ago - it definitely sounds like a loose grub screw. The only way I could get the threaded bit unscrewed was to spray a load of WD40 in there, leave it for a while, then in a very convuluted way use screwdrivers to 'hammer' and twist the threaded bit until it finally turned. This was probably not the best way to do it, and if I'd slipped with the screwdrivers it could have gone into the door, but I could find no other way to do it.
Mav.
Can't really help you with the jammed thread - you just need to find a way to create a 'screwdriver' for it - maybe bent nose pliers??
As for getting on the Torx bolt - note easy. I showed in my last set of pictures above that I used a small Torx adaptor and an odd-shaped set of pliers (but I don't know what the pliers are called I'm afraid) as normal pliers just allowed the Torx bit to rotate.
As for getting on the Torx bolt - note easy. I showed in my last set of pictures above that I used a small Torx adaptor and an odd-shaped set of pliers (but I don't know what the pliers are called I'm afraid) as normal pliers just allowed the Torx bit to rotate.
Gassing Station | Chimaera | Top of Page | What's New | My Stuff