MGB V8 Conversion
Discussion


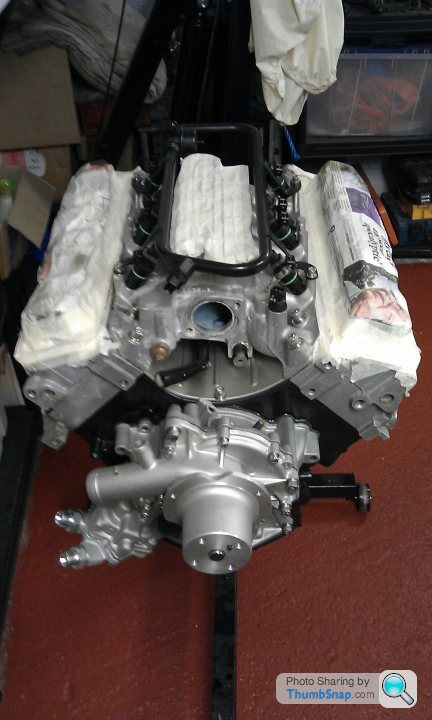
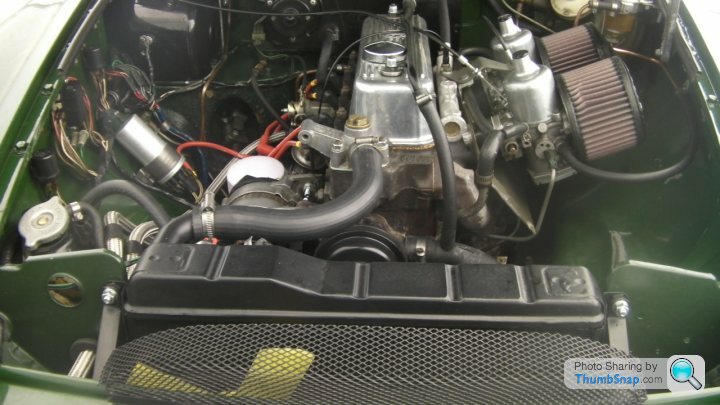
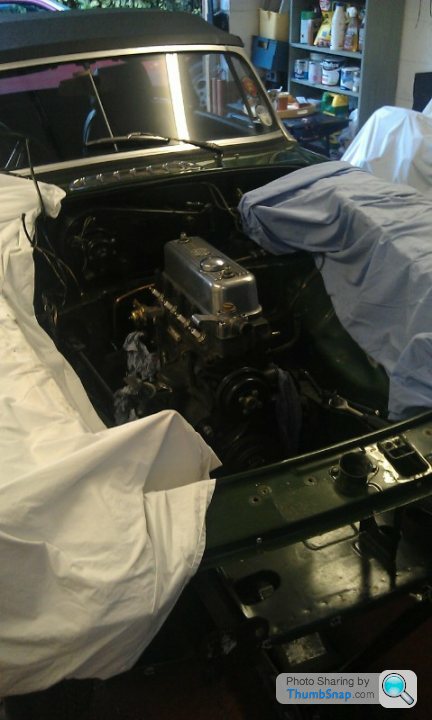
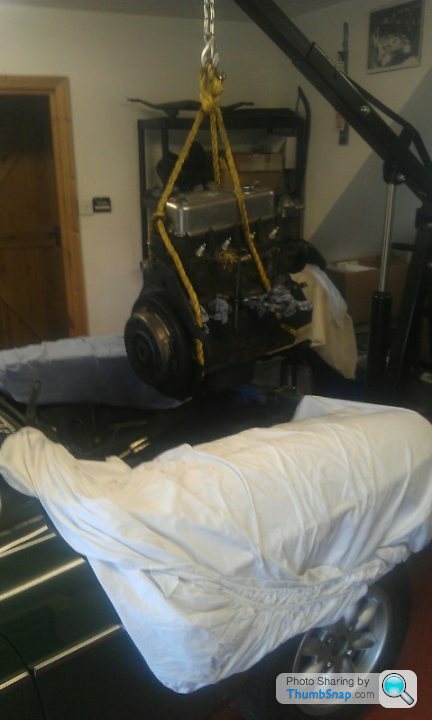
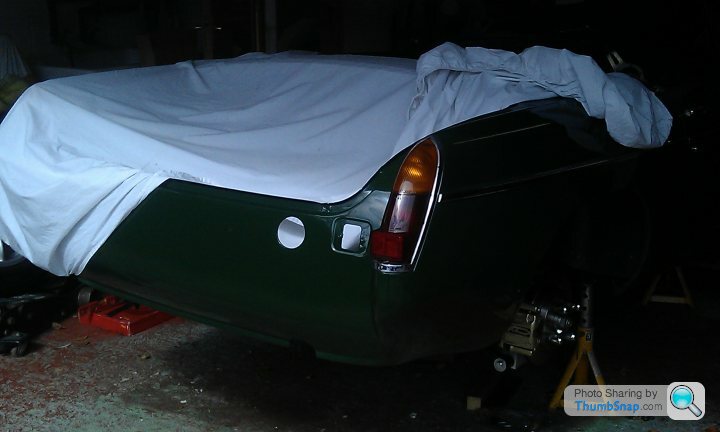
Well Gents, the time has come to change the heart and soul of the 1977 roadster. Some of you may be aware this summer has been spent rebuilding the TVR V8 engine + R380 'box and spending far too much money on new Hoyle front and rear suspension, special brakes, injection tank, new wiring looms plus a million & one other parts. This means I have a seriously good engine + 4speed OD + all the mechanicals from front to rear available + seriously good condition rubber bumpers +++ Most parts are in near perfect condition having been refurbished over the past few years, and/or, are nearly new. Thought the PH MG owners should get first call on the components if any of you are needing something. If so, do PM me.
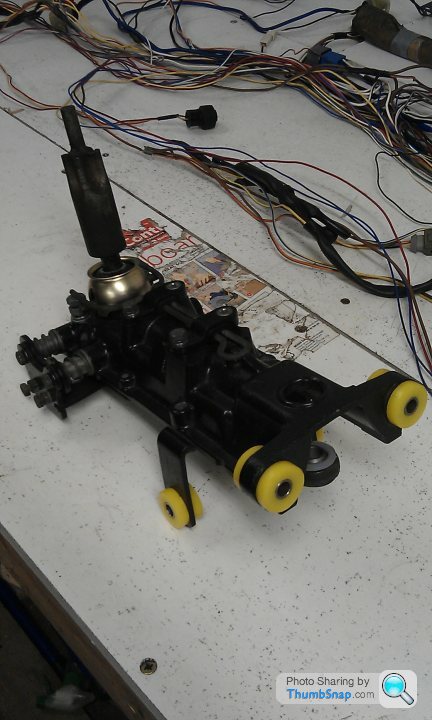
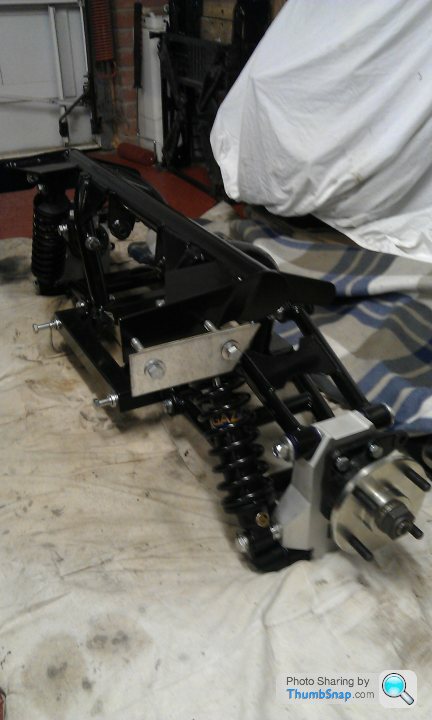
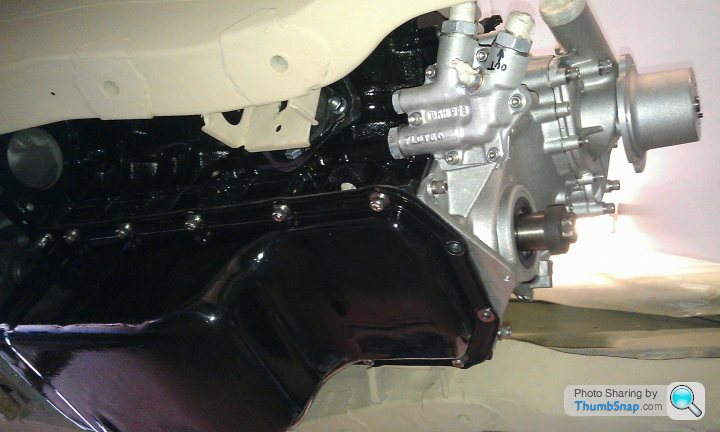
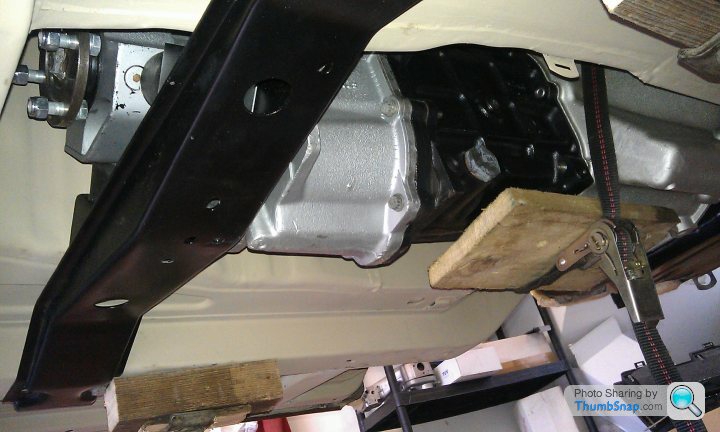
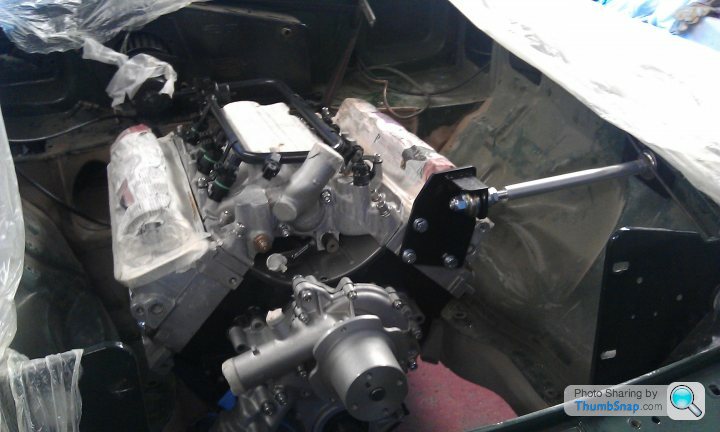
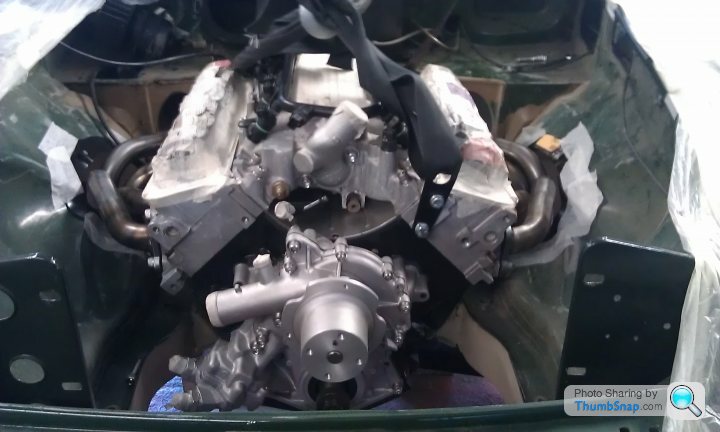
Reference the conversion, here are some of the parts nearly ready to be fitted...

Will post more pics as the Autumn/Winter work progresses. Optimistically, I'm intending the conversion to be ready and on the road 1st April 2014...
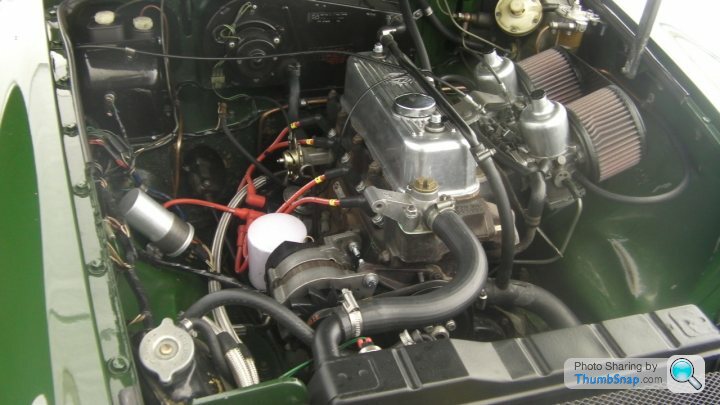
Reference the conversion, here are some of the parts nearly ready to be fitted...
Will post more pics as the Autumn/Winter work progresses. Optimistically, I'm intending the conversion to be ready and on the road 1st April 2014...
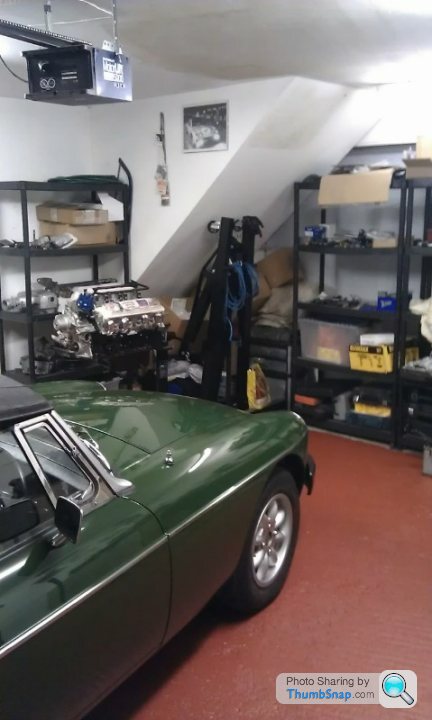
hi tony, yes, can't believe where the year has gone. lot's happened...relocated to west berks, new job plus all the mgb prep' work. frankly there's been masses to correctly spec' and buy. the garage and office above is looking like a mg/v8 parts store...and that's before the de-install starts. it would be great to get together, with ben too...though haven't heard from him for a while...did he not get married this year? let's catch up soon. rgds, Andrew.

MGHammer said:
MGHammer said:
Any updates, Andrew?
Hello Mr Hammer 
Well, yes...lots. Christmas and New Year got in the way of finishing the underside waxoyl removal and what's become clear is that I really do need a car rotisserie for the finishing off and underside repainting. Looked at rotisserie prices and the only decent one out there is £1300, so pondered naval for a while and realized I could make my own with 2x 680kg rotating engine stands and some extra 2" steel box section & 10mm steel plate. This is taking place this week and this coming w/e. The plan being to get the old girl up in the air by midday Sunday.
Paint-wise, I've opted for tintable UPOL Raptor where I'll add 4% base colour and have a VERY tough polyurethane based body coloured underside. This should look the dogs do-dahs when finished; particularly as all other underside components are brand new.
The V8 wiring loom conversion finally arrived from the US...together with a whopping importation charge that I'd forgotten to factor-in[!] But, the finished product and the complete kit is really very good.
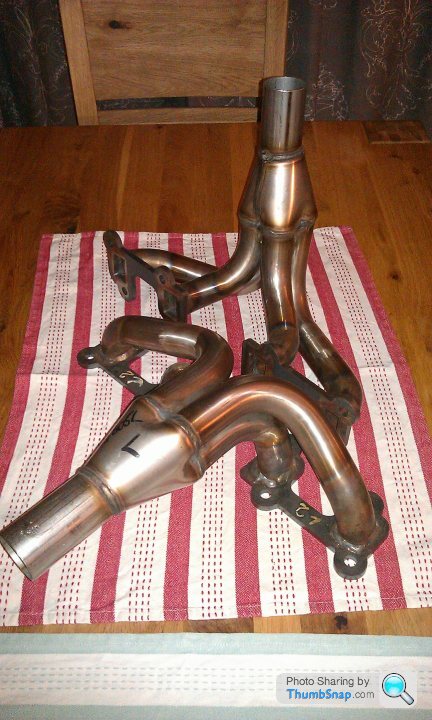
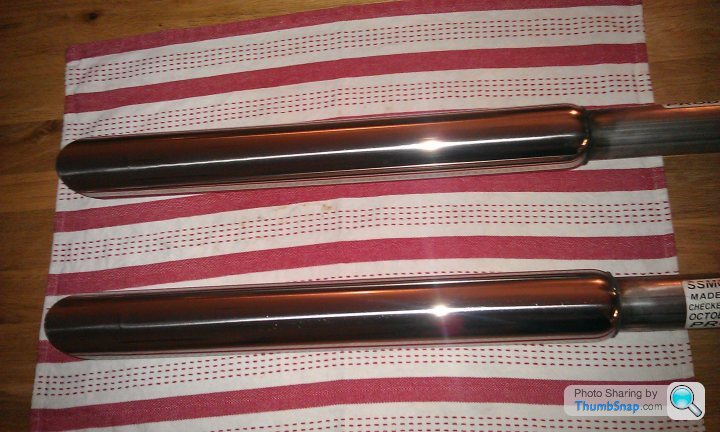
The other major component to arrive is the Supersports exhaust system from MGOC. Have to say a big thanks to these guys as ordered last Monday, arrived @ 08.55 next day and I was still in my dressing gown having a leisurely breakfast when the delivery chap arrived[!] Also, MGOC had this on offer with free delivery and free Supersports mounting kit...so saved a few pennies

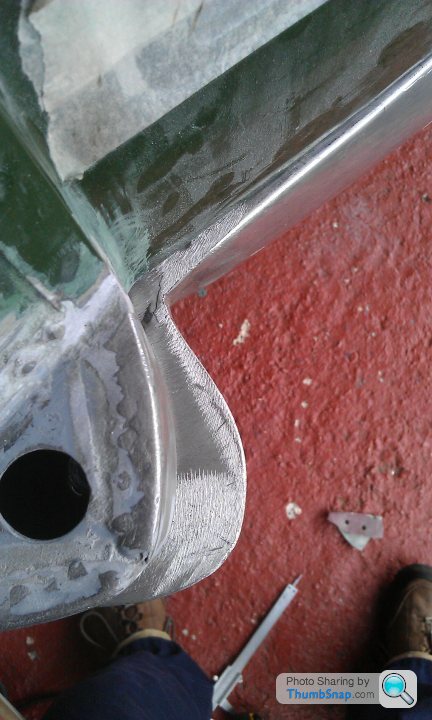
Prior to spraying I need to add sill strengtheners, add the RV8 gearbox tunnel cover and modify the boot floor for the centralized fuel tank. Will post more pics when these are done...so here are some shiny stainless pics for the interim...

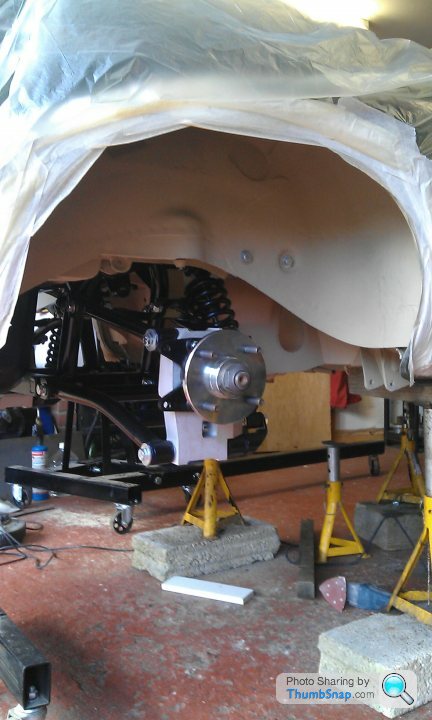
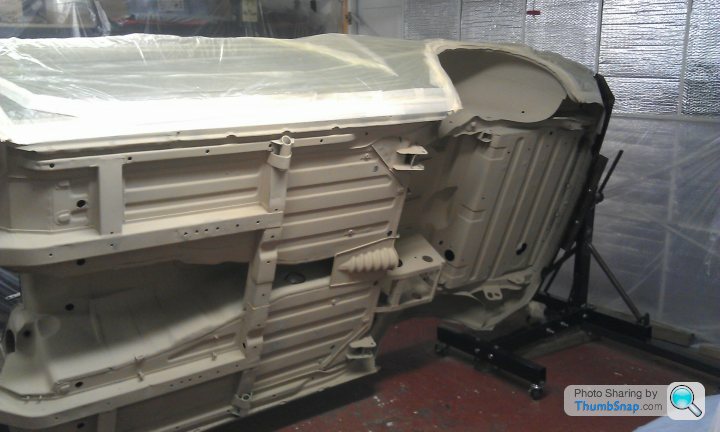
Evening All, right a quick update...having been busting the doo-dahs to get the old girl rotated in order to fully prep' the underside. Bought 2no 680kg engine stands and spent a good amount of time beefing them up with additional steel. Was able to use the B's rubber bumper irons mounted to the chassis. Look closely and you'll see these were beefed up too. Yesterday raised onto the new patent 'v8250 rotisserie' and this morning look what happened...
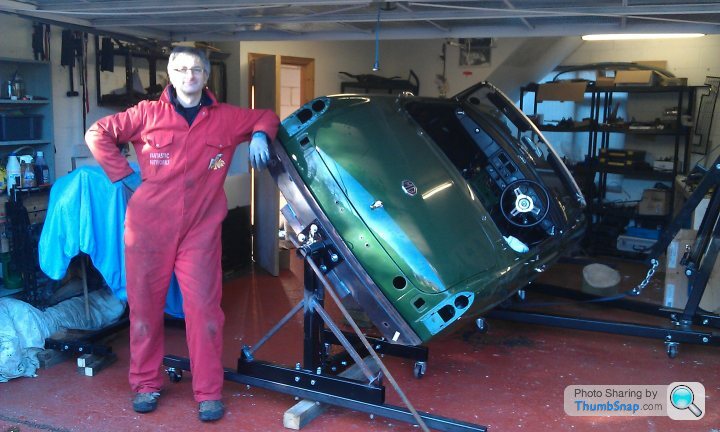
...can really press-on now with removing the last bits of the bloody awful to remove waxoyl and stonechip. Will post pics when there's something exciting to see...
...can really press-on now with removing the last bits of the bloody awful to remove waxoyl and stonechip. Will post pics when there's something exciting to see...
mgtony said:
I've never seen a rear rubber bumper armature that isn't rusted out!
You could go overboard and put on an electric motor with a few sprockets and a remote control to make it rotate, strap yourself in and have endless fun!
Hi Tony, yes agree ref' rear bumper iron though luckily mine's in good condition. Despite this I still reinforced both front and rears ensuring complete rigidity both in length and depth. I did think about motorizing but knew I really wanted slow and stable control during rotation. As you can imagine there were a few 'buttock clenching' moments as the old girl was raised and then very gently rolled. It's a very unusual position for ones car to be in. Yesterday afternoon was great as the underside access is now fabulous You could go overboard and put on an electric motor with a few sprockets and a remote control to make it rotate, strap yourself in and have endless fun!

Edited by v8250 on Monday 20th January 18:34
Afternoon All, so the work continues at quite a rate. Underbody's spotlessly clean of waxoyl and stone chip. Treated with two coats of Hydrate 80 and is now in primer. Completing dummy run assembly and to install the the stainless steel twin exhaust. To be frank, it's a slight pain in the arse as the kit supplied is not designed for the Hoyle rear suspension so am having to hand make the rear sections between the front silencers and rear baffled tail pipes. Here, the space is very tight between the centralized fuel tank and the rear chassis inner verticals; but they will fit. Here are some time for tea pics'. Plus, have just had insurance quote for only £139.50 with the correct agreed valuation...!! That's not bad considering the level of modifications
PS those very nice people as British Motor Heritage in Witney have donated the gearbox tunnel height increasing plate to the project. Tunnel has been cut out, new plate goes in this weekend...
PS those very nice people as British Motor Heritage in Witney have donated the gearbox tunnel height increasing plate to the project. Tunnel has been cut out, new plate goes in this weekend...
Edited by v8250 on Thursday 20th March 14:25
Church of Noise said:
Bookmarked! Is that one of Clive Wheatly's engine steady bars?
Seriously considering getting one for mine as well...
Keep up the good work!
Thanks Alex, yes it's one of Clive's steady bars. In the flesh they're very well thought through, lightweight, and strong. I think all B' V8's should have a steady bar of some sort as the old style engine mounting rubbers do take a pounding...similar with the overall weight/forces through to the gearbox too...so every little helps.Seriously considering getting one for mine as well...
Keep up the good work!
PS have you signed up for Club 55 yet?
Project update: have been uber busy completing final prep' before spraying with tintable Raptor & waiting delivery of MGC bonnet and Sebring rear valence from Honeybourne Mouldings. Yesterday completed Raptor spraying and am really chuffed with the results as this was the first time I've sprayed a car. Used one of the turbine-type sprayer called an Apollo Spraymaster 1200 and it's a very good tool giving excellent results. What do you guys think...


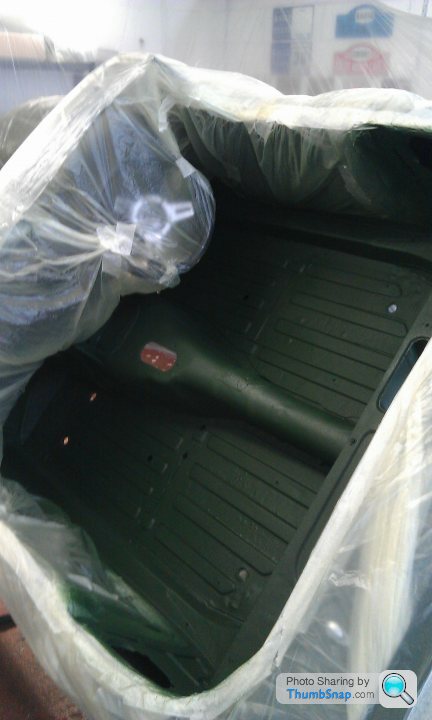
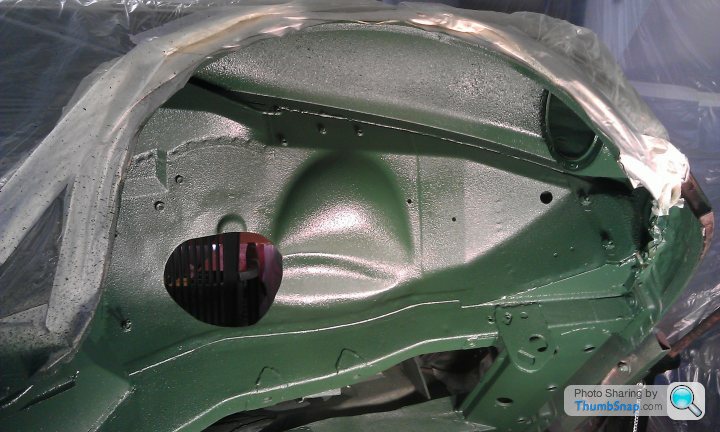

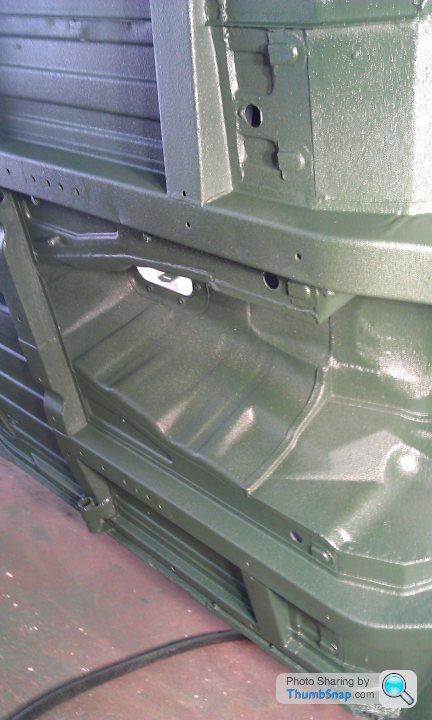

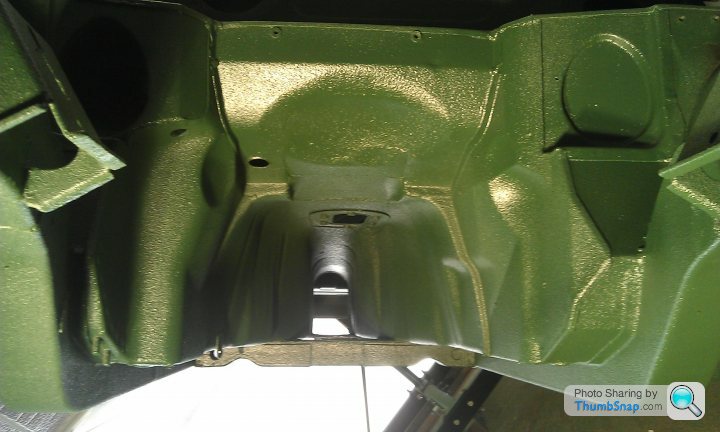
The colour looks odd in the pics'...it is Brooklands Green in the flesh!
Next stage is to remove car from the rotisserie and back onto axle stands...then fit front and rear valence, apparently a bugger of a job[!], buzz back and prep engine bay, inner boot and bonnet. This w/e rework the V8 injection wiring loom. Once all done I can finally start on the car build proper. A+
Edited by v8250 on Saturday 3rd May 12:46
Thanks, task. The outer panels were resprayed a few years ago with acrylic. I'm needing to spray the engine bay, font end/Sebring spoiler, bonnet, boot, rear Sebring spoiler and near area; so...this is going to be challenging as 1, never sprayed with acrylic before and 2, I'm going to have the learn to 'blend'. Still some way to go before spraying starts as still at prep' stage.
Have you any advice on the above which would help?
Have you any advice on the above which would help?
task said:
Are you using an air-fed mask to spray the acrylic?
Not quite. I'm using the Gerson 2k disposables [36hr max' usage - I'll only use for 8hrs max'] plus complete coverall and face mask + have rigged up very good airflow [input and extraction] within tented double garage. Garage door open 1/3rd, side door open + 3x large velux windows open on 1st floor + 2x industrial air extractor units; the airflow is excellent. Using HVLP so there's only a tiny amount of overspray. Used this set up when sprayed the Raptor tintable. The working environment was very comfortable from initial mixing to finished job. Am very aware of what 2k acrylic and isocyanates can do. I do value my health.Morning Alex, sat here with second cup of tea of the day knowing I need to get back into the garage and crack on.
So, progress. Didn't realize it's such a long time since last posting. The summer to date has been immensely busy with the V8 project, searching for/buying a new Forester, the summer holiday et al. So, the V8 conversion is progressing well. Finally the bodywork is finished...at last! And to be frank, the Sebring back end was very very difficult to get right. Simply, the GRP panels available are all crap and need an enormous amount of reworking to fit and look correct. I even tracked down an alloy panel that was 20mm out of shape in some areas; bloody ridiculous.
Naturally, it was rejected.
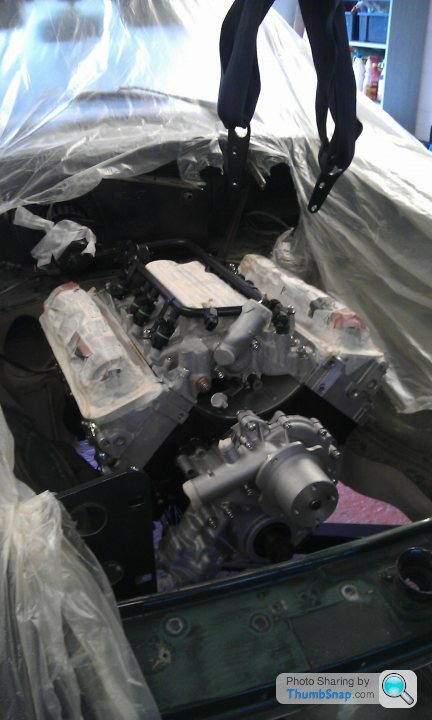
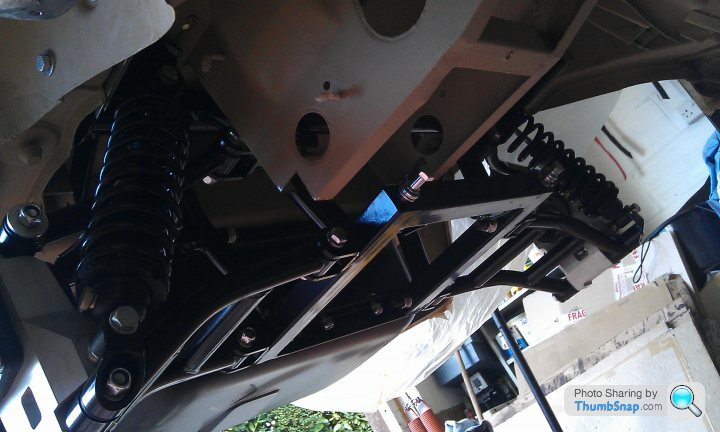
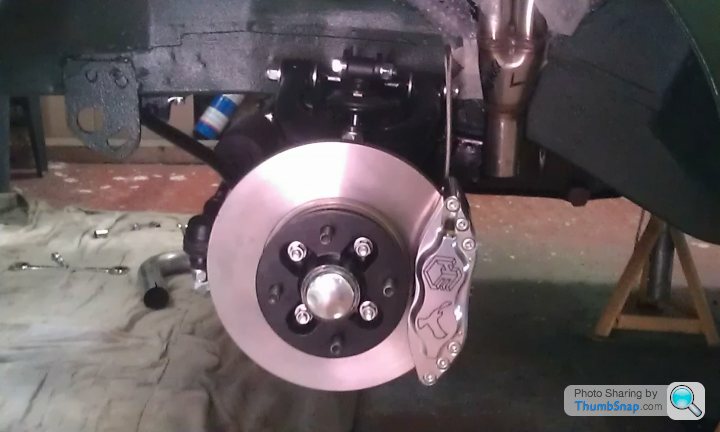
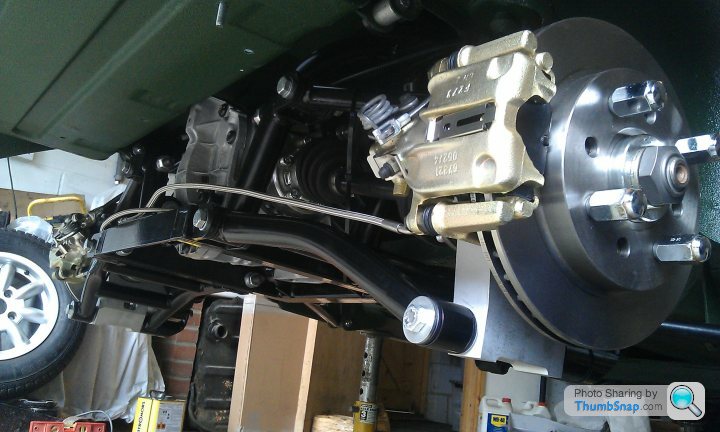
Good news is that the rear end is looking pretty good and for a novice sprayer I'm very pleased with the results. Am slowly forgetting how many hours were spent profiling, sanding back, flattening back with 1500 and 2000 grade and finally polishing. Plus engine, gearbox, front + rear suspension and steering rack are installed. I'll send some updated pics over the weekend.
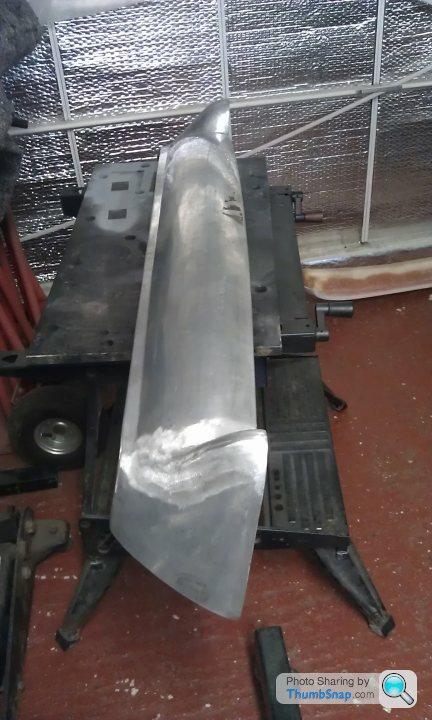
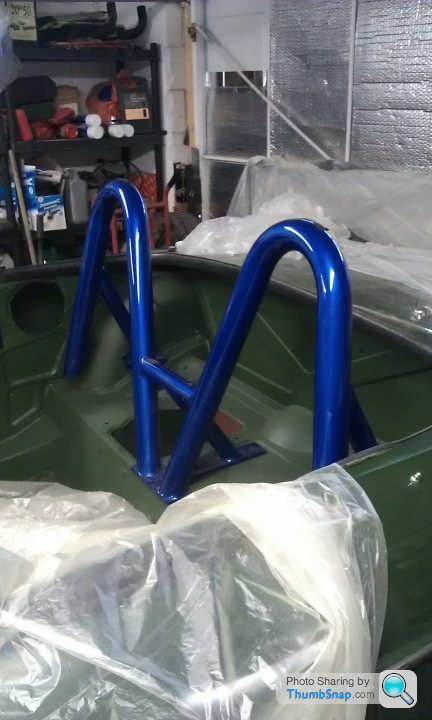
Another bonus is that I had wanted to install a good quality twin roll hoop system behind the seats; these are very hard to find. Fellow PH'er, llohcins, emailed me with a link to an ebay sale. Made contact with the seller who, as luck would have it, lived only 40 minutes away. Viewed and bought straight away as the workmanship and welding is very good. It needs sanding back and repainting...
Need to buy the wheels and tyres this week as standard 14" are too small to fit over discs and calipers. The car hasn't rolled since last October and need the car sitting on wheels to set up and fully tighten the suspension.
Simon what's new fella'? How's your GT coming on? Fancy a beer in deepest darkest West Berkshire?
So, progress. Didn't realize it's such a long time since last posting. The summer to date has been immensely busy with the V8 project, searching for/buying a new Forester, the summer holiday et al. So, the V8 conversion is progressing well. Finally the bodywork is finished...at last! And to be frank, the Sebring back end was very very difficult to get right. Simply, the GRP panels available are all crap and need an enormous amount of reworking to fit and look correct. I even tracked down an alloy panel that was 20mm out of shape in some areas; bloody ridiculous.
Naturally, it was rejected.
Good news is that the rear end is looking pretty good and for a novice sprayer I'm very pleased with the results. Am slowly forgetting how many hours were spent profiling, sanding back, flattening back with 1500 and 2000 grade and finally polishing. Plus engine, gearbox, front + rear suspension and steering rack are installed. I'll send some updated pics over the weekend.
Another bonus is that I had wanted to install a good quality twin roll hoop system behind the seats; these are very hard to find. Fellow PH'er, llohcins, emailed me with a link to an ebay sale. Made contact with the seller who, as luck would have it, lived only 40 minutes away. Viewed and bought straight away as the workmanship and welding is very good. It needs sanding back and repainting...
Need to buy the wheels and tyres this week as standard 14" are too small to fit over discs and calipers. The car hasn't rolled since last October and need the car sitting on wheels to set up and fully tighten the suspension.
Simon
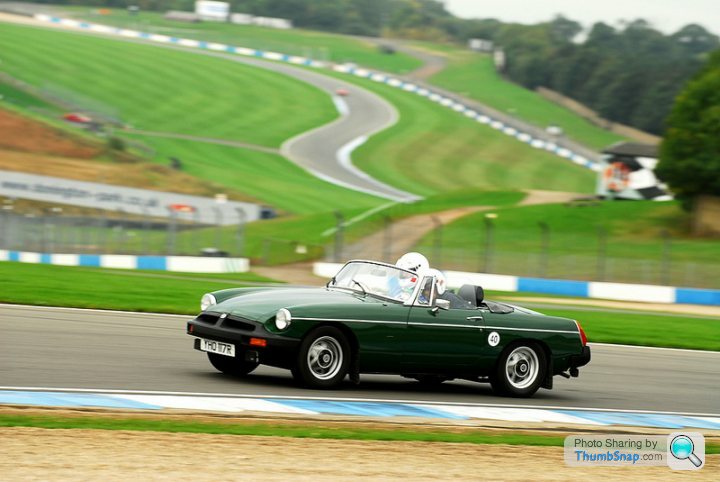
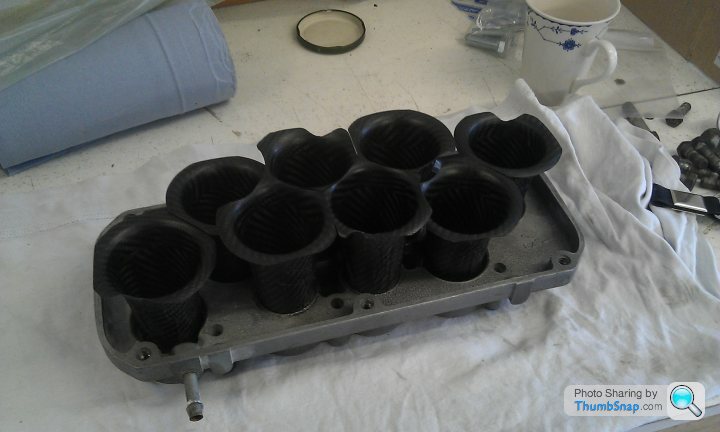
what's new fella'? How's your GT coming on? Fancy a beer in deepest darkest West Berkshire?Alec/All, here are some 'teaser' pics taken this morning...and it's been a slightly expensive morning as ordered new 6x15 wheels and tyres, lightweight starter motor and alternator, hydraulic boot stays, early rear lamp assemblies...plus the ACT plenum trumpets arrived in post this morning

Gassing Station | MG | Top of Page | What's New | My Stuff