VW Golf GTi MK1 Restoration
Discussion


Hi
I have just completed a nut and bolt restoration of a Ford Fiesta RS Turbo.
The whole thread can be viewed here:
http://www.pistonheads.com/gassing/topic.asp?h=0&a...
With this completed I decided to do the same sort of thing with a MK1 Golf GTi.
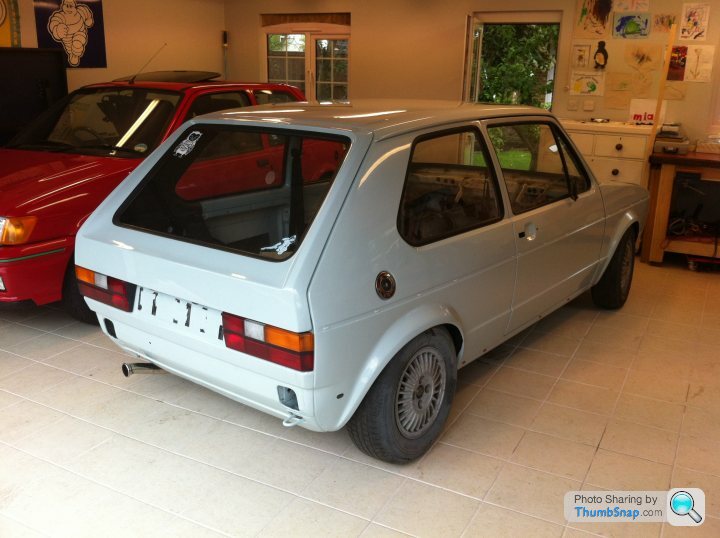
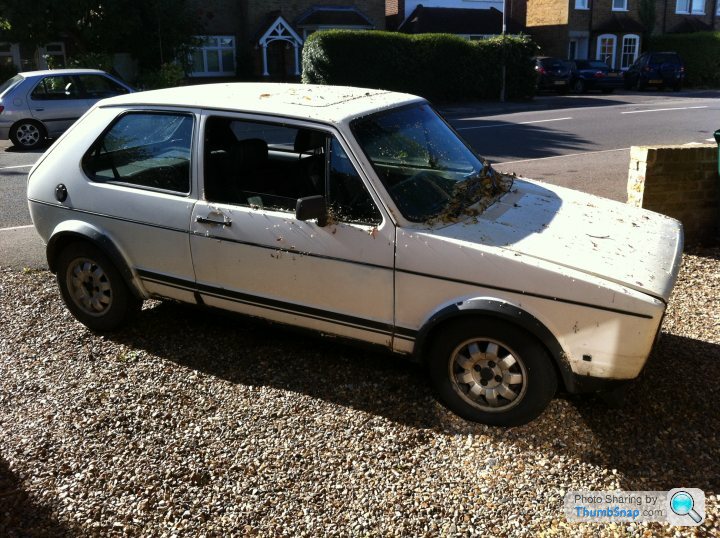
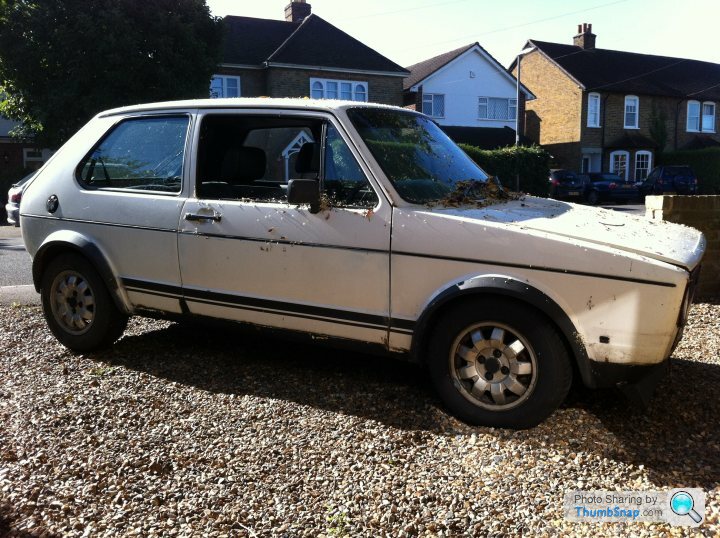
The car: 1982 VW Golf MK1 Gti / Should be (will be) White / 7 keepers / EGO 414X
Well the rolling shell was dropped to me 48 hours ago and I spent a few hours on the weekend remvoing the running gear etc.
If the interest is there I will update frequently.
The plan is to restore the shell to original before buying a donor mk1 Gti (probably with a rotten shell) and transfering the required parts. All parts will be new or refurbished.
Here with the pictures from the weekend:
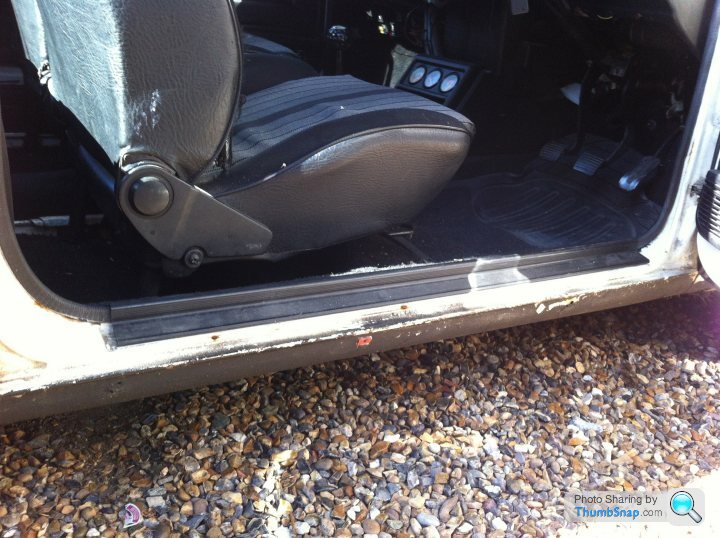
When it was dropped:
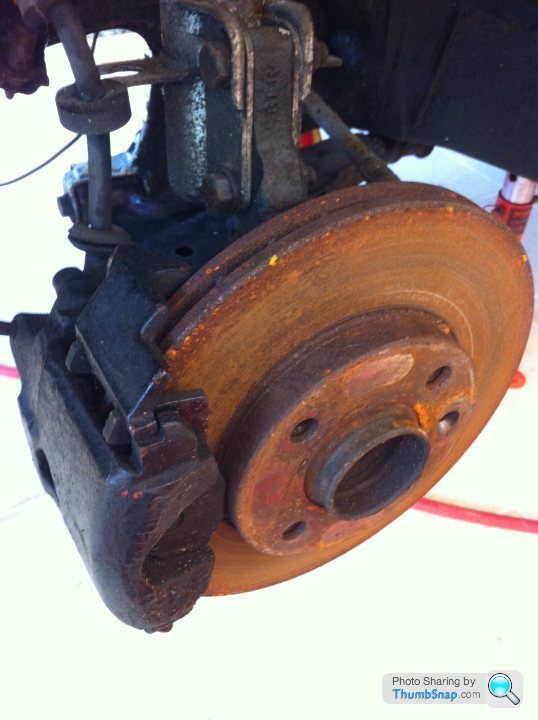
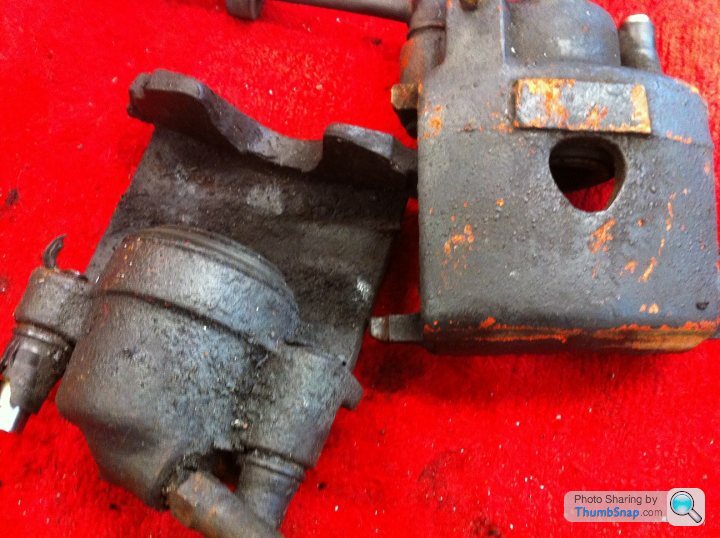
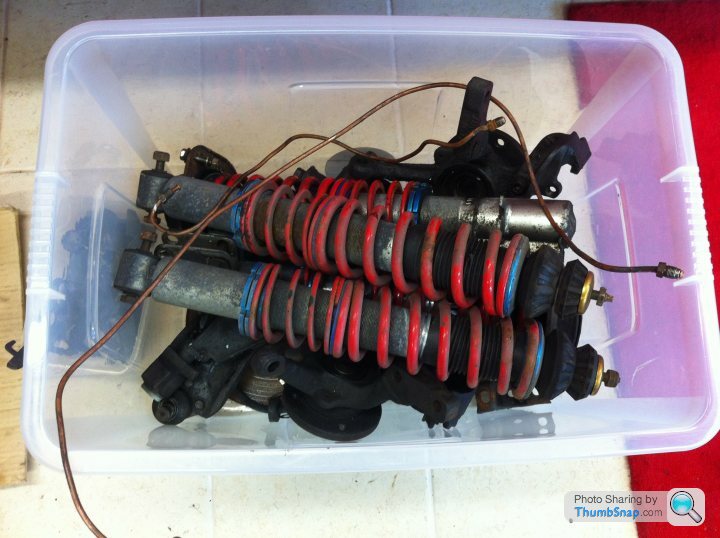
The poor state of the brakes etc; believe it or not the seller informed me the brakes and suspension componenets were new......clown
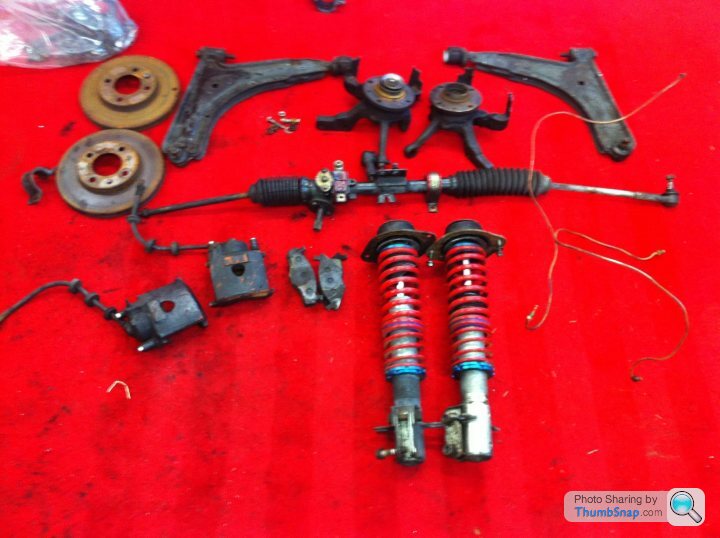
Front components removed:
Rear beam and fuel tank:
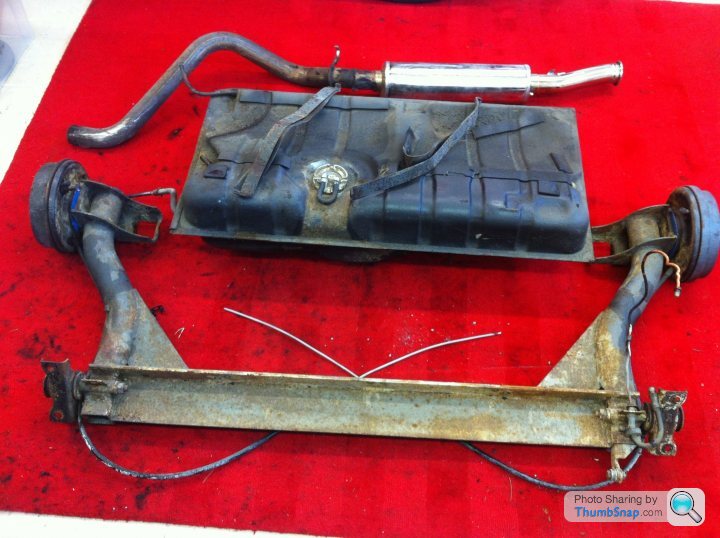
Rear suspension etc:
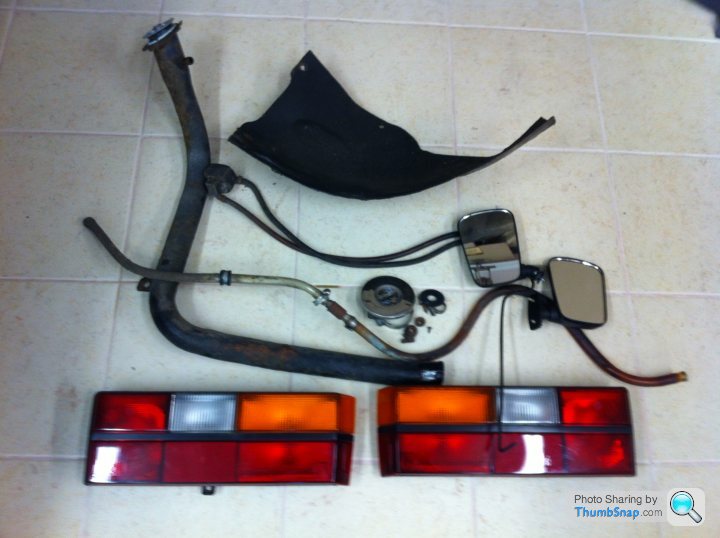
Rear lights and fuel filler neck:
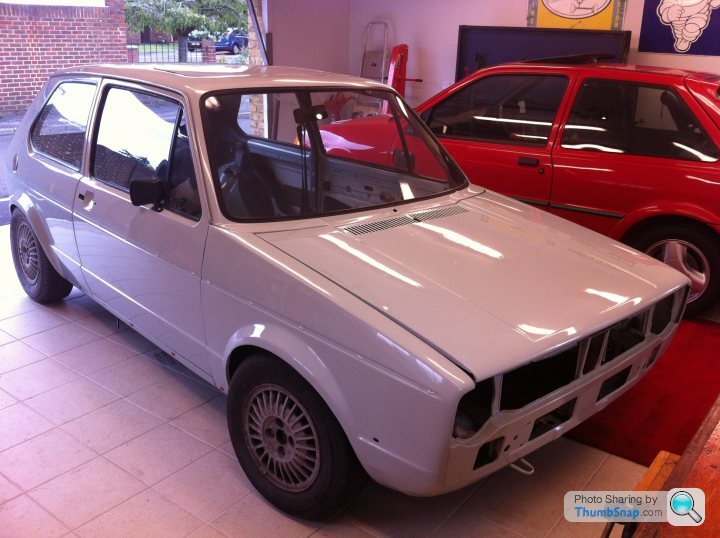
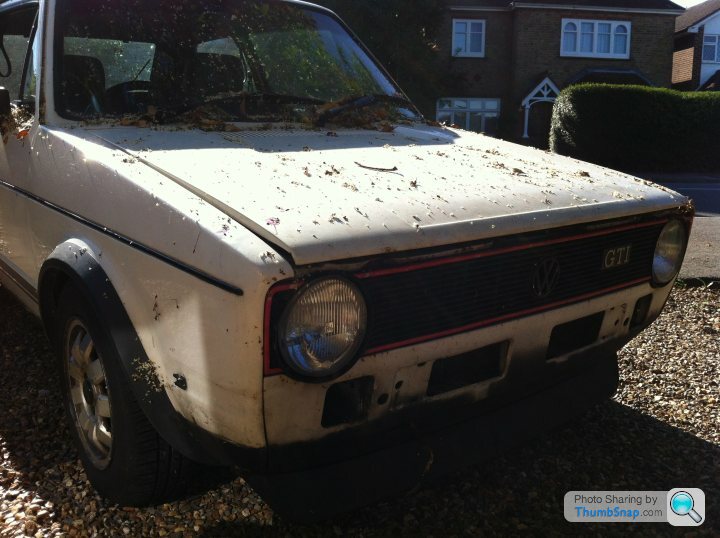
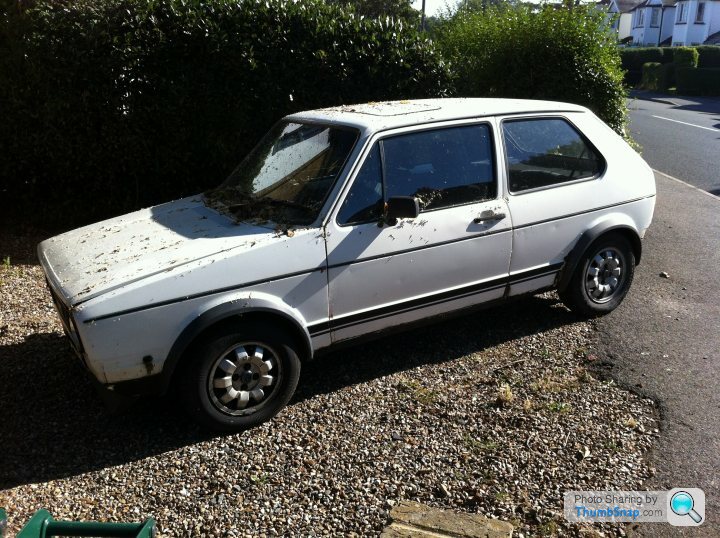
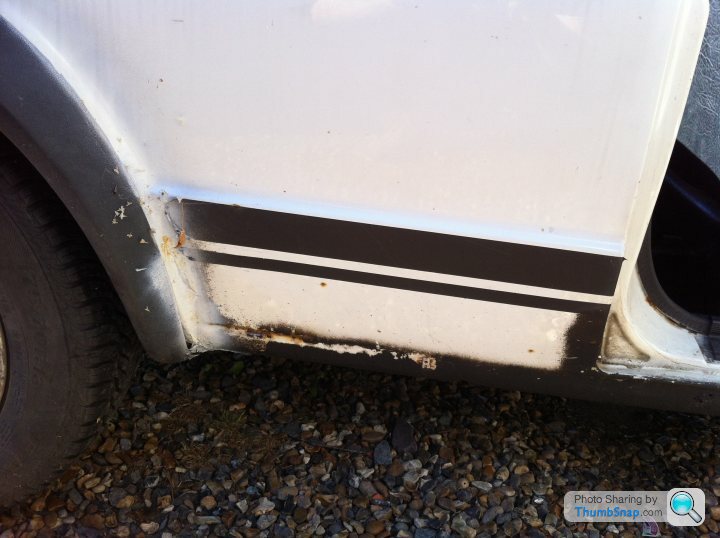
The car was reportedly painted in 2011 a one of blue. To be honest it is not the best paint job. It will be fully repaired where need be and I will paint it in the colour it shoule be, White.
Cheers
I have just completed a nut and bolt restoration of a Ford Fiesta RS Turbo.
The whole thread can be viewed here:
http://www.pistonheads.com/gassing/topic.asp?h=0&a...
With this completed I decided to do the same sort of thing with a MK1 Golf GTi.
The car: 1982 VW Golf MK1 Gti / Should be (will be) White / 7 keepers / EGO 414X
Well the rolling shell was dropped to me 48 hours ago and I spent a few hours on the weekend remvoing the running gear etc.
If the interest is there I will update frequently.
The plan is to restore the shell to original before buying a donor mk1 Gti (probably with a rotten shell) and transfering the required parts. All parts will be new or refurbished.
Here with the pictures from the weekend:
When it was dropped:
The poor state of the brakes etc; believe it or not the seller informed me the brakes and suspension componenets were new......clown
Front components removed:
Rear beam and fuel tank:
Rear suspension etc:
Rear lights and fuel filler neck:
The car was reportedly painted in 2011 a one of blue. To be honest it is not the best paint job. It will be fully repaired where need be and I will paint it in the colour it shoule be, White.
Cheers
 boy said:
MJK 24 said:
Looking forward to this!
I've owned a Mk2 Scirocco for 14 years and I've just done a top to bottom refurb of the steering, brakes and suspension with the aim of making it drive like a brand new one. Why am I telling you this? Because EVERY mechanical component on a Mk2 Scirocco is identical with a Mk1 Golf.
I've used:
Bilstein B4 Dampers (OEM stiffness)
Eibach Springs & Anti Roll Bars
Superflex Bushes (OEM stiffness)
Lemforder (OEM) track rod ends, ball joints and steering arms
GKN (OEM) CV joints and boots
SKF (OEM) wheel bearings and top mounts.
Steering rack was returned by a local company.
When it was all reassembled, I had the camber and tracking set up on a Hunter type rig. 0.18 toe and 1.25 degrees of camber on the front. The end result is phenomenal. High speed stability is excellent. Handling and grip are a revelation. It's just so progressive. BUT most importantly to me, the ride quality is superb. No crashing or banging or bumping
and thumping over pot holes/speed bumps etc. It's just brilliant and the difference to before is staggering. As someone else said, avoid cheap coil over kits unless you like the bounce down the road with zero control!
Can't recommend the above set up enough. Shout if you want to know where to find the best prices for the above as I did a lot of shopping around to try and keep costs vaguely sensible!
Again, good luck with your project
HiI've owned a Mk2 Scirocco for 14 years and I've just done a top to bottom refurb of the steering, brakes and suspension with the aim of making it drive like a brand new one. Why am I telling you this? Because EVERY mechanical component on a Mk2 Scirocco is identical with a Mk1 Golf.
I've used:
Bilstein B4 Dampers (OEM stiffness)
Eibach Springs & Anti Roll Bars
Superflex Bushes (OEM stiffness)
Lemforder (OEM) track rod ends, ball joints and steering arms
GKN (OEM) CV joints and boots
SKF (OEM) wheel bearings and top mounts.
Steering rack was returned by a local company.
When it was all reassembled, I had the camber and tracking set up on a Hunter type rig. 0.18 toe and 1.25 degrees of camber on the front. The end result is phenomenal. High speed stability is excellent. Handling and grip are a revelation. It's just so progressive. BUT most importantly to me, the ride quality is superb. No crashing or banging or bumping
and thumping over pot holes/speed bumps etc. It's just brilliant and the difference to before is staggering. As someone else said, avoid cheap coil over kits unless you like the bounce down the road with zero control!
Can't recommend the above set up enough. Shout if you want to know where to find the best prices for the above as I did a lot of shopping around to try and keep costs vaguely sensible!
Again, good luck with your project
Thanks again to all who have taken the time to contribute thus far.
MJK: That would be great if you could supply me with the details of the above parts; where you got them from and what you paid etc. PM me if you like.
I have a company coming out on Saturday to remove the windscreen, rear screen and rear windows. The same company will then refit the glass when required.
The job for the next week or so is going to be removing the horrible stone chip from the 4 arches and the floor. I do not know why someone has painted it on...
From manufacture there would have been the standard underseal and it would appear someone has gone over the top of this. It scrapes of with a finger nail so will try some petrol on it to soften it. It is like black tar.
From experience it is long horrible job.
Once it is all removed any damage can be addressed before I paint the floor and the arches white again.
I will post up pictures of my progression.
Hi
Have been doing a few hours on the Golf. As I am sure most will know it will go through the process of looking far worse than it was before it gets better!
I had a company out on the weekend to remove the windscreen, rear screen and rear windows. They will return when need to reinstall.
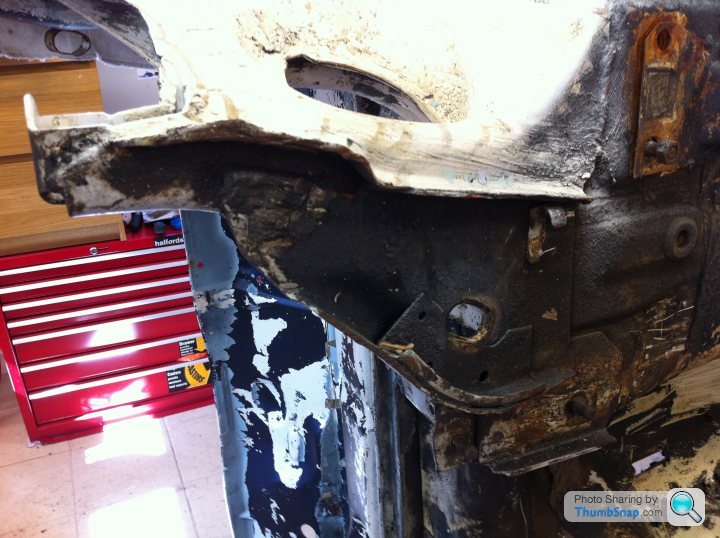
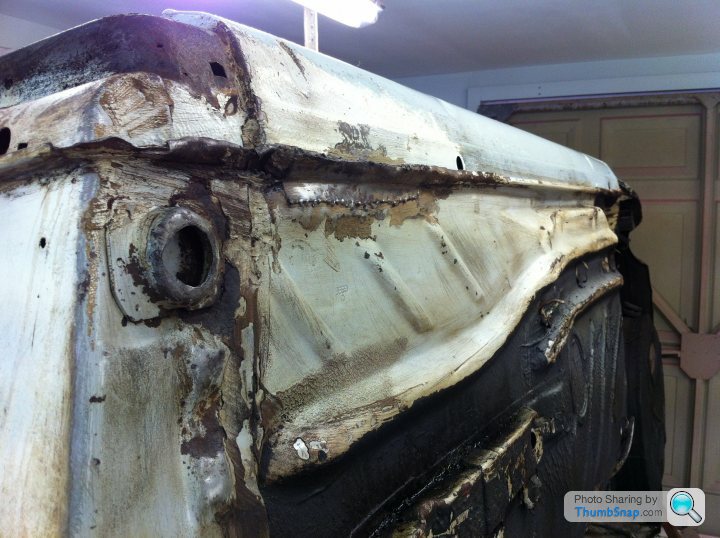
I removed both front wings to start the horrible, horrible task of stripping all of the underseal from all arches and the floor.
I began with the passenger side which took about a day with a blow torch, wire brushes and scrapers. To be honest there is zero rot under the original underseal so I was very pleased. If from now I can just remove the black waxoyl to reveal the dry original underseal and it looks in good condition I will not remove it.
This being said just removing the top black waxoyl is not easy. You will see I have started the drivers side this morning. A heat gun and a wire brush will do it but again I would guess that a day per arch to do it properly.
I have borrowed a shell roller (spit roast principle) from the bodyshop so in a couple of weeks I will roll the shell which will make doing the floor a million times easier.
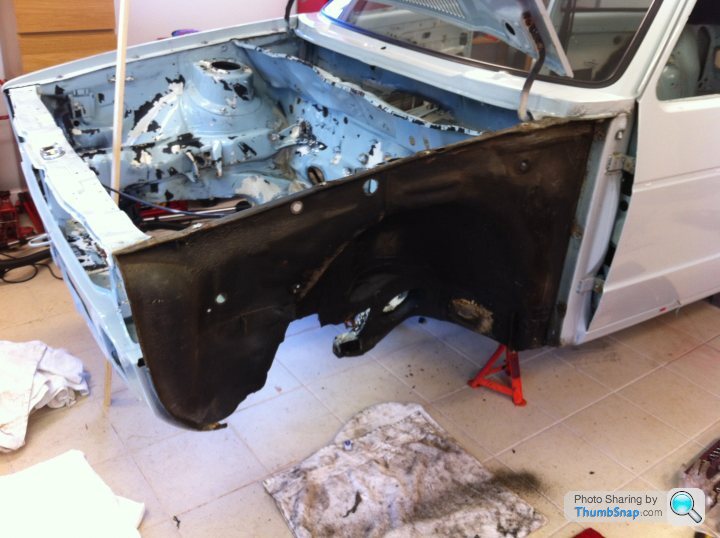
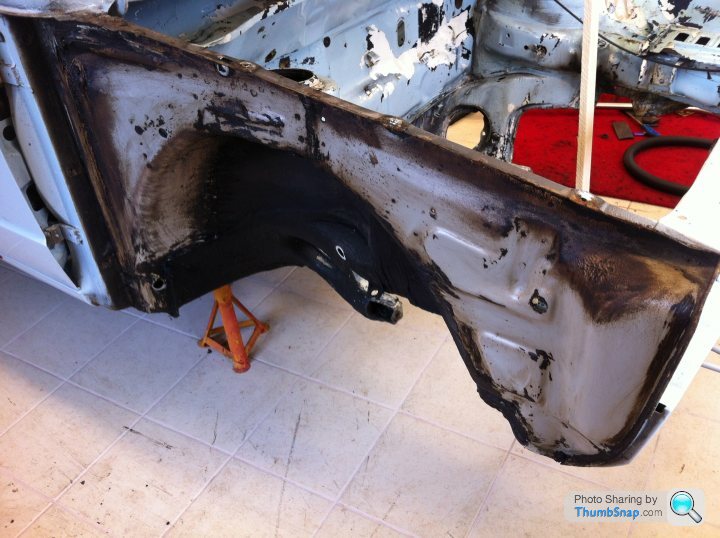
Passenger wing removed; the black is the waxoyl, it looks dry in the picture but a lot of it is still sticky to touch:
During the horrible job:
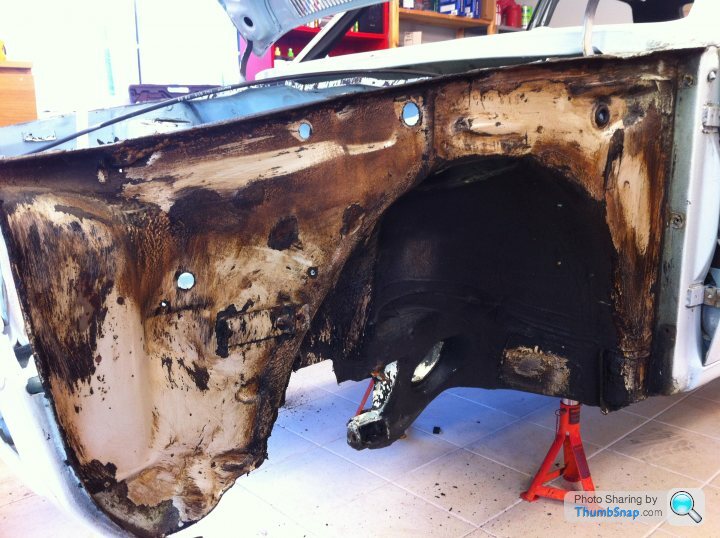
During.....:
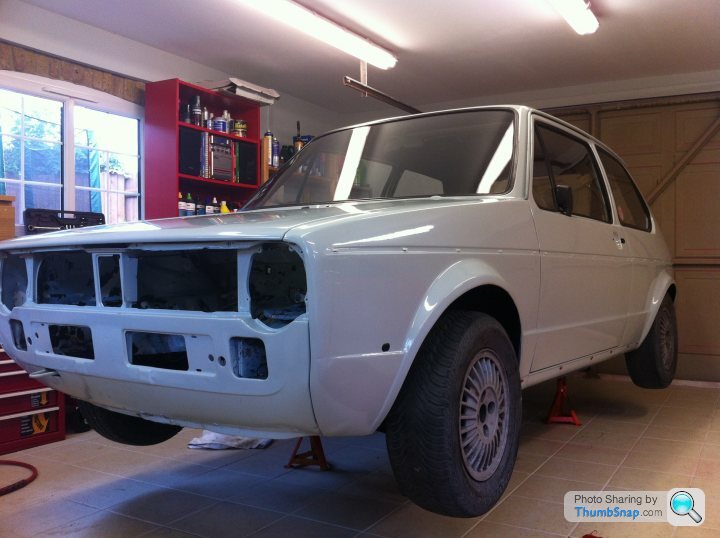
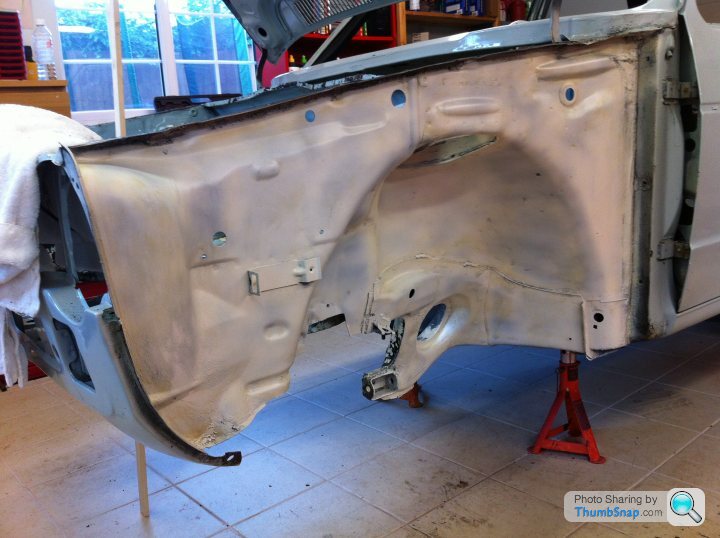
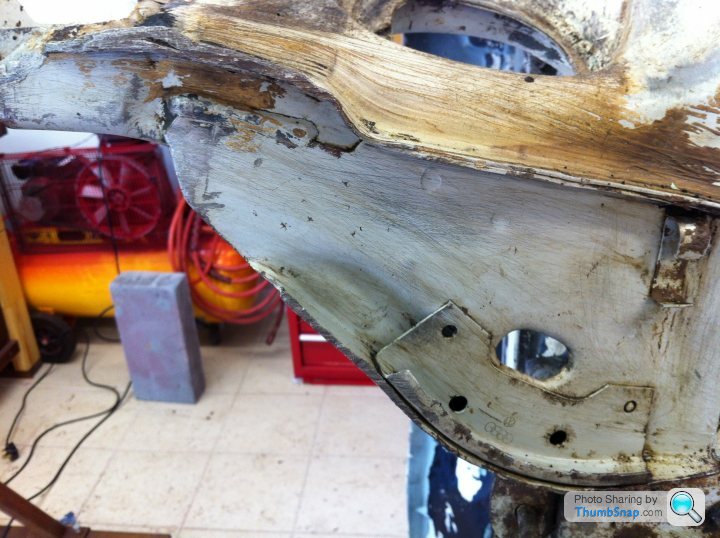
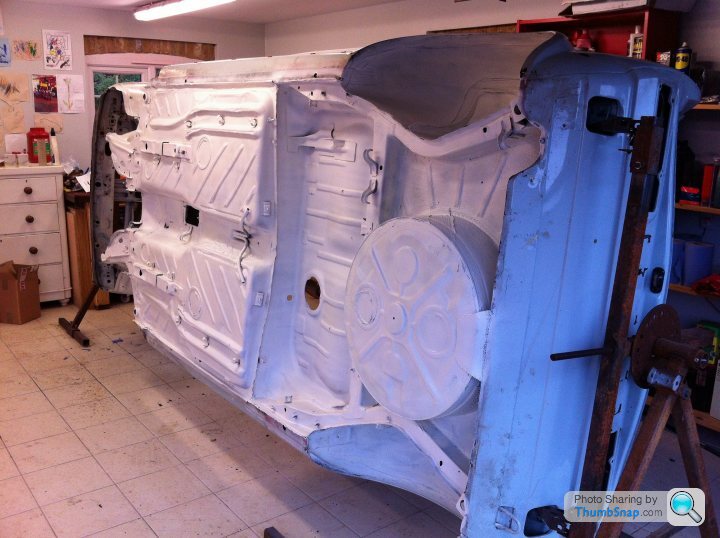
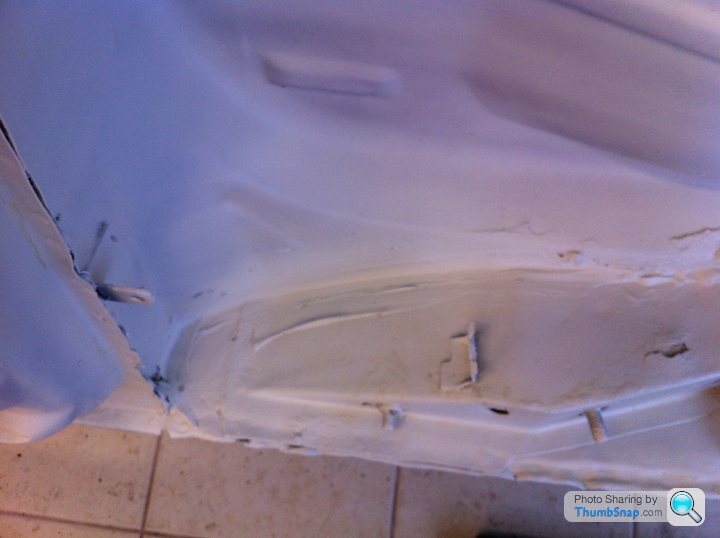
Passenger side completed; the white paint is simply to stop it rusting for now. When all completed, the white will be removed and the bare metal acid etch primed before applying a suitable rubberised top coat:
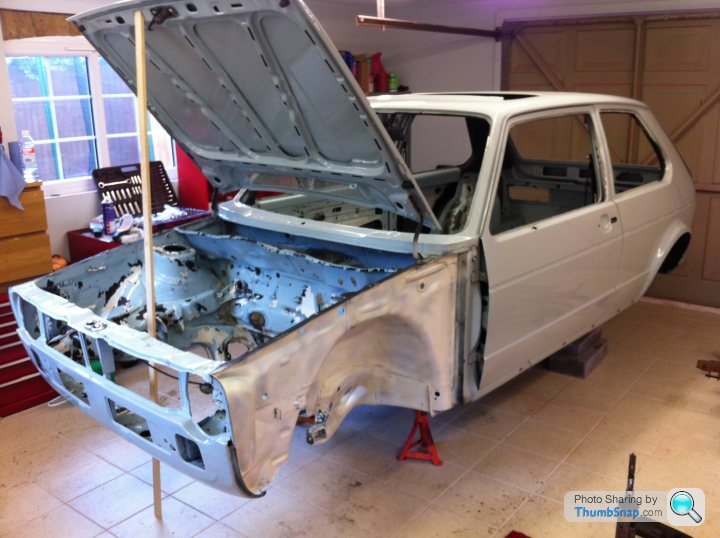
Shell as it stands:
Just started drivers side:
Have been doing a few hours on the Golf. As I am sure most will know it will go through the process of looking far worse than it was before it gets better!
I had a company out on the weekend to remove the windscreen, rear screen and rear windows. They will return when need to reinstall.
I removed both front wings to start the horrible, horrible task of stripping all of the underseal from all arches and the floor.
I began with the passenger side which took about a day with a blow torch, wire brushes and scrapers. To be honest there is zero rot under the original underseal so I was very pleased. If from now I can just remove the black waxoyl to reveal the dry original underseal and it looks in good condition I will not remove it.
This being said just removing the top black waxoyl is not easy. You will see I have started the drivers side this morning. A heat gun and a wire brush will do it but again I would guess that a day per arch to do it properly.
I have borrowed a shell roller (spit roast principle) from the bodyshop so in a couple of weeks I will roll the shell which will make doing the floor a million times easier.
Passenger wing removed; the black is the waxoyl, it looks dry in the picture but a lot of it is still sticky to touch:
During the horrible job:
During.....:
Passenger side completed; the white paint is simply to stop it rusting for now. When all completed, the white will be removed and the bare metal acid etch primed before applying a suitable rubberised top coat:
Shell as it stands:
Just started drivers side:
Hi all
It has been a few weeks....
I have not been spending much time on the Golf due to time restraints but a fair bit has happened since I last updated.
Since my last post I have (see pictures):
Purchased a donor car! A white MK1 GTi in fairly original condition. The shell is in a poor state but naturally that does not bother me as it will be scrapped.
The bumpers have been removed as I needed the bumper irons to attach my shell to the jig/roller!! I have been removing the horrible black oily stone chip/underseal that someone has applied at some point. Horrible job but much easier with it on the roller.
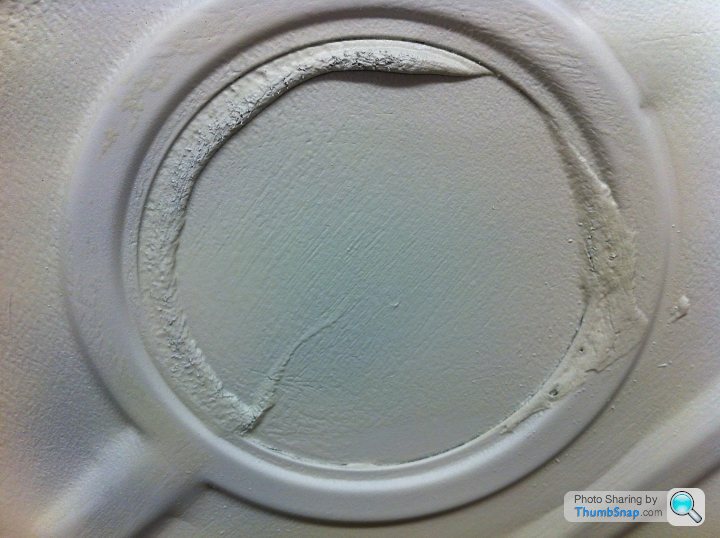
I have drilled out the original wiper holes (someone fitted a single wiper conversion) and removed the stone chip from all arches.
It may not look it but good progress is being made!!
The donor car:
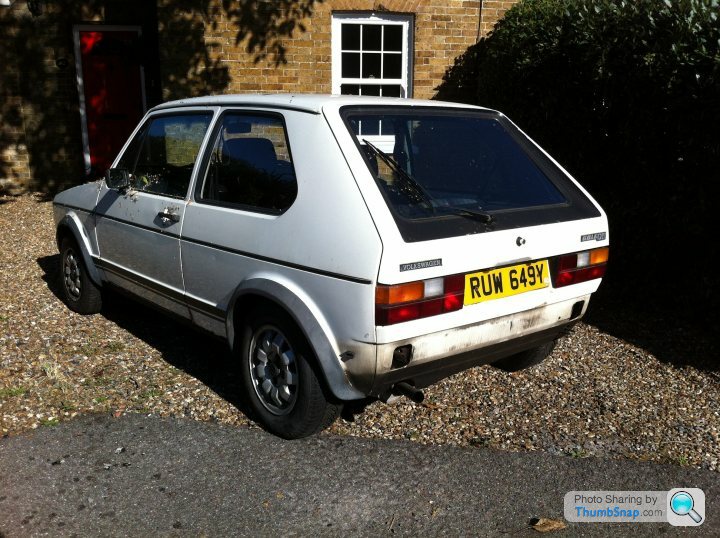
Ok, thats the donor car! As you can see it looks original enough!
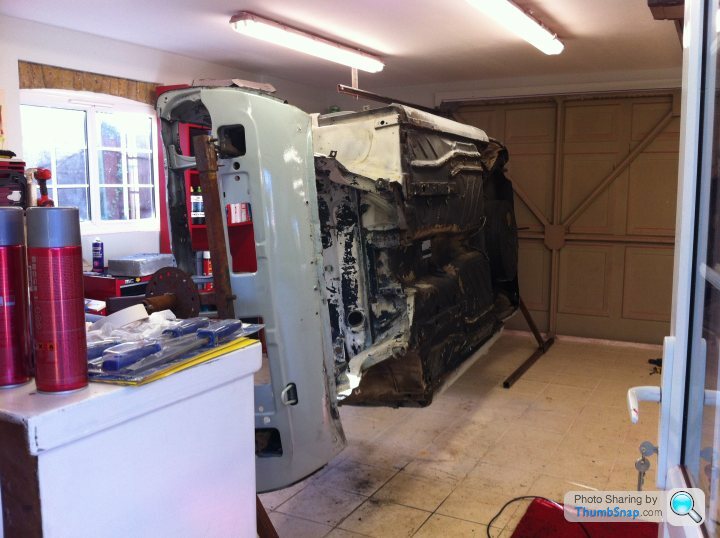
Now the shell that I am using on the roller!!
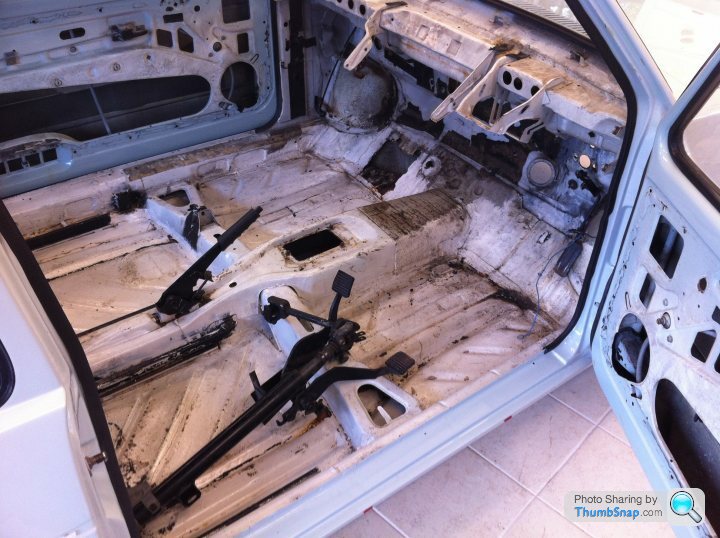
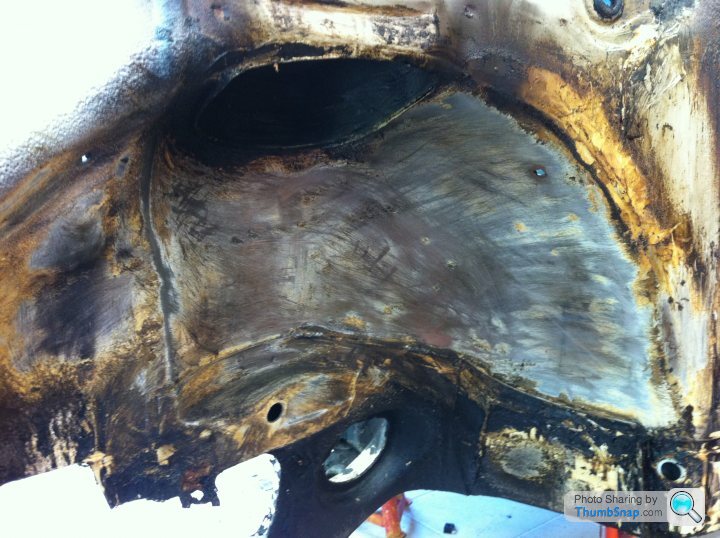
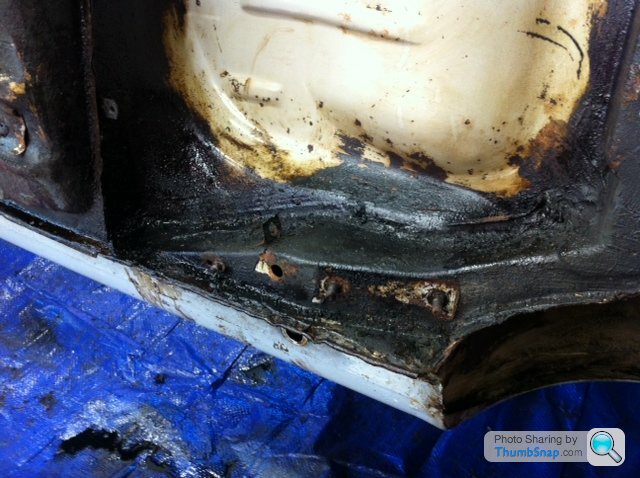
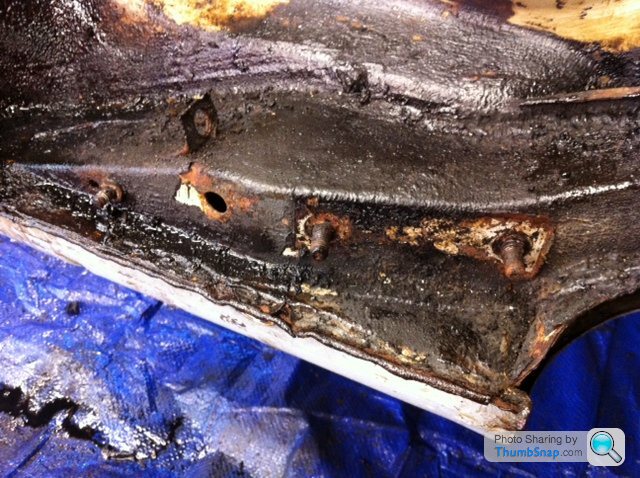
The floor as it was:
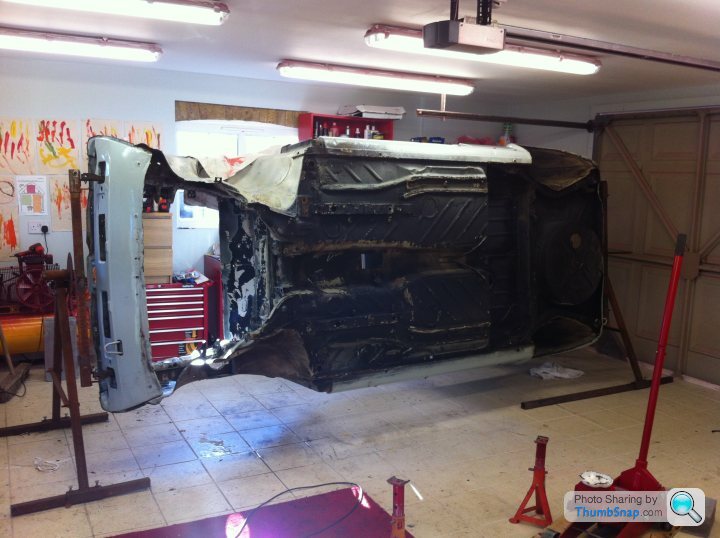
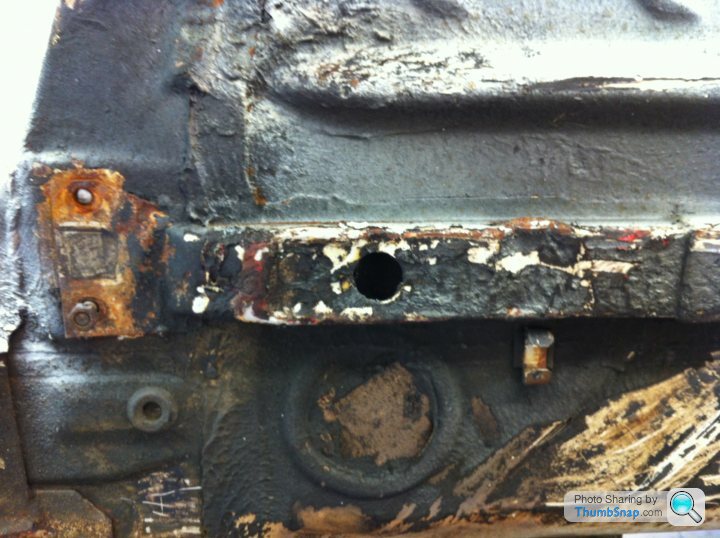
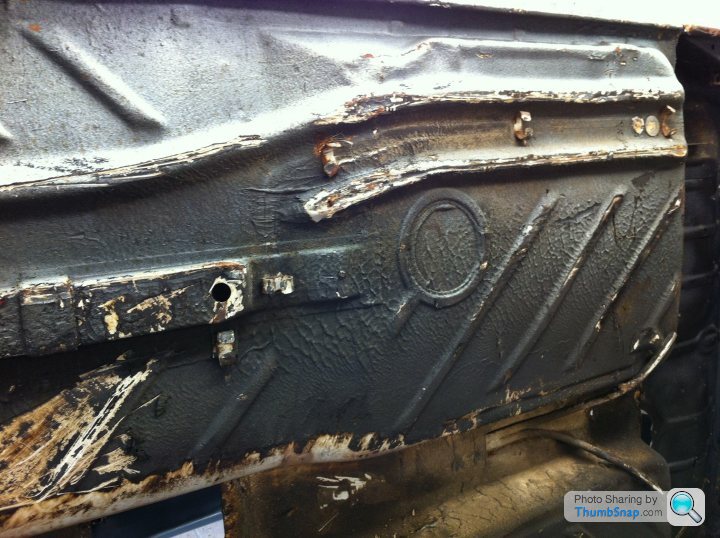
The removal....!
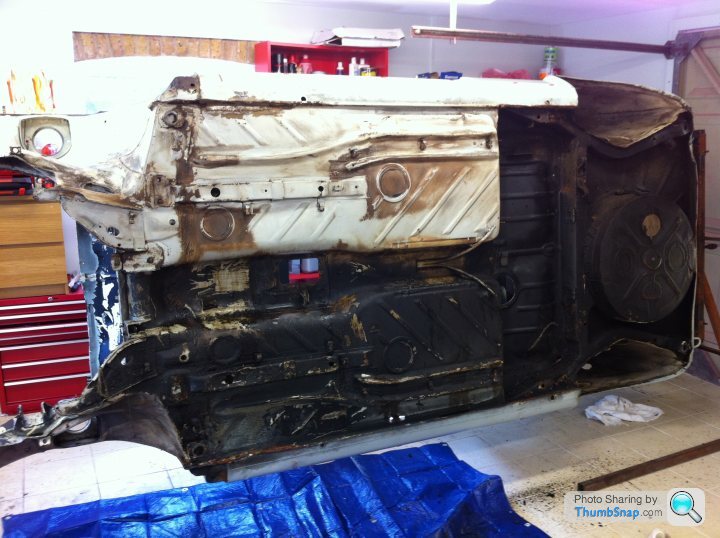
The above removal took a few hours so to complete the floor will take a good week or so. It will then be painted in a suitable whire rubber based paint.
It has been a few weeks....
I have not been spending much time on the Golf due to time restraints but a fair bit has happened since I last updated.
Since my last post I have (see pictures):
Purchased a donor car! A white MK1 GTi in fairly original condition. The shell is in a poor state but naturally that does not bother me as it will be scrapped.
The bumpers have been removed as I needed the bumper irons to attach my shell to the jig/roller!! I have been removing the horrible black oily stone chip/underseal that someone has applied at some point. Horrible job but much easier with it on the roller.
I have drilled out the original wiper holes (someone fitted a single wiper conversion) and removed the stone chip from all arches.
It may not look it but good progress is being made!!
The donor car:
Ok, thats the donor car! As you can see it looks original enough!
Now the shell that I am using on the roller!!
The floor as it was:
The removal....!
The above removal took a few hours so to complete the floor will take a good week or so. It will then be painted in a suitable whire rubber based paint.
hotrubber007 said:
Nice job so far - really enjoy the way you go about this.
could we ask how much you paid for the 'donor' and the 'chosenone '?
also having worked with restoring cars for some 25 years professionally - as you've just seen the OE underseal / and Ziebart wax you've just removed did an amazing job for 30 years. You'll be really hard pressed to find a trade counter with such quality products. Hammerite and such which you find in retail motorstores is not up to much. We had great succes with Bilt hamper products and dinitrol- but do apply it in dry and possibly baking hot conditions.
-do keep what seem to be bilstein adjustable dampers - or PM me - i'll gladly have them.
cheers
Hicould we ask how much you paid for the 'donor' and the 'chosenone '?
also having worked with restoring cars for some 25 years professionally - as you've just seen the OE underseal / and Ziebart wax you've just removed did an amazing job for 30 years. You'll be really hard pressed to find a trade counter with such quality products. Hammerite and such which you find in retail motorstores is not up to much. We had great succes with Bilt hamper products and dinitrol- but do apply it in dry and possibly baking hot conditions.
-do keep what seem to be bilstein adjustable dampers - or PM me - i'll gladly have them.
cheers
Many thanks for your input!
You are more than welcome to the dampers. When the project is finished I will put all the bits I do not need together and you can help yourself.
I have started a thread in the bodywork section as I need advice regarding what paint to now use on the floor and arches.
As you will see from the info so far the only area where the original underseal has been removed is the one front arch. The rest I have just removed the bitumen. All of the original underseal is in great condition so will keep it. Naturally I want it to look good, what would be the best paint to put on directly over the floor and the original underseal??
Cheers
aka_kerrly said:
Please say you removed more than just the bumper irons from the donor and you haven't just scrapped the rest of the car!!!
The donor still has loads of parts which can help other mk1 owners.
Keep up the good work on the "chosen" shell.
No, I did not buy the donor car just for the irons....The donor still has loads of parts which can help other mk1 owners.
Keep up the good work on the "chosen" shell.
I will be using a lot of it.
Cheers
Hi Guys
Thank you for all of your positive comments!
Over the past few weeks the car has remained on the roller to enable easy access to the floor.
As you saw in the last pictures I uploaded, the 4 arches and the floor was covered in the black underseal/bitumen that had been put on by someone after manufacture.
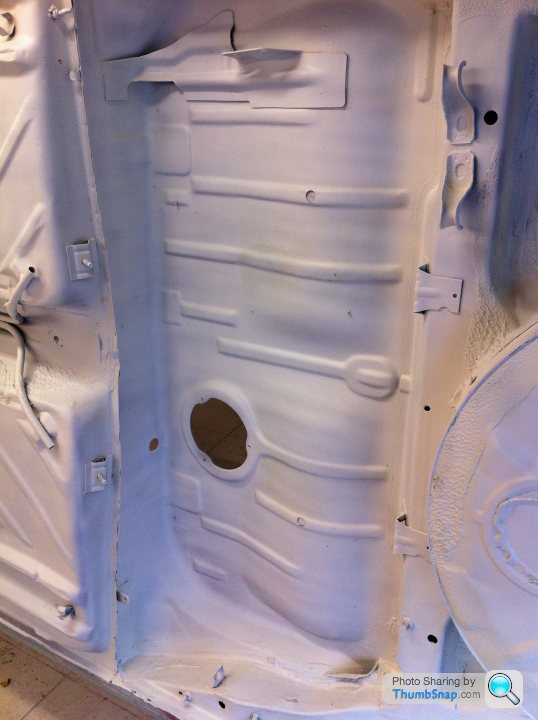
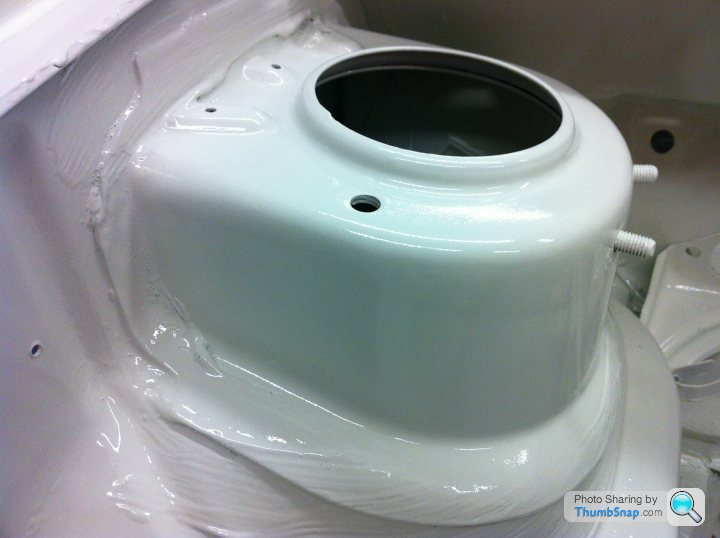
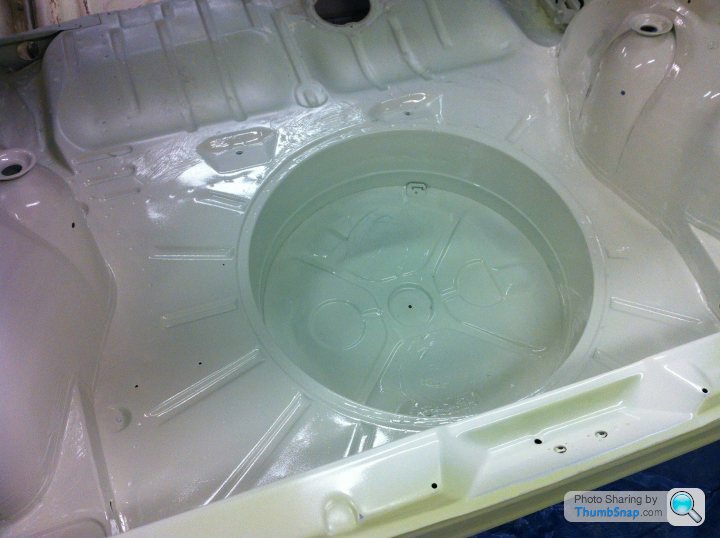
It was a very long, dirty job with a heat gun and lots of white spirit but I eventually removed it all. The floor and arches have now been painted in white stone chip. The original underseal was all in very good condition. I re-seam sealed a few of the joins so it now looks great.
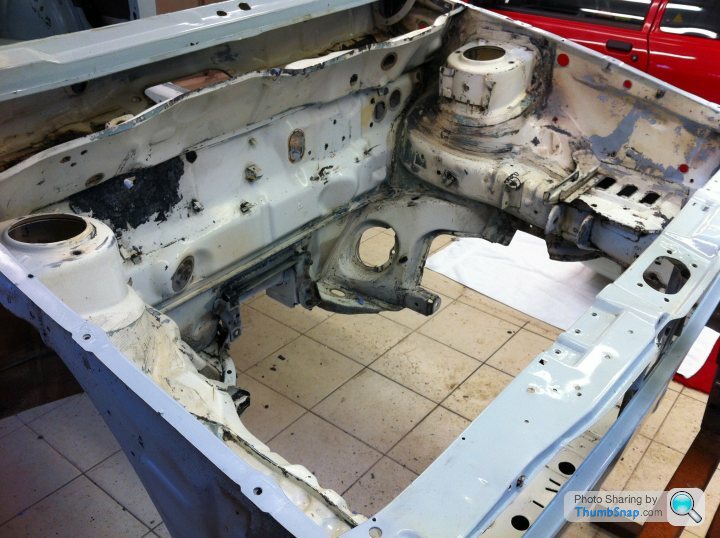
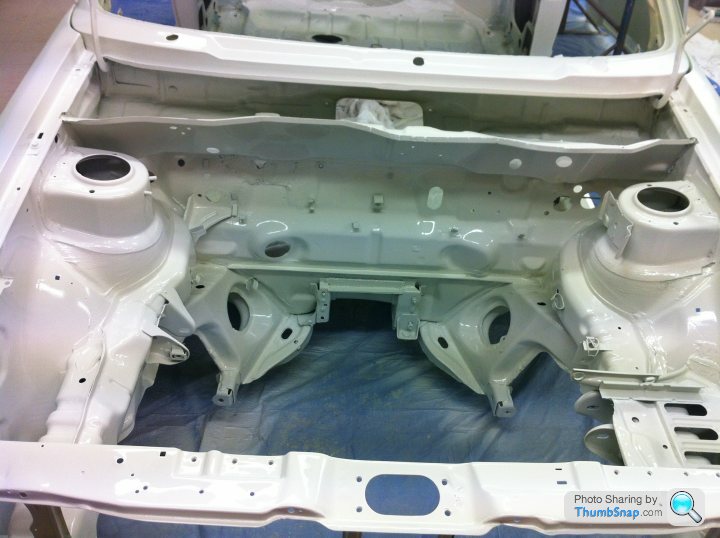
The engine bay was a real mess. I jet washed it which removed most of the blue paint but did not remove the black base coat. After trying a few methods I found that petrol broke it down so I carried on and have now cleaned up the whole of the engine bay.
Today I will clean up the back of the front wings, stone chip them and then fit them back onto the car.
The shell can then be sanded before priming and painting.
Enjoy the pictures!
Cheers
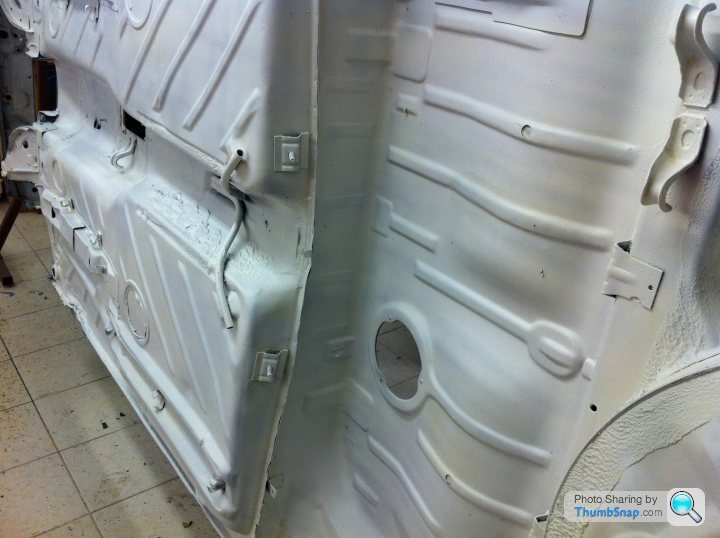
To remind you what most of it was like:
The finished floor!!:
Thank you for all of your positive comments!
Over the past few weeks the car has remained on the roller to enable easy access to the floor.
As you saw in the last pictures I uploaded, the 4 arches and the floor was covered in the black underseal/bitumen that had been put on by someone after manufacture.
It was a very long, dirty job with a heat gun and lots of white spirit but I eventually removed it all. The floor and arches have now been painted in white stone chip. The original underseal was all in very good condition. I re-seam sealed a few of the joins so it now looks great.
The engine bay was a real mess. I jet washed it which removed most of the blue paint but did not remove the black base coat. After trying a few methods I found that petrol broke it down so I carried on and have now cleaned up the whole of the engine bay.
Today I will clean up the back of the front wings, stone chip them and then fit them back onto the car.
The shell can then be sanded before priming and painting.
Enjoy the pictures!
Cheers
To remind you what most of it was like:
The finished floor!!:
Kell said:
I have to congratulate you on your attention to detail and dedication to the cause. If I was wearing a hat, I'd take it off to you.
Just stumbled across this thread, and then read the whole RST one. I'm sure you don't do it for the praise, but well done anyway.
My Dad used to restore old British Bikes (Nortons, Triumphs etc) in his garage and while I'd have loved to have inherited some of his skill.
The only problem I have now, is that if this rebuild takes as long as the last one, I'm now going to have to subscribe to this thread for the next few years ... though I'm sure this will take less time due to the learnings you made on the Fiesta.
Good luck, can't wait to see the finished car.
Just out of interest, what did you reckon the final figure of the RST build was and what did you sell it for?
Hi GuysJust stumbled across this thread, and then read the whole RST one. I'm sure you don't do it for the praise, but well done anyway.
My Dad used to restore old British Bikes (Nortons, Triumphs etc) in his garage and while I'd have loved to have inherited some of his skill.
The only problem I have now, is that if this rebuild takes as long as the last one, I'm now going to have to subscribe to this thread for the next few years ... though I'm sure this will take less time due to the learnings you made on the Fiesta.
Good luck, can't wait to see the finished car.
Just out of interest, what did you reckon the final figure of the RST build was and what did you sell it for?
Thanks for all the interest. Funny timing as I was going to put a post up today or tomorrow...
I have not been working on the MK1 at all as had to carry out some work on a MK3 which needed a gearbox rebuild. Whilst the gearbox was sent away for refurbishment I changed the timing belt, water pump and clutch etc.
Anyway that is all done now so I can concentrate on the MK1 again. I sanded the shell ready for primer a couple of months ago after the floor was finished. Tomorrow I will sand the doors, bonnet and bootlid meaning I should be able to prime in the next couple of weeks. After this it will be on with the paint....
This project will not take as long as the Fiesta, the Fiesta was in storage for a year or so whilst we moved and had the garage built.
The Golf will all be completed in the next few months. It will be on the road by the spring.
The Fiesta cost £7500 to build and it was sold for £3500!
What made it problematic was the fact that the shell was a non-original item. Had it be original it would have been worth/sold for what it had cost....
Never mind it was never done for the money.
The Golf on the other hand will cost a fraction to do and the end result will be the same if not better.
I will post some pictures up tomorrow!
Thanks again
Well I have been cracking on with the Golf over the past couple of weeks when time has allowed.
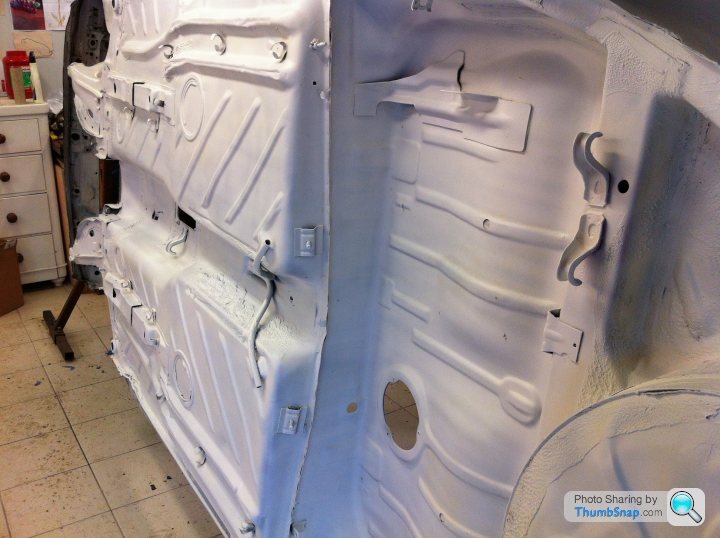
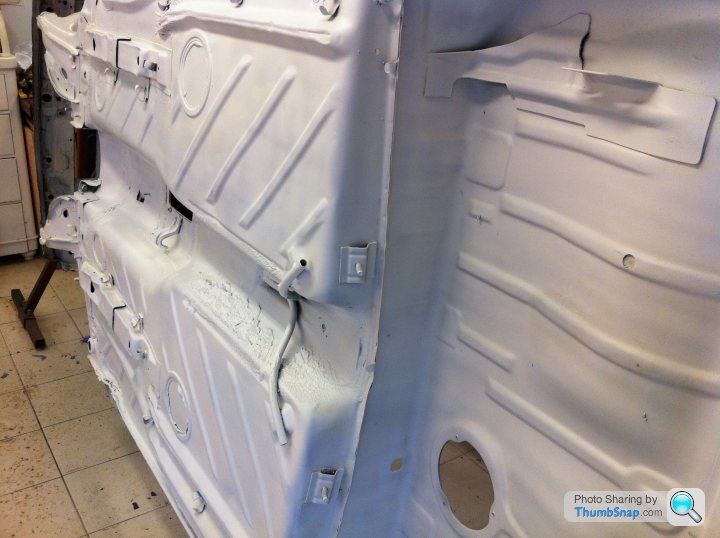
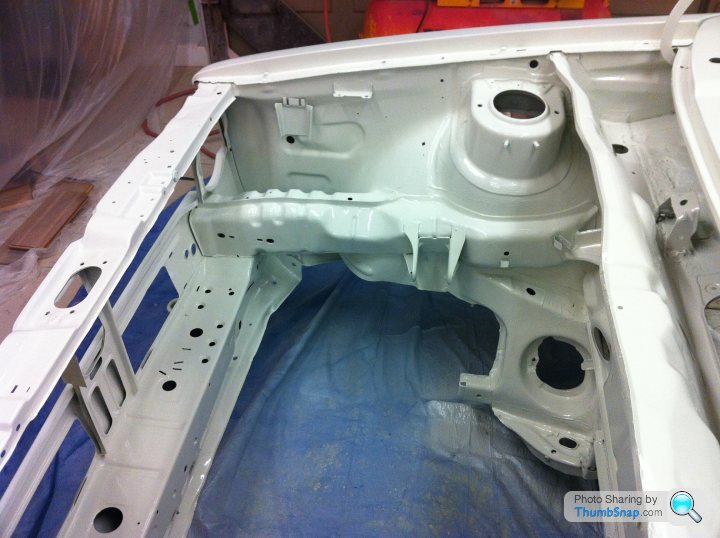
It has simply been prepping every thing ready for paint. All the panels and any exposed metal inside the car had yo be prepped.
All panels were prepped on the stand and have been temporarily put back on the shell for the first coat of primer.
Here are all the pictures but I am afraid they are not very exciting. Within the next few days I hope to spray 2 coats of primer!
Cheers


GIBBS101 said:
Yep That sure is a Straight rot free shell.. hard to find one like that these days!
It is now... As you will have seen from the pictures it was a different story when I purchased it....
It has already had a few metal work repiars and needs another couple.
There was so much filler in the boot lid that came with it so I have used the bootlid from the the donor car. The same with the sunroof. To the untrained/in-experienced eye the filler would look good, I for one though do not want a car full of it.
Hi Guys
Thanks for the comments.
I have been working quite hard getting everything ready for paint.
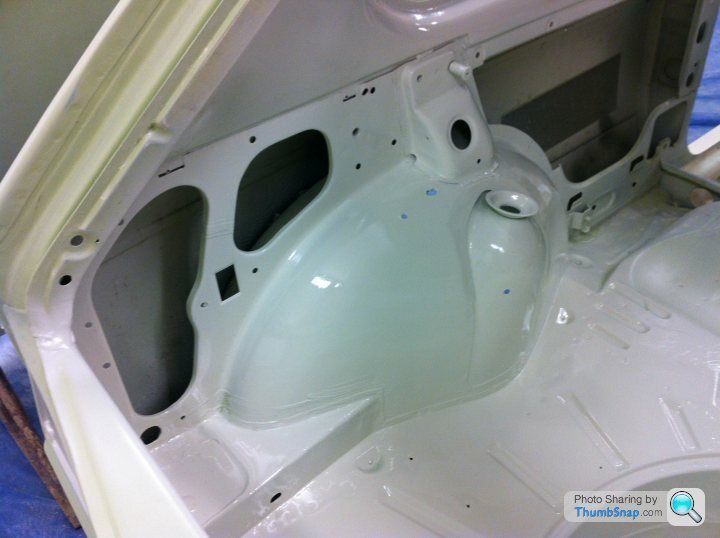
During the week I painted the engine bay and inside the boot.
This morning I have painted the whole car!
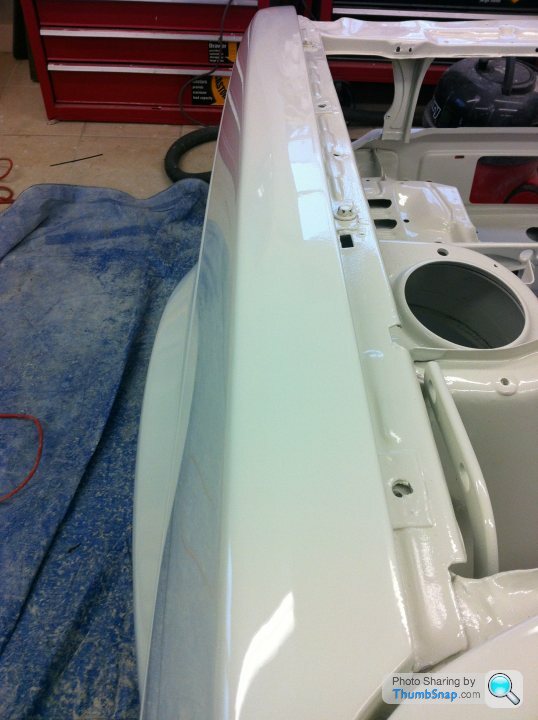
Here are some pictures that I took during the week. The shell will all need wet sanding and polishing to remove the orange peel. Once/during this is done I will update with more pictures.
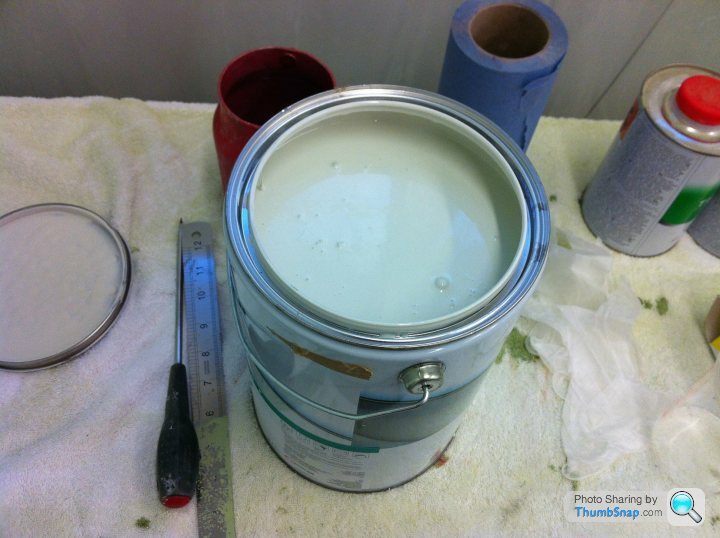
5 litres of Alpine 2k White:

Cheers!
Thanks for the comments.
I have been working quite hard getting everything ready for paint.
During the week I painted the engine bay and inside the boot.
This morning I have painted the whole car!
Here are some pictures that I took during the week. The shell will all need wet sanding and polishing to remove the orange peel. Once/during this is done I will update with more pictures.
5 litres of Alpine 2k White:
Cheers!
Hi Guys
Been getting on with the Golf but it has been a lot of work. I sprayed the shell but was not happy with the finish (heavy orange peel). I therefore decided to flat it all right back and do it again!
The peel was probably down to spraying when it was to cold....
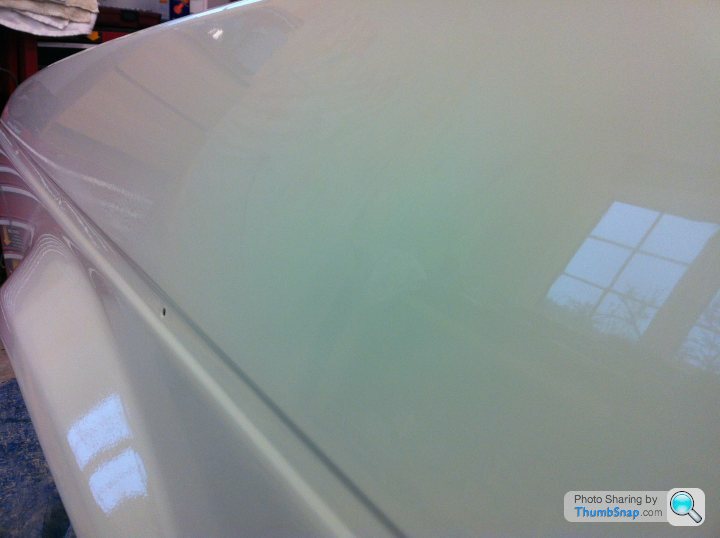
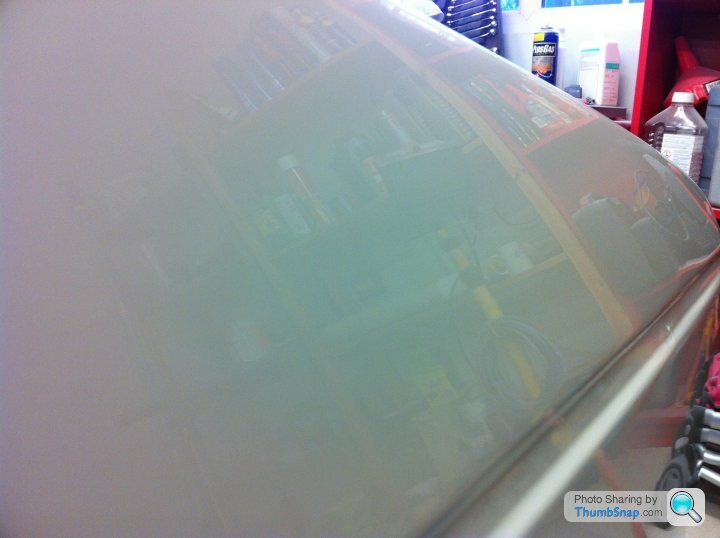
Anyway, have a look at the following pictures of the panels that have been wet sanded and polished!
There is still a degree of orange peel which I am happy with.
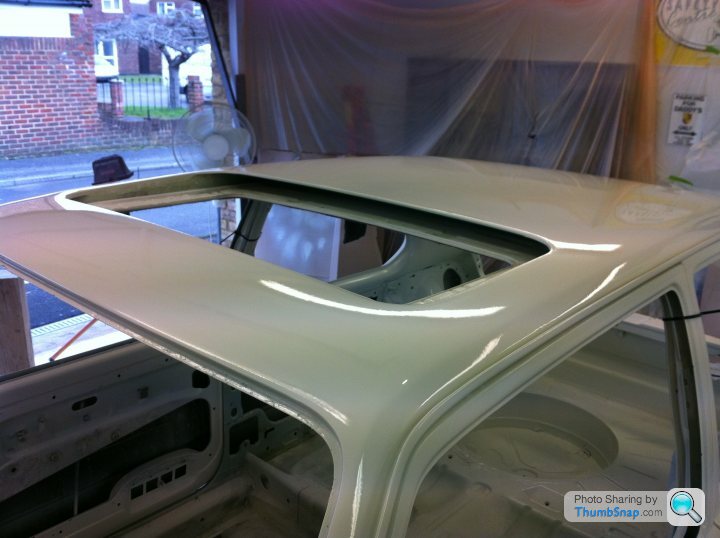
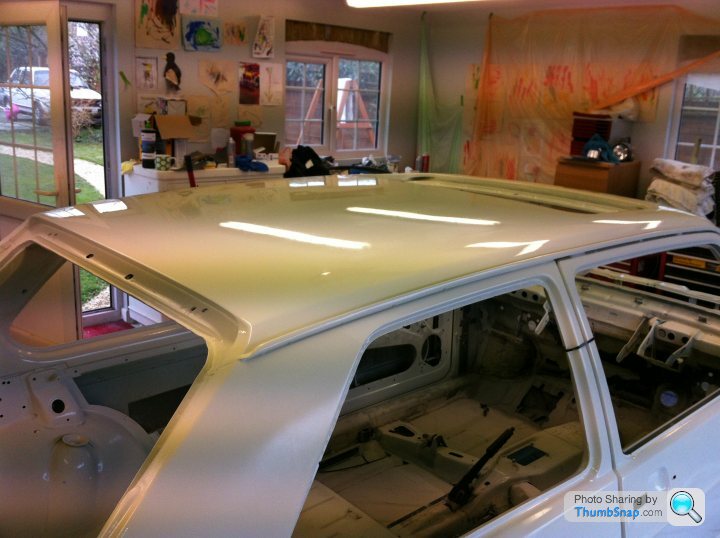
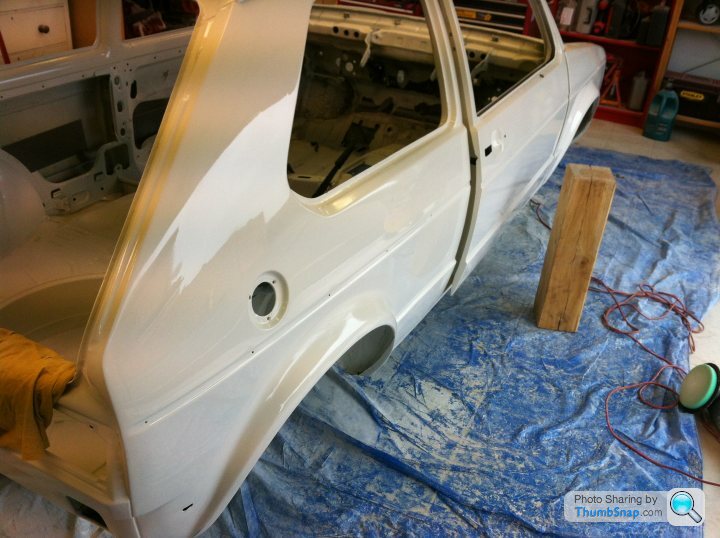
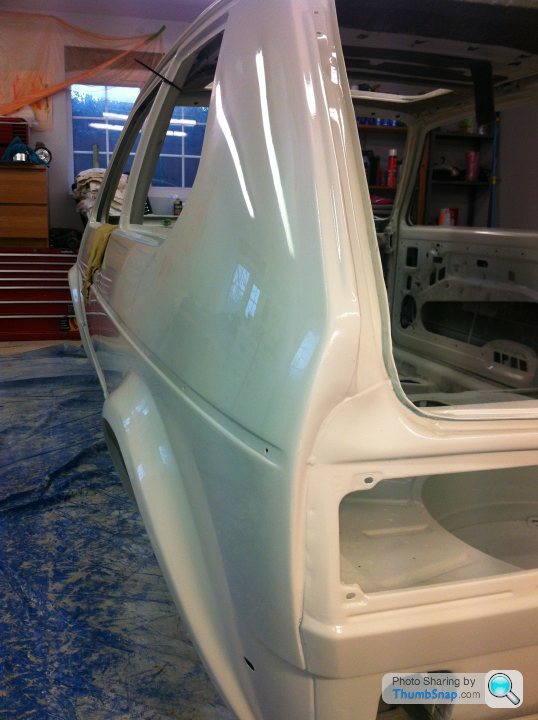
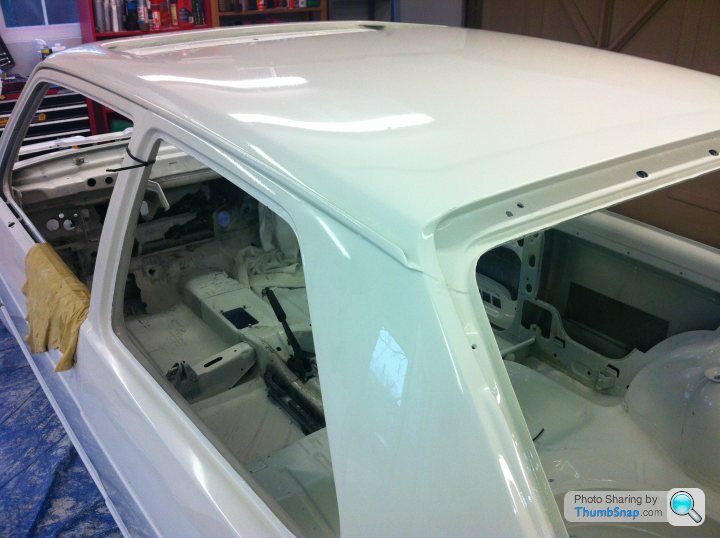
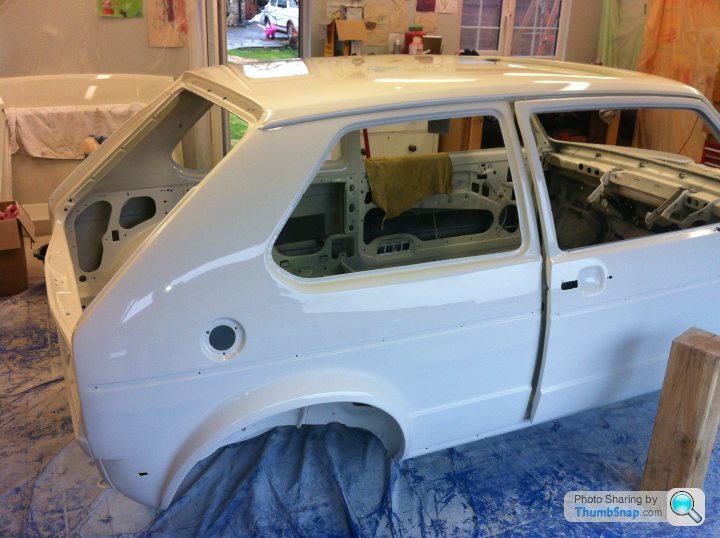

There you go!
I will take some more when the shell is finished which should be over the weekend.
Next week I will start stripping the donor GTi!
Cheers
Been getting on with the Golf but it has been a lot of work. I sprayed the shell but was not happy with the finish (heavy orange peel). I therefore decided to flat it all right back and do it again!
The peel was probably down to spraying when it was to cold....
Anyway, have a look at the following pictures of the panels that have been wet sanded and polished!
There is still a degree of orange peel which I am happy with.
There you go!
I will take some more when the shell is finished which should be over the weekend.
Next week I will start stripping the donor GTi!
Cheers
Hi
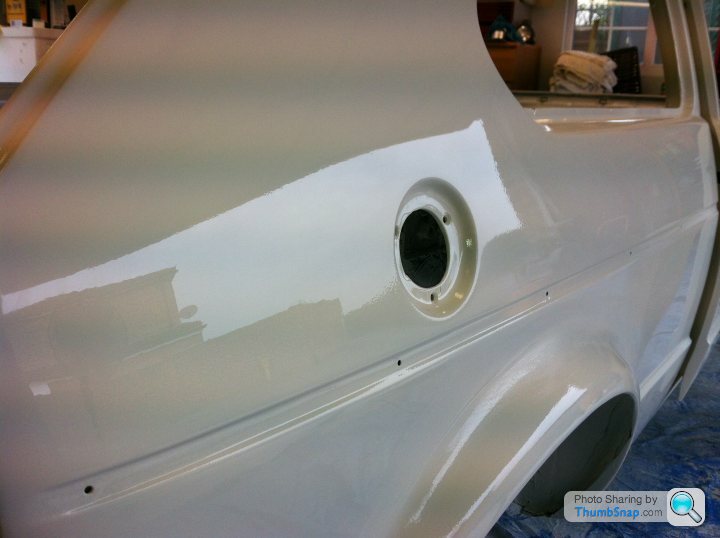
Thanks for the comments.
The panels shown have been flattened with 1200 and polished. If I want a better finish I can go over it again when complete with 1500-2000 and polish again but to be honest I think it will be more than good enough as it stands.
'Ruby' will be stripped in the next week or so! I will update with pictures as I go.
The Fiesta was sold. I plan on using the Golf in the good weather in the Summer but will listen to offers when complete!
Cheers
Hi
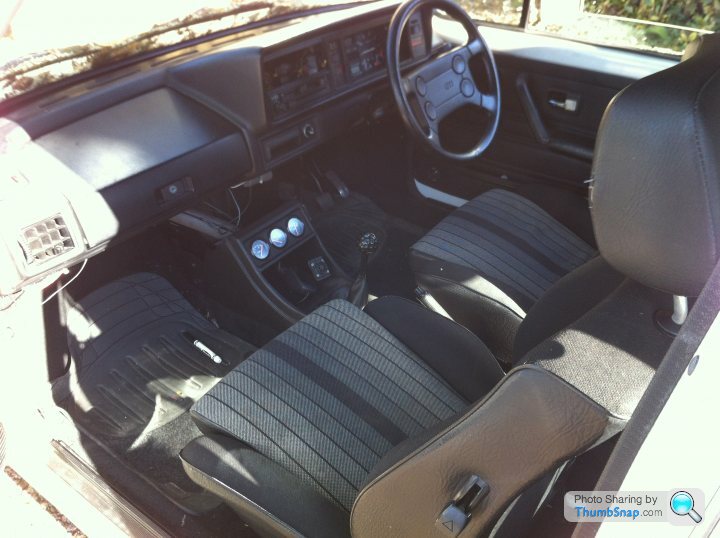
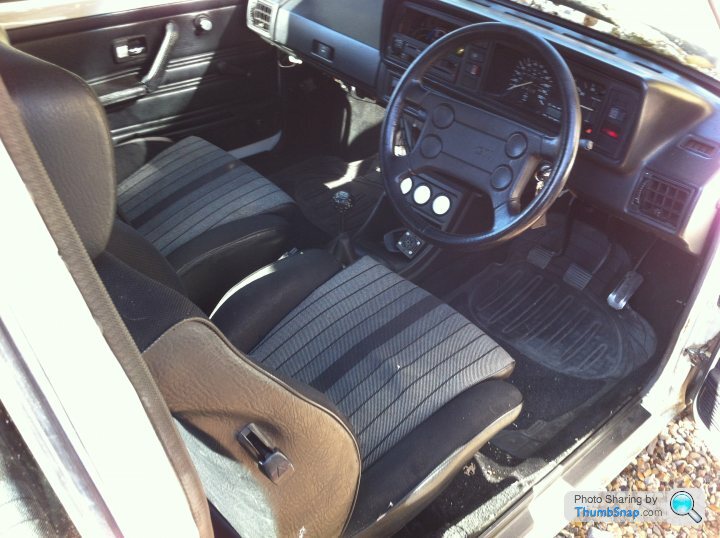
Got the donor car started and drove it into the garage ready to be stripped.
Began with removing the engine and gearbox which is now done. Think I will do a bit on the interior over the next few days as some of this will transfer straight over.
Cheers


I will update with pics of the removed engine later!
Got the donor car started and drove it into the garage ready to be stripped.
Began with removing the engine and gearbox which is now done. Think I will do a bit on the interior over the next few days as some of this will transfer straight over.
Cheers
I will update with pics of the removed engine later!
Gassing Station | Audi, Seat, Skoda & VW | Top of Page | What's New | My Stuff