Fitting dash camin S5 Convertible
Discussion


I'm thinking of installing a dash cam into my S5 convertible, not decided which cam to get yet, ideally in front of the mirror so that it's barely noticeable.
Looking at the trim around the windscreen I struggle to see where to hide the wires as it consists of a rigid plastic that appears to be firmly fixed. Anyone got any tips/advice on how to run the wires for this type of car?
Looking at the trim around the windscreen I struggle to see where to hide the wires as it consists of a rigid plastic that appears to be firmly fixed. Anyone got any tips/advice on how to run the wires for this type of car?
hilly said:
Yup, I have fitted a Mobius to an A5 Cab, I used a ball joint tripod mount fitted the rear view mirror casing.
I didn't want to run wires all round the the screen so hunted around with a voltmeter and ended up using the ignition switched supply to the auto-dimming mirror to power the Dash cam.
It is dark now so will try to take a picture tomorrow.
interesting, I didn't think of this. I take it though that this means that the camera is powered off when the ignition is off? I was hoping to use the parking feature of the camera, which requires a permanent live connection.I didn't want to run wires all round the the screen so hunted around with a voltmeter and ended up using the ignition switched supply to the auto-dimming mirror to power the Dash cam.
It is dark now so will try to take a picture tomorrow.
but a picture of how you did it would be great!
I fitted my dashcam yesterday, took about 20 minutes to run the cable around the windscreen. I liked the idea of wiring it to my mirror but this circuit is not unswitched which means I couldn't use the parking facility of the camera, and also the battery monitor unit is way too big to be able to stash anywhere up there.
I have yet to fit the battery monitor unit and wire it all into the fusebox but I see this as trivial now. I searched for hours looking for instructions on how to run the cable invisibly and found little, so for the record (and anyone else interested in doing it) here are my instructions and some photographs.
1 - Put the roof down and open the passenger door
2 - Pop out the lug and remove the screw for the sunvisor (as below). The red arrow marks the lug that you can pop out with a screwdriver. The visor can then be removed out of the way, although it is connected via a power cable so it won't remove completely.
Photo 1: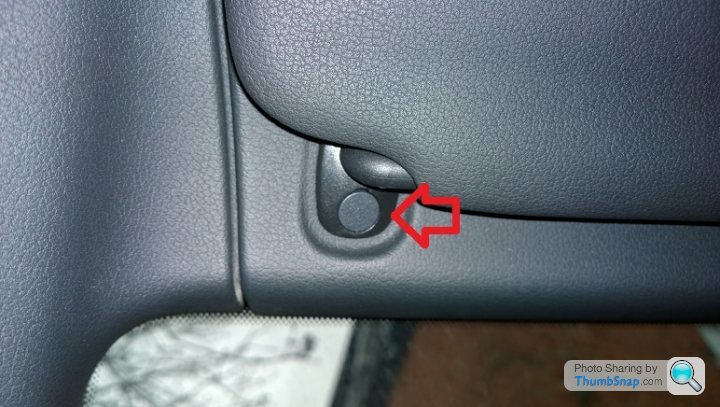
This allows you to work loose the horizontal plastic trim that is underneath it. I worked a gap open from the front (the side closest to the windscreen). This allowed me to push the cable in and run it along the top of the windscreen right to the rearview mirror in the centre.
3 - With the horizontal plastic loose, you can work loose the top of the vertical fascia that covers the A-pillar. You also need to pull down on the horizontal fascia in order to expose the top of the fascia for the A-pillar. I ended up pulling it far harder than I really wanted to in order to get access, the trick is to pull with constant pressure rather than yanking it as it will likely bend/snap. And you only need to pull it enough to slide the cable under it.
Once open, you can work the cable in to go towards you and then left into the A-pillar. In the photo, the lowest arrow denotes where the cable comes from, the arrow above that shows where the cable runs along, and the final arrow shows where it runs to along with how to get access.
Photo 2: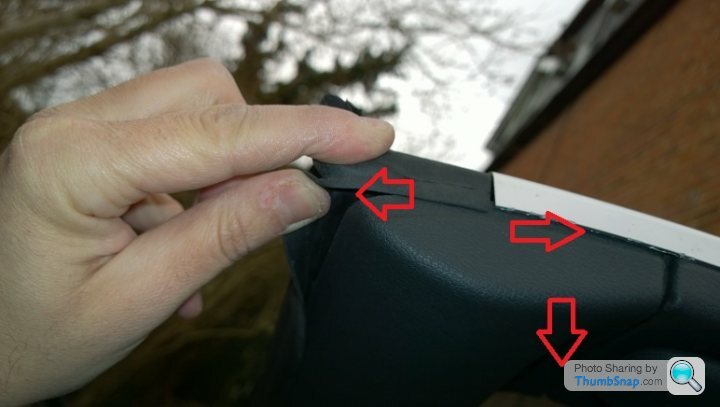
4 - Rather than remove the A-pillar fascia, there was enough room to push the cable in behind it by opening the rubber seal. In the photo, the top two arrows show how the cable runs. The final arrow shows where I ran the cable along into the fusebox. The plastic here just pops open to let you put the cable through.
Once down, the cable falls through the fusebox onto the floor of the passenger footwell. And you are done :-)
Photo 3: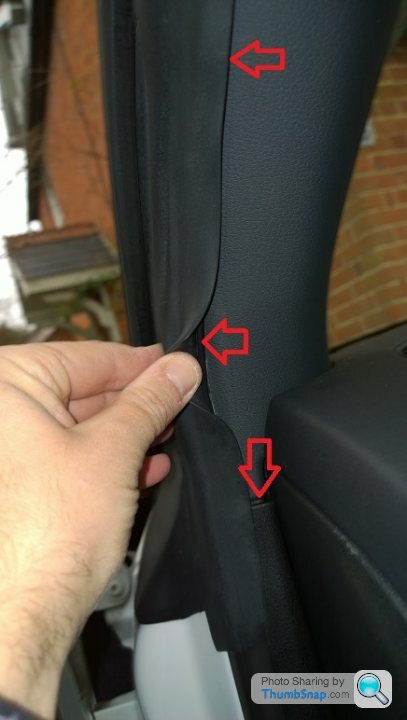
Important: before popping back the fascias and screw, make sure your cable is long enough to reach where you are sticking your camera!
Problems:
The only problem I really hard was fear of breaking something. You have to remove the plastic and it really does not want to budge. When I finally got it open the lump of plastic in the below photo fell onto my lap. It had sheered off of something but I couldn't work out exactly what. It did not prevent all the fascia returning back to normal and staying fixed tight though so I am not concerned.
Photo 4: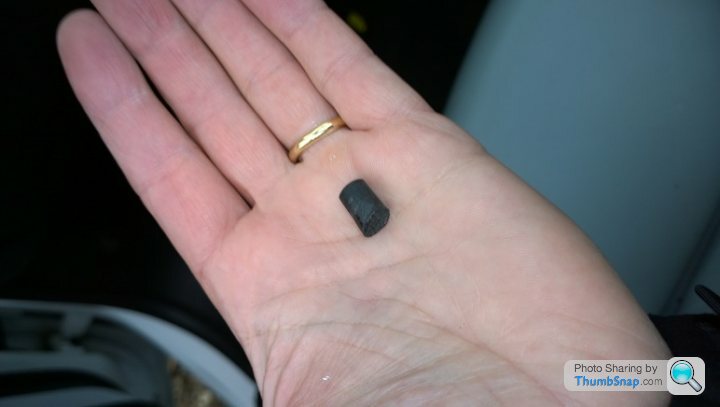
Tools required:
- Philips screwdriver
- Patience
Camera location:
I wanted the camera to be invisible to the driver so originally planned to put it behind the rearview mirror. But when I did that it was really obvious to the passenger. In the end I opted to install it above the mirror, hard up against the top of the windscreen, as shown below. Making sure that it did not restrict whatsoever the movement of the rearview mirror (sit in the drivers seat, and make sure it is OK).
I think it looks better there, is less obvious to the passenger and is pretty much out of sight for the driver. Also, by having it higher up it is hidden a little by the tinting at the top of the windscreen, without any deterioration in picture quality. This means that I can record just fine and the camera is virtually invisible from the outside of the car.
Photo 5: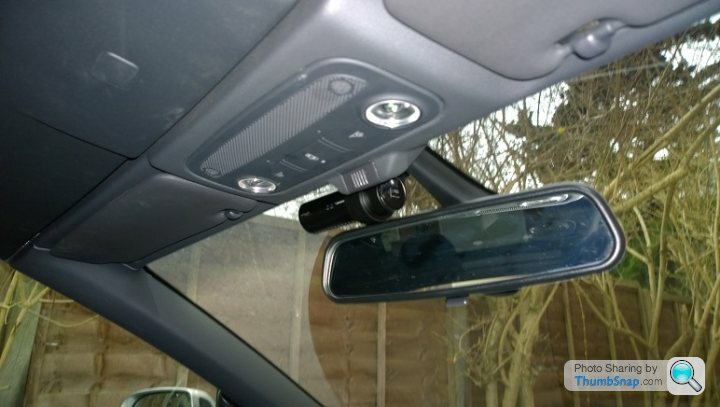
Photo 6: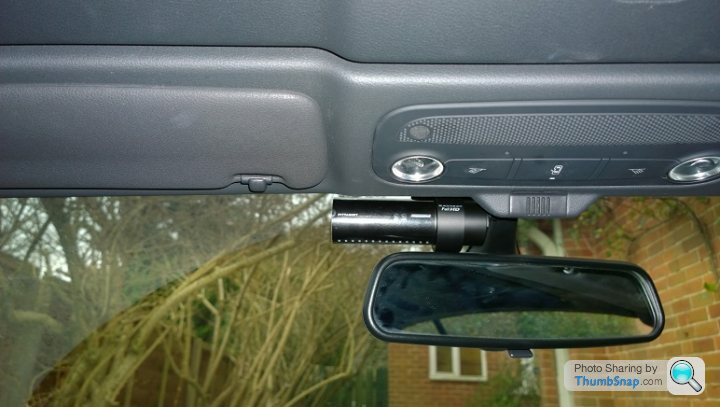
As I said, the final step now is to wire into the fusebox, for which I am awaiting the delivery of a fuse jumper: http://www.amazon.co.uk/dp/B00LA00AI6/ref=pe_38572...
Any Q's, feel free to ask here or PM me.
Gassing Station | Audi, Seat, Skoda & VW | Top of Page | What's New | My Stuff