
centre console bolster retrim
Discussion


I have just started out on retrimming the side bolsters to the centre console as mine had too many cuts and bare patches.
Markings on the fibreglass suggest that mine were put together by one David T, which is coincidental with my son's name!
I'd be interested to know how these items were originally trimmed as the vinyl had obviously been stretched into a concave shape to fit the fibreglass formers. Luckily I am using very soft leather to do mine and this will stretch without too many creases round the edges.
I wonder if there was a former or mould of some type into which the trim pieces were laid upside down, the fibreglass former forced in and the edges glued. It would not surprise me if steam or heat was involved too!
Does anybody know how this was actually done at the factory?
Pic shows my work thus far - 50% complete. Leather is Jaguar Ivory but will be dyed to match TVR Magnolia.


Markings on the fibreglass suggest that mine were put together by one David T, which is coincidental with my son's name!
I'd be interested to know how these items were originally trimmed as the vinyl had obviously been stretched into a concave shape to fit the fibreglass formers. Luckily I am using very soft leather to do mine and this will stretch without too many creases round the edges.
I wonder if there was a former or mould of some type into which the trim pieces were laid upside down, the fibreglass former forced in and the edges glued. It would not surprise me if steam or heat was involved too!
Does anybody know how this was actually done at the factory?
Pic shows my work thus far - 50% complete. Leather is Jaguar Ivory but will be dyed to match TVR Magnolia.
Edited by fenderbender on Sunday 6th November 16:03
Part two: both bolster sides done:

Next stage is to recolour the leather to match the TVR interior. I used vinylkote. They did a spectroscopic colour match on a sample taken from one of the old bolster covers. As you can see from the test pieces below, the match is remarkable.
Here we have the original magnolia oddments tray base with two test pieces of leather - one with vinylkote applied by cloth (Right) and the other sprayed (Left). The sprayed version has a far better finish as it covers evenly.

Next stage is to recolour the leather to match the TVR interior. I used vinylkote. They did a spectroscopic colour match on a sample taken from one of the old bolster covers. As you can see from the test pieces below, the match is remarkable.
Here we have the original magnolia oddments tray base with two test pieces of leather - one with vinylkote applied by cloth (Right) and the other sprayed (Left). The sprayed version has a far better finish as it covers evenly.
SILICONEKID340HP said:
Do yu have a link for the company who supplied the vinylkote
Yes, but to be honest all you have to do is Google "vinylkote"...http://www.kolorbond.co.uk/index.html
They are based in Aston, Birmingham. I elected to collect my order as being solvent-based it otherwise has to be couriered. Ask for David.
You should also ask them to supply a small bottle of Vinyl Kleen, and also a bottle of vinylprep. The former does what the name implies - the latter prepares the vinyl to assist the vinylkote to stick.
I cannot emphasise how important it is to follow the instructions and to make sure that the surface you want to coat is clean, dry and completely free of grease, silicone or any other contaminant. Otherwise the vinylkote will peel after it has dried and you have to start all over again.
You should have facilities to spray the vinylkote: the surface you are treating (in my case leather) is uneven and if you appoly by cloth you will fill the valleys and crevices in the material too deeply, and the raised surfaces too lightly. Only by spraying will you get an even coating. You need an HVLP set up. Set the pressure regulator to 2.5-3.0 bar
Edited by fenderbender on Thursday 1st December 15:29
Jon Brown said:
Looks like a very good job.
Looks a shame to have the plastic handbrake handle though, I have a metal one in the classifieds if your interested. Shameful plug
Sorry for thread invasion Looks a shame to have the plastic handbrake handle though, I have a metal one in the classifieds if your interested. Shameful plug
but Jon Im looking out for shiney bits (have missed a few on the classifieds and ebay  )if the guy who is selling the hand brake and stalks together doesnt get back to me I will have yours (obviously if its still for sale)
fenderbender said:
Yes, but to be honest all you have to do is Google "vinylkote"...
http://www.kolorbond.co.uk/index.html
They are based in Aston, Birmingham. I elected to collect my order as being solvent-based it otherwise has to be couriered. Ask for David.
You should also ask them to supply a small bottle of Vinyl Kleen, and also a bottle of vinylprep. The former does what the name implies - the latter prepares the vinyl to assist the vinylkote to stick.
I cannot emphasise how important it is to follow the instructions and to make sure that the surface you want to coat is clean, dry and completely free of grease, silicone or any other contaminant. Otherwise the vinylkote will peel after it has dried and you have to start all over again.
You should have facilities to spray the vinylkote: the surface you are treating (in my case leather) is uneven and if you appoly by cloth you will fill the valleys and crevices in the material too deeply, and the raised surfaces too lightly. Only by spraying will you get an even coating. You need an HVLP set up. Set the pressure regulator to 2.5-3.0 bar
Do yu send a sample for colour matching http://www.kolorbond.co.uk/index.html
They are based in Aston, Birmingham. I elected to collect my order as being solvent-based it otherwise has to be couriered. Ask for David.
You should also ask them to supply a small bottle of Vinyl Kleen, and also a bottle of vinylprep. The former does what the name implies - the latter prepares the vinyl to assist the vinylkote to stick.
I cannot emphasise how important it is to follow the instructions and to make sure that the surface you want to coat is clean, dry and completely free of grease, silicone or any other contaminant. Otherwise the vinylkote will peel after it has dried and you have to start all over again.
You should have facilities to spray the vinylkote: the surface you are treating (in my case leather) is uneven and if you appoly by cloth you will fill the valleys and crevices in the material too deeply, and the raised surfaces too lightly. Only by spraying will you get an even coating. You need an HVLP set up. Set the pressure regulator to 2.5-3.0 bar
Edited by fenderbender on Thursday 1st December 15:29
angus99 said:
I'm looking to re-trim the bolsters as part of a winter project to refresh the interior. Can I ask what adhesive you used to for the re-trim.
Sure. It was a mixture of good old Evo-Stik Impact and a specialist upholstery adhesive called Trim-Fix. The latter is available in spray cans with a directional nozzle and I used it first to recarpet my boot. In my opinion the job you are undertaking requires precise glue application, so I would not recommed the Trim-Fix option as it can go everywhere if you are not careful. It seems to be rubber based and dries like latex.
When you come to do the job I would recommend you stick one long side down first. When this is dry glue the opposite long side down. Do the ends and corners last. If you cut V-shapes out of the material as you go round the end edges you will get a neater job than mine - I only found out about this trick after I had finished!
Again, I cannot emphasise how important it is to follow the instructions and to make sure that the surface you want to coat is clean, dry and completely free of grease, silicone or any other contaminant. Otherwise the vinylkote will peel after it has dried and you have to start all over again.
Here is a small area which I had missed - handbrake area.
This shows what happens if you have not cleaned properly:

Here is a small area which I had missed - handbrake area.
This shows what happens if you have not cleaned properly:
Part 3: Ready for reassembly
Finally ready to refit to the car. Items are loosely pushed together to show colour match, although the magnolia looks washed out here because of low ambient light in which I took the picture.
The actual colour is closer to the "after" refurbed seat below.

Finally ready to refit to the car. Items are loosely pushed together to show colour match, although the magnolia looks washed out here because of low ambient light in which I took the picture.
The actual colour is closer to the "after" refurbed seat below.
Edited by fenderbender on Friday 2nd December 16:35
While I was at it - as you do - I refurbed the leather seats with a leather renovator kit from Woolies Trim (http://www.woolies-trim.co.uk/c-108-featured-products.aspx).
It is fantastic stuff, although you will find the leather cleaner is so gobsmackingly good you might not need to use the renovator dye at all.
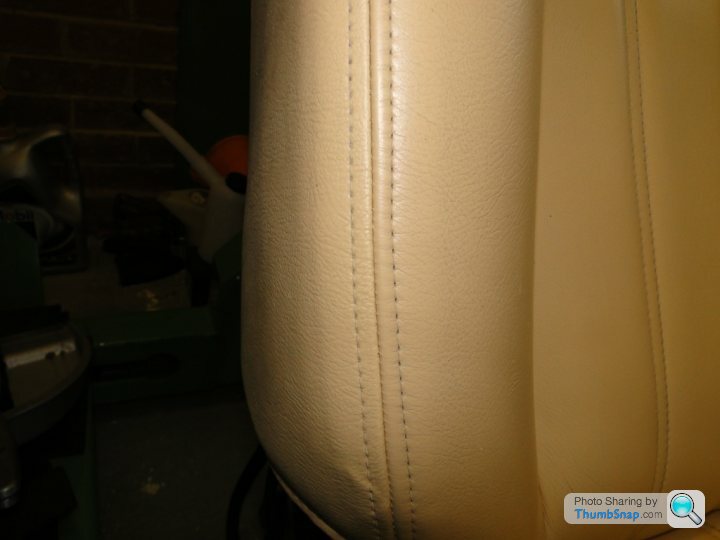
Drivers seat BEFORE (with nasty scuff cause by the jeans covering my butt):

Drivers seat AFTER: Ignore colour differences caused by ambient light affecting camera
It is fantastic stuff, although you will find the leather cleaner is so gobsmackingly good you might not need to use the renovator dye at all.
Drivers seat BEFORE (with nasty scuff cause by the jeans covering my butt):
Drivers seat AFTER: Ignore colour differences caused by ambient light affecting camera
VictorMeldrew said:
Cheers - still a very good result. I wonder if TVR Magnolia is as variable as anything else TVR - mine is Magnolia as well and I need a few bits tidying up.
I did the seat facings on 2OOM (remember him?) about 3 years ago and just ordered magnolia and it was a slightly different shade, but it looked fine just on the leather. They still look good now esp as they have now aged slightly 2OOM said:
I did the seat facings on 2OOM (remember him?) about 3 years ago and just ordered magnolia and it was a slightly different shade, but it looked fine just on the leather. They still look good now esp as they have now aged slightly
Sure I remember 2OOM, you never forget your first! Gassing Station | Chimaera | Top of Page | What's New | My Stuff