another OZ referb thread
Discussion


Hi All,
Just an update on the SX inspired by Jimbo to do the referb myself and save some $$$$.
Before,


they were not too bad but the pitting had started the rim bolts were rusty and they had been curbed a bit,basically they looked twenty odd years old!
in progress,


new bits,


a bit of fleabay


I`ve sanded the cast rim and they are at the paint shop I`ve decided to paint them the same silver as the car, the standard OZ colour was close to it just not as metalic.
the ally rims are almost done, but it sure is a slow process............ and my fingers are rooted (thats aussie for f ked)
ked)
I did all i could while the wheels were together so i could still use the car, i only dis assembled them this saturday.
I`ll post more pics as i progress...
Thanks Jimbo for your help with info.
Adam
Just an update on the SX inspired by Jimbo to do the referb myself and save some $$$$.
Before,
they were not too bad but the pitting had started the rim bolts were rusty and they had been curbed a bit,basically they looked twenty odd years old!
in progress,
new bits,
a bit of fleabay
I`ve sanded the cast rim and they are at the paint shop I`ve decided to paint them the same silver as the car, the standard OZ colour was close to it just not as metalic.
the ally rims are almost done, but it sure is a slow process............ and my fingers are rooted (thats aussie for f
ked)I did all i could while the wheels were together so i could still use the car, i only dis assembled them this saturday.
I`ll post more pics as i progress...
Thanks Jimbo for your help with info.
Adam
cuneus said:
they are closer than the ones i`ve got but going by the pic they curve the wrong way and therefore would be upside down????I still have the originals they are a bit grotty but the layout is O.Z. Racing but the `R` is not as high as the O and the Z

I might just get some and compare them, anyone bought some? if so post a pic
Cheers
Adam


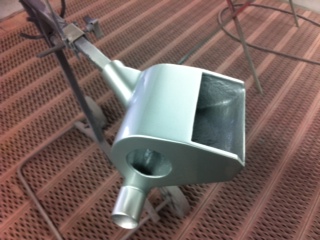
 it`s an OZ fruit bowl!!
Looking good there Adam, i still have pins and needles in the ends of my fingers lol!
I'm sure i don't need to tell you but it's good practice to get into the habit of rinsing the rims off and drying them after every drive so as not to have it parked up with brake dust etc sitting on the rims.
This is assuming you're not re-laquering the rims?
Admittedly a bigger concern here in blighty with all our weather!
Out of interest what did you torque the new rim bolts to when re-assembling?
Jimbo
Nice job matey,took me a good eight to twelve weeks polishing those rims and the state of the bathroom basin each night well its a wonder the misses didnt divorce me,each time i polished and thought thats it i would find another bit i wasnt happy with so it was back to the wet n dry for another hour or so,then times that by 4. I bought the stainless bolts from Persch & Partner in Germany and the sealant, thread lock and wheel cleaner,didnt bother about laquer just clean em regular,got the main part of wheel blasted and re-sprayed a metalic graphite.
The torque i used was around 28 ft lbs i think Jim,nothings happened in mean time and they seem ok. wooly.
PS,ive just had one and half hour operation with keyhole surgery to repair 5 torn muscles and an out of control bone,maybe doing it myself wasnt my best decision ive ever made!!!
The torque i used was around 28 ft lbs i think Jim,nothings happened in mean time and they seem ok. wooly.
PS,ive just had one and half hour operation with keyhole surgery to repair 5 torn muscles and an out of control bone,maybe doing it myself wasnt my best decision ive ever made!!!
Edited by wooly350i on Sunday 26th August 00:46
Hi
Jimbo, i was going to ask you what you torqued the rim bolts too..... 28 Cheers wooly!!!
By the way, out of control bone??? that'd be those little blue pills, swallow'm quick or you'll get a stiff neck.
The polishing is much easier with them spinning to the wood lathe.
The inside of the wheels are sprayed the outside will be done this week same silver as the car.
I'm also getting the cold air box sprayed the same.
I should get it all back together this week and then
Adam
This has been highly recommend
http://www.nyalic.com.au/nyalic.com.au/Home.html
I'm in two minds??????
Interested in you thoughts guys.
http://www.nyalic.com.au/nyalic.com.au/Home.html
I'm in two minds??????
Interested in you thoughts guys.


rev-erend said:
So is there a sealing ring between the two wheel pieces ?
Or mastic ?
There wasn't on mine just what appeared to be common old silicone sealant. I put them back together with proper rim sealant which to me first appears very similar to 'no more nails'Or mastic ?
Make sure you do one bead first and work it into the mating faces with your finger, leave for 24hrs then apply a second bead and smooth this in too. After another 24hrs re-assemble.
All i'm saying of course is this is how i did it after a bit of homework and i have no problems with leaking air almost a year on.
Jimbo
Think I did everything opposite to jimbo but hay ho,I just cleaned up both halfs applied sealant and bolted em together,thread seal on bolts and tightened em opposite sides as I went ifyounderstand my meaning,I smoothed sealant on inside of wheel and left em to set for a couple of days,one mistake I did make wth first wheel was applying to much sealant too close to bolt holes so it oused through when tightened resulting in a messy clean up operation,the other three went fine.


Jonny weggie said:
Looking superb, have you decided to leave them as they are or get them coated.
jonny.
Hi Jonny jonny.
I'm a bit worried about coating the ally because however good the coating is if it gets compromised and corrosion starts it will be a lot of work to rectify so even though it's a pain in the arse I've decided to wash them down each time I return from a drive, just hose the brake dust off.
Might take me a bit longer to get them together as I stuck my index finger, R/H into a router
not too bad no stitches just bound and phucking sore......Cheers
Adam
Gassing Station | Wedges | Top of Page | What's New | My Stuff