Parrott install using the GM/Holden telephone connector
Discussion


I am planning to install a Parrott CK3100 Phone Kit into the Ro using the Holden Phone Connector incorporated within the existing wiring loom. The aim is to fit the without disturbing any of the existing wiring loom. So far, using the excellent information available on this forum, I have confirmed all the connections I need to use, and sourced the connector needed to plug into the connector provided by GM, the only part of the jigsaw not fitting yet is which of the Mute Cables provided on the Parrott Kit should I use. From what I can make out from the not very detailed wiring diagram supplied by Parrott, I will have a choice of 3 types of signal that can be used to Mute the Blaupunkt Radio, these signal I believe will be presented on yellow coloured cables.
I was wondering if anyone here had carried out a similar install using a Parrott Kit, and were they able to determine which of the Mute signals to use, and how the correct signal was identified by cable on the Parrott Kit.
If anyone has recently fitted a Parrott CK3100, does the kit actually have 3 cables offering a choice of Mute Signal, I have not purchased the Parrott Kit yet, as I want to be sure I can fit the kit using the GM Phone Connector before handing over the readies.
Any pointers would be most appreciated.
My apologies if this topic has already been covered in detail, and I have not found it.
 I would like to do the same.
gsd2000 said:
I did the same but using a sony handsfree kit, but since removed it as my stereo had built in parrot handsfree 
gsd2000Did the Sony kit work well with the standard radio while you were using that set up ?
When a call came in, how did the Blaupunkt distribute the callers voice, from all speakers, or just 1 or 2 ?
LS2Noir said:
gsd2000
Did the Sony kit work well with the standard radio while you were using that set up ?
When a call came in, how did the Blaupunkt distribute the callers voice, from all speakers, or just 1 or 2 ?
If I remember correctly sound went through all speakers and the stereo auto muted any music and I think it said phone on the stereoDid the Sony kit work well with the standard radio while you were using that set up ?
When a call came in, how did the Blaupunkt distribute the callers voice, from all speakers, or just 1 or 2 ?
I used the guide on ls1gto
gsd2000 said:
If I remember correctly sound went through all speakers and the stereo auto muted any music and I think it said phone on the stereo
I used the guide on ls1gto
gsd2000I used the guide on ls1gto
Thanks for confirming the sound distribution, exactly what I am looking for.
I have read that guide, a very good post which gave me the confidence to go for this type of install, just wish the parrot wiring was as simple as the Sony kit which seamed to have only the single Mute signal option.
MyM8V8 said:
Good man.
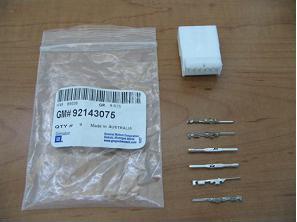
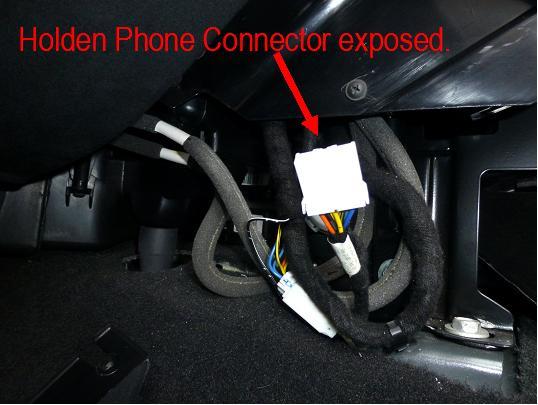
The install went well and the setup works fine, so here is how I went about it.To install a Parrot or similar Hands Free kit ( I am installing a Parrot CK3100 ) using the Holden Phone Connector which is factory fitted, you will need to lay your hands on a connector which will be used to house the cables supplied with the Hands Free Kit. See below the upper photo which is the GM item, which will be very difficult to source, I found the correct connector online, shown in the 2nd photo. Supplier name – Simtek UK. At this point I am not sure about the rules on posting links to products, if you need a link to the product let me know and I will point you in the right direction.

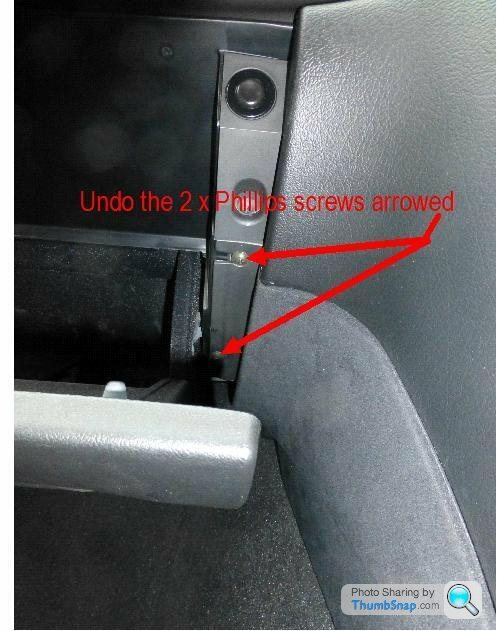
First thing to do is access the Holden Phone Connector which will require removing a section of Trim.
The section of Trim outlined in red is what is being removed.

Lower the glove box and remove the 2 Phillips screws arrowed, I used a stumpy driver on the lower screw.
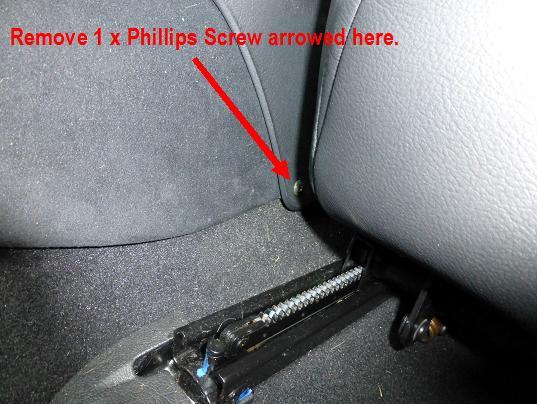
Move the passenger seat backwards fully and tilt seat front edge fully up to allow access to this Phillips screw, remove 1 x Phillips screw.
Gently remove Trim Section.
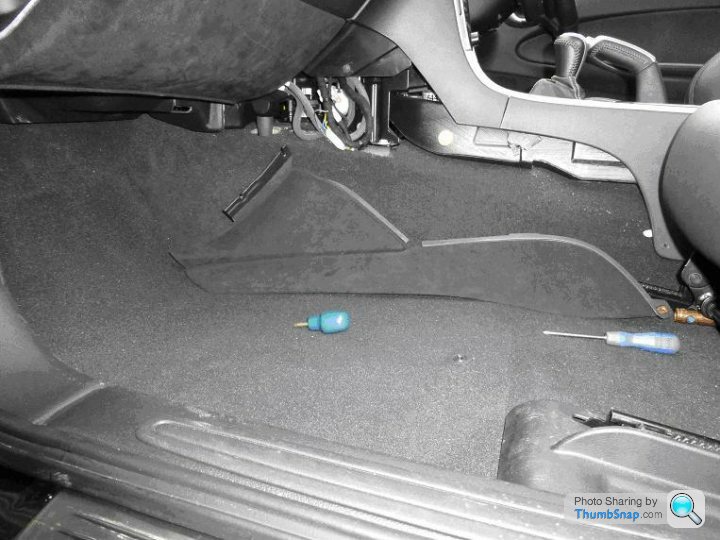
Holden Phone Connector can now be located.
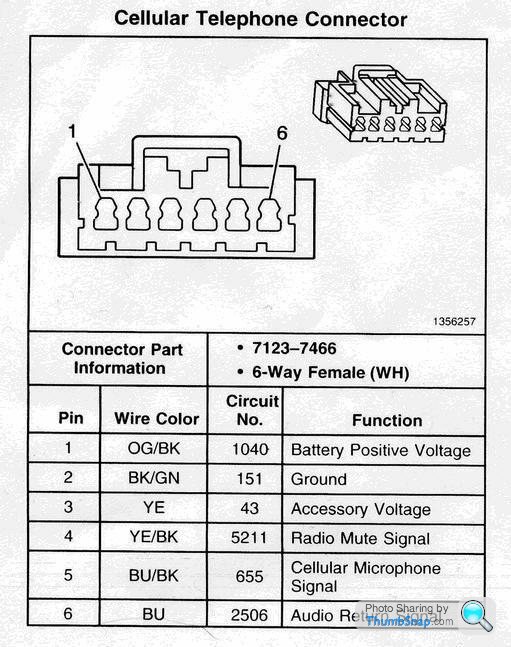
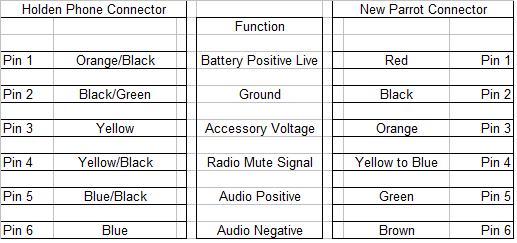
Holden Phone Connector Pin-Out Guide.
Now you will need to prepare the Hands Free Kit for installation.
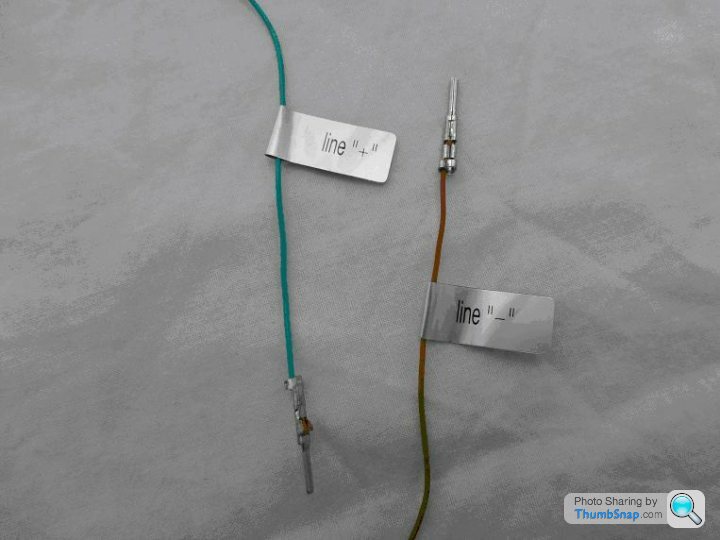
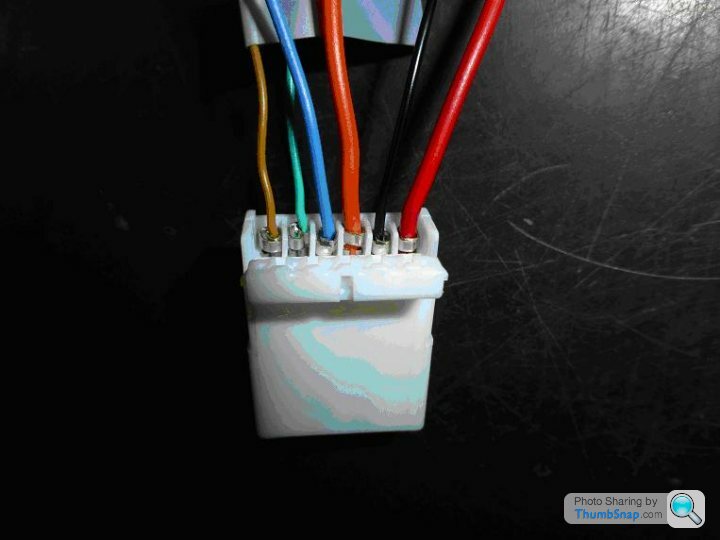
The photo below shows the cables to be used on the Hands Free Kit, the six cables are shown with pins supplied with the new connector, already crimped on to the Parrot cables. The Yellow cable supplied with the kit had a male bullet connector fitted to it, I have extended this with a short piece of blue cable purely to keep the original male bullet connector, if I ever fit the kit in another car, rewiring the kit to it’s original state will be minimised. You can see the part of the Parrot loom that will not be used, in the bottom right of the photo.
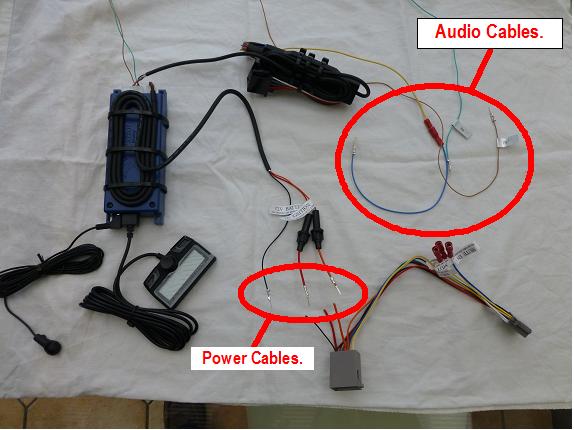
Audio Cables, the Mute cable is not shown here, Yellow with Blue extension shown above.
Power Cables.

With the Parrot Kit Cables now prepared with the new Pins attached, I decided to do a quick check that the Parrot Kit actually works with the car audio system, so I inserted the pins of the Parrot Kit Cables into the Holden Phone Connector in the correct positions, remember to isolate the exposed parts of the pins to avoid any short circuits. See below the Connector Pin Out Diagram and Photo of temporary connection for testing the Parrot Kit.
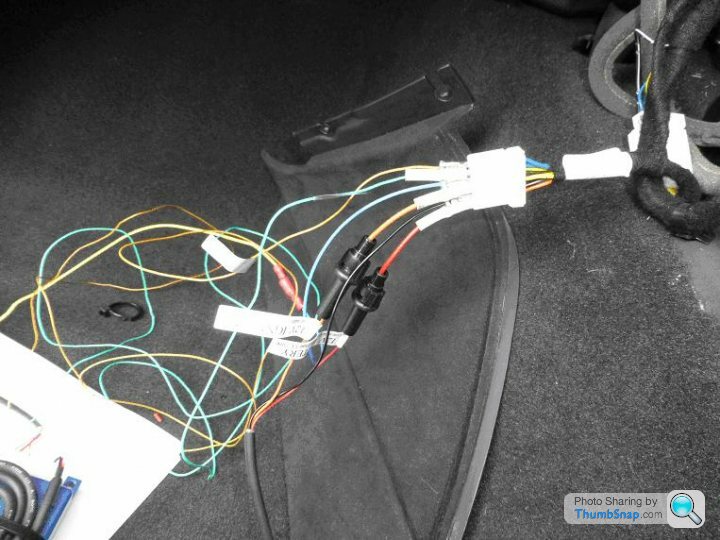
The Parrot Kit worked fine at this point, so now we need to load the Parrot Kit Cables into the new connector housing.
Before locating the Parrot Kit components in the space available behind the Holden Phone Connector position, I would suggest using Cable Ties to tidy the cable slack.


The Parrot Kit components can now be located, and the cables run out to the Control Unit and Microphone. The positions of the Control Unit and Microphone are a matter of personal choice, so I will not go into detail with this part of the install. I located my Mic using one of the clips supplied with the kit, just to the right of the Rear View Mirror and ran the cable along the top of the Windscreen ( tucking cable into Head Lining ), then down the left Pillar ( again tucking cable behind the trim ), behind the Glove Box to the Parrot Unit. The Control Module I located on the Dash to the right of the Dial Pod, running the cable downwards and under the Centre Console.
When a call is received, or you make a call the Audio System Mutes and shows Voice In on the display.

Best of luck !

Edited by LS2Noir on Tuesday 10th December 19:38
Edited by LS2Noir on Tuesday 10th December 19:39
Edited by LS2Noir on Tuesday 10th December 19:41
Don't get me wrong, it's a great job you have done, but, plugging in the parrot harness into the exisiting radio harness does exactly the same thing, but without the "voice in" display on the radio screen, IE, when a call comes through, the radio mutes and the call is heard therough the speakers.
What made you go this route? As I assume you still have to hold the phone to select a number to call etc?
What made you go this route? As I assume you still have to hold the phone to select a number to call etc?
Tattooboy said:
Don't get me wrong, it's a great job you have done, but, plugging in the parrot harness into the exisiting radio harness does exactly the same thing, but without the "voice in" display on the radio screen, IE, when a call comes through, the radio mutes and the call is heard therough the speakers.
What made you go this route? As I assume you still have to hold the phone to select a number to call etc?
The 3 reasons I went down this route was that I didn't want to disturbe the Head Unit, removing the the small section of trim looked easier than removing the Head Unit and prior to carrying out the install I went to a local establishment for a quote to install this Parrot Kit, after plenty of Head Scratching and What made you go this route? As I assume you still have to hold the phone to select a number to call etc?
 they gave me a price, which they justified by stating that because of the type of car they wouldn't be able to install the kit without cutting cables as there were no adapters avialable off the shelf, at this point I decided that installing in the traditional way may lead to problems, I looked at installing the kit myself using the Holden Connector and was happy that the kit could be installed in this way with minimal effort.
Cheers.
Perhaps they meant the steering wheel control harness? as you loose this with the parrot kit and I couldnt find a suitable harness at the time either.
I've now changed the stock head unit for a CD/DVD jobby with built in Bluetooth, works fine, I just need to sort out a dodgy ariel connection !
Cracking job none the less, and it works which is the main thing
I've now changed the stock head unit for a CD/DVD jobby with built in Bluetooth, works fine, I just need to sort out a dodgy ariel connection !
Cracking job none the less, and it works which is the main thing
Gassing Station | HSV & Monaro | Top of Page | What's New | My Stuff