That Eureka roof stowage moment
Discussion


At last I have worked out how Potless Paul manages to store his roof, flat in the boot, which means bags can be stowed in the base of the boot making it a lot easier to fit the roof for those rare occasions it rains on a Eurotour.
The left panel goes in first with the curved edge (window side) to the right of the boot. This just about pushes past the boot seal.
The right panel goes on top of that, with the curved edge (window side) to the rear of the boot.
Needless to say it is a good idea to put the panels in their bags or to place a towel or blanket between them.
Thanks to PP for the inspiration to take a look at my boot after I saw him load his flat; I stupidly didn't make a note of the orientation of his roof panels in the boot and was itching to try it once I got home.
Canny lads these chaps from the North East!

Oldred_V8S said:
At last I have worked out how Potless Paul manages to store his roof, flat in the boot, which means bags can be stowed in the base of the boot making it a lot easier to fit the roof for those rare occasions it rains on a Eurotour.
The left panel goes in first with the curved edge (window side) to the right of the boot. This just about pushes past the boot seal.
The right panel goes on top of that, with the curved edge (window side) to the rear of the boot.
Needless to say it is a good idea to put the panels in their bags or to place a towel or blanket between them.
Thanks to PP for the inspiration to take a look at my boot after I saw him load his flat; I stupidly didn't make a note of the orientation of his roof panels in the boot and was itching to try it once I got home.
Canny lads these chaps from the North East!
That is a very technical way of describing it Paul.The left panel goes in first with the curved edge (window side) to the right of the boot. This just about pushes past the boot seal.
The right panel goes on top of that, with the curved edge (window side) to the rear of the boot.
Needless to say it is a good idea to put the panels in their bags or to place a towel or blanket between them.
Thanks to PP for the inspiration to take a look at my boot after I saw him load his flat; I stupidly didn't make a note of the orientation of his roof panels in the boot and was itching to try it once I got home.
Canny lads these chaps from the North East!
All I did was follow the advice of Arkwright in Open All Hours and "jer jer jer jiggle it a bit!!!

AutoAndy said:
is that an early boot with the sliding metal catch or a later one with the gas strut...just a thought as my one with the gas strut did have issues if something rested against the strut when the boot closed....cant check this at the moment as the car is a the menders!
Later type (S3) Boot catch on the side.If you have problems with the roof interfering with the gas strut use the Arkwright method!!

Hmm not the best photos I'm afraid - I couldn't hide the sun!
The bigger of the two panels goes in first with the window rubber (curved part of the roof) facing the side mounted boot latch

Then the other panel sits on top with the curved edge facing the rear of the car.
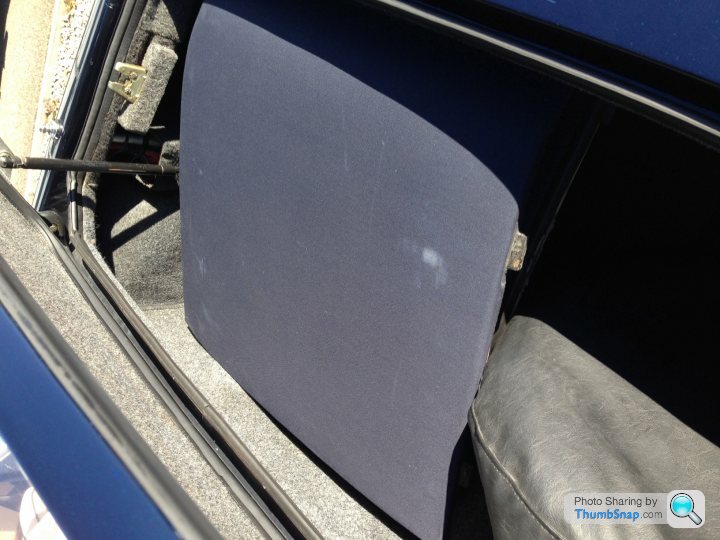
Hope this is useful
Andy
The bigger of the two panels goes in first with the window rubber (curved part of the roof) facing the side mounted boot latch
Then the other panel sits on top with the curved edge facing the rear of the car.
Hope this is useful
Andy


Gassing Station | S Series | Top of Page | What's New | My Stuff