1988 Jaguar XJ40 Sovereign
Discussion


The XJ40 has aged gracefully, I never particularly liked it in the 90s, compared to the XJ6 S1,2 & 3 it seemed to look very square and unimaginative, the the X300 came out and the XJ40 gets instantly forgotten. Now though, it really does have a presence of it's own.
There was a lovely late Kingfisher blue V12 on Ebay a few months ago that tempted me...
There was a lovely late Kingfisher blue V12 on Ebay a few months ago that tempted me...
TheDoggingFather said:
The XJ40 has aged gracefully, I never particularly liked it in the 90s, compared to the XJ6 S1,2 & 3 it seemed to look very square and unimaginative, the the X300 came out and the XJ40 gets instantly forgotten. Now though, it really does have a presence of it's own.
I agree. The XJ40 is unloved, but I think that it has real beauty, and the design is very much of its time. Very similar the how the RR Silver Spirit gets overlooked by what came before (Silver Shadow) and after (Silver Seraph/Phantom).I believe that the XJ40 was the last Jaguar that was designed under William Lyons?
AmitG said:
I believe that the XJ40 was the last Jaguar that was designed under William Lyons?
That’s often touted but Lyons retired in 1972.I believe he used to pop in to see how things were going but his health deteriorated sharply after 1980.
The XJ-S was the last car started under his direct oversight, the XJ40 certainly would have got the nod from Bill Lyons but it wouldn’t have been influenced much by him.
Following this one. Fondly remember my 4.0 Sovereign bought 24 years ago (heavens, I feel old all of a sudden). I was commuting from Kent into Central London every day, and decided that if I was going to do 0 mpg sitting in traffic, I'd rather do 0 mpg in the best quality armchairs. And they were terribly lovely armchairs.
Stick Legs said:
AmitG said:
I believe that the XJ40 was the last Jaguar that was designed under William Lyons?
That’s often touted but Lyons retired in 1972.I believe he used to pop in to see how things were going but his health deteriorated sharply after 1980.
The XJ-S was the last car started under his direct oversight, the XJ40 certainly would have got the nod from Bill Lyons but it wouldn’t have been influenced much by him.
https://www.instagram.com/autoatlantica/p/C0rG9iHL...
I really love these, your example looks great, so well kept
I remember back in the day with my dad looking at a used one, but instead in went Rover sterling. this was in 89, both on an F plate
I was gutted he did not go for the Jag. Years later he had an XJS, but I so wanted him to get the XJ40
Fast forward a good few years and a mate purchased what I expect was a very rare XJ40. It was a base model 2.9 manual, very early build I think, and it had a cloth interior. It was very cheap and had rust spots on all arches, sills and round the rear screen.
It had done well over 100K and was super slow, I think a few horses had escaped.
You got the sense that is was aware it was on its last legs but wanted to go out with dignity. I took it for a short drive and despite all its faults, it still felt special.
Sadly it failed its MOT less than 2 months afterwards and was sold for peanuts
Never sat in one since. So will be glued to this thread
As an aside, the XJ40’s boot was often complained about for size. I found the opposite. It is very deep - so much so I can confirm you can get a washing machine in on its side if you have to  I also managed to transport a church pulpit on the roof of mine (don’t ask…), and several pieces of furniture in the cabin. A most practical car
I also managed to transport a church pulpit on the roof of mine (don’t ask…), and several pieces of furniture in the cabin. A most practical car ferret50 said:
skwdenyer said:
.......... I also managed to transport a church pulpit on the roof of mine (don’t ask…), and several pieces of furniture in the cabin. A most practical car
Was the vicar still in position and rambling?
So, had some time to sort a few bits on the Jag and thought I'd post an update. Thank you for the comments above.
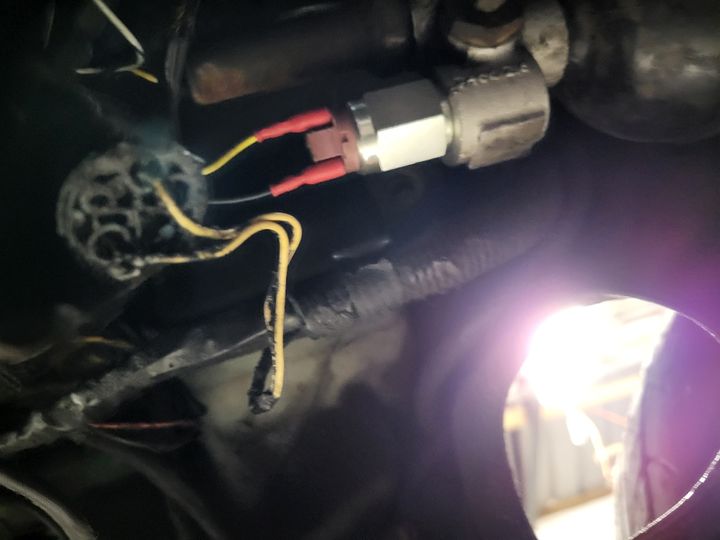
First, the low pressure switch on the accumulator. The aftermarket part was shorter than the original, so I had to make some wire extenders to make them fit right. Wiring isn't my best ability and I didn't have anything to hand apart from these crimps, but the end result appears to have worked.
Then to top up the hydraulic fluid. This uses a special bottle attachment which opens a valve to allow fluid to enter the reservoir, as usually the system is pressurised. This attachment is NLA. So I fashioned a device using a small funnel and a pick to allow the calve to open. This took AGES.
[url]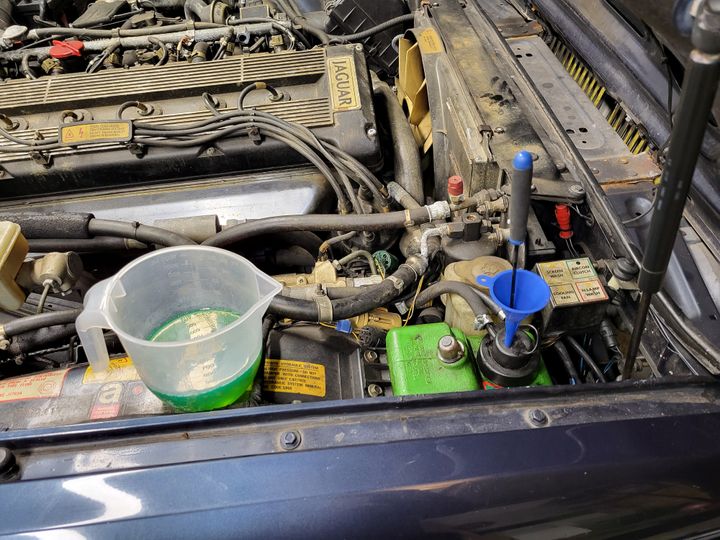 |https://forums-images.pistonheads.com/363739/202404288194446
Luckily, there is a really good Facebook group for these cars so I asked the question and someone suggested to use a nozzle like what you would use for silicone. This worked a treat and do the job was complete. Started the car, brake pedal feels good and so far no leaks.
Next up, to refix some trims that had worked loose and these all went well using generic clips I had in my garage.
I then raised the car up to remove and realign rear bumper, but I couldn't figure out how to remove the foglight housing so that had to be abandoned. I did manage to fit an exhaust outlet that had worked its way off its mount.
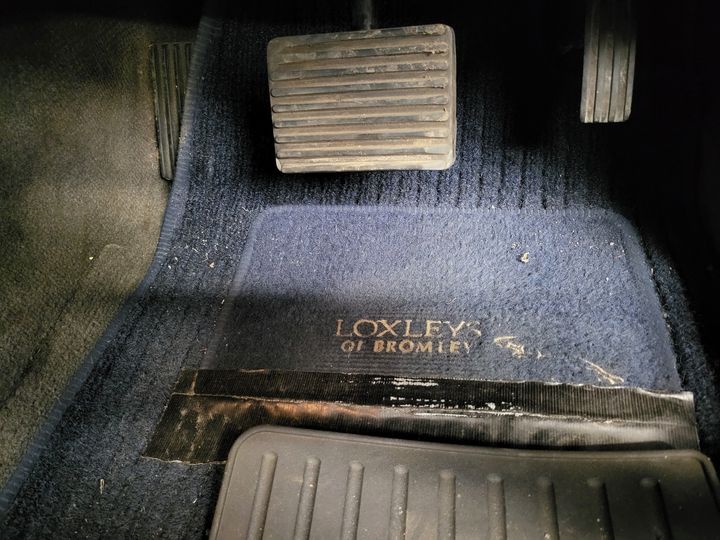
I removed the drivers floor mat, only to see the carpet below like new. Again another result
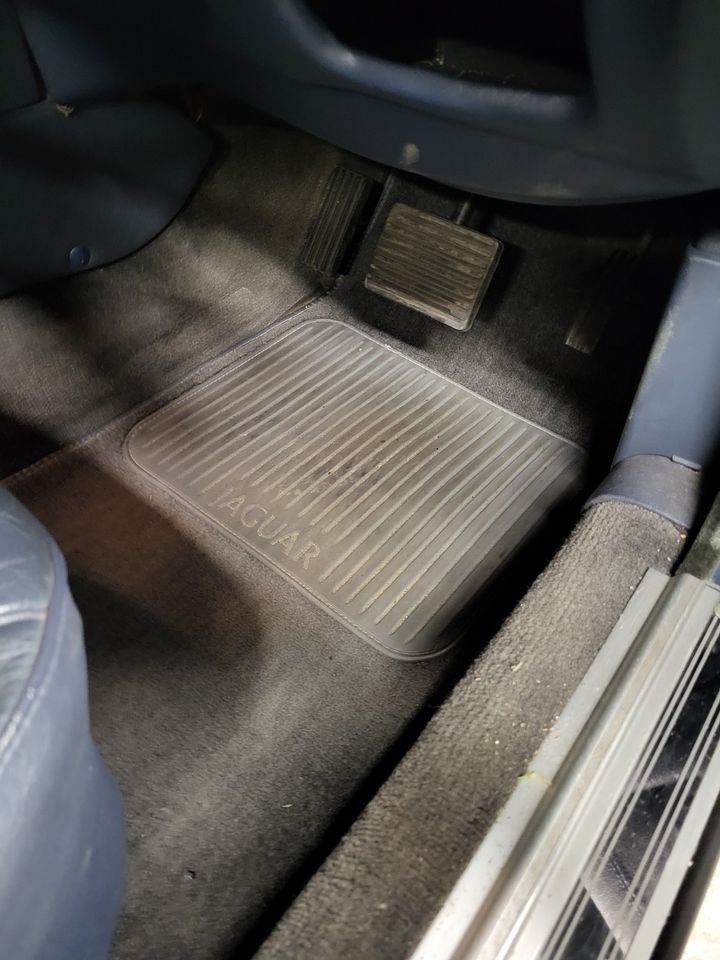
If anyone has any idea how to remove this tape from this mat I'd be grateful to hear it...
Next up, boot lid alignment. The boot sits proud of the back wings, I've attributed this to the catch needing adjusting and so it was. Only thing is it difficult to completely tighten one of the screws securing it so I suspect this it what's causing the catch to move.
The car has been sat for a while and I'd forgotten to put it on a battery conditioner, so I've done that. But one of the MOT advisories on the car was for the clamp being absent, again these are NLA so any feedback on a solution is appreciated.
List of jobs seems to be getting smaller but a few have been added, notably..
Alignment as inner edges on front tyres worn
New discs and pads as discs have a lip
Realign rear bumper
Work out how on earth I adjust the internal clock
Fit bits of trim I'm collecting this week
But most importantly, drive it. Some more pictures, this car is a reminder of "tgry don't make them like they used to"...
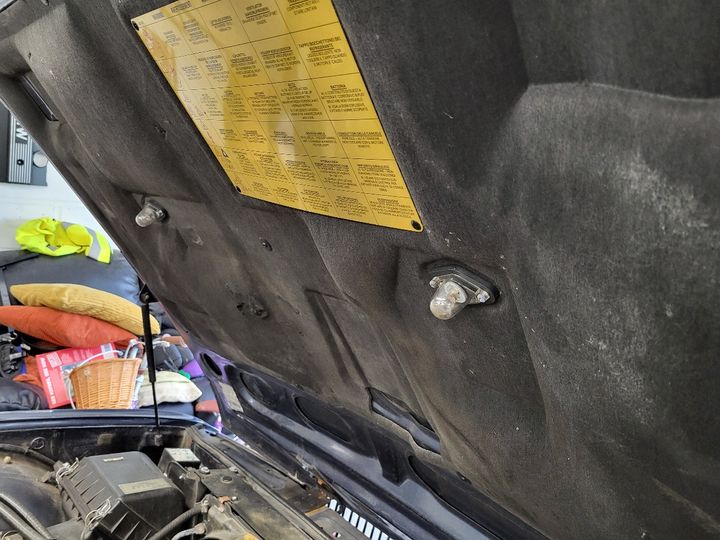
Under bonnet lights. They still work....
[url]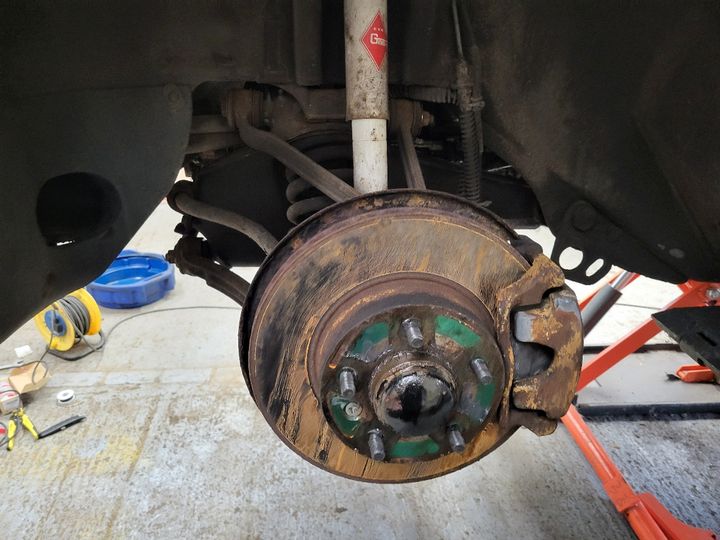
 [/url]
First, the low pressure switch on the accumulator. The aftermarket part was shorter than the original, so I had to make some wire extenders to make them fit right. Wiring isn't my best ability and I didn't have anything to hand apart from these crimps, but the end result appears to have worked.
Then to top up the hydraulic fluid. This uses a special bottle attachment which opens a valve to allow fluid to enter the reservoir, as usually the system is pressurised. This attachment is NLA. So I fashioned a device using a small funnel and a pick to allow the calve to open. This took AGES.
[url]
Luckily, there is a really good Facebook group for these cars so I asked the question and someone suggested to use a nozzle like what you would use for silicone. This worked a treat and do the job was complete. Started the car, brake pedal feels good and so far no leaks.
Next up, to refix some trims that had worked loose and these all went well using generic clips I had in my garage.
I then raised the car up to remove and realign rear bumper, but I couldn't figure out how to remove the foglight housing so that had to be abandoned. I did manage to fit an exhaust outlet that had worked its way off its mount.
I removed the drivers floor mat, only to see the carpet below like new. Again another result
If anyone has any idea how to remove this tape from this mat I'd be grateful to hear it...
Next up, boot lid alignment. The boot sits proud of the back wings, I've attributed this to the catch needing adjusting and so it was. Only thing is it difficult to completely tighten one of the screws securing it so I suspect this it what's causing the catch to move.
The car has been sat for a while and I'd forgotten to put it on a battery conditioner, so I've done that. But one of the MOT advisories on the car was for the clamp being absent, again these are NLA so any feedback on a solution is appreciated.
List of jobs seems to be getting smaller but a few have been added, notably..
Alignment as inner edges on front tyres worn
New discs and pads as discs have a lip
Realign rear bumper
Work out how on earth I adjust the internal clock
Fit bits of trim I'm collecting this week
But most importantly, drive it. Some more pictures, this car is a reminder of "tgry don't make them like they used to"...
Under bonnet lights. They still work....
[url]
Re the battery, an ebay saved search may turn one up. Equally there a few people on eBay advertising that they’re breaking XJ40s - get in touch and ask them for a battery clamp.
I don’t remember; is the tray open underneath? If so, you can buy a simple adjustable “luggage strap” to retain it.
Re the carpet, after peeling off the tape you’ll be left with an adhesive residue. There are commercial adhesive removers out there, but as a DIY measure you can try dabbing with isopropyl alcohol (don’t drench the carpet) to loosen it, then use a non-scratching scouring pad to work it away. Distilled white vinegar can also work, depending upon the adhesive. Obviously try first on a hidden area
Another approach that can work sometimes is to use parcel tape. Just in small areas - a few inches at a time - but it can sometimes pull the residue off (or at least some of it).
Some people swear by “Goof Off” but I’ve never used it: https://www.onbuy.com/gb/p/goof-off-pro-strength-r...
Edited by skwdenyer on Monday 29th April 02:57
skwdenyer said:
Re the battery, an ebay saved search may turn one up. Equally there a few people on eBay advertising that they’re breaking XJ40s - get in touch and ask them for a battery clamp.
I don’t remember; is the tray open underneath? If so, you can buy a simple adjustable “luggage strap” to retain it.
Re the carpet, after peeling off the tape you’ll be left with an adhesive residue. There are commercial adhesive removers out there, but as a DIY measure you can try dabbing with isopropyl alcohol (don’t drench the carpet) to loosen it, then use a non-scratching scouring pad to work it away. Distilled white vinegar can also work, depending upon the adhesive. Obviously try first on a hidden area
Another approach that can work sometimes is to use parcel tape. Just in small areas - a few inches at a time - but it can sometimes pull the residue off (or at least some of it).
Some people swear by “Goof Off” but I’ve never used it: https://www.onbuy.com/gb/p/goof-off-pro-strength-r...
Thank you. I don’t remember; is the tray open underneath? If so, you can buy a simple adjustable “luggage strap” to retain it.
Re the carpet, after peeling off the tape you’ll be left with an adhesive residue. There are commercial adhesive removers out there, but as a DIY measure you can try dabbing with isopropyl alcohol (don’t drench the carpet) to loosen it, then use a non-scratching scouring pad to work it away. Distilled white vinegar can also work, depending upon the adhesive. Obviously try first on a hidden area
Another approach that can work sometimes is to use parcel tape. Just in small areas - a few inches at a time - but it can sometimes pull the residue off (or at least some of it).
Some people swear by “Goof Off” but I’ve never used it: https://www.onbuy.com/gb/p/goof-off-pro-strength-r...
Edited by skwdenyer on Monday 29th April 02:57
Ref the battery clamp, I've already contacted a number of people breaking them and it turns out it's a part that sells out immediately. Will continue to monitor though.
Ref the carpet mat, the tape that's here is proving quite difficult to remove without further damaging the fabric, but to be fair I've not really tried too much since the last update.
Update time, with young kids, a full time job and trying to sort out a very broken BMW 440i I've not had much time to update the thread.
Anyway, onwards.
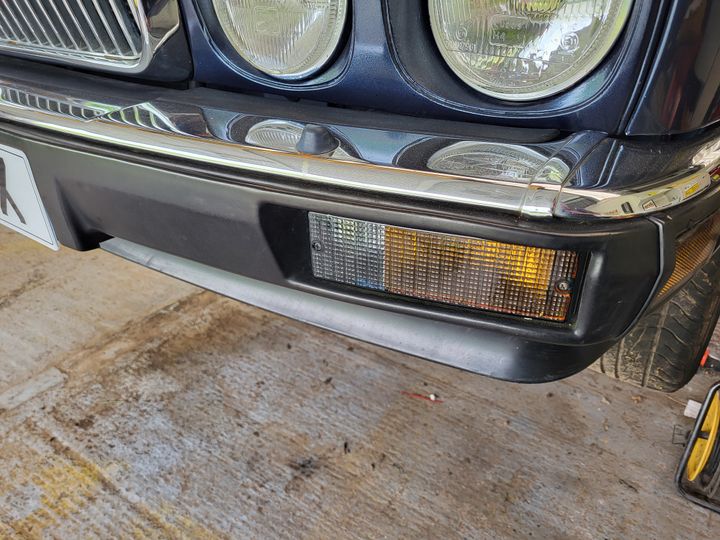
Front indicators were a little cracked and looking past their best. It turns out they are still available to but new, so a nice easy and fairly inexpensive fix on this one.
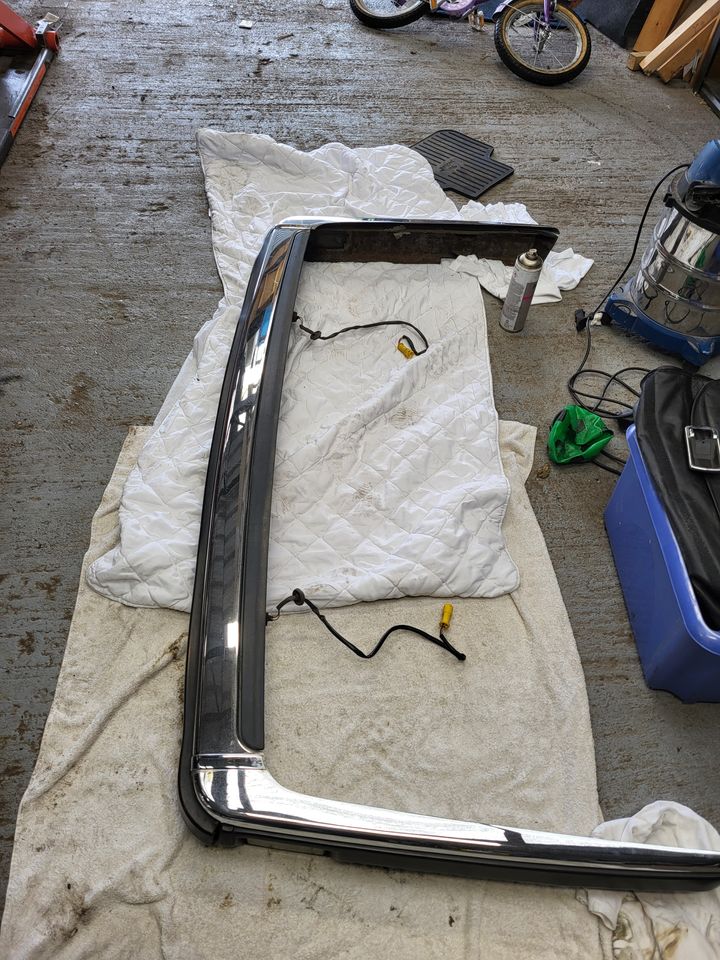
Next up, rear bumper. The ends of the bumper were splayed out a little as they meet the rear wheel arch, and although still attached it really bothered me. So I set about removing the bumper which was easy enough, they are made of quite thick grade steel and they bend easily if they are hit. I'm no expert in this area, but I managed to manipulate the sections so they sit a lot better. It's not perfect, but it's good enough for a car at this price point. I also treated the rust that was starting to form on the inside of the bumper and put it all back.
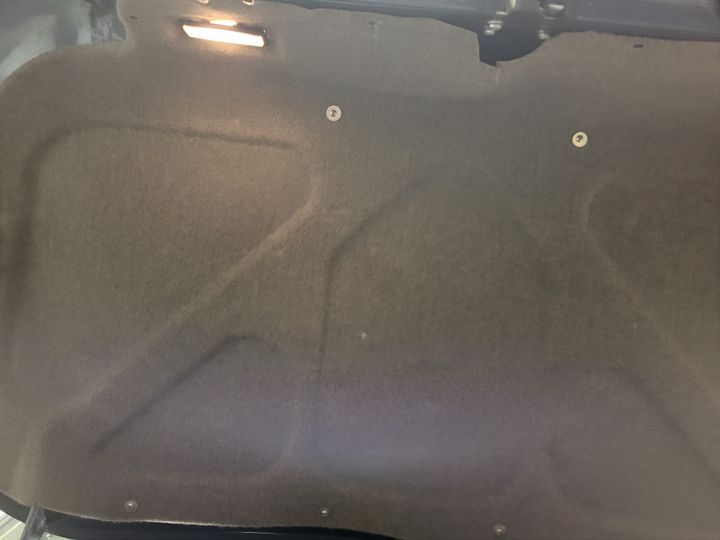
Next up, boot lid liner. The early XJ40 only came with a hardboard liner which looks awful and is a bit of an after thought.
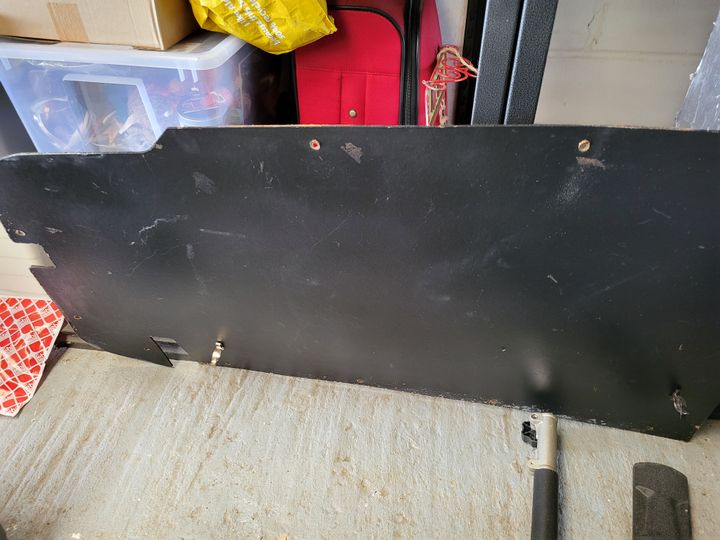
I was also missing a part of it that includes the boot light.
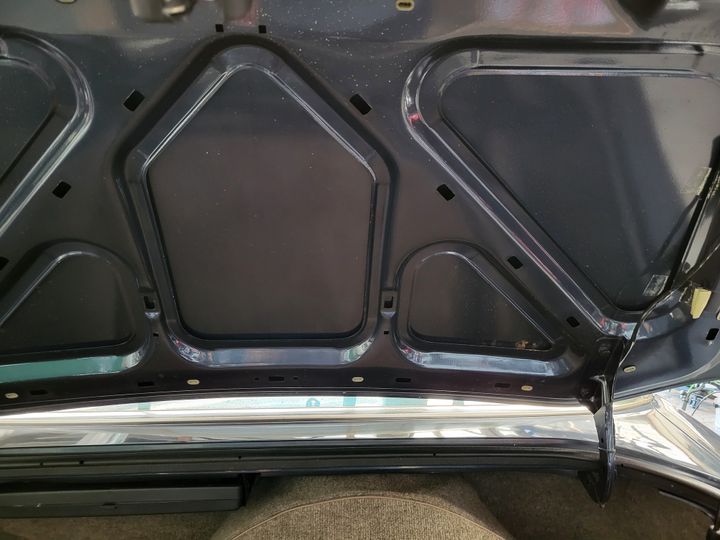
I found that later XJ40s use a far nice set up with fabric, so I obtained one of these in a similar shade to the rest of the boot trim. Only down side is that not all the fixing holes line up and the light is in a different location. I used some wire and solder to sortvthe light and gathered some fixings from the hundreds I have in my garage and am very pleased with the end result.
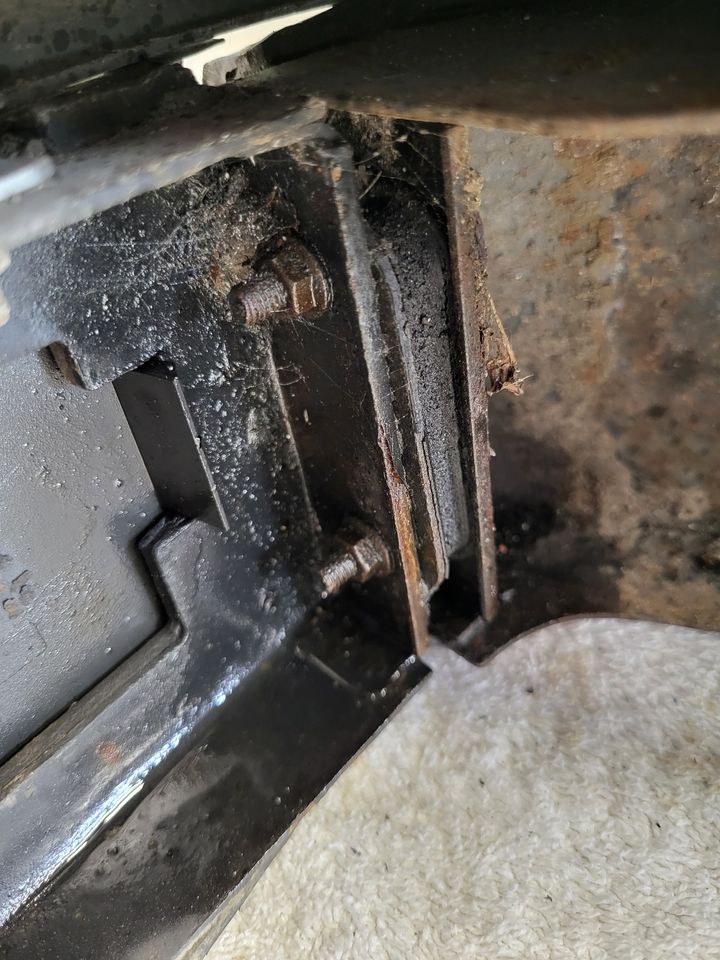
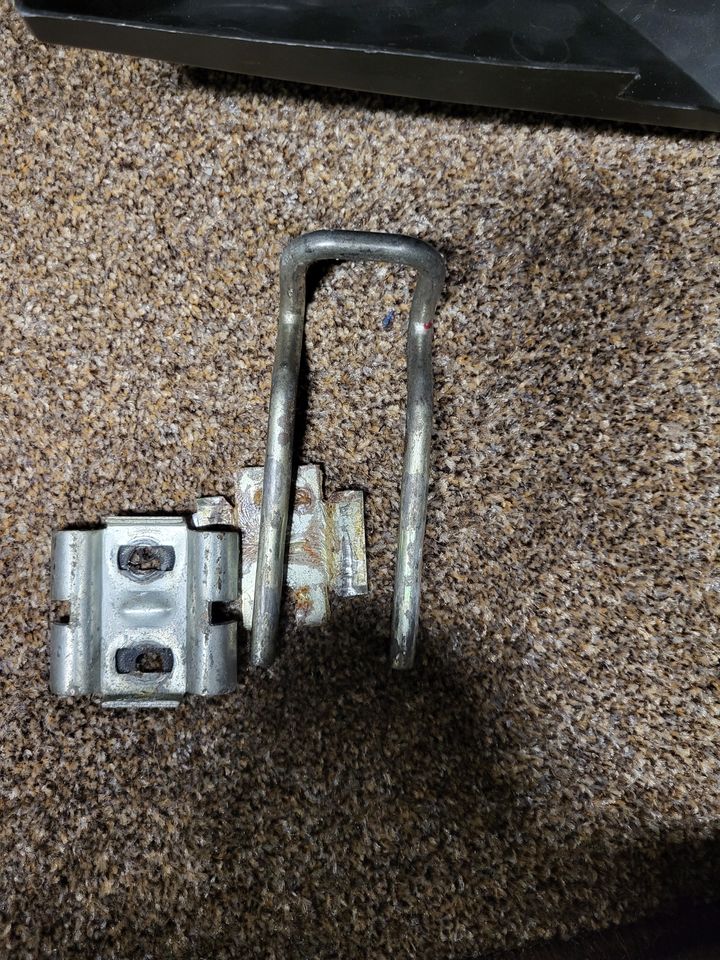
Finally, boot latch. The bootlid had been sitting proud of the rest of the bodywork since I got the car, I managed to locate the issue to the latch sitting too high, but rvery time I adjusted it, it wouldn't stay put. This troubled me far more than it ought to.
Last week, by chance I was with a customer at work who specialises in Jag parts and he suggested I try another latch which he had. I swapped them over, and it worked. Bootlid lines up nicely and opens and closes like it should. Another great result! Turns out the old latch was falling to pieces when it shouldn't really....
Anyway, onwards.
Front indicators were a little cracked and looking past their best. It turns out they are still available to but new, so a nice easy and fairly inexpensive fix on this one.
Next up, rear bumper. The ends of the bumper were splayed out a little as they meet the rear wheel arch, and although still attached it really bothered me. So I set about removing the bumper which was easy enough, they are made of quite thick grade steel and they bend easily if they are hit. I'm no expert in this area, but I managed to manipulate the sections so they sit a lot better. It's not perfect, but it's good enough for a car at this price point. I also treated the rust that was starting to form on the inside of the bumper and put it all back.
Next up, boot lid liner. The early XJ40 only came with a hardboard liner which looks awful and is a bit of an after thought.
I was also missing a part of it that includes the boot light.
I found that later XJ40s use a far nice set up with fabric, so I obtained one of these in a similar shade to the rest of the boot trim. Only down side is that not all the fixing holes line up and the light is in a different location. I used some wire and solder to sortvthe light and gathered some fixings from the hundreds I have in my garage and am very pleased with the end result.
Finally, boot latch. The bootlid had been sitting proud of the rest of the bodywork since I got the car, I managed to locate the issue to the latch sitting too high, but rvery time I adjusted it, it wouldn't stay put. This troubled me far more than it ought to.
Last week, by chance I was with a customer at work who specialises in Jag parts and he suggested I try another latch which he had. I swapped them over, and it worked. Bootlid lines up nicely and opens and closes like it should. Another great result! Turns out the old latch was falling to pieces when it shouldn't really....
AmitG said:
I remember when I had mine (admittedly a few years ago) I was surprised at how many parts were still available new from Jaguar. There must be some closet XJ40 fans working at Jaguar's parts department...
Quite a lot of the underpinnings are shared with the X300, which probably helps. Gassing Station | Readers' Cars | Top of Page | What's New | My Stuff