Anyone interested in home-built sailing dinghies?
Discussion


ConnectionError said:
Well I think it looks great,
Thank you, that is very kind 
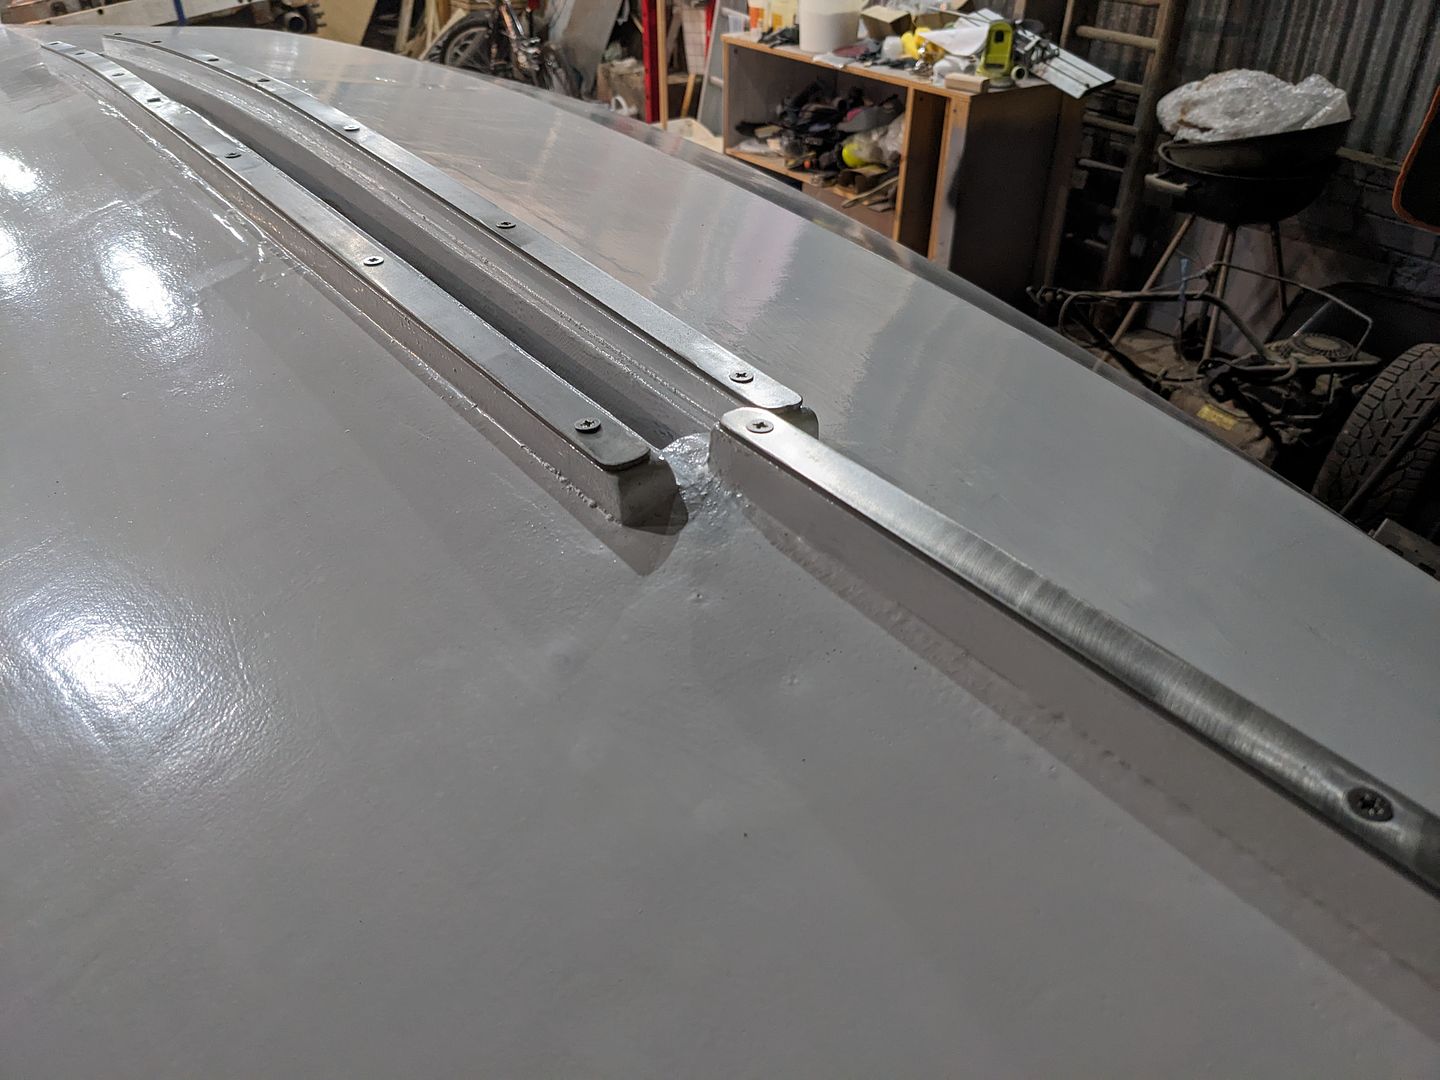
I've now got the stainless steel rubbing strips dry fitted to the keel. One or two countersinks need to go a bit deeper ideally but I've now spent more on 5mm drill bits and HSS TIN coated countersink bits than I did on the flat bar. I think I mentioned before that I hate working with stainless steel. I'm not sure any of the countersink bits have any more to offer as despite going slowly and keeping the work oiled to minimise heat, the stainless steel is savage on the tools. The TIN coating vanishes and the bits are blunt in no time...
Anyway, here we are. Next I'm going to remove these along with the dry fitted stainless steel fittings such as the chainplates etc, get the top plank painted the final contrasting colour, then reassemble all this stuff with appropriate sticky gunk to prevent water ingress along the screws and into the wood.

I thought that was it, then, and it was ready to turn upright finally but fortunately I remembered that I forgot I have to make a gasket for the daggerboard case and fit that, so I'll be on the sewing machine next I think...
I've had a bad run with cars recently which has soaked up a lot of time (I'm still not done actually). Still, I have cut some plywood bits this weekend which was enjoyable.
I started by making a template for the thwarts.
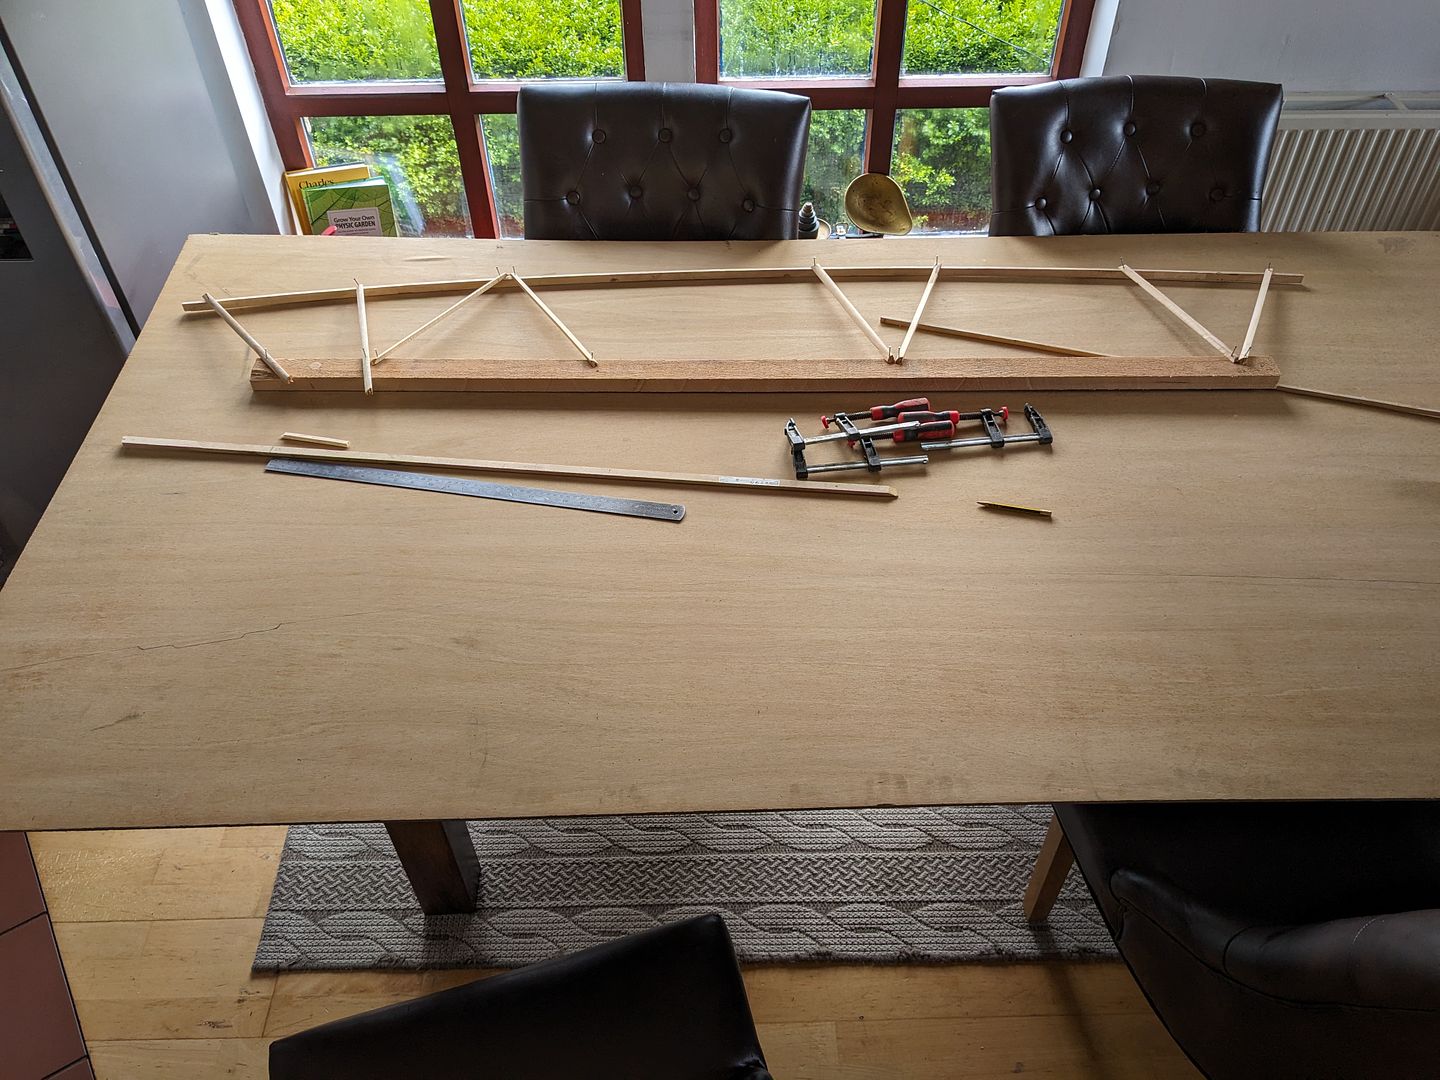
The template looks and indeed was pretty rough, but I'm pleased to say the thwart fit nicely with minimal fuss. You'll see that unfortunately we've had a soaking in the rain which isn't ideal but it's drying out nicely and as a strictly short term thing shouldn't hurt marine ply overly much. (the boat's place in the big shed is currently occupied by a sick car but that'll be done soon enough - I need it working - and the boat can go back indoors.)
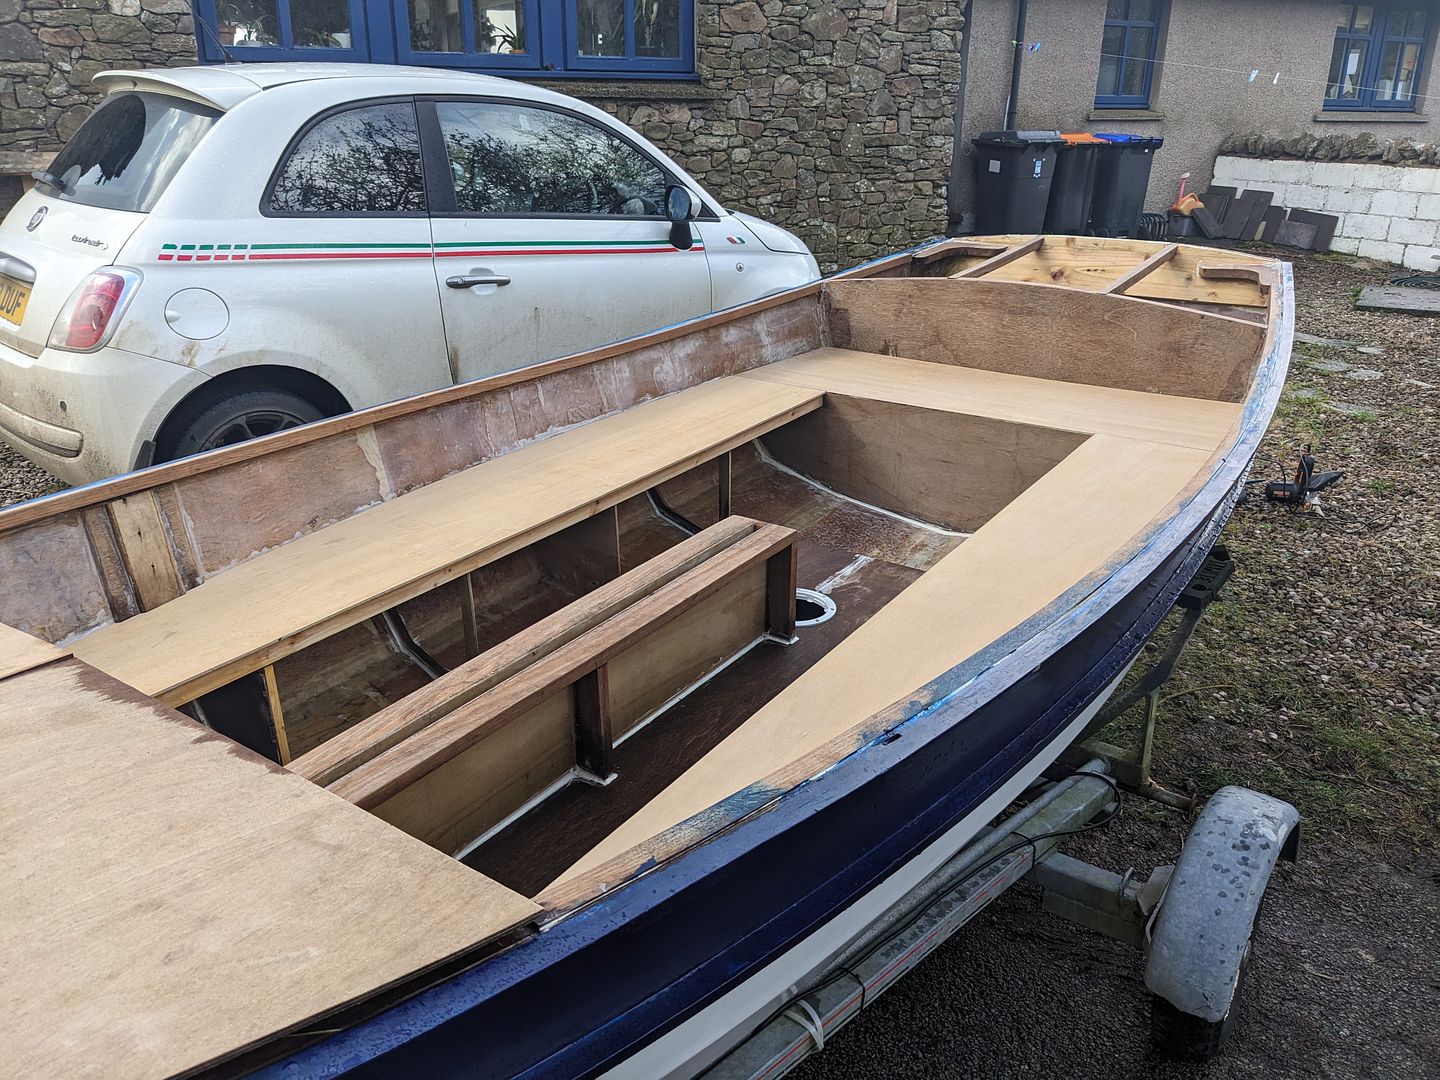
I've started cutting the pieces of the aft deck from what ply I have left too.

I need to make lockers for storage under the thwarts and will frame these out before gluing the plywood down. I've been thinking for months now about the advantages and disadvantages of different ways to do this, but I'm definitely open to suggestions.
I started by making a template for the thwarts.
The template looks and indeed was pretty rough, but I'm pleased to say the thwart fit nicely with minimal fuss. You'll see that unfortunately we've had a soaking in the rain which isn't ideal but it's drying out nicely and as a strictly short term thing shouldn't hurt marine ply overly much. (the boat's place in the big shed is currently occupied by a sick car but that'll be done soon enough - I need it working - and the boat can go back indoors.)
I've started cutting the pieces of the aft deck from what ply I have left too.
I need to make lockers for storage under the thwarts and will frame these out before gluing the plywood down. I've been thinking for months now about the advantages and disadvantages of different ways to do this, but I'm definitely open to suggestions.
Hi folks,
I've been scuttering about, as my grandmother from Perth, the old on in Scotland, used to say with the jib. In retrospect one could criticise earlier decisions made but actually I really enjoy the problem solving... I more or less followed the plans suggestions for attachment points when I made the fitting at the end of the bowsprit. The only other one of these I'm aware of that's been built with the cutter rig has a flying jib and no outer forestay. Because I always intended to put the forestay there, but designed the sails before most of the rig was there due to using my jib and staysail as the sail making course subjects, I chose to have a hanked on jib which has beautiful little brass piston hanks on it.
The realisation set in, however, that perhaps I didn't want a light air jib that had to be hanked onto a forestay and the tack shackled on 3 feet beyond the stem of a dinghy as it would mean I couldn't pull it in if the wind picked up, and hence I'd probably be reluctant to set it at all much of the time.
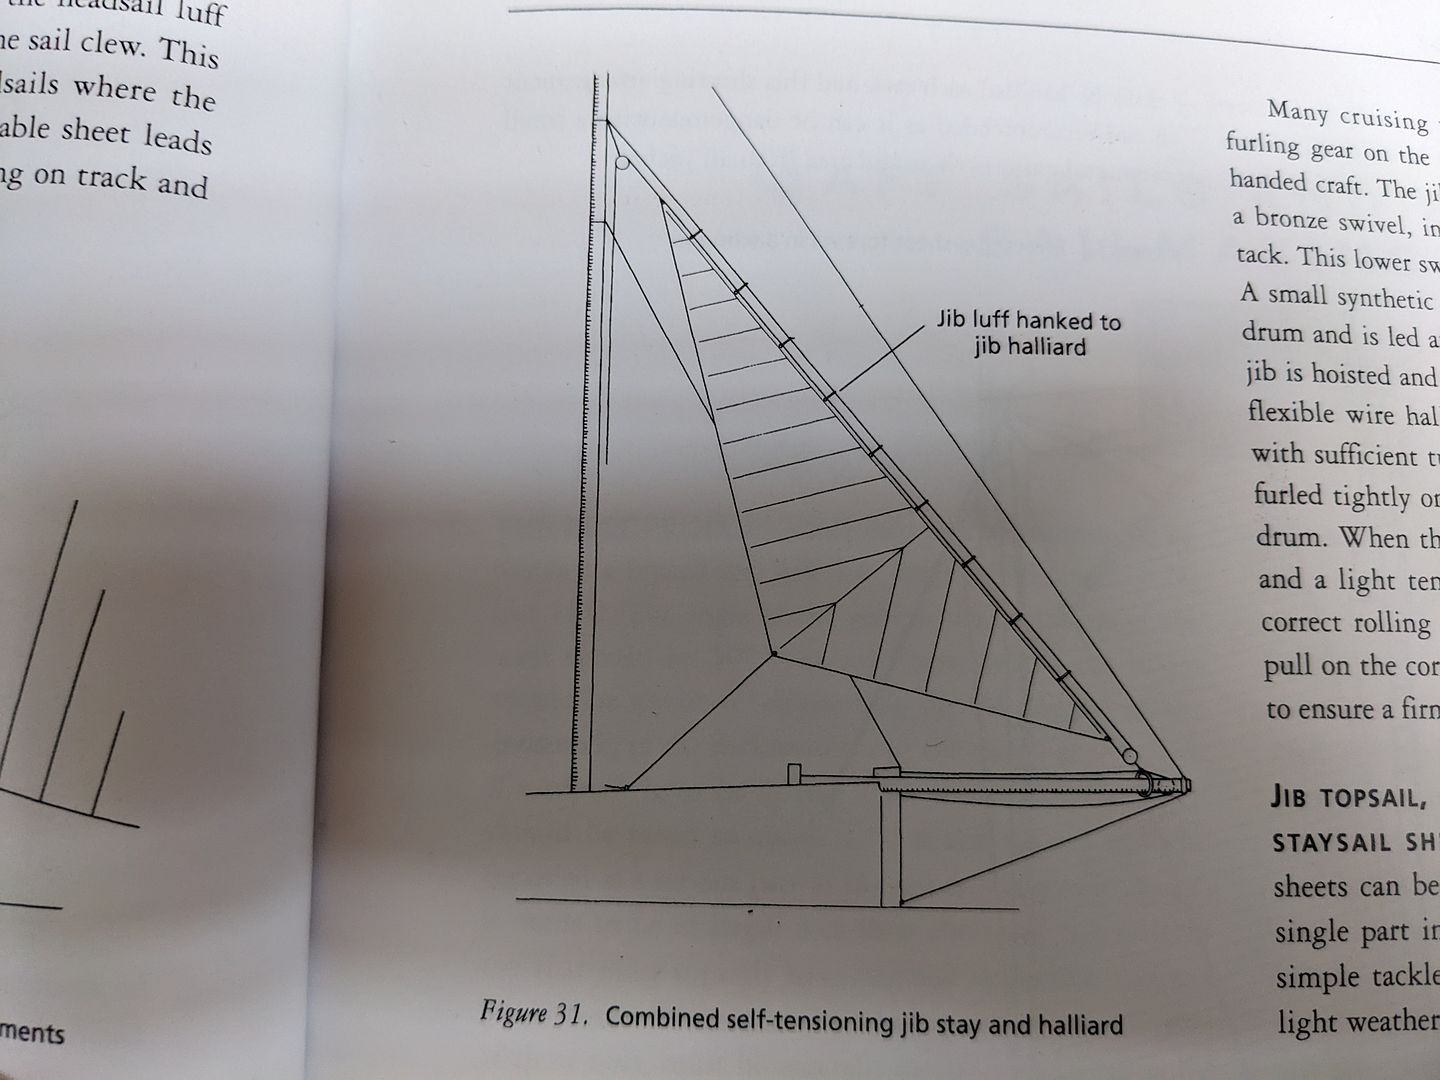
Mark, the sail making instructor did send me home with his personal copy of The Gaff Rig Handbook by John Leather suggesting I'd have more immediate use for it than he, which was immensely kind of him. He also suggested that having built the rest so far I could consider a traveller, and that sounded like fun.
In the book there was a diagram showing how to hank the jib onto the running rig, so I decided to try this. I haven't bought any proper rope yet so I'm using cheap stringy stuff just to figure out how it's all going to work and what lengths I'm going to need.
I ordered a pile of inexpensive stainless steel fittings and experimented. I used an S hook, squashed one end into a loop, welded it shut then welded this onto a stainless ring as my traveller.
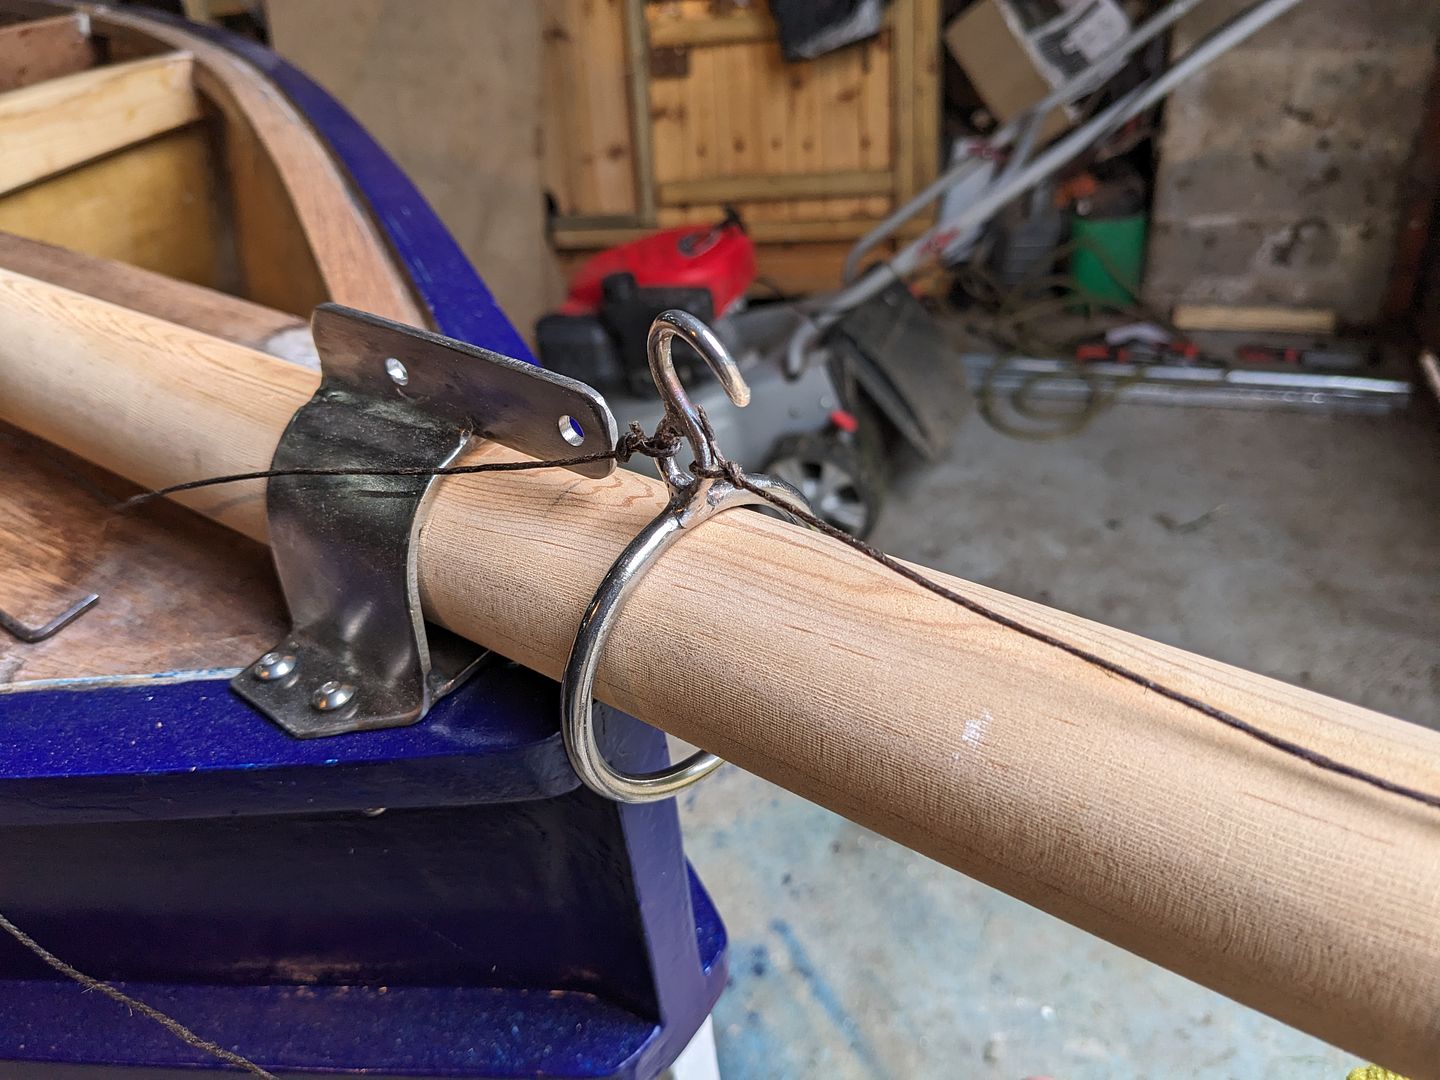
Fitting a pulley to the bowsprit fitting where the plans would have you shackle the jib tack to does the other half of the job.
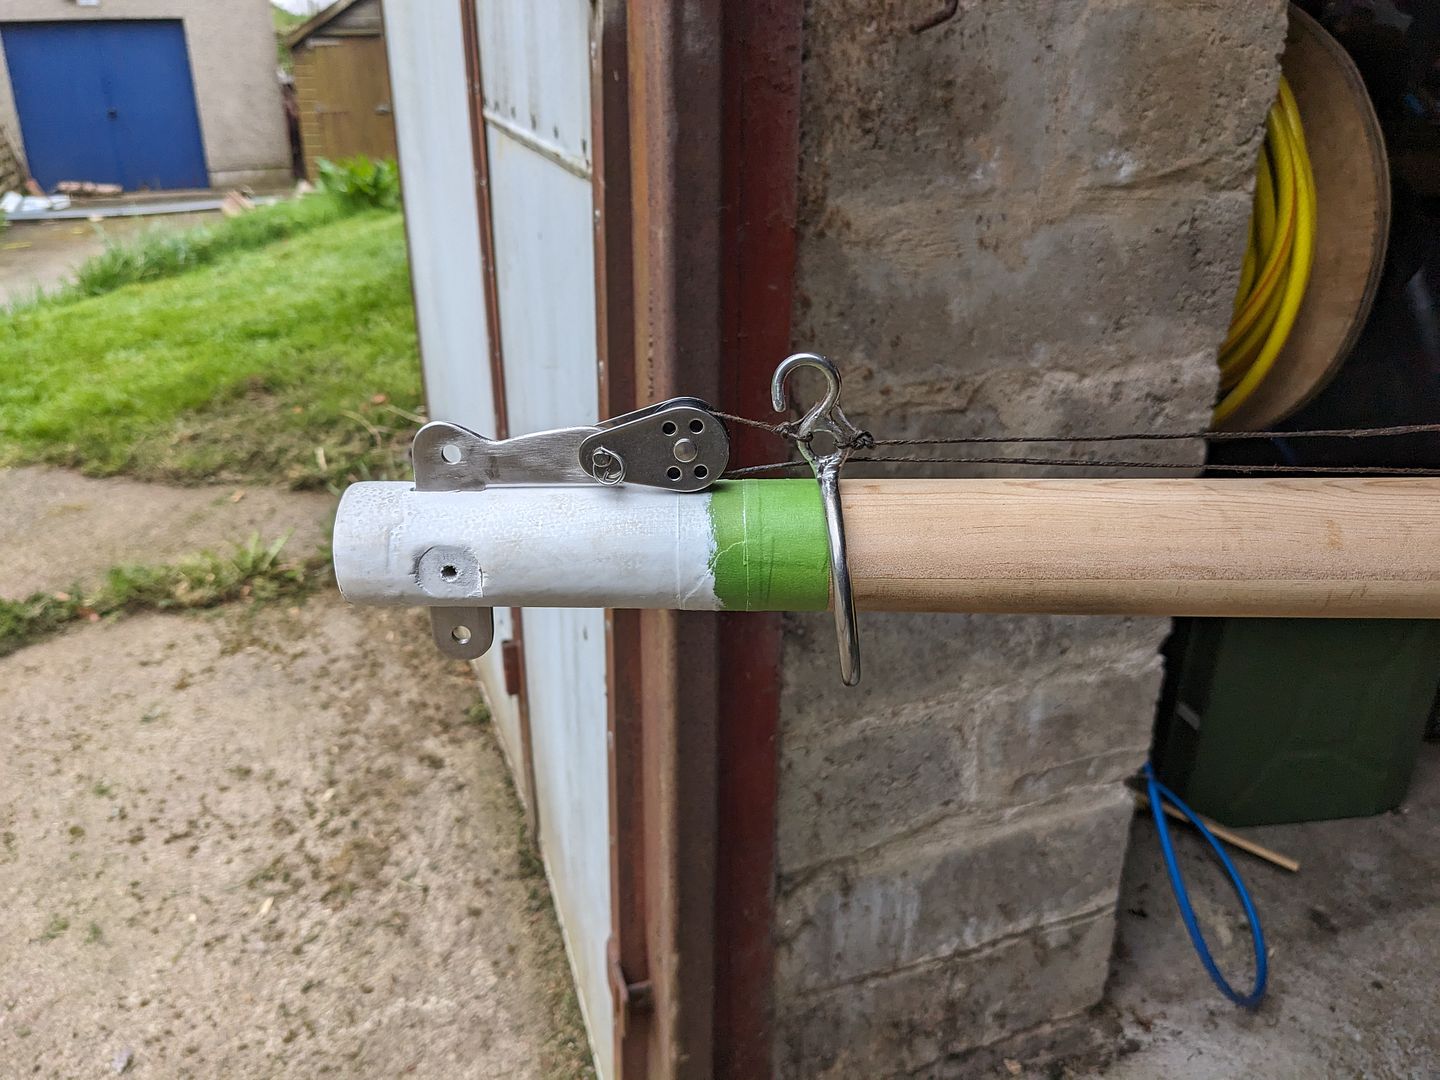
I didn't like the growth in distance from tack to end of the bowsprit though so I shortened the original fitting thus which is neater.

I also sqeezed shut the top of the S hook to make a figure-8 and used the new eyelet at the top to attach the tack's pulley to. When I get the proper 6mm rope I might need to attach a second eyelet for the traveller inhaul & outhaul. No big deal though...
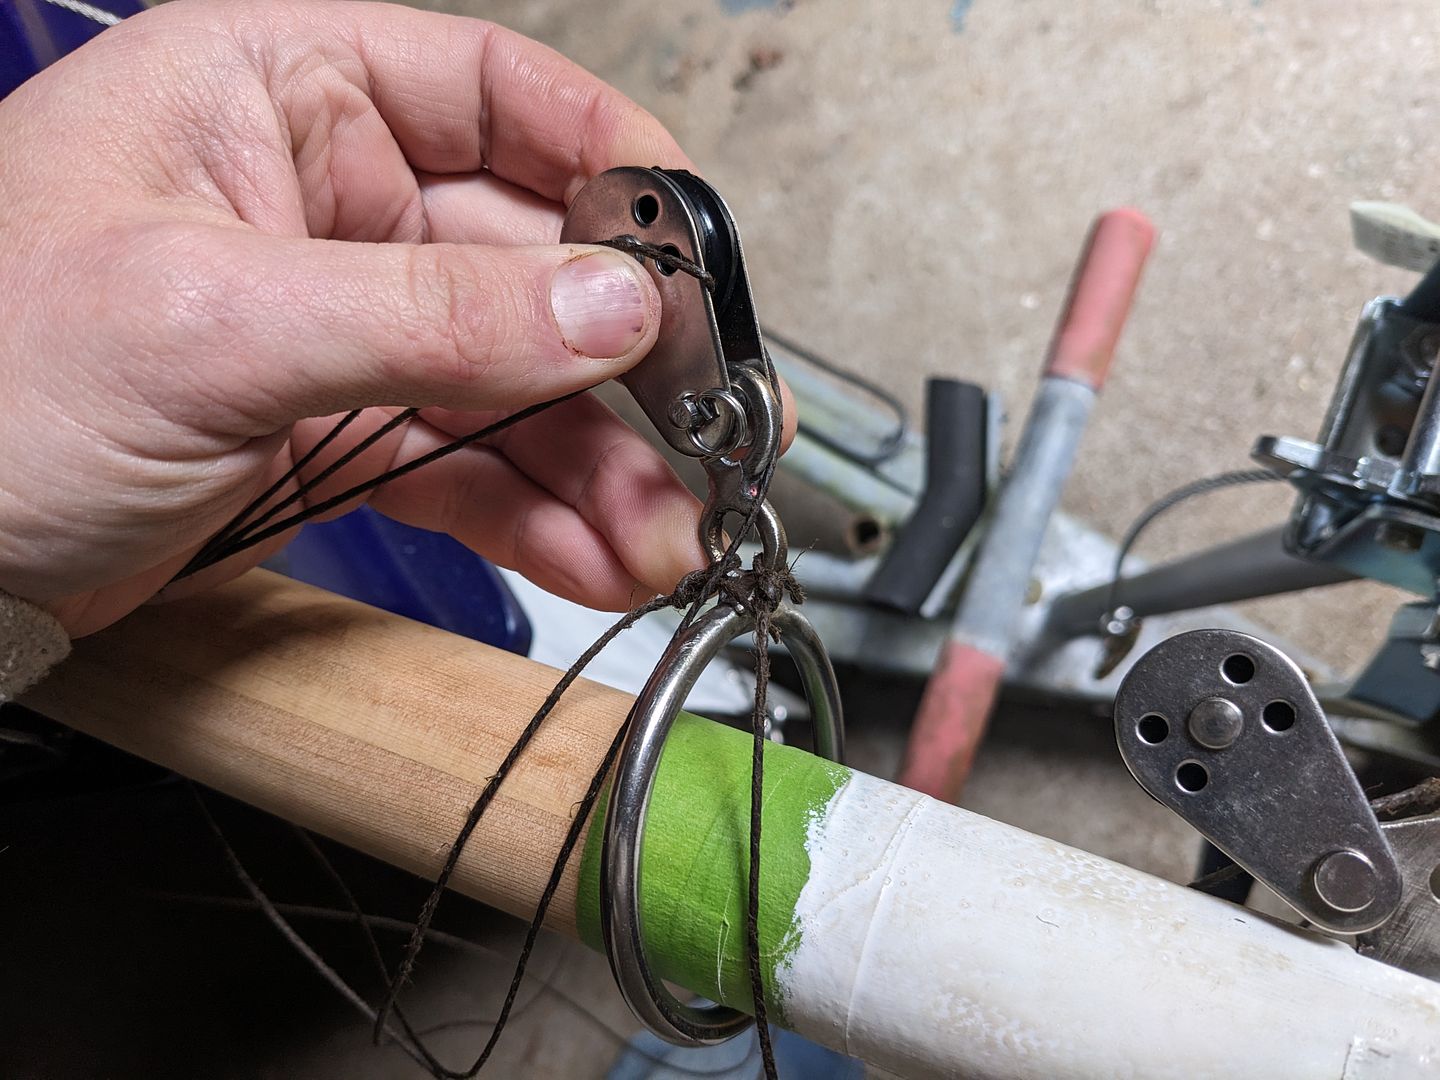
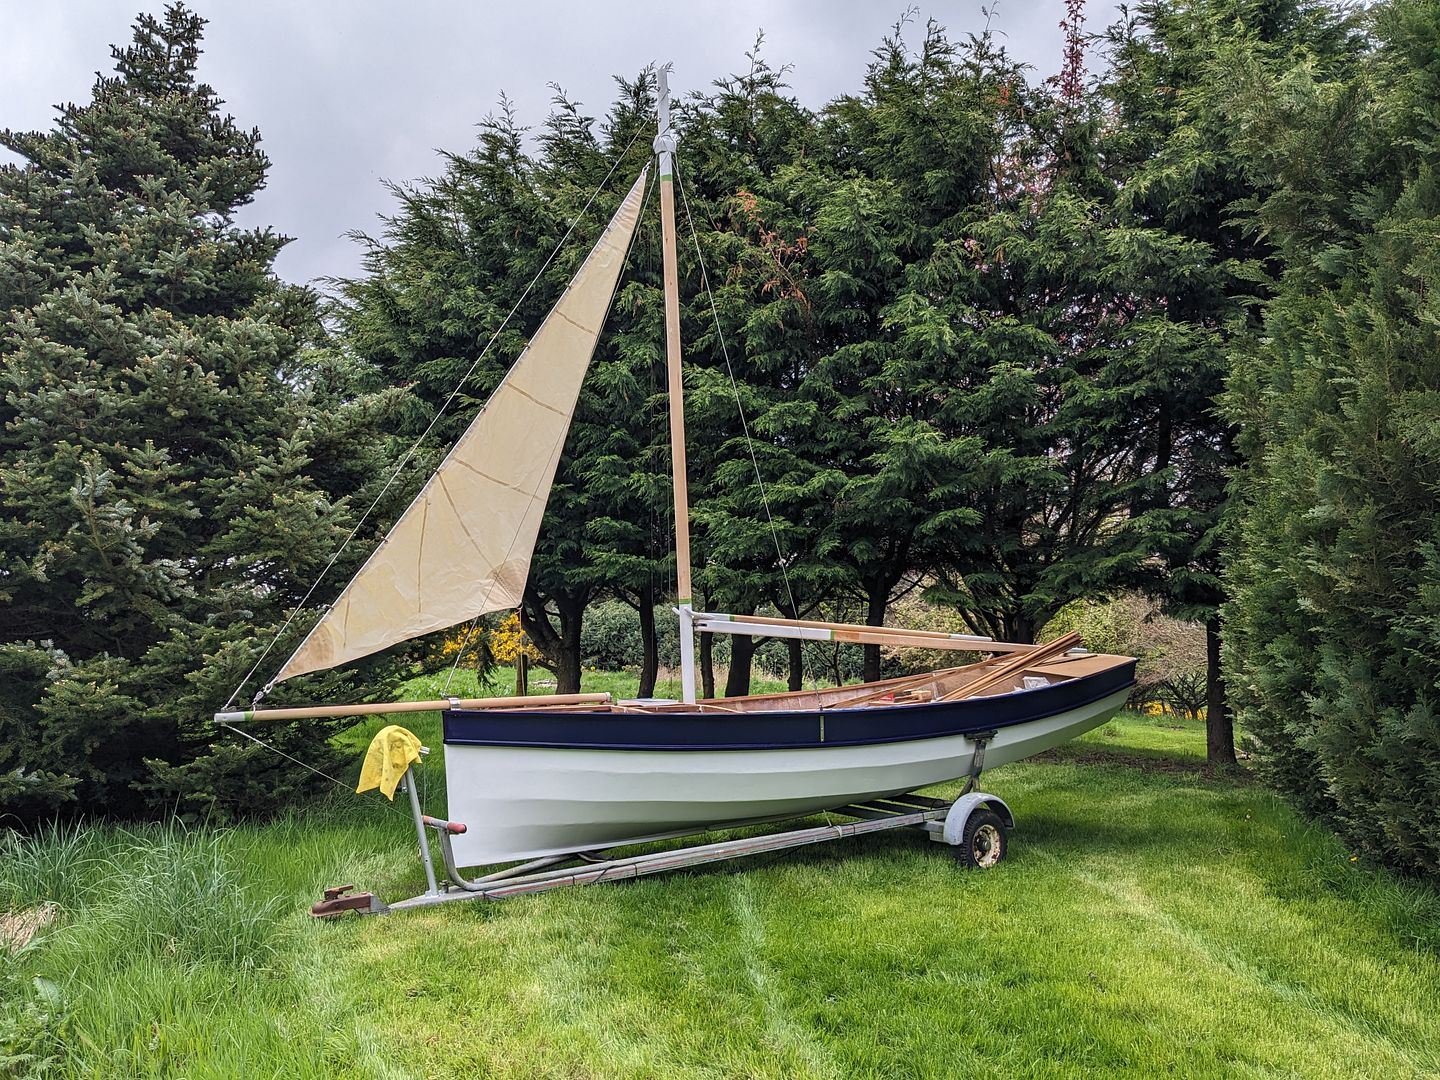
This works better than I hoped. The strop at the top of the mast is attached to a lower pair of hooks, but I think next time I'll sling it off the higher pair and use the lowers for the gaff running rig. Using the higher one will bring the luff in line with the outer forestay as designed. It works though, so I'm quite pleased, and this will allow a hanked on light air jib to be hauled in or out from leaning on the foredeck.
I imagine this will not meet the approval of many dinghy sailers who prefer to keep things simple, which I can understand, but frankly if I start to feel the same way I can build another dinghy.
I've been scuttering about, as my grandmother from Perth, the old on in Scotland, used to say with the jib. In retrospect one could criticise earlier decisions made but actually I really enjoy the problem solving... I more or less followed the plans suggestions for attachment points when I made the fitting at the end of the bowsprit. The only other one of these I'm aware of that's been built with the cutter rig has a flying jib and no outer forestay. Because I always intended to put the forestay there, but designed the sails before most of the rig was there due to using my jib and staysail as the sail making course subjects, I chose to have a hanked on jib which has beautiful little brass piston hanks on it.
The realisation set in, however, that perhaps I didn't want a light air jib that had to be hanked onto a forestay and the tack shackled on 3 feet beyond the stem of a dinghy as it would mean I couldn't pull it in if the wind picked up, and hence I'd probably be reluctant to set it at all much of the time.
Mark, the sail making instructor did send me home with his personal copy of The Gaff Rig Handbook by John Leather suggesting I'd have more immediate use for it than he, which was immensely kind of him. He also suggested that having built the rest so far I could consider a traveller, and that sounded like fun.
In the book there was a diagram showing how to hank the jib onto the running rig, so I decided to try this. I haven't bought any proper rope yet so I'm using cheap stringy stuff just to figure out how it's all going to work and what lengths I'm going to need.
I ordered a pile of inexpensive stainless steel fittings and experimented. I used an S hook, squashed one end into a loop, welded it shut then welded this onto a stainless ring as my traveller.
Fitting a pulley to the bowsprit fitting where the plans would have you shackle the jib tack to does the other half of the job.
I didn't like the growth in distance from tack to end of the bowsprit though so I shortened the original fitting thus which is neater.
I also sqeezed shut the top of the S hook to make a figure-8 and used the new eyelet at the top to attach the tack's pulley to. When I get the proper 6mm rope I might need to attach a second eyelet for the traveller inhaul & outhaul. No big deal though...
This works better than I hoped. The strop at the top of the mast is attached to a lower pair of hooks, but I think next time I'll sling it off the higher pair and use the lowers for the gaff running rig. Using the higher one will bring the luff in line with the outer forestay as designed. It works though, so I'm quite pleased, and this will allow a hanked on light air jib to be hauled in or out from leaning on the foredeck.
I imagine this will not meet the approval of many dinghy sailers who prefer to keep things simple, which I can understand, but frankly if I start to feel the same way I can build another dinghy.
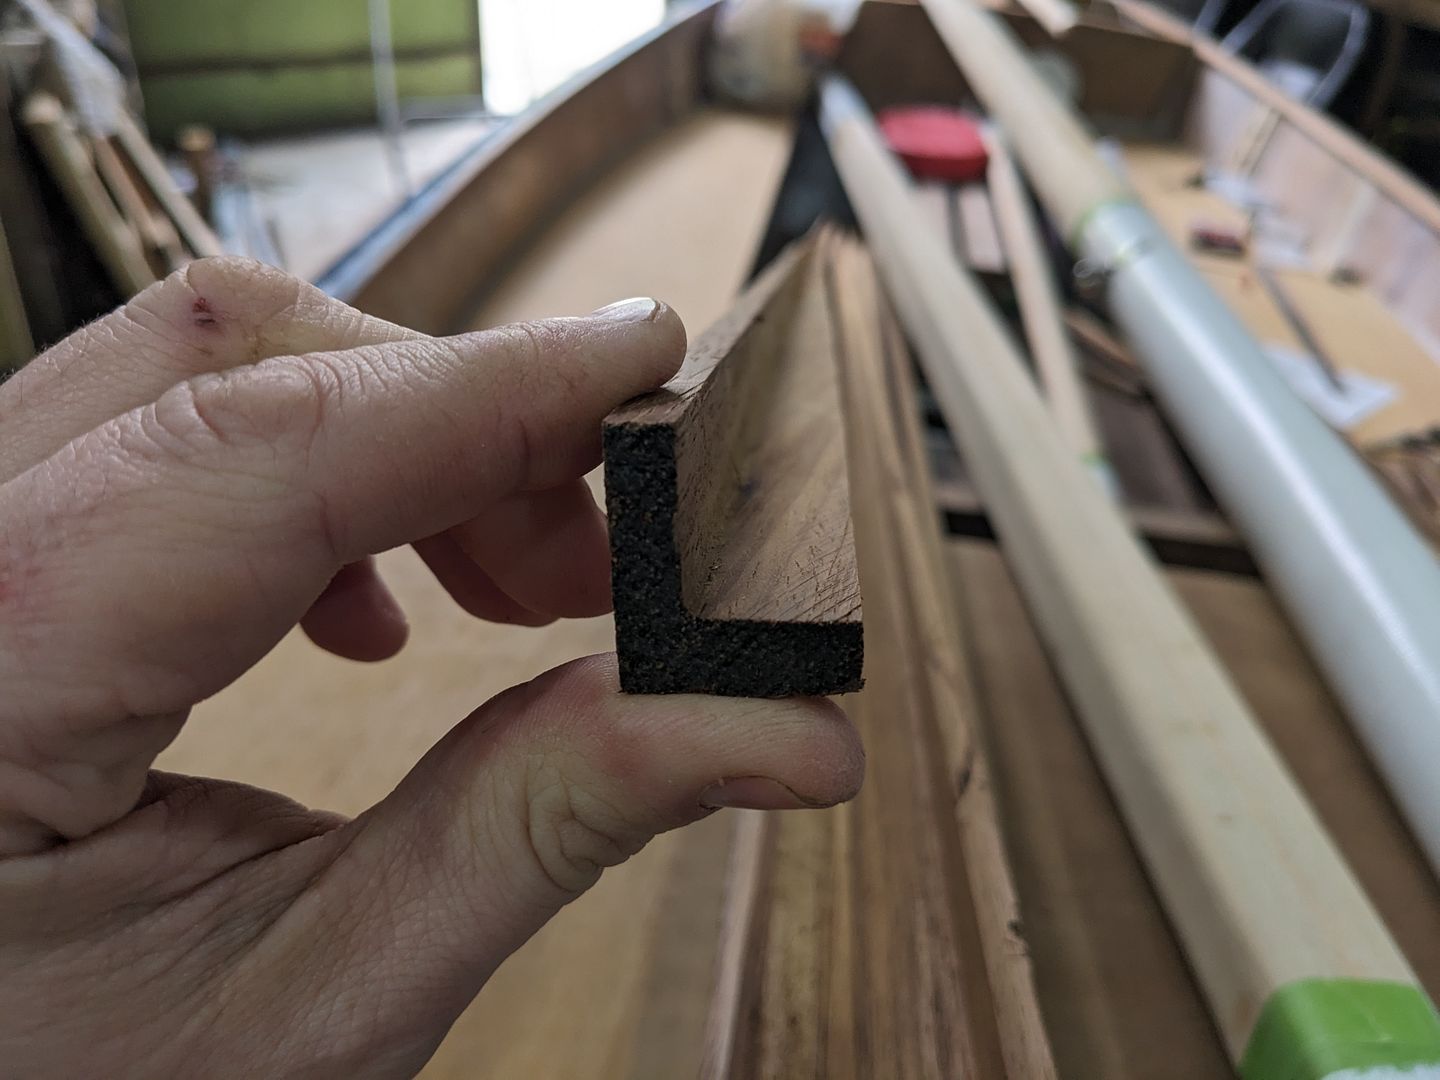
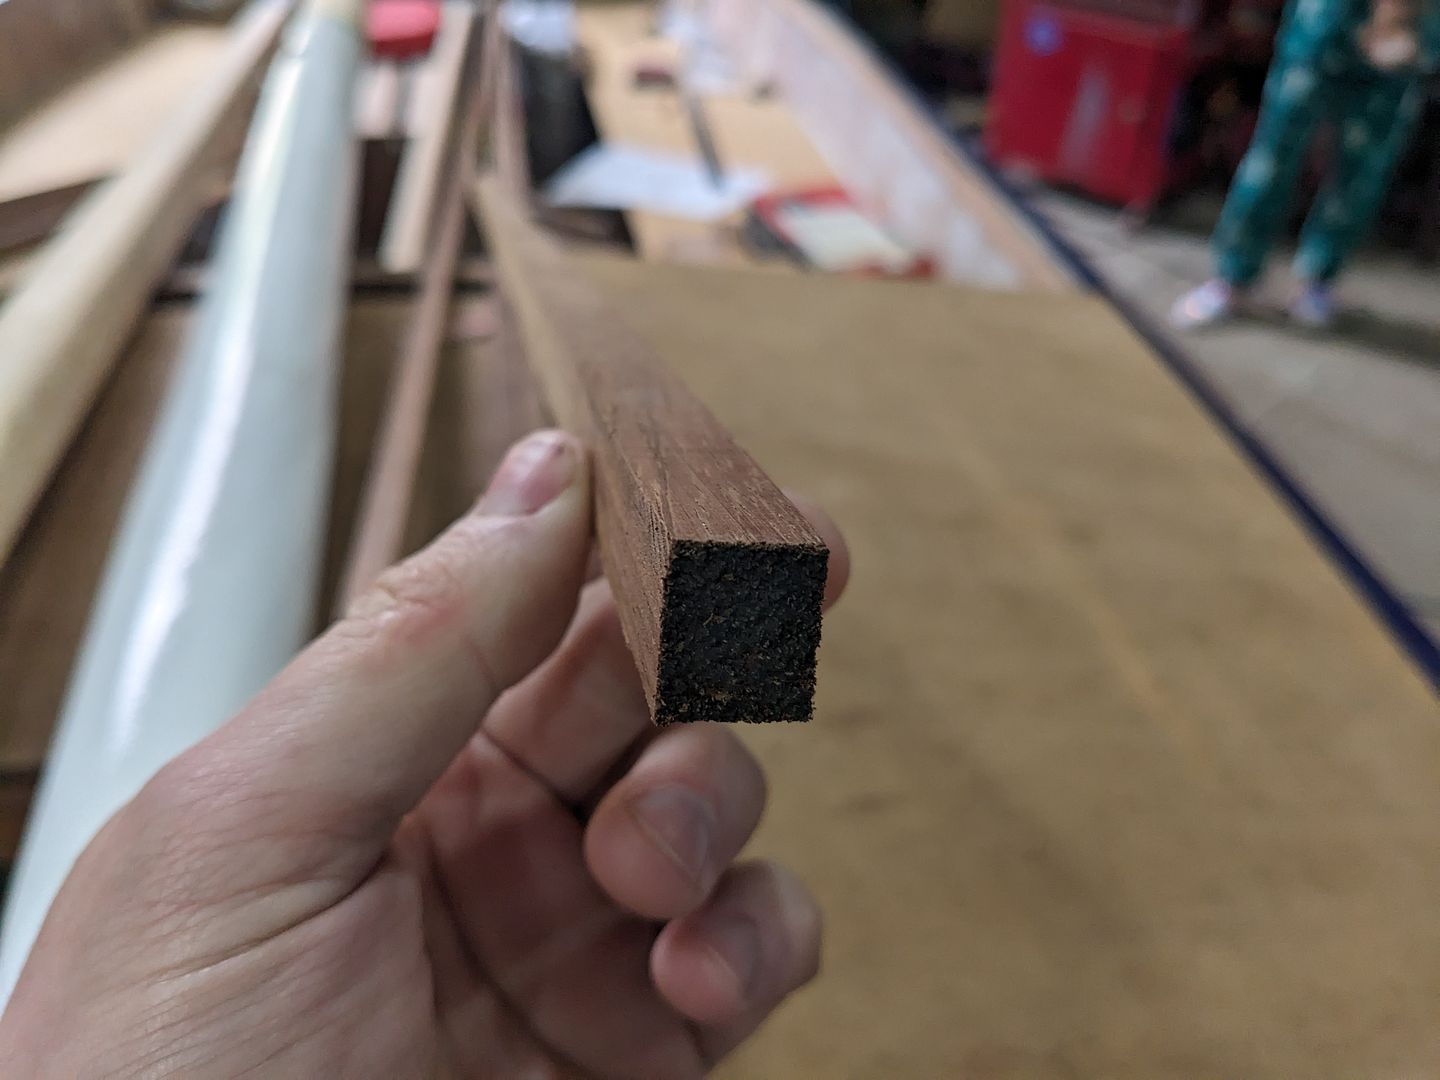
I have also machined up some iroko to build the lockers. These were ripped from a long board which had been planed to thickness, than ran through the table saw two more times to cut a smaller section out giving me an L shape to glue round the jambs with some seal strip for splash-proofness (I do not expect them to be truely waterproof) and a rectangular section to glue to the opening part perimeter to land in the L and squish the seal strip stuff.
Lots more measuring, marking a cutting next. Then gluing, which I enjoy somewhat less.
Lots more measuring, marking a cutting next. Then gluing, which I enjoy somewhat less.
Apologies for coming to this very late but I'd suggest putting in drain plugs in your buoyancy tanks. If you get any water in your bow tank it'll be virtually impossible to get it all out; and the last thing you want is water sat around in the bottom of the tanks. That's a surefire way for rot to set in.
Gassing Station | Boats, Planes & Trains | Top of Page | What's New | My Stuff