The house that Nadger (re)built.... well, sort of!
Discussion


Hello all.
I'm in the process of renovating and updating our house at the moment. I know how popular renovation threads are (I certainly love reading them!) so I hope people enjoy mine!
Now I need to start by explaining I am utterly hamfisted when it comes to DIY, so the house we bought isn't going to show total rewiring, etc. However I have got my hands dirty and achieved feats I never knew I could!
So this is our house
Its in a village reasonably close to Cambridge. We were previously in a new build in Peterborough, but wanted to get out of the city so our kids could grow up in a village.
The house was built in 2000, so again a relatively modern build. However the previous owners had altered it to suit them (he was disabled) so some remedial work was needed.
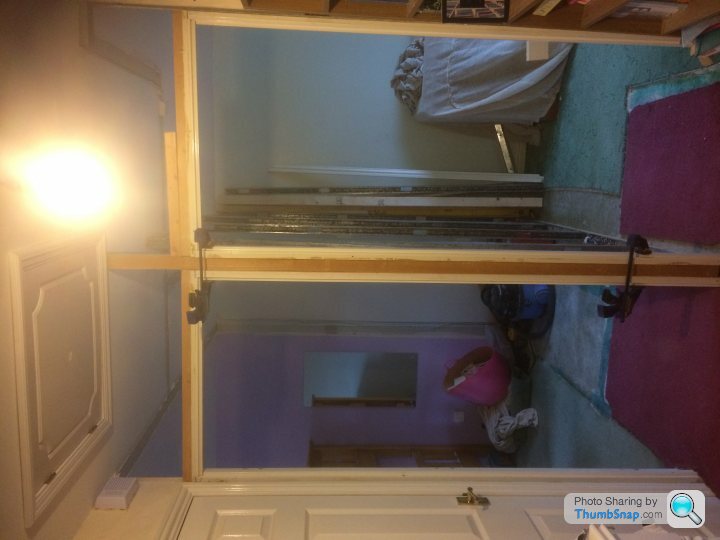
The most obvious issue was the decor. Everyone is absolutely entitled to their own taste, but they had wall papered the hallway and landing in two different coloured wall paper with a contrasting border. Not to our taste at all! Unfortunately the only image I have of this is this one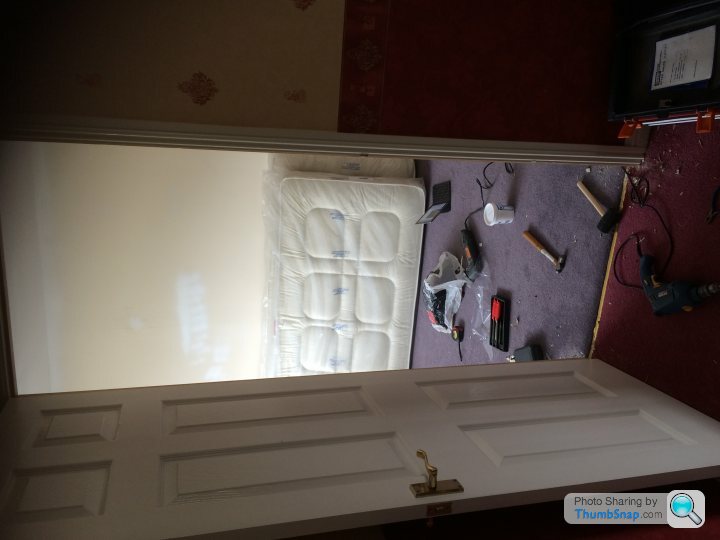
So a wall paper stripper was booked, and over a weekend all the paper was removed. Along with a fair amount of the plaster. So the next day, a plasterer was booked! Sadly an unaccounted expense, but hey ho these things happen!
Whilst I was waiting for the plasterer I tackled the next issue. I have always wanted a wood burner. Our previous place was a mid-terrace, so it wasn't really an option. We'd decided when we put an offer in on the house, that one of the key improvements we wanted to make was to put in a wood burner (I say we........). The previous owners had already had a fireplace fitted, but it was a fake one on an internal wall.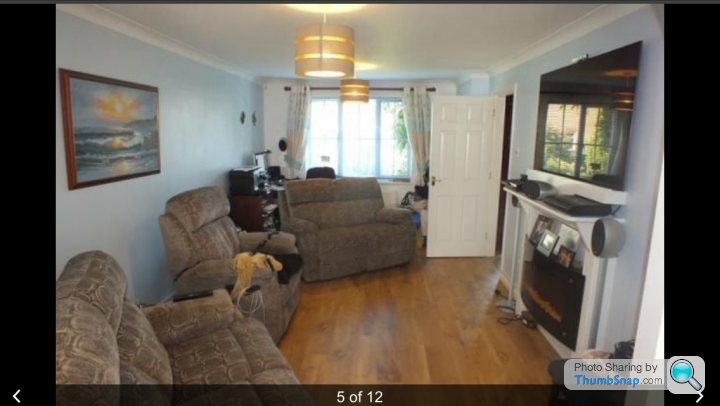 . Therefore that had to go. Unfortunately removing this did a lot more damage to the plaster, but luckily the plasterer was now on first name terms, so came back pretty quickly!
Once all this was sorted, it was time to order a wood burner. I had managed to find the perfect one, which came with a bit of a back story.
In the may before we moved, my maternal Grandmother had sadly passed away. She was Danish, and lived in a city called Frederikshavn in North Jutland. Whilst looking at Morso fireplaces, I came across another manufacturer called Rais. It turned out that they were based in Frederikshavn as well, actually less than 10 mins down the road from where my Grandmother (Mormor in Danish - it means mothers mother) had lived. It seemed destined, plus I was able to use the inheritance money she'd left me to buy the fireplace. This is the fire in situ, just before xmas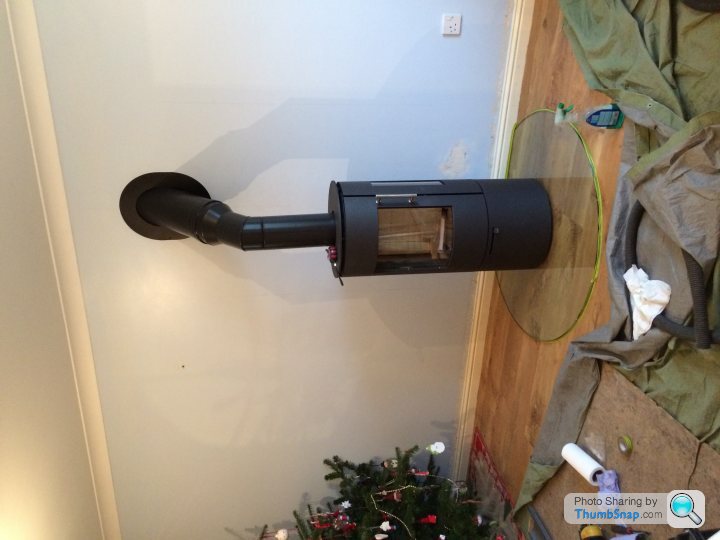
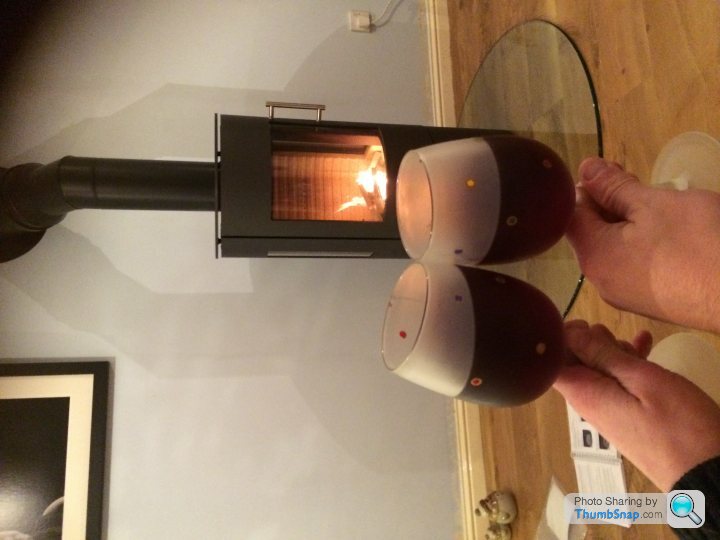
and this is it in action, with obligatory xmas mulled wine ??
 .
.
Its the Rais Viva 98 with side glass if anyone is interested!
Getting the wood burner was another interesting tale (at least to me anyway!). I was quite prepared to order the wood burner in the UK. I'd already located several stockists in the local area, but just before I ordered sheer bloody mindedness made me look at prices in Denmark. It transpired that the same fire in Denmark was £1k less than in the UK! I decided that it was well worth ordering and collecting the fire for that sort of saving! I worked out that to travel over in the family Smax to collect would cost in the region of £300. However on emailing the company I was looking to buy though, they informed me that transport to the UK was free, just as it was in Denmark. Order was placed with alacrity and 3 weeks later the wood burner duely arrived!
Well Ive scratched the surface of the changes we've made to the house. I hope I haven't bored anyone too much. I know this isnt a build thread to rival the likes of Pvapour, or Muncher but please do let me know if you'd like any more of these sorts of updates with other changes we'e made.
Cheers!
I'm in the process of renovating and updating our house at the moment. I know how popular renovation threads are (I certainly love reading them!) so I hope people enjoy mine!
Now I need to start by explaining I am utterly hamfisted when it comes to DIY, so the house we bought isn't going to show total rewiring, etc. However I have got my hands dirty and achieved feats I never knew I could!
So this is our house
Its in a village reasonably close to Cambridge. We were previously in a new build in Peterborough, but wanted to get out of the city so our kids could grow up in a village.
The house was built in 2000, so again a relatively modern build. However the previous owners had altered it to suit them (he was disabled) so some remedial work was needed.
The most obvious issue was the decor. Everyone is absolutely entitled to their own taste, but they had wall papered the hallway and landing in two different coloured wall paper with a contrasting border. Not to our taste at all! Unfortunately the only image I have of this is this one
So a wall paper stripper was booked, and over a weekend all the paper was removed. Along with a fair amount of the plaster. So the next day, a plasterer was booked! Sadly an unaccounted expense, but hey ho these things happen!
Whilst I was waiting for the plasterer I tackled the next issue. I have always wanted a wood burner. Our previous place was a mid-terrace, so it wasn't really an option. We'd decided when we put an offer in on the house, that one of the key improvements we wanted to make was to put in a wood burner (I say we........). The previous owners had already had a fireplace fitted, but it was a fake one on an internal wall.
. Therefore that had to go. Unfortunately removing this did a lot more damage to the plaster, but luckily the plasterer was now on first name terms, so came back pretty quickly!Once all this was sorted, it was time to order a wood burner. I had managed to find the perfect one, which came with a bit of a back story.
In the may before we moved, my maternal Grandmother had sadly passed away. She was Danish, and lived in a city called Frederikshavn in North Jutland. Whilst looking at Morso fireplaces, I came across another manufacturer called Rais. It turned out that they were based in Frederikshavn as well, actually less than 10 mins down the road from where my Grandmother (Mormor in Danish - it means mothers mother) had lived. It seemed destined, plus I was able to use the inheritance money she'd left me to buy the fireplace. This is the fire in situ, just before xmas
and this is it in action, with obligatory xmas mulled wine ??
.Its the Rais Viva 98 with side glass if anyone is interested!
Getting the wood burner was another interesting tale (at least to me anyway!). I was quite prepared to order the wood burner in the UK. I'd already located several stockists in the local area, but just before I ordered sheer bloody mindedness made me look at prices in Denmark. It transpired that the same fire in Denmark was £1k less than in the UK! I decided that it was well worth ordering and collecting the fire for that sort of saving! I worked out that to travel over in the family Smax to collect would cost in the region of £300. However on emailing the company I was looking to buy though, they informed me that transport to the UK was free, just as it was in Denmark. Order was placed with alacrity and 3 weeks later the wood burner duely arrived!
Well Ive scratched the surface of the changes we've made to the house. I hope I haven't bored anyone too much. I know this isnt a build thread to rival the likes of Pvapour, or Muncher but please do let me know if you'd like any more of these sorts of updates with other changes we'e made.
Cheers!
The next change we made was to do with the layout of the upstairs of the house. When we moved in the floor plan looked like this -
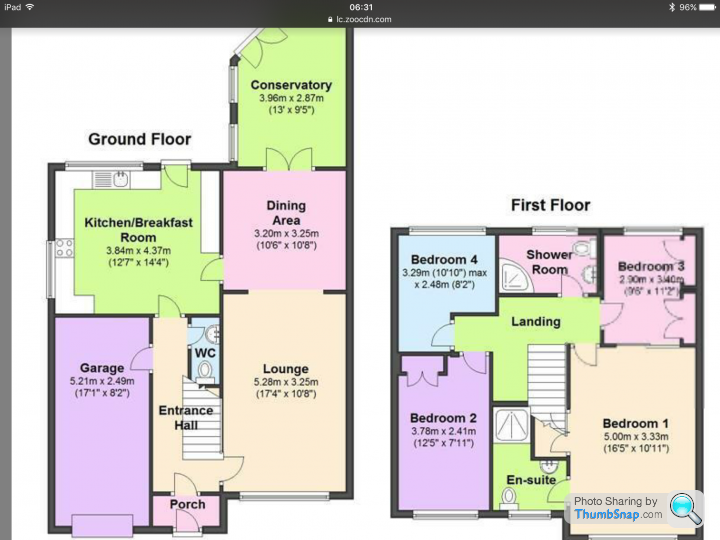
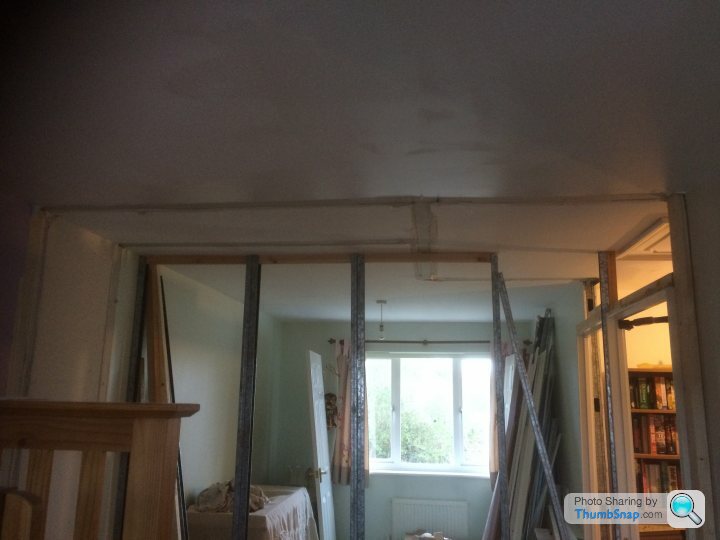
As you'll see, the previous owner had knocked through between the main and adjacent bedroom, in order to make a walk-in wardrobe. We didn't want this, as we have three small kids so I had to set about turning them back into two bedrooms.
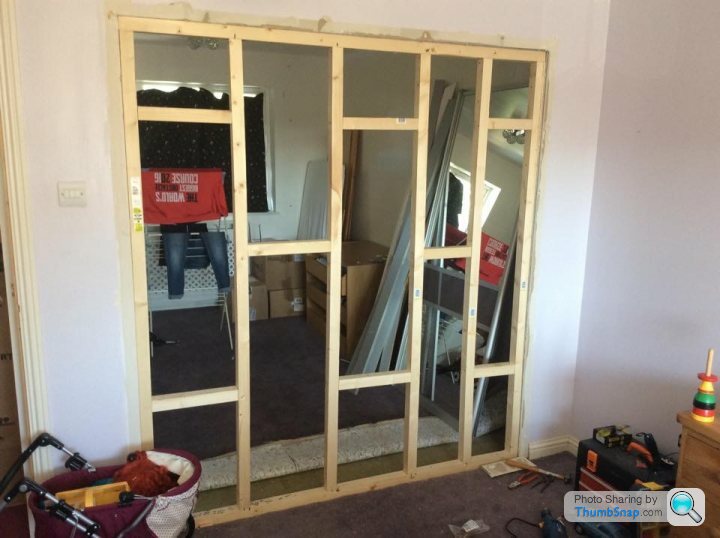
As I stated previously, I am utterly hamfisted at DIY, so this was quite a daunting prospect. You can imagine my surprise therefore when all went to plan and I managed to remove the sliding doors which had been put in place and built a stud wall without anyone dieing/the house falling down or anything! (Ok, I did whack my thumb with a hammer....twice). This was the outcome
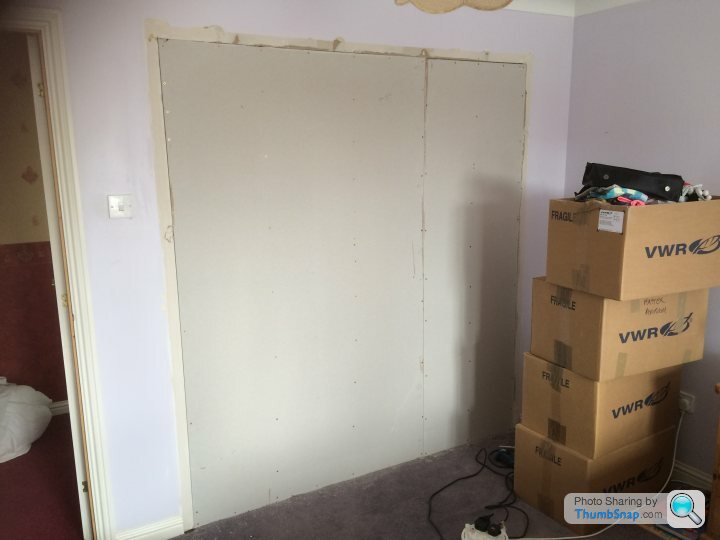
The Smax was then pressed into service again to fetch plasterboard to clad the framework. My old man (who is very much of the opinion that such jobs should be left to the professionals generally speaking, and thus is even more hamfisted than I am) 'helped' me sort this out, with the following result
I am inordinately proud of this, as it still hasn't fallen down! That represents a significant improvement on my previous DIY efforts.
Our tame plasterer was then pressed into service again and hid my work from view. They wife then went mad in IKEA and a huge artic dropped off 1k's worth of wardrobes which, apparently, were for me to fit! One went up in front of the new wall (which was easy as it was only 210cm and left a space to the roof) and the other one was intended for my son's room and altogether more complicated!
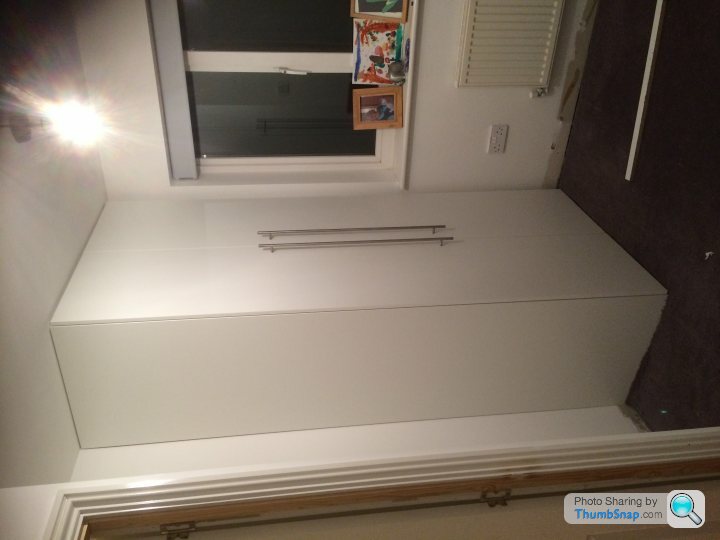
SWMBO had images of fitted wardrobes, clearly completely ignoring the fact that I have the technical aptitude of a small gibbon when it comes to DIY (I've always been a thinker, not a doer!). Nevertheless I had a whirl, and managed this
It still hasn't fallen down (the sole measurement of success required when it comes to my DIY!).
The most recent change is at the other side of the hallway. Now I must admit here that the following work is not my own. Instead we got a Steve in. Everyone needs a Steve now and again! Steve's an old friend, and he set about removing the wardrobe in bedroom 2, and squaring both corners of bedrooms 2 and 4 off so that they take up the odd little space on the landing. This has resulted in bedroom 2 being significantly larger and bedroom 4 being about the same size, but not such an awkward shape. The trade off is that the landing is now small, but meh, who cares!
These are the new door frames, facing onto the (now smaller) landing.
This one shows the old positions of the walls from the marks on the roof. You can see the space that's been gained from doing this in bedroom 2 (about 3m2).
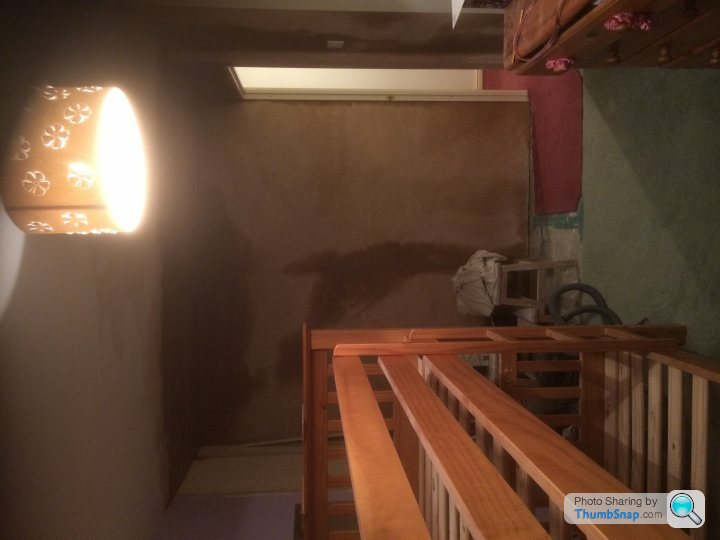 all finished and plastered!
Since then its just been a case of painting and fitting skirting. I havent really enjoyed this, as the previous owners had decorated everywhere with satin paint, which is a bugger to cover! However I have discovered that decorators caulk is a wonderful, wonderful thing when it comes to skirting boards!
That's basically all the changes so far to the interior of the house. Just the garden left I guess!
As you'll see, the previous owner had knocked through between the main and adjacent bedroom, in order to make a walk-in wardrobe. We didn't want this, as we have three small kids so I had to set about turning them back into two bedrooms.
As I stated previously, I am utterly hamfisted at DIY, so this was quite a daunting prospect. You can imagine my surprise therefore when all went to plan and I managed to remove the sliding doors which had been put in place and built a stud wall without anyone dieing/the house falling down or anything! (Ok, I did whack my thumb with a hammer....twice). This was the outcome
The Smax was then pressed into service again to fetch plasterboard to clad the framework. My old man (who is very much of the opinion that such jobs should be left to the professionals generally speaking, and thus is even more hamfisted than I am) 'helped' me sort this out, with the following result
I am inordinately proud of this, as it still hasn't fallen down! That represents a significant improvement on my previous DIY efforts.
Our tame plasterer was then pressed into service again and hid my work from view. They wife then went mad in IKEA and a huge artic dropped off 1k's worth of wardrobes which, apparently, were for me to fit! One went up in front of the new wall (which was easy as it was only 210cm and left a space to the roof) and the other one was intended for my son's room and altogether more complicated!
SWMBO had images of fitted wardrobes, clearly completely ignoring the fact that I have the technical aptitude of a small gibbon when it comes to DIY (I've always been a thinker, not a doer!). Nevertheless I had a whirl, and managed this
It still hasn't fallen down (the sole measurement of success required when it comes to my DIY!).
The most recent change is at the other side of the hallway. Now I must admit here that the following work is not my own. Instead we got a Steve in. Everyone needs a Steve now and again! Steve's an old friend, and he set about removing the wardrobe in bedroom 2, and squaring both corners of bedrooms 2 and 4 off so that they take up the odd little space on the landing. This has resulted in bedroom 2 being significantly larger and bedroom 4 being about the same size, but not such an awkward shape. The trade off is that the landing is now small, but meh, who cares!
These are the new door frames, facing onto the (now smaller) landing.
This one shows the old positions of the walls from the marks on the roof. You can see the space that's been gained from doing this in bedroom 2 (about 3m2).
all finished and plastered!Since then its just been a case of painting and fitting skirting. I havent really enjoyed this, as the previous owners had decorated everywhere with satin paint, which is a bugger to cover! However I have discovered that decorators caulk is a wonderful, wonderful thing when it comes to skirting boards!
That's basically all the changes so far to the interior of the house. Just the garden left I guess!
Well done, great effort so far. I recently moved into a house built in 2001, and it's surprising how much work is needed for what most people consider a "new build". Thing is, these houses are now 16/17 years old, a lot of it is dated or very tired unless previous owners have kept on top of stuff, and mine certainly didn't!
easytiger123 said:
Thanks and congrats on the new gaff Nadger. Love a renovation thread too. For someone who claims to be rubbish at DIY you've done well...certainly puts my pathetic efforts to shame!
Any pics of the garden as is?
Thanks, thats very kind! Any pics of the garden as is?
This is the garden as it was when we bought the house
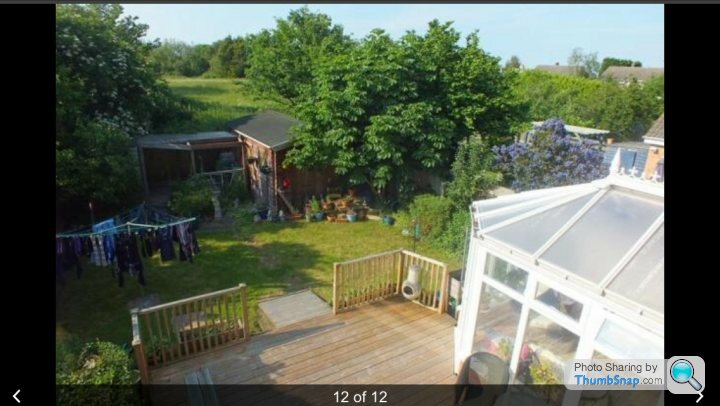
First thing we did was remove the large horse chestnut to the right

We have since then also removed tree to the left and rear (behind the pear tree, which we've kept. Pear and lemon jam here we come!) but I havent taken any pics of this yet.
The eventual plan is to remove the shed to the left, and the odd covered decking area in between it and the workshop, however we have had some exceedingly exciting news which might (hopefully!) affect this. I won't say anything about this yet, but it could be a dream come true for me if it actually happens!
JackReacher said:
Well done, great effort so far. I recently moved into a house built in 2001, and it's surprising how much work is needed for what most people consider a "new build". Thing is, these houses are now 16/17 years old, a lot of it is dated or very tired unless previous owners have kept on top of stuff, and mine certainly didn't!
Ours wasn't too bad in terms of upkeep. However they had made some odd design decisions. For instance I'm pretty certain the previous owner was a bit obsessed with electricity! There were more plug sockets than you could shake a stick at and the loft resembled a spiders web with the number of wires dangling everywhere! Our sparkle actually reduced his hourly rate from £30 p/h to £20 because he'd never taken so much out of a house without putting new stuff in before (the wife also let him decimate the crop of the pear tree for his dehydrator, which may have helped!)I also discovered yesterday that under one of the carpets upstairs there isnt any underlay (which I'd sort of guessed). Instead they'd just put the carpet over lino!
Love the wood burner. Interesting to see that it simply sits on a glass base which itself sits directly on the floor boards. Does the fire have some sort of heat transfer insulation to stop it burning the floor? I was under the impression that most wood burners need to sit on a pretty substantial stone base.
Looks great with the glass base so would be interested to learn more about it.
TD
Looks great with the glass base so would be interested to learn more about it.
TD
Ive just realised that I have managed to miss off my greatest DIY triumph so far! When we moved in the previous owners had had a stairlift fitted. This ran up the stairs and round the corner into the master bed. To allow this to happen the door had been turned around so that it opened into the hall. The corner had also been cut off. However we wanted the door to open into the bedroom (I saw we. I mean SWMBO. I wasnt that bothered tbh!). The wife contracted a Ukrainian chap to do this, which required him to rebuild the frame. He did a pretty good job (although neither of us could really understand him!) and he amended a door from elsewhere in the house to fit (which I'd never have managed!).
In bedroom 3 we wanted to have the facility to have a guest bed. My parents live a fair way away (Cheshire) and we wanted them and other to be able to stay in comfort. In order to facilitate this we purchased a bed with trundle bed. However in order to make it useable the door needed to be turned around to open into the hall. Having watched the chippy I wondered if Id be able to do it. We were short of cash, so I decided to have a pop. I believe what I did is technically cheating, but I measured up where all the holes were and simply drilled them in on the other side in the same relative places! I screwed on the door, and hey presto it worked!
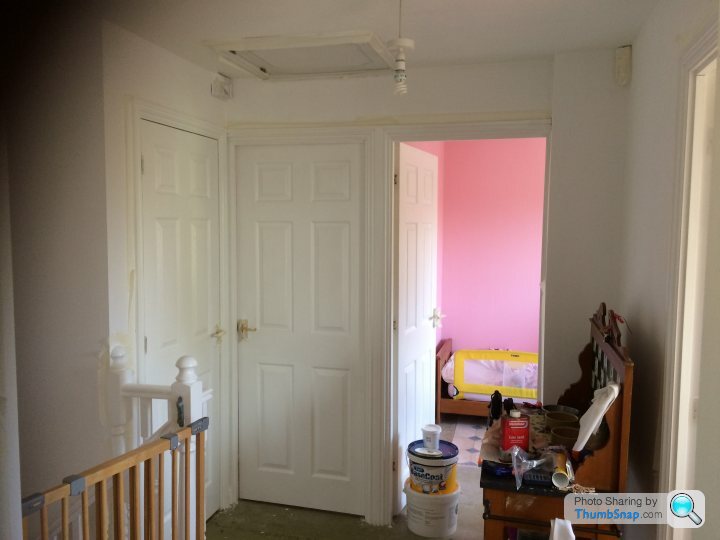
Ive actually posted the picture earlier (showing the wall paper), but here is the evidence of my triumph!
In bedroom 3 we wanted to have the facility to have a guest bed. My parents live a fair way away (Cheshire) and we wanted them and other to be able to stay in comfort. In order to facilitate this we purchased a bed with trundle bed. However in order to make it useable the door needed to be turned around to open into the hall. Having watched the chippy I wondered if Id be able to do it. We were short of cash, so I decided to have a pop. I believe what I did is technically cheating, but I measured up where all the holes were and simply drilled them in on the other side in the same relative places! I screwed on the door, and hey presto it worked!
Ive actually posted the picture earlier (showing the wall paper), but here is the evidence of my triumph!
TorqueDirty said:
Love the wood burner. Interesting to see that it simply sits on a glass base which itself sits directly on the floor boards. Does the fire have some sort of heat transfer insulation to stop it burning the floor? I was under the impression that most wood burners need to sit on a pretty substantial stone base.
Looks great with the glass base so would be interested to learn more about it.
TD
Thanks! The base is toughened glass, so is heat resistant. However the chamber where the combustion occurs is off the ground, behind the windows on the front. So the glass doesnt actually get hot at all. Rais actually sell a hearth which is glass, but sits in front of the fire, not underneath it. However it doesn't conform to UK standards apparently, so we went with the same idea but underneath as well.Looks great with the glass base so would be interested to learn more about it.
TD
Hope that makes sense!
So
The past week and a half has been dedicated to decorating the upstairs. This has been something of a ball ache for a variety of reasons, for instance tape pulling off small sections of paint when being removed (I can't cut in to save my life!), paint colours not matching from different pots (total nightmare!) and of course the major cause - glossing!
Some pics -
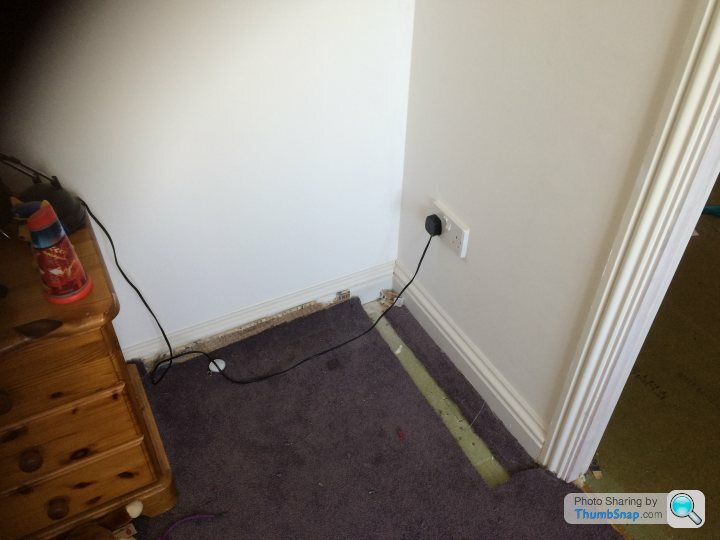
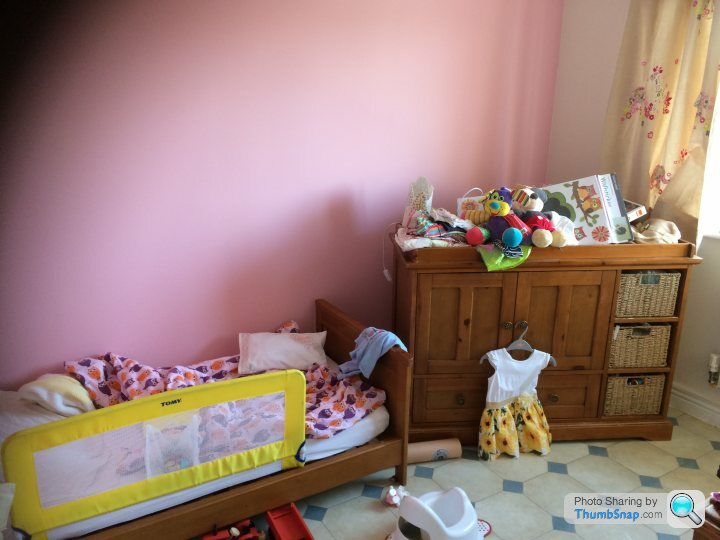 |https://thumbsnap.com/tS1zzj3N[/url] this is mini-daughter's bedroom. It had some honking green patterned carpet fitted before, which I've removed ready for the new carpet to be fitted on Tuesday. It turned out it had no underlay under it (which I'd guessed from the feel), but oddly it had Lino underneath! The carpet had basically been glued to the Lino! Very odd. This was the room that I had the major issue with colours it matching. The pink wall was a right bugger, as the colour is the same as in the major daughter's room. I ran out when trying to finish this one, and stupidly believed a b&q assistant when she told me the new tin would definitely be the same colour! Meant I had to repait both rooms with a third lot to ensure the colour matched! Utter pita!
I've also painted the new wall in the hallway, and have cracked on with the gloss work. It's all working to a tight schedule as I don't really want to be painting over a new carpet, that's a monumental receipe for disaster for me!!
I've also fitted skirting in the boy's bedroom. The previous owners had converted it to fitted wardrobes, so there wasn't really any skirting there at all! I'd never done this before, but am pretty pleased with the result! The key lesson I've learnt from the job is that decorator's caulk is definitely my friend when it comes to this sort of job!
The past week and a half has been dedicated to decorating the upstairs. This has been something of a ball ache for a variety of reasons, for instance tape pulling off small sections of paint when being removed (I can't cut in to save my life!), paint colours not matching from different pots (total nightmare!) and of course the major cause - glossing!
Some pics -
|https://thumbsnap.com/tS1zzj3N[/url] this is mini-daughter's bedroom. It had some honking green patterned carpet fitted before, which I've removed ready for the new carpet to be fitted on Tuesday. It turned out it had no underlay under it (which I'd guessed from the feel), but oddly it had Lino underneath! The carpet had basically been glued to the Lino! Very odd. This was the room that I had the major issue with colours it matching. The pink wall was a right bugger, as the colour is the same as in the major daughter's room. I ran out when trying to finish this one, and stupidly believed a b&q assistant when she told me the new tin would definitely be the same colour! Meant I had to repait both rooms with a third lot to ensure the colour matched! Utter pita!I've also painted the new wall in the hallway, and have cracked on with the gloss work. It's all working to a tight schedule as I don't really want to be painting over a new carpet, that's a monumental receipe for disaster for me!!
I've also fitted skirting in the boy's bedroom. The previous owners had converted it to fitted wardrobes, so there wasn't really any skirting there at all! I'd never done this before, but am pretty pleased with the result! The key lesson I've learnt from the job is that decorator's caulk is definitely my friend when it comes to this sort of job!
So today's been a bit of a mixed bag, home improvement wise. I've spent the past week and a bit repainting most of the upstairs, and finished off with the glossing. Most of this was finished yesterday, so I left it to dry overnight. This morning I removed the tape, only for the paint to come away with it as well!

I did some swearing.
I used something called 'easy sand' to key the woodwork before painting. I'd never used it before, but was taken in by the misleading title! Not only did it not 'sand' it also wasn't 'easy', as you had to wipe the stuff off one you'd wiped it on! I've given up on the painting now, and the wife's on the task of calling in a decorator! I just don't trust myself to gloss over new carpets.
So, having been put into a foul mood, I decided to tackle another little job which was outstanding. When we fitted the ikea wardrobe in the boy's room it had to stand a little further away from the wall than I'd anticipated, as I hadn't taken into account the fact that the window sill sticks out where the door would swing. Basically this resulted in a choice, put it further away from the wall, or not be able to use the drawers. We could, of course, have left the doors off, but SWMBO deemed this a stupid idea, leaving the only viable option to be to have a gap of about 6cm. A typical nadgerism I'd say.
In order to fill said gap I whipped down to MK ikea again, and bought another door. I cut this down to size, fitted a baton onto one side and screwed it to the side of the wardrobe. It fitted pretty tightly, and a bit of decorators caulk did the job pretty well, if I do say so myself! Bodgetastic.

The gap fill fitted without the door on.
Thank you whoever invented decorator's caulk!
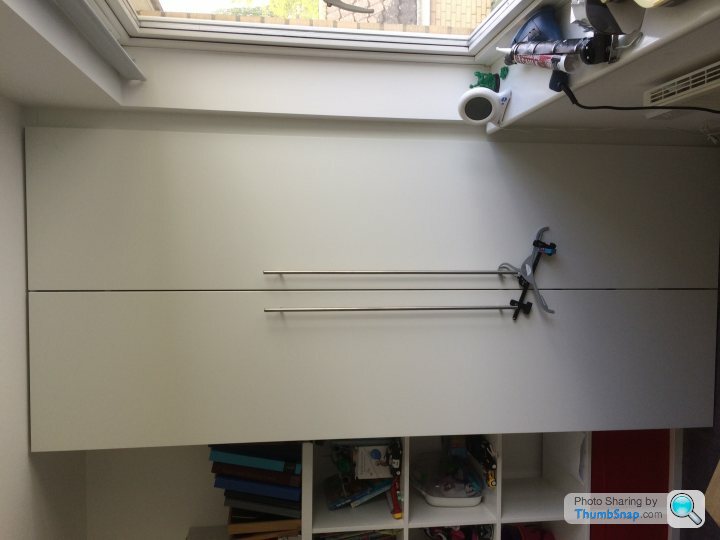
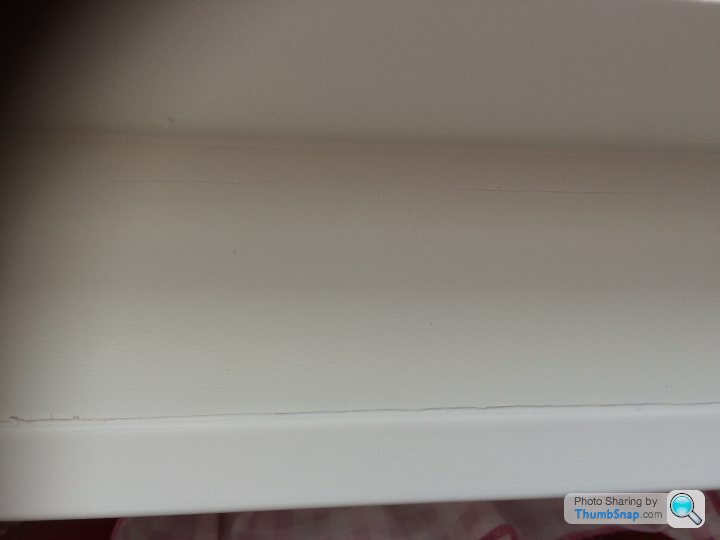
The finished article. Personally I'm pretty pleased. It's certainly not up to a professional standard, but I'm not a professional so that's fine!
Next job is to fit the last piece of skirting upto the infill piece.
Edited to add - apologies for the pics being sideway. Uploaded from my phone and they seem to do this automatically!
I did some swearing.
I used something called 'easy sand' to key the woodwork before painting. I'd never used it before, but was taken in by the misleading title! Not only did it not 'sand' it also wasn't 'easy', as you had to wipe the stuff off one you'd wiped it on! I've given up on the painting now, and the wife's on the task of calling in a decorator! I just don't trust myself to gloss over new carpets.
So, having been put into a foul mood, I decided to tackle another little job which was outstanding. When we fitted the ikea wardrobe in the boy's room it had to stand a little further away from the wall than I'd anticipated, as I hadn't taken into account the fact that the window sill sticks out where the door would swing. Basically this resulted in a choice, put it further away from the wall, or not be able to use the drawers. We could, of course, have left the doors off, but SWMBO deemed this a stupid idea, leaving the only viable option to be to have a gap of about 6cm. A typical nadgerism I'd say.
In order to fill said gap I whipped down to MK ikea again, and bought another door. I cut this down to size, fitted a baton onto one side and screwed it to the side of the wardrobe. It fitted pretty tightly, and a bit of decorators caulk did the job pretty well, if I do say so myself! Bodgetastic.
The gap fill fitted without the door on.
Thank you whoever invented decorator's caulk!
The finished article. Personally I'm pretty pleased. It's certainly not up to a professional standard, but I'm not a professional so that's fine!
Next job is to fit the last piece of skirting upto the infill piece.
Edited to add - apologies for the pics being sideway. Uploaded from my phone and they seem to do this automatically!

 )
)nadger said:
So today's been a bit of a mixed bag, home improvement wise. I've spent the past week and a bit repainting most of the upstairs, and finished off with the glossing. Most of this was finished yesterday, so I left it to dry overnight. This morning I removed the tape, only for the paint to come away with it as well!
I did some swearing.
I used something called 'easy sand' to key the woodwork before painting. I'd never used it before, but was taken in by the misleading title! Not only did it not 'sand' it also wasn't 'easy', as you had to wipe the stuff off one you'd wiped it on! I've given up on the painting now, and the wife's on the task of calling in a decorator! I just don't trust myself to gloss over new carpets.
So, having been put into a foul mood, I decided to tackle another little job which was outstanding. When we fitted the ikea wardrobe in the boy's room it had to stand a little further away from the wall than I'd anticipated, as I hadn't taken into account the fact that the window sill sticks out where the door would swing. Basically this resulted in a choice, put it further away from the wall, or not be able to use the drawers. We could, of course, have left the doors off, but SWMBO deemed this a stupid idea, leaving the only viable option to be to have a gap of about 6cm. A typical nadgerism I'd say.
In order to fill said gap I whipped down to MK ikea again, and bought another door. I cut this down to size, fitted a baton onto one side and screwed it to the side of the wardrobe. It fitted pretty tightly, and a bit of decorators caulk did the job pretty well, if I do say so myself! Bodgetastic.
The gap fill fitted without the door on.
Thank you whoever invented decorator's caulk!
The finished article. Personally I'm pretty pleased. It's certainly not up to a professional standard, but I'm not a professional so that's fine!
Next job is to fit the last piece of skirting upto the infill piece.
Edited to add - apologies for the pics being sideway. Uploaded from my phone and they seem to do this automatically!
So, you didn't remove the carpet prior to painting? Also, where did you put the masking tape?I did some swearing.
I used something called 'easy sand' to key the woodwork before painting. I'd never used it before, but was taken in by the misleading title! Not only did it not 'sand' it also wasn't 'easy', as you had to wipe the stuff off one you'd wiped it on! I've given up on the painting now, and the wife's on the task of calling in a decorator! I just don't trust myself to gloss over new carpets.
So, having been put into a foul mood, I decided to tackle another little job which was outstanding. When we fitted the ikea wardrobe in the boy's room it had to stand a little further away from the wall than I'd anticipated, as I hadn't taken into account the fact that the window sill sticks out where the door would swing. Basically this resulted in a choice, put it further away from the wall, or not be able to use the drawers. We could, of course, have left the doors off, but SWMBO deemed this a stupid idea, leaving the only viable option to be to have a gap of about 6cm. A typical nadgerism I'd say.
In order to fill said gap I whipped down to MK ikea again, and bought another door. I cut this down to size, fitted a baton onto one side and screwed it to the side of the wardrobe. It fitted pretty tightly, and a bit of decorators caulk did the job pretty well, if I do say so myself! Bodgetastic.
The gap fill fitted without the door on.
Thank you whoever invented decorator's caulk!
The finished article. Personally I'm pretty pleased. It's certainly not up to a professional standard, but I'm not a professional so that's fine!
Next job is to fit the last piece of skirting upto the infill piece.
Edited to add - apologies for the pics being sideway. Uploaded from my phone and they seem to do this automatically!
susanq said:
nadger said:
So today's been a bit of a mixed bag, home improvement wise. I've spent the past week and a bit repainting most of the upstairs, and finished off with the glossing. Most of this was finished yesterday, so I left it to dry overnight. This morning I removed the tape, only for the paint to come away with it as well!
I did some swearing.
I used something called 'easy sand' to key the woodwork before painting. I'd never used it before, but was taken in by the misleading title! Not only did it not 'sand' it also wasn't 'easy', as you had to wipe the stuff off one you'd wiped it on! I've given up on the painting now, and the wife's on the task of calling in a decorator! I just don't trust myself to gloss over new carpets.
So, having been put into a foul mood, I decided to tackle another little job which was outstanding. When we fitted the ikea wardrobe in the boy's room it had to stand a little further away from the wall than I'd anticipated, as I hadn't taken into account the fact that the window sill sticks out where the door would swing. Basically this resulted in a choice, put it further away from the wall, or not be able to use the drawers. We could, of course, have left the doors off, but SWMBO deemed this a stupid idea, leaving the only viable option to be to have a gap of about 6cm. A typical nadgerism I'd say.
In order to fill said gap I whipped down to MK ikea again, and bought another door. I cut this down to size, fitted a baton onto one side and screwed it to the side of the wardrobe. It fitted pretty tightly, and a bit of decorators caulk did the job pretty well, if I do say so myself! Bodgetastic.
The gap fill fitted without the door on.
Thank you whoever invented decorator's caulk!
The finished article. Personally I'm pretty pleased. It's certainly not up to a professional standard, but I'm not a professional so that's fine!
Next job is to fit the last piece of skirting upto the infill piece.
Edited to add - apologies for the pics being sideway. Uploaded from my phone and they seem to do this automatically!
So, you didn't remove the carpet prior to painting? Also, where did you put the masking tape?I did some swearing.
I used something called 'easy sand' to key the woodwork before painting. I'd never used it before, but was taken in by the misleading title! Not only did it not 'sand' it also wasn't 'easy', as you had to wipe the stuff off one you'd wiped it on! I've given up on the painting now, and the wife's on the task of calling in a decorator! I just don't trust myself to gloss over new carpets.
So, having been put into a foul mood, I decided to tackle another little job which was outstanding. When we fitted the ikea wardrobe in the boy's room it had to stand a little further away from the wall than I'd anticipated, as I hadn't taken into account the fact that the window sill sticks out where the door would swing. Basically this resulted in a choice, put it further away from the wall, or not be able to use the drawers. We could, of course, have left the doors off, but SWMBO deemed this a stupid idea, leaving the only viable option to be to have a gap of about 6cm. A typical nadgerism I'd say.
In order to fill said gap I whipped down to MK ikea again, and bought another door. I cut this down to size, fitted a baton onto one side and screwed it to the side of the wardrobe. It fitted pretty tightly, and a bit of decorators caulk did the job pretty well, if I do say so myself! Bodgetastic.
The gap fill fitted without the door on.
Thank you whoever invented decorator's caulk!
The finished article. Personally I'm pretty pleased. It's certainly not up to a professional standard, but I'm not a professional so that's fine!
Next job is to fit the last piece of skirting upto the infill piece.
Edited to add - apologies for the pics being sideway. Uploaded from my phone and they seem to do this automatically!
elanfan said:
I suspect using frog tape rather than masking tape might solve your issue.
Sadly it wouldn't have done. It wasn't the masking tape pulling the paint off because it was on top of it, it was when I removed the tape which was on the wall it pulled the gloss off as well. It was because the easy sand hadn't keyed the surface sufficiently I thinkGassing Station | Homes, Gardens and DIY | Top of Page | What's New | My Stuff