1997 Mazda MX5 1.8 - Track/Fast Road
Discussion


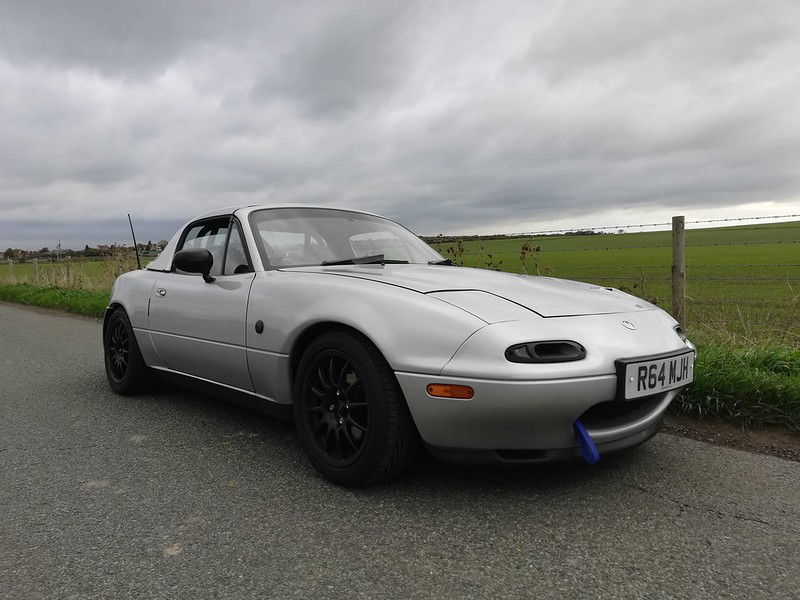
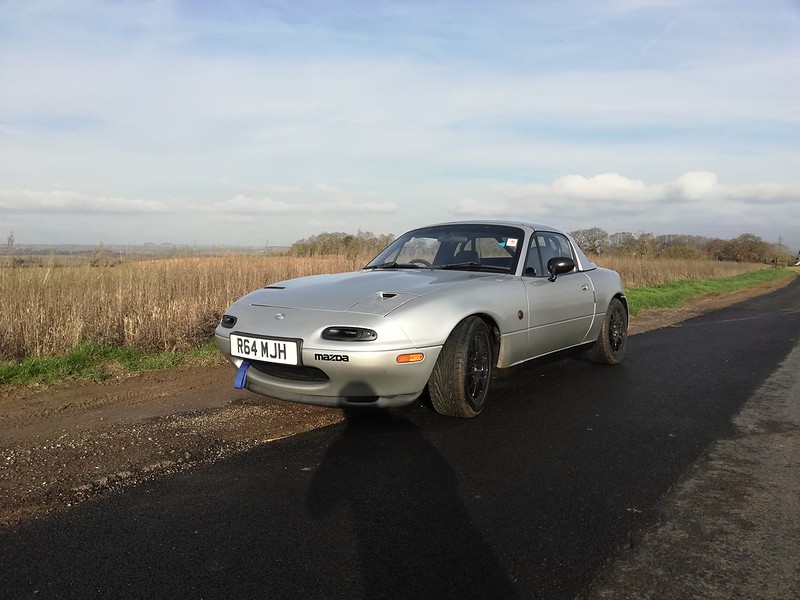
This is my Mk1 Mazda MX5 1.8 made in 1997 which currently has 96k miles on it. It doesn't have ABS or power steering. The purpose of this car is to be a fast road/track car to have some fun in on the weekend, do a few trackdays a year, but not be so focused towards the track that driving it on the road becomes a chore.
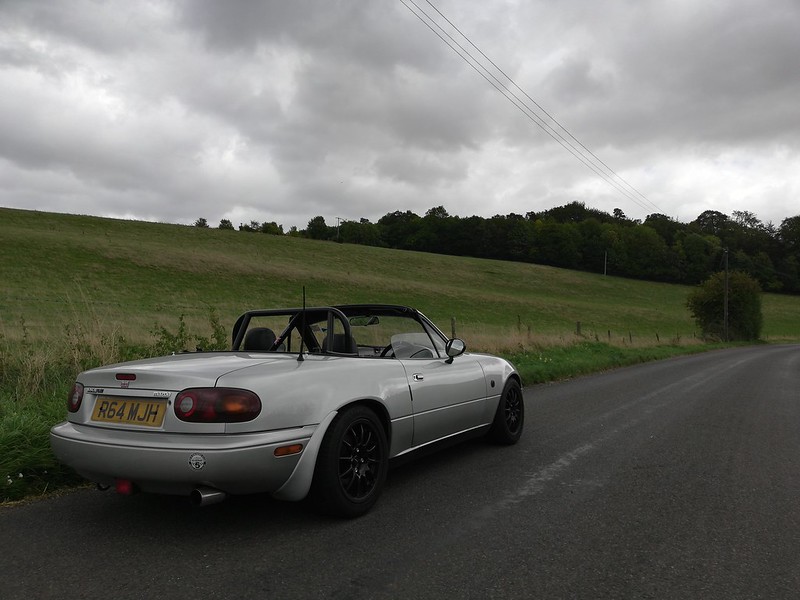
The car is a fast road/track car, with more fast road driving than track driving (though I still want it to perform well when on track). It's a great car, feels amazing to drive and has a lot of value for me. This is a record of the things I do with the car and learning to work on cars as a home mechanic (something I'm keen on doing as I think it's important to know how to fix your car as well as driving it). As a 19 year old, I haven't had too much experience in driving nor doing much mechanic work (I'm an apprentice software developer so my job isn't too practical) so I think a 130BHP RWD car that's fairly simple to work on is a good starting place. For those interested, I daily a '03 1.0 Toyota Yaris so the MX5 is a sizeable increase in power and completely different to drive. This is what the car currently looks like, along with all the modifications/general points of the car:
Points to note about the car:
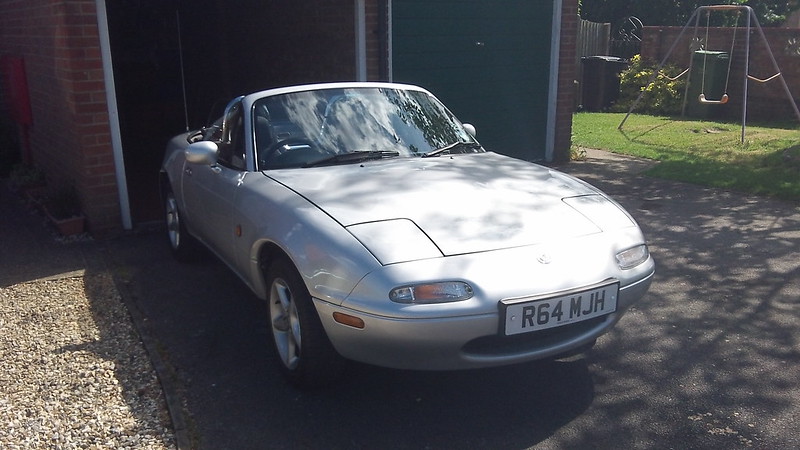
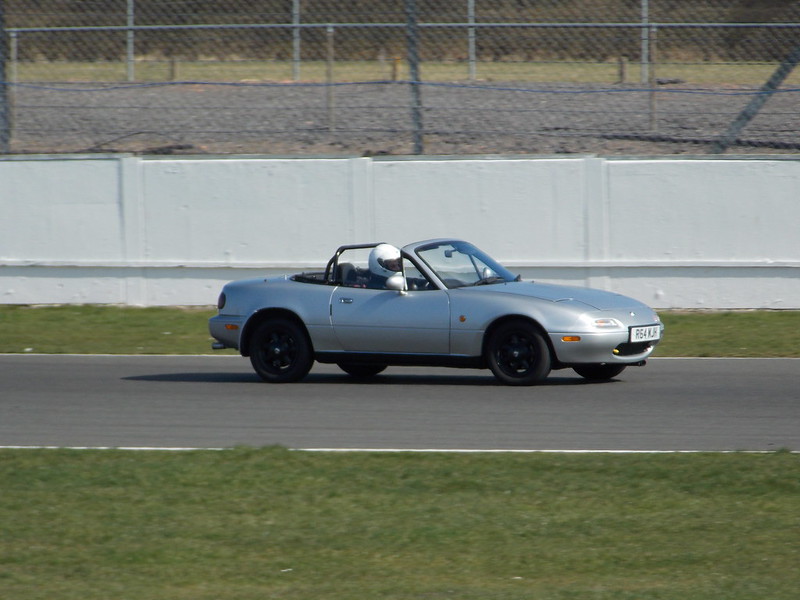
Back in 2011, my dad purchased the car for the same intentions I outline above. Mod and track a car and learn about working on cars in the process. I remember him test driving the car - the trader was more interested in watching the rugby and let us test drive it on our own. This is the car he bought back in 2011:
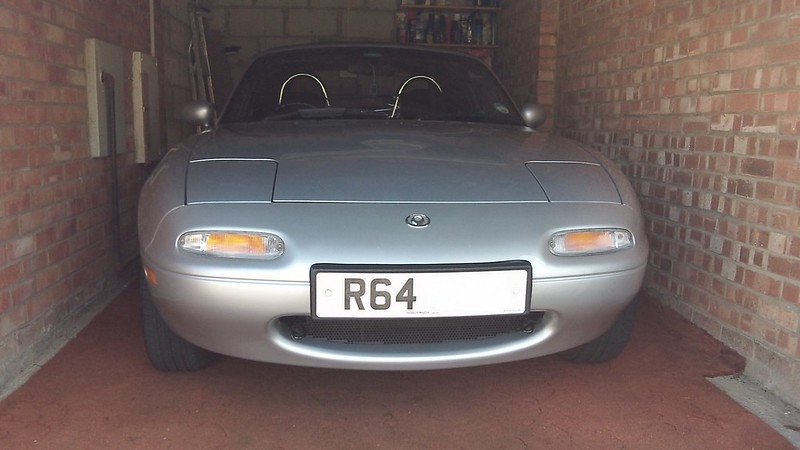
The garage got cleared of all the junk ready for the purchase of the car, it even got some old carpet!
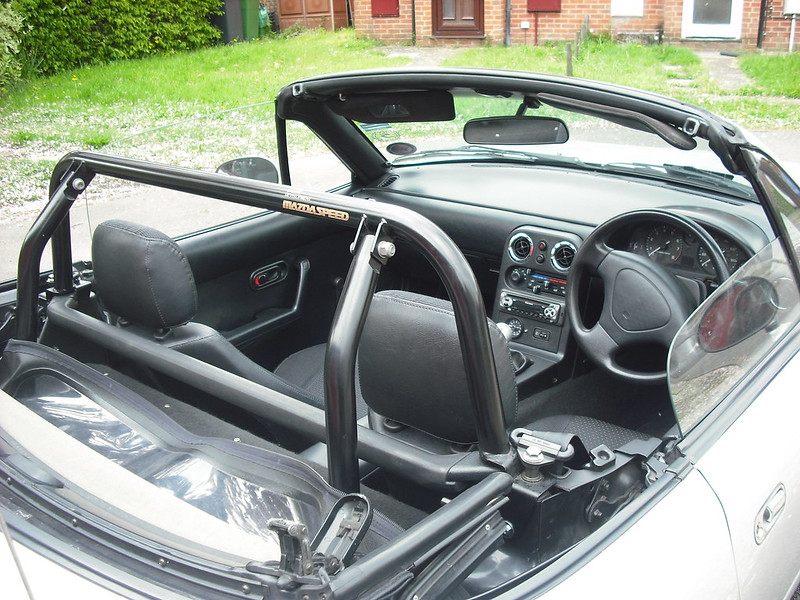
He did a number of maintenance items on the car, and after a little while, bought some old daisy wheels which he sprayed black, a Mazdaspeed roll bar and did his first trackday at Silverstone National, one of the few taster days they occasionally hold:

Myself and my dad have done a lot in this car together (obviously I was too young to drive the car at this point so my experiences were all from the passenger seat!). Two taster days at Silverstone National (one of which was a PH Sunday Service), a few trackdays at Castle Combe, one at Goodwood in the wet and a parade lap round Silverstone GP as part of the Silverstone Classic have all been highlights among the fun we had on the road. And as such, this car is part of the family (it'll be 8 years in February) - it's been quite a big part of growing up as a teenager and important in growing my passion for fun, affordable motoring. The car holds a lot of memories for us both and really is special to us. We shared the car during the MX5 Owners Club trackday at Rockingham, which was my first ever trackday, and certainly made me want to do lots more. Earlier this year, my dad wanted to stop spending money on the car and do other things, so the car has been given to me I'm very thankful for this, and so glad I can use the car to learn (just as he did).
Since having the car, I've just driven it on the road, done a trackday at Castle Combe and have replaced the front brake discs and pads this week. I will write about these in separate posts over the coming days.
The car is a fast road/track car, with more fast road driving than track driving (though I still want it to perform well when on track). It's a great car, feels amazing to drive and has a lot of value for me. This is a record of the things I do with the car and learning to work on cars as a home mechanic (something I'm keen on doing as I think it's important to know how to fix your car as well as driving it). As a 19 year old, I haven't had too much experience in driving nor doing much mechanic work (I'm an apprentice software developer so my job isn't too practical) so I think a 130BHP RWD car that's fairly simple to work on is a good starting place. For those interested, I daily a '03 1.0 Toyota Yaris so the MX5 is a sizeable increase in power and completely different to drive. This is what the car currently looks like, along with all the modifications/general points of the car:
Points to note about the car:
- Lowered on 30mm Eibach lowering springs, with new OE shocks all round
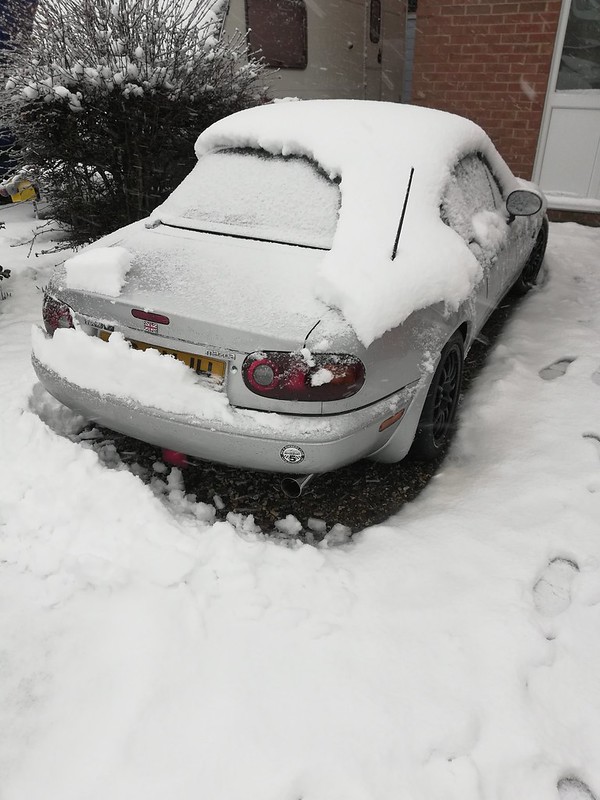
- Hardtop used in the autumn/winter months to protect the car from the dreaded rust a little bit (no drainage holes being used)
- 15" Team Dynamics Pro Race 1.2 wheels in gloss black fitted with Toyo T1Rs on 195/50/R15. A tyre greatly debated on PH but for the cost (£130 + £30 fitting) they fit what I want them for and allow me to get the car to move around in the wet with ease
- TR Lane roll bar and 5 Race side impact bars
- Turn signal intake sidelights painted in matte black
- Mirrors painted black
- Rear sills and a section of passenger side rear wheelarch done last year by DoctorMX5
- IL Motorsport catback and exhaust manifold with a K&N induction kit
- ATE DOT 4 brake fluid used, with OE discs and Greenstuffs used all round
Back in 2011, my dad purchased the car for the same intentions I outline above. Mod and track a car and learn about working on cars in the process. I remember him test driving the car - the trader was more interested in watching the rugby and let us test drive it on our own. This is the car he bought back in 2011:
The garage got cleared of all the junk ready for the purchase of the car, it even got some old carpet!
He did a number of maintenance items on the car, and after a little while, bought some old daisy wheels which he sprayed black, a Mazdaspeed roll bar and did his first trackday at Silverstone National, one of the few taster days they occasionally hold:
Myself and my dad have done a lot in this car together (obviously I was too young to drive the car at this point so my experiences were all from the passenger seat!). Two taster days at Silverstone National (one of which was a PH Sunday Service), a few trackdays at Castle Combe, one at Goodwood in the wet and a parade lap round Silverstone GP as part of the Silverstone Classic have all been highlights among the fun we had on the road. And as such, this car is part of the family (it'll be 8 years in February) - it's been quite a big part of growing up as a teenager and important in growing my passion for fun, affordable motoring. The car holds a lot of memories for us both and really is special to us. We shared the car during the MX5 Owners Club trackday at Rockingham, which was my first ever trackday, and certainly made me want to do lots more. Earlier this year, my dad wanted to stop spending money on the car and do other things, so the car has been given to me
I'm very thankful for this, and so glad I can use the car to learn (just as he did). Since having the car, I've just driven it on the road, done a trackday at Castle Combe and have replaced the front brake discs and pads this week. I will write about these in separate posts over the coming days.
Edited by MRichards99 on Friday 21st December 07:42
MRichards99 said:
I'm sure there's stuff I've forgotten to mention, but it hasn't always been this modified...
As long as you haven't forgotten to mention them to the insurance company? I imagine the insurance for a 19 year old on the standard car would be pretty bad, on this one it must be horrific.singlecoil said:
MRichards99 said:
I'm sure there's stuff I've forgotten to mention, but it hasn't always been this modified...
As long as you haven't forgotten to mention them to the insurance company? I imagine the insurance for a 19 year old on the standard car would be pretty bad, on this one it must be horrific.After getting the insurance sorted and putting a few tanks of fuel in the car, I spent the first few weeks driving the car and having fun on B roads:
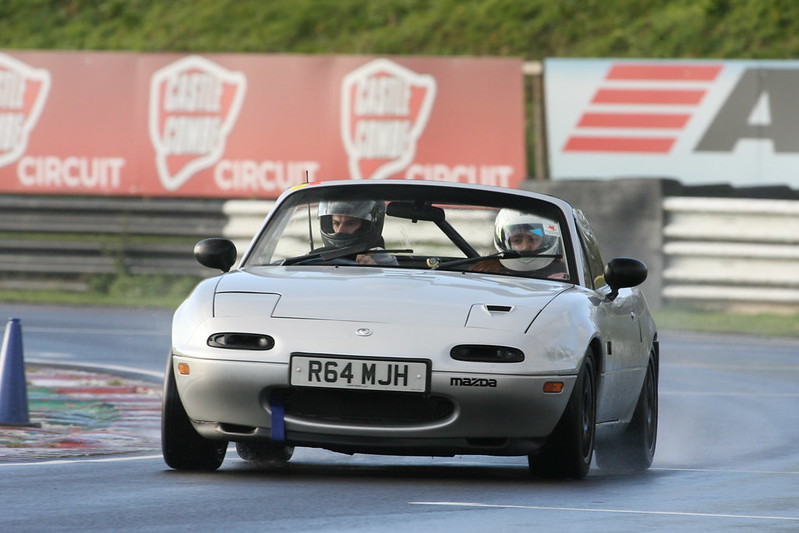
Once I got used to the car a bit, I booked a trackday at Castle Combe. This was a sessioned trackday (with open pit lane in the afternoon) run by the Boundless club (originally CSMA), comprised of 20 minute sessions and 2 groups - so 20 minutes out and 20 minutes break. This was my second trackday as a driver, and the first without my dad (i.e. the technical expertise ). I took some basic tools, some fluids etc as well as the all important cable ties, gaffer tape in case I ran out of talent
  . It rained the night before meaning the track was quite slippy during the first couple of sessions, before a dry line developed. I actually really enjoyed the drying track as it allowed me to feel the car move about at lower speeds than a dry track (where you'd have to try harder to make the car unstick). There was only one drying line through Tower, so if you got off line through there (even by only a wheel), you could start to feel the car under and oversteer. I got some tuition which was extremely useful - you don't realise how fast smooth is until you go out with an instructor. I had 20 minutes during one of the drying sessions and it helped a great deal, I certainly built a lot of confidence, especially in braking a lot later (that was something I really struggled with at Rockingham earlier in the year).
On the session just before lunch, I didn't encounter many cars and the track had pretty much dried up so I was pushing quite hard and as such, didn't have much fuel left. So I went to buy some fuel from a Texaco station about 3 miles away. On that journey, I realised the brakes were pretty cooked, the pedal was long and barely brought me to a stop. This was a bit worrying but I let the car cool down over the lunch break after getting fuel. No brake fluid had been lost, but one brake disc (rear left) was burning hot (more so than the other three corners). I missed the first session after lunch to allow more time to cool down but went out after that, very gingerly. My plan was to do 1 lap to see what the brakes were like, then come back in, wait a little while then slowly drive the car back home. But luckily the brakes were somewhat up to the job. The pedal travel was longer than normal but they slowed the car down and after building my confidence back, I was pretty much braking where I was before lunch. I think if I was at somewhere like Rockingham where there's a stop from high speed to a 2nd gear corner, I would've been packing my stuff and going home early. I managed 2 sessions after lunch (~15 minutes with an hours break in between) and left the car to cool for 50 minutes before heading home. The brakes were safe enough to make the journey home but I took things very easy.
On reflection, maybe the 20 minutes on, 20 minutes off wasn't such a good idea (though this was because the day didn't have many cars booked on) and if I was to relive that day I'd not go out every third session, to allow the car more time to cool. Though I had a lot of fun and it just reminded me what a car this really is. I also remember the transition from track driving to going out to buy fuel at lunch was a very odd feeling. I think the most surprising thing of the day was getting very sideways (more than I anticipated) on the exit of the esses and girlfriend sat next to me saying how fun that was.
I had a few theories about what happened regarding the brakes. I thought the rear left caliper had seized, hence the higher temperature relative to the others. Before the trackday, my dad and I bled the brakes to put in ATE fluid. Prior to that, there was ordinary DOT 4 fluid in the car for a reason I can't quite remember, but the theory was to save a bit of money by using normal fluid as we didn't plan to do any trackdays for a little while. I thought maybe we hadn't got all the ordinary fluid out and the fluid boiled.
Since getting the car back home, it hasn't really done much apart from sitting on the drive due to lack of time. However, both calipers have been replaced on the left hand side as they were both seized and made a right mess of the discs. The front right already had a new caliper so the only original one is the rear right. We've rebled the system and now the brakes work, but there's still excess pedal travel. My dad installed a new set of rubber hoses at some point in the process. One of our theories is that the master cylinder is faulty, so we've bought a second hand part from MX5 Heaven and it's been installed, but we haven't had time to bleed the cylinder and the entire system again. We didn't want to install the second hand part but a brand new unit is £280 from MX5 Parts, so I didn't want to spend all that money on it for it to not fix the problem - this is supposed to be a budget sort of thing, not spend money where it doesn't need to be spent. If this second hand part does cure it though, I would definitely buy a brand new item in the future. The brake discs also look quite contaminated, so I've bought new discs and pads all round, which will lead me to my next post of me installing them on the front.
Once I got used to the car a bit, I booked a trackday at Castle Combe. This was a sessioned trackday (with open pit lane in the afternoon) run by the Boundless club (originally CSMA), comprised of 20 minute sessions and 2 groups - so 20 minutes out and 20 minutes break. This was my second trackday as a driver, and the first without my dad (i.e. the technical expertise
). I took some basic tools, some fluids etc as well as the all important cable ties, gaffer tape in case I ran out of talent . It rained the night before meaning the track was quite slippy during the first couple of sessions, before a dry line developed. I actually really enjoyed the drying track as it allowed me to feel the car move about at lower speeds than a dry track (where you'd have to try harder to make the car unstick). There was only one drying line through Tower, so if you got off line through there (even by only a wheel), you could start to feel the car under and oversteer. I got some tuition which was extremely useful - you don't realise how fast smooth is until you go out with an instructor. I had 20 minutes during one of the drying sessions and it helped a great deal, I certainly built a lot of confidence, especially in braking a lot later (that was something I really struggled with at Rockingham earlier in the year). On the session just before lunch, I didn't encounter many cars and the track had pretty much dried up so I was pushing quite hard and as such, didn't have much fuel left. So I went to buy some fuel from a Texaco station about 3 miles away. On that journey, I realised the brakes were pretty cooked, the pedal was long and barely brought me to a stop. This was a bit worrying but I let the car cool down over the lunch break after getting fuel. No brake fluid had been lost, but one brake disc (rear left) was burning hot (more so than the other three corners). I missed the first session after lunch to allow more time to cool down but went out after that, very gingerly. My plan was to do 1 lap to see what the brakes were like, then come back in, wait a little while then slowly drive the car back home. But luckily the brakes were somewhat up to the job. The pedal travel was longer than normal but they slowed the car down and after building my confidence back, I was pretty much braking where I was before lunch. I think if I was at somewhere like Rockingham where there's a stop from high speed to a 2nd gear corner, I would've been packing my stuff and going home early. I managed 2 sessions after lunch (~15 minutes with an hours break in between) and left the car to cool for 50 minutes before heading home. The brakes were safe enough to make the journey home but I took things very easy.
On reflection, maybe the 20 minutes on, 20 minutes off wasn't such a good idea (though this was because the day didn't have many cars booked on) and if I was to relive that day I'd not go out every third session, to allow the car more time to cool. Though I had a lot of fun and it just reminded me what a car this really is. I also remember the transition from track driving to going out to buy fuel at lunch was a very odd feeling. I think the most surprising thing of the day was getting very sideways (more than I anticipated) on the exit of the esses and girlfriend sat next to me saying how fun that was
.I had a few theories about what happened regarding the brakes. I thought the rear left caliper had seized, hence the higher temperature relative to the others. Before the trackday, my dad and I bled the brakes to put in ATE fluid. Prior to that, there was ordinary DOT 4 fluid in the car for a reason I can't quite remember, but the theory was to save a bit of money by using normal fluid as we didn't plan to do any trackdays for a little while. I thought maybe we hadn't got all the ordinary fluid out and the fluid boiled.
Since getting the car back home, it hasn't really done much apart from sitting on the drive due to lack of time. However, both calipers have been replaced on the left hand side as they were both seized and made a right mess of the discs. The front right already had a new caliper so the only original one is the rear right. We've rebled the system and now the brakes work, but there's still excess pedal travel. My dad installed a new set of rubber hoses at some point in the process. One of our theories is that the master cylinder is faulty, so we've bought a second hand part from MX5 Heaven and it's been installed, but we haven't had time to bleed the cylinder and the entire system again. We didn't want to install the second hand part but a brand new unit is £280 from MX5 Parts, so I didn't want to spend all that money on it for it to not fix the problem - this is supposed to be a budget sort of thing, not spend money where it doesn't need to be spent. If this second hand part does cure it though, I would definitely buy a brand new item in the future. The brake discs also look quite contaminated, so I've bought new discs and pads all round, which will lead me to my next post of me installing them on the front.
Next job on the car was installing new brake discs and pads on the front. As I've said before, I'm no mechanic, and all I've done in the past is change oil and other little bits. My dad was at work while I did this, so all this work was completed on my own which is something I'm quite happy about. I started by getting all the tools I'd be needing and putting them in the garage:
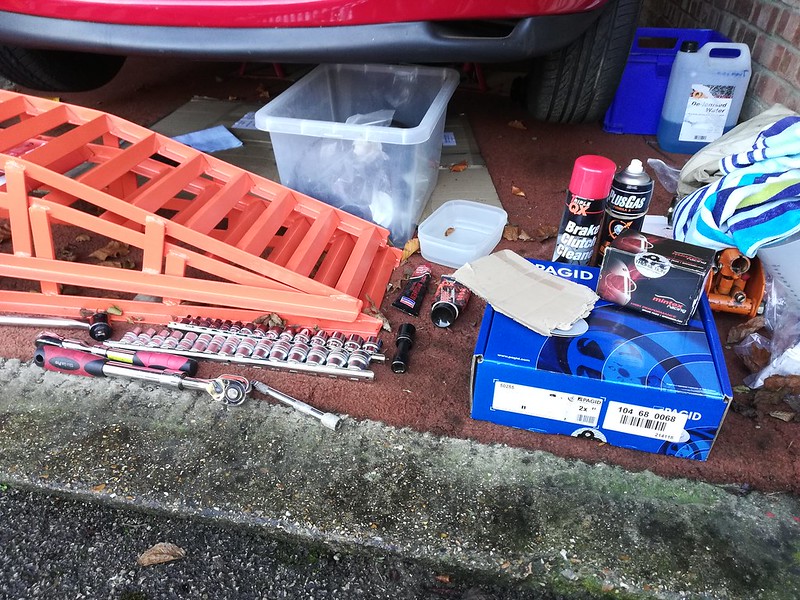
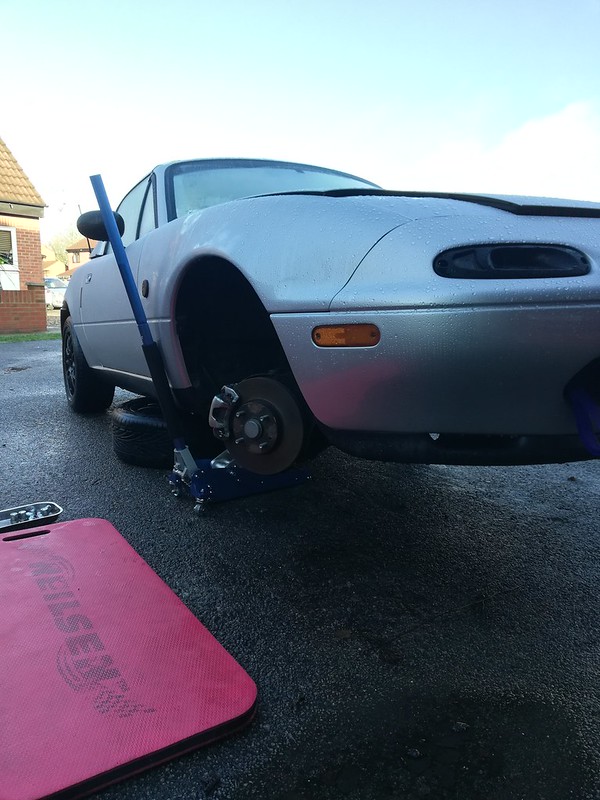
After taking this picture, I realised I would need a bungee cord and a G clamp so I went to get them too. As for choice of brake material, I've gone with standard Pagid discs and Mintex M1144. This should hopefully be a bit better than Greenstuffs (though we never had any issues with Greenstuff pads in the 2 sets of them we used, but I thought it was time for a change and experiment with someone different). I jacked the front up (I spent a while doing this to be safe), took the front wheels off and got to work.
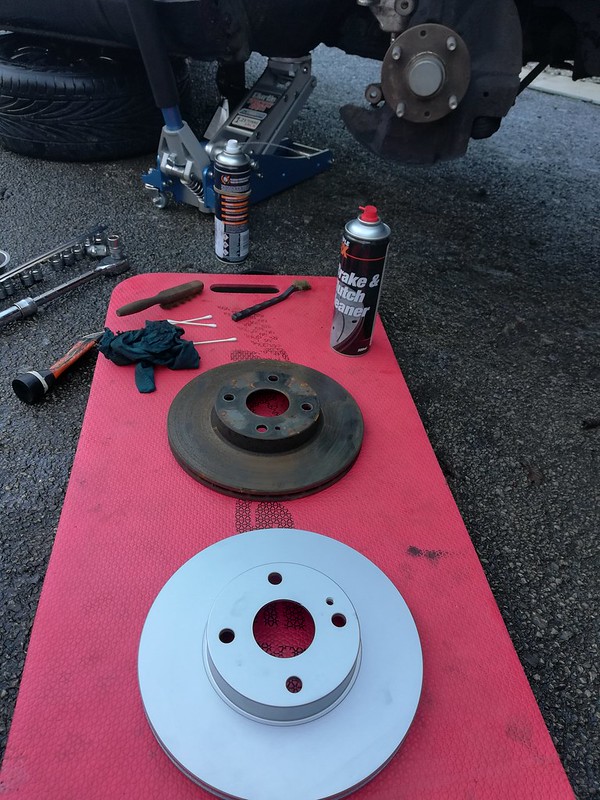
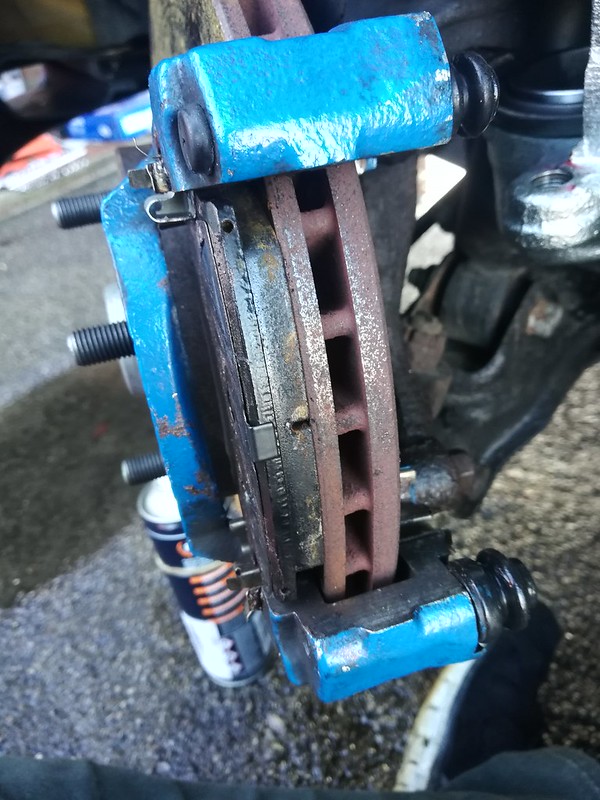
Throughout these pictures you'll have noticed a selection of blue carriers and silver calipers. Don't paint your calipers unless you want to paint them again when you need new ones However as of writing this, the car has new calipers all round so I might repaint them again at some point (my dad painted them the first time so it would be something new for me to do). I started on the driver's side as there was a puddle on the passenger side and I didn't much fancy getting wet. I took everything apart and didn't have much hassle with the old disc (it pretty much fell off) as my dad copper greased the hub when he replaced the discs last (around 8 years ago, one of the first jobs he did on the car). While some of the corrosion on the disc was caused by rain, you can see they were due a replacement:
Upon putting everything back together, I spent quite a bit of time cleaning things up. Probably more time than necessary but I wanted to get everything right. I wire brushed the hub and applied a layer of copper grease as well as putting copper grease on the back of the pad and the metal clips. I made sure the slider pins were nicely lubed up with red rubber grease before putting the caliper back on. I probably found pushing the piston back the most difficult part as I did it while it was on the bungee cord so it moved about all over the place. It would've helped so much if I had someone there to hold it still, but I managed to push it back after a little while. These Pagid discs come with a painted coating on (instead of the film of oil like most discs) so I just cleaned the discs once it was all refitted to remove all my dirty fingerprints. The W spring clips weren't too bad - I expected them to keep popping out but they behaved.
The passenger side was much of the same though when I lifted up the caliper, one of the pads was stuck to the disc. This stumped me for a minute or two, before getting a hammer and it unsticking after a couple of whacks. My guess is that it got stuck due to corrosion (the car had just been sitting for a couple of weeks and it was raining most days).
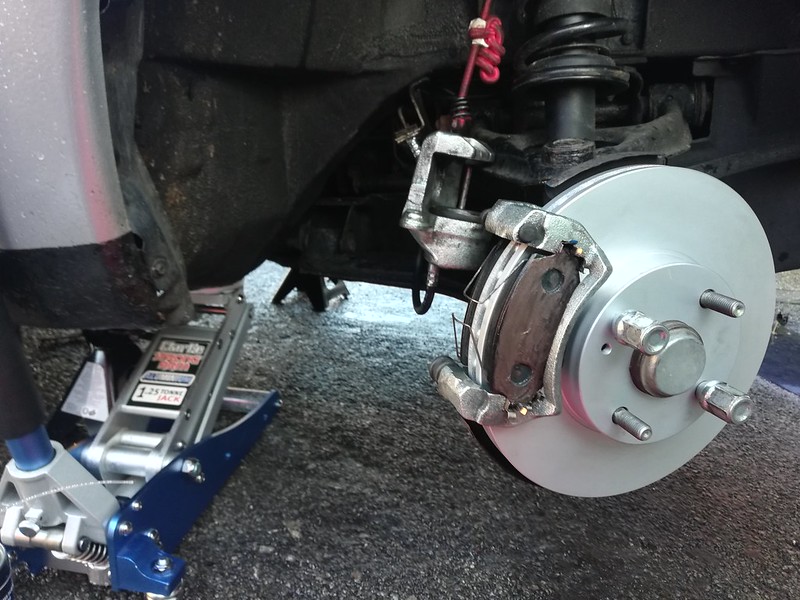
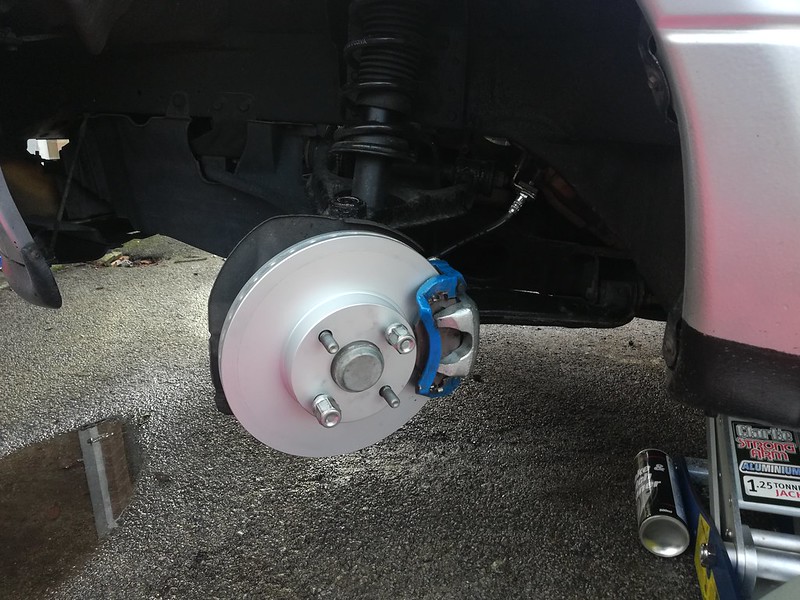
Below is the end of the passenger side:
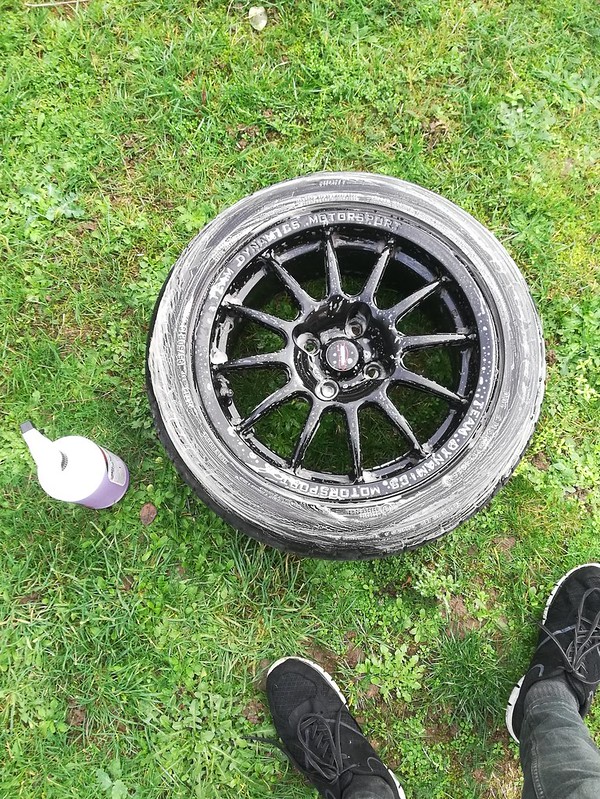
Everything went pretty well throughout this job. I took a few hours to do the job but I just took my time and thought about everything I was doing since I'd never done it before. I even had a little bit of time to clean the front wheels while they were off the car. Nothing too fancy, just some Demon Wheels and a brush to agitate.
After taking this picture, I realised I would need a bungee cord and a G clamp so I went to get them too. As for choice of brake material, I've gone with standard Pagid discs and Mintex M1144. This should hopefully be a bit better than Greenstuffs (though we never had any issues with Greenstuff pads in the 2 sets of them we used, but I thought it was time for a change and experiment with someone different). I jacked the front up (I spent a while doing this to be safe), took the front wheels off and got to work.
Throughout these pictures you'll have noticed a selection of blue carriers and silver calipers. Don't paint your calipers unless you want to paint them again when you need new ones
However as of writing this, the car has new calipers all round so I might repaint them again at some point (my dad painted them the first time so it would be something new for me to do). I started on the driver's side as there was a puddle on the passenger side and I didn't much fancy getting wet. I took everything apart and didn't have much hassle with the old disc (it pretty much fell off) as my dad copper greased the hub when he replaced the discs last (around 8 years ago, one of the first jobs he did on the car). While some of the corrosion on the disc was caused by rain, you can see they were due a replacement: Upon putting everything back together, I spent quite a bit of time cleaning things up. Probably more time than necessary but I wanted to get everything right. I wire brushed the hub and applied a layer of copper grease as well as putting copper grease on the back of the pad and the metal clips. I made sure the slider pins were nicely lubed up with red rubber grease before putting the caliper back on. I probably found pushing the piston back the most difficult part as I did it while it was on the bungee cord so it moved about all over the place. It would've helped so much if I had someone there to hold it still, but I managed to push it back after a little while. These Pagid discs come with a painted coating on (instead of the film of oil like most discs) so I just cleaned the discs once it was all refitted to remove all my dirty fingerprints. The W spring clips weren't too bad - I expected them to keep popping out but they behaved.
The passenger side was much of the same though when I lifted up the caliper, one of the pads was stuck to the disc. This stumped me for a minute or two, before getting a hammer and it unsticking after a couple of whacks. My guess is that it got stuck due to corrosion (the car had just been sitting for a couple of weeks and it was raining most days).
Below is the end of the passenger side:
Everything went pretty well throughout this job. I took a few hours to do the job but I just took my time and thought about everything I was doing since I'd never done it before. I even had a little bit of time to clean the front wheels while they were off the car. Nothing too fancy, just some Demon Wheels and a brush to agitate.
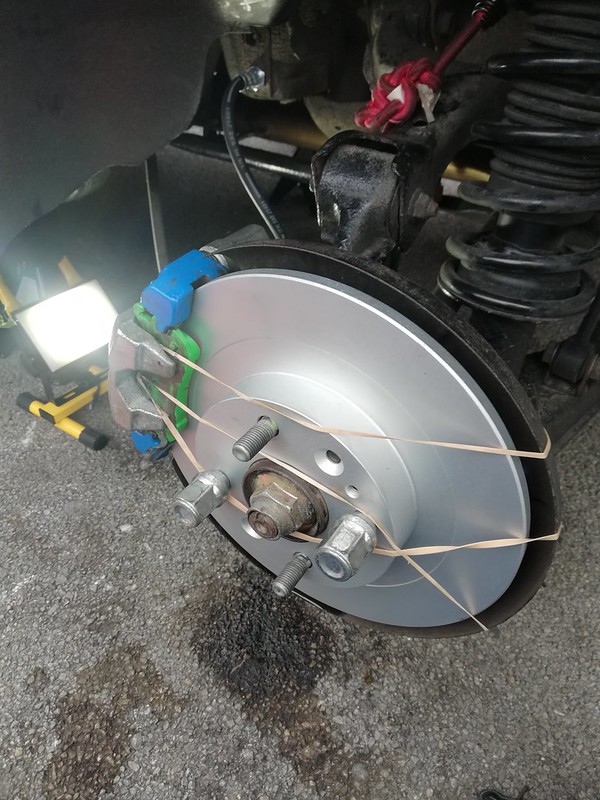
Following front discs and pads, the rears also needed doing. My dad helped me with these as they're a bit more complicated with winding back the piston on the allen key. I've replaced the old material with OE Pagid discs and EBC Greenstuff pads. Reason for this is that we had them spare and so just used what we have (sadly money isn't endless!). The W springs were being a pain so I came up with a very elegant solution containing some rubber bands which held the pads in nicely:
As we moved to the right hand side, it was clear that the caliper wasn't going to wind back properly. My dad had a refurbished caliper from Autolink sat around so we used that. It was getting colder and darker so I let him do the replacement caliper since he's a much quicker worker than I am (it's amazing how much you speed up when you don't want to be outside on a dark, cold evening!).
We made sure the handbrake works and backed off the allen key by 1/3 turn. Some people say 1/2 - 3/4 but we've found 1/3 turn works well.
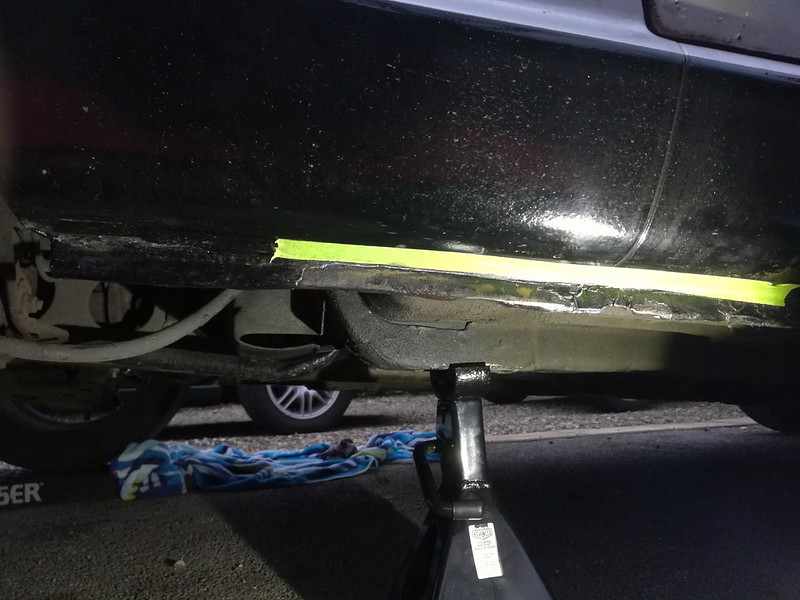
During the same weekend, I did some rustproofing on the rear sills. The paint had been chipping a bit and so a bit of surface rust was starting (the rear sills were done a couple years ago so they're solid!). I sanded the area down and applied some Kurust, and applied some black metal paint after letting that dry for 24 hours. I didn't take any pictures of the finished work (I will put some up though), but I did take one while rubbing down. I must say that I don't mind rustproofing. I hate the thought of doing it but when I'm actually doing it, I'm quite happy to get on with it. I did some other rustproofing last summer and don't mind doing it. We've since done the front chassis rails which I'll put a picture up of when I get a chance.
To get pretty much up to date with the brake issue. After a few miles on the road it's clear the brakes work, but the feel of the pedal isn't superb. But the main thing to start with is the brakes work, I wouldn't drive it if it wasn't safe. There's a couple of inches where there's no resistance (no feel) but when you get to a certain amount of travel, the pedal firms up and the brakes do work. My dad noticed some moisture coming from the block on the brake hose on the rear right (I forget the purpose of it from the top of my head) so he tightened it up and we re-bled that corner. There was some air from it. We would've bled all 4 corners again but time didn't allow. However, after driving it post one corner bleed, the pedal has improved. The amount of travel where there's no resistance has reduced, and it allows for easier heel-toe. Like I say, it's not perfect, but I think we're making progress, and despite the multiple times we've bled it (using a kit with a non-return valve), maybe there is still air in the system. But the main thing for the moment is the car is in action and being driven!
Next jobs are to re-bleed all 4 corners and have everything crossed that it passes its MOT in February. Tax, MOT, insurance all due for it next month, so that'll be expensive! Being able to drive it for the last week has made me realise that the cost is worth it
As we moved to the right hand side, it was clear that the caliper wasn't going to wind back properly. My dad had a refurbished caliper from Autolink sat around so we used that. It was getting colder and darker so I let him do the replacement caliper since he's a much quicker worker than I am (it's amazing how much you speed up when you don't want to be outside on a dark, cold evening!).
We made sure the handbrake works and backed off the allen key by 1/3 turn. Some people say 1/2 - 3/4 but we've found 1/3 turn works well.
During the same weekend, I did some rustproofing on the rear sills. The paint had been chipping a bit and so a bit of surface rust was starting (the rear sills were done a couple years ago so they're solid!). I sanded the area down and applied some Kurust, and applied some black metal paint after letting that dry for 24 hours. I didn't take any pictures of the finished work (I will put some up though), but I did take one while rubbing down. I must say that I don't mind rustproofing. I hate the thought of doing it but when I'm actually doing it, I'm quite happy to get on with it. I did some other rustproofing last summer and don't mind doing it. We've since done the front chassis rails which I'll put a picture up of when I get a chance.
To get pretty much up to date with the brake issue. After a few miles on the road it's clear the brakes work, but the feel of the pedal isn't superb. But the main thing to start with is the brakes work, I wouldn't drive it if it wasn't safe. There's a couple of inches where there's no resistance (no feel) but when you get to a certain amount of travel, the pedal firms up and the brakes do work. My dad noticed some moisture coming from the block on the brake hose on the rear right (I forget the purpose of it from the top of my head) so he tightened it up and we re-bled that corner. There was some air from it. We would've bled all 4 corners again but time didn't allow. However, after driving it post one corner bleed, the pedal has improved. The amount of travel where there's no resistance has reduced, and it allows for easier heel-toe. Like I say, it's not perfect, but I think we're making progress, and despite the multiple times we've bled it (using a kit with a non-return valve), maybe there is still air in the system. But the main thing for the moment is the car is in action and being driven!
Next jobs are to re-bleed all 4 corners and have everything crossed that it passes its MOT in February. Tax, MOT, insurance all due for it next month, so that'll be expensive! Being able to drive it for the last week has made me realise that the cost is worth it
Edited by MRichards99 on Friday 18th January 13:19
I've abandoned this thread throughout the summer, but I want to update it retrospectively and keep it up to date from now on. Going to split this up into logical, separate posts. So, post MOT...
During the colder months, the alternator belt squealed on startup, with longer squeals when the engine hadn't been started all week. Myself and my dad (because I hadn't done it before) replaced the alternator belt which seemed to cure the problem - I think the neighbours were happy with that!
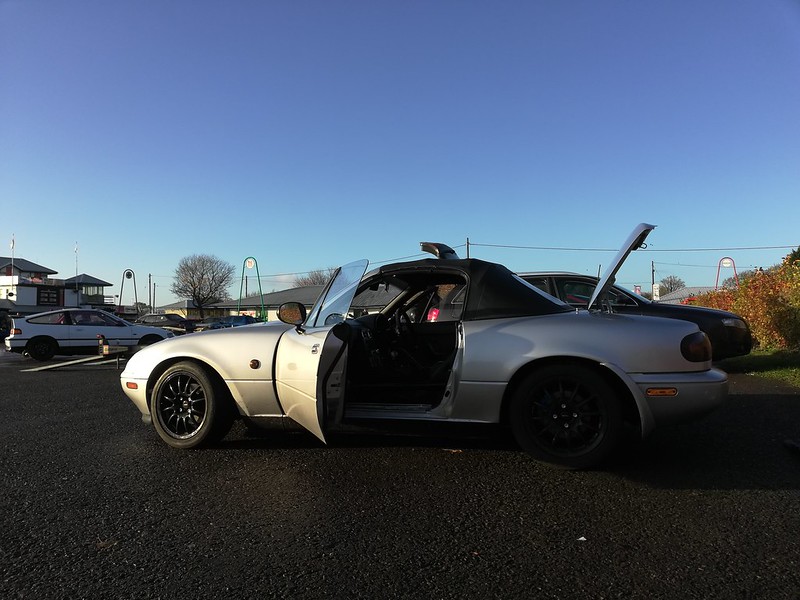
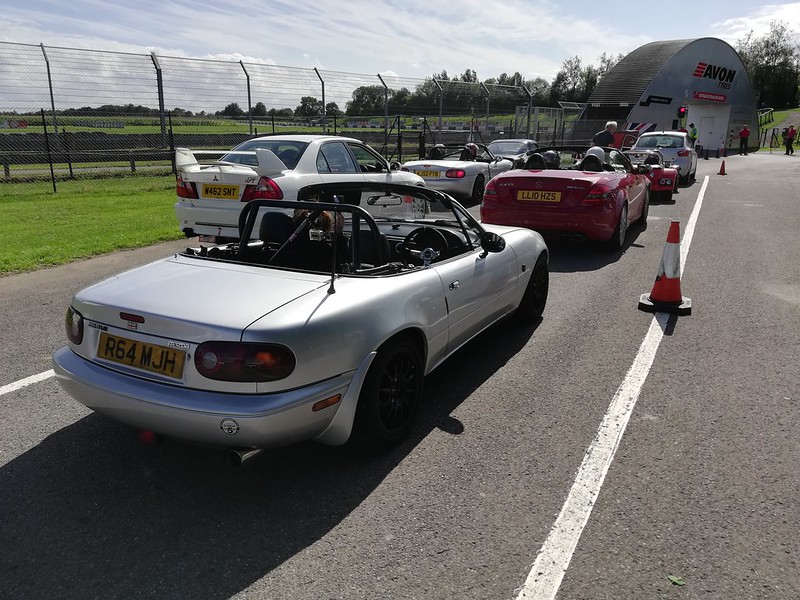
I then attended a trackday at Abingdon which was great fun. It was a dry morning, but turned yet during the afternoon, which on T1Rs, was an interesting experience! I really enjoyed the track - some folk won't attend a day at somewhere like Abingdon because it's 'just an airfield', but it really is good fun. A good mix of slow and faster corners, ideal for something like an MX5. Good driving standards all day, with a couple of red flags for kit cars that broke down on circuit. This was my first open pit lane day I've ever done and I'm not scared of it like I thought I would've been - I've typically done sessioned days with some open pit lane in the afternoon, but at that point, lots of people have already left. Some pictures from the day:

No garages here - just stick your stuff on the grass and cover it up when it rains!

The rain seemed to leave plenty of tyre marks on my car, nothing a bit of cleaning the following day didn't get rid of:

As has been the theme of this thread, brake issues loom ahead...
During the colder months, the alternator belt squealed on startup, with longer squeals when the engine hadn't been started all week. Myself and my dad (because I hadn't done it before) replaced the alternator belt which seemed to cure the problem - I think the neighbours were happy with that!
I then attended a trackday at Abingdon which was great fun. It was a dry morning, but turned yet during the afternoon, which on T1Rs, was an interesting experience! I really enjoyed the track - some folk won't attend a day at somewhere like Abingdon because it's 'just an airfield', but it really is good fun. A good mix of slow and faster corners, ideal for something like an MX5. Good driving standards all day, with a couple of red flags for kit cars that broke down on circuit. This was my first open pit lane day I've ever done and I'm not scared of it like I thought I would've been - I've typically done sessioned days with some open pit lane in the afternoon, but at that point, lots of people have already left. Some pictures from the day:
No garages here - just stick your stuff on the grass and cover it up when it rains!
The rain seemed to leave plenty of tyre marks on my car, nothing a bit of cleaning the following day didn't get rid of:
As has been the theme of this thread, brake issues loom ahead...
Post trackday saw that one of the rear calipers wasn't locking when the handbrake was engaged, so I elected to purchase two new aftermarket calipers from MX5 Heaven:

Probably could've got away with just doing the one but I was getting fed up of brake issues so just thought why not... To replace the calipers, you have to remove the handbrake cable from the old one. The new cradle on the caliper (for the cable) was extremely stiff so getting that on was a complete nightmare. In the end we completely loosened the handbrake adjustment from inside the car (to lengthen the cable) and with a pry bar to pry the cradle forward a bit more, we got both sides in. After that was the obvious bleeding of the calipers - we probably did all 4 while we were here. I also roughed up the brake pads while I was there. Rear pads looked fine (understandably because they don't get too much work), the fronts (M1144) took a bit of work to rough up:

While I was there, I noticed a bit of corrosion on the front brake pistons - they're also new, so not massively impressed by that as they're only a couple of years old:

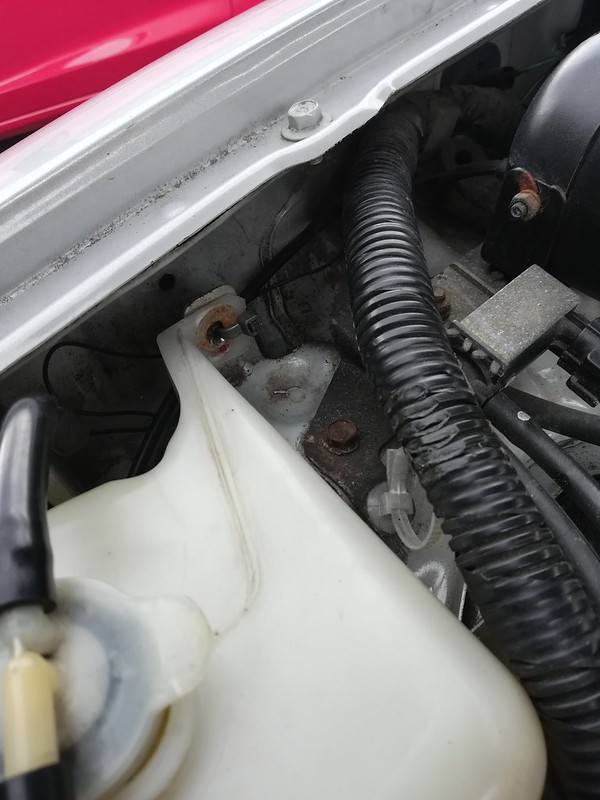
As I learn the art of home mechanics from my dad, we replaced the coolant next. This hadn't been done for ~3 years and it didn't look in the best of shape, so seemed a good thing for the car and a good learning exercise. The reservoir looked like it had seen better days so I thought it would be a good idea to take it out and try and clean it out a bit. Another learning exercise occurred here - what happens when you shear a bolt... I thought I'd let my dad do this - I'm still not comfortable with drilling into my car yet, even after measuring 3 times! We learned that our drill bits are horribly weak, so instead of drilling the bolt out, he drilled just below it and we cable tied the reservoir back (only one bolt sheared so not the end of the world). We've since got halfs on better drill bits that don't take 20 minutes to go through metal...

Probably could've got away with just doing the one but I was getting fed up of brake issues so just thought why not... To replace the calipers, you have to remove the handbrake cable from the old one. The new cradle on the caliper (for the cable) was extremely stiff so getting that on was a complete nightmare. In the end we completely loosened the handbrake adjustment from inside the car (to lengthen the cable) and with a pry bar to pry the cradle forward a bit more, we got both sides in. After that was the obvious bleeding of the calipers - we probably did all 4 while we were here. I also roughed up the brake pads while I was there. Rear pads looked fine (understandably because they don't get too much work), the fronts (M1144) took a bit of work to rough up:
While I was there, I noticed a bit of corrosion on the front brake pistons - they're also new, so not massively impressed by that as they're only a couple of years old:
As I learn the art of home mechanics from my dad, we replaced the coolant next. This hadn't been done for ~3 years and it didn't look in the best of shape, so seemed a good thing for the car and a good learning exercise. The reservoir looked like it had seen better days so I thought it would be a good idea to take it out and try and clean it out a bit. Another learning exercise occurred here - what happens when you shear a bolt... I thought I'd let my dad do this - I'm still not comfortable with drilling into my car yet, even after measuring 3 times! We learned that our drill bits are horribly weak, so instead of drilling the bolt out, he drilled just below it and we cable tied the reservoir back (only one bolt sheared so not the end of the world). We've since got halfs on better drill bits that don't take 20 minutes to go through metal...
After all that, I got some new tyres. I was running the 'highly rated' Toyo T1Rs - my dad fitted these, mainly due to price. At Abingdon, I spoke to a couple of guys sharing a green mk1 who were running Michelin Pilot Sport 3s which they seemed to be very impressed with - they were certainly quicker than me on track! After doing a couple of wet trackdays, I realised that the great British weather will happily rain on most trackdays I attend. While I'm not scared of the rain on track, I was always a bit weary of T1Rs in the wet, because of their poor wet weather performance. I did consider semi slicks (Nankang NS2R) but wanted a better overall option. All this was prompted by major outer edge wear on the T1Rs. Pilot Sport 3s it was in the end:
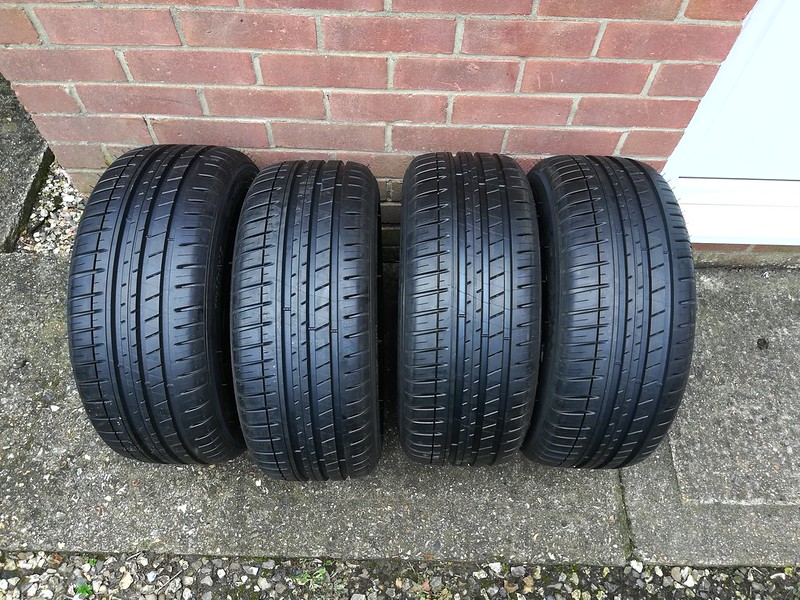
Since this is retrospective, what are my thoughts on them? I think they're great. I paid £253 for 4, in 195/50/R15. Yes they're expensive compared to T1Rs but I think they're worth it. Wet performance on track is so much better, and they can handle dry track action too. They're good on the road - I have to try quite hard to unstick the car through a roundabout. I'm conscious of this and always had concerns of over-tyring the car on the road - I still want the ability to have fun on the road, where perhaps a semi slick would mean no small sideways moments through quiet roads. I'm really happy with them so far.
I still think T1Rs are good, for the price. Price is critical with those tyres. Toyo have since released the TR1, which is like a Uniroyal tyre. From what I've read, these are better than the T1R (providing even better value), but I've learned that you do need to pay for better quality tyres. It's not until you've experienced something better like PS3s (which I know are still a road tyre I'm using for track abuse), that you realise the extra money is worth it.
The eagled eyed will notice the black turn signal intakes (sidelight replacements) returned to factory sidelights in some pictures. This was for MOT reasons and on the days of getting new tyres, I finally got round to refitting them. One of the bulbs failed on me a couple days after fitting them, so I went into a local motor factors to buy a pair of amber bulbs. RING RB343 is the part number for MX5 sidelights - I'm putting the picture more for my reference

Trackday at Castle Combe next...
Since this is retrospective, what are my thoughts on them? I think they're great. I paid £253 for 4, in 195/50/R15. Yes they're expensive compared to T1Rs but I think they're worth it. Wet performance on track is so much better, and they can handle dry track action too. They're good on the road - I have to try quite hard to unstick the car through a roundabout. I'm conscious of this and always had concerns of over-tyring the car on the road - I still want the ability to have fun on the road, where perhaps a semi slick would mean no small sideways moments through quiet roads. I'm really happy with them so far.
I still think T1Rs are good, for the price. Price is critical with those tyres. Toyo have since released the TR1, which is like a Uniroyal tyre. From what I've read, these are better than the T1R (providing even better value), but I've learned that you do need to pay for better quality tyres. It's not until you've experienced something better like PS3s (which I know are still a road tyre I'm using for track abuse), that you realise the extra money is worth it.
The eagled eyed will notice the black turn signal intakes (sidelight replacements) returned to factory sidelights in some pictures. This was for MOT reasons and on the days of getting new tyres, I finally got round to refitting them. One of the bulbs failed on me a couple days after fitting them, so I went into a local motor factors to buy a pair of amber bulbs. RING RB343 is the part number for MX5 sidelights - I'm putting the picture more for my reference
Trackday at Castle Combe next...
I went to Castle Combe for my next trackday. This was with the CSMA (or Boundless) - they're always good fun, good set of people. Sessioned like usual, with open pit lane after lunch. Like most UK trackdays, it was raining on and off all day, and this is where I had my first spin on track. Towards the end of the day, on the exit of Bobbies, I grabbed the exit curb (obviously no grip there!) and just went round. It took me a little by surprise but as soon as it happened, I knew it couldn't be saved. One wheel went through the grass but likely I ended up nowhere the barrier on the inside. It was quite an exciting experience, I'm not sure my girlfriend was best pleased, but we went into the pits the following lap to rest our heart rates!

A good day nonetheless, the brakes did survive all day, but you guessed it, they didn't feel as good afterwards.
Anyway, a couple of days after when I drove it, I noticed a little bit of liquid on the engine tray. I drove it a couple of miles near my house, and I realised it was cooled. I got the front end up in the air, removed the engine tray, and realised it was coming from the water pump area. My dad had the water pump and cambelt changed a few years ago (I can't remember how long ago, but the cambelt wasn't due yet). He didn't use a Genuine Mazda water pump when it got replaced - I guess this is why it leaked after not a huge amount of time. I learned that for a track car, proper quality OE parts are important. The same water pump probably could've lasted a long time on an MX5 which just potters about, but obviously this isn't the case with this car. I don't have the experience to replace a water pump, so I got a trusted garage to fit it for me. I supplied the parts, they fitted it. I used Genuine Mazda everything for the replacement to avoid this in the future. Since the garage have to remove the cambelt to do this job, I got the cambelt replaced at the same time. This is one of the few parts on the car that's had to be replaced because it's failed - a testament to Japanese reliability.

As I mentioned, the brakes didn't feel up to scratch after Combe. I was really fed up of this by now... I noticed that the day at Castle Combe had caused the front discs to be quite scored. These discs had been replaced at the start of the year (earlier in the thread) so I didn't want to just bin them. I don't have access to a sander so instead I used a sanding disc on a drill which worked pretty well. After I finished both discs, there were still some visible signs of scoring, but it felt so much smoother. I went to bed these discs in on some spare budget pads I had lying around and while it got the discs looking good again, it didn't solve the brake issue. Ever since sanding the discs, they've felt good ever since - I'd recommend doing it for anyone with discs that are scored. I started using 120 grit, but found 80 grit got the job done quicker.

Before removing the scoring ^

I roughed up the pads when I sanded the discs, but they looked like a right state to me. I managed to get them a bit better than what you see in the picture, but there was still some smoothness of the pad I just couldn't remove. I didn't want to rub them down a huge amount as I didn't want to throw pad material away. I haven't been very impressed with the M1144s, so I decided to look for different pads at this point.

In the end, I decided to go for Roddisons pads, front and rear. £120 from BOFI Racing, who even sent me a sticker At the same time, I bought a litre of Motul RBF600 - this has a higher boiling than the ATE I was using at this point. Did all this and to this day, the brakes are all good!!!
A good day nonetheless, the brakes did survive all day, but you guessed it, they didn't feel as good afterwards.
Anyway, a couple of days after when I drove it, I noticed a little bit of liquid on the engine tray. I drove it a couple of miles near my house, and I realised it was cooled. I got the front end up in the air, removed the engine tray, and realised it was coming from the water pump area. My dad had the water pump and cambelt changed a few years ago (I can't remember how long ago, but the cambelt wasn't due yet). He didn't use a Genuine Mazda water pump when it got replaced - I guess this is why it leaked after not a huge amount of time. I learned that for a track car, proper quality OE parts are important. The same water pump probably could've lasted a long time on an MX5 which just potters about, but obviously this isn't the case with this car. I don't have the experience to replace a water pump, so I got a trusted garage to fit it for me. I supplied the parts, they fitted it. I used Genuine Mazda everything for the replacement to avoid this in the future. Since the garage have to remove the cambelt to do this job, I got the cambelt replaced at the same time. This is one of the few parts on the car that's had to be replaced because it's failed - a testament to Japanese reliability.
As I mentioned, the brakes didn't feel up to scratch after Combe. I was really fed up of this by now... I noticed that the day at Castle Combe had caused the front discs to be quite scored. These discs had been replaced at the start of the year (earlier in the thread) so I didn't want to just bin them. I don't have access to a sander so instead I used a sanding disc on a drill which worked pretty well. After I finished both discs, there were still some visible signs of scoring, but it felt so much smoother. I went to bed these discs in on some spare budget pads I had lying around and while it got the discs looking good again, it didn't solve the brake issue. Ever since sanding the discs, they've felt good ever since - I'd recommend doing it for anyone with discs that are scored. I started using 120 grit, but found 80 grit got the job done quicker.
Before removing the scoring ^
I roughed up the pads when I sanded the discs, but they looked like a right state to me. I managed to get them a bit better than what you see in the picture, but there was still some smoothness of the pad I just couldn't remove. I didn't want to rub them down a huge amount as I didn't want to throw pad material away. I haven't been very impressed with the M1144s, so I decided to look for different pads at this point.
In the end, I decided to go for Roddisons pads, front and rear. £120 from BOFI Racing, who even sent me a sticker
At the same time, I bought a litre of Motul RBF600 - this has a higher boiling than the ATE I was using at this point. Did all this and to this day, the brakes are all good!!! I spent quite a bit of the summer using the car and got the car up to 99k miles. Quite close 100k as of writing.

Did a trackday on August 17th, Castle Combe again. This was with the Bristol Pegasus Motor Club, another good club with good people. They do a sprint in October, and while I don't plan to do the one this year, I'd like to do a sprint at Castle Combe in the future. The brakes went well - Roddisons pads are really good! I had great day, but the format of sessions meant things were a bit slower. You're given 4 tickets for the day and you can use these when you want - this means when you get in the queue, you might be waiting an entire session before going out - a bit of a waste of 15 minutes. Not everyone uses their 4 tickets (I'm not sure how, I want to be on track as much as possible!), so you get in the queue to have more runs and just get let out when there's space, adding more delay to your day. I can now see why people like open pit lane so much.
When my dad got the rear sills done, he treated the suspension arms as he wanted to keep the rust at bay for a few years. He didn't end up doing the rear subframe, I think he realised how much work it was! So this was my next task - and probably the most involved thing I've done on cars to date. The subframe was solid before doing this (I had a really good poke around with a screwdriver), but there was quite a bit of surface rust. I started with a wire brush to remove 22 years of loose dirt and rust. Because there's a lot of awkward angles and not much space, this took an entire weekend. I started by removing the rear anti roll bar as this would free up a bit of space and allowed me to treat it off the car


Post wire brush

I'll be the first to admit it's not the best job, but it should keep the rust at bay for a while to come. I guess the ultimate thing would be to remove the subframe, get it sandblasted and powder coated, but for my purposes, I'm not sure I want to shell out all that time and effort.
Nearly up to date!
Did a trackday on August 17th, Castle Combe again. This was with the Bristol Pegasus Motor Club, another good club with good people. They do a sprint in October, and while I don't plan to do the one this year, I'd like to do a sprint at Castle Combe in the future. The brakes went well - Roddisons pads are really good! I had great day, but the format of sessions meant things were a bit slower. You're given 4 tickets for the day and you can use these when you want - this means when you get in the queue, you might be waiting an entire session before going out - a bit of a waste of 15 minutes. Not everyone uses their 4 tickets (I'm not sure how, I want to be on track as much as possible!), so you get in the queue to have more runs and just get let out when there's space, adding more delay to your day. I can now see why people like open pit lane so much.
When my dad got the rear sills done, he treated the suspension arms as he wanted to keep the rust at bay for a few years. He didn't end up doing the rear subframe, I think he realised how much work it was! So this was my next task - and probably the most involved thing I've done on cars to date. The subframe was solid before doing this (I had a really good poke around with a screwdriver), but there was quite a bit of surface rust. I started with a wire brush to remove 22 years of loose dirt and rust. Because there's a lot of awkward angles and not much space, this took an entire weekend. I started by removing the rear anti roll bar as this would free up a bit of space and allowed me to treat it off the car
Post wire brush
I'll be the first to admit it's not the best job, but it should keep the rust at bay for a while to come. I guess the ultimate thing would be to remove the subframe, get it sandblasted and powder coated, but for my purposes, I'm not sure I want to shell out all that time and effort.
Nearly up to date!
At some point, my dad got an alignment done on the car. When he got it done, the mechanic said the alignment would undo itself because a bush was spinning - I think that's what the guy said, it was quite a while back! Regardless, the suspension bushes are 22 years old and don't look in the best of shape. Yes, they pass an MOT, but I don't think they'll be doing their job as effectively as new ones. So, I've decided to re-bush the entire car, which will be the biggest job I've done while DIYing on car - I'm excited to tackle it, but also aware that things are going to go wrong.
The next decision is deciding what I should replace them with - poly, Mazda OE rubber, or something else? Since the car is used on the road, I didn't want to compromise comfort too much, so poly are out the question. I've also heard countless problems with some of the cheaper ones, and they need to be re-greased etc. As someone who's learning how to spanner, I think my confident would drop quite a lot if something ever happened due to these bushes - quite a lot of thread claiming poor installation etc. Mazda OE are very expensive -£5/600 when I calculated it a few months back. So, I've decided to use IL Motorsport's rubber bushes. They're stiffer than OE, but apparently a good mid balance between them and poly. With shipping, they cost me £311 with shipping in the recent MX5 Parts sale, so a good compromise on price too. I'm hoping these will refresh the handling, while not being so hard that road use becomes a chore. They arrived the other day in some nice packaging:

Because all the suspension needs to be ripped out, I think this is a good chance to replace Eibach springs and OE shocks with coilovers - it seems to make sense, espeically as I'm doing more trackdays as time goes on. The ride is quite hard with the current setup, so I'd like damper adjustable coilovers so I can have a soft setup for the road, and stiffen it up for trackdays. I'm currently thinking about Gaz or Meister R's - not quite sure which, I thought Gaz had a good name but plenty of stuff online where customers are talking about issues with their coilovers. Meister R's are a bit more expensive and I like the fact you can adjust damping from the top mounts. They also have separate height and pre-load adjustment which the Gaz don't appear to have. In reality, I'm not sure how important that feature is on a coilover!
As I'm thinking about this job more and more, I'm going to replace all the balljoints and both track rod ends, simply because I might as well while it's all out. The arms could do with rubbing down and repainting because little bits of rust have reappeared, but I think the amount of effort spent on that will be decided by how well it all comes apart! There's a good video on YouTube by a guy called 'Jazda' who shows you how to remove and install bushes using threaded bar, so I'm hoping to use that technique, and get a trusted garage to remove/install the new upper balljoints, since I can't
So I'm in the process of sourcing all the parts, and waiting for some time to crack on with it. So with the amount of time I have to do the work, waitnig for parts etc, I reckon the car will be off the road or a month or so - I'm a very slow worker!
Finally up to date!
The next decision is deciding what I should replace them with - poly, Mazda OE rubber, or something else? Since the car is used on the road, I didn't want to compromise comfort too much, so poly are out the question. I've also heard countless problems with some of the cheaper ones, and they need to be re-greased etc. As someone who's learning how to spanner, I think my confident would drop quite a lot if something ever happened due to these bushes - quite a lot of thread claiming poor installation etc. Mazda OE are very expensive -£5/600 when I calculated it a few months back. So, I've decided to use IL Motorsport's rubber bushes. They're stiffer than OE, but apparently a good mid balance between them and poly. With shipping, they cost me £311 with shipping in the recent MX5 Parts sale, so a good compromise on price too. I'm hoping these will refresh the handling, while not being so hard that road use becomes a chore. They arrived the other day in some nice packaging:
Because all the suspension needs to be ripped out, I think this is a good chance to replace Eibach springs and OE shocks with coilovers - it seems to make sense, espeically as I'm doing more trackdays as time goes on. The ride is quite hard with the current setup, so I'd like damper adjustable coilovers so I can have a soft setup for the road, and stiffen it up for trackdays. I'm currently thinking about Gaz or Meister R's - not quite sure which, I thought Gaz had a good name but plenty of stuff online where customers are talking about issues with their coilovers. Meister R's are a bit more expensive and I like the fact you can adjust damping from the top mounts. They also have separate height and pre-load adjustment which the Gaz don't appear to have. In reality, I'm not sure how important that feature is on a coilover!
As I'm thinking about this job more and more, I'm going to replace all the balljoints and both track rod ends, simply because I might as well while it's all out. The arms could do with rubbing down and repainting because little bits of rust have reappeared, but I think the amount of effort spent on that will be decided by how well it all comes apart! There's a good video on YouTube by a guy called 'Jazda' who shows you how to remove and install bushes using threaded bar, so I'm hoping to use that technique, and get a trusted garage to remove/install the new upper balljoints, since I can't
So I'm in the process of sourcing all the parts, and waiting for some time to crack on with it. So with the amount of time I have to do the work, waitnig for parts etc, I reckon the car will be off the road or a month or so - I'm a very slow worker!
Finally up to date!
Gassing Station | Readers' Cars | Top of Page | What's New | My Stuff