Targa panel tangs (again)
Discussion


Hi guys,
I'm about to replace the tangs on the roof panels and have read a number of threads on how to do this as well as checked the posting at gbsportscar.com which have got me 90% of the way. A couple of mine have rusted far enough to create a bulge on the top surface which I assume will need flattening out. However, all 4 tangs at the rear have bulges on the under surface but it's not obvious that this has been caused by rust.
So my question is - are they all like that or should I flatten them out?
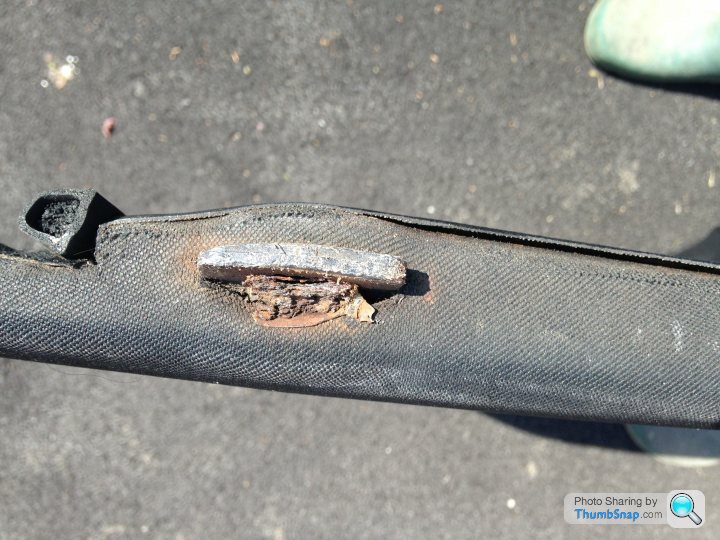
Hi, just saw your post and your tangs look as bad as mine did. You will find the expansion of the rust has caused the roof to split either side. Took me about 3 hours to extract all 8 tangs but has taken 3 to 4 days to fabricate, glue and fettle the new tangs back in. I used aluminium 8mm x 40mm but it would have been easier with 6mm ali. They look much better and i used 4 packs of araldite. Where there is a bulge that has not gone completely back i have sanded it down as i think they should be flat for the panel to sit right and the tangs to locate. Next is to get a new roof covering. Forgot to mention this is my first TVR had it now 6 months and have yet to enjoy it as need to replace all the shocks and ball joints etc which i am purchasing now so hopefully next year it will be more road worthy than she is right now
Hi cb500t, i had one original tang that had all the plastic case intact. The dimension of that is length 50mm, width 40mm and depth 8mm. Looking at it from the side it is actually tapered to 6mm where it stops at the edge of the panel and down to 4mm at the end that locates in to the slots of the car. You should have around 18mm that sticks out of the panel. I purchased flat aluminium bar 8mm x 40mm, and cut to the 50mm length then filed the front 20mm with a grinder then a hand file and an electric file. I had to cut and file the rear part as well until they sat home in the panel. Then once they fit both holes you will still need to do a bit of filing and shaping the front after you have glued them in as they can be a little tight, and thats why it took some time. I will try to upload a picture of the finished panels. The roof now sits tight in place
Hi, just caught up with this post again. . .
I ended up using stainless bar 40mm wide and 6mm thick cut into 55mm lengths with all sharp corners taken off on a bench grinder.
The answer to the question I originally posted was obvious once I had peeled the covers back.
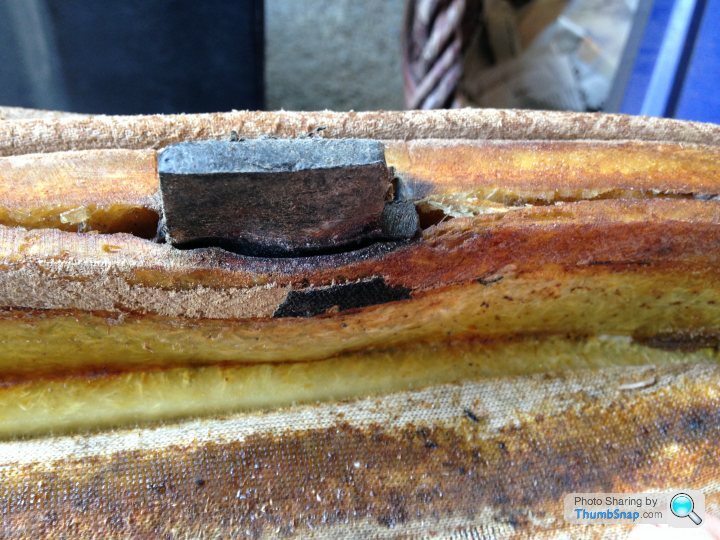
The ones at the rear of the roof panels had all split the fibreglass on the lower side and once the old tang was removed there wasn't much fibreglass left. Grinding away the fibreglass remnants to get the lower edge flat left even less!

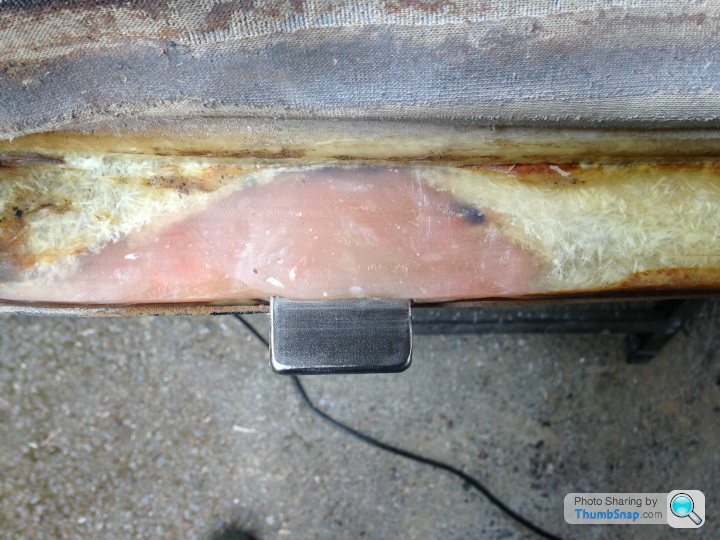
I used P40 to fill the voids and fix the new tang in place having drilled a hole in the tang to improve the grip. Here's what it looked like when smoothed down ready to put the trim back in place.
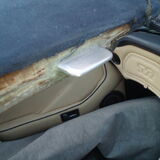
I had to adjust one of the tangs with an angle grinder to get it to seat correctly in its slot and once the car had shaken things in I can see that a couple of others will need a tweak for a better fit. Fabricating new tangs out of your material of choice is not a difficult task, the trickiest bit was getting the alignment right before the P40 went off!
GB
I ended up using stainless bar 40mm wide and 6mm thick cut into 55mm lengths with all sharp corners taken off on a bench grinder.
The answer to the question I originally posted was obvious once I had peeled the covers back.
The ones at the rear of the roof panels had all split the fibreglass on the lower side and once the old tang was removed there wasn't much fibreglass left. Grinding away the fibreglass remnants to get the lower edge flat left even less!
I used P40 to fill the voids and fix the new tang in place having drilled a hole in the tang to improve the grip. Here's what it looked like when smoothed down ready to put the trim back in place.
I had to adjust one of the tangs with an angle grinder to get it to seat correctly in its slot and once the car had shaken things in I can see that a couple of others will need a tweak for a better fit. Fabricating new tangs out of your material of choice is not a difficult task, the trickiest bit was getting the alignment right before the P40 went off!
GB
Gassing Station | S Series | Top of Page | What's New | My Stuff