450 SEAC - the return
Discussion


Well a bit more progress made this weekend. Friday I collected my rebuilt diff. It needed new bearings and seals but the crown wheel and pinion and clutches were all good so at least I know I shouldn't have any issues with it.


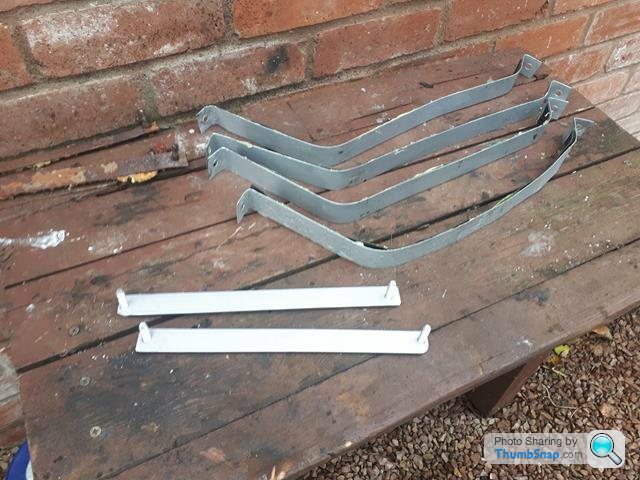
Fuel tank wise they are all back in. The top brackets which secure the straps to the rear parcel shelf were dust so I made two new brackets with retained bolts, with plenty of galvanised zinc spray coating. I also cleaned up the old straps, wire brushed down, zinc spray and bonded new rubbers to the straps. I've got some new stainless items coming which I'll swap out on a later date but I was keen to crack on today.
I also power wire brushed the filler piece, swirl pot and all assorted steel connectors and again applied several coats of zinc finish to them.
The new 2" hose from filler to tank was a bit of a fiddle to get in but after much pushing, manipulation and some choice words it all lined up. So both tanks now refitted, fuel filler all plumbed up and small bore overflow and larger bore tank breathers also now all connected. Next job is a new flexible mount for the fuel pump then refit the pump and new fuel filter into place.
Well thought I'd better update the thread in case you think I've been idle. Work is progressing although 4 university open days for the lad have got in the way of progress somewhat.
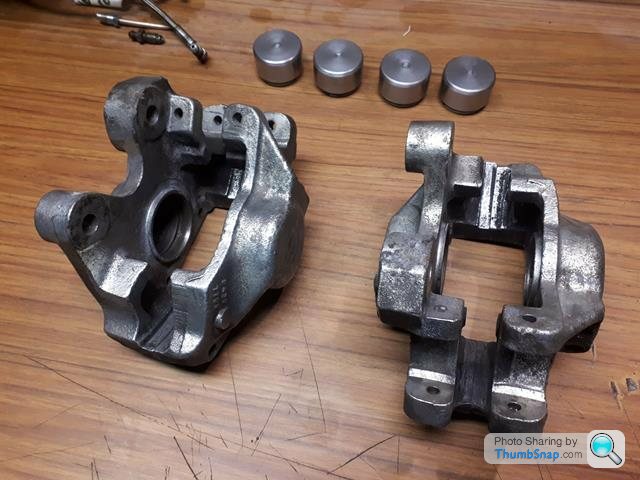
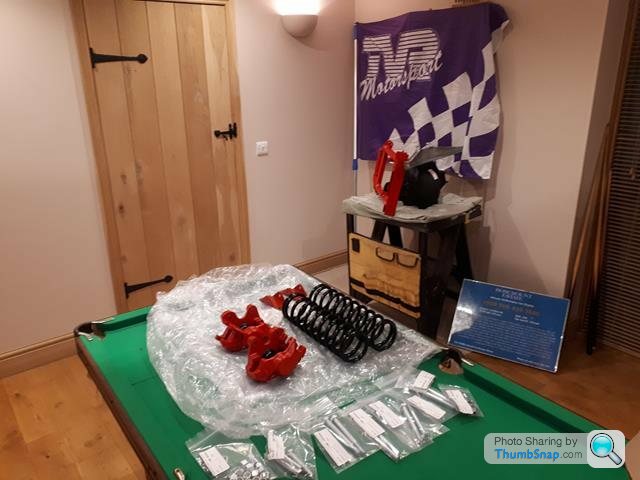
Calipers have been stripped, cleaned, blasted out with an air line, painted and today I've fitted new seals. Currently got the handbrake mechanisms apart on the bench but apart from a clean they look like new.

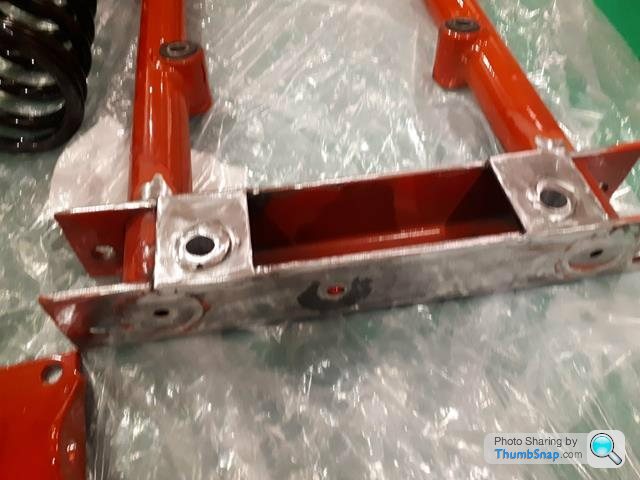
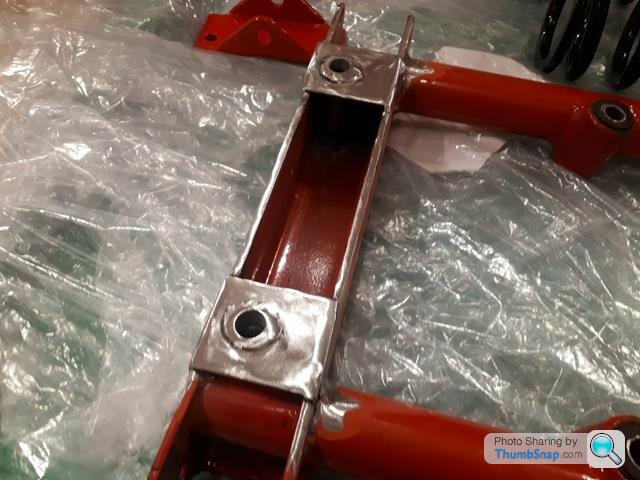
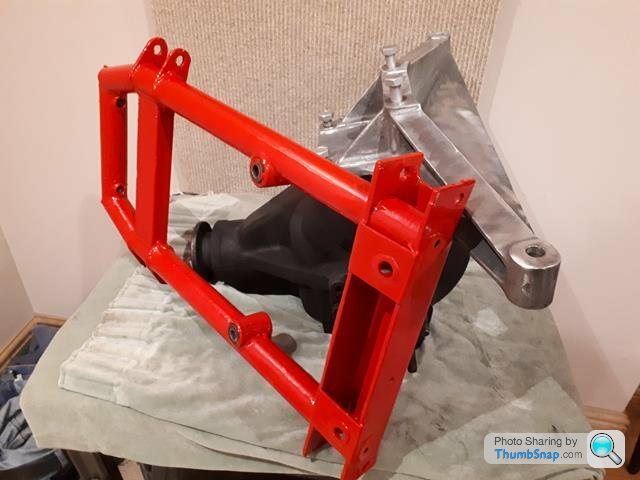
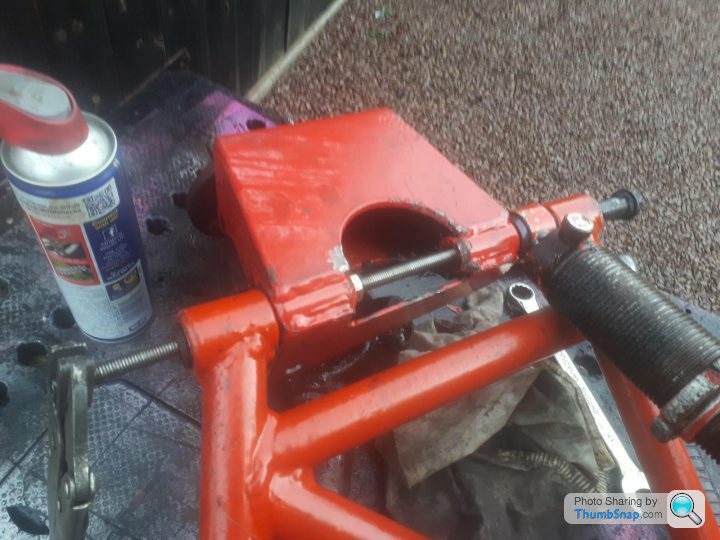
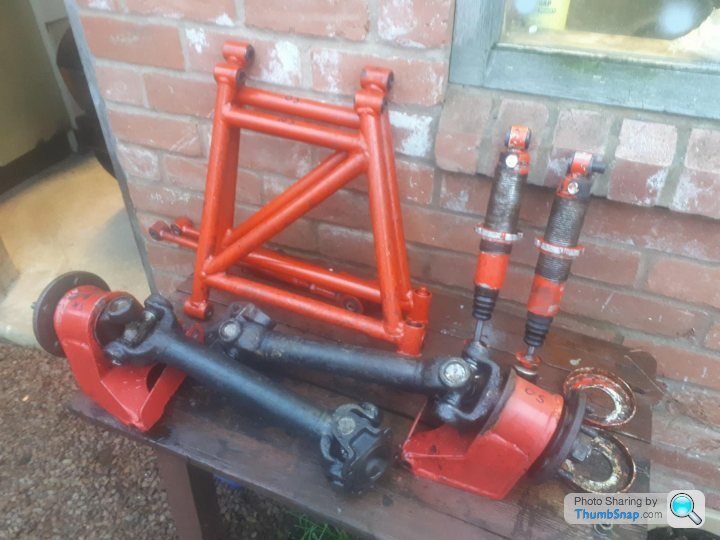
Other job now complete is the modification of the diff carrier to allow longer through bolts, rather than the bolts trapped inside the channel. New Grade 5 high tensile bolts all purchased and trial fitted, without the diff, just to ensure everything lined up okay.

Original rear springs have been lightly blasted and epoxy coated for £20.
Next job is to finish off the handbrake mechanisms and then start re-assembling the diff and brakes on its cradle.
Calipers have been stripped, cleaned, blasted out with an air line, painted and today I've fitted new seals. Currently got the handbrake mechanisms apart on the bench but apart from a clean they look like new.
Other job now complete is the modification of the diff carrier to allow longer through bolts, rather than the bolts trapped inside the channel. New Grade 5 high tensile bolts all purchased and trial fitted, without the diff, just to ensure everything lined up okay.
Original rear springs have been lightly blasted and epoxy coated for £20.
Next job is to finish off the handbrake mechanisms and then start re-assembling the diff and brakes on its cradle.
Well it's been a while since I updated this thread and as the missus and daughter are hogging the TV I thought I'd post a few photos of the progress.
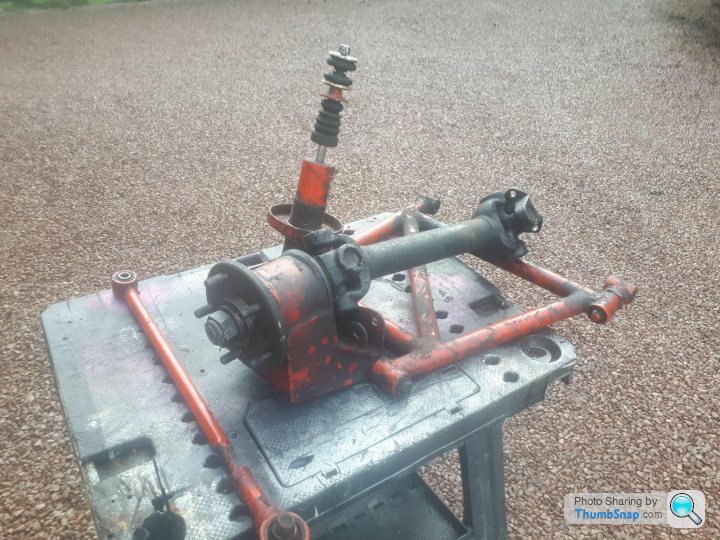
So progress was going well, diff had been returned following rebuild, calipers were refurbished so came to re-assemble the rear brakes only to find that the output hubs were not as original dimensions, with one flange too tight on the diff casing and rubbing and the second too far out so the brake disc rubbed on the caliper.

One call later and the rebuilder was straight over, collected it, found he'd used incorrect bearings, and diff was returned the next week. Annoying but good service on the second rebuild. Brakes were refitted with the original number of shims and everything lined up and diff was then reassembled with hand brake mechanisms and I also made new kunifer brake pipes to suit.

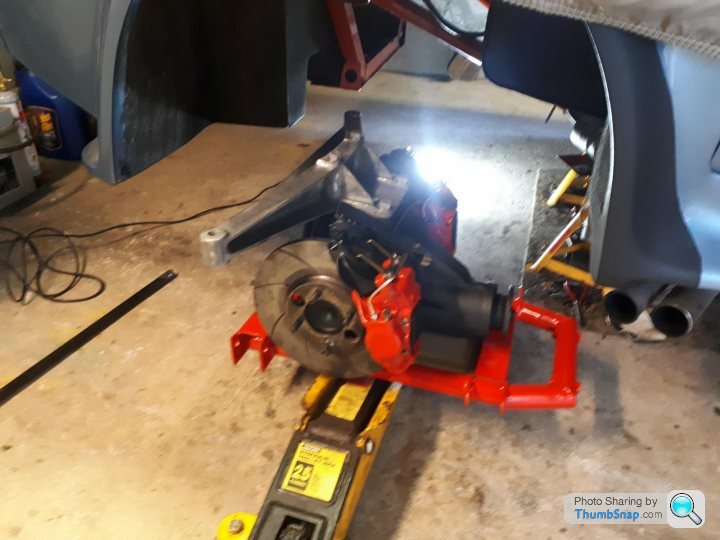
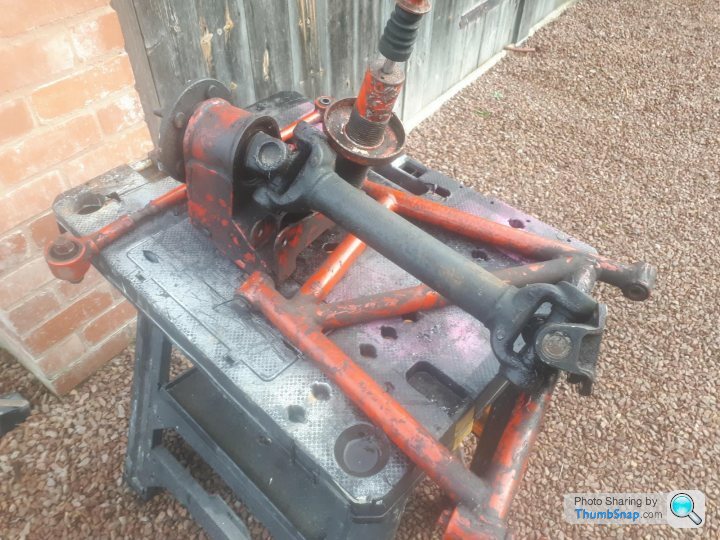
I'd trial fitted the modified diff cradle previously so knew it would fit, so put the diff in the wheelbarrow and took it down to the garage. I'd tied a suitable flt section of wood under the carrier to ensure it would balance on the trolley jack, so 10 minutes later it was back in position. Very satisfying.


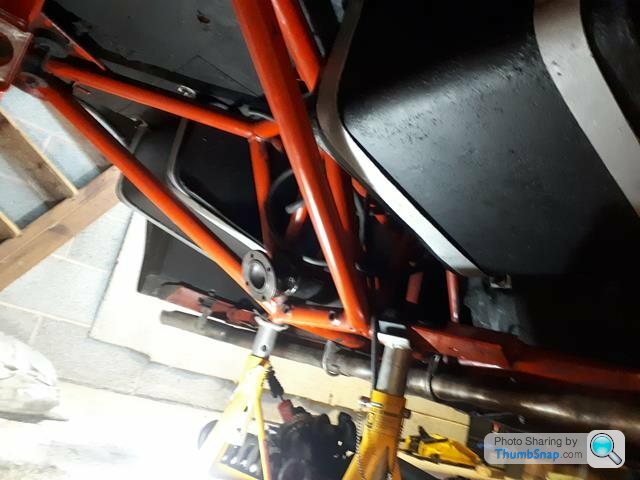
So next was to reconnect the brake and the prop shaft. When the prop shaft was installed it was obvious that the cross hose linking the two fuel tanks was touching the top of prop. The bottom of the tank outlets is approx 10mm lower than the top of the prop shaft. I therefore re-positioned the hose to ensure it arched over the prop shaft and to ensure it never touches the prop I made a stainless cowl from an off cut of 6" stainless pipe.


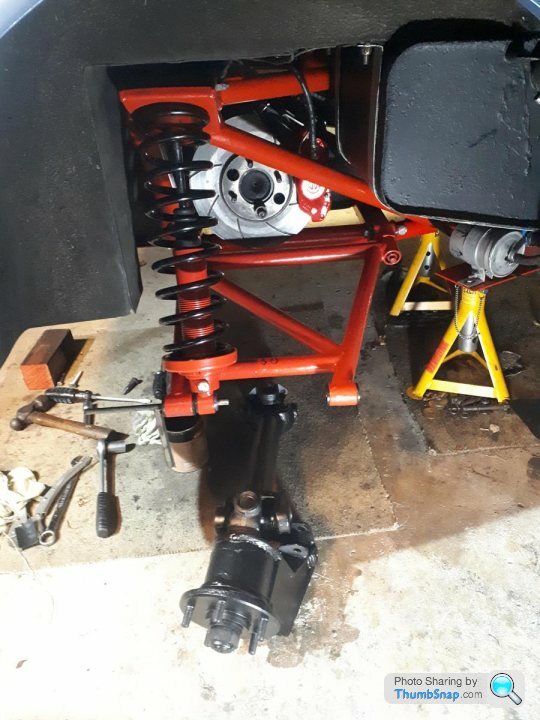
Next job was to strip the rear suspension, which I'd left it two large lumps. The bolts were seized in the rear hubs, as always, but plenty of WD40 and a length of studding helped ease the old bolts out. Suspension parts then cleaned, stripped and repainted. Unfortunately the A frame bushes were shot so a new set of poly bushes were bought.


Before the suspension went back in I ran a new kunifer brake line front to back, bled the brakes with new DOT 5.1 brake fluid, adjusted the handbrake cable, and greased the prop shaft.
So today I've fitted some new black silicon hoses in the engine bay as a few of the hoses were perished and leaking, stripping a load of rusty bits and pieces from the engine bay ready for wire brushing and repainting and I've made a start on the suspension reassembly.


Still plenty left to do before I can get it on the road though, but pleased with the progress so far.
So progress was going well, diff had been returned following rebuild, calipers were refurbished so came to re-assemble the rear brakes only to find that the output hubs were not as original dimensions, with one flange too tight on the diff casing and rubbing and the second too far out so the brake disc rubbed on the caliper.
One call later and the rebuilder was straight over, collected it, found he'd used incorrect bearings, and diff was returned the next week. Annoying but good service on the second rebuild. Brakes were refitted with the original number of shims and everything lined up and diff was then reassembled with hand brake mechanisms and I also made new kunifer brake pipes to suit.
I'd trial fitted the modified diff cradle previously so knew it would fit, so put the diff in the wheelbarrow and took it down to the garage. I'd tied a suitable flt section of wood under the carrier to ensure it would balance on the trolley jack, so 10 minutes later it was back in position. Very satisfying.
So next was to reconnect the brake and the prop shaft. When the prop shaft was installed it was obvious that the cross hose linking the two fuel tanks was touching the top of prop. The bottom of the tank outlets is approx 10mm lower than the top of the prop shaft. I therefore re-positioned the hose to ensure it arched over the prop shaft and to ensure it never touches the prop I made a stainless cowl from an off cut of 6" stainless pipe.
Next job was to strip the rear suspension, which I'd left it two large lumps. The bolts were seized in the rear hubs, as always, but plenty of WD40 and a length of studding helped ease the old bolts out. Suspension parts then cleaned, stripped and repainted. Unfortunately the A frame bushes were shot so a new set of poly bushes were bought.
Before the suspension went back in I ran a new kunifer brake line front to back, bled the brakes with new DOT 5.1 brake fluid, adjusted the handbrake cable, and greased the prop shaft.
So today I've fitted some new black silicon hoses in the engine bay as a few of the hoses were perished and leaking, stripping a load of rusty bits and pieces from the engine bay ready for wire brushing and repainting and I've made a start on the suspension reassembly.
Still plenty left to do before I can get it on the road though, but pleased with the progress so far.
Edited by KKson on Sunday 2nd February 18:18
Well it's been a while since I last updated but those on FB will probably be fed up with my various updates but thought I'd add a little more to this PH thread.
Work on the SEAC project has come on in leaps and bounds, helped by our current unfortunate circumstances and virus lock down.
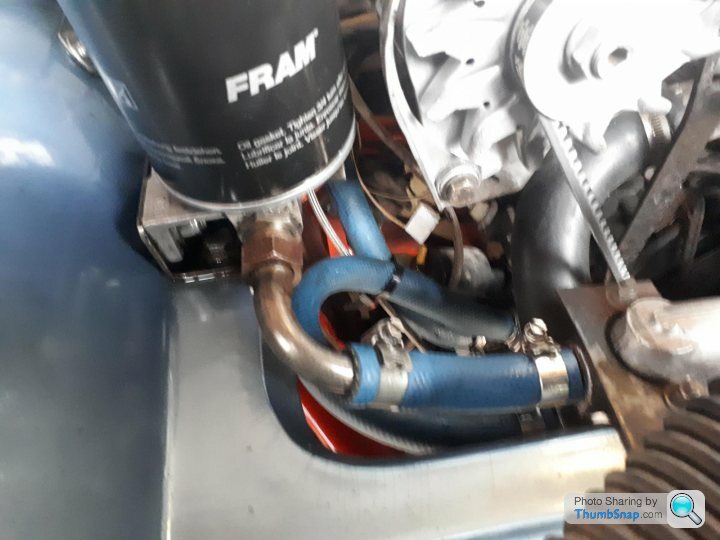
Suspension was the last reported work, and this is now all rebuilt, new brake lines in, system bled and brake pedal nice and firm. The next area of attention was the engine bay which was horrible. Oxidised components, knackered and perished mixture of hoses, and plenty of rust. basically anything in the engine bay I could easily unbolt came off, including all brackets, power steering pump, alternator, plenum etc. I cleaned and painted up all I could, polished up the plenum and all things oxidised. Complete new set of hoses, belts etc. The other issue I had was a large bundle of unused wired tied up near the battery box. After much head scratching Dick dastardlys mate confirmed that the wires were from the redundant factory fitted alarm system. I therefore carefully chased the wires back into the interior, cut, heat shrinked and tidied them up. I also fitted a new oil catcher to replace the original K&N filter rusty tin can. All in all it's much tidier under there now.

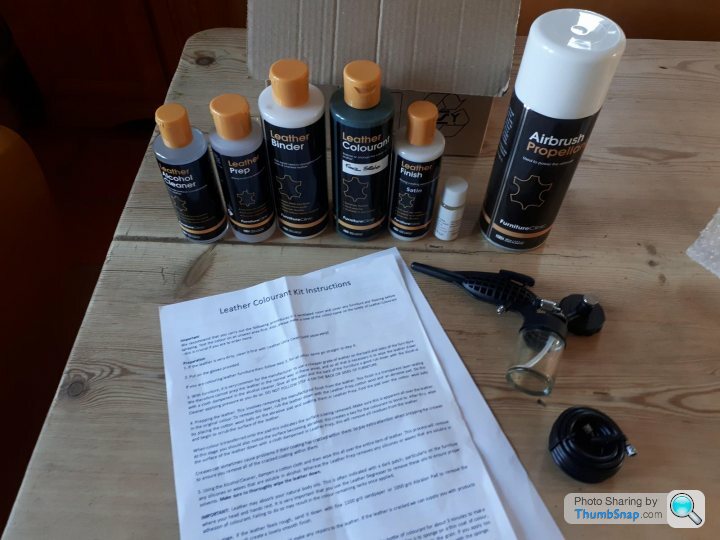
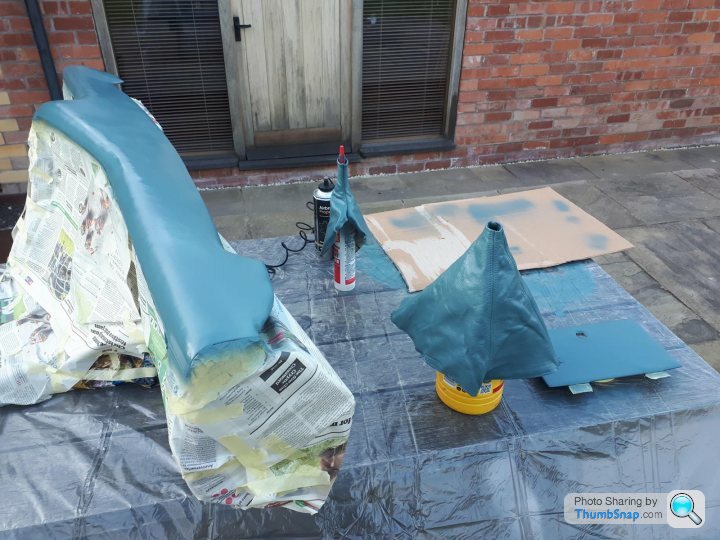
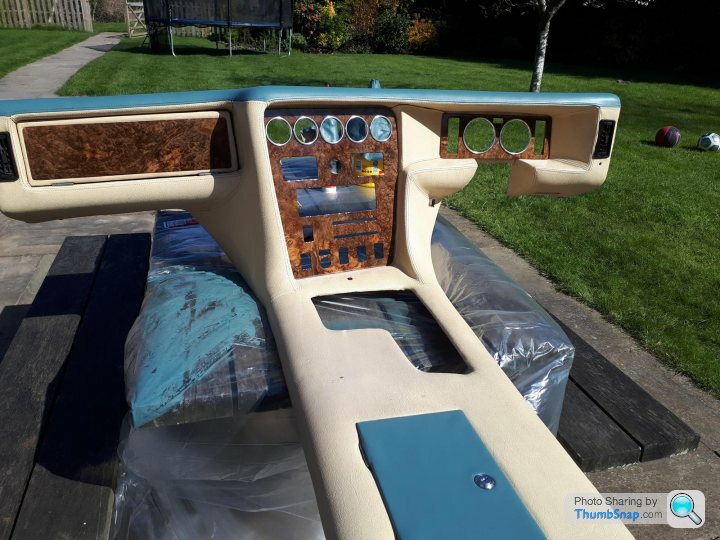
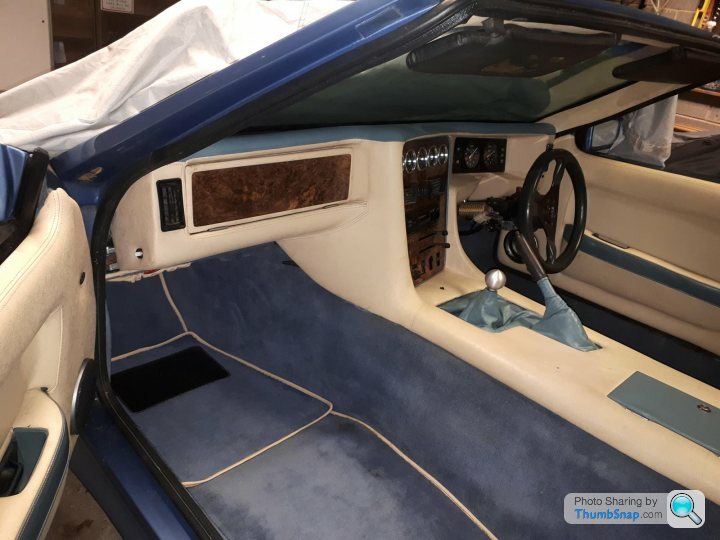
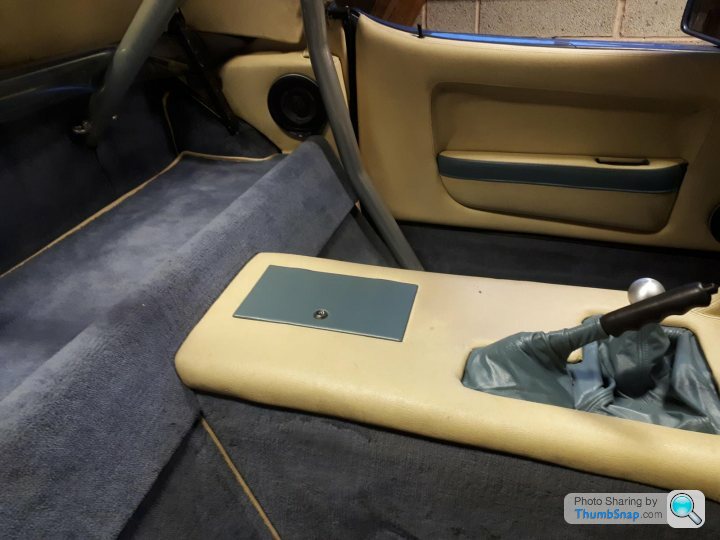
The dashboard was in a sorry state plus there was a miriad of hacked wires behind it. The heater didn't work and the mini disc stereo was of no use, so I decided to take the lot out. That way I could recolour it properly. The dash was a doddle to remove and came out without issue. I was able to snip a small section of blue trim off the back of the dash and sent it to Furniture Clinics who matched it and sent a recolouring kit, including small air brush. As well as the dash top I also recoloured the gaiters and locking cubby hole cover. To say I'm happy with the results would be an understatement.


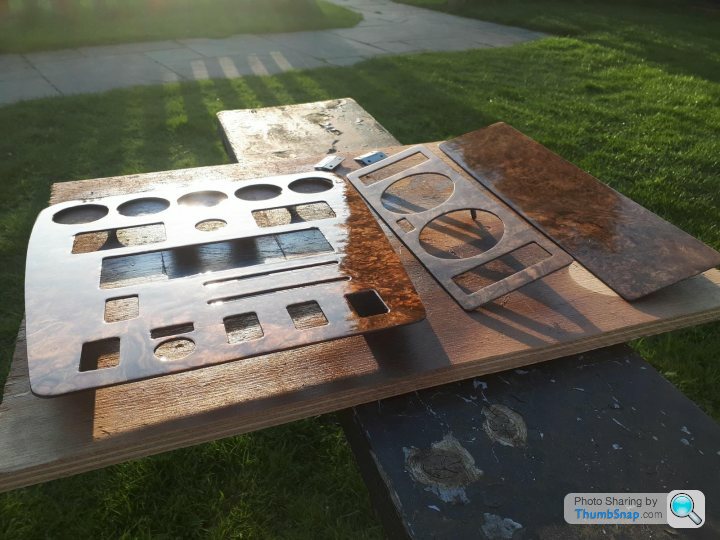
Another job required was to reveneer the dash inserts. The veneers had been badly damaged by the 15 years of damp storage. So for £29 I bought a large sheet of walnut burr, made myself a press using thick ply sheet and loads of bolts and nuts, and also bought a variety of glues. My initial attempt was a disaster. I used the water activated Gorilla glue and when it expanded it covered everything and completely buggered up my press. i then tried Cascamite, but this wasn't strong enough to hold the veneers down, so back to the Gorilla glue but very sparingly and plenty of grease proof paper to stop it sticking the press together. This time it worked well. Several hours with craft knives, fine sand paper and finally 12 coats of lacquer and I'm delighted with the results. With the cost of the glue, lacquer and walnut coming in at less than £50.


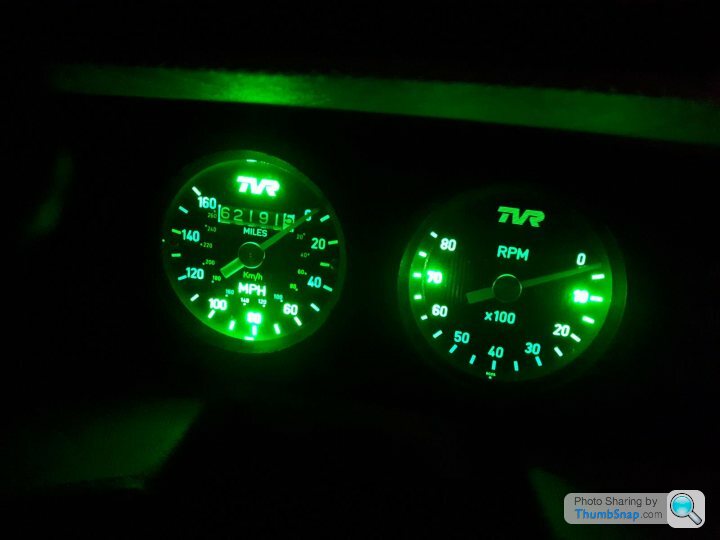
Dashboard was then refitted, the steel gauge/switch back plates stripped and painted, replacement clock sourced as the old one was dead, and time to wire everything back in. I had labelled everything so refit was straight forward and amazingly everything worked as well. I did upgrade all bulbs to LED and the main clocks are now VERY bright at night.
Breakfast calls. I'll continue update later.
Work on the SEAC project has come on in leaps and bounds, helped by our current unfortunate circumstances and virus lock down.
Suspension was the last reported work, and this is now all rebuilt, new brake lines in, system bled and brake pedal nice and firm. The next area of attention was the engine bay which was horrible. Oxidised components, knackered and perished mixture of hoses, and plenty of rust. basically anything in the engine bay I could easily unbolt came off, including all brackets, power steering pump, alternator, plenum etc. I cleaned and painted up all I could, polished up the plenum and all things oxidised. Complete new set of hoses, belts etc. The other issue I had was a large bundle of unused wired tied up near the battery box. After much head scratching Dick dastardlys mate confirmed that the wires were from the redundant factory fitted alarm system. I therefore carefully chased the wires back into the interior, cut, heat shrinked and tidied them up. I also fitted a new oil catcher to replace the original K&N filter rusty tin can. All in all it's much tidier under there now.
The dashboard was in a sorry state plus there was a miriad of hacked wires behind it. The heater didn't work and the mini disc stereo was of no use, so I decided to take the lot out. That way I could recolour it properly. The dash was a doddle to remove and came out without issue. I was able to snip a small section of blue trim off the back of the dash and sent it to Furniture Clinics who matched it and sent a recolouring kit, including small air brush. As well as the dash top I also recoloured the gaiters and locking cubby hole cover. To say I'm happy with the results would be an understatement.
Another job required was to reveneer the dash inserts. The veneers had been badly damaged by the 15 years of damp storage. So for £29 I bought a large sheet of walnut burr, made myself a press using thick ply sheet and loads of bolts and nuts, and also bought a variety of glues. My initial attempt was a disaster. I used the water activated Gorilla glue and when it expanded it covered everything and completely buggered up my press. i then tried Cascamite, but this wasn't strong enough to hold the veneers down, so back to the Gorilla glue but very sparingly and plenty of grease proof paper to stop it sticking the press together. This time it worked well. Several hours with craft knives, fine sand paper and finally 12 coats of lacquer and I'm delighted with the results. With the cost of the glue, lacquer and walnut coming in at less than £50.
Dashboard was then refitted, the steel gauge/switch back plates stripped and painted, replacement clock sourced as the old one was dead, and time to wire everything back in. I had labelled everything so refit was straight forward and amazingly everything worked as well. I did upgrade all bulbs to LED and the main clocks are now VERY bright at night.
Breakfast calls. I'll continue update later.

Hi Adrian, I bought the veneer off ebay, from this supplier. They have many different grains to choose from. Veneer was lovely, with no splits or tears. I have nothing to do with the supplier, and I'm sure there are several alternative suppliers also.
https://www.ebay.co.uk/itm/REAL-WOOD-VENEER-4X-LON...
Lacquer wise, after much google searching I went for just normal aerosol auto lacquer. I gave it several coats, then 1200 wet and dry to flatted it and then many more coats. Cheers.
https://www.ebay.co.uk/itm/REAL-WOOD-VENEER-4X-LON...
Lacquer wise, after much google searching I went for just normal aerosol auto lacquer. I gave it several coats, then 1200 wet and dry to flatted it and then many more coats. Cheers.
Right, last update before I head down to the garage for some seat rail modifications....
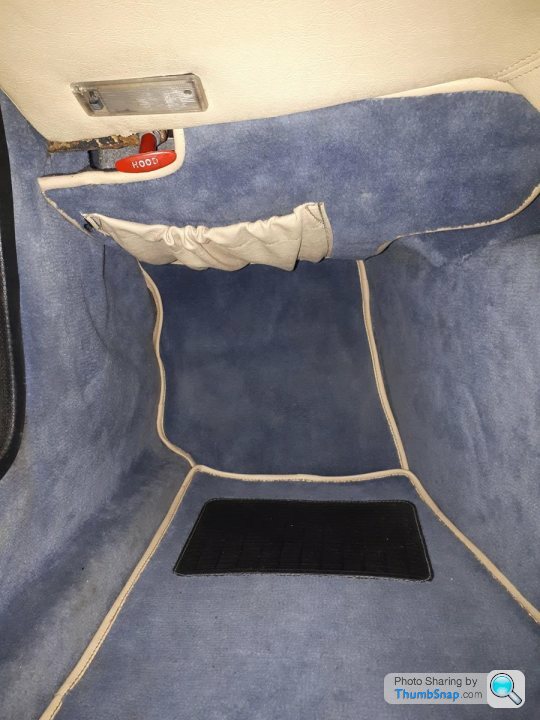
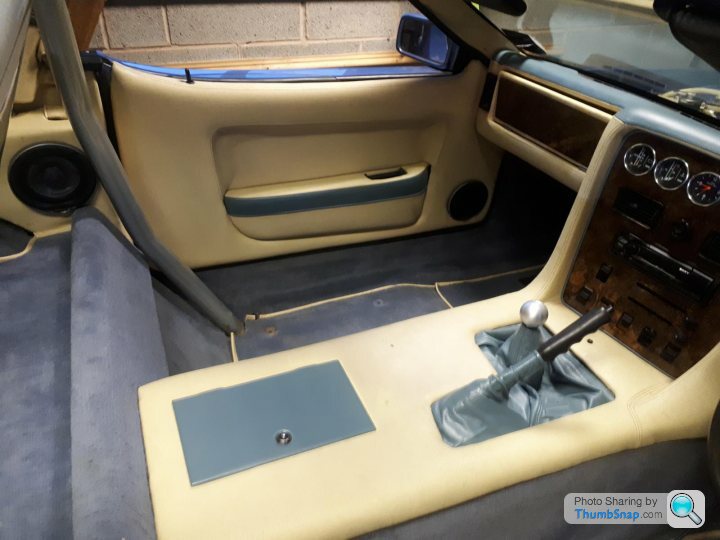
Last few jobs over this last week have been cleaning and refitting the interior trim and cleaning all the carpets.
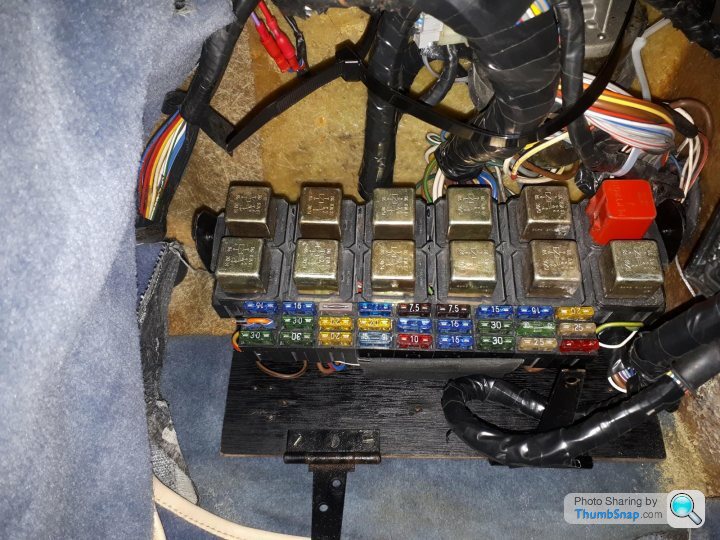
Before all the trim could go back in I wanted to make a better securing catch for the relay board, which was just loosely stuffed under the dash. I tried a few options, which weren't ideal, until I knocked up a couple of sprung stainless clips as photo. The clips hold the relay board 50mm off the original superbly designed bit of ply and gate hinges, but also clip over the top of the relay board with a 5mm overlap. That way if I want to release the relay/fuse board i just pop the tabs on each catch and off it comes.
I stripped the old ECU flap, fitted new hardboard, retrimmed it and refitted. it's the first Wedge I've had that doesn't now need a cable tie or self tapper to hold the flap in place.
 [url]
[url]
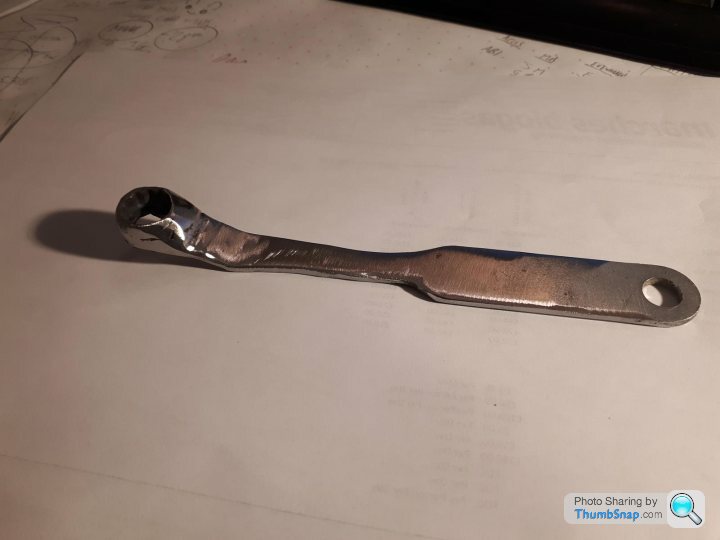
Time to refit the cleaned trim panels. All went in fine apart from when I tried to fit the door card to the drivers door. Giving it a little brute force, the door dropped 1" on its hinges. It appeared that the hinge plate wasn't tight. The problem was I could bnt get at the top inner nyloc with my usual range of spanners, so resorted in butchering an old 13mm spanner and welding up a suitable cranked tool that fits perfectly. Trim and carpets all fitted and looking pretty good.
Last few jobs this weekend. My new speedo cable arrived from Speedy cables. They turned around a new cable in less than 2 weeks from posting the old one off, to receiving the new cable. Well impressed. So cable fitted, new oil hoses to remote and oil cooler stat fitted, engine oil and filter change and also changed the gearbox oil, even though it looked like new. It took exactly 2 litres. I ran the car up after the oil changes and let it idel for an hour to double check for leaks, over heating etc. All behaved with the rad fan kicking in nicely as required.
Well the SEAC is now ready for an MOT, however with the current lockdown my preferred local garage is closed so I'll keep fettling for the time being. One job is to modify the seat rails. Due to the roll bar mounts, the rear outer seat bolt was stuck under the chassis mount and is a pain to get at so I'm going to weld a small extension to the seat rail, to move the bolt location away from it's current position by 2". Nearly there.... Cheers.
Last few jobs over this last week have been cleaning and refitting the interior trim and cleaning all the carpets.
Before all the trim could go back in I wanted to make a better securing catch for the relay board, which was just loosely stuffed under the dash. I tried a few options, which weren't ideal, until I knocked up a couple of sprung stainless clips as photo. The clips hold the relay board 50mm off the original superbly designed bit of ply and gate hinges, but also clip over the top of the relay board with a 5mm overlap. That way if I want to release the relay/fuse board i just pop the tabs on each catch and off it comes.
I stripped the old ECU flap, fitted new hardboard, retrimmed it and refitted. it's the first Wedge I've had that doesn't now need a cable tie or self tapper to hold the flap in place.
[url]Time to refit the cleaned trim panels. All went in fine apart from when I tried to fit the door card to the drivers door. Giving it a little brute force, the door dropped 1" on its hinges. It appeared that the hinge plate wasn't tight. The problem was I could bnt get at the top inner nyloc with my usual range of spanners, so resorted in butchering an old 13mm spanner and welding up a suitable cranked tool that fits perfectly. Trim and carpets all fitted and looking pretty good.
Last few jobs this weekend. My new speedo cable arrived from Speedy cables. They turned around a new cable in less than 2 weeks from posting the old one off, to receiving the new cable. Well impressed. So cable fitted, new oil hoses to remote and oil cooler stat fitted, engine oil and filter change and also changed the gearbox oil, even though it looked like new. It took exactly 2 litres. I ran the car up after the oil changes and let it idel for an hour to double check for leaks, over heating etc. All behaved with the rad fan kicking in nicely as required.
Well the SEAC is now ready for an MOT, however with the current lockdown my preferred local garage is closed so I'll keep fettling for the time being. One job is to modify the seat rails. Due to the roll bar mounts, the rear outer seat bolt was stuck under the chassis mount and is a pain to get at so I'm going to weld a small extension to the seat rail, to move the bolt location away from it's current position by 2". Nearly there.... Cheers.
Gassing Station | Wedges | Top of Page | What's New | My Stuff