What's happening in your garage this weekend ?
Discussion


Try copper gaskets and white assembly paste.
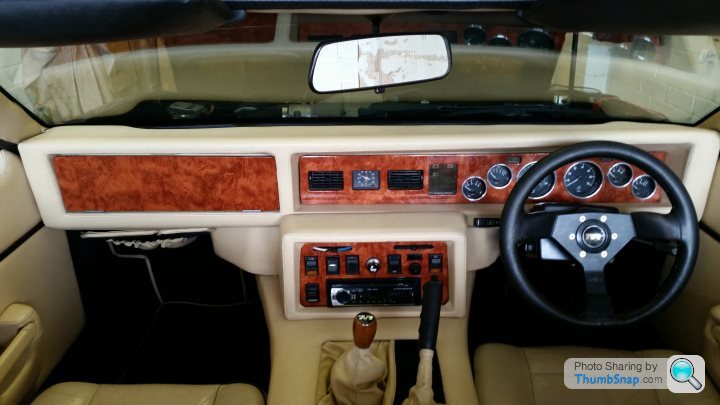
For my part I have started pulling the interior apart to upgrade to full leather, and I have a buyer for the old centre console lined up. Going OK apart from some d head decide to splice wires to both sides of the instrument panel harness (where it plugs together) so it doesn't unplug any more. I suspect the alarm installer.
Some side-projects on the go: already repaired the heater switch so hopefully that should be good for a few 10k miles.
Also having ago at the VDO/Motometer clock that hasn't worked for 10+ years. More about that on another thread.
For my part I have started pulling the interior apart to upgrade to full leather, and I have a buyer for the old centre console lined up. Going OK apart from some d
head decide to splice wires to both sides of the instrument panel harness (where it plugs together) so it doesn't unplug any more. I suspect the alarm installer.Some side-projects on the go: already repaired the heater switch so hopefully that should be good for a few 10k miles.
Also having ago at the VDO/Motometer clock that hasn't worked for 10+ years. More about that on another thread.
I have some experience of specialist exhausts on my SEAC.
If you suspect one of the branches to be harder to tighten than the others then my first suggestion would be to remove the rest of the system (unbolt so its not touching) as this will make it easier.
Next loosely mount each header with gaskets, I have found the bolts at bottom rear need to be screwed in about 3/4 way even before all other bolts can be attached. Then I tighten the hardest bolts next, then tighten in branch pairs.
Good luck.
rev-erend said:
I have some experience of specialist exhausts on my SEAC.
If you suspect one of the branches to be harder to tighten than the others then my first suggestion would be to remove the rest of the system (unbolt so its not touching) as this will make it easier.
Next loosely mount each header with gaskets, I have found the bolts at bottom rear need to be screwed in about 3/4 way even before all other bolts can be attached. Then I tighten the hardest bolts next, then tighten in branch pairs.
Good luck.
Thanks for that. I had undone the connection to the main exhaust. To be honest I don't think I pulled the bolts up evenly. It was such a contorted pain in the arse to get at the bottom bolts that I probably pulled them tight too soon without evenly matching the top bolt pressure. I've big hands and had to even disconnect the starter motor to have a chance of getting anywhere near the bottom bolts. New big bore gaskets ordered as ones I tried to fit definitely had a slightly reduced bore compared to the highly ported head and manifold on my John Eales engine. Another 6 hours of ripped knuckles to look forward to at the weekend.If you suspect one of the branches to be harder to tighten than the others then my first suggestion would be to remove the rest of the system (unbolt so its not touching) as this will make it easier.
Next loosely mount each header with gaskets, I have found the bolts at bottom rear need to be screwed in about 3/4 way even before all other bolts can be attached. Then I tighten the hardest bolts next, then tighten in branch pairs.
Good luck.
Many years ago I used stainless steel cap screws for securing the exhaust manifold. Allen keys were cut to different lengths and used with a suitable socket, or ratchet ring spanner. This allowed all bolts to be tightened from above. IIRC three different length pieces of Allen key did the job. (One bit may have been ball ended)
This is on a 400SE with stainless manifolds from RT Racing. Gaskets were wire reinforced jointing from Richard.
This has been satisfactory for many thousands of miles.
Car is currently garaged away from home, but if you need more info about this arrangement I can go and get sizes, take a few photos etc for you.
Best regards
Hamish
... or that what I assumed it would be, turns out it's the offside rear wheel bearing was a bit slack.
Have repacked it with grease and reassembled, but usually with these they rarely last more than a thousand miles if they are too worn, so I had better find a garage with a press to do this side, as my last friendly garage has shut down.
Took a quick spin up to the rugby club and it's nice and quiet, and wheel no longer wobbly, so that's good.
Edited by adam quantrill on Saturday 9th February 21:26
adam quantrill said:
... or that what I assumed it would be, turns out it's the offside rear wheel bearing was a bit slack.
Have repacked it with grease and reassembled, but usually with these they rarely last more than a thousand miles if they are too worn, so I had better find a garage with a press to do this side, as my last friendly garage has shut down.
Took a quick spin up to the rugby club and it's nice and quiet, and wheel no longer wobbly, so that's good.
Hi AdamHave repacked it with grease and reassembled, but usually with these they rarely last more than a thousand miles if they are too worn, so I had better find a garage with a press to do this side, as my last friendly garage has shut down.
Took a quick spin up to the rugby club and it's nice and quiet, and wheel no longer wobbly, so that's good.
Edited by adam quantrill on Saturday 9th February 21:26
I have a press which I am more than happy for you to use, it is great for changing rear hub bearings on.
Andy
Well my wheel bearing is still holding up for now.
Today I was under the car to check for an oil leak, but it's not obvious exactly where it's coming out. I did check the gearbox oil and that seems a little lower maybe, but still plenty in there.
The engine oil has dropped slightly but only commensurate with general consumption. But I think it's engine oil coming out, albeit slowly.
I also greased the rear bearing on the blower with the special Staraburgs or whatever grease, at 89,500 miles it was probably time for that job.

Hi Ron
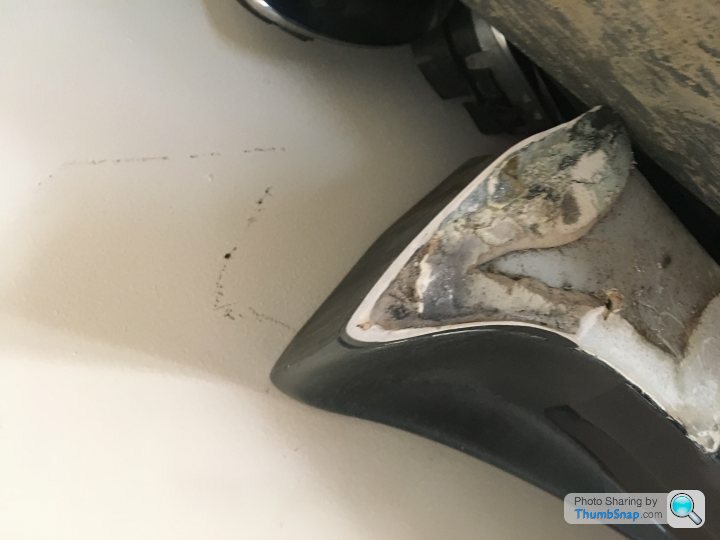
Thats a relief...get some rust treatment and paint on them.happy days ..Poppy has lived in the street for many years and im still convinced that's not a bad thing...now she is in a garage I have noticed condensation as she cools down...look at this...looks worrying doesn't it...

Gonna put some water absorbing crystals in there...
Thats a relief...get some rust treatment and paint on them.happy days
..Poppy has lived in the street for many years and im still convinced that's not a bad thing...now she is in a garage I have noticed condensation as she cools down...look at this...looks worrying doesn't it...Gonna put some water absorbing crystals in there...
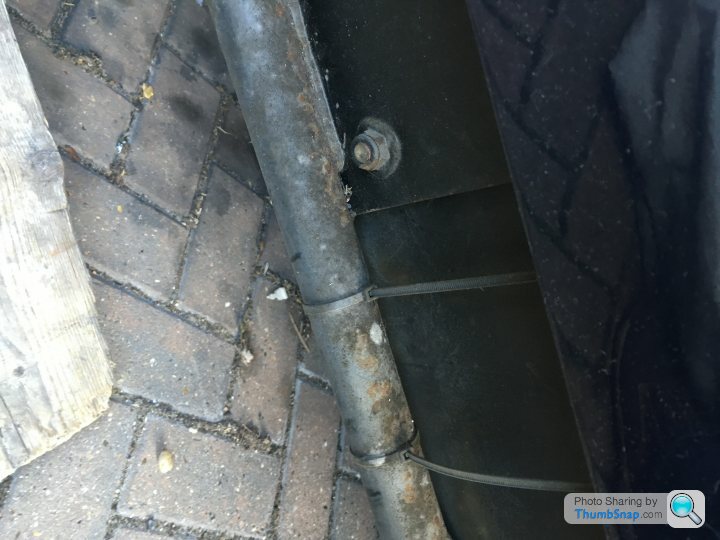
Just gave the suspension bolts a nudge to make sure they move before impending removal - looks like the penetrating juice has done the job.
That vinyl - what dimentions is it supplied in? I am thinking it would be a good one for the door strips assuming you can get wide enough sections?
That vinyl - what dimentions is it supplied in? I am thinking it would be a good one for the door strips assuming you can get wide enough sections?
adam quantrill said:
That vinyl - what dimentions is it supplied in? I am thinking it would be a good one for the door strips assuming you can get wide enough sections?
It comes in a variety of sizes. I bought 122 x 30cm, which was enough to do the above (plus some spare). You can get it on ebay - search for "3M DI-NOC wood grain". It's a Polish seller called "carbodydesign_eu"Gassing Station | Wedges | Top of Page | What's New | My Stuff