My new Toy's on it's way!
Discussion


Hi
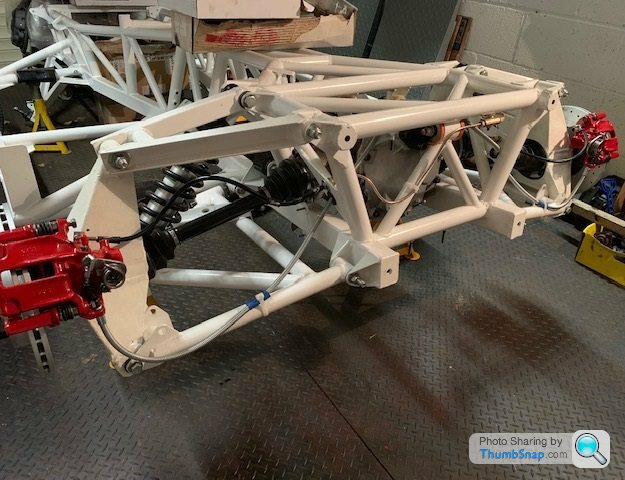
Another quick (promise!) update. I have now cleaned,iced sealed, painted and mostly fitted the diff.
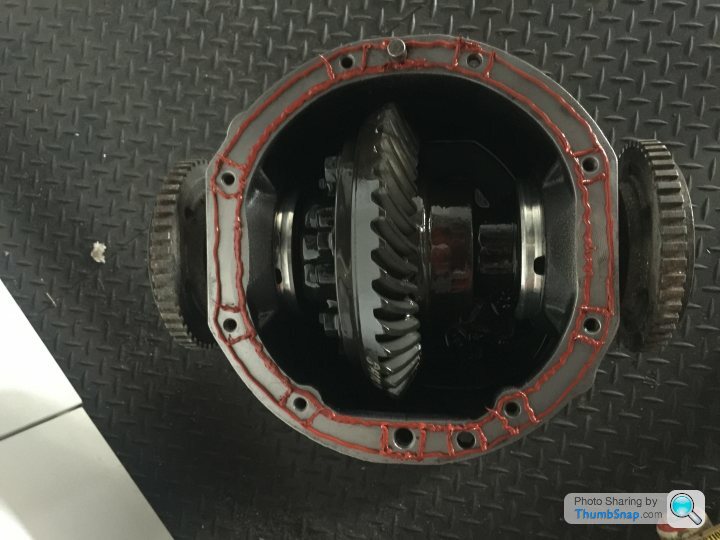
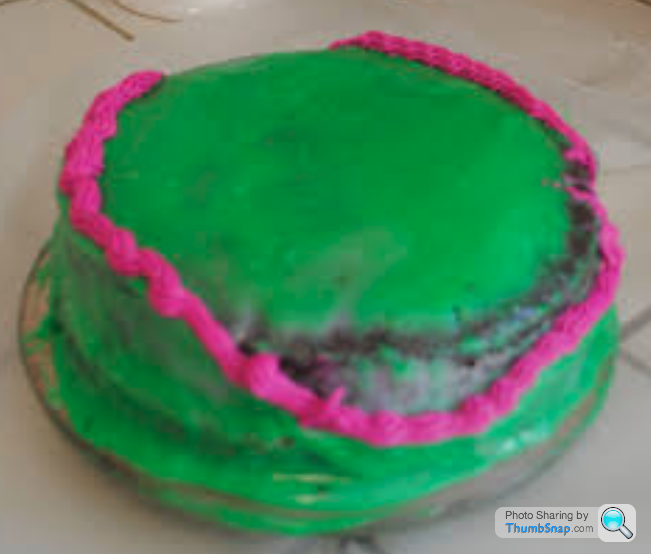
I think my new-found skills should transfer seamlessly to home-baking...
Anyroad, after the obligatory hefting, twisting, turning and swearing, the diff is now more or less in place. I say more or less as I've not got all the bolts in yet as I ran out of time. Or rather, my wife ran me out of time...
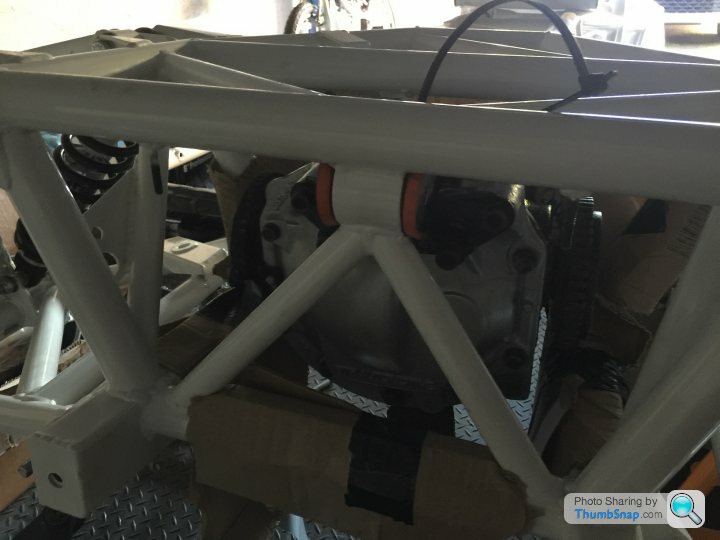
Whatever the garages charge for doing this whilst the body is on is not enough. It isn't a task I'd relish, so pat yourselves on the back, those that have done it.
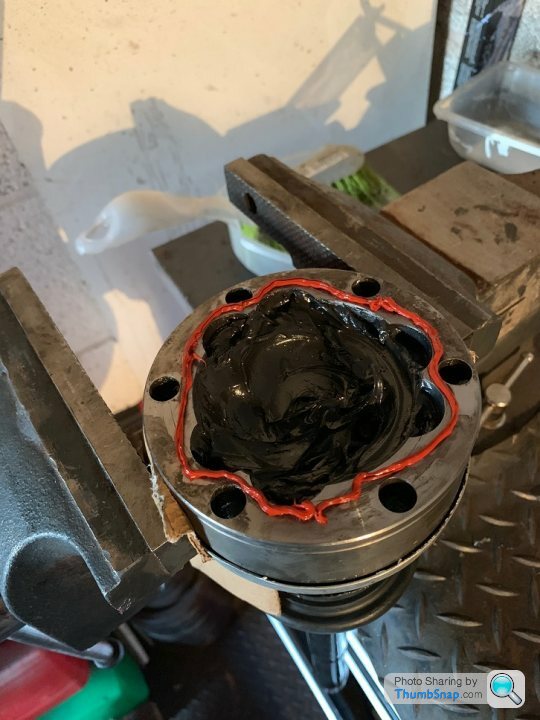
I have now turned my attention to completing the hub reassembly, which has been on the back-burner for a while. Now made possible thanks to my latest purchase:

So getting there bit by bit. Once the carriers are back on, I'll turn my attention to cleaning up the drive shafts and then rebuilding the rear calipers.
Told you it'd be a quick one.
Laters.
Another quick (promise!) update. I have now cleaned,
I think my new-found skills should transfer seamlessly to home-baking...
Anyroad, after the obligatory hefting, twisting, turning and swearing, the diff is now more or less in place. I say more or less as I've not got all the bolts in yet as I ran out of time. Or rather, my wife ran me out of time...
Whatever the garages charge for doing this whilst the body is on is not enough. It isn't a task I'd relish, so pat yourselves on the back, those that have done it.
I have now turned my attention to completing the hub reassembly, which has been on the back-burner for a while. Now made possible thanks to my latest purchase:
So getting there bit by bit. Once the carriers are back on, I'll turn my attention to cleaning up the drive shafts and then rebuilding the rear calipers.
Told you it'd be a quick one.
Laters.
LeeHodges said:
BIG DUNC said:
Nice one Lee. You are making progress.
It sounds as though you have had more issues with your new chassis than I did using my existing one.
Since the MOT in June mine has done just over 400 miles. There have been a few issues in that time, mostly annoying rather than major.
We take it on holiday this week, to France, so that will be its first real test.
Hi DuncanIt sounds as though you have had more issues with your new chassis than I did using my existing one.
Since the MOT in June mine has done just over 400 miles. There have been a few issues in that time, mostly annoying rather than major.
We take it on holiday this week, to France, so that will be its first real test.
Yes, progress of sorts. I am learning to adjust my expectations; instead of assuming I'm going to get into the garage and achieve x, y and z on a given day, I just hope to get some time and am pleasently surprised that A) I got in there and B) I got x done!
I was going to ask you if you were set for France; I can't imagine being in the position for such an exciting trip in the TVR. Have a great time and report back!
Glad to hear you are still at it.
France was EPIC
4 Griifs (inc me)
2 Chims
2 Tuscans
1 Ford Mustang
1 Ferrari F355
1 Daimler Dart
1 BMW M5
We were a quiet bunch, officer.....
700 ish miles and 4 days of just having a laugh with some really good friends. My car even escaped reliability issues, although I did raise the suspension a tad before loading it up for the return trip with duty free.
Anyway, back to topic, stick at yours. When the suspension is finally finished it isn’t that much work to put the engine and drive chain back and then the bottom half is done.
BIG DUNC said:
My, what a nice press you have there!!
Glad to hear you are still at it.
France was EPIC
4 Griifs (inc me)
2 Chims
2 Tuscans
1 Ford Mustang
1 Ferrari F355
1 Daimler Dart
1 BMW M5
We were a quiet bunch, officer.....
700 ish miles and 4 days of just having a laugh with some really good friends. My car even escaped reliability issues, although I did raise the suspension a tad before loading it up for the return trip with duty free.
Anyway, back to topic, stick at yours.
Hi Duncan - I was going to drop you an email to see how things went. I'll do that. Sounds like a great time; I've got road-trip envy!Glad to hear you are still at it.
France was EPIC
4 Griifs (inc me)
2 Chims
2 Tuscans
1 Ford Mustang
1 Ferrari F355
1 Daimler Dart
1 BMW M5
We were a quiet bunch, officer.....
700 ish miles and 4 days of just having a laugh with some really good friends. My car even escaped reliability issues, although I did raise the suspension a tad before loading it up for the return trip with duty free.
Anyway, back to topic, stick at yours.
The press has, so far, worked a treat. Long may that continue!
BIG DUNC said:
When the suspension is finally finished it isn’t that much work to put the engine and drive chain back and then the bottom half is done.
I wish I shared your confidence - you forget that I don't know what the hell I'm doing half the time! 
Really, the suspension gave me a lot more grief than fitting the engine, gearbox and diff.
Then you will have a chassis just waiting for the body to be dropped on. Suddenly it will feel like you are on the home straight.
Back in Feb I had a chassis with half the suspension on and I was wondering whether it would ever be finished. The body went on at Easter......
Then you will have a chassis just waiting for the body to be dropped on. Suddenly it will feel like you are on the home straight.
Back in Feb I had a chassis with half the suspension on and I was wondering whether it would ever be finished. The body went on at Easter......
I know it's been a while since I updated this thread, I must need a new gasket on my Time sump because it seems to be leaking out all over the place. It's ironic that I dropped my work down to three days per week from five, but this made things worse as I keep thinking "I won't go into the garage after work today because I've got a couple of days to catch up" but then find myself very busy on those two days, the net result being that I'm behind from where I want to be. Oh well.
So, I think I had semi-located my diff back into the chassis and was looking at the rear hubs and brakes. Well I've managed to get all the bolts back into the diff brackets, using liberal amounts of swearing to get things in place. That worked well, although I may have shocked anyone passing within 50 yards of my garage...
Next I turned my attention to the driveshafts, which I stripped down and cleaned before painting, re-greasing and replacing the boots.
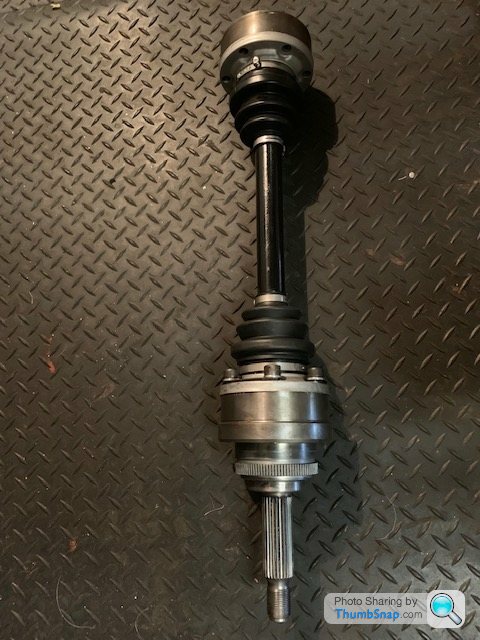
As a tip for anyone doing this, if you put the boot clip on before you fit the shaft to the car make sure that you don't block a bolt hole with the clip tightener like I did. Of course, attempts to slide the clip around failed and I had to replace it. Dang it.
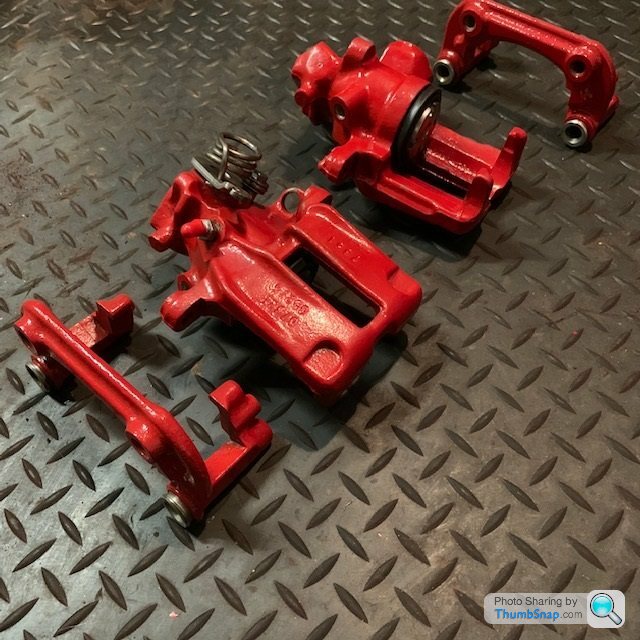
With the shafts back in, it was time to get the hubs back on and turn my attention to the scabby brakes. In my attempt to stop the project turning into a Trigger's Broom, I wanted to overhaul the calipers rather than buy some already done.
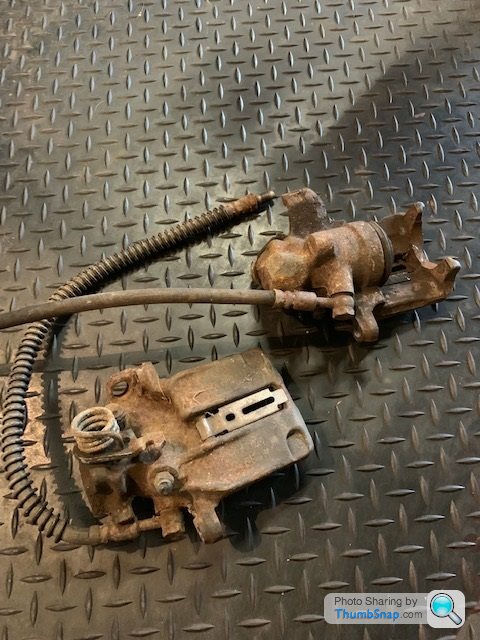

Thinking it was best to have a 'referal' unit, I stripped and repaired them one at a time. My various wire brushes earned their keep on this sub-project.
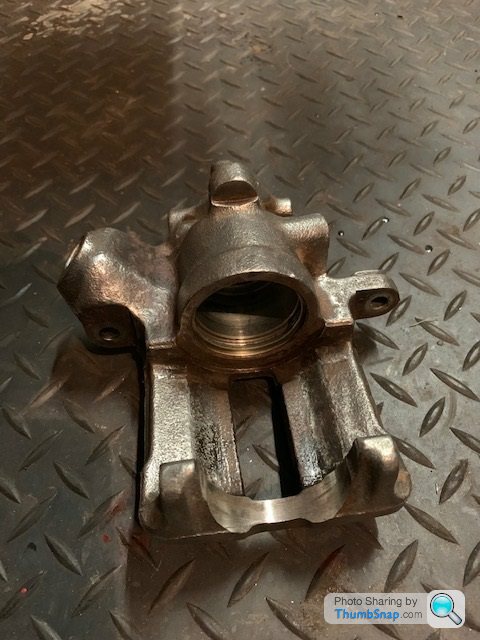
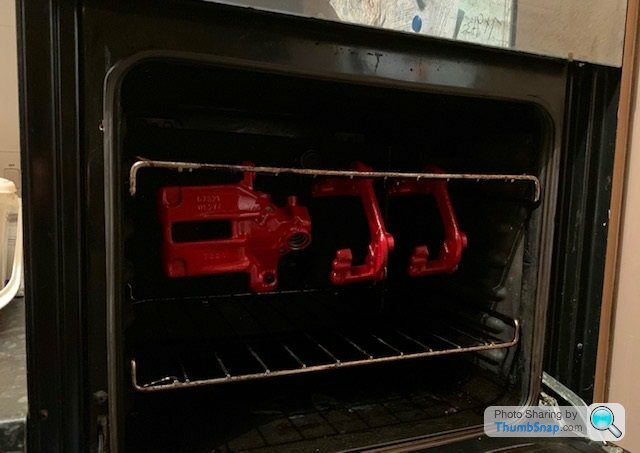
Once they were cleaned up, I then sprayed them with UHT paint and popped them into the oven like a rack of lamb. I'm sure my wife would've preferred me to have cleaned it instead of cooking my car in it.

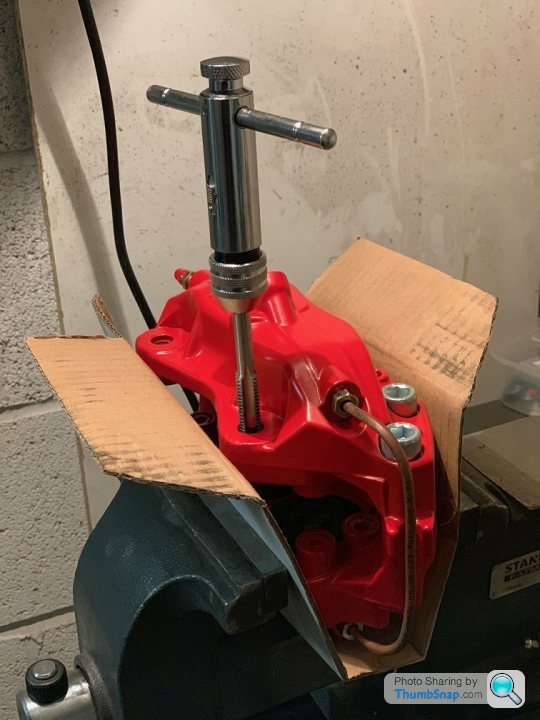
Next was the rebuild, using the Big Red kit, which is very good. Another top (?) tip for those that are doing this, on the first caliper I added the boot seal to the top of the piston, added the piston to the caliper, turned it all the way in and then struggled to get the lower lip of the boot into the recess in the caliper bore. With the next one, I added the boot to the piston, slid it all the way to the bottom of the piston until it extended past the bottom, with the piston held in my hand over the caliper bore, I fixed the lower lip of the boot into the groove in the bore and then carefully located and twisted in the piston in. That worked a treat.
Compressing the spring to fit the circlip; press coming in usefull:

Top tip: don't struggle like a tw@t for hours with straight-nosed circlip pliers for this job like I did as they just are not up to it. Do yourself a favor and buy 90 degree pliers. Seconds later, job done. Both frustrating and satisfying at the same time.
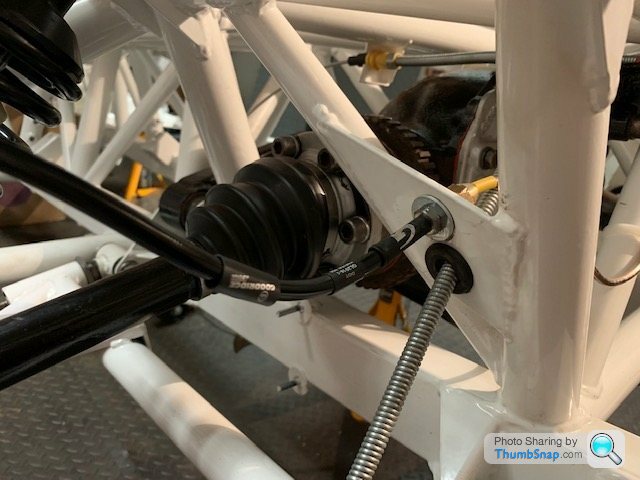
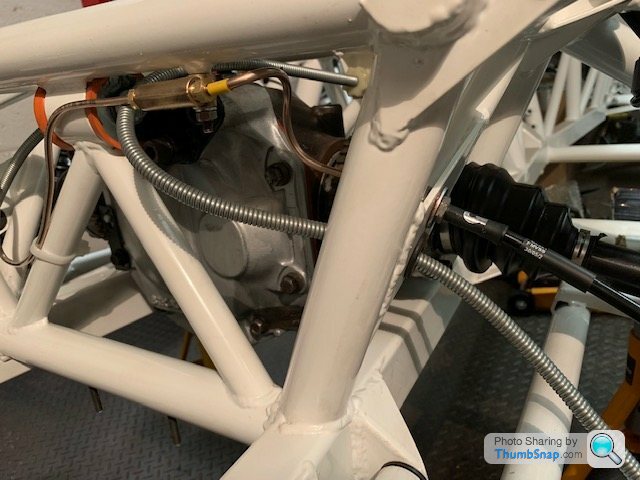
With the brakes done, I could get them onto the car and look at fitting the brake pipes and cables. I had kept the entire pipe arrangement from the car on stripdown but had ordered new pipes. I thought that I would reuse the splitter arrangement, so took that lot apart. However, when I attempted to remove the male-to-male coupler out of the bias valve, it stripped out the threads in the female part of the valve. "No problem", I thought. "I'll just order a new one." Then I checked the price...


However, the back end is now looking a bit more complete than it has been.
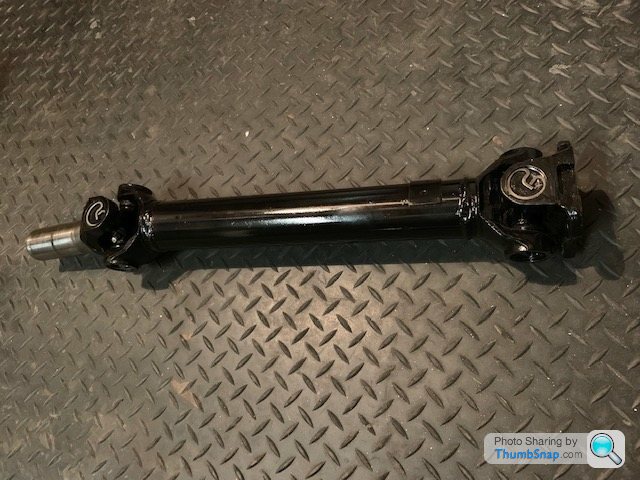
With the brakes more or less completed, I turned my attention to the prop-shaft, which has seen better days. This was cleaned up, prepped and painted.
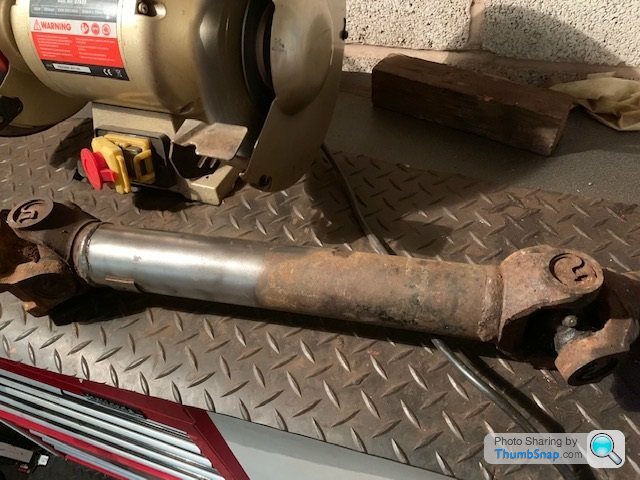
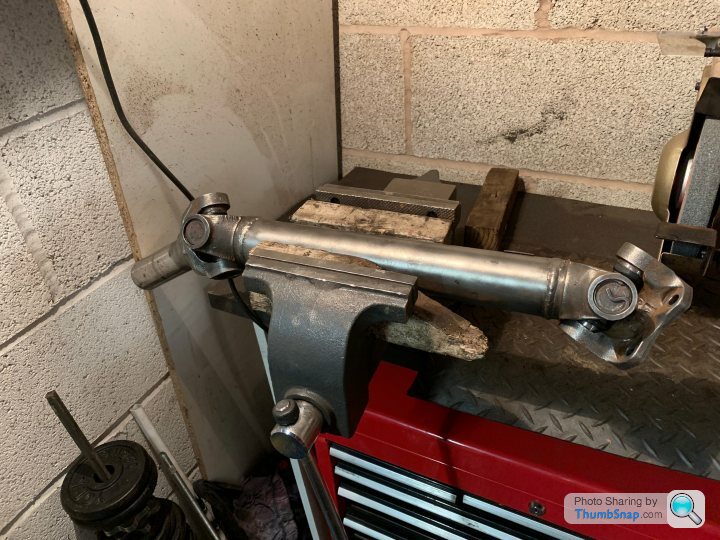
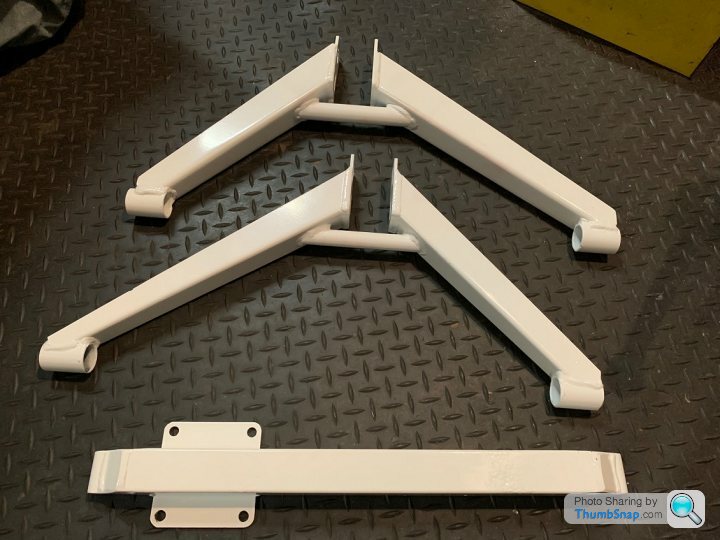
That's pretty much where I'm up to right now. Of the chassis and wishbones on the original car, only the top front wishbones were ok; I have cleaned them up and tried to paint them to look inkeeping with the rest of the chassis but I haven't got them good enough. I have sent them down to a local powder coater to be professionally done, along with the cross member.
Better let you go - have a great Christmas and New Year, folks!
Edited by LeeHodges on Friday 11th January 17:04


Hi Lee,
Thanks for the update.
If it makes you feel better then I had a lot of similar issues. I got the whole family involved in wire brushing and painting calipers, although my wife did draw the line at baking them.
I agree with your comments on the diff. It was such an epic fitting the diff to a naked chassis I have full respect to those who can do it with a body on.
My Griff has now done 1,500 miles since the rebuild and MOT in May. I know you have body paint and trim to sort, which I didn’t , but you are getting close and it will be worth it in the end.
I have spent the day removing (well, not finished yet) the shot turbo from my wife’s daily driver. Obviously it would be rude not to fit a larger one, but I seem to have set myself a tough challenge this Christmas. There were a couple of moments today when I regretted starting....
If you get to continue work over Christmas then do keep us updated.
Hi Duncan!
Sorry, I meant to catch up with you to see how your turbo fitting went but I don’t seem to be able to catch my breath lately. I hope to get some time in the garage over Christmas; now that I have the correct nuts AND bolts for the diff (don’t ask) then that should get bolted in and I will then turn my attention to the front suspension. It’ll be a bit restrictive until the top wishbones come back from powder coating but I should be able to get the hubs, suspension and brake upgrade in (engage “Wishfull Thinking” mode).

Sorry, I meant to catch up with you to see how your turbo fitting went but I don’t seem to be able to catch my breath lately. I hope to get some time in the garage over Christmas; now that I have the correct nuts AND bolts for the diff (don’t ask) then that should get bolted in and I will then turn my attention to the front suspension. It’ll be a bit restrictive until the top wishbones come back from powder coating but I should be able to get the hubs, suspension and brake upgrade in (engage “Wishfull Thinking” mode).
Happy New Year, all!
I did actually manage to get a little bit of time in the garage over Christmas, which was not expected but very gratefully received! Having done the majority of the rear end suspension setup, I have moved to the front. The two top wishbones ended up being the only parts of the structural chassis that was kept as they had been done at some point. I had previously cleaned them up, removed the old bushes and refitted new ones before painting them with white POR15.
However, given that the rest was new and powder coated, I wasn't happy with the results. I repainted them but was still not happy (I hate being a perfectionist!). So I then found a company just around the corner that said they'd powder coat them for £60. This meant removing the new bushes (which was a bit of a pain and wrecked them), before sending them off. I took the opportunity to get the chassis cross member done also. They were finished just after New Year and only cost £40! Result. I picked them up and refitted new bushes again.
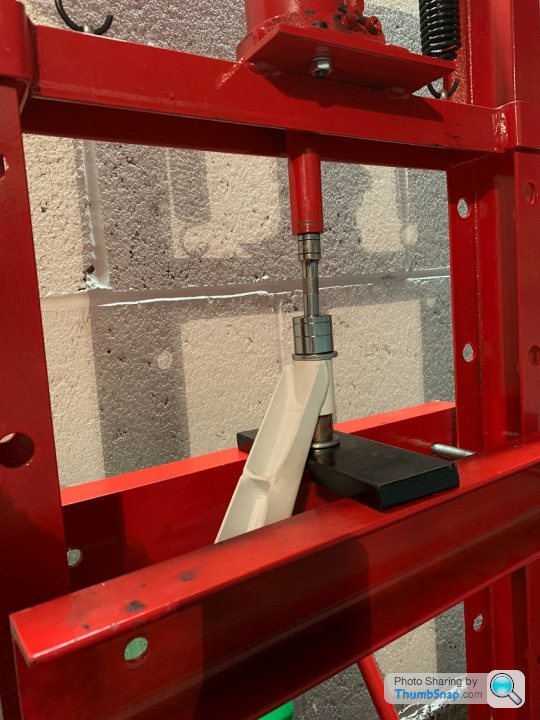
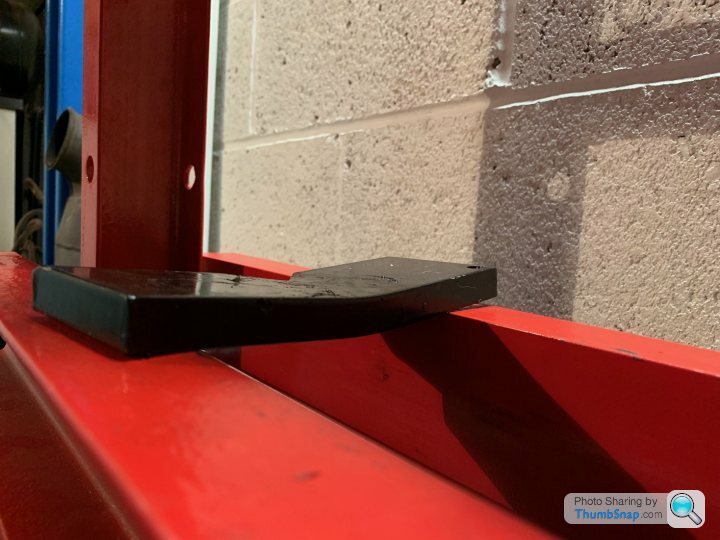
As before, I started them off in the vice but one just didn't want to go in more than around half way. As the wishbones are an odd shape for the press, I had to 'tweak' the setup of it to get the wishbone in. I should mention that this is highly unlikely to impress the people that manufactured it and would definitely invalidate the warranty (and maybe my life) if things went awry! Even with the press, it took all it had before it finally went all the way in. In fact, it took so much pressure that it bent the very thick and heavy cross plates!

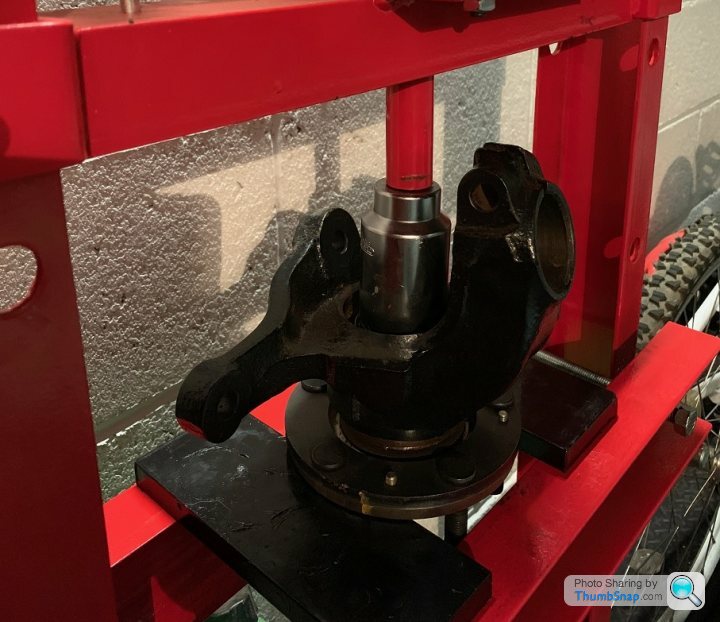
Once they were all bushed up, I moved back to the front uprights. I had replaced the bearings on these previously but had a similar issue where pushing the hubs back into the upright with the vice had only got them half way in. I ended up having to use the press to remove and reseat the hubs before they would push in correctly.
Pushing off the bearing, which was not seated straight:

Pushing the bearing on straight this time!

Pushing the hub into the carrier:
I think it's safe to say that the press has earned its cost back!
With the hubs back in, I then needed to use my latest toy to 'nip' them up to 300nm - I had to stick a block of wood between the side of the vice and the wall to stop it twisting on its ajusters!

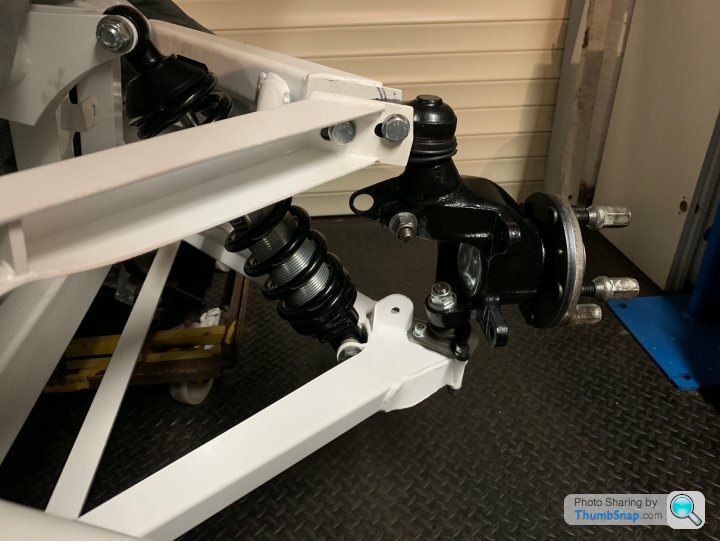
When done, it was reassembly time. Those top ball joint spacers were a tight fit, I have to say!
I've got to finish off the other side now, which is mostly there, before I look at fitting the new front disks, calipers, pipes and hoses.
Who knows, it may even be rolling before the end of the month! (no promises, however).
I did actually manage to get a little bit of time in the garage over Christmas, which was not expected but very gratefully received! Having done the majority of the rear end suspension setup, I have moved to the front. The two top wishbones ended up being the only parts of the structural chassis that was kept as they had been done at some point. I had previously cleaned them up, removed the old bushes and refitted new ones before painting them with white POR15.
However, given that the rest was new and powder coated, I wasn't happy with the results. I repainted them but was still not happy (I hate being a perfectionist!). So I then found a company just around the corner that said they'd powder coat them for £60. This meant removing the new bushes (which was a bit of a pain and wrecked them), before sending them off. I took the opportunity to get the chassis cross member done also. They were finished just after New Year and only cost £40! Result. I picked them up and refitted new bushes again.
As before, I started them off in the vice but one just didn't want to go in more than around half way. As the wishbones are an odd shape for the press, I had to 'tweak' the setup of it to get the wishbone in. I should mention that this is highly unlikely to impress the people that manufactured it and would definitely invalidate the warranty (and maybe my life) if things went awry! Even with the press, it took all it had before it finally went all the way in. In fact, it took so much pressure that it bent the very thick and heavy cross plates!
Once they were all bushed up, I moved back to the front uprights. I had replaced the bearings on these previously but had a similar issue where pushing the hubs back into the upright with the vice had only got them half way in. I ended up having to use the press to remove and reseat the hubs before they would push in correctly.
Pushing off the bearing, which was not seated straight:
Pushing the bearing on straight this time!
Pushing the hub into the carrier:
I think it's safe to say that the press has earned its cost back!
With the hubs back in, I then needed to use my latest toy to 'nip' them up to 300nm - I had to stick a block of wood between the side of the vice and the wall to stop it twisting on its ajusters!
When done, it was reassembly time. Those top ball joint spacers were a tight fit, I have to say!
I've got to finish off the other side now, which is mostly there, before I look at fitting the new front disks, calipers, pipes and hoses.
Who knows, it may even be rolling before the end of the month! (no promises, however).
Well Done Lee.
You are getting there. I think suspension bushes was one of the hardest parts of mine.
I really do have press envy. Your photos are pretty similar to how my bushes went in, courtesy of a friend who works in a garage.
So, front and rear suspension sorted. Are you now onto engine / gearbox / diff / drive shafts steering rack?
What is the plan for the body?
Are you putting the body on and then getting it sprayed and sorting the trim, or are you sorting the body before reuniting it with the chassis?
Is the engine back from Powers yet?
Keep the updates coming.
For the record, I didn’t quite finish the turbo project over Christmas, but it’s close.
Hi Duncan!
BIG DUNC said:
. Are you now onto engine / gearbox / diff / drive shafts steering rack?
The diff and drive shafts are all in place, prop shaft ready to go in. Steering rack is going to be fairly soon now, not sure if it needs much more than a clean up and paint. I think that I'll wait to put the box and engine back in until I've got the car actually back on its wheels, as this will help the refit because I'll use my lift to raise the engine, but that won't go forward and back like a engine hoist.BIG DUNC said:
What is the plan for the body?
A good question! Briefly, I need to clean the crud off the underside, replace the heat shielding, tidy up the wiring, strip out the rest of the interior to be sent off for retrimming, possibly fix/replace the break master/slave cylinders, remove the roof, remove the wing mirrors, remove the bespoke front lights, overhaul the wiper motor and probably much more! As I am considering having it resrayed with a non standard paint, I may have to recoup some cost by doing some of the body prep myself, but we'll see.BIG DUNC said:
Are you putting the body on and then getting it sprayed and sorting the trim, or are you sorting the body before reuniting it with the chassis?
Another good question and the jury is out on this one. It'd be easier for me to deliver top and bottom together, but that makes it harder to paint without getting some aspect of the chassis etc over sprayed. I will decide a little nearer the time I think!BIG DUNC said:
Is the engine back from Powers yet?
It is and it's not moved from the front of the chassis since the day it was delivered back; it'll be fantastic to get it back in. I am really hoping that I can get that done within the next 3-4 weeks, but we'll see how much time I get.BIG DUNC said:
Keep the updates coming.
Certainly. Probably in big info-dumps as usual I'm afraid! Hi all
It feels like a long time since I last posted, so I thought I'd better post an update. As usual, I've not found anywhere near as much time as I'd like on this, but I have managed to get in the garage over the last couple of months, so here's a brief resume!
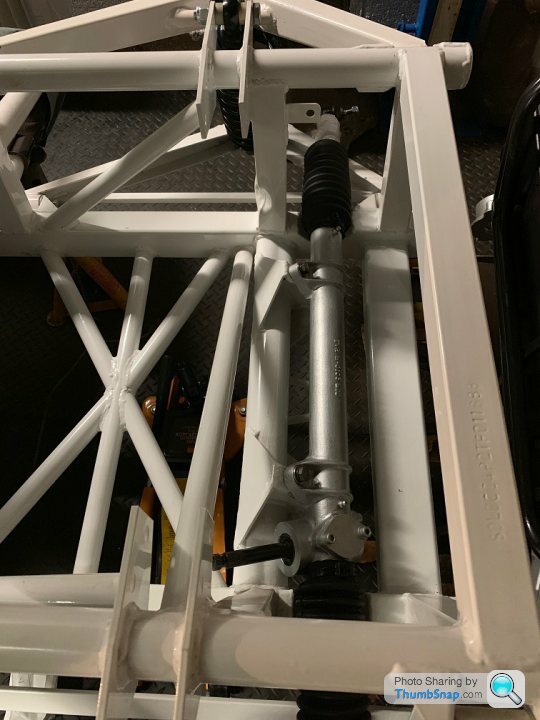
After refitting the front hubs, it was time to look at the steering rack, which was typically tired-looking.
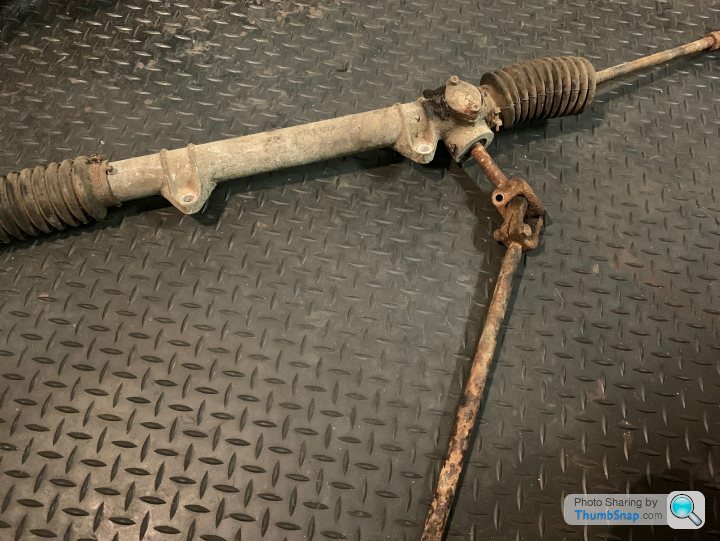
The track rod nuts simply refused to come off, so 'persuasion' was required.
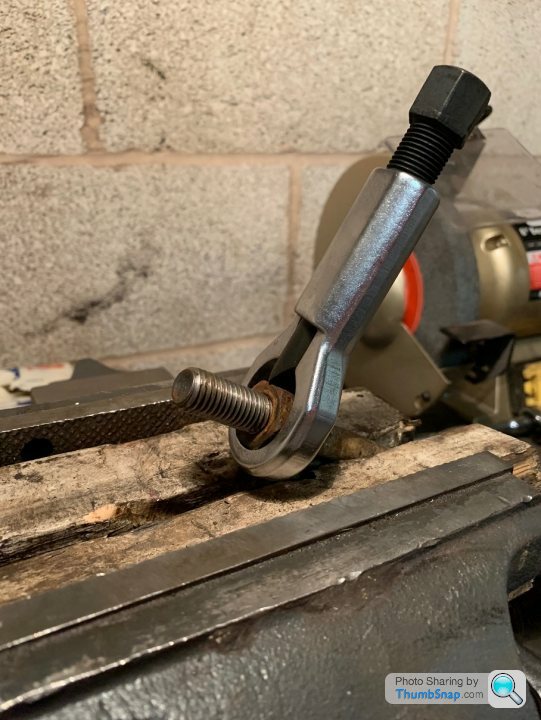
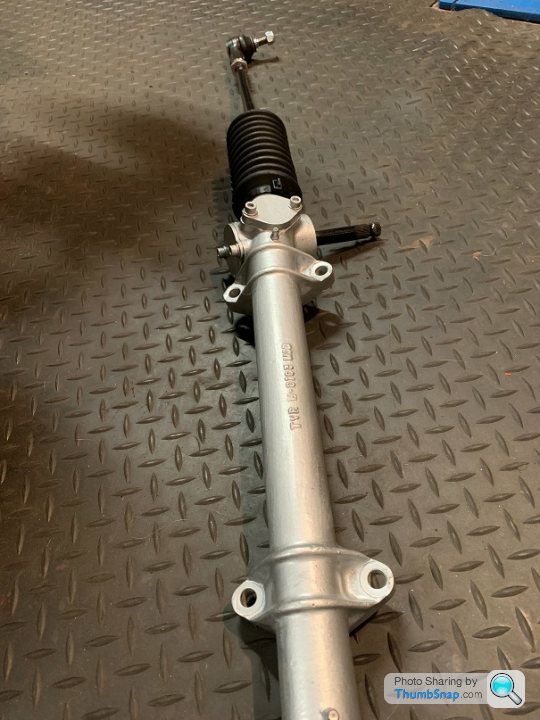
However, after a good inspection, degrease, paint, new track rods and nuts and re-grease, it was looking better.
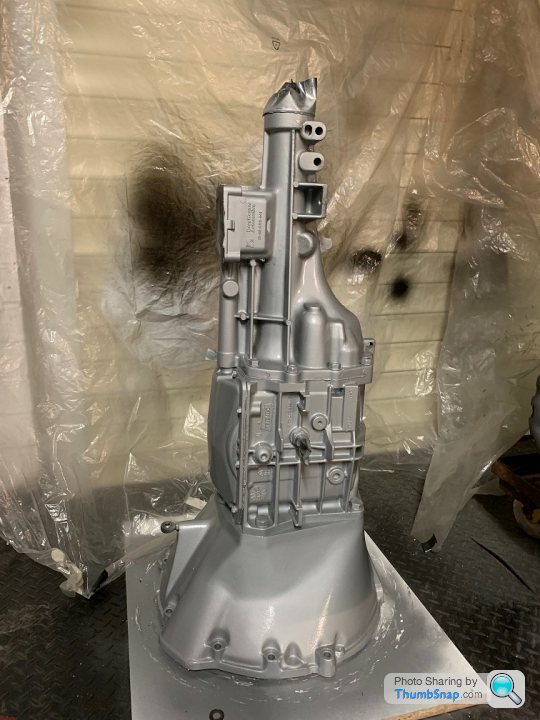
I then thought I would move onto the gearbox, which I was going to leave alone, but decided it would let the side down if I threw it back in the way it was.
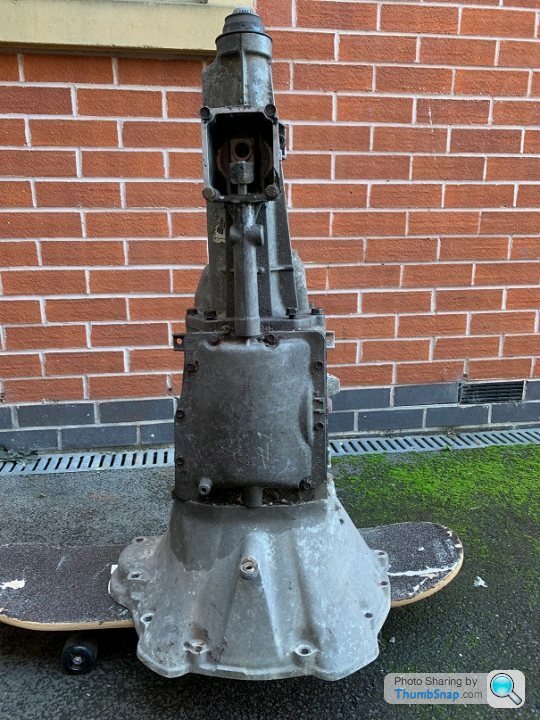
Another clean-up, paint and lacquer session and it's looking much more respectable.
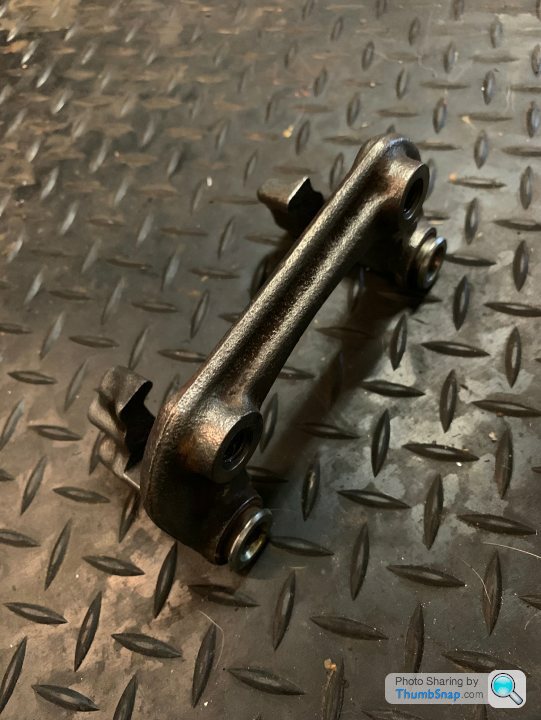
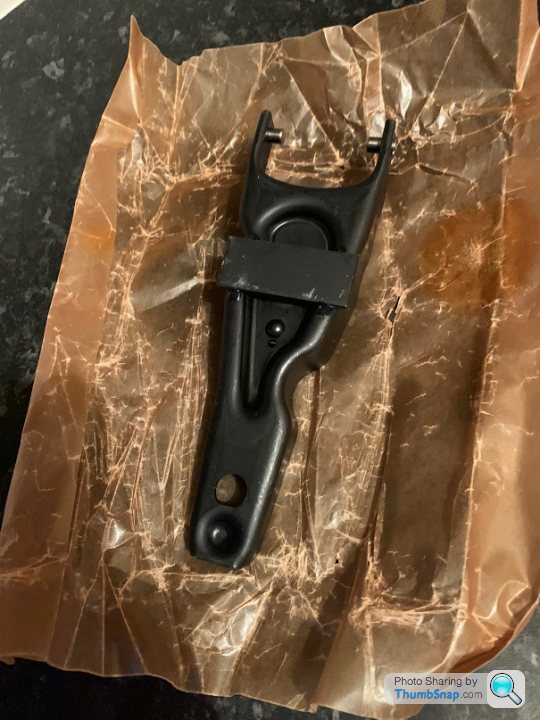
Once that was dry, I fitted the upgraded arm (nothing visually wrong with the last one, but I wasn't taking this thing off again anytime soon as I've lost my clutch pedal!).
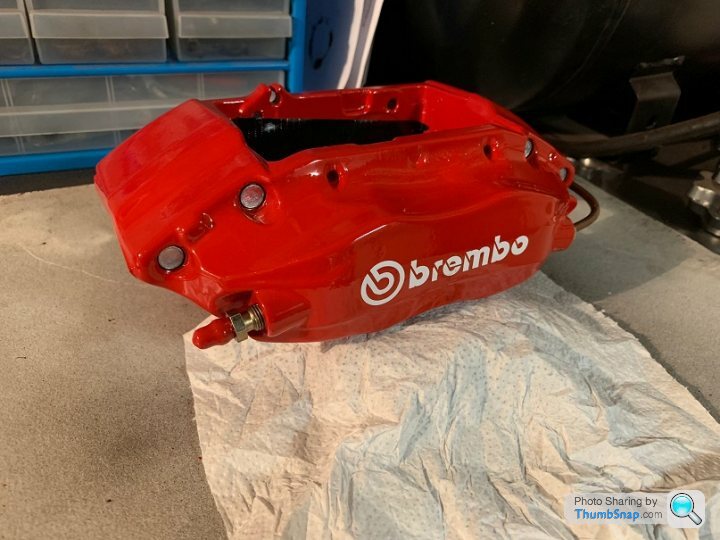
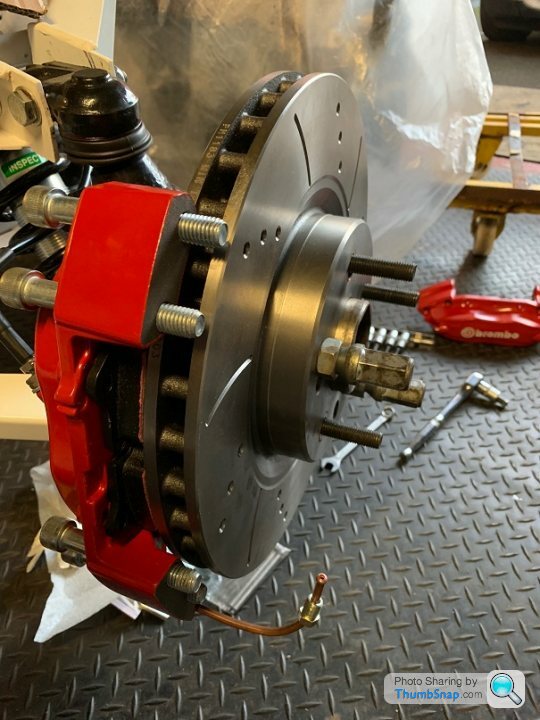
Next was to sort out my brake upgrade.
WARNING: The following section may contain caliper porn - you've been warned!
I had bought these units a while ago as refurbished. They looked ok, but could've been better, as I found out. Firstly, they had been sprayed without covering up the mounting holes, which meant I had to clean them out.
They hadn't lacquered them either, so I thought I'd better do that too. However, I found that they had put one of the Brembo stickers on the other way around to the other side. This triggered my OCD and so, after a lot of deliberation, decided to measure the sticker and order new ones. However, when they turned up, they were slightly bigger than those on it and I wasn't convinced they would fit comfortably in the contours of the caliper, so I left it as is and sprayed them up. Hopefully I won't lose sleep over that decision!
I then had to cut a thread into the hubs for the mounting brackets.

I bought Ford Focus ST 324mm disks to go with the new brakes.
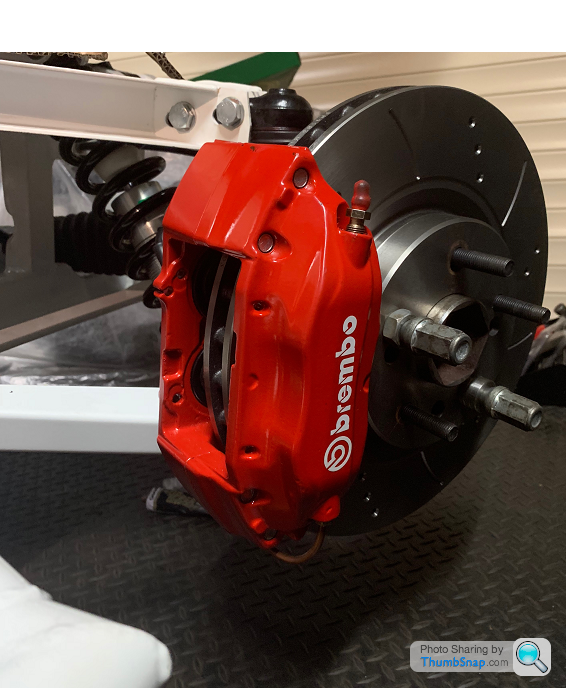
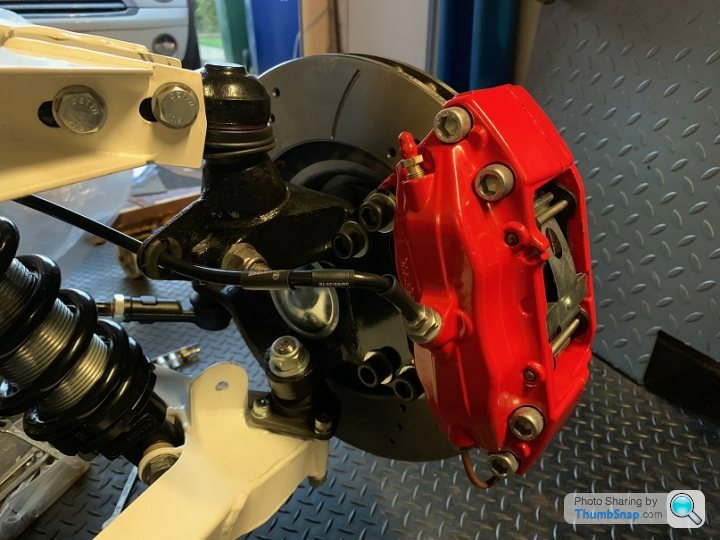
After this, I went to fit the brake pads. Oh dear, I could not get the springs to locate for some reason. I popped a note on this fine website and it was pointed out that the spring locator slots were offset, which meant that they had rebuilt them with the wrong sides!
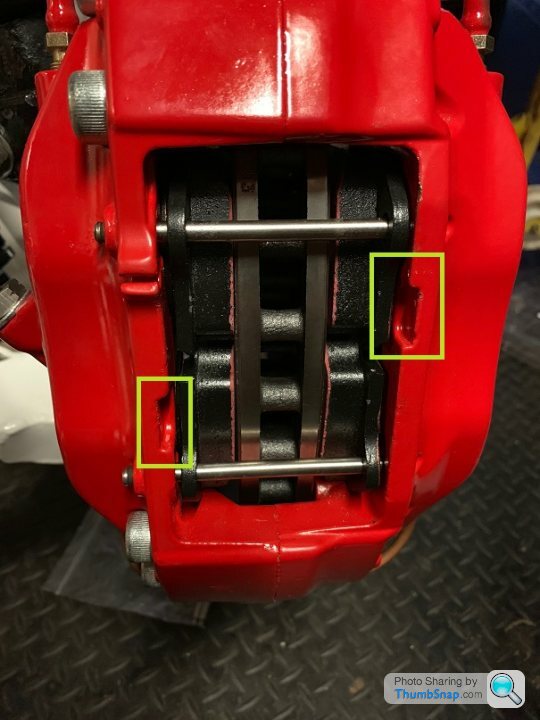
More work that I didn't see coming!
Sorted.
Ok, so I needed to start thinking about running the fuel and brake lines but before I could do that I had to add heat shielding to the chassis to try and avoid the coating from flaking off.
With this out of the way, my next task was to clean up the pump and brackets and fit new hose, clips and filter.
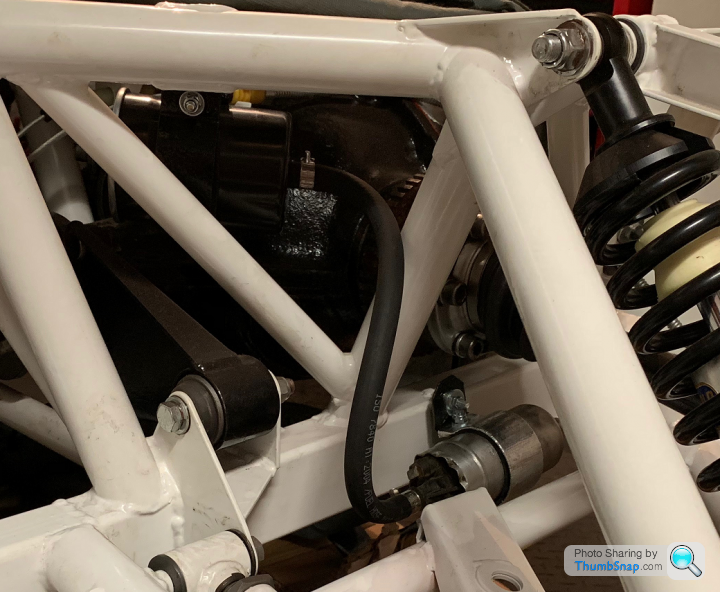
I haven't got a picture of it yet, but I have fitted my nickel fuel pipe after the flexi hose in the filter, flaring the ends as I went. As this run tends to change to hose just over the bell housing (where you can't get to it if / when it leaks!) I have taken the pipe all the way into the engine bay instead.
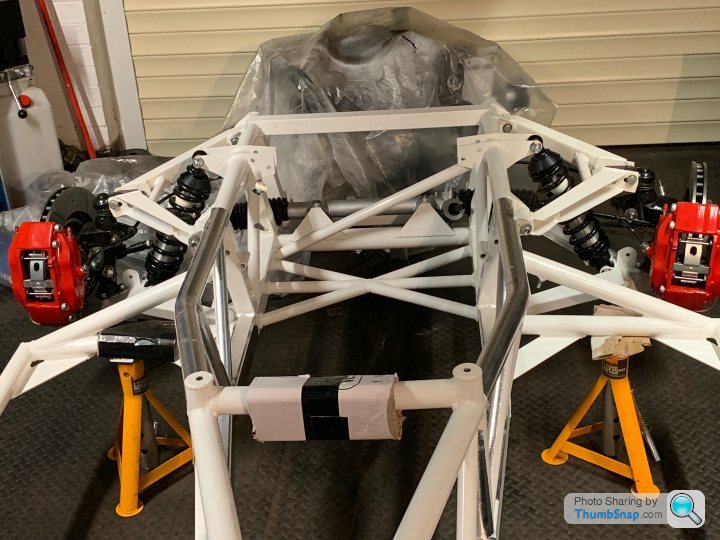
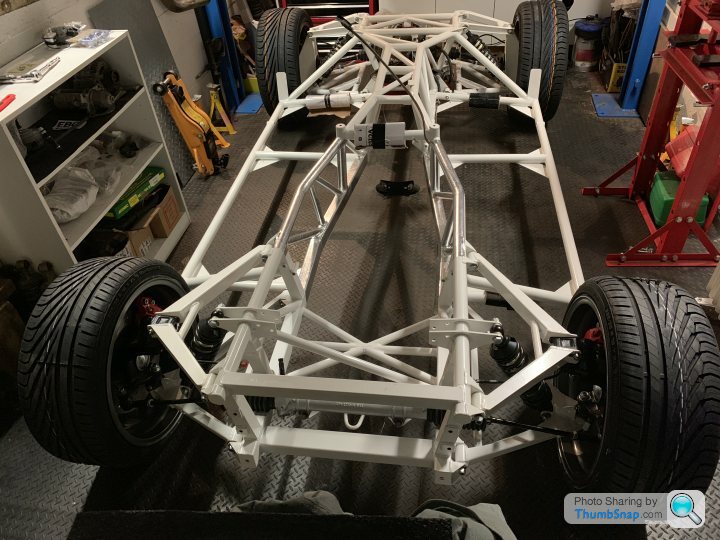
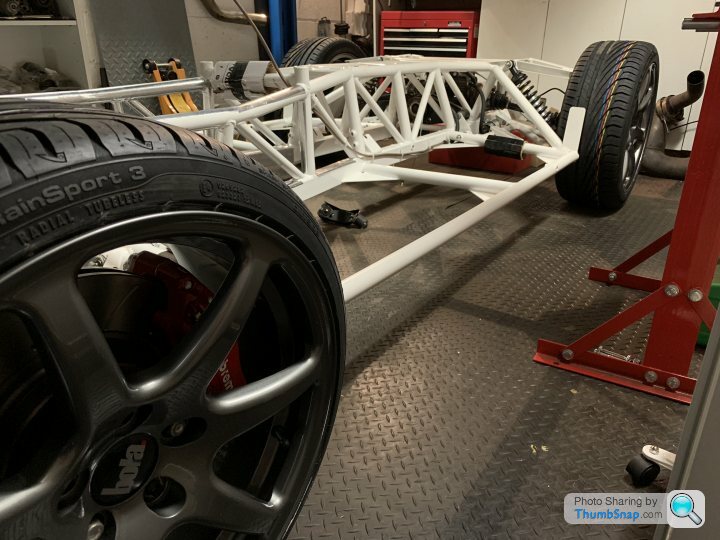
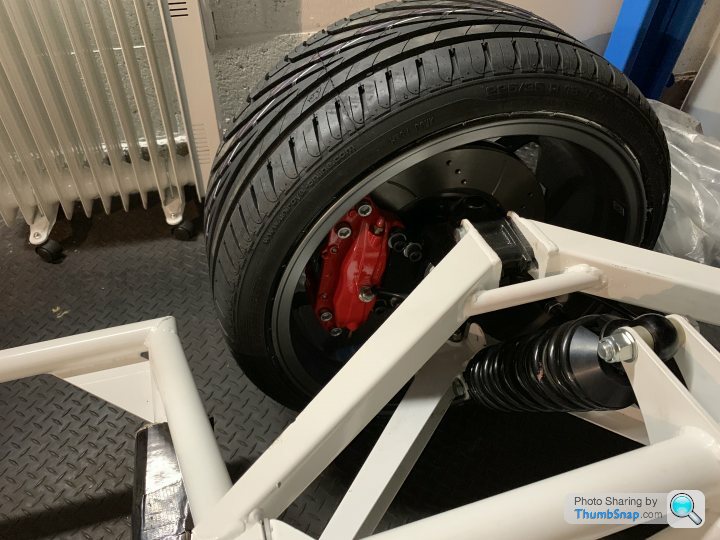
That's about it for now. Oh, I've just taken delivery of my latest bling:
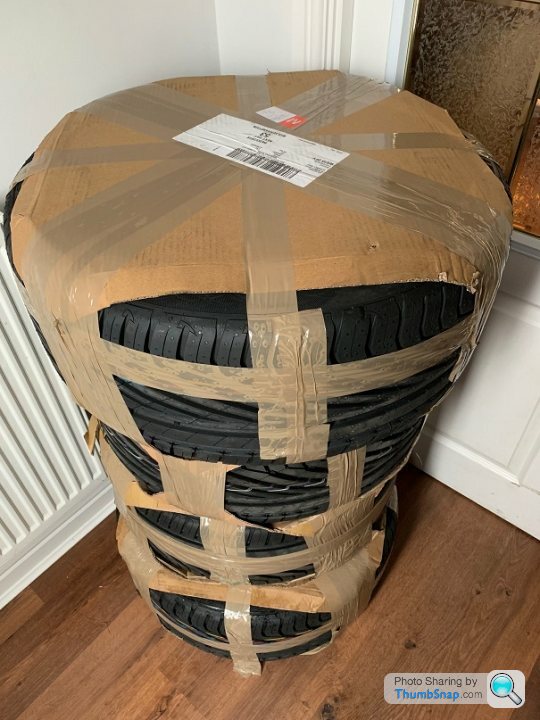
Wheels and tyres. The chassis is about to be mobile for the first time in around a year - a significant date!
Thanks for listening all.
Lee
It feels like a long time since I last posted, so I thought I'd better post an update. As usual, I've not found anywhere near as much time as I'd like on this, but I have managed to get in the garage over the last couple of months, so here's a brief resume!
After refitting the front hubs, it was time to look at the steering rack, which was typically tired-looking.
The track rod nuts simply refused to come off, so 'persuasion' was required.
However, after a good inspection, degrease, paint, new track rods and nuts and re-grease, it was looking better.
I then thought I would move onto the gearbox, which I was going to leave alone, but decided it would let the side down if I threw it back in the way it was.
Another clean-up, paint and lacquer session and it's looking much more respectable.
Once that was dry, I fitted the upgraded arm (nothing visually wrong with the last one, but I wasn't taking this thing off again anytime soon as I've lost my clutch pedal!).
Next was to sort out my brake upgrade.
WARNING: The following section may contain caliper porn - you've been warned!
I had bought these units a while ago as refurbished. They looked ok, but could've been better, as I found out. Firstly, they had been sprayed without covering up the mounting holes, which meant I had to clean them out.
They hadn't lacquered them either, so I thought I'd better do that too. However, I found that they had put one of the Brembo stickers on the other way around to the other side. This triggered my OCD and so, after a lot of deliberation, decided to measure the sticker and order new ones. However, when they turned up, they were slightly bigger than those on it and I wasn't convinced they would fit comfortably in the contours of the caliper, so I left it as is and sprayed them up. Hopefully I won't lose sleep over that decision!
I then had to cut a thread into the hubs for the mounting brackets.
I bought Ford Focus ST 324mm disks to go with the new brakes.
After this, I went to fit the brake pads. Oh dear, I could not get the springs to locate for some reason. I popped a note on this fine website and it was pointed out that the spring locator slots were offset, which meant that they had rebuilt them with the wrong sides!
More work that I didn't see coming!
Sorted.
Ok, so I needed to start thinking about running the fuel and brake lines but before I could do that I had to add heat shielding to the chassis to try and avoid the coating from flaking off.
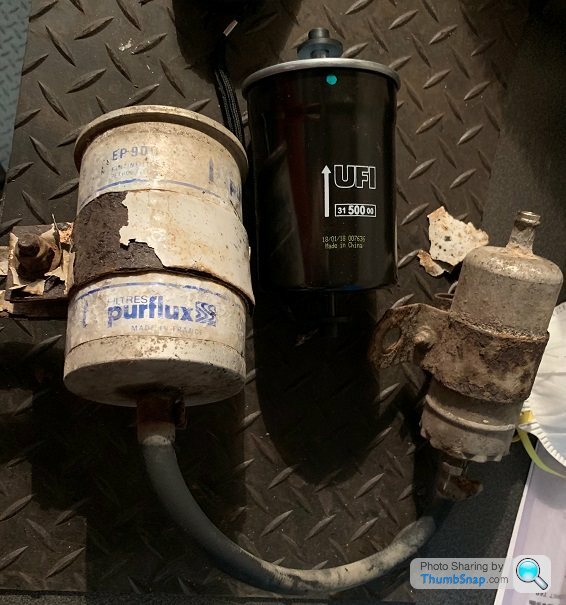
With this out of the way, my next task was to clean up the pump and brackets and fit new hose, clips and filter.
I haven't got a picture of it yet, but I have fitted my nickel fuel pipe after the flexi hose in the filter, flaring the ends as I went. As this run tends to change to hose just over the bell housing (where you can't get to it if / when it leaks!) I have taken the pipe all the way into the engine bay instead.
That's about it for now. Oh, I've just taken delivery of my latest bling:
Wheels and tyres. The chassis is about to be mobile for the first time in around a year - a significant date!
Thanks for listening all.
Lee
N7GTX said:
Bloody excellent work and write up. All this work will be well worth the effort. You do realise your car will be finished before the new Griff is built? And you don't even have a factory........
Thanks; I know at times I talk (post) too much and the work I put myself to seems a little anal, but I'm only planning to do this once, so I may as well try and do a half decent job! I'm putting myself under a bit of pressure as we want to move to a new house this year and I need the car to at least be whole again to make moving practical. It should be rolling tonight, which will make getting the engine/box in easier and then I've got a few underside/engine bay jobs to do before I can drop the lid on and pack it off for bodywork. When it's away, I'll turn to house repair jobs instead. Hopefully I can persuade my wife to let us have a double-width "factory" in the next place so I can at least move around a fully repatriated car... 


Wow, Lee, You have made EPIC progress.
& I do have calliper envy.
& actually lots of other envy.
Well done and keep the updates coming.
Mine is suffering from lack of use, but still going well.
My friend got his Griff back today, just having had a respray, new roof and carpets etc. Tonight is a good night for Griff Owners.
& I do have calliper envy.
& actually lots of other envy.
Well done and keep the updates coming.
Mine is suffering from lack of use, but still going well.
My friend got his Griff back today, just having had a respray, new roof and carpets etc. Tonight is a good night for Griff Owners.
Gassing Station | General TVR Stuff & Gossip | Top of Page | What's New | My Stuff