Exige S1 over-winter Refresh
Discussion
Esprit said:
shirt said:
hi esprit,
came here via the decently modded cars thread.
hats off to you for this build, seems really well thought out and certainly thorough. i want one!
Cheers Shirt came here via the decently modded cars thread.
hats off to you for this build, seems really well thought out and certainly thorough. i want one!

If you've ever wanted an Exige S1, GET one... they're not getting any cheaper now and prices are starting to edge up, they're becoming collectible.
They're temperamental, grumpy, impractical and hard work to drive.... but every day, even when it's in bits and looks like sh!t, you open the garage door and fall in love all over again.
 It's an itch everyone should scratch.
keep up the good work, am insanely jealous

Frustratingly little to show for work of late.
Subframe has been acid-dipped and is currently in being galvanised, should be done mid-week giving me something to do next weekend (could next weekend be the weekend I ACTUALLY start bolting stuff back on the car?!?!?)
More destruction this weekend, I decided to drop the fuel tank out as they can sometimes rust out on top (they're hung up inside the chassis behind the driver, so the top is completely blocked off unless removed). I'll take this opportunity to replace all of the hoseclamps etc as well as these were all just mild steel ones happily fizzing away to themselves.
Upon pulling the tank out, it was clear that mine was in good nick and it's also clear to see why they rust out on top. It appears that any petrol that seeps from the filler hose joint sits on top of the tank... the odd seep here and there turns the paint coating to goop over a year or two, blistering it and leaving the steel exposed. Mine's not really started rusting yet, but would have if I'd left it. (Although this probably wouldn't have become a problem for several years yet, it's nice to nip it in the bud)
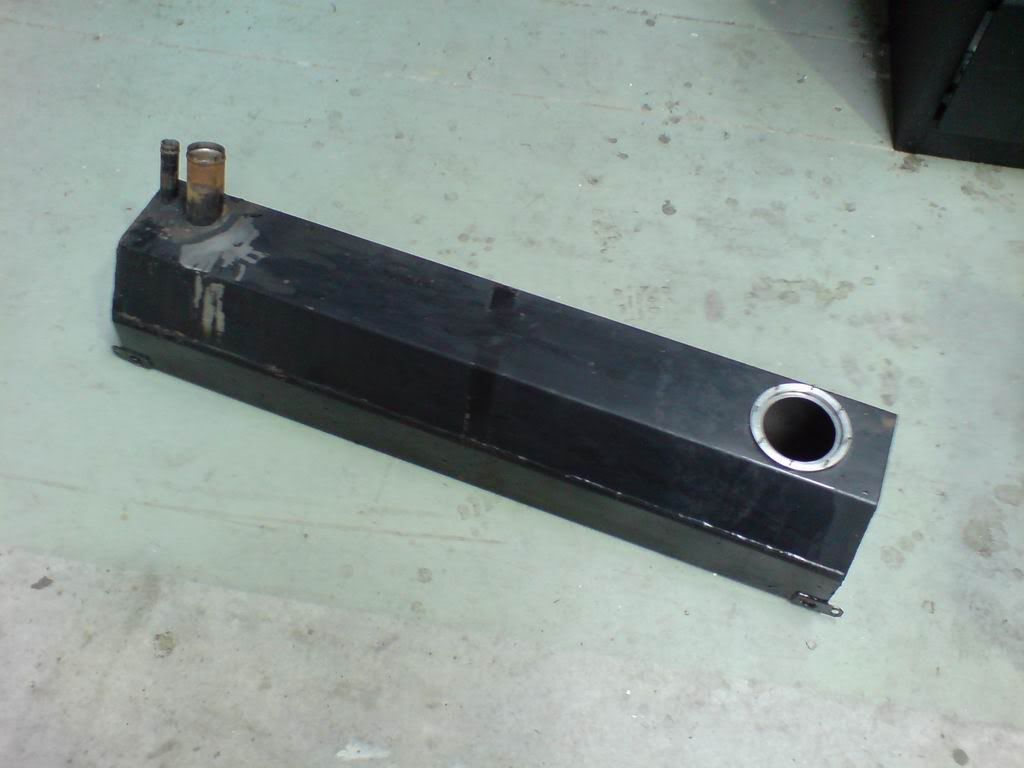
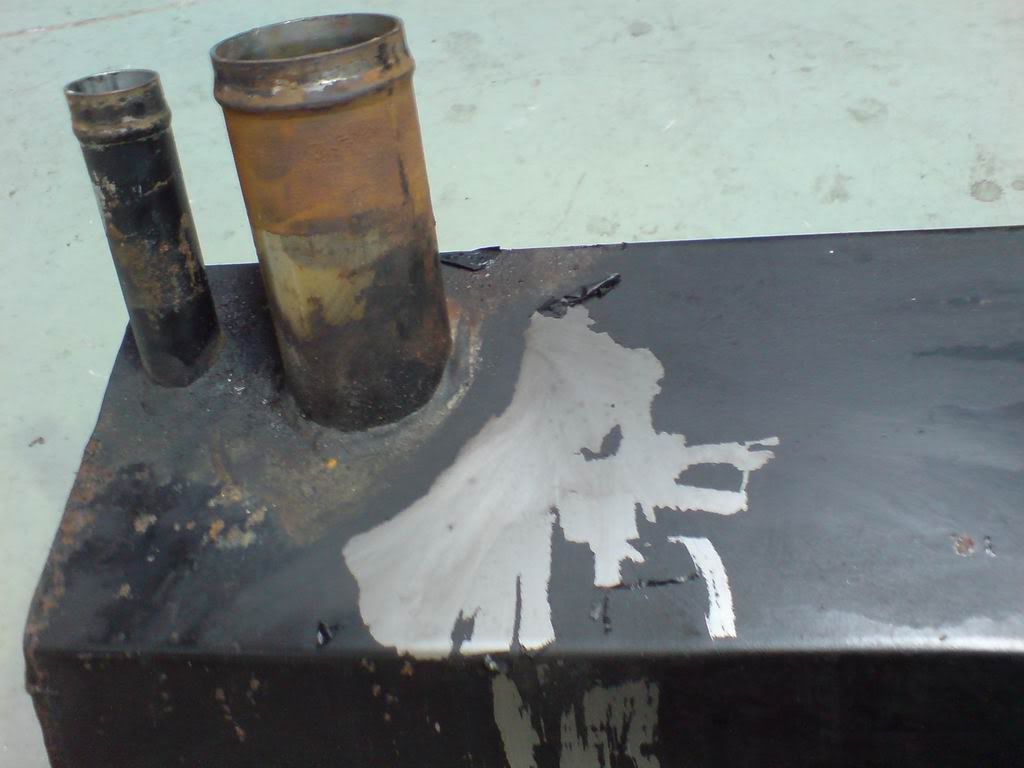
I was just going to touch the areas affected up, but rather a lot of the paint has been turned to soft crap, so it's best to start again. My options are to strip it (with a paint stripper) back to bare steel and re-paint with POR15 or just drop the tank off to a powdercoaters and get them to powdercoat the outside of the tank. I'm about 50/50 at the moment as to what to do as each method has their pros and cons:
- Powdercoating will look nicer but might be less resilient than POR (impervious to petrol/oil) and I'm not sure of how the powdercoat baking will affect the hylomar seal around the pump mounting boss
-POR will arguably provide better protection with no risk to damaging what's there or risk, but will take me a lot more time/prep and won't give quite as good a finish.
Given that it's not really a cosmetic item and will still look pretty good in POR, the only thing that's putting me off is the thought of ANOTHER weekend wearing sodding rubber gloves painting s t black with POR15.... getting a bit sick of doing that now. This is definitely the period of a rebuild that's worst... when boredom and a lack of VISIBLE progress despite hours in the garage start to take their toll. Thankfully I've been here before and know that these moments eventually pass
Subframe has been acid-dipped and is currently in being galvanised, should be done mid-week giving me something to do next weekend (could next weekend be the weekend I ACTUALLY start bolting stuff back on the car?!?!?)
More destruction this weekend, I decided to drop the fuel tank out as they can sometimes rust out on top (they're hung up inside the chassis behind the driver, so the top is completely blocked off unless removed). I'll take this opportunity to replace all of the hoseclamps etc as well as these were all just mild steel ones happily fizzing away to themselves.
Upon pulling the tank out, it was clear that mine was in good nick and it's also clear to see why they rust out on top. It appears that any petrol that seeps from the filler hose joint sits on top of the tank... the odd seep here and there turns the paint coating to goop over a year or two, blistering it and leaving the steel exposed. Mine's not really started rusting yet, but would have if I'd left it. (Although this probably wouldn't have become a problem for several years yet, it's nice to nip it in the bud)


I was just going to touch the areas affected up, but rather a lot of the paint has been turned to soft crap, so it's best to start again. My options are to strip it (with a paint stripper) back to bare steel and re-paint with POR15 or just drop the tank off to a powdercoaters and get them to powdercoat the outside of the tank. I'm about 50/50 at the moment as to what to do as each method has their pros and cons:
- Powdercoating will look nicer but might be less resilient than POR (impervious to petrol/oil) and I'm not sure of how the powdercoat baking will affect the hylomar seal around the pump mounting boss
-POR will arguably provide better protection with no risk to damaging what's there or risk, but will take me a lot more time/prep and won't give quite as good a finish.
Given that it's not really a cosmetic item and will still look pretty good in POR, the only thing that's putting me off is the thought of ANOTHER weekend wearing sodding rubber gloves painting s
 t black with POR15.... getting a bit sick of doing that now. This is definitely the period of a rebuild that's worst... when boredom and a lack of VISIBLE progress despite hours in the garage start to take their toll. Thankfully I've been here before and know that these moments eventually pass
Edited by Esprit on Sunday 7th December 12:13
More progress this week. Got the stripper sorted for the tank so will tackle that this coming weekend. In the meantime I've got my toelinks back from the electroplaters and I've also got my subframe back from the galvanisers.... so shiiiiny 
Before:
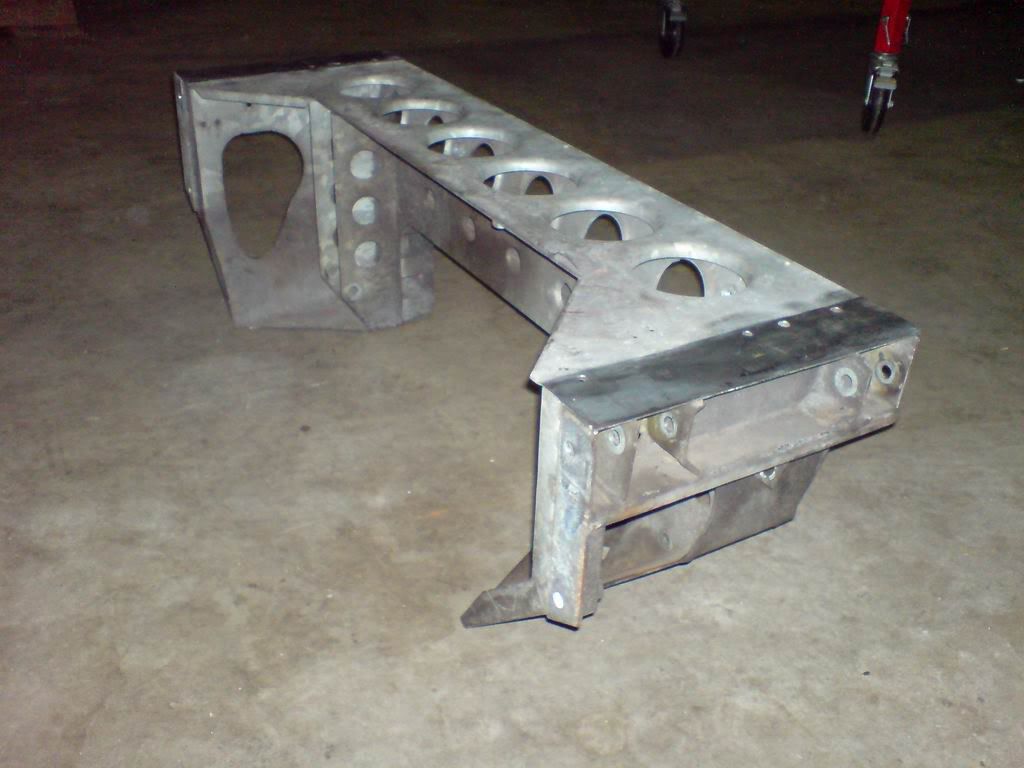
After:
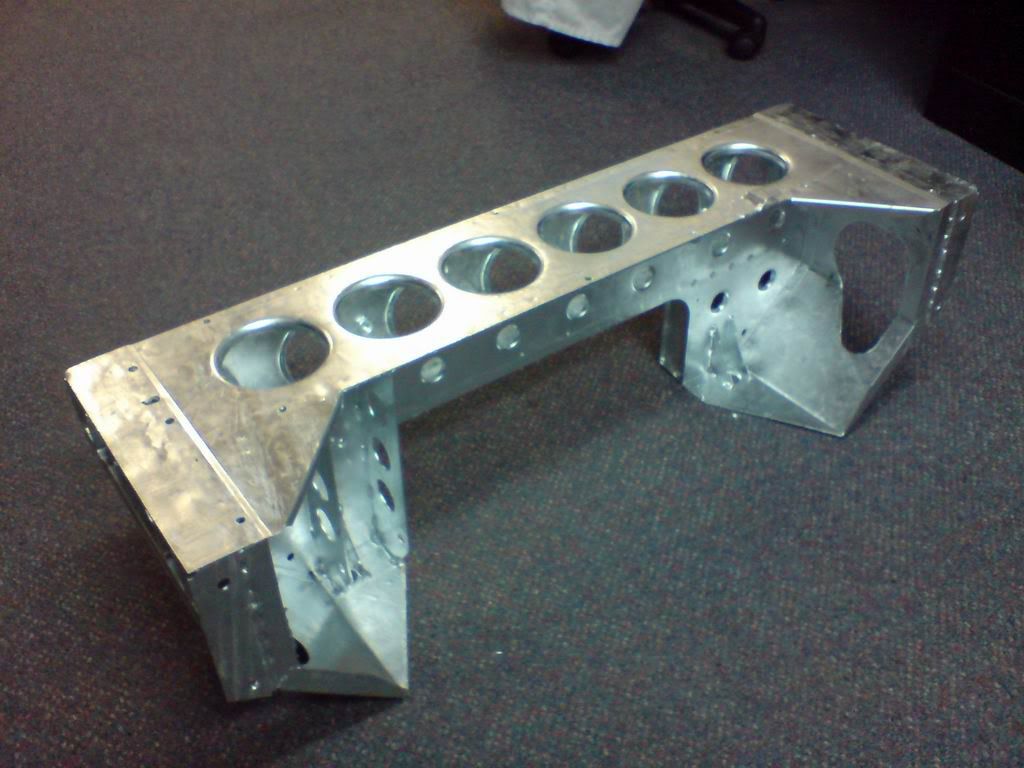
Going to have to get the sikaflex sorted for the rear longerons next week and also some rivets for the rear heat shield/subframe assembly.... should keep me busy.
Not long now before I can begin the long assembly process!

Before:

After:

Going to have to get the sikaflex sorted for the rear longerons next week and also some rivets for the rear heat shield/subframe assembly.... should keep me busy.
Not long now before I can begin the long assembly process!

Edited by Esprit on Sunday 7th December 12:14
how do you go about bonding the subframe back onto the chassis?
also, the nxt time you do a bit of POR15 work esprit, would you mind documenting how you go about prepping the surface etc. you say its a weekend's work to paint up some parts in it but it sounds a good product and i wouldn't mind seeing how much work is involved!
also, the nxt time you do a bit of POR15 work esprit, would you mind documenting how you go about prepping the surface etc. you say its a weekend's work to paint up some parts in it but it sounds a good product and i wouldn't mind seeing how much work is involved!
shirt said:
how do you go about bonding the subframe back onto the chassis?
also, the nxt time you do a bit of POR15 work esprit, would you mind documenting how you go about prepping the surface etc. you say its a weekend's work to paint up some parts in it but it sounds a good product and i wouldn't mind seeing how much work is involved!
Subframe is bolted back to the chassis, not bonded. Only thing that's bonded is the rear longerons on top of the subframe.... these just mount and support the rear bodywork.also, the nxt time you do a bit of POR15 work esprit, would you mind documenting how you go about prepping the surface etc. you say its a weekend's work to paint up some parts in it but it sounds a good product and i wouldn't mind seeing how much work is involved!
I can do a full writeup on the POR15... it takes a bit of time to do, but the instructions that come with their "super starter kit" (which contains everything you need) are pretty explicit. It's just a fair few steps to go through and you have to spend time pasting stuff on, washing it off and waiting for stuff to dry.
shirt said:
nice one, cheers.
have been looking at exige prices recently. i really should stop that!
Warning... they get under your skin (can you tell?) I'm now faced with so much rebuilding to do, I've not had a social life in months, and have no prospect of any in months to come and I've completely forgotten what a woman looks like. Please, for your own sanity, think carefully! have been looking at exige prices recently. i really should stop that!

well worth it i would say. i would be happy simply with a good one but its treads like these that would haunt me and have the car in pieces for a refresh.
i was surprised to learn they only built 160 s1 exiges, so imo it's a guaranteed future classic. do it once and do it right [as you are and then some] and it'll be well worth it.
fwiw i have no life either. have been renovating a house for almost 2 years now on evenings and weekends, and forget what my OH looks like at times! knowing i will never live here makes it harder, but my reward for all the graft and hassle is going to come in the form of using some of the profit for a fun car purchase!
601 Exiges built.... probably between 150-200 cars left in the UK.
My car was actually a pretty good one, there will be plenty out there worse. To be honest, mine didn't NEED a refresh, it's just that I'm one of those types who believes you can't claim true ownership of a car until it's been in a million parts on your garage floor. I plan to keep the Exige for ever and I didn't fancy doing all of this over a number of years bit by bit. Decided to do it now as there were a few niggles that needed sorting and I figured I may as well kill two birds with one stone. Once it's done, I can concentrate on enjoying the car, without worrying about stuff that needs doing to it. When I get it back together around Christmas, it'll be basically brand new under the skin, the bodywork is perfect (bar a few stonechips that I'll probably sort out with a respray next year) and the engine will be fresh.... there will be nothing to do but enjoy it on road and track for the next 5 years or so
My car was actually a pretty good one, there will be plenty out there worse. To be honest, mine didn't NEED a refresh, it's just that I'm one of those types who believes you can't claim true ownership of a car until it's been in a million parts on your garage floor. I plan to keep the Exige for ever and I didn't fancy doing all of this over a number of years bit by bit. Decided to do it now as there were a few niggles that needed sorting and I figured I may as well kill two birds with one stone. Once it's done, I can concentrate on enjoying the car, without worrying about stuff that needs doing to it. When I get it back together around Christmas, it'll be basically brand new under the skin, the bodywork is perfect (bar a few stonechips that I'll probably sort out with a respray next year) and the engine will be fresh.... there will be nothing to do but enjoy it on road and track for the next 5 years or so

Nice job. Thanks for taking the time to keep this up to date. I do remember reading on SELOC about you importing your exige to NZ so it's good to see what you are doing with it.
You do realise that this single thread will be responsible for increasing the prices of S1 exiges in the uk ;-)
Cheers
Stewart
You do realise that this single thread will be responsible for increasing the prices of S1 exiges in the uk ;-)
Cheers
Stewart
melting point of zinc is just under 400degC, a zinc bath will be around 460ish.
i take it the subframe is steel alloy? doubt there would be any problems at all, particularly on a sturdy item such as a subframe and it will only be dipped. the galv will have solidified and cooled way before the subframe has had chance to heat up to a significant degree.
ETA - rpm - is that your 911? you may well have to join esprit on my 'phers i envy' list!
Edited by shirt on Saturday 13th September 00:36
R.P.M said:
just a quick question..
How can you be sure that re-galvanizing the sub frame hasn't distorted it?
I'm 99% certain that the original subframes would have gone through a tolerance check after the original dip to check that the process hasn't caused distortion. just a thought.
Rpm
There's NO WAY the subframe would have distorted because of galvanising, the energy input is actually not that high for galvanising. As an engineer I can't see Lotus designing a relatively expensive and complex part that would result in a significant number being rejected after being galvanised.How can you be sure that re-galvanizing the sub frame hasn't distorted it?
I'm 99% certain that the original subframes would have gone through a tolerance check after the original dip to check that the process hasn't caused distortion. just a thought.
Rpm
Esprit said:
R.P.M said:
just a quick question..
How can you be sure that re-galvanizing the sub frame hasn't distorted it?
I'm 99% certain that the original subframes would have gone through a tolerance check after the original dip to check that the process hasn't caused distortion. just a thought.
Rpm
There's NO WAY the subframe would have distorted because of galvanising, the energy input is actually not that high for galvanising. As an engineer I can't see Lotus designing a relatively expensive and complex part that would result in a significant number being rejected after being galvanised.How can you be sure that re-galvanizing the sub frame hasn't distorted it?
I'm 99% certain that the original subframes would have gone through a tolerance check after the original dip to check that the process hasn't caused distortion. just a thought.
Rpm
Rpm
R.P.M said:
Esprit said:
R.P.M said:
just a quick question..
How can you be sure that re-galvanizing the sub frame hasn't distorted it?
I'm 99% certain that the original subframes would have gone through a tolerance check after the original dip to check that the process hasn't caused distortion. just a thought.
Rpm
There's NO WAY the subframe would have distorted because of galvanising, the energy input is actually not that high for galvanising. As an engineer I can't see Lotus designing a relatively expensive and complex part that would result in a significant number being rejected after being galvanised.How can you be sure that re-galvanizing the sub frame hasn't distorted it?
I'm 99% certain that the original subframes would have gone through a tolerance check after the original dip to check that the process hasn't caused distortion. just a thought.
Rpm
Rpm

Lotus's own tolerances on the suspension pick-ups are +/-1mm if I recall when new and there's no way it's moved anything like this.
It's a good point to raise though, and I'd imagine that it's possible to cock it up if the galvanisers don't know their craft well. I took it to a reputable shop and told them that I wanted a good job, not a cheap job

Edited by Esprit on Saturday 13th September 02:02
Today's progress thus far! Couple hours of elbow grease and working with the X-Strip has left me with a nice bare, shiny fuel tank 
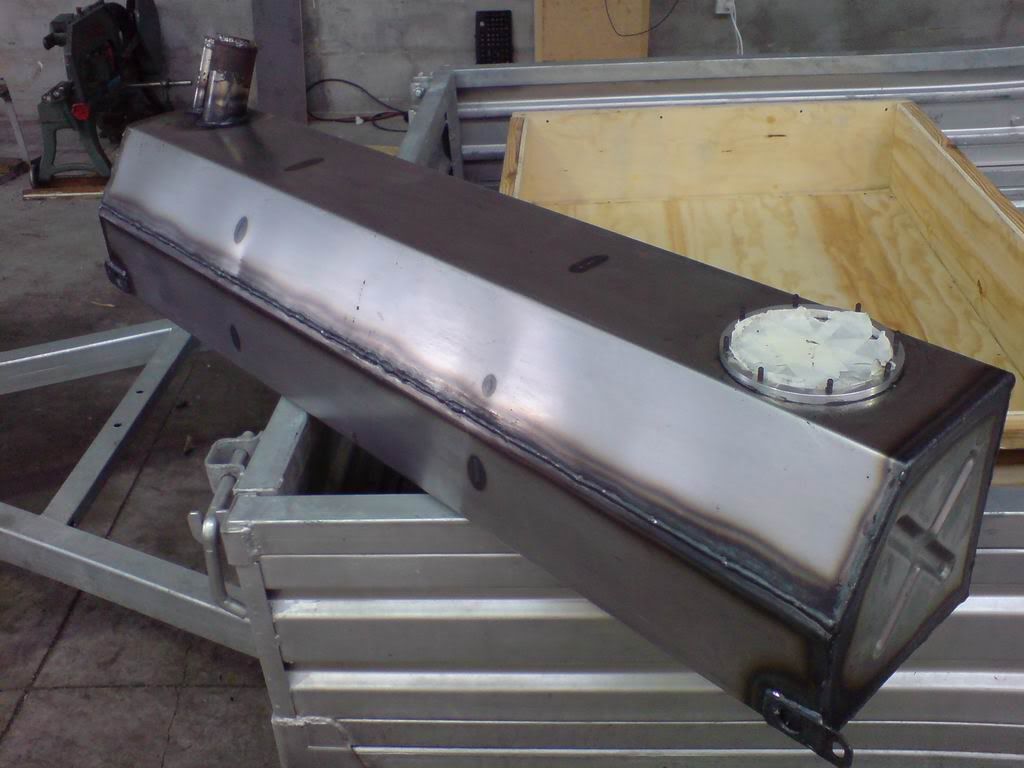
Next step as I'll begin shortly will be to wash-down then acid-etch/Zinc Phosphate (MetalPrep) the tank then cover with a couple of coats of black POR15. POR15 should be much more robust than the OEM paint, which seemed about as resistant to petrol/chemicals as... well... something that's not very resistant to petrol or chemicals.


Next step as I'll begin shortly will be to wash-down then acid-etch/Zinc Phosphate (MetalPrep) the tank then cover with a couple of coats of black POR15. POR15 should be much more robust than the OEM paint, which seemed about as resistant to petrol/chemicals as... well... something that's not very resistant to petrol or chemicals.
Edited by Esprit on Sunday 7th December 12:15
Right, well it took long enough through having to do 4 coats on the damned tank (2 coats, but done in two parts so I could get the whole tank coated as I had nothing to hang it from). Took AGES waiting the requisite 2.5 hours between coats so it's taken pretty much all day, but it's bloody done now and will never need to be done again 
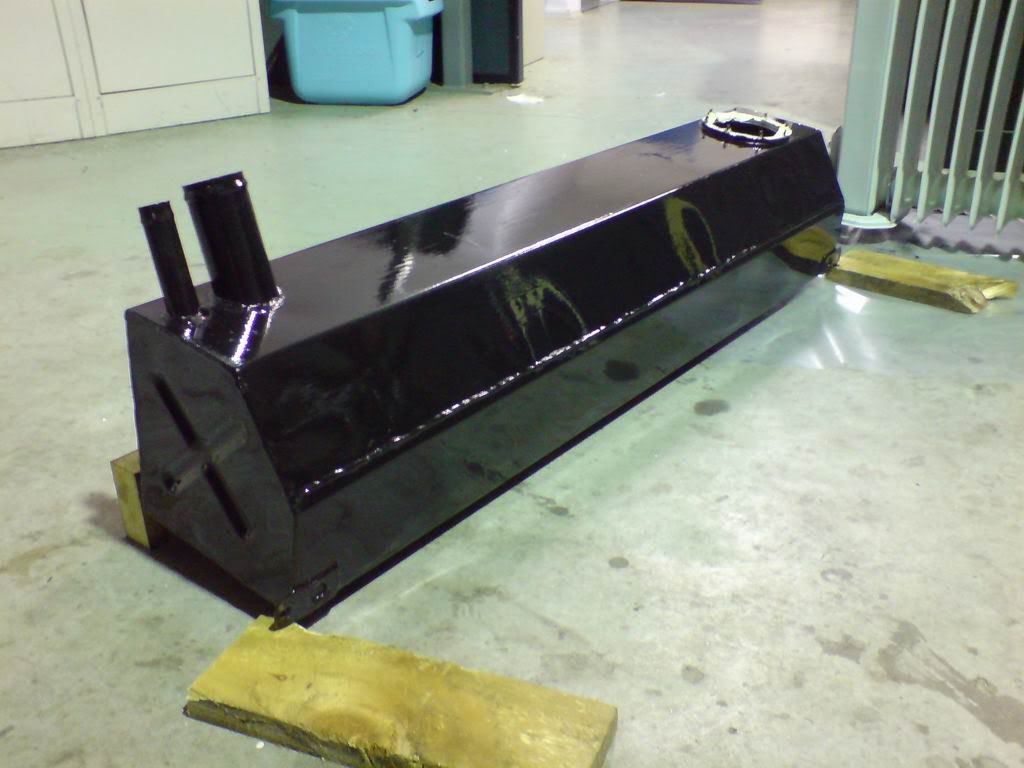
The top still looks manky in this pic as it's still wet and showing brush marks but it should level out pretty good. The finish isn't perfect, but again it's more than good enough for the fuel tank that'll never be seen and it won't suffer the same fate as the original paint and it'll never rust


The top still looks manky in this pic as it's still wet and showing brush marks but it should level out pretty good. The finish isn't perfect, but again it's more than good enough for the fuel tank that'll never be seen and it won't suffer the same fate as the original paint and it'll never rust

Edited by Esprit on Sunday 7th December 12:16
Gassing Station | Elise/Exige/Europa/340R | Top of Page | What's New | My Stuff


